I will try to do the requests everyone wants, but I am busy so understand that I might not be able to get them done quickly or at all.
Now a lot of people have been wondering how I draw in Microsoft Office Word. I have decided to do a guide of drawing a simple Pokemon. I chose Luvdisc because it's easy and this thread could use some more love.
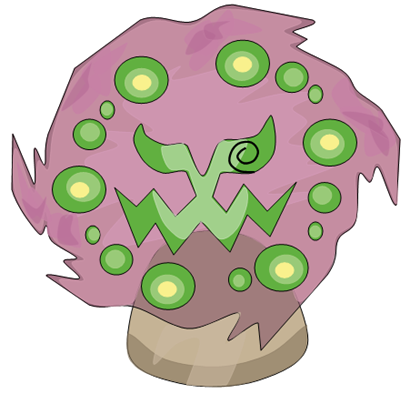
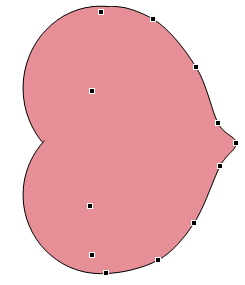
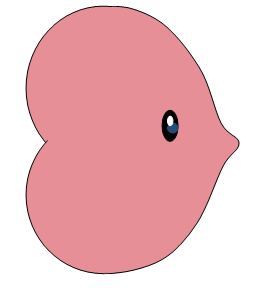
Final Product:


Go to Insert and select Shapes. I will start with an oval tool since Luvdisc has a circular design.
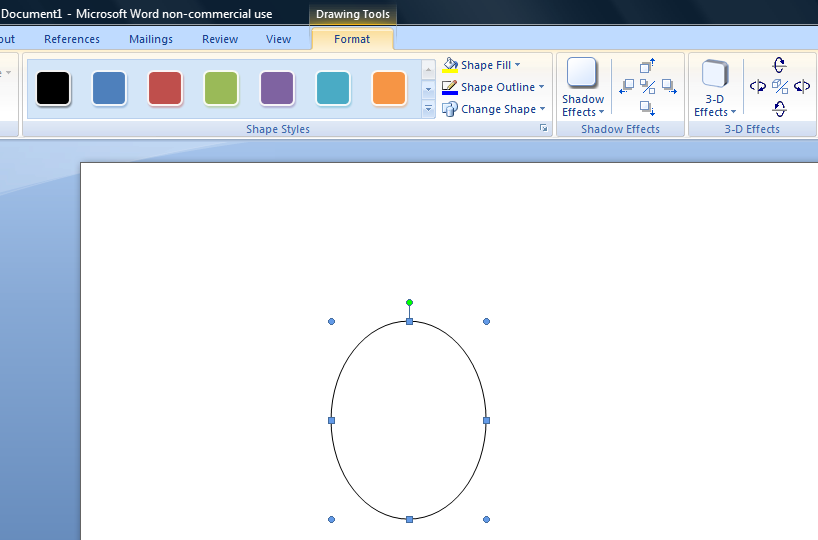
Draw your oval.
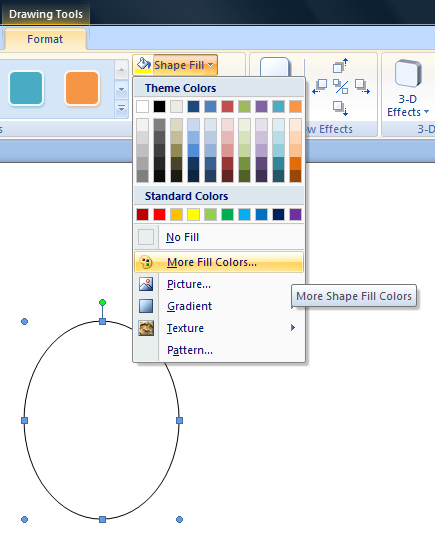
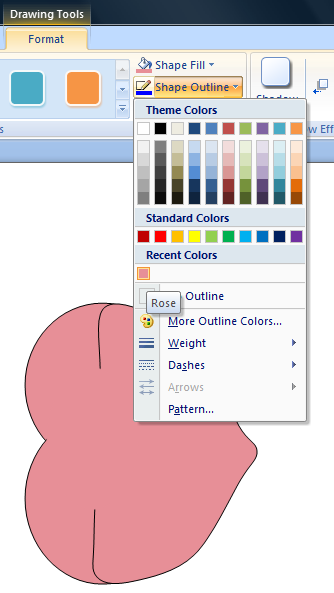
Go to More Fill Colors to find an accurate color to fill your shape with.
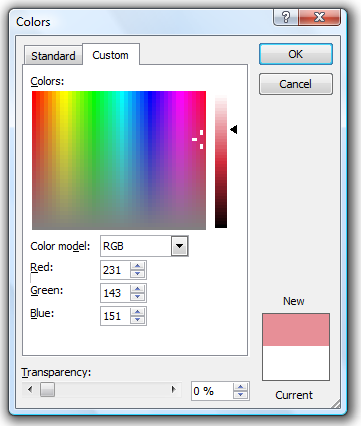
That is the color I chose.
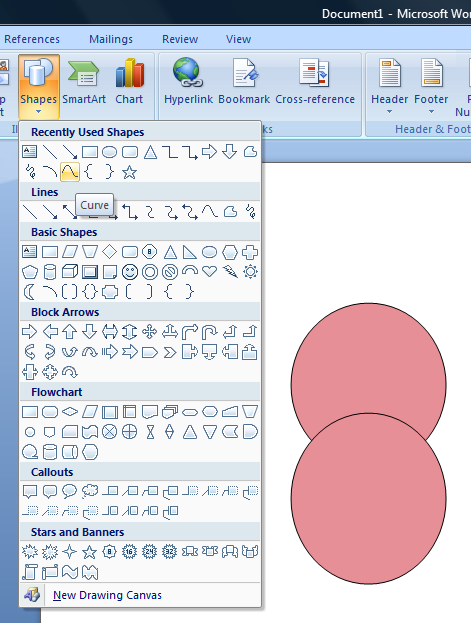
I used copy and paste on the oval and now I will select the Curve tool.
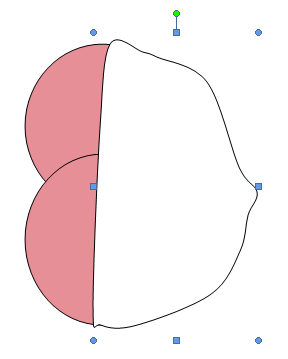
Draw the outline to your custom shape. They rarely turn out looking right the first time. I usually do it very casually as you'll see above since I always tweak it afterwards anyway.
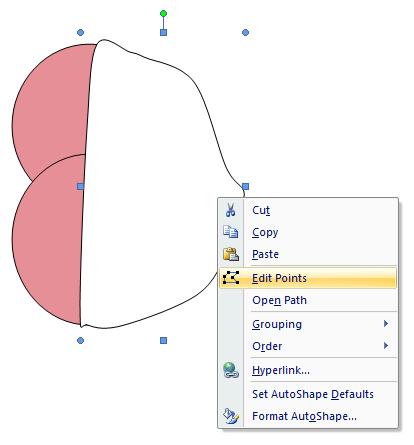
Right click, go to Edit Points.
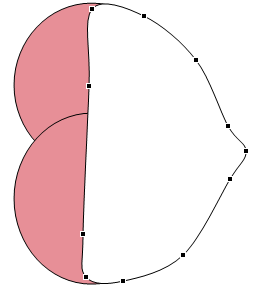
Now it looks a lot better. Make the outlines of the new shape match up with the ovals.
Now it's time to cover up lines that shouldn't be there. You can use either the Oval or Curve tool. To cover up lines, select the same color as the other shapes and fill the outline with the same color.
Sometimes you might have to work the shapes into a weird angle in order to get the best result.
Now it is all covered up. I also edited the points a little more.
I drew three ovals for the eye.
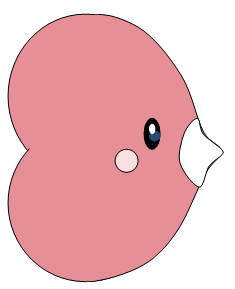
Now I make a new shape with the Curve tool for the area around the mouth.
Edit the points to make them accurate.
Fill it with the desired color.

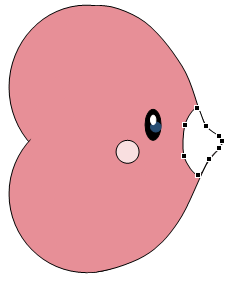
Now for the mouth, I will use the Arc tool.
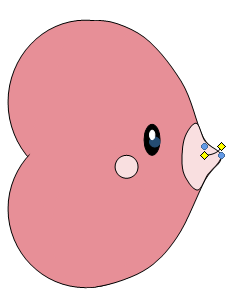
I just select whatever it gives me. Like the Curve tool, you will need to edit it afterwards.
That is the end result. The way the Arc tool works is it will form the shape of a circle or oval whether you have it all shown or not. By knowing this, you can figure out how to manipulate to your desired outcome.
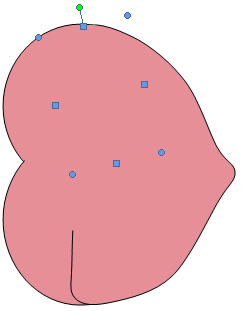
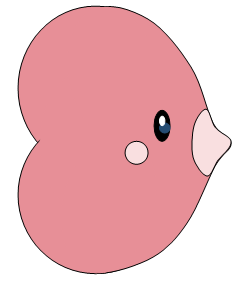
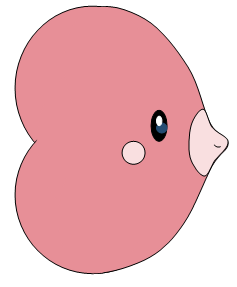
I edited the points for the front of its body because it looked too wide.

Now I use the Curve tool for the final step, shading.
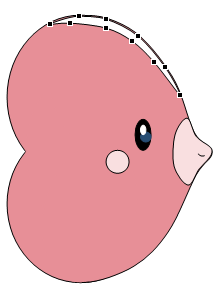
Fix the points.

Fill the shape and outline. I also edited the points a final time to make it fit the contour of its body.
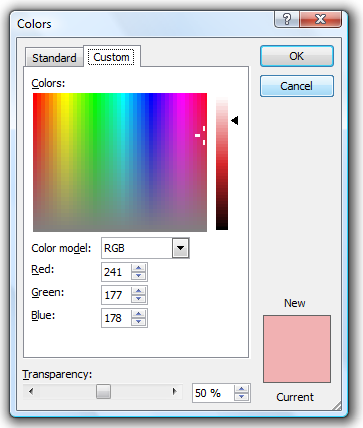
Now for the final part of shading, I am going to put a highlight at the back of its body. Instead of just doing a simple shape fill, I am also making the color be transparent to give it a less powerful look.

There it is.

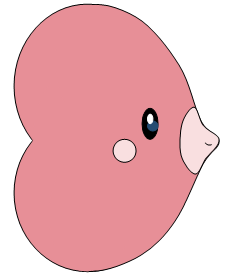
For the final change, I put a highlight above its upper lip.
I hope you either found the guide to be informative or interesting.
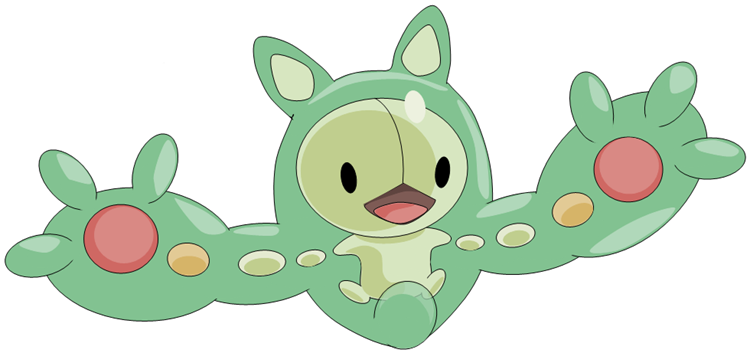
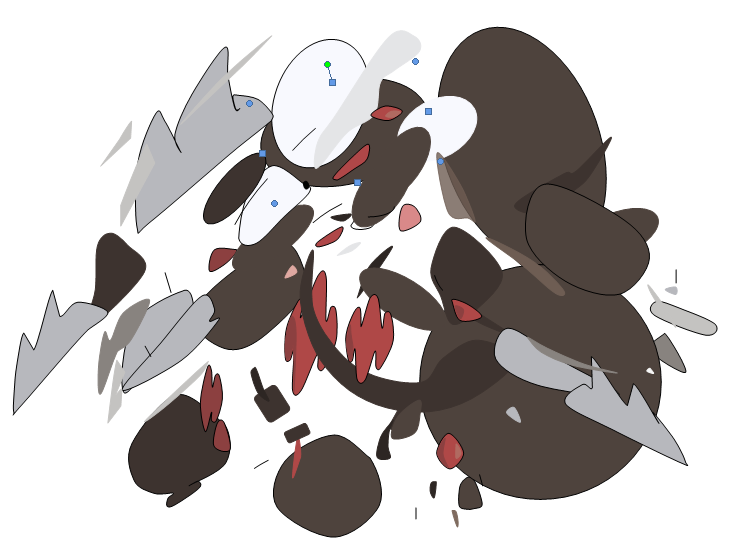
Just to show you how much work this is, take a look at all the shapes it took to make a more complex Pokemon like Excadrill.
Now a lot of people have been wondering how I draw in Microsoft Office Word. I have decided to do a guide of drawing a simple Pokemon. I chose Luvdisc because it's easy and this thread could use some more love.
Final Product:


Go to Insert and select Shapes. I will start with an oval tool since Luvdisc has a circular design.

Draw your oval.

Go to More Fill Colors to find an accurate color to fill your shape with.

That is the color I chose.

I used copy and paste on the oval and now I will select the Curve tool.

Draw the outline to your custom shape. They rarely turn out looking right the first time. I usually do it very casually as you'll see above since I always tweak it afterwards anyway.

Right click, go to Edit Points.

Now it looks a lot better. Make the outlines of the new shape match up with the ovals.

Now it's time to cover up lines that shouldn't be there. You can use either the Oval or Curve tool. To cover up lines, select the same color as the other shapes and fill the outline with the same color.

Sometimes you might have to work the shapes into a weird angle in order to get the best result.

Now it is all covered up. I also edited the points a little more.

I drew three ovals for the eye.

Now I make a new shape with the Curve tool for the area around the mouth.

Edit the points to make them accurate.

Fill it with the desired color.

Now for the mouth, I will use the Arc tool.

I just select whatever it gives me. Like the Curve tool, you will need to edit it afterwards.

That is the end result. The way the Arc tool works is it will form the shape of a circle or oval whether you have it all shown or not. By knowing this, you can figure out how to manipulate to your desired outcome.

I edited the points for the front of its body because it looked too wide.

Now I use the Curve tool for the final step, shading.

Fix the points.

Fill the shape and outline. I also edited the points a final time to make it fit the contour of its body.

Now for the final part of shading, I am going to put a highlight at the back of its body. Instead of just doing a simple shape fill, I am also making the color be transparent to give it a less powerful look.

There it is.

For the final change, I put a highlight above its upper lip.
I hope you either found the guide to be informative or interesting.
Just to show you how much work this is, take a look at all the shapes it took to make a more complex Pokemon like Excadrill.