you have no special attackers, so you could try something fast with good SAtk like Greninja, Gengar (with either giga drain or energy ball for rocks), starmie, Sash Alakazam (has a damn good movepool for the maison, even can use Encore for lolz, plus has the always useful Magic Guard + Focus Sash), or even more obscure stuff like Frosslass/Accelgor if you like (Kanga's good, but not exactly a speed demon). I did see a team a while back that used an Azumarril in the third slot of the exact team you used (I think it was either AV or Bellyjet) but I cannot place the name of who did it (but the user did get all 5 trophies).Sorry for the misinformation, I am currently using Talonflame as a lead. Also: Please do not suggest Lati@s because I don't have the ability to RNG/Sav/Get them good enough to even use. Some people are not lucky enough to have mons like that. Thats why my pool is largely bred mons. I can get hold of pretty much anything that can breed one way or another. Gliscor is an interesting shout though, but is its natural bulk enough to cover the rock weakness I have in tandem with teaching kanga EQ?
-
Welcome to Smogon! Take a moment to read the Introduction to Smogon for a run-down on everything Smogon, and make sure you take some time to read the global rules.
-
Congrats to the winners of the 2023 Smog Awards!
Battle Maison Discussion & Records
- Thread starter NoCheese
- Start date
Whelp, my slump has decided to subside for a little bit. I've finally managed to win 100 Super Triples battles with my usual methods; while only two runs in the few dozen trips I've taken have failed to reach even 50, I'd still been running into a lot of problems in the mid 50s-70s even without being served a platter of crap. Trick Room is broken enough that even the crap is still able to scrape together some victories (battles 81-90 consisted of such a team.)
Mega Tyranitar/Cresselia/Avalugg/Porygon2/Probopass/Golurk made up the latest motley crew. Coincidentally a lot of my ice types tend to hold Weakness Policies, and Avalugg got a ton of mileage out of it. Tyranitar's presence pretty much always drew the fighting attacks that could hit it, which prevented Avalugg from being ganged upon, which was handy. Golurk was also frequently exploited as a switch.
I probably would have lost midway were I not using Four-Attacks Porygon2, as it's the only variant that knows Psyshock, and with a fortunate Download boost, was needed to kill a healthy Blaziken. The other two pokes were a +1 Scrafty and a Sawk in the red, the latter of whom Cresselia needed to finish.
I would have lost in my usual zone were it not for an extremely large dose of luck in the form of AI retardation- a Veteran battle which got off to an AWFUL start, and I was soundly being flattened until for reasons I cannot comprehend, the AI's Cresselia 4 decided to use Trick Room (I was unable to set it up myself, of course.) Not only did the lack of damage help me immensely, the speed advantage was enough that my badly injured Marowak and Gourgeist were able to clean up the floor. I couldn't frigging believe it. Occurrences like this are the reason I forfeit extremely rarely.
That was way back at #56, and while I was obligated to save a replay, I don't see any reason to upload it.
In other news, after a lot of breeding in between runs, I'm now up to 101 unique species throughout my overall army. I've fallen in love (some more) with the Iron Ball and Power items, which had encouraged me to raise some base 85 pokes I'd never have found myself using normally, mostly because 85 is such a crappy speed group.
Mega Blastoise continues to torment me with five moveslot syndrome. It knows Fake Out/Aura Sphere/Dark Pulse/Water Spout, and while there were several occasions in which it wanted Ice Beam at its disposal, ML Dark Pulse is far too useful as an answer to enemy TR users, which are generally more threatening to my team than a Zapdos or Grass/Dragon type, and Fake Out has allowed it to function as a terriffic lead and support poke. While the prospect of 1st-turn damage does weaken Water Spout more often than not, it's also mitigated far more often than not by frequent appearances from Heal Pulse users, or Helping Hand or just favorable matchups in general. Still, the lack of Ice Beam has bitten me in the ass =/
Well, after some pretty serious grinding, I'm at 500 wins with Greninja / Mega Blastoise / Talonflame / Sylveon / Garchomp* / Mienshao*. I'll post a longer writeup when I lose or get to 1000, and don't expect to be battling as much in the next while, but would like to at least get some basic impressions down on "paper" now.
First of all, this team arose out of the ashes of my 406 win Greninja / Sylveon / Talonflame / Mega Kangaskhan / Aron / Aegislash team, discussed HERE. After considering its strengths and weaknesses, I felt Mega Kangaskhan was out of place, and wondered about doubling down on powerful spread attackers by replacing it with Mega Gardevoir. turskain, SimicCombine, and Eppie all provided some helpful thoughts and suggestions, and though I stuck with the double spread attacker plan, I shifted to a lead Mega Blastoise and a reserve Sylveon. The final two slots remained uncertain, and I fought the first 321 battles of this streak with Heatran and Aron before shifting to Garchomp and Mienshao.
Blastoise (Water Spout / Aura Sphere / Ice Beam / Protect) is in the lead instead of Sylveon because Blastoise + Grass Knot Greninja plays better against many counters than Sylveon + Extrasensory Greninja. Beautifully, however, if Blastoise gets knocked out or walled, I can just bring in Sylveon and continue on my merry way. Having a reserve nuke like this allows me to play much more aggressively with Blastoise, and not have to panic about it drawing attacks to the same extent a team that is more all-in on Blastoise would have to. While I haven't switched Blastoise out for Sylveon on the first turn all that often, it can be a very valuable play, particularly against foes resistant to Water Spout in situations where Blastoise might not get to attack on the first turn if it stayed in, such as when facing Fake Out. In such a matchup, the immediate switch is basically free, and I'm happy to take it.
Because of the hard hitting Sylveon backup, this team is happy to trade attacks back and forth, and so I don't do a lot of Protect-baiting with Talonflame, who thanks to attack recoil is often my first poke knocked out. If Talonflame goes down, I'm usually happy to bring Sylveon in as a winger to replace it, as even with just a two-Poke spread, Specs Pixilate Hyper Voice cuts through a ton of foes, and my teammates are strong enough that I don't need to take a "center spot or bust" approach with Sylveon. If worst comes to worst, I can shift to the middle once in battle, though that's a somewhat unusual play.
These first four Pokemon have been constant throughout my streak, but I've changed up my back row. Air Baloon Heatran (Heat Wave / Earth Power / HP Ice / Dragon Pulse) and Level 1 Aron were fine, but they always felt a bit like filler, executing a cookie cutter "solid" strategy rather than playing more fully into the team's overall plan. They also left me pretty heavily skewed towards special attackers, which risked becoming problematic against bulky special walls, especially those that could frustrate Endeavor either via Ghost-type immunity or evasion (Minimize Blissey, I'm pointing at you!)
SimicCombine and Eppie both had lots of success with Greninja / Mega Blastoise / Talonflame, and both of them strongly recommended making room for a Garchomp. I agreed that Garchomp has significant appeal, but when you bring in a Pokemon who relies heavily on Earthquake, you need to have teammates built around that, and given my insistence on keeping Sylveon, that made things a little complicated. Sylveon badly wants to hold Choice Specs, so if it finds itself in battle next to an Earthquaking Garchomp, it's going to take some pain, since it won't be able to Protect or hold an Air Balloon, so there's already something of a synergy problem. The sixth slot raised more difficulties. As Eppie noted, Rotom-W and Togekiss usually make excellent partners for Garchomp because they are immune to Earthquake and have nicely contrasting attacks. But with Sylveon on the team, Togekiss is something of a Fairy overload, and Rotom-W seems a little underpowered to me, particularly since his Water-type STAB is either dangerously inaccurate (Hydro Pump) or badly underpowered (HP Water). Indeed, SimicCombine noted that Rotom-W felt like the weakest link on his squad.
Thankfully, I had long been playing around with the idea of support Mienshao, and realized that I could set it up to not only play well with Garchomp, but also help ensure that Sylveon would too. What initially drew me to Mienshao was its potential to buy extra turns for my spread nukes. When you have partners serving up massively powered Water Spouts and Hyper Voices, just buying them one extra turn of attacking can often turn a tough battle into an easy one. Accordingly, Fake Out was in for sure, and Fling + Razor Fang looked awfully tempting as a way to net a second turn of flinching, especially given Jolly Mienshao's excellent Speed. Wide Guard became the real key to the set, however, since it can be spammed over and over, allows Garchomp to safely fire off Earthquakes without risking harm to his teammates, and even shuts down powerful opposing spread attackers. With respect to attacking, High Jump Kick's inaccuracy ruled it out, and I ended up selecting Low Kick over Drain Punch since Mienshao is frail enough that the HP recovery from Drain Punch isn't worth the loss in power against big foes. I thought about just running these four moves, but realized that I might want to attack simultaneously with a Garchomp Earthquake, so chose Air Balloon to let me safely Fake Out and Earthquake on the same turn. Once Air Balloon is in, Fling is obviously out, so I rounded out the set with Knock Off to allow me to hurt Ghost-types, and better cover the Psychic-types who laugh at Low Kick. So far, I've been very pleased.
I'll wrap this up by responding to a few of Eppie's comments, since though they are well thought out, I ended up making different choices concerning many of them.
I'm certainly hoping to keep this streak going for a long time, but for now, I hope this basic summary proves helpful. Thanks again to all who provided advice, suggestions, and critiques. And next time you're building a Triples team, consider trying out Sylveon and/or Mienshao. I think you'll find they can be very helpful indeed.
First of all, this team arose out of the ashes of my 406 win Greninja / Sylveon / Talonflame / Mega Kangaskhan / Aron / Aegislash team, discussed HERE. After considering its strengths and weaknesses, I felt Mega Kangaskhan was out of place, and wondered about doubling down on powerful spread attackers by replacing it with Mega Gardevoir. turskain, SimicCombine, and Eppie all provided some helpful thoughts and suggestions, and though I stuck with the double spread attacker plan, I shifted to a lead Mega Blastoise and a reserve Sylveon. The final two slots remained uncertain, and I fought the first 321 battles of this streak with Heatran and Aron before shifting to Garchomp and Mienshao.
Blastoise (Water Spout / Aura Sphere / Ice Beam / Protect) is in the lead instead of Sylveon because Blastoise + Grass Knot Greninja plays better against many counters than Sylveon + Extrasensory Greninja. Beautifully, however, if Blastoise gets knocked out or walled, I can just bring in Sylveon and continue on my merry way. Having a reserve nuke like this allows me to play much more aggressively with Blastoise, and not have to panic about it drawing attacks to the same extent a team that is more all-in on Blastoise would have to. While I haven't switched Blastoise out for Sylveon on the first turn all that often, it can be a very valuable play, particularly against foes resistant to Water Spout in situations where Blastoise might not get to attack on the first turn if it stayed in, such as when facing Fake Out. In such a matchup, the immediate switch is basically free, and I'm happy to take it.
Because of the hard hitting Sylveon backup, this team is happy to trade attacks back and forth, and so I don't do a lot of Protect-baiting with Talonflame, who thanks to attack recoil is often my first poke knocked out. If Talonflame goes down, I'm usually happy to bring Sylveon in as a winger to replace it, as even with just a two-Poke spread, Specs Pixilate Hyper Voice cuts through a ton of foes, and my teammates are strong enough that I don't need to take a "center spot or bust" approach with Sylveon. If worst comes to worst, I can shift to the middle once in battle, though that's a somewhat unusual play.
These first four Pokemon have been constant throughout my streak, but I've changed up my back row. Air Baloon Heatran (Heat Wave / Earth Power / HP Ice / Dragon Pulse) and Level 1 Aron were fine, but they always felt a bit like filler, executing a cookie cutter "solid" strategy rather than playing more fully into the team's overall plan. They also left me pretty heavily skewed towards special attackers, which risked becoming problematic against bulky special walls, especially those that could frustrate Endeavor either via Ghost-type immunity or evasion (Minimize Blissey, I'm pointing at you!)
SimicCombine and Eppie both had lots of success with Greninja / Mega Blastoise / Talonflame, and both of them strongly recommended making room for a Garchomp. I agreed that Garchomp has significant appeal, but when you bring in a Pokemon who relies heavily on Earthquake, you need to have teammates built around that, and given my insistence on keeping Sylveon, that made things a little complicated. Sylveon badly wants to hold Choice Specs, so if it finds itself in battle next to an Earthquaking Garchomp, it's going to take some pain, since it won't be able to Protect or hold an Air Balloon, so there's already something of a synergy problem. The sixth slot raised more difficulties. As Eppie noted, Rotom-W and Togekiss usually make excellent partners for Garchomp because they are immune to Earthquake and have nicely contrasting attacks. But with Sylveon on the team, Togekiss is something of a Fairy overload, and Rotom-W seems a little underpowered to me, particularly since his Water-type STAB is either dangerously inaccurate (Hydro Pump) or badly underpowered (HP Water). Indeed, SimicCombine noted that Rotom-W felt like the weakest link on his squad.
Thankfully, I had long been playing around with the idea of support Mienshao, and realized that I could set it up to not only play well with Garchomp, but also help ensure that Sylveon would too. What initially drew me to Mienshao was its potential to buy extra turns for my spread nukes. When you have partners serving up massively powered Water Spouts and Hyper Voices, just buying them one extra turn of attacking can often turn a tough battle into an easy one. Accordingly, Fake Out was in for sure, and Fling + Razor Fang looked awfully tempting as a way to net a second turn of flinching, especially given Jolly Mienshao's excellent Speed. Wide Guard became the real key to the set, however, since it can be spammed over and over, allows Garchomp to safely fire off Earthquakes without risking harm to his teammates, and even shuts down powerful opposing spread attackers. With respect to attacking, High Jump Kick's inaccuracy ruled it out, and I ended up selecting Low Kick over Drain Punch since Mienshao is frail enough that the HP recovery from Drain Punch isn't worth the loss in power against big foes. I thought about just running these four moves, but realized that I might want to attack simultaneously with a Garchomp Earthquake, so chose Air Balloon to let me safely Fake Out and Earthquake on the same turn. Once Air Balloon is in, Fling is obviously out, so I rounded out the set with Knock Off to allow me to hurt Ghost-types, and better cover the Psychic-types who laugh at Low Kick. So far, I've been very pleased.
I'll wrap this up by responding to a few of Eppie's comments, since though they are well thought out, I ended up making different choices concerning many of them.
Mandatory is too strong a word, but I agree that Garchomp is a good fit. Still, I did just fine the first 321 battles without him. Note that the squad's seeming Electric-type weakness, and Garchomp's corresponding Electric-type immunity have been essentially non-issues. First, the team has enough attacking power to muscle through most Electric types without a ton of difficulty. Second, having all of my leads be Electric-weak is in fact helpful, since it means fewer foes try to hit my Blastoise with Electric-type moves, instead usually sending them to the flanks. While I'll occasionally Protect on the first turn with Blastoise, I've yet to want to switch Garchomp into a predicted Electric-type attack. Garchomp's importance is further reduced by the fact that Sylveon fills my secondary spread attacker niche. But as you say, having a powerful physical attacker is something this team wants, and Garchomp is well suited for that role.A Pokémon like Garchomp is mandatory because it is immune to Electric type attacks and you simply need extra physical power.
I agree completely, and I bred up a second Chomp. I'm running Jolly, Max Speed and Attack with Dragon Claw / Earthquake / Swords Dance / Protect. While I'm currently using a Lum Berry, I'm strongly temped to switch to a Yache Berry, since I no longer have to worry about Outrage confusion and late in battle (when Garchomp comes in) I seem to face far more attacks than status moves.~ Ditching Outrage for Dragon Claw is a must, if you need it for other battle modes, breed another one.
This is really clever, and I'll admit that when I initially built the team, I didn't think about this improved lure potential from making my Talonflame more frail. That said, I've stuck with my bulky Max HP spread for a few reasons. First, even with the bulky spread on Talonflame, the vast majority of stuff that can outrun Mat Block and hit Blastoise with a first-turn Electric-type attack choose to attack either Greninja or Talonflame, since they are both significantly more frail. After that first turn, once Tailwind is up, it matters much less if Blastoise is targeted, and the current spreads seem fine for getting through the first turn unscathed. Second, to the extent that foes do start trying to hit Blastoise, the presence of Sylveon in reserve makes a dented Blastoise much less of a problem. If I can get in a healthy Water Spout or two, I'm completely fine with Blastoise then being KOed, because Sylveon can then step in and mop up. While very rare, I have lost Blastoise on the first turn before, and Sylveon took over sweeping duties like a champ. Even the seemingly awful case of Blastoise not being KOed (so no free switch) but being at such low health that Water Spout becomes worthless is not too big of a problem, since after the opening volleys of Water Spout, the team usually has no problem winning through single-target attacks, and Blastoise's Ice Beam and Aura Sphere hit reasonably hard. Finally, Talonflame really appreciates the extra 31 HP it gains from 252 HP EVs compared to 4. With respect to theorymoning/damage calculations, its not as simple as calculating that "this spread guarantees that Talonflame will avoid a OHKO/2HKO/etc. from scary attack X," because of all the recoil damage Talonflame takes. Instead, what matters to me is that I've survived an awful lot of attacks at less than 31 HP, so the bulk, and the extra turns it buys, really do help. Against Trick Room teams especially, increased survivability means more priority Brave Birds, and that's a big deal. Since this increased survivability for Talonflame, in my mind, outweighs the lure potential of a frailer spread, and since extra Speed EVs aren't very helpful due to Talonflame's priority and high base Speed, I'm sticking with the bulky spread.~ I'd suggest 252 Atk / 252 Speed for Talonflame, unless you ran damage calculations why you aren't running that spread. Hit Points are far more important to Blastoise than any other team member, therefor you want to trick the AI into attacking Talonflame / Greninja, rather than Blastoise. When I created the team I theorymon'd about using 0/31/0/x/0/31 Talonflame and 0/x/0/31/x/31 Greninja to put them into so much more KO ranges for STAB or SE moves from the AI, just to keep Blastoise ''safer''
I'm certainly hoping to keep this streak going for a long time, but for now, I hope this basic summary proves helpful. Thanks again to all who provided advice, suggestions, and critiques. And next time you're building a Triples team, consider trying out Sylveon and/or Mienshao. I think you'll find they can be very helpful indeed.
Balloon Mienshao, eh? It seems to resemble the Balloon Infernape I ran in Doubles with Greninja/Charizard-Y/Infernape/Garchomp (which got a 301-win streak). A Ballooned Fake Out back-up to accompany Chomp is certainly viable. I found it a bit unreliable in the end, though, especially when there are enemies faster than Chomp (or priority users) possibly getting a hit in to break the Balloon before Chomp gets to EQ when I wanted to switch the Balloon Ape into a friendly EQ rather than let Greninja take a spill. That wouldn't be a problem in Triples where you have a much more solid frontline and many more options available, I suppose. Veterans were especially bad for it, since its base 108 speed was not enough for it to do things and there were many enemies that outsped Chomp and were going to bust Ape's Balloon. Wide Guard seems exciting, especially for blocking Blizzard, and Knock Off could do things, I suppose. Infernape (even without the Sun) would have much better STAB attacks with Flare Blitz and Close Combat, though, and after taking recoil damage or a Def/SDef drop it turns into great bait with Protect. It can also kill things like Articuno with Flare Blitz, which reduces the need for Wide Guard to block its Blizzard a bit.Well, after some pretty serious grinding, I'm at 500 wins with Greninja / Mega Blastoise / Talonflame / Sylveon / Garchomp* / Mienshao*. I'll post a longer writeup when I lose or get to 1000, and don't expect to be battling as much in the next while, but would like to at least get some basic impressions down on "paper" now.
First of all, this team arose out of the ashes of my 406 win Greninja / Sylveon / Talonflame / Mega Kangaskhan / Aron / Aegislash team, discussed HERE. After considering its strengths and weaknesses, I felt Mega Kangaskhan was out of place, and wondered about doubling down on powerful spread attackers by replacing it with Mega Gardevoir. turskain, SimicCombine, and Eppie all provided some helpful thoughts and suggestions, and though I stuck with the double spread attacker plan, I shifted to a lead Mega Blastoise and a reserve Sylveon. The final two slots remained uncertain, and I fought the first 321 battles of this streak with Heatran and Aron before shifting to Garchomp and Mienshao.
Blastoise (Water Spout / Aura Sphere / Ice Beam / Protect) is in the lead instead of Sylveon because Blastoise + Grass Knot Greninja plays better against many counters than Sylveon + Extrasensory Greninja. Beautifully, however, if Blastoise gets knocked out or walled, I can just bring in Sylveon and continue on my merry way. Having a reserve nuke like this allows me to play much more aggressively with Blastoise, and not have to panic about it drawing attacks to the same extent a team that is more all-in on Blastoise would have to. While I haven't switched Blastoise out for Sylveon on the first turn all that often, it can be a very valuable play, particularly against foes resistant to Water Spout in situations where Blastoise might not get to attack on the first turn if it stayed in, such as when facing Fake Out. In such a matchup, the immediate switch is basically free, and I'm happy to take it.
Because of the hard hitting Sylveon backup, this team is happy to trade attacks back and forth, and so I don't do a lot of Protect-baiting with Talonflame, who thanks to attack recoil is often my first poke knocked out. If Talonflame goes down, I'm usually happy to bring Sylveon in as a winger to replace it, as even with just a two-Poke spread, Specs Pixilate Hyper Voice cuts through a ton of foes, and my teammates are strong enough that I don't need to take a "center spot or bust" approach with Sylveon. If worst comes to worst, I can shift to the middle once in battle, though that's a somewhat unusual play.
These first four Pokemon have been constant throughout my streak, but I've changed up my back row. Air Baloon Heatran (Heat Wave / Earth Power / HP Ice / Dragon Pulse) and Level 1 Aron were fine, but they always felt a bit like filler, executing a cookie cutter "solid" strategy rather than playing more fully into the team's overall plan. They also left me pretty heavily skewed towards special attackers, which risked becoming problematic against bulky special walls, especially those that could frustrate Endeavor either via Ghost-type immunity or evasion (Minimize Blissey, I'm pointing at you!)
SimicCombine and Eppie both had lots of success with Greninja / Mega Blastoise / Talonflame, and both of them strongly recommended making room for a Garchomp. I agreed that Garchomp has significant appeal, but when you bring in a Pokemon who relies heavily on Earthquake, you need to have teammates built around that, and given my insistence on keeping Sylveon, that made things a little complicated. Sylveon badly wants to hold Choice Specs, so if it finds itself in battle next to an Earthquaking Garchomp, it's going to take some pain, since it won't be able to Protect or hold an Air Balloon, so there's already something of a synergy problem. The sixth slot raised more difficulties. As Eppie noted, Rotom-W and Togekiss usually make excellent partners for Garchomp because they are immune to Earthquake and have nicely contrasting attacks. But with Sylveon on the team, Togekiss is something of a Fairy overload, and Rotom-W seems a little underpowered to me, particularly since his Water-type STAB is either dangerously inaccurate (Hydro Pump) or badly underpowered (HP Water). Indeed, SimicCombine noted that Rotom-W felt like the weakest link on his squad.
Thankfully, I had long been playing around with the idea of support Mienshao, and realized that I could set it up to not only play well with Garchomp, but also help ensure that Sylveon would too. What initially drew me to Mienshao was its potential to buy extra turns for my spread nukes. When you have partners serving up massively powered Water Spouts and Hyper Voices, just buying them one extra turn of attacking can often turn a tough battle into an easy one. Accordingly, Fake Out was in for sure, and Fling + Razor Fang looked awfully tempting as a way to net a second turn of flinching, especially given Jolly Mienshao's excellent Speed. Wide Guard became the real key to the set, however, since it can be spammed over and over, allows Garchomp to safely fire off Earthquakes without risking harm to his teammates, and even shuts down powerful opposing spread attackers. With respect to attacking, High Jump Kick's inaccuracy ruled it out, and I ended up selecting Low Kick over Drain Punch since Mienshao is frail enough that the HP recovery from Drain Punch isn't worth the loss in power against big foes. I thought about just running these four moves, but realized that I might want to attack simultaneously with a Garchomp Earthquake, so chose Air Balloon to let me safely Fake Out and Earthquake on the same turn. Once Air Balloon is in, Fling is obviously out, so I rounded out the set with Knock Off to allow me to hurt Ghost-types, and better cover the Psychic-types who laugh at Low Kick. So far, I've been very pleased.
I'll wrap this up by responding to a few of Eppie's comments, since though they are well thought out, I ended up making different choices concerning many of them.
Mandatory is too strong a word, but I agree that Garchomp is a good fit. Still, I did just fine the first 321 battles without him. Note that the squad's seeming Electric-type weakness, and Garchomp's corresponding Electric-type immunity have been essentially non-issues. First, the team has enough attacking power to muscle through most Electric types without a ton of difficulty. Second, having all of my leads be Electric-weak is in fact helpful, since it means fewer foes try to hit my Blastoise with Electric-type moves, instead usually sending them to the flanks. While I'll occasionally Protect on the first turn with Blastoise, I've yet to want to switch Garchomp into a predicted Electric-type attack. Garchomp's importance is further reduced by the fact that Sylveon fills my secondary spread attacker niche. But as you say, having a powerful physical attacker is something this team wants, and Garchomp is well suited for that role.
I agree completely, and I bred up a second Chomp. I'm running Jolly, Max Speed and Attack with Dragon Claw / Earthquake / Swords Dance / Protect. While I'm currently using a Lum Berry, I'm strongly temped to switch to a Yache Berry, since I no longer have to worry about Outrage confusion and late in battle (when Garchomp comes in) I seem to face far more attacks than status moves.
This is really clever, and I'll admit that when I initially built the team, I didn't think about this improved lure potential from making my Talonflame more frail. That said, I've stuck with my bulky Max HP spread for a few reasons. First, even with the bulky spread on Talonflame, the vast majority of stuff that can outrun Mat Block and hit Blastoise with a first-turn Electric-type attack choose to attack either Greninja or Talonflame, since they are both significantly more frail. After that first turn, once Tailwind is up, it matters much less if Blastoise is targeted, and the current spreads seem fine for getting through the first turn unscathed. Second, to the extent that foes do start trying to hit Blastoise, the presence of Sylveon in reserve makes a dented Blastoise much less of a problem. If I can get in a healthy Water Spout or two, I'm completely fine with Blastoise then being KOed, because Sylveon can then step in and mop up. While very rare, I have lost Blastoise on the first turn before, and Sylveon took over sweeping duties like a champ. Even the seemingly awful case of Blastoise not being KOed (so no free switch) but being at such low health that Water Spout becomes worthless is not too big of a problem, since after the opening volleys of Water Spout, the team usually has no problem winning through single-target attacks, and Blastoise's Ice Beam and Aura Sphere hit reasonably hard. Finally, Talonflame really appreciates the extra 31 HP it gains from 252 HP EVs compared to 4. With respect to theorymoning/damage calculations, its not as simple as calculating that "this spread guarantees that Talonflame will avoid a OHKO/2HKO/etc. from scary attack X," because of all the recoil damage Talonflame takes. Instead, what matters to me is that I've survived an awful lot of attacks at less than 31 HP, so the bulk, and the extra turns it buys, really do help. Against Trick Room teams especially, increased survivability means more priority Brave Birds, and that's a big deal. Since this increased survivability for Talonflame, in my mind, outweighs the lure potential of a frailer spread, and since extra Speed EVs aren't very helpful due to Talonflame's priority and high base Speed, I'm sticking with the bulky spread.
I'm certainly hoping to keep this streak going for a long time, but for now, I hope this basic summary proves helpful. Thanks again to all who provided advice, suggestions, and critiques. And next time you're building a Triples team, consider trying out Sylveon and/or Mienshao. I think you'll find they can be very helpful indeed.
Additionally, I ran Life Orb on Garchomp when using Balloon Fake Out Infernape in order to maximize its damage potential on the Fake Out turn. If nothing else on your team is taking up the item yet, I'd consider it on Chomp, since Mienshao/Infernape is not going to be a major sweeper and a harder-hitting Chomp to make better use of the space created for it is useful. Yache isn't as needed if the Ice Beam user is being Fake Outed and Wide Guard is blocking Blizzard, and Life Orb lets you kill those bulky waters faster in two hits so you never have to tank it in the first place and risk a freeze or a big crit.
I lost the 400-win streak I mentioned before with Greninja/Charizard for Triples V2 (to big misplays), and drafted up a new (non-Greninja/Charizard) team afterwards, which is currently at 750 wins. See you at 1000 wins, I suppose? Maybe even 2000, since this is a pretty damn strong team and there's only been 3-4 actually close battles so far, but I don't want to jinx it yet.
I reached 59 wins in Super Multi Battles with an AI partner
My Team
Crawdaunt@Focus Sash
Adamant Nature
Ability: Adaptability
4 Hp, 252 Attack,122 Def, 132 Speed
-Aqua Jet
-Knock Off
-Dragon Dance
-Protect
Conkeldurr@Assault Vest
Careful Nature
Ability: Guts
252 HP ,120 attack, 138 Special Defense
-Drain Punch
-Payback
-Poison Jab
-Rock Slide
Partner's team
Aromatisse@Expert Belt
Modest Nature
Ability: Aroma Veil
unsure of exact EVs due to it not being my Pokemon
-Psyshock
-Thunder
-Flash Cannon
-Moon Blast
Nidoqueen@Black Sludge
Modest Nature
Ability: Sheer Force
unsure of exact EVs due to it not being my Pokemon
-Sludge Bomb
-Flamethrower
-Earth Power
-Ice Beam
I was thinking I would end up losing to Aromatisse missing with Thunder. It did make a few close calls, and I just kept on using this squad since winning was very easy. In the end I lost because I decided to Protect on Turn 1, and Aromatisse didn't use MoonBlast on Garchomp. I knew it wouldn't, but that thing just wrecked me. Not even hax on my end could save me (avoiding Sky Attack, and a critical hit Drain Punch on Garchomp at the end.) I think if I had used Knock Off on Garchomp on turn 1, I probably would have won. Conkeldurr could have KOed it, and their last Pokemon, Tyrantrum most likely could have been dealt with. I was expecting a High Jump Kick on turn 1. I completely forgot about the Sky Attack Hawlucha, and I think Protect was a good idea anyway. If he had used HJK on Crawdaunt, Crawdaunt would have fainted to Earthquake before making a single move.
Battle Video
QABW-WWWW-WWW9-57K3
Lost at #104 with a decent team due to a mix of Swagger and simply really poor prediction (namely when the AI would Protect.) Wanted to break the 3DS by the third wasted turn. While the team was more solid than anything I'd been given recently in terms of support/output (Cofagrigus/Scrafty/Mega Ampharos/Machamp/Aggron/Ferrothorn) I was completely outraged by the waste alone.
What's more annoying than having a Steelix 4 and Telepathy Medicham get the better of you? A Telepathy Medicham with no access to HJK, no less? =P
I wonder if I may have fared better had I not spent a turn of Ferro using Gravity, since Power Whip and Focus Blast were important moves, but for all I knew that fucking Steelix would have dodged it without. I also mismanaged my use of Wide Guard.
I'm posting a 72 win record on Multi w/ AI and proof that I have collected all the trophies! As a bonus I think I had a different mega (or indeed for rotations no mega at all for each streak)
Proof of all trophies (all teams used to follow):

Multi Streak 72 wins
Losing Battle: E39G-WWWW-WWW9-5ENL
My team: Garchomp/Mega-Scizor
AI team: Staraptor/Cryogonal
I was quite fortunate with all other modes before Multi in that I hit the 50+ streak at the first time of asking. I attribute this down to good fortune, hours of practice put in on the Battle Subway in Gen 5 and both the comments made from the contributors of this thread and the old Battle Subway thread. My multi streak took quite a bit of work, I forget exactly how many attempts but I still think I managed it in less than a dozen attempts. I put this down to extreme good fortune. I felt my best AI partners comprised of a team of CB-Intimidate Staraptor and Levitate Cryogonal. With this team I knew I could spam earthquake. I build a Mold Breaker Excadrill (can't remember the back-up) to start with as I thought the steal typing would also be beneficial and I always wanted to try one. Silly move, I would kill my own Cryogonal with my typically best move. From there I moved to choice banded Garchomp. I now had a solid lead pair with the AI CB Staraptor and it was a matter of finding a partner. I felt I'd have great synergy with a steel back up as it would resist Ice and Dragon and have a super effective move against fairies. I started with a Timid Empoleon, which had great synergy with Garchomp (and achieved my previous PB streak of 36!) but just didn't always get the KO's I wanted as it didn't hit hard enough. I then tried a timid Air Balloon Heatran and it just didn't seem to gel. Both were not quite fast enough. I then looked at the speed issue - Gengar and Froslass were definitely potential threats in my mind - and I felt priority was the way forward. I then looked at megas and initially thought of Mega-Mawile before deciding on trying out Mega-Scizor. In one attempt I got my trophy and managed my streak. Further details are in the spoiler.
Other teams and streaks (with proof)
Singles Streak 57 wins
Losing Battle: DZYW-WWWW-WWW9-5EZU
Aegislash/Mega-Mawile/Rotom-W
Doubles Streak 63 wins
Losing Battle: FU9G-WWWW-WWW9-5EZY
Yanmega/Terrakion/Latios/Mega-Venusaur
Triples Streak 216 wins
Losing Battle: QSXW-WWWW-WWW8-QDM2
Greninja/Brelooom/Talonflame/Mega-Kangaskhan/Aegislash/Rotom-W
See this post for details
Rotations Streak 54 wins
Losing Battle: KPUW-WWWW-WWW9-5ENU
Bisharp/Latias/Gliscor/Volcarona
A really long post. Thanks for reading and woo - 5 trophies at last.
Proof of all trophies (all teams used to follow):

Multi Streak 72 wins
Losing Battle: E39G-WWWW-WWW9-5ENL
My team: Garchomp/Mega-Scizor
AI team: Staraptor/Cryogonal
I was quite fortunate with all other modes before Multi in that I hit the 50+ streak at the first time of asking. I attribute this down to good fortune, hours of practice put in on the Battle Subway in Gen 5 and both the comments made from the contributors of this thread and the old Battle Subway thread. My multi streak took quite a bit of work, I forget exactly how many attempts but I still think I managed it in less than a dozen attempts. I put this down to extreme good fortune. I felt my best AI partners comprised of a team of CB-Intimidate Staraptor and Levitate Cryogonal. With this team I knew I could spam earthquake. I build a Mold Breaker Excadrill (can't remember the back-up) to start with as I thought the steal typing would also be beneficial and I always wanted to try one. Silly move, I would kill my own Cryogonal with my typically best move. From there I moved to choice banded Garchomp. I now had a solid lead pair with the AI CB Staraptor and it was a matter of finding a partner. I felt I'd have great synergy with a steel back up as it would resist Ice and Dragon and have a super effective move against fairies. I started with a Timid Empoleon, which had great synergy with Garchomp (and achieved my previous PB streak of 36!) but just didn't always get the KO's I wanted as it didn't hit hard enough. I then tried a timid Air Balloon Heatran and it just didn't seem to gel. Both were not quite fast enough. I then looked at the speed issue - Gengar and Froslass were definitely potential threats in my mind - and I felt priority was the way forward. I then looked at megas and initially thought of Mega-Mawile before deciding on trying out Mega-Scizor. In one attempt I got my trophy and managed my streak. Further details are in the spoiler.
My lead: Garchomp Choice Band
Ability:Sand veil
EVs: 4HP/252Atk/252Spe
IVs: 31/31/31/31/31/31
Jolly Nature
- Earthquake
- Rock Slide
- Dragon Claw
- Shadow Claw
My back-up: Scizor Scizorite
Ability: Technician
EVs: 4HP/252Atk/252Spe
IVs: 31/31/27/31/28/31
Adamant Nature
- Swords Dance
- Bullet Punch
- Bug Bite
- Superpower
AI lead: Staraptor Choice Band
Ability: Intimidate
EVs/Nature: ?
- Brave Bird
- Close Combat
- Giga Impact
- U-Turn
Cryogonal @Occa Berry
Ability: Levitate
EVs/Nature: ?
- Blizzard
- Flash Cannon
- Icy Wind
- Sheer Cold
The team is based around the simple concept of hit hard and fast. Not a lot more than that to be honest. With my AI partners I can generally spam EQ freely without any worries. I tended to go for the spread moves. Garchomp being faster than Staraptor is very useful as it allows me to "direct" Staraptor's hits more. CB Strapator is really beneficial for the same reasons other people have cited for choice AI pokemon. Intimidate was obviously also a big help.
I would normally just decide which spread move of mine would most benefit the team and go ahead with it. Veterans were more troublesome as they were faster but I did OK with them. Cryogonal being fast was also it's big advantage but it is frail to physical hits and has a slightly odd move set (which it doesn't always select the best option from - why blizzard a fairy when you're sitting on flash cannon?!). Scizor gave me priority, something I felt I needed and it had good defensive synergy with my Garchomp. I feared losing Garchomp against a lead pair and then having a fire type revealed. Fortunately I never had that issue.
If I did this again (maybe one day) I would definitely want to try out a Rough Skin Garchomp over my current build. I also slapped Shadow Claw on my Garchomp to get the Ghosts that Staraptor couldn't but to be honest I can't really remember using it in any of my attempted streaks.
Other teams and streaks (with proof)
Singles Streak 57 wins
Losing Battle: DZYW-WWWW-WWW9-5EZU
Aegislash/Mega-Mawile/Rotom-W
Aegislash Leftovers
Ability: Stance Change
EVs: 252HP/252Atk/4SpD
IVs: 31/31/31/xx/31/00
Brave Nature
- Sacred Sword
- Shadow Sneak
- Iron Head
- Kings Shield
Mawile @Mawilite
Ability: Intimidate>Huge Power
EVs: 220HP/252Atk/4SpD/28Spe
IVs: 31/31/31/xx/31/31
Adamant Nature
- Iron Head
- Play Rough
- Sucker Punch
- Protect
Rotom-W Sitrus Berry
Ability: Levitate
EVs: 252HP/248SpA/4SpD/4Spe
IVs: 31/2/31/30/31/31
Modest Nature
- Hydro Pump
- Thunderbolt
- Hidden Power [Grass]
- Protect
Double Steel for the win! I originally considered going for a spin on the gen 5 staple of 1 drag 2 mag, (I know Magnezone isn't involved here but indulge me) but decided Rotom-W had better synergy. Didn't think it'd work due to shared weaknesses but it did. Prediction and switching was key.
Doubles Streak 63 wins
Losing Battle: FU9G-WWWW-WWW9-5EZY
Yanmega/Terrakion/Latios/Mega-Venusaur
Yanmega Life Orb
Ability: Speed Boost
EVs: 40HP/252SpA/212Spd
IVs: 31/31/31/31/31/31
Modest Nature
- Detect
- Bug Buzz
- Air Slash
- Hidden Power [Ice]
Terrakion Focus sash
Ability: Justified
EVs: 4HP/252Atk/252Spe
IVs: 31/31/31/31/31/31
Jolly Nature
- Protect
- Rock Slide
- Close Combat
- Earthquake
Latios Leftovers
Ability: Levitate
EVs: 4HP/252SpA/252Spe
IVs: 30/30/31/30/31/30
Timid Nature
- Psychic
- Dragon Pulse
- Hidden Power [Fire]
- Thunderbolt
Venusaur @Venusaurite
Ability: Chlorophyll>Thick Fat
EVs: 12HP/248SpA/248Spe
IVs: 31/2/31/30/31/31
Modest Nature
- Sludge Bomb
- Energy Ball
- Sleep Powder
- Protect
The lead pair was my doubles lead from the subway and I enjoy using them. I'll revisit this pair and look for a different backup I think. Latios' EV's aren't ideal at level 50, but nevermind. Mega Venusaur was fun and I later changed for a non-chlorophyll one with Giga Drain which added longevity.
Triples Streak 216 wins
Losing Battle: QSXW-WWWW-WWW8-QDM2
Greninja/Brelooom/Talonflame/Mega-Kangaskhan/Aegislash/Rotom-W
See this post for details
Rotations Streak 54 wins
Losing Battle: KPUW-WWWW-WWW9-5ENU
Bisharp/Latias/Gliscor/Volcarona
Bisharp Focus sash
Ability: Defiant
EVs: 4HP/252SpA/252Spd
IVs: 31/31/31/xx/31/31
Adamant Nature
- Sucker Punch
- Iron Head
- Psycho Cut
- Swords Dance
Latias Light Clay
Ability: Levitate
EVs: 252HP/248Atk/8Spe
IVs: 31/30/31/30/31/30
Timid Nature
- Dragon Pulse
- Light Screen
- Reflect
- Safeguard
Gliscor Toxic Orb
Ability: Poison Heal
EVs: 228HP/148Atk/132SpD
IVs: 26/27/31/22/16/31
Careful Nature
- Toxic
- Aerial Ace
- Earthquake
-Protect
Volcarona Lum Berry
Ability: Flame Body
EVs: 4HP/252SpA/252Spe
IVs: 23/19/19/30/31/31
Timid Nature
- Heat Wave
- Quiver Dance
- Hidden Power [Electric]
- Bug Buzz
I really wanted to use a Defiant Bisharp and I thought it would work well in Rotations. Latias has great defensive synergy with Bisharp and is my dual screener (thanks everyone here for tips on that!). Gliscor and Volcarona were both made before I learnt to RNG or used Gen 6 breeding so have messy IVs. Gliscor's EV's still get it to a HP value that divides by 8 but when I originally made it I thought it'd be better to bulk up it's SpD. Not sure about that now. Gliscor was probably my most underrated member of my team and I was so impressed by it when it was behind screens.
A really long post. Thanks for reading and woo - 5 trophies at last.

I just beat Nita + Morgan in Super Multis yesterday, so I now have all the trophies :).
Garchomp @ Lum Berry
Ability: Rough Skin
EVs: 252 Atk / 6 SpD / 252 Spe
IVs: 31 / 31 / 31 / x / 31 / 31
Jolly Nature
- Swords Dance
- Outrage
- Earthquake
- Rock Slide
Azumarill @ Sitrus Berry
Ability: Huge Power
EVs: 92 HP / 252 Atk / 164 Spe
IVs: 31 / 31 / 31 / x / 31 / 31
Adamant Nature
- Belly Drum
- Play Rough
- Superpower
- Aqua Jet
Aegislash @ Leftovers
Ability: Stance Change
EVs: 252 HP / 252 SpA / 6 SpD (something like this anyway, don't remember the exact evs)
IVs: 31 / 31 / 31 / 31 / 31 / x
Quiet Nature
- King's Shield
- Shadow Ball
- Sacred Sword
- Shadow Sneak
Pretty standard team I think. I made this team using the first three Pokemon I bred for flawless IVs in XY lol. These three Pokemon have great synergy together, and worked very well against the different opponents in the Maison. Between Garchomp and Azumarill, it was pretty easy to get a sweep going, and if they failed, Aegislash was usually capable of taking on the last mon or so by itself. I actually managed to get this team up to a streak of 99, but was thwarted from my 100th win by Confuse Ray Umbreon :[. Whatevs I guess.
Garchomp @ Lum Berry
Ability: Rough Skin
EVs: 252 Atk / 6 SpD / 252 Spe
Jolly Nature
IVs: 31 / 31 / 31 / x / 31 / 31
- Swords Dance
- Outrage (should be protect but too lazy to change)
- Earthquake
- Rock Slide
Kangaskhan (F) @ Kangaskhanite
Ability: Scrappy
EVs: 252 Atk / 6 SpD / 252 Spe
IVs: 31 / 31 / 31 / x / 31 / 31
Jolly Nature
- Fake Out
- Double-Edge
- Power-Up Punch
- Sucker Punch
Togekiss @ Sitrus Berry
Ability: Serene Grace
EVs: 252 HP / 4 SpA / 252 SpD
IVs: 26 / 1 / 30 / 27 / 29 / 30
Calm Nature
- Follow Me
- Helping Hand
- Thunder Wave
- Air Slash
Scizor @ Iron Plate
Ability: Technician
EVs: 252 HP / 252 Atk / 4 Spe
IVs: 31 / 31 / 31 / x / 31 / 31
Adamant Nature
- Swords Dance
- Bullet Punch
- Thief
- Protect
This team was incredibly easy to use and kinda fun (I really wanted to make a Doubles team using the Helping Hand Togepi that I SR'd for in XD lol). Basically, I just used Kanga to Fake Out whatever threatened Chomp while Chomp SDed. Then, I'd switch Kanga out to Togekiss while Chomp EQed, and watched as both pkmn on the opponent's side probably died. Then I'd use Helping Hand with Togekiss as Chomp EQed again, and win by turn 3. I probably won the majority of my Super Doubles Maison matches with this strat without having to make any plays at all lol. Sometimes things did get a little dicey (ie: when the opponent had two waters with Ice Beam leading), but thanks to Kanga and Sciz, those situations usually were easy enough to overcome.
Greninja @ Focus Sash
Ability: Protean
EVs: 252 SpA / 4 SpD / 252 Spe
IVs: 31 / x / 31 / 31 / 31 / 31
Timid Nature
- Hydro Pump
- Dark Pulse
- Ice Beam
- Mat Block
Garchomp @ Garchompite
Ability: Rough Skin
EVs: 252 Atk / 6 SpD / 252 Spe
IVs: 31 / 31 / 31 / x / 31 / 31
Jolly Nature (Adamant is probs better but I was too lazy to breed an Adamant chomper just for triples)
- Swords Dance
- Outrage (Ideally this would be Protect but I was too lazy to change this lol)
- Earthquake
- Rock Slide
Talonflame @ Sharp Beak
Ability: Gale Wings
EVs: 252 Atk / 4 SpD / 252 Spe
IVs: 31 / 31 / 31 / x / 31 / 31
Adamant Nature
- Brave Bird
- Flare Blitz
- Tailwind
- Protect
Tyranitar @ Air Balloon
Ability: Sand Stream
EVs: 252 Atk / 4 SpD / 252 Spe
IVs: 31 / 31 / 31 / x / 31 / 31
Jolly Nature
- Dragon Dance
- Rock Slide
- Earthquake
- Crunch
Togekiss @ Sitrus Berry
Ability: Serene Grace
EVs: 252 HP / 4 SpA / 252 SpD
IVs: 26 / 1 / 30 / 27 / 29 / 30
Calm Nature
- Follow Me
- Helping Hand
- Thunder Wave
- Air Slash
Scizor @ Iron Plate
Ability: Technician
EVs: 252 HP / 252 Atk / 4 Spe
IVs: 31 / 31 / 31 / x / 31 / 31
Adamant Nature
- Swords Dance
- Bullet Punch
- Thief
- Protect
Also kinda standard, I looked around in this thread and saw that apparently Mat Block Greg and Tailwind Talonberd + strong spread attacker was a good strat in Triples. However, because I didn't pick up BW2 (unfortunately ;_;) I did not have access to Hyper Voice Sylveon with Pixilate, nor did I have a Hyper Voice Gardevoir. So, I had to make do with SD Mega Chomp in Sand, which worked well enough. Typically, I'd just use Mat Block + Tailwind while Chomp SD'd and Mega'd, then I'd swap out Greg for Air Balloon TTar and Talonberd for Togekiss while Chomp EQ'd and trucked the opponent's team with +2 Sand Force-boosted Earthquake or on the rare occasion, Rock Slide. From there, Helping Hand +2 Sand Force boosted Earthquake usually just won :]. Wisp users were annoying, but fortunately I didn't run into too many of those so they weren't huge issues for the most part.
Garchomp @ Lum Berry
Ability: Rough Skin
EVs: 252 Atk / 6 SpD / 252 Spe
IVs: 31 / 31 / 31 / x / 31 / 31
Jolly Nature
- Swords Dance
- Outrage
- Earthquake
- Rock Slide
Azumarill @ Sitrus Berry
Ability: Huge Power
EVs: 92 HP / 252 Atk / 164 Spe
IVs: 31 / 31 / 31 / x / 31 / 31
Adamant Nature
- Belly Drum
- Play Rough
- Superpower
- Aqua Jet
Aegislash @ Leftovers
Ability: Stance Change
EVs: 252 HP / 252 SpA / 6 SpD
IVs: 31 / 31 / 31 / 31 / 31 / x
Quiet Nature
- King's Shield
- Shadow Ball
- Sacred Sword
- Shadow Sneak
Kangaskhan (F) @ Kangaskhanite
Ability: Scrappy
EVs: 252 Atk / 6 SpD / 252 Spe
IVs: 31 / 31 / 31 / x / 31 / 31
Jolly Nature
- Fake Out
- Double-Edge
- Power-Up Punch
- Sucker Punch
Literally just my singles team with a Mega Kangaskhan slapped on as backup. The good synergy between the first three Pokemon combined with how bad the AI is in Rotation was enough to get me to 50 battles easily. Most of the time, I just got away with spamming whatever was the "safest" move and was able to just whittle down the opposing team until I won. This mode for the most part was probably the easiest for me, since the only time I came close to losing was vs Morgan and that was because I didn't think I needed to cteam her in order to win (Aegislash still trucked her tho).
Garchomp @ Yache Berry
Ability: Rough Skin
EVs: 252 Atk / 6 SpD / 252 Spe
IVs: 31 / 31 / 31 / x / 31 / 31
Jolly Nature
- Swords Dance
- Outrage
- Earthquake
- Rock Slide
Azumarill @ Sitrus Berry
Ability: Huge Power
EVs: 92 HP / 252 Atk / 164 Spe
IVs: 31 / 31 / 31 / x / 31 / 31
Adamant Nature
- Belly Drum
- Play Rough
- Superpower
- Aqua Jet
Ai: Haunter's Scarf Charizard and Air Balloon Raikou
Oh my lord this mode is more of a butt than Oglemi ... Due to my bad luck and the limited number of friend codes that I had registered on my 3DS, all the AI partners I had were pretty mediocre, the best being like, White Herb Roserade + Floatzel. So, I ended up using Tierno as my partner for the first few tries at this. I did manage to make some pretty decent progress sometimes (I got to like 46 once with Tierno, so I imagine that if I was more persistent I could have gotten to 50 with him), but the times I lost were just really frustrating since, due to how weak Tierno's Pokemon are, some teams I lost against felt like literal autolosses (coincidentally, on the time I got to 46 with Tierno, I went up against Intimidate DD Gyara + Tentacruel + Ice Beam Starmie...nothin I could do).
Tired of losing in this mode, I ended up contacting Haunter yesterday to see if I could use his AI partner, which I felt would probably make this mode a lot easier. Fortunately, because he is such a nice man, Haunter let me use it, and with his AI partner I was able to beat this mode fairly easily. Scarf Heat Wave Zard + Chomp EQ basically won most of the games for me, and in the situations where it didn't Azumarill was usually able to clean up. For Nita + Morgan, I just used Sash Protean Greninja and Aegislash, and with Haunter's Scarf Zard Heat Wave spam, was easily able to beat them.
tl;dr Chomper is a strongmon. Maison was actually pretty fun I gotta say; being able to stop anytime during a streak was very nice, and getting BP after every battle was a nice motivator to actually get all the trophies. Hopefully every Pokemon game's Maison / Battle Tower or whatever is as good as this from now on :).
I've updated through here, and as per usual, please let me know if you spot any errors or omissions.
Also, I'm trying to go back through old streak links and make sure there's a link to the team writeup and not just the "how I lost" post. Most notably, I've added a second link to the entry for R Inanimate's big 1845 win triples streak, so that it's easy to not only pull up a list of his team members and the video of the losing battle, but also see his extensive and useful commentary on team design and play strategy. Please let me know if you see any leaderboard streaks where the posted link only takes you to a "how I lost" post that does not itself contain a link back to the original writeup, so that I can update the leaderboard with a second link. Going forward, however, please remember to include a link back to the detailed writeup within your own "how I lost" posts so that all the info concerning your team is readily accessible to people who click on the leaderboard link.
Continued good luck on the streaks, all!
I just lost my Singles streak at 1174 wins. I'm super frustrated with myself, so I'm just going to get this over with.I have an ongoing streak with my new team. The team should look pretty familiar to some of you. I'm currently at 1000 wins in Super Singles.
My previous attempt (Sableye/Durant/Smeargle) got me thinking of how to best capitalize on Entrainment. After seeing how good Moody (usually) is, I realized that Acupressure is just mind-bogglingly good. All the boosts of Moody with none of the annoying drawbacks? Yes please. Without further ado, I present Team Plaguarism:

Whimsicott (M) @ Focus Sash (Fluffy Bunny)
Ability: Prankster
Nature: Timid
EVs: 44 HP / 244 Def / 220 Speed
~ Taunt
~ Encore
~ Switcheroo
~ Memento
I needed to choose a nickname that accurately captured the vicious and aggressive powers on my lead; Fluffy Bunny it is! Whimsicott is still amazing. As turskain mentioned, having Switcheroo as an egg move only makes it better. Whimsicott's job isn't just to make sure Durant gets to use Entrainment; it wants to keep Durant as healthy as possible. I don't always do this (for example, using Encore on Nidoking 4's Poison Jab will keep Durant at 100% health, but unless I'm up against a Worker, I usually use Memento instead), but when I know the opponent's team might have Quagsire, I do. Keeping Durant healthy almost never matters, but when you want to win 1000 battles, "almost" isn't good enough. Whimsicott has a lot of cool tricks, and the fact that Drapion can often set up without Truant just by using Memento makes Whimsicott work perfectly with the other two Pokemon. The EVs let it outspeed Thundurus 4 and Tornadus 4 by one point, meaning that Whimsicott always goes first against opponents with +1 priority or less (except, like Floatzel's Aqua Jet, which it never uses). The rest of the EVs maximize his physical bulk, which I actually use fairly regularly. Once it steals Tyrantrum's Choice Band, Tyrantrum actually only has a 6.3% chance to OHKO with Head Smash unless it crits. That lets me use Memento to help preserve Durant's health. Special bulk doesn't help much, because most special attacks have annoying secondary effects and will 2HKO through the Sash anyway (Fire and Ice moves in particular).
Durant (F) @ Choice Scarf (The Bug Life)
Ability: Truant
Nature: Jolly
EVs: 244 HP / 12 Def / 252 Speed
~ Entrainment
~ Protect
~ X-Scissor
~ Iron Head
"I didn't choose the bug life; the bug life chose me." -Tupac Shakur (Pixar version)
Durant does what it's always done, but with a twist. Using the Moody team made me realize how helpful it is to keep Durant alive and healthy in case anything goes wrong. Of course, when you use Drapion instead of a Moody sweeper, there's a much smaller set of things that can go wrong, so you know which opponents have them and how to prepare for them. I added Protect to help with PP stalling Umbreon (I think there was something else I've PP stalled, but I don't remember what; maybe Hippowdon 4?). After you give them Truant, you can switch out to Drapion on the loafing turn, then bring Durant back in on the loafing turn and use Protect to waste their attacking PP. I've only done this once and I didn't save the battle video, but I was glad I had it. Entrainment is the whole point of the set; X-Scissor OHKOs Espeon. I used to try to use Taunt against Espeon and only switched in Durant when it was Magic Bounce, but I didn't like both Whimsicott and Durant taking a bunch of damage, so now I just go straight to Durant and use X-Scissor against lead Espeon. I've never used Iron Head; in theory I could replace it with Dig for more PP stalling. In practice, I don't think it will ever matter. As I mentioned with the Moody team, the EVs maximize physical bulk, which is particularly important for Quagsire on this team. But because Durant has crappy HP, maximizing physical bulk also gives a nice boost to special bulk as well. Durant usually survives the Entrainment turn with 50% of its health or more unless it has to take a crit.

Drapion (M) @ Black Sludge (Plaguarism)
Ability: Battle Armor
Nature: Adamant
EVs: 252 HP / 252 Atk / 4 SpDef
~ Substitute
~ Protect
~ Acupressure
~ Knock Off
The big boss. Given that this entire team is ripped off of other people's ideas, I thought the name was only fitting. Thanks to GG Unit for reminding me that it gets Knock Off as a level-up move, not a BW2 tutor move, meaning I could use it without jumping through a ton of hoops that would ultimately end up with some imperfect IVs. The Adamant nature and the Attack EVs are crucial. I knew they were important before I started running the team, but I didn't know how essential they were to breaking through Drapion's old "flaws" until I really got into it. With the given spread, Knock Off has a 62.5% chance to OHKO Terrakion, which is awesome. I don't know its exact odds of getting a 2HKO on Cobalion 2, but it's better than 50%, and I've 2HKO'd Cobalion 2 every time it's showed up. Perhaps most importantly, Knock Off will usually 3HKO Quagsire 4 if it doesn't use Curse (three minimum damage rolls falls just 10 HP short of a KO), so if Quagsire 3 spams EQ (which does 62.1% max, but it has to break the Sub first), it will almost always lose. I haven't run the calculations if it does use Curse, but basically, the extra turns you get while it doesn't attack should make up for the reduced damage. Obviously, the reason this works is because Knock Off gets rid of its Leftovers. I've only fought Cobalion 3 once (and it used Iron Head...), but if it DID use Psych Up, hitting it with Knock Off first will get rid of its Lax Incense, meaning you'll still always hit it even after it copies your Evasion boosts.
Knock Off does other cool things too, particularly against Sturdy Pokemon. Donphan 4 can survive a hit with Sturdy and break your Sub, but since you Knock Off its Quick Claw, it doesn't matter at all; just set up another one. Probopass 4 can survive a hit with Sturdy and break your Sub (if the Sub has really low HP, which it sometimes does), but because you Knocked Off its Life Orb, it doesn't kill itself and you can set up another one.
I changed up the strategy depending on the opponent; as I mentioned, I sometimes used Memento and skipped Durant entirely to keep Durant at full health if I knew Drapion would be safe. You need to be careful when doing so, though; if you forget about Spiritomb's Infiltrator and try to set up without using Truant, you'll have a burned (and dead) Drapion, which pretty much means an instant loss for the team.
I originally had the 4 EVs in Speed (which did nothing), but I realized that Mismagius 4 didn't always break my Sub with Power Gem. The extra SpDef brings its odds of breaking the Sub from 9/16 to 7/16, which is nifty. Coincidentally, Skuntank's Fire Blast has the same odds of breaking the Sub, so the EVs are useful there too, since I always bring in Drapion against both of those leads.
Threats: Dropping the 3DS and having the cartridge fall out in the middle of a battle, running out of battery, accidentally selecting the "forfeit" button.
Oh, you wanted real threats? Fiiiine. I'll put most of them behind Hide tags, because I have plenty to say about each one.
Unaware Quagsire:
As I mentioned, Quagsire is one of the few Pokemon who can actually do something about Drapion when it's fully set up. You want to keep Durant as healthy as possible in case you need to switch out and use Entrainment on it again. Fortunately, Quagsire does really poor damage to Durant, so Durant doesn't need much health to do so. It also has an odd tendency to use Amnesia against Drapion, which makes it very easy to KO. I've fought Unaware Quagsire four times in this streak; the one time it DID spam EQ, it was the third Pokemon, meaning Durant could have just come in and taken it out if Drapion has failed to 3HKO. Because my "back-up plan" against Quagsire involves setting up Drapion again, opposing leads that can force me to waste all of Protect's PP (which are really just Pokemon with Taunt) could cause problems. I actually fought a lead Sawk 4 (I used all of my Protect PP setting up against it) followed by a second Pokemon Unaware Quagsire in battle 885, but Drapion 3HKO'd it, so it didn't matter. In theory, I could have lost if the third Pokemon was a Donphan 4 who activated its Quick Claw and hit with Fissure, but that three-Pokemon combination is basically a one in a million chance. I've faced a second or third Pokemon Unaware Quagsire four times in my streak; the biggest problem it ever caused was leaving Drapion without a Sub and at ~1/3 health against a mystery third Pokemon. Quick Claw Donphan is really the only Pokemon who can actually capitalize on that situation.
Cobalion 3:
Cobalion 3 could theoretically be a threat, but as I mentioned, I've only fought it once and the AI was really dumb with it. That said, Drapion has a few options against it. With 252 Adamant, Knock Off actually has a 50% chance of doing 75% damage or more. This means that, in the event that the AI uses Psych Up and I've done 75% damage or more, its only choice is to use Iron Head (because I have a Sub up to block Swagger). If I Protect against its first Iron Head, I can actually completely stall out its Iron Head PP by alternating Sub and Protect (I ran the numbers several times to be sure); Drapion's HP gets too low to make another Sub RIGHT as Cobalion uses its last Iron Head. Then it can't hit you, meaning you can just KO it.
Taunt leads have never been a problem for me. I always give them Truant and I can just use Protect every other turn until I run out. I put up a Sub first, so that gives me 15 turns of Acupressure before they can actually hit me. By then, I have a ton of boosts, and I often have enough Evasion to dodge Taunt and get the rest of my Acupressures (especially because the AI doesn't always use Taunt and will sometimes use weak attacking moves that will either miss or fail to break the Sub). Life Orb leads also aren't a problem, because I manage to start dodging their attacks early enough to finish setting up. Even if I didn't, I could just Protect every other turn once their health gets too low.
High Jump Kick:
This is barely worth mentioning; Medicham and Mienshao will use Fake Out first, so I can use Encore on the next turn, give them Truant, bring in Drapion, and Protect as they KO themselves. If Medicham uses Detect, I just Encore that and go straight to Drapion, setting up a Sub on its last Detect turn. The reason I mention it is because the one truly close call I had was the result of a lead Mienshao. It was battle #91 or something like that (so super early on). It used High Jump Kick on turn 1 instead of Fake Out. I hadn't expected that at all. I used Memento on it and brought in Drapion, letting it KO itself. I was hoping the next Pokemon would be something I could bring in Durant against, but it was Arcanine 4. Fuuuuck. I was forced to try to set up Acupressure while it attacked with Flare Blitz while I had no Sub. I didn't get a boost I wanted and Drapion was down to the red. I used Protect (for no particularly good reason) and it used...EXTREME SPEED. Apparently, a quirk in the AI makes them really like to use Extreme Speed on weakened opponents. Next turn, I switched Durant in on Extreme Speed, used Entrainment, and managed to fully recover and set up Drapion and win.
Explosion is a minor problem, particularly if you don't know the AI lead well enough. Here's how I play against Explosion Pokemon:
Bronzong 3: I've never fought this thing, but I'd probably go to Durant and use Entrainment. If it Explodes on turn 1, good; if not, it will probably use Iron Head or Zen Headbutt; those moves + EQ doesn't even come close to KOing Durant. It will probably use EQ against Drapion and not Explode, so nothing to worry about there. Even if it does, Whimsicott and Durant are still alive.
Carbink 4: Go to Durant and use Entrainment. If it uses Power Gem on turn 1 (which does less to Whimsicott than Moonblast, but it will use it anyway), it will 2HKO Durant. The first two times I fought this thing, it didn't Explode until I was almost fully set up (or didn't Explode at all). The third time, it Exploded early, which led to a very close call (battle video below). So be sure to Protect every other turn against it, or it can break your Sub with Explosion and leave you in a bad spot. Full health Whimsicott and Drapion behind a Sub with few boosts sounds bad, but it's actually pretty good; Drapion can PP stall certain dangerous attacks (or use bait stuff like Overheat) and Whimsicott can Encore EQs to waste their PP before using Explosion. It's not super hard to fully set up Drapion against the new switch-in.
Claydol 4: From what I've seen, it will use a different move (typically ZH on turn 1), but it might Explode on turn 2. Encore the first attack, Memento, bring in Durant, Entrainment. Once you bring in Drapion, Claydol will switch to using EQ, so you can set up without problems.
Claydol 2: Taunt, switch to Durant as it kills itself.
Cryogonal 4: It will Explode early. Bring in Durant, Entrainment, set up Drapion until it Explodes. The rest of the team should have plenty of health, so it's easy to switch out and set up again.
Exeggutor 4: Used Trick Room; Encore it, give it Truant, go to Drapion. Whimsicott and Durant are at full health, so if it Explodes against Drapion, you can switch out and set up again.
Ferrothorn 3: Ace Trainer Bunny can have this. I've never fought it. Just use Taunt -> Entrainment. It will probably Explode before too long, but Whimsicott and Durant will be alive, so it doesn't matter.
Forretress 3: Hex Maniac Mara led with this against me once. I predicted it would Explode on turn 1, so I switched to Durant. I was right.
Forretress 4: Taunt (it will use hazards), go to Durant as it KOs itself.
Gigalith 3: Worker Rasmus? See Claydol 4. Super rare.
Golem 3 and 4: See Claydol 4.
Gourgeist 2: Switch to Durant.
Landorus 4: I've actually never fought a lead Landorus 4. I expect it would either use U-Turn or Explosion on turn 1. I would just use Taunt on the first turn; if it uses Hammer Arm or EQ, use Encore, Memento, then see Claydol 4 for the rest.
Lickilicky 4: I've fought this thing as a lead twice. I didn't record what it did the first time; I think it Exploded on turn 1. The second time, it Exploded on turn 1. I just switch to Durant now, expecting it to Explode. If it doesn't, use Entrainment and bring in Drapion; it should prefer EQ to Explosion, but I'm not sure.
Metagross 3: I've never fought this as a lead, but it would actually kind of suck, since you want to Taunt turn 1 against Metagross 4. I would use Taunt, then switch to Durant (it should Bullet Punch on the second turn). After that, it will probably EQ>Explosion on Drapion.
Muk 4: Switch to Durant (it will use Gunk Shot). It will Explode early against Drapion, but it doesn't matter.
Probopass 3: See Claydol 4 (but Whimsicott with faint and you won't be able to Memento).
Regirock 2: See Claydol 4. Clear Body is an asshole, but use Memento anyway (if possible) to avoid the switch-in damage on Durant.
Regirock 4: If Alfie or Eleanor, use Encore turn 1 (wasting a turn). Regirock 4 should use Rock Polish, so Encore that and bring in Durant for free.
Reuniclus 2: Laugh because it sucks. Then Encore its Trick Room and bring in Durant.
Shiftry 3: Taunt, switch to Drapion. Drapion resists its other moves and this Shiftry has no Atk EVs, so Drapion should tank Explosion just fine.
Skuntank 4: Switch to Drapion on the Poison Jab. Set up a Sub (it's slower than Drapion) and just set up on it until it Explodes. Fire Blast is the only move that can break the Sub.
Perish Song
Mismagius and Lapras are the only users. Against Missy, I use Taunt (which could theoretically miss, but hasn't yet), switch to Drapion, and set up a Sub. Then i Just Sub+Protect stall until it uses Perish Song and switch in Whimsicott on the last turn. Against Lapras, I use Encore and then spam Switcheroo until it uses Block or Perish Song. If Block, I Encore it until it runs out of PP. Then I spam Switcheroo until it uses Perish Song and use Memento on the last turn of it (try to avoid leaving Lapras with Focus Sash, or it will be able to Perish Song Drapion). If it uses Perish Song, I encore that and switch out on the last turn. This isn't perfect (Body Slam often paralyzes and I could get parahaxed; it might not decide to switch out), but it's worked alright thusfar. The one time it didn't use Perish Song, I just brought in Drapion after Whimsicott fainted, set up until I had to switch out of Perish Song, and had Durant used Entrainment on the next Pokemon. This introduces some risk. I fought a lead Lapras 4 five times in my streak; the only time it caused a potential problem was when it never used Perish Song against Whimsicott. I had to stall with Drapion until it used Perish Song and brought in Durant on the last Perish Song turn. The AI sent out Abomasnow (which is bad, because it has Protect), but it didn't use Protect. Even if it had, Drapion's good against Abomasnow (Aboma has low PP on its moves and wastes turns with Protect).
Breloom 4:
I only fought a lead Breloom 4 once during my streak and it didn't have Poison Heal, but it was still a tremendous pain. If you use Switcheroo, it can get a free Sub; if you use Taunt, it gets Poisoned. If you use Entrainment, it dies to the Poison. I ended up using Taunt on turn 1 (blocking its Sub), using Encore on turn 2 (it did nothing), switched in Drapion (it took like 70% damage from Focus Punch), switched back to Whimsicott hoping it would use a non-attacking move (it used Sub), and Encored the Sub until it died of Poison. Against Poison Heal, I would probably Taun, Encore (does nothing), Encore the Focus Punch, Memento, Entrainment, go to Drapion and watch it die. At least Drapion would have a sub and Durant would be at roughly 2/3 health at worst (barring a crit). But yeah, lead Breloom 4 is a really bad opponent to face.
Static: I don't see this as a threat, because nothing except OHKO users can really beat Drapion when it's fully set-up, even if it's paralyzed. OHKO users have to hit twice while Drapion is fully paralyzed both times. I guess Static Zapdos could be a problem if the third Pokemon is a musketeer, but usually the AI will send out the musketeer before they send out Zapdos.
Flame Body: No hide tag for this one, because I think this is what will actually cause me to lose. A burned fully set-up Drapion can beat most Pokemon, but there are a few Pokemon it can't get past, specifically Umbreon 4 (and set 1, but that won't be on a team with a Flame Body Pokemon), Scrafty 4 (the other Scrafty sets won't be on a team with a Flame Body Pokemon), Mandibuzz 4 (unless it has Weak Armor), certain musketeers sets. Umbreon and Scrafty are common partners for Flame Body Pokemon on Punk Guy/Girl sets (except Puck), and, in Scrafty's case, the numerous Fire + Fighting trainers. I have been known to stall out the Fire-type PP of a Pokemon that might have Flame Body (in Rapidash's case, I stalled out Protect as well) so I could bring Durant in and use Entrainment again, just to avoid the possibility of Flame Body. This works fine for Magmortar, is mediocre for Rapidash (it has a lot of PP), sucks against Chandelure (but it's usually on Psychic/Hex Maniac teams anyway, so it doesn't matter), sucks against Volcarona, sucks against Talonflame, and is pretty good against Moltres. Moltres also telegraphs Pressure, so I know immediately if it has Flame Body or not. Heatran is a real problem, especially Heatran 1. Heatran 2 doesn't have too many PP and Heatran 4 has Choice Scarf (so not many PP at all), but Heatran 1 has a ton of PP, will use Earth Power before Lava Plume, and can OHKO a full-health Durant with a crit Earth Power (note that I did once switch in a full health Durant against a Heatran that used Earth Power, risking the crit, but it was Heatran 3 and used Sunny Day on the switch-in turn). Oh, and Heatran 1 has Focus Sash, so it has two chances to burn. That's fine if the next Pokemon is a Regi, a genie, Raikou, Entei, Cresselia, a legendary bird, or Lati@s, but it puts me in a really bad spot against some Suicune sets and most of the musketeers. And because Heatran's Earth Power is so good against Drapion, the AI is likely to send in Heatran before the musketeer. So yeah; I'm placing my bets that, when my team does lose, it will be because of a second Pokemon Heatran (probably Heatran 1) followed by a third Pokemon musketeer.
Here are a couple of battle videos:
The "close call," #607: GFDW-WWWW-WWW8-GRHA: Vs. Battle Girl Rei, Carbink 4, Tyrantrum 4, Throh 4
As I mentioned above, Carbink Exploded WAY earlier than I expected it to, breaking my Sub. Tyrantrum 4 comes in; I know I have to stall it out of Head Smashes and lower its attack to reduce Struggle's damage. I Protect, go to Whimsicott, Memento, Drapion. The miss is really lucky; even at -2, CB Head Smash hits like a truck. I manage to get some boosts and it faints while I still have a Sub. Fortunately, the next opponent is Throh, who burns himself. I stall it out until it has really low health and KO it with +2 Knock Off. Note that, because of the +2, I might have still been able to win without the miss, because +2 Knock Off does between 40 and 50% damage, so I wouldn't have had to stall for too long. Of course, now I know to Protect every other turn against Carbink. If I had had a Sub up against Tyrantrum, I could have stalled out Head Smash, let it weaken itself with Struggle, and KO'd with Knock Off, leaving Whimsicott alive to cripple (or in this case Encore) Throh.
Battle #1000: HYRG-WWWW-WWW8-GRHE: Vs. Worker Rasmus, Dugtrio 1, Hippowdon 2 or 3, Ferrothorn 1
The big battle, and surprisingly, it was something different! Worker Rasmus sent out Dugtrio; its Protect reveals it to be set 1. This is actually somewhat of an annoyance; Dig lets it dodge Entrainment pretty well. Drapion clearly destroys it thanks to Protect blocking Dig, but I'd rather not waste that many Protect PP. I try to Memento, only to learn that the move doesn't faint your Pokemon if you use it on Dig's charge-up turn. I Encore Dig to waste some PP and use Taunt for a while, then take out Dugtrio with Memento (mainly to weaken Reversal on the turn I break Dugtrio's Sash so that it won't break my Sub...if it actually hits). I set up fully and take out Dugtrio (Reversal missed), Hippowdon, and Ferrothorn. I turned on the battle animations on my game just for this battle. Don't do it, guys; Acupressure's animation behind a Sub is SO SLOW. That said, Drapion's Knock Off looks freaking awesome.
Beginning after battle #126, I started recording who each of my opponents were. Because Knock Off reveals the opponent's item, you can usually figure out what set a Pokemon is when Drapion KOs it. So for those who are interested, I recorded some random stats about my opponents:
My most frequent opponents were Pokemon Ranger Tanner (18 battles), Black Belt Wystan and Tourist Ibiza (15 battles each), and Tourist Geneva, Veteran Isabella, and Hex Maniac Mara at 14 battles each. The opponent I battled the least was Veteran Eleanor, at a mere 2 battles in the 875 I recorded.
The most common leads were Chesnaught 4 and Gengar 4 at 10 battles a piece, with Carracosta 4 third at 9 and Victreebel 4 in fourth at 8. I was struck at how low that number was; there really is a huge variety of opponents in the Battle Maison. There were a ton of leads I only faced once, but among set 4 non-legendary Pokemon, I only faced Abomasnow, Ambipom, Breloom, Escavalier, Flygon, Gliscor, Gogoat, Goodra, Hariyama, Kangaskhan, Lilligant, Pinsir, Roserade, Skuntank, Tauros, Unfezant, Vanilluxe, and Yanmega once each. I have faced all four sets of Jolteon, Krookodile, Raikou, Regirock, Registeel, Terrakion, and Zapdos as leads. Krookodile is particularly striking, since Punk Guy Puck is literally the only trainer who can run Krookodile 1, 2, or 3 after battle 40.
Demonstrating the AI's tendency to select whichever of their remaining Pokemon is best (or at least is "good enough" against yours), here are the most frequent second Pokemon I faced, all at 10 battles a piece unless otherwise stated: Carracosta 4 (11), Claydol 4 (9), Dugtrio 4, Electivire 4, Gigalith 4, Hippowdon 4 (11), Jolteon 4, Metagross 4 (9), Muk 4 (9), Nidoking 4, Nidoqueen 4, Poliwrath 4, Skuntank 4, Tyranitar 4, and Tyrantrum 4 (9). That's a ton of Earthquake, but I was particularly surprised by the number of Explosion Pokemon. The AI seems to think that Explosion is the best move ever and will KO anything; I've actually seen the AI send out Carbink 4 (which has base 50 Atk/SpAtk and no super-effective moves on Drapion) ahead of Tyrantrum 4 (is fucking jacked, has EQ and Head Smash), so apparently the AI just thinks Explosion is a really good choice against a fully set-up Drapion.
Similarly, the most common third Pokemon reads like a list of "Pokemon who are awful against Drapion": Barbaracle 4 (10), Bronzong 4 (9), Carracosta 4 (9), Cradily 4 (10), Mienshao 4 (10), Mr. Mime 4 (10), Venusaur 4 (11), and Vileplume 4 (10). The exception to the rule is Carracosta 4, who made all three lists and is apparently just extremely common. It makes sense, though; Battle Girls and Black Belts run Fire/Fighting/Rock, Hikers run Rock/Ground/Fighting, Pokemon Rangers run Water/Grass/Ground, some Beauties and Chefs run Water/Ice, Scientists run fossil Pokemon in addition to their normal types, and Workers run Rock/Ground/Steel. Carracosta can even have Swift Swim, putting in Beauty Claire's team. So many trainers run either Water or Rock that a Water/Rock type is bound to be really common.
I was expecting to break the old record by a huge margin if I got to 1000, so I was really surprised to see StarKO all the way up at 991. It's awesome to know that different kinds of teams can get up to 1000 wins (which StarKO's team definitely can, but it's easier to misplay when you're already at the top of the leaderboard). I'll be playing the Maison on and off; I'll update with my progress periodically. Building up the streak is slow, though; the average battle takes a little over five minutes if I'm paying attention (which I need to be; using Protect when I should have used Sub can lead to a crippling burn that ends my streak).
Good luck, everyone!
EDIT: Got Whimsicott's Speed EVs wrong. They're fixed now.
First of all, I made some big changes (for a team that already has 1000 wins) to Durant's set. Here's the updated set:

Durant (F) @ Choice Scarf (The Bug Life)
Ability: Truant
Nature: Jolly
EVs: 172 HP / 108 Def / 228 Speed
~ Entrainment
~ Iron Head
~ X-Scissor
~ Aerial Ace
My team only faced lead Breloom 4 once in the first 1000 battles (which is odd, because I faced lead Chesnaught 4 like 10 times, and only two trainers can run Chesnaught but not Breloom). I noticed I had a big weakness to Breloom, since the first way I beat it involved hoping it would use a non-attacking move on Drapion, and that only worked if it didn't have Poison Heal. So I decided to add Aerial Ace to Durant's set. Even with no attack EVs, Aerial Ace does enough that Breloom will die to Toxic Orb damage on the turn after Durant attacks (during which I switch back to Whimsicott). Here's the strategy:
Turn 1: Whimsicott Taunt (Breloom never attacks here)
Turn 2: Switch to Durant
Turn 3: If it's not Poison Heal, use Aerial Ace (Focus Punch fails). If it is Poison Heal, use Entrainment and set up Drapion as Breloom faints to its Toxic Orb. That's not ideal, but it does get me a few turns to boost, and I'll still have Whimsicott at full health to Memento if necessary.
Turn 4: If not Poison Heal, switch back to Whimsicott, tank Focus Punch; Breloom faints. Do the usual strategy against the second mon.
Durant also had unnecessary speed EVs, so I took those away. I used a new EV spread that maximizes its physical bulk, which gives it just enough bulk to always survive a Breloom 4 crit Focus Punch.
Some of my highest risk scenarios were a second mon Flame Body (especially Moltres or Heatran with a third mon musketeer). With Durant's current moveset, this is less of a risk. Iron Head takes out a Terrakion that has had to take a burned Knock Off, while Aerial Ace takes out Virizion. I would still probably lose against a third mon Cobalion, but the odds of that (second Pokemon is Heatran or Moltres that has Flame Body, can't be stalled out of Fire-type PP, and Flame Body actually activates, and the third mon is Cobalion) are obscenely low.
I lost because I'm an idiot and the AI made a move I didn't expect, knocking out Drapion. Here's the video:
Battle #1175: HGDG-WWWW-WWW9-639S
Lead Volcarona: I use Memento and Entrainment. Whimsicott and Durant are gone, everything's going according to plan.
I bring in Drapion and set up. I didn't bother to Protect, because 1) most of the time, I had enough Speed that I was faster than Volcarona, and the AI tends to Quiver Dance when I'm faster, and 2) I have never seen the AI use Bug Buzz before it runs out of Heat Waves. I set up for several turns, getting no SpDef or Evasion boosts and getting to +6 Speed. Volcarona boosts to +5 (which is +3 SpAtk, thanks to Memento) and uses Bug Buzz to OHKO Drapion through the Substitute.
I feel really fucking stupid for losing. In the back of my mind, I thought "maybe I should Protect; it can probably OHKO with Bug Buzz." If it had been faster than me, I probably would have. If I had run the calc and seen that it can OHKO at +2, I might have done it as well. Obviously, this team could have won if I had played better, but sometimes playing the Maison too much can be a detriment, because you think you know the AI better than you actually do. But, of course, if I were in this situation again, I would have used Protect after Volcarona got to +2 SpAtk.
Unless someone beats my record, I probably won't try again; it would take over 100 hours to get my streak this high again, and there isn't the sort of diversity and excitement that can make other teams fun. I'm frustrated that I didn't even lose to one of the situations I actually consider dangerous. But hey, we all lose sometimes (except Jumpman and ~Mercury~).
Here's another battle to show one of the situations where this team actually can lose without misplays (and that's another reason why I'm probably not going to try again):
BBTG-WWWW-WWW9-63G9
Lead Mienshao 4. I start with Switcheroo; I expect it to Fake Out, but Switcheroo is the best move if it DOESN'T Fake Out. Unfortunately, it uses High Jump Kick. I go to my pre-planned strategy for this situation: Immediately Memento, go to Drapion, and make it KO itself ASAP, making sure Drapion has a Sub up. This is successful, but ends with Drapion at low health.
My hope in this case is that she sends out something with Earthquake. Fire-types with Overheat are manageable, since they drop their own SpAtk. Flare Blitz users are the worst case scenario, but I can get out of some of them (e.g. the Arcanine 4 ExtremeSpeed fiasco). She sends out Infernape 4.
I have a few options: try to take it out (with or without some stalling involved) or switch to Durant. Infernape 4 has four moves: Flare Blitz, Close Combat, Fake Out, and Encore. My instinct is to stay in, because I have a Sub up and I can try to improve my situation somehow. But Infernape is faster, and I realize that, on this turn, it might use any one of its moves. The AI does sometimes Fake Out against a Sub, Encore is viable because I just used a non-attacking move, and Flare Blitz and Close Combat have equal BP. Next turn, Fake Out will not be viable, and my odds will get worse. So I switch Durant in on a Flare Blitz user. It uses Close Combat, Durant lives, I get off an Entrainment. Drapion sets up and KOs the other Pokemon, which is Arcanine 4 (another Flare Blitz user).
It's rare that Mienshao 4 doesn't use Fake Out on turn 1, but when it doesn't, it can cause real problems. Durant can switch in on most Pokemon, but Black Belts and Battle Girls are likely to have Flare Blitz users as back-up (and aren't as likely as Hikers to have EQ users, who are better choices against Drapion than Flare Blitz users). Both times I've faced Mienshao 4 that led with Fake Out, it caused problems, but those battles were over 1000 battles apart. Still, those situations require this team to play the odds in ways I don't particularly like.
Good luck, everyone!
Posting an ongoing streak of 1000 wins in Super Triples.
Battle video: #1000 - E97G-WWWW-WWW9-6A25 vs. Walrein/Aggron/Drapion/Machamp/Houndoom/Metagross (removed)
Battle video: #1133 - AV9W-WWWW-WWW9-8GAG vs. Tornadus/Articuno/Heatran/Latios/Registeel/Regice (removed)
Battle video: #1400 - CZDG-WWWW-WWW9-YKJB vs. Typhlosion/Pyroar/Aggron/Armaldo/Bastiodon/Throh ) (removed)
Battle video: #2001 - TTHW-WWWW-WWW9-PHWQ vs. Weavile/Salamence/Espeon/Dragonite/Electivire/Seismitoad (removed)
Battle video: #2367 - 5H8W-WWWW-WWW9-VWP8 vs. Slowking/Nidoqueen/Gourgeist/Steelix/Lapras/Vaporeon (removed)
Battle video: #3000 - VZQW-WWWW-WWWA-4Q8G vs. Skarmory/Archeops/Honchkrow/Hawlucha/Zebstrika/Togekiss
When I started working on Triples, the initial plan was to adapt Lucario/Greninja/Talonflame/Garchomp for an easy streak; unfortunately, it wasn't as simple as I thought. Filling the last two slots proved very difficult, particularly the center - I tried a variety of unsuccesful things here, and I couldn't figure out what the missing piece to solve Lucario/Greninja for Triples was. That's when I looked to Greninja/Charizard instead and the criminally unreliable Heliolisk team happened; afterwards, I stuck with better Greninja/Charizard variants for a while (Greninja/Scarf Infernape/Charizard and Greninja/Wide Lens Blaziken/Charizard, to be exact), but I got bored of it (after 800 battles with it in Triples, and 1500+ in Doubles before that) and went back to furiously theorymoning the missing center for Lucario/Greninja. After a lot of intense head-against-wall action, I finally realized that only Rotom-W could fit the bill, and that it was viable to put Choice Specs on it to solve its usual problem of low damage output, and that its low Speed was not going to be a deal-breaker or require Choice Scarf like I had thought.
And it was good - like in Doubles, Lucario/Greninja wipes the floor with Greninja/Charizard for a lot of the same reasons, in addition to the the very nice Triples-specific properties that the team happened to coincidentally have despite being a Doubles team.
Introducing Lucario/Greninja for Triples:
Lucario @ Lucarionite ** Zica Charger
Nature: Timid
EVs: 252 SAtk, 252 Spe, 4 HP
Ability: Steadfast
-Aura Sphere
-Flash Cannon
-Nasty Plot
-Protect
Lucario is even better at Triples than it was in Doubles, with Aura Sphere hitting across the field from the relative safety of the side position. Having a team of six Pokémon and three Pokémon out gives it a lot more space: in Triples, it gets to use Nasty Plot on Turn 1 in the majority of battles, as opposed to something like 30-40% in Doubles (rough estimate). As in Doubles, he's in the left-side position to scout for Magnet Pull. For Triples, there's the additional benefit that the AI sends out its last Pokémon in the right-side position, which allows Lucario to safely shoot it from across the field with Aura Sphere. This maneuver can also be applied to any last Pokémon in the side position with switches and the Shift command as long as you have enough Pokémon left alive; this allows nearly any set-up sweeper/Double Teamer to be ignored if they're in a side position as long as you can kill everything else and keep 2-3 allies and Lucario alive to reliably finish it off with cross-field +6 Aura Sphere.

Rotom-W @ Choice Specs ** ChargeCannon
Nature: Modest
IVs: 31/31/31/30/31/30
EVs: 172 HP, 120 SAtk, 216 Spe
Stats: 147/76/127/154/127/133
Ability: Levitate
-Thunderbolt
-Hidden Power [Water]
-Discharge
-Volt Switch
Greninja @ Focus Sash ** Zinglon
Nature: Timid
EVs: 252 SAtk, 244 Spe, 12 HP
Ability: Protean
-Ice Beam
-Grass Knot
-Dark Pulse
-Mat Block
Mat Block Greninja, the best Pokémon in Maison Doubles and Triples by far. It's even stronger in Triples than it is in Doubles with full-field Mat Block and cross-field Dark Pulse added to its already enormous capabilities.
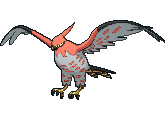
Talonflame @ Sharp Beak ** U-Ship
Nature: Adamant
EVs: 252 HP, 252 Atk, 4 SDef
Ability: Gale Wings
-Brave Bird
-Flare Blitz
-Tailwind
-Protect
Talonflame is a lot better in Triples than in it is in Doubles due to it having less weight to carry with its terrible stats and tendency to murder itself at the earliest opportunity. Brave Bird being cross-field, and Tailwind being stronger is also good. I still wish I could have a Life Orb on it for a little extra punch, especially on Flare Blitz.
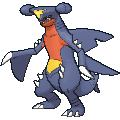
Garchomp @ Life Orb ** SuperCarrot
Nature: Jolly
EVs: 252 Atk, 252 Spe, 4 HP
Ability: Rough Skin
-Dragon Claw
-Earthquake
-Swords Dance
-Protect
Garchomp, Mat Block Greninja's best friend. Same as its Doubles incarnation, with the added ability to hit three enemies from the center with EQ.

Scizor @ Choice Band ** Camanis
Nature: Adamant
EVs: 252 HP, 164 Atk, 44 SDef, 44 Spe, 4 Def
Ability: Technician
-Bullet Punch
-U-Turn
-Superpower
-Quick Attack
The biggest threat so far has been taking a Sniper critical hit in the face from a phantom Barbaracle4 while playing, which has been the case in two close battles I can recall so far.
Tailwind from Moltres1/Articuno4 is probably the largest threat of all, as getting outsped by everything is no fun, though I do have two priority users and the option to go for a Tailwind of my own. Using a Timid Rotom-W to outspeed OHKO Moltres1 might be worth it for that alone, even though it only uses Tailwind like 10% of the time. Claire sending out Politoed with Swift Swimmers can act as a pseudo-Tailwind with lots of damage and be bad, but Specs Rotom-W has been known to eat Claire for breakfast, barring Giga Drain from the two Ludicolo sets that have it.
Trick Room from a non-Hex Maniac, like in the Aromatisse/Druddigon battle #400 in Doubles, can be troublesome, but double priority and bulky-ish units in Scizor and Rotom-W go a long way towards combating it.
Aside from those, Donphan4 can Quick Claw crit Rotom-W with Seed Bomb. Confusion and paralysis are horrible, freezes hurt. Zapdos2 in the left-side position can be annoying if it has a 100% BrightPowder/Double Team dodge rate and burns Chomp with Heat Wave.
From these 1000 battles, I don't think the team has any real weaknesses outside opposing Tailwind from Veterans, extreme Trick Room situations, and superb hax. The Rotom-W center with Scizor in the back plugs all the openings that the already super-powerful Lucario/Greninja squad had, Nasty Plot + Aura Sphere is perfectly reliable, absolutely broken and makes every other Triples set-up sweeper look like a joke, and in case Mat Block is no good, the team is armed to the teeth with hard-hitting fast goodstuffs, strong priority, good typing combinations and two bulky-ish units in Rotom-W and Scizor.
Situational threats include:

Crobat4 in the left-side position, choosing Hypnosis on both Turn 1 and Turn 2 with 100% accuracy and perfect targeting, and inflicting 2+ turn sleeps with both of them.
Crobat4 is usually just an annoyance and a Mat Block distruptor, since it is OHKO'd by both Rotom-W and Greninja. But in the left-side position, if it uses Hypnosis on Rotom-W, it avoids getting KO'd - and then it can Hypnosis Lucario at the beginning of Turn 2 (Flash Cannon + Dark Pulse is a KO, but Crobat outspeeds Greninja as usual, so the kill will come only after the double sleep is already done if Greninja was Mat Blocking against the other two Pokémon). In the battle I encountered this scenario in, both sleeps were 2-3 turns (not sure which, since I sacced both Rotom-W and Lucario while they were still asleep, doing nothing), and it was not very fun - at two 3-turn sleeps, that's a double KO that cannot be counterplayed at all with this team. Even Donphan4 couldn't inflict that kind of damage.
Fortunately, Crobat4 needs a lot of luck to do this - using Hypnosis twice in a row (I estimate it uses Taunt or Cross Poison around 60-70% of the time or more), targeting it correctly (50%), actually hitting both (60% each), and getting two or three turns of sleep on both (67% for each). I've only seen it reach its full damage potential once in 1400 battles so far, but it's definitely a top threat.
Altaria is similar to Crobat in that in the left-side position, it may rarely use Sing twice in a row to take out both Rotom-W and Lucario (instead of using Dream Eater after sleeping one of them). Its massive special bulk and relatively low threat level most of the time makes it sting particularly unpleasantly in the rare case it decides to Sing all day long.
There are other threatening Hypnosis/Sing users as well, but they are somewhat rare (Bronzong1, Gengar1). Common Sing/Hypnosis users not named Crobat/Altaria (such as Politoed4 and Drifblim4) are typically outsped and KO'd outright.
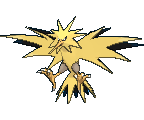
Aura Sphere is good against Lax Incense and Brightpowder and most other forms of evasion hax. But not all of its users; Lati@s1 (especially in the right-side position) and Zapdos2 (any position) are not kind to Lucario, as they resist its STABs and have great bulk (Zapdos2) or dodge Flash Cannon every time (Lati@s1) while also sporting hax items to prevent other teammates from dealing with them reliably, with recovery to take full advantage of their 100% evasion and good bulk. Garchomp "should" outspeed and do well against Lati@s1, but Lax Incense makes this very risky, with just one proc turning the situation on its head and possibly losing your last answer to a runaway Lati@s1. Scizor does well against all Latis, but CB U-Turn tragically falls short of the KO on Set1, so it isn't a silver bullet. Running Bug Bite could be an option, but being Choice-locked into Bug Bite is really bad and much worse than just using U-Turn (which avoids Choice Band's disadvantage completely) in most cases, and all the other moves are somewhat necessary.
Thunder Wave. There are a bunch of other users, but these three are the worst, sporting massive bulk for Luxray4/Regice4 and outspeeding Lucario with Focus Sash on top in Zebstrika4's case. There are a bunch of other Roller Skater-exclusives that can also be nasty and a few others elsewhere, but they're generally lesser evils. Rotom-W's Electric-typing helps make them predictable if they're in a side position, but they still hurt badly.
Confuse Ray, Swagger and Teeter Dance are no fun, but as confusion is cured by switching out and has fewer threatening users, it tends to be a lesser worry in general.
Entei3 and Heatran4 both carry Choice Scarves and force Lucario off the field while being generally unpleasant and threatening other team members as well - Entei3 has Eruption for spread bombardment, while Heatran4's Magma Storm traps in the switch option, and deals unpleasant amounts of damage even to resists with the buff to trapping attacks in XY. If allowed to live, Heatran4 can even trap multiple Pokémon.
The first close battle involved big misplays turning the opening into a disaster. The situation culminated with Rotom-W locked into Thunderbolt up against a rapidly Cursing Swampert4 in the left-side position, with a half-hp Chomp (after having taken some LO damage and five turns of Hail) sitting in the right-side position position SD'ing up waiting for the auto-center. It was at +3 and had the KO on Chomp at that point - but +6 LO Dragon Claw was 75% minimum, which was enough to get the kill since the Swampert had also taken Hail damage. Even if Chomp missed the kill, assuming it was going for Waterfall, Rough Skin would have turned battle in my favor. This battle's the best argument in favor of Swords Dance as the third move on Chomp I've had, in addition to the usual "every other option is either 29% accurate Rock Slide or an Iron Head that is redundant when Scizor and Lucario are punchcannoning fairies".
The second close battle was also caused by misplays, with insane Lax Incense luck on a Latios to make it more fun. There was very little real danger in the end, though, it dodged several lethal hits with Lax Incense over the course of the battle and it would have needed another two or three to actually win it.
These were the two only "oh shit, I might lose this" battles I can remember. I forgot to save the battle video for them, and the limit of 10 uploaded battle videos is also a concern - every time I upload a battle video from now on (including the 1000-win proof one here), I have to take down something that's a streak proof or an interesting battle. I started from the beginning and the 433-win Dragonite/Scizor/Suicune streak proof is now down, and everything after is going to have to follow in order from here on out when I upload more, so I'll probably have to avoid uploading anything other than proof videos. It sucks, but what're you going to do? Maybe ORAS with Doubles Battle Factory with 4-Pokémon teams instead of 3-Pokémon ones in the last Factory and Triples Battle Factory with 6-Pokémon teams and a double swap every round will increase the limit so you can upload all the amazing battles that will result. A man can dream, right?
Additional close battles:
Battle video: #2730 - MG5W-WWWW-WWWA-4Q8L vs. Raikou/Zapdos/Terrakion/Thundurus/Latias/Registeel
Zapdos2 appears in the center and dodges a ridiculously high amount of attacks while Raikou keeps boosting with Calm Mind. If the back-up to come out first was anything more threatening than Registeel, losing would have been possible.
Battle video: #1665 - LX8W-WWWW-WWWA-4Q8T vs. Alakazam/Trevenant/Dusknoir/Mismagius/Claydol/Spiritomb
Anastasia sends out Trick Room, and multiple massive misplays with some hax result in an extremely close battle, ending with Rotom-W locked into HP Water against Dusknoir3 (Double Team). With luck, Rotom-W lands the decisive HP Waters and wins the duel with 2HP left. You could say I was "supposed" to lose, but luck was on my side even with all the terrible plays.
The closest battle yet:
Battle video: #3186 - YYKG-WWWW-WWWA-5S9Z vs. Latios/Zapdos/Regice/Heatran/Raikou/Cobalion
Write-up: HERE
A nearly lost Greninja/Charizard battle:
Battle video: G99G-WWWW-WWWY-47UC - #4694 vs. Registeel/Landorus/Latias/Entei/Heatran/Terrakion
11 turns of horrific misplays with the AI doing its best to save the streak while I sleep at the wheel.
Current progress with team swaps
Edit: Scizor re-EV'd to survive Discharge.
Edit 2: Scizor re-re-EV'd, hopefully for the last time.
Edit 3: 1400 update, minor edits, goddamn bats
Edit 4: Scizor replaced again, I swear this is the last time
Edit 5: 3000!
Edit 6: another edit - trying to keep the battle videos in one post.
Battle video: #3000 - VZQW-WWWW-WWWA-4Q8G vs. Skarmory/Archeops/Honchkrow/Hawlucha/Zebstrika/Togekiss
When I started working on Triples, the initial plan was to adapt Lucario/Greninja/Talonflame/Garchomp for an easy streak; unfortunately, it wasn't as simple as I thought. Filling the last two slots proved very difficult, particularly the center - I tried a variety of unsuccesful things here, and I couldn't figure out what the missing piece to solve Lucario/Greninja for Triples was. That's when I looked to Greninja/Charizard instead and the criminally unreliable Heliolisk team happened; afterwards, I stuck with better Greninja/Charizard variants for a while (Greninja/Scarf Infernape/Charizard and Greninja/Wide Lens Blaziken/Charizard, to be exact), but I got bored of it (after 800 battles with it in Triples, and 1500+ in Doubles before that) and went back to furiously theorymoning the missing center for Lucario/Greninja. After a lot of intense head-against-wall action, I finally realized that only Rotom-W could fit the bill, and that it was viable to put Choice Specs on it to solve its usual problem of low damage output, and that its low Speed was not going to be a deal-breaker or require Choice Scarf like I had thought.
And it was good - like in Doubles, Lucario/Greninja wipes the floor with Greninja/Charizard for a lot of the same reasons, in addition to the the very nice Triples-specific properties that the team happened to coincidentally have despite being a Doubles team.
Introducing Lucario/Greninja for Triples:

Lucario @ Lucarionite ** Zica Charger
Nature: Timid
EVs: 252 SAtk, 252 Spe, 4 HP
Ability: Steadfast
-Aura Sphere
-Flash Cannon
-Nasty Plot
-Protect
Lucario is even better at Triples than it was in Doubles, with Aura Sphere hitting across the field from the relative safety of the side position. Having a team of six Pokémon and three Pokémon out gives it a lot more space: in Triples, it gets to use Nasty Plot on Turn 1 in the majority of battles, as opposed to something like 30-40% in Doubles (rough estimate). As in Doubles, he's in the left-side position to scout for Magnet Pull. For Triples, there's the additional benefit that the AI sends out its last Pokémon in the right-side position, which allows Lucario to safely shoot it from across the field with Aura Sphere. This maneuver can also be applied to any last Pokémon in the side position with switches and the Shift command as long as you have enough Pokémon left alive; this allows nearly any set-up sweeper/Double Teamer to be ignored if they're in a side position as long as you can kill everything else and keep 2-3 allies and Lucario alive to reliably finish it off with cross-field +6 Aura Sphere.

Rotom-W @ Choice Specs ** ChargeCannon
Nature: Modest
IVs: 31/31/31/30/31/30
EVs: 172 HP, 120 SAtk, 216 Spe
Stats: 147/76/127/154/127/133
Ability: Levitate
-Thunderbolt
-Hidden Power [Water]
-Discharge
-Volt Switch
The final form of the Scarf Heliolisk center. Heliolisk was all kinds of bad, but it had one thing right which allowed it to not bomb the streak instantly - a Choiced Electric-type center with Volt Switch is a very strong unit to complete a Mat Block Greninja & friends Doubles team's lead trio for Triples.
STAB Specs Thunderbolt is its largest instant contribution - Slowking and Slowbro and other bulky waters, Lucario/Greninja's biggest enemy, are destroyed by it, and with the Specs boost it deals decent damage to neutral targets as well.
The other key move is Volt Switch. This is the most commonly used move on Turn 1 with this team, and a large part of its strength. With Volt Switch, any of the back-ups can be brought in to the center under Mat Block while dealing respectable damage, weakening a target into KO range and breaking Sturdy, Focus Sash and Air Balloon. This is much more awesome in practice than it sounds at first, and allows Lucario to use Nasty Plot much more often - if there's an enemy that one of the back-ups can outspeed and OHKO that Rotom-W can't, Volt Switch will let you bring in that Pokémon under Mat Block while bringing another target into KO range for Greninja or Lucario, breaking a Sash, or outright KOing an Electric-weak enemy. The benefits are clearer if you think of a Mat Block Greninja opening as a two-turn affair: with Volt Switch, your options for the two center moves during the opening skyrocket:
-Volt Switch into Earthquake or Dragon Claw
-Volt Switch into CB Bullet Punch
-Volt Switch into Brave Bird
-Volt Switch into CB U-Turn
-Volt Switch into Protect (Talonflame or Chomp)
A lot of threats can survive a Specs Thunderbolt or two, and Rotom-W isn't the fastest Pokémon in town. But how many of them can survive Specs Volt Switch followed by one of the above attacks or a hit from Lucario or Greninja on Turn 2? Boosting items on every back-up Pokémon and Specs on Volt Switch further amplify the two-part Greninja opening's damage potential. The most common Pokémon I bring in on the Volt Switch are Scizor and Talonflame for their priority attacks synergizing very nicely with the speed of Greninja and Mega Lucario, but Chomp sees situational use as well. Talonflame can even go for a Tailwind on Turn 2 after Volt Switch against particularly weak opposition to ensure a quick win.
Bringing in Talonflame (or rarely Garchomp) for the purpose of using Protect to lure Electric- or Rock-attacks is also a possible play. This is particularly effective against Zapdos, Raikou and some others.
HP Water is Rotom-W's best Water STAB; with Specs, its damage output is respectable, and it hits Lightningrod users and Ground types.
Discharge is a decently-powered spread attack for Turn 1 under Mat Block. You will be forced to switch out Rotom-W on Turn 2, or Protect and switch in Garchomp on the sides to avoid getting killed by it, and though decent in damage output with the Specs boost and great at parahax, it isn't Specs Pixilate Hyper Voice - but it is useful and I prefer it over Dark Pulse, since the ability to hit cross-field is less relevant for a center Rotom-W and coverage for Latis and Exeggutor isn't too necessary. Originally I was using Dark Pulse, but I switched to Discharge at battle 863 since I was barely ever using it and remembered that Discharge existed. It's definitely the least used of the three (!) Electric attacks on the set, but there aren't many options. It is also useful against Lightningrod when a Roller Skater sends out Zebstrika/Raichu together with Flying-types you want to hit with an Electric move. Using the Shift command to move Rotom-W into a side position when it is locked into Discharge can be a good play in some situations to avoid having to switch it out.
And that's just the offensive potential it provides. A lot of Electric-types could do this; what makes Rotom-W the best Pokémon for the job is its absurd defensive capability. Water/Electric typing with Levitate is fantastic, as it gives immunity to EQ (which the AI likes to use a lot on Lucario) and only a very manageable Grass weakness with two 4x resists to Grass among the back-ups. With HP investment and its lack of weaknesses, not being able to use Protect is a non-issue, as Rotom-W will rarely be targeted by the AI and it can keep firing off Specs Thunderbolts while surviving until the end in most battles. Leafeon4 (Quick Claw) is only relevant Grass Pokémon that can force it out - even Mat Block being distrupted won't slow it down against most other Grass-types, as it can simply Volt Switch out before a slow Wood Hammer/Power Whip comes crashing down on it. The only time I switch it out on Turn 1 is when I see Leafeon; against everything else, between Mat Block and the AI preferring to target Lucario and Greninja most of the time, it can stand its ground and at the very least use Volt Switch. Donphan4 has a 56.3% chance to OHKO it with critical QC Seed Bomb, but I have only gotten Seed Bombed by it 3-4 times (it heavily prefers EQ/Fissure), and only one of those was QC'd and able to get a hit in.
Volt Switch has another advantage - once it has made its exit, you now have a full-HP Rotom-W in the wings ready to switch in on Fire and Ground moves aimed at Lucario and Scizor and Ice moves aimed at Chomp, among other things.
Investing EVs in HP over maxing Special Attack may seem like nonsense, but it makes the AI less likely to target it in addition to providing a lot of bulk to allow it to stand its ground against most enemies. The specific HP/SAtk split allows Rotom-W to survive Lickilicky4's Explosion almost every time while providing nearly equal damage to Mega Lucario's attacks with Thunderbolt, and also surviving Typhlosion4's Power Herb Solar Beam most of the time:
252+ Atk Lickilicky Explosion vs. 172 HP / 0 Def Rotom-W: 124-147 (84.3 - 100%) -- 6.3% chance to OHKO
252+ SpA Typhlosion Solar Beam vs. 172 HP / 0 SpD Rotom-W: 126-150 (85.7 - 102%) -- 12.5% chance to OHKO
120+ SpA Choice Specs Rotom-W Thunderbolt vs. 252 HP / 0 SpD Regigigas: 91-108 (41.9 - 49.7%)
252 SpA Adaptability Mega Lucario Flash Cannon vs. 252 HP / 0 SpD Regigigas: 90-106 (41.4 - 48.8%)
It also conveniently maximizes the stat boost from a Modest nature, hitting 140 SAtk for the 10% bonus to push it to 154. I initially used a more offensive spread of 92 HP / 200 SAtk / 216 Spe, but changed it into the more defensive one seen here at battle 300-something. I never looked back - the bulk is very useful, and the damage is barely sufficient with 120 SAtk EVs and a Modest nature.
216 Speed EVs hits the 133 Speed target that I prefer for Rotom-W in the Maison; Speed is the most important stat in the Maison and 133 is the best nice number (outspeeding neutral-natured base 80s) that a 30 Speed IV Modest Rotom-W can reach while freeing valuable EVs that can be put into SAtk or HP. If you had a HP Water Rotom-W with a Speed IV of 31, you could max Speed for 138 instead, which allows it to outspeed and likely OHKO Articuno4 in the right-side position which sometimes uses Tailwind (for other positions, Flash Cannon is a 81.3% chance to OHKO). The spare EVs from cutting to 133 are also pretty useful, though... well, the choice is easy for me since this Rotom-W has a Speed IV of 30 and is unable to hit 138 Speed. Along that train of thought, Timid is also an option to outspeed Moltres1 (142 speed), the other Tailwind user - but it would come at the cost of other stats. 133 also lets it outspeed the whole Maison under Tailwind.

Greninja @ Focus Sash ** Zinglon
Nature: Timid
EVs: 252 SAtk, 244 Spe, 12 HP
Ability: Protean
-Ice Beam
-Grass Knot
-Dark Pulse
-Mat Block
Mat Block Greninja, the best Pokémon in Maison Doubles and Triples by far. It's even stronger in Triples than it is in Doubles with full-field Mat Block and cross-field Dark Pulse added to its already enormous capabilities.

Talonflame @ Sharp Beak ** U-Ship
Nature: Adamant
EVs: 252 HP, 252 Atk, 4 SDef
Ability: Gale Wings
-Brave Bird
-Flare Blitz
-Tailwind
-Protect
Talonflame is a lot better in Triples than in it is in Doubles due to it having less weight to carry with its terrible stats and tendency to murder itself at the earliest opportunity. Brave Bird being cross-field, and Tailwind being stronger is also good. I still wish I could have a Life Orb on it for a little extra punch, especially on Flare Blitz.

Garchomp @ Life Orb ** SuperCarrot
Nature: Jolly
EVs: 252 Atk, 252 Spe, 4 HP
Ability: Rough Skin
-Dragon Claw
-Earthquake
-Swords Dance
-Protect
Garchomp, Mat Block Greninja's best friend. Same as its Doubles incarnation, with the added ability to hit three enemies from the center with EQ.

Scizor @ Choice Band ** Camanis
Nature: Adamant
EVs: 252 HP, 164 Atk, 44 SDef, 44 Spe, 4 Def
Ability: Technician
-Bullet Punch
-U-Turn
-Superpower
-Quick Attack
I initially wanted a regular Bullet Punch/Bug Bite/Superpower Scizor in this slot, but the pesky Item Clause put a stop to those plans as Garchomp needs the Life Orb more. I initially tried Metal Coat, but its power was underwhelming compared to Life Orb - and it needed power, so I stuck a Choice Band on it and taught it U-Turn. I initially used a Pokecheck-sourced BW2-tutored Scizor with Bug Bite/Superpower, but since I didn't need Superpower badly and could've used a different move rather than the redundant Bug Bite (which I couldn't afford to overwrite) and get it nicknameable on top, I went to breed a new Scizor of my own at around battle 400, which you see here. Losing Superpower hurts slightly - perhaps most notably, CB Superpower would OHKO Heatran, which Brick Break cannot, though attacking Heatran would still not be a great idea because of Flame Body. Outside losing the OHKO on Heatran, I never really missed Superpower - Lucario already provides massive Fighting-type damage with Aura Sphere, so Scizor very seldom needs to use its Fighting-type coverage move. Breaking Light Screen when Electrode or Luxray sets it is quite nifty, too. Quick Attack is useful for hitting Steel resists, and the other options (Thief, Aerial Ace) are not very relevant. I initially used Thief, but switched to Quick Attack at battle 960 since I never used it and remembered that Quick Attack exists.
44 Speed EVs give it 91 Speed, which is the lowest I'd consider for a Maison Doubles Scizor that wants to hit some nasty stuff (which there is a lot of in the 85-90 Speed bracket) with Bug Bite or U-Turn. 182 under Tailwind is pretty good, still. The HP/SDef split allows it to survive 2 Discharges. The Attack cut allows having all those useful HP/SDef/Spe EVs while still retaining sufficient power.
Not being able to use Protect is not much of a problem - Rotom-W (often available as a switch-in after it has used Volt Switch), Garchomp and Talonflame and Greninja (if it was switched out) all resist Fire, providing ample switch-ins if it needs to go. Losing the ability to create free turns while drawing Fire attacks hurts, but the raw power of Choice Band is very useful and adds a lot of oomph to the Rotom-W Volt Switch combo.
The only complaint I have is its Zapdos weakness, which can make handling a Zapdos2 in the left-side position a pain, but it is manageable.
Edit: re-bred in HGSS for Superpower. It's still the least used move on the set, but it has more power when it is needed.
The biggest threat so far has been taking a Sniper critical hit in the face from a phantom Barbaracle4 while playing, which has been the case in two close battles I can recall so far.
Tailwind from Moltres1/Articuno4 is probably the largest threat of all, as getting outsped by everything is no fun, though I do have two priority users and the option to go for a Tailwind of my own. Using a Timid Rotom-W to outspeed OHKO Moltres1 might be worth it for that alone, even though it only uses Tailwind like 10% of the time. Claire sending out Politoed with Swift Swimmers can act as a pseudo-Tailwind with lots of damage and be bad, but Specs Rotom-W has been known to eat Claire for breakfast, barring Giga Drain from the two Ludicolo sets that have it.
Trick Room from a non-Hex Maniac, like in the Aromatisse/Druddigon battle #400 in Doubles, can be troublesome, but double priority and bulky-ish units in Scizor and Rotom-W go a long way towards combating it.
Aside from those, Donphan4 can Quick Claw crit Rotom-W with Seed Bomb. Confusion and paralysis are horrible, freezes hurt. Zapdos2 in the left-side position can be annoying if it has a 100% BrightPowder/Double Team dodge rate and burns Chomp with Heat Wave.
From these 1000 battles, I don't think the team has any real weaknesses outside opposing Tailwind from Veterans, extreme Trick Room situations, and superb hax. The Rotom-W center with Scizor in the back plugs all the openings that the already super-powerful Lucario/Greninja squad had, Nasty Plot + Aura Sphere is perfectly reliable, absolutely broken and makes every other Triples set-up sweeper look like a joke, and in case Mat Block is no good, the team is armed to the teeth with hard-hitting fast goodstuffs, strong priority, good typing combinations and two bulky-ish units in Rotom-W and Scizor.
Situational threats include:


Crobat4 in the left-side position, choosing Hypnosis on both Turn 1 and Turn 2 with 100% accuracy and perfect targeting, and inflicting 2+ turn sleeps with both of them.
Crobat4 is usually just an annoyance and a Mat Block distruptor, since it is OHKO'd by both Rotom-W and Greninja. But in the left-side position, if it uses Hypnosis on Rotom-W, it avoids getting KO'd - and then it can Hypnosis Lucario at the beginning of Turn 2 (Flash Cannon + Dark Pulse is a KO, but Crobat outspeeds Greninja as usual, so the kill will come only after the double sleep is already done if Greninja was Mat Blocking against the other two Pokémon). In the battle I encountered this scenario in, both sleeps were 2-3 turns (not sure which, since I sacced both Rotom-W and Lucario while they were still asleep, doing nothing), and it was not very fun - at two 3-turn sleeps, that's a double KO that cannot be counterplayed at all with this team. Even Donphan4 couldn't inflict that kind of damage.
Fortunately, Crobat4 needs a lot of luck to do this - using Hypnosis twice in a row (I estimate it uses Taunt or Cross Poison around 60-70% of the time or more), targeting it correctly (50%), actually hitting both (60% each), and getting two or three turns of sleep on both (67% for each). I've only seen it reach its full damage potential once in 1400 battles so far, but it's definitely a top threat.
Altaria is similar to Crobat in that in the left-side position, it may rarely use Sing twice in a row to take out both Rotom-W and Lucario (instead of using Dream Eater after sleeping one of them). Its massive special bulk and relatively low threat level most of the time makes it sting particularly unpleasantly in the rare case it decides to Sing all day long.
There are other threatening Hypnosis/Sing users as well, but they are somewhat rare (Bronzong1, Gengar1). Common Sing/Hypnosis users not named Crobat/Altaria (such as Politoed4 and Drifblim4) are typically outsped and KO'd outright.


Aura Sphere is good against Lax Incense and Brightpowder and most other forms of evasion hax. But not all of its users; Lati@s1 (especially in the right-side position) and Zapdos2 (any position) are not kind to Lucario, as they resist its STABs and have great bulk (Zapdos2) or dodge Flash Cannon every time (Lati@s1) while also sporting hax items to prevent other teammates from dealing with them reliably, with recovery to take full advantage of their 100% evasion and good bulk. Garchomp "should" outspeed and do well against Lati@s1, but Lax Incense makes this very risky, with just one proc turning the situation on its head and possibly losing your last answer to a runaway Lati@s1. Scizor does well against all Latis, but CB U-Turn tragically falls short of the KO on Set1, so it isn't a silver bullet. Running Bug Bite could be an option, but being Choice-locked into Bug Bite is really bad and much worse than just using U-Turn (which avoids Choice Band's disadvantage completely) in most cases, and all the other moves are somewhat necessary.


Thunder Wave. There are a bunch of other users, but these three are the worst, sporting massive bulk for Luxray4/Regice4 and outspeeding Lucario with Focus Sash on top in Zebstrika4's case. There are a bunch of other Roller Skater-exclusives that can also be nasty and a few others elsewhere, but they're generally lesser evils. Rotom-W's Electric-typing helps make them predictable if they're in a side position, but they still hurt badly.
Confuse Ray, Swagger and Teeter Dance are no fun, but as confusion is cured by switching out and has fewer threatening users, it tends to be a lesser worry in general.


Entei3 and Heatran4 both carry Choice Scarves and force Lucario off the field while being generally unpleasant and threatening other team members as well - Entei3 has Eruption for spread bombardment, while Heatran4's Magma Storm traps in the switch option, and deals unpleasant amounts of damage even to resists with the buff to trapping attacks in XY. If allowed to live, Heatran4 can even trap multiple Pokémon.
The first close battle involved big misplays turning the opening into a disaster. The situation culminated with Rotom-W locked into Thunderbolt up against a rapidly Cursing Swampert4 in the left-side position, with a half-hp Chomp (after having taken some LO damage and five turns of Hail) sitting in the right-side position position SD'ing up waiting for the auto-center. It was at +3 and had the KO on Chomp at that point - but +6 LO Dragon Claw was 75% minimum, which was enough to get the kill since the Swampert had also taken Hail damage. Even if Chomp missed the kill, assuming it was going for Waterfall, Rough Skin would have turned battle in my favor. This battle's the best argument in favor of Swords Dance as the third move on Chomp I've had, in addition to the usual "every other option is either 29% accurate Rock Slide or an Iron Head that is redundant when Scizor and Lucario are punchcannoning fairies".
The second close battle was also caused by misplays, with insane Lax Incense luck on a Latios to make it more fun. There was very little real danger in the end, though, it dodged several lethal hits with Lax Incense over the course of the battle and it would have needed another two or three to actually win it.
These were the two only "oh shit, I might lose this" battles I can remember. I forgot to save the battle video for them, and the limit of 10 uploaded battle videos is also a concern - every time I upload a battle video from now on (including the 1000-win proof one here), I have to take down something that's a streak proof or an interesting battle. I started from the beginning and the 433-win Dragonite/Scizor/Suicune streak proof is now down, and everything after is going to have to follow in order from here on out when I upload more, so I'll probably have to avoid uploading anything other than proof videos. It sucks, but what're you going to do? Maybe ORAS with Doubles Battle Factory with 4-Pokémon teams instead of 3-Pokémon ones in the last Factory and Triples Battle Factory with 6-Pokémon teams and a double swap every round will increase the limit so you can upload all the amazing battles that will result. A man can dream, right?
Additional close battles:
Battle video: #2730 - MG5W-WWWW-WWWA-4Q8L vs. Raikou/Zapdos/Terrakion/Thundurus/Latias/Registeel
Zapdos2 appears in the center and dodges a ridiculously high amount of attacks while Raikou keeps boosting with Calm Mind. If the back-up to come out first was anything more threatening than Registeel, losing would have been possible.
Battle video: #1665 - LX8W-WWWW-WWWA-4Q8T vs. Alakazam/Trevenant/Dusknoir/Mismagius/Claydol/Spiritomb
Anastasia sends out Trick Room, and multiple massive misplays with some hax result in an extremely close battle, ending with Rotom-W locked into HP Water against Dusknoir3 (Double Team). With luck, Rotom-W lands the decisive HP Waters and wins the duel with 2HP left. You could say I was "supposed" to lose, but luck was on my side even with all the terrible plays.
The closest battle yet:
Battle video: #3186 - YYKG-WWWW-WWWA-5S9Z vs. Latios/Zapdos/Regice/Heatran/Raikou/Cobalion
Write-up: HERE
A nearly lost Greninja/Charizard battle:
Battle video: G99G-WWWW-WWWY-47UC - #4694 vs. Registeel/Landorus/Latias/Entei/Heatran/Terrakion
11 turns of horrific misplays with the AI doing its best to save the streak while I sleep at the wheel.
Current progress with team swaps
Edit: Scizor re-EV'd to survive Discharge.
Edit 2: Scizor re-re-EV'd, hopefully for the last time.
Edit 3: 1400 update, minor edits, goddamn bats
Edit 4: Scizor replaced again, I swear this is the last time
Edit 5: 3000!
Edit 6: another edit - trying to keep the battle videos in one post.
Last edited:
More than that, I just want to be able to search videos based on Pokemon or the user that uploaded them, similarly as to prior gens. Since they limit your uploads, regardless, I'm not sure why they removed the feature.
All they really accomplished was creating a general unwillingness amongst fans to watch replays =/
All they really accomplished was creating a general unwillingness amongst fans to watch replays =/
So I'm in the process of breeding a SubToxic Gliscor for my next shot at the Maison but I'm struggling to get one with 5 IVs. I do have one that's perfect save for Attack and Sp. Attack, so I was wondering, how much does it matter having 31 Attack IVs for what is, primarily, a defensive Pokemon? Would that one do, or should I push on and keep breeding?
Since you are only really Earthquake stuff that is immune to Toxic (or that can be cleanly OHKOed), I suspect that near max IVs in attack won't make too much of a difference in how many Earthquakes it takes to get a KO against those pokes. But I'd be very wary of actively poor attack IVs, since those have a much higher chance of costing you a KO. Accordingly, if you plan to settle, be sure you actually figure out the Attack IV with Rare Candies before you decide to use the 4 perfect IV Gliscor.So I'm in the process of breeding a SubToxic Gliscor for my next shot at the Maison but I'm struggling to get one with 5 IVs. I do have one that's perfect save for Attack and Sp. Attack, so I was wondering, how much does it matter having 31 Attack IVs for what is, primarily, a defensive Pokemon? Would that one do, or should I push on and keep breeding?
More generally, though, now that you are at 4 perfect IVs, you're in fine position for the getting the 5th, so long as you have a suitable parent with perfect Attack to breed with it. Though it may take some time if you have bad luck on the die rolls, its probably worth holding out for 5 perfect if for no other reason than to make other future breeding projects easier by giving you access to a 5 perfect IV Gliscor as a parent.
IF (and only if) you're content with a 4IV Gliscor, Attack is surely the one that matters least. I don't really have experience with Gliscor, but in theory that IV is as required as a perfect Speed IV on Aegislash or a perfect Defense IV on Lucario: always nifty to have it, but you usually don't really notice it if you don't. (of course, it could be that the IV is required to get some specific KOs, I can't tell you whether or not it is). I run 4 IVs on a lot of my pokemon (mostly the ones I bred early on), simply because that final IV takes nearly as much time to breed as the four other ones combined and I like to think I have a life beside pokemon; however, if a pokemon really uses all five stats (e.g. Gyro Ball Ferrothorn, bulky Scizor, Clefable, most Trick Room mons), I go the extra mile to breed in that fifth one.So I'm in the process of breeding a SubToxic Gliscor for my next shot at the Maison but I'm struggling to get one with 5 IVs. I do have one that's perfect save for Attack and Sp. Attack, so I was wondering, how much does it matter having 31 Attack IVs for what is, primarily, a defensive Pokemon? Would that one do, or should I push on and keep breeding?
But I have to admit, if you want to get really far, it all comes down to the details and I really encourage you to make your pokemon as perfect as you can :\ (for the trophy it shouldn't matter that much, I won the triples trophy with a Zapdos with crap IVs and a suboptimal nature)
Also, it kinda depends on the EV spread you intend to use. VaporeonIce runs Atk EVs on his Gliscor, and in that case you're gonna want a perfect one of course because you'd waste them otherwise, but if you simply intend to run a fully defensive or a speedy defensive one, I don't really think it's desperately required - but someone with more experience can correct me on this one of course.
Edit: Backing up NoCheese on the notion of a 5IV Gliscor being a good parent for future breeding. The reason why I can breed much faster now than I used to is because I have a 5IV male for most egg groups, simply from earlier breeding projects.
Last edited:
Ok, thanks for the replies, guys.
For the record, I was planning on using a spread of 252 HP / 252 Spd and then sticking the remaining 4 in one of the defences. And, annoyingly, I do actually have a 5 IV Gligar, but it didn't have the Hidden Ability (grr!)
I have got two good parents for breeding, so I guess I'll forge on for a bit. If I get bored before I get lucky, I might see how many attack IVs the 4 IV one has, and then roll with it if it's a decent amount.
Like NoCheese said, I think it comes down to how bad the Attack IV actually is. It also depends on what else is on your team. I ran Attack EVs on Gliscor because I didn't feel I needed them anywhere else (the way I used Gliscor, its Subs should be taking the damage instead of Gliscor itself, and given that Gliscor is built to stall, I usually didn't care too much if its Subs broke). But then, I was playing Rotations, where Gliscor's teammates could take on anything Gliscor had problems with. Also, my team didn't have great ways of damaging many Steel-types, so getting a little extra punch behind EQ was helpful there.So I'm in the process of breeding a SubToxic Gliscor for my next shot at the Maison but I'm struggling to get one with 5 IVs. I do have one that's perfect save for Attack and Sp. Attack, so I was wondering, how much does it matter having 31 Attack IVs for what is, primarily, a defensive Pokemon? Would that one do, or should I push on and keep breeding?
Gliscor really likes having 216 HP EVs, because it puts its HP at 177. That gives it 44 HP Subs and 22 HP recovery with Poison Heal. 252 HP Gliscor gets 182 HP, leaving it with 45 HP Subs but still 22 HP recovery each turn with Poison Heal. The extra HP doesn't really help you as much as the guaranteed full recovery from Poison Heal, and those EVs are typically better spent somewhere else.
Okay, well, good news, I forged onwards and managed to get that 5 IV Gligar (didn't actually take that long... *ahem*) so now I'll be (attempting to) rip up the Maison with a team of Specs Greninja / Aegislash / Gliscor.
Of course, I'm not asking anyone to do my job for me, so please don't go out of your way to answer the question, but are there any glaring weaknesses you can spot with the team or anything that I'd need to watch out for?
Edit: Oh and VaporeonIce thanks for the tips about the EVs on Gliscor! Would you put those extra EVs into one of the Defences?
Proof that the AI takes note of Sturdy once activated: ZK3W-WWWW-WWW9-7KB6
I used to have a battle video were Landorus4 went for a turn 1 Fissure on Dusclops (ignoring ''magnet'' Aron), but I do not have that anymore due to shiny TSV hatching, which involves removing/uploading battle videos.
Battle #124, Vs. Pokémon Ranger Tanner


 Vs.
Vs.


I used to have a battle video were Landorus4 went for a turn 1 Fissure on Dusclops (ignoring ''magnet'' Aron), but I do not have that anymore due to shiny TSV hatching, which involves removing/uploading battle videos.
Battle #124, Vs. Pokémon Ranger Tanner
Last edited:
Psycho Cut Depending on the move Greninja locks itself(i.e. any non water move), strong special Fire types could give you trouble, as Aegislash is weak to fire(it can usually tank a hit, though), and Gliscor has poor special bulk. Maybe you could use a Life Orb Greninja?
In response to my previous post, here´s the proof that the AI randomly selects a target when it uses a 1HKO move, in contrast to what Quanyails stated earlier: Y6WW-WWWW-WWW9-7LD8
Battle #149, Vs. Chef Carlos


 Vs.
Vs.


That's two Walrein4's hitting 1HKO moves within 25 battles, I guess I shouldn't even try..
Battle #149, Vs. Chef Carlos
That's two Walrein4's hitting 1HKO moves within 25 battles, I guess I shouldn't even try..
You might as well put them into Special Defense. Aegislash should handle stuff like Curse/Rest users and the like pretty well, so Attack EVs probably aren't necessay. SpDef EVs are used to help your Sub survive resisted attacks, which it should do pretty well once you've stalled the opponent out of their STAB/super-effective moves.Okay, well, good news, I forged onwards and managed to get that 5 IV Gligar (didn't actually take that long... *ahem*) so now I'll be (attempting to) rip up the Maison with a team of Specs Greninja / Aegislash / Gliscor.
Of course, I'm not asking anyone to do my job for me, so please don't go out of your way to answer the question, but are there any glaring weaknesses you can spot with the team or anything that I'd need to watch out for?
Edit: Oh and VaporeonIce thanks for the tips about the EVs on Gliscor! Would you put those extra EVs into one of the Defences?
I have a lot of experience with Aegislash+Gliscor, and like Berry Juice said, the move you lock yourself into with Greninja can cause problems. General threats include Glaceon (who is bulky as fuck), Froslass, Haxorus, Fire-types that are faster than Gliscor (which is a lot), and opposing Greninja. Fortunately, Life Orb Greninja Grass Knot OHKOs Greninja (and the AI's Greninja 4 is Modest, so you outspeed) and you can switch Aegislash into Signal Beam, bring Gliscor in on Glaceon's Shadow Ball, and stall out Blizzard (but Glaceon is still a pain, because it can waste a lot of Gliscor's PP). Haxorus 4 is a big problem, because it's Jolly, runs Dragon Dance, and holds a Yache Berry, preventing Greninja from getting a OHKO with Ice Beam (Specs only has an 18.8% chance to OHKO). You COULD stall it with Gliscor, except that it carries Dragon Tail and will randomly use it. That negative priority lets it break Gliscor's Sub and KO Gliscor on the next turn. I would probably use Life Orb Greninja and just spam Ice Beam against it (it might attack instead of DD, or it might be dumb and DD twice), sacrificing Greninja to damage it, then bring in Aegislash and take it out with Shadow Sneak. Life Orb helps you beat Fire-types (though Fire-types will still cause you problems if you have to sacrifice Greninja, which will probably happen pretty often against Veterans and such).
Also, watch out for Tornadus. Set 2 holds Yache Berry (making Greninja bad against it), but Set 1 holds Life Orb and has Dark Pulse to hit Aegislash, meaning you need to take it out ASAP. You'll probably have to sacrifice Greninja against lead Tornadus 2 (assuming the AI plays smart and uses Focus Blast to KO Greninja); if you do, stall out its attacking PP with Gliscor (Gliscor outspeeds it), then set up Aegislash. Don't set up Aegislash without stalling out Tornadus's PP; Hurricane can cause a +6 Aegislash to kill itself in confusion.
Good luck!
For Tornadus1/2, switching into Aegislash should work for both sets, since you can scout and confirm which set it is with King's Shield after the switch, and if it's Tornadus1 (Dark Pulse) you can switch Greninja back in on a resisted hit and KO it with Ice Beam.You might as well put them into Special Defense. Aegislash should handle stuff like Curse/Rest users and the like pretty well, so Attack EVs probably aren't necessay. SpDef EVs are used to help your Sub survive resisted attacks, which it should do pretty well once you've stalled the opponent out of their STAB/super-effective moves.
I have a lot of experience with Aegislash+Gliscor, and like Berry Juice said, the move you lock yourself into with Greninja can cause problems. General threats include Glaceon (who is bulky as fuck), Froslass, Haxorus, Fire-types that are faster than Gliscor (which is a lot), and opposing Greninja. Fortunately, Life Orb Greninja Grass Knot OHKOs Greninja (and the AI's Greninja 4 is Modest, so you outspeed) and you can switch Aegislash into Signal Beam, bring Gliscor in on Glaceon's Shadow Ball, and stall out Blizzard (but Glaceon is still a pain, because it can waste a lot of Gliscor's PP). Haxorus 4 is a big problem, because it's Jolly, runs Dragon Dance, and holds a Yache Berry, preventing Greninja from getting a OHKO with Ice Beam (Specs only has an 18.8% chance to OHKO). You COULD stall it with Gliscor, except that it carries Dragon Tail and will randomly use it. That negative priority lets it break Gliscor's Sub and KO Gliscor on the next turn. I would probably use Life Orb Greninja and just spam Ice Beam against it (it might attack instead of DD, or it might be dumb and DD twice), sacrificing Greninja to damage it, then bring in Aegislash and take it out with Shadow Sneak. Life Orb helps you beat Fire-types (though Fire-types will still cause you problems if you have to sacrifice Greninja, which will probably happen pretty often against Veterans and such).
Also, watch out for Tornadus. Set 2 holds Yache Berry (making Greninja bad against it), but Set 1 holds Life Orb and has Dark Pulse to hit Aegislash, meaning you need to take it out ASAP. You'll probably have to sacrifice Greninja against lead Tornadus 2 (assuming the AI plays smart and uses Focus Blast to KO Greninja); if you do, stall out its attacking PP with Gliscor (Gliscor outspeeds it), then set up Aegislash. Don't set up Aegislash without stalling out Tornadus's PP; Hurricane can cause a +6 Aegislash to kill itself in confusion.
Good luck!
Edit: Aegislash can also stall out Tornadus2 - just don't use Swords Dance and use King's Shield repeatedly to stay in Shield form to marginalize confusion self-hit damage. Depending on how much Sub/Double Team it uses, you may not be able to get all Hurricane PP out with King's Shield spam and might need to mix in a few Sacred Swords on alternate turns - but even at worst (1x sub, 6x DT, then 10x hurricane to 16 King's Shield PP) you will only need to risk a confusion self-hit in Blade form at +0 2-3 times, which is not enough to kill you even if you hit yourself every time.
I was just going to breed a Singles gimmick lead (inspired by cocomunga's success with CounterPlot Ape) to try out - SalacReversal Sawk with Counter and Rock Tomb (for Volcarona and stuff, and since it should be as awesome as Icy Wind is, and since it's the most accurate useful coverage option available):
Sawk @ Salac Berry
Nature: Adamant
Ability: Sturdy
IVs: 0 Def, 0 SDef (maybe)
EVs: 252 Atk, 228 Spe, 20 HP
-Reversal
-Close Combat
-Rock Tomb
-Counter
I was thinking of pairing it up with Suicune and Garchomp since status of all kinds destroys it, and between Suicune's fuckitallitude and Garchomp's Ground-typing and Lum Berry, most things should be covered. Sawk can also kill Walrein with Close Combat, and also beat things like Sheer Cold Articuno. Not sure how good it is, but it looks too fun not to try.
(I haven't abandoned the Triples streak, which is at 1095; I'll get back to it eventually.)
Last edited:
You think that's bad?! Chef Carlos was so obsessed with me that he paid a visit to me well within a dozen times between battles 50-100 of a streak, and once I changed teams, I began seeing a ridiculous number of Wailord 4s as well. You'd think Carlos was my next-door neighbor.In response to my previous post, here´s the proof that the AI randomly selects a target when it uses a 1HKO move, in contrast to what Quanyails stated earlier: Y6WW-WWWW-WWW9-7LD8
Battle #149, Vs. Chef Carlos


 Vs.
Vs.


That's two Walrein4's hitting 1HKO moves within 25 battles, I guess I shouldn't even try..
Granted, Carlos didn't -always- bring that damned Walrus, but it did make frequent appearances...
turskain- Very nice! Team looks solid, nice job breaking 1000 wins.
I really like your choice in lucario as a special attacker and placement on the team.
Curious though, from a glance I would imagine fire to be a threat, but you do not list it as so. I guess garchomp can handle it well? I might be underestimating the strength of rotom as well, since the only water move I run is scald but freeing up a slot for dark pulse on greninja is something that a few teams do and I like the results.
Anyway, keep up the good work, maybe I will get finish breeding and take another run before November.


