I've spent a lot of my Tower time up to this point trying different variations of a lead crippler strategy and wanted to bring one particular 'Mon up because of how much it manages to get done... Shuckle.
It gets an incredible amount of utility options, many of which weren't around in Gen 4. Here are a few of the most notable ones:
- Power Split. This is, in most cases, a panacea when it comes to neutering anything that wants to take you down with direct damage moves. There are a few exceptions, like specific Swords Dance leads that can get too scary too quickly, but even they are usually manageable with the right backup. With double switching, you can effectively cut some of the most dangerous sweepers down to a fourth of their usual power (or more if you can manage it again!), making even some +6 'Mons a breeze to deal with. Since it's not considered a stat change, Clear Body doesn't block it, Haze doesn't reset it, Magic Bounce doesn't stop it, and a critical hit won't ignore reductions the same way that something like Charm or Intimidate users occasionally have to deal with, making setup after the fact a much safer affair. It also bypasses accuracy/evasion checks, so Bright Powder or Evasion spam won't bother you much, either. It also handles both Attack and Special Attack via a single move, so you're not struggling as much to fit four moves on your set. The only real impediments are Substitute and switches (and by extension U-Turn/Volt Switch). Pre-HOME, relevant users are few and far between, and nothing else comes close to Shuckle's abysmal base 10 Attack and Special Attack stats. With minimum IVs, that brings it down to 15 in both stats at Level 50 (13 with a negative nature), effectively halving the opponent's attacking stats on each use, though you have to switch in and out to use it again.
- Sticky Web. The benefits of -1 Speed on a majority of Pokémon are significant for all sorts of reasons, and it increases the viability of many setup sweepers. It doesn't work against Flying-types, Levitate users, or Clear Body users, and you should be mindful of Competitive Milotic and Defiant Empoleon, too.
- Knock Off. It had this back in Gen 4, but the increased power can come in handy after a Power Split, and its usefulness has increased for scouting (against Trainers that can use two different leads of the same species) as well as when you know a specific set's item could lead to trouble.
It also gets some solid stat reduction moves in Struggle Bug (-SpAtk), Rock Tomb (-Speed), and Flash (-Accuracy), depending on what your build needs. Endure is an option as insurance to get Custap Berry gets to do its thing, but it's usually not necessary. This thing can get a lot done even without Toxic available to it. As the cherry on top, it's got Sturdy to function as insurance against OHKO users, which are pretty prevalent in this Tower. I'm convinced it's in its own class when it comes to a crippling lead. I've even considered using a low-level Shuckle in order to incentivize the opponent to go for the OHKO instead of setting up against it, snce you generally get two attacks with Custap Berry anyway; maybe something to consider for your own teams.
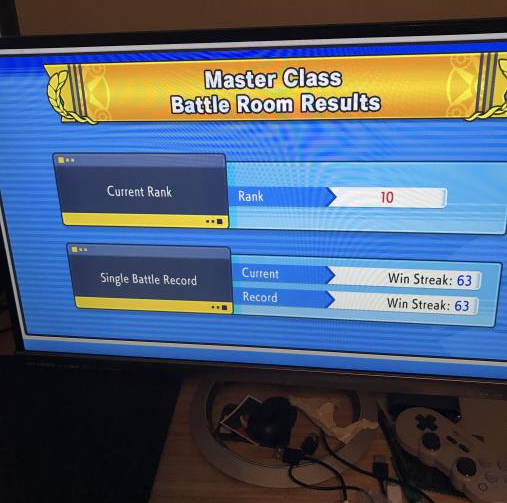
That said, I'm currently sitting at50 63 wins with a fairly straightforward strategy using it, so I thought I'd share this build:
Impasse (Shuckle) @ Custap Berry
Bold, Sturdy
0 Atk IV, 0 SpAtk IV
252 HP / 156 Def / 96 SpDef
Power Split
Sticky Web
Knock Off
Rock Tomb
A lot of what it does can be described up top. No real reason for the specific EV spread, and I'm sure it could be improved. The next two Pokémon are relatively simple win conditions aided by the tools available, which are described in the sections of those individual 'Mons. Most fights start with a Power Split, then go into whichever of the two flowcharts seems best suited to handle that Trainer. Knock Off can be valuable if the enemy has a Choice item and you'd rather them not switch out after running out of PP on their one move, but remember that you may have to anticipate resist switches, too. Rock Tomb is here to ease prediction for Suicune and get their lead slow enough for Breloom to Breloom it (again, though, consider resist switches), and it's STAB if you stick around after a Power Split against physical sweepers and will do decent damage in that case. Sturdy allows you to stall out OHKO moves; you can often get away with constant double switching to get them to exhaust uses without having to PP stall their entire set. Custap Berry is sometimes pivotal to getting an extra Power Split or utility tool when it's needed. Getting yourself into Custap range, then switching out can be really nice insurance if you get unlucky or make a misplay with your initial win condition so that Shuckle gets a free move that can bail you out for the last 'Mon to clean up.
Sleepfinite (Breloom) @ Toxic Orb
Jolly, Poison Heal
4 HP / 200 Atk / 52 Def / 252 Speed
Spore
Substitute
Seed Bomb
Rock Tomb
After losing enough times because of poorly-constructed teams that failed to consider Breloom, I figured I should get in on the action myself. With a combination of Sticky Web, Knock Off, and Rock Tomb, you can often get all three enemies at your mercy. You have to look out for a few things: Grass-types are immune to Spore, items and abilities can set you back, and you want the opponent to be slower than you. Thankfully, the only abilities in play are Vital Spirit (just Magmortar-3) and Insomnia (Hypno-2 and Hypno-3). No Early Bird or Overcoat users, in case you were wondering. Clear Body users are immune to Sticky Web, but none of the Clear Body users are faster than Jolly max Speed Breloom (Metagross-7 has a Speed tie, but that's specific to Byron in Rank 7 of Masters Singles). Magic Bounce users (Espeon-2 and Espeon-3) make Spore useless, but if you have Sticky Web and a Substitute up when it comes in, you 2HKO with Seed Bomb. Sound moves go through Substitute, but the threatening ones are few and far between; other than Perish Song shenanigans that aren't hard to play around, there's Bug Buzz (Vespiquen-3 and Yanmega-2) and Boomburst (Exploud-2 and Flygon-3). Also, if you can't afford to miss against Bright Powder/Evasion strats, it's often a sign that Suicune is the way to go for consistency's sake. Once you've scouted for those stipulations, you can get a pretty mindless sweep going. Since you'll have a substitute up after taking something out, it's usually not a problem to have to use Spore twice if their reserve 'Mons are carrying a Lum Berry or Chesto Berry. Quick Claw is obviously carrying some risk, too.
You know the drill: Spore -> Substitute. If they're still asleep, use Rock Tomb if they're Rock weak and Grass-resistant (common for Flying-types) and/or if lowering Speed would be valuable (if they can boost with Dragon Dance or if they were immune to Sticky Web, mostly). Seed Bomb is decently powerful STAB. Nothing is immune to either move (no Sap Sipper users in Masters Tower), and neither of them are contact moves (though with Poison Heal that hardly matters). The 52 Defense EVs are to be able to take a non-crit Head Smash from Rampardos-3 and always have enough HP to create a Substitute afterward. 4 HP is to make it so Breloom gets 25% health back after two turns so it can perpetually Spore -> Sub so long as it has the health to create the first one. As I understand it, Rampardos Head Smash is the only non-crit move that Shuckle just straight-up loses to even with max HP / max Defense (Mold Breaker negates Sturdy), and it is a lead on more than one team, so this felt necessary. Technician would be really nice to boost damage (and replace Seed Bomb with Bullet Seed), but I've had enough close calls with enemies waking up after a single turn six or seven times in a row for the stall potential with Poison Heal to feel more risk-averse and useful. It also allows you to switch in Breloom to save low-health Shuckle for a Custap move later without risking being left without multiple Substitute uses.
Kyle (Suicune) @ Leftovers
Bold, Inner Focus
252 HP / 252 Def / 4 Speed
Scald
Ice Beam
Rest
Calm Mind
Simple CMCune. Just sits on a lot of teams until it's ready to sweep. The ideal is getting at least two Power Splits off, then boosting up freely. Sacrifice Breloom to manage it if necessary, but double switching to/from Suicune is perfectly fine after a Power Split in the overwhelming majority of cases. There's honestly not a whole lot to say about it; it's just one of the most reliable setup sweepers around. After a couple of Power Splits, very few things scare you anymore. Ice Beam is to deal with strong Dragons and to have something to hit Water Absorb 'Mons.
It gets an incredible amount of utility options, many of which weren't around in Gen 4. Here are a few of the most notable ones:
- Power Split. This is, in most cases, a panacea when it comes to neutering anything that wants to take you down with direct damage moves. There are a few exceptions, like specific Swords Dance leads that can get too scary too quickly, but even they are usually manageable with the right backup. With double switching, you can effectively cut some of the most dangerous sweepers down to a fourth of their usual power (or more if you can manage it again!), making even some +6 'Mons a breeze to deal with. Since it's not considered a stat change, Clear Body doesn't block it, Haze doesn't reset it, Magic Bounce doesn't stop it, and a critical hit won't ignore reductions the same way that something like Charm or Intimidate users occasionally have to deal with, making setup after the fact a much safer affair. It also bypasses accuracy/evasion checks, so Bright Powder or Evasion spam won't bother you much, either. It also handles both Attack and Special Attack via a single move, so you're not struggling as much to fit four moves on your set. The only real impediments are Substitute and switches (and by extension U-Turn/Volt Switch). Pre-HOME, relevant users are few and far between, and nothing else comes close to Shuckle's abysmal base 10 Attack and Special Attack stats. With minimum IVs, that brings it down to 15 in both stats at Level 50 (13 with a negative nature), effectively halving the opponent's attacking stats on each use, though you have to switch in and out to use it again.
- Sticky Web. The benefits of -1 Speed on a majority of Pokémon are significant for all sorts of reasons, and it increases the viability of many setup sweepers. It doesn't work against Flying-types, Levitate users, or Clear Body users, and you should be mindful of Competitive Milotic and Defiant Empoleon, too.
- Knock Off. It had this back in Gen 4, but the increased power can come in handy after a Power Split, and its usefulness has increased for scouting (against Trainers that can use two different leads of the same species) as well as when you know a specific set's item could lead to trouble.
It also gets some solid stat reduction moves in Struggle Bug (-SpAtk), Rock Tomb (-Speed), and Flash (-Accuracy), depending on what your build needs. Endure is an option as insurance to get Custap Berry gets to do its thing, but it's usually not necessary. This thing can get a lot done even without Toxic available to it. As the cherry on top, it's got Sturdy to function as insurance against OHKO users, which are pretty prevalent in this Tower. I'm convinced it's in its own class when it comes to a crippling lead. I've even considered using a low-level Shuckle in order to incentivize the opponent to go for the OHKO instead of setting up against it, snce you generally get two attacks with Custap Berry anyway; maybe something to consider for your own teams.
That said, I'm currently sitting at
Impasse (Shuckle) @ Custap Berry
Bold, Sturdy
0 Atk IV, 0 SpAtk IV
252 HP / 156 Def / 96 SpDef
Power Split
Sticky Web
Knock Off
Rock Tomb
A lot of what it does can be described up top. No real reason for the specific EV spread, and I'm sure it could be improved. The next two Pokémon are relatively simple win conditions aided by the tools available, which are described in the sections of those individual 'Mons. Most fights start with a Power Split, then go into whichever of the two flowcharts seems best suited to handle that Trainer. Knock Off can be valuable if the enemy has a Choice item and you'd rather them not switch out after running out of PP on their one move, but remember that you may have to anticipate resist switches, too. Rock Tomb is here to ease prediction for Suicune and get their lead slow enough for Breloom to Breloom it (again, though, consider resist switches), and it's STAB if you stick around after a Power Split against physical sweepers and will do decent damage in that case. Sturdy allows you to stall out OHKO moves; you can often get away with constant double switching to get them to exhaust uses without having to PP stall their entire set. Custap Berry is sometimes pivotal to getting an extra Power Split or utility tool when it's needed. Getting yourself into Custap range, then switching out can be really nice insurance if you get unlucky or make a misplay with your initial win condition so that Shuckle gets a free move that can bail you out for the last 'Mon to clean up.
Sleepfinite (Breloom) @ Toxic Orb
Jolly, Poison Heal
4 HP / 200 Atk / 52 Def / 252 Speed
Spore
Substitute
Seed Bomb
Rock Tomb
After losing enough times because of poorly-constructed teams that failed to consider Breloom, I figured I should get in on the action myself. With a combination of Sticky Web, Knock Off, and Rock Tomb, you can often get all three enemies at your mercy. You have to look out for a few things: Grass-types are immune to Spore, items and abilities can set you back, and you want the opponent to be slower than you. Thankfully, the only abilities in play are Vital Spirit (just Magmortar-3) and Insomnia (Hypno-2 and Hypno-3). No Early Bird or Overcoat users, in case you were wondering. Clear Body users are immune to Sticky Web, but none of the Clear Body users are faster than Jolly max Speed Breloom (Metagross-7 has a Speed tie, but that's specific to Byron in Rank 7 of Masters Singles). Magic Bounce users (Espeon-2 and Espeon-3) make Spore useless, but if you have Sticky Web and a Substitute up when it comes in, you 2HKO with Seed Bomb. Sound moves go through Substitute, but the threatening ones are few and far between; other than Perish Song shenanigans that aren't hard to play around, there's Bug Buzz (Vespiquen-3 and Yanmega-2) and Boomburst (Exploud-2 and Flygon-3). Also, if you can't afford to miss against Bright Powder/Evasion strats, it's often a sign that Suicune is the way to go for consistency's sake. Once you've scouted for those stipulations, you can get a pretty mindless sweep going. Since you'll have a substitute up after taking something out, it's usually not a problem to have to use Spore twice if their reserve 'Mons are carrying a Lum Berry or Chesto Berry. Quick Claw is obviously carrying some risk, too.
You know the drill: Spore -> Substitute. If they're still asleep, use Rock Tomb if they're Rock weak and Grass-resistant (common for Flying-types) and/or if lowering Speed would be valuable (if they can boost with Dragon Dance or if they were immune to Sticky Web, mostly). Seed Bomb is decently powerful STAB. Nothing is immune to either move (no Sap Sipper users in Masters Tower), and neither of them are contact moves (though with Poison Heal that hardly matters). The 52 Defense EVs are to be able to take a non-crit Head Smash from Rampardos-3 and always have enough HP to create a Substitute afterward. 4 HP is to make it so Breloom gets 25% health back after two turns so it can perpetually Spore -> Sub so long as it has the health to create the first one. As I understand it, Rampardos Head Smash is the only non-crit move that Shuckle just straight-up loses to even with max HP / max Defense (Mold Breaker negates Sturdy), and it is a lead on more than one team, so this felt necessary. Technician would be really nice to boost damage (and replace Seed Bomb with Bullet Seed), but I've had enough close calls with enemies waking up after a single turn six or seven times in a row for the stall potential with Poison Heal to feel more risk-averse and useful. It also allows you to switch in Breloom to save low-health Shuckle for a Custap move later without risking being left without multiple Substitute uses.
Kyle (Suicune) @ Leftovers
Bold, Inner Focus
252 HP / 252 Def / 4 Speed
Scald
Ice Beam
Rest
Calm Mind
Simple CMCune. Just sits on a lot of teams until it's ready to sweep. The ideal is getting at least two Power Splits off, then boosting up freely. Sacrifice Breloom to manage it if necessary, but double switching to/from Suicune is perfectly fine after a Power Split in the overwhelming majority of cases. There's honestly not a whole lot to say about it; it's just one of the most reliable setup sweepers around. After a couple of Power Splits, very few things scare you anymore. Ice Beam is to deal with strong Dragons and to have something to hit Water Absorb 'Mons.
Attachments
-
 1.5 MB Views: 274
Last edited: