SwSh Battle Facilities Discussion & Records

Eisenherz

επέκεινα της ουσίας
is a Forum Moderatoris a Community Contributoris a Tiering Contributoris a Top Social Media Contributor Alumnus
Moderator
EISEN'S TOWER RANDOMIZER
(Part II)

–––––––––––––––––––––––––––––––––––––––––––––––––––
Battles 201-210


@

Timid | Justified
252 SpA / 4 SpD / 252 Spe
Scald / Secret Sword / Air Slash / Icy Wind

@

Jolly | Gulp Missile
252 Atk / 4 Def / 252 Spe
Dive / Brave Bird / Steel Wing / Superpower

@

Brave | Lightning Rod
0 Spe IV
252 HP / 252 Atk / 4 SpD
Bonemerang / Fire Punch / Low Kick / Detect

@

Brave | Gluttony
244 HP / 76 Atk / 188 Def
Double-Edge / Darkest Lariat / Curse / Recycle

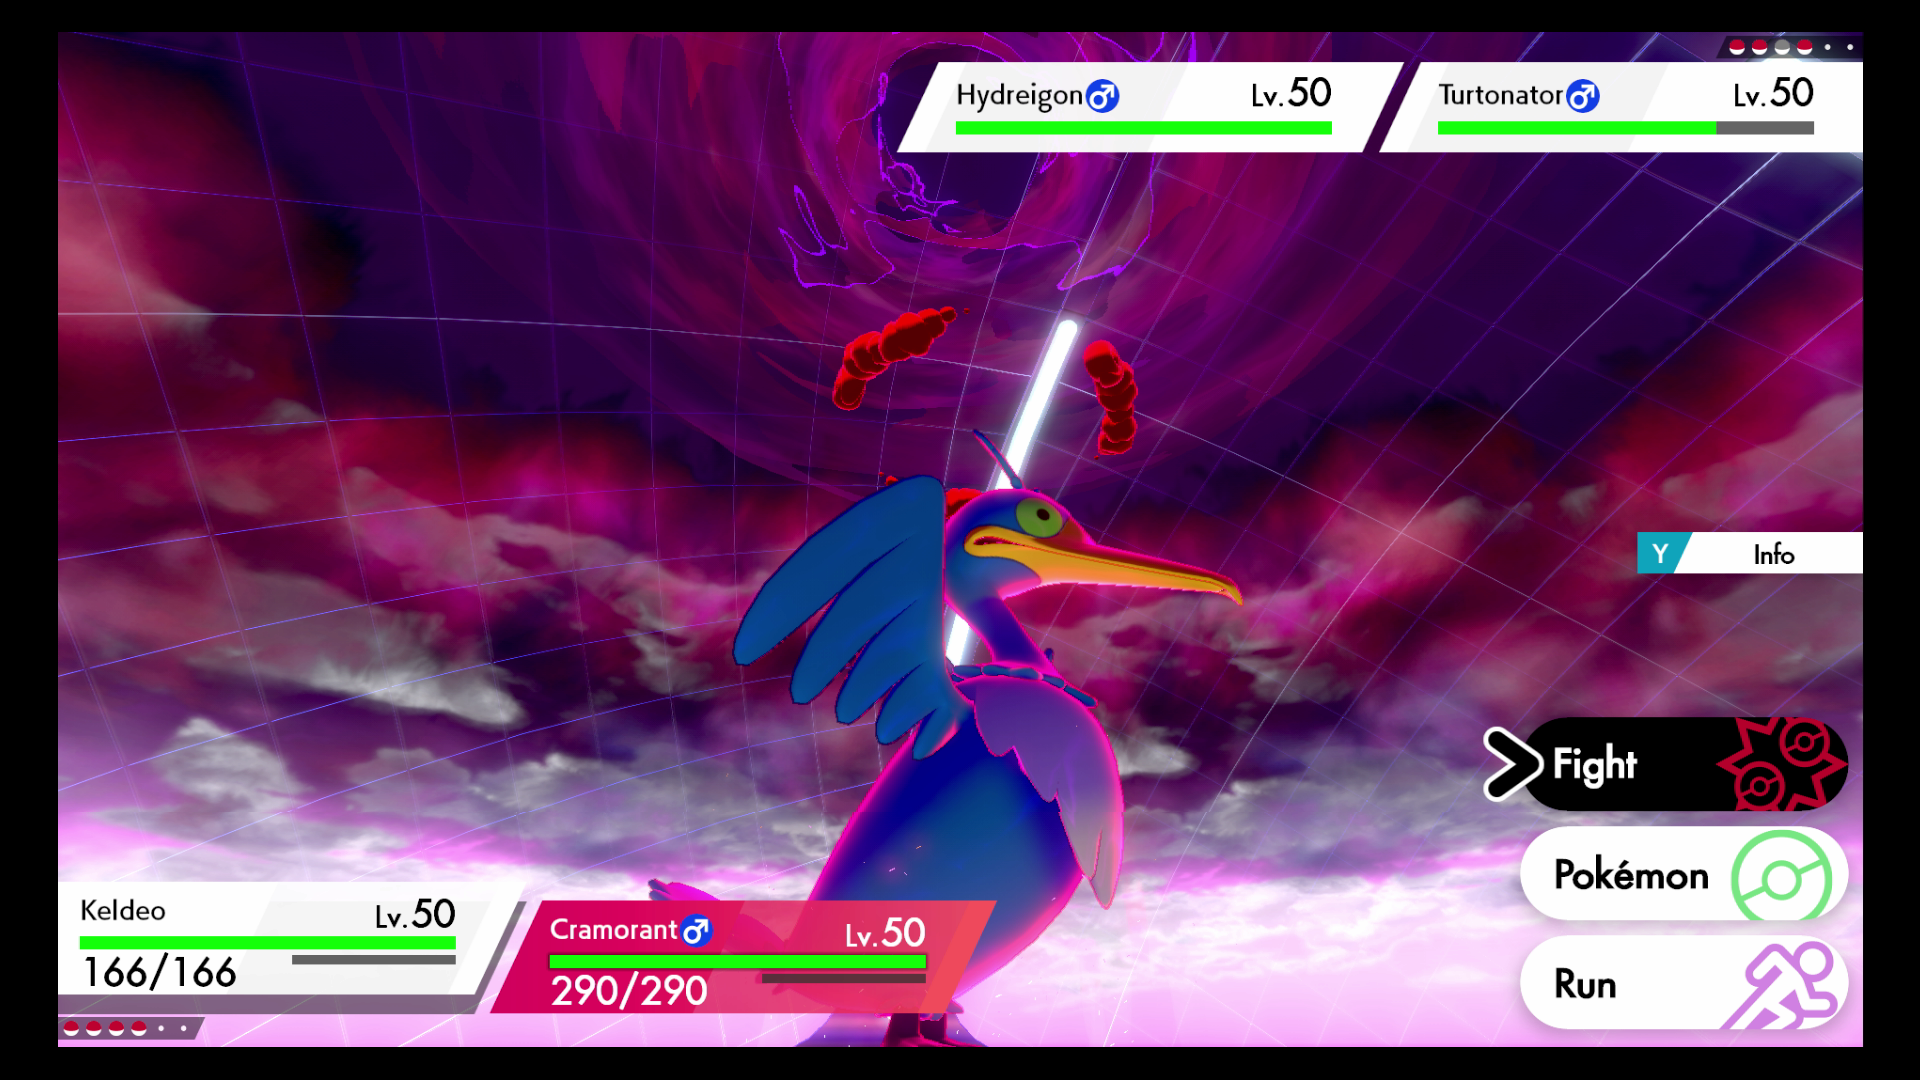
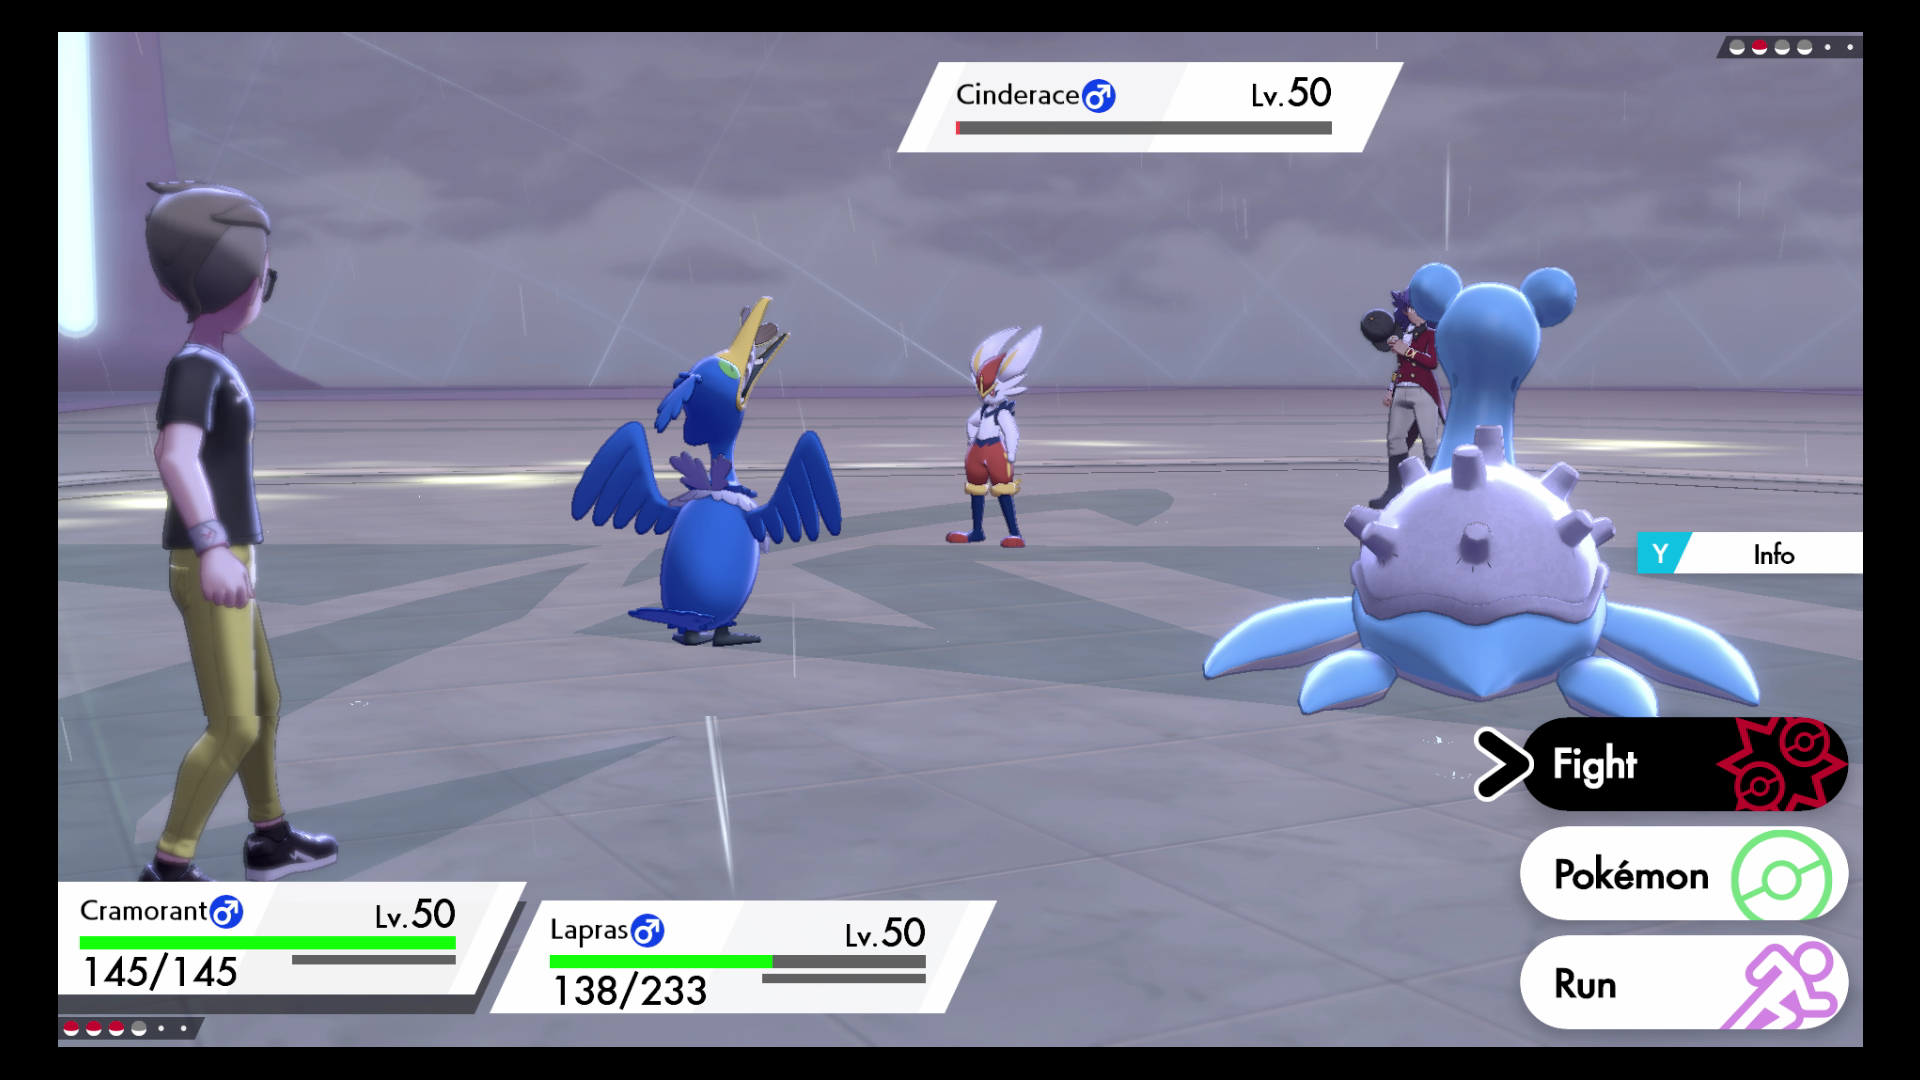
Notes: This looked like it would be a rough one, but it was actually very smooth. The backline barely ever came out, Cramorant and Keldeo took turns Dmaxing, their max moves can both support each other out, and with the Band and sometimes boosts/rain, birb's damage output was great. Leon was a breeze with Aegi Dragapult lead, Draco went into Birb, so it got a Pikachu from Dive, Keldeo then Dmaxed and Max Overgrowth from Charizard didn't even do 50% to Keldeo as it got KOd back. LRod was used only once vs a Jolteon but it was worth a bring (also, Marowak next to Max Knuckles has insane damage output).


Pokémon Sword-Shield Screen Shot 2020-08-31, 2.21 AM.png

MVP:


–––––––––––––––––––––––––––––––––––––––––––––––––––
Battles 211-220


@

Modest | Screen Cleaner
44 HP / 12 Def / 236 SpA / 4 SpD / 212 Spe
Fake Out / Psychic / Freeze-Dry / Icy Wind

@

Modest | Flame Body
84 HP / 28 Def / 84 SpA / 92 SpD / 220 Spe
Quiver Dance / Flamethrower / Bug Buzz / Protect

@

Bold | Water Absorb
228 HP / 164 Def / 4 SpA / 76 SpD / 36 Spe
Tailwind / Scald / Helping Hand / Protect

@

Modest | Water Absorb
12 HP / 100 Def / 196 SpA / 12 SpD / 188 Spe
Hydro Pump / Ice Beam / Freeze-Dry / Icy Wind

Notes: This run made me re-appreciate how good Freeze-Dry is. Tower features a lot of 4x weaks and I ran into 3 Seismitoads, as well as 2 Gyarados. Volc swept most games and had a clutch survival against a Scarf Malamar Rock Slide. Leon allowed Volc to setup with an Aegi/Rilla lead, and with Rime down, I was able to set TW before Charizard's entrance, leading to an easy Max Geyser OHKO.

MVP:


–––––––––––––––––––––––––––––––––––––––––––––––––––
Battles 221-230


@

Modest | Torrent
36 HP / 4 Def / 196 SpA / 20 SpD / 252 Spe
Muddy Water / Ice Beam / Dark Pulse / Protect

@

Impish | Prankster
244 HP / 196 Def / 68 SpD
Fake Out / Reflect / Light Screen / Foul Play

@

Timid | Lightning Rod
4 Def / 252 SpA / 252 Spe
Fake Out / Thunderbolt / Nuzzle / Protect

@

Brave | Sand Stream
0 Spe IV
244 HP / 252 Atk / 12 SpD
Rock Slide / Stomping Tantrum / Heavy Slam / Superpower

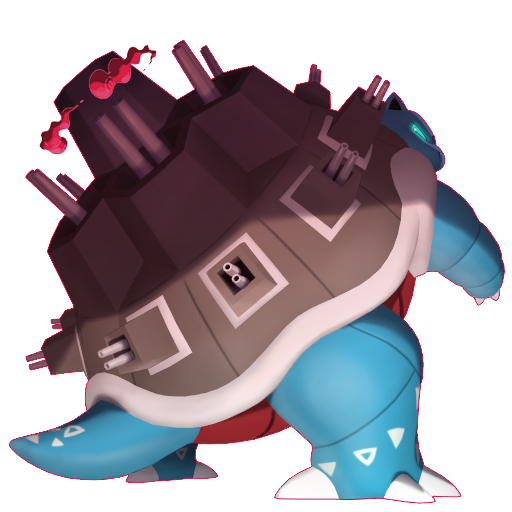
Notes: The true MVP is actually G-Max Cannonade, it was soooo good. Between screens, double Fake Out and often Hailstorm (I would say Sand because that was the idea, but Gigalith didn't hit the field a single time lol), things were losing health very quickly. Being able to ignore things that live hits on 25-30% makes planning so much easier. Incredibly satisfying run, I can't wait to roll G-Max Venusaur too now! Leon led Rhyp/Rime, so my lead made quick work of it, and Charizard/Cinderace in the back got a taste of Blastoise's refreshing geysers.

MVP:


–––––––––––––––––––––––––––––––––––––––––––––––––––
Battles 231-240 (no Dynamax used)


@

Modest | Turboblaze
236 HP / 4 Def / 180 SpA / 4 SpD / 84 Spe
Fusion Flare / Dragon Pulse / Earth Power / Tailwind

@

Modest | Liquid Voice
76 HP / 68 Def / 108 SpA / 4 SpD / 252 Spe
Hyper Voice / Moonblast / Icy Wind / Protect

@

Timid | Lightning Rod
84 HP / 4 Def / 196 SpA / 4 SpD / 220 Spe
Thunderbolt / Flamethrower / Snarl / Volt Switch

@

Modest | Cursed Body
252 HP / 124 SpA / 132 Spe
Shadow Ball / Ally Switch / Strength Sap / Protect

Notes: This was so straightforward... Not only was I blessed with Reshiram, but the type synergy is also really good between Reshiram and Prima. Tailwind allowed Prima to just hammer away with Hyper Voices, and if any of the 2 ever went down the backline had no trouble cleaning up. Leon was able to prevent TW turn 1 with Fake Out Rilla, forcing me to sacrifice Polteageist to a Wood Hammer on the next turn to be safe, but after that, the duo had no trouble mowing through.

MVP:


–––––––––––––––––––––––––––––––––––––––––––––––––––
Battles 241-250


@

Timid | Psychic Surge
236 SpA / 20 SpD / 252 Spe
Expanding Force / Hyper Voice / Dazzling Gleam / Mystical Fire

@

Timid | Clear Body
4 Def / 252 SpA / 252 Spe
Shadow Ball / Draco Meteor / Flamethrower / Scald

@

Brave | Sand Stream
0 Spe IV
236 HP / 236 Atk / 36 SpD
Rock Slide / Crunch / Curse / Protect

@

Adamant | Intimidate
204 HP / 220 Atk / 84 Spe
Fake Out / Close Combat / Helping Hand / Wide Guard

Notes: That lead was so fast, with so much damage output (when Dmaxing, anyway), the AI could rarely do much about it, though Indeedee's damage output is severely affected by not having Specs. Rhyperior / AV Aegislash lead from Leon allowed me to set the rain with Max Geyser, and that was the whole story. This lead was just too good. Fun interaction that happened, an Araquanid set Sticky Web and Hitmontop's Eject Pack got it ejected instantly, allowing me to cycle back into Hitmontop right away and get -2. That was the only time Tyranitar hit the field (I brought it as a safety measure against Leon's Charizard).

MVP:


–––––––––––––––––––––––––––––––––––––––––––––––––––
Battles 251-260


@

Hasty | Technician
4 HP / 252 Atk / 252 Spe
Fake Out / Covet / Icy Wind / Taunt

@

Jolly | Sand Stream
12 HP / 244 Atk / 4 Def / 4 SpD / 244 Spe
Rock Slide / Crunch / Low Kick / Dragon Dance

@

Modest | Levitate
156 HP / 4 Def / 116 SpA / 4 SpD / 228 Spe
Overheat / Thunderbolt / Ally Switch / Protect

@

Quiet | Quick Draw
0 Spe IV
244 HP / 4 Atk / 4 Def / 252 SpA / 4 SpD
Psychic / Shell Side Arm / Flamethrower / Protect

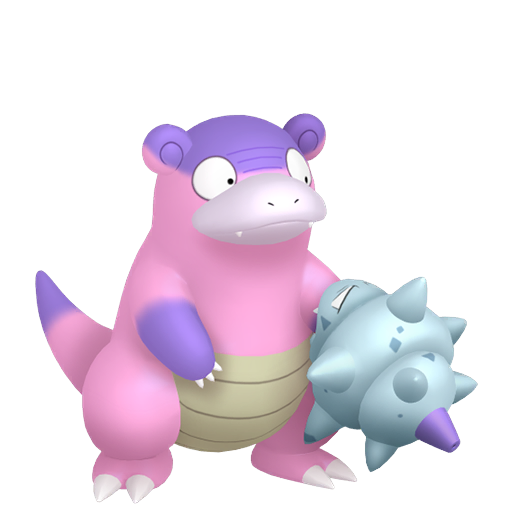
Notes: I was very nervous about having a lead so weak to Fighting since double Fighting leads are not uncommon from the AI, but through FO and Slowbro I hoped it could be manageable. In the end, I encountered no Fighting types at all, but a Delibird did mess me up by OHKOing Ttar turn 1 (I didn't remember Banded Brick Break was a set lol). Persian stole the Band, and the backline ended up being weak to Fire - Vanilluxe and something else, so Rotom cleaned up (alone by the end, it was quite tight). The Leon battle was tough, I again ignored the Ice type, this time Mr. Rime, to FO Rhyp and DD, but Ebelt Grass Knot did a ton to Ttar, which I had to sacrifice in exchange for a KO on Rhyp. Charizard only came in 4th, and Dmax Rotom had to Max Guard to prevent Max Rockfall from Weather Ball on the last turn of sand. Meanwhile, Slowbro got 2 QCQDs in a row and did a good 75%, making for an easy Rotom finish. Overall, that was 5/7 QCQDs on G-Slowbro's debut!

MVP:


–––––––––––––––––––––––––––––––––––––––––––––––––––
Battles 261-270


@

Modest | Swift Swim
20 HP / 4 Def / 252 SpA / 4 SpD / 228 Spe
Scald / Dragon Pulse / Hurricane / Protect

@

Timid | Lightning Rod
84 HP / 4 Def / 196 SpA / 4 SpD / 220 Spe
Thunderbolt / Flamethrower / Snarl / Volt Switch

@

Adamant | Intimidate
76 HP / 244 Atk / 4 Def / 36 SpD / 148 Spe
Flare Blitz / Extreme Speed / Helping Hand / Protect

@

Jolly | Anticipation
4 HP / 236 Atk / 12 Def / 4 SpD / 252 Spe
Play Rough / Psycho Cut / High Horsepower / Bounce

Notes: Kingdra might as well has solo'd the entire thing, it hasn't gone down a single time. Max Geyser turn 1 made the rest of the turns mostly trivial. The closest battle had a Quick Claw Grimmsnarl/Scarf Crawdaunt lead, QC activated twice in a row while Crawdaunt disposed of Manectric immediately; this could have been trouble, but I finished Grimm with Airstream to give Rapidash the jump and thankfully, Play Rough connected. Arcanine was mostly there for Intimidate, but it did OHKO a Ferro in the rain, and got an important Espeed on Leon's Haxorus3 to break sash after it had gone for a DD.

MVP:


–––––––––––––––––––––––––––––––––––––––––––––––––––
Battles 271-280


@

Timid | Synchronize
252 SpA / 4 SpD / 252 Spe
Psyshock / Flamethrower / Pollen Puff / Tailwind

@

Adamant | Dry Skin
140 HP / 108 Atk / 4 Def / 252 SpD / 4 Spe
Fake Out / Drain Punch / Poison Jab / Knock Off

@

Bold | Prism Armor
236 HP / 148 Def / 12 SpA / 28 SpD / 84 Spe
Photon Geyser / Earth Power / Calm Mind / Moonlight

@

Adamant | Unburden
236 HP / 140 Atk / 12 Def / 116 SpD / 4 Spe
Tailwind / Acrobatics / Close Combat / Helping Hand

Notes: Not the most synergistic team, but setting Terrain with Dmax Mew was pretty good for Necrozma and Seed Hawlucha, and having 2 Tailwind options helped, especially with FO at the front. I really enjoyed the Max Flare pairing with Necrozma's Moonlight (though it only came into play in one battle lol). The regular battles were straightforward, Mew mostly swept, but I was scared of Leon since I had nothing super effective for Charizard, and indeed, that battle was super close. In the end, it came down to Necrozma at full vs Charizard, very low, in Terrain. Wildfire did way more than I expected, something like 80%, giving me the berry, but Photon Geyser finished it off thankfully; Dragapult1 put in a ton of work against me in that battle, KOing both Toxicroak and Hawlucha.

MVP:


–––––––––––––––––––––––––––––––––––––––––––––––––––
Battles 281-290


@

Adamant | Frisk
52 HP / 236 Atk / 20 Def / 4 SpD / 196 Spe
Fake Out / False Surrender / Spirit Break / Low Kick

@

Modest | Weak Armor
252 SpA / 4 SpD / 252 Spe
Shadow Ball / Stored Power / Shell Smash / Protect

@

Jolly | Clear Body
252 Atk / 4 Def / 252 Spe
Dragon Darts / Phantom Force / Substitute / Protect

@

Modest | Chlorophyll
36 HP / 20 Def / 228 SpA / 4 SpD / 220 Spe
Energy Ball / Psychic / Ancient Power / Protect

Notes: This was a no Dmax run until the Leon battle, where I felt forced to Gmax Grimmsnarl in front of Aegislash. Grimm got the Snooze effect on Charizard, which was a big help. Leon focused down Polteageist early, so it never got to attack in that battle (because of Wildfire), but that gave Grimmsnarl the opportunity to put everything in range of Dragon Darts, so Dragapult cleaned up with Charizard asleep. The rest of the run was mostly FO + Shell Smash turn 1, but this combo doesn't enable Polteageist sweeps like Follow Me Clef did, since I often went down to Sash turn 1. Regardless, Polteageist makes for a perfect bait and usually gets at least 1 KO, while the AI tends to ignore Grimmsnarl, who is free to score most KOs. First 2 battles were a bit scary, both were mono Dark, and the 2nd one had a Bisharp that OHKOd Grimm. Dragapult came in clutch with baits thanks to the Sub. Frisk was a huge help overall.

MVP:


–––––––––––––––––––––––––––––––––––––––––––––––––––
Battles 291-300 (no Dynamax used)


@

Jolly | Reckless
36 HP / 212 Atk / 4 Def / 12 SpD / 244 Spe
Fake Out / High Jump Kick / Helping Hand / Ally Switch

@

Jolly | Intrepid Sword
36 HP / 252 Atk / 4 Def / 4 SpD / 212 Spe
Behemoth Blade / Play Rough / Close Combat / Protect

@

Jolly | Intimidate
12 HP / 252 Atk / 244 Spe
Waterfall / Bounce / Dragon Dance / Protect

@

Brave | Lightning Rod
0 Spe IV
228 HP / 252 Atk / 28 SpD
High Horsepower / Rock Slide / Hammer Arm / Protect

Notes: What a way to reach 300! I got given the red carpet here with Zacian, obviously. The Leon battle was also a no damage taken one, Behemoth Blade did 90% to GMax Charizard, and HJK finished it off. To no surprise, this was a very easy run, the most trouble I encountered was Aegislash, which still took 45% from Behemoth Blade in Shield forme, and was quickly revenged by Rhydon (it was the offensive LO set). Zacian is busted, but it's super fun using busted Pokémon every once in a while and destroying everything in sight!

MVP:


–––––––––––––––––––––––––––––––––––––––––––––––––––
Battles 301-310 (no Dynamax used)


@

Jolly | RKS System
4 HP / 252 Atk / 252 Spe
Explosion / Multi-Attack / Crunch / Parting Shot

@

Timid | Clear Body
4 Def / 252 SpA / 252 Spe
Shadow Ball / Draco Meteor / Flamethrower / Scald

@

Bold | Volt Absorb
108 HP / 252 Def / 20 SpA / 12 SpD / 116 Spe
Scald / Thunderbolt / Icy Wind / Protect

@

Timid | Turboblaze
4 HP / 252 SpA / 252 Spe
Freeze-Dry / Dragon Pulse / Fusion Flare / Earth Power

Notes: This was not a good run. Since I rolled Kyurem-W, I really wanted to keep it a no Dmax run, but both the Dragapult and Kyurem sets were made with Dmax in mind. Lanturn offered the only support, and was also the only one with Protect. Dragapult was the worst by far here... Kyurem was least able to do well just from raw power; Dragapult was always in an awkward spot, unable to get KOs, threatened to be OHKOd itself, and unable to do anything about it. I should have just put Protect on it for this run. I won several battles 1-0 with only Kyurem or Lanturn left, and against Leon, Lanturn clutched it out in the end, thanks to being EVd to live Overgrowth. I think I was clicking Explosion a little too mindlessly and would have had less close games by going for Multi-Attack sometimes... but then again, special Dragapult is pretty weak and usually cannot score OHKOs even with LO (this set is *really* meant to dmax), so weakening something to double-KO with Explosion was often the necessary play. Overall unhappy of this run and my preparation, I think seeing Kyurem made me too comfortable and careless.

MVP:


–––––––––––––––––––––––––––––––––––––––––––––––––––
Battles 311-320


@

Modest | Adaptability
116 HP / 172 SpA / 220 Spe
Tri Attack / Shadow Ball / Hyper Beam / Protect

@

Timid | Trace
12 HP / 4 Def / 252 SpA / 4 SpD / 236 Spe
Moonblast / Psyshock / Mystical Fire / Icy Wind

@

Jolly | Skill Link
252 Atk / 4 SpD / 252 Spe
Tail Slap / Bullet Seed / Rock Blast / Protect

@

Adamant | White Smoke
196 HP / 116 Atk / 36 Def / 84 SpD / 76 Spe
Fire Lash / Leech Life / Coil / Protect

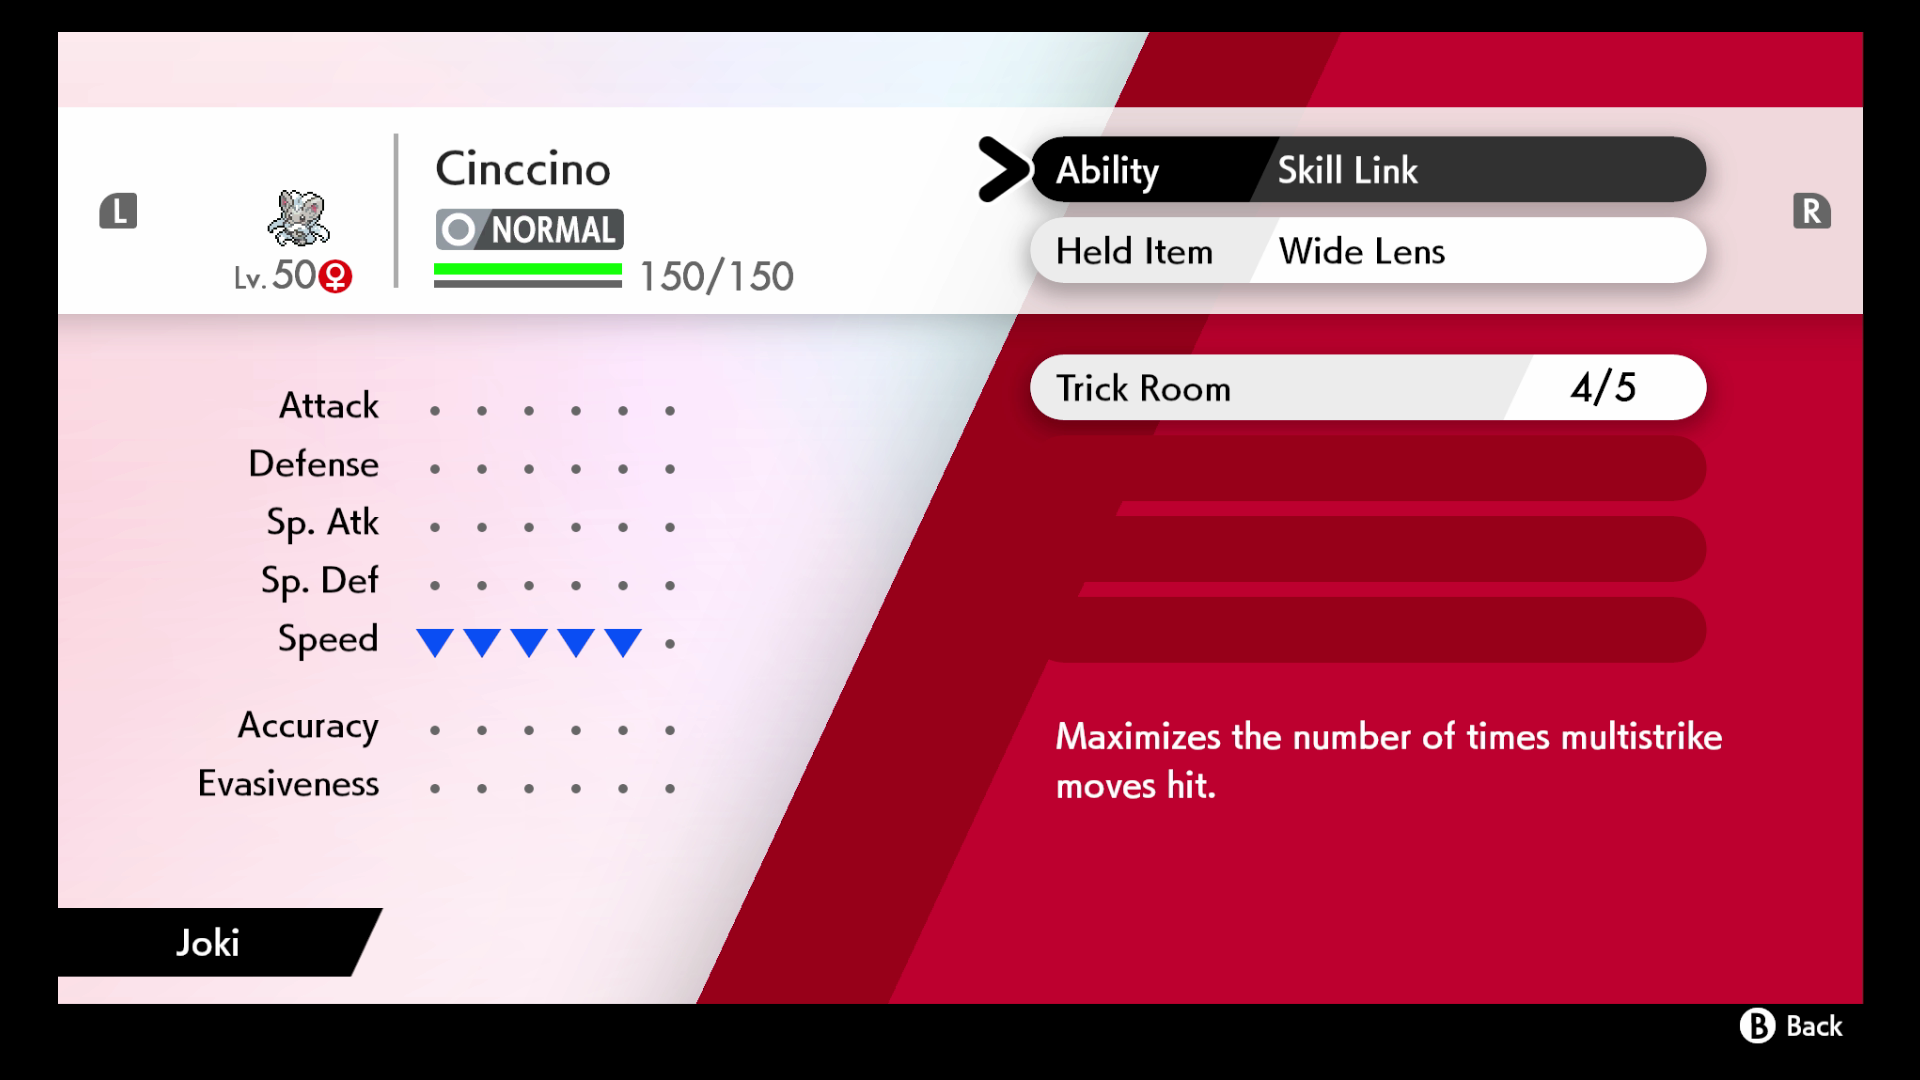
Notes: Cinccino is such a great backliner for Charizard safety! Rock Blast always OHKOs through Charti since it only weakens the 1st hit. Centiskorch didn't hit the field a single time, Dmax P-Z + Gardevoir swept almost everything. Funnily, Leon's Cinderace1 locked into Shadow Ball, and Gardevoir got double targeted turn 1 (I Icy Winded), so when I revenged with Cinccino, Cinderace was forced to switch, and I was able to catch Rillaboom on the switch with Max Strike and OHKO.... I was hoping this would be Charizard, but oh well, this allowed Cinccino to contribute!

MVP:


–––––––––––––––––––––––––––––––––––––––––––––––––––
Battles 321-330 (no Dynamax used)


@

Quiet | Harvest
0 Spe IV
220 HP / 36 Def / 252 SpA
Energy Ball / Psychic / Trick Room / Protect

@

Sassy | Prankster
0 Spe IV
252 HP / 124 Def / 132 SpD
Fake Out / Foul Play / Quash / Ally Switch

@

Quiet | Sturdy
0 Spe IV
252 HP / 244 SpA / 12 SpD
Thunderbolt / Flash Cannon / Ally Switch / Protect

@

Brave | Steelworker
0 Spe IV
252 HP / 244 Atk / 12 Def
Power Whip / Poltergeist / Anchor Shot / Ally Switch

Notes: The Magnezone calc on Charizard is truly blessed (244+ SpA Magnet Magnezone Thunderbolt vs. 0 HP / 0 SpD Dynamax Charizard: 234-276 (102.1 - 120.5%) -- guaranteed OHKO). This was a solid team, Eggy was a bit shaky as a setter, especially since it's an offensive one, but Sableye supported it well enough that I got Trick Room up every game. Leon led Rhyp/Rime and went for the classic gamer move of Fake Out+Protect, which ironically was bad for me since it did prevent TR and burned my own FO, but Ally Switch saved the day, and Dhelmise/Mag had no trouble cleaning everything (shoutouts to Quash allowing the Rhyp KO, because it outsped Eggy in TR). Overall, that was just a solid TR team, always happy to draw these!

MVP:


–––––––––––––––––––––––––––––––––––––––––––––––––––
Battles 331-340 (no Dynamax used)


@

Modest | Drizzle
4 Def / 252 SpA / 252 Spe
Scald / Hurricane / Tailwind / Protect

@

Jolly | Unseen Fist
252 Atk / 4 SpD / 252 Spe
Wicked Blow / Close Combat / Sucker Punch / Protect

@

Timid | Sniper
4 HP / 4 Def / 252 SpA / 20 SpD / 228 Spe
Scald / Draco Meteor / Focus Energy / Protect

@

Bold | Effect Spore
252 HP / 244 Def / 12 SpA
Moonblast / Giga Drain / Spore / Strength Sap

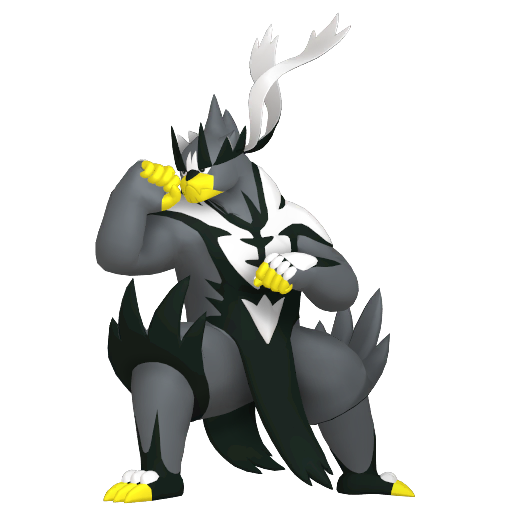
Notes: That was a really fun run, Urshifu is so satisfying to use with all the Protects. Ran into 2 Protect Glalie and 3 Aegislash (including Leon's). Leon couldn't have give me a better lead with Aegi/Rhyp, but that meant I had to TW/Detect turn 2, and take Charizard out on turn 3 with a double-up. Sadly, Inteleon at +1 outsped Pelipper in TW, so it finished off Urshifu, but Pelipper + Shiinotic easily handled Inteleon (it was set 3). I might have said this last time I got Urshifu, but I'd easily rank it top tier for Battle Tower, Wicked Blow OHKOs so many things it's crazy, and its speed tier is great because of the lower IVs. I replaced Iron Head with Sucker Punch on the set and I think it'll be a permanent change, Iron Head really didn't feel necessary, Wicked Blow deals plenty to Fairies, and priority is always valuable. Critdra was not the ideal set to draw alongside Pelipper, but its natural speed tier is still good, and rain-boosted crits would have been great if they had been needed... but it barely ever hit the field.

MVP:


–––––––––––––––––––––––––––––––––––––––––––––––––––
Battles 341-350 (no Dynamax used)


@

Sassy | Mummy
0 Spe IV
252 HP / 140 Def / 116 SpD
Trick Room / Shadow Ball / Body Press / Ally Switch

@

Brave | Water Absorb
0 Spe IV
252 HP / 252 Atk / 4 SpD
Fishious Rend / Icicle Crash / Freeze-Dry / Protect

@

Brave | Volt Absorb
0 Spe IV
252 HP / 252 Atk / 4 SpD
Bolt Beak / Icicle Crash / Stomping Tantrum / Protect

@

Quiet | Pixilate
0 Spe IV
140 HP / 124 Def / 244 SpA
Hyper Voice / Psyshock / Mystical Fire / Swift

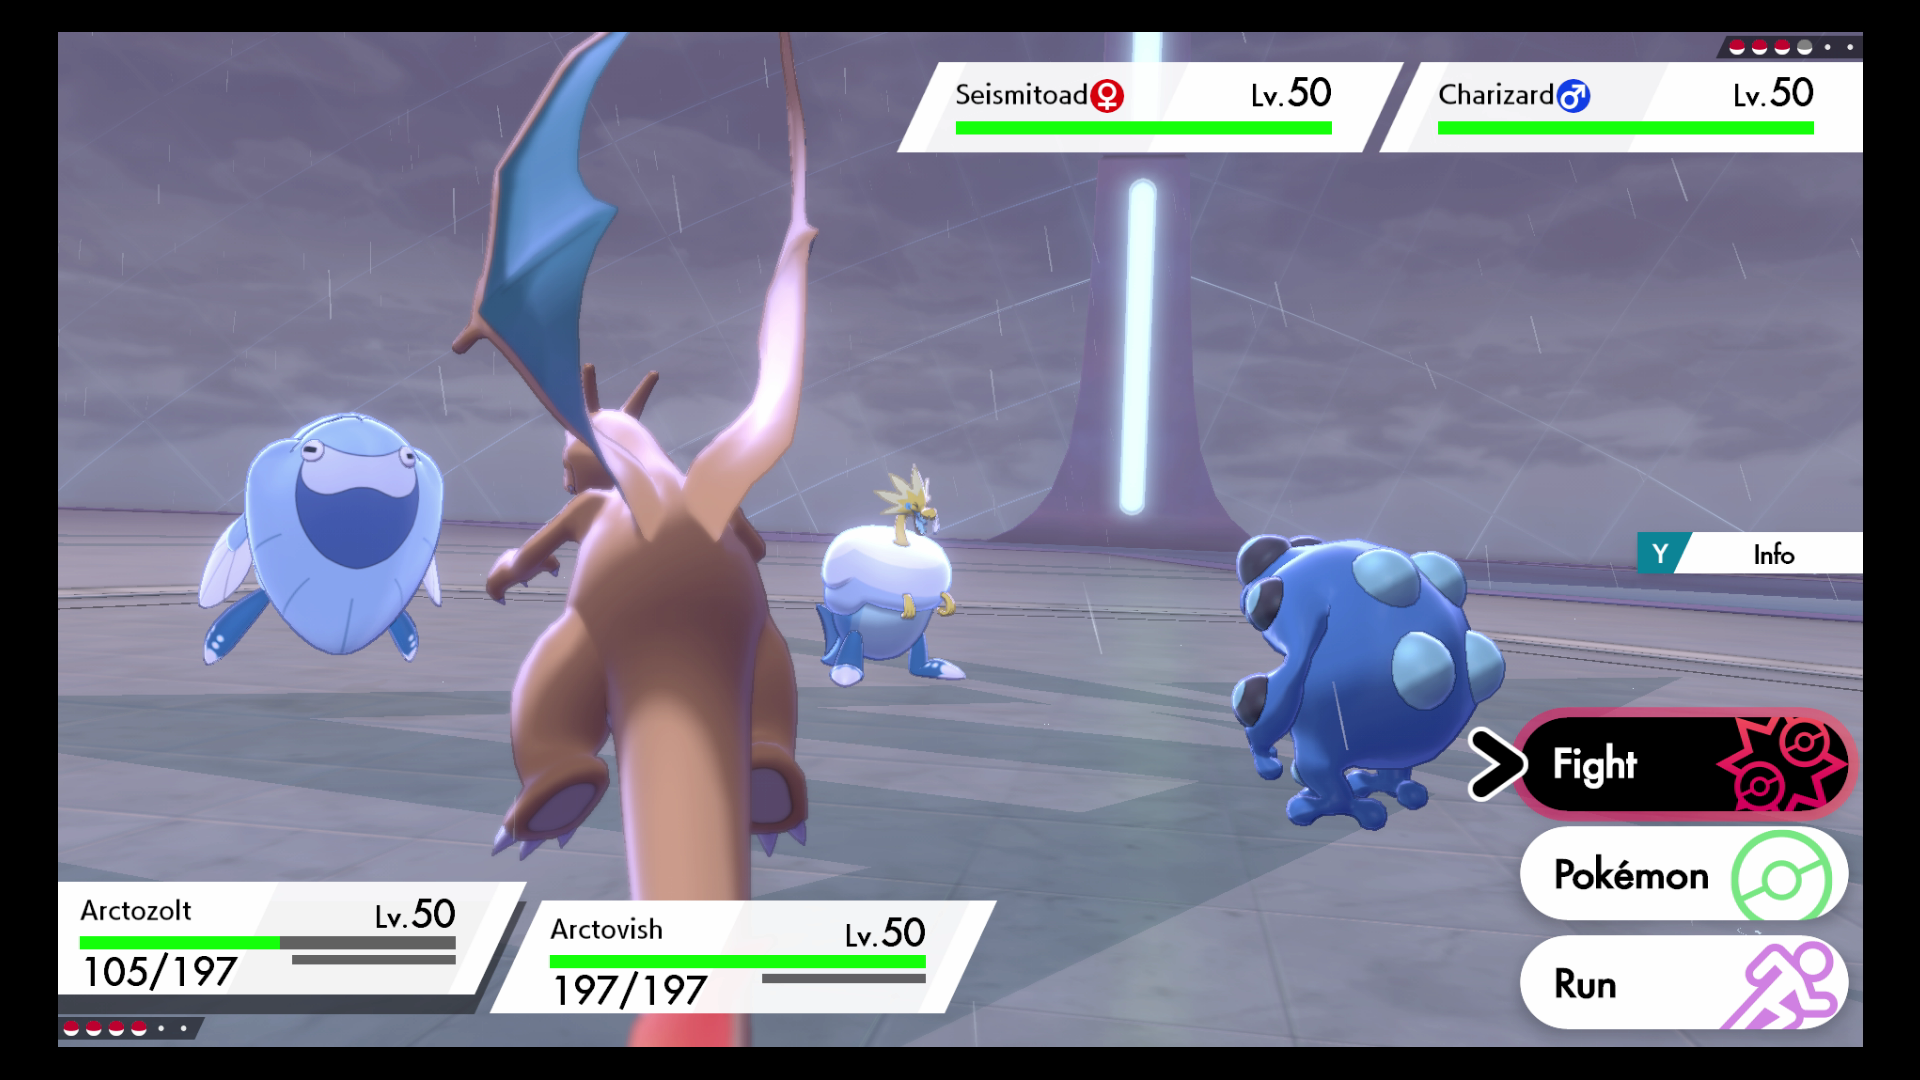
Notes: I wasn't going to let the double fossil opportunity pass! Very dangerous battle #3, where Sheer Cold Lapras took out Cofag turn 1. I was ready to Dmax one of my last 2 if need be (probably Arctozolt), but it then missed Sylveon twice, and once it was out of the way, Arctovish and Sylveon tanked and swept through Slurpuff/Drapion/Xatu. Then something hilarious happened in the next battles: Arctovish started freezing everything with Freeze-Dry!! In the span of 2 battles, it scored freezes on Qwilfish, Vikavolt, Mimikyu, Turtonator and Flygon; those were 5 Freeze-Dry IN A ROW freezing. A feat I will most likely never repeat in my life!


Pokémon Sword-Shield Screen Shot 2020-09-02, 8.51 AM 5.png

MVP:


–––––––––––––––––––––––––––––––––––––––––––––––––––
Battles 351-360


@

Adamant / Unburden
68 HP / 252 Atk / 4 Def / 4 SpD / 180 Spe
Fake Out / Close Combat / Knock Off / Protect

@

Jolly | Ice Face
252 Atk / 4 SpD / 252 Spe
Ice Punch / Liquidation / Belly Drum / Protect

@

Jolly | Sturdy
252 Atk / 4 SpD / 252 Spe
Rock Slide / Stomping Tantrum / Shell Smash / Protect

@

Adamant | Strong Jaw
12 HP / 252 Atk / 4 Def / 12 SpD / 228 Spe
Fishious Rend / Crunch / Psychic Fangs / Rock Slide

Notes: First time trying Eiscue, and I have mixed feelings. Battles either went amazingly or horribly wrong. I had to dmax Dracovish twice to survive enough moves to clean up remaining Pokémon, and in one of them I was paralyzed too thanks to Qwilfish, so I could easily have lost. I think Crustle next to Hitmonlee would have been more solid overall. However, Eiscue got its fair share of sweeps, and Hitmonlee was a good partner, able to hit it to get Noice speed quickly if need be. The original speed was generally a huge problem though, and I'll be reluctant to bring it again without Follow Me support, it sure felt like I could have lost here. Leon, however, was one of the easy battles; he led Dragapult/Rime and U-turned into Charizard, giving me the Noice speed and I was able to OHKO it with Liquidation on turn 2 lol (though Rime was able to KO Eiscue after). Fish cleaned up Rime and Rhyperior easily.

MVP:


–––––––––––––––––––––––––––––––––––––––––––––––––––
Battles 361-370 (no Dynamax used)


@

Jolly | Motor Drive
124 HP / 116 Atk / 4 Def / 12 SpD / 252 Spe
Tailwind / Wild Charge / Acrobatics / Helping Hand

@

Jolly | Libero
252 Atk / 4 SpD / 252 Spe
Pyro Ball / Bounce / Iron Head / Protect

@

Modest | Bulletproof
4 HP / 252 SpA / 252 Spe
Clangorous Soul / Clanging Scales / Aura Sphere / Protect

@

Jolly | Guts
4 HP / 244 Atk / 4 Def / 4 SpD / 252 Spe
Facade / Knock Off / Close Combat / Obstruct

Notes: Obstagoon MVP!? Cinderace was good, but a lot less busted with no Dmax. Its damage output was just short of OHKOs a lot of the time, so Kommo-o and Obstagoon had to put in some work to clean up, and TW was a big help. The Leon battle was good but tight; I was able to setup Kommo-o on Rilla/Toad, and Bounce allowed Cinderace to bait attacks, as well as finish off Charizard after the +2 Clanging Scales. Sadly, Charizard was able to Airstream Kommo-o in between, but this left Cinder and Obstagoon to deal with Aegi. I don't think this team would be solid enough to go no dmax many times, but I was lucky enough to pull it off this once.

MVP:


–––––––––––––––––––––––––––––––––––––––––––––––––––
Battles 371-380


@

Timid | Unburden
252 HP / 28 Def / 4 SpA / 36 SpD / 188 Spe
Dazzling Gleam / Helping Hand / After You / Sticky Web

@

Adamant | Emergency Exit
244 HP / 244 Atk / 20 Def
First Impression / Leech Life / Liquidation / Aqua Jet

@

Jolly | Guts
28 HP / 220 Atk / 4 Def / 4 SpD / 252 Spe
Close Combat / Facade / Knock Off / Protect

@

Adamant | Lightning Rod
236 HP / 140 Atk / 12 Def / 20 SpD / 100 Spe
Waterfall / Megahorn / Knock Off / Protect

Notes: Only Dmaxed twice there, both times Seaking. The first time, a mono Steel team featuring Corviknight and Ferrothorn really gave me trouble, I couldn't use Hera until Corviknight was down, and Max Geyser was the only way I really had to accomplish that. Against Leon, Rime lead Faked Out Golisopod and then proceeded to freeze it with Freeze-Dry (payback for Arctovish's earlier streak?), which mattered a lot because it didn't even bring it to Emegency Exit range, and Leon had both Cinderace and Rillaboom, both of which Golisopod could have devoured. I had to resort to Seaking to OHKO Charizard, and sacrificed Golisopod to the obvious Airstream. Outside of these battles though, super solid team, EExiting into Hera, having Guts activate on that turn, and After You/Webs really helped Hera sweep through most of this run.


Pokémon Sword-Shield Screen Shot 2020-09-02, 7.27 PM 2.png

MVP:


––––––––––––––––––––––––––––––––––––––––––––––––––––
Battles 381-390 (no Dynamax used)


@

Relaxed | Frisk
0 Spe IV
252 HP / 92 Def / 164 SpD
Trick Room / Night Shade / Helping Hand / Ally Switch

@

Jolly | Skill Link
252 Atk / 4 SpD / 252 Spe
Tail Slap / Bullet Seed / Rock Blast / Protect

@

Quiet | Sturdy
0 Spe IV
252 HP / 244 SpA / 12 SpD
Thunderbolt / Flash Cannon / Ally Switch / Protect

@

Quiet | Berserk
0 Spe IV
196 HP / 60 Def / 252 SpA
Hyper Voice / Dragon Pulse / Flamethrower / Protect

Notes: Drampa is the MVP damage-wise, but Dusclops enabled that entire team with Frisk, reliable TRs, and most importantly, Ally Switch next to 3 Fighting-weaks, which was incredibly helpful and made the whole run a breeze. Cinccino often scored a KO or 2 with HH assistance turn 1 before TR going up, it turned the weird situation of a fast Pokémon on a TR team into an advantage. Funnily, the first Tail Slap target was a Gooey Goodra which brought Cinccino to -5 speed, allowing it to become a certified member of the TR squad (and then Rhyperior still outsped in TR, but we don't talk about it)!


Pokémon Sword-Shield Screen Shot 2020-09-02, 7.52 PM.png

MVP:


–––––––––––––––––––––––––––––––––––––––––––––––––––
Battles 391-400


@

Sassy | Contrary
0 Spe IV
252 HP / 36 Def / 220 SpD
Superpower / Knock Off / Trick Room / Protect

@

Sassy | Friend Guard
0 Spe IV
252 HP / 220 Def / 36 SpD
Follow Me / Heal Pulse / Moonlight / Charm

@

Brave | Flash Fire
0 Spe IV
252 HP / 252 Atk / 4 SpD
Rock Slide / Flare Blitz / Body Press / Protect

@

Brave | Serene Grace
0 Spe IV
20 HP / 236 Atk / 252 SpD
Headbutt / Bite / Curse / Roost

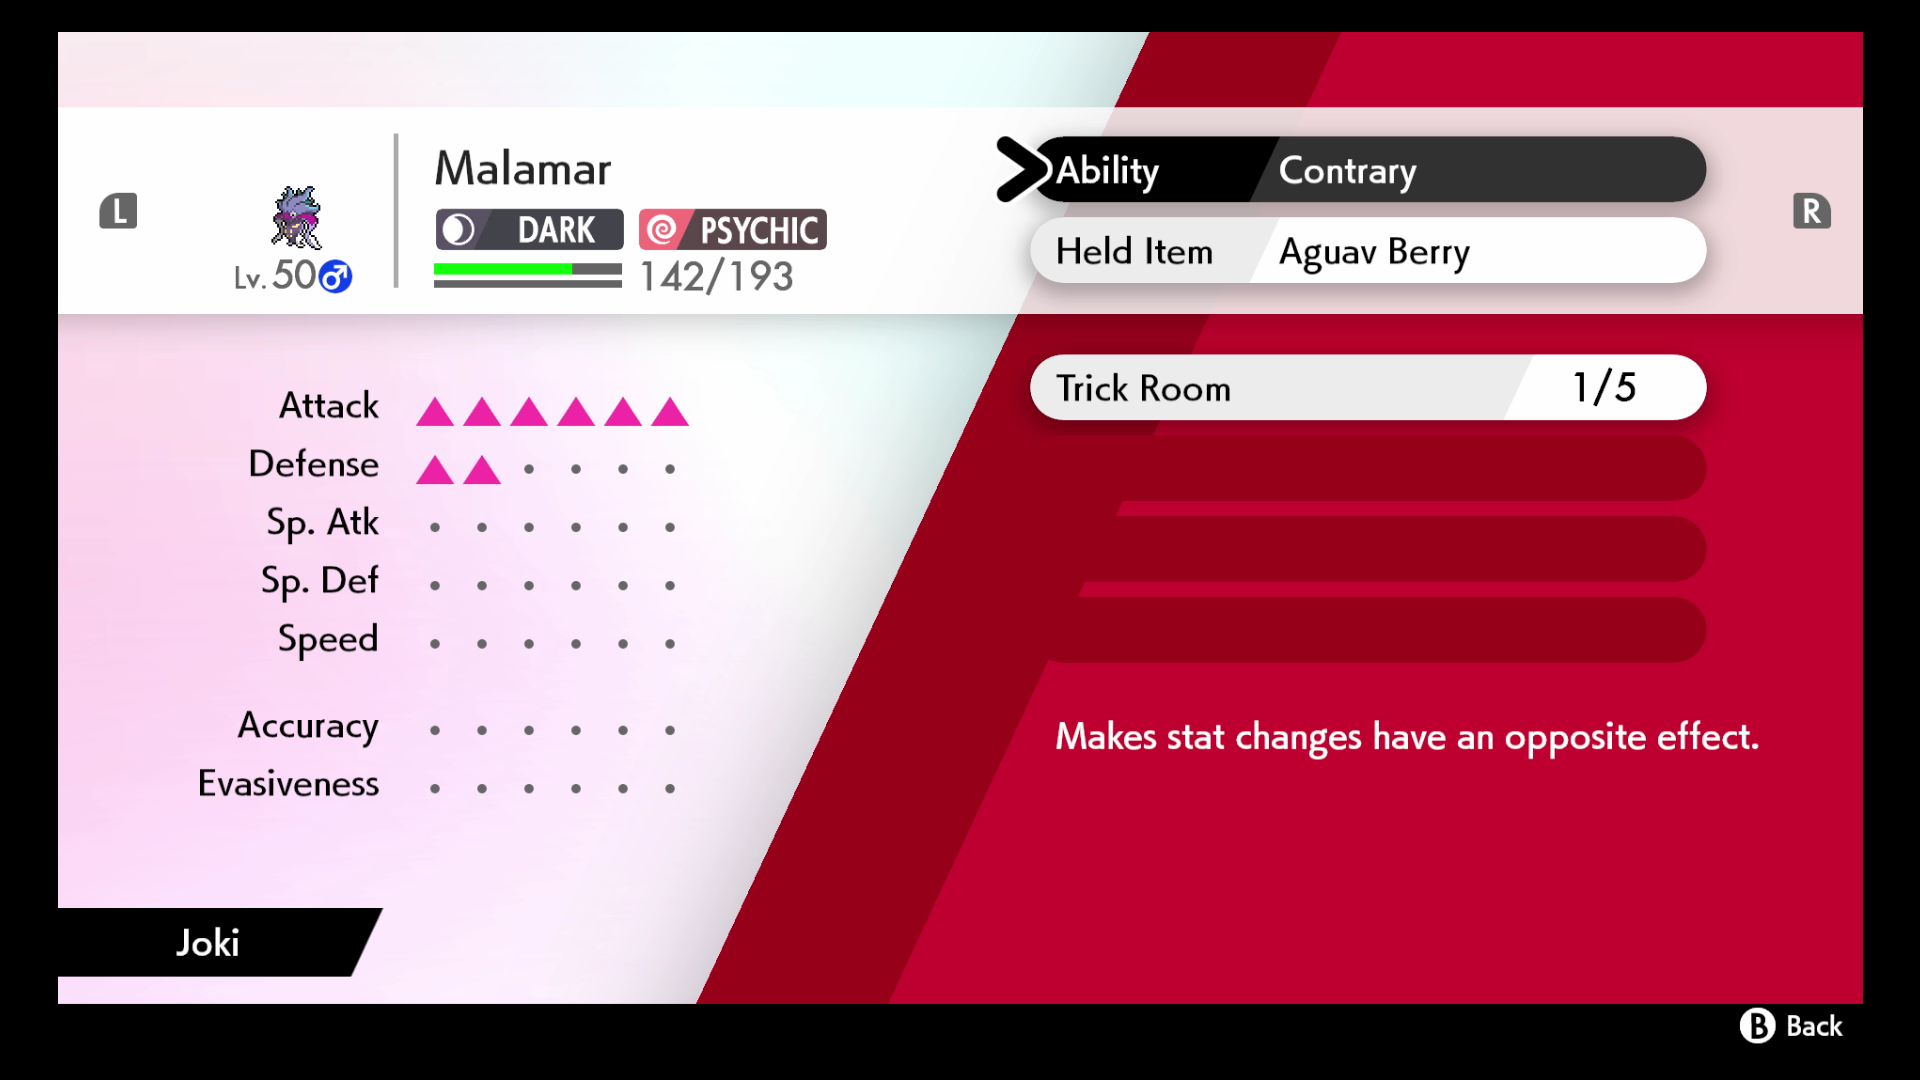
Notes: This was a really fun, gimmicky team; Clefairy ensured TR, but also boosted Malamar much quicker with Charm. Malamar's bad TR speed tier was awkward a few times, but it mostly worked. However, I had to Gmax Coalossal twice in similar circumstances: first a Coalossal1 dodged every one of my Superpowers and stalled out TR twice with Protects while Clefairy kept everyone healthy, it became extremely shaky once it started Mud-Slapping. It was a lead too, so I still had the backline to go through, Gmax Coal became pretty much my only hope. Similarly, against Leon, Inteleon kept Double Teaming, while Cinderace was Iron Heading Clefairy which had to heal constantly; on the TR reset turn, Cinderace crit+burned+flinched Malamar with Fire Fang (!!) (it was -2 from a Charm), it was an absolute nightmare. It became worse when Inteleon passed the double teams into Aegislash1. As soon as Clefairy went down, I Gmaxed Coal and got the coals going to wear down Aegi. Knock Off finally connected on Shield Aegi once, but did little damage. Thankfully, Coal OHKOd Charizard, and then Inteleon. Not a pleasant battle 400 at all.


Pokémon Sword-Shield Screen Shot 2020-09-02, 9.08 PM.png

MVP:


–––––––––––––––––––––––––––––––––––––––––––––––––––
Battles 401-410


@

Modest | Shell Armor
220 HP / 4 Def / 244 SpA / 4 SpD / 36 Spe
Hydro Pump / Freeze-Dry / Thunder / Life Dew

@

Timid | Corrosion
4 HP / 252 SpA / 252 Spe
Fake Out / Flamethrower / Sludge Bomb / Protect

@

Modest | Flash Fire
108 HP / 4 Def / 132 SpA / 12 SpD / 252 Spe
Flamethrower / Shadow Ball / Energy Ball / Protect

@

Jolly | Gulp Missile
252 Atk / 4 Def / 252 Spe
Dive / Brave Bird / Steel Wing / Superpower

Notes: I didn't feel good about this team, not only about having 2 Fire types in what would most likely be rain, but also 2 Electric weaknesses and no resist or even super effective move for them. But between Veil and WP, Lapras never fails to carry. Salazzle was a lot better than I expected, it bought Lapras some time to score KOs with FO and Sash bait. Cramorant was usually the revenge killer for the Salazzle slot, so Chandelure saw practically no action outside finishing up a Togedemaru once. I don't think Lapras went down a single time. The Leon battle went great, except turn 1 where in an attempt to save Dmax I FOd Rhyperior and Freeze-Dried Inteleon... but it was Inteleon2, it went for Muddy Water, got 2 acc. drops and F-D missed... I set my veil on Rhyp, OHKOd Charizard on the next turn, and finally KOd the Inteleon with Max Lightning, which was a blessing because this game could have gone very poorly if Inteleon stayed alive after Dmax was over (it had a bunch of double teams by then).


Pokémon Sword-Shield Screen Shot 2020-09-03, 10.11 AM.png

MVP:


–––––––––––––––––––––––––––––––––––––––––––––––––––
Battles 411-420


@

Jolly | Moxie
252 Atk / 4 SpD / 252 Spe
Close Combat / High Horsepower / Rock Slide / Aerial Ace

@

Impish | Sand Veil
244 HP / 4 Atk / 36 Def / 108 SpD / 116 Spe
High Horsepower / Rock Slide / Body Press / Protect

@

Brave | Iron Barbs
0 Spe IV
244 HP / 244 Atk / 20 SpD
Gyro Ball / Power Whip / Leech Seed / Protect

@

Modest | Bulletproof
4 HP / 252 SpA / 252 Spe
Clangorous Soul / Clanging Scales / Aura Sphere / Protect

Notes: Heracross and Sandaconda kind of took turns Dmaxing in this run, Sandaconda was able to handle most teams with Psychics/Fairies that threatened the other 2 sweepers. Sadly, I lost to Leon, he led Dragapult / Haxorus, and I completely forgot Dragapult1 has Acrobatics, so I felt comfortable dynamaxing Hera and going for the speed boost into Hax along with HH, hopefully get a KO, Moxie, and Rockfall Charizard on the following turn. Instead, Haxorus went for Breaking Swipe, weakening me right away, and Heracross lost like 70% from Acrobatics. In hindsight, I should just have switched Hera to Ferro and played "the long game", but I'm honestly not sure how I would have been able to position myself to KO Charizard without a prior Airstream boost, I may have ended up Gmaxing Sandaconda. Kommo-o could obviously not setup on that lead, so I don't know. In any case, I finished off Haxorus and got to +1 from Moxie and Knuckle, but obviously, Dragapult finished off Hera and Charizard swept with ease. This team was very weak to Charizard, relying on Heracross was probably too dangerous a plan to begin with. If I could have Max Guarded Hera and finished off Hax, I could at least have Rockfalled Charizard once, and might have been able to finish it off with something else, but this Heracross set is doomed with no Protect, so that's that. Sad about the run ending, but I'll start a new one!
 
Last edited:
In my continuing quest to utilize Wish, I looked to Flying, the main reason being Charizard. It can easily set up sun with Max Flare, then trigger its Solar Power to do absurd damage. Such power comes with great cost, though, at 1/8 (1/16th in dmax) HP loss per turn. However, unlike Obstagoon who I tried before in Mono-Normal, Charizard can use its item slot for the coveted Shell Bell to offset the health loss. While Charizard would still lose health fairly quickly, it definitely wouldn't be as quick as Obstagoon. With a Wish recipient decided, there was just the matter of a Wish user. Flying has a few options, but I liked Xatu the best at first. Its raw defenses aren't great, but Magic Bounce and Teleport are excellent. I went with a set of Feather Dance/Roost/Wish/Teleport with max HP/Defense, put a Gyarados on my team because it's Gyarados, then went to testing.

The results weren't terrible; Charizard was pretty threatening, and Xatu could pass Wishes with decent consistency. One big issue soon became clear though - Charizard's 4x Rock weakness. Pokemon like Cinccino and Gigalith threatened it from full HP, so even if I could consistently Wishpass to it, there were still multiple scenarios where it would just instantly lose anyways. Another issue was that Gyarados performed much worse than expected without the Shell Bell. It has little PP for Airstream, so it tends to bleed HP before too long from faster Pokemon. With this in mind, I considered replacing Charizard with a Life Orb user as another way to utilize Wish, which would let Gyarados use the Shell Bell instead. I initially considered Drain Punch Hawlucha before realizing Sigilyph could use Life Orb without recoil at all! The results were pretty great from Eisen's LO Alakazam, so I hoped Sigilyph could make it work to similar results. Its offenses are much worse, but it's also quite a bit bulkier on the physical side at least, and Airstream can help patch up the speed. It also didn't have a critical failure versus Scizor. I went with a set of Air Slash/Dark Pulse/Heat Wave/Solar Beam over Charizard, and the results were pretty good! I got 50 on my first attempt, which was nice. I did an exhaustive check of the sparring roster for Sigilyph (which it OHKOs slightly over 80% of), and realized Psychic was better overall than Dark Pulse. With that replacement, I was able to get up to 76 with this team. That being said, this was clearly lucky; this team had no protection against Sturdy Magneton/Magnezone/Gigalith (even Sand Stream for the last one) and owes its length largely to the pro strat of never seeing them.

While not dissatisfied with that streak, I had some more ideas. Rather than using Wish to offset Sigilyph's lack of healing, I tried Bulk Up Corviknight in place of Xatu. This at least countered Gigalith decently, and could also switch in on a lot of what Sigilyph would fail to OHKO and take damage from. But in practice it never went farther than it could with Xatu. I was also getting frustrated at running into Electrics with Gyarados, repeatedly having its portion of the legs cut short by them. While partially bad luck, this got me to consider Rotom-Fan. With the all-too precious Electric neutrality and Nasty Plot+Airstream (with more than 8 PP), I wondered if the mighty Gyarados was actually suboptimal. I tried Rotom over it and swapped it to the lead, and got an awesome 86 streak. At the time, this didn't feel too lucky since Sigilyph actually did pretty poorly without Wish as Rotom+Corviknight carried for ~70 battles of this streak, and it got me to consider 100 was feasible if I had a better third. As more attempts quickly revealed though, Rotom+Corviknight was nowhere near as ironclad as this test run had made it seem, so I lowered my expectations.

While I would've been satisfied with the 86 numerically, I hate showing off teams I know are suboptimal. Sigilyph just doesn't work very well without Wish. I first tried Togekiss in its place, then devolved into Togetic for some slow Wish+Work Up passing. Both actually seemed good, but Togetic seemed a bit rougher because only having 2 mons with attacking PP meant surpassing an 86 streak was very tight. So I went back to Togekiss, and was nearly ready to give up before...


No more suboptimal team!

Rotom-Fan @ Shell Bell
Timid/Levitate(!)
252 SpA/12 SpD/244 Spd
Rising Voltage/Air Slash/Dark Pulse/Nasty Plot

The star of the show. Rotom can ideally set up NP+Airstream, but even Airstream alone is pretty solid. The Thunder Wave immunity is a godsend; no worrying about Magneton! The Electric neutrality is nice, especially versus Pokemon like Magnezone and Boltund, but the flipside of the coin is that both of Rotom's STABs are resisted by Electrics. So ironically, while I'd still say it deals with Electrics better than Gyarados, it's by a much smaller margin than you'd expect. Basically, Rotom is far better at dealing with Electrics in the lead when it can set up NP, but it's much worse at dealing with them later in the battle (if it can't set up). Said scenario can be annoyingly common, too, since the AI prioritizes sending out Pokemon by their strongest move versus your mon, and I'm fairly certain it doesn't factor in enemy STAB. So most Electrics don't seem like particularly good options for the AI versus Rotom (for example: Rock Tomb is seen as a better option than a STAB Thunder), which ironically makes them more likely to come out when they're especially problematic.

Anyways, for only 3 attacking moves Rotom's PP is pretty great, totalling at 80. Rising Voltage in particular is excellent; it has 32 PP and is a 140 BP max move. Additionally, while Rotom can't utilize the Electric Terrain's 1.3 power boost, Rising Voltage's doubling is tied to whether the opponent is grounded, which helps Rotom's viability post-dynamax. This is particularly nice since Rotom has Max Guard via NP to stall out the last turn of dynamax and get double the Shell Bell recovery on the last mon, and at least with Rising Voltage there's essentially no power loss to doing this. On that note, it's worth noting that Rotom is a bit bulkier than the combo of its HP and defenses might indicate. Since Shell Bell isn't based off the percent of the user's HP, it's basically just mitigating damage taken from Rotom's high base 107 defenses.

Togekiss @ Scope Lens
Timid/Super Luck
4 HP/252 SpA/252 Spd
Air Slash/Draining Kiss/Flamethrower/Nasty Plot

Togekiss is a secondary sweeper that switches in on some lightly problematic Pokemon for Rotom, though I like to switch it in on things that even Rotom can handle perfectly fine to conserve its PP. As for the moves, the idea is pretty simple - boost with NP, heal with Draining Kiss, get speed boosts from Airstream. Similar to Rotom, but it at least gets the blessing of a real coverage move in Flamethrower. Aura Sphere has better coverage, but Flamethrower is significantly more useful as a max move. What is somewhat less simple is the Scope Lens+Super Luck combo, which might seem like a peculiar gimmick for a longer streak. Of course relying on a coinflip to win a match-up isn't an ideal strat, but it's nice to even have the option. And more importantly, having the high crit rate smooths over many lightly problematic match-ups. Take Exploud for example. Boomburst does too much damage to safely set up NP, so I instantly dynamax to mitigate the damage and just 2HKO while getting the Airstream speed boost. But with Scope Lens, this already ideal play has a large chance to completly nullify the ~30% taken that would be taken and conserve a turn of dynamax. It's okay if I miss the crit, but great if I do get it. And since this is sparring, every minor victory like this helps lengthen Togekiss's longevity. Over a long streak, several of these coinflips will go my way and noticeably extend Togekiss's reign.

Corviknight @ Leftovers
Careful/Mirror Armor
252 HP/76 Atk/4 Def/116 SpD/60 Spd
Drill Peck/Iron Head/Bulk Up/Roost

The glue that holds the team together. Corviknight's synergy with Rotom is incredible; it's neutral to both of its weaknesses, and so many of the annoyingly bulky Pokemon for Rotom are complete fodder for Corviknight. It can set up a couple (usually 3) Bulk Ups and go off and sweep. Drill Peck and Iron Head provide a total of 56 attacking PP, and in practice this is enough such that I tend to run out of Bulk Up first. Body Press is the typical option for BU Corviknight, but I wanted both STABs; Flying for Airstream and Steel for stronger coverage versus Rock-types. Body Press is also a pretty bad max move. Speaking of Airstream, Corviknight is decently fast at +1, reaching 142 speed, though it needs +2 to outspeed everything (notably Froslass). I considered giving it slightly more speed so it could outspeed Volcarona at +1 (which has 144 speed), and I think this would be a good idea. The damage from Heat Wave isn't actually that bad in dynamax, but the burn chance is unfortunate. As is, Corviknight's speed EVs are actually intended for when it's unboosted, the most important target being Gardevoir, who is annoying for Rotom and awful for Corviknight to be slower than due to Grudge. I then put in a little extra speed for Lycanroc-M, though this is super janky in practice due to the Salac Berry and Endure. The attack EVs serve two purposes; one, to let Corviknight 2HKO Gigalith unboosted with Iron Head, and to let it OHKO Solid Rock Rhyperior guaranteed at +6 with Iron Head, both of which are showstoppers for my leads actually it needs 84 for the latter I slightly messed up the calc lol. The rest of the EVs go to HP and special bulk (with 4 Def since it's wasted otherwise). Lastly, I just want to praise Mirror Armor, which is an incredible ability. Reflecting Intimidate, reflecting speed drops from Icy Wind (which tends to lock the AI into constantly trying to outspeed you), making moves like Shadow Ball not so risky, reflecting back special attack drops to ease set-up - this ability does so much.

Threats

:vanilluxe:
Most Ice-types are irrelevant in practice, but this is not, and it's really bad. Lightning is a very unfavorable range, and it does nearly 70% in return to Rotom with Ice Beam even in dynamax. Corviknight isn't an awful switch-in, but it's slower and takes up to 40% from Ice Beam, so even in the best case scenario it burns through a lot of Roosts while maybe setting up a Bulk Up or two, but realistically that's risking a lot of freeze chances that are basically instant death. I usually just have Rotom take the damage if it can. At least Togekiss doesn't care about this if it's leading.

:rhyperior:
This OHKOs both my sweepers with Rock Wrecker in dynamax, and needs boosts (or a crit ;)) to be OHKOd. Corviknight can switch into Rock Wrecker if it has at least 80% HP, then start setting up BU on the recharge turn. However this also has Heat Crash, which does upwards of 80% on a crit. Until Corviknight has a couple BUs it's impossible to even somewhat critproof versus this, so this is a very perilous Pokemon to see. I also need to set up to +6 to OHKO if I don't have dynamax, and I can't go for an Iron Head 2HKO because of Weakness Policy. The only upside is that if I don't get that fatal crit I'm in a great position with Corviknight.

:luxray:
Nothing OHKOs this unboosted, and even in dynamax Wild Charge does a lot to Rotom, up to 40%. This is particularly disastrous if seen at the end of a battle without dynamax, basically forcing a death if I don't get flinches, since unlike a lot of Pokemon some kind of pivoting with Corviknight and Togekiss is absolutely not an option versus this.

:dusknoir:
I went through a lot of iterations of Flying teams, and while many of the threats changed as I did this always sucked to deal with. Not weak to STAB any good Flying mon has with 135 base defenses plus Thunder and Ice Punch with an Expert Belt is a very annoying combination. Corviknight is theoretically a good switch-in, except it risks a ton of burn chances from Fire Punch (it seems to prefer this over Thunder Punch for whatever reason) so in practice it really isn't. I let Rotom or Togekiss take the damage (and freeze chance) usually, but that's not great.

:blissey:
Usually you put this in the damage calc to laugh at the 500% or whatever and take the massive Shell Bell healing, but obviously the tables are turned when you're using special leads. It's actually somewhat managable in a pinch for Rotom since +2 Lightning/boosted Voltage does around 40%. Corviknight does around 85% with its STABs, but Flamethrower actually does a good amount of damage and risks (potentially Serene Grace-boosted) burn chances, likely several times. Togekiss has the same issue, +6 Draining Kiss keeps it healthy but it's even more likely to get burned since it takes longer.

:lycanroc-midnight:
Rotom can muscle through this by immediately dynamaxing and taking around half its health, but I really don't like it doing this since Lycanroc can use Endure on the second turn and completely waste my dynamax. Corviknight isn't great either though, Fire Punch does a lot and risks many burns, just like Blissey.

:magnezone:
This is awkward as a lead, I NP and hope it uses Reflect instead of Light Screen, but honestly I've never seen that. NP and Light Screen basically cancel out, so from there I dynamax and 2HKO with Darkness, and hope for Reflect t2 but Thunderbolt isn't awful either. But the main reason it's on this list is that it's an unmitigated disaster if it comes in when Corviknight is trying to sweep. First, it can have Magnet Pull, preventing switching. The only hope there is to attack it until Corviknight gets attacked, then spam Roost until it sets up screens again (hopefully). I don't think this actually works though, but I haven't even gotten the opportunity to try it in a while. If no Magnet Pull, I can attack it once to break Sturdy, then switch to Togekiss on what is hopefully a second screen and KO with a crit Flamethrower...yeah. Since its sibling Magneton will not be on this list, I should explain it's so much less problematic when the inverse is usually true. Even if it has Magnet Pull, Corviknight can use Airstreams to outspeed Magneton even after Thunder Wave. And from there...it doesn't really use Electro Ball! The AI is notoriously bad at utilizing variable BP moves, and I believe the only reason Magneton uses Electro Ball is some specific AI that overrides the default to use Electro Ball if it's faster. But if it's slower it uses the "strongest" option, Flash Cannon. So, Corviknight actually wins, albeit paralyzed. And that's only if it gets Magnet Pull; otherwise, Rotom switches in for free on Thunder Wave, NP as it Magnet Rises, then 2HKOs with Dark Pulse while taking a Flash Cannon.

:morpeko:
I need to instantly dynamax versus this and Airstream, lest I risk taking two Aura Wheels (due to its own speed boost). Thankfully Lightning KOs after that. That being said I've considered just switching to Togekiss versus this, as suicidal as it may seem I have never actually seen this use Aura Wheel turn 1, only opting for Fake Out or Parting Shot. The former is fine, and while the second is annoying it's much better to see it before committing to dynamax than afterwards.

:quagsire:
The typing, special defense investment, Leftovers, Unaware, and Yawn is an obnoxious package. If Rotom has committed to dynamax I Max Darkness to lower its special defenses, then switch if I see Yawn, to Togekiss who hopefully gets some crits and/or flinches from Air Slash and Draining Kiss. I switch out every time Yawn is used, generally between Corviknight and Togekiss. Honestly I don't have an exact plan for this, I tend to play it by ear. But while it's unlikely to put me in a bad position directly, I have no set-up coming into whatever's sent out with dynamax possibly spent.

The Run

As per usual, the first leg is mostly a blur. I remember Rotom fainted a little early at battle 22, but Togekiss did decently and got to battle 30 with Corviknight. I don't think I was in a perilous position at that point, but 30 is overall a good leg so I took the heal.

The second leg started fine, but around battle 40 Corviknight got paralyzed by a Porygon2's Tri Attack. This is pretty unfortunate; Corviknight often doesn't even take a Tri Attack because Porygon2 uses Conversion2 first at which point Psychic is the strongest move. Oh well. A paralyzed Corviknight isn't useless, but still bad. But I ran into a Cinccino lead soon at 44. This is a borderline threat; I so often have a speed boost that it just goes down, Rotom can facetank Rock Blast for around half its health if it's Skill Link, and Corviknight is a workable switch though somewhat iffy due to Metronome. But here, I had no speed boost, Rotom was at half health, and Corviknight was paralyzed. I decided to test my luck with Corviknight. I usually try to set up Bulk Up, but I believe I was only at 60% health at the start too which made that iffy. I had to risk 2 Roosts to get my health up which I thankfully got, then I just went straight to unboosted to dynamax to buffer the damage and get defenses boosts with Steelspike. But I FPd the first turn, reset Metronome's boost the second turn with Max Guard, then FPd again, so I was out of dynamax with no defense boosts at all and health too low to accomplish anything. Corviknight fainted, and I resigned myself to the fact my streak was over. But then...it used Bullet Seed on Togekiss. I truly can't even fathom the thought process here. I don't think I had stalled out the Rock Blast PP, and even if I had Tail Slap and Triple Axel should still be stronger options even with the AI's shoddy calculations. Regardless of the reason, Togekiss KOd Cinccino and my streak lived. Rotom and Togekiss then managed to get all the way to battle 57 before it became too dangerous to continue, somehow turning this terrible leg into a good one. Obviously most of the fights there weren't too bad, but there was one super iffy fight against Morpeko where Rotom only had 1 turn of dynamax left, which prevents it from 2HKOing unless it sets up Electric Terrain for Rising Voltage, but then Morpeko could KO me with Aura Wheel. I decided to switch in to Togekiss hoping for Fake Out or Parting Shot, and got the latter into a Gourgeist which I set up NP on. Of course, since this relied on it not using Aura Wheel anyways I suppose it wasn't that much better than leaving Rotom in.

The last leg started out with Corviknight getting a disproportionate amount of use, particularly in a scenario where I swapped to it versus Alcremie (too bulky for Rotom) and got an immediate Misty Explosion into Boltund. Lots of Roosts to bait out Electrify and set up Bulk Up left it the victor, but particuarly screwed up its Roost PP. And then I ran into Lycanroc-M around battle 70, which as mentioned earlier is a huge burn risk. I decided to completely forgo Bulk Up to minimize burn risk and immediately Steelspiked it. Then Froslass came in and burned me. Well...fuck you! With burn and very few Roosts Corviknight was screwed, and came out for one last hurrah versus a Marowak and Lunatone battle at 72 before fainting. Once again Rotom and Togekiss had to carry the run, and somehow pulled on for a whopping 17 battles before the streak ended at 89. The road was somewhat bumpy, running into 2 Dusknoirs, a Lycanroc-M, and a Blissey that Togekiss dealt with but got burned, but they managed to clutch it out once again. As you can see I got really close to 90, but a Tentacruel lead quickly ended Togekiss's dreams.

Anyways, I'm very happy with this run. Running special leads was a nice change of pace (I went through the leaderboards at some point, and I believe every #1 streak except Psychic had a physical lead), no Intimidate is great and while maybe it's because of the dominance of Corviknight, I feel like special walls are a lot easier to deal with than the physical ones. And even if it didn't end up being the best run, Wish still proved to be viable.
 
I wanted to do a Ghost run with the same Shedinja as the Bug team while its usage was still fresh in my mind. What I got was nothing special compared to other scores and I didn't come up with anything new but it was a personal best for me and I'm happy with it. There's not a ton to say because Mimikyu and Shedinja have been written about plenty.

Ghost:
EhRSgkUU0AA1xwW.jpg


Mimikyu @ Shell Bell
Ability: Disguise
Shiny: Yes
EVs: 4 HP / 252 Atk / 252 Spe
Jolly Nature
- Swords Dance
- Shadow Claw
- Play Rough
- Wood Hammer

Standard Mimikyu.


Dragapult @ Leftovers
Ability: Clear Body
EVs: 68 HP / 252 Atk / 188 Spe
Adamant Nature
- Dragon Claw
- Phantom Force
- Fly
- Dive

These Speed EVs place Dragapult place it right above the ever-annoying Weavile, Ribombee, Boltund, and Alakazam. The only things that can outspeed it unbuffed are Barraskewda and Accelgor, which aren't very threatening to this team. I tried Steel Wing for the PP, but didn't think it was worth it. With that much PP, I would run out of Hone Claws (on Shedinja) first. And overall, this team is liable to completely fall apart because of one bad matchup, so consistency is more important than longevity. I will add that the multi-turn moves are useful outside of Dynamax to get recovery from Leftovers. I think if I use Dragapult again on a Dragon team, I will most likely go with Solar Beam over Dive with a Naughty nature. But Hone Claws is integral to this team, so I didn't want to run a mixed set.


Shedinja @ Safety Goggles
Ability: Wonder Guard
EVs: 252 Atk
Brave Nature
IVs: 0 Spe
- Baton Pass
- Shadow Sneak
- Hone Claws
- Toxic

I suppose this is now the standard Shedinja set. I did try out Baton Pass/Shadow Sneak/Hone Claws/Agility and Baton Pass/Will-o-Wisp/Hone Claws/Agility when I tried to run Marowak-A and Aegislash on this team. When I ran those teams, I used Lagging Tail instead of Safety Goggles (due to speed boosts from Agility leading you to outspeed many Pokemon), which of course added some additional weather threats.

Marowak-A hits like a train with Thick Club, and it's also immune to Magneton's Thunder Wave with Lightning Rod. The problem with Marowak-A is that it can't hold Leftovers. It has no way of healing (outside of Grassy Terrain from Mimikyu, but you have to sacrifice Dynamax, and at most you get two turns of healing) so it will inevitably be worn down. And without Thick Club it isn't worth using. I ran Flame Wheel/Shadow Bone/Bulldoze/Low Kick. That gives a ton of PP and OHKOs pretty much everything with a +1 in Attack and a +1 in Speed. Overall I couldn't make it work due to a lack of durability.

Aegislash seems more viable due to Leftovers. You can always Baton Pass back and forth to get Leftovers healing on something that Shedinja walls. I ran Iron Head/Shadow Claw/Aerial Ace/Sacred Sword on Aegislash and it worked well enough. Ultimately though, it is very squishy in its Blade form and that causes problems. Another problem with Aegislash (and Marowak-A) is that once Shedinja is down, it's basically useless. It isn't fast enough to sweep by itself, while Dragapult is certainly capable of winning ten battles on its own with decent luck. I would love to see someone use a Hone Claws+Agility Shedinja and make it work though!

I didn't think that Toxic and Shadow Sneak were both necessary on Shedinja, but they pretty much are, imo. When I was trying out my Agility sets without Toxic, I ran into problems with the likes of Aromatisse, Miltank, and other Wish and Recovery users. When I ran Toxic but not Shadow Sneak, Steelix and Magneton (and to a lesser extent Magnezone) become leg-ending or run-ending problems. I wanted to try out Will-o-Wisp for these threats, but then the healing walls become a huge problem and incredibly time-consuming. Shadow Sneak is just overall useful for setting up OHKOs for whatever it Baton Passes into.

Threats: Anything that outspeeds Mimikyu. Check out the Ghost Run by sb879 for a very similar threatlist.

Additionally, if you want more info about using Shedinja, check out my Bug Run (or any of the other teams with Shedinja). A typical battle for that team is similar to a typical battle for this team.

Oh, and in case anyone was wondering, I did have to transfer a whole new Shedinja after messing around with Toxic-less Agility sets.
 
Just some minor thoughts regarding the sparring leaderboard:
-A couple of alternate forms aren't specified, like Galarian forms and Urshifu.
-Is there any interest in the "across-all-types" category? I don't know, it's been nearly 3 months and even our most dedicated players are barely scratching trying all 18 types, which seems like a hefty minimum to even be in the running for this category.
-Would there be any interest in maintaining a ranking of the #1 streak of all the types? That way we can say objectively-true statements like "Rock is better than Fairy" (no offense doak, I know it's an old run ;)).
 
i would be slightly curious to high "no heal" streak. dont have to worry about wasting resources because your mon got para'd again. i suppose all the 3rd leg streaks are like this but i digress.
-Would there be any interest in maintaining a ranking of the #1 streak of all the types? That way we can say objectively-true statements like "Rock is better than Fairy" (no offense doak, I know it's an old run ;)).
thing is that one team (like rock) can win if they just don't see a threat that mauls them and you can theoretically luck out
also due to lack of time/resources/players you can't really say "rock is better than fairy"
 

turskain

activated its Quick Claw!
is a Community Contributor Alumnus
Just some minor thoughts regarding the sparring leaderboard:
-A couple of alternate forms aren't specified, like Galarian forms and Urshifu.
-Is there any interest in the "across-all-types" category? I don't know, it's been nearly 3 months and even our most dedicated players are barely scratching trying all 18 types, which seems like a hefty minimum to even be in the running for this category.
-Would there be any interest in maintaining a ranking of the #1 streak of all the types? That way we can say objectively-true statements like "Rock is better than Fairy" (no offense doak, I know it's an old run ;)).
The ranking for the top streak of all types, ordered by the top streak's length as a combined "type leaderboard" and highlight of the top streaks is in progress, and would replace the current top5 streaks with something that represents all types including ones with lower potential but I've been procrastinating on it.

Across-all-types indeed seems like potentially not populated after all, I've been waiting for all types to have 2-3 streaks each to add it but the quite large effort of streaking all types doesn't seem to have caught on. Right now the list would simply be the two players with the most types played, and everyone else far behind them.

I'm adding forme information with the next update, kinda forgot they existed and could be listed, lol.
 
i would be slightly curious to high "no heal" streak. dont have to worry about wasting resources because your mon got para'd again. i suppose all the 3rd leg streaks are like this but i digress.

thing is that one team (like rock) can win if they just don't see a threat that mauls them and you can theoretically luck out
also due to lack of time/resources/players you can't really say "rock is better than fairy"
"Rock is better than Fairy" was entirely tongue-in-cheek; Rock is imo the absolute worst type and Fairy should be one of the best, but the current records don't reflect that at all so I was just poking fun at that. And while there are outliers like that (mainly due to a lack of interest in certain types, as you note), I think overall the type ranking would be reasonably accurate from scrolling through the records just now. It also provides a quick way for prospective sparrers to exclaim, "Wait, no way Fairy is the 2nd worst type!", and to fix these inaccuracies.

Highest individual legs is interesting and I know is at least mentally tracked by top players to some extent, but honestly I don't think the ranking would look that different than the complete runs. But the bigger issue is verification. I can't really think of any good way to prove you got x battles without using a heal bar recording the run, which is definitely an unfair burden of proof.
The ranking for the top streak of all types, ordered by the top streak's length as a combined "type leaderboard" and highlight of the top streaks is in progress, and would replace the current top5 streaks with something that represents all types including ones with lower potential but I've been procrastinating on it.
Ah, cool. I don't think I want it replacing the top 5, though. As is, and will probably always be the case since some types are just the best, there are duplicate types in the top 5 where the #2 runners would lose recognition for what are still extremely impressive runs.

EDIT: Also, another minor thing: Eisenherz made a useful speed-tiers list in his 96 Fire write-up which I've been getting to from the leaderboard, but it should be directly linked with the other sparring resources.
 
Last edited:
Curious, why Careful nature and Sitrus Berry? Did you really get any mileage whatsoever out of Crunch or Poison Jab?

Neutral Liquids deal more damage than supereffective Leech Life because of WB, and it’s not worth using Crunch for things like Jellicent when you have Power Whip or Scrafty.

Mystic Water or Life Orb with an attack-boosting nature widely expands your OHKOs, including things that resist water in dmax, and Leech Life is enough to restore some HP if you even bother to use it.

Without the pretty irrelevant STABless moves, you can easily fit Protect or Wide Guard, or Soak, which broadens the number of things weak to that Power Whip. There’s no major loss in running both Protect AND Wide Guard, even.

Araquanid is very strong but has the capacity to be so much stronger than what you’re doing with it.
You are right I definitely could have done more with him, though crunch did save a run because of a shedinja
 
Wish, wish, wish...I sure do talk about this a lot without it ever showing up in my final teams! But damn it, I swear there's something to it! I didn't talk about it a lot in my Flying write-up, but for as much as I love the prospect of HP-draining gimmicks with Wish, running with Rotom/Corviknight/Togetic made me realize the way forward for Wish was to just use a normal lead and use Wish to smooth over their bad match-ups. With that in mind, rather than look for a gimmicky Wish recipient, I started by looking for the best Wish-passer. The clear winner seemed to be Umbreon, making Dark my next type. Any Wish-passer is realistically going to be almost nothing but support moves, so Umbreon's completely defensive stat spread is perfect. It also has a fairly slow pivot option in Baton Pass off of 65 base speed, which isn't the slowest but still good with a minimum IV. For the lead, Krookodile and its incredible Moxie ability was the obvious choice. And while I claimed to have an epiphany about HP-draining gimmicks...well, I couldn't help myself - I made my third a Life Orb/Drain Punch Urshifu to be used as a secondary sweeper.

Initial testing didn't go great; part of it was just bad luck in running into Krookodile's bad match-ups relentlessly, but also it was quickly clear that Urshifu didn't really do anything. Outside of a Bug-neutrality it couldn't act on very well, Urshifu had no switch-in utility and mostly had trouble with the same mons Krookodile did. Trying to integrate a secondary sweeper didn't seem worth it in the end; Krookodile was just so good. To make my core more resolute, I replaced Urshifu with AV Incineroar, which had useful Bug and especially Fairy-neutralities. Wish also greatly helped with AV's usual drawback. This worked out to be more stable, but one huge problem became clear: Golisopod. While many threats can be neutralized by Moxie or Airstream boosts, Golisopod was always garbage to deal with. It still survives Airstream at +1, gets priority with First Impression, and can come back for more with Emergency Exit if I'm not careful (at +1, Knuckle+Airstream would be the way to go). Incineroar worked okay if I hadn't committed to dynamax (Airstream from Incineroar forced it out), but if I had, Golisopod was a massive problem. Dark only has one real option to switch into this without dynamax available, but fortunately it's a good one: Mandibuzz. I made one attempt with Mandibuzz on the team, and...


Now that's a First Impression I can get behind!


Krookodile @ Shell Bell
Jolly/Moxie
36 HP/252 Atk/220 Spd
Earthquake/Knock Off/Aerial Ace/Low Kick

Krookodile is absurdly good; I honestly think it's the best lead in sparring after Cinderace and Rillaboom. It has 112 total attacking PP, no 4x weaknesses, and excellent coverage (both super-effective and neutral). It's also perfectly usable outside of dynamax due to having accurate moves and strong dual STABs. So even versus leads it has to 2HKO, it can usually amass some combination of attack and speed boosts, so for the final Pokemon it has to face outside of dynamax it's almost always fine. Admittedly it's not all rosy; it's weak to a ton of bad types, namely Water, Fairy, Fighting, and Grass. Still, none of these are critical failures and pale to its many boons.

Anyways, most of the moves are easy picks: Earthquake is the best Ground move, Knock Off has a slightly weaker max move than Crunch in exchange for 8 more PP and being much better outside of dynamax, and Aerial Ace not only leads to the incredible Airstream but has useful super-effective coverage (Bug, Grass, Fighting). The last slot has the most slack, I initially had Iron Tail to make a couple turn 1 match-ups less awkward, then tried Bulk Up for reasons I can't fathom, and finally settled on Low Kick for its attack-boosting effect, and more importantly its high PP. On that note Bulldoze might be a workable option over Earthquake, since while the power drop is notable (especially outside of dynamax) the 16 extra PP would be amazing. I don't really like having both STABs under the standard 130 max power, though. Politoed for example is a 44% range with Earthquake's Max Quake, and that's something that's really, really nice to not take a hit from, even if it's just a range.

Mandibuzz @ Leppa Berry
Bold/Overcoat
252 HP/252 Def/4 SpA
Iron Defense/Nasty Plot/Air Slash/Roost

Mandibuzz's bulk and useful Flying-type lets it switch in and beat a number of problematic Pokemon, but keeping momentum with its usual fare is tough. Hence, this wonky set. Iron Defense lets it dominate many problematic physical Pokemon, and its natural bulk is so high that it tends to be easy to critproof. From there I set up to +6 with Nasty Plot, then ideally sweep with Airstreams. And I do mean +6, NP PP be damned. Mandibuzz is very weak and genuinely needs that to score a lot of KOs, even in dynamax. While mono-attacking might seem a bit dangerous, Krookodile can switch into Electrics and Rocks that give Mandibuzz a hard time even set-up, though at +6 Def/+6 SpA even most resists lose eventually.

The item choice was tough, since as you can imagine Umbreon is using the Leftovers. I went with Leppa since as the lone damaging move Air Slash is liable to run out of PP. In practice this tends to happen around the same time Roost does, though, so I don't think Leppa is optimal. But honestly, what would be? I really can't think of anything that would help that much. Roseli Berry for a panic switch from Ribombee (instant dynamax and Airstream)??? As for the ability choice, Big Pecks is more helpful than you'd expect since both Golisopod and Escavalier have defense dropping moves, but the Spore immunity for Amoonguss from Overcoat is too helpful to pass up. Sandstorm immunity is nice versus Crustle, too.

Umbreon @ Leftovers
Sassy/Synchronize
252 HP/4 Def/252 SpD [0 Speed IV]
Work Up/Heal Bell/Wish/Baton Pass

Umbreon rounds out the team, providing Wish support for when taking a heavy hit with Krookodile is unavoidable. It's also Umbreon's only healing move for itself, but 16 Wishes is far more than what's needed for Krookodile and so this usually isn't a problem. Heal Bell can heal the team's statuses, and while Krookodile is resistant to the usual status problems more than most (Thunder Wave immunity, Accelgor prefers Leech Life), Pokemon like Milotic, Passimian, and Froslass are still problematic. There's also Pyukumuku, where Synchronize inflicts its own Toxic on it which is incredibly helpful.

While Baton Pass is mainly there to safely pass Wish, there's no reason I can't pass some boosts at the same time. Umbreon doesn't have much, but Work Up, well, works. Raising both attack stats when I have a physical and a special Pokemon to pass to might seem cute, but in practice passing to Mandibuzz is worthless since it has a better boosting move and capability to set up. But even just passing to Krookodile is invaluable, mainly versus bulky water leads so it can OHKO them without taking a hefty hit.

Threats

:ribombee: :mienshao:
These do a ton of damage to Krookodile and I can't do anything about it unless I have an Airstream boost. Mienshao does more damage, but on the bright side it can opt to use Fake Out instead of HJK since it doesn't OHKO.

:dedenne:
This is a very frustrating Pokemon to be walled by...with its Air Balloon, it resists Krookodile's entire moveset. And it's faster too! If it attacks it's fine (I just Airstream+Quake which is a good position to be in), but it's fairly likely to Charm and things can get real bad real fast from there. I wish I had something to switch into it, but I really don't.

:kommo-o: :kingler: :crawdaunt: :politoed:
These are all slower Pokemon that are very bad in the lead position, all dealing 60+% to Krookodile, but after a single Moxie boost they are just OHKOd. Politoed is the worst since I can't switch into it - it does a lot to Umbreon, but worse it can use Perish Song which I will BP to Krookodile. At least Max Quake dampens the damage. Kingler and Crawdaunt are especially dangerous for Krookodile since Crabhammer has 1/8 crit rate, and this also makes setting up on them with Mandibuzz dangerous, especially since both have ways to get faster than Mandibuzz. Kommo-o is also difficult for Mandibuzz - Clangorous Soul+Draco Meteor is very dangerous, so the safest way is to switch in on Close Combat, then immediately dynamax and Airstream, OHKOing due to the special defense drop. But unboosted Mandibuzz isn't exactly dangerous, so...

:slurpuff:
This isn't even a guaranteed KO for Krookodile at +2. Thankfully, its only way to attack is a weak Misty Explosion, which Umbreon only takes around 30% from so I just bait it out usually. But it's likely to set up Sticky Web which can make progressing afterwards difficult.

The Run

Honestly, I don't remember a lot of this run in general. Since the object is to keep Krookodile healed up with Wish and status can be healed with Heal Bell, outside of the constantly dwindling PP team state tends to be relatively constant battle to battle which is usually what makes for the more interesting fights. And Krookodile's dominance makes it very rare for a fight to go poorly from full health. I know my first leg went for 33 fights and Krookodile just ran out of PP. The second went for 28, but this wasn't because I really needed to heal. Krookodile had a few battles left of PP but was "only" at 60% HP, so I was scared I would run into Ribombee lead or something and lose. Of course, I could sack Krookodile and send in Mandibuzz to dynamax which would give me an okay chance at winning even in that scenario, so this was just really needless caution. And given how close this run got to 100, I definitely regret it! My mindset was that 28 was still a good leg even if the heal wasn't strictly necessary, but obviously this team is capable of a bit more. The final leg lasted for 35 battles, with no heals to tempt my wimpy self. I did realize something during this leg that made the premature heal even worse - one of the random leads I was scared of was Starmie, and during this final leg I ran into basically this exact scenario with Krookodile at nearly 2/3 exactly, giving Starmie a 50/50 chance of KOing me. But I realized that Umbreon can actually just stall out Starmie due to Life Orb recoil, though it is taxing on Wish PP. I did also run into a perilous situation, though one of my own making - Conkeldurr, while unable to hit Krookodile with Fighting moves in dynamax to using Focus Punch and Low Kick, is still unlikely to be 2HKOd by even Airstream. I decided to go for the 2HKO and Knuckle if I failed, but I missed the 2HKO and it used Stone Edge and KOd itself with LO recoil, depriving me of a precious Moxie boost. Even if I had to burn the last turn of dynamax, getting that boost would definitely put me in a better overall position. The Heracross after went down easy, but the last was Aromatisse, which was not OHKOd by +1 Earthquake (+2 or more would have, though). Moonblast had a 50/50 shot of OHKOing Krookodile outside of dynamax, but I realized I could weaken it by using Knock Off to remove the Pixie Plate, ensuring Krookodile could at least survive. But it did more than that, since Aromatisse just used Wish! Anyways, after that I simply ran out of PP by battle 97 and went down to a Wishiwashi.

I'm quite happy with this team, and I'm very glad I finally got to really show off Wish's potential. I think this team definitely can break 100, and while I was tempted to go back and try for that, if I'm going to grind out a long run I can think of loftier heights than that...
 
LuchaDeedee officially falls at 308 wins. The loss was to Preschooler Rennie. I ended up losing because I let Polteageist-4 set up Shell Smash in my face instead of straight up attacking it and it just rolled me. Anyway, here's the last run of battles with LuchaDeedee. As a recap, here's the full team and threatlist below.
LuchaDeedee Playlist
So first off, the team above was made before the Isle of Armor DLC came out. This team was made after it and for me personally, it's a lot more fun. Also, yes! This is a SwSh version of my LuchaLele team from the Battle Tree! Anyway, here's the team:


Hawlucha @ Psychic Seed
Ability: Unburden
Level: 50
EVs: 252 HP / 252 Atk / 4 SpD
IVs: 31/31/31/xx/31/31
Adamant Nature
- Low Kick
- Acrobatics
- Tailwind
- Protect

This is the same Hawlucha from that Tree steak! Now taking residence in Galar, Lucha wanted to have another go at a facility and Galar's Battle Tower is probably the best place for it. The set is completely unchanged from the previous team but I'll still go over what it is. First up, with Psychic Seed and Unburden, Hawlucha will out-speed everything in the Battle Tower. Yes, everything; unless it gains an item or is switched out for whatever reason. Low Kick is used over Hawlucha's new TR move, Close Combat, as it has more PP and also doesn't lower my defenses. I did briefly consider CC, but the loss of the Special Defense boost from Psychic Seed proved to be a little problematic so I nixed the idea. Acrobatics is also used as it is Hawlucha's strongest accurate Flying-STAB. Tailwind is used for Speed control and it is FANTASTIC with gen 8's new auto-updating speed tiers. With it, Indeedee and friends can blast away and will have almost no need to protect themselves on the turn Hawlucha is Tailwinding. Protect is, as always, used for stalling out turns and scouting when necessary.


Indeedee @ Choice Specs
Ability: Psychic Surge
Level: 50
EVs: 4 HP / 252 SpA / 252 Spe
IVs: 31/xx/31/HT/31/31
Modest Nature
- Expanding Force
- Mystical Fire
- Energy Ball
- Dazzling Gleam

Alright, first of all, I do miss Tapu Lele, but Indeedee is a pretty nice replacement. I went with male Indeedee as it had more base Special Attack than the female variant. I went with Modest with max Special Attack to allow Indeedee to hit as hard as possible. The Psychic/Normal typing is pretty nice and protects Indeedee from dangerous Ghost-type attacks. Of course, most super effective Dark or Bug-type attacks can still destroy it but that's not so bad, right? I've been trying to get this guy to work since I found out it was the new Psychic Terrain setter, almost to the point of giving up. Leon's Charizard proved to be a problem and everything I tried just didn't work. Until the DLC happened... You see, there's a new move called Expanding Force. And what does it do? Well, it's a measly 80 BP move, but when Psychic Terrain is active, it gets a 1.5x boost in power in addition to the boost from the terrain itself and it becomes a spread move. What does this mean? Well, anything that isn't immune or doesn't resist Psychic is usually OHKO'd by Specs Indeedee. Most Dynamax stuff also goes down to EF+another attack. It's a huge buff to Indeedee's movepool. The other moves on Indeedee are rarely clicked though. I think so far, I've clicked Energy Ball once or twice and Mystical Fire is pretty nice for taking out some Steels but Expanding Force is usually better anyway as the partner can pick off what Indeedee doesn't OHKO. Finally, Dazzling Gleam is used to take out Dark-types that Indeedee can't kill with EF. It's pretty weak, but still does decent damage thanks to Choice Specs.


Marowak-Alola @ Thick Club
Abulity: Lightning Rod
Level: 50
EVs: 4 HP / 244 Atk / 4 Def / 4 SpD / 252 Spe
IVs: 31/31/31/xx/31/31
Jolly Nature
- Fire Punch
- Shadow Bone
- Bonemerang
- Protect

Another new the toy the DLC gave to me! Marowak might seem like a bit of an odd choice for a Tailwind team, but it's actually not so bad. Thanks to the lower IVs of the Tower Pokemon, Marowak can still get the jump on quite a bit after Tailwind is up. Plus, it can still take a hit or two. Thick Club is the best item for Wak as it doubles its Attack stat. Lightning Rod is also used to protect the team from things like Thunder Wave and other Electric-type attacks. Fire Punch is used over Flare Blitz as it doesn't hit Wak with recoil and still does ok damage to a decent chunk of the Tower roster. Shadow Bone is used as its Marowak's most accurate Ghost-type STAB. The chance to lower Defense is also pretty damn nice as well. Bonemerang is used for coverage as its accurate and it hits twice. The 90% accuracy can be a bit of a pain sometimes, but it hasn't really been a huge issue (except for a Morpeko that I missed 3 times in a row...). With Tailwind, Marowak hits a decent speed tier of 212.


Duraludon @ Life Orb
Ability: Stalwart
Level: 50
EVs: 12 HP / 244 SpA / 252 Spe
IVs: 31/xx/31/31/31/31
Modest Nature
- Dragon Pulse
- Flash Cannon
- Thunderbolt
- Protect

And finally, we have Duraludon. I love this guy. I think Duraludon fit pretty well on the team, and I felt with Marowak's Ghost coverage, Hydreigon was no longer needed. Duraludon provides some pretty nice Steel-coverage though, which is sorely missed as Metagross was snapped along with Lele. First, I should maybe address Thunderbolt on a team that features Lightning Rod. Thanks for Duraludon's exclusive ability, Stalwart, I can ignore that Lightning Rod and have Duraludon still shock all the pesky Electrick-weak Pokemon for pretty big damage. Dragon Pulse and Flash Cannon are pretty damn good STABs to have. With Life Orb, Duraludon hits super hard and can take out a damn good chunk of the AI mons. The low Special Defense can be a bit of a problem sometimes though. 12 HP EVs are used so Duraludon can hit an odd-numbered HP stat for Life Orb recoil.

Trick Room - The team still struggles with Trick Room quite a bit. Most of the setters can be taken out with Indeedee, but a lot of the Psychic ones are a pain. Musharna is a big one that comes to mind. Mimikyu is another one as it takes a free hit thanks to Disguise. Other than that, as long as Trick Room doesn't go up, you should be fine.
Neutralizing Gas - Gen 8 has brought a new pain in the ass in the form of Galarian Weezing. If it rolls Gas, it cancels out the Psychic Terrain activation which also stops Psychic Seed from consuming which stops Unburden. It also shuts off Lightning Rod and Stalwart which are all pretty important. Pretty much, Weezing can shut down each of the team members in a different way and should be considered public enemy #1 if it comes out with the ability. Fortunately, all abilities that are suppressed will reactivate if it goes down so that's a plus.
Opposing terrain - Gen 8 has also brought on other Terrain setters in the facility roster! Rillaboom, Pincurchin, and the aforementioned Weezing-G can all reset Indeedee's Psychic Terrain. Fortunately, Hawlucha's Seed will activate regardless but Indeedee loses a lot of power without Terrain. Usually switching out and bringing Indeedee back later is the best option for dealing with this.
Quick Claw - A lot of the stuff carrying Quick Claw can be scary. The fossils all have Quick Claw sets with Fishious Rend and Bolt Beak that tear the team a new one. Perrserker, of all things, can also be a problem with Quick Claw+Tough Claws+Play Rough.
Heliolisk-1 - This set can be a little annoying as it carries Glare. Since Glare is a Normal-type move that can paralyze, Marowak's Lighting Rod doesn't block it. Plus, thanks to its spread (SpD/Spe), it has a chance to live Expanding Force which can make things pretty difficult. Approach with caution.
Contact abilities - Flame Body and Static can be frustrating and can both abilities can stop Hawlucha in its tracks. Marowak can be hit by Static but it's not so bad as Shadow Bone and Bonemerang both do not make contact.
Fake Out - While not a huge problem, the AI will still try to Fake Out Hawlucha if it has the chance to do so since Lucha is the only member of the team that can still be hit with priority.
EDIT: I forgot to note that I replaced Energy Ball with Hyper Voice on Indeedee at some point. I think it was when I was at 250 wins. I have updated the rental code to include this change.
 
Last edited:
Hi! Reporting a Dragon streak of 61 on Restricted Sparring. I've lurked on the Restricted Sparring bit of this thread for a while, but haven't posted any streaks since the teams are not usually very original and the streaks are not usually the best on the leaderboard. But I picked up Shield for the first time in a while yesterday, and ended up getting a (slightly!) better Dragon streak than any that are recorded here, so I feel obliged to document it a little bit.

dragon rs.jpg


The team is basically sb879's but with Dracozolt instead of Flapple, so I won't go into too much detail - but here they are:

Dracozolt @ Shell Bell
Jolly/Hustle
4 HP/244 Atk/4 Def/4 SpD/252 Spe
Wild Charge/Outrage/Low Kick/Aerial Ace

The monster. It just kills everything. You know it by now.

Kommo-o @ Muscle Band
Jolly/Soundproof
4 HP/244 Atk/4 Def/4 SpD/252 Spe
Drain Punch/Outrage/Iron Head/Dragon Dance

I actually liked this a lot: it was fun to use once Dracozolt was dead, and useful for the odd key moment when it was alive. It's sb879's set, but just with a Muscle Band instead of Yache Berry, since Dracozolt isn't quite as scared of Ice-type attacks as Flapple.

Turtonator @ Leftovers
Bold/Shell Armor
244 HP/252 Def/4 SpA/4 SpD/4 Spe
Body Press/Flamethrower/Iron Defense/Rest

It's never not funny to switch this in on physical Froslass.

The Run

I think I was quite lucky in my opponents, especially on the last leg. I was playing conservatively, not really expecting a big streak, so I healed at (I think) 16 and 26. From there, Dracozolt powered through impressively, eventually having to switch into a Seismitoad after fleeing something else, and getting poisoned by Poison Jab on the switch, some time in the late 40s. It struggled on valiantly, and sacrificed itself to Mienshao in battle 51 so that Kommo-o could tank a HJK and Dragon Dance/Drain Punch to keep the streak going.

Kommo-o pushed on fairly well, but went down to a Rhyperior in battle 59, and then an already tired, PP-depleted Turtonator did a valiant job of adding a few last wins before lead Appletun on battle 62 ended any further hopes.
 
Cinderace is a ludicrous lead for RS, in fact it may very well be the best one. It has tons of attacking PP, Libero for perma-STAB and a way to weasel its way out of strong hits in conjunction with its incredible speed, and a Mold Breaker Fire-move for the dreaded magnet duo. Volcarona is also excellent, being able to set up on many of the usual physical walls and easily sweep with its amazing stats and Quiver Dance. But after that...what do you run, really? Eisenherz ran Darmanitan as a secondary sweeper in his 96 run, and while it worked pretty well I didn't like its complete inability to switch in, forcing it to be used as a secondary sweeper, an always-precarious role.

But it's no surprise he tended towards that option, since Fire's defensive options aren't great. Intimidate Arcanine/Incineroar offer some solid utility, especially since Intimidate alone can help Volcarona set up, but neither has good ways to heal. Arcanine has Morning Sun with its terrible 8 PP, while Incineroar is saddled with Drain Punch and/or Rest. Plus, they desperately want the Leftovers that Volcarona also craves. So, I thought perhaps it wasn't worth it at all trying to make the sturdiest core, especially since Cinderace/Volcarona alone is a great pair. Instead, I started by focusing on supporting said pair with Wish. What Fire-type learns Wish? Well...Flareon. But hey, it still has 110 Special Defense and a fairly slow Baton Pass, so I thought it could work well.

I ran into a rather paradoxical problem when testing, though: Cinderace was too good to get much use out of Wish. I'm not saying scenarios don't exist where it takes heavy damage, but they're far and few between. And unlike Umbreon and Krookodile, Flareon couldn't BP Work Up to help Cinderace with any match-up, really. There was also one horrendous match-up: the dreadful Pyukumuku. There just wasn't a good way to get past with it without risking several chances at Toxic. Flareon could run Heal Bell to remove it later, but I kind of hated to run this since Cinderace is otherwise so resistant to the usual status problems: it OHKOs Magneton, Froslass, Passimian, and Amoonguss, plus Volcarona can deal with the bulkier burn problems, generally. Besides, I'd already decided that Flareon's contribution to the team was marginal at best. So I sought out a new third Pokemon, focusing on dealing with Pyukumuku. While my mind initially wandered to many flavors of set-up+Rest, Rest is a long-term suicidal option versus something with Spite, so I just didn't see that working out. But beyond that the only good way I saw to deal with this was to have something immune to Toxic. Which consisted of...Salazzle. It may have had nice offensive stats, but its non-existent bulk and offensive movepool made it seem like a pretty desperate option.

Hmm...maybe not that desperate. What Salazzle lacks in coverage it makes up for in spades in disruptive options. In particular, it learns Encore. There's a number of Pokemon that can be mostly assured to use a non-damaging move, so Salazzle can come in, Encore, get 2 Nasty Plots and sweep. Furthermore, while its statistical bulk may be awful, Fire/Poison blesses it with three 4x resistances, so there's a couple of Pokemon it can set-up on even without the aid of Encore. And because it's a Poison-type, it can use Black Sludge to keep healed up while letting Volcarona keep its Leftovers! It sounded better and better in my head the more I thought about it.

Testing went really well: my first leg went for 43 battles, and that was with a bad misplay having Volcarona faint at battle 25. And uh, then Cinderace fell on the first battle of the second leg. A Rhyperior lead shredded most of my health, and the Rotom at the end with no dynamax left required a Zen Headbutt to hit lest Volcarona risk several chances of Discharge paralysis, and I missed and fell. I reset and on my next attempt got a 47 leg, then got demolished by a Barraskewda at battle 67. Salazzle was trying to sweep, and it got Drill Runned and then I forgot it had a Rindo Berry with Volcarona. As I'll talk about more later though, this was a perfectly salvageable position, and given how high my legs had been I was pretty convinced this team had what it took to go far if I stopped making bad misplays.


Like, #1 far.


Cinderace (Gmax) @ Shell Bell
Jolly/Libero
252 Atk/4 SpD/252 Spd
Flame Charge/Low Kick/U-turn/Zen Headbutt

The god itself. All of Eisenherz's reasoning with Cinderace's moves seemed sound to me, so there's little variation. The one change is that I used Flame Charge instead of Fire Punch, equivalent as a max move with Gmax. While nowhere near the insane PP boost Branch Poke grants Rillaboom, an extra 8 PP is still much-appreciated. The big downside of course is that it also deprives Cinderace of an option outside of dynamax. In fact, that earlier situation with the Rotom I mentioned was a non-issue if I had Fire Punch. Oh well! At least Flame Charge's speed boosting effect is nice versus Mandibuzz and Cloyster leads. I will say U-turn's ability to hit-and-run is useful in these post-dynamax scenarios, taking some of the pressure off of Volcarona. It's nice versus some leads like Goodra and Quagsire, too.


Salazzle @ Black Sludge
Timid/Oblivious
252 SpA/4 SpD/252 Spd
Flamethrower/Sludge Wave/Encore/Nasty Plot

I basically described how Salazzle works earlier, so I'll talk about some niche things. Sludge Wave is used over Sludge Bomb since it's slightly stronger, though honestly this isn't as important as the fact that its Poison chance is lower. While poisoning last Pokemon Pyukumuku can conserve some attacking PP, Salazzle's isn't that valuable anyways. And poisoning lead Pyukumuku is generally detrimental, since if I get it close to when I'm edging its health down to minimize Innards Out-HP loss, I can't set up on it much before it faints. Speaking of Pyukumuku, any team with a Toxic-immunity can switch stall Pyukumuku, and since in this case I essentially have two Pokemon with Leftovers any Pyukumuku sighting means Salazzle and Volcarona can heal up to full. Meowstic also ends up granting this boon, since its Disarming Voices net very little damage and it's harmless once stalled out of those and Yawn.

Lastly, the ability choice. Not that Corrosion accomplishes anything anyways, but Oblivious does have one important application: Taunt-immunity versus Gyarados. This is a massive problem for Cinderace if it has Intimidate (and still bad without it), but Salazzle helps out a lot with this. I can go to Volcarona on the Icy Wind, then to Salazzle on the likely Taunt and Encore it. "Likely" isn't guaranteed though, and in fact the one time I tried this on this run it used Scald instead. But even then Salazzle helps, because Gyarados will now use Scald again since Salazzle will be in KO range. This means I can switch in Volcarona with its speed intact, letting it get several Quiver Dances as Gyarados repeatedly tries to nerf its speed before wisening up with Taunt. While it doesn't leave me with boosted speed, it's still a respectable position to be in.

Volcarona @ Leftovers
Bold/Flame Body
252 HP/216 Def/12 SpA/28 Spd
Flamethrower/Bug Buzz/Giga Drain/Quiver Dance

Awesome as ever. I think every other Volcarona on the leaderboards has used Fiery Dance, but I didn't see a lot of point to it. The thawing effect only really matters versus Porygon2, and with Quiver Dance's special defense boost and Leftovers that's not terribly consequential (also, it can Trace Libero which means TR turns it into a Psychic-type at which point it will prefer Psychic!). It's the paralysis I'm worried about there. There's also the special attack boost, but with Giga Drain to heal my initial KOs often need to be done with that instead to keep healed up. Flamethrower meanwhile has extra PP, but honestly Giga Drain and Quiver Dance tend to be the practical PP limiters. In conclusion, the Fire-move doesn't matter that much, lol. I guess if I were to run Roost I would have more opportunities to get Fiery Dance boosts, but then the lowered PP would be more relevant with only 2 attacking moves, so who knows.

On the topic of Roost versus Giga Drain, I started with Giga Drain since it's not a transfer move. While Roost would let me set-up on more things, Quagsire alone made me not want to get rid of Giga Drain so I stuck with it. I'll talk about Quagsire more in the Threats section, but it can be obnoxious even with Giga Drain. Anyways, EV-wise I started with full physical defense investment to complement Quiver Dance and Flame Body, then tinkered from there. The 12 Special Attack EVs let Volcarona have a guaranteed OHKO on Barraskewda with Bug Buzz, and the speed EVs let it outspeed even Weavile at +1. I initially thought it would need no speed since it could get multiple Quiver Dances, but there's more situations than I thought where only 1 is feasible. However I would definitely add 8 more EVs to outspeed Goodra were I to use this team again (I actually noticed this issue before the run but forgot to fix it, oops). As is Goodra will repeatedly Bulldoze Volcarona as it QDs, and on the final turn it's a speed tie that Goodra can get the jump on Volcarona and leave it at -1 speed.

Also, one other minor change I would make to this team would be to put Volcarona in the second slot. Salazzle is there because Volcarona can switch into more things, so Salazzle should lead if Cinderace is down, but Salazzle is awful as a conventional sweeper so I would much rather have Volcarona leading in that scenario. But this team doesn't really operate on secondary sweeper rules anyways, so once Cinderace is down I'm realistically taking that heal. So this is mostly moot except for maaaaybe wringing out a few extra wins for this team.

Threats

:barraskewda: :cloyster:
Surprising as it may seem for a streak this high, these can both outright sweep me. Barraskewda is faster than Cinderace and Salazzle, which is a huge problem since this team largely relies on speed to neutralize threats. I try to never leave dmax as a Fire-type with Cinderace if I can help it to alleviate this, though Salazzle is mostly helpless. Drill Run has a good chance to OHKO even if dynamax is available. But, Drill Run is wonderful because Volcarona can actually switch into it and survive the subsequent Waterfall before OHKOing with Bug Buzz. Dynamax can blunt the impact of Waterfall, notably its flinch chance which is a loss if it happens, so I never dynamax with Salazzle unless I really need to. Cloyster again negates my teams speed, and while Flame Charge can let Cinderace outspeed it then pickup the KO next turn if it's leading, it can be disastrous if seen as the last Pokemon and I haven't gotten a Knuckle boost. In that case, I go for Knuckle versus it (1/16 range wooo), and in the likely event I miss the range and it Shell Smashes Cinderace has a ~19% chance to faint and my team along with it.

:quagsire:
Very awkward mon, as tends to be the case for teams without a Grass move on their lead. As a lead, I can U-turn into Volcarona and Giga Drain, which gives me no set-up but dmax still intact, which is alright. I've only seen it EQ on this switch, but if it Yawns it would be pretty bad. I would have to swap back to Cinderace and take a lot from Aqua Tail (or hopefully Power-Up Punch). But at least it can KO me, so I should be able to avoid the KO by dmaxing and type changing, avoiding Yawn. If I see it mid-dmax, I KO it with a favorable range with +1 Mindstorm, but if it's Unaware or I'm unboosted I just Mindstorm to weaken it, then either 2HKO it if it damaged me or go to Volcarona if it Yawns.

:rhyperior: :milotic:
These both show the frustrating limits of Libero. While I can Knuckle to resist Rhyperior's Rock Wrecker, this also triggers its Weakness Policy making it essentially neutral and taking ~70% or so inevitable. At least I get to +2. Milotic on the other hand can only safely be disposed of by using Fireball (burn immunity)+Mindstorm, which means it takes a lot from Scald, and then I've used up 2 turns of dmax with no attack boosts. Volcarona can sort of deal with Milotic, but with low HP, lots of Giga Drains used, and instant loss if a crit is seen, so....not really lol

:coalossal:
God, what a frustrating Pokemon. It's not OHKOd, can potentially lower speed with Tar Shot, and it can then use Endure to completely waste dmax (albeit with as many Knuckle boosts as I want). And if I see it at the end, I have to risk Flame Body unless it's low from Enduring a +1 Knuckle. Then I can use Flame Charge, but risk taking 75% from a +1, Flash Fire-boosted Heat Crash. Fun! At least I can safely use a contact move after that. Oh, and this also sucks to see with both Salazzle and Volcarona; it's threatening even with set-up.

:goodra: :wailord:
Neither is KOd unboosted, and their speed control makes it difficult to get anything going. Wailord's Self-Destruct is particularly annoying for Volcarona. Honestly for Wailord I'm thinking it might be best to just take the speed drop on Cinderace, its speed is still ok at -1, I guess...

The Run

The first leg was actually the best one, going on for a whopping 50 battles. The only perilous moment I remember was the dreaded last Pokemon Cloyster, whose +2 Razor Shell left Cinderace with 2 HP. I was able to get out of that hole after several battles, but it was quite nerve-wracking, especially since I kept running into leads I needed to have Volcarona handle, even some like Seismitoad that I wouldn't usually switch out for. I was able to reach 50 with a completely spent Cinderace, Salazzle out of Encore and Volcarona out of Giga Drain.

The second leg was the worst, only lasting for 44 battles. Barraskewda gave me a scare where it was the last Pokemon and stalled out the last turn of dmax with an Acupressure defense boost, but thankfully I didn't flinch to Waterfall afterwards. I also got into a bad situation where +1 Cinderace had to face an Escavalier outside of dynamax. Bizarre as that may seem, +1 Flame Charge couldn't KO with the Occa Berry (Fire Punch would!). Unfortunately, I couldn't help being a Fire-type going into this, which meant it would use Razor Shell, making switching out not feasible. While I could make Razor Shell neutral, it would still deal a lot of damage. I also had to watch out for Metal Burst. Thankfully, Zen Headbutt (not Low Kick, unfortunately) into Flame Charge could barely KO while avoiding a Metal Burst/Razor Shell KO, but despite planning I got a nice Razor Shell miss anyways! Despite that wonderful miss, I still got antsy by battle 95. I had just run into a Rhyperior lead so Cinderace's health was low, so despite still having 3 Fireballs and 2 Mindstorms I took the heal.

The last leg nearly got off to a horrific start as I again ran into last mon Cloyster with no boosts by the second battle. But...Razor Shell missed again! It's nice seeing these 95% accurate moves be a joke for the opponent sometimes. Later on, I ran into Barraskewda with Salazzle, this time actually switching to Volcarona. But again Acupressure got the right boost, special defense, causing Volcarona to not OHKO with Flutterby. Thankfully I had only just started dmax, so I took the Waterfall next turn with that buffer intact Things were progressing alright after that and I comfortably got the #2 RS streak, but I was not feeling optimistic about beating Jumpman's 139 record. Volcarona fainted at battle 132ish, making me feel even worse about that. There was a Runerigus lead, which is one of those awkward leads where +1 Volcarona comes into play: +1 Giga Drain+2 turns of Sticky Barb is a dicey range, and if I miss it I get Hazed and then it goes down to Sticky Barb, leaving me with nothing. And obviously +2 can't happen. So instead I think it's best to dmax and KO with +1 Overgrowth, though with only 60% HP remaining. This is when Coalossal came in, and I failed to KO with Overgrowth as it got +1 from Liechi Berry and a 3 hit Rock Blast finished Volcarona off. And even then I still had to risk a Flame Body hit with Cinderace! I realized after I could've used Flutterby+Overgrowth to avoid the Liechi Berry and massage the odds a bit in my favor with Rock Blast hits, but oh well. Despite my pessimism, a string of leads from 135 to 137 that Salazzle could set up on greatly reduced the PP strain on Cinderace. I also didn't run into any of the various trouble-makers that Volcarona is good for at this point, which helped. By battle 143, Cinderace was mostly spent except 3 Fireballs and 3 Flutterbys, and a Turtonator lead assured it would sweep nothing. I spammed Flutterby so I could faint and goad Turtonator into using Shell Trap without switching out with U-turn, and this let Salazzle use its last Encores and sweep. It only had 2 Flamethrowers left afterwards so obviously 144 was a loss, ending this final leg at 49 battles.


Good night, sweet run.

Anyways, #1 RS streak! We'll see how long it lasts. It's kind of surreal, Eisenherz's original 40 win Fire streak seemed really impressive at the time, beyond the ~30 one might initially expect these runs to cap out at. Yet just over three months later, that's not even a single leg of a top-tier run. Somehow, I doubt we'll get to the point where an individual leg is ~150 wins to repeat this, but it'll be interesting to see how high they get! I'm sure Crown Tundra will have a thing or two to say about that.
 
Last edited:

Jumpman16

np: Michael Jackson - "Mon in the Mirror" (DW mix)
is a Site Content Manager Alumnusis a Top Team Rater Alumnusis a Battle Simulator Admin Alumnusis a Smogon Discord Contributor Alumnusis a Researcher Alumnusis a Top Tiering Contributor Alumnusis a Top Contributor Alumnusis an Administrator Alumnus
-Is there any interest in the "across-all-types" category? I don't know, it's been nearly 3 months and even our most dedicated players are barely scratching trying all 18 types, which seems like a hefty minimum to even be in the running for this category.
-Would there be any interest in maintaining a ranking of the #1 streak of all the types? That way we can say objectively-true statements like "Rock is better than Fairy" (no offense doak, I know it's an old run ;)).
I have a ton of interest in trying all the types, but the mechanics of the RS are pretty prohibitive to this. So many times have I wanted to try out an idea I have for a poke or a type, but I'm mid-streak and can't in good conscience just abandon my streak because you can't save your progress. I get what the game was trying to do with making it an "all at once" kind of thing, and it's not really "realistic" to save progress for a type with damage levels and PP and status, but yeah.

I mean, this doesn't matter, but they could have made it so that you literally have to leave the pokes you're sparring with in the RS area, like some daycare kind of shit? That would have worked, at least for one type at a time. But whatever.

Anyway, what do you guys think the best overall lead poke is for the RS, full moveset/EVs/TOTAL PP? I'm a little biased towards Rilla and I think Hera is second, but I don't want to bias you guys, etc etc.

Rillaboom-Gmax @ Shell Bell
Ability: Grassy Surge
Level: 50
EVs: 4 HP / 252 Atk / 252 Spe
Jolly Nature
- Branch Poke
- Grassy Glide
- Low Kick
- Acrobatics

Total PP: 152
Total Attacking PP: 152

Obviously, Swords Dance can make it a threat where it can OHKO everything with Drum Solo. Forgoing 32 attacking PP isn't the best idea imo, especially when Low Kick and its 100 BP Max Knuckle do indeed boost attack, albeit by just one stage.

The things that make Rillaboom ridiculous are its stupid 160BP Drum Solos that ignore abilities and benefit from Grassy Surge. It almost doesn't need Shell Bell, but that's still the best item for it.

Heracross @ Shell Bell
Jolly Nature
Ability: Guts
EVs: 4 HP / 252 Atk / 252 Spe
- Low Kick
- Pin Missile
- Bullet Seed
- Rock Slide

Total PP: 128
Total Attacking PP: 128

Moxie Is the reason this is such a stud, with that same 150 speed that Rilla has. Great coverage with Rock Slide and a decent enough Max Rockfall that mitigates its Fire and Flying weaknesses also sell it.

I know sb879 and others have had great success with Krookodile, whose best set has 112 PP (all attacking), better speed, even better STAB and shares Moxie. Let's hear some other ideas like this, even ones that are on bad types like Ice (Cloyster and its 48PP Icicle Spear may have some awesome set, etc.)!
I waver between Rillaboom or Cinderace being the best lead. Rillaboom's PP is of course incredible but I have to imagine being a mono-Grass-STAB attacker is somewhat problematic, while Cinderace in a vacuum is a more stable Pokemon. But I guess "in a vacuum" doesn't necessarily matter, because in practice Rillaboom exists in a Grass team which has an incredible backbone to support it and let it burn through all of its PP. But, and I know this is kind of a weird hypothetical, I really don't think a Rillaboom lead with Fire's backbone (not the literal Pokemon, but just that level of defensive mons) could even have it consistently burn through all or even most of its PP. Cinderace meanwhile just does whatever it wants, and it only really "needs" a few counters to very specific threats - a lot of Salazzle and Volcarona's work is just finding sweeps for the sole sake of preserving Cinderace's PP.

For the #3 slot, I will again extol the virtues of Krookodile - using Cinderace really made me appreciate how good Krookodile is post-dmax. I mentioned strong STABs and 100 acc in my Dark write-up, but it also has a great non-contact option in EQ for Flame Body etc. For me, that's really the aspect that puts Krookodile so high; I would even say it's actually worse than Heracross during dmax (Overgrowth and STAB Knuckle are amazing). But that flexibility for icky post-dmax situations is why I love it so much. Heracross is definitely right after it though.

For #5, I honestly don't know. If you would've asked me a month ago or so, I would've said Mimikyu - actually I probably would've said Mimikyu was #3. Going forward, though, it's really hard for me to see past how bad Mimikyu's attacking PP is. Shadow Claw/Play Rough/Wood Hammer is 64 total, and that makes it really hard to get past like, 100 (honestly, it's incredibly impressive to me that Eisenherz got to 99 with his Ghost team). I'm not sure Ghost has a better alternative, but Fairy might (well, certainly post-Tundra lmao). idk, maybe Dracozolt or Durant for #5? Hustle is a horrendous ability for post-dmax situations, but both have solid PP (Wild Charge/Outrage/Aerial Ace/Low Kick = 104, Iron Head/Bug Bite/Thunder Fang/Stomping Tantrum = 96) and amazing starting firepower.

For some less explored options, your example of Ice reminds me that one of the leads I considered for that was Weavile. Its PP is incredible, just under Rillaboom's. Knock Off/Icicle Spear/Psycho Cut/Low Kick = 144 total. Its offenses are great, there's Max Knuckle in there, but I had a hard time seeing past its frailty and useless ability. But it might be worth another look. For me, Ice's big problem is that its leads are bad (Zen Darm is cute, but ultimately not good if I'm being honest). The backline is solid though; Avalugg and Frosmoth are a nice pair. So maybe Weavile is the killer app Ice needs to go somewhere past 53. It's also Dark, which has Mandibuzz as a good Fighting switch-in and Umbreon for Wish, so maybe it could work there too.

I also wonder if there's any merit in a more offensive Scizor as a lead? It learns a ton of high-PP moves. Something like Bug Bite/Steel Wing/Wing Attack/Brick Break has 152 PP, with a nice double STAB/Knuckle/Airstream set. Horrible versus Fires, but Bug at least has Volcarona (and soon Steel will have Heatran). As an aside, I'm kind of shocked at how few Pokemon actually seem to learn Wing Attack! Though as far as potential Tundra returnees go, I can't help but notice Gliscor and Honchkrow learn it... (if anyone responds to this bit yes I know there's a datamine, but please be respectful of the fact that some people are avoiding spoilers and tag them)
 
Ok so, I may have beaten another record in another less-popular type with another not-entirely-original team... reporting a streak of 51 in Poison type.

A while ago, I had fun using Photon's Regenerator-based Poison-type team (with a lower streak than them), but I thought it would be good to try an offensive team too. I liked Gengar as a lead, and agreed with doctordoak's assessments that Drapion is an obvious partner, and that the third team member should be something not weak to Ground. Enter one of my favourite, ridiculous-looking regional variations: Galarian Weezing!

To be honest, I'm not entirely sure whether Weezing is better or worse than Venusaur for this team - I think I just had a lot of luck, and a truly ridiculous number of battles that were completely swept by Gengar. But it was fun to play, and led to a decent result, so I'm happy!

poison rs.jpg


Gengar @ Shell Bell
Ability: Cursed Body
EVs: 4 HP / 12 Def / 252 SpA / 4 SpD / 236 Spe
Timid Nature
- Sludge Wave
- Shadow Ball
- Giga Drain
- Psychic

The moves are doctordoak's, with Giga Drain and Psychic both being strongly appreciated for their terrains. It feels like cheating to beat Scizor with a Max Mindstorm while it Swords Dances, followed by a Bullet Punch-immune Max Phantasm, but it isn't! The EVs are enough to outspeed Starmie - the only thing I lose out on outspeeding by dropping down is the ridiculous Salazzle set, which isn't much of a threat.

Drapion @ Leftovers
Ability: Battle Armor
EVs: 4 HP / 252 Atk / 4 Def / 12 SpD / 236 Spe
Adamant Nature
- Knock Off
- Earthquake
- Brick Break
- Ice Fang

The moves are doctordoak's again, except that I substituted Knock Off for Crunch - you get higher power out of Dynamax plus more PP, at the cost of a little bit of Dynamax power, which I thought was worth it. In the end, I don't think I came close to running out of PP on it, but I did appreciate the non-Dynamax power. That said, the extra Dynamax power would have been handy too, the last time Drapion lost (see below...)

The EVs have a nice symmetry with Gengar's - unintentionally! They let Drapion hit 145 Speed, compared to an Adamant maximum of 147 and a Jolly maximum of 161. The only difference between 145 and 147 is speed-tying a boosted Kommo-o rather than outspeeding it, which didn't seem very important. And I realised that the group between 147 and 161 is surprisingly barren: Rotom, Zoroark, Drapion, Obstagoon, Dedenne, and Emolga (on 161). None of those seemed worth the power drop by going to Jolly. I think this definitely helped a bit with doctordoak's complaint that Drapion felt a bit weak, and I actually found it perfectly fine when I was using it.

Weezing-Galar @ Black Sludge
Ability: Levitate
EVs: 252 HP / 252 SpA / 4 Spe
Modest Nature
- Sludge Wave
- Strange Steam
- Flamethrower
- Aromatherapy

What a beautiful Pokemon.

I wasn't totally satisfied with the build here, or the way I used it. I almost wonder if you could explore a more offensively EV-ed set - this one felt a bit like it wasn't bulky enough to be a proper tank (especially without recovery beyond Black Sludge), but it wasn't fast enough to be a reliable attacker on its own. I did enjoy having Fairy and Fire coverage, and Aromatherapy got a few uses (mostly to remove burns on Gengar rather than anything more crippling, but always nice to have). Thunderbolt would be an option, I suppose - I always sort of panic when I see Gyarados, before remembering it's really rubbish here and you can just 3HKO it, especially with Aromatherapy support for any Scald burns.

The Run

I got a good first leg of 20 battles - I don't remember a lot, except that I managed to hit a rhythm with playing Gengar, and had enough luck with opponents that Gengar did a lot of the work pretty easily.

The second leg lasted 24 battles, with Gengar (very nearly) running out of PP before fainting this time. In battle 39, I encounted a last-Pokemon Pyukumuku, who is a convenient healing station for any team with Leftovers and a Toxic immunity. Very handy since Drapion had been sitting on half health for about ten battles, completely unused and unwanted since Gengar was just steamrolling everything! However, after that point, Gengar had bad luck on leads who could be taken down with just Poison and Psychic coverage remaining, and Drapion got too worn down having to carry the team from second position without a Shell Bell or Giga Drain, and so I healed after 44 rather than make Weezing try to solo anything with 81 Speed.

The third leg was, um, a lot less ideal, with Gengar getting an early burn, and Weezing struggling to find an opportunity to get in and heal it (and ultimately being sacrificed to a lead Volcarona in battle 51). That same Volcarona then survived Drapion's Max Darkness (5/8 chance) to burn it, and Drapion got worn down and taken out by the following Swift Swim Beartic and Porygon-Z, leaving a burned 58/136 HP Gengar. Based on earlier legs, Gengar could easily have gone on for another 10+ battles with the right opponents, but it wasn't to be. Opposing Drapion broke the Acupressure habit to actually attack with Crunch, nearly taking me down, and then that weird specially defensive Centiskorch ended the run.

I won't do a full threat list, although one note is that Magnezone is always a coin flip whether Gengar has to eat a Steel Beam, since the others both get OHKOed by it, and Gengar needs it to not be Sturdy, and then has a 75% OHKO chance with an unboosted Max Phantasm. In particular, there was one moment early on in the third leg where Gengar was damaged already and would have fainted. This is very much a point in favour of Venusaur rather than Weezing.

Overall, a fun run, and it does feel like one where there is more potential in the team, or some variant of it, albeit Gengar's PP issues and general frailty mean it's never going to be a Cinderace-level lead.

Looks like Fairy is now the only type left with a sub-50 record - who wants to get there first?
 

Eisenherz

επέκεινα της ουσίας
is a Forum Moderatoris a Community Contributoris a Tiering Contributoris a Top Social Media Contributor Alumnus
Moderator
Still feeling the RS burnout, I've been mostly playing Tower lately, but I have 3 unposted streaks in store, 2 of which I was hoping to improve before posting since I know they could go much further. But seeing as I don't know when/if I'll be working on them again, I figure I should get them out of the way!

First is a mono Poison streak that I had been working on since basically the very beginning of RS. I think the team has very high potential, but would require someone with ungodly patience to bring it to fruition:

Pokémon Sword-Shield Screen Shot 2020-10-11, 9.02 AM.png

(This run used only 1 heal, after battle 47 if I remember correctly. Getting 40+ from a single leg is definitely the standard for it.)

–––––––
S E T S
–––––––

@

Bold | Regenerator
IVs: 31/0/31/31/31/31
EVs: 236 HP / 252 Def / 20 SpD
Giga Drain / Clear Smog / Poison Powder / Confide

@

Bold | Regenerator
IVs: 31/0/31/31/31/31
EVs: 252 HP / 60 Def / 196 SpD
Scald / Toxic / Haze / Recover

@

Jolly | Battle Armor
IVs: 31/31/31/31/31/31
EVs: 252 HP / 4 SpD / 252 Spe

Knock Off / Poison Fang / Earthquake / Swords Dance

––––––––––––––––––––––
T E A M B U I L D I N G
––––––––––––––––––––––

I'm pretty sure one of the very first things that was talked about on the Facilities Discord when RS dropped is double and even triple Regen with mono Poison. Others also thought of it, clearly, as demonstrated by early Poison attempts documented in this thread. However, I made sure to build it without looking at other approaches at first, because I wanted to make sure I worked with a blank slate for moves and EVs. My team of 3 remained the same since the very beginning; the 2 best Regen Pokémon Poison has to offer (imo), and Drapion because I need an Alakazam switch-in, a very simple base.

However, I made many, many runs with different versions before settling on the moves and EVs. I used to lead with Toxapex, but found Amoonguss a bit more consistent in testing since Toxapex tends to be a more solid initial switch (it doesn't make a huge difference, since you'll end up switching back and forth throughout the battle regardless).

I started with the basic Spore and Toxic on Amoonguss, switched to Poison Powder because it has insane PP, and the speed at which things get poison stalled is really not an issue for this team (nor is occasionally missing); the only thing this misses out on is being able to Poison Grass-types, which would add nothing except quicken the pace of a few battles. Spore was bad; it's a decent "oh no!" button that can save a bad situation, but otherwise it's really just an inconsistent gamble that serves no real purpose on the team, so I spent a while looking at other options until I found something that really helped seal some of the tougher matchups the team had: Confide. It's very situational, but a few special threats can end the run, like Magnezone, Drampa or Porygon-Z, and Confide made it possible to deal with all of them.

Haze and Clear Smog proved essential to both walls, as none of them can afford to let certain threats setup (Braviary or Krookodile, for example).
Haze and Confide were also my "PP bank" moves (Poison Powder as well at times), where sometimes I needed to waste some turns without switching, and those moves have so much PP it's mostly expandable, because the important moves are guaranteed to run out of PP before these do.

Drapion is more of an outsider; it helps defensively against very particular matchups, but otherwise, the goal is to sometimes set it up for free to at least +4, usually on a lead which has been PP stalled out of attacking moves, so it can swiftly run through the battle with Dmax. I found it's usually worth pulling the Drapion trigger even when a team could be handled by the Regen core and waste no PP at all, because ultimately, what tends to force a heal is a lack of Scald, Recover or Giga Drain PP. Only specific leads offer Drapion a free setup though; sometimes you can get 3-4 in 10 battles, but sometimes 0. It's just an alternate way to clear battles faster though; Drapion's reason for being on the team is ultimately defensive, so keeping it healthy is very important. That's also why Poison Fang is my move of choice; at +4 or +6 as a Max Move, the lower power doesn't matter, and outside Dynamax, scoring a lucky Toxic can allow me to go back to my Regen core and waste no further PP.

As I went along and adjusted the team, I was dead set on making it as optimal as I could, and I created a cheatsheet for how to handle every single opponent in RS in order to single out problems and resolve them. It's the result of dozens of hours of playing with its different stages of evolution.

––––––––––––
B A T T L E S
––––––––––––

Battling with this team is a painful experience. As highlighted on my matchup spreadsheet, several Pokémon are handled solely by the Rocky Helmet, which is really good since it wastes no PP, but can taker a lot of time (they might not always attack on the Amoon switch-in turn). Other sets, like Vileplume, are handled by pure PP stalling... A single battle can feature hundreds of switches back and forth between Toxapex and Amoon, just to be sure not to waste PP (Corrosive Gas alone has 40 PP...). In that sense, any chance to throw a little Poison Powder was very welcome, and by the end I found it worth to do so even if it wasn't optimal PP usage (Poison Powder PP ran low at times, but I never ran out before the important moves, so why not...).

An interesting feature of the team is that it rarely Dynamaxes; since most things are KOd by Rocky Helmet/Poison/PP stall, most Dynamaxing is either defensive, or made to score an OHKO on a threat with something like Max Overgrowth, after which I usually switch out of Dynamax immediately to keep stalling.

One of the biggest things that came into play during the run was status. With a stall team, status is unavoidable, because you'll be switching into moves with a chance to induce status constantly. At first, I thought it would be the team's downfall, but as I made further runs, I slowly realized things usually fell into place nicely on their own; Amoonguss usually ends up paralyzed, and Toxapex usually ends up burned. This is the ideal status distribution wanted; a burn on Amoonguss cripples it too much because it has a Helmet, and being paralyzed works in its favour surprisingly well most of the time, saving some PP. It's not totally ideal, because in a few specific scenarios, a full para could be costly, but most of the time it doesn't mind it. Meanwhile, Toxapex, with its Black Sludge, Recover and superior bulk, can afford to take the burn chip, but has the job of handling some of the biggest threats, where getting fully paralyzed would be too costly. It's impossible to fully control what will get statused exactly and when (I could sometimes for 15+ battles with no status at all, but other times both would be statused by battle 3), but you can definitely try to fish for them at times, and it can be worth to ensure they don't get the wrong status. Drapion, on the other hand, can't afford a status at all, so it has to be used with care.

On the days I wasted playing with the team, my hands were cramped by the end from repeating the same switching motion on the controller for hours and hours and hours. The vast majority of runs were ended by human error; my muscle memory for switching was so deeply rooted, that between battles I would press down before pressing A without even thinking about it (a motion necessary both to get to and select the Pokémon menu in battle, and then again to switch to the 2nd Pokémon), which cancels the run... Dozens of hours of mind-numbing switches down the drain every time. Other times, I would PP stall something, and fail to notice I was done PP stalling because I wanted to multitask. The next threat came in, and I failed to notice, and threw the run.

I'll be honest, I regret all of it. It wasn't worth. I hate this team. And I hate the fact I genuinely think it's an near-optimal team that could very well get to 150 wins; I hope no one ever tries to do that. Save your time and use Cinderace, or Rillaboom, or anything that sounds remotely fun; they can get similarly great results without ruining both your hands and your brain.

This particular streak was ended by Magnezone. While it's certainly one of the biggest threats to the team overall, the team should handle it just fine the vast majority of the time. All it requires is no crit on a key turn, and no paralysis on Drapion on the one turn it has to tank a Thunderbolt.
You'd think such a stally team really opens itself to hax, but not really, only a small handful of Pokémon can be threatening with crits, and those have to come at a very specific time; I'm not giving many turns for these to crit at all, the plan is always to remove them ASAP and not stall them.
You see where I'm going with this... Magnezone crit Toxapex on the only turn it even could.

¯\_(ツ)_/¯

Magnezone ended more runs after that, AGAIN critting Toxapex on the one turn where it had to tank a -3 Thunderbolt, and then another run ended with a Thunderbolt paralysis on Drapion, again, on the only time it could even do it (I needed to break the Balloon first). I don't know what I've ever done to Magnezone to deserve all of this. Those were basically the only times the team lost to the AI, outside of a Pelipper ending it once with +3 Spit Up on Toxapex (I didn't take the time to calc it at the time, because I never thought it could do this much damage lol. I learned from that battle and handled Pelipper with more caution in further runs).

––––––––––––––––––
C O N C L U S I O N
––––––––––––––––––

I'm not going to list threats here, because they're highlighted in red with details in my personal cheatsheet for the team. I'm a bit sad I wasn't able to push this team to its full potential, but at the same time, I'm glad I was able to stop trying for my sanity's sake. On the one hand, I'm very proud of the work I've done on this team, it's probably the best RS team I've built thus far. On the other hand, this team is the very antithesis of fun, it slowly drained my soul...... and yet, a part of me wants to use it again, one day. Hopefully I won't give in.
 
Last edited:
I would imagine that this will become a total joke once the Tapus become legal, so I'd really like to see it done before then.
...OK.

fairy rs.jpg


This team could definitely do better, but I need a break, I think... anyway, here is a streak of 60 with Fairy-types.

I had previously played around with doctordoak's Mimikyu/Primarina/Clefable set-up, and felt that Primarina was very much the weak link. It was taking too much damage too quickly that it didn't have a way to heal, and it wasn't providing a lot of really obvious support to Mimikyu - not least because you're scared to ever switch it in, with no healing beyond Grassy Terrain. So I just replaced it with sb879's shiny new Togekiss, and ta-da.

Mimikyu @ Shell Bell
Ability: Disguise
EVs: 4 HP / 252 Atk / 12 Def / 4 SpD / 236 Spe
Jolly Nature
- Shadow Claw
- Play Rough
- Wood Hammer
- Swords Dance

The standard. Speed EVs are to outspeed everything you can except Emolga, which is no threat at all.

Togekiss @ Scope Lens
Ability: Super Luck
EVs: 4 HP / 252 SpA / 252 Spe
Timid Nature
- Air Slash
- Draining Kiss
- Flamethrower
- Nasty Plot

A really clever set which I haven't altered at all. It's very fun to use and Draining Kiss goes much further than you might imagine it would to keep you alive. Super Luck, which might seem gimmicky, is really great here, much more reliable and useful in a Dynamax-heavy play-style than Serene Grace. I wanted full Speed investment to outspeed Volcarona, and then you could probably take 8 out of Special Attack to put into the defences, but I didn't think to do that, and maybe it's sub-optimal on a Nasty Plot set.

Clefable @ Leftovers
Ability: Unaware
EVs: 252 HP / 252 Def / 4 SpD
Bold Nature
- Toxic
- Protect
- Wish
- Heal Bell

Shoutout to doctordoak for realising that this is a really good ally for Mimikyu, who hates status to the extent that it has been genuinely and successfully run with a Lum Berry rather than Shell Bell. Unaware is great, Wish and Heal Bell support together is great. You could get one with Teleport to provide more proactive Wish support to the sweepers, but it honestly didn't even occur to me until I was mid-through the run, you would need to trek through the VC Gen 1 games to get it, and you don't really want to lose any of your moves anyway.

The Run

I'm not going to lie, I got bored as I was going through and mis-played a few times. I had a great first leg, with an injured Mimikyu losing to Steelix in battle 21, while pretty low on PP anyway, and Togekiss getting me up to 29 wins before I took the heal. Togekiss was on less than 50% and I didn't want to risk that first leg, given I was mostly just aiming for 50 anyway.

The second leg started well, but in battle 39, a key Mimikyu nemesis appeared: Weavile. The others don't like Triple Axel, although potentially a Clefable switch would still have been better, but I stayed in and Mimikyu went down to a crit Shadow Claw, before its time. I'm not sure if Weavile might have wasted the turn on Taunt instead, if Mimikyu hadn't already been Taunted by Corviknight. Togekiss then powered right through, frequently using Draining Kiss to end a battle on (nearly) full HP despite being much lower at points, but went down in battle 51. This was the first of the Very Bad Misplays: I decided to properly set up on Kommo-o, forgetting that Clangorous Soul would cut its HP and therefore limit my recovery. Might have been fine, except Sturdy Gigalith showed up, who Togekiss can only deal with if it has enough HP to take a +1 Meteor Beam in Dynamax, and it very much did not. Clefable crossed its fingers to be able to stall out the final Starmie and I took the heal.

The third leg was Cursed (by luck but mostly by me). Firstly, in battle 53, Clefable had to Toxic stall lead Musharna, and ended that with Trick Room up and having just been Yawned, only for Escavalier to come out. Togekiss managed to switch into the Screech and OHKO with Max Flare (without a critical hit, which is a 1/8 chance, although given Togekiss has a 1/2 critical hit chance with every move, the OHKO was more likely than not...) But it was a bad omen. Fast forward to battle 58, and I just misplayed a lead Magnezone horribly with Mimikyu. I don't even remember the details - I think I forgot about Reflect at some point - but Mimikyu went down. I think just straightforward Shadow Clawing it until it died, with the benefit of Disguise, would have been enough. Oh well. Togekiss could have gone another 10 easily, as the first two legs show, but in battle 60, the final Very Bad Misplay occurred: I looked at a damage calc, and forgot it wasn't in Dynamax. Pincurchin used Rising Voltage! Ok, that's fin-- oh. Bye Togekiss. Luckily they didn't have anything immune to Toxic, and Clefable eked out a final win to hit a nice round total of 60 wins.

I hope people whose sets I've used basically verbatim don't mind too much, and I hope it's clear enough that I am giving them (in this case doctordoak and sb879) basically all the credit. It didn't take a genius to say "Primarina is the weak link in the current record team, and here is another cool Fairy-type set from the leaderboard", which was basically the extent of my team-building here. So thanks - and thanks to everyone who has posted really clever, creative teams here. It's very fun to read about your runs with them and appreciate the creativity.
 
I started a weird project of mine some time ago called "let your favourites shine".

Truth is, SwSh bores the hell out of me, as the restricted roster means less stupid teams to try in battle facilities, so I selected the available favourites of mine to teambuild around and see where I can go in restricted sparring and see if I can climb the leaderboards.

I started with Mamoswine and... ice. Needless to say, it's a challenge, but I did manage to reach 54, which is not a great improvement over the presently uploaded streaks (1 or 2 wins come down to matchup luck, not skill).
1602771727757.png

[/SPOILER]

So, since the constraint was to use Mamoswine in Ice, I soon figured out that as trash as ice is, and wanting to be original and detach from the Avalugg+Frosmoth core, I shouldn't use it as a primary sweeper.

Given Ice weakness to... well, everything, I teambuilt around the few immunities secondary typings provided, ending up with this team.

DARMANITAN
Nature: Jolly/Adamant
Item: Shell Bell
Evs: 252 attack, 6 sp.def, 252 speed
Ability: Zen Mode
Moveset: Ice Punch/Fire Punch/Zen Headbutt/Focus Punch

The shining star of the team, and in my opinion the true only mandatory option on Ice. It hits like a truck, can boost, is reasonably fast, and pretty versatile. I opted for Shell bell for mandatory recovery, and Zen Mode because a) Gorilla Tactics may force you to switch out if something like Toxapex burns your Dynamax too soon, and you don't want to switch if not 100% safe with ice and b) Zen Mode acts like a sort of Desperation Salac Berry, boosting your speed, your attack slightly, and providing additional stab. Darmanitan HP is so high that in Dynamax it reaches 360, basically un-OHKOable bar Rock Wrecker and Steel Beam.
Fire Punch vs Fire Blitz and Nature are both weird conundrums: the added power comes into play very often both for the nature (Adamant Max Hailstorm just murders even neutral targets, whereas Jolly sometimes left me blue-balled) and moves (Excavalier can survive Max Flare at +0 attacks), but I disliked having both Fire Punch and Focus Punch outside Dynamax, so I opted for the safest option.
I initially tried with both U-Turn and Earthquake in the third slot, but Zen Headbutt both murders Fighting types that are hugely problematic (Passimian, Poliwrath, potential Scrappy Sirfetch) and has the added bonus of preventing priority, neutralizing the biggest threat to the team (Scizor) as well as stopping Azumarrill in his tracks.
Focus Punch is there due to having 100 BP in Dynamax but, believe it, it can also be useful outside (Porygon 2 when it Trick Rooms comes to mind), and has an unmatched 32 PPs with Low Kick unavailable.

This mon is so powerful that it can actually outrun Poison Damage with Shell Bell and continuous OHKOs. Just a monster.

Jolly outspeeds a variety of significant targets for my team (especially Zoroak and Obstagoon, as well as Boltund in Zen Mode), so I do think it is the better option. Needless to say, I achieved 54 with Adamant. The Sheer Power at +1 and even neutral is absurd.

6Spdef evs to avoid a special attack boost from Download Porygon 2 and Z, which comes into play more often that I liked.

MAMOSWINE
Nature: Jolly/Adamant
Item: Leftovers
Evs: same as Darmanitan
Ability: Thick Fat
Moveset: Icycle Spear, Earthquake, Superpower, Peck

Secondary sweeper that comes in on safe Mons (Pinchurchin, Emolga, Luxray, Lanturn) and relieves Darmanitan, trying to stay alive with Leftovers and sweep. I think both Peck and Superpower are unavoidable, since it lacks both the speed and the sheer power of Darmanitan. Icicle spear may be inconsistent, but I disliked the accuracy issues of Icicle Crash and I do believe that in the second leg of the record run I did use more than 16 PPs.
Plus, against some particularly sturdy mons (Miltank if Darmanitan is out of Dynamax and unboosted comes to mind) its relative high crit chance can help.

Not much to say outside that it should lead to perform the best, but Darmanitan is just better and I needed a way to handle T-Wave and occasional potential paralysis from electric attacks).

FROSLASS
Nature: Timid
Item: Assault Vest
Evs: 252 sp attack, 6 Spdef, 252 speed
Ability: Snow Cloack
Moveset: Ice Beam, Shadow Ball, Thunderbolt, Draining Kiss

I needed something to swich into both Mienshao and Scrafty desperately, and Froslass was the only option. I started out with a stupid Icicle spear/Toxic/WillOWisp/Pain Split set with the illusion that stall-healing was an option on such a frail mon with a hundread weaknesses, but soon realized that I could kill things outright. She's weak and frail, but she did her awesome job and also acted as a soft counter to Starmie that could otherwise murder any combination (save Frosmoth, but as I said, I didn't want to use it). Can't be touched by Scrafty, effectively healing Mamoswine on switches (same with Rotom), and also deals with Gyarados who could otherwise go for fishy burns. Only somewhat reliable answer to Pyukumuku and Status absorber: immune to Body Slam, can prevent Toxic with Max Starfall, and if something can take a wisp from Froslass, it's... Froslass.

It also provided some sort of Speed control due to its High 110 fully invested base speed stat.

Snow Cloack can also make for some hilarious interactions.

BIG THREATS:
Basically, you should work to keep Darmanitan always as healthy as possible because it's the only self sufficient mon of this team. Mamoswine can sweep some battles but Mamo+Froslass can easily run into a stonewall.

Zoroark: dealt with if Darmanitan is Jolly and doesn't disguise as a Fighting Type. If it does, you run the risk of wasting a Dynamax Turn and Take a Flamethrower to the face.
Crustle: Can Survive even +1 Max Hailstorm from Darmanitan and retaliate with Body Press. Fortunately, Weak Armor works against it, and sometimes it just Sandstorms.
Steelix: huge hindrance as it is unkillable if unboosted and, if you run into it with Psychic Terrain Up, it's Steel Roller murder time.
Rhyperior: same as above but killable without Solid Rock. Otherwise you can't stop it unless your prayer are answered and it sandstorms. It never used Heat Crash on non-Dynamax Darmanitar to my disdain, opting only for Sandstorm (phew) or Rock Wrecker (spoiler alert: as you can imagine, nothing survives Rock Wrecker). I even tried to use neutral/resisted moves to not proc Weakness Policy but it went nowhere.
Magnetone/Zone: Sturdy sucks, and if Darmanitan has taken some damage, Zone will usually go for Steel Beam, destroying everything in front of him (and itself).
Miltank and Toxapex: not huge threats per se, but they can stall out Dynamax by themselves which can leave you in a very bad position.
Starmie: ousped only by Froslass, which can come in, eat an attack due to Assault Vest, and OHKO back. Also, OHKOed by Max flare in Sun from Zentan.
Pyukumuku: dreadful, but if it doesn't Toxic on the switch, Froslass can blue-ball it. Otherwise, it can put one of your mons on a timer or deal a shit ton of damage with Counter.
Conkeldurr: not killed by even Max Mindstorm unless boosted, fortunately it has a stupid moveset. It can opt for Stone Edge if Darmanitan is low enough, which is dreadful. Usually not a problem if you've saved your Dymanax as it will waste a turn using Low Kick.
Scizor: if Psychic Terrain isn't up, it can outright sweep me.

I don't remember a lot about the record run, which I achieved a coulple of weeks ago, save for healing first on battle 25, which was amazing.

DISCLAIMER: I am convinced that for someone better than me 60 is definitely possibile, but
  1. I didn't bother to 100% optimize EVs;
  2. I usually play while lifting/doing something else, hence getting distracted often (that's why I won't use multi-turn set up sweepers like Avalugg and Frosmoth;
  3. As suggested a few posts above, there may be some room to use Weavile, since it indeed offers an immunity. I may give a thought about it, or keep Darmanitan in the rear and change strategy.
  4. Tundra will certainly roll with some new options, and since I was running out of time I decided that 54 was enough for the time being.
Next "let favorite mons shine in RS" projects: Tyranitar (ahah), Rhyperior (ahah), Alolan Raichu (I had something very hipster-like on electric in mind, but I feel that Koko with 32PP rising voltage, 32PP Grass Knot and a neverending movepool will be able to pulverize any record), Galarbro (the most reasonable and probably the first one I will tackle, probably on Psychic).
I must say I am incredibly impressed with the streaks you guys have posted, some of those are insane! If any of my projects manage to break the top 3, I'll be back.
 

Eisenherz

επέκεινα της ουσίας
is a Forum Moderatoris a Community Contributoris a Tiering Contributoris a Top Social Media Contributor Alumnus
Moderator
2nd of the 3 RS streaks I had in store, this one I do consider completed, with better luck it might be able to get higher, but this archetype has been explored enough already, and I'm content with this number for Bug.

Pokémon Sword-Shield Screen Shot 2020-10-11, 9.02 AM 2.png


–––––––
S E T S
–––––––
@

Jolly | Hustle
IVs: 31/31/31/x/31/31
EVs: 252 Atk / 4 SpD / 252 Spe
Iron Head / X-Scissor / Stomping Tantrum / Rock Slide

@

Jolly | Moxie
IVs: 31/31/31/31/31/31
EVs: 252 Atk / 4 SpD / 252 Spe
Low Kick / Pin Missile / Bullet Seed / Rock Slide

@

Modest | Flame Body
IVs: 31/0/30/31/31/31
[Hyper trained to 31/0/31/31/31/31]
EVs: 132 HP / 204 Def / 116 SpA / 4 SpD / 52 Spe

Fiery Dance / Giga Drain / Quiver Dance / Roost

–––––––––––––––––––––
T E A M B U I L D I N G
–––––––––––––––––––––

By now, there's nothing surprising or outlandish on the team. It's the Heracross that got me my Fighting streak, the Volcarona that gave me my Fire streak, and Durant added to the mix. I went with Muscle Band after doing a few calcs; while the boost it provides is usually minimal, it scales up by quite a lot with Max moves, allowing for calcs like this:

252 Atk Muscle Band Hustle Durant Max Flutterby (130 BP) vs. 252 HP / 0 Def Quagsire: 201-237 (103.6 - 122.1%) -- guaranteed OHKO

I figured Durant could do without recovery; my main idea with this team was to rely on the Heracross-Volcarona core as a standalone for most of it, hopefully to the point of exhausting both of their PP almost entirely. Durant was there to squeeze as many wins as possible before these 2 got to work, something like 8-10 wins every leg for Durant alone seemed like a reasonable expectation.

The only change this Heracross has compared to my Fighting one is Pin Missile over Megahorn, I did the change after seeing Jumpman's own Bug report since I very much agreed with it.

–––––––––––
T H E R U N
–––––––––––

At the time I got it, this streak was the highest Bug streak; that was before we figured out the best Shedinja strats, so now it feels like a dated team and an unimpressive streak. Thankfully, this is not a streak I had to grind for, I may have gotten lucky, but I got it on my second attempt. My first attempt had me leading Heracross, and I had Thunder Fang on Durant, which I ended up disliking since it was not getting the KOs I needed it to, so I went with the more obvious Rock Slide to feel it out, and things just went buttery smooth for the first 2 legs.

I mention in teambuilding that my hopes were for Durant to get around 10 wins every leg before going down; the reason this streak ended up pretty good is because Durant massively overperformed. It got more than 20 wins on its own in both of the first legs (granted, I remember going Volcarona a couple of times in there); in the first leg it even came very close to exhausting all of its PP, I think it had only 1-2 remaining on all moves. Sadly, it went down quickly in the third leg, I don't remember to what. Durant definitely carried this streak in general, because Heracross did poorly in the 2nd leg and died before going through even half of its PP; not its fault, I just remember running into several rough matchups in a row, stuff like Starmie and Sandaconda I think...maybe a Tangrowth in there.

It's been several months now since the run, so I don't remember many details at all of what happened during the games. I also don't remember how the run ended. I had written a lengthy report about it at the time, but saved it as a draft to concentrate on SPH for a week, and the draft ended up getting lost during that time, so I felt very unmotivated to rewrite it after that. Now that the team doesn't feel so relevant anymore since better archetypes have been unearthed, giving lots of details feels unnecessary. I do think this team has potential for 100 or more, but I think the Shedinja teams have a higher ceiling regardless.

I possibly got fairly lucky overall with this run despite Heracross underperforming for most of it, and I don't know if Durant could carry this hard again. I was satisfied with 95 and excited to move on to the next type at the time, so I never even gave it another run. If anything, OHKOing stuff with Durant is very satisfying and makes you go through battles quickly, so it can probably be a fun team to mindlessly grind with.
 
Last edited:
There's several types in RS where one or more Pokemon are virtually set in stone. That's not to downplay the innovations that can still be made in that space or the skill in playing the team, but some types definitely have a relative lack of mystery of what you're going to see when a new streak is posted. Water is not one of those types. There are SO many viable options. Even completely excluding options that have been seen before, there's still the possibility of Inteleon for a lead and its glorious Sturdy-ignoring Gmax, more Regenerator options like Slowbro/king, pivot options like Vaporeon and Pyukumuku, Leech Seed from Ludicolo, alternative Water/Ground options (Quagsire gets Encore to potentially work as a pivot, Seismitoad can be used more offensively with Swift Swim), and loads of stally, passive options (Milotic, Mantine, Jellicent). The next record streak for Water could be completely different than anything seen before. This boundless potential gives a Water a level of expressiveness not seen in other types. But I didn't come here just to blather about the wonders of Water. Now! Who can most elegantly dance with their Water Pokemon in RS? I'll show you right here and now!


Wait, something seems a little off here...

Teambuilding

So, obviously, the gimmick is that this is a Little Cup team (only as far as Pokemon goes, they're not Level 5). I looked for viable leads first, and truthfully my favorite was Rufflet. 80 base attack with STAB Airstream and Hustle? Hell yeah. But I ran into a silly issue. Rufflet can be used on a Normal or Flying team, which are both types I've already used and thus prevent me from having this nice little streak card (well, assuming I don't break my previous records, but lol). It's still perfectly possible to verify the run, but I like these cards! Another tempting option was Scraggy, which had the combination of STAB Drain Punch, Dragon Dance, and Moxie. This seemed good, though I would have to use it in Fighting if I wanted my pretty scorecard. I wasn't too enthused by my other options there, though. So I kept looking, and noticed that Remoraid got Hustle with, uh, respectable 65/65 offenses. So with Remoraid as the lead, I looked for reserves. Thankfully, Water's options are bountiful all the way to the bottom. I initially decided on Slowpoke and Frillish, EVd physically and specially, respectively, with each using boosting moves to patch up the other defense (Calm Mind and Acid Armor). Initial testing went okay, things were pretty volatile but I expected that. What I didn't expect was Slowpoke being a third wheel. Frillish's Normal immunity was very helpful, since those can't be hit super-effectively by Remoraid. And Slowpoke really didn't offer much that it didn't. So I decided to run a second lead instead. I pondered Krabby and Carvanha, and obviously I went with Carvanha, letting me achieve the wonderful streak I've just shown you.

Remoraid @ Expert Belt
Jolly/Hustle
252 Atk/4 SpD/252 Spd
Waterfall/Bullet Seed/Rock Blast/Bounce

Remoraid has a wide offensive movepool, with good super-effective coverage and momentum-building with rain and speed boosts. It was immediately clear to me that Shell Bell would accomplish nothing with Remoraid's defenses (35-straight), so I went for damage-boosting items instead. Expert Belt naturally makes for a good fit with its wide movepool. Life Orb is a bit better I think (I had it while using Slowpoke), but that's reserved for Carvanha. Plus, Remoraid can take a (neutral) hit in Dynamax, so the recoil could be detrimental. My only issue with this set is Rock Blast; anything it hits for more damage doesn't seem to faint anyways, and Max Geyser KOs are always preferred on frailer Rock-weaks for the rain. But the only viable alternative is like, Assurance. So whatever.


this thing looks way more vicious than sharpedo
Carvanha @ Life Orb
Adamant/Speed Boost
252 Atk/4 SpD/252 Spd
Liquidation/Crunch/Bounce/Protect

Lead #2. Remoraid was what started this team, but I honestly think this might be better. It's not that much weaker, and Speed Boost is incredible. While Jolly would let it outspeed almost everything at +1, Adamant still gives it 175 speed at +1 which is really good, and I don't think it can afford the power loss. Protect gives a free way to access Speed Boost versus faster leads, and from there Carvanha does most of the work with its STABs. Airstream is the lone coverage move and while its speed boost is redundant with Speed Boost, its super-effective coverage is still clearly the most useful of any move Carvanha gets. For all these nice perks, Carvanha has absurdly awful defenses, which are somehow even worse than Remoraid's. That's the main reason this gets the Life Orb; this survives nothing. Plus it hit less mons super-effectively to use Expert Belt.

Frillish @ Eviolite
Calm/Cursed Body
252 HP/4 Def/252 SpD
Scald/Night Shade/Strength Sap/Acid Armor

The...glue? As much as anything can be in these conditions, I suppose. The goal is just to set up Acid Armors and then slowly mow its way through the opponent's team. Slowpoke seemed like it would be better due to boosting an offensive stat, but the Ghost typing on Frillish was invaluable, mainly for its Normal and Fighting immunities. Another awesome perk was Cursed Body. It's near-inevitable this will trigger sometime (30%) with a set as slow to accomplish anything as this. A lot of Pokemon are forced into a much worse option if it triggers, possibly even immune moves. Speaking of 30%, Scald's burns are great to see. Since Frillish doesn't boost its offenses, I tried to have its damaging options be as far removed from its stats as I could. Scald deals like 20% to bulkier neutralities, lol. Night Shade is great consistent damage and usually the preferred option, though Frillish's Normal-immunity means it finds itself fighting Normal-types a lot. My only reservation with how this set turned out is Strength Sap; it's obviously amazing versus physical attackers but it tends to be awkward when dealing with special attackers that come out. I think I would go with Recover if I wanted to optimize this team (lol).

Threats

roughly a third of the roster

The Run

An upside of a very short run is that it can feasibly be logged! You get the entire Little Cup RS experience. The first battle was a typical RS battle, with Remoraid scoring OHKOs on Butterfree, Quagsire, and Orbeetle with Airstream, Overgrowth, and Rockfall, respectively (not that Rockfall is needed for Orbeetle, but I just wanted to use it once). Battle 2 seemed to get off to a horrible start versus Cursola who more than likely isn't OHKOd and does a ton of damage with Shadow Ball, but Remoraid got a 1/16 range and OHKOd it with Max Geyser! I was happy to not lose Remoraid by the second battle, but then a Drought Torkoal wiped the smile off my face, as it usually does. While Geyser overwrote the sun and forced Solar Beam to charge, it still left me without Dynamax for the final Pokemon, which was...Luxray. Rain Waterfall would still KO, Hustle permitting, but Luxray got Intimidate. I'm sorry I got that 1/16 range!!! Remoraid was at least able to hit before fainting, so Carvanha finished with Crunch. Not a great start, but I pressed on. Carvanha got a nice Geyser KO on a Solrock lead, but an Intimidate Scrafty walled it. Thankfully, Frillish is nearly immune to it. Frillish set up and defeated it, and in came Obstagoon. With Night Shade immunity, Obstruct, and Parting Shot, this took a dreadfully long time to defeat, taking around half my Scald PP. But after that I got a very nice pair of battles where Carvanha swept through Beartic/Toxicroak/Gourgeist and Marowak/Volcarona/Lopunny teams with no issue. Battle 6 seemed to get off to a nice start too as Carvanha got a Geyser KO versus Vanilluxe, but then Greedent totally stopped me and I had to set up Frillish. I was a little lazy with healing versus it, and only ended with around 60% HP. Clawitzer came in and 2HKOd me with Dragon Pulse while I used Night Shade, blissfully unaware that Frillish was going to lose. Thankfully, Carvanha was able to finish it off with Crunch and keep the run going. Obvious heal time.

The first fight in the second leg had an Escavalier lead I had to switch to Frillish for, with the somewhat annoying caveat that I had to wait for it to stop using or miss with Screech. Frillish pressed on through it, though, and straight into an Appletun. Most Grass-types are horrendous to run into with Frillish, but Appletun's only Grass move is Solar Beam, and both Remoraid and Carvanha can OHKO it! It's more likely to start with Sunny Day, though, so I went to Carvanha since it was impacted less by that and got the Airstream KO. In came Kommo-o, which to my surprise was also a guaranteed Airstream KO. The next fight featured a Ribombee lead which Remoraid was forced to take 80% of its health or so from. Ouch...at least it got an Airstream KO for a speed boost. It then got easy OHKOs versus Wailord and Salazzle with Overgrowth and Geyser, respectively. The next fight was a nice reprevieve with an easy sweep versus Eldegoss/Exeggutor/Cinccino. The battle after that was looking to be problematic with a Perrserker lead that I went to Frillish for. Frillish "walls" this, but it's hard to keep defense up due to Screech and Iron Head can flinch. But then I got Cursed Body to activate on Iron Head. At first I didn't even think this was a good thing since it meant it would only use Screech, but I realized that I could get a free switch back to one of my sweepers now! Since Perrserker had been weakened a bit it could be KOd, so I went to Carvanha, primed to sweep with rain and a speed boost. It got just that, OHKOing Sirfetch'd and Starmie. Frillish had a smoother time the next battle versus a Crustle lead that could barely harm it (especially when Cursed Body triggered), and pushed through that, Klefki, and Marowak. Scald burned Marowak and I used Strength Sap on it, which caused Marowak to do the least damage I've ever seen it do (25 damage iirc?). Still could've gotten murdered by a crit, though. The 12th battle brought in another faster lead, Lopunny, which Remoraid no longer had the health to deal with. I sacrificed it and brought in Carvanha. I would need to Protect for a Speed Boost and risk Cosmic Power, but since Play Rough did 170% min that shouldn't have been a problem. Well...it used Cosmic Power anyways. God damn it! Now Geyser wouldn't KO, and I was still in KO range in Dynamax from LO recoil. I failed to get the KO, but then it used Cosmic Power again. O...k. Sure. Carvanha then KOd Eldegoss with Airstream, and was thankfully able to get a post-dmax KO on Orbeetle with Crunch. With Carvanha and Frillish alive, I was still in a decent position, but I took the heal anyways and moved on to my final leg.

And oh, how I immediately regretted it. I ran into a Beheeyem lead, which is totally inconsequential if I'm leading Carvanha but almost certainly a knock-out with Remoraid. Weakening it is pointless since Carvanha OHKOs, so I went for the option most likely to cause Remoraid to win - a Waterfall flinch, somewhat stymied by Hustle. I didn't get it and Remoraid fainted, leaving me in a pretty similar position to where I took the heal. Ugh. Carvanha easily got the KO with Darkness, and was then forced to use Max Guard for an extra Speed Boost versus Accelgor. Thankfully, the final Quagsire could be dealt with by Frillish. Power-Up Punch immunity was a godsend there. The next battle also seemed perilous with a Barraskewda lead, but thankfully it just used Acupressure and Carvanha defeated it with Max Airstream, and got OHKOs with Max Darkness versus Politoed and Porygon-Z. And then on battle 15, I ran into the worst lead - Tangrowth. I can't OHKO it, and it just mows this team down with priority Grassy Glides. The best option is to have Frillish disable Grassy Glide with Cursed Body, which is obviously inconsistent but worth going for. And I got it! With that, Carvanha was able to 2HKO with Airstream. Gigalith came in, and no Sand Stream activation meant it could have Sturdy. Thankfully, it didn't, but now my Dynamax would be gone for the last Pokemon. Which was....Passimian. A 3/16 range with rain Liquidation. Well, this team's already beaten the odds a couple times on this battle, what's one more? Too much, as it turns out. Carvanha missed the range and took 300% from Drain Punch. Passimian will be feasting on that health for years to come...

This is just a silly gimmick idea I've had in the back of my mind for a while now, and the eve of the Crown Tundra release seemed like a good time to do it since I'm kind of unmotivated for more serious runs with that so close. I don't think this team's record can be improved by a lot, but I could definitely see more defensive LC options like Scraggy going further than this, feasibly breaking 20 or even 30 with a really good run.
 

Eisenherz

επέκεινα της ουσίας
is a Forum Moderatoris a Community Contributoris a Tiering Contributoris a Top Social Media Contributor Alumnus
Moderator
Well, my RS burnout has ended, thanks mostly to sb879 for writing an amazing guide that really gave me the itch to play! I picked up where I had left off; 3 types were left in my list, and Dark was next! I felt a bit intimidated by it, because it looked to me like sb's current top streak was pretty optimal already, but as I rummaged through my boxes in the hopes of not having to breed anything new, I thought Sableye looked like it could have a lot of potential with Prankster Recover and a Fighting immunity, so I gave it a shot, and 2 runs later, here we are!

Pokémon Sword-Shield Screen Shot 2020-10-17, 10.54 PM.png


–––––––
S E T S
–––––––
@

Jolly | Moxie
IVs: 31/31/31/31/31/31
EVs: 4 HP / 244 Atk / 4 Def / 4 SpD / 252 Spe
Knock Off / Earthquake / Low Kick / Aerial Ace

@

Adamant | Intimidate
IVs: 31/31/31/31/31/31
EVs: 228 HP / 36 Atk / 4 Def / 4 SpD / 236 Spe
Knock Off / Fire Punch / Drain Punch / Swords Dance

@

Relaxed | Prankster
IVs: 31/0/31/31/31/0
EVs: 252 HP / 60 Def / 196 SpD
Toxic / Encore / Recover / Protect


–––––––––––––––––––––
T E A M B U I L D I N G
–––––––––––––––––––––

I really rushed things while building this, because I'm hoping to complete all types before Crown Tundra comes out, which is also why I gave a strong priority to Pokémon I already had ready in my boxes. Krookodile was a no-brainer, it's a top tier Shell Bell lead in RS, and I saw no reason to deviate from the one I got my Ground streak with, so the question was more about how I'd support it.

One of the first things that came to mind for my Krook lead was how to deal with Mienshao. Mandibuzz seemed like it might be pretty much a mandatory addition until I came across Sableye in my boxes. Prankster Recover and a Fighting immunity as well as a Bug resistance?? Count me in! Sableye's stats are obviously subpar, but EV investment goes a long way. With Toxic and Recover as staples to create a better version of my Mono Flying Emolga, I looked for ways to complete the moveset. Sableye has access to a lot of fun tricks, but very few of them seemed too useful for RS Encore jumped out at me, it's a new Gen 8 toy and I loved the idea of encoring stuff into Fighting moves, or stuff like First Impression.... or Cloyster into Shell Smash, for example, not to mention Pyukumuku. The 8 PP from Encore concerned me, but I wanted to test it out regardless and see how much it would come into play; it's not like Sableye was going to see a ton of action in theory. For the first run, going attackless seemed unfathomable, so I put Hex on there... I considered Night Shade, but Hex seemed like it would be often better and almost never worse.

Krookodile + Sableye made the team very weak to Fairies, and among Dark types neutral to Fairy, Incineroar was a pretty obvious pick for me since it can boost and recover with Drain Punch, not to mention Intimidate is really nice to have around and could pair well with Sableye in particular for some Intimidate shuffling and safe Recovers. At first, I put Lefties on Sableye, and really had no idea for a good item for Incin, so I just went with Muscle Band as a placeholder; I just wanted to get testing and see if Sableye was any viable.

The first run was very convincing, with my first heal happening at 36, and a loss at 54 before the 2nd heal. Sableye was really clutch and removed all doubts I had, but the set really didn't feel right. Not having Protect on a Toxic stall set felt awful, I had to tank so much more damage and it drained my Recovers away in no time, meanwhile, Hex was clicked only once, and it's really just because I had nothing better to click (ie. Protect!!). So I went against my principles and added Protect to make Sableye attackless... the 3 other moves were too important to remove for sure.

I thought Prankster Toxic+Recover was the reason Sableye would be good, but then I realized how amazing Prankster Encore actually was. I would say it was not only the best thing about Sableye, but the best thing about the entire backline, the glue that held it together and helped Incineroar really put in work. The usual pattern for anything that Incin outsped was simply to Encore, switch to Incin, SD as the Encore ends, and then sweep; it surprisingly worked out a lot! (it combos well with Krook too, since it can come in on the Encored Pokémon and start boosting with Max moves)

Ironically, while I added Protect in part to get free turns of Leftovers recovery, I also removed Sableye's Lefties and gave them to Incin... while useful on Sableye, Incin struggled really hard to stay healthy. Finding situations where I could Drain Punch a lot of HP back without taking an equally big hit was really difficult without ever having Incin in the lead. It often found itself in front of Fairies or Grass types that really can't easily be farmed for recovery. So I moved the Lefties, and thought about giving Sableye a Leppa Berry to help with Encore PP, but settled for Rocky Helmet. In hindsight, I think both would be fine, Rocky Helmet didn't come into play a ton, but it did handle a lead Barraskewda pretty much entirely, and I never actually ran out of Encore PP, though I came close.

Meanwhile, the Lefties were a godsend for Incin, it was truly night and day how much easier it was to keep it healthy. While any occasion to SD and Drain Punch a lot of HP back was very welcome, Incin managed to remain healthy mostly thanks to the Lefties alone. In the 3rd leg of this run, it went on and used about 3/4th of all of its attacking PP sweeping through stuff, which I find impressive for a secondary attacker without Shell Bell (this was without ever becoming the lead either)... I'm pretty sure it ended that leg with more sweeps than Krook.

–––––––––––
T H E R U N
–––––––––––

I'm particularly happy I was able to go past my goal in only 2 runs and not have to go on a long grind. This run had a really good first leg, with the first heal coming at 38. Krookodile still had a bit of PP, but had been worn down to low HP, and the rest of the team wasn't exactly healthy either, so I healed a little early to ensure no bad surprises.

The second leg, however, was a disaster. Similarly to how my Mono Ground streak was lost, Skarmory proved to be the most annoying thing ever; nothing on the team can really handle it reliably. It's not always a problem, because it usually sets up Spikes...but not this time. I still had a ton of PP on Krook and it was pretty healthy, but Skarmory showed up as a lead and it went straight for the Body Press. With no attacking moves, there wasn't much point in going Sableye, so I had to just tank it. I went for Max Knuckle, after which Max Darkness is a roll to KO. Skarmory lived the Max Darkness, went for another Body Press, and KOd... thanks to a crit. That really hurt, because the odds of healing everything back thanks to the Shell Bell weren't so bad... I kept going with lead Incineroar to battle 50, and Starmie showed up... I survived the encounter, but Incineroar ended at maybe 30% which isn't comfortable enough to keep going, so I healed after only 11 battles...

The third leg was a lot better though not ideal. As I mentioned already, this was Incineroar's leg, sooo many of the things Incin is meant to handle showed up as leads in the first dozen battles (stuff like Comfey, Tangrowth, Slurpuff...), as well as several things like Golisopod and Poliwrath that call for Sableye – and those encounters usually end with Incin sweeping. By the end, Incin had worryingly low PP left on all of its attacking moves, while Krook still had about half remaining all around. Things looked good for at least 90+, but a string of Pokémon that wore Krook down started showing up. It started with a Starmie, then as it was getting sort of healthy again, Dedenne, then a Kingdra... and despite all this, it was back at about 60% HP a couple battles later when a Lopunny showed up and went straight for the Play Rough (very unusual, it usually Cosmic Powers), crit, and left Krook in the red... and then the lead of the next battle was a Ribombee. Incin was also not at full HP, so I had to sacrifice Sableye to win that battle with Incin, and then the next battle featured a Sirfetch'd lead... lol.

If anything, that 3rd leg showed me that the backline now fulfills its role really well, since it allowed for an overall good leg (32 wins) despite Krook not getting the matchups to get a ton of sweeps as it often does.

–––––––––––––
T H R E A T S
–––––––––––––

Some of the things I had come to fear the most with Krookodile were handled pretty cleanly by the backline: Mienshao, Golisopod, Tangrowth, Froslass, Weavile, Cloyster, Slurpuff, Escavalier, Obstagoon, Scizor...

The biggest threats to the team were Pokémon I couldn't switch into and forced Krookodile to tank a big hit and then slowly heal it all with the Shell Bell; encountering too many of them in a row was a certain downfall for the team. These are the worst ones:

:starmie: :ribombee: :skarmory: :kingler: :clawitzer:

There are possibly more I just haven't run into since I didn't study the matchups before building the team and rather just tested things.

:pyukumuku: is certainly threatening as usual, but it went for Counter the both times I've seen it on my switch to Sableye, which means it was very safely handled by Encore + Toxic. A Toxic on the switch would be pretty horrible.

:sirfetchd: can be a problem, but only if it's a lead and is Scrappy – and goes for Meteor Assault rather than Defog. I encountered it twice outside the losing game and just risked the switch to Sableye, ready to accept the loss if it's indeed Scrappy Meteor Assault... the odds are in Sableye's favor to either catch a Defog or it being non-Scrappy.

I'm now setting my sights to Mono Steel, one of the only 2 types I still need to complete!
 
Last edited:

Jumpman16

np: Michael Jackson - "Mon in the Mirror" (DW mix)
is a Site Content Manager Alumnusis a Top Team Rater Alumnusis a Battle Simulator Admin Alumnusis a Smogon Discord Contributor Alumnusis a Researcher Alumnusis a Top Tiering Contributor Alumnusis a Top Contributor Alumnusis an Administrator Alumnus
SHORYU.jpg

A burned Apple is as good as a dead Apple. Tangrowth outspeeds, and obviously OHKOs 4HP apple with any attack.

Except Grassy Terrain.

This was Battle 145, in a string of good legs that had me use my first heal at 60 and my second at 105. But I wasn't going to be pleased with breaking my personal best by a mere six battles. And after being burned by a leadoff Torkoal's last-ditch Lava Plume at Battle 144, then having to take 342/434HP Dynamaxed, burned Appletun off the mound two batters later when Thievul threatened to knock my goals out of the park, my goal was in jeopardy.

Team, for a recap:

Rillaboom-Gmax@Shell Bell, Grassy Surge, 4HP/252Atk/252Spe, Jolly, Branch Poke/Grassy Glide/Low Kick/Acrobatics
Appletun-Gmax@Leppa Berry, Thick Fat, 252HP/4Def/252SpD, Calm, Apple Acid/Leech Seed/Recycle/Recover
Ferrothorn@Leftovers, Iron Barbs, 252HP/252Def/4SpD, Impish, Bullet Seed/Leech Seed/Protect/Rest

Thanks to Goodra in Battle 144 (Draco Meteor and unreliable Breaking Swipe usage) and Thievul's Stakeout Burning Jealousies, Apple was put at ~50HP to start Battle 145. A lead P2 that just did not cooperate with the usage of Conversion2 put it at 13HP on a switch from Ferro, which took it to 4HP after burn damage. Not good, obviously, especially with Apple's low speed. Luckily for me, this team is.

Rillaboom started Battle 145 at 36HP thanks to the aforementioned Goodra's stupid usage of Breaking Swipe the prior battle, one of which CHed as I was trying to get it to use Focus Blast on Ferro, then switching in on that Thievul's Knock Off at 100 HP to finish it off with Grassy Glide. Through careful usage of Ferro's PP (after beating one-out Perrserker with Leech Seed, Max Guard and Max Overgrowth) and daring switches to Rillaboom on that Tangrowth, I was able to get Apple in on the last two PP Tangrowth would use, and spar a little farther.

2020-10-19.jpeg


This team is so good, and I honestly think it would do amazingly in the actual Battle Tower. Its combination of power, synergy and high PP came into play so well throughout the entire run. The most important thing about this streak was, as I mentioned in my previous post, taking Zoroark and its ability to use FT on Ferro off the table. That meant deciding whether it was worth it to switch Apple into things like Drapion, or leave Rillaboom in on lead Scizor, etc. But diligence and sticking with this team to learn how it truly operates really paid off in the long run.

I'm satisfied enough with 168 to leave Grass to grow lazily in the outfield for a while, but Gamefreak really hit a home run with this format.
 

Eisenherz

επέκεινα της ουσίας
is a Forum Moderatoris a Community Contributoris a Tiering Contributoris a Top Social Media Contributor Alumnus
Moderator
Phew, barely made it in time! While I'm a bit disappointed I wasn't able to finish all 18 types properly pre-Tundra, I'm really happy I was at least able to break 100 before Tundra, and definitely not with a type I was expecting to have such potential!

Pokémon Sword-Shield Screen Shot 2020-10-22, 1.15 AM.png


–––––––
S E T S
–––––––
@

Jolly | Hustle
IVs: 31/31/31/x/31/31
EVs: 252 Atk / 4 SpD / 252 Spe
Iron Head / X-Scissor / Stomping Tantrum / Rock Slide

@

Jolly | Sand Rush
IVs: 31/31/31/x/31/31
EVs: 252 Atk / 4 SpD / 252 Spe
Iron Head / Earthquake / Rock Slide / Swords Dance

@

Impish | Mirror Armor
IVs: 31/31/31/x/31/31
EVs: 252 HP / 4 Atk / 116 Def / 132 SpD / 4 Spe

Drill Peck / Body Press / Bulk Up / Roost

–––––––––––––––––––––
T E A M B U I L D I N G
–––––––––––––––––––––

Right away, it was pretty obvious to me that Durant was the best sweeper to build around for Mono Steel. I thought about giving it the Shell Bell, but discussion on the Discord server made it clear that Torkoal was going to be a threat for Steel, and the Muscle Band allows for a guaranteed OHKO on it, among other important Pokémon that switching into (or taking a hit from) would have been very problematic:

252 Atk Muscle Band Hustle Durant Max Quake (130 BP) vs. 252 HP / 0 Def Torkoal: 170-202 (100.5 - 119.5%) -- guaranteed OHKO
252 Atk Muscle Band Hustle Durant Max Flutterby (130 BP) vs. 252 HP / 0 Def Quagsire: 201-237 (103.6 - 122.1%) -- guaranteed OHKO
252 Atk Muscle Band Hustle Durant Max Steelspike (130 BP) vs. 0 HP / 0 Def Kommo-o: 142-168 (100 - 118.3%) -- guaranteed OHKO
252 Atk Muscle Band Hustle Durant Max Steelspike (130 BP) vs. 252 HP / 0 Def Falinks: 174-205 (106 - 125%) -- guaranteed OHKO
(and a bunch of higher calcs where the Muscle Band turns a roll into a guaranteed KO)

...as well as the option to OHKO some weaker foes with the neutral coverage (Quake and Rockfall), like Gardevoir or Starmie, which helps with PP management.

Initially, I thought Ferrothorn was certainly a must, if only for the juicy Leech Seed healing. With the Shell Bell available, a secondary sweeper seemed like a good way to go, especially since I wasn't sure Durant could reliably go through its offensive PP before going down (spoiler: it can), so I went with Excadrill, probably the best Shell Bell sweeper available pre-Tundra for Steel.

Early testing didn't go so well; Steelix proved a massive problem very quickly, and the only way Ferrothorn could deal with it was with an Iron Defense Body Press set, which didn't sound bad at all, so I ran that... and then ran into Palossand, which Body Press Ferro is obviously powerless against. I spent a while looking for ways Ferro could deal with both of these, or a sweeper that could help out the situation against these over Excadrill... to no avail. And that's when I found Corviknight, the one Pokémon that seemed to be a reliable answer to both, and could even setup on them for safer wins. So I said goodbye to Ferrothorn, shed a tear for the departure of Leech Seed, and tested Corviknight, and holy cow was it good. The very first leg I had with it, which granted was probably as good as it could have gone, went all the way to 46; needless to say I was sold. That run brought me to 76 with no 3rd leg.

I streamed the 2nd run with the team, which funnily ended at the exact same number, but with 3 full legs; none of them went particularly well. I faced a lot of stuff I hadn't faced in my first run, and got my fair share of bad luck, but it was a valuable run nonetheless that taught me how to deal with a lot of the threats, many of them which I hadn't thought about previously. I made a few more runs afterwards, and learned to better protect Durant against what threatened it. During those runs, I changed Corviknight's Speed to outspeed Pikachu at +1, this seemed relevant since it was definitely a threat to Corviknight, but this made Corviknight speed tie with Magneton, and came into play when a Magnet Pull Magneton showed up and paralyzed Corviknight... When underspeeding, Magneton doesn't bother Thunder Waving (most of the time, anyway) since it already outspeeds, and goes straight for Electro Ball, which is relatively better (corvi vs magneton is a pretty bad spot to be in regardless, of course). So I went back to my old EVs, and figured if anything, I have Exca as a safe switch-in to Pika at any time, so it should be ok.

During those couple runs, it became increasingly clear that Excadrill was more than a secondary sweeper, it was a common switch-in that needed to finish things off at times, and Shell Bell recovery wasn't really cutting it to offset the damage it had to tank. I think this issue stemmed from the fact I was using my Mono Ground Excadrill set, a Sand Force set that I ran with Soft Sand, and I underestimated how important the Soft Sand was for its damage output. Without it, it had way fewer OHKOs, and therefore had to tank more hits.

So I switched my Excadrill approach and switched to a SD set to take advantage of the good matchups it switched into. This meant Sand Force was less important, and also left me without a way to boost speed (I replaced Aerial Ace), so I also switched to Sand Rush. It had exactly the effect I was hoping: cleaner sweeps, and in return, easier Shell Bell recovery! The very first run with this set ended up being this one.

–––––––––––
T H E R U N
–––––––––––

This was a very balanced run. I had no crazy legs where everything was going great, but also no disastrous legs. The first heal happened at 40, then the second at 81, and the 3rd was cut short by a Tri Attack burn on Excadrill, but still had a decent number. In all 3 legs, I was able to utilize Durant's PP in its entirety, and realized it didn't require any recovery in the end.

Pokémon Sword-Shield Screen Shot 2020-10-21, 6.16 AM 2.png

(around the end of the second leg... even Struggle did quite a lot of damage!)

Pokémon Sword-Shield Screen Shot 2020-10-22, 12.56 AM.png

(battle 112... good night Durant, you did good ;_;)

One might think Hustle is an issue for Durant, but it hasn't really come into play. In this run, Durant only hit 1 Hustle move, and it was on a lead Meowstic, where going for a Hustle X-Scissor is the best play in case of a Prankster Yawn; if it misses, it's not the end of the world, there are safe switches. Otherwise, any time Dmax would run out, or a threat that stalls out my Dmax too badly and chip Durant down would show up, I would simply switch rather than risk Hustle moves. Switching out of Dmax on turn 2 or 3 was relatively common, and Corviknight proved to be an incredible partner for Durant in that regard, and certainly the reason it did so well.

I cannot praise Corviknight enough for its role in this streak, it was the giant on which's wings Durant and Excadrill both stood. It reliably disposed of everything that threatened the team, and while it was often at the cost of more PP than I would have liked, it tended to have just enough to allow Durant to go through all of its PP, and a bit more (surprisingly enough, Roost is usually what had the most PP remaining by the end). It spent the entire 2nd leg paralyzed (thanks Miltank), which definitely held it back a lot. Usually, corvisweeps after a couple Bulk Ups + Airstream are pretty common, and paralysis made this impossible to rely on, but it still managed to do its job through it all.

Having Excadrill as a safe switch-in to Electric was definitely a massive help for Corviknight, and SD Excadrill proved to not only be good when switched into favorable matchups, but also as a lead after Durant was down. Letting it tank a hit for a safe sweep was often beneficial since most of it could be recovered through Shell Bell. I thought about switching to Adamant Excadrill when switching to Sand Rush, but after looking at speed tiers and seeing that Jolly was the only way to outspeed Volcarona, the thought immediately went away.

–––––––––––––
T H R E A T S
–––––––––––––

The worst Pokémon for this team are not really things that threaten it offensively, but rather things that drain Corviknight's PP. If they show up often enough, they reduce a leg's lifespan by a lot. In that category, these are the worst offenders by far (I wasn't particularly lucky in this run sadly, and faced those several times, while some easier matchups like Musharna, Pyukumuku or Aromatisse didn't show up a single time):
:sandaconda: :toxapex: :corviknight: :dubwool: :skarmory: :crustle:

The next category of threats are those that have a chance to inflict status to Corviknight. Burn is definitely worse than Paralysis for it, but both hold it back a lot:
:dusknoir: :miltank: :lickilicky: :porygon2: :gyarados: :milotic:

And finally, a few Pokémon can be offensive threats when the team is caught off-position (Excadrill is in and unboosted, or Corviknight is unboosted/unhealthy when they come out):
:boltund: :krookodile: :trevenant: :coalossal: (when dmax has been used already)

A special shout out to the Pokémon that singlehandedly ended one of my runs:
:poliwrath: The play against Poliwrath is clearly Corviknight, which means playing the Dynamic Punch roulette. Corvi can tank several Dynamic Punches, so for things to go wrong, Poliwrath has to hit several in a row (at least 3, 4 if Corviknight was healthy), and Corviknight has to hit itself in confusion every single time as well. The odds are heavily in Corviknight's favor, but one of my runs where Poliwrath showed up 2 times within 5 battles (with a heal in between), it hit 8 Dynamic Punches in a row, and Corviknight hit itself 6 times in a row; it killed the 2nd leg of that streak, and then right after the heal, the streak itself. This was heavily infuriating. My next Poliwrath encounters were not as bad; its streak ended at 10 D-Punches in a row, and while the 11th missed... the 12th hit and crit, lol. Thankfully, Corviknight didn't hit itself that time, and the run was saved.
While I harbor special resentment toward this Poliwrath, I don't think it's generally an issue for Corviknight, a lot of stuff needs to go wrong to fail 1v1ing it.

––––––––––––––––––––––––––––––––––––––––––––––––––––

I wanted to finish all 18 RS types before Crown Tundra dropped, but as it's literally hours away now, I'm out of time to do Fairy. I could have left my Steel streak at 76 to tackle Fairy earlier and accomplish my goal, but when I realized the team definitely had 100+ potential, it felt wrong to just leave it, as Steel is another type that will be shaken heavily by Crown Tundra (Celesteela, Kartana, Heatran...), so I decided it was more important to do this team justice, and if anything, getting 100 before Tundra feels just as good as finishing all 18 types would have!!

See you on the other side of the DLC!
 
Last edited:

Users Who Are Viewing This Thread (Users: 2, Guests: 1)

Top