Rotations Retrospective: A Look At The Lost Metagame Of Battle Spot!
| « Previous Article | Home | Next Article » |
Introduction
The sun is setting on the sixth generation of Pokémon. It's been a fun ride these past three years, and almost everyone is hyped for the many new Pokémon, features, and refinements Pokémon Sun and Moon are set to bring!
However, like most sequels, Pokémon Sun and Moon can't expand on everything Pokémon X, Y, Omega Ruby, and Alpha Sapphire have done. One of these things are Rotation battles, which are unlikely to return to Battle Spot in Pokémon Sun and Moon.
Now, what are Rotation battles? Most people remember them as a weird, gimmicky battle mode that was introduced in Pokémon Black and White and as a good way to train up multiple Pokémon in Pokémon X and Y's Cafe Le Wow. However, believe it or not, while the Rotations ladder wasn't very active over its short life, there was in fact a metagame developing underground. And, it just so happens that this obscure "lost metagame" is one of the weirdest and most intriguing forms of Pokémon out there!
Rules of Rotations
- The maximum level for Pokémon is level 50. They will be leveled down if they exceed this level.
- You bring six Pokémon to Team Preview, but you may only choose four Pokémon to battle.
- Unlike in Smogon metagames, there is no OHKO, Sleep, or Evasion Clause.
The mechanics of Rotations
The big hook of Rotations is right in the name: the mechanic of rotating. Players send out three Pokémon at once (and choose four Pokémon in total), but only one of them can attack, and only the Pokémon in front of the pack can be attacked. However, instead of just switching, you can choose to rotate to one of the other two Pokémon you sent out. Rotating works much like switching, except your Pokémon attacks on the same turn it rotates in! This one mechanic comes with several quirks that you should get acquainted with.
- Pokémon that are rotated out will keep their boosts.
- Pokémon afflicted by moves such as Taunt and Torment, or under the effect of pseudo-status such as confusion, will still be affected by those if they are rotated out.
- You may only switch out the Pokémon that is currently rotated in. You can't switch and rotate at the same time.
- For activation abilities such as Intimidate and Sand Stream to be triggered, Pokémon must either lead or be switched in. If these Pokémon are sent out in the back, their abilities will not activate.
- Similarly, abilities and moves that announce their presence such as Mold Breaker and Air Balloon will not be shown if the Pokémon with them are sent out in the back.
- Moves that only work on turn one such as Fake Out will be conserved until the user rotates in.
- Shadow Tag and moves that block switches do not prevent a rotation.
- Perish Song only counts down on the turn an afflicted Pokémon has been rotated in or stays in play.
Big metagame trends in Rotations
While Pokémon often run similar sets to what they run in Battle Spot Singles, the rotation mechanic really changes up metagame trends compared to Battle Spot Singles.
- Rotations tends to be a very fast-paced metagame. Because of the many possible moves to use in a single turn that rotation allows, stall teams are nearly nonexistent in this metagame. However, support Pokémon do exist.
- Rotations can get very prediction heavy due to the rotation mechanic. Most of the best teams usually find ways to lessen the need for perfect prediction, such as using field moves that give them an edge.
- Field effects are huge in Rotations, since teammates can immediately take advantage of them by rotating in! Let's discuss the most common field moves you'll find below.
- Tailwind and Trick Room are the most common field moves, since they provide effective speed control. Icy Wind and Rock Tomb are also seen for their ability to lower Speed.
- The biggest change here is Trick Room, which is far more common in Rotations than in Battle Spot Singles.
- Reflect and Light Screen are very common, since they can save teams from bad predictions. As a side effect, some teams will run Chandelure or Brick Break to deal with these.
- Other common field effects include Gravity and weather.
- Switching is usually not a good idea in Rotations, since it completely costs you a valuable turn for little reward when compared to rotating. After losing one Pokémon, switching also becomes impossible.
- Choice item users, while not unseen, tend to be saved for late-game, as the difficulty in switching makes them risky to use.
| Defining unique Pokémon | Defining Battle Spot Singles Pokémon | Important unique Pokémon | Important Battle Spot Singles Pokémon | Niche unique Pokémon |
|---|---|---|---|---|
| Click on the Pokémon sprite to show/hide the information about it. | ||||
| These Pokémon tend to only fluctuate in usage with other top Pokémon and are very unique to the Rotations metagame. Every player needs to take these Pokémon into account when teambuilding! | Thankfully, many of Rotation's most important Pokémon happen to be staples of Battle Spot Singles as well, so you can read their analyses to get plenty of information on them! Here, we'll focus on how rotations forces them to mix up their tactics a bit. | These Pokémon aren't quite as defining, and their usage can fluctuate quite a bit between seasons, sometimes being used as much as the defining Pokémon, or sometimes having rather low usage. Either way, preparing for these Pokémon is still important, since they are uniquely situated to take advantage of Rotations! | Many more Battle Spot Singles Pokémon, while prone to fluctuating in usage between seasons, are still important to take into account! | Like with most Pokémon metagames, there are many uncommon Pokémon that fill out a niche in Rotations. However, because of Rotation's low userbase and somewhat unstable nature, sometimes these niche Pokémon will end up with rather high usage for one season at a time, because some good battlers may have discovered how useful they are! |

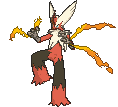
Thundurus-T
Roles: Special Attacker, Special Sweeper
Choice Specs
- Thundurus-Therian @ Choice Specs
- Ability: Volt Absorb
- EVs: 4 HP / 252 SpA / 252 Spe
- Timid Nature
- - Thunderbolt
- - Hidden Power Ice
- - Focus Blast
- - Dark Pulse / Thunder
Special Attacker
- Thundurus-Therian @ Life Orb
- Ability: Volt Absorb
- EVs: 4 HP / 252 SpA / 252 Spe
- Timid Nature
- - Thunderbolt
- - Hidden Power Ice
- - Focus Blast
- - Dark Pulse / Nasty Plot / Thunder
What's unique about this Pokémon?
Thundurus-T is a fine case study of how Rotations can cause unexpected Pokémon to rise to stardom. Thundurus-T is used much more than Thundurus, for two major metagame-specific reasons. The Prankster Thunder Wave that Thundurus is famous for in other metagames is a riskier proposition in Rotations with the large number of Trick Room teams, and Thundurus-T's extra power and Electric-type immunity give it more chances to punish incorrect rotations. Thundurus-T's Volt Absorb also makes it a good Pokémon to consider on rain teams.
What can I expect to see?
Thundurus-T's two main sets tend to switch around in usage a lot, but Choice Specs as of this article has been the most common set for the past few seasons. As discussed before, Choice items can be a risky proposition in Rotations with how difficult it is to switch out, so this type of Thundurus-T usually performs best later in the game, after Electric-resistant Pokémon have been dealt with. The other moves are more emergency attacks in case removing those proves to be difficult. Hidden Power Ice OHKOes Garchomp and Mega Salamence, and it 2HKOes opposing Thundurus-T, but it's easy for other Pokémon to take advantage of. Focus Blast smashes through Tyranitar, Hydreigon, Ferrothorn, and Excadrill, but note that its shaky accuracy can make things risky. Dark Pulse has few Pokémon resistant to it, which makes it a good emergency move, but rain teams may opt for Thunder for an immense amount of power and a 30% shot of paralysis.
Life Orb Thundurus-T tends to work similarly to Choice Specs, but being able to switch up moves makes it much easier to use early on in the game. If you're willing to risk setup or have dual screens support, you can even use Nasty Plot to make Thundurus-T extremely difficult to wall! Choice Scarf's usage has fallen drastically over the past year, but it can still be a shocking surprise for hitting fast Pokémon such as Talonflame and Garchomp.
What are its flaws?
Thundurus-T's biggest issue is that it's slower than Garchomp, which makes it much more difficult to use by making Thunderbolt far riskier to use. Thundurus-T's frailness and reliance on diverse coverage in general mean that it will be severely punished when the wrong rotation is made against threats such as Aegislash, Sylveon, Tyranitar, or even opposing Thundurus-T.

Klefki
Roles: Dual Screen setter, Prankster Thunder Wave user
Dual Screener
- Klefki @ Light Clay
- Ability: Prankster
- EVs: 252 HP / 252 Def / 4 SpD
- Bold Nature
- - Reflect
- - Light Screen
- - Thunder Wave
- - Foul Play / Dazzling Gleam
What's unique about this Pokémon?
Klefki is the premier user of Reflect and Light Screen in the Rotations metagame. This is a huge deal in a metagame that is so heavily reliant on prediction. Getting Reflect and Light Screen up isn't just great for sweepers; it can also act as a buffer that saves you from a bad rotation!
What should I expect to see?
Almost all the Klefki you see will be running Reflect and Light Screen, since that's Klefki's big selling point in Rotations! Thunder Wave is still excellent in Rotations, since crippling a Pokémon with paralysis further reduces the mind games your opponent can play. Foul Play is usually the best offense Klefki can offer, since its attacking stats are low, but Dazzling Gleam is useful if you really need to OHKO Hydreigon. Unlike in most metagames, Klefki usually runs a Bold nature and maximum HP and Defense, since Special Defense investment won't stop Chandelure from ruining Klefki's day!
There are some other support moves you may see Klefki running that can be a nasty surprise if you aren't prepared. The notorious Swagger set is occasionally seen in Rotations, though it's even riskier than usual since rotating Pokémon away is much easier than switching. Torment can exert more control over the opponent's options. As odd as this may sound, some Klefki even use Rain Dance or Sunny Day to support their weather teams, which can make Klefki a very useful asset against Sandstorm teams! Rain Dance in particular can save Klefki from getting devastated by Chandelure.
What are its flaws?
Klefki has one big archnemesis in Rotations: Chandelure! Since it has access to Infiltrator and STAB Fire-type attacks, Light Screen won't save Klefki from getting smited. Klefki also gets shut down by Taunt, especially considering how difficult it is to switch out in Rotations. Some users of Taunt you may encounter include Whimsicott, Talonflame, Jellicent, Gengar, and Thundurus.
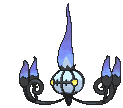
Chandelure
Roles: Special Attacker, Trick Room user, Burn supporter
Offensive support
- Chandelure @ Focus Sash / Air Balloon
- Ability: Infiltrator
- EVs: 4 HP / 252 SpA / 252 Spe
- Modest / Timid / Quiet Nature
- - Shadow Ball
- - Flamethrower / Fire Blast
- - Trick Room
- - Will-O-Wisp / Clear Smog / Energy Ball / Hidden Power Ice
What's unique about this Pokémon?
Chandelure is a major response to Rotations's obsession with setting up field effects. With Infiltrator, it blasts through dual screens and Substitute, and it has a great support movepool to back up its excellent offenses!
What should I expect to see?
Shadow Ball is the one consistent STAB move you can expect to see on Chandelure, dealing massive damage to Aegislash regardless of the weather and having few Pokémon that resist it. Flamethrower is the usual best choice for a reliable Fire-type STAB move to fry Ferrothorn, but Fire Blast actually has a 75% chance to OHKO Aegislash if Chandelure is running a Modest or Quiet nature, at the cost of lower accuracy. Trick Room may seem strange on a Pokémon that often invests in Speed, but it's extremely useful against Tailwind and opposing Trick Room teams, and if you go with Quiet Chandelure, it works well on Trick Room teams itself. Item-wise, Focus Sash helps with Chandelure's mediocre defenses, but Air Balloon is great if you don't lead with Chandelure, since the Air Balloon message doesn't show up if it's in the back!
The last moveslot is rather team dependent. Will-O-Wisp does a good job of crippling the many physical Pokémon of Rotations and is especially effective with Air Balloon against Mega Kangaskhan and Garchomp. Clear Smog is more risky, but with a Focus Sash in tow, it could save your team from getting swept, and it is especially useful against Minimize Clefable. Energy Ball is handy for hitting Water-types such as Rotom-W and Politoed much harder than Shadow Ball, while Hidden Power Ice is a risky option that can seriously damage Garchomp and Mega Salamence.
What are its flaws?
Chandelure's Speed makes it just slow enough for most major offensive Pokémon to outspeed it, but fast enough to get undersped by key Pokémon such as Mega Mawile. This leaves Chandelure in an awkward position where it sometimes has trouble attacking first no matter what field effects are up, which is a problem considering how bad its defenses are. Chandelure also has a lot of trouble against rain teams, which neuter its Fire-type STAB.

Togekiss
Roles: Early-game Choice Scarfer
Choice Scarf Flincher
- Togekiss @ Choice Scarf
- Ability: Serene Grace
- EVs: 4 HP / 252 SpA / 252 Spe
- Timid Nature
- - Air Slash
- - Dazzling Gleam
- - Tailwind / Fire Blast
- - Trick
Support
- Togekiss @ Sitrus Berry
- Ability: Serene Grace
- EVs: 252 HP / 252 SpA / 4 Spe
- Modest Nature
- - Air Slash
- - Tailwind
- - Heal Bell / Roost
- - Yawn / Thunder Wave
What's the big deal?
Choice Scarf Togekiss is already infamous with most Pokémon players with its annoying knack for Air Slash flinches, but Rotations brings that to a whole new level, with Togekiss now being fully capable of softening up Pokémon for sweepers with its flinches!
What should I expect to see?
Togekiss is all about softening Pokémon up with Air Slash. In fact, this is so much the case that the other moves tend to be rather situational! Dazzling Gleam allows Togekiss to OHKO Hydreigon and is generally useful if you need to slam Dragon-types. Getting locked into Tailwind isn't good news, but it's a good move to use after Trick and can be used in emergencies if you send out Togekiss late-game. Fire Blast isn't too bad to be locked into, dealing slightly less damage than Air Slash and frying Ferrothorn and Mega Mawile. Flamethrower is more reliable, but it's rather weak to be locked into. Trick is a situational move where it might just be useful to lock something into a bad move with a Choice Scarf, and it also makes Tailwind more usable.
While rare, Togekiss that lack Choice Scarf aren't unheard of, as Togekiss has an excellent support movepool with moves such as Tailwind, Wish, Yawn, and Heal Bell to back it up.
What are its flaws?
The best way to deal with Togekiss is to make sure that Air Slash isn't threatening whatsoever. Under the sand, Excadrill smashes through Togekiss with Iron Head, while the rare Scizor ignores Air Slash with its priority Bullet Punch. Pokémon that resist Air Slash and hit Togekiss super effectively such as Thundurus-T and Mega Mawile are a serious threat, but note that if they flinch, they may just get into the KO range of another sweeper. Finally, though hard to set up against Togekiss, getting Trick Room set up removes most of its flinching threat.

Whimsicott
Roles: Tailwind setter, Trick Room setter, Encore user
Speed Support
- Whimsicott @ Focus Sash
- Ability: Prankster
- 252 HP / 36 SpA / 220 Spe
- Timid Nature
- - Encore
- - Moonblast
- - Tailwind / Trick Room
- - Taunt / Grass Whistle / Giga Drain / Light Screen
Level 1 Endeavor
- Whimsicott @ Focus Sash
- Ability: Prankster
- Any nature
- - Endeavor
- - Encore
- - Trick Room
- - Grass Whistle / Taunt / Light Screen / Sunny Day
What's the big deal?
With how difficult it is to switch out in Rotations, Whimsicott's priority Encore can become a deadly tool. It also has plenty of other valuable support moves that fluctuate in usage, such as Tailwind, Trick Room, and Taunt.
What should I expect to see?
Be warned: Whimsicott's moves tend to be extremely unpredictable, as its moveset usage fluctuates a lot between each season! The only two constants are Encore and Moonblast. Encore is the big reason to use Whimsicott; since switching out is so difficult in Rotations, Encore is extremely punishing! Moonblast isn't very powerful, but it gets an important OHKO on Hydreigon and 2HKOes Garchomp and Mega Salamence. Most Whimsicott will have some sort of speed control move as well. Tailwind is an excellent choice, since Prankster allows it to go first, giving your offensive team an edge. However, Trick Room is still a useful option despite going last, since it allows Whimsicott to mess with other Trick Room teams, and it's even useful on your own Trick Room team because of its other support moves.
There are tons of options for the last slot. Taunt is great for dealing with other Prankster Pokémon such as Meowstic-M, Klefki, and Thundurus. Grass Whistle is a last-ditch attempt to cripple the foe and becomes especially deadly with Gravity support. Giga Drain gives Whimsicott an option against Rotom-W and Jellicent, while Light Screen protects you from special attackers. Sunny Day is an especially useful tool against rain teams, and if you want to roll the dice, you can use Swagger.
Whimsicott should usually be running 220 Speed EVs to outspeed Adamant Talonflame and Timid Thundurus and using a Focus Sash so it can use a speed control move at least once. However, if you're worried about opposing Whimsicott, using maximum Speed is fine. Maximum HP gives it more bulk, and the rest can go into Special Attack, but you can switch HP and Special Attack around if you want to deal over 70% to Garchomp and Mega Salamence with Moonblast. Finally, you can opt to use a Level 1 Endeavor set for Whimsicott. While this set's usage has greatly diminished over the past few seasons, it allows Whimsicott to be more of an asset on Trick Room teams, allowing it to snipe certain problem Pokémon with either Endeavor or Encore.
What are its flaws?
Whimsicott is a great support Pokémon, but unless you get lucky with Grass Whistle, it fails to do much to most non-Dragon-type offensive Pokémon, such as Chandelure and Mega Mawile. Mega Kangaskhan in particular can be a big issue, since it can set up through Taunt and slice through Focus Sash with Parental Bond Double-Edge.

Ferrothorn
Roles: Bulky Offense, Gravity support, Paralysis support, Trick Room attacker
Support
- Ferrothorn @ Rocky Helmet
- Ability: Iron Barbs
- 252 HP / 252 Atk / 4 Def
- IVs: 0 Spe
- Brave Nature
- - Power Whip
- - Gyro Ball / Iron Head
- - Gravity / Thunder Wave / Leech Seed
- - Thunder Wave / Protect
Curse
- Ferrothorn @ Rocky Helmet / Chesto Berry
- Ability: Iron Barbs
- 252 HP / 252 Atk / 4 Def
- IVs: 0 Spe
- Brave Nature
- - Curse
- - Gyro Ball
- - Power Whip / Bullet Seed
- - Gravity / Rest / Bulldoze / Protect
Choice Band
- Ferrothorn @ Choice Band
- Ability: Iron Barbs
- 252 HP / 252 Atk / 4 Def
- IVs: 0 Spe
- Brave Nature
- - Gyro Ball
- - Power Whip / Bullet Seed
- - Iron Head / Knock Off
- - Knock Off / Bulldoze
What's the big deal?
Ferrothorn is a common sight in Battle Spot Singles, but in Rotations, Ferrothorn takes a rather different approach, focusing on its deceptively powerful attacks to deal much more damage than you'd expect and also having access to the excellent support move Gravity!
What should I expect to see?
Most Ferrothorn will use Gyro Ball and Power Whip, as Ferrothorn's low Speed and alright Attack stat make these high-powered moves rather strong. For example, even with no offensive item, Gyro Ball is able to 2HKO important Pokémon such as Mega Kangaskhan, Thundurus-T, and Garchomp. Gravity is an excellent support move that makes Pokémon such as Garchomp much more dangerous. However, if you have no use for Gravity, Thunder Wave is good for defeating teams that rely on Tailwind, and it pairs well with Iron Head. Leech Seed isn't as useful as usual, but the difficulty in switching does make it last much longer in Rotations. Protect is especially good if you have Wish support, letting Ferrothorn last much longer.
Support isn't all Ferrothorn is capable of in Rotations, as offensive sets can be rather useful on Trick Room teams. Curse is uncommon anywhere but Rotations, and it's awesome for making Gyro Ball extremely powerful. Power Whip is still good, but Bullet Seed is good to consider if you're worried about Power Whip's accuracy, and it can break through Substitutes occasionally as well. The usual support moves are still good, but you can use Bulldoze to nail non-Air Balloon Heatran while under Trick Room, and Chesto Berry + Rest lets Ferrothorn last longer. If you want immediate power under Trick Room, Choice Band works even better than it does in Battle Spot Singles.
What are its flaws?
As usual, Fire-type Pokémon are the bane of Ferrothorn's existence, especially since many of them such as Chandelure and Heatran can use Air Balloon to avoid even boosted Bulldozes. Other Fire-types to watch out for include Entei, Mega Charizard X and Y, and Blaziken.

Sylveon
Roles: Wish passer, Calm Mind user, Special attacker
Wish Passer
- Sylveon @ Sitrus Berry / Kee Berry
- Ability: Pixilate
- 236 HP / 12 Def / 248 SpA / 12 Spe
- Modest / Quiet Nature
- - Wish
- - Hyper Voice
- - Protect / Shadow Ball
- - Yawn / Heal Bell / Calm Mind
Choice Specs
- Sylveon @ Choice Specs
- Ability: Pixilate
- EVs: 236 HP / 12 Def / 248 SpA / 12 Spe
- Modest / Quiet Nature
- - Hyper Voice
- - Psyshock
- - Shadow Ball
- - Hidden Power Fire / Hidden Power Ground
Calm Mind + Rest
- Sylveon @ Chesto Berry
- Ability: Pixilate
- EVs: 236 HP / 12 Def / 248 SpA / 12 Spe
- Modest / Quiet Nature
- - Calm Mind
- - Rest
- - Hyper Voice
- - Shadow Ball / Snore
What's the big deal?
Sylveon is a common sight in Battle Spot Singles, and while it does run some similar sets here, Rotations gives Sylveon a new very important role as well: it makes Sylveon one of the best Wish passers in the game!
What should I expect to see?
Most Sylveon run Wish, and with its special bulk, Sylveon does a great job of using it. However, don't underestimate Sylveon's offenses, since Hyper Voice still does plenty of damage even without a boost and is particularly good against Substitute Pokémon. Protect works great with Wish, giving Sylveon the ability to restore its health fairly reliably. Yawn works wonderfully in a metagame where switching is so difficult, while Heal Bell can save your sweepers from status. However, if you want more offensive potential, you can run Calm Mind, and even use Shadow Ball over Protect to nail Aegislash. Sitrus Berry usually makes the most sense for recovering some health, but Kee Berry is also a great choice, since using Wish and then Protect as it gets hit by a weaker physical attack can make Sylveon much harder to take down!
That being said, the standard Choice Specs and Rest + Calm Mind sets still work fine in Rotations, so you can check out the Battle Spot Singles analysis for those. The big difference in Rotations is that even the Calm Mind + Rest set tends to go offensive, as it's usually best to hit hard and support it with Reflect and Light Screen. Also, with the prominence of Trick Room, using Quiet Sylveon is not out of the question.
What are its flaws?
Much like in Battle Spot Singles, Steel-types are serious problems, with Aegislash, Mega Mawile, Ferrothorn, and Heatran all being around to give it trouble. As long as dual screens aren't set up, physical attackers such as Mega Kangaskhan, Garchomp, and Mega Salamence can smash through it fairly easily.
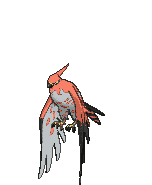
Talonflame
Roles: Late-game cleaner, Tailwind setter, Taunt user, Burn support
What's new for this Pokémon?
With the prediction-heavy nature of Rotations weighing heavily on its players, Talonflame comes as a relief for most teams, with its excellent priority Brave Bird making it one of the best cleaners in the metagame! Choice Band Talonflame works great late-game (though it can also use U-turn early in the game to hit Tyranitar decently hard), but a significant portion of Talonflame run Life Orb, Sharp Beak, or Sky Plate because of Tailwind, which can give Talonflame's team a huge offensive edge over others thanks to the Speed boost. Talonflame even works well on Trick Room teams thanks to Brave Bird's priority, and it gives teams a fast Pokémon to use once Trick Room is over. The last slot on non-Choice Band Talonflame is usually Swords Dance to set up a sweep, but Roost, Will-O-Wisp, and Taunt are not unheard of.
Unlike in Battle Spot Singles, defensive Talonflame are rather rare in Rotations, since rotating in Pokémon with Rock-type attacks is a lot easier than switching them in. Also, note that dual screens can be a big problem if you intend to sweep a weakened team with Talonflame, since its low Attack stat makes it lose tons of KOs when Reflect is up.
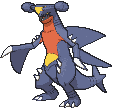
Garchomp
Roles: Physical attacker, Physical sweeper, Choice Band user
What's new for this Pokémon?
The king of Battle Spot is still one of Rotations's biggest threats! Unlike in Battle Spot Singles, since Garchomp has no use for Stealth Rock here, it usually focuses on immediate offense, almost always carrying either a Life Orb or Choice Band. Earthquake can be risky in Rotations with so many floating Pokémon, but Garchomp has an awesome way around that: Gravity support. Garchomp becomes devastating under Gravity, with its Choice Band set in particular being very capable of cleaning up teams once it's set up, since very few Pokémon resist Ground. Common Gravity teammates to consider include Ferrothorn, Meowstic-M, and Porygon2. Some Garchomp even run Brick Break to help deal with the rampant use of Reflect and Light Screen!
One big issue Garchomp has to deal with, however, is that Outrage is much harder to use in this metagame, since it prevents you from rotating. Usually, Outrage is best used as a late-game move, or you can even just use Dual Chop if you don't want to risk getting locked in. Also, Whimsicott and Togekiss are far more common in Rotations than in Battle Spot Singles, and both are big problems for Garchomp, since they can handle both of its STAB moves.

Aegislash
Roles: Special attacker, Substitute user, Physical sweeper
What's new for this Pokémon?
Aegislash's bulk is very useful for coping with the difficult-to-predict nature of Rotations. Its usual mixed set works fine in Rotations, except they usually use Flash Cannon for the many Fairies that infest Rotations and Shadow Sneak over Sacred Sword for the potentially life-saving priority. Substitute Aegislash is quite a bit more common in Rotations as well, as its bulk usually ensures at least one Substitute and makes Aegislash very difficult to check without Chandelure. King's Shield in general is always a given on Aegislash. Finally, even less common than Battle Spot Singles, Swords Dance Aegislash can be a shocking surprise for many teams, especially with Trick Room being common enough for it to actually outspeed foes more easily.
However, Aegislash has one big new problem in the Rotations metagame: Chandelure. Chandelure blasts through even Substitute thanks to Infiltrator, and it deals tons of damage with Flamethrower or Fire Blast. Also, Taunt is much more crippling to Aegislash than usual due to how difficult it is to switch out in Rotations.
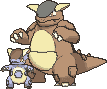
Mega Kangaskhan
Roles: Physical sweeper
What's new for this Pokémon?
Mega Kangaskhan is still one of the most dangerous Pokémon in Rotations! Its Normal-type STAB is especially useful here, since many Pokémon are neutral to it. Since Fake Out is only useful on the first turn Mega Kangaskhan rotates in, most of them use the classic Power-Up Punch sweeper set. Unlike in Singles, however, Mega Kangaskhan uses Return much more often, since it usually sweeps late in the game after most Pokémon have been softened up. Double-Edge is still great before setup, though.
Something new Mega Kangaskhan must watch out for is Air Balloon. Chandelure and Heatran often run it, letting them seriously damage Mega Kangaskhan before it can OHKO them, or even burn it with Will-O-Wisp. On the bright side, Mega Kangaskhan is especially deadly with dual screens support, since it's so difficult to OHKO already!
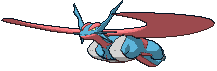
Mega Salamence
Roles: Physical sweeper
What's new for this Pokémon?
Mega Salamence benefits a lot from Rotations's fast paced nature; with many of its troublesome walls from Battle Spot Singles being far less common and Mega Salamence having great bulk, its Dragon Dance set can be very difficult to stop in Rotations compared to in Battle Spot Singles! Also, its base forme's Intimidate ability is great for crippling Tyranitar leads when facing sand teams, and it is also useful when you send in Salamence after a teammate gets KOed. More Salamence use Roost in this metagame to make setup easier, and with dual screens support, Mega Salamence becomes rather easy to set up with against many teams.
However, watch out for the dramatic increase in Fairy-types in Rotations. This is especially problematic if Trick Room is set up, since Azumarill and Mega Mawile easily cut through Mega Salamence's defenses.

Mega Mawile
Roles: Physical attacker, Trick Room attacker, Physical sweeper
What's new for this Pokémon?
Mega Mawile is usually the centerpiece of Trick Room teams in Rotations. With its insane amount of power and low Speed, Mega Mawile is extremely difficult to counter when Trick Room is up! Mega Mawile runs fairly similar sets to its Battle Spot Singles counterpart, except Iron Head is much more common than Knock Off in Rotations, since there are so many Fairy-types to deal with here. You'll also see some Mega Mawile run Brick Break to get rid of Reflect and Light Screen. Intimidate is also handy for weakening Tyranitar leads for sand teams, even though Mega Mawile itself does poorly against them when Trick Room isn't set up.
Watch out for the increased number of Fire-types in Rotations. Chandelure isn't very bulky, but it can cancel out Trick Room, and Sucker Punch can be risky with the threat of Will-O-Wisp. Entei is also a lot more common in Rotations than in Battle Spot Singles, and it's bulky enough to withstand unboosted Sucker Punch. Ground-types paired with Gravity such as Garchomp can also be very difficult for Mega Mawile to deal with.
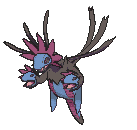
Hydreigon
Role: Special attacker, Tailwind user
What's new with this Pokémon?
Hydreigon is one of Battle Spot Singles's mid-tier threats, but Rotations gives Hydreigon a huge boost as one of the best Choice attackers in the metagame! Thanks to so few Pokémon resisting Dark Pulse, Hydreigon's Choice Specs set becomes a fairly reliable offensive threat. Choice Scarf is also seen sometimes, which is useful for surprising Garchomp and Mega Salamence. Life Orb is a good alternative to Choice Specs, especially since this allows Hydreigon to use Tailwind effectively. Many Hydreigon in Rotations opt to not run Draco Meteor, however, because while it may be powerful, the difficulty in switching out in Rotations means that it will usually be crippled for the rest of the match.
Hydreigon may be a much more prominent threat in Rotations than in Battle Spot Singles, but so are Fairy-types, which easily OHKO it. Mega Mawile and Klefki must watch out for Fire-type attacks and Earth Power, but they're still massive threats, especially since Hydreigon is usually locked into Dark Pulse.

Rotom-W
Roles: Burn support, Special attacker, Dual screens setter
What's new with this Pokémon?
Rotom-W is still one of the best bulky Water-types around, thanks to Will-O-Wisp. However, it can perform a new twist on the role as well, since using a Ddual screens set with Light Clay is more viable in Rotations than in Singles. Offensive sets are also fairly viable, with Choice Specs being the standout variant, since Hydro Pump hits many of Rotation's biggest threats fairly hard. However, unlike in Singles, Rotom-W doesn't use Volt Switch very much, since with just one teammate getting KOed Volt Switch's use is gone. However, Volt Switch is usable early-game if you wish, and it is a great way to change your matchup while still being able to rotate.
Whimsicott is a rather annoying new threat for Rotom-W, since it can use Taunt to block its support options and Giga Drain its health away. Hydreigon's increased usage isn't doing it any favors either. Also, be careful about Gravity, which makes Rotom-W extremely vulnerable to Garchomp and Sand Rush Excadrill.

Meowstic-M
Roles: Prankster, Dual screens setter, Paralysis spreader, Gravity user, Cleric, Yawn user
Dual Screen Support
- Meowstic-M @ Light Clay
- Ability: Prankster
- 252 HP / 252 Def / 4 SpD
- Bold / Calm Nature
- - Reflect
- - Light Screen
- - Heal Bell / Gravity / Trick Room
- - Yawn / Gravity / Trick Room / Psychic
What's the big deal?
Male Meowstic's typing may not be as good as Klefki's, but it makes up for that with its absolutely insane support movepool and superior capabilities against Fire- and Ground-types. With such a crazy movepool, Meowstic-M is one of the most unpredictable support Pokémon in Rotations!
What should I expect to see?
The only moves you can expect to consistently see on Meowstic-M are Reflect and Light Screen, since these moves are excellent for reducing the punishments you receive from rotating in the wrong Pokémon, especially when they last longer thanks to Light Clay. The rest of the moves depend on what kind of support your team needs. Heal Bell is great at removing deadly status from your teammates, while Yawn allows you to put foes to sleep. Gravity is an excellent choice when you have Ground-type teammates such as Garchomp, Excadrill, and Mamoswine. Trick Room gives Meowstic-M some valuable speed control, while Psychic gives Meowstic-M a way to be useful if it has been hit by Taunt. Sunny Day is a great move if you need help against rain and to make Fire-type teammates such as Chandelure and Entei more powerful. If you need paralysis support, Thunder Wave is always an option as well.
A Bold nature with maximum HP and Defense makes the most sense, since this allows Meowstic-M to avoid a 2HKO from the likes of Garchomp after using Reflect. However, if you want it to survive Chandelure's Shadow Ball and do better against Gengar and Hydreigon after a Light Screen, a Calm nature with maximum HP and Special Defense is a reasonable option as well.
What are its flaws?
Meowstic-M may be a great support Pokémon, but it heavily relies on its teammates to do its dirty work. If Meowstic-M is the last Pokémon standing, it will usually lose unless the foe is dramatically weakened and it's carrying Psychic. Meowstic-M also has massive problems with Chandelure, which OHKOes Bold variants through Light Screen due to Infiltrator. Powerful Ghost- and Dark-types such as Gengar, Mega Tyranitar, and Hydreigon in general deal massive damage even when Light Screen or Reflect is up. Any Pokémon with Taunt such as Whimsicott or Thundurus can shut Meowstic-M down as well.


Jellicent
Roles: Trick Room setter, Burn support, Defense booster
Trick Room Support
- Jellicent @ Wacan Berry / Maranga Berry
- Ability: Cursed Body
- 252 HP / 252 Def / 4 SpD
- Bold / Calm Nature
- - Trick Room
- - Recover
- - Scald
- - Will-O-Wisp / Acid Armor
What's the big deal?
With Rotations being so obsessed with speed control, Jellicent's is a great choice for a Trick Room setter, with its excellent ability Cursed Body being especially deadly when it's so difficult to switch out and access to moves that make up for its mediocre Defense stat helping mitigate one of its weak points.
What should I expect to see?
Jellicent is all about using Trick Room, so they tend to focus on bulk to ensure that they are difficult to OHKO. Recover goes along with this to let Jellicent stick around, while Scald its a decent offensive move to potentially burn foes with, and it also makes Jellicent a decent Blaziken check. Will-O-Wisp is great for crippling offensive Pokémon, but in the world of Rotations, Acid Armor deserves serious consideration as well, since it lets Jellicent tank physical hits regardless of what Pokémon rotates in! Wacan Berry lets Jellicent set up Trick Room once against Choice Specs Thundurus-T, but if you opt for a specially defensive Jellicent, Maranga Berry's Special Defense boost allows Jellicent to set up Trick Room on Chandelure and no longer risk a 2HKO by Shadow Ball. If you're especially worried about Hydreigon, Colbur Berry allows Jellicent to set up Trick Room once against it, while Sitrus Berry lets Jellicent restore some extra health in general.
What are its flaws?
Jellicent's biggest flaw is that it's extremely vulnerable to Taunt. Whimsicott is the prime culprit here, since it doesn't care about any of Jellicent's moves and can even reverse Trick Room if it rotates in later. Serperior can also Taunt Jellicent and hit it hard with Leaf Storm. Thundurus isn't particularly bulky, but it can Taunt Jellicent and get rid of its Wacan Berry. Choice Specs Hydreigon will smash through Jellicent that lack Colbur Berry, and Thundurus-T defeats Jellicent that lack Wacan Berry.


Gengar / Mega Gengar
Roles: Focus Sash attacker, Burn support, Perish Song user, Destiny Bond user, Trick Room user
Offensive Support
- Gengar @ Focus Sash
- Ability: Levitate
- 4 HP / 252 SpA / 252 Spe
- Timid Nature
- - Shadow Ball
- - Sludge Bomb
- - Will-O-Wisp / Icy Wind
- - Destiny Bond / Perish Song / Trick Room / Dazzling Gleam
Gravity Sleeper
- Gengar @ Focus Sash / Gengarite
- Ability: Levitate
- 4 HP / 252 SpA / 252 Spe
- Timid Nature
- - Hypnosis
- - Shadow Ball
- - Sludge Bomb
- - Destiny Bond / Focus Blast / Perish Song
Choice Specs
- Gengar @ Choice Specs
- Ability: Levitate
- 4 HP / 252 SpA / 252 Spe
- Timid Nature
- - Shadow Ball
- - Sludge Bomb
- - Focus Blast / Dazziling Gleam
- - Destiny Bond / Dazziling Gleam / Trick
What's the big deal?
Mega Gengar may lose a lot of its luster due to Shadow Tag being far less effective in Rotations, but don't let that fool you: Gengar's excellent offensive stats and good support movepool still make it a threat!
What should I expect to see?
The only two reliably common moves you'll see on Gengar are Shadow Ball and Sludge Bomb. Shadow Ball is great because so few Pokémon resist it, making it a reliable STAB move to stick with. Sludge Bomb is very important for hitting Sylveon hard and OHKOing Whimsicott. Sludge Wave is actually usually better, but it's a difficult move to get on cart since Rotations requires that Pokémon come from generation 6.
Will-O-Wisp severely punishes physical Pokémon, but if you'd like to hit Garchomp and Mega Salamence hard while providing a bit of speed control, Icy Wind is a fine choice as well. Destiny Bond is useful for when you know Gengar isn't likely to survive the next attack, but Perish Song is a slower option to consider if you want to ensure a Pokémon will faint in three turns without immediately sacrificing Gengar, which is especially useful if you have KOed one Pokémon. Trick Room may seem odd on such a fast Pokémon, but it allows Gengar to surprise teams that rely on Tailwind and even shuts down opposing Trick Room. If you just want to OHKO Hydreigon, Dazzling Gleam is a fine option as well. You can even use more esoteric support options, such as Sunny Day or Rain Dance for weather support, and Taunt to shut down support Pokémon.
If you see Gengar paired with common Gravity Pokémon such as Ferrothorn, Meowstic-M, and Porygon2, then watch out: you may be facing the dreaded Hypnosis Gengar! Gravity may give Gengar a weakness to Ground-type attacks, but the massively increased accuracy of Hypnosis more than makes up for this. Since Gengar is so fast, it's extremely difficult to shut this set down without a fast Taunt or setting up speed control before your opponent sets up Gravity. In this case, Focus Blast also makes a lot of sense on Gengar to prevent Tyranitar from outstalling its sleep turns and hitting Mega Kangaskhan very hard. This is also one of the few sets that can make effective use of Gengarite, giving up the safety of Focus Sash for more power and the ability to outspeed Mega Salamence. Finally, if you want to take advantage of Gengar's excellent Ghost-type STAB, you can use a Choice Specs set to attempt to clean up late game.
What are its flaws?
Tyranitar is Gengar's archnemesis, making it unsafe to rotate in without getting its Focus Sash broken and enabling Excadrill to outspeed it and crush it with Iron Head. Gengar is extremely frail in general, meaning that anything that is faster than it such as Talonflame, Blaziken (after a Speed boost), or Mega Salamence can smash through it before it uses Destiny Bond. Although Gengar hits most users of Trick Room very hard and can nullify it, Gengar will have a very difficult time staying alive if Trick Room actually goes up, since most slow and bulky Pokémon can OHKO it.

Heatran
Roles: Special attacker, Burn support, Choice Specs user
What's new for this Pokémon?
Heatran's excellent defensive typing still makes it a fine choice for Rotations. Magma Storm is nearly useless because of rotating now, but to make up for this, Heatran has a new and improved Air Balloon to use! Since Air Balloon won't have a message as long as Heatran is sent out in the back, this makes rotating into Pokémon such as Garchomp a lot easier than usual. Since Air Balloon is common enough on Heatran, it's even possible to bluff it! Flash Fire also gets more mileage here than usual, since Heatran keeps the boost while in rotation. Sunny Day or Mega Charizard Y support also makes Heatran very powerful and aids it against Water-types such as Rotom-W. Just watch out: rain is far more common than it is in Battle Spot Singles, and it'll be a big problem for Heatran to face without sun support.

Azumarill
Roles: Sweeper, Perish Song User
What's new for this Pokémon?
With Reflect and Light Screen support, Azumarill becomes an even deadlier setup sweeper than usual, since it becomes nearly impossible to OHKO without a strong, STAB super effective attack! You can even provide it Rain Dance support to make Aqua Jet even more difficult to block. Azumarill becomes especially ferocious when given speed support in the form of Trick Room or Tailwind. However, Reflect and Sunny Day do pose big problems for Azumarill. Because of this, many Azumarill actually use Perish Song over a third attack so it can at least put a timer on foes when it's unable to sweep.

Serperior
Roles: Special sweeper, Dual screens setter
What's new for this Pokémon?
Serperior's ability to boost its Special Attack with Leaf Storm is even more appreciated with the fast-paced nature of Rotations, since it can simply rotate out while keeping its boosts if it's worried about being walled! Serperior also makes a decent user of Reflect and Light Screen, being a more offensive twist on the concept compared to Klefki and Meowstic-M. For some reason, Serperior has used Cheri Berry a lot in the past few seasons. This seems to be for letting it take one priority Thunder Wave while absorbing burns. Just note, however, Serperior has a lot of problems with the large number of Chandelure running around in Rotations, since not even Light Screen can save Serperior from its wrath!

Dragonite
Roles: Sweeper, Choice Band user, Tailwind user
What's new for this Pokémon?
Rotations may be one of Dragonite's best metagames, since it no longer has to worry about Stealth Rock ruining Multiscale! Dragonite almost always gets a Dragon Dance set up, especially if supported by Reflect and Light Screen, which make it almost impossible to OHKO. The Choice Band set also still makes a good late-game cleaner, especially since it's fairly easy to support it with Tailwind. Speaking of which, Dragonite is actually a great user of Tailwind in Rotations itself because of its bulk, giving Dragonite a new fold as a offensive support Pokémon. The main issue that Dragonite has to watch out for in Rotations is that Outrage is far more risky in this metagame, since your opponent can simply rotate in a Fairy- or Steel-type to ruin its day, which is especially problematic because Rotations has a larger pool of common Fairy-type Pokémon than other metagames.

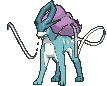
Cresselia
Roles: Wall, Trick Room user, Paralysis support
What's new for this Pokémon?
Cresselia is one of the few viable walls in the Rotations metagame. The biggest difference you'll notice if you're used to Battle Spot Singles is that most Cresselia no longer use Lunar Dance, since switching is so difficult in Rotations that it rarely has a need to use it. Trick Room is also a more valuable asset on Cresselia than usual, especially since it has an important Ground-type immunity for Mega Mawile, meaning it can set up on fearsome threats such as Garchomp and Excadrill. Although it may seem counterintuitive, Gravity is well worth considering on Cresselia, since it's one of the bulkiest users of it around, and many teams don't expect it, giving your Garchomp a serious chance to sweep!
A new problem to watch out for is the massive increase in rain teams in Rotations. With these around, Moonlight's recovery is cut to 33%, much like with Sandstorm in play. Hydreigon's and Chandelure's massively increased usage is a new problem as well, making it more difficult for Cresselia to wall teams.

Politoed
Roles: Rain setter, Perish Song user, Encore user
What's new for this Pokémon?
Politoed runs rather similar sets to what it runs in Battle Spot Singles: that is, it tends to focus on bulk and hold a Damp Rock to make sure that the rain stays up. However, it's much more valuable in Rotations than in Battle Spot Singles, since you can simply rotate to a Pokémon that enjoys the rain support and take advantage of it right away. Common partners for this include Thundurus-T, Rotom-W, and Mega Swampert. Politoed's two main support moves, Encore and Perish Song, are also extremely valuable in Rotations. Perish Song puts a hard time limit on Pokémon once there are only three Pokémon left (at the cost of your Politoed after two more rotations to it), while Encore is far more deadly in a metagame without easy switching! Rain Dance is also a viable support option to defeat sand teams, while Icy Wind can be used against teams that rely on Tailwind to slow them down. Note that while most Politoed tend to focus on bulk, rarer offensive variants are not out of the question to use either, since with a Modest nature, Politoed actually has a shot at 2HKOing Mega Kangaskhan with Scald!
Weather wars are still a thing in Rotations, however. Tyranitar in particular often uses its Mega Evolution to put sand back into play even if you have used Rain Dance, while some Pokémon such as Klefki may actually use Sunny Day as a way to mess up rain teams! Because of this, it's best to make sure that your rain team doesn't completely rely on the weather.
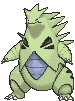
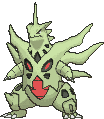
Tyranitar / Mega Tyranitar
Roles: Sand setter, Sweeper
What's new for this Pokémon?
The fast-paced nature of Battle Spot Rotations tends to reduce Tyranitar's role to Dragon Dancing, but don't let that fool you: Tyranitar is a very important Pokémon in Rotations! Tyranitar is the heart and soul of sand teams here, making Excadrill far more deadly than normal. A unique aspect of Tyranitar is that while most of them are carrying Tyranitarite, many will not Mega Evolve right away. Instead, Tyranitar will lead the team to set up sand and will only rotate in to Mega Evolve once sand runs out. This is useful for keeping the sand up even longer than Smooth Rock normally would, though Smooth Rock is not out of the question if you want another Mega Evolution. You may also occasionally see Weakness Policy Tyranitar. These are often given dual screen support, which makes Tyranitar extremely difficult to OHKO. Be very careful, since a +3 Tyranitar can easily sweep a team!
Tyranitar's new problem in Rotations is the dramatic increase in Fairy-types, which make sweeping with Dragon Dance harder than you'd expect. Also, since some teams have manual weather moves, they may try to screw up your plans with Excadrill, so make sure your entire team is not dedicated to sand!

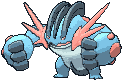
Excadrill
Roles: Sweeper, Sand Rush, Mold Breaker
What's new for this Pokémon?
Sand teams may be deadly enough in Singles, but they become dangerous on a whole new level now that Excadrill can immediately take advantage of it! While its lack of bulk can be an issue when making risky predictions, Excadrill does a great job of cleaning up teams in Rotations, especially if given Gravity support to weed out threats such as Rotom-W. Sand Rush may be extremely appealing, but Mold Breaker Excadrill is still a very good Pokémon to consider, since it can catch Rotom-W and Rotom-H off guard with a swift KO, and it can still do plenty of damage if Tailwind is set up. Be sure to consider Brick Break support as well, since Excadrill tends to struggle the moment Reflect is set up.
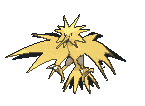
Zapdos
Roles: Tailwind support
What's new for this Pokémon?
Much like in Battle Spot Singles, Zapdos tends to focus on bulk to differentiate itself from other Electric-types. However, the big twist for Zapdos here is that it uses Tailwind instead of Toxic to support its team in Rotations, and it happens to be one of the most reliable, bulky users of Tailwind around! While Bold is still a very common nature for Zapdos, Calm is also often seen, since it allows Zapdos to take hits from the likes of Thundurus-T and Hydreigon better. While not as common, offensive Zapdos is also a much bigger threat in Rotations than in Battle Spot Singles, since it still makes an effective user of Tailwind, and the extra offense can be a nasty surprise to Pokémon such as Rotom-W! Just note that Zapdos tends to struggle against Trick Room teams, so be sure to prepare for those.

Porygon2
Roles: Gravity user, Trick Room user, Paralysis support
What's new for this Pokémon?
Porygon2 tends to focus more on being one of the few defensive Pokémon of Rotations, rather than also using offenses like in Battle Spot Singles. Porygon2 stands out as one of the most reliable users of Gravity around, which is great news when using it with Garchomp! It also stands out as one of the few Trick Room Pokémon that don't have serious problems with Hydreigon and Chandelure. Icy Wind and Thunder Wave give Porygon2 additional ways to control the speed of its foes. That being said, while the defensive support set is the most common Porygon2, some still use offensive sets with a Quiet nature and Analytic, as Download is less reliable unless Porygon2 switches in.
One major thing Porygon2 must now watch out for is Pokémon with Taunt, since the difficulty of switching out will cripple Porygon2. Common users of it to watch out for include Whimsicott, Gengar, and Thundurus.

Entei
Roles: Burn support, Physical Attacker
What's new for this Pokémon?
Entei has always been one of Battle Spot's secret good Pokémon thanks to Sacred Fire, but in Rotations, you'll notice that Entei is far more common! This is because with the unpredictability that Rotations brings, Sacred Fire can act as a nice buffer, since almost no physical Pokémon wants to risk a burn! While the Choice Band, Toxic stall, and Assault Vest sets are certainly still around, Rotations brings a Choice Scarf set to the table. The potential to spread fast burns can be devastating, and since you can simply rotate out, Choice Scarf Entei becomes a unique cleaner that can also spread burns!
One big new problem to watch out for, however, is that the more common rain can absolutely ruin Entei because of the weakened Sacred Fire and most Pokémon on rain relying on special attacks. Some non-Choiced Entei actually run Sunny Day, but if that's not possible, you may want to consider some sun support yourself, from the likes of Mega Charizard Y, Klefki, and Meowstic-M.
Suicune
Roles: Calm Mind user, Tailwind user
What's new for this Pokémon?
With the faster and more unpredictable pace of Rotations, and with new threats like Thundurus-T, Suicune finds Rotations to be tougher to swallow than Battle Spot Singles. However, it's still a fine choice as a bulky Calm Mind Pokémon, especially if given Wish support to lessen the need for Rest, or Heal Bell support from Sylveon or Meowstic-M. What makes Suicune unique among Calm Mind users is that it happens to be an expert on speed control as well, being a good choice as a bulky Tailwind user, and it can even use Icy Wind over Ice Beam for further speed control. Just remember not to be reckless with rotating Suicune in, because relying on Rest for recovery means that Suicune can be easily worn down.
Mega Swampert
Roles: Rain sweeper, Physical attacker
What's new for this Pokémon?
Unlike in Battle Spot Singles, most Swampert in Rotations plan on Mega Evolving. Mega Swampert is one of the bulkiest choices for a rain sweeper, which is extra useful considering how unpredictable Rotations can be! It's Ground typing is also useful against the common Thundurus-T, letting it pair well with Politoed. Mega Swampert's bulk also means that its good at setting up Rain Dance itself, which is useful in case a foe such as Klefki or Meowstic uses a surprise Sunny Day. Make sure to prepare for Grass-types, however, since using Politoed and Swampert together makes Pokémon such as Whimsicott and Serperior big problems!

Breloom
Roles: Sleep support, physical attacker
What's new for this Pokémon?
Not much actually changes for Breloom. While it has an awkward Speed tier, Spore is such a deadly move that few Pokémon can rotate into it safely! Rock Tomb is even better than usual as well, since it provides valuable speed control while dealing good damage thanks to Technician. Swords Dance Breloom is also easier to use in this format, since you can simply rotate Breloom out until it can sweep if you manage to set up. Breloom is also especially deadly if you manage to get Tailwind up, since a Breloom that outspeeds everything is almost impossible to take out without a Lum Berry, Grass-type, or priority! Just note though, Whimsicott's increased prominence is a big problem for Breloom, since it resists Breloom's STAB moves and is immune to Spore.

Blaziken / Mega Blaziken
Roles: Speed Boost attacker, Sweeper
What's new for this Pokémon?
Blaziken and Mega Blaziken's Speed Boost is put to unique use in Rotations. Blaziken can still use Protect to guarantee +1 Speed, and thanks to Rotations keeping boosts, you can save Blaziken for a sweep later on the match! Blaziken's ability to set up for free is very valuable in such a fast-paced metagame, but since Swords Dance is rather difficult to set up in Rotations unless you have dual screen support, many Blaziken simply use a third attacking move such as Knock Off or Rock Slide (mainly to nail Chandelure and Talonflame, respectively).
Blaziken's Achilles heel in Rotations, however, is that its frailness means that one wrong rotation can spell doom for it, meaning that it can have trouble earlier in the game. Also, Speed Boost can backfire on Blaziken if Trick Room is set up, while Tailwind can trump Speed Boost if it's set up in time.

Thundurus
Roles: Prankster, Taunt, Paralysis support
What's new for this Pokémon?
Rotations is one of the few formats where Thundurus is often overshadowed by Thundurus-T, but it's still a fine choice for most teams. Thundurus takes full advantage of Prankster here like in most metagames, using a priority Thunder Wave to cripple sweepers and using Taunt to shut down support Pokémon such as Klefki, Meowstic-M, and Jellicent. Unlike most Prankster Pokémon, Thundurus also has reasonable offensive presence. However, Thundurus's Thunder Wave shenanigans are hit hard by Trick Room use, and its lack of an Electric-type immunity means it has a harder time rotating in than Thundurus-T.

Mega Charizard Y
Roles: Sun setter, Special Attacker, Tailwind User
What's new for this Pokémon?
Mega Charizard Y is the most reliable setter of sun in Rotations, being able to set it up even if it's sent out in the back thanks to gaining Drought upon Mega Evolution! This makes Mega Charizard Y a formidable threat to rain teams and forces Tyranitar to Mega Evolve early for sand teams. Flamethrower in the sun does a tremendous amount of damage to most Pokémon in the format as well, with the only major worry being a Heatran rotating in. Mega Charizard Y also makes a very competent user of Tailwind because of its good special bulk. While it's possible to pair Mega Charizard Y up with other Fire-types such as Chandelure, Heatran, and Entei, this isn't very common because many teams prefer to compress their rules for more team variety, and there is no good sun equivalent of Pokémon such as Mega Swampert. When using Mega Charizard Y, be wary of Pokémon that occasionally carry Rain Dance such as Klefki and Meowstic-M, since Mega Charizard Y is much less threatening without the sun!

Clefable
Roles: Minimize user, Calm Mind user
What's new for this Pokémon?
In Battle Spot Singles, Clefable is notorious for being one of the best users of Minimize in the game, but Rotation kicks that up several notches thanks to dual screen support being much easier to justify! With Reflect and Light Screen up, Clefable becomes almost impossible to KO, making it fairly easy to set up Minimize and Calm Mind. Despite this, Stored Power is much less common in this format, because while it's easy to make it extremely powerful, Hydreigon's massively increased usage makes Moonblast the better option most of the time. This Pokémon in particular is a major reason why some Chandelure run Clear Smog. Also, since this ladder is on Omega Ruby and Alpha Sapphire, Soft-Boiled is illegal, giving Clefable recovery problems when rain or sand is in play, since it must rely on Moonlight.

Landorus-T
Roles: Intimidate support, Choice Scarf U-turn user
What's new for this Pokémon?
Rotations is the one metagame where Landorus-T isn't a huge, metagame-defining threat. The big reason for this is that Intimidate affects only one Pokémon, and only if it either leads or is sent out after a switch or KO. This means that Landorus-T's bulk is far more compromised in Rotations, making most teams opt for Garchomp instead. Don't mistake this for meaning that Landorus-T isn't good, though, because it does have some unique niches. Its typing and access to Intimidate make it a great pick against most sand teams, forcing Tyranitar leads to take an Attack cut, and usually defeating Excadrill one-on-one. Intimidate and Choice Scarf also make Landorus-T one of the few useful users of U-turn, being able to use U-turn early in the match to get a better matchup. Finally, Landorus-T can be effective later in the game if you lose a Pokémon to a physical attacker, guaranteeing an Attack drop when it comes in.

Rotom-H
Roles: Burn support
What's new for this Pokémon?
Rotom-H is a bit of a weird choice for Rotations, since it isn't particularly powerful, and Overheat has a heavy cost when opportunities for switching out are rare. However, Rotom-H is less used for Overheat, and more because its Electric / Fire typing gives it a very valuable Fairy-type resistance, which is especially helpful against Mega Mawile! Most Rotom-H use support sets, but Choice Specs isn't entirely out of the question, especially when it can use Volt Switch early-game if there are no Ground-types around. Just remember that Overheat should only be used in emergencies, otherwise Rotom-H will only be able to burn Pokémon with such a diminished Special Attack stat.

Mamoswine
Roles: Physical Attacker
What's new for this Pokémon?
Mamoswine usage tends to take a big hit in Rotations compared to in Battle Spot Singles, since Stealth Rock is useless and rotating Pokémon such as Garchomp or Mega Salamence away from a predicted Ice Shard can be devastating for Mamoswine. That being said, it's still a powerful user of Earthquake, and it avoids some of Garchomp's major weaknesses such as the 4x Ice-type weakness. Mamoswine's Ice-type STAB comes in handy beyond the usual Dragon-types, allowing it to smash through Whimsicott and giving Mamoswine a STAB type nothing is immune to.

Umbreon
Roles: Wish passer, Yawn user
Wish Passer
- Umbreon @ Leftovers / Rocky Helmet
- Ability: Inner Focus
- 252 HP / 252 Def / 4 SpD
- Bold Nature
- - Wish
- - Yawn
- - Foul Play
- - Protect / Heal Bell / Screech / Moonlight / Taunt
What's the big deal?
Umbreon is a fairly good alternative to Sylveon when it comes to Wish passing. While it doesn't have nearly as much of an offensive presence, it boasts much better physical bulk and a unique typing that lets it take on certain threats such as Aegislash and Heatran better.
What should I expect to see?
Umbreon is all about Wish passing. In fact, it's so dedicated in this goal that it runs Inner Focus, which allows it to easily set up Wish on Choice Scarf Togekiss that are locked into Air Slash. Yawn reduces Umbreon's passiveness, threatening to put its foes to sleep. Foul Play lets Umbreon effectively hit physical sweepers such as Mega Kangaskhan and Garchomp fairly hard without needing any investment.
Protect works wonderfully with Wish to give Umbreon reliable recovery on its own, and it's also the move you'll want to use if you're carrying Leftovers. If you prefer more immediate recovery, Moonlight works well as a backup plan. Screech may seem like an odd choice, but when switching out almost never happens, the Defense drop could open up new holes for your team to exploit! Taunt is also fine if you want to stop slower support Pokémon or Trick Room.
What are its flaws?
Umbreon's big problem is its weakness to Fairy-type attacks, which is problematic in a metagame full of teams with Mega Mawile and Sylveon! Umbreon is also a much more passive Pokémon than Sylveon, relying on Yawn to do much damage to Special Attackers and Tyranitar. Umbreon is particularly weak to surprise Taunts from the likes of Whimsicott as well.

Aron
Roles: Level 1 Endeavor
Sturdy + Endeavor
- Aron @ Shell Bell / Berry Juice
- Ability: Sturdy
- 252 Atk / 4 Def / 252 Spe
- IVs: 0 HP
- Jolly Nature
- - Endeavor
- - Toxic
- - Protect / Sandstorm
- - Sandstorm / Rock Tomb / Aerial Ace
What's the big deal?
Aron became somewhat famous as one of the few viable FEAR Pokémon in Generation 5. While that role has mostly diminished because of weather's limited time in Generation 6, Rotations's fast-paced nature and lack of entry hazards makes it far kinder to Aron, making it a rare but dangerous threat!
What should I expect to see?
Aron is fairly simple: it's all about using Endeavor in the sand! This will knock out almost any non Ghost-type Pokémon that rotates in, making Aron actually dangerous! The next important decision to consider is choosing between Shell Bell or Berry Juice. Shell Bell is the more consistent choice, allowing Aron to restore all of its health after hitting with Endeavor. Berry Juice gives Aron more limited chances to rotate in but allows it to actually defeat Mega Kangaskhan if its at full health.
The rest of the moves are situational filler moves. Toxic allows Aron to at least status Chandelure, and Protect can let you scout for your opponent's sets or even get Aron's health back if you have Wish support. Sandstorm can restore the weather in case your opponent has manual weather. Rock Tomb lets Aron take out Pokémon that are at 1 HP and even reduces the Speed of your foes in case you predict wrong. If you want a 100% reliable attack for this, however, go with Aerial Ace.
What are its flaws?
Ghost-types such as Aegislash, Chandelure, and Gengar are the bane of Aron's existence, being totally immune to Endeavor. Mega Kangaskhan is also a serious problem, using its Parental Bond to smash through Sturdy as long as Aron lacks Berry Juice. Excadrill's Mold Breaker ignores Sturdy as well, ruining Aron's strategy.

Machamp
Roles: Confusion spreader, Choice Scarf user
Choice Scarf
- Machamp @ Choice Scarf
- Ability: No Guard
- 4 HP / 252 Atk / 252 Spe
- Jolly Nature
- - Dynamic Punch
- - Knock Off
- - Ice Punch
- - Stone Edge
Bulky Attacker
- Machamp @ Assault Vest / Lum Berry
- Ability: No Guard
- 252 HP / 252 Atk / 4 Spe
- Adamant / Brave Nature
- - Dynamic Punch
- - Knock Off
- - Ice Punch
- - Bullet Punch / Stone Edge
What's the big deal?
Machamp's notorious No Guard Dynamic Punch strategy is much more dangerous in Rotations, since switching out almost never happens, forcing Pokémon to keep their confusion for the long term!
What should I expect to see?
Most Machamp run a Choice Scarf, as outspeeding important threats such as Garchomp and Mega Kangaskhan is very valuable. Most of the time, they'll just throw out as many Dynamic Punches as they can or use Knock Off to slam Ghost-types. Ice Punch is used to surprise Mega Salamence rotating in and smashes through Garchomp, while Stone Edge slices most Flying-types. A bulkier set with Assault Vest or Lum Berry isn't out of the question either, as Machamp has decent bulk, and this lets it use Bullet Punch to take care of weakened threats.
What are its flaws?
Talonflame is a huge issue for Machamp, because unless Reflect is set up, Brave Bird will simply OHKO it. Togekiss is similarly a problem, since it often uses Choice Scarf. Ghost-types are a problem if Machamp is locked into Dynamic Punch, but Aegislash is especially troublesome because it can take advantage of Knock Off to activate Weakness Policy or simply cripple Machamp with King's Shield. The deluge of Fairy-types in Rotations will usually defeat Machamp as long as they don't hit themselves in confusion as well.

Seismitoad
Roles: Rain sweeper, Choice Specs user
Rain Sweeper
- Seismitoad @ Choice Specs
- Ability: Swift Swim
- 4 HP / 252 SpA / 252 Spe
- Modest Nature
- - Hydro Pump
- - Earth Power
- - Sludge Wave
- - Surf / Focus Blast
What's the big deal?
With a Choice Specs in hand, Seismitoad is a special attacking alternative to Mega Swampert, offering much more power than you'd expect based on its Special Attack stat!
What should I expect to see?
Most Seismitoad run Choice Specs to bolster its average Special Attack, allowing it to actually hit its foe seriously hard with Hydro Pump or Surf! Earth Power is a great secondary STAB attack that allows Seismetoad to crush Rotom-W under Gravity, while Sludge Wave is a nice filler move against Fairy-types in bad weather and Grass-types. If you really hate Ferrothorn, you can use Focus Blast to nail it on the rotation.
What are its flaws?
Any surprise Sunny Days or Mega Charizard Y will turn Seismitoad from a big threat to a big fat joke in record time. It's also extremely weak to Ferrothorn, which easily OHKOes it with Power Whip. Despite being a rain Pokémon, it actually takes massive damage from Choice Band Talonflame because of Brave Bird. Finally, Seismitoad hates Trick Room teams turning Swift Swim into a flaw.

Kingdra
Roles: Rain Sweeper
Rain Sweeper
- Kingdra @ Life Orb / Choice Specs
- Ability: Swift Swim
- 4 HP / 252 SpA / 252 Spe
- Modest Nature
- - Surf
- - Dragon Pulse
- - Hydro Pump
- - Draco Meteor / Sleep Talk / Rain Dance
What's the big deal?
Kingdra is a good alternative to Mega Swampert and Seismitoad as a rain sweeper. Its Dragon typing lets it make short work of Hydreigon, and it actually gives your team a 4x water-type resistance, unlike the other two more common rain sweepers!
What should I expect to see?
Kingdra is a fairly simple Pokémon, usually running Surf and Hydro Pump to have a reliable and a powerful rain STAB move, respectively. Dragon Pulse is a given as well, since this allows Kingdra to OHKO Hydreigon, a unique asset compared to most rain sweepers. Life Orb is great for switching between attacks, but Choice Specs is still a reasonable option if you just want to throw out as many Water-type attacks as possible. Finally, Draco Meteor can be a useful emergency move for its extra power regardless of the weather, but it will make Kingdra a dead weight after use, so Sleep Talk is still a reasonable filler option if you are worried about sleep. You can even run Rain Dance to defeat the dreaded sun teams.
What are its flaws?
Kingdra is huge setup bait for Azumarill, getting completely walled as Azumarill can threaten to set up Belly Drum. It's also walled by Whimsicott and Ferrothorn, which, despite their mediocre offenses, can deal plenty of damage to Kingdra. Like most rain sweepers, Kingdra also takes heavy damage from Choice Band Talonflame and becomes nearly useless if Trick Room or the sun goes up.

Omastar
Roles: Rain Sweeper
Choice Specs
- Omastar @ Choice Specs
- Ability: Swift Swim
- 4 HP / 252 SpA / 252 Spe
- Modest Nature
- - Surf
- - Ice Beam
- - Hidden Power Grass
- - Hydro Pump
Shell Smash
- Omastar @ Life Orb
- Ability: Swift Swim
- 4 HP / 252 SpA / 252 Spe
- Modest Nature
- - Shell Smash
- - Surf
- - Ice Beam
- - Hidden Power Grass
What's the big deal?
Omastar may seem like an ordinary Swift Swim sweeper on the surface, but it has one major aspect that makes it stand out: an extremely important resistance to Flying-type attacks, meaning that Talonflame has a much harder time sniping it with Brave Bird!
What should I expect to see?
Most Omastar will run a fairly standard Choice Specs set, with the usual Surf and Hydro Pump to blast through Pokémon and Ice Beam for coverage. While most of them use Ancient Power, Hidden Power Grass is usually a better filler move to at least hit Rotom-W and other opposing Water-types for some damage. Unlike most rain sweepers, Omastar also gets a set up move in Shell Smash, which can make Omastar dangerous even if the rain is replaced thanks to the Speed boost.
What are its flaws?
The Rock typing may be great in a metagame infested with Talonflame, but it's also a curse for Omastar, giving it a 4x weakness to Grass, and new common weaknesses to types such as Ground and Fighting. In particular, Omastar has little to no chance of defeating Ferrothorn, getting walled and OHKOed by Power Whip. Like most rain Pokémon, Omastar also hates Trick Room and sunny weather.

Probopass
Roles: Level 2 Pain Split
Pain Split
- Probopass @ Berry Juice
- Ability: Sturdy
- Level: 2
- - Pain Split
- - Gravity
- - Sunny Day / Sandstorm / Toxic
- - Magic Coat / Toxic / Protect
What's the big deal?
Probopass provides an interesting alternative to Aron thanks to its access to Pain Split. While it won't make threats go down in the sand, Probopass has no worries about Ghost-types, and it has a better support movepool than Aron.
What should I expect to see?
With Pain Split, many teams will struggle to actually find a safe way to rotate into Probopass, since they will usually lose 50% of their health. Since it caries Berry Juice, unless you are facing Mega Kangaskhan, it's a good idea to use one of Probopass's support moves first, such as Gravity or a weather-changing move. Magic Coat is risky, but if you predict it right, you can flip sleep and burns right back on your foes! Toxic also makes decent filler for wearing down foes, while Protect is useful if using Probopass with Wish support.
What are its flaws?
Just like Aron, Probopass has big problems with Mega Kangaskhan (and multi-hit move users in general), relying on Berry Juice to be active to get one hit in on Mega Kangaskhan. Probopass also despises burns from the likes of Rotom-W, needing Safeguard support or good prediction with Magic Coat to take advantage of those kinds of Pokémon. Finally, if Probopass gets hit by Taunt, it becomes useless.
Crobat
Roles: Sleep Inducer, Tailwind Setter
Gravity Sleeper
- Crobat @ Sharp Beak
- Ability: Infiltrator
- 4 HP / 252 Atk / 252 Spe
- Jolly Nature
- - Hypnosis
- - Brave Bird
- - Tailwind
- - Super Fang
What's the big deal?
In most cases, Gengar is the better choice for sleep inducing due to its power, but Crobat should not be discounted. Crobat is faster and has the awesome Tailwind, Super Fang for lessening the need to predict rotations, and the awesome Infiltrator that allows Crobat to batter through Reflect, Light Screen, and even Safeguard!
What should I expect to see?
Crobat may be a Flying-type, but it's actually best used on Gravity teams, where Hypnosis becomes a much more reliable move. Brave Bird and Sharp Beak give Crobat some moderate attacking power, granting it comparable power to Talonflame. Tailwind is great for giving your team a much-needed Speed boost, especially if you can't get Gravity up. Super Fang gives Crobat a nearly guaranteed way to slice 50% of your foe's HP, which can be great if you are having a hard time predicting a rotation.
What are its flaws?
Crobat's mediocre Attack stat means that it relies far more on sleep than Gengar does. Its coverage is also rather poor, making it very weak to Aegislash in particular. Crobat also becomes nearly useless if Trick Room is set up.

Vaporeon
Roles: Wish Passer, Yawn user
Wish Passer
- Vaporeon @ Leftovers / Sitrus Berry
- Ability: Water Absorb
- 252 HP / 252 Def / 4 SpD
- Bold Nature
- - Wish
- - Scald
- - Yawn
- - Protect / Ice Beam
What's the big deal?
Vaporeon's massive HP stat makes it a great choice for Wish passing. As a bonus, Vaporeon is also a fairly usable bulky Water-type outside of just this.
What should I expect to see?
Vaporeon is all about Wish passing, arguably doing just as good of a job of it as Sylveon and Umbreon. Unlike the other two Eeveelutions, Vaporeon also has a shot at burning its targets thanks to Scald. Like Sylveon and Umbreon, Vaporeon is fairly adept at using Protect to restore its health and Yawn to put foes to sleep. However, if you are fine with giving up the reliability that Protect provides after Wish, Ice Beam is a good choice for dealing massive damage to the likes of Garchomp and Mega Salamence.
What are its flaws?
Vaporeon may be bulky, but it's also weak to some rather high-profile threats such as Thundurus-T and Rotom-W. Vaporeon also has big issues with Taunt, since Wish passing is its main goal. Since Vaporeon is so focused on this role, it also doesn't make last Pokémon stands very well, relying on its teammates to function well.

Alomomola
Roles: Soak user, Wish Passer
Super Soaker
- Alomomola @ Sitrus Berry / Leftovers
- Ability: Hydration
- 252 HP / 252 Def / 4 SpD
- Impish / Bold Nature
- - Soak
- - Wish
- - Protect
- - Waterfall / Aqua Jet / Scald
What's the big deal?
Alomomola may be the best user of Soak in Rotations. Soak turns your target into a pure Water-type. Normally, this isn't very useful, but since switching is nearly impossible in Rotations, Alomomola can use this to make Pokémon such as Thundurus-T and Serperior much more difficult to check thanks to their STAB attacks being super effective against Water! Alomomola also has a gigantic HP stat that makes it an even more usable Wish passer.
What should I expect to see?
Alomomola will almost always have Soak handy, as this is its big selling point compared to other Wish passers. Alomomola's movepool isn't anything to write home about otherwise, so Protect is usually slotted in so Alomomola can restore its health more reliably. Waterfall gives Alomomola at least some form of attack, while Aqua Jet can snipe weakened Blaziken. If you want to have a chance to spread status, Scald also works, though Alomomola's Special Attack stat is laughable.
What are its flaws?
Alomomola's biggest issue is its poor Special Defense stat, which is especially problematic with special attackers such as Thundurus-T, Rotom-W, and Serperior being fairly common. Alomomola also has pathetic offensive presence, meaning that when it ends up as the last Pokémon, Alomomola is unlikely to be making any comebacks.
For other niche Pokémon you may find in Rotations's usage stats, look up to see if they have Battle Spot Singles analyses, since they usually use similar sets here!
Conclusion
Everything must come to an end eventually, and in the case of Rotations, that end may be coming sooner than for most Pokémon metagames. Even Triples can easily live on in Pokémon Showdown, but with Rotations support being so difficult to implement, it may be stuck on generation 5 and 6 cartridges for the foreseeable future. In a sense, this makes Rotations one of the few lost metagames, alongside the often forgotten Wonder Launcher mode of Generation 5.
Don't be too sad, though. While Rotations's short life may be over, unlike Wonder Launcher, Rotations having had an online ladder means that this metagame has a recorded history to go alongside it, one that may prove useful some day if Game Freak decides to bring Rotations back. Even if Rotations stays buried, with Pokémon Sun and Moon looking like the most creative Pokémon games yet, Rotations may have one last lesson to teach us coming into this generation: cherish Pokémon's unique game modes, because you never know how long they will last!
| « Previous Article | Home | Next Article » |