SMOKING GUNZ

What's cracking guys Lifeisaroll here bringing you the rmt of the team that I used to peak 1 with 2047 Elo. This team is designed to be able to do well against every kind of match up including stall which is often the predominant gamestyle of high rated players. So without any further ado let's jump into this like a Mega Medicham on a Chansey.
THE TEAM


BUILDING PHASE


I have chosen this offensive core because it is incredibly powerfull and fully capable of destroying walls.


This is the defensive volt-turn core that will gain the momentum we need and bring in safely our strong attackers.


Finally we have what in my opinion are the best two mons for dealing with hazards in offense oriented teams.
IN DEPTH ANALYSIS

Something To Fear (Medicham) @ Medichamite
Ability: Pure Power
EVs: 252 Atk / 4 Def / 252 Spe
Adamant Nature
- Fake Out
- High Jump Kick
- Ice Punch
- Bullet Punch
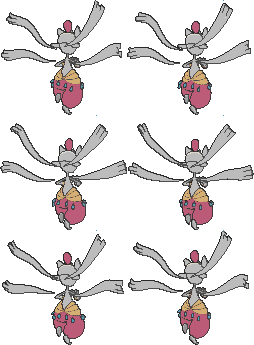
The name says it all. With a fearsome 656 attack stat and a decent speed after mega evolving, this monster can take a kill everytime it gets into the field leaving smoking holes in the enemy team. An adamant nature is chosen to maximaze its power.
Fake out is a very usefull +4 Priority to mega evolve this boss and also acquire precious informations about the enemy mons. You can tell the enemy set you are facing judging on the Fake Out damage e.g. defensive Landorus-t or scarfed, Tank Chomp or offensive lead etc. It can also be used to revenge kill faster mons in conjunction with Bullet punch.
High Jump Kick is simply brutal, most of the time something is gonna die.
Ice Punch is the coverage move of choice to ohko walls like Tank Chomp, Gliscor and even Landorous-T after one Fake Out or Stealth Rock damage.
Bullet Punch is the second priority move avialable at all times which makes Mega Medicham even a stronger lead as it can ohko Diancie from full and Weavile after Fake Out.

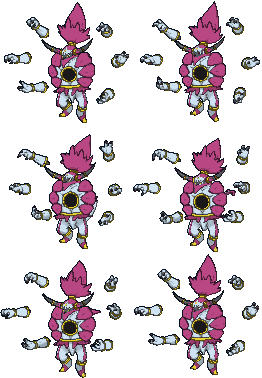
Too Far Gone (Hoopa-Unbound) @ Choice Specs
Ability: Magician
EVs: 252 SpA / 4 SpD / 252 Spe
Timid Nature
- Dark Pulse
- Psyshock
- Focus Blast
- Trick
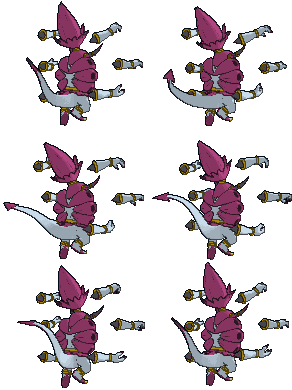
The few things that can wall Medicham's assault like Slowbro, Mew and Reuniclus will get ohko by Hoopa-U. It is basically the second nuker of the team with its ridicolous 658,5 special attack stat. It also has a remarkable special defense bulk that allows it to take a +3 Manaphy Scald and a Charizard-Y Fire Blast under the sun.
Dark Pulse is the main stab that hits very hard, it 2hkos specially defensive Heatran after Stealth Rock damage.
Psyshock is the second stabbed preferred option to Psychic since it takes down Chansey that otherwhise walls the set.
Focus Blast is the mandatory coverage for mons like Tyranitar and Ferrothorn that can strike back and kill Hoopa-U.
Trick can be used when the Choice Specs item is not needed to cripple annoying walls.

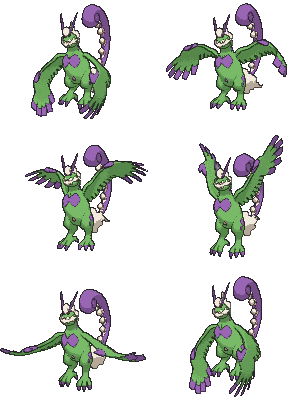
Thank You (Tornadus-Therian) @ Assault Vest
Ability: Regenerator
EVs: 96 HP / 160 SpA / 252 Spe
Hasty Nature
- Hurricane
- Heat Wave
- U-turn
- Knock Off
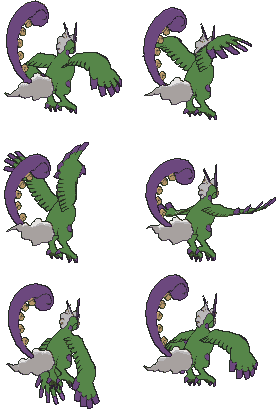
This fast bird can gain momentum and hit hard. The Assault Vest allows it to switch into powerfull special attackers like Keldeo or the Lati twins, forcing the switch and creating opportunities to Hurricane or Knock Off some items.
Hurricane is the powerfull stab move that isn't accurate but it's compensated by the fact that Torn-t will usually have many chances to fire some of them off thanks to his speed.
Heat Wave is the coverage move chosen for the likes of Skarmory, Ferrothorn, Scizor, Klefky, Jirachi, Bisharp, Metagross and Magnezone.
U-Turn is essential to create the Volt-Turn core.
Knock Off takes this monster to the next level since having the possibility to remove items is huge.

Always Accountable (Rotom-Wash) @ Leftovers
Ability: Levitate
EVs: 248 HP / 216 Def / 44 Spe
Bold Nature
- Volt Switch
- Hydro Pump
- Thunder Wave
- Pain Split
Rotom-W completes the Volt-Turn core and checks the bird spam. It can also be a situational switch-in to Keldeo or Starmie if the pressure on Torn-T is too high. 44 points in speed are invested to always outspeed Azumarill that can be very dangerous due to the access to Belly Drum.
Volt-Switch is to gain momentum and complete the core.
Hydro Pump can do cheap damage taking down offensive mons like Talonflame and Diggersby or other walls such as Gliscor, Landorus-T, Hippodown and Heatran.
Thunder Wave is used to stop mons like Mega Charizard-X, Mega Alakazam or Kingdra allowing other members of the team to kill them easily.
Pains Split is to gain health back.

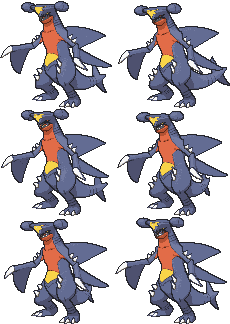
No Sanctuary (Garchomp) (M) @ Rocky Helmet
Ability: Rough Skin
EVs: 240 HP / 168 Def / 100 Spe
Impish Nature
- Earthquake
- Dragon Tail
- Fire Blast
- Stealth Rock
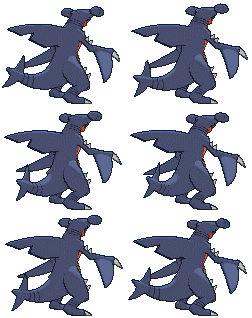
Garchomp is probably the best defensive setter choice for offense oriented teams, making contact with it will cause the enemy to suffer a lot of damage by the combination of Rough Skin and Rocky Helmet. It doens't end here, with Stealth Rock and Dragon tail it can act as a stallbreaker or drag in mons that will take significant damage from rocks. 100 speed is to outspeed opposing Tank Chomps that are very common while manteining it's bulk.
Earthquake is the main stab that even uninvested is able to do some decent damage to offensive mons.
Dragon Tail is the main move of the set, it offers the possibility to force in the field mons that don't want to take Stealth Rock damage.
Fire Blast is the coverage move used to kill a potential Scizor that tries to set-up on us or to finish off weakened walls like Ferrothorn or Skarmory.
Stealth Rock is there because hazards are key to success in the game.

No Way Out (Excadrill) @ Choice Scarf
Ability: Mold Breaker
EVs: 252 Atk / 4 SpD / 252 Spe
Jolly Nature
- Earthquake
- Iron Head
- Rock Slide
- Rapid Spin
Excadrill is the spinner and a solid win condition after that the flying types are removed, possibly with a Medicham's Ice Punch. It is also a good offensive pivot since it can easily switch in electric types like Raikou. Finally thanks to Mold breaker it can hit with earthquake mons with levitate like Rotom-Wash, the Lati twins, Hydreigon or Shedinja that otherwise would result immune. A jolly nature is chosen to outspeed threats such as Mega Altaria at +1, Adamant Mega Charizard-X at +1, Feraligatr and Gyarados at +1, Mega Alakazam, Mega Manectric, Mega Lopunny, Mega Aerodactyl, Mega Beedrill, Choice Scarf Hoopa-U and Choice Scarf Heatran.
Earthquake is a very strong stab that can sweep once flying types are removed and walls weakened.
Iron Head will make faries cry and pop like balloons.
Rock Slide can revenge kill Threats like Mega Charizard-Y, Mega Pinsir or Thundurus.
Rapid Spin is to remove hazards.


-Shoutouts to Sunding (http://www.smogon.com/forums/members/sunding.268987/) who helped me with the graphic-

What's cracking guys Lifeisaroll here bringing you the rmt of the team that I used to peak 1 with 2047 Elo. This team is designed to be able to do well against every kind of match up including stall which is often the predominant gamestyle of high rated players. So without any further ado let's jump into this like a Mega Medicham on a Chansey.
THE TEAM
BUILDING PHASE
I have chosen this offensive core because it is incredibly powerfull and fully capable of destroying walls.
This is the defensive volt-turn core that will gain the momentum we need and bring in safely our strong attackers.
Finally we have what in my opinion are the best two mons for dealing with hazards in offense oriented teams.
IN DEPTH ANALYSIS
Something To Fear (Medicham) @ Medichamite
Ability: Pure Power
EVs: 252 Atk / 4 Def / 252 Spe
Adamant Nature
- Fake Out
- High Jump Kick
- Ice Punch
- Bullet Punch
The name says it all. With a fearsome 656 attack stat and a decent speed after mega evolving, this monster can take a kill everytime it gets into the field leaving smoking holes in the enemy team. An adamant nature is chosen to maximaze its power.
Fake out is a very usefull +4 Priority to mega evolve this boss and also acquire precious informations about the enemy mons. You can tell the enemy set you are facing judging on the Fake Out damage e.g. defensive Landorus-t or scarfed, Tank Chomp or offensive lead etc. It can also be used to revenge kill faster mons in conjunction with Bullet punch.
High Jump Kick is simply brutal, most of the time something is gonna die.
Ice Punch is the coverage move of choice to ohko walls like Tank Chomp, Gliscor and even Landorous-T after one Fake Out or Stealth Rock damage.
Bullet Punch is the second priority move avialable at all times which makes Mega Medicham even a stronger lead as it can ohko Diancie from full and Weavile after Fake Out.
Too Far Gone (Hoopa-Unbound) @ Choice Specs
Ability: Magician
EVs: 252 SpA / 4 SpD / 252 Spe
Timid Nature
- Dark Pulse
- Psyshock
- Focus Blast
- Trick
The few things that can wall Medicham's assault like Slowbro, Mew and Reuniclus will get ohko by Hoopa-U. It is basically the second nuker of the team with its ridicolous 658,5 special attack stat. It also has a remarkable special defense bulk that allows it to take a +3 Manaphy Scald and a Charizard-Y Fire Blast under the sun.
Dark Pulse is the main stab that hits very hard, it 2hkos specially defensive Heatran after Stealth Rock damage.
Psyshock is the second stabbed preferred option to Psychic since it takes down Chansey that otherwhise walls the set.
Focus Blast is the mandatory coverage for mons like Tyranitar and Ferrothorn that can strike back and kill Hoopa-U.
Trick can be used when the Choice Specs item is not needed to cripple annoying walls.
Thank You (Tornadus-Therian) @ Assault Vest
Ability: Regenerator
EVs: 96 HP / 160 SpA / 252 Spe
Hasty Nature
- Hurricane
- Heat Wave
- U-turn
- Knock Off
This fast bird can gain momentum and hit hard. The Assault Vest allows it to switch into powerfull special attackers like Keldeo or the Lati twins, forcing the switch and creating opportunities to Hurricane or Knock Off some items.
Hurricane is the powerfull stab move that isn't accurate but it's compensated by the fact that Torn-t will usually have many chances to fire some of them off thanks to his speed.
Heat Wave is the coverage move chosen for the likes of Skarmory, Ferrothorn, Scizor, Klefky, Jirachi, Bisharp, Metagross and Magnezone.
U-Turn is essential to create the Volt-Turn core.
Knock Off takes this monster to the next level since having the possibility to remove items is huge.
Always Accountable (Rotom-Wash) @ Leftovers
Ability: Levitate
EVs: 248 HP / 216 Def / 44 Spe
Bold Nature
- Volt Switch
- Hydro Pump
- Thunder Wave
- Pain Split
Rotom-W completes the Volt-Turn core and checks the bird spam. It can also be a situational switch-in to Keldeo or Starmie if the pressure on Torn-T is too high. 44 points in speed are invested to always outspeed Azumarill that can be very dangerous due to the access to Belly Drum.
Volt-Switch is to gain momentum and complete the core.
Hydro Pump can do cheap damage taking down offensive mons like Talonflame and Diggersby or other walls such as Gliscor, Landorus-T, Hippodown and Heatran.
Thunder Wave is used to stop mons like Mega Charizard-X, Mega Alakazam or Kingdra allowing other members of the team to kill them easily.
Pains Split is to gain health back.
No Sanctuary (Garchomp) (M) @ Rocky Helmet
Ability: Rough Skin
EVs: 240 HP / 168 Def / 100 Spe
Impish Nature
- Earthquake
- Dragon Tail
- Fire Blast
- Stealth Rock
Garchomp is probably the best defensive setter choice for offense oriented teams, making contact with it will cause the enemy to suffer a lot of damage by the combination of Rough Skin and Rocky Helmet. It doens't end here, with Stealth Rock and Dragon tail it can act as a stallbreaker or drag in mons that will take significant damage from rocks. 100 speed is to outspeed opposing Tank Chomps that are very common while manteining it's bulk.
Earthquake is the main stab that even uninvested is able to do some decent damage to offensive mons.
Dragon Tail is the main move of the set, it offers the possibility to force in the field mons that don't want to take Stealth Rock damage.
Fire Blast is the coverage move used to kill a potential Scizor that tries to set-up on us or to finish off weakened walls like Ferrothorn or Skarmory.
Stealth Rock is there because hazards are key to success in the game.
No Way Out (Excadrill) @ Choice Scarf
Ability: Mold Breaker
EVs: 252 Atk / 4 SpD / 252 Spe
Jolly Nature
- Earthquake
- Iron Head
- Rock Slide
- Rapid Spin
Excadrill is the spinner and a solid win condition after that the flying types are removed, possibly with a Medicham's Ice Punch. It is also a good offensive pivot since it can easily switch in electric types like Raikou. Finally thanks to Mold breaker it can hit with earthquake mons with levitate like Rotom-Wash, the Lati twins, Hydreigon or Shedinja that otherwise would result immune. A jolly nature is chosen to outspeed threats such as Mega Altaria at +1, Adamant Mega Charizard-X at +1, Feraligatr and Gyarados at +1, Mega Alakazam, Mega Manectric, Mega Lopunny, Mega Aerodactyl, Mega Beedrill, Choice Scarf Hoopa-U and Choice Scarf Heatran.
Earthquake is a very strong stab that can sweep once flying types are removed and walls weakened.
Iron Head will make faries cry and pop like balloons.
Rock Slide can revenge kill Threats like Mega Charizard-Y, Mega Pinsir or Thundurus.
Rapid Spin is to remove hazards.
All the threats listed can be very well handled if the match is played correctly.
Also note that a lot of them can be revenge killed by Excadrill and the biggest one has low usage in the tier.
 The number one threat of the team, thankfully with a low usage. Tank Chomp is the best way to deal with it, setting up rocks early in the game and hopefully dragon tailing it out. Try to never let it Quiver Dance.
 This thing is very annoying to deal with, when the opponent chose it as leader, I usually let Rotom-W take the burn and Volt Switch to Hoopa-U that has a good chance to kill it with a Dark Pulse at that point. Generally the idea is to force it to recover the way you can bring in Hoopa-U safely.
 His usage is almost non existent in OU but you'd better do not understimate this one. Like with Volcarona the goal is to never let it Dragon Dance or you will be in troubles becouse Mold Breaker ignores Rotom-W's Levitate and Tank Chomp gets smacked by the dragon stab.
 Even with Thunder Wave on Rotom-W, this dragon is still very threatening for his incredible power. If you face one of those, keep Rotom-W healthy for an unexpected Thunderwave and use Garchomp the best you can (unboosted Dragon Claw is never gonna ohko from full barring the crit).
 To beat this flying moster set rocks as soon as possible and try to dragon tail it out.
 This one has generally speaking very few switches in so it is important to always keep the offensive presence with Mega Medicham on the field in order to prevent it from doing serious damages. The same goes with other powerfull hitting mons like Mega Diancie, Mega Gardevoir, Kyurem, Kyurem-B and Weavile.
 Our answer to it is Garchomp. If Mega Lopunny hits Chomp it will be now in range of Mega Medicham priorities. Best is to bring the tank on the Fake Out.
 The combination of Glare and the ability of Contrary is broken, it can easily paralize our best switch in: Torn-t.
 It can go for the stabbed Earthquake or Return so you have to make the right prediction and go either Rotom-W or Garchomp. It should never be able to Sword Dance.
 It needs to be predicted accurately, specially the mixed version. The best scenario is to go Excadrill on the electric type move, but you risk the Knock Off or the Focus Blast / Superpower so be careful.
 Even tho we can interrupt his Volt Switch, it must be predicted right. Flamethrower / Overheat and Hidden Power Ice can punish our Excadrill and Garchomp switches in, so you have to play around it.
 Always try to predict his switch in and anticipate it with Torn-T.
 It will probably put one of us to sleep, in that case chose the less usefull mon for the game.
Also note that a lot of them can be revenge killed by Excadrill and the biggest one has low usage in the tier.
OU Room Tour: http://replay.pokemonshowdown.com/ou-347376452
Manectric RMT: http://replay.pokemonshowdown.com/ou-347373132
Give Me Everything: http://replay.pokemonshowdown.com/ou-347142945
Using a Togekiss variant (most recent ones) re peak: http://imgur.com/CdcLNWm
ABR's Weavile Stall: http://replay.pokemonshowdown.com/ou-358483775
BC Wish Skiller 1: http://replay.pokemonshowdown.com/ou-358490486
BC Wish Skiller 2: http://replay.pokemonshowdown.com/ou-358499413
BC Wish Skiller 3: http://replay.pokemonshowdown.com/ou-358674385
BC Wish Skiller 4: http://replay.pokemonshowdown.com/ou-361834337
Empoleon: http://replay.pokemonshowdown.com/ou-358505875
Something To Fear (Medicham) @ Medichamite
Ability: Pure Power
EVs: 252 Atk / 4 Def / 252 Spe
Adamant Nature
- Fake Out
- High Jump Kick
- Ice Punch
- Bullet Punch
Too Far Gone (Hoopa-Unbound) @ Choice Specs
Ability: Magician
EVs: 252 SpA / 4 SpD / 252 Spe
Timid Nature
- Dark Pulse
- Psyshock
- Focus Blast
- Trick
Thank You (Tornadus-Therian) @ Assault Vest
Ability: Regenerator
EVs: 96 HP / 160 SpA / 252 Spe
Hasty Nature
- Hurricane
- Heat Wave
- U-turn
- Knock Off
Always Accountable (Rotom-Wash) @ Leftovers
Ability: Levitate
EVs: 248 HP / 216 Def / 44 Spe
Bold Nature
- Volt Switch
- Hydro Pump
- Thunder Wave
- Pain Split
No Sanctuary (Garchomp) (M) @ Rocky Helmet
Ability: Rough Skin
EVs: 240 HP / 168 Def / 100 Spe
Impish Nature
- Earthquake
- Dragon Tail
- Fire Blast
- Stealth Rock
No Way Out (Excadrill) @ Choice Scarf
Ability: Mold Breaker
EVs: 252 Atk / 4 SpD / 252 Spe
Jolly Nature
- Earthquake
- Iron Head
- Rock Slide
- Rapid Spin
Last edited:


