• Follow our Instagram!
  • Curious about what we're currently doing about bots? Check out the latest updates from staff in this thread.

Challenge Ultra Sun: Cosmog vs. the Alola region

:sm/ditto: :sm/volcarona:
69 Trainers remaining - my inner 12-year-old is delighted to discover this. Poni Coast will bring that number down to 65 once I've worked my way through it, so off I go, smashing my way through the rocks with a little help from Tauros until I find the first opponent.
34-1.png

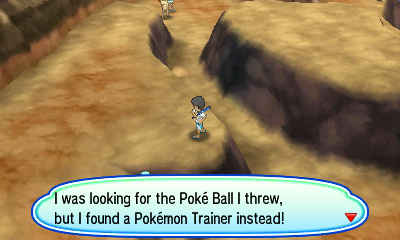
Youth Athlete Anton
Alolan Sandslash Lv58 (Slash/Defense Curl/Ice Ball/Metal Claw, Ability: Snow Cloak, IVs: All 20)

A gentle start. I use an X Defense, Metal Claw deals 13 damage and Slash deals 12, then Phart uses Struggle at +2 Attack but can't manage a quarter of Sandslash's HP. But since the only concerning move it has is Ice Ball and it doesn't even use the move until it's about to faint, a 5HKO from Struggle is fine by me.
34-2.png

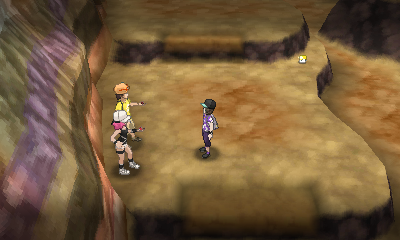
"You and I can never meet, so long as you only have one Pokémon in your party."
"If you want to see our precious Exeggutor, you need to have at least two Pokémon with you!"


I'm not running off to grab Ralts just yet because there are actually two Double Battles in Poni Coast, and I'd like to see the other pair's you-can't-battle-with-one-mon dialogue first. In the meantime, I grab that sparkling Dark Pulse TM in the top-right corner of the screen, then a Max Revive, and finally a Power Bracer which happens to be right next to another Trainer.
34-3.png

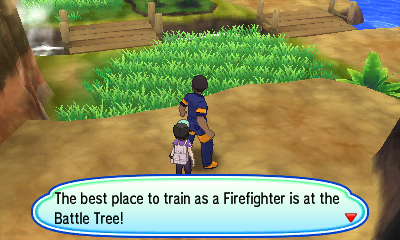
Firefighter Aiden
Octillery Lv60 (Ice Beam/Bullet Seed/Hydro Pump/Hyper Beam, IVs: All 25)
Clawitzer Lv60 (Water Pulse/Smack Down/Aqua Jet/Muddy Water, Ability: Mega Launcher, IVs: All 25)

I reckon I'll get away with not using X Defenses - it's the other moves that are the bigger issues here. Octillery's Hydro Pump does 43 damage after an X Sp. Def, and while Phart's Struggle can't get the 3HKO I was hoping for with one X Attack, it can with a second one. Clawitzer's first Muddy Water gets a totally useless accuracy drop whilst only taking off 30 HP, then its next two miss entirely and it also faints after 3 Struggles.
34-4.png

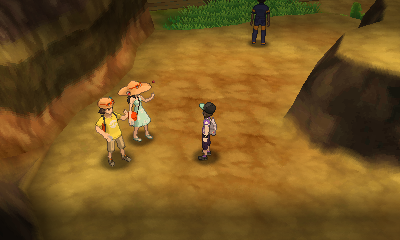
"I came all the way to Alola, so I want you to show me two Pokémon!"
"Surely you are able to battle with two Pokémon at the same time, aren't you?"


Here's the other pair. Now that the regular Trainers have been dealt with in the area, I can grab Ralts and get started on the irregular ones.

34-5.png

Honeymooners Noriko and Devin
Ninetales Lv59 (Flamethrower/Quick Attack/Confuse Ray/Safeguard, Ability: Flash Fire, IVs: All 15)
Sandslash Lv59 (Gyro Ball/Swords Dance/Sandstorm/Earthquake, Ability: Sand Veil, IVs: All 15)
Geodude Lv59 (Earthquake/Explosion/Double-Edge/Stone Edge, IVs: All 15)
Graveler Lv59 (Earthquake/Explosion/Double-Edge/Stone Edge, Ability: Sturdy, IVs: All 15)
Golem Lv59 (Earthquake/Explosion/Double-Edge/Stone Edge, IVs: All 15)

Ralts's Quick Claw fails to activate like usual and it gets fried by Flamethrower before it can chuck a Memento at Phart, while Geodude takes one look at Phart and decides to blow itself up, denting it to the tune of 24 HP thanks to an X Defense. Its "ally" Ninetales is less sturdy and loses half its health to the friendly fire. When Graveler is sent out, I decide to use another X Defense and see if it also goes for Explosion... no, it's Double-Edge and doesn't do much at all. But it does decide to blow up on the next turn, KOing Ninetales for the sake of another 14 damage to Phart.

This leaves it facing Sandslash and Golem at +6 Defense, and the latter is also likely going to KO itself at some point. So I use a Moomoo Milk to bring Phart back up to 240/270 HP (Ninetales's Flamethrowers did hurt a bit), and it dodges Sandslash's Gyro Ball while Golem immediately blows up, landing a crit on Sandslash to knock the poor thing straight into red! Phart only loses 17 HP to the blast and can KO Sandslash on the next turn with a completely unboosted Struggle.

5 Pokémon taken down in 5 turns and only one use of Struggle. With enemies like these, who needs friends? It was a nice breath of fresh air before getting back to normal combat. I use a Revive for the second time this playthrough on Ralts and revisit the other pair of Trainers from earlier.

34-6.png

Tourist Couple Steve and Reika
Exeggutor Lv59 (Psyshock/Egg Bomb/Wood Hammer/Leaf Storm, Ability: Chlorophyll, IVs: All 15)
Alolan Exeggutor Lv59 (Psyshock/Egg Bomb/Wood Hammer/Leaf Storm, Ability: Frisk, IVs: All 15)

Both Exeggutor can hit fairly hard with either Wood Hammer or Leaf Storm, but since Leaf Storm will be the stronger of the two on its first use, I start with an X Sp. Def on Phart. Ralts faints once again to an opponent's attack, this one being the Kantonian Exeggutor's Leaf Storm, and the Alolan Exeggutor hits Phart for 58 damage with Wood Hammer. Then I use an X Defense, both opponents use Wood Hammer, then an X Attack while they try Leaf Storm (from the tiny Exeggutor again) and Egg Bomb.

They're both fairly unthreatening now, so I heal Phart up and let it start Struggling. The Kantonian Exeggutor only takes about 25% and Phart's already in need of healing again following a double Leaf Storm, so this may take a while... luckily the recoil from Wood Hammer helps wear them down a bit, and the Kantonian Exeggutor faints after 4 Struggles while the Alolan one only takes 3, knocking itself out with a final Wood Hammer. Time to put Ralts back in the PC for a short while before its last contribution to the run.
34-7.png

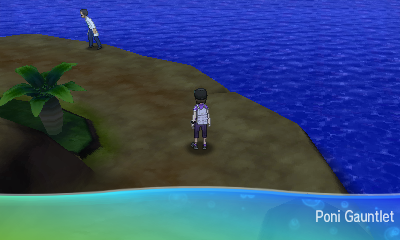
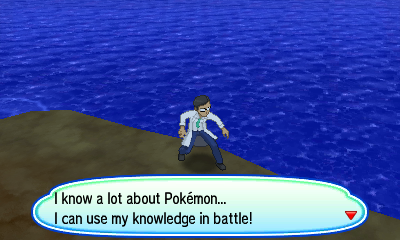
Poni Island doesn't do "routes" (why would you need a route system on a largely uninhabited island?), but this would probably count as the final route in the game if it had them. And true to its name, there are another 6 Trainers to rattle through before the Battle Tree, so let's see what that Scientist has over there.
34-8.png

Scientist Kyle
Items: X Speed
Ditto Lv61 (Transform, Ability: Imposter, IVs: All 30)
Porygon-Z Lv61 (Discharge/Lock-On/Tri Attack/Magic Coat, Ability: Download, IVs: All 30)

34-9.png

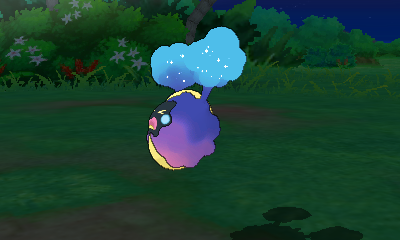
Oh, what a terrible day to have Imposter. Not only is poor Ditto shafted by auto-transforming into a Cosmog, it doesn't get to copy Phart's Eviolite boosts, and it gains 5 Splash PP so it can't even launch straight into Struggles! Kyle decides the best way to handle this is by using his X Speed, while I go for an X Sp. Def, knowing that there's a Porygon-Z behind Ditto that can actually deal some damage. Actually, make that 2 X Sp. Defs. Ditto makes a start on its Splash PP while I use a couple of X Attacks, then I stall for a few turns and let it Struggle itself to death, dealing 10-11 damage with each puny blow.
34-10.png

The only time I'll ever be glad to see this fainting animation.

Porygon-Z comes in and Downloads itself an Attack boost, a massive boon to a Pokémon with no physical attacks that's facing an Unaware user. Its Tri Attack deals 22 damage to Phart, which isn't bad on its own, but the freezing it inflicts is a bit annoying. I'm too stubborn to heal it manually, so I wait a couple of turns before Phart thaws out and uses Struggle, dealing around 40%. The lack of further status conditions from Porygon-Z means that Phart just needs a Max Potion before it can knock out its opponent and win the battle.

A bridge just past Kyle leads to a small island with an item. It looks as though I'll have to defeat a Veteran to reach it, but no, her line of sight doesn't extend far enough to spot me. The item in question is a Power Band, and by picking it up, I've now completed my collection of all 6 EV-training Power items! They're all borderline useless, but still. May as well take on that Veteran to celebrate.

34-11.png

Ooh, I know this one! It's either Friend, Pal or Ally. Definitely not Underling or Junior.

Veteran Sheri
Jellicent Lv63 (Water Spout/Shadow Ball/Surf, Ability: Cursed Body, Calm nature, IVs: 30/15/15/30/30/15, EVs: 252 SpA / 252 SpD)
Pyroar Lv63 (Hyper Voice/Fire Blast, Ability: Rivalry, Modest nature, IVs: 30/15/15/30/15/30, EVs: 252 SpA / 252 Spe)
Froslass Lv63 (Shadow Ball/Blizzard/Ice Shard, Ability: Snow Cloak, Timid nature, IVs: 30/15/15/30/15/30, EVs: 252 SpA / 252 Spe)

Another reminder that Alola's Veterans don't mess around (empty moveslots aside). Jellicent's moveset calls for an immediate maxing-out of Phart's Sp. Def, and even then, 2 Water Spouts deal 59 and 46 damage while I'm setting up. Phart spares itself further injury by dodging a Shadow Ball, but now there's the matter of setting up all the other X items: 2 X Attacks, 2 X Speeds, and a Dire Hit. By the time these are in place, Jellicent has run out of Water Spout PP (which is weird, because I'm pretty sure Shadow Ball is stronger against Phart?) and it goes down in 2 Struggles, but not before blasting through 176 HP with a single critical hit! Jellyfish strong.

34-12.png

Nothing quite so damaging from its allies, as Froslass manages 30 damage with a Shadow Ball before getting a 2HKO. Pyroar does about as much with its Fire Blasts, and while the second one leaves Phart with a burn, a Full Restore fixes it up again so Pyroar can also go down to a 2HKO. Setting your Phart on fire is never a good idea.

With no bridge to carry me across to the next little island, I have to put on some Max Repel and wade through the tall grass like a peasant, but I do come across a Guard Spec. during this process. Past all the grass lies a Backpacker.
34-13.png

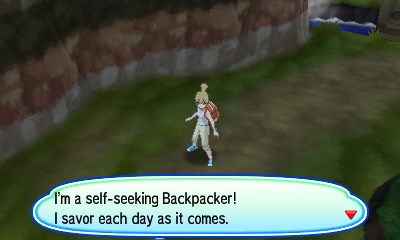
Backpacker Yuho
Ambipom Lv61 (Double Hit/Fling/Nasty Plot/Last Resort, IVs: All 15)

Two of its moves are useless and another one will fail unless it's already used both of those useless moves, so this should be easy enough. Ambipom opens with Nasty Plot while I use an X Defense, then takes Phart down to 244/273 HP with Double Hit while I'm using an X Attack. It's an easy 3HKO from there, only using up one Max Potion. The next bridge brings me to a PP Up, a Full Restore, and yet another Trainer.
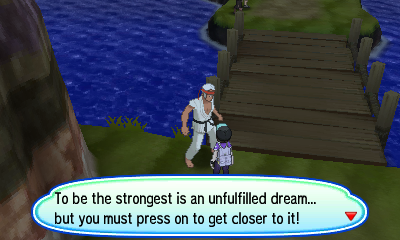
34-14.png

Black Belt Tracy
Hawlucha Lv62 (High Jump Kick/Sky Attack/Sky Drop/Swords Dance, Adamant nature, IVs: 15/31/15/15/15/15, EVs: 252 Atk)
Machamp Lv62 (Bulk Up/Cross Chop/Scary Face/Dynamic Punch, Adamant nature, IVs: 15/31/15/15/15/15, EVs: 252 Atk)

One X Defense and one X Attack against Hawlucha, who Swords Dances and then starts charging up a Sky Attack. It doesn't get a crit, it doesn't get a flinch, and it doesn't even land thanks to Phart's impeccable dodging skills, but Struggle disappoints afterwards by failing to achieve a 3HKO. Phart has to settle for a 4HKO instead, with the next couple of Sky Attacks connecting for 46 damage each. Machamp is not especially problematic either, its only achievement being landing a Dynamic Punch and causing Phart to hit itself twice before fainting to 4 Struggles.
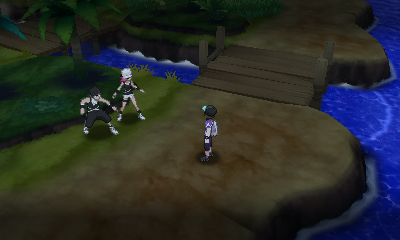
34-15.png

"I wanna get psyched up! Just show me two healthy Pokémon."
"I wanna beat you down! Come back with two healthy Pokémon."


By ignoring the very obvious path to the Battle Tree and instead taking a different path that leads to a dead-end island, I come across a Misty Seed as well as this Punk Pair. Much like Poni Coast, there are 2 Double Battles in this area, so I'll check out the dialogue of the other pair before I head back for Ralts. And I'll also grab the nearby Metal Coat despite Phart not needing it at all. Who knows, maybe I'll be attacked by a shiny Scyther the next time I visit Poni Plains.
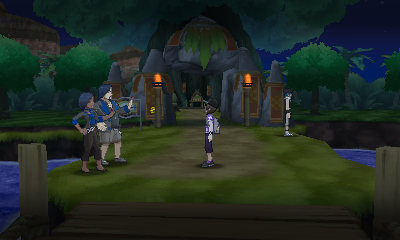
34-16.png

"You want to fight us! You've gotta have two Pokémon."
"You want to fight with us, right? Then you've gotta have two Pokémon."


And so my quest to document all the dialogue Double Battle Trainers use when you only have one Pokémon comes to an end. It's "notable" in that I literally noted it all down, but whether it's interesting is a matter of opinion.

There's a PC up ahead in the Battle Tree, but I can hardly set foot inside it before Red and Blue will walk up and force me to fight one of them. But I can enter the Battle Tree and avoid triggering that encounter by not walking forward at all and just leaving, which then unlocks it as a location for Charizard to fly to. In theory, this would save me time by letting me fly directly to the Battle Tree when I return with Ralts... but it also forces me to fight the Veteran Duo before the Punk Pair, since it's impossible to walk past them without entering their line of sight, and I'd rather not fight the Veteran Duo first because they're a much, much harder fight.

So despite me going to the effort of unlocking a more convenient fly location for the return trip, I ignore it and fly to Poni Plains instead once I've picked up Ralts in the Seafolk Village. It doesn't take too long to get back to where I was and track down the Punk Pair again.
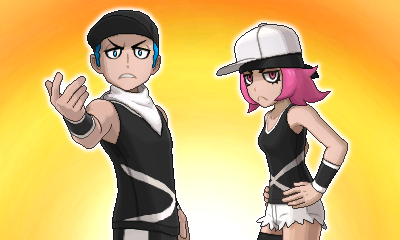
34-17.png

Punk Pair Marie and Troy
Midnight Form Lycanroc Lv61 (Scary Face/Crunch/Rock Climb/Stone Edge, IVs: All 15)
Honchkrow Lv61 (Swagger/Nasty Plot/Foul Play/Night Slash, IVs: All 15)

Phart gets an X Defense and Ralts's Quick Claw fails to work again, so Lycanroc's Crunch is the move that takes it off the field rather than Memento. Honchkrow spends the turn giving itself a Nasty Plot boost that it can't use rather than trying to attack Phart. I don't really want to give it any Attack boosts because of Foul Play (although it might get some anyway via Swagger), so once it's at +6 Defense and taking ~20 damage from the attacks being thrown at it, I give it a Dire Hit and an X Speed, then see how well it fares with Struggle. It instantly loses its Speed boost to Scary Face and is struck by Swagger, but manages to take out half of Honchkrow's HP and then a third of Lycanroc's after I cure the confusion. Its third Struggle knocks out Honchkrow, removing the opponent with the more dangerous moves from the battle, and Lycanroc follows suit 2 attacks later.

Time for the Veteran Duo, and by extension Ralts's last hurrah. I normally don't care too much when its Quick Claw doesn't activate and it's unable to use Memento on Phart to take itself out of the battle - its whole purpose is to faint on turn 1 and it still does so in those circumstances, just to an opponent's attack instead of its own, so the only advantage when Quick Claw fails is that Phart doesn't get double-targeted on that turn. However, since the next Double Battle is the last one in the game (apart from ones where I partner up with someone else) and it's also probably the hardest one of all, I think it'd be best if I make sure Ralts actually gets to use Memento in this fight. Even if that means resetting until the Quick Claw's 20% activation rate kicks in.
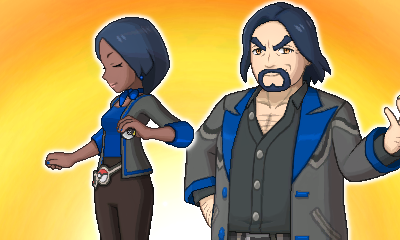
34-18.png

Veteran Duo Tsunekazu and Nobuko
Houndoom Lv63 (Flamethrower/Dark Pulse/Shadow Ball/Sludge Bomb, Ability: Flash Fire, Modest nature, IVs: 30/15/15/30/15/30, EVs: 252 SpA / 252 Spe)
Magmortar Lv63 (Thunder Punch/Fire Punch/Brick Break, Ability: Flame Body, Adamant nature, IVs: 30/30/15/15/15/30, EVs: 252 Atk / 252 Spe)
Volcarona Lv63 (Bug Buzz/Heat Wave/Hurricane, Ability: Flame Body, Modest nature, IVs: 30/15/15/30/15/30, EVs: 252 SpA / 252 Spe)
Comfey Lv63 (Floral Healing/Light Screen/Sunny Day/Draining Kiss, Ability: Flower Veil, Calm nature, IVs: 30/15/15/15/30/30, EVs: 252 HP / 252 SpD)
Whimsicott Lv63 (Helping Hand/Sunny Day/Solar Beam/Dazzling Gleam, Ability: Chlorophyll, Calm nature, IVs: 30/15/15/15/30/30, EVs: 252 HP / 252 SpD)
Lilligant Lv63 (Sunny Day/Helping Hand/After You/Solar Beam, Ability: Chlorophyll, Calm nature, IVs: 30/15/15/15/30/30, EVs: 252 HP / 252 SpD)

The battle against Morimoto and Iwao was bad enough, and Iwao didn't even have EVs on his Pokémon. These two Veterans are running a sun team, one side loaded with heavy hitters and the other with support moves for those heavy hitters, and Houndoom and Volcarona also have a type advantage over Phart if they don't feel like simply frying it instead. This might hurt.
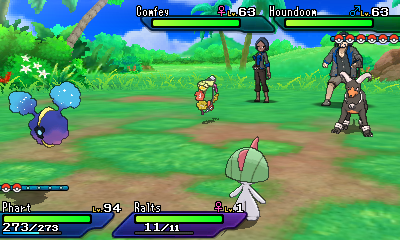
34-19.png

No resets are necessary as Ralts's Quick Claw activates on the first attempt, taking itself out of the fight with Memento at the cost of 2 Attack stages on Phart. Speaking of Phart, an X Sp. Def lets it tank Houndoom's Sludge Bomb quite well, leaving it on 246/273 HP while Comfey sets up a Light Screen.

Now I simply have to max out Phart's stats and KO everything. Reaching +6 Sp. Def allows Phart to take 38 damage from Dark Pulse, which is still not ideal but it's the best it'll get. It helps that Comfey doesn't have Helping Hand and its Draining Kiss barely does anything, as I can squeeze in one X item between heals to keep Phart out of KO range from a crit Dark Pulse. Playing cautiously seems to be the way to go, at least until Comfey runs out of Draining Kiss PP...
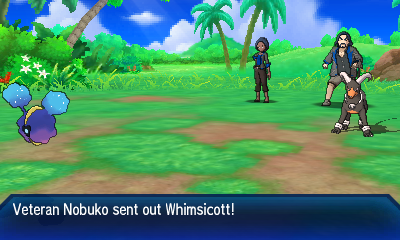
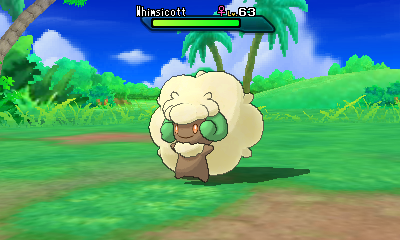
34-20.png

34-21.png

Since Sunny Day and Light Screen are already active and Houndoom has no damage to be healed by Floral Healing, the AI recognises that Comfey is dead weight and switches it out. This isn't ideal because not only does Whimsicott have a slightly better damage output than Comfey, it can also boost Houndoom's damage with Helping Hand. A small mercy is that Houndoom is now out of Dark Pulse PP, but if the 136 HP Phart just lost to a crit Shadow Ball is any indication, it's not done fighting yet.

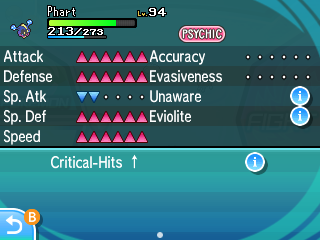
After I've used a Max Potion on Phart, Whimsicott sets up Sunny Day and then lands a crit of its own with Solar Beam, so that's another 79 HP gone already. At least Houndoom's sun-boosted Flamethrower isn't so bad in comparison. Back to X items again - Phart is already at +6 in both defenses, so now I'll focus on Attack and Speed. The remainder of the setup process isn't too bad apart from a random Flamethrower burn and another Solar Beam crit.
34-22.png

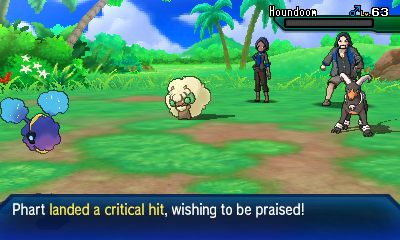
Whimsicott has run out of Sunny Day PP in the meantime, which is good since it now has to wait a turn to use Solar Beam, but also bad because it's far more inclined to use Helping Hand now. I'll have to heal Phart up and hope it can target Whimsicott and take it out before it gives a Helping Hand boost to a critical hit. Luckily it gives Phart a free turn with Solar Beam and loses half its HP to Struggle. Phart is too weak to safely attack right away, but after a Max Potion it targets Houndoom and KOs it from full!
34-23.png

Houndoom is not very bulky.

Also, it turns out Whimsicott did have one Sunny Day left, which it uses just after Houndoom faints. So why on earth did it waste multiple turns charging Solar Beam? Weird.
34-24.png

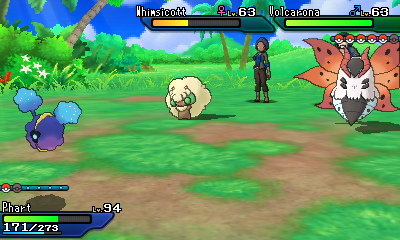
Big moth is here to do big damage. Considering how high Volcarona's Sp. Atk is before the Modest nature and full EVs, I imagine a Helping Hand-boosted crit will just be instant death for Phart. Of course, even a regular crit might mean instant death after Struggle recoil, so I'm slightly fucked no matter what I do here. The best idea I have is just healing to full again and trying to KO someone before anything bad can happen - Phart's struck by a Helping Hand-Bug Buzz combo that takes it down to 201/273 HP, so I risk a Struggle on the next turn. It targets Whimsicott, knocking it out and leaving Phart on 133 HP, and Volcarona "only" deals 50 damage with Bug Buzz afterwards.

34-25.png

Lilligant's about the same as Whimsicott but with After You instead of Dazzling Gleam. Since Phart's X Speeds make it faster than Lilligant even while Chlorophyll is active, I don't think that will be an issue here. I heal Phart back to full once more, and Lilligant deals 19 damage with a Solar Beam while Volcarona goes for another Bug Buzz... which Phart dodges! Now that's a welcome sight. It leaves it with enough HP to semi-safely Struggle again, hitting Volcarona for well over 80% and avoiding the wrath of Flame Body. It survives another Solar Beam and Bug Buzz without any crits, is healed with another Max Potion, tanks another Bug Buzz while Lilligant reactivates Sunny Day, then Struggles on Volcarona again to remove the biggest threat from the fight!

34-26.png

Magmortar's not weak by any means, but its Fire Punch is not as deadly as Volcarona's Bug Buzz could've been, even factoring in Sunny Day. It lands a sun-boosted, Helping Hand-boosted Fire Punch on Phart right away to demonstrate this, only reaching 36 damage, so I let Phart Struggle once again - it hits Magmortar and very nearly OHKOs it. One more Max Potion and Phart can take it out... or target Lilligant instead for 66% of its HP, I guess? Suit yourself. After I heal it again, whoever's targeted by Struggle is getting knocked out, and it ends up being Magmortar.
34-27.png

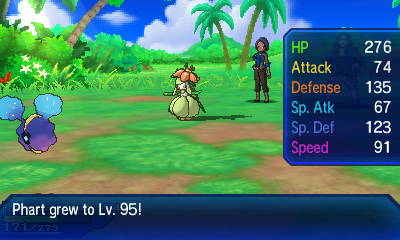
Fairly trivial from there. Lilligant is outsped and defeated by Struggle, leaving only the Comfey who has no damaging attacks left. One final Moomoo Milk gives Phart enough HP to 2HKO it. Hurrah!
34-28.png

I had no desire whatsoever to use anything other than Phart in this run, but the game mechanics forced me to use something unless I wanted to skip every Double Battle, and Ralts offered a compromise by consistently dying on the first turn even if it couldn't get to use Memento. It had one job, and it did it very well. Now back into the PC with you! There's no need for you to get knocked out any more.
34-29.png

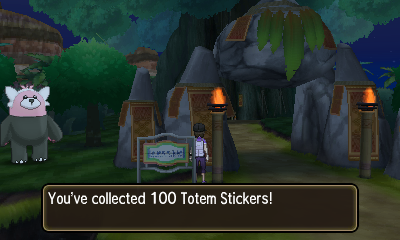
At last, the final sticker is mine. Must remember to go and visit Samson Oak once I've finished everything else.

34-30.png

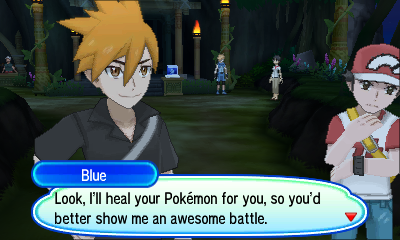
Taking a couple of steps into the Battle Tree causes Red and Blue to show up and say hi. Well, one of them says hi. They've come to Alola to act as the bosses of the Battle Tree, but that doesn't mean they can't enjoy a casual battle against a fellow Champion without worrying about battle facility rules like "no Cosmog" or "no X items" or "seriously why are you using a Cosmog".

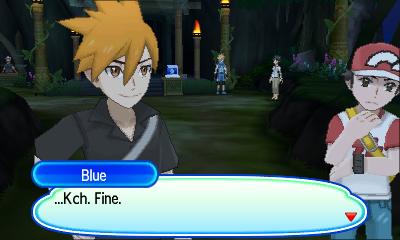
Blue offers me a battle against either himself or Red. This is a slight problem because it's a non-repeatable event and I can't fight both of them, even though I need to. So what I'll do instead is fight one of them, hopefully win, then reset my game and fight the other one. May as well start with Red first.
34-31.png

34-32.png

BLUE
MOTHERFUCKING
OAK


There go my hopes of this being an easy fight. Nuh-uh, 40 turns of Splashing it shall be.
34-33.png

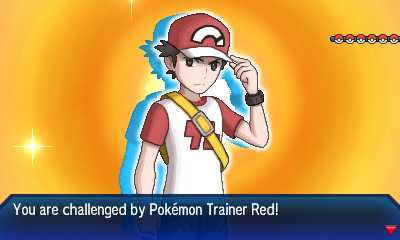
Pokémon Trainer Red
Pikachu Lv74 @ Light Ball (Volt Tackle/Quick Attack/Light Screen/Nuzzle, Ability: Static, Jolly nature, IVs: All 30, EVs: 252 Atk / 252 Spe)
Lapras Lv69 (Surf/Blizzard/Ice Shard/Psychic, Ability: Water Absorb, Serious nature, IVs: All 30, EVs: 252 HP / 252 SpA)
Snorlax Lv69 (Body Slam/Heavy Slam/Crunch/High Horsepower, Ability: Thick Fat, Adamant nature, IVs: All 30, EVs: 252 HP / 252 Atk)
Venusaur Lv70 (Leaf Storm/Leech Seed/Sludge Bomb/Earthquake, Ability: Overgrow, Quiet nature, IVs: All 30, EVs: 252 SpA / 252 SpD)
Charizard Lv70 (Fire Blast/Air Slash/Focus Blast/Will-O-Wisp, Ability: Blaze, Timid nature, IVs: All 30, EVs: 252 SpA / 252 Spe)
Blastoise Lv70 (Hydro Pump/Flash Cannon/Dark Pulse/Ice Beam, Ability: Torrent, Calm nature, IVs: All 30, EVs: 252 Def / 252 SpD)

Pikachu will hit hard and then probably blow itself up from Volt Tackle recoil, but the rest of his team doesn't seem too bad unless Venusaur gets a chance to use Leech Seed. Hopefully Red will simply send in Snorlax or Blastoise after Pikachu so they can spam Crunch/Dark Pulse rather than get clever with status moves.

Also, his Lapras has a Serious nature. That's not weird in itself - a lot of Trainers have Serious natures on all of their Pokémon, to the point I've just been leaving the natures out of their team descriptions unless they're non-Serious - but I think Red is the first Trainer I've seen where it's just one of his Pokémon that's Serious. Maybe because it uses both attacking stats and it's got fairly well-rounded stats overall so Game Freak didn't want to lower any of them?

Pikachu spares Phart for a moment by using Light Screen on turn 1, then hits for 51 damage into +4 Defense. The recoil it takes is actually a lot less than I expected, so maybe it won't KO itself after all? Guess I'll find out sooner or later. For now, I'll just keep going with the setup process and let Pikachu take 40-HP chunks out of Phart.
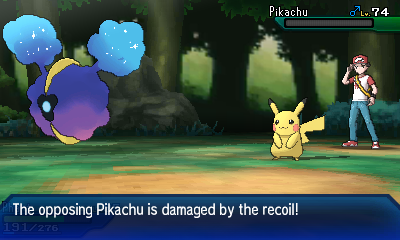
34-34.png

I wasn't counting its attacks, but it must've been close to using up all 15 Volt Tackle PP by the time it conked out. A couple more dodges from Phart and it might have survived. No matter, Snorlax is next out and Phart has mostly finished setting up, missing only its X Speeds (not that it needs them for Snorlax).

A Guard Spec. keeps Crunch from getting any Defense drops to up its 28 damage, then I use a couple of X Speeds so Phart can go before Charizard later on. Now fully set up, Phart launches itself at Snorlax and, uh... starts using Splash. Almost forgot about that. Snorlax ends up running out of Crunches and switching to High Horsepower and Heavy Slam, which seems odd because Body Slam would surely outdamage both of them. Of course, it eventually depletes its PP for those moves too and starts using Body Slam at last.
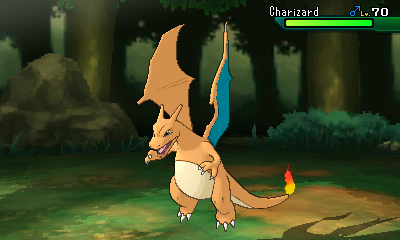
34-35.png

I did expect Red to withdraw Snorlax once it ran out of PP, but I didn't think it would be Charizard that replaced it. Mind you, Blastoise doesn't actually have any Sp. Atk EVs, so maybe the AI thought about more than just "what would be super effective?" when picking a switch-in.

Unfortunately Splash still has 6 PP, so Charizard gets to unleash a few Fire Blasts while Phart is still waiting to regain its true power, although they're only reaching 30 damage at most. And then I have to deal with a Will-O-Wisp burn just when Phart's about to Struggle. It finally gets to attack once it's cured, dealing just over 50% to Charizard before getting burned again, then Struggles again after a second Full Restore and takes down Charizard. Phart's finally scored its first KO of the match!

Red sends in Blastoise next. Whatever damage Dark Pulse deals remains a mystery for now as Phart dodges its first one, then lines up for a 3HKO with Struggle. The second Dark Pulse lands for an unimpressive 20 damage, and poor Blastoise misses again with its third attack before fainting.
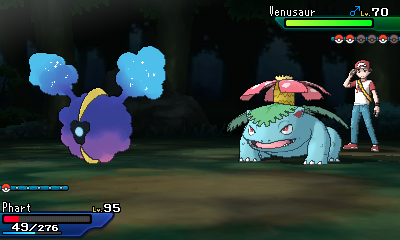
34-36.png

Not the most ideal situation for Phart - it needs healing, but that will give Venusaur a chance to use Leech Seed. Luckily it goes for Leaf Storm instead and misses, then uses it again to deal fairly trivial damage before Struggle 2HKOs it. Phew, no need to worry about permanent passive damage/healing. Lapras hits all of its Blizzards but doesn't do much with any of them, and once it's been dispatched with 3 Struggles, Red has to send in his PP-less Snorlax and let it Struggle itself to death. Victory!

After I've mashed through all of Red's lengthy rambling dialogue, I'm free to explore the Battle Tree, though of course there's no point as I have to reset my game in order to fight Blue.
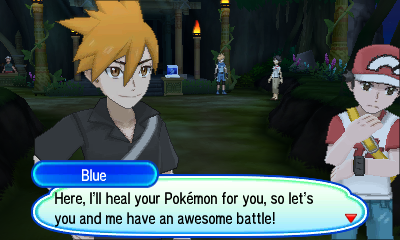
34-37.png

Slightly different lines compared to when I picked Red, but the free heal is exactly the same and just as unwanted as before. Time for round 2!
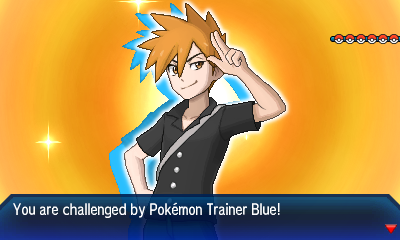
34-38.png

Pokémon Trainer Blue
Alakazam Lv69 (Psychic/Future Sight/Shadow Ball/Reflect, Ability: Synchronize, Modest nature, IVs: All 30, EVs: 252 SpA / 252 Spe)
Machamp Lv69 (Cross Chop/Bulk Up/Knock Off/Poison Jab, Ability: Guts, Adamant nature, IVs: All 30, EVs: 252 Atk / 252 Spe)
Aerodactyl Lv69 (Rock Slide/Crunch/Iron Head/Sky Drop, Ability: Pressure, Jolly nature, IVs: All 30, EVs: 252 Atk / 252 Spe)
Exeggutor Lv69 (Leaf Storm/Psychic/Sludge Bomb/Hypnosis, Ability: Chlorophyll, Modest nature, IVs: All 30, EVs: 252 SpA / 252 Spe)
Arcanine Lv69 (Extreme Speed/Flare Blitz/Thunder Fang/Bulldoze, Ability: Intimidate, Adamant nature, IVs: All 30, EVs: 252 Atk / 252 Spe)
Gyarados Lv69 (Aqua Tail/Crunch/Ice Fang/Dragon Dance, Ability: Intimidate, Adamant nature, IVs: All 30, EVs: 252 Atk / 252 Spe)

Blue definitely looks nastier overall. Alakazam carries Shadow Ball and doesn't seem likely to KO itself like Pikachu, and there are two Intimidate users and three other super-effective attacks spread across his other Pokémon, one of which is Knock Off. This definitely isn't the sort of battle where Phart can shrug off losing its Eviolite.

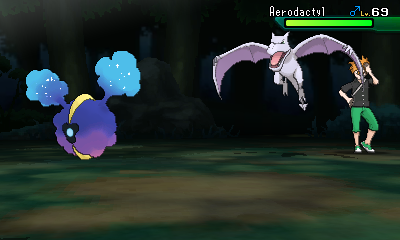
Just like Pikachu, Alakazam sets up a screen on turn 1 and grants me a free X Sp. Def usage, then takes off 38 HP with a Shadow Ball. It misses its next attack while Phart is brought to +6 Sp. Def, leaving me free to use a Guard Spec. and start on all the other boosts. Aside from a rogue critical hit on Alakazam's last Shadow Ball bringing Phart down to 24 HP, the setup process is uneventful. Now Phart can begin Splashing.

34-39.png

34-40.png

There was no way Phart was going to get fully set-up and use Splash 40 times before Alakazam ran out of PP, so off it goes to be defeated at a later date. At least it wasn't Machamp that replaced it - Phart can keep its Eviolite a little longer.

It still has 15 Splashes to go before it can attack, and it's not affected by Pressure since the move targets Phart itself. Aerodactyl's Crunch turns out to be fairly weak (24-ish HP per hit) and only requires Guard Specs. and the occasional Max Potion to deal with, so the remaining Splash PP is slowly whittled away. It soon runs out of Crunch PP and starts picking its other moves, leading to Phart getting kidnapped and rendered immobile by Sky Drop a few times, but it gets knocked out by 2 Struggles once Phart is able to attack.

Gyarados is Blue's next choice, sparing me the wrath of Knock Off for now. The Attack drop from Intimidate is slightly let down by Gyarados wasting a turn on Dragon Dance instead of attacking. It's let down even further when it uses Dragon Dance another two times, then only musters 32 damage with Crunch and loses half its health to a single Struggle. The best it can do is squeeze in another Crunch courtesy of all its Speed boosts before fainting.
34-41.png

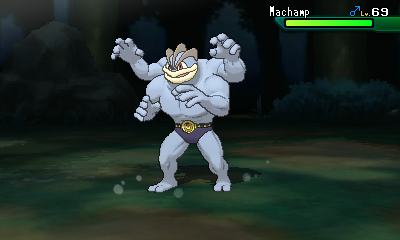
I heal Phart to full and brace for Knock Off - 34 damage. That's not so bad, and Machamp itself shouldn't be too hard if Blue's AI is like other Trainers I've faced and it doesn't go for Knock Off again. How well Phart can tank STAB critical hits from Exeggutor or Arcanine without its Eviolite is another matter. But for now, Phart simply uses Struggle twice to KO Machamp while it tries to Bulk Up.

Exeggutor's next, knocking Phart down to 222/276 HP from full with a Leaf Storm. The Sp. Atk drop hurts it a lot, but a critical hit will ignore that drop and almost certainly OHKO Phart if it lands. And of course Struggle falls just short of knocking Exeggutor into yellow... but its next Leaf Storm fails to crit and Phart gets a high damage roll to 2HKO it! Arcanine comes in afterwards and takes Phart down to +5 Attack again with Intimidate. I am worried about Flare Blitz despite it not being quite as destructive as Exeggutor's Leaf Storm, but it looks as though Arcanine would rather focus on gaining the speed advantage with Bulldoze than dealing damage. I throw a few X Speeds at Phart along with an X Attack, and sure enough, it keeps using Bulldoze, so Phart can click Struggle twice for an easy KO. It actually did use Flare Blitz on its last turn but it still wasn't enough.

34-42.png

The problem with my opponents leaving their zero-PP Pokémon until last is that it makes for a bit of an anticlimax. But still funny.

Before Red and Blue leave, the latter tells me that we'll definitely battle again... provided I can make it through the Battle Tree. So no, I will not be smelling either of them later.

34-43.png

Having stepped foot inside the Battle Tree and defeated its bosses, I've now seen every corner of Alola's four islands and completed my "second island challenge"! All that's left to do now is make a few preparations before heading to Aether Paradise to see what all this Rainbow Rocket nonsense is about. (And Title Defense battles, of course. But that comes later.)
Trainers defeated: 370/427
 
Last edited:
:sm/clefairy: :sm/groudon:
35-1.png

I didn't get round to looking at the Battle Tree's BP shops last time, so I'll do that now. The lady on the right only sells Mega Stones, while the lady on the left sells items for trade-evolution Pokémon (the only one Phart can use is the King's Rock and I already have one), but the lady in the middle has some vaguely interesting items to offer.

35-2.png

I've blued-out the items I already have, so what's good out of the remaining wares? The Iron Ball and Ring Target are useless to Phart, there's no reason to use a Weakness Policy when an X Attack works just as well, and a Choice Scarf also seems pointless when Phart can outspeed pretty much anything after 2 X Speeds, so that's four items ruled out. It's now a question of what would be worth giving up an Eviolite for.

Protective Pads would let Phart ignore the effects of things like Flame Body or Rough Skin when attacking, which is nice... just not nice enough. The Assault Vest is a strictly worse Eviolite UNLESS Phart's forcibly healed immediately before a battle, in which case it would get to attack straight away at the cost of its 50% Defense boost. Pity I've literally just fought in two of those battles to get here and I don't think there are any more left in the game. As for the Choice Band, it's possible there might be some peculiar opponent who can't be beaten unless Phart does absolutely everything to maximise its Attack stat, but if I've made it this far without that happening then I'm not sure it ever will.

That leaves just the Rocky Helmet. And unlike every other item here, I can actually see a use for it! Taking away 1/6 of an enemy's max HP every time they touch Phart is very nice, and might actually be a better alternative to using Struggle against some foes. It's probably not suited to boss battles where they have full EVs and could nuke Phart without its Eviolite boosts to shield it, but as long as there's some use for it, it's still worth buying one. Though I'm actually 4 BP short of being able to afford one and have to go Mantine Surfing before I can make the purchase.

35-3.png

Fun fact: the Alola games are the only ones where the Rocky Helmet isn't available until the postgame. Not very fun for me though. Would've been nice to have had it as an option for some of the story fights.

35-4.png

Here's my reward for collecting all 100 Totem Stickers: a large bee. Not quite as impressive as the giant Kommo-o you get in Ultra Moon for completing the same quest (I get that they're all version-exclusives apart from Totem Mimikyu, but I think making Ribombee and Mimikyu counterparts and letting both games get Kommo-o would've been cooler/less uneven). Oh, and unless Game Freak pushes an update within the new few months before it shuts down, you still can't put Totem Ribombee into Bank.

Not that this one was ever going anywhere near Bank. Time to stock up on Max Potions and X items again before a very long trip to Aether Paradise.

35-5.png

Definitely didn't take this screenshot three posts ago when Team Rainbow Rocket gatecrashed the press conference and then waited until now to include it, what are you talking about?

35-6.png

Lillie's in a bit of a state when I arrive, which according to Wicke is because Lusamine's been taken captive by Team Rainbow Rocket and her mansion has been taken over by some mysterious force. This sounds like it might be slightly above Phart's pay grade. But perhaps the Big Malasada Wicke gives me will make all the difference?

35-7.png

A grunt is stationed outside and ready to intercept the invading children, but Lillie offers to hold him off while I go on ahead. So she's got her own Pokémon that can battle now? That's a relief! Now I can sit back and let her do the fighting, apart from these few grunts up ahead.

35-8.png

35-9.png

Team Rainbow Rocket Grunt
Primeape Lv61 (Screech/Stomping Tantrum/Outrage/Final Gambit, IVs: All 15)

There are a total of 36 grunts in Episode RR who use a total of 10 Pokémon species, all from Kanto. Given that this grunt, the first of the lot, uses the default level-up moves for his Primeape and it has zero EVs and average IVs, it doesn't bode well for how interesting they'll be to battle. And yet I might just be pleasantly surprised once I get inside the castle itself and start working through waves of grunts.

I've equipped Phart with the Rocky Helmet for this battle... let's see if it helps. I use an X Defense and Primeape locks itself into Outrage, with the first hit dealing 31 damage. The Outrage wears off after the second turn but Primeape launches right back into another one, this time scoring a crit that leaves Phart on 124 HP. It then hits itself in confusion on the next turn and falls into yellow HP - not bad considering Phart hasn't attacked yet! I've just been stalling with useless Revives while the Rocky Helmet does its thing. A Max Potion ensures that Phart won't be knocked out by a second crit, leaving Primeape to hit twice more with Outrage and faint to Rocky Helmet damage.

Phart's new held item seems to work quite well, so I keep it on for the next grunt battle that comes about ten steps later.

35-10.png

Team Rainbow Rocket Grunt
Persian Lv61 (Nasty Plot/Assurance/Captivate/Night Slash, IVs: All 15)

Another X Defense to start with, then Persian does 36 damage with Assurance and 18 with Night Slash (after a second X Defense). 5 more attacks against Phart and the Rocky Helmet takes it out, at the cost of a Moomoo Milk thanks to Night Slash getting a critical hit.

35-11.png

Easy peasy. But can grunt number 3 be taken down with a faceful of helmet too?

35-12.png

Team Rainbow Rocket Grunt
Haunter Lv61 (Dark Pulse/Destiny Bond/Hex/Nightmare, Ability: Levitate, IVs: All 15)

Nope, none of those moves make contact, so it's back to the Eviolite for now. I use an X Sp. Def to give Phart a bit of shielding from those super-effective attacks, but Haunter seems to think it's about to be one-shotted and uses Destiny Bond. Given how the move works, I'll have to use an X Speed next so that Phart doesn't accidentally faint while dealing a knockout blow. With Hex only dealing 36 damage, I can use an X Attack and have Phart Struggle twice for the win, not seeing any further Destiny Bond attempts from Haunter. One more grunt to go before the front door of whatever Lusamine's mansion has become.

35-13.png

Team Rainbow Rocket Grunt
Golbat Lv61 (Haze/Venoshock/Air Slash/Quick Guard, Ability: Inner Focus, IVs: All 15)

Haze is a bit of a pain given that Golbat also can't be hurt with the Rocky Helmet, so all I can do is use a Dire Hit and slowly weaken it. But since Venoshock only manages 22 HP and Air Slash reaches 28, Phart manages a 5HKO with a couple of heals.

35-14.png

Oh, they've turned it into a castle. That must've taken a lot of effort. Were they so dead-set on the idea of converting Festival Plaza's castle into Team Rocket's Castle that they didn't want to change its name when they had to resort to targeting Lusamine's mansion instead?

Lillie catches up with me before I can start literally storming the castle, but with or without her support, there's still one more fight to get through if we want to rescue her mother.

35-15.png

35-16.png

Faba sticks to his role of Blatantly Evil Aether Guy by revealing that he's in cahoots with Team Rainbow Rocket and helped them take over Aether Paradise. All so that the Aether Foundation can grow and help rescue more Pokémon, of course. Any career-related benefits for Faba himself are merely a bonus. Lillie tells him to make it stop, Faba says no, we get ready to fight him, he summons his favourite minion, and now we have a Multi Battle on our hands.

35-17.png

Aether Branch Chief Faba and Aether Foundation Employee
Items: X Defense (Faba)
Claydol Lv63 (Earth Power/Extrasensory/Ancient Power/Grass Knot, Ability: Levitate, Relaxed nature, IVs: 30/25/30/25/25/25, EVs: 252 HP / 252 Def)
Bruxish Lv63 (Aqua Jet/Crunch/Psychic Fangs/Waterfall, Ability: Strong Jaw, Adamant nature, IVs: 25/30/25/25/25/30, EVs: 252 Atk / 252 Spe)
Hypno Lv63 (Psychic/Hypnosis/Focus Blast/Dream Eater, Ability: Insomnia, Timid nature, IVs: 25/25/25/30/25/30, EVs: 252 SpA / 252 Spe)
Granbull Lv61 (Snarl, Ability: Intimidate, Calm nature, IVs: 30/25/30/25/30/25, EVs: 252 HP / 252 SpD)
Scrafty Lv61 (Snarl, Ability: Intimidate, Calm nature, IVs: 30/25/25/25/30/25, EVs: 252 HP / 252 SpD)
Shiinotic Lv61 (Spore/Dazzling Gleam, Ability: Effect Spore, Calm nature, IVs: 30/25/25/25/30/25, EVs: 252 HP / 252 SpD)

Pokémon Trainer Lillie (Multi Battle partner)
Clefairy Lv60 (Moonblast/Sing/Reflect/Light Screen, Ability: Friend Guard, Calm nature, IVs: 30/15/30/15/30/15, EVs: 252 HP / 252 SpD)

The only Multi Battle in the game where I can't just have my partner KO everything for me! Moonblast off base 60 Sp. Atk won't do much to anyone, even before the Granbull who only knows Snarl starts attacking us. The good news is that only Faba's Bruxish is anything more than an annoyance to Phart, and Clefairy's support options should make setting up a bit easier while it's on the field. It may be dead weight offensively but that doesn't mean the battle is a 2v1.

35-18.png

This smug fucker (whose expression is not done justice by this screenshot) has Phart starting off at -1 Attack thanks to Granbull's Intimidate, but that's a problem for later. For now, I use an X Sp. Def, and Claydol takes 25% off Clefairy's HP with Earth Power while Granbull's Snarl reaches the dizzying heights of 9 damage against Phart. Clefairy sadly sets Reflect first even though neither opponent runs physical attacks, but at least Friend Guard still helps a bit. After 2 more X Sp. Defs and a Light Screen, Earth Power and Snarl only deal 8 damage to Phart combined! The bulk is off the charts.

35-19.png

35-20.png

Unfortunately Clefairy gets struck by a couple of critical hits and neglects to put its Light Screen back up, leading to its early demise. But Phart is only 3 X items away from being ready to attack, plus Clefairy's Moonblasts left a bit of damage on the opposing team as you can see, so it's not long before Phart can start scoring KOs.

35-21.png

This definitely helps speed things along. The Aether Employee doesn't want to switch his Granbull out despite it running out of PP, so I decide to let it Struggle to death before having Phart attack, rather than potentially waste its HP attacking something that's already doomed to faint by its own hand. Once it's dished out 20 HP of Struggles and been replaced with Scrafty (whose Intimidate bounces harmlessly off a Guard Spec.), Phart quickly takes 50% of said Scrafty's HP off with its first Struggle, is healed back to full, then KOs it on the next turn while Claydol scores a worthless Ancient Power omniboost.

The Employee is down to just Shiinotic now, but Spore makes it more of a nuisance than some ineffectual Snarl users. Phart decides to target Claydol this time and brings it down to 33%, just before it gets a second omniboost and Shiinotic puts Phart to sleep. How fortunate I am to have 100 Full Restores in my bag. Phart brings Shiinotic well below 50% with its next Struggle, but it neglects to use Spore for a few turns while I heal up Phart again, leaving Claydol wide open to a KO from Struggle.

As I expected, Faba sends in Bruxish next, just as Shiinotic remembers it has Spore and puts Phart to sleep. That's alright - I wanted to heal it up anyway to gauge Crunch's damage, so I can just use another Full Restore instead of a Max Potion. Back at full health, Phart is hit by Crunch and loses... 30 HP, so it might not be able to survive Struggle recoil followed by a crit Crunch. Hmm. I'll try stalling with healing items for now until I think of something better, because I don't believe Bruxish can KO Phart from full, only after Struggle recoil. A few Sitrus Berries keep it topped up until I get some inspiration from Shiinotic using Spore on the still-sleeping Phart. And what am I inspired to do? Why, keep stalling! Aside from eventually forcing Shiinotic to use Struggle and KO itself, this will also run through all of Bruxish's Crunch PP and remove the possibility of it ever knocking out Phart unless I horribly misplay.

35-22.png

Bruxish is left with 16-HP Waterfalls as its best option and Shiinotic has dazzled its last gleam, so now it's Phart's job to clean up. Struggle 2HKOs Bruxish, Hypno comes in, a Max Potion heals Phart, it dodges Hypnosis, then dodges Hypnosis again for the 2HKO! Faba was wrong to think that Lillie would only be tripping me up by joining forces with me.

But defeating Faba won't help us, or so he says - the power of the Ultra Wormhole that brought Team Rainbow Rocket here has also summoned high-ranking villains from other worlds, and of course I'll have to fight my way through them as well in order to foil their plans. Once Faba leaves, Lillie and I are free to enter Team Rocket's Castle at last.

Bizarrely, that Multi Battle didn't automatically heal Phart afterwards like every other one in the game. And you'd think if anyone was going to heal it, it'd be Lillie! How very odd.

35-23.png

The inside of the mansion has been made to look all evil and ominous as well, and the door leading to Lusamine's cryogenically-frozen Pokémon exhibition dungeon won't open, so Lillie and I have to head back out to the entrance room. We're ambushed by a pair of grunts, but Lillie suddenly finds herself too scared to move! Eh, she got a couple of battles in before her legs gave out, so she's done alright for a new Trainer. And now big bad Guzma is here to cover for her in the next Multi Battle.

35-24.png

Team Rainbow Rocket Grunts
Raticate Lv62 (Sucker Punch/Super Fang/Double-Edge/Endeavor, IVs: All 15)
Fearow Lv62 (Focus Energy/Roost/Drill Peck/Drill Run, Ability: Keen Eye, IVs: All 15)

Pokémon Trainer Guzma (Multi Battle partner)
Golisopod Lv64 (Sucker Punch/Waterfall/First Impression/Brick Break, Ability: Emergency Exit, Adamant nature, IVs: All 30, EVs: 252 Atk / 252 Def)
Vikavolt Lv64 (Flash Cannon/Thunderbolt/Bug Buzz/Energy Ball, Ability: Levitate, Modest nature, IVs: All 30, EVs: 252 HP / 252 SpA)
Pinsir Lv64 (Throat Chop/Storm Throw/X-Scissor/Stone Edge, Ability: Mold Breaker, Adamant nature, IVs: All 30, EVs: 252 Atk / 252 Spe)
Masquerain Lv64 (Air Slash/Bug Buzz/Ice Beam/Energy Ball, Ability: Intimidate, Modest nature, IVs: All 30, EVs: 252 SpA / 252 Spe)
Scizor Lv64 (X-Scissor/Iron Head/Night Slash/Bullet Punch, Ability: Technician, Adamant nature, IVs: All 30, EVs: 252 Atk / 252 Spe)

This feels like overkill.

X Defense on Phart, Fearow uses Drill Peck on Golisopod and takes it to 133/189 HP, Raticate uses Endeavor on Golisopod and fails before getting one-shotted by its Brick Break. I stall for a turn while Fearow passes up an opportunity to trigger Emergency Exit by targeting Phart with Drill Run for a whopping 13 damage. Then Golisopod leaves Fearow in the red with a single Waterfall, KOing it on the next turn with another one while it tries to Roost. And that's it! No more Multi Battles in this playthrough.

The humiliated grunts run off in separate directions and open up doors to other areas of the castle as they do so. Might've helped if they shut the doors behind them.

35-25.png

No, really, there's no need to- FUCK

I mean... she was right there. She saw the entire battle with me and Guzma against those grunts. What made her think Phart needed healing rather than Golisopod? Guess it's back to Route 1 for me. One small mercy is that Lillie's now moved to the other room and won't heal my Pokémon unless I go and talk to her, so I'm hoping that means there won't be any more forced heals in Team Rocket's Castle.

35-26.png

Right, I'm back again, and Guzma guarding the entrance means I can go check out the other areas. I can either go left and beat up Archie, or go right and beat up Maxie - given that I'm already 26 images deep in this update and Maxie's section contains 6 grunts while Archie's section has 14 of them, I think the choice is obvious. (Also, the Groudon gif at the start of this post was probably a bit of a giveaway. A gifaway, if you will.)

The door I take leads to a small room with a warp panel, and that in turn leads to a bigger room. There's some sort of weird tiles on the floor and a button in the middle of this room, but I'll save deciphering those until I've dealt with a nearby grunt.

35-27.png

Team Rainbow Rocket Grunt
Golbat Lv62 (Super Fang, Ability: Inner Focus, IVs: 30/15/15/15/15/30, EVs: 252 HP / 252 Spe)

Here's the surprise I was alluding to earlier - the Rainbow Rocket Grunts are kept from being boring and repetitive by having super-special meme teams. Someone at Game Freak clearly had a fun afternoon crafting a load of gimmicky Pokémon sets for USUM's postgame. Since it's all but impossible for Super Fang to KO Phart, I give it the Rocky Helmet and let Golbat KO itself with 7 attacks (only 6 really, but Phart showboated by dodging one of them).

35-28.png

The floor tiles form a little memory game. They flash up in a sequence of different colours, and I have to stand on them in the same order to progress to the next room. It starts off easy enough - red, green, blue, yellow, and then the next warp panel opens up for me. The next room has a slightly longer green-blue-blue-red-green-red sequence, with a grunt trying to distract me halfway through it by striking a cool pose. If only I hadn't been writing down the colour sequences as I went, he might've been successful.

I pick up a Full Heal in the corner of the room before moving on. The third and final sequence is an even longer red-blue-yellow-blue-green-yellow-red-green, made worse when one of the grunts in the room challenges me to a battle when I'm 3 tiles in.

35-29.png

Team Rainbow Rocket Grunt
Primeape Lv62 (Seismic Toss, Ability: Vital Spirit, IVs: 15/15/15/15/30/30, EVs: 252 SpD / 252 Spe)

This one actually can KO Phart unlike Golbat, but only if I don't heal it, and knowing exactly how much damage it will take each turn means there's no risk at all. The Rocky Helmet makes short work of Primeape with help from a Max Potion. Back to stepping on the tiles again, but I only manage another 3 of them before another grunt picks a fight.

35-30.png

Team Rainbow Rocket Grunt
Tentacruel Lv62 (Toxic Spikes/Barrier, IVs: 15/15/15/15/30/30, EVs: 252 SpD / 252 Spe)
Persian Lv62 (Play Rough/Protect/Slash/Fake Out, Ability: Technician, IVs: 15/30/15/15/15/30, EVs: 252 Atk / 252 Spe)

Phart needs its Eviolite for this one as Tentacruel has no contact moves. In fact, Tentacruel doesn't have any damaging moves at all! This lets me give Phart 3 X Attacks and a Dire Hit so it can OHKO with Struggle, bringing in Persian. Fake Out does 36 damage - more than I expected, but I did forgo any Defense boosts so that's on me - and Slash also does 36 damage thanks to its lack of Technician boost. I give Phart a Moomoo Milk to be on the safe side before it OHKOs Persian as well.

No more grunts remain to interrupt me, so I finish off the memory game and unlock two warp panels this time. One of them leads to Maxie's office, which I ignore for now to explore the other path. It leads to a room with an item ball. I wonder what it could be?

35-31.png

Electrode
Lv60 (Discharge/Explosion/Gyro Ball/Mirror Coat, Ability: Soundproof, IVs: Random)

There are 3 of these Electrode scattered across Team Rocket's Castle. They basically just serve as booby traps and are a cute addition to the various puzzles of Episode RR, but they also happen to be the only wild Electrode available in USUM. And since the castle gets turned back into Lusamine's mansion at the end of the episode, if you don't catch at least one of them here, you'll never be able to obtain an Electrode (or Voltorb) without trading with another game. That's quite rare to see in a post-Platinum game where pretty much every one-off encounter will respawn after you beat the Pokémon League again.

35-32.png

I was hoping to catch this one, but unfortunately I didn't have any Quick Balls left and it used Explosion on turn 1 as I was activating a Roto Catch. Oops! Still a couple of others I can try and grab later on.

Elsewhere within this dead-end room, I find an X Attack and a grunt. I say "find" - the grunt was actively patrolling the room and I had to walk very carefully around her to grab the other stuff first, so she wasn't exactly hard to locate.

35-33.png

Team Rainbow Rocket Grunt
Muk Lv62 (Gunk Shot/Thunder Punch/Ice Punch/Fire Punch, IVs: 30/30/15/15/15/15, EVs: 252 HP / 252 Atk)

While Team RR mostly uses funny joke sets, there are a few exceptions where they actually have good Pokémon like this one. But that doesn't mean their AI won't make odd decisions, like using Thunder Punch instead of Gunk Shot and dealing 18 damage to the +2-Defense Phart. It takes an Ice Punch and dodges a Thunder Punch while I use 2 X Attacks, then squeezes in a couple of Struggles before getting burned by Fire Punch. Once it's been Full Restored back to tip-top condition, it Struggles twice more to KO Muk, who waited until the last possible opportunity to land a Gunk Shot and poison Phart.

Now to go and meet Maxie! There's a Full Restore in the room outside his office, but a pair of grunts are standing guard at the door. I'll have to fight them back-to-back if I want to get inside.

35-34.png

Team Rainbow Rocket Grunt
Haunter Lv62 (Spite, Ability: Levitate, IVs: 30/15/30/15/30/0, EVs: 252 Def / 252 SpD)

what the fuck.

I stall for 14 turns and Haunter claims 42 HP before KOing itself with Struggle. Moving on...

35-35.png

Team Rainbow Rocket Grunt
Hypno Lv62 (Attract/Thunder Wave/Swagger/Foul Play, Ability: Inner Focus, IVs: 30/15/15/15/30/15, EVs: 252 HP / 252 SpD)

That's a bit better. 3 X Defenses and a Dire Hit provide a safe (if excessive) way to ensure there are no Foul Play-induced disasters. Meanwhile, Phart dodges a Swagger, gets hit by a second Swagger, dodges a Foul Play, and gets hit by a second Foul Play for 10 damage. It overcomes the confusion to hit twice before needing a Max Potion, then accidentally hits itself just once before finishing off Hypno with a third Struggle. Bouncers: trounced.

35-36.png

Even Faba's allies think he's a prick.

Maxie explains to me that in his own world, he had finally succeeded in his plans to have Groudon expand the world's landmass when he was swallowed up by a fissure and somehow ended up in my world. And even though he's got a perfectly good world shaped to his grand design already, he wants to reshape this one with Groudon's powers as well. Of course, I cannot abide such greed, so we have to fight it out to determine the fate of Alola. Awfully high stakes for someone I only met 30 seconds ago.

35-37.png

35-38.png

Team Magma Maxie
Items: Full Restore
Mightyena Lv64 (Crunch/Fire Fang/Thunder Fang/Ice Fang, Ability: Intimidate, IVs: All 25, EVs: 252 Atk / 252 Def)
Crobat Lv64 (Air Slash/Toxic/Dark Pulse/Sludge Bomb, Ability: Inner Focus, IVs: All 25, EVs: 252 SpA / 252 Spe)
Weezing Lv64 (Sludge Bomb/Thunderbolt/Shadow Ball/Pain Split, Ability: Levitate, IVs: All 25, EVs: 252 Def / 252 SpD)
Camerupt Lv64 (Earthquake/Stone Edge/Flamethrower/Flash Cannon, Ability: Solid Rock, IVs: All 25, EVs: 252 Atk / 252 SpA)
Groudon Lv66 (Earthquake/Flamethrower/Ancient Power/Solar Beam, Ability: Drought, IVs: All 30, EVs: 252 Atk / 252 Def)

The lead Mightyena is annoying and there are a couple of other irritants on the rest of Maxie's team (Pain Split and his Full Restore stick out to me), plus Groudon has the stats of a Groudon. But we've certainly dealt with worse opponents before. Time to save the Alola region once again!

35-39.png

Intimidate starts Phart off on -1 Attack as it always does, but that's okay because it's not attacking for a good while yet. I max out Phart's Defense to cushion the blows of the inevitable Crunches - Mightyena lands 3 of them while I'm setting up, taking Phart down to 163/281 HP. At least it didn't get any Defense drops, and it definitely won't after a Guard Spec. Nothing else notable about the setup process, apart from that Mightyena runs out of Crunch PP and its elemental fangs deal about 7 damage each. It gets a swift 2HKO once Phart's at full power.

35-40.png

I doubt Phart can OHKO Crobat and it'd risk fainting to a crit Shadow Ball if it attacked again now, so there's little reason not to use a Max Potion. Crobat hits it with Toxic, then manages 16 damage with Dark Pulse before it also gets a 2HKO from Struggle.

35-41.png

Obviously have to use a Full Restore here. Weezing does 14 damage with Shadow Ball and manages to avoid a 2HKO, healing itself back up a bit with Pain Split. After a second Struggle, it Pain Splits again but only takes 3 HP off the slightly weary Phart. It's too weak to attack again, so I give it another Max Potion - thankfully Weezing opts for another Shadow Ball instead of using Pain Split to drain some of that healing, and gets taken out by Struggle on the next turn as a result.

35-42.png

Maxie's former ace Camerupt narrowly avoids a Struggle OHKO and doesn't do much in return with Earthquake, but it does drag the battle out for another turn when Maxie uses his Full Restore. Since Phart doesn't have enough HP to survive two doses of recoil damage, I just use another Max Potion on Maxie's healing turn and then it 2HKOs afterwards.

35-43.png

11'06" my ass. It's shorter than Maxie!

Groudon's Drought grants it access to instant Solar Beams, but not to Solar Beams that take off more than 14 HP. Or the ability to recognise that Earthquake would be a much better choice, apparently. The only thing that saves it from being a complete embarrassment is that it's bulky enough to require 4 Struggles to take down, and believe me, it is taken down. That should be enough to stop Maxie from going all expandy-landy on us.

35-44.png

Team Magma Leader Loser Maxie is polite enough to let me know that I'll need to examine two paintings in order to delve deeper into Team Rocket's Castle: one red, one blue. The red one's right behind him and conceals a hidden switch which, when pressed, causes an almighty rumbling and activates a warp panel back to the entrance room.

Everything appears to be the same as before. Guzma's still standing guard and Lillie's still in the other room in case I need healing (lmao), and nothing bad's happened during my absence. Good to know. I'll stop for a quick rest, then I'd better get started on Archie's grunt-infested wing of the castle. Again, there's 14 of them! Sapphire's Team Aqua had 21 grunts in comparison, so he's done well assembling a new crew so quickly.
Trainers defeated: 383/427
 
:sm/raticate: :sm/kyogre:
36-1.png

As soon as I start making my way towards Archie's office, I'm ambushed by a small army of grunts! Though their plans quickly fall apart when only the lead grunt actually makes an effort to engage me.

Team Rainbow Rocket Grunt
Tentacruel Lv62 (Toxic/Protect, IVs: 30/15/15/15/30/15, EVs: 252 HP / 252 SpD)

Another gimmick-mon, but one that does pose a bit of danger to Phart, so I use 3 X Attacks and a Dire Hit in the hopes that it can just power through Tentacruel. The first Toxic is instantly cured by affection magic and Tentacruel has to use it again before it sticks, and I cure it just before Phart attacks - it does about 75% to Tentacruel, but by healing its own poisoning for a second time, Phart preserves enough HP to Struggle again and knock it out.

36-2.png

So they fluffed the timing and then decided to just stand there doing nothing? Great job.

They redeem themselves by managing to retreat all at once through a couple of warp panels. I'll be taking the northern warp panel first, as it leads to a smaller section of the giant teleporter maze that forms Archie's wing of the castle. And a grunt of course.

36-3.png

Team Rainbow Rocket Grunt
Arbok Lv62 (Spite, Ability: Intimidate, IVs: 30/15/30/15/30/0, EVs: 252 Def / 252 SpD)

Oh god not another one. I stall out its Spites without having Phart attack at all, just like the Haunter from last time, and let Arbok Struggle for a grand total of 80 damage before it faints. On to the next grunt in the next room.

36-4.png

Team Rainbow Rocket Grunt
Primeape Lv62 (Brick Break/Thunder Punch/Ice Punch/Fire Punch, Ability: Vital Spirit, IVs: 15/30/15/15/15/30, EVs: 252 Atk / 252 Spe)

An actual sensible set, just in case I was getting used to the weirder stuff. But Primeape's elemental punches only manage 17 HP at most after an X Defense, so once Phart is at +2 Attack as well, it's a simple 3HKO.

I'm ignoring that item ball for now - it's actually another Electrode, and as much as I want to try catching it, there's another grunt coming up that I need to fight first in order to clear a path (a couple of the warp panels are one-way only so I can't just double back). So off I go to find her.

36-5.png

Team Rainbow Rocket Grunt
Hypno Lv62 (Hypnosis/Dream Eater, Ability: Insomnia, IVs: 15/15/30/15/15/30, EVs: 252 Def / 252 Spe)

I mean, it's thematically appropriate if nothing else? I use an X Attack, Hypno misses Hypnosis twice before landing one, then deals 21 damage with Dream Eater and heals itself a bit. With Struggle looking like a 6HKO at best before it started regaining its HP, I suspect another X Attack may be needed. It seems to do the trick, KOing Hypno with 3 more Struggles while it misses Hypnosis over and over again.

36-6.png

The item ball in the room with this grunt actually IS an item, albeit a useless Iron Ball. Anyway, now that all the grunts have dealt with in this area, I can go back and catch the Electrode without having to ninja my way past any Trainers on my way to dump it in the PC.

36-7.png

Actually remembered to buy a Quick Ball for this encounter and it didn't even work. But the Electrode was nice enough to not blow up while I was busy using a Roto Catch. Once I've run back to the reception desk at Aether Paradise and used their PC to store it, I can get back to navigating warp panels.

36-8.png

Surely there must have been a better way to slow me down than forming human walls. Like Pokémon battles, for example? Also, I guess these people are part of Archie's crew as well, so that brings him up to 28 grunts in total! Since barging through them all would be terribly rude, I just take the northern warp panel to a room with another grunt to battle.

36-9.png

Team Rainbow Rocket Grunt
Tentacruel Lv62 (Wring Out, Ability: Clear Body, IVs: 30/15/15/15/30/15, EVs: 252 HP / 252 SpD)

Phart is at full HP, so Wring Out will have its maximum power of 120 on its first hit, but it's still only got 5 PP and has no EVs boosting its damage output. For the longest time, I just assumed Wring Out started at 150 power, like a reverse Eruption/Water Spout. But no, it's weaker than those moves, and it can't even be super-effective against anything! No wonder nothing really uses it. The first hit takes 19 HP from Phart after an X Sp. Def, and Tentacruel only lasts another 8 turns from there before fainting to its own Struggle.

This is a dead end like he said, so I head back and take another couple of warp panels to the next battle.

36-10.png

Team Rainbow Rocket Grunt
Raticate Lv62 (Blizzard/Thunder/Shadow Ball/Grass Knot, Ability: Hustle, IVs: 15/15/15/30/15/30, EVs: 252 SpA / 252 Spe)

Special attacking Raticate??? I don't even know what to say. Shadow Ball does do 54 damage to an unboosted Phart, so it's not complete shit, but it proceeds to miss a Blizzard and a Thunder before getting a 2HKO from Struggle. Time to see what bizarre set the next grunt wields.

36-11.png

Team Rainbow Rocket Grunt
Haunter Lv62 (Destiny Bond, Ability: Levitate, Timid nature, IVs: 0/0/0/0/0/31, EVs: 252 Spe)

This Haunter could plausibly get a free kill on something in a normal playthrough, but not against Phart. It doesn't even hit that hard with Struggle thanks to its nature and IVs, dishing out 29 damage before being rendered unconscious. The next room leads to a Guard Spec., and then... oh, I'm back to the room with the grunt-walls. Time to take some different warp panels to reach a shiny new area.

36-12.png

Team Rainbow Rocket Grunt
Persian Lv62 (Fake Out/Feint, Ability: Technician, IVs: 30/30/15/15/15/15, EVs: 252 HP / 252 Atk)

Phart takes up the Rocky Helmet once again and lets Persian do itself in. An X Defense means Fake Out does 22 damage and Feint does 18, but it's only when the Rocky Helmet fails to activate that I discover Feint isn't a contact move! What a way to learn that. But since Feint's limited to 10 PP and isn't hurting Phart very much, I just stall out Persian entirely instead and let it faint to a combination of Struggle recoil and Rocky Helmet damage, with Phart surviving on 61 HP.

36-13.png

The next room bears the third and final Electrode, which I allow to Explode because I don't need to catch a second one. (I didn't need to catch a first one either but never mind that.) On to another room now, one with a Rare Candy and yet another grunt.

36-14.png

Team Rainbow Rocket Grunt
Golbat Lv62 (Heat Wave/Sludge Bomb, Ability: Inner Focus, IVs: 15/15/15/30/15/30, EVs: 252 SpA / 252 Spe)

Back to the Eviolite for this special-attacking foe. Sludge Bomb does 25 damage after an X Sp. Def, but also leaves Phart poisoned, though it expels the poison on the next turn while I give it an X Attack. No further poisonings after that, so Phart simply 3HKOs Golbat. The Max Potion I used in that fight is replaced with another one I pick up nearby after the battle, then I end up back in the room with the walls of grunts again. Must be getting close to Archie now.

36-15.png

36-16.png

Their plan of ganging up on me falls apart when two of the grunts run straight into the incredibly obvious warp panels and get whisked away to other rooms. But that won't stop the third grunt from starting a battle all on his own.

Team Rainbow Rocket Grunt
Raticate Lv62 (Super Fang, Ability: Guts, IVs: 15/15/30/15/15/30, EVs: 252 Def / 252 Spe)

Another outing for the Rocky Helmet - Raticate has no hope of actually KOing Phart and can only bring it down to 3 HP before the contact damage takes it out. Now it's time to track down those wayward grunts from a few moments ago.

36-17.png

Team Rainbow Rocket Grunt
Hypno Lv62 (Dazzling Gleam/Psychic/Shadow Ball/Signal Beam, Ability: Inner Focus, IVs: 15/15/15/30/15/30, EVs: 252 SpA / 252 Spe)
Primeape Lv62 (Close Combat, Ability: Defiant, IVs: 15/30/15/15/15/30, EVs: 252 Atk / 252 Spe)

Wow, multiple Pokémon! And the Hypno has a fairly good moveset too. This grunt might be wasted on Team RR.

Then again, he has Hypno open with Psychic against Phart, so maybe not. A follow-up Signal Beam manages 30 damage with Phart at +4 Sp. Def, after which I use a couple of X Attacks and let it get started. Struggle just barely misses out on a 2HKO and necessitates a Max Potion, but the third hit KOs Hypno without issue. Phart's low enough to need healing again once Primeape comes in, missing its first Close Combat and hitting for 57 damage with the second, but Rocky Helmet damage weakens it enough for Struggle to one-shot it. Once the grunt is beaten, I pick up the Revive in the corner of the room and head back to fight the other one that went missing earlier.

36-18.png

Team Rainbow Rocket Grunt
Arbok Lv62 (Glare/Stockpile/Mud Bomb, Ability: Intimidate, IVs: 15/15/30/15/30/15, EVs: 252 Def / 252 SpD)

Back to the Eviolite for this one. I can't prevent Intimidate from going off, but I can certainly use 4 X Attacks and a Dire Hit to let Phart smash through it. Stockpile is ignored by Unaware, Phart shakes off the paralysis from Arbok's first Glare, and Mud Bomb only does 16 damage, leaving Arbok to be knocked out in two hits.

Once that grunt is beaten, I have officially completed the teleporter maze! No more warping around and getting lost for me... though there's still the pair of grunts guarding the door to Archie's office to deal with (plus a Full Restore to pick up nearby). Looking at their Pokémon, I think it'd be best to stick with the Eviolite for these battles.

36-19.png

Team Rainbow Rocket Grunt
Fearow Lv62 (Sky Attack/Drill Run, Ability: Sniper, IVs: 15/30/15/15/15/30, EVs: 252 Atk / 252 Spe)

Fearow's clearly built around getting crits, but since Sniper only boosts the damage of said crits and doesn't make them more likely to occur, I think using an X Defense is still a good idea. Fearow charges up a Sky Attack and hits Phart while I'm using an X Attack, knocking 43 HP off it (without a crit). Struggle can only 3HKO it in return, but when Fearow's next Sky Attack and 2 Drill Runs also fail to score a critical hit, it's got no hope of beating Phart.

36-20.png

Team Rainbow Rocket Grunt
Muk Lv62 (Toxic/Minimize/Mud-Slap, IVs: 30/15/15/15/30/15, EVs: 252 HP / 252 SpD)

More of an annoyance than a threat really. Phart still being on 53 HP after the previous battle means I need to heal it first, but Muk wastes this free turn on Minimize, and its follow-up Toxic is immediately expelled by Phart. Mud-Slap's accuracy drops are also useless against Struggle, which goes on to 3HKO Muk at +4 Attack. And that concludes this group of grunts, so off we go to meet a pirate from another world now.

36-21.png

Maxie Archie explains to me that in his own world, he had finally succeeded in his plans to have Groudon Kyogre expand the world's landmass oceans when he was swallowed up by a fissure giant wave and somehow ended up in my world. And even though he's got a perfectly good world shaped to his grand design already, he wants to reshape this one with Groudon's Kyogre's powers as well. Of course, I cannot abide such greed, so we have to fight it out to determine the fate of Alola. Awfully high stakes for someone I only met 30 seconds ago.

36-22.png

36-23.png

Team Aqua Archie
Items: Full Restore
Mightyena Lv64 (Crunch/Fire Fang/Thunder Fang/Ice Fang, Ability: Intimidate, IVs: All 25, EVs: 252 Atk / 252 Def)
Crobat Lv64 (Air Slash/Toxic/Dark Pulse/Sludge Bomb, Ability: Inner Focus, IVs: All 25, EVs: 252 SpA / 252 Spe)
Muk Lv64 (Gunk Shot/Fire Punch/Thunder Punch/Ice Punch, Ability: Poison Touch, IVs: All 25, EVs: 252 Atk / 252 SpD)
Sharpedo Lv64 (Night Slash/Liquidation/Ice Fang/Poison Fang, Ability: Rough Skin, IVs: All 25, EVs: 252 Atk / 252 Spe)
Kyogre Lv66 (Hydro Pump/Ice Beam/Ancient Power/Thunder, Ability: Drizzle, IVs: All 30, EVs: 252 SpA / 252 SpD)

His Mightyena and Crobat look awfully familiar... the other three are definitely new though. I reckon Archie might be slightly easier than Maxie just because his other team members are less physically bulky than the ones on Maxie's team - Sharpedo's STAB Night Slash is only useful if it actually gets a chance to use it. Could be wrong though, and I'm about to find out either way.

36-24.png

It's the same Mightyena as Maxie's, so the same X item strategy applies. Phart reaches +6 Defense with 208/284 HP to spare, then gets the rest of its boosts while Mightyena does around 30 damage with each Crunch. Once Phart is fully set up, it 2HKOs Mightyena without it even scoring any status conditions from its elemental fangs.

36-25.png

Same Crobat as well. I give Phart a Max Potion and it 2HKOs Crobat with Struggle, just about surviving with 25 HP after 2 rounds of Toxic damage and a Dark Pulse.

36-26.png

36-27.png

I forgot to screenshot Sharpedo when it was first sent out, but it didn't last very long anyway. I healed Phart with a Full Restore, it failed to get a crit with Night Slash and did 30 damage, then got one-shotted by Struggle as expected.

36-28.png

Using a Moomoo Milk lets me gauge what Muk wants to do and how hard it hits. It chooses Gunk Shot and manages 22 damage, also poisoning Phart only for it to cure itself right away, so Phart is quite safe to strike back and achieves a 2HKO.

36-29.png

I heal Phart once again, it dodges a scary Drizzle-boosted Hydro Pump, Struggle takes Kyogre into yellow, it dodges Hydro Pump again, then Kyogre is defeated on the next turn. One of these Pokémon is supposed to be a box legendary, and it's not the Cosmog.

36-30.png

What power was that again, sorry? I must've missed it.

Archie reminds me that I need to examine the blue painting behind him if I want to progress further into the castle, and sure enough, there's another switch behind it. Once again, pushing the switch triggers a load of rumbling and activates a nearby warp panel.

36-31.png

36-32.png

It seems this switch did a bit more than the last one, opening up the remaining doors in the entrance room and siccing a couple of grunts on Guzma. But he's got them at arm's length for now. Considering the grunts are just flailing around indefinitely instead of taking even a single step back so they can send out their Pokémon, I'd have to agree with Guzma's assessment.

36-33.png

Uh-oh, they've spotted each other. This might get interesting.

36-34.png

36-35.png

36-36.png

36-37.png


36-38.png


What do you mean, "that didn't happen"?

Fine, let's go with the boring version then. Maxie and Archie are getting ready to take their argument outside when a mysterious light envelops their bodies, and they both disappear without a trace. Spooky.

I haven't a clue what became of those two, but they've both been beaten and seem to have vanished for now, so that's two bad guys out of the way. Time for another quick rest before I head upstairs and clear out the rest of Team Rainbow Rocket.
Trainers defeated: 398/427
 
:sm/dialga: :sm/xerneas:
Off we go to Cyrus's wing of the castle, and what do you know, there's a grunt waiting in the very first room.

37-1.png

Team Rainbow Rocket Grunt
Fearow Lv62 (Double Team/Roost/Fly, Ability: Keen Eye, IVs: 30/15/15/15/15/30, EVs: 252 HP / 252 Spe)

I use 3 X Attacks in the hope that Struggle can just blast through Fearow without letting it use Roost - it goes for Double Team twice and then Fly, but misses Phart as it comes back down to earth. Sadly Struggle can only manage just over 50% and most of it is Roosted off, so I have to use a Dire Hit and then heal Phart before trying again. A Fly deals 40 damage, then Phart very nearly KOs with its first crit Struggle, getting Fearow with its second strike while it fails to heal enough HP with Roost.

37-2.png

Once I'm past the entrance room, the gimmick of this wing is revealed to be spinning tile mazes. It doesn't look too difficult at first glance, but I'll have to fight my way through a second grunt before I can verify that.

37-3.png

Team Rainbow Rocket Grunt
Haunter Lv62 (Night Shade, Ability: Levitate, IVs: 15/15/15/15/30/30, EVs: 252 SpD / 252 Spe)

It's a shame that Phart can't use its Rocky Helmet like it did against the Seismic Toss Primeape from earlier, but never mind. Struggle is a 2HKO after an X Attack and a Max Potion, and there was absolutely no risk involved thanks to Night Shade having fixed damage.

The spinning tiles are just as easy to negotiate as I thought they'd be. I pick up the Revive in the middle of the room before taking a teleporter on to the next one, running into another grunt guarding a Zinc before too long.

37-4.png

Team Rainbow Rocket Grunt
Raticate Lv62 (Sucker Punch/Quick Attack, Ability: Guts, IVs: 15/30/30/15/15/15, EVs: 252 Atk / 252 Def)

This time Phart actually can use the Rocky Helmet, and quite effectively too! Sucker Punch doesn't do anything if it's not trying to attack, so after using an X Defense on it, Phart can just sit there and watch Raticate fail to hit with its Sucker Punches and fail to impress with its Quick Attacks. None of them even reach 20 damage and it faints to Rocky Helmet damage after landing 7 of them.

Once that grunt is defeated and the Zinc is picked up, I can move on to the third and final spinning tile room. The tile pattern is a bit more complicated than the previous two, but there are no grunts in this room so it's not especially screenshot-able. Long story short: I solved the puzzle, reached the room outside Cyrus's office and picked up a Hyper Potion I found there, went back to the puzzle to pick up an HP Up (and that wasn't me forgetting about it - the puzzle is designed so that you have to leave and re-enter the room to grab it), equipped Phart with its Eviolite again, then challenged the two grunts guarding the door.

37-5.png

Team Rainbow Rocket Grunt
Hypno Lv62 (Psychic/Psyshock, Ability: Forewarn, IVs: 15/15/15/30/15/30, EVs: 252 SpA / 252 Spe)

Resisted moves galore. The best Hypno can manage is 27 HP from Psychic, so Struggle 4HKOs it at +2 Attack and we quickly move on.

37-6.png

Team Rainbow Rocket Grunt
Arbok Lv62 (Glare/Gunk Shot, Ability: Intimidate, IVs: 30/15/30/15/15/15, EVs: 252 HP / 252 Def)
Golbat Lv62 (Air Slash, Ability: Inner Focus, IVs: 15/15/15/30/15/30, EVs: 252 SpA / 252 Spe)

Phart carries over 164/287 HP from the previous fight and immediately has its Attack dragged down by Intimidate, so it's not off to a great start. But it only takes 27 damage from Gunk Shot after an X Defense, then dodges the next two Arbok throws at it, giving me a bit of time to use an X Sp. Def and 2 X Attacks before it needs healing. A couple more Gunk Shots later and Arbok can no longer deal any damage at all, taking 5 Struggles before fainting and letting Golbat in, who gets a 2HKO thanks to a critical hit after failing to get any Air Slash flinches.

Subtracting the 3 Trainers at the start of the game that I had to battle with Litten before I unlocked trading, the defeat of those grunts brings me to a whopping 400 Trainers beaten using a Cosmog. And how do I celebrate such a milestone? By barging in on Cyrus's scheming and sweeping him aside, of course!

37-7.png

You know how it goes. Cyrus was busy using Dialga and Palkia to create his amazing new world devoid of human spirit, and then some massive shadow engulfed him and brought him here. He can tell this isn't the new world he wanted because I clearly have some desire to protect in me, and just like Maxie and Archie, he wants to shape this world to fit his ideals as well instead of just going back home. Why can't anyone here be happy with what they already have?

37-8.png

37-9.png

Team Galactic Cyrus
Items: Full Restore
Houndoom Lv65 (Fire Blast/Dark Pulse/Sludge Bomb/Shadow Ball, Ability: Flash Fire, IVs: All 25, EVs: 252 SpA / 252 Spe)
Honchkrow Lv65 (Night Slash/Sky Attack/Heat Wave/Icy Wind, Ability: Super Luck, IVs: All 25, EVs: 252 Atk / 252 SpA)
Crobat Lv65 (Cross Poison/Zen Headbutt/X-Scissor/Super Fang, Ability: Inner Focus, IVs: All 25, EVs: 252 Atk / 252 Spe)
Weavile Lv65 (Night Slash/Quick Attack/Ice Punch/Brick Break, Ability: Pressure, IVs: All 25, EVs: 252 Atk / 252 Spe)
Dialga Lv67 (Roar of Time/Flash Cannon/Earth Power/Thunderbolt, Ability: Pressure, IVs: All 30, EVs: 252 HP / 252 SpA)

This feels like a step up from Hoenn's chief villains, what with Houndoom's Dark Pulse being a fair bit strong than Mightyena's Crunch and a pair of Night Slash users in the back. Honchkrow's got Super Luck boosting its crit rate as well - that's a 50% chance of it sticking its middle feather up at Phart's Defense boosts. Even Crobat's carrying Super Fang to make up for its lack of super-effective STAB, and I'm sure the god of time itself will also try its best.

37-10.png

Even after an X Sp. Def, Dark Pulse still deals 72 damage, and then down to 36 once Phart is at +6 Sp. Def. So setting up X items against Houndoom is a bit slower than I hoped given how often I have to stop and heal Phart, unless I want it getting taken out by a critical hit. Not even running out of Dark Pulse PP completely stops Houndoom, as it's quite happy to drop Phart's Sp. Def with Shadow Ball and then burn it with Fire Blast! But once those issues are sorted and all the X items are in place, its awful bulk sees it one-shotted by Struggle.

37-11.png

This isn't the first Crobat I've seen in Team Rocket's Castle and it certainly won't be the last. Oh, hang on a sec, apparently it IS the last one I'll see here. I guess 3 is the limit. This one passes up an opportunity to use Super Fang and instead takes off just 20 HP with X-Scissor, letting Phart 2HKO it fairly easily.

37-12.png

I got away with not healing against Crobat, but that's a recipe for instant death against Honchkrow. So I use a Max Potion, Honchkrow uses Night Slash, and it's a critical hit! Poor Phart is straight down to 111/287 HP already and can't possibly risk attacking. After a second Max Potion, Honchkrow can't manage another crit and only deals 30 damage with Night Slash, which should leave Phart enough room to tank a critical hit after Struggle recoil, so I have it attack.

37-13.png

37-14.png

Phew. At least I was right about Phart being able to tank a crit, but still... too close for my liking. Honchkrow fails to land another critical hit while I'm healing Phart back to full again, and since Cyrus doesn't use his Full Restore either, Phart takes it out with the next Struggle.

37-15.png

I know Weavile has a slightly lower Attack stat than Honchkrow, but its Night Slash crits are still going to hurt, and if Honchkrow could tank a Struggle then I imagine Weavile could too. Phart's not going to OHKO it before it can strike, meaning it's time for yet another Max Potion. 30 damage from Night Slash again, so Phart Struggles on the next turn and leaves Weavile very low on HP, then takes another Night Slash without suffering a critical hit. I have no idea why Cyrus didn't use his Full Restore here, but he didn't, so Phart just KOs Weavile on the next turn.

37-16.png

Hurrah! A complete tour of the entire Alola region and an in-progress assault on some intergalactic baddies has finally brought Phart to its peak potential, towering over every remaining foe with its several-dozen level advantage. Well, maybe it's not quite reached peak potential yet... more on that in a minute.

37-17.png

Time for another quick heal. Phart somehow dodges Roar of Time - how an attack that warps reality itself can miss is beyond me - and takes a good third off Dialga's HP before it successfully Roar of Times (or is that Roars of Time?) for 42 damage. Not much of a threat, but also not bad for a neutral attack into +6 Sp. Def. The recharging turn leaves Dialga immobile and presumably prevents Cyrus from trying his Full Restore as well, so Phart is free to Struggle twice more and knock it out, putting another villain's sinister plans to rest.

Also, if you were wondering what Cyrus's team looks like in Ultra Moon, here you go:

Team Galactic Cyrus (in another dimension)
Palkia Lv67 (Spacial Rend/Surf/Earth Power/Thunderbolt, Ability: Pressure, IVs: All 30, EVs: 252 HP / 252 SpA)

Everything other than the box legendary remains the same. Hard to say whether Palkia would've been more difficult than Dialga or not - Spacial Rend is weaker than Roar of Time, but carries a higher crit rate and doesn't force Palkia to wait a turn afterwards. It's a little less bulky than Dialga too, but maybe not "turns a 3HKO into a 2HKO" levels of reduced bulk, and if it took enough damage from Struggle for Cyrus to use his Full Restore then it would've made the battle longer rather than shorter. So maybe it would've been a bit more difficult overall? Not that it matters.

37-18.png

Rotom emerges from the plot-irrelevant state it's been in since I became Champion to tell Cyrus that I'm so nice and cool and kind to everyone. Recognising that he's no match for the power of friendship, Cyrus gives up on his plans to convert this world into one without spirit. He instead gives me a Galactic Key that can help unlock the door to where Lusamine is being held captive.

37-19.png

See, there it is in all its glory, complete with its Sinnoh-centric description. Luckily the Galactic Key can also disengage security systems here in Team Rocket's Castle. And it's a good thing I took this screenshot when I did, because...

37-20.png

...it breaks maybe 30 seconds after I obtained it. That seems a lot flimsier than it should be. Maybe it was accidentally put through the wash or something? Anyway, using the key did activate a teleporter back to the entrance room, so I could start making my way to Lysandre if I wanted. But I'd like to make a quick trip to Hau'oli City first.

37-21.png

Hyper Training time! Phart's IVs are 31/15/31/16/31/17, so after excluding Sp. Atk due to it being irrelevant, that means I'll need 2 Bottle Caps, which happens to be exactly how many I have. (I also have 4 Gold Bottle Caps but using one feels excessive.) So I hand them over to Mr. Hyper and he does whatever it is that makes Hyper Training work.

37-22.png

37-23.png

Before and after. 94 Attack still isn't a lot, but considering Phart would only ever gain 1 Attack point per level-up and even that wasn't guaranteed, the boost in power is a bit like it suddenly growing to Lv. 120. The Speed boost is less useful, only saving me an X Speed usage against teams of Pokémon that all have less than 220 Speed, but it's still an improvement and there's no reason not to take it. Now, on to the final wing of the castle!

37-24.png

Team Rainbow Rocket Grunt
Muk Lv62 (Toxic/Pain Split, IVs: 15/15/30/15/30/15, EVs: 252 Def / 252 SpD)

Once again, the very first room in Lysandre's wing contains a grunt to fight. This Muk's unusual in that the Eviolite and the Rocky Helmet both have no effect against it (unless it runs out of PP), so I have to dust off the Leftovers for possibly the first time since Konikoni City. Though looking at its moves, it might be risky to have Phart attack it, because who knows where Phart's HP will be by the end of each turn with Pain Split and Toxic damage factored in. So Muk may be running out of PP after all...

I start by using a Revive to no effect, and Muk uses Pain Split to bring Phart down to 250/290 HP, though the Leftovers quickly bring it back to 268. It applies Toxic on the next turn and then gets back to spamming Pain Split, letting the poisoning wear Phart down. As long as I use a Full Heal whenever Phart's getting a bit too low, it should be fine, so I carry on stalling for time. Muk eventually runs out of Pain Split PP, then Toxic PP, then uses Struggle 4 times and faints without Phart ever needing me to restore its HP.

37-25.png

This wing features Meowth security cameras that I'll have to weave my way around to get to Lysandre's office. Much like the spinning tile puzzles, they don't translate especially well to a screenshot-based account of what I'm doing, so you'll just have to take my word for it that I solve them all. At least it's easy enough to take a screenshot of me being spotted by the grunt in this room.

37-26.png

Team Rainbow Rocket Grunt
Persian Lv62 (Power Gem/Hyper Voice/Dark Pulse/Thunderbolt, IVs: 15/15/15/30/15/30, EVs: 252 SpA / 252 Spe)

Dark Pulse does 32 damage after an X Sp. Def, then Struggle is a 2HKO after an X Attack. Easy peasy. I spin one of the Meowth statues around so I can grab a Calcium without being spotted, then move on to the next room and find another grunt straight away.

37-27.png

Team Rainbow Rocket Grunt
Arbok Lv62 (Ice Fang/Thunder Fang/Fire Fang/Crunch, Ability: Intimidate, IVs: 15/30/15/15/15/30, EVs: 252 Atk / 252 Spe)

Probably could've gone with the Eviolite for this one and let Phart actually attack it, but I just went with the Rocky Helmet instead. I use an X Defense, Crunch deals 50 damage, so I use a couple more and Arbok decides to try Thunder Fang instead for 10 damage. Then it's just a matter of letting Arbok get chipped to death by Rocky Helmet damage after landing 7 attacks.

I ninja past some more Meowth statues to reach a PP Up, then move them around a bit to access the teleporter to the final statue room. Again, not easy to represent me navigating the puzzle in text or screenshot form, but I manage. There's a Cell Battery to be claimed in the corner of the room, then a Max Revive in the room just outside Lysandre's office, and of course the usual pair of grunts guarding the door.

37-28.png

Team Rainbow Rocket Grunt
Muk Lv62 (Explosion, IVs: 30/30/15/15/15/15, EVs: 252 HP / 252 Atk)
Fearow Lv62 (Giga Impact, Ability: Keen Eye, IVs: 15/30/15/15/15/30, EVs: 252 Atk / 252 Spe)

Now Phart's back to holding the Eviolite. I give it an X Defense, Muk blows up, Phart takes 58 damage and we're on to Fearow already! Another X Defense, Fearow misses its first Giga Impact, then a third X Defense while it hits for 21 damage. It's only got 3 PP left at this point so I just stall until it knocks itself out with Struggle, healing Phart back to full just before Fearow faints.

37-29.png

Team Rainbow Rocket Grunt
Tentacruel Lv62 (Scald, Ability: Liquid Ooze, IVs: 30/15/30/15/15/15, EVs: 252 HP / 252 Def)

X Sp. Def this time, then 3 X Attacks and Struggle. Scald only deals 19 damage per hit and manages one single burn during setup, but even without a burn, Struggle is still only a 3HKO against Tentacruel. A couple more burns slow things down even further, though Phart still manages to get its 3HKO despite being on fire during its last attack.

Not only does that conclude the weird and wacky Pokémon sets of Team Rainbow Rocket's minions, it also concludes the "regular" Trainers in Ultra Sun! It's all boss battles from this point onwards, and one of them's just behind this door, so I'll go and say hi.

37-30.png

There he is. Same story as usual - Lysandre had just triggered the ultimate weapon to wipe the slate of the world clean when he somehow ended up in this world. But maybe he won't want to nuke this one as well? After all, he's always going on about people who give and people who take, so hopefully he can settle for obliterating one world's population and not take this world for himself too.

37-31.png

Fuck's sake.

He tells me to pick a button from the wall behind him, but no matter which one I pick, it activates the ultimate weapon and threatens to destroy the world. Good thing the other button disables the weapon.

37-32.png

37-33.png

Team Flare Lysandre
Items: Full Restore
Mienshao Lv65 (Fake Out/Dual Chop/High Jump Kick/U-turn, Ability: Inner Focus, IVs: All 25, EVs: 252 Atk / 252 Spe)
Pyroar Lv65 (Flamethrower/Hyper Voice/Snarl/Will-O-Wisp, Ability: Rivalry, IVs: All 25, EVs: 252 SpA / 252 Spe)
Honchkrow Lv65 (Dark Pulse/Heat Wave/Psychic/Shadow Ball, Ability: Super Luck, IVs: All 25, EVs: 252 SpA / 252 Spe)
Gyarados Lv65 @ Gyaradosite (Crunch/Waterfall/Earthquake/Stone Edge, Ability: Intimidate, IVs: All 25, EVs: 252 Atk / 252 Spe)
Xerneas Lv67 (Geomancy/Moonblast/Thunderbolt/Psyshock, Ability: Fairy Aura, IVs: All 30, EVs: 252 HP / 252 SpA)

I'll admit I nearly shat myself until I thought a bit harder about how Mold Breaker and Unaware would interact when facing Mega Gyarados: it would only ignore Phart's ability to ignore Gyarados's own stat changes (which it has no way of getting), and wouldn't ignore the X items I've used on Phart. That's a relief. But I still don't want to see what a critical-hit Crunch would do, and Lysandre obviously has 4 other Pokémon too, none of which look harmless.

37-34.png

It wouldn't surprise me if Mienshao U-turned out of the fight, but who would come in to replace it? Maybe Honchkrow? Still, it would suck if I used an X Sp. Def in preparation for Honchkrow and then Gyarados came out instead. So I may as well use an X Defense first, since I know Mienshao at least is going to use a physical attack or two. It is indeed U-turn, knocking 42 HP off Phart and exiting stage left.

37-35.png

Okay, now I use an X Sp. Def. Dark Pulse does 68 damage, but I do have to be mindful of Super Luck making it more likely to randomly crit, which it does a few turns of setup later. Luckily it was just after I'd used a Max Potion and left Phart with 114/290 HP. Unluckily, it happens again as soon as I use another Max Potion, right down to the 114 HP. But that's the last of Honchkrow's crits, at least on Dark Pulse, as it runs out of PP after some more X items/healing and starts using Shadow Ball instead. I use a Guard Spec. on Phart, heal it again, then it OHKOs Honchkrow with Struggle. Hyper Training paid off!

Mienshao comes back in afterwards, does 6 damage with Fake Out and then gets OHKO'd as well.

37-36.png

Huh, didn't think Pyroar would be next. I know the Rainbow Rocket bosses always save their legendary Pokémon until last, so I assumed Lysandre would just send out his Gyarados whenever, but I guess he's saving it until second-last since it can Mega? Anyway, I heal Phart to full, Will-O-Wisp burns it and it cures itself on the same turn, I use a Guard Spec. again, Phart gets burned again and it sticks this time, and it takes 21 damage twice from a couple of Flamethrowers while bringing Pyroar into red with its Struggles.

With Phart now on 50 HP and burned, I have to give it a Full Restore, and Lysandre does the same with his Pyroar - good news for me because I'd rather he didn't have access to the Full Restore for Gyarados or Xerneas. Another Struggle nearly OHKOs Pyroar now that Phart isn't burned... and then Pyroar burns it again. Right. I'll have to get rid of that before Gyarados comes in, so it's a Guard Spec., then a Full Restore, then Struggle again to KO it.

37-37.png

Good, I didn't want it losing an Attack stage here. Mega Gyarados is not exactly setup bait.

37-38.png

Phart's Struggle does over 50% to it, but not that much over, so being at +6 may have made a difference. Crunch does 42 damage back and leaves Phart on 81 HP, letting it KO Gyarados with its next attack.

37-39.png

It's not got anything super-effective, but Fairy Aura-boosted Moonblast might still hurt? Never mind, it deals 28 damage. Struggle 3HKO it is. Xerneas is right not to bother with Geomancy as it won't help because of Unaware, and neither will Moonblast's Sp. Atk drop. Let's see if Lysandre's Ultra Moon team would've done any better:

Team Flare Lysandre (in another dimension)
Yveltal Lv67 (Oblivion Wing/Air Slash/Psychic/Shadow Ball, Ability: Dark Aura, IVs: All 30, EVs: 252 HP / 252 SpA)

Something seems to be missing here...

I've seen at least one person speculate that somebody at Game Freak forgot Oblivion Wing isn't a Dark-type move when they were giving Yveltal its moveset, and I buy that explanation. Suddenly Shadow Ball is looking like a better coverage move than expected. Yveltal would've been a 3HKO too since it has identical stats to Xerneas, and without any actual Dark attacks, probably would've had similar damage output as well. Cosmog sweeps regardless of game version.

37-40.png

In the world where Lysandre's plan succeeds, will he become known as W in the future?

37-41.png

After clearing out 4 wings' worth of RR chumps and their respective otherworldly bad guys, the door to that weird frozen Pokémon trophy room has finally been reactivated. I'll be interested to see if/how Team Rainbow Rocket has managed to make that room look more sinister than it already did. I'll also be interested in rescuing Lusamine and turning everything back to normal, but, y'know, one step at a time.
Trainers defeated: 410/427
 
:sm/zekrom: :sm/mewtwo:
38-1.png

Lillie brings my attempts to rescue her mother to a screeching halt with her unwanted kindness, but at least I get the chance to go back to Route 1 before proceeding. I was worried her dialogue might transition straight into the next battle.

5 minutes later...

38-2.png

Ghetsis doesn't have his own office and seems to just be doing his own thing around the castle, which leads to him bumping into me when I try to enter the teleporter. He's also come here from another world, but somehow has even loftier ambitions than the other team leaders: consolidating all the power from multiple worlds to himself and forcing everyone to release their Pokémon so he can reign over all existence. He wants to use Team RR's leader as his personal pawn to that end, and he won't let me past him because that'd risk ruining his plans. Perhaps a Pokémon battle will help him see reason... of course not, this is Ghetsis after all, but it might force him aside.

38-3.png

38-4.png

Team Plasma Ghetsis
Items: Full Restore, Full Restore
Cofagrigus Lv66 (Will-O-Wisp/Shadow Ball/Power Split/Dark Pulse, Ability: Mummy, IVs: All 25, EVs: 252 Def / 252 Spd)
Bouffalant Lv66 (Head Charge/Poison Jab/Earthquake/Megahorn, Ability: Reckless, IVs: All 25, EVs: 252 Atk / 252 Spe)
Bisharp Lv66 (Iron Head/Night Slash/Stone Edge/X-Scissor, Ability: Defiant, IVs: All 25, EVs: 252 Atk / 252 Def)
Hydreigon Lv66 (Dragon Pulse/Hyper Voice/Dark Pulse/Surf, Ability: Levitate, IVs: All 25, EVs: 252 SpA / 252 Spe)
Zekrom Lv68 (Bolt Strike/Hyper Voice/Dragon Claw/Zen Headbutt, Ability: Teravolt, IVs: All 30, EVs: 252 Atk / 252 SpA)

He carries an extra Full Restore compared to the previous leaders and all of his Pokémon apart from Zekrom can strike at Phart's weaknesses, but they're not especially fancy in terms of movesets - just plain old damage-dealers once Cofagrigus is taken out. I think Phart can manage.

38-5.png

Cofagrigus starts with Power Split, adding its 87 Attack to Phart's 94 Attack and then sharing it equally between the two of them. As you can imagine, that doesn't make much difference, and now it can only manage 24 damage with Shadow Ball because I got to use 2 X Sp. Defs before it attacked instead of just one. Apart from one critical hit and a few Will-O-Wisp burns, Cofagrigus continues to not do much while I lob every X item in the bag at Phart, and it gets 2HKO'd just after having to resort to a 14-damage Dark Pulse.

38-6.png

Coming into contact with Cofagrigus caused Phart to gain Mummy instead of Unaware, but it's not a big issue - none of its opponents can boost their stats, and Bouffalant is the only one who cares about losing its own ability (and even that's only if it uses Head Charge). Speaking of Bouffalant, its Megahorn does 30 damage and it faints after 2 Struggles.

38-7.png

Time for a spot of healing. Bisharp's Night Slash also does 30 damage when it fails to crit, and it too is knocked out after exactly 2 Struggles.

38-8.png

Another Max Potion, then Hydreigon's Dark Pulse hits for 42 damage. Struggle does enough for another 2HKO but not quite enough to make Ghetsis use a Full Restore, which is very handy. I did take a bit of a risk by having Phart attack there, because a crit Dark Pulse probably would've been a KO, but it paid off nicely and now Ghetsis is down to his last Pokémon.

38-9.png

Zekrom is only scary because Phart's low on HP, and that's nothing a Max Potion can't fix. Bolt Strike does 34 damage, but Phart falls short of being able to get a 2HKO back and has to watch as Ghetsis uses both his Full Restores, which is not ideal (hurr hurr). Once Ghetsis runs out of medicine, Zekrom doesn't stick around much longer. Would he have stood more of a chance in Ultra Moon with his Reshiram?

Team Plasma Ghetsis (in another dimension)
Reshiram Lv68 (Blue Flare/Hyper Voice/Dragon Claw/Zen Headbutt, Ability: Turboblaze, IVs: All 30, EVs: 252 Atk / 252 SpA)

Ehh, not really. Blue Flare would hit slightly harder than Bolt Strike thanks to Phart being Impish, but it wouldn't be a big enough step up to matter. Plus the burn chance might've worked against Reshiram - I could deliberately keep Phart burned for one of its Struggles to prevent Reshiram from falling into Full Restore range, and that's assuming its lower Defense stat wouldn't see it being 2HKO'd outright.

38-10.png

38-11.png

Since the Pokémon battle didn't go the way he hoped, Ghetsis is now resorting to physical violence and threatening to murder a child. Actually not a bad strategy! He should've opened with that one. Lillie tells me not to do what he says, so I refuse, and Ghetsis gets ready to cave her skull in with that cane he had in BW2 or something like that. I don't know, I'm just guessing. He didn't specify a killing method.

38-12.png

*teleports behind you*

38-13.png

It turns out Colress has been following me around the castle by concealing himself with an invisibility device he designed himself. Fair enough, he probably didn't want to be seen, but I really could've used a hand against all those grunts earlier. But Colress makes up for that now by using another of his machines to warp Ghetsis back to his own world.

38-14.png

38-15.png

38-16.png

Colress is looking at the possibility of changing the castle back into Lusamine's mansion, but says it won't be easy for his machines to do unless we remove the tremendous power of evil from the centre of the castle... in other words, the boss of Team RR. I'm not sure if "evil" is like a proper SI unit or anything, but I probably shouldn't question someone who can send me to another dimension if he feels like it. Time for Lillie and I to go and find this evil boss man.

38-17.png

38-18.png

Giovanni is impressed that I got here (isn't he always) and maybe a bit disappointed that all the other bosses were beaten so easily. He explains that Team Rocket has moved on from merely wanting to control the world and has become Team Rainbow Rocket in order to conquer all worlds.

38-19.png

He's started dabbling in Ultra Beasts as well, apparently. Giovanni plans to build an entire army of them, and has had one of them put Lusamine to sleep in an effort to turn her into his brainwashed minion. (I'm assuming it must've been a Nihilego. Xurkitree and Blacephalon can learn Hypnosis but that's not quite the same thing.) Lillie's understandably not too happy about this.

Despite all my efforts in crushing the rest of his organisation - or maybe because of them - he offers to let me join Team Rainbow Rocket, but he'd only think I was joking if I actually said yes. Instead, I have to battle Giovanni to save the Alola region for, I think, the sixth time so far? Maybe seven if you include Necrozma.

38-20.png

38-21.png

38-22.png

38-23.png

Team Rainbow Rocket Boss Giovanni
Items: Full Restore, Full Restore
Dugtrio Lv68 @ Smooth Rock (Sandstorm/Earthquake/Sucker Punch/Stealth Rock, Ability: Sand Veil, IVs: All 30, EVs: 252 Atk / 252 Spe)
Nidoking Lv68 (Earthquake/Poison Jab/Throat Chop/Aqua Tail, Ability: Poison Point, IVs: All 30, EVs: 252 HP / 252 Atk)
Nidoqueen Lv68 (Surf/Sludge Wave/Earth Power/Flamethrower, Ability: Poison Point, IVs: All 30, EVs: 252 HP / 252 SpA)
Rhyperior Lv68 (Megahorn/Earthquake/Stone Edge/Thunder Punch, Ability: Solid Rock, IVs: All 30, EVs: 252 Atk / 252 Def)
Mewtwo Lv70 @ Mewtwonite X (Zen Headbutt/Earthquake/Stone Edge/Drain Punch, Ability: Pressure, IVs: All 30, EVs: 252 Atk / 252 Spe)

One thing I haven't got round to mentioning yet is that all of the Rainbow Rocket leaders keep their Pokémon in Master Balls. It obviously makes sense for Mewtwo and the various box legendaries, but it's funny to see stuff like Dugtrio or Mightyena flying out of them as well. Some of his grunts could have put those Master Balls to much better use catching their Fearow and Tentacruel.

Anyway, Giovanni's team seems to not be that bad actually. A couple of odd super-effective coverage attacks, but Dugtrio seems easy enough to set up on and nobody else seems to have anything massively threatening. Some of them are quite bulky, yes, but I can cope with that.

38-24.png

No surprise forced heal before the fight, so that's nice. Dugtrio kicks up a Sandstorm and then starts using Earthquake, but by the time Phart is at +6 Defense they're only hitting for 22 damage (plus sandstorm chip of course), and it's mostly just setup bait. Phart only needs one Max Potion for me to finish using X items on it, and once I've used another one it OHKOs Dugtrio.

38-25.png

There's still one turn of sandstorm left, so I may as well heal Phart again and let it expire. Phart loses 40 HP to Megahorn before taking a good third off Rhyperior's HP with Struggle, then dodges another Megahorn after being healed again and takes out Rhyperior with two more attacks... or at least it would have, if not for Giovanni throwing out a Full Restore. Boo. On the plus side, he saves his second Full Restore for later and lets Phart KO Rhyperior after exchanging a few more attacks.

38-26.png

Nidoking could have been blessed with Megahorn too, but instead it's got the more accurate but notably weaker Throat Chop and can only do 24 damage at a time. It's quite a bit flimsier than Rhyperior as well, falling to a mere 2 Struggles.

38-27.png

Nidoqueen is even weaker, having 19-damage Sludge Waves as its best option, and being slightly more defensive than Nidoking doesn't save it from a 2HKO as well. Congratulations to Phart for making contact with Poison Point users 4 times and not getting poisoned.

38-28.png

Phart could easily take a Mewtwo, but what about a Mega Mewtwo? We'll have to find out.

38-29.png

Stone Edge does 23 damage, so yes, it can take it. Struggle is a 2HKO.

38-30.png

Somehow Giovanni ended up being easier than all the other leaders! Using Dugtrio as a manual sand setter lead (also, using Dugtrio at all) probably didn't help. And just for the sake of it, here's what his Mewtwo would have looked like in Ultra Moon:

Team Rainbow Rocket Boss Giovanni (in another dimension)
Mewtwo Lv70 @ Mewtwonite Y (Psystrike/Aura Sphere/Psychic/Ice Beam, Ability: Pressure, IVs: All 30, EVs: 252 SpA / 252 Spe)

Doesn't look like it'd be much harder, although Mega Mewtwo Y's lower Defense means that maybe it would've fallen into Full Restore range and lasted an extra turn. But without Shadow Ball, it just wouldn't scare Phart very much. What's Psychic doing for it in that moveset anyway? I get it might not want to use Psystrike against something with really high Defense, but surely most of those things would be weak to Aura Sphere. Maybe Torkoal? Turtonator??

38-31.png

That seems to have done the trick. Giovanni's seen how strong Phart is and knows there's no point carrying on fighting, so he gives up on Team Rocket's Castle. It doesn't sound like he's completely abandoned his plans for world domination, but he's someone else's problem now.

38-32.png

38-33.png

Phew, everything seems to be back to normal. Colress works very quickly. He comes in with Guzma to confirm that all the Team RR members have been whisked away along with Giovanni.

38-34.png

And Lusamine's come round too. We'll have to wait and see if she's been successfully brainwashed or not, but I'm leaning towards no.

38-35.png

Ever the loyal disciple, Faba emerges from hiding to see if Lusamine's okay now that his treacherous plans have been thwarted. Lillie begins to explain what he did before Faba puts his foot in his mouth by basically admitting he betrayed the Aether Foundation just to further his career. Lusamine gives him a funny look and he runs off like the coward he is. I have a feeling he's not going to be branch chief for much longer.

38-36.png

hahahahahaha get fucked

38-37.png

Everything's back to normal now and Team Rainbow Rocket won't bother us again. Hurrah. Wicke hands me a big pile of Big Nuggets that they'd had stashed away, probably to be used for buying stuff once they'd got a bit more established. I don't think I really need them, since selling them puts me at just over $7,000,000, but whatever. Money!

38-38.png

38-39.png

I hear Earth is lovely this time of year.

38-40.png

It is currently 12th September as I write this. I mention this because Gladion will only come back from his overseas training one month after Episode RR is completed - I'm not sure how the game accounts for the varying lengths of months, but I would assume he'll be back on 12th October. Maybe the 13th if it's just a flat 31 days, but I'd expect it to be 30 over 31 if it is a fixed number. So I'll probably have to slow down the challenge a bit, because I can't finish it for another few weeks no matter how quickly I smash through the other Title Defense battles.

For now, I'll just wrap up the last few things before the final battles at the Pokémon League. Wicke's currently loitering in the entrance area of Aether Paradise, and gives me a couple of Big Malasadas after confirming that Gladion is still off training in Kanto. Intern Faba is here as well, asking for a battle with me to help improve his image so he can climb his way back to a higher position.

38-41.png

Aether Foundation Faba
Items: X Defense
Claydol Lv63 (Earth Power/Extrasensory/Ancient Power/Grass Knot, Ability: Levitate, Relaxed nature, IVs: 30/25/30/25/25/25, EVs: 252 HP / 252 Def)
Bruxish Lv63 (Aqua Jet/Crunch/Psychic Fangs/Screech, Ability: Strong Jaw, Adamant nature, IVs: 25/30/25/25/25/30, EVs: 252 Atk / 252 Spe)
Alolan Raichu Lv63 (Psychic/Thunderbolt/Quick Attack/Nuzzle, Ability: Surge Surfer, Modest nature, IVs: 25/25/25/30/25/30, EVs: 252 SpA / 252 Spe)
Alakazam Lv63 (Psychic/Psyshock/Disable/Dazzling Gleam, Ability: Synchronize, Modest nature, IVs: 25/25/25/30/25/30, EVs: 252 SpA / 252 Spe)
Hypno Lv63 (Psychic/Hypnosis/Focus Blast/Dream Eater, Ability: Insomnia, Timid nature, IVs: 25/25/25/30/25/30, EVs: 252 SpA / 252 Spe)

I might be wrong, but I don't think the addition of the physically frail Raichu and Alakazam to his team will make Faba much more difficult than our previous encounters. Indeed, poor Claydol can only manage single-digit damage with Earth Power once Phart is at maximum Sp. Def, and it gets even worse once that runs out of PP and it has to try Ancient Power.

38-42.png

38-43.png

Phart's lost exactly 100 HP by the time it's ready to attack, so this seems like the perfect opportunity to use the final Moomoo Milk from the 999 I've been carrying around since halfway through Ula'ula. The Soft Drink Parlor was definitely very useful for a time, but it gradually dropped off the higher Phart's maximum HP rose, so I don't regret getting rid of it back then. Max Potions will be good enough from this point onwards.

Phart ends up narrowly missing out on a 2HKO on Claydol, so I heal it up again just before the final blow so it's not too weak when Bruxish comes in. Sure enough, it is Bruxish that's sent out next, and Phart outspeeds and OHKOs it without having to worry about Crunch at all. Then it's Raichu who is OHKO'd next, followed by Alakazam after a Max Potion - it puts its 5,000 IQ to use on its free turn by trying to Disable Struggle. At least Hypno has the bulk to survive an attack and possibly put Phart to sleep... oh, never mind, another OHKO from Struggle.

Well, that was pathetic. Suddenly I'm not so worried about all the Title Defense battles. Faba gives me a Dubious Disc as part of his new nice-person routine before he leaves. To be fair, he actually did seem alright during our conversation here. If this was my first time meeting him I might not have realised he was a massive prick.

38-44.png

Time for a couple of last-minute bits and bobs before the Pokémon League. I can acquire a Porygon from an employee at the Aether House (along with an Up-Grade from another nearby employee) now that I've completed Episode RR. Sort of impressive that they managed to make its availability even worse than in SM, where it was already postgame-only, but maybe I'm just biased because I like Porygon2.

38-45.png

And here's a fun little event to finish off my dipping into USUM's various sidequests. A lady calling herself Madame Meowth comes barging into our house to compare her Alolan Meowth to the family Meowth. This ends up turning into a weird dialogue-based battle between the two cats, with me giving it commands, though the Alolan Meowth only gets in a Fake Out before getting one-shotted by Return. I get a PP Up from Meowth afterwards, which will rot in the bag for all eternity. Phart does not need more Splash PP.

Right, I can't think of anything else worth doing, so it's time to restock my bag. 100 Max Potions, 100 Full Restores and 100 of each X item that Phart can actually use, plus the massive pile of Sitrus/Lum Berries that's already in my bag courtesy of Isle Aplenny, ought to be enough for the final battles.

38-46.png

Being the Champion of the Alola region sadly doesn't spare me from having to fight the Elite Four every time I enter the Pokémon League. Since there are 10 Title Defense challengers in all, that would mean 36 repeat battles against Elite Four teams that I've already beaten... not something I'd like to put myself through. So even though it is possible to battle all of them like that (as opposed to Red and Blue, where it was outright impossible to fight both of them without soft-resetting), I'm just going to save the game once I reach the Champion's chamber and then reset after every successful Title Defense. I'll almost certainly have to do some resetting anyway if/when I get duplicate challengers showing up, so that's alright.

Having said that, the first Title Defense is always against Hau, meaning I'll still need to throw Phart at the Elite Four twice even if I use that little workaround. So that leaves me with 18 battles remaining across 14 unique Trainers, one of whom won't become available for a little under a month. Guess I'll just be back once a week with a handful of fights each time?
Trainers defeated: 413/427
 
:sm/dhelmise: :sm/noivern:
The Pokémon League's about the same as it was last time, minus Kukui being there to explain everything to me since I'm quite familiar with the format by now. On my first challenge, I had to choose my Elite Four battles carefully because I didn't want Phart growing past the obedience cap against the harder opponents, but since it's Lv. 100 now and will never ignore me again, I'll just battle them from left to right. That puts Big Mo first in line.

39-1.png

39-2.png

Elite Four Molayne
Klefki Lv66 (Spikes/Thunder Wave/Flash Cannon/Reflect, Ability: Prankster, IVs: 30/25/30/25/30/25, EVs: 252 Def / 252 SpD)
Bisharp Lv66 (Night Slash/Iron Head/X-Scissor/Poison Jab, Ability: Defiant, IVs: 25/30/30/25/25/30, EVs: 252 Atk / 252 Def)
Magnezone Lv66 (Flash Cannon/Thunderbolt/Tri Attack/Signal Beam, Ability: Sturdy, IVs: 30/25/30/30/25/25, EVs: 252 Def / 252 SpA)
Metagross Lv66 (Hammer Arm/Meteor Mash/Bullet Punch/Zen Headbutt, Ability: Clear Body, IVs: 30/25/30/25/30/25, EVs: 252 Def / 252 SpD)
Alolan Dugtrio Lv66 @ Steelium Z (Earthquake/Iron Head/Sucker Punch/Stone Edge, Ability: Tangling Hair, IVs: All 30, EVs: 252 Atk / 252 Spe)

Same team as before, just a few tweaks to their movesets: Bisharp ditches Metal Sound for Poison Jab, Magnezone loses Screech for Signal Beam, and Dugtrio swaps out Fissure for Stone Edge. Probably better choices overall, especially for their Phart matchup. It's a bit disappointing that Molayne (and the rest of the Elite Four) is still only using 5 Pokémon, especially if they're not going to swap out any of the slightly weaker team members, but I guess Game Freak didn't want fighting them to be too boring if you're repeatedly smashing through them to tick off every Title Defense challenger or grind Exp./money or whatever. Probably why none of them use Full Restores or Full Heals this time round.

39-3.png

Klefki remains unaltered, so I can stick 3 X Sp. Defs on Phart to reduce Flash Cannon's damage to 10 and then boost all its other stats as well. It only manages to tank one Struggle before getting knocked out, and doesn't even get to leave Phart paralysed because it dodged the last-ditch Prankster Thunder Wave.

39-4.png

I give Phart a quick Max Potion to see how much Night Slash does - 32 damage (without a critical hit obviously). That should be enough for Phart to Struggle and survive a crit... not that I can check because it simply dodges the second Night Slash instead. Works for me. Bisharp is 2HKO'd as well with plenty of Phart's HP to spare.

39-5.png

Signal Beam hits for 26 damage as I heal Phart again, but Phart becomes confused! Disaster. Hopefully one of my 999 Lum Berries can save it. Phart makes a full recovery and knocks Magnezone into yellow with Struggle, but only just, and I don't want to risk it missing the KO when it's already down to 131/290 HP again. Another Max Potion fixes it up and it KOs on the next turn, though I don't feel bad about playing it safe.

39-6.png

One-shotted. NEXT.

39-7.png

Metagross gets in 19 damage with Meteor Mash on a healing turn and actually manages to avoid a 2HKO, better than any of its teammates, but it just doesn't have any way of getting past Phart and goes down in 3 Struggles.

That was quite a bit easier than I expected. I suppose that's not too surprising when Phart's at its absolute maximum potential and its opponents are all 30+ levels lower than it... but maybe Olivia's team will offer a bit more resistance?

39-8.png

39-9.png

Elite Four Olivia
Armaldo Lv66 (Crush Claw/X-Scissor/Stone Edge/Liquidation, Ability: Battle Armor, IVs: All 30, EVs: 252 Atk / 252 Spe)
Cradily Lv66 (Stone Edge/Seed Bomb/Sludge Wave/Earth Power, Ability: Suction Cups, IVs: All 30, EVs: 252 Atk / 252 SpA)
Gigalith Lv66 (Stone Edge/Earthquake/Iron Head/Throat Chop, Ability: Sand Stream, IVs: All 30, EVs: 252 HP / 252 Def)
Probopass Lv66 (Earth Power/Power Gem/Dazzling Gleam/Flash Cannon, Ability: Sturdy, IVs: All 30, EVs: 252 HP / 252 SpD)
Midnight Form Lycanroc Lv66 @ Rockium Z (Crunch/Stone Edge/Fire Punch/Rock Climb, Ability: Keen Eye, IVs: All 30, EVs: 252 HP / 252 Def)

Olivia's team actually sees quite a few more changes than Molayne's, more than it'd be worth listing, though part of that is because some of them only had 3 moves in the initial battle and now they all have 4. Cradily stands out for not only having an entirely new moveset but also a new EV spread, focused on its offensive stats instead of the defensive ones, but the only new addition that Phart particularly dislikes is Gigalith's Throat Chop, and even that doesn't look too bad.

39-10.png

At least Armaldo's better than Klefki as a lead, taking out 78 HP with its first X-Scissor against the +2-Defense Phart. It's reduced to 36 damage per hit after a couple more X Defenses, which is not exactly weak but still doesn't do much to interfere with setting up. Phart reaches optimal stattage with help from 3 Max Potions and 3HKOs Armaldo shortly afterwards.

39-11.png

Gigalith's still fully-invested in physical bulk like last time, so no breezing through this one. I give Phart another Max Potion just to help burn through the sandstorm turns, and it loses 20 HP to Throat Chop, just slightly higher than the sandstorm damage. Struggle is another 3HKO, but unlike Armaldo it's not even close to being a 2HKO (though it doesn't make much difference since Olivia has no Full Restores this time).

39-12.png

Probably would've used a Guard Spec. against Gigalith if I'd put some thought into who'd be replacing it. Oops. Lycanroc does go for Crunch as I heal Phart back up again, but only manages 18 damage and doesn't get a Defense drop, and it certainly won't now that the Guard Spec.'s active. Struggle is a 2HKO and the mighty Continental Crush lands for a total of 30 damage in between Phart's attacks.

39-13.png

I'm not sure if an all-out offensive set is really playing to Cradily's strengths. But maybe it'll be a lot stronger than I expected? Can't tell yet because the first Stone Edge missed, and it's straight below 50% after one Struggle, so let's hope its next Stone Edge hits. Lo and behold, it does! ...for 16 damage. It was worth a try.

39-14.png

Probopass also has a fully offensive set but doesn't have the EVs to match, nor a particularly high Sp. Atk stat, so I'm not surprised when Power Gem does 12 damage. Probopass is down in 3 Struggles.

I wouldn't really describe that battle as hard, but it was harder than Molayne at least. Forcing me to restore Phart's HP a few more times than usual is about the best I can expect. Time to see if Acerola's found any cool new moves for her ghosts.

39-15.png

39-16.png

Elite Four Acerola
Banette Lv66 (Shadow Claw/Sucker Punch/Infestation/Shadow Sneak, Ability: Insomnia, IVs: 30/30/25/25/25/30, EVs: 252 Atk / 252 Spe)
Drifblim Lv66 (Shadow Ball/Thunderbolt/Psychic/Will-O-Wisp, Ability: Aftermath, IVs: 30/25/30/25/30/25, EVs: 252 Def / 252 SpD)
Dhelmise Lv66 (Phantom Force/Heavy Slam/Earthquake/Power Whip, Ability: Steelworker, IVs: 30/25/30/25/30/25, EVs: 252 Def / 252 SpD)
Froslass Lv66 (Blizzard/Shadow Ball/Thunderbolt/Ice Shard, Ability: Snow Cloak, IVs: 30/25/25/30/25/30, EVs: 252 SpA / 252 Spe)
Palossand Lv66 @ Ghostium Z (Shadow Ball/Earth Power/Sludge Bomb/Giga Drain, Ability: Water Compaction, IVs: 30/25/25/30/30/25, EVs: 252 HP / 252 SpA)

Let's see... Banette ditches Feint Attack and Screech for Sucker Punch and Shadow Sneak (probably easier for Phart - no need for Guard Specs.). Drifblim changes its weird Baton Passing set to a more conventional attacking set with Will-O-Wisp (probably harder for Phart). Dhelmise goes from a shit unconventional mixed set to fully physical (definitely harder), Froslass swaps Confuse Ray for Thunderbolt (definitely easier), and Palossand loses Iron Defense for Sludge Bomb (I think technically harder but I don't expect it to get used). Her team's changed quite a lot for a team that hasn't really changed much!

39-17.png

Banette technically has a mixed attacking set but I don't really rate Infestation's damage output, so best to start with X Defenses. Banette manages 56 damage with its first Shadow Claw, misses its second one, then scores a crit for a whopping 180! Phart still has 54 HP to spare, but I'll have to keep it healthy while I'm setting up. It helps me out by dodging a couple more Shadow Claws, though one of them crits again and leaves its HP even lower than before. Since that one happened just as I was using the last necessary X item, I give Phart a Max Potion on the next turn in the hopes it can then OHKO Banette with Struggle, only for it to land another crit. So I chuck Phart another Max Potion and this time Shadow Claw doesn't crit, leaving Banette to be taken out in one hit.

39-18.png

I could probably have Phart Struggle right away and not risk it being knocked out because Phantom Force won't actually land until next turn. But I'm not 100% certain the AI will go for it, so I'll heal Phart and wait a turn instead. It does use Phantom Force, which is a bit of a shame. I let Phart attack the empty space where Dhelmise used to be while the move finishes executing, and once it's finished achieving nothing, Phantom Force hits for 36 damage, then Phart takes half its HP off with Struggle. It takes a bit longer to KO Dhelmise than I expected when its next Phantom Force gets yet another critical hit, just shy of 200 damage, but another Max Potion sorts that out and Dhelmise faints at the next available opportunity.

39-19.png

Need to be mindful of Aftermath here. I try healing Phart to see how much Shadow Ball will do, only for Drifblim to use Will-O-Wisp instead, only for Phart to dodge it! Phew. Struggle was never going to get an OHKO against Drifblim and its 252 Defense EVs, but it's a comfortable 2HKO and Shadow Ball only does 24 damage back, so Phart easily disposes of it and survives the Aftermath damage.

39-20.png

Another Max Potion, obviously, then Froslass does 26 damage with Shadow Ball and lowers Phart's Sp. Def. That's no good when Palossand is just around the corner with its Z-Move, so I have to reapply an X Sp. Def before Phart can OHKO with Struggle.

39-21.png

Yet another Max Potion for Phart, which was definitely a good choice because Palossand immediately uses Never-Ending Nightmare for 66 damage. A follow-up Shadow Ball does 38 damage and gets another Sp. Def drop (I really must remember Guard Specs. exist), but after fixing that up and healing Phart to full, Struggle is a safe 2HKO and I can disregard the second Sp. Def drop Palossand got before it fainted.

That one was a bit more lively than Molayne and Olivia. Still not too difficult but definitely heavier on the potions. Now it's just Kahili and her largely-unchanged flock of birds.

39-22.png

39-23.png

Elite Four Kahili
Braviary Lv66 (Crush Claw/Brave Bird/Superpower/Scary Face, Ability: Sheer Force, IVs: All 30, EVs: 252 Atk / 252 Spe)
Hawlucha Lv66 (Flying Press/Throat Chop/Dual Chop/Poison Jab, Ability: Mold Breaker, IVs: All 30, EVs: 252 Atk / 252 Spe)
Baile Style Oricorio Lv66 (Revelation Dance/Teeter Dance/Air Slash/Feather Dance, Ability: Dancer, IVs: All 30, EVs: 252 SpA / 252 Spe)
Mandibuzz Lv66 (Snarl/Air Slash/Roost/Toxic, Ability: Big Pecks, IVs: All 30, EVs: 252 Def / 252 SpD)
Toucannon Lv66 @ Flyinium Z (Bullet Seed/Rock Blast/Beak Blast/Brick Break, Ability: Skill Link, IVs: All 30, EVs: 252 Atk / 252 Spe)

Braviary swaps out Air Slash for Superpower and Toucannon drops Screech for Brick Break. Neither of those matter too much (and they're probably downgrades if anything), but Mandibuzz has a completely new moveset revolving around Toxic stalling... which also might be a downgrade from its previous set, which carried Punishment and came within an affection bonus of OHKOing Phart via critical hit. Whether Phart will be able to 2HKO it this time and avoid a Roost cycle is another matter, but stalling out Roost's PP and using an occasional Full Heal wouldn't be too hard if it came to that.

39-24.png

3 X Defenses off the bat effectively neuter Braviary - it can only do 24 damage with Brave Bird and isn't even doing much damage to itself with the recoil. A stray crit does briefly bring Phart down to 33 HP, but it's balanced out by it dodging two follow-up Brave Birds. By the time Phart's gobbled up all its X items, Braviary has fallen into yellow HP and is no match for Struggle.

39-25.png

A quick Max Potion on the off-chance that Throat Chop is stronger than I expected... 18 damage, so that was quite unnecessary. Hawlucha faints to 2 Struggles.

39-26.png

The demon vulture returns. It lands a Toxic on Phart while I use another Max Potion, so rather than attack it once and let it Roost while I'm stuck healing it again, I use a Full Heal first. Snarl reaches the dizzying heights of 12 damage and Mandibuzz misses its next Toxic, but Struggle misses the 2HKO. Boo. However, since Phart has enough HP to spare for another attack, I have it Struggle again in the hopes that Mandibuzz might go for something other than Roost... and it pays off! It lands another weak Snarl that leaves Phart with exactly 100 HP, so it's healthy enough to KO Mandibuzz before it can Roost and without KOing itself in the process.

39-27.png

Max Potion, then Toucannon heats up its beak and uses Beak Blast to take off 21 HP. Phart remains unburned since it didn't make contact with its foe, though it does get burned on the next turn when it Struggles into another Beak Blast. Since the Struggle brought Toucannon straight into the red and Phart still has 156 HP remaining, I just let it Struggle again rather than trying to heal it - it can (and does) comfortably KO Toucannon even with the burn weakening it, and even if I'd stopped to cure the burn, it'd just get reapplied anyway unless Toucannon went for its Z-Move.

39-28.png

An exciting opportunity to use a Full Restore presents itself, so I take it. Oricorio tries an Air Slash and only manages 15 damage, after which I use a Guard Spec. in case it wants to try Feather Dance. It goes for Teeter Dance instead, but that's easily remedied with a Lava Cookie (I ran out of actual Full Heals). Then the AI has a bit of a brain fart and uses Teeter Dance immediately afterwards, so I heal it again, and then it uses it a third time, so I heal it again. Luckily that's where the stupidity ends, as Oricorio goes for Air Slash (and misses, but that's not the point) and suffers a 2HKO once Phart isn't bogged down by confusion.

Some annoyances here and there, but Kahili wasn't very hard either. No clue why Mandibuzz didn't try to Roost when Struggle's damage output made it very clear it would get knocked out if it didn't, but oh well. The warp panel to the Champion's chamber has lit up now that the Elite Four have been humiliated once again, so off I go to defend my title.

39-29.png

I actually get to sit in my special chair this time around without being rudely interrupted by Professor Kukui. The peace and quiet lasts for about 5 seconds before a challenger rocks up, eager to literally dethrone me.

39-30.png

"Elio! I'm back! And I'll keep on coming back, too! No matter how many times it takes. I'm not giving up until I overcome the obstacle that's staring me right in the face!"

Hau again? Well, he's already lost to me 7 times across his career as a Trainer, 5 of which were against a solitary Cosmog, so hopefully he's learnt from his failures and adjusted his team accordingly.

39-31.png

Pokémon Trainer Hau
Alolan Raichu Lv69 (Thunderbolt/Quick Attack/Psychic/Focus Blast, Ability: Surge Surfer, IVs: All 30, EVs: 252 SpA / 252 Spe)
Vaporeon Lv68 (Hydro Pump/Quick Attack/Charm/Baby-Doll Eyes, Ability: Water Absorb, IVs: All 30, EVs: 252 SpA / 252 Spe)
Tauros Lv68 (Zen Headbutt/Iron Head/Earthquake/Double-Edge, Ability: Intimidate, IVs: All 30, EVs: 252 Atk / 252 Spe)
Noivern Lv68 (Dragon Pulse/Air Slash/Dark Pulse/Super Fang, Ability: Infiltrator, IVs: All 30, EVs: 252 SpA / 252 Spe)
Crabominable Lv69 (Power-Up Punch/Ice Hammer/Stone Edge/Dizzy Punch, Ability: Iron Fist, IVs: All 30, EVs: 252 Atk / 252 Spe)
Decidueye Lv70 @ Decidium Z (Spirit Shackle/Leaf Blade/Smack Down, Ability: Overgrow, IVs: All 30, EVs: 252 HP / 252 Atk)

Oh. That's exactly the same team as the Champion battle against him, plus 10 levels on each of his Pokémon and minus 4 Full Restores. So the only threats are going to be the same as last time, i.e. Noivern and Decidueye. That kind of sucks. I mean, the Elite Four made a few tweaks to their lineups without changing the actual Pokémon, and there's certainly room to optimise his team a little bit (having a fourth move on his starter, for example), so seeing them all have exactly the same sets is a bit of a letdown.

Hang on a minute... something was changed! Decidueye isn't holding a Grassium Z, it's got a Decidium Z! That's a start. And that crystal runs off Spirit Shackle, so it's actually a bit more dangerous for Phart now that it has to worry about being hit by a Sinister Arr-

39-32.png

jesus christ i'm so sorry hau

39-33.png

No need to make many changes to my strategy from last time. Thunderbolt does 40 damage after an X Sp. Def, 25 damage after the second one, and 19 after the third - roughly the same damage as last time, as it happens, so this really is just a repeat of a battle I've already won 6 weeks ago.

39-34.png

I don't think I need to include a screenshot of Phart's stat boosts here - after 170+ hours of this shit you can sort of assume they look like this in every boss fight - but here they are anyway. Raichu didn't do much of anything to Phart apart from forcing it to chug 2 Max Potions, not even paralysing it or getting a crit, and it's too frail to take even a single Struggle.

39-35.png

I dealt with Noivern last time by PP-stalling Raichu and 2HKOing Noivern as it switched in, so it never got a chance to attack. Maybe I should've done that again here? Nah, it'll probably be fine. I give Phart a Max Potion to see what Noivern does, and it tries a Dark Pulse, totalling 22 damage. Phart takes around 75% off it with Struggle and Noivern's smart enough to go for Super Fang this time, bringing Phart down to 98 HP, but that's still healthy enough for it to Struggle again and remove Noivern from the battle. I had it in my head that Super Fang would be a problem because it deals much more damage than any non-crit attack Phart would take at this point, but I sort of overlooked that it's only ever that effective if Phart's at full HP. Plus it's certainly not going to KO it.

39-36.png

The poor forsaken owl will be relying on critical hits to do anything notable, but I seem to remember it landing one last time and nearly KOing Phart, so I'll not be getting too cocky. Once Phart is back at full HP, Spirit Shackle deals 38 damage, which suggests that it would be able to KO with a crit after Struggle recoil. Rather than risk that happening, I take the boring safe approach and spam Sitrus Berries until it uses up its 10 Spirit Shackle PP. Decidueye actually does land a critical hit with its very last one, bringing Phart down to 84/290 HP, but it ceases to be a threat after that and gets two-shotted quite quickly.

39-37.png

Intimidate activates and brings Phart down to +5 Attack, rendering the battle totally unwinnable. Yeah right. I heal Phart back to full and it dodges a Double-Edge, then I use an X Attack to put it back at +6. Tauros manages to pull off a crit Double-Edge for 138 damage, but even if it manages to keep doing that while I throw out more Max Potions, it'll just wind up KOing itself via recoil damage. The next Double-Edge is far less impressive at 24 damage and Tauros goes down in one hit, probably thanks to that very recoil.

39-38.png

While Vaporeon's Sp. Atk is higher than Tauros's Attack and Phart has lower Sp. Def than Defense, I don't think it's going to be OHKOing Phart from its current HP, especially since it'd need to land a 70%-accurate Hydro Pump and get a critical hit and bypass Phart's 25% chance of tanking it regardless. So I take the opportunity to use a Guard Spec., just in case it likes the look of Charm or Baby-Doll Eyes. Vaporeon chooses Hydro Pump instead and misses, so I heal Phart once again and it 2HKOs Vaporeon while taking minimal damage from the one Hydro Pump that managed to hit it.

39-39.png

Nearly there now. One last Max Potion, then Phart takes 30 damage from Ice Hammer and 2HKOs Crabominable with Struggle thanks to it still not having any defensive EVs. I said before that it's kind of weird to put full Speed EVs on a Pokémon with base 43 Speed, but I'm now realising it's even weirder given that Crabominable's strongest attack is Ice Hammer... which lowers its Speed, defeating the purpose of giving it those EVs in the first place.

39-40.png

"Man, I really want to be stronger than a kahuna! But I still just don't get how I can do that... But if I keep trying and using my full power, I think I'll find the way. That's how I feel whenever I battle against you, Elio. That's why I love battling you!"

And with that, Hau makes his exit. Probably. The screen fades to black and I'm assuming he leaves the room at some point, though I do like the idea of keeping all the Title Defense challengers captive and forcing them to watch my other battles after they lose to me. I know Hau changes his team up a bit depending on which starter I picked at the beginning of the game - obviously changing his own starter but also using a different Eeveelution - so I'll have a quick look at those alternative teams while I'm here.

Pokémon Trainer Hau (if I chose Rowlet)
Flareon Lv68 (Flare Blitz/Quick Attack/Charm/Baby-Doll Eyes, Ability: Flash Fire, IVs: All 30, EVs: 252 Atk / 252 Spe)
Primarina Lv70 @ Primarium Z (Sparkling Aria/Moonblast/Hyper Voice, Ability: Torrent, IVs: All 30, EVs: 252 HP / 252 Atk)

This would definitely be a step down. Flareon's HP being so much lower than Vaporeon's means Struggle would be a guaranteed OHKO, and even if it somehow got to attack, Flare Blitz would have no chance of KOing Phart even with a critical hit, a burn, and Struggle recoil. As for Primarina... 252 Attack EVs??? I checked the corresponding team for the Champion battle and it has 252 Sp. Atk EVs there, so it's specifically the Title Defense team that got fucked up. And don't forget the non-functional Z-Crystal and only having 3 moves. Primarina got absolutely shafted here.

Pokémon Trainer Hau (if I chose Popplio)
Leafeon Lv68 (Leaf Blade/Quick Attack/Charm/Baby-Doll Eyes, Ability: Leaf Guard, IVs: All 30, EVs: 252 Atk / 252 Spe)
Incineroar Lv70 @ Incinium Z (Darkest Lariat/Flare Blitz/Earthquake, Ability: Blaze, IVs: All 30, EVs: 252 HP / 252 Atk)

This team, on the other hand, would be about the same as the Hau-team I just fought, maybe slightly harder. Leafeon still wouldn't be too scary but it could actually take a Struggle (unlike Flareon), and its primary attack would have 90% accuracy against Phart instead of 70% (unlike Vaporeon), so it might squeeze a Max Potion or two out of me. Even without being able to actually use Malicious Moonsault, Incineroar would still waltz right past Phart's Defense boosts with Darkest Lariat and take out half its HP with every hit, more if it gets a critical hit, so it would never be entirely safe to attack it until Darkest Lariat ran out of PP. Very similar to Decidueye in that regard.

It doesn't look like any iteration of Hau would have been much trouble. Some of that is just because his Pokémon happen to not be very dangerous to Phart no matter how they're configured, but some of it is because their movesets really could've used a few tweaks. We're in the postgame, I'm sure Raichu can find a better option than Quick Attack.

39-41.png

39-42.png

39-43.png

Phew! I get to keep my Champion title for the time being.

I'm not sure if this first set of fights bodes well for the remaining battles in terms of difficulty. Aside from having to fight the exact same Elite Four teams again (and therefore knowing exactly what to expect) just to access the other Title Defense challengers, most of those challengers don't even have full teams of 6 - I think it's just Kukui and Gladion, plus Hau who I've just beaten. And even setting aside the Pokémon count, some of those teams aren't as strong as you might expect from Trainers who can't be battled until you've cleared the Elite Four three times. Perhaps I'll have to find some way to spice things up a bit.

39-44.png

The game dumps me back in front of the Pokémon League in a rather unceremonious fashion. I guess warping me home would seem a bit weird, and playing the game's really long credits sequence again would definitely be excessive, so giving me a quick congratulations and then just plopping me back outside is probably the best option. Certainly works for me, since I have to go straight back inside to get started on the last few battles. Just need to autopilot my way through the Elite Four first...
Trainers defeated: 418/427
 
:sm/exeggutor-alola: :sm/garchomp:
A quick check of my bag's supplies shows that I didn't use much during my previous Pokémon League run. I've still got 71 Max Potions and 98 Full Restores, plus 84 to 95 of each relevant X item, so I may as well charge straight back in for round 2. Or round 3 if you count when I first became Champion.

40-1.png

This is it. I'm stuck in here until I've defended my title against every last challenger, at which point the entire challenge will be complete. That's going to take at least a couple of weeks since Gladion's still off training in Kanto. So what better way to begin this final string of battles than by going up against the same Elite Four teams from a few days ago?

40-2.png

Elite Four Kahili (again)
Braviary Lv66 (Crush Claw/Brave Bird/Superpower/Scary Face, Ability: Sheer Force, IVs: All 30, EVs: 252 Atk / 252 Spe)
Hawlucha Lv66 (Flying Press/Throat Chop/Dual Chop/Poison Jab, Ability: Mold Breaker, IVs: All 30, EVs: 252 Atk / 252 Spe)
Baile Style Oricorio Lv66 (Revelation Dance/Teeter Dance/Air Slash/Feather Dance, Ability: Dancer, IVs: All 30, EVs: 252 SpA / 252 Spe)
Mandibuzz Lv66 (Snarl/Air Slash/Roost/Toxic, Ability: Big Pecks, IVs: All 30, EVs: 252 Def / 252 SpD)
Toucannon Lv66 @ Flyinium Z (Bullet Seed/Rock Blast/Beak Blast/Brick Break, Ability: Skill Link, IVs: All 30, EVs: 252 Atk / 252 Spe)

I'm hoping that battling them in reverse order this time might make things a little bit more interesting, and maybe even cause me to forget what Molayne's team was like by the time I get around to fighting him. But as I say, they're still the same teams as before, so I'll keep the battle descriptions fairly brief.

Phart's stats are mostly maxed out against Braviary while it throws out a slew of Brave Birds, but without any critical hits to boost its damage output, it only succeeds in making Phart use up 2 Max Potions. It then tries to undo my X Speeds with Scary Face, so I have to use a Guard Spec. to keep them safe. Phart KOs it with one Struggle a few turns later thanks to all the Brave Bird recoil weakening it so much.

Hawlucha is next, just about avoiding a Struggle OHKO but only doing 20 damage with Throat Chop before fainting. I heal the 26-HP Phart when Mandibuzz comes out, take a risk by having it Struggle twice while it's badly poisoned, and it removes Mandibuzz with a 3HKO when it decides not to Roost at low HP. Toucannon uses Supersonic Skystrike as soon as it comes in, deals 40 damage and suffers a 2HKO, but the burn damage from its last-ditch Beak Blast leaves Phart on 1 HP! A Full Restore fixes it up and Oricorio is 2HKO'd as well, Phart not being at all bothered by Teeter Dance's confusion. On to Acerola.

40-3.png

Elite Four Acerola (again)
Banette Lv66 (Shadow Claw/Sucker Punch/Infestation/Shadow Sneak, Ability: Insomnia, IVs: 30/30/25/25/25/30, EVs: 252 Atk / 252 Spe)
Drifblim Lv66 (Shadow Ball/Thunderbolt/Psychic/Will-O-Wisp, Ability: Aftermath, IVs: 30/25/30/25/30/25, EVs: 252 Def / 252 SpD)
Dhelmise Lv66 (Phantom Force/Heavy Slam/Earthquake/Power Whip, Ability: Steelworker, IVs: 30/25/30/25/30/25, EVs: 252 Def / 252 SpD)
Froslass Lv66 (Blizzard/Shadow Ball/Thunderbolt/Ice Shard, Ability: Snow Cloak, IVs: 30/25/25/30/25/30, EVs: 252 SpA / 252 Spe)
Palossand Lv66 @ Ghostium Z (Shadow Ball/Earth Power/Sludge Bomb/Giga Drain, Ability: Water Compaction, IVs: 30/25/25/30/30/25, EVs: 252 HP / 252 SpA)

I know from last time that a critical hit from Banette's Shadow Claw will deal about 180 damage, so I play it safe and keep Phart's HP above that level while I'm spamming X items on it. It takes 4 Max Potions before I'm done thanks to Banette not actually getting any crits this time, and Phart gets rid of it in a single hit.

Dhelmise is made easy by Phantom Force giving me a chance to heal Phart, getting 2HKO'd while only doing 32 damage. Drifblim burns Phart with Will-O-Wisp and does 30 damage with Shadow Ball while I heal it, then burns it again after a Struggle, but a Full Restore lets Phart 2HKO it and avoid fainting to Aftermath. Another Max Potion against Froslass, then a second when it lands a crit Shadow Ball for 170 damage, but Phart OHKOs it to make up for that. Finally, Palossand's Never-Ending Nightmare barely manages 20% of Phart's HP and it goes down to 2 Struggles. Straight on to Olivia now.

40-4.png

Elite Four Olivia (again)
Armaldo Lv66 (Crush Claw/X-Scissor/Stone Edge/Liquidation, Ability: Battle Armor, IVs: All 30, EVs: 252 Atk / 252 Spe)
Cradily Lv66 (Stone Edge/Seed Bomb/Sludge Wave/Earth Power, Ability: Suction Cups, IVs: All 30, EVs: 252 Atk / 252 SpA)
Gigalith Lv66 (Stone Edge/Earthquake/Iron Head/Throat Chop, Ability: Sand Stream, IVs: All 30, EVs: 252 HP / 252 Def)
Probopass Lv66 (Earth Power/Power Gem/Dazzling Gleam/Flash Cannon, Ability: Sturdy, IVs: All 30, EVs: 252 HP / 252 SpD)
Midnight Form Lycanroc Lv66 @ Rockium Z (Crunch/Stone Edge/Fire Punch/Rock Climb, Ability: Keen Eye, IVs: All 30, EVs: 252 HP / 252 Def)

Armaldo's X-Scissors still hit as hard as the last fight, but it decides to waste time missing Stone Edges instead of going for its super-effective STAB attack. Then it remembers about X-Scissor and scores a critical hit that leaves Phart with 55 HP. But there are no more nasty surprises from Armaldo and it's taken out with 2 Struggles.

A sandstorm is kicked up when Gigalith enters the battle. It's bulky enough to only suffer a 3HKO and Throat Chop doesn't do much to Phart, which means the sandstorm's worn off by the time it faints and is replaced by Lycanroc. It goes for Stone Edge for some reason and deals 16 damage, then I use a Guard Spec. and it tries Crunch, improving to 22 damage before being 2HKO'd. Cradily doesn't do much with Stone Edge before it too is 2HKO'd, and Probopass is even worse, managing 36 damage across 3 attacks before fainting. Just Molayne left before my title-defending can resume.

40-5.png

I forgot to screenshot Molayne's Klefki so please enjoy his face instead.

Elite Four Molayne (again)
Klefki Lv66 (Spikes/Thunder Wave/Flash Cannon/Reflect, Ability: Prankster, IVs: 30/25/30/25/30/25, EVs: 252 Def / 252 SpD)
Bisharp Lv66 (Night Slash/Iron Head/X-Scissor/Poison Jab, Ability: Defiant, IVs: 25/30/30/25/25/30, EVs: 252 Atk / 252 Def)
Magnezone Lv66 (Flash Cannon/Thunderbolt/Tri Attack/Signal Beam, Ability: Sturdy, IVs: 30/25/30/30/25/25, EVs: 252 Def / 252 SpA)
Metagross Lv66 (Hammer Arm/Meteor Mash/Bullet Punch/Zen Headbutt, Ability: Clear Body, IVs: 30/25/30/25/30/25, EVs: 252 Def / 252 SpD)
Alolan Dugtrio Lv66 @ Steelium Z (Earthquake/Iron Head/Sucker Punch/Stone Edge, Ability: Tangling Hair, IVs: All 30, EVs: 252 Atk / 252 Spe)

Klefki's Flash Cannon is still pathetic, to the point that Phart hasn't even lost 100 HP by the time it's ready to attack, though it does manage to leave Phart fully paralysed for 3 turns in a row. Those extra turns buy it time to use its last Flash Cannons, and since Phart is still paralysed and Reflect is active (leaving Klefki with nothing to do), Molayne switches it out for Metagross before Phart can 2HKO it. Metagross immediately gets a crit Meteor Mash for 96 damage, but it's not enough to stop the Full-Restored Phart from 3HKOing it.

Bisharp is next (I guess Molayne didn't want to hard-switch it into a Struggle?) and Phart needs a Max Potion, but it fails to crit with Night Slash and only does 32 damage. So Phart Struggles, taking it below 50%, and Bisharp goes for Night Slash again.

40-6.png

Oops! The move with a high critical hit ratio landed a critical hit.

Let's try that again. Klefki is not quite so lucky this time and gets 2HKO'd by Struggle, with Bisharp replacing it. I throw Phart a load of Sitrus Berries with the intention of having it Struggle after Bisharp misses a Night Slash, but it never gets a single miss. What it does get are a couple of critical hits, though I only have to wait a few more turns before it's out of Night Slash PP and Phart can 2HKO it with Struggle. Magnezone confuses Phart with Signal Beam like last time but still gets 2HKO'd. Dugtrio is one-shotted, only dealing 12 damage with Stone Edge because I had to heal Phart before it could attack, and Metagross gets a 3HKO.

I think that loss was my fault for being reckless and trying to rush through the Elite Four battles, but mind you, my notes from last time seemed to suggest I thought Phart would be safe taking a non-crit Night Slash + crit + Struggle recoil... which was clearly not the case. Damage rolls are weird. But I was quite impressed to see Molayne hard-switching to Metagross in my first attempt - it was the only member of his team that could tank 2 Struggles in a row and attack back, and all of his other backup Pokémon had super-effective attacks while Metagross didn't, so I'm assuming the AI chose it based on that bulkiness.

40-7.png

Here at last. I'm still a little concerned that the Title Defense battles might be a bit too easy given how Hau's team fared against Phart. Not that there's anything especially wrong with them being a victory lap, but it would be a bit disappointing to just breeze through the last 9 battles of the game, especially since I'm going to have to spread them out over 2 weeks while I wait for Gladion. However, I've got an idea to liven things up.

40-8.png

If Phart's opponents are too weak, why not weaken Phart to match them? Losing the 50% boost to its defenses ought to do a good job of that. The King's Rock is mostly just for fun, but it does apparently affect Struggle, so perhaps Phart will trigger the odd flinch here and there.

Now then, time to take a seat and wait for challengers to show up. I've decided to try and fight them in a rough order of weakest to strongest, the "rough" part being that I don't know for certain how strong they'll actually be until the fight is underway. But I can make an educated guess as to who I should start with, and after a bit of soft-resetting, he finally appears.

40-9.png

"Hey, Champion! You’ve gotta recommend a move for me!"

This may look like a random Youngster, but he's actually the same Youngster who asked Kukui to recommend a move for him at the beginning of the game! What a fun little reference.

Actually, no, that was only in Sun and Moon. They changed the Route 1 section in USUM so you're no longer being escorted by Kukui on your first journey through it, meaning he never shows up to ask Kukui for a move recommendation, meaning he really is a random Youngster in this game. Huh.

40-10.png

Youngster Tristan
Emolga Lv66 (Volt Switch/Quick Attack/Acrobatics/Thunder Wave, Ability: Static, IVs: All 20)
Sharpedo Lv66 (Aqua Jet/Night Slash/Waterfall/Ice Fang, Ability: Rough Skin, IVs: All 20)
Alolan Exeggutor Lv66 (Wood Hammer/Dragon Hammer/Earthquake/Brutal Swing, Ability: Frisk, IVs: All 20)
Magmortar Lv66 (Flamethrower/Focus Blast/Thunderbolt/Will-O-Wisp, Ability: Flame Body, IVs: All 20)
Tauros Lv66 @ Normalium Z (Giga Impact/Rock Slide/Earthquake/Pursuit, Ability: Intimidate, IVs: All 20)

I'll let Tristan off for having a weak team on the basis of him being more like an Easter egg than an actual serious opponent. He does have a Sharpedo and a Z-Move user at least, and who knows how well Phart will be able to take their attacks without its beloved Eviolite.

40-11.png

Since Hau has his own version of the Title Defense theme in these games and uses it in his rematches as well, this is actually the first time I've been able to hear the regular version in this playthrough. Anyway, I'm not sure what Emolga will want to do but I think an X Defense would be best - it'll either protect Phart from its strongest attack in Acrobatics, protect it from a likely Sharpedo switch-in if it uses Volt Switch, or just get a Defense boost in place if it spends a turn on Thunder Wave. It goes for Volt Switch in the end, but it's actually Tauros that comes out next.

40-12.png

40-13.png

Tauros's Intimidate is so scary that even the moon flees in terror to be replaced with broad daylight. More importantly, I hadn't got round to using a Guard Spec. yet, so it drags Phart's Attack into the negatives. Oh well, I'm sure I'll find an opportunity to use a fourth X Attack against Tauros later. I know I don't have to worry about special attacks for a while, so I use another X Defense to help shield Phart from the likely incoming Breakneck Blitz.

40-14.png

40-15.png

So much for shielding! Tauros ignored all the boosts with a crit. Still, you can just about make out the 4 HP with which Phart survived in that screenshot, and now it doesn't have to worry about any move Z-Moves. Giga Impact is the worst it can be subjected to, and that forces Tauros to rest for a turn. I give it a Max Potion and Tauros tries out Rock Slide, only doing 14 damage, then goes for Pursuit and does 12 damage after a third X Defense. Now I can finally get started on all the other boosts. Tauros sticks with Pursuit for a few turns before using Giga Impact, but even that only manages 33 damage without another crit to back it up.

A few X items and one Max Potion later, Phart's almost ready to attack Tauros, who's stuck recharging after a Giga Impact. In theory, I could have Phart Struggle twice to KO it without it getting to attack back... but that would leave Phart too low on HP to immediately attack whoever comes in next, and if it's Sharpedo and it goes for Night Slash, that might end badly. So I let Phart hit Tauros once, knocking it into red HP, then use a Max Potion while Tauros chips off 11 HP with its last Rock Slide before the second Struggle takes it out.

40-16.png

Phew, the planning paid off. Sharpedo's terrible defenses see it OHKO'd before it can attack, and Phart has plenty of HP left to stomach the Rough Skin damage.

40-17.png

If Phart couldn't OHKO Tauros then I don't think it can OHKO Exeggutor, so time for another Max Potion. Wood Hammer hits for 28 damage and takes a tiny bit off Exeggutor's HP, though that won't be enough to let Phart KO it with a single use of Struggle. Unless, of course, its next Wood Hammer gets a critical hit... which it does! Fortunately Phart tanks it with 32 HP to spare and Wood Hammer's recoil knocks out poor Exeggutor.

40-18.png

Anything other than a Max Potion would be suicide at this point. Phart loses 24 HP to Flamethrower once it's back at full health, then surprises me by taking out Magmortar in one hit. I know it's not that bulky, but I didn't think it was that not-that-bulky.

40-19.png

Don't worry, Phart healed it with sheer determination before Emolga could even reenter the battle.

40-20.png

I imagine Phart could probably one-shot it, but I'm not 100% certain and it would be a pity to lose to a critical hit at this point, so I give it one last Max Potion first. Emolga paralyses it with Thunder Wave, but the affection bonuses strike again and let Phart cure itself on the same turn, OHKOing Emolga with Struggle afterwards. Somehow I don't think Static activating as it faints will make much difference.

40-21.png

"I trained as much as I could on Route 1... I went through the whole island challenge to get here... and still! Man, the Champion really is something!"

If he did so much training on Route 1, why did none of his Pokémon have EVs? Unless he decided to delete them afterwards to make things harder for himself. Personally, I've never had much time for self-imposed challenges.

There were actually a couple of close calls there, even if they were only due to critical hits, so I'm glad swapping out the Eviolite did seem to make it less of a snoozefest. I might come to regret that decision in the later battles, but for now it seems like a good decision. It's back to resetting for now until the next challenger on my list shows up. He's actually nice enough to appear on my first attempt, so that saved me a few minutes.

40-22.png

"The name's Ryuki. I'm what you might call a star. I mean, with partners like my Pokémon, how could I not be a star? I came all the way across the sea here to Alola to spread my fame out here, too! The whole world will be mine soon!"

With Ryuki showing up in USUM's Kantonian Gym as well, now there are two places where I can have endless rematches against him! I'm not that bothered about it really, but it does seem a bit of a shame when you have Trainers like Hala and Faba who become one-time rematches in these games, knowing that there's a spot right here in the Title Defense roster where they could've been slotted in (or kept, in Faba's case) without the ability to rebattle Ryuki being lost forever.

40-23.png

Pokémon Trainer Ryuki
Garchomp Lv67 (Dragon Claw/Crunch/Earthquake/Poison Jab, Ability: Sand Veil, IVs: 25/30/25/25/25/30)
Drampa Lv67 (Dragon Pulse/Hyper Voice/Blizzard/Thunder, Ability: Berserk, IVs: 30/25/25/30/25/25)
Turtonator Lv67 (Overheat/Dragon Pulse/Fire Blast/Focus Blast, Ability: Shell Armor, IVs: 25/25/30/25/30/25)
Dragonite Lv67 (Hurricane/Dragon Rush/Fire Punch/Thunder Punch, Ability: Inner Focus, IVs: 25/30/25/30/25/25)
Kommo-o Lv67 (Clanging Scales/Focus Blast/Flash Cannon/Flamethrower, Ability: Bulletproof, IVs: 25/25/25/30/25/30)

His team's identical to the one he uses in postgame rematches at the Kantonian Gym, but with an extra 9 levels on each Pokémon. Still no EVs, but having 3 pseudo-legendaries helps to compensate for that, and Ryuki's Garchomp is not the most ideal setup bait.

40-24.png

I can at least be thankful that it doesn't have Rough Skin. After an X Defense, Garchomp's first Crunch brings Phart down to 226/290 HP, but it dodges the second Crunch and takes a more tolerable 30 damage from the third, now at +6 Defense. A Guard Spec. ensures those boosts will stay there for a few turns, and a Max Potion lets me lob a few more X items at my trusty partner without risking a crit Crunch KOing it. This cycle repeats a few times until Garchomp runs out of Crunch PP and starts using Earthquake - now I don't have to bother with Guard Specs. and can give Phart its last boosts in relative peace.

A rogue Poison Jab poisoning has me stopping for a Full Restore just before Phart's ready to attack, but that's the extent of my troubles. Garchomp faints to 2 Struggles.

40-25.png

A quick Max Potion so that Phart can attack once again, and Turtonator goes for Overheat, only taking off 31 HP and tanking its Sp. Atk in the process (though there's always the possibility of a critical hit that ignores the stat drop). Phart takes off about 40% with its first Struggle, and Turtonator misses its next Overheat, so I take the chance to heal Phart again rather than risk one of those crits. That's rendered unnecessary when Phart dodges a second Overheat, followed immediately by a third! Phart uses this godly stroke of luck as an opportunity to 3HKO Turtonator.

40-26.png

After being healed again, Phart loses 30 HP to Hyper Voice and almost one-shots Drampa, taking a further 25 damage from Dragon Pulse before KOing on the next turn. Unaware does its thing by shrugging off the Berserk boost that Drampa gained after the first attack.

40-27.png

Dragon Rush's 65% accuracy after factoring in the affection bonuses makes it rather difficult for Dragonite to actually hit Phart. It misses the first one, loses well over half of its HP to Struggle, then lands a Dragon Rush for 28 damage before fainting.

40-28.png

Kommo-o goes for the not-very-effective Focus Blast while I heal Phart one last time, probably because Clanging Scales would drop its Defense and make it even less likely to pull off a last-minute victory. Phart can just about cope with the loss of 15 HP and 2HKOs in response, taking a further 27 damage from Clanging Scales before Kommo-o conks out.

40-29.png

"Everyone's got their own problems, huh? The critics loved my songs, but nobody was buying my music for a while, man. But I'm just a rocker down to my bones. Nothing else to do but keep on rocking. I dig you, Champ. Looks like you know who you are, too, right down to your bones."

He felt a bit easier than Tristan overall, but that's probably due to Ryuki's Pokémon not getting any critical hits while a couple of Tristan's did. Their movesets were good enough and 3 pseudos makes for a pretty solid lineup... just a shame about the lack of EVs. I guess they wanted to keep everything (levels aside) the same as his Kantonian Gym team, and it'd be weird for him to have a fully-competitive team with multiple pseudos in the Kantonian Gym fight, given that every other battle there is against some solitary Lv. 55/56 rando with default level-up moves.

40-30.png

40-31.png

Just checking in on Poké Pelago and I'm like 98% sure this is a shiny Seel. Actually, make that 100% now that I've seen it on my laptop as well as my 2DS. Not the most blindingly obvious palette swap, but pretty cool! I'll have to look up how to guarantee Poké Pelago visitors will stick around, and also whether you can keep them waiting in Poké Pelago for 2 weeks once they've decided to stay - if I just went and agreed to keep Seel straight away, it'd get added to my party and probably brick the whole challenge, because I can't put it in the PC until I leave the Pokémon League (which I can't do without beating a challenger, which I can't do unless Phart is my only Pokémon).

Eh, it won't be the end of the world even if I can't get it to stay. Being forever immortalised in this forum thread is a better fate than the umpteen random shinies I've simply caught and chucked in a box until the next time I restarted their save file. As for the other Title Defense battles, I think they're best left until the next post. Doing another 4 of them a week from now and the remaining 3 a week after that sounds like a good way to kill time until Gladion returns. I've beaten Ryuki today, and that's what you might call a start.
Trainers defeated: 420/427
 
Just saw this thread... This looks painful.
Honestly, it's not been quite as bad as I expected, once I got used to the general strategy for getting through battles and worked out which Pokémon/moves would the biggest threats. Still pretty tedious though, and I'll definitely be relieved once it's over.


:sm/lilligant: :sm/vikavolt:
41-1.png

It's been a full day now since the shiny Seel showed up, and it seems like it wants to stick around! I'll still have to hold off on formally accepting it into my team PC until I've escaped the Pokémon League, but if that Jynx there has been willing to wait 24+ hours for me to interact with it then I think they'll both be happy to wait another couple of weeks.

Now I can focus on the point of the thread again. As SadisticMystic has mentioned above, Lusamine only shows up at the Pokémon League on the first day of each month, so I'll have to battle her right away regardless of whether I want to leave the other challengers for a few days.

41-2.png

"The Pokémon League... They say that being the strongest Pokémon Trainer is not enough to become Champion. So how about you show me exactly what kind of Trainer you are?"

Even if USUM!Lusamine's role in the story perhaps isn't as significant as in SM, at least she didn't end up off her tits on jellyfish juice and shipped off to Kanto forever. This is a much more favourable outcome for her health.

41-3.png

Aether President Lusamine
Clefable Lv68 (Moonblast/Charm/Psychic/Hyper Voice, Ability: Magic Guard, Calm nature, IVs: All 30, EVs: 252 SpA / 252 SpD)
Lilligant Lv68 (Petal Dance/Teeter Dance/Stun Spore, Ability: Own Tempo, Modest nature, IVs: All 30, EVs: 252 SpA / 252 Spe)
Lopunny Lv68 (Dizzy Punch/Thunder Punch/Ice Punch/Fire Punch, Ability: Cute Charm, Adamant nature, IVs: All 30, EVs: 252 Atk / 252 Spe)
Milotic Lv68 (Hydro Pump/Icy Wind/Flail/Dragon Pulse, Ability: Marvel Scale, Modest nature, IVs: All 30, EVs: 252 SpA / 252 Spe)
Bewear Lv68 (Zen Headbutt/Drain Punch/Take Down/Dual Chop, Ability: Fluffy, Adamant nature, IVs: All 30, EVs: 252 HP / 252 Atk)

Like Ryuki before her, Lusamine has an identical team to one she used in her previous battle, just with an extra 21 levels on top. But that's hardly a bad thing given that they all have near-perfect IVs, full EVs, and even custom natures - if anything, it suggests her Aether Paradise team was pretty impressive for that point in the game. I think Phart will miss its Eviolite here, but the lack of any Bug, Ghost or Dark attacks on Lusamine's Pokémon should help it cope with their assaults.

41-4.png

Clefable carrying Charm has me wondering if I should use a Guard Spec., but I decide it's probably better to stick with X Sp. Defs first. Its first Moonblast deals 58 damage with Phart at +2 Sp. Def, and once it's at +6 that's reduced to, uh... dunno, it went for Psychic for some reason??? That only managed 10 damage, so if Clefable keeps this up I'll be done in no time with the X items. It baffles me even more by using Hyper Voice a few times, then finally uses Moonblast again and misses! A few turns later, Moonblast is at last revealed to deal 28 damage.

By this point, Phart is fully set up in every stat except Attack, which is sitting at -2 courtesy of a Charm. I give Phart a Guard Spec. in preparation for using a few X Attacks, but Clefable's next Moonblast scores a critical hit and leaves it on 65 HP, so I have to heal it first. The setup takes a bit longer as a result and Phart needs a second Guard Spec., but once everything's sorted it easily 2HKOs with Struggle.

41-5.png

Lilligant's Petal Dance looks to be the strongest attack across Lusamine's entire team, and I can't even hope for confusion to give Phart any free turns thanks to Own Tempo shielding it. I give it a Max Potion and Lilligant strikes it with Stun Spore instead, then hits for 47 damage with Petal Dance as I cure it. Losing 47 HP at +6 means Phart will probably faint to a crit Petal Dance combined with Struggle recoil, so the best idea I have is to heal it until Petal Dance wears off, then have it Struggle and hope Lilligant goes for Stun Spore or Teeter Dance instead of attacking.

41-6.png

I have to rely on the little status menu thingy to tell me when Petal Dance is up, as it could last for either 2 or 3 turns and Own Tempo disables the message that normally appears when the move finishes executing. But once it does, Phart's Struggle leaves Lilligant with a tiny sliver of HP, and the King's Rock causes it to flinch! I love hax. A second Struggle quickly chips off the rest and takes out Lilligant.

41-7.png

I heal Phart back to full immediately, but rather than using Hydro Pump to potentially take it out, Milotic goes for Icy Wind and leaves Phart outsped by the upcoming Lopunny. Since it might be a good idea to stall out Hydro Pump's limited PP before attacking Milotic, I spend a few turns reapplying its Speed boosts and keeping them in place with Guard Specs., only to discover that Milotic has no desire to use Hydro Pump at all and is still spamming weak Icy Winds that don't affect Phart's stats whatsoever. I eventually give up waiting for Hydro Pumps and let Phart score another 2HKO.

41-8.png

In theory, Bewear should want to use Take Down as it's the strongest of its attacks against Phart, but I genuinely have no idea what the AI's been thinking in this battle. After another Max Potion, it proves me right by using Dual Chop, although Phart dodges it anyway. I stall for a bit to see how much damage Take Down inflicts, and Bewear uses its other three moves for around 10 turns before Take Down takes out 33 HP. Once Phart is healed yet again, it gets to work on bludgeoning Bewear, taking 4 hits to knock it out but not feeling particularly threatened in the meantime.

41-9.png

I don't think she's saved the best til last. Struggle leaves Lopunny in the red and Fire Punch only does 15 damage, so with Phart on 118/290 HP, it's healthy enough to attack one last time and defeat Lusamine again.

41-10.png

Yeah, that's a proud face if ever I've seen one.

41-11.png

"Caring won't keep the things you love safe. But if you don't care, if you're so hard at heart, you may find you have nothing left to protect... Is that it? Maybe I can understand Lillie a little better now."

Looking at Lusamine's Trainer data, she seems to have the "Expert" AI bit set, but not the "Strong" one, so maybe that's why her Pokémon seemed to be all over the place with the moves they were using. No big deal, I've beaten her before the date rolled over to 2nd October and that's what really matters. I swear I did remember she only appears one day a month and just forgot to mention it in the last post

Elio goes back into hibernation on the Champion's throne for a few days, then wakes up to fight more challengers once I can be bothered.

41-12.png

"Those old dudes Molayne and Nanu somehow talked me into this. I'm starting from scratch as a Pokémon Trainer and doing it right this time. I've got a Z-Power Ring now, so I might actually be able to live up to their expectations."

Haven't seen Plumeria in a while. Vast Poni Canyon, I think? She's also one of the possible Battle Tree opponents in Ultra Sun, but I don't think I need to explain why we haven't crossed paths there.

41-13.png

Pokémon Trainer Plumeria
Gengar Lv67 (Shadow Ball/Dark Pulse/Sludge Bomb/Dazzling Gleam, Ability: Cursed Body, Modest nature, IVs: All 30, EVs: 252 SpA)
Alolan Muk Lv67 (Venoshock/Brick Break/Toxic/Rock Slide, Ability: Poison Touch, Careful nature, IVs: All 30, EVs: 252 SpD)
Crobat Lv67 (Leech Life/Fly/Poison Fang/Protect, Ability: Inner Focus, Jolly nature, IVs: All 30, EVs: 252 Spe)
Toxapex Lv67 (Liquidation/Baneful Bunker/Recover/Poison Jab, Ability: Merciless, Impish nature, IVs: All 30, EVs: 252 Def)
Salazzle Lv67 @ Poisonium Z (Sludge Bomb/Flamethrower/Dragon Pulse/Protect, Ability: Corrosion, Hasty nature, IVs: All 30, EVs: 252 SpA / 252 Spe)

It took me nearly 10 years to realise that Plumeria's second outfit is supposed to look like a Salazzle. You know, her ace Pokémon? I am not very observant.

That aside, she's got a pretty good team overall, only let down a bit by most of her Pokémon having half EVs instead of full. But half EVs is better than no EVs, and her Gengar is probably the worst lead Phart could ask for at a time when it's not holding its Eviolite. I fear I may have to reset if this doesn't go my way.

41-14.png

I'd be stupid not to use an X Sp. Def here. But even at +2, Gengar's Shadow Ball does a whopping 128 damage! So a critical hit will just OHKO Phart unless its affection bonuses activate. That's unfortunate, but there's nothing I can do about it, so I may as well use another X Sp. Def and hope for the best. Phart's fallen to 76 HP after the second Shadow Ball, so I use a Max Potion, then a third X Sp. Def, and Shadow Ball hits for 60 damage at +6.

May as well max out Phart's attacking power and try to KO Gengar before it gets a crit - the rest of its boosts can wait. Phart takes another Max Potion in order to survive long enough for a Dire Hit and 3 X Attacks, with Gengar failing to get any crits but dropping its Sp. Def on the final X Attack turn. There's no time to fix that right now as Phart needs healing. Shadow Ball deals 72 damage at +5, which is low enough for Phart to tank another one and hit back with Struggle, just as long as Gengar doesn't crit. Here goes...

41-15.png

No critical hit! Aaand unclench.

41-16.png

That was stressful, not least because if I had lost to Plumeria then I'd have to go through the process of soft-resetting for challengers until she appeared all over again. Hopefully the rest of her team will be a bit nicer so I can get back to a normal blood pressure.

41-17.png

Crobat has Leech Life, but it also has a Jolly nature and 252 Speed EVs, i.e. no Attack investment. Phart downs another Max Potion and takes 88 damage from Leech Life, down to 22 after its Defense is maxed out. Crobat makes it easier for me to finish setting up by using Protect every other turn, a strategy that might've been more effective if it had tried Poison Fang first. Once Phart's all set, it can't quite OHKO Crobat with Struggle, but that simply means healing Phart again on the next turn and KOing it afterwards, even with Crobat finally giving up on using Protect and using an extra Leech Life just before fainting.

41-18.png

I have to assume that a 175-power Acid Downpour is at least as strong as Gengar's Shadow Ball was, so a critical hit would OHKO Phart no matter what. But Salazzle's currently slower than Phart and has a Hasty nature lowering its physical bulk, which isn't that high to begin with at 68/60. I think Phart could outspeed and OHKO it, and even if it misses the KO, Struggle recoil would leave it with 120 HP to tank any non-crit attack.

It doesn't feel 100% safe, but I click the Fight button and let Phart Struggle... directly into a Protect. Forgot about that. But protecting itself doesn't achieve anything, and when Phart attacks again on the next turn it takes Salazzle out in one hit. Result!

41-19.png

Another Max Potion here, and Toxapex tries to use Baneful Bunker but fails. This lets Phart get in a safe Struggle on the next turn, dealing just under 50% and taking 13 damage from Liquidation. Can't be too mad that it failed to 2HKO a Toxapex really. I try stalling for a turn with a Sitrus Berry expecting it to use Baneful Bunker again, but no, another Liquidation. Maybe try stalling another turn? Right, this time it uses Baneful Bunker. Phart takes it into red with another Struggle while it uses Liquidation again, and now it can't Recover to save itself from the final blow. I suspect it tried anyway, as it didn't use Baneful Bunker on its last turn, but it doesn't matter - Phart's too fast for it to get a chance.

41-20.png

I won't complain about Muk not having any Dark attacks, especially not after dealing with Gengar. Phart is healed one last time, gets struck by Toxic, gets cured on the next turn, takes 12 damage from Rock Slide, then 2HKOs Muk without much fuss.

41-21.png

"Even when I give it my all, I'm nothing compared to you! Maybe my Pokémon and I need to go through more together to deepen our friendship. I'm out of here, Champ."

My 2DS actually froze here for some reason and I had to look up Plumeria's post-battle dialogue online. Might've been from me taking screenshots a bit too quickly? I was about to reset the game to hunt for the next challenger anyway, so all it does is eat up an extra minute while I switch the console off and on again. Possibly the least impactful game freeze I've ever experienced.

Plumeria wasn't too bad overall, aside from the Gengar lead. I think Phart would've been absolutely fine if Muk or Crobat or Toxapex had been her lead instead, and maybe even Salazzle too (an Acid Downpour crit would've been an OHKO but it only has 1 PP), because Gengar would've been outsped and one-shotted by Struggle if Phart had set up against another Pokémon first. But having it as her lead was bad enough for Phart that I had to KO it before I'd even finished using all the X items, which I don't recall being necessary in any battles before this one. Let's see if the next challenger has a horrible lead Pokémon as well.

41-22.png

"I came to keep my word about us having a battle next time, as I said after my trial at the Observatory."

But didn't we already battle during Mina's trial? This dialogue does not account for players of Ultra Sun having already fought Sophocles by this point. Literally unplayable.

41-23.png

Captain Sophocles
Togedemaru Lv67 (Electric Terrain/Zing Zap/Spiky Shield/Fell Stinger, Ability: Iron Barbs, IVs: 30/30/25/25/25/30, EVs: 252 Atk / 252 Spe)
Magnezone Lv67 (Flash Cannon/Discharge/Tri Attack/Reflect, Ability: Analytic, IVs: 25/25/30/30/30/25, EVs: 252 Def / 252 SpA)
Electivire Lv67 (Thunder Punch/Giga Impact/Fire Punch/Quick Attack, Ability: Motor Drive, IVs: 25/30/25/25/30/30, EVs: 252 Atk / 252 Spe)
Vikavolt Lv67 (Bug Buzz/Thunderbolt/Air Slash/Guillotine, Ability: Levitate, IVs: 25/25/25/30/30/30, EVs: 252 SpA / 252 Spe)
Alolan Golem Lv67 (Stone Edge/Steamroller/Thunder Punch/Heavy Slam, Ability: Sturdy, IVs: 25/30/30/25/30/25, EVs: 252 Atk / 252 SpD)

Electivire and Vikavolt have been added to his team since last time, and I suspect Vikavolt will be another I-crit-and-you-die sort of Pokémon. It's also too bulky to go down in one hit, which is annoying. Might have to think up a better plan than praying for good luck...

41-24.png

Togedemaru's not a big deal though, wasting turns on Spiky Shield and only dealing 34 damage with Zing Zap once Phart's Defense is at +6, even with Electric Terrain active. I finish using all the standard X items before having to use the first Max Potion, and Phart's now ready to KO Togedemaru. But is that the right thing to do?

Looking at the rest of Sophocles's team, Vikavolt seems all but guaranteed to be the next Pokémon he'll send out, and I've mentioned already that it could easily snuff out Phart with a critical hit. If I PP-stall instead of letting Phart KO Togedemaru, hopefully Sophocles will hard-switch to Vikavolt and it could be 2HKO'd without getting a chance to use Bug Buzz, though I can't be certain it would be chosen as his switch-in (Molayne hard-switched to Metagross even when Bisharp was available to him, for example). But it feels like a good idea.

Zing Zap is the first of Togedemaru's moves to be drained of PP, followed closely by Spiky Shield. It's only after it runs out of Zing Zaps that Fell Stinger is first used, so there's still 30 PP to go before it's completely out of options. At last, this exciting gameplay comes to a close with a final Fell Stinger, so now I've just got to hope it's Vikavolt that's sent in.

41-25.png

41-26.png

wheyyyy

Phart is still in tip-top shape after Togedemaru's pathetic onslaught and has enough HP to Struggle twice in a row, so Vikavolt doesn't get to use a single attack.

41-27.png

Phart takes a Max Potion because I can't see it tanking a crit Thunder Punch, especially not if it uses Struggle again first. But Electivire goes for Giga Impact instead (it is stronger to be fair), though 36 damage isn't much and now it's stuck recharging while Phart OHKOs it back. I thought it might've been able to take one Struggle... poor Electivire.

41-28.png

Another heal for Phart, then it dodges Stone Edge and Struggles to take Golem into the yellow. The second Stone Edge is a hit, and a crit! Oh shit. The 178 HP it wiped out leaves Phart too weak to attack again, but another Max Potion lets it take down Golem when it decides to use Heavy Slam for 24 damage instead.

41-29.png

Magnezone sees Phart getting critical hits with every attack and sets up a Reflect that is bypassed by critical hits. Phart glugs down another Max Potion, loses 36 HP to Discharge after just about doing 50% to Magnezone with Struggle, then KOs it with another one before it can attack again.

41-30.png

As close to winning as we may be, Phart can't attack at its current HP because the Iron Barbs damage will KO it, so I just chuck it a potion while Togedemaru flails around for a few turns with Struggle, managing 39 damage before fainting. It's not pretty but it works.

41-31.png

"You're great, Elio! You understand Pokémon so well and know so much about Pokémon battles. I see that thinking up this and that to try to defeat the Champion is the highest form of fun!"

I'm not sure I'd describe the rest of Sophocles's team as hard, but playing around Vikavolt took some effort and it would've been risky to give it a chance to attack. Got to give him credit for that. Now then, who's up next?

41-32.png

"Phew! It is difficult, triumphing over all the Elite Four in a row. However, defeating the Champion will surely be even more challenging."

Alola's new Elite Four system means that Hapu doesn't have to entertain every island challenger while they face all four kahunas back-to-back at the end of their challenge, like in the old days. But she's come here anyway to try and get her hands on my Champion title.

41-33.png

Island Kahuna Hapu
Golurk Lv68 (Dynamic Punch/Earthquake/Phantom Force/Stone Edge, Ability: No Guard, IVs: All 30, EVs: 252 HP / 252 Atk)
East Sea Gastrodon Lv68 (Muddy Water/Mud Bomb/Sludge Wave/Ice Beam, Ability: Sticky Hold, IVs: All 30, EVs: 252 HP / 252 SpA)
Krookodile Lv68 (Earthquake/Crunch/Dragon Claw/Aerial Ace, Ability: Intimidate, IVs: All 30, EVs: 252 Atk / 252 Spe)
Flygon Lv68 (Dragon Rush/Earthquake/Stone Edge/Steel Wing, Ability: Levitate, IVs: All 30, EVs: 252 Atk / 252 Spe)
Mudsdale Lv69 @ Groundium Z (Heavy Slam/Earthquake/Payback/Rock Slide, Ability: Stamina, IVs: All 30, EVs: 252 Atk / 252 Def)

Continuing on with the trend of things that can instantly kill Phart, Hapu's added a Krookodile to her team! Everyone else gets a few moveset tweaks from her grand trial battle, with Golurk's Phantom Force and Mudsdale's Payback looking like they might also be problems. So that's 3/5 team members that have a shot at beating Phart to a pulp.

41-34.png

As strong as Golurk may be, it does make it easier for me to set up by taking 2 turns to use Phantom Force. Phart therefore gets to use 2 X Defenses before the first one hits for 84 damage. Using the rest of the X items isn't too hard when Golurk occasionally tries out Stone Edge and always gives me a turn to prepare for Phantom Force, so after a fair few Max Potions, Phart's ready to roll. Struggle deals about 66%, but before Phart attacks again to KO Golurk, I make sure to heal it and use a Guard Spec. in case Krookodile is up next.

41-35.png

Nice! Not that it'll help against a crit Crunch, of course. I'll have to just smash through Krookodile quickly before that can happen, so I heal Phart up and it takes 56 damage from Crunch, then 2HKOs Krookodile with 32 HP to spare.

41-36.png

Thought it might be Mudsdale next with its super-effective Payback, but apparently not. Phart dodges a Dragon Rush once it's back at full HP and gets another 2HKO, only taking 31 damage when the next Dragon Rush connects.

41-37.png

Mudsdale's first attack is Heavy Slam and Phart simply dodges it, so I have no idea how much damage Payback will do. Stalling for a turn causes Phart to take 48 damage from one, which is a bit unfortunate - it looks like it might just be able to OHKO Phart with a critical hit, in which case I'd want Phart to take it out ASAP, but it could also barely miss out on the OHKO with a critical hit, in which case I'd want Phart to stall out Payback's PP and then attack it, otherwise its Struggle recoil would put it into KO range.

I decide to wait a few turns to see if Mudsdale actually wants to use Payback before making a decision, because it went for Heavy Slam on its first turn. While I'm busy spamming Sitrus Berries, Mudsdale uses Payback, then Tectonic Rage (for 60 damage), then Payback, then Payback again. That convinces me to try stalling out Payback's PP, since it doesn't seem like it'll give Phart any chances to attack safely by using its other moves. Annoyingly it does try out Earthquake and Heavy Slam as soon as I've committed to that plan, but it eventually uses up all 10 Paybacks without any critical hits, after which Phart can 3HKO it without being aware of Stamina.

41-38.png

Gastrodon's not a pushover but it's probably the easiest member of Hapu's team for Phart to face, particularly now that it's forgotten Recover. Healed to full once more, Phart takes 27 damage and a useless accuracy drop from Muddy Water - not enough to stop it from 2HKOing Gastrodon and ending the battle.

41-39.png

"We do our utmost as kahunas, always striving onward to make a tale worthy of our history. Looks like you are going to make a fine tale for yourself, Champion!"

In hindsight, Phart got quite lucky not taking any crits from the scary moves Hapu's team were carrying. 10 Paybacks, 2 Crunches and probably at least 7 Phantom Forces, all of which could've ended the battle if RNG willed it. But I've only got myself to blame for that because I gave Phart the King's Rock, and it's probably still worth it for making the end of the challenge a bit more exciting.

Speaking of which, 3 battles to go! Weird to think that it's almost over now. I could go on about how it feels like only yesterday that I was setting off on my island challenge with nothing but a Lv. 5 Cosmog... but that would be a lie. It feels like I've been stuck here for half a year, largely because I've been stuck here for half a year.
Trainers defeated: 424/427
 
:sm/silvally-water: :sm/cosmog:
42-1.png

I have no idea why I'm still bothering with Festival Plaza at this point, but here's another 5-star dye shop for my collection. This is the only way I can wear green clothes in Ultra Sun at all without interacting with other games - not easy now that the online functions are dead - so I'll happily swap out a fortune-teller for this facility. I still need Team Red ★★★★★ for a full house, although I doubt I'll keep going with the eternal FC grind once the run is over. 3 out of 4 ain't bad.

Now, on to more pressing matters. Just one final trio of Trainers to go before our ignoble quest is complete. We've nearly done it!

It looks like the final three are among the harder Title Defense challengers, which is nice for the narrative but means that I might have to (gasp!) put some thought into the battles. Two of them have full teams of 6 Pokémon, so I'll start with the last remaining challenger who has only 5 of them. Surely this logic will lead me to an easier fight.

42-2.png

"Wanna see what destruction looks like? Here it is in human form—it's your boy Guzma!"

A nearly-full team of bugs? Hopefully they won't all have custom natures and full offensive EVs, otherwise this won't be easy at all.

42-3.png

Pokémon Trainer Guzma
Golisopod Lv68 (Sucker Punch/Waterfall/First Impression/Brick Break, Ability: Emergency Exit, Adamant nature, IVs: All 30, EVs: 252 Atk / 252 Def)
Vikavolt Lv68 (Flash Cannon/Thunderbolt/Bug Buzz/Energy Ball, Ability: Levitate, Modest nature, IVs: All 30, EVs: 252 HP / 252 SpA)
Pinsir Lv68 (Throat Chop/Storm Throw/X-Scissor/Stone Edge, Ability: Mold Breaker, Adamant nature, IVs: All 30, EVs: 252 Atk / 252 Spe)
Masquerain Lv68 (Air Slash/Bug Buzz/Ice Beam/Energy Ball, Ability: Intimidate, Modest nature, IVs: All 30, EVs: 252 SpA / 252 Spe)
Scizor Lv68 (X-Scissor/Iron Head/Night Slash/Bullet Punch, Ability: Technician, Adamant nature, IVs: All 30, EVs: 252 Atk / 252 Spe)

Bollocks.

Guzma's team is identical to the one he used to help me out in Team Rocket's Castle, complete with his shiny new Scizor and an extra 4 levels on each Pokémon. Not that I'd know that without pk3DS, because his Golisopod soloed the RR Grunts in 3 turns. Now, obviously super-effective STAB attacks will do a lot to Phart without its Eviolite, so I plugged all his sets into the damage calculator to work out which of Guzma's Pokémon could OHKO Phart with a critical hit. All of them, it turns out. So, as long as Guzma doesn't get a single critical hit, everything should be fine!

42-4.png

The only relief comes from Golisopod having exactly one chance to OHKO with First Impression, then being stuck with failed Sucker Punches and neutral Waterfalls. So hopefully I can get Phart fully set up against Golisopod, stall it out completely for old times' sake, then smack Guzma's switch-in with a 2HKO and only have to worry about 3 of his team members.

I use an X Defense to kick things off, and Phart is swiftly brought to 164/290 HP with First Impression. No critical hit! We're over the first hurdle. Waterfall deals 40 damage after the second X Defense, then I heal Phart to be on the safe side and Guzma orders, uh, Brick Break? 12 HP is not impressive, but I guess it's better than 0 HP from a Sucker Punch. Waterfall's damage falls to 33 once Phart's at +6 Defense, so that's now the best Golisopod can do barring critical hits.

Phart doesn't have any issues while I'm busy maxing its stats, the only crit from Golisopod coming from a Brick Break and not being particularly damaging. On the turn where Golisopod uses its final First Impression, I stick a Guard Spec. on Phart just in case Masquerain somehow gets sent in next, then let Phart launch a Struggle as Guzma switches Pokémon.

42-5.png

42-6.png

That's the second time Phart's hit a Vikavolt with Struggle as it switched in during a Pokémon League battle. If I had a nickel, etc. This Vikavolt also faints to a second Struggle without getting a single attack in.

42-7.png

Nice! I assumed Masquerain would be kept back until later, but it's arrived just before the Guard Spec. wears off. I'm hoping that its 70/62 physical bulk will be enough for a Struggle OHKO, but if it isn't, Phart will still have 25% of its HP with which to hopefully tank a Bug Buzz. If Masquerain does survive the hit, it will probably need a critical hit to KO Phart, and there's still the chance of Phart toughing it out with 1 HP, dodging it altogether, or making it flinch with the King's Rock. So, knowing that a crit Bug Buzz would be just as dangerous even if I went for a Max Potion instead, I risk having Phart use Struggle... and it's a one-hit KO! Phew.

42-8.png

Right, it definitely can't use Struggle again without KOing itself, so I have to use a Max Potion and hope Phart can avoid critical hits from the next couple of attacks. One of them ends up being a Stone Edge rather than the expected X-Scissor (no, I don't understand either), hitting for 27 damage, and so Phart uses Struggle to place Pinsir firmly in the yellow. It comes to its senses and uses X-Scissor this time, but fails to crit again and only takes off 54 HP, letting Phart take it out afterwards.

42-9.png

Please don't faint here. I heal Phart again, then Scizor's X-Scissor hits, doesn't crit, and leaves it on 228/290 HP. Struggle takes Scizor to just above red HP, not that it matters because anything less than OHKOing it is still dangerous, and another X-Scissor deals 60 damage and puts Phart at 95 HP. That's enough for Struggle to not KO Phart... oh, but what if Scizor uses Bullet Punch first? Is that something it would want to do? 95 HP is a little under 33% of Phart's HP, which I suppose seems a bit too high to warrant attempting to finish it off with Bullet Punch. And I don't think the AI's smart enough to consider chipping my Pokémon with a priority attack in the hopes that it'll then KO itself via recoil damage - it's certainly overlooked much simpler tactics throughout the challenge. I decide to just go for it, and luckily Scizor chooses some other move that it fails to execute before Struggle knocks it out.

42-10.png

Golisopod's out of PP and can only flail around with its own Struggles, but Phart's not tanking 4 of those at 22 HP. A final Max Potion lets it shrug off the last few blows and watch Guzma's signature Pokémon collapse in a heap. Never in doubt!

42-11.png

"Who knows what the Alolan winds will bring? Next time we meet, I'm counting on you to test how strong I've gotten."

I did not expect to get through that battle on my first attempt. Mind you, I think there were only 6 opportunities for Phart to be OHKO'd (Golisopod's First Impression, Masquerain if it had survived Struggle, two attacks from Pinsir and two from Scizor), so avoiding critical hits for 6 turns isn't quite as impressive-sounding as "everything can kill Phart and there's nothing I can do to stop them". Anyway, it's now the 12th, so Gladion ought to back from Kanto any minute now. I reset the game and sit back down on the throne, and what do you know, he's the first one to show up.

42-12.png

"What does a Pokémon Trainer really need to be successful? I trained for a long time trying to figure that out. I guess everyone might have their own answer. But at least for me... I want the strongest rival for myself."

The line about him training for a long time was only added in USUM, and I can attest to it being 100% accurate. I could've been done with the challenge like a week ago if not for him waltzing off to a different region. He didn't even bring me any souvenirs!

42-13.png

Pokémon Trainer Gladion
Crobat Lv68 (Acrobatics/Cross Poison/X-Scissor/Steel Wing, Ability: Inner Focus, IVs: All 30, EVs: 252 Atk / 252 Spe)
Zoroark Lv68 @ Darkinium Z (Night Daze/Hyper Voice/Grass Knot/Foul Play, Ability: Illusion, IVs: All 30, EVs: 252 SpA / 252 Spe)
Porygon-Z Lv68 (Tri Attack/Dark Pulse/Ice Beam/Thunderbolt, Ability: Download, IVs: All 30, EVs: 252 SpA / 252 Spe)
Lucario Lv68 (Aura Sphere/Flash Cannon/Extreme Speed/Psychic, Ability: Inner Focus, IVs: All 30, EVs: 252 Atk / 252 Spe)
Charizard Lv68 (Air Slash/Flamethrower/Earthquake/Outrage, Ability: Blaze, IVs: All 30, EVs: 252 Atk / 252 SpA)
Water Silvally Lv70 @ Water Memory (Crunch/Crush Claw/X-Scissor/Multi-Attack, Ability: RKS System, IVs: All 30, EVs: 252 Atk / 252 Spe)

Porygon-Z and Charizard are the new additions, but apart from Porygon-Z's Dark Pulse I don't think they'll be too difficult. Really, the only super-scary thing on Gladion's team is Zoroark, and I'll know if it's been sent out when his "Silvally" suddenly appears to be Lv. 68. There are a couple more super-effective attacks on Crobat and Silvally (the actual one), but fingers crossed Phart is up to tanking a few of those.

42-14.png

Instead of tanking Crobat's X-Scissor, Phart simply dodges the first one, then loses 25 HP to Cross Poison at +4 Defense. The next X-Scissor does hit but only for 34 damage once Phart's had its Defense maxed out, so it should be pretty safe to slap on the rest of its X items as long as I keep its HP above 200-ish. Nothing particularly bad happens during the setup process and Crobat is 2HKO'd by Struggle.

42-15.png

Sort of a shame that I know this is Zoroark, but that's my fault for looking up his team beforehand. At least it's better than ORAS Sidney using a Zoroark disguised as his Absol... who he mega evolves, meaning the real Absol would never get sent out mid-battle! Anyway, Zoroark is outsped and goes down in one hit thanks to its defenses being identical to a Shroomish, so it never got a chance to use its Z-Move.

42-16.png

Download grants Porygon-Z a Sp. Atk boost, but Unaware means it won't matter at all. Once I've healed Phart with a Max Potion, Dark Pulse deals 42 damage, but Struggle isn't strong enough to OHKO it back. Must be a bit bulkier than I th-

42-17.png

42-18.png

Whoops! Crit Dark Pulse strong. Maybe it was a bit reckless of me to have Phart attack Porygon-Z without being certain it would KO. Then again, the only alternative would've been stalling out its Dark Pulse PP for 15 turns, and I've had enough of that tactic against Guzma's Golisopod. Another Max Potion restores Phart to good health and it KOs with a second Struggle.

42-19.png

I've learnt my lesson from Porygon-Z and will not be taking risks, so Phart can have another Max Potion for now. Silvally's X-Scissor deals 36 damage, and presumably Crunch will do the same, so I let Phart Struggle - just over 50%. A Crunch from Silvally does indeed do about as much as X-Scissor, and it's knocked out with Phart's next attack.

42-20.png

Flamethrower shouldn't be too bad unless Charizard gets knocked into Blaze range, and even then it'd need a critical hit. I have to heal Phart before it can think about Struggling, giving Charizard a chance to land a Flamethrower that scores a burn but doesn't hurt too much. A Full Restore sorts that out and Phart gets to Struggle, only to knock Charizard into the dreaded Blaze range right before it uses Flamethrower... for 43 damage. Never mind. The next Struggle takes it out.

42-21.png

I'm not really sure why Lucario has 252 Attack EVs when its only physical attack is Extreme Speed. It doesn't even attempt to use it as I throw another Max Potion at Phart, instead going for Flash Cannon and taking off 25 HP before being one-shotted.

42-22.png

"I didn't beat you, but it was still worth it... Going to train in Kanto, I mean. At the very least, I can appreciate your strength a lot more now than I could've before. Thanks, Champ. You've helped make us stronger."

He did have a pretty good team to be fair, just not one that troubled Phart too much. Despite the hiccup with Porygon-Z, I don't think it was a big threat since I could have just waited for it to run out of Dark Pulses before attacking - that's more than could be said of Guzma's team. The only thing that could've realistically KO'd Phart was Zoroark, but with it being frail enough to be one-shotted, it would've only had a chance to attack if I'd needed to heal Phart on the turn it came in.

Like Hau, Gladion uses a slightly different team depending on which starter you pick, so I'll have a quick look at his other ones.

Pokémon Trainer Gladion (if I chose Rowlet)
Venusaur Lv68 (Petal Blizzard/Sludge Bomb/Earthquake/Outrage, Ability: Overgrow, IVs: All 30, EVs: 252 Atk / 252 SpA)
Fire Silvally Lv70 @ Fire Memory (Crunch/Crush Claw/X-Scissor/Multi-Attack, Ability: RKS System, IVs: All 30, EVs: 252 Atk / 252 Spe)

Pokémon Trainer Gladion (if I chose Popplio)
Blastoise Lv68 (Surf/Ice Beam/Earthquake/Outrage, Ability: Torrent IVs: All 30 EVs: 252 Atk / 252 SpA)
Grass Silvally Lv70 @ Grass Memory (Crunch/Crush Claw/X-Scissor/Multi-Attack, Ability: RKS System, IVs: All 30, EVs: 252 Atk / 252 Spe)

Silvally's form doesn't really matter because Crunch and X-Scissor remain stronger than Multi-Attack, so it's just his new Kanto starter that makes a difference. All of the starters have Earthquake and Outrage and full EVs in both attacking stats, but neither of Blastoise's other options hit as hard as Charizard's Flamethrower, and neither does Venusaur's Petal Blizzard. Sludge Bomb is slightly weaker than Flamethrower due to the lower base Sp. Atk stat, but the possible poison damage is stronger than burn damage, so they're about even overall. Blastoise is a downgrade and Venusaur is probably a sidegrade, but it wouldn't make much difference to Phart.

Right, this is it. The final battle of the entire challenge. Just need to reset my game and wait for the last challenger to appear. I have to try again a couple of times, as Gladion keeps showing up, but I stick with it...


...and Gladion keeps appearing. That can't be good. I know he only appears after 30 days from clearing Episode RR, but I don't recall reading that he becomes the only challenger after that point. And yet after 10 resets, I've had nothing but the broody boy. I think it would've been documented by now if USUM's Title Defense matches eventually became nothing but Gladion for all eternity, so I'm guessing he's like Hau in that he's guaranteed to appear, but only once. That's not good for me because I'd very much like to fight someone else.

42-23.png

42-24.png

Out of desperation, I try changing my 3DS's clock to earlier in the month, in the hopes that it'll either make the game think he shouldn't be back from Kanto yet or make it detect that I've been fucking with the clock and lock me out of fighting him (it's sort of a time-based event, in a sense). Alas, no luck, as he shows up another 10 times in a row before I give up. I can turn back time, but I can't find a way.

...am I going to have to beat Gladion and the Elite Four again? Fuck me.

42-25.png

I'll keep this brief - I know I can beat him on account of the fact I literally just did. Phart gets maxed out against Crobat and 2HKOs with Struggle, tanks a Black Hole Eclipse from Zoroark at the cost of 86 HP (I was curious about how much it'd do, so I gave it a chance to attack Phart), 2HKOs Porygon-Z without getting critted this time, 2HKOs Silvally, 2HKOs Charizard and finally 2HKOs Lucario. Phart must've got lucky with OHKOing Lucario last time.

Whee, I've successfully defended my title against the wrong person. I have to sit through the game displaying my triumphant team of one Cosmog for a moment, then it boots me back to the entrance of the Pokémon League.

42-26.png

Apparently I've gained some fans as the new Champion of Alola. (Well, first Champion of Alola, but the title itself is still new.) I was worried that I'd have to restock my bag before challenging the Elite Four yet again, but clearly I don't have to bother with that now that I've been awarded 2 Sweet Hearts! I'll just go and sell all the stuff I've been getting from Poké Pelago during my stay in the Champion's chamber, then I'll get on with duffing up the Elite Four for the fourth time... after another bout of Splashing against a wild Buneary. Ugh.

42-27.png

On my first Pokémon League challenge, I battled the Elite Four in the order Acerola - Molayne - Kahili - Olivia in an effort to keep Phart under the obedience cap as long as possible whilst also making use of its level-ups against some of the tougher opponents. Then I just went left-to-right on my second challenge, and right-to-left on my third. So if I fight them in the order Olivia - Kahili - Molayne - Acerola this time, then each Elite Four member will have been fought first, second, third and fourth exactly once. And that's really, really interesting!

...look, I've got to do what I can to make this less dull.

Elite Four Olivia (yet again)
Armaldo Lv66 (Crush Claw/X-Scissor/Stone Edge/Liquidation, Ability: Battle Armor, IVs: All 30, EVs: 252 Atk / 252 Spe)
Cradily Lv66 (Stone Edge/Seed Bomb/Sludge Wave/Earth Power, Ability: Suction Cups, IVs: All 30, EVs: 252 Atk / 252 SpA)
Gigalith Lv66 (Stone Edge/Earthquake/Iron Head/Throat Chop, Ability: Sand Stream, IVs: All 30, EVs: 252 HP / 252 Def)
Probopass Lv66 (Earth Power/Power Gem/Dazzling Gleam/Flash Cannon, Ability: Sturdy, IVs: All 30, EVs: 252 HP / 252 SpD)
Midnight Form Lycanroc Lv66 @ Rockium Z (Crunch/Stone Edge/Fire Punch/Rock Climb, Ability: Keen Eye, IVs: All 30, EVs: 252 HP / 252 Def)

I was fine having Phart hold the Eviolite for the third round of Elite Four battles, and I wasn't expecting there to be a fourth round, so I'll swap out the King's Rock for now. Armaldo can't stop Phart from getting fully set up and gets 2HKO'd, Gigalith is a slow 3HKO thanks to Sand Stream chip damage, Lycanroc is a 2HKO, Cradily is also a 2HKO, and Probopass just about manages to be a 3HKO.

42-28.png

Elite Four Kahili (yet again)
Braviary Lv66 (Crush Claw/Brave Bird/Superpower/Scary Face, Ability: Sheer Force, IVs: All 30, EVs: 252 Atk / 252 Spe)
Hawlucha Lv66 (Flying Press/Throat Chop/Dual Chop/Poison Jab, Ability: Mold Breaker, IVs: All 30, EVs: 252 Atk / 252 Spe)
Baile Style Oricorio Lv66 (Revelation Dance/Teeter Dance/Air Slash/Feather Dance, Ability: Dancer, IVs: All 30, EVs: 252 SpA / 252 Spe)
Mandibuzz Lv66 (Snarl/Air Slash/Roost/Toxic, Ability: Big Pecks, IVs: All 30, EVs: 252 Def / 252 SpD)
Toucannon Lv66 @ Flyinium Z (Bullet Seed/Rock Blast/Beak Blast/Brick Break, Ability: Skill Link, IVs: All 30, EVs: 252 Atk / 252 Spe)

Brave Bird recoil puts Braviary at ~50% before Phart even gets to attack, and Struggle finishes it off. Then Hawlucha gets a 2HKO, Mandibuzz takes 4 hits after remembering it has Roost for once, Toucannon is 2HKO'd but gets a burn with Beak Blast, and Oricorio is one-shotted without even trying Teeter Dance this time.

42-29.png

Elite Four Molayne (yet again)
Klefki Lv66 (Spikes/Thunder Wave/Flash Cannon/Reflect, Ability: Prankster, IVs: 30/25/30/25/30/25, EVs: 252 Def / 252 SpD)
Bisharp Lv66 (Night Slash/Iron Head/X-Scissor/Poison Jab, Ability: Defiant, IVs: 25/30/30/25/25/30, EVs: 252 Atk / 252 Def)
Magnezone Lv66 (Flash Cannon/Thunderbolt/Tri Attack/Signal Beam, Ability: Sturdy, IVs: 30/25/30/30/25/25, EVs: 252 Def / 252 SpA)
Metagross Lv66 (Hammer Arm/Meteor Mash/Bullet Punch/Zen Headbutt, Ability: Clear Body, IVs: 30/25/30/25/30/25, EVs: 252 Def / 252 SpD)
Alolan Dugtrio Lv66 @ Steelium Z (Earthquake/Iron Head/Sucker Punch/Stone Edge, Ability: Tangling Hair, IVs: All 30, EVs: 252 Atk / 252 Spe)

Klefki barely tickles Phart while it sets up and then gets 2HKO'd by Struggle, only succeeding in leaving Phart paralysed. I have to stall out Bisharp's Night Slashes again with Sitrus Berries just to be safe, but it goes down in two hits after that. Magnezone takes two Struggles, Dugtrio just the one, and Metagross requires three.

42-30.png

Elite Four Acerola (yet again)
Banette Lv66 (Shadow Claw/Sucker Punch/Infestation/Shadow Sneak, Ability: Insomnia, IVs: 30/30/25/25/25/30, EVs: 252 Atk / 252 Spe)
Drifblim Lv66 (Shadow Ball/Thunderbolt/Psychic/Will-O-Wisp, Ability: Aftermath, IVs: 30/25/30/25/30/25, EVs: 252 Def / 252 SpD)
Dhelmise Lv66 (Phantom Force/Heavy Slam/Earthquake/Power Whip, Ability: Steelworker, IVs: 30/25/30/25/30/25, EVs: 252 Def / 252 SpD)
Froslass Lv66 (Blizzard/Shadow Ball/Thunderbolt/Ice Shard, Ability: Snow Cloak, IVs: 30/25/25/30/25/30, EVs: 252 SpA / 252 Spe)
Palossand Lv66 @ Ghostium Z (Shadow Ball/Earth Power/Sludge Bomb/Giga Drain, Ability: Water Compaction, IVs: 30/25/25/30/30/25, EVs: 252 HP / 252 SpA)

Setting up against Banette proves to be miserable once again, but 4 Shadow Claw crits are not enough to stop Phart. It gets one-shotted by Struggle, Dhelmise is two-shotted and doesn't even land Phantom Force thanks to a dodge from Phart, Drifblim is a 2HKO, Froslass goes down in one hit, and after stalling to let Palossand use up its Z-Move, Phart 2HKOs it to finish off the last of these totally unwanted battles.

Right, Elite Four vanquished, so Phart can have the King's Rock back now. I make my way to the Champion's chamber once more and take a seat... prompting Sophocles to show up. That's good to see. Not great, because I've already battled him, but good to see someone that isn't Gladion. Remind me to update Bulbapedia at some point with the findings of my unwitting research into the Pokémon League mechanics.

A few resets later, and the Trainer I was hoping to see after the first Gladion fight finally shows up after that not-so-brief interruption of my plans. The beginning of the end is here at last.

42-31.png

"I don't really wanna be the Champion of the Pokémon League I made myself, but there's nothing wrong with wanting to take on the biggest and baddest Trainer there is, right? After all, I do love my research!"

In hindsight, I might not have saved him til last if I'd known how Gladion's Title Defense battles worked in USUM. But I think the logic behind it was decent - Professor Kukui was the person who gave me my starter Litten and let me embark upon this ridiculous quest in the first place, and he already served as the final boss of the main story in Sun and Moon. So what better way to end things than by showing Kukui, a man who lives for researching Pokémon moves, just how well Phart has mastered Struggle?

42-32.png


Optional background music:
The Battle at the Summit!


Pokémon Professor Kukui
Midday Form Lycanroc Lv69 (Stone Edge/Accelerock/Crunch/Stealth Rock, Ability: Keen Eye, IVs: All 30, EVs: 252 Atk / 252 Spe)
Alolan Ninetales Lv68 (Dazzling Gleam/Blizzard/Ice Shard/Safeguard, Ability: Snow Cloak, IVs: All 30, EVs: 252 SpA / 252 Spe)
Braviary Lv68 (Crush Claw/Brave Bird/Whirlwind/Tailwind, Ability: Keen Eye, IVs: All 30, EVs: 252 HP / 252 Spe)
Magnezone Lv68 (Thunderbolt/Flash Cannon/Thunder Wave/Mirror Coat, Ability: Sturdy, IVs: All 30, EVs: 252 HP / 252 SpA)
Snorlax Lv68 (Body Slam/Crunch/Heavy Slam/High Horsepower, Ability: Thick Fat, IVs: All 30, EVs: 252 HP / 252 SpD)
Primarina Lv68 @ Waterium Z (Sparkling Aria/Moonblast/Aqua Jet/Hyper Voice, Ability: Torrent, IVs: All 30, EVs: 252 SpA / 252 SpD)

Nothing sticks out as being too awful for a Cosmog, but they're all decent Pokémon in their own right, the Eviolite is sitting this one out, and Primarina has a Z-Crystal it can actually use unlike Hau's last battle. Just need to play it carefully one last time and victory should be ours. Let's go, Phart!

42-33.png

The AI has consistently been smart enough to not set up hazards against my one-Pokémon team, so Lycanroc will probably just be using Crunch until it's out of PP. The first one deals 64 damage, the second one 50, and after a quick Max Potion, my attempt at bringing Phart to +6 Defense is hampered by the third Crunch getting a Defense drop. Oh well. It ends up at +6 a couple of turns later, Crunch now dealing 36 damage, and now I can afford to use Guard Specs. to stop Lycanroc dropping Phart's Defense again. Then I get to use the rest of the X items, with the same method that's got us through nearly every other boss fight up to now.

A critical hit on Stone Edge brings Phart to 16 HP at one point, but it misses most of its other ones and eventually runs out of PP for both Crunch and Stone Edge - with a crit Accelerock only dealing 73 damage, it's safe to say Lycanroc can no longer KO it.

42-34.png

I don't think I've ever had to refer to this screen as much as I have in this playthrough. A very handy feature indeed. The +6 Speed may seem like overkill, but it lets Phart outspeed Braviary even if it decides to use Tailwind, as well as the rest of Kukui's team under Tailwind apart from Lycanroc (who almost certainly won't be around by then) and Ninetales.

Phart is all set to show the professor its moves, so once I heal it back to full again, it leaves Lycanroc with a tiny bit of HP after one Struggle and takes that away as well with a second blow.

42-35.png

42-36.png

Another Crunch user. But its specially defensive EVs work quite well for Phart, not boosting its damage output at all nor going all-in on physical bulk. I chuck Phart another Max Potion before Snorlax Crunches, but the Defense drop it gets is probably more impressive than the 30 HP it took off. Another Guard Spec. and X Defense undo that spot of progress, and after another heal, Phart just about knocks it into yellow HP with Struggle. I decide to compensate for my slightly boring potion spam by risking another Struggle from Phart, knowing full well it might not be a 2HKO after all, but it pulls through and takes down Snorlax.

42-37.png

42-38.png

It's a pity the Guard Spec. wore off just as the Pokémon with Crush Claw entered the battle. But it sets up Tailwind on its first turn while I use another Max Potion, so Phart gets to be protected by another Guard Spec. for a few turns at least. It also helps that Braviary goes for Brave Bird instead of Crush Claw, only managing 31 damage to boot, and Phart 2HKOs it just as the Tailwind peters out.

42-39.png

42-40.png

Ninetales will need some luck to land any Blizzards on Phart with no way to set up hail and Phart's affection bonuses. It sets up a useless Safeguard instead while I'm using a Max Potion, gets taken straight into the red by Struggle, then actually hits with Blizzard for 31 damage. Only a crit or a freeze would've saved it, and with neither of those happening, it faints to a second Struggle.

42-41.png

42-42.png

Man, if only he'd sent out Magnezone next, I could've finished the challenge by beating up the Primarina that saved me from beating mauled to death by a wild Yungoos, all the way back on Route 1 when it was still a Popplio. I guess it wasn't meant to be.

Phart would much rather wait until Hydro Vortex is used up before it thinks about attacking, so I heal it once again and wait. Primarina goes for a 41-damage Moonblast instead, then another one, then a third, fourth and fifth... how odd. Rather than keep chucking Sitrus Berries at Phart until Moonblast runs out of PP, I have it Struggle once, taking Primarina straight into the red, i.e. into Torrent range. But any fears that it might use that opportunity to nuke Phart with its Z-Move and KO it prove unnecessary, as it clicks Moonblast yet again and is disposed of with another Struggle.

42-43.png

42-44.png

One last Pokémon before the run is over - if I fuck up now I'll never be able to live it down. Mirror Coat won't work, Thunder Wave is annoying, Thunderbolt and Flash Cannon are strong but not super-effective... best to heal Phart up and see how much damage Thunderbolt deals before trying any attacks.

Magnezone goes for Thunder Wave first, paralysing Phart, but it breaks through the paralysis on the same turn. I stall for a couple of turns to let it first use Thunder Wave again and then land a Thunderbolt, which ends up dealing 36 damage. If I assume a critical hit deals about 6 times as much damage as usual against a Pokémon with +6 Sp. Def, that'd be around 216 HP lost to a crit. Add on 73 damage from Struggle recoil and Phart would have exactly 1 HP left, cutting it slightly fine to say the least.

However, Magnezone seems to prefer to paralyse Phart before attacking, so if I get it in tip-top condition with a Full Restore it should have a free turn where it's not struck by Thunderbolt. I give it a try, but since Phart was already paralysed, Magnezone goes for Thunderbolt anyway and triggers its 10% paralysis chance. It fails to do so with the next one, and this one gets a lower damage roll of 33 HP, so I have Phart use Struggle, only for it to fall short of a 2HKO. But Magnezone does go for Thunder Wave as I suspected, so after another Full Restore Phart should be safe to attack... unless Thunderbolt paralyses it again, which it does. So I use another Full Restore and immediately get to watch Thunderbolt score the THIRD 10% paralysis chance of the match. It finally stops being a nuisance after the next Full Restore and simply deals 37 damage with no extra effect, letting Phart Struggle a second time and, despite Magnezone's HP bar still being green after the first Struggle, defeat it with a 2HKO after all!

42-45.png

42-46.png

42-47.png

The Cosmog solo run is complete! Phart has defeated every possible Trainer in Ultra Sun and conquered the Alola region!

42-48.png

"Whoa! Well, I always knew it would be a crushing defeat. I'm still glad I got to battle you, Champ. And I'm as thankful as I could be that I met you and your Pokémon!"

I was wrong about Magnezone feeling like an anticlimactic finish at least. Where on earth did all that luck with the 10% paralysis chances come from? Actually, who gives a fuck - I've finished the challenge! But because it's become routine to include them at this point, I'll have one last look at the Trainer party data by checking out the sets for Kukui's other Alola starter Pokémon (the rest of his team remains the same no matter which starter you pick):

Pokémon Professor Kukui (if I chose Rowlet)
Incineroar Lv68 @ Firium Z (Flare Blitz/Darkest Lariat/Outrage/Cross Chop, Ability: Blaze, IVs: All 30, EVs: 252 HP / 252 Atk)

Pokémon Professor Kukui (if I chose Popplio)
Decidueye Lv68 @ Grassium Z (Leaf Blade/Spirit Shackle/Brave Bird/Sucker Punch, Ability: Overgrow, IVs: All 30, EVs: 252 Atk / 252 Spe)

They both would've been harder for Phart to fight than Primarina, of course, just by targeting its weaknesses with STAB attacks. But Incineroar is the clear winner of the two, taking out 200 HP at minimum with every Darkest Lariat and threatening to OHKO it if any of them landed a critical hit, or even if Inferno Overdrive got a crit instead. Decidueye, meanwhile, wouldn't be doing much with its standard Spirit Shackles since they don't inherently ignore Defense boosts, and they'd only have a chance to OHKO Phart with a critical hit unlike Darkest Lariat (though a Bloom Doom crit would always suffice). Purely theoretical, of course, but being able to avoid this stuff is exactly why I picked Litten at the start of the game.

42-49.png

42-50.png

I didn't think to take screenshots of the congratulatory messages after beating Kukui, probably because they'd be literally identical to the ones from after I defended my title against Hau. So I've copied a couple of those screenshots over from that post, just for additional showing off. It still amuses me to watch the camera pan around all the empty space where my other 5 team members would be if I had them.

Once again, the game sends me back to the entrance of the Pokémon League once the celebrations are over. I could call it a day here if I wanted, now that the final Trainer has been defeated, but I may as well tie up a couple of loose ends before The End.

42-51.png

42-52.png

Being freed from the confines of the Champion's chamber lets me finally claim my shiny Seel from Isle Abeens and put it in the PC. I think it's actually cooler this way - it feels more like a reward for everything I've been through, sort of like the shiny Gible/Dratini you get in BW2.

I think that's just about everything now. Trainers all done, useless valuable items all sold to make my money go as high as possible, no point bothering with Festival Plaza or Poké Pelago any more... oh, there is something I've just thought of, actually. Since I unlocked that green dye shop a little while ago, why not try dyeing my clothes green? Just to see how they would've looked if I'd unlocked that dye shop earlier in the run.

42-53.png

Ehh, I don't think I was missing out on much. May as well soft-reset my clothes back to their usual purple goodness and save myself the 400 FC it'd cost to dye them back again.

42-54.png

42-55.png

424 Trainers, 8 Totem Pokémon, somewhere between 1 and 2 box legendaries (I'm not sure how to count the half of Ultra Necrozma's head on the box art), god knows how many other battles, nearly 180 hours of play time and just over 6 months of actual real-world time... and here's the allegedly useless gasbag that made it all possible! The little Cosmog that could. Phart's summary screen looks a bit off without its Eviolite being listed at the bottom, but after everything it's been through, I think it can retire for now and enjoy wearing a fancy crown to celebrate all that we've accomplished together.

42-56.png

Half a year later and she still hasn't touched those boxes. There's a lot to unpack there.

Heading back home after the end of the journey is always a nice way to end things - I'm not the sort of person who always makes my character sit down at home with Mom once I've "finished" with a game, but I respect the idea, and I ought to put a bit more effort than usual into this particular save file. I'm sure Elio can keep himself occupied doing normal 11 year old boy stuff now that he's done with Pokémon battling for the forseeable future. Like sitting in his room all day on his Switch, for example.

What do you think, Phart?


...Phart?


42-57.png

...

Actually, that's not a bad idea either. It has been an awfully long ride, for both of them.


42-58.png


Sweet dreams, Champion.


42-59.png

42-60.png
Trainers defeated: Yes

I'm not done yet though! Since the point of this thread was for me to try completing a Cosmog solo run and documenting every step of it (or at least how far I got, if it failed), I've written some notes on some of the many features in USUM that made the run possible, as well as the nastier foes and mechanics that gave me issues throughout. I'm also planning to open my save file in PKHeX to read through some of the interesting statistics the game keeps on this and that. If you enjoyed reading this challenge, then A: my condolences, and B: you can expect those notes to be posted in the coming days.
 
43-1.png

Useful features, part 1

Six months of my wretched existence went into this thread, so I thought I may as well sink a little more time/effort into describing the items, mechanics and other things in USUM that helped make this challenge possible. I've also tried to figure out whether this run (i.e. beating every possible Trainer with a single Cosmog) might've still been achievable without each of those features. They're sorted by the order they first became accessible in-game, but given how long this challenge took to complete, it's quite possible I've forgotten about one or two things.

Just to be clear, when I talk about whether the run would've been possible without a certain feature, you can assume I'm only talking about that one particular feature and not combining it with the removal of other ones. I could probably get away with not using several of the more niche mechanics together, but if I started looking at, for example, combining no affection bonuses with no X items, the descriptions would quickly go from "theoretically possible if bla bla bla" to "fuck no". And there's no point doing that.

I should mention as well that I wrote this section on-and-off over the course of several weeks during the postgame stuff, so if some parts seem a bit contradictory, are missing information on things I did in the postgame, or just don't make much sense at all, that'd be why. I tried not to make my ramblings too lengthy, but I also discovered the forums have a limit of 65,000 characters per post whilst writing this, so clearly that failed.

I'm not sure I'd recommend reading all of this. Unless you're looking for tips and advice on how to complete your own Cosmog solo run. (The best advice I can give is "do not".)

43-2.png

Litten

Cosmog is not featured among the starter Pokémon of Alola and there's no way to trade one in until after 3 mandatory Trainer battles, so that meant I had to briefly make do with one of the usual offerings from Professor Kukui. The pre-Cosmog section was pretty trivial regardless of which one I picked (Hau's Lv. 5 starter, a Lv. 4 Spearow with Pursuit instead of Peck, a Lass with a Lv. 3 Buneary, then Hau again with a Lv. 6 Pichu and Lv. 7 starter), so the main difference came in later battles whose lineups depended on my chosen starter.

Since I picked Litten, the Teacher at the Trainers' School used a Popplio and was probably the hardest starter for Phart to face, while Ilima's Smeargle knew Water Gun in his first battle but never got a chance to use it. But neither of those battles were my main concern when choosing Litten - I was more interested in keeping Incineroar away from Hau and Kukui's teams during the "Champion" and Title Defense battles, since Darkest Lariat would've been super-effective and ignored any X Defenses used on Phart. So with that in mind, choosing Litten over the other starters technically made things a bit easier... just a long time after the choice was actually made.

Could I have managed without it?

That depends. If the question is "could I have picked a different starter", then I think the answer is yes. Picking Rowlet would put the less-impressive Primarina in Hau's hands for the final story battle, leaving Incineroar for the Title Defense battle against Kukui. Phart would have a 32-level advantage over it and even a critical hit from Darkest Lariat would never OHKO it (assuming it had the Eviolite), so it wouldn't be much of a concern. If I had chosen Popplio, however, Incineroar would be on Hau's team for the not-technically-Champion battle. With his Incineroar also packing Darkest Lariat and being closer in level to Phart (Lv. 60 compared to Lv. 81), it would certainly deal a lot more damage, but perhaps not as much as I expected:

Lvl 60 252 Atk 30 IVs Incineroar Darkest Lariat vs. Lvl 81 252 HP / 128+ Def Eviolite Cosmog on a critical hit: 198-234 (83.8 - 99.1%) -- guaranteed 2HKO

Phart was Lv. 81 when it fought Hau's Decidueye at the Pokémon League, and as it turns out, Lv. 81 would've been exactly the right level for Hau's Incineroar to never be able to OHKO it with a crit Darkest Lariat, given both Pokémon's EVs and IVs. How about that? I couldn't possibly have known that at the beginning of the playthrough, of course, but it's nice to see I could've just PP-stalled even Hau's Incineroar if needed.

Going back to the question again... what if Cosmog was a starter Pokémon in Ultra Sun (or I chose to PKHeX one in)? Could I have still managed then? The main issue with starter!Cosmog is the almost complete lack of resources at the start of the game: no Poké Marts, no Festival Plaza, no Poké Pelago, nothing. But access to Pokémon Refresh is granted as soon as a starter Pokémon is chosen, and with the 49 free Poké Beans that come with it, maxing out Phart's affection before the first Hau fight would be possible by feeding it beans, petting it, sending it into a wild battle, then repeating from the top.

All well and good, but how would it navigate the battles themselves? The usual strategy of spamming Splash against wild Buneary falls apart when Phart's Lv. 5 and I have no Potions to heal the damage from Pound, even if Buneary only has a 25% chance to use it each turn. I'd basically have to savescum and use Splash 1 or 2 times per encounter so that it doesn't take any damage, very slowly get its PP down to zero, then hope that its affection powers can KO its opponents before they KO it. And then obviously run home to heal it afterwards, and then start savescumming all over again to get rid of the Splash PP...

Sadly, even that tedious method quickly runs into an old foe: you are forcibly healed before the first Hau fight, the wild Spearow on Plank Bridge, and the second Hau fight. It's possible to lose to the Spearow and the game still progresses (plus it wouldn't interfere with my beat-all-the-Trainers goal, being a wild Pokémon), but for the Hau fights, I'd have to bank on his starter failing to KO Phart with 35 Tackles/Scratches/Pounds (i.e. lots of dodging or toughing out attacks from Phart), then hitting 4 Struggles to KO themselves whilst still not KOing Phart... and for the second one, there's also a Pichu with 30 Thunder Shocks and 4 Struggles before it faints, plus his starter gains Leafage/Ember/Water Gun! It's theoretically possible with affection bonuses, but the odds of it actually working are disgustingly low thanks to the lack of Potions (1 before the first Hau fight, another 6 before the second) and how much damage Phart would take at Lv. 5-6. Even if I tried to grind Phart to a higher level against wild Pokémon to give it better stats for those battles, it would still be very difficult, and the grinding itself would be incredibly tedious for the reasons mentioned in the previous paragraph. I do suspect a starter-Pokémon-Cosmog could still escape the earlygame and complete this challenge - after the second Hau fight there are no more mandatory battles before Festival Plaza is unlocked - but I think I would rather die than prove it.

43-3.png

Struggle

What an odd, awful little move. Struggle hits slightly harder than the Tackle most Pokémon have replaced by about Lv. 12, has no chance of ever receiving STAB, and strips its user of 25% of their maximum HP with each use. And if you want to go more obscure than that, it targets an opponent at random in Doubles/Multis/Totem fights, which is a pain when one of them is in KO range and the other one isn't. Phart's damage output would have been fairly pathetic even if it could learn stuff like Confusion or Return, but Struggle just made it even worse, and forced me to plan ahead whenever it attacked so that it wouldn't somehow end up at ~25% HP before Struggling and KO itself.

So how on earth can I say it was useful, given all that? Well for starters, it basically has infinite PP, so I never had to worry about any PP-draining effects or having to use Leppa Berries/Ethers mid-battle (I did have to worry about Phart being healed, but that's another matter). And since Struggle is the "fallback" move for when a Pokémon is unable to use its actual moves, it was completely immune to stuff like Disable, Encore, Torment, Imprison... pretty much anything that restricted move choices had no effect on Phart, because it was in a near-permanent state of having no moves already. On top of that, Struggle bypasses accuracy checks just like Swift and its ilk, so that rendered another set of moves like Sand-Attack and Minimize useless for Phart's enemies. It basically functioned outside normal battle mechanics in several ways and helped to avoid a lot of annoying moves/Abilities that would often disrupt my strategies in regular playthroughs, even if Struggle was clearly kind of shit in other aspects.

Could I have managed without it?

Taking that to mean whether the run could be completed without ever using Struggle, I would say no, but only just. For the majority of the game, not using Struggle would mean completely stalling out every single opponent, letting them be the ones to use Struggle to KO themselves. Very tedious, somehow even more resource-intensive than what I already did, but possible. The earlygame sections would be more brutal under these conditions because resources are much harder to come by, but I can still see a couple of ways I could've managed. Festival Plaza is accessible right before the Trainers' School and can be used to buy items such as Fresh Waters and Hyper Potions (or other items that can then be sold to fund Poké Mart Potions) with Festival Coins, the only restriction being that most of its services are once-a-day affairs. And if I needed even more cash, there's always the grim-sounding option to visit the tall grass at the Trainers' School, savescum until I encounter and catch a Meowth/Grimer on the first ball that's holding a Quick Claw/Black Sludge (both at a 5% rate), sell that item for an overall profit of $1,800, and repeat from the top. Money would become less of an issue once I defeated Hala and gained access to Mantine Surf, being able to use vitamins as a way to convert each BP into $2,500, and the challenge would become slightly less horrible from there.

But none of that addresses why I think it wouldn't be possible to make do without Struggle - it's actually one specific fight that convinced me of this, though another couple of fights deserve a mention too. The wild Nihilego at Aether Paradise gets a quick shout-out because it automatically flees after 5 turns, but being a wild Pokémon and not a Trainer, it doesn't really matter if Phart can't defeat it before it escapes. I'll also mention the Jynx from the postgame version of the Kantonian Gym - with a moveset of Avalanche/Body Slam/Wring Out/Perish Song, I'd have to give Phart a Sticky Barb and hope Jynx is willing to wait for 8 turns of passive damage to KO it before using Perish Song. Probably very RNG-dependent, but still doable, considering all of Jynx's other attacks make contact and it took 3 turns to use Perish Song during the actual run.

The major obstacle, the one that would bring a Struggle-less run to a screeching halt, is the Battle Royal fight against Hau, Gladion and the Masked Royal. There is absolutely no way to win it without attacking Phart's opponents, and I had a bad enough time with it even then! It's a shame to think that one single fight would prevent a no-Struggle challenge from being possible, especially one that's on the fence in terms of whether it counts as a "proper" Trainer battle or not, but that's how it is. I did count it, and that means I couldn't have managed without Struggle, but if I didn't care about the outcome of that fight then I could probably get away with Phart never using Struggle. Probably.

43-4.png

Unaware

Possibly the only real upside to using a Cosmog. In a region where one of the gimmicks is big old Totem Pokémon that start the battle with stat boosts, sometimes reaching as high as a +2 omniboost, being able to completely ignore all of them apart from the Speed boosts is incredibly useful. That also applies to anything with Iron Defense, Barrier, Bulk Up, Swords Dance, Nasty Plot, Calm Mind, Coil, Quiver Dance, the list goes on... point is, there were a lot of opponents where Phart could just completely no-sell at least one of their attacks, sometimes several of them, and basically treat them as a free turn.

Having such a useful Ability does mean that any effects that would negate or overwrite Unaware could've put Phart in a difficult situation, but unless I'm forgetting something massive, I don't recall that ever happening - a few Ekans belonging to Team Skull's minions had Gastro Acid, and there were a couple of odd users of stuff like Entrainment or Mummy, but none of them featured on teams with suitable Pokémon/movesets to take advantage of removing Unaware (though Dexio's Mega Alakazam Tracing it and disabling Phart's own boosts was kind of funny). It also had the small downside of ignoring stat drops from things like Weak Armor or Close Combat, but for the most part, Unaware just served to make a lot of battles a fair bit easier, turning the likes of Ultra Necrozma and Totem Ribombee into less nightmarish foes.

Could I have managed without it?

If we're being pedantic, no, because it's Cosmog's only Ability. But if we assume it could have something functionally worthless like Illuminate instead, then I would say yes, though it'd definitely be quite a bit harder. Every Totem Pokémon would now have an aura that actually does something, and any random Pokémon that can boost one of its offensive stats is suddenly more of a danger. But Phart's still just as capable of using X items as ever, and it can still ignore Defense boosts by virtue of having guaranteed critical hits after a Dire Hit. On the topic of critical hits, I suspect they'd be a lot scarier in this scenario - there were a few Pokémon in Ultra Sun that could OHKO Phart from full HP with a crit even without it having to worry about whatever stat boosts they might've had, so if it did have to worry about stat boosts as well, I'd expect it to spend more fights at constant risk of being randomly OHKO'd.

As an example, I'll use the Totem Ribombee battle. Against a Lv. 74 Phart with +6 Sp. Def and the stats both sides had during that fight, Ribombee would deal 9.2 - 11.9% with Bug Buzz, or 53.4 - 63.5% with a critical hit. If you take away Unaware, then Phart now has to be subjected to Ribombee's +2 omniboost, so Bug Buzz is dealing 17.5 - 22.1% to it, or 105 - 124.4% with a crit! When you add to that the fact that Ribombee knows Quiver Dance and has a couple of ally Pokémon that can chip in as well... yuck. So I might have to reset a few times against opponents with useful stat boosts and pray for affection bullshit to save Phart, but its Struggles would still be as strong as ever and a bit of luck would still let it steamroll through its opponents before they could get an untimely crit. And there would always be the option of tailoring Phart's EVs for a specific battle if it really needed it. Overall, I think a hypothetical Unaware-less Cosmog could still have conquered Alola, just with more difficulty against more opponents.

43-5.png

HP-restoring items

I mean... duh. When it takes 40 turns before you can begin to attack, every attack you use causes you to lose HP, and your defensive stats are dwarfed by those of a Metapod, you are not making it very far without some flavour of potion. Especially since Pokémon Centers are a no-go due to them restoring Splash's PP. Luckily Festival Plaza had me covered from the very beginning, offering endless Fresh Waters (and later Moomoo Milks) until I was in a position to buy more conventional medicine from Poké Marts. I don't think there's much more that needs saying here. Potions good.

Could I have managed without it?

lmao


Alright, proper answer: no. But that's not a 100% no - it's more like 99.999%, i.e. horrendously unlikely but probably not impossible. If you take "HP-restoring items" to just mean Potion spam and not held items that can restore HP, like Berries or Leftovers, then some interesting (to think about, not to actually attempt) possibilities come up.

With a combination of maximum affection, Leftovers recovery and ridiculous RNG, it'd be possible for me to have Phart use Struggle, avoid getting hit for several turns, spam unusable items until the Leftovers have healed off its Struggle recoil damage, then Struggle again. If you combine that with sufficient X item usage, it provides a general template for how Phart could get through most battles Potion-less, albeit one that's very very VERY heavily luck-dependent. But even that plan has a fair few issues, the most obvious one being that the earliest way to acquire Leftovers is by finding them on a wild Munchlax, which can only be encountered after defeating Hala. So unless I chose to break the "can't enter battles unless I only have Cosmog in my party" rule in order to grind for the 1% Leftovers drop on Pickup with a team of Alolan Meowth, I'd need to figure out some way of clearing the game up to Hala without HP-restoring items or Leftovers.

Getting a Rare Kitchen in Festival Plaza would let Phart gain 3 levels a day up to Lv. 30, and if I managed to get a Battle Table then that would mean I could fully EV Phart right off the bat, given enough time. With 15-25 levels on its opponents and 252 HP and Attack EVs, Struggle ought to OHKO most foes and definitely will after a couple of X items... but that's assuming Phart has no PP and is actually able to Struggle. Since even the weakest wild Pokémon will damage it while it's burning through 40 Splash PP, it'd probably be better in this scenario to ditch Splash for Teleport at Lv. 23, giving Phart a risk-free method of burning PP and also only having 20 PP instead of 40 - handy for those battles where it's forcibly healed immediately before the fight, like the Hau fight after Melemele Meadow and the aforementioned Hala.

So assuming Phart is Lv. 30-something with full EVs, the Hala fight would be something like this: give Phart a Sitrus Berry (available from Berry piles or wild encounters on Route 2), use a Roto Boost, an X Attack and a Dire Hit, spam Teleport for 20 turns, then OHKO Machop, OHKO Makuhita and hopefully OHKO Crabrawler. And all that time, pray that Phart's ~33% obedience rate pulls through for every single attack and all of Hala's Pokémon's attacks either miss or do so little damage that they fail to deplete 50% of its HP across 25+ turns (it'll lose 75% to Struggle but regain 25% from the Sitrus Berry). If Phart somehow pulls that off, then it gains access to Leftovers and can heal off every one of its Struggles by merely avoiding all incoming damage for 4 turns!

As for the rest of the game post-Hala? Fucking grim. It'd probably be best to use the infinitely-purchasable Rare Candies from Mantine Surfing to bring Phart straight up to Lv. 100, immediately making battles a lot easier at the cost of reducing Phart's obedience rate to 17.5% for the rest of Akala. ("Immediately" in this case meaning after I've grinded for around 3,000 BP, of course.) The real problems would come when Phart starts facing Trainers with 4+ Pokémon later on in the game - the more times Phart has to use Struggle to win a battle, the less wiggle room there is for it in terms of taking damage, and of course longer battles mean more chances for something to go wrong (hitting itself via disobedience, long spells of failing to attack, taking crits at the wrong moment, etc.). Not to mention that if Phart's holding Leftovers, it isn't holding the Eviolite and is therefore taking considerably more damage from everything. I do still think it might be possible in theory to clear the storyline and the postgame like this, but nearly every single battle later on would require a ridiculous amount of luck to pull it off. And it's possible I've forgotten about some weird move or ability that would completely fuck Phart over and render it impossible after all.

43-6.png

Affection bonuses

Maybe the real bonuses were the friends I made along the way, but the ones that let Phart bullshit its way through tricky situations were pretty useful as well. Since Pokémon Refresh was unlocked as soon as I received my starter Litten, I could instantly get to work on maxing out Phart's affection by cramming 20+ Poké Beans down its throat. Aside from presumably a violent case of the runs, the overall effects on Phart were that it gained the following bonuses:
  • An extra 20% more Exp. Points from battles
  • A 20% chance to cure whatever status condition it may have at the end of the turn
  • A 10% higher chance of dodging attacks, subtracted from the move's usual accuracy
  • A 25% chance to tough out an attack that would have KO'd it with 1 HP remaining
  • A doubled critical hit ratio
The elevated crit rate was particularly nice because using a Dire Hit would raise Phart's critical hit ratio by 2 stages, which would normally equate to a 50% crit rate, so the affection mechanics guaranteed that it would always land critical hits with Struggle (barring the occasional Shell/Battle Armor user).

The other effects were all quite useful too, apart from maybe the bonus Exp. Points because they pushed Phart's level up and into disobedience territory a few times - obviously the extra stat points from those levels made it a bit stronger, but I'd have rather it received fewer Exp. Points and just used Rare Candies if I needed to make up the difference. Of the percentage-based bonuses, I found the higher dodging rate to be most useful because pretty much any opponent had the potential to trigger it, whereas lots of them didn't have any way to inflict status conditions or any realistic means of KOing Phart (apart from me being careless). But all of them were good in their own ways. It was just nice for Phart to have that sort of passive ability to shrug off an occasional attack here and there.

Could I have managed without it?

Given that most of those bonuses were luck-based, I'm leaning towards yes. It's true that the 10% dodge chance did go off at least once in most of the "important" battles that I began with a load of X items, but really, it wouldn't have mattered if most of those dodged attacks did hit because Phart would usually not be losing that much HP to them, especially if it was already at +6 Defense/Sp. Def. The discount Shed Skin effect also wasn't that necessary when my bag was full of Full Heals and functionally identical items, or Full Restores for the times when I also needed to replenish its HP as well. And as for the 25% chance of tanking knockout blows... sure, it did save Phart a few times, but if it ever activated then that meant there was a 75% chance of Phart fainting and the battle being lost. Ideally I'd just, y'know, not put it in that position in the first place. (I know there were some times when an opponent could OHKO Phart from full HP and that couldn't be helped, but I don't recall any instances where that wasn't reliant on them getting a crit, so it'd just be a case of not being unlucky.)

I've already mentioned that the 20% extra Exp. Points was a bit of a double-edged sword, so I'm sure Phart would manage without them. But it's the loss of the boosted critical hit ratio that I think would sting the most, because that would mean a 50:50 chance for Phart to miss out on a 50% power boost to every single Struggle it used. Plus it would miss out on being able to bypass Reflect whenever it failed to get a crit. So that would represent an overall drop in Phart's power on average, meaning it'd take longer to KO foes and leave more opportunities for them to strike back with their own critical hits, possibly KOing it if the timing was just right.

But even the loss of guaranteed crits is ultimately just something that would make Phart a bit more vulnerable to bad luck. It's not some crucial feature without which it could never succeed, and I think the same applies to the other affection bonuses, so I'm fairly confident it could have managed with zero affection. Which is funny because I was convinced affection bonuses would be almost mandatory going into this challenge.

43-7.png

Skipping turns with useless items

I'm not really sure how to word what this feature even is. If it has an official name/descriptor then I must have missed it. But basically, ever since Gen 5 (I think), it's been possible to "use" an item on a Pokémon even if it would have no effect, which essentially skips the turn without consuming the item in question - previous games would just display the "It won't have any effect" message and refuse to let the item be used. You could also pull this off in older games by using a Poké Ball in a Trainer battle, but that actually does consume the chosen Poké Ball prior to Gen 4, so you'd need to keep a good supply of them if it was a strategy you were relying on.

But why bother wasting the turn entirely when I could just heal Phart with a Moomoo Milk or something instead? To be fair, that usually would've been the most optimal choice, but I wasn't always in a position where I could spaff resources like that, and unless there was a genuine risk of Phart being knocked out then it would be fairly wasteful to heal it every single turn, compared to just clicking an Antidote for several turns and then using a Moomoo Milk.

There were quite a few situations where turn-skipping strategies proved useful. Sometimes I simply wanted to scout Phart's opponent and see which attack it used or how much damage it dealt, and if Phart was at full or nearly-full HP then there was no point healing it instead. Sometimes Phart's opponent had a recovery move and was bulky enough that it couldn't Struggle through them, so it was better to just stall them out. Sometimes they'd have a move like Bide or Counter that needed playing around or PP-stalling before it was safe for Phart to attack, and speaking of Counter, I'd occasionally run into something like a Pyukumuku where the safest option was to just never attack it at all, letting it be the one to Struggle and KO itself. Once I finally got hold of the Rocky Helmet, it was sometimes better to let the opposing Pokémon faint by repeatedly touching it instead of having Phart attack them. And while they were mostly confined to the Rainbow Rocket Grunts and their bizarre Pokémon sets, some opponents were just so shit that it was easier to completely stall them out rather than bother letting Phart get hurt. There's probably some other use cases I've forgotten about, but you get the point - I got a lot of mileage out of a mechanic that probably wasn't intended to be used as a skip-turn button.

Could I have managed without it?

This is most likely a yes. "Useless items" in this case meant items that literally could not be used, so even if I banned myself from using stuff like Revives on Phart while it was perfectly conscious, I could still just spam healing items whenever it lost even the slightest amount of HP. And if I needed to stall while it was at full HP, I could always bring along some X Sp. Atks and X Accuracies to buy it another 6 turns, or use a Guard Spec. every 5 turns even if it wasn't needed. If that's still not enough, I could just use a Leppa Berry and let Phart Splash for 10 turns. So yeah, there are still quite a few options available even if I forbade myself from achieving absolutely nothing on a given turn.

The only issue I can think of is with the rare Embargo users. My usual strategy was to chuck Poké Balls at them until the Embargo wore off, since I couldn't use any items on Phart while it was active and I didn't want Phart Struggling itself to death while I couldn't heal it, but Poké Balls would almost certainly count as useless items in that context. But considering there were only 5 Embargo users in the game and none of them were featured in any scary boss battles, I don't think it would've mattered very much. At worst, I might have had to reset a few times until Phart didn't get Embargoed at a bad time and forced to KO itself with Struggle recoil.

43-8.png

Festival Plaza The Phart Zone

I always preferred the PSS myself, but that's more to do with the games' communication features (which I barely had to use in this run). What really mattered in this challenge were the facilities that Festival Plaza had, along with the fact that it used its own form of currency that didn't require any amount of Pokémon battling at all (apart from the Battle Agency, but I ignored that). Combined with Festival Plaza being accessible as soon as I unlocked trading, it basically meant that Phart had access to an unlimited source of healing items and EVs as soon as it arrived from Ultra Moon, the only restriction being that most services were once-a-day affairs and Festival Coins were slightly limited at first.

When I do regular playthroughs of the Alola games, I never really use the communication features, meaning the people who show up in Festival Plaza are just the generic Festival Fan NPCs. So I was a little surprised to find that they were permanently exiled as soon as Selene (my Ultra Moon character) showed up, and even more surprised that she never left Festival Plaza. She ended up being a fairly reliable source of Festival Coins, asking me to compare random game-related stats with her every hour or so and giving me 17 FC if I had a higher stat. Sometimes she asked me to show her a visitor who ranked really highly among my Festival Plaza visitors instead, which I couldn't do because she was the only visitor, but all I had to do was wait another hour or so before her request got rerolled. I also did FAR more missions than anyone should ever have to do for the sake of grinding even more FC, and considering I had well over 20,000 FC to spare by the end of the challenge, I'm not sure it was entirely worth it. At least now I really know my inverse type matchups?

It's hard to describe how useful Festival Plaza was overall because I was frequently swapping out its facilities throughout the game when Sophocles offered me better ones. So I'll just list the facilities I found some use for below (all of them except the Switcheroo - it's useless if you aren't touching the Battle Agency), roughly sorted from least to most useful:

  • Dye houses: Oddly enough, you can actually beat the game without buying new clothes. But I thought I'd make a bit of an effort to dress up Elio since the run went on for so long, and if Sophocles was nice enough to offer me three different 5-star dye shops, I was hardly going to turn them down, especially since I didn't need all 7 facility slots for practical stuff by that point. So yeah. Functionally worthless, but fun.
  • Haunted houses: I'll be honest, these were fairly shit. You pay 10 FC, your Pokémon goes into the haunted house, then it comes out with an item. Usually a Hard Stone, sometimes a vitamin or Hyper Potion or Festival Ticket or other item of that calibre. And if you were lucky, they might bring you back a second item from the same pool! They could boast having some practical use unlike the dye houses, but the only reason I ever had 2 haunted houses in Festival Plaza was because they were already there when I first unlocked it, and I replaced both of them pretty quickly.
  • Fortune-teller tents: Apart from sometimes boosting the likelihood of me getting rare items from lottery shops or haunted houses, none of which were especially vital, the tents served as a way of increasing the Festival Coins I'd get from a randomly-selected feature of Festival Plaza. The Battle Spot, GTS and Wonder Trade bonuses were useless, but the bonuses to missions and to Festival Plaza (i.e. talking to Selene and comparing stats) helped with grinding FC and increasing Festival Plaza's rank, letting me cycle through Sophocles's new facility offerings a bit faster. The tents were mostly hampered by me having too many useful facilities to squeeze them in in the earlygame, and then having too many FC for them to be particularly beneficial later on, but they still served a purpose.
  • Lottery shops: These are quite similar to the haunted houses in that you get one chance a day to win a random prize, with some common dud prizes and rarer ones that are (allegedly) more useful. It even has the same rare chance of letting you win two prizes at once. The reason I rate it higher than the haunted houses is because the prizes are generally better overall - the lottery shops named Gold Rush gave me Nuggets and Big Nuggets as their top prizes, and all of them had stuff like Full Heals and Berry Juices as their bottom prizes, which weren't amazing but certainly meant more to Phart than Hard Stones. They were basically just an occasional source of high-value items and low-quality medicine, which was better than most of the other facilities that could take their spots, especially once Phart's EVs were finalised.
  • Bouncy houses: These facilities come in 3 exciting varieties: ones that raise Attack and Sp. Atk EVs, ones that raise Defense and Sp. Def, and ones that raise HP and Speed, with higher-ranking bouncy houses offering additional courses that give more EVs at once. I think I ended up with three HP/Speed houses and one Defense/Sp. Def house across the run, and there was a point at which Phart was able to gain 84 HP EVs per day from the bouncy houses I had at the time, though it only got to do that once because it was already almost fully-EV'd by then. But that was very much the point of the bouncy houses - giving Phart a way to quickly increase its EVs during the earlygame portions where it needed every little boost it could get. It already had maxed-out EVs (even if they weren't 100% optimal) by the time I reached Akala Island, so that was definitely a big help.
  • Food stalls: Kind of hard to lump the different types of food stalls together because they all served different purposes, but I'm doing it anyway. I used a Rare Kitchen exactly once at the start of the game to bring Phart from Lv. 5 to Lv. 8, giving it the stats to go toe-to-toe with the mighty Caterpie and Wingull, then never touched it again because I didn't want it zooming past the obedience cap. I got a lot more mileage out of the Battle Table, which was basically like the bouncy houses except it could boost Phart's EVs in all of its stats, not just two per facility. The only downsides were that it only did 10 EVs per meal (the bouncy houses I had went as high as 60 EVs from a single facility) and they cost a little more FC per EV, but still nice to get some extra boosts to Defense/Sp. Def. I also had a Friendship Parlor at one point, which mainly provided useless friendship-boosting meals (duh) but also had one that would subtract 100 Attack EVs from Phart. I think I'd planned to use it for optimising its EVs a bit more, but I don't recall ever using it before I reached Ula'ula and unlocked the EV-reducing berries, so the food stalls were basically just another source of EVs and a few levels very early on - in other words, pretty useful.
  • Goody shops: Again, there were a few different types of facility that fell under the "goody shop" umbrella, but overall I think I got the most use out of these facilities. I'll ignore the Ball Shop I started out with (as limited as my resources were, even I didn't need 12 Poké Balls), but the General Stores and Pharmacies I came to possess were a handy source of Fresh Waters, Hyper Potions and Full Heals (or similar stuff like Rage Candy Bars) at the start of the game when I didn't have enough money to splurge on Poké Mart items. The absolute star of the show, though, was the Soft Drink Parlor, which gave me 24 Moomoo Milks a day for only 30 FC as soon as I first unlocked one around Totem Araquanid. And then when I upgraded it from a 1-star facility to a 2-star just after Totem Marowak, that increased to 48 Moomoo Milks! That was the equivalent of a Max Potion to Phart at the time, and even once its HP stat started to outgrow their 100-HP heals, they were still perfectly good at healing it outside of battles. I had a full stack of 999 Moomoo Milks when I finally ditched the Soft Drink Parlor halfway through Ula'ula and I didn't finish using them until after Episode RR, which I think says a lot about how much of this challenge was propped up by stuff I bought from goody shops.

Could I have managed without it?

Despite having verbally noshed off Festival Plaza in such excessive detail just now, I still think this is a yes, though it'd be quite unpleasant. The dye shops and fortune tellers wouldn't be missed at all, and the haunted houses and lottery shops were an inconsistent source of vaguely-useful items, so the facilities that I'd actually suffer without would be the goody shops, food stalls and bouncy houses. Narrowing it down a bit further to the useful functions of those facilities, there are 3 functions of Festival Plaza that I might have missed: the medicine, the EVs, and the levels.

The 3 levels Phart gained from the Rare Kitchen would actually be 100% replaceable - the man in the Pokémon Center Café on Route 1 gave me 3 Rare Candies for having fed 20 Poké Beans to my Pokémon, I just never bothered using them - so that wouldn't be an issue. The loss of "free" (i.e. not bought with Poké Dollars) medicine would be a much bigger problem, because money was pretty tight at the start of the game and I don't know how easily I'd make up for the loss of 12 Fresh Waters a day. I might've had to try that awful-sounding tactic of savescumming until I caught a Meowth/Grimer at the Trainers' School that's holding a Quick Claw/Black Sludge, then selling it for $2,000, just to get me through the super-early stuff. Once I reached the first Ilima fight in Hau'oli City, I'd be able to buy Fresh Waters from a nearby vending machine for $200 each, a direct upgrade over regular Potions that cost the same but don't heal as much. Super Potions and Roto HP Restores would be available in time for the first trial, for any occasions where Phart needed a lot of HP replenishing, and once I'd beaten Hala I'd be able to buy unlimited Max Potions from Mantine Surfing regardless of how disastrous my finances were.

And what about EVs? Without Festival Plaza, there'd be no way for Phart to get any sort of tailored EV training on Melemele Island, short of old-fashioned grinding against wild Pokémon... which sounds absolutely horrendous. Even if it could OHKO every wild Caterpie it came across, how would I heal the Struggle recoil with such limited access to healing items? So realistically, Phart would be plodding along with whatever handful of EVs it received from beating up its foes, and given that it was somewhere around 252 HP / 19 Atk / 105 Def / 10 SpA / 106 SpD / 21 Spe before I left for Akala Island, it would be missing out on a lot of EVs early on without its beloved bouncy houses.

But I don't know if those missing EVs would actually translate to a massively harder earlygame. Take Hala, for example: if I plug his Crabrawler's stats into a damage calculator and put it alongside the Lv. 19 Phart it fought during the challenge, its Pursuit would deal, at most, 62.7% to Phart with a critical hit if Phart had absolutely no EVs. With the EVs Phart actually had in that battle, a crit Pursuit maxed out at 51.7%. It's not a trivial difference, but taking about 20% more damage than before wouldn't be that bad, especially if I took the time to grind money to stock up on X items before the scarier fights like Hala or Totem Gumshoos. If I did get past his grand trial, then I'd be able to buy as many vitamins as I needed with Mantine Surf BP, which would help pad out Phart's stats for Akala (though the 100-EV limit on each stat would still leave it slightly held back, and I'd probably have to invest some in Attack and/or Speed). I'd still have to wait until Ula'ula Island to reach the EV-reducing berries, but once I got there, I'd be able to combine them with Isle Aphun to properly EV Phart like I did in my actual run, and then it'd be sorted for the rest of the game. So in summary, I don't think any massive run-ending issues would arise from not using Festival Plaza, but it would be quite a lot grindier. And that's no fun.

43-9.png

X items

Imagine you could somehow teach Swords Dance, Iron Defense, Amnesia, Agility, Focus Energy and Mist to a single Pokémon. Now imagine they don't take up any moveslots, have infinite PP, have priority over every other move in the game, and they can't be affected by anything like Taunt or Disable, and you're quite close to describing how X items worked for Phart.

I only had to make do without X items for a short period before I could buy them in Hau'oli City, and they were still slightly limited by how strapped for cash I was at the time, although most opponents on Melemele were close enough to Phart's natural power level that it didn't need to go +6 in every stat to beat them. But once I overcame my money issues... well, I don't think I need to explain why being able to quadruple all of Phart's stats, guarantee it lands critical hits and temporarily prevent those stats from being lowered was so useful. Hardly a battle went by where I didn't use some X items, and most boss battles were an excuse to fill up Phart's status screen with those big pink arrows and then smash the shit out of everyone with Struggle. Just to illustrate how powerful X items were, when Phart was at +6 in all its relevant stats, it was equivalent in power to having base stats of 43/170/226/29/226/202. Being stuck with Struggle as your only move is a lot more manageable when you have 896 BST!

Of course, there were downsides to being so dependent on having stat boosts to make Phart less Cosmog-like. I didn't need to worry about Psych Up thanks to Phart having Unaware, but the occasional users of Haze or Clear Smog would instantly bring it back down to earth, stripping it of everything apart from the Dire Hit boost and forcing me to set up all over again if there were any other opposing Pokémon to deal with afterwards. And although Guard Specs. would protect it from annoying status moves like Screech or Charm (or even lucky drops from moves like Crunch), there was still the matter of actually using the Guard Specs., which was sometimes difficult to do in battles where Phart needed constant healing or hadn't set up its other X items yet. But it was critical hits that gave me the most misery - even though they usually only had a 1 in 24 chance of landing, I still had to manage Phart's HP to account for it possibly taking 6 times the usual damage from pretty much any attacking move. Sometimes its opponents were so strong that it would never be able to tank a crit without affection kicking in, so I had to just hope Phart could KO them before they KO'd it... which was made more difficult by some of those strong opponents carrying stuff like Night Slash, or Super Luck, or Night Slash and Super Luck. Despite those issues, I think it's safe to say X items were one of the most useful features I had on my side throughout the challenge, as there were very few battles where I didn't use them to some extent.

Could I have managed without it?

I'm going to say no despite the fact that I think it probably is possible, just because it sounds so awful to go without them. The immediate consequences of not using X items (i.e. Phart having dogshit stats for the entire game) are pretty obvious, but it gets even worse when I think about the finer details. Phart not getting any X Speeds means it would be attacking second the vast majority of the time, so any scenario where it might fall below 25% HP before it got to attack means it'd risk KOing itself with Struggle - affection bonuses wouldn't be able to save it from recoil damage. With no Defense or Sp. Def boosts either, that would cover a lot of scenarios, and it would probably have to resort to PP-stalling its foes without its usual Attack boosts to improve Struggle's damage output. Not that PP-stalling would be especially easy without any defensive boosts - it would probably be a case of spamming potions and praying that Phart's opponents don't get any crits, because all it would have to protect itself are random affection bonuses. Even if that somehow works, there's still the issue of Phart no longer having Guard Specs. to prevent its stats from falling even lower than they already would be. What could I possibly do to stop something like Guzma's Golisopod from dragging its Defense down with Razor Shell and then chewing it to bits?

I haven't even got into Double Battles and Totem fights yet. Every issue I mentioned about praying Phart isn't struck by critical hits or has its stats lowered becomes even worse when there are two opponents at once who can do those things. How would I get past Totem Gumshoos, whose Bite did nearly 50% to Phart in my actual run with a critical hit, when its ally Yungoos can freely spam Leer and Phart has a completely unboosted Struggle? And what about Totem Mimikyu, who brings along its friend Banette that knows Screech and Curse? Unless Phart had a godly streak of luck with its affection bonuses and dodged 15 Shadow Claws in a row, I don't think there's much it could do besides waiting to die. If I accept that Struggle is going to do fuck all in these circumstances and there's no point ever using it, then I guess I could just grind Mantine Surf for all eternity until I have enough Rare Candies to bring it to Lv. 100, because it's not like I'd have to worry about disobedience if it's never using any attacks. But that's terribly boring, it still doesn't guarantee there won't be some postgame opponents that can break through it, and it assumes I actually manage to get through Melemele Island in the first place. I imagine it should technically be possible to beat the game without X items, but I would seriously pity any person who takes it upon themselves to prove it.

43-10.png

Wild Buneary

It's slightly ironic that, for all of Phart's dependence on being constantly healed, being healed by someone else was one of the worst fates that could befall it, just because that would restore all its Splash PP and lock it out of Struggling until they were gone. With how many times those forced heals popped up across the game, I had to find some way of letting it exhaust its Splash PP without exhausting itself in the process and chewing through loads of potions. My initial thought had been the wild Metapod on Route 1, as they'd only know Harden and therefore grant it 30 turns of Splashing before it started taking damage, but alas, they only live on Route 1 in SM, not USUM.

As luck would have it, the Pokémon that sort of "replaced" Metapod on Route 1 was very well-suited to Phart's needs. Buneary appears at a 30% rate in the field of grass where you obtain your starter in USUM, and can only be Lv. 2 or Lv. 3 so it's not dishing out massive damage. The moveset it carries at those levels (Defense Curl/Splash/Pound/Foresight) not only gives it a mere 25% chance of hurting Phart each turn, it also gives it a whopping 155 PP before it starts Struggling itself, which guaranteed that Phart would be able to use up all its Splash PP in a single Buneary encounter, even if it was disobedient and spent most of its turns loafing around. It did get slightly nerfed in a sense once I'd cleared the first trial, because the Buneary gained the ability to call for help and drag out the battle whilst also dealing a bit more Pound damage to Phart, but it wasn't a disaster or anything. It actually got a bit easier once I'd grabbed some Leftovers, because Phart could sit there and heal off any damage it did take in the battles, but I didn't use that trick very often because I was at a point where I had enough healing items to not care (and the Leftovers messages made the battles even longer). The fact the Buneary could hurt Phart at all meant they weren't perfect as a means of burning Splash PP, but there wasn't much room for improvement.

Could I have managed without it?

This is an easy yes. Technically Phart could waste Splash's PP against any wild Pokémon that had a non-damaging move, so long as I was willing to save the game beforehand, flee every encounter after using one Splash, and reset if Phart took any damage at all. But that wouldn't be very practical. Unfortunately I probably would have to do something along those lines in the earlygame if Buneary somehow didn't exist in USUM, but once I'd reached Melemele Meadow I could use the wild Metapod there for safely burning Splashes (though all of their SOS allies are Caterpie, who has a 50% chance of using Tackle every turn), and then after clearing Lana's trial I could fish up wild Magikarp, which would either only know Splash or have a 50% chance of Tackling like Caterpie. Buneary was the most practical way of consuming Splash's PP I could come up with, but it's certainly not the only way I could've done it.

43-11.png

Rotom Dex (specifically Roto Loto)

When it wasn't busy taking up the bottom screen being a gobshite, the Rotom Dex sometimes threw me a couple of Rotom Powers to help me along my journey. Some of them were quite useful, others really weren't, but it was always nice to have another source of items without having to cough up any money or win any battles. I eventually stopped bothering with the Roto Loto somewhere around Poni Island because I already had like 30+ of each power and didn't need any more, but I guess that shows how easy it was to get hold of them.

I've roughly sorted them from most to least useful below, though some of them felt about as useful as one another so I've split them into three categories as well.

Useful Powers:
  • Roto HP Restore: A Max Potion by any other name would smell as sweet, and that's what the Roto HP Restore was. Despite them probably being the most useful Rotom Power for me overall, I still didn't use that many of them across the run, just because getting hold of them was a literal lottery and actual Max Potions were fairly affordable once I unlocked them.
  • Roto Bargain: These things are the reason why Max Potions were affordable. Roto Bargains cut the prices of every single item at every single Poké Mart in half for 10 minutes, so I was saving tens of thousands of Poké Dollars every time I made a big purchase of potions/X items/etc., and I had enough of them on hand to even use them for smaller purchases. Given that I finished the game with well over $9,000,000 to hand, perhaps some of those uses weren't necessary, but I had plenty of Roto Bargains in my bag and there was no reason not to use them.
  • Roto Catch: I probably didn't have to catch half the Pokémon I caught in this run, but any attempts I did make at capturing stuff were hampered by Phart not having the best moveset for weakening them, to say the least. So it was nice to have an item I could use to instantly boost the odds of success and make up for the lack of False Swipe and/or Spore - it roughly doubled the chance of catching a given wild Pokémon whenever I used it, which was very handy when I was rounding up legendaries in the postgame. Whether I actually needed to catch all those legendaries is another matter (spoiler: I did not), but at least I can say Zygarde was mandatory in order to unlock the final Dexio battle.
Vaguely Useful Powers:
  • Roto Boost: I really thought this one would be amazing at first, but what actually happened is that it was fairly useful early on and then dropped off quite quickly. An instant, guaranteed omniboost sounds really good even if you ignore the Sp. Atk boost that does nothing for Phart, but that supposes that it actually needs all those boosts - unless the opponents have both physical and special attacks, it's a waste to boost both defenses. And even when I did use a Roto Boost, adding +1 to its defenses meant that Phart would be taking more damage initially than if I'd used an X Defense/Sp. Def instead, so the handful of turns I'd gain from using Roto Boosts over X items would be slightly offset by needing to heal Phart earlier than otherwise. That's not to say Roto Boosts were bad, because they weren't, especially early on when I didn't have enough money to constantly splurge on Poké Mart purchases. But I found that their niche compared to X items just wasn't worth it 99% of the time, so they were mostly outclassed by the time I'd got a decent amount of money to play with.
  • Roto Hatch: I toyed with putting this one under Useful Powers, because it was very handy for halving the time it took to hatch my army of Ralts in order to unlock all the Poké Pelago functions, but that was literally the only time I used a Roto Hatch in the entire playthrough. Besides, it's perfectly possible to hatch Eggs without using a Roto Hatch (as every other game in the series will tell you), and I was already using a Flame Body Litwick to help hatch them as well, so it wasn't 100% mandatory to use it even on the one occasion where I found it useful.
  • Roto Prize Money: I've mentioned already that I had well over $9,000,000 by the end of the run, so a power that tripled the prize money I received from Trainer battles obviously wasn't in high demand. I did use a few of them against the Elite Four/Title Defense battles at the run's final stages, but that was just for the personal amusement of seeing how high I could get the money to go and not because I actually needed them, but I could have used one or two of them in the earlygame to squeeze a few extra thousand Poké Dollars out of the odd Gentleman or Madame. I didn't actually do that, and I probably shouldn't be judging its usefulness based on times I could've used it but didn't, but I think it would be unfair to say the Roto Prize Moneys were useless.
  • Roto Stealth: A power that prevents you from encountering wild Pokémon for a while? That sounds a lot like a Max Repel, probably because it is. I did use a couple of Roto Stealths, mostly when I was charging back and forth through cave sections I'd already explored - since their duration is time-based rather than step-based like the repels, I could get more mileage out of them than a Max Repel if I had Tauros run around very quickly and didn't stop for any battles or items. But they were mostly interchangeable with Max Repels, which I could easily afford, so they didn't see much use overall.
Generally Useless Powers:
  • Roto Encounter: Oddly enough, Phart didn't want to encounter even more wild Pokémon whenever it went wading through tall grass, and neither did I. I guess there might've been some occasions where I was searching for a specific wild Pokémon (like Munchlax when I was hunting for Leftovers) and a Roto Encounter could have saved me a few seconds of shuffling around... but I doubt it would've made much difference.
  • Roto Friendship: I can't think of any time when I actually needed Phart to be friendly in order to receive an item or whatever, and even if there was a time, I'm pretty sure it would have already been at max friendship from all the running around and backtracking and usage of X items that I did, not to mention never letting it faint (I always reset the game if that happened). So no need for Roto Friendships to make it like me more.
  • Roto Exp. Points: The only time I made use of this power was when Rotom automatically used one in Melemele Meadow, and it lasted long enough for a battle against one Lv. 12 Oricorio. And even that wasn't particularly helpful. There just wasn't any point increasing the number of Exp. Points Phart got from battling, because it was "strong" enough without deliberately grinding and I preferred to keep its level as low as possible to avoid the obedience caps (or keep its disobedience rate as low as possible, once it did go past the caps). Even if I did want to level it up more for some reason, I'd have much rather used Rare Candies to do it.
  • Roto PP Restore: This should be rather self-explanatory. Struggle is good, Splash isn't, and the former only works when the latter has no PP. It's a pity you can't sell Rotom Powers, otherwise I could've made a small profit off these ones instead of them sitting in my bag forever.
Could I have managed without it?

Pretty sure this is a yes again. I've already demonstrated that some of the powers were useless to me and other ones were basically the same as regular items like Max Potions or Max Repels, so I wouldn't be missing out on much. The loss of Roto Bargains would mean everything cost twice as much in Poké Marts, and I'd need to buy a few more items than before without access to the HP Restore, Catch, Boost and Stealth powers that helped cut down on the resources I had to purchase. So money would be tighter, but otherwise things would be mostly the same.

Bear in mind as well that the period of gameplay where not having Roto Loto would be notably restrictive on my money is pretty small - the feature's only first unlocked at the Pokémon Center on Route 2, so everything before that would be unaffected by the loss of Roto Loto, and once I unlocked Mantine Surfing I could get as much money as I wanted from selling vitamins bought with BP. That in-between period covers Totem Gumshoos, the first Dulse fight, another Hau fight, and Hala's grand trial, plus another 6 random Trainers, which feels short enough that I could probably manage without Roto Bargains and all the other stuff.


That section on the Rotom Dex brings me to just over halfway through the 100,000+ characters I've written, so I'll have to leave the rest for another post. It should be slightly shorter than this one, but if this part felt too lengthy/boring then the next one will likely be no different.
 
44-1.png

Useful Features, part 2

If brevity is the soul of wit then I am absolutely fucked. Nevertheless, here's the second half of my 19,000-word essay about the features of Ultra Sun that helped Phart triumph over Alola.

44-2.png

Leftovers

The Alola games don't feature any instances of random Leftovers lying around in some postgame area, or any other areas for that matter. What they do have are wild Munchlax roaming around the section of Route 1 that becomes accessible after Hala's grand trial, and they're guaranteed to come holding Leftovers. Since Phart's held items up to that point had been one-use Sitrus Berries or the Quick Claw, the latter of which was basically worthless unless it activated against a faster foe to KO them before they could attack, gaining Leftovers after the slight ordeal of catching a Munchlax was a definite step up.

Ideally I'd write something here about the specific battles where having Leftovers made a huge difference, but I'm not sure if there were any notable ones... it was more of a nice bonus to have in the background. Any time Phart was left with less than 1/16 of its max HP after being hurt by an attack or recoil damage probably counts, as that would have resulted in it fainting without the Leftovers recovery, but I imagine I would've just used more healing items in those circumstances. So it was more of a way to slightly reduce the number of potions I had to pour into Phart's mouth, which was still a good thing. And it was funny to watch it use up all its Splashes against a pair of wild Buneary and still emerge completely unscathed.

Could I have managed without it?

The description I wrote above about how the Leftovers helped out seems to have veered off into saying they weren't even that good, so it's not surprising that I think the answer is yes. For starters, the period of time between Phart first grabbing hold of them and Phart swapping them for the Eviolite "only" covered the very end of Melemele and most of Akala. Certainly there will have been some battles in there where having passive recovery was more convenient than spamming extra healing items, but HP restoration was hardly a property unique to the Leftovers. Also, most of the opposing Trainers in that section of the game were using 1 or 2 Pokémon, mostly unevolved ones with no EVs, while Phart was already fully-EV'd by that point (not 100% optimally but close enough) - unless those battles somehow took more than 15 turns or so, the total recovery from Leftovers would be less than one single Moomoo Milk at that stage of the game, i.e. not mind-blowingly good.

So, I know Phart would still grab the Eviolite as usual once I got to Konikoni City, but what would it hold in the meantime if I didn't give it the Leftovers? My usual go-to in most playthroughs would be the Silk Scarf or some other type-specific item, but unfortunately Struggle is typeless so they wouldn't help at all. However, there are a few held items available that might have been useful in the pre-Eviolite period:
  • Quick Claw, which I already had pre-Leftovers. If Phart was within a Struggle of KOing a faster opponent, the Quick Claw would have a 20% chance of saving it from taking one extra attack in return, but that's quite niche.
  • Sitrus Berries, available from big piles of berries on Routes 2 and 3. Having to fend off or catch a wild Crabrawler every time I needed a new Sitrus Berry would get annoying quite quickly, but they would still be useful, basically being 4 turns of Leftovers recovery condensed into one fruity blob. Definitely the closest substitute for Leftovers of what's available.
  • Normalium Z, which I already had pre-Leftovers. Z-Splash might have been nice to start off battles with a +3 Attack boost, but having to use Splash 39 times against wild Pokémon every time I wanted to use it? No thanks. Ethers/Elixirs and Leppa Berries do exist, but even doing it 9 times would still be a chore.
  • Shell Bell, available from Hau'oli City Hall around the time Leftovers would've been available. I don't really rate this one too highly even in regular playthroughs, where I'm using Pokémon that get OHKOs/2HKOs much more easily and don't hurt themselves every time they attack, so I can't see Phart getting much use out of it either. 1/8 of its Struggle damage usually wouldn't translate to very much HP.
  • Scope Lens, available from Paniola Ranch. Technically would provide a mild bonus for Phart by increasing its critical hit ratio from 1/12 to 1/4... but that's still not guaranteed, whereas using a Dire Hit would guarantee them even if Phart wasn't holding the Scope Lens. Probably not worth it.
  • Amulet Coin, available from Paniola Ranch. This one's obviously useless for battling purposes but would let me generate a little extra cash from Trainer battles to buy more potions/X items. However, since Mantine Surf would already be available by that point in the game and is a much better way of grinding money, I don't think the Amulet Coin would be worth it, even if Phart's other options for held items wouldn't be much better.
  • Bright Powder, available from trading with an NPC on Route 5. If you squint hard enough, the Bright Powder is sort of like the Leftovers in that it reduces the overall damage Phart takes from attacks... just by dodging some of them entirely instead of slightly healing it. A 10% lower chance of being hit wouldn't be amazing on its own, but it'd be an additional slice of cheese to add to the bullshit sandwich that is affection mechanics.
  • Muscle Band, purchasable from the Battle Royal Dome for 48 BP. A 10% boost to Struggle would be a small but welcome bonus. Not much else to say really.
If I couldn't use Leftovers, I'd probably stick with the Quick Claw at first, maybe head back to Melemele to grab a Sitrus Berry or two if Phart really struggled with some battles in early Akala, then go with either the Bright Powder or Muscle Band after obtaining them until I reached the Eviolite. None of them seem quite as useful as the Leftovers were, but Phart could still manage with those second-rate held items if Alola's Munchlax population suddenly went extinct.

44-3.png

Mantine Surf

I'd like to preface this section by saying FUCK SHARPEDO.

Moving on. Unlocking Mantine Surf at the end of Melemele Island felt like the first real safety net in terms of access to resources - Festival Plaza did have me covered for Fresh Waters/Hyper Potions and Full Heal-type items by that point, but not for X items or actual cash with which to buy them, plus all the Festival Plaza services were limited to once per day. But with Beach Points and Battle Points somehow being interchangeable in Alola (try not to think too hard about how that would work), I could buy some handy items with the BP earned from pulling off sick moves atop a Mantine! Mostly vitamins, because they were 2 BP each and sold for $5,000 apiece, so I was able to make a nice $80,000 profit at the start of Akala from a few surfing sessions. Phart even got to drink a few of the vitamins itself to up its defenses.

A slightly odd side-effect of Cosmog being banned from Alola's battle facilities was that Mantine Surfing was also the only way for me to earn BP in this run, and therefore the only way I could buy items from the Battle Royal Dome and Battle Tree too. I don't recall actually buying anything from the former, but I did grab a Rocky Helmet from the Battle Tree, and it saw some use during Episode RR. 48 BP was a little steep, but I knew all the super-cool surfing tricks by then and could easily score 50 BP from a single run on the Ula'ula course, much better than the 10 BP I was getting at the start of the game... provided I was willing to deal with those shitty fucking piece of shit sharks.

I honestly expected I'd need to use Mantine Surf a lot more than I ultimately did when I was first planning out the challenge. I dunno, maybe I just underestimated how much free stuff the game would throw at me, but I was expecting to have to save money by buying the 2-BP Max Potions that the beach BP shops sold, and maybe even save up for the 48-BP Rare Candies at some point. But no, money was hardly ever an issue after the initial bit of vitamin-selling, and some of the stuff I'd want to spend money on (HP-restoring items and Full Heals) was already covered by Festival Plaza. But Mantine Surf still had some use even if it wasn't as much as I anticipated, and like I said, it was nice to have it as a safety net - no matter how badly I fucked up my item management, I could always go surfing for a bit and use the BP to buy more things again.

Could I have managed without it?

The pedantic answer is no, because you can't get to Akala Island in USUM without riding Mantine on your first trip, but that's also a boring answer. It's a yes if you ignore that mandatory trip - the only things I'd really miss out on would be vitamins and the Rocky Helmet. No vitamins means Phart would be a little lighter on defensive EVs, but I only got to use 2 Irons and 2 Zincs on it anyway and I still had bouncy houses/Battle Tables in Festival Plaza that would raise those stats, so its EVs would probably just take a couple more days to be maxed out under those circumstances. Missing out on selling vitamins would hurt a bit more, although I apparently already had $84,000-ish at the start of Akala even without selling Irons and Zincs, so maybe I could get away with just being a bit stingy and only buying X items that I needed to use straight away. That leaves the Rocky Helmet, which I don't want to go into too much detail on because it's got its own section coming up, but the fact that I used it for 9 battles against Rainbow Rocket Grunts should tell you how necessary it was overall. I would miss Mantine Surf and the BP it gave me, but I don't think I'd suffer too much in its absence.

44-4.png

Pokémon Nursery

On my first trip through Paniola Ranch, I didn't have any need to use the Pokémon Nursery. And why would I? Pokémon don't gain Exp. Points from being left there like in older games, and even if Phart could breed there'd be no reason for it to do so. When Mohn rolled up a little further into the story and unlocked Poké Pelago, however, I suddenly found myself in need of lots of Pokémon to chuck in the PC, because fully upgrading all the islands required having 90 Pokémon in storage. Catching some random low-level fodder on Route 1 would have worked just as well and helped to minimise the unwanted Exp. Points Phart would gain from the captures, but it would still gain some Exp. Points, and I can't imagine backtracking to a Pokémon Center to deposit a freshly-caught Yungoos 70+ times would be captivating gameplay.

Suddenly the Nursery looked a lot more appealing. Hatching Eggs doesn't award any Exp. Points, it doesn't require stocking up on Poké Balls, and unlike catching wild Pokémon, the rules I set at the start of the challenge don't require me to have an empty party aside from Phart whenever I hatch one. Since I already had a Litwick/Ralts pair lined up to breed a Memento Ralts for Double Battle usage later on, I tried chucking them in the Nursery to fill up my boxes, but found that their breeding rate was a bit slow since they were different species that were both caught by me. Fortunately inbreeding has been possible since Gen 3, so after swapping the Litwick out for a male Ralts I'd hatched, running around on Tauros for a bit, then running around some more with a Roto Hatch or two active, Poké Pelago was flooded with enough Ralts to fully develop every island. No catching necessary!

Could I have managed without it?

Yes
, because as I mentioned, I could've just caught a load of wild Pokémon instead to reach that 90-Pokémon requirement. That would've taken a lot longer with me having to run to a Pokémon Center and deposit every single capture before I could start a battle with the next one, plus Phart would get some Exp. Points out of it, plus I'd need to stock up on Poké Balls to actually catch 'em all (not that money was much of an issue by that point, but still). It just so happened that using the Nursery to generate Eggs was a faster way of filling up my boxes.

44-5.png

Normalium Z

This is a weird one in that it was incredibly niche and yet also quite vital to the run. Despite gaining access to Z-Splash as soon as it had defeated Totem Gumshoos, Phart rarely bothered with it because the +3 Attack bonus, while certainly rather nice, was not worth the effort of restoring its Splash PP and then burning through all but one of them so it can start using Struggle afterwards. The only times Z-Splash was worth using were when I needed to specifically use a Z-Move for some reason, or when Phart was in a battle where it needed to be using Struggle as soon as possible and couldn't wait for me to set up X Attacks - as it turned out, there were 2 of each of these scenarios across the challenge.

I'll start with the less important ones. There were a couple of Trainers featured in little sidequests who wouldn't have their sidequest completed unless a Z-Move was used to defeat their Pokémon, so Phart had to Z-Splash against a Clamperl and a Crabrawler before pummelling them in order to receive some admittedly lackluster prizes from completing those quests (a Max Revive and 5 Full Heals). And it was totally possible to defeat those Trainers even without using a Z-Move, so the only reason I "had" to give Phart the Normalium Z was for personal satisfaction... but then again, none of this challenge "had" to happen.

The wild Nihilego that popped up at Aether Paradise was also optional by virtue of being a wild Pokémon, but once I'd decided to try and defeat it, it became apparent that Phart would need Z-Splash to knock it out. Nihilego is set to automatically flee at the end of turn 5 if it's able to do so - since Phart had no way of trapping it, that was guaranteed to happen - and that turn limit combined with Nihilego's attacks being fairly strong meant that Phart didn't have time for me to use 2 X Attacks, nor would the boost from one X Attack be enough. The winning strategy ended up being to use a Dire Hit, then Z-Splash, then a Moomoo Milk to heal the damage from Venoshock/Psywave, then 2HKO it with Struggle. Even that plan took 4 attempts to succeed thanks to Nihilego randomly using Clear Smog to delete the +3 Attack boost, but since Phart had already failed to KO it 12 times before I came up with that strategy, I don't think there's any way it could've defeated Nihilego without the Normalium Z.

That leaves the most important fight of the 4: the Battle Royal. It's debatable whether this fight even counted as a proper Trainer battle (I know I debated it in rather excessive detail at the time), but I decided to count it on the basis of the opponents' Pokémon data being included in the game's data for regular Trainers rather than Battle Royal Trainers. Basically, Phart was up against Hau's Dartrix, Gladion's Type: Null and the Masked Royal's Rockruff in a free-for-all, and the only way for it to "win" was to KO one of them and then survive the rest of the turn. I found that its Leftovers weren't really helping it on my first few attempts and switched to the Normalium Z in the hopes that Z-Splash might give it a better shot of KOing an opponent, most likely the frail Rockruff - while the mandatory Battle Royal did bend some of the usual rules, particularly allowing Phart in at all when Cosmog would usually be a banned Pokémon, it still enforced the no-items rule and prevented me using any X Attacks on it, so Z-Splash was its only way of boosting its Attack. It still took a further 5 attempts before Phart managed to KO Rockruff with a +3 Struggle, but it got there in the end thanks to a bit of Z-Power.

Could I have managed without it?

I'm not really sure, but probably? I've already established that the Nihilego battle doesn't matter and the Trainers who wanted to see Z-Moves could be beaten without them (also, I guess there's still Z-Teleport if it's only Normalium Z I'd be going without and not Z-Crystals as a whole), so it's really just the Battle Royal that's a concern. It took a few attempts to beat it even with Phart having a 2.5x multiplier on its Attack stat, so could we have won without it?

There were no Speed ties among the Pokémon in the Battle Royal, so Type: Null would always attack first (unless Rockruff used Protect), then Phart, then Rockruff and finally Dartrix. I never quite understood what the AI was thinking in terms of its move choices, but it seemed like Type: Null and Rockruff would choose their moves at random (from Tackle/Pursuit and Rock Throw/Bite/Protect respectively), while Dartrix would always use Razor Leaf no matter what. But knowing all of that didn't make it any easier to win, what with Struggle being so weak and targeting opponents at random, Type: Null being faster than Phart and able to steal KOs, Dartrix attacking everyone every single turn, Rockruff having Protect, Phart potentially getting knocked out... there was just far too much that had to go right for it to have much of a chance. Even after I swapped its Leftovers for the Normalium Z to try and give it a better shot at KOing something, it still needed to get lucky, and the level of required luck would be even higher without being able to use Z-Splash.

Perhaps if I couldn't use a Normalium Z, I might have given Phart the Scope Lens instead for the 1 in 4 chance of getting a crit. That'd probably be better than the Leftovers, since Phart seemed to have fairly good odds of surviving the Battle Royal and wasn't relying on that tiny bit of regained HP to stay conscious. So then I'd just have to hope that Rockruff ends up very low on HP on a turn where it isn't using Protect, Type: Null isn't able to KO Rockruff before Phart can move, Phart targets Rockruff and KOs with Struggle, then Dartrix fails to KO Phart with Razor Leaf. That's a lot to ask for, but if that did eventually happen, then I'd be able to complete the rest of the game without ever needing to use a Z-Move. (Of course, I could also just decide that the Battle Royal doesn't count because it's not a standard Trainer battle. But where's the fun in that?)

44-6.png

Ralts (and Abra)

USUM features 23 Double Battles between the start of Route 5 and the end of Poni Gauntlet, and as with most games there's no option to take them on with just one Pokémon (pretty sure it's just the Orre games that let you do that). Since skipping them entirely would be a bit lame in a challenge where the point is to defeat every possible Trainer, not to mention impossible due to there being a mandatory Double Battle against Team Skull before you can enter Po Town, I realised early on that Phart needed a trusty partner. Preferably one who could die quickly and get out of the way.

This sacrifice Pokémon would have to be low-level so it would be OHKO'd by any attack and swiftly removed from the battlefield. But I didn't just want to catch any old Route 1 fodder, because their typing was important too - if I used something like a Yungoos, then it might get double-targeted by Fighting attacks and one of them would hit Phart after Yungoos fainted, which seems unfair if they had some coverage attack that they would've preferred to use on Phart instead. So ideally I'd be wanting another Psychic-type to get around that issue, and I happened to have an Abra in my PC already, having caught one to show off to an NPC in Hau'oli City to receive $3,000. It wasn't perfect, because if it failed to get KO'd then I'd have to reset due to Abra not having any methods of self-KOing, but it worked well enough until I got hold of a better sacrificial lamb.

At first I thought I'd use a Litwick as Abra's replacement. It learns Memento at Lv. 33, so it could knock itself out even if its foes failed to do so, and Memento was able to target Phart and avoiding making the battle easier for it (as opposed to, say, Self-Destruct damaging its opponents). I felt that there was a massive problem with that though - why should my sacrifice Pokémon be higher-levelled than Phart??? Especially since Phart was already about 10 levels above most of its opponents. Having Memento to self-KO would be cool and all, but if Litwick was that overlevelled then it would need to use Memento to get knocked out, which wasn't really my intention because I just wanted it as a backup in case its enemies failed to KO it. Not to mention Ghost/Fire isn't a very similar typing to Psychic overall. Clearly I was going to need a different species of Memento user if I was going down that route.

As the Litwick I caught was male, it could pass down Memento as an Egg Move to any amorphous blobs with which it could breed. The Pokémon available to me at that point in the game that could breed with Litwick were Drifloon and Ralts, and since Ralts was a Psychic-type as well (albeit half-Fairy), I figured it would be the better choice. So I caught a female one, kept it in the PC until Poké Pelago was unlocked, used that to grind Litwick up to Lv. 33 without bringing it into any actual battles, threw them in the Nursery, and voilà! I had a Lv. 1 Ralts with Memento. Once it was given the Quick Claw, I had a fairly ideal sacrifice Pokémon ready to go: it had a 20% chance to KO itself before anyone else could move, and failing that, was weak enough to be OHKO'd by anything the opposing Pokémon could throw out, with any extra moves that hit Phart after Ralts was double-targeted probably being ones that would've been used on Phart anyway. I probably could've been extra fussy and resetted the game until it got Memento off in every single Double Battle, just to make sure Ralts didn't spare Phart any enemy's attacks, but that felt a bit excessive.

Could I have managed without it?

I couldn't have managed with only Phart unless I wanted to abandon the run outside Po Town, but if it's just a case of using something that wasn't Abra or Ralts, then obviously yes. There are plenty of Pokémon available in USUM that could fill that sacrificial role, depending on how much I'd be willing to relax my requirements for their typing/moves/etc., but really it would've been fine with any old Caterpie or Grubbin from Route 1 aside from the small chance of them not getting KO'd on turn 1 and making me wish they had Memento.

I did wonder about how Phart would've fared if Double Battles worked like they do in Orre and I could just bring Phart on its own to trigger a 1v2. The most obvious difference is that Phart would be taking 2 attacks on the very first turn, rather than being spared the single attack that was used to KO Ralts. Setting up Phart to use Struggle would therefore be a bit harder because it would need healing earlier on, at a time when I'd much rather be applying X items to it, but I'm not convinced it would make most Double Battles that much harder. The earlygame Trainers still have fairly lacking teams overall (oh no, Phart has to take an extra Karate Chop from a pair of Machop!) and even the ones that did trip me up later on usually did so because of some weird move (like the Punk Pair with the Embargo Krokorok), not from their sheer strength. Maybe the harder Double Battles like the Game Freak staff or the Veteran Duo in Poni Gauntlet would be different, but in general I think Phart would still manage if it had to do a true solo run.

44-7.png

Poké Pelago

When I first unlocked it after Kiawe's trial, I suggested Poké Pelago was a bit like Festival Plaza but without all the RNG regarding what services you can use and how effective they are, instead having five "facilities" whose effectiveness can be upgraded with vast quantities of beans (and a few dozen Pokémon too). Having finished the game now, I think that was pretty accurate. Once I'd hatched enough Ralts to fill up 90 slots in the PC, I just had to wait a few days to gather up enough Poké Beans and then I could fully develop all of the islands. I never actually found any use for Isle Avue's friendship-boosting or Egg-hatching services, and Isle Abeens was only useful in that it was the source of the Poké Beans that I used on the other islands (recruiting wild Pokémon to add some variety to the sprites dotted around Poké Pelago was cute, but not useful). However, the other three islands were definitely important factors in Phart's success.

My main use for Isle Aplenny was growing the EV-reducing berries so I could properly optimise Phart's EV spread, and that worked a treat, with the berries first being picked up on Route 10 and Phart's EVs being finalised just after Totem Togedemaru. Apart from that, I also maxed out my supply of all the status-curing berries and then barely used them, as well as Sitrus Berries in the postgame (for some reason I didn't have any in my bag when I unlocked Poké Pelago and never thought to pick one up until postgame). I found the Sitrus Berries to be a lot more useful than the status-curing stuff, with them essentially taking the role that Moomoo Milks once had after I finally exhausted my supply of them. Overall, not massively important aside from the EV-related stuff, but it did help.

I thought Isle Aphun would just be a source of cash through giving me valuable items, and to be fair, that was 100% accurate. But I was quite surprised by how much cash it gave me. Since I didn't need any shards or evolution stones for anything, I always sent my Poké Pelago minions on the Rare Treasure-Hunting path, which would throw me some mixture of Hard Stones, valuable items (everything from Pearls up to Comet Shard), fossils and very rarely Gold Bottle Caps every 12 hours if I remembered to check in on them. That translated to $10,000 per day at worst, sometimes going past $100,000 if I got very lucky, and so Isle Aphun was largely responsible for me having so much money by the end of the game.

Lastly, Isle Evelup was another niche one but still saw a bit of use, first for grinding Litwick up to Lv. 33 so it could learn Memento and pass it down to my sacrificial Ralts. I left Phart there for a few hours after I'd wiped its EVs so I could finish re-training it - the vitamins I bought from Mantine Surfing brought it up to 252 HP / 100 Def / 100 SpD, but since vitamins don't work past 100 EVs in Gen 7, it needed a few training sessions to get the last 28 points in each defense. That was pretty much it for the important stuff, although I did also use it to grind an Omanyte until it learned Tickle to complete a sidequest for a Comet Shard, as well as bringing my shiny Grumpig to Lv. 100 because it amused me.

Could I have managed without it?

Despite Poké Pelago clearly being useful, I'd still say yes because nothing it offered felt absolutely crucial to the challenge, just convenient. The stuff I've written above lets me pick out a few problems I'd run into without it, though:
  • Not being able to grow EV-reducing berries. I miscalculated Phart's EVs as I was going through Melemele and had no idea what they were exactly, so I had to just clear them and start from scratch (aside from its maxed HP), which required a couple dozen of the berries. They would still be obtainable without Isle Aplenny, but only from the solitary berry tree on Route 10 that gives 3-5 random berries per day, so it'd take quite a few days and a lot of soft-resetting to get enough for Phart. It would still get its EVs sorted eventually, but later on into the game than if Poké Pelago was there to help it out.
  • Even after Phart's EVs are reset, I can no longer use Isle Evelup to finish off its defenses after using vitamins to bring them back up to 100. I could use Festival Plaza facilities instead if I still had ones that boosted Defense/Sp. Def by that point in the game, otherwise Phart would have to grind against wild Pokémon like a pleb, and that's terrible. But I could buy it a couple of Power items from the Battle Royal Dome and have it earn 9 EVs every time it beats up a Roggenrola or Ledyba, so maybe it wouldn't be that bad.
  • No more Isle Aphun means no more free valuable crap to sell for big profits. As this was the biggest source of money in the challenge for me, it might have an actual effect on my ability to buy things, but there'd still be the option to sell vitamins bought with Mantine Surf BP or go Pyukumuku chucking once a day for an easy $20,000. If that's not enough, I could try other tactics like using a Roto Prize Money just before battling a particularly well-off Trainer, or actually selling all the useless items I picked up throughout the game instead of just carting around 20 evolution items and all the Silvally memories wherever I went.
  • This isn't as important as the EV-reducing berries, but I also can't grow Sitrus Berries without Poké Pelago. I already forgot they were an option until the postgame, so clearly I could cope without them, but it was nice to have something that wasn't as wasteful as a Max Potion to use when Phart was slightly injured (after I'd run out of Moomoo Milks).
  • Without Isle Evelup or the ability to use it in battle, the only way to raise Litwick to Lv. 33 and teach it Memento would be to either keep a Rare Kitchen in Festival Plaza, or grind 900+ BP in Mantine Surf to buy enough Rare Candies to get it there. So that's probably not happening. I could still breed for a Lv. 1 Ralts or whatever other Pokémon I fancied bringing to Double Battles, but without a way to KO itself, I'd probably have to just reset the game if it survived past turn 1.
It looks like the biggest problems would be money being less plentiful and Phart's EVs being more of a pain to optimise. There would still be other sources of money available and the EVing would just take longer than otherwise to get sorted, so I'd miss having Poké Pelago available but I can't see its absence ruining the entire run.

44-8.png

Multi Battle partners

I would have much rather gone without these, but they were all very useful (which was why I didn't want them helping me) so they deserve a mention here. There are a total of 7 battles in USUM where you're forced to partner up with someone to battle a couple of Trainers, invariably some bad guys who are either getting in your way or don't want you getting in their way. The full list is as follows:
  • Diglett's Tunnel, with Hau (Eevee, Pikachu, Noibat, Dartrix) against two Team Skull Grunts (Ekans, Salandit)
  • Aether Paradise, with Hau (Alolan Raichu, Vaporeon, Noivern, Tauros, Decidueye) against two Aether Foundation Employees (Huntail, Gorebyss)
  • Aether Paradise, with Hau (same team as above) against two Aether Foundation Employees (Lileep, Anorith)
  • Aether Paradise, with Gladion (Type: Null, Golbat, Zoroark) against two Aether Foundation Employees (Magmar, Houndoom, Electabuzz, Manectric)
  • Aether Paradise, with Hau (same team as above) against Faba (Claydol, Bruxish, Hypno) and an Aether Foundation Employee (Ledian, Pupitar)
  • Team Rocket's Castle, with Lillie (Clefairy) against Faba (Claydol, Bruxish, Hypno) and an Aether Foundation Employee (Granbull, Scrafty, Shiinotic)
  • Team Rocket's Castle, with Guzma (Golisopod, Vikavolt, Pinsir, Masquerain, Scizor) against two Team Rainbow Rocket Grunts (Raticate, Fearow)
You can tell just by looking at their teams how lopsided some of those battles were. Phart was fine sitting back for the first two Aether Paradise fights with Hau and the Rainbow Rocket battle with Guzma, and even though it did have to attack a few times in the Diglett's Tunnel fight, it was easy enough that Hau didn't lose a single Pokémon.

The other two Aether Paradise battles were a bit trickier though. Phart didn't use any attacks in the Multi Battle with Gladion either, but Gladion had a pretty hard time fighting on his own, what with Golbat getting KO'd and both Type: Null and Zoroark getting roughed up. Had the opposing Manectric used Discharge instead of wasting time by using Roar twice, Phart might have been stuck fighting on its own. And even after Gladion fended off those employees, the game immediately threw me into the second fight alongside Hau, automatically healing Phart between the battles so it couldn't Struggle for at least 40 turns. I got lucky with this battle as well because the Employee's Ledian never set up Reflect or Light Screen, nor did Faba's Claydol go for an Earth Power KO on Hau's Raichu when it could've done so - Raichu (and later Decidueye) would've had a harder time KOing everything if either of those had happened. Maybe not so hard that Hau's entire team would've fainted and Phart would have to burn through 40 Splashes, but the fact that it plausibly could have happened made it a slightly worrying fight.

That leaves just the Multi Battle with Lillie. Unlike all the others, Phart had to do most of the legwork for this one because her single Clefairy was never going to cleave through 6 Pokémon by itself. Faba's lead Claydol had no super-effective moves or offensive investment, and the Granbull backing it up had nothing but Snarl, so Phart probably could have managed to get set up and sweep on its own... but despite what I expected, Lillie proved to be quite helpful! Her Clefairy had Friend Guard and Light Screen to weaken the incoming attacks, to the point that the combination of Earth Power and Snarl only cost Phart 8 HP, and it even got a bit of chip damage on them both with Moonblast before fainting. Phart still had a couple of issues with the other enemy Pokémon, but just like the other Multi Battle partners, Lillie managed to be useful while she was in the battle.

Could I have managed without it?

Yes
, if there was somehow a way to fight those 7 battles without any allies backing me up. I know Phart wouldn't have any issues with the Skull Grunts or the Rainbow Rocket Grunts, and the first two Aether Paradise fights look fairly easy with them both having only 2 Pokémon, so that leaves the other two Aether Paradise battles and the Faba + Employee battle in Episode RR. I can't imagine Phart massively struggling without Clefairy's support in the Faba fight, handy though it was, because Claydol had a defensive EV spread and base 70 Sp. Atk while Granbull had nothing but Snarl - they wouldn't be doing much to a +6 Phart, with or without Friend Guard.

So what about the back-to-back Aether Paradise battles? The Magmar/Electabuzz lead on the first battle would not be nice at all, with movesets of Confuse Ray/Fire Punch/Lava Plume/Sunny Day and Light Screen/Thunder Punch/Discharge/Screech. They could attack either of Phart's defenses with strong STAB, confuse it, drop its Defense, or burn/paralyse it on contact with their Abilities. On the plus side, they'd damage each other with Lava Plume and Discharge, and the Houndoom and Manectric waiting behind them aren't so bad apart from the Dark-type attacks and Embargo on Houndoom to lock Phart out of being healed.

If we assume I was still forcibly healed going into the second battle, Phart would be stuck with 40 Splash PP against Claydol and Ledian, but I honestly think it still might be better than the first battle. Claydol has that lack of Sp. Atk investment that it would carry over into Episode RR, and Ledian's dual screens aren't an issue for Phart and its guaranteed crits. As long as I started with 3 X Sp. Defs and then did all the other X items, it should be perfectly possible for Phart to Splash for 40 turns without risking a KO and then sweep, the only threat being a critical hit from Bruxish's Crunch. So apart from these two back-to-back battles (and even then, it's mostly the first one that's the problem), Phart should have been capable of soloing all of USUM's Multi Battles if that was an option.

44-9.png

Eviolite

Hands-down the best item in the game for Phart. Not surprising really - Cosmog has awful stats no matter how many levels or EVs you pump into it, so an automatic 50% boost to both of its defenses was incredibly helpful and more than made up for the loss of its Leftovers. Phart was vulnerable to critical hits throughout the game because they'd ignore all of its X item boosts, but they couldn't bypass the Eviolite, so that helped Phart tank random crits that might've been OHKOs without it. It still had a few battles where even the Eviolite wouldn't have protected it from being OHKO'd, but they were usually against super-strong stuff like Absol or Volcarona with full EVs and optimal natures, i.e. not just any old fucker. And it still helped Phart every time those opponents didn't land a critical hit.

It's hard to give specific examples of situations where the Eviolite was useful, because the criteria would be something like "when it was fighting a Pokémon that had a damaging attack", which covers roughly 99% of the game. And it's not like it had to worry about losing the Eviolite very often either, because I only counted 10 Knock Off users and 2 Trick/Switcheroo users throughout the game. A few of the Knock Off users appeared in difficult battles and did screw me over a bit, but even they were made easier by the AI often forgetting Knock Off actually deals damage and only using it once to remove Phart's Eviolite. The only item that came close to it in terms of usefulness was the Rocky Helmet, and that was locked away in the Battle Tree... so yeah, once I got hold of the Eviolite in Konikoni City, that was Phart's item set for basically the rest of the game. It really says something that I ended up removing it before the Title Defense battles because it was making my Cosmog solo run too easy.

Could I have managed without it?


It wouldn't be fun, but I imagine the answer is yes. Phart managed alright in the final Pokémon League battles with nothing but a King's Rock, so I don't see why that couldn't extend to the rest of the game. Disobedience would be in play for a good chunk of the battles, yes, but at least that's all RNG-based and only affects Phart's ability to attack, not my ability to heal it and keep it afloat. The main issue would still be critical hits - non-crit attacks should be covered well enough by X items, but anything that can deal 75% or more to Phart with a crit means it'd risk KOing itself with Struggle recoil, assuming the opponent doesn't OHKO it outright, and without its Eviolite there'd be more opponents who could reach that damage range.

As an example, I'll look at Cyrus's team during Episode RR. Under normal circumstances, none of his team could KO Phart from full HP with a critical hit. But once the Eviolite is taken away, Houndoom's Dark Pulse has a 75% chance to OHKO while Honchkrow's Night Slash has a 6.3% chance (I know, not very high, but it's possible). Weavile's Night Slash could only manage 98.2% of Phart's HP, but that's still enough to make using Struggle very risky if it failed to OHKO Weavile, which did happen during the actual battle. So Phart would clearly be spending a good chunk of the battle in danger of being knocked out, particularly since it'd have to sit in front of Houndoom for a lot of turns while I used X items on it, and nearly all of that danger would be directly caused by not having the Eviolite. If I then took away the Eviolite in every battle, it's fair to say Phart would be considerably more prone to random KOs, some of which I wouldn't be able to do anything to prevent.

On the plus side, Phart would still have the ability to hold a different item instead. I think I covered the held items that were available pre-Eviolite pretty extensively in the Leftovers section earlier, including the Leftovers themselves, so no need to repeat that here. Sadly there aren't many useful other options that become available afterwards, so it'd probably just be holding the Leftovers and maybe the Bright Powder on occasion, but a few things do stand out. Sticky Barbs can be fished up in Seafolk Village and would allow Phart to wear down annoying lead Pokémon and have items used on it at the same time, but that only works if the opponent uses a contact move. The Rocky Helmet would function just as well as it did in the actual run, but unfortunately is still restricted to the Battle Tree and won't help for the majority of the game. Lastly, the Battle Tree also sells Assault Vests, which would work as a discount Eviolite that only boosts Phart's Sp. Def. Amusingly it would also let Phart overcome one of its greatest nemeses, the forced heal, by preventing it from using Splash! Pity there's only one forced heal left by that point in the game.

The Eviolite's location made it available for a massive portion of the game - over 300 Trainers - so it wouldn't surprise me if I forgot some particular battle where not having it would be a massive problem for Phart. But the Title Defense fights make me think that Phart could clear the rest of the game without its Eviolite... just as long as I was willing to accept that it'd be taking a lot more damage from everything and I'd have to reset over random critical hits more often. I'll be quite happy to just speculate that a no-Eviolite run would be possible and never actually attempt it.

44-10.png

Pyukumuku chucking

Once I'd cleared Olivia's grand trial, I could do a bit of part-time work on Hano Beach once a day by flinging half a dozen Pyukumuku back into the sea. This would take maybe a couple of minutes at most and rewarded me with $20,000 each day, not bad for the time invested in it. Between all the valuable stuff my PC minions were finding in Isle Aphun and the vitamins I could buy from my Mantine Surfing efforts, I never needed to do any Pyukumuku chucking, but I usually did it anyway just in case I suddenly needed lots of money for something.

Could I have managed without it?

...I mean, I had over $9,000,000 by the end of the game. Yes. This is probably the least important feature on the list, and I only kept going back day after day to chuck more Pyukumuku because doing a Cosmog solo run was, oddly enough, uncharted territory - I didn't know if I'd one day need to buy shitloads of everything to defeat some horribly difficult foe, so it was safer to have as much money as possible just in case. In hindsight, not necessary at all, but it wasn't a complete waste of time.

44-11.png

Rocky Helmet

It really does make me sad that the Rocky Helmet is restricted to the postgame in Alola. It was pretty much the only held item in the game that could compete with the Eviolite, so to only have access to it for Episode RR and the Pokémon League rematches was a crying shame, especially when every other game makes the Rocky Helmet available by like Gym 6. I know, complaining that I had to give Phart the same really useful item for 90% of the game is a bit silly, but I like variety too! Just not when variety means using worse stuff for the sake of it.

Anyway, enough of that. Once I did get my hands on the Rocky Helmet, it came in handy for a few of the Rainbow Rocket Grunts and their weird and wacky Pokémon sets. Some of them had movesets with nothing but contact moves, so rather than fuss about with X items and Struggling, Phart could just sit back and let them KO themselves with 6 or 7 hits. I don't know if it actually made the battles faster in terms of turns but it definitely made them a little more fun for me. Again, it's just a shame I didn't have that option throughout the main storyline.

Could I have managed without it?

Hard to say no when I did manage without it for 90% of the game and only used it for 9 battles in total... so yes. The grunts against which Phart used the Rocky Helmet had the following Pokémon:
  • Primeape, with Screech/Stomping Tantrum/Outrage/Final Gambit. It chose to spam Outrage against Phart in my run, but potentially could have self-KO'd with Final Gambit if given enough turns. Even if that didn't happen, Primeape had no EVs and didn't hit too hard, so Phart shouldn't have had much trouble KOing it.
  • Persian, with Nasty Plot/Assurance/Captivate/Night Slash. It was frail and also had no EVs, so at worst it might get a few crits with Night Slash before probably being 2HKO'd.
  • Golbat, with Super Fang. It had one attack and literally couldn't KO Phart with it unless it was on 1 HP. I think we'd be able to overpower it.
  • Primeape, with Seismic Toss. It'd be hard to lose to something that either dealt exactly 62 damage every turn or missed entirely due to Phart's affection.
  • Persian, with Fake Out/Feint. The Rocky Helmet wasn't even a good choice for this fight because Feint isn't a contact move, and while it did have 252 HP EVs, it also had the base stats of a Persian. 3HKO at worst, I reckon.
  • Raticate, with Super Fang. I think the Golbat description above works just as well for Raticate.
  • Hypno, with Dazzling Gleam/Psychic/Shadow Ball/Signal Beam, and Primeape, with Close Combat. I'm not sure why I kept the Rocky Helmet on for this one... Eviolite would've actually done something against Hypno and a resisted Close Combat wouldn't be much of an issue.
  • Raticate, with Sucker Punch/Quick Attack. Not hard to stall out its Sucker Punch PP with X items and then KO once it's reduced to fairly weak Quick Attacks.
  • Arbok, with Ice Fang/Thunder Fang/Fire Fang/Crunch. Crunch wasn't ideal when it had 252 Attack EVs, not to mention Intimidate, but the grunt's AI was silly and wanted to try using the elemental fangs instead. That would most likely buy me some time for setting up Phart and smacking Arbok with Struggle.
So, 9 Trainers out of 424 were faced with the Rocky Helmet, 2 of those seem like I should've used the Eviolite in hindsight, and the other 7 look perfectly beatable with the Eviolite instead. Yeah, Phart would be fine going helmetless.

44-12.png

Hyper Training

At last, the final feature in these horrendously long-winded writeups, but it should be a fairly quick one. Phart only had 27 battles left by the time it finally reached Lv. 100 during the Cyrus fight, earning the right to have its stats Hyper Trained to unimaginable heights, by which I mean its Attack went from 78 to 94 and its Speed went from 96 to 110. Not the most impressive numbers at first glance, but they made more of a difference than I expected.

Speed was less important due to Phart already becoming faster than everything after a couple of X Speeds, but it did go from 192 to 220 Speed when it had one X Speed active, which was enough to outspeed the entire teams of certain Trainers: Lysandre, Ghetsis, Faba, Molayne, Acerola, Lusamine, Sophocles and Hapu had at least one Pokémon that would've outsped (or speed-tied) Phart at +2 before it was Hyper Trained. So that saved me one turn against each of them during the setup process.

The Attack boost is harder to provide concrete evidence for regarding its usefulness, but it certainly felt more useful than the Speed boost. What I can say is that Phart's Attack stat increased by 16 points from the Hyper Training, and if I go backwards to when its Attack was 16 points lower than it was just before getting Hyper Trained, it was Lv. 79 at the time. In other words, the Attack boost from Hyper Training was on par with 21 levels of natural stat growth - obviously that won't be a 100% accurate equivalent because, uh, some crap about damage formulae that I don't understand. But it works as a rough comparison, and Phart was surprising me by OHKOing stuff like Electivire and Masquerain in the Pokémon League, so it's not unreasonable to think the extra Attack made the difference in those cases.

Could I have managed without it?

Yes.
I can't pretend it's so incredibly vital when Phart had already won 397 battles without it! The only downsides to not having access to Hyper Training would be possibly missing out on certain OHKOs/2HKOs here and there, and having to use one extra X Speed against a few opponents. Even then, the only times Phart actually had issues with the final sections of the game were when I took away its Eviolite during the Title Defense battles, and among the really scary Pokémon that could OHKO it (Plumeria's Gengar, Hapu's Golurk/Krookodile, Guzma's Everything, etc.), hardly any of them seemed like they were on the verge of not being OHKO'd or 2HKO'd by Struggle. As for every other opponent, it wouldn't really matter if Phart had to make do with 3HKOing some other Pokémon that weren't threatening it back.


TL;DR: Lots of things helped me out in this run, but I could probably make do without most of them. Just not HP restoration, X items, or using Struggle. Or maybe the Normalium Z or having a starter Pokémon that wasn't Cosmog. Or multiple useful things removed at once.

I think that covers everything! Thank goodness I kept things concise and didn't waffle too much, otherwise these posts could've gone on for ages. Some of the difficult battles and annoying mechanics I encountered during the run will be covered in slightly less excruciating detail in the next post. They'll actually all fit into a single post, which is an improvement.
 
45-1.png

Unpleasant Foes

As a sort of counterpart to the Useful Features list - but nowhere near as long, thankfully - I've listed some of the battles and mechanics that made life a lot harder for Elio and Phart. A Hall of Infame, if you will. Nearly every battle was a slog to get through by the nature of the challenge, but some Trainers and Pokémon felt worthy of recognising for their efforts to screw me over.

The majority of this list does focus on individual Trainer battles or Pokémon, but sometimes I've just lumped several fights into one category like "Double Battles" and then listed particular ones that were really annoying separately. Some entries aren't actual battles or Pokémon at all, but individual moves or game mechanics that gave me more grief than most Trainers ever did.

Once again, battles/moves/etc. are sorted by the order they were encountered during the story. Trainer battles and other specific Pokémon will have their sets listed as well.

45-2.png

Cosmog

Not hard to guess why this is here. It's shit. It's complete and utter shit, and it is designed to be complete and utter shit. Cosmog is like some unholy fusion of all the worst traits of earlygame bugs, pseudo-legendaries and Magikarp, learning no damaging attacks whatsoever and having to wait until Lv. 43 to become a black hole cocoon thingy that STILL can't attack, taking another 10 levels to finally become an actual Legendary Pokémon worthy of the title. And that's perfectly fine under normal circumstances - it gives a reason why Nebby needs looking after so much and can't fight on its own during the story, and the only Cosmog you get in SM/USUM is relegated to the postgame, where you're presumably meant to use the Exp. Share/Poké Pelago/other mechanics to level it up and evolve it because it's so useless in battle.

But when you ignore all the obvious warning signs and try to use it as an actual team member, let alone complete a solo run with it... suddenly it's not at all fine. 43/29/31/29/31/37 base stats weren't even good at the start of the game, never mind when I was facing off against legendaries and other late/postgame bosses, and being a Psychic-type in the Alola region isn't easy even for much stronger Pokémon. The only useful thing it had to offer was Unaware, but that only helped if its opponents were actually raising their own stats, otherwise it was just as worthless as every other aspect of its existence. The entire run was dedicated to finding and using every item, boost and mechanic available that would let me work around Phart simply being a Cosmog. It is one of the worst Pokémon of all time in terms of battling capability, almost certainly the worst, and only the sheer quantity of resources I poured into it across the game made the solo run possible. Put Cosmog in anything close to a fair fight and it will lose every single time.

45-3.png

Rising Star Joseph and Teacher Emily
Rising Star Joseph
Ekans Lv8 (Wrap/Bite, Ability: Intimidate, IVs: All 15)

Teacher Emily
Popplio Lv10 (Pound/Water Gun, Ability: Torrent, IVs: 30/10/20/10/30/20)

I've merged these two into one entry because they were both fought at the same time and were difficult for the same reasons. The Trainers' School was the first part of the story that Phart tackled, coming so early on that lots of its favourite items weren't available yet, and the stuff I did have was limited either by my shortage of money or by Festival Plaza only selling me its products once a day. I wanted to be stingy with those limited items, but these two battles taught me that that wouldn't always be an option.

Joseph's Ekans could almost 2HKO Phart with Bite at a time when I had no X items, knocking it out in 3 turns on my first attempt and forcing me to use 4 Fresh Waters, 3 Potions and an Oran Berry to let Phart survive on attempt two. Emily's Popplio never succeeded in beating Phart unconscious, but that was only because I burnt through 8 Fresh Waters and 4 Hyper Potions trying to keep on top of its Torrent-boosted Water Guns, and still only won due to a last-second Quick Claw Struggle! Things did get a bit better afterwards when I was able to purchase X items in Hau'oli City, but still... running into such horrible Pokémon when I'd barely started the challenge made me worry if Phart was capable of handling the rest of it.

45-4.png

Forced heals

I'm not sure if anyone actually likes these, at least compared to, for example, a Yes/No option or an optional NPC who only heals your Pokémon if you speak to them. But the usual gripes with forced heals are to do with them making the games easier. They don't really make the games harder unless you're carrying some niche stuff like a pre-statused Guts user or a starter Pokémon in Overgrow/Blaze/Torrent range, and that's rarely necessary unless you're doing some sort of challenge run.

Unfortunately, using a Cosmog instantly plunged me into the realm of challenge runs, and so every time someone kindly healed Phart for me, I'd have to haul it all the way back to Route 1 and find a Buneary so it could use Splash 40 times and regain access to Struggle. And god help me if Phart was disobedient, because that would mean waiting even longer for those 40 Splashes to be squeezed out of a Pokémon who, at best, had a 49.38% chance of actually listening when I told it to attack. I counted 39 forced heals across the entire game (not including the section before I acquired Phart), and some locations like Aether Paradise and Vast Poni Canyon featured multiple forced heals, repeatedly grinding my progress to a halt while I flew to and from Route 1. And don't get me started on the times when Phart was healed immediately before an important fight and had to burn through its Splashes during said boss battle...

45-5.png

Totem Pokémon in general

The 8 Totem Pokémon of Alola did vary a bit in terms of difficulty (only one of them will be appearing later on in this list), but the whole concept of Totem fights was unfriendly enough to Phart for them to get a group mention here. 1v2s were never good news for a Pokémon who struggled so immensely even in Single Battles, and the support-centric nature of their ally Pokémon meant they were often carrying annoying status moves, some of which were a nuisance to Phart no matter how many X items I pumped into it.

Even when Phart got past all the stat-lowering, status conditions and whatever other crap was thrown at it, it still had trouble taking down the Totems because of Struggle's random targeting. It got lucky against Kommo-o and Ribombee by KOing them first and not having to deal with their backup allies (Scizor and Blissey), but usually Struggle would take out a Totem's ally first and force Phart to deal with their second ally as well. The Totem Gumshoos rematch had a particularly bad case of this, with Phart taking out five of its never-ending Yungoos allies before successfully targeting Gumshoos for the KO! Their overall strength was diminished a bit by Unaware ignoring their auras, but generally speaking, big bulky Totem Pokémon with annoying helper Pokémon were not something Phart could easily deal with.

45-6.png

Hala
Island Kahuna Hala
Items: Super Potion, Full Heal
Machop Lv15 (Karate Chop/Revenge/Focus Energy, Ability: Guts, Adamant nature, IVs: All 30, EVs: 252 HP / 252 Spe)
Makuhita Lv15 (Arm Thrust/Sand Attack/Fake Out, Ability: Thick Fat, Adamant nature, IVs: All 30, EVs: 252 HP / 252 SpD)
Crabrawler Lv16 @ Fightinium Z (Pursuit/Power-Up Punch/Leer, Ability: Iron Fist, Adamant nature, IVs: All 30, EVs: 252 HP / 252 Def)

Using a Psychic-type legendary against a Fighting-type specialist is not always as easy as it sounds. Despite Hala coming early enough in the game for my item supply to still be a bit limited, I thought I was fairly prepared for him... and then I discovered the game heals you before the battle without any warning. Not even a healing jingle! He still wasn't too difficult overall, since Crabrawler was the only one with a super-effective attack and Machop was weak enough to let Phart spam Splash, but it ran out of attacking PP before Phart had used up all its Splashes and Hala switched to Crabrawler early. I didn't have enough X items/Roto Boosts in my bag to undo all of its Leers, so I was lucky that it didn't keep using Leer and subsequently trapping me in a cycle of healing off Pursuit damage, because it felt like it would've become unbeatable had Phart's Defense fallen much lower than the +2 it ended up on.

45-7.png

Gentleman Reginald
Gentleman Reginald
Dunsparce Lv14 (Spite/Pursuit/Screech/Mud-Slap, IVs: All 20)

This one was quite similar to Hala - a forced heal immediately before the battle, and a Defense-lowering move at a time when I didn't have enough items to keep Screech at bay forever. But it turns out that once this battle is unlocked (after defeating Hala), you are forcibly dragged into the battle the instant you set foot in Hau'oli City Hall, with no chance to prepare, so I hadn't saved my game beforehand and had to make do with what was in my bag, i.e. no X Defenses at all. The only reason I actually won was because the AI was unfamiliar with Phart's game and kept using Spite on it, letting it run out of Splashes earlier than otherwise and start attacking with Struggle. If it had used a few more Screeches instead, Pursuit would've been dealing too much damage for Phart to have much hope of winning.

45-8.png

Double Battles in general

I've already touched upon this in the Totem Pokémon section, but getting the short end of the 1v2 stick was never something Phart enjoyed. Even though most of the game's 23 Double Battles felt a bit easier than the Totems - probably because most of them had default level-up movesets and no fancy items/EVs/natures - it was still annoying to have to deal with 2 incoming attacks per turn, leave Phart's HP high enough to account for a double crit, watch it repeatedly target the wrong opponent with Struggle, have to double back every single time I ran into a Double Battle to fetch Abra/Ralts and then go back again afterwards to get rid of them... you get the idea. Everything was just more difficult when Phart had two opponents to face.

Of course, some of the Double Battles were actually hard, not just annoying. There were a pair of Swimmers on Route 15 that each used one Frillish with Surf/Ominous wind as their only moves, triggering Water Absorb constantly and forcing Phart to stall out their PP, which is probably more tedious than hard but whatever. Mount Lanakila had some nasty ones too, with two pairs of Black Belts fought in hail (against one of which Phart had to pause Struggling so that the enemy Hawlucha could use up its Endeavor PP before its own HP got low enough for Endeavor to threaten Phart) and a Veteran/Ace Trainer pair wielding some nasty stuff like Vikavolt, Bisharp and Tyranitar that would happily eat a Cosmog for breakfast. The postgame had some stinkers as well, namely Morimoto & Iwao and the Veteran Duo on Poni Gauntlet, but they actually get their own sections later in this list so I won't spoil all of that now.

45-9.png

The Battle Royal
Pokémon Trainer Hau
Dartrix Lv20 @ Normalium Z (Razor Leaf/Peck/Tackle, Ability: Overgrow, IVs: All 25, EVs: 252 HP / 252 Atk)

Pro Wrestler The Royal
Rockruff Lv20 (Rock Throw/Bite/Protect, IVs: All 15)

Team Skull Gladion
Type: Null Lv20 (Tackle/Pursuit, Ability: Battle Armor, IVs: All 30)

This was 100% a problem of my own creation because I could've just not bothered with it and moved on... but then again, that could be said of the entire challenge. The mandatory Battle Royal didn't need to be won to advance the plot and it didn't even give me different dialogue once I eventually triumphed, but I did need to "win" it to tick it off my checklist, which meant Phart had to KO one of those three lovely opponents and not get KO'd by another one on the same turn. That would've been difficult under normal circumstances. It was even more difficult when I couldn't use any items on Phart, couldn't control who it was hitting with Struggle, and couldn't stop its opponents from trying to KO each other as well.

I had to swap Phart's Leftovers for a Normalium Z in the end, give it exactly 1 Splash PP so it could use its Z-Move, then pray that Struggle coming off +3 Attack would target and KO Rockruff on a turn where it wasn't using Protect. Even then, it took 5 attempts for that strategy to prove successful, for a total of 9 attempts at the Battle Royal. And after all that, not a single acknowledgement from the game itself! Brutal.

45-10.png

Haze and Clear Smog

These were basically the same move, because the damage from Clear Smog wasn't the main issue. I don't think I really need to explain why two moves that reset all of my Pokémon's stat stages were bad news for a Pokémon with piss-poor stats who relied on X items to not be pathetic. The only upsides were that they were fairly uncommon moves overall (5 Haze users, 6 Clear Smog users) and they didn't affect the Dire Hit boost, so Phart could still chuck out an endless stream of crit Struggles off its base 29 Attack. Neither move was utterly disastrous when they were just on a lone Trubbish or Golbat, but Haze was a nuisance against the random Team Skull Grunt with 5 Pokémon who sent out his Haze Golbat second and forced me to reapply X items for the rest of his team.

45-11.png

Office Worker Dugal
Office Worker Dugal
Clamperl Lv23 @ Eviolite (Iron Defense/Scald, Ability: Shell Armor, Calm nature, IVs: All 31, EVs: 252 HP / 252 SpD)

Very bulky Clamperl, holding an Eviolite, carrying Scald to burn Phart and immune to critical hits. But Phart was bulky too with its Eviolite and stat boosts, so what was the problem? It wasn't holding its Eviolite, that's what! Dugal's little sidequest required that I use a Z-Move in the battle with him, so Phart held the Normalium Z instead and its defenses suffered accordingly. +3 Attack from Z-Splash wasn't enough to KO Clamperl before it landed two critical hits for the KO and made a fool of me. I did get it on the second try with some slightly better luck, but honestly, Clamperl was probably strong enough to get a mention here even if I didn't lose to it. (And yes, I could've just not bothered with completing his sidequest and used the Eviolite instead, but that's boring.)

45-12.png

Disobedience

I've never been that keen on trading in Pokémon to use in playthrough teams, and even when I use NPC trades like the Mr. Mime/Jynx in Kanto they rarely get a chance to level up beyond the limits of my badge collection, so I basically never see disobedience come into play. But I knew it would almost certainly be a factor in this run, and it was. Painfully so.

To be honest, I still haven't completely wrapped my head around the disobedience formula, but as I understand it the checks that took place when Phart tried to disobey were something like this:
  • If Phart was above the obedience cap and tried to attack, a check was performed to see if it would successfully attack. The exact odds of it successfully attacking varied based on its level and how many grand trials I'd cleared, but its absolute highest success rate was 49.38%.
  • If it failed to obey, a check was performed to see if it would begin taking a nap. The odds of this happening started at 1/256 when Phart was one level above the obedience cap, becoming 2/256 when it was two levels above, and so on.
  • If it didn't feel like napping, a check was performed to see if it would hit itself in confusion. The odds of this happening were the same as the napping formula but with a x2 multiplier, so it would have a 2/256 chance when it was one level above the obedience cap, then 4/256, 6/256, etc. Feel free to simplify those fractions if you want.
  • If Phart didn't fall asleep or hit itself, it would randomly choose between loafing around, pretending not to notice, turning away, or not obeying. All four of those are exciting flavour text for "does nothing".
I made a chart in Excel with the exact disobedience rates at each level and with each number of grand trials completed, which you can find in Part 15 if you're so intrigued. Otherwise, I'll move on to the startling revelation that a Cosmog who ignored me 50%+ of the time was not an effective battler. The napping and confusion effects were as rare as the formula implied and didn't impact Phart's performance too much, but there were so many opponents who got to squeeze in multiple extra attacks while Phart was dicking around doing nothing, turn after turn, battle after battle. It seems Phart spent 7 battles ignoring me on Akala, then 37 on Ula'ula, then 31 on Poni, plus the majority of the Champion battle. So that's 76 Trainer battles marred by disobedience, plus 3 Totem Pokémon and 2 forms of Necrozma, and those Trainers included Plumeria, Olivia, Plumeria again, everyone in and around Po Town including Guzma, Gladion, Nanu, Dulse, all of Vast Poni Canyon, Mina, Ilima, Mallow, Kiawe, Sophocles and Hapu! Not all of those battles were big issues, but they hopefully illustrate just how often I was sitting there watching Phart fail to KO something before they scored a crit or used Recover or otherwise fucked me over.

45-13.png

Nihilego
Nihilego
Aura: +2 Defense
Lv27 (Clear Smog/Psywave/Headbutt/Venoshock, Ability: Beast Boost, Calm nature, IVs: 31/1/31/1/31/31)

A bit like the Battle Royal, this was a hurdle I created for myself, one that went beyond the scope of the rules I wrote in this thread's first post. As it happens, this hurdle was also solved by using Z-Splash! Basically, I decided to try and KO the Nihilego that appeared on the first trip to Aether Paradise, despite it not being a Trainer and therefore not being required for the challenge. Aside from the obvious detail of it having 570 BST compared to Phart's 200, Nihilego proved difficult to beat because it automatically fled at the end of turn 5 - far too quickly for me to use enough X items to have Phart OHKO or 2HKO it.

I had the foresight to give Phart the Normalium Z before even attempting to take on Nihilego, a step up from throwing it into four Battle Royals before realising the Leftovers weren't doing much for it, but Nihilego was still an uphill battle. It seemed smarter than the average wild Pokémon because it never went for Headbutt, but it wasn't very consistent with the attacks it did use, avoiding Clear Smog on turn 1 but otherwise choosing them at random. Clear Smog, of course, proved to be a massive headache when my entire plan was to give Phart +3 Attack and KO Nihilego quickly, so that meant a lot of attempts went down the drain as soon as it was used (perfect accuracy innit). I eventually figured that maybe it wasn't using Clear Smog on turn 1 because Phart didn't have any boosts yet, so I switched things up by using a Dire Hit on turn 1 and then making Phart use Z-Splash, followed by a Moomoo Milk and a 2HKO with Struggle, a plan which finally paid off with victory on the 16th try. Totally worth it.

45-14.png

Cosmoem's existence

It's ironic that for all of the horrible battles Phart went through, one of the most persistent thorns in its side came from a Pokémon that it never fought once. Cosmoem's mere presence in the game data as the Pokémon Phart could evolve into (if I was a COWARD!) meant that once it reached Lv. 43, it tried to evolve, and I had to cancel its evolution. Then it happened again at Lv. 44. And again at Lv. 45, Lv. 46, and every other level until it had played out fifty-eight (58) times by the end of the game. Sure, there was an Everstone in my bag, but I wasn't wasting its item slot on that! Ew.

Pressing the B button was only a mild inconvenience though. A slightly bigger issue was that like all Pokémon in Gen 6+ games, Phart, by remaining unevolved at a level higher than its evolution level, gained a bonus 20% Exp. Points from every Pokémon it defeated or I caught. It had no need for those Exp. Points and they only served to push it towards the obedience cap at a higher rate, and even once it had gone past one of them, it simply grew more disobedient with every extra level. As I said earlier (and demonstrated by, well, finishing the challenge), it wasn't impossible to win fights while Phart wasn't listening to me, but I much preferred it and it really could've done without those extra Exp. Points.

45-15.png

Veteran Akira
Veteran Akira
Alolan Persian Lv33 (Fake Out/Feint Attack/Screech, Ability: Technician, Adamant nature, IVs: 30/30/20/20/20/30, EVs: 252 Atk / 252 Spe)
Absol Lv33 @ Darkinium Z (Night Slash/Slash/Quick Attack, Ability: Super Luck, Adamant nature, IVs: 30/30/20/20/20/30, EVs: 252 Atk / 252 Spe)

There was only so much the Eviolite could do against certain opponents, and two Dark-types with full EVs, Adamant natures, abilities that pair nicely with their STAB attacks and a Darkinium Z on the second one would definitely fall into that group. Persian didn't actually use Screech that often, which was lucky because I forgot I had Guard Specs. until the third attempt, but it was still taking out good chunks of Phart's HP with Technician-boosted Feint Attacks. But it was Absol that had me resetting the game twice, OHKOing Phart from full HP with a crit Black Hole Eclipse and then doing it again with a plain old Night Slash. Both Persian and Absol were frail enough to sometimes be OHKO'd back, or 2HKO'd at the very least, but battling Akira made Phart's limitations very clear - sometimes, it would go up against Pokémon that could instantly kill it with a critical hit, and there was nothing I could do to prevent that. Apart from overlevelling it, but that'd be laaaaaame.

45-16.png

Embargo

This one was another niche move, only appearing in 5 Trainer battles and none of them were important ones, but that's just as well really. Embargo would switch off Phart's Eviolite and block me from attempting to use items on it for 5 turns, denying it access to its favourite HP restoration or X items. Note the word "attempting" there... even trying to waste turns with useless items like Revives was forbidden. So if things went badly, Phart could be stuck on low HP with no option but to use Struggle and KO itself. I could still use those useless items on my other Pokémon since Embargo only targeted Phart, but that wasn't really an option in a solo run.

However, one amusing option remained that would spare Phart a humiliating defeat: throwing Poké Balls at the enemy Pokémon! Obviously they didn't work because they were in Trainer battles and I'd get told off for being a thief (even by Team Skull), but they let me skip the turn and stall out the effects of Embargo. Then I could heal Phart and hopefully it'd get a KO in before Embargo could be used again. It still wasn't a huge issue for the challenge because Embargo only showed up in random unimportant battles, but disabling the Eviolite and all of my bag items for 5 turns was quite strong for a random status move. And creating a scenario where attempting to catch another Trainer's Pokémon was a viable strategy was priceless.

45-17.png

Totem Mimikyu (and Banette)
Totem Mimikyu
Aura: +1 Attack, +1 Defense, +1 Sp. Atk, +1 Sp. Def, +1 Speed
Lv35 @ Lum Berry (Shadow Claw/Play Rough/Leech Life/Slash, Ability: Disguise, Impish nature, IVs: 31/8/31/15/31/15, EVs: 198 HP / 124 Def / 104 SpD / 84 Spe)

Ally Banette
Lv32 (Screech/Will-O-Wisp/Feint Attack/Curse, Ability: Insomnia, Jolly nature, IVs: 31/15/31/15/31/15)

Ally Jellicent
Lv33 (Water Pulse/Snore/Spite/Night Shade, Ability: Cursed Body, Naughty nature, IVs: All 0)

I can't write this section and not bring up Snore Jellicent again. It didn't even get a chance to battle Phart because Totem Mimikyu fainted before Banette, but I still wonder what the thinking was behind it. Like, how many people in the world have ever seen Jellicent successfully use it? It's Mimikyu's backup ally, so it's quite possible to never fight it at all (as was the case for me), and even if it does appear, you need to put it to sleep yourself because Jellicent has no way of falling asleep on its own. Setting aside how niche a scenario that is to prepare for, surely Sleep Talk would've been better anyway...

Moving on from that weirdness, this fight was horrible. Absolutely horrible. Totem Mimikyu wasn't a pushover by itself, with possible Shadow Claw crits to take big bites out of Phart's HP and Disguise to make KOing it even more of a hassle (bear in mind Phart was freshly disobedient for this battle and couldn't be relied on to hit anyone). But a crit Shadow Claw still wouldn't have been a 2HKO on Phart thanks to an Attack IV of 8 with zero investment, and none of its other moves were that bad. It would need support from an ally Pokémon to really mess things up.

That would be where Banette comes in. I genuinely considered giving Banette its own section here because it was such a colossal pain, but it wouldn't be fair to judge it in isolation when it was so important to the Totem battle. Banette came in at the end of turn 1, used Curse, sacrificed half its HP, and doomed Phart to lose 25% of its own HP at the end of the turn, every turn, for 87 turns. When you add Struggle recoil and a Shadow Claw crit to that, it would leave Phart with a tiny sliver of HP if it dared to use Struggle at full HP, just enough for Banette's Feint Attack to take it out. In other words, Phart was not safe using any attacks at all.

Curse alone would've been bad enough, but Banette had 3 other moves and they weren't nice either. Screech would happily tank Phart's Defense into the ground if left unchecked, so I had to slot in regular Guard Specs. in between all the HP-restoring items, and Will-O-Wisp added yet another source of HP loss into the mix, one that I simply didn't have time to waste turns on curing once I ran out of Full Restores (although Phart's affection bonuses had that partially covered). Feint Attack wasn't as damaging as, say, a second Shadow Claw, but it was yet another source of damage and was immune to Phart's occasional dodges by virtue of its perfect accuracy. Banette didn't have a single wasted moveslot when fighting Phart, which was impressive. And also rather annoying.

All of that should paint a decent picture of how the battle went: not a single attempt at Struggling from Phart, just spamming X Defenses, Guard Specs., and every healing item known to man, praying that Phart wouldn't be hit by a double crit or Screeched while the Guard Spec. was down and I was stuck healing it. I couldn't even count on its affection to let it tank a stray critical hit with 1 HP, because the Curse damage would finish it off regardless. Honestly, Curse might've warranted its own section in this post if not for the only other Ghost!Curse user in the game being the wild Gastly I fought as part of this very trial. Just an awful battle from start to finish, and the fact that I beat it on the first try doesn't make up for it taking 88 turns to get there. I think this took at least a few days off my lifespan.

45-18.png

Golfer Dean
Golfer Dean
Hariyama Lv39 @ Flame Orb (Knock Off/Fake Out/Arm Thrust, Ability: Guts, IVs: 30/20/30/20/30/20, EVs: 252 HP / 252 SpD)
Alakazam Lv39 @ Flame Orb (Recover/Psybeam/Trick, Ability: Magic Guard, IVs: 30/20/20/30/20/30, EVs: 252 SpA / 252 Spe)

This one was a breath of fresh air compared to Totem Mimikyu and not even that hard overall, but his Alakazam was a nuisance. Hariyama swatted away Phart's Eviolite with Knock Off, then spammed Arm Thrust until it fainted because the AI forgot that Knock Off deals damage - not a big threat. Having Alakazam's Flame Orb foisted upon it by Trick was far more of a problem, since even 3 X Attacks and a Dire Hit were only enough to deal 50% to Alakazam with Phart constantly being burned, and that would get Recovered away almost immediately... assuming the disobedient Phart even bothered to attack. Obviously Alakazam was never going to win with only 20 Psybeams and some burn damage to offer, but it took a lot longer to faint than I expected.

45-19.png

Faba and Aether Foundation Employee (with Hau)
Aether Branch Chief Faba and Aether Foundation Employee
Items: X Defense (Faba)
Claydol Lv44 (Earth Power/Extrasensory/Ancient Power/Grass Knot, Ability: Levitate, Relaxed nature, IVs: 30/25/30/25/25/25, EVs: 252 HP)
Bruxish Lv44 (Aqua Jet/Crunch/Psychic Fangs/Waterfall, Ability: Strong Jaw, Adamant nature, IVs: 25/30/25/25/25/30, EVs: 252 Atk)
Hypno Lv45 (Psychic/Hypnosis/Focus Blast/Nightmare, Ability: Insomnia, Timid nature, IVs: 25/25/25/30/25/30, EVs: 252 Spe)
Ledian Lv42 (Light Screen/Reflect/Bug Buzz/Air Slash, Ability: Swarm, Timid nature, IVs: All 30, EVs: 252 Spe)
Pupitar Lv42 (Snarl, Ability: Shed Skin, Bold nature, IVs: All 25, EVs: 252 Def)

Pokémon Trainer Hau (Multi Battle partner)
Alolan Raichu Lv43 (Electro Ball/Quick Attack/Psychic, Ability: Surge Surfer, IVs: All 20, EVs: 252 SpA / 252 Spe)
Vaporeon Lv42 (Water Pulse/Quick Attack, Ability: Water Absorb, IVs: All 20, EVs: 252 Atk / 252 SpA)
Noivern Lv42 (Dragon Pulse/Air Cutter, Ability: Infiltrator, IVs: All 20, EVs: 252 SpA / 252 Spe)
Tauros Lv42 (Pursuit/Horn Attack, Ability: Intimidate, IVs: All 20, EVs: 252 Atk / 252 Spe)
Decidueye Lv44 @ Grassium Z (Razor Leaf/Spirit Shackle, Ability: Overgrow, IVs: All 30, EVs: 252 HP / 252 Atk)

Is it fair to include a battle here based on how difficult it could have been? I guess so. Most Multi Battles were an excuse for Phart to relax and let Hau/Gladion/Guzma do all the fighting, but this one came immediately after a Multi Battle alongside Gladion, meaning Phart got fully healed and couldn't attack even if it wanted to thanks to a big dollop of Splash PP. I was going to have to rely on Hau for this one. And frankly, seeing him lead with Alolan Raichu into two Pokémon with STAB Earth Power, STAB Bug Buzz and dual screens, I was not expecting an easy fight.

It ended up being alright though - Ledian never set up either screen and Claydol ignored an opportunity to KO Raichu with Earth Power, then Hau's Decidueye blasted through everything else. Still, a couple of different AI choices and maybe Raichu faints early, Ledian sets up both screens and Decidueye can't sweep before getting knocked out. If Phart did get stuck fighting on its own, the only real issue would be Crunch from Bruxish, but having to wait 40+ turns to attack wouldn't have been much fun, nor would having to complete the previous Multi Battle with Gladion all over again if I lost. Obviously that's all hypothetical, but having a Multi Battle where Phart couldn't contribute and its AI partner wasn't guaranteed to win on our behalf was slightly stressful.

45-20.png

Veteran Eric
Veteran Eric
Noctowl Lv48 (Reflect/Tailwind/Magic Coat/Air Slash, Ability: Insomnia, Calm nature, IVs: 30/15/15/15/30/30, EVs: 252 SpD / 252 Spe)
Gengar Lv48 (Dark Pulse/Shadow Ball, Ability: Cursed Body, Timid nature, IVs: 30/15/15/30/15/30, EVs: 252 SpA / 252 Spe)
Slowking Lv48 (Psychic/Scald, Ability: Own Tempo, Calm nature, IVs: 30/15/15/30/30/15, EVs: 252 SpA / 252 SpD)
Flygon Lv48 (Dragon Rush/Earthquake, Ability: Levitate, Adamant nature, IVs: 30/30/15/15/15/30, EVs: 252 Atk / 252 Spe)

No prizes for guessing who the threat was. Noctowl gets some credit for making Gengar even faster with Tailwind, but it's the big ghosty fella that splatted Phart twice with critical hits on Shadow Ball and made me very sad. I knew to expect big damage if that happened, and I had Phart prepared in terms of stat boosts, and it was all set to OHKO with Struggle... then disobedience struck it down on both occasions and forced it to eat Shadow Balls. Couldn't be helped really. I just had to try again and be luckier, and Flygon and Slowking were nowhere near as bad in comparison once Phart got past Gengar on the third attempt.

45-21.png

Mallow
Captain Mallow
Trevenant Lv51 (Horn Leech/Shadow Claw/Leech Seed, Ability: Natural Cure, IVs: 30/25/30/25/30/25, EVs: 252 Def / 252 SpD)
Shiinotic Lv51 (Moonblast/Giga Drain/Spore, IVs: 30/25/30/25/30/25, EVs: 252 Def / 252 SpD)
Tsareena Lv51 @ Grassium Z (Trop Kick/Low Sweep/U-turn, IVs: 30/30/25/25/25/30, EVs: 252 Atk / 252 Spe)

Leech Seed was another candidate for inclusion in this post that I left out due to it only mattering in one battle - this one. Once Mallow's Trevenant set it up, its attacking moves almost felt like an afterthought compared to Phart losing 26 HP every turn and its opponent gaining that 26 HP. Hitting Trevenant was hard enough with Phart's constant loafing around, and having Leech Seed slowly shrug off any Struggle damage that did get through meant that Phart basically had no chance of KOing Trevenant, and I had to let it run out of PP so Mallow could switch to something else.

Sadly, getting Trevenant off the field did not help. The Leech Seed remained in effect, and Phart eventually fainted to a critical hit on Tsareena's U-turn after failing to break through Shiinotic as well and having to PP stall a second opponent. I basically gave up during the second attempt and didn't bother making Phart Struggle at all, just stalling out all three opponents entirely. I don't think there was any other way I could've done it without ridiculous luck - how else was I meant to get past a Shiinotic that would take 50% from Struggle, put Phart to sleep with Spore, then recover 30% via Leech Seed by the time Phart could even attempt to Struggle again?

I was lucky to be playing Ultra Sun, because there's a postgame rematch with Mallow in Ultra Moon where she uses the same Pokémon, just with different moves on Tsareena (but it keeps U-turn, of course) and the addition of Ingrain on Shiinotic. Despite that seeming even more tedious at first glance, I suspect it would've been a bit easier without having to worry about Phart ignoring my orders any more, not to mention Ingrain preventing Shiinotic from switching out even if it ran out of PP, but it'd still be a time-consuming fight. Anyway, Leech Seed was very bad news for Phart, and I'm lucky that this was the only major battle where it came into play. Red's Venusaur just used Leaf Storm and got 2HKO'd instead.

45-22.png

Kahili
Elite Four Kahili
Items: Full Restore, Full Restore, Full Heal
Braviary Lv56 (Crush Claw/Brave Bird/Air Slash/Scary Face, Ability: Sheer Force, IVs: All 30, EVs: 252 Atk / 252 Spe)
Hawlucha Lv56 (Flying Press/Throat Chop/Dual Chop/Poison Jab, Ability: Mold Breaker, IVs: All 30, EVs: 252 Atk / 252 Spe)
Baile Style Oricorio Lv56 (Revelation Dance/Teeter Dance/Air Slash/Feather Dance, Ability: Dancer, IVs: All 30, EVs: 252 SpA / 252 Spe)
Mandibuzz Lv56 (Bone Rush/Brave Bird/Punishment/Flatter, Ability: Big Pecks, IVs: All 30, EVs: 252 Def / 252 SpD)
Toucannon Lv57 @ Flyinium Z (Bullet Seed/Rock Blast/Beak Blast/Screech, Ability: Skill Link, IVs: All 30, EVs: 252 Atk / 252 Spe)

Honestly, most of Kahili's team wasn't that bad for various reasons. Sheer Force prevented Braviary from getting Defense drops with Crush Claw, Oricorio and Toucannon didn't have much to offer apart from confusion and burns, and Hawlucha just wasn't very strong. Mandibuzz, however, would have one-shotted Phart from full HP with a crit Punishment if not for its affection bonuses saving it. Base 65 Attack is less of an issue when you have a 200-power STAB attack, which it did thanks to all the X items I'd used.

I'm not sure if there was any other way I could've handled Mandibuzz, at least not a risk-free method. If I'd only used X Defenses on Phart and no other X items, then Punishment would have "only" had 180 power (it starts at 60 and gains 20 for every stat stage) once Mandibuzz came in, which isn't a huge drop but might've stopped a critical hit from OHKOing Phart. But Mandibuzz was the third Pokémon Kahili sent out, and how would Phart handle Braviary and Hawlucha without any Attack boosts? I'd be there all day. The other option I thought of would be stalling out Hawlucha until it runs out of PP and hitting Mandibuzz with Struggle on the switch-in, but since Struggle was only a 3HKO in my playthrough, it would still get at least one chance to use Punishment.

Luckily I only had to worry about Punishment on the initial Elite Four challenge, because Kahili replaced Mandibuzz's entire moveset for the rematches and Snarl/Air Slash/Toxic/Roost was far less threatening, especially since Mandibuzz frequently failed to use Roost when it needed to. Kahili was just another example of a battle where I couldn't really do anything if a particular move got a critical hit on Phart.

45-23.png

"Champion" Hau
Pokémon Trainer Hau
Items: Full Restore, Full Restore, Full Restore, Full Restore
Alolan Raichu Lv59 (Thunderbolt/Quick Attack/Psychic/Focus Blast, Ability: Surge Surfer, IVs: All 30, EVs: 252 SpA / 252 Spe)
Vaporeon Lv58 (Hydro Pump/Quick Attack/Charm/Baby-Doll Eyes, Ability: Water Absorb, IVs: All 30, EVs: 252 SpA / 252 Spe)
Tauros Lv58 (Zen Headbutt/Iron Head/Earthquake/Double-Edge, Ability: Intimidate, IVs: All 30, EVs: 252 Atk / 252 Spe)
Noivern Lv58 (Dragon Pulse/Air Slash/Dark Pulse/Super Fang, Ability: Infiltrator, IVs: 30/15/30/30/30/30, EVs: 252 SpA / 252 Spe)
Crabominable Lv59 (Power-Up Punch/Ice Hammer/Stone Edge/Dizzy Punch, Ability: Iron Fist, IVs: All 30, EVs: 252 Atk / 252 Spe)
Decidueye Lv60 @ Grassium Z (Spirit Shackle/Leaf Blade/Smack Down, Ability: Overgrow, IVs: All 30, EVs: 252 HP / 252 Atk)

Hau could have used 6 Rattata and Phart still would've struggled with this fight, just because it was doomed to reach Lv. 81 after KOing any of his Pokémon and become disobedient one final time before the credits. I ended up getting around that a bit by stalling out Raichu's PP and 2HKOing Noivern when Hau withdrew his useless lead, but that still left 4 Pokémon of course.

It was quite fortunate then that most of his team weren't especially dangerous. Raichu's Thunderbolts weren't that strong and everything else it had was weaker, hence why Phart was able to stall it out. Vaporeon had 5 Hydro Pumps with 70% accuracy against Phart and then all it could do was try to lower its Attack - easily countered with a Guard Spec. or two. Tauros didn't have anything super-effective and Double-Edge hurt it as well, and one single Intimidate didn't make much difference. Noivern could have taken big chunks out of Phart with Super Fang, had Hau not hard-switched to it from Raichu and let it get 2HKO'd by Struggle. And Crabominable's attacks were either very weak or fairly inaccurate, not to mention it being a lot frailer than you might expect.

So really, the only problem for Phart was Hau's Decidueye. 10 Spirit Shackles that could instantly put Phart into the red with a critical hit, 15 Leaf Blades that weren't super-effective but did carry a higher crit rate, and a Z-Crystal to upgrade one of them into a 175-power Bloom Doom. And don't forget the 252 HP EVs, enough to let it take 2 Struggles, activating Overgrow and making Leaf Blade even stronger! Granted, I don't think any of them were in OHKO range apart from if Bloom Doom had scored a crit, but Decidueye hit hard enough to make attacking it risky, assuming Phart was even willing to attack and not just loaf around. It was good to have a bit of stress in what was essentially USUM's equivalent of a Champion battle.

(Also, spare a thought for Hau's Title Defense team swapping Decidueye's Grassium Z for a Decidium Z that the AI isn't programmed to be able to use.)

45-24.png

Hala rematch
Island Kahuna Hala
Hariyama Lv63 (Fake Out/Close Combat/Knock Off/Heavy Slam, Ability: Thick Fat, Adamant nature, IVs: All 30, EVs: 252 Atk / 252 SpD)
Machamp Lv63 (Cross Chop/Thunder Punch/Ice Punch/Fire Punch, Ability: Guts, Adamant nature, IVs: All 30, EVs: 252 Atk / 252 Spe)
Bewear Lv63 (Hammer Arm/Brutal Swing/Dragon Claw/Shadow Claw, Ability: Fluffy, Adamant nature, IVs: All 30, EVs: 252 Atk / 252 Def)
Poliwrath Lv63 (Waterfall/Brick Break/Poison Jab/Payback, Ability: Water Absorb, Adamant nature, IVs: All 30, EVs: 252 Atk / 252 SpD)
Crabominable Lv63 @ Fightinium Z (Ice Hammer/Close Combat/Stone Edge/Earthquake, Ability: Iron Fist, Adamant nature, IVs: All 30, EVs: 252 Atk / 252 Def)

Hala decided to give me a warm welcome to the postgame by leading with a Knock Off Hariyama, thus ensuring that Phart would have to go without its Eviolite against a nearly-full team with full EVs and custom natures. That left it open to potential critical-hit OHKOs from Bewear, Poliwrath and Crabominable, so Phart had to move fast to KO them first once Hariyama had fainted. But as you can see in the screenshot, I did get to have some fun with this battle by incorporating the Sticky Barb into it. After all, Phart was destined to lose its held item against Hariyama, so I thought I'd use that to my advantage and bring it down without Phart having to waste precious HP on Struggle. The rest of the fight was still a pain, but hey ho.

45-25.png

Morimoto and Iwao
GAME FREAK Morimoto and GAME FREAK Iwao
Gengar Lv57 (Shadow Ball/Dark Pulse/Sludge Bomb/Psychic, Ability: Cursed Body, Modest nature, IVs: 31/15/15/31/15/31, EVs: 252 SpA / 252 Spe)
Machamp Lv57 (Dynamic Punch/Stone Edge/Poison Jab/Dual Chop, Ability: No Guard, Adamant nature, IVs: 31/31/15/15/15/31, EVs: 252 Atk / 252 Spe)
Dragonite Lv57 (Hurricane/Draco Meteor/Thunder/Blizzard, Ability: Multiscale, Modest nature, IVs: 31/15/15/31/15/31, EVs: 252 SpA / 252 Spe)
Kecleon Lv56 (Sucker Punch/Shadow Claw/Rock Slide/Brick Break, Ability: Protean, Jolly nature, IVs: 15/15/15/15/15/31)
Ambipom Lv56 (Double Hit/Dual Chop/U-turn/Aerial Ace, Ability: Technician, Adamant nature, IVs: 15/31/15/15/15/15)
Blissey Lv56 (Fire Blast/Thunder/Blizzard/Dazzling Gleam, Ability: Serene Grace, Calm nature, IVs: 15/15/15/15/31/15)

Phart would rather have taken on the Sun & Moon version of this fight - Morimoto on his own in a Single Battle, with Kangaskhan and the Kanto Eeveelutions instead of Gengar - but alas, there's a new game director in town for USUM. Morimoto and Iwao were troublesome for the same reasons as all the other 1v2 fights, with the added bonus of having six Pokémon, half of them fully-EV'd, and leading with Gengar and Protean Kecleon to feast on Phart's Ghost weakness. Gengar obviously had the stronger attacks of the two, and the fact that it couldn't OHKO with a Shadow Ball crit didn't matter so much when Kecleon would be there to follow up with Shadow Claw. Setting up against the two of them was not enjoyable, nor was Struggle choosing to target Kecleon first instead of Gengar, but their remaining Pokémon weren't much of a bother after that. Pretty nasty leads though.

45-26.png

Perish Song

This move came up exactly once in the entire playthrough, on a random Trainer in the Kantonian Gym with a single Jynx. It went down in two hits after an X Attack and didn't use Perish Song until the turn where it fainted. So I guess Perish Song doesn't really belong here because it wasn't an issue for Phart, but it feels wrong not mentioning a move that had perfect accuracy and guaranteed Phart would faint in 3 turns unless it finished the battle before then. It would've been horrible in pretty much any other battle in the game, and probably made the challenge unbeatable on some of the hardest ones, so I was very lucky to only encounter it on something as frail as Jynx. Funny to think that Phart could set up on Ultra Necrozma no problem but Winona's Swablu from Emerald would've sent it running for the hills.

45-27.png

Tsunekazu and Nobuko
Veteran Duo Tsunekazu and Nobuko
Houndoom Lv63 (Flamethrower/Dark Pulse/Shadow Ball/Sludge Bomb, Ability: Flash Fire, Modest nature, IVs: 30/15/15/30/15/30, EVs: 252 SpA / 252 Spe)
Magmortar Lv63 (Thunder Punch/Fire Punch/Brick Break, Ability: Flame Body, Adamant nature, IVs: 30/30/15/15/15/30, EVs: 252 Atk / 252 Spe)
Volcarona Lv63 (Bug Buzz/Heat Wave/Hurricane, Ability: Flame Body, Modest nature, IVs: 30/15/15/30/15/30, EVs: 252 SpA / 252 Spe)
Comfey Lv63 (Floral Healing/Light Screen/Sunny Day/Draining Kiss, Ability: Flower Veil, Calm nature, IVs: 30/15/15/15/30/30, EVs: 252 HP / 252 SpD)
Whimsicott Lv63 (Helping Hand/Sunny Day/Solar Beam/Dazzling Gleam, Ability: Chlorophyll, Calm nature, IVs: 30/15/15/15/30/30, EVs: 252 HP / 252 SpD)
Lilligant Lv63 (Sunny Day/Helping Hand/After You/Solar Beam, Ability: Chlorophyll, Calm nature, IVs: 30/15/15/15/30/30, EVs: 252 HP / 252 SpD)

Slightly easier than Morimoto and Iwao in some ways, because Nobuko's half of the team was focused on support rather than dealing damage, and her lead Comfey wasn't much help against Phart (Light Screen was useless and so was Floral Healing because Phart wasn't dealing any damage initially). But there were still two Helping Hand users in the back, plus a Volcarona who'd happily OHKO Phart with a crit if it got that boost from Whimsicott or Lilligant, and probably could've splatted Phart without a Helping Hand boost if it went for Struggle on the same turn. Their nature as a sun team didn't affect things too much because Houndoom and Volcarona preferred clicking their STAB moves over their Fire-type options, but the added chip damage from Solar Beams here and there didn't help either. Overall, not too bad once they were down to Magmortar and their support Pokémon, but 6 Pokémon in a Double Battle was always going to be a challenge.

45-28.png

Red and Blue
Pokémon Trainer Red
Pikachu Lv74 @ Light Ball (Volt Tackle/Quick Attack/Light Screen/Nuzzle, Ability: Static, Jolly nature, IVs: All 30, EVs: 252 Atk / 252 Spe)
Lapras Lv69 (Surf/Blizzard/Ice Shard/Psychic, Ability: Water Absorb, Serious nature, IVs: All 30, EVs: 252 HP / 252 SpA)
Snorlax Lv69 (Body Slam/Heavy Slam/Crunch/High Horsepower, Ability: Thick Fat, Adamant nature, IVs: All 30, EVs: 252 HP / 252 Atk)
Venusaur Lv70 (Leaf Storm/Leech Seed/Sludge Bomb/Earthquake, Ability: Overgrow, Quiet nature, IVs: All 30, EVs: 252 SpA / 252 SpD)
Charizard Lv70 (Fire Blast/Air Slash/Focus Blast/Will-O-Wisp, Ability: Blaze, Timid nature, IVs: All 30, EVs: 252 SpA / 252 Spe)
Blastoise Lv70 (Hydro Pump/Flash Cannon/Dark Pulse/Ice Beam, Ability: Torrent, Calm nature, IVs: All 30, EVs: 252 Def / 252 SpD)

Pokémon Trainer Blue
Alakazam Lv69 (Psychic/Future Sight/Shadow Ball/Reflect, Ability: Synchronize, Modest nature, IVs: All 30, EVs: 252 SpA / 252 Spe)
Machamp Lv69 (Cross Chop/Bulk Up/Knock Off/Poison Jab, Ability: Guts, Adamant nature, IVs: All 30, EVs: 252 Atk / 252 Spe)
Aerodactyl Lv69 (Rock Slide/Crunch/Iron Head/Sky Drop, Ability: Pressure, Jolly nature, IVs: All 30, EVs: 252 Atk / 252 Spe)
Exeggutor Lv69 (Leaf Storm/Psychic/Sludge Bomb/Hypnosis, Ability: Chlorophyll, Modest nature, IVs: All 30, EVs: 252 SpA / 252 Spe)
Arcanine Lv69 (Extreme Speed/Flare Blitz/Thunder Fang/Bulldoze, Ability: Intimidate, Adamant nature, IVs: All 30, EVs: 252 Atk / 252 Spe)
Gyarados Lv69 (Aqua Tail/Crunch/Ice Fang/Dragon Dance, Ability: Intimidate, Adamant nature, IVs: All 30, EVs: 252 Atk / 252 Spe)

Neither of them were too difficult, but Blue was definitely the harder of the two, with Shadow Ball Alakazam being a worse lead for Phart than a Volt Tackle Pikachu that blew itself up before I'd even finished using X items. And then he had Machamp remove Phart's Eviolite with Knock Off and leave it open to OHKOs from Exeggutor's Leaf Storm or Arcanine's Flare Blitz (with crits of course). Meanwhile, Red's only dangerous move was Venusaur's Leech Seed, which it opted not to use.

But never mind their team compositions - what really slowed Phart down was Blue automatically healing it right before the battle, regardless of whether I chose to battle him or Red. I do get why they added that heal in USUM, because the encounter with Red and Blue comes out of nowhere just after you've cleared Poni Gauntlet and there's no option to decline the battle, so the original no-heal battles in SM were possibly a bit unfair. It wasn't horrendous for Phart to have to use Splash 40 times before attacking, as it could tank critical hits fairly well in the meantime due to not hurting itself with Struggle recoil quite yet, but that's still annoying to go through in any battle, much less ones against fellow Champions with full teams.

45-29.png

Title Defense Plumeria
Pokémon Trainer Plumeria
Gengar Lv67 (Shadow Ball/Dark Pulse/Sludge Bomb/Dazzling Gleam, Ability: Cursed Body, Modest nature, IVs: All 30, EVs: 252 SpA)
Alolan Muk Lv67 (Venoshock/Brick Break/Toxic/Rock Slide, Ability: Poison Touch, Careful nature, IVs: All 30, EVs: 252 SpD)
Crobat Lv67 (Leech Life/Fly/Poison Fang/Protect, Ability: Inner Focus, Jolly nature, IVs: All 30, EVs: 252 Spe)
Toxapex Lv67 (Liquidation/Baneful Bunker/Recover/Poison Jab, Ability: Merciless, Impish nature, IVs: All 30, EVs: 252 Def)
Salazzle Lv67 @ Poisonium Z (Sludge Bomb/Flamethrower/Dragon Pulse/Protect, Ability: Corrosion, Hasty nature, IVs: All 30, EVs: 252 SpA / 252 Spe)

I chose to remove Phart's Eviolite for the last 9 Title Defense battles just to add some difficulty to the final parts of the challenge, and a few of those battles did make me kind of regret that decision at certain points. Plumeria was the first of those, as her Gengar would happily OHKO Phart if it scored a critical hit with Shadow Ball, and as her lead Pokémon I couldn't exactly do much to prevent that. I ended up skipping the X Defenses and X Speeds so Phart could just OHKO it as soon as possible and get the rest of its boosts against the less threatening Crobat. That tactic worked out quite well, but the fact it was necessary at all didn't bode well for my other Title Defense challenges.

45-30.png

Title Defense Hapu
Island Kahuna Hapu
Golurk Lv68 (Dynamic Punch/Earthquake/Phantom Force/Stone Edge, Ability: No Guard, IVs: All 30, EVs: 252 HP / 252 Atk)
East Sea Gastrodon Lv68 (Muddy Water/Mud Bomb/Sludge Wave/Ice Beam, Ability: Sticky Hold, IVs: All 30, EVs: 252 HP / 252 SpA)
Krookodile Lv68 (Earthquake/Crunch/Dragon Claw/Aerial Ace, Ability: Intimidate, IVs: All 30, EVs: 252 Atk / 252 Spe)
Flygon Lv68 (Dragon Rush/Earthquake/Stone Edge/Steel Wing, Ability: Levitate, IVs: All 30, EVs: 252 Atk / 252 Spe)
Mudsdale Lv69 @ Groundium Z (Heavy Slam/Earthquake/Payback/Rock Slide, Ability: Stamina, IVs: All 30, EVs: 252 Atk / 252 Def)

Case in point: Hapu's Golurk lead could also OHKO Phart with a critical hit on Phantom Force, and even worse, her Krookodile and Mudsdale could one-shot it as well! I should point out that being able to OHKO Phart didn't always make something a massive threat in these battles - it was perfectly fine if Phart could simply OHKO them first (like Gladion's Zoroark), or exhaust the attacking PP of a weaker teammate and 2HKO the dangerous Pokémon as it switched in (like Sophocles's Vikavolt). Unfortunately Hapu's team was far too sturdy for any OHKOs and the only Pokémon whose PP I could try to stall out was Flygon, but the Mudsdale that followed it was still too bulky for a 2HKO.

45-31.png

Title Defense Guzma
Pokémon Trainer Guzma
Golisopod Lv68 (Sucker Punch/Waterfall/First Impression/Brick Break, Ability: Emergency Exit, Adamant nature, IVs: All 30, EVs: 252 Atk / 252 Def)
Vikavolt Lv68 (Flash Cannon/Thunderbolt/Bug Buzz/Energy Ball, Ability: Levitate, Modest nature, IVs: All 30, EVs: 252 HP / 252 SpA)
Pinsir Lv68 (Throat Chop/Storm Throw/X-Scissor/Stone Edge, Ability: Mold Breaker, Adamant nature, IVs: All 30, EVs: 252 Atk / 252 Spe)
Masquerain Lv68 (Air Slash/Bug Buzz/Ice Beam/Energy Ball, Ability: Intimidate, Modest nature, IVs: All 30, EVs: 252 SpA / 252 Spe)
Scizor Lv68 (X-Scissor/Iron Head/Night Slash/Bullet Punch, Ability: Technician, Adamant nature, IVs: All 30, EVs: 252 Atk / 252 Spe)

Guzma managed to outdo both of the previous foes, having his entire team be capable of one-shotting Phart with a critical hit. The good news was that Golisopod could only pull that off with First Impression, so once its one shot at KOing failed it was reduced to setup bait, letting Phart 2HKO Vikavolt as it came in to replace the PP-less Golisopod. Even better, it managed to OHKO Masquerain by having a Guard Spec. up for its Intimidate, though there was still a chance of it missing the KO even at +6 Attack. But even with me planning things out to minimise the number of attacks Guzma got in, Phart still had to stomach 5 of them (plus it risked taking a Bug Buzz from Masquerain if it didn't OHKO) and pray that none of them got critical hits. Such was the price of not using the Eviolite.


TL;DR: Critical hits bad, 1v2 battles bad, disobedience bad, forced heals bad. Also, using Cosmog bad, but that should go without saying.

That's basically all of the nasty stuff I can think of. Nearly every battle was difficult to some degree, of course, but most of that difficulty would just fall under the Cosmog section at the start of the post. Once I've finished my upcoming "interesting" statistics post I should be pretty much done with all these bonus ramblings. I don't think any of these extra posts are super necessary, but it would've felt weird to spend 6 months on this thread and then instantly drop it once I finished the challenge.
 
46-1.png

Miscellaneous Statistics

While Elio and Phart were busy with their very slow-paced rampage across the Alola region, the game was tracking all sorts of weird statistics behind the scenes. Some of them can be viewed in-game if I know where to look, while others require another player to be seen (e.g. through interacting with them in Festival Plaza). And some of them don't appear to be viewable to any players at all, as far as I can tell.

Enter PKHeX! Now I can just trawl through all of those stats at once. Some of them are still viewable within the game itself, of course, so I've included a couple of screenshots where appropriate to stop this post from becoming nothing but a wall of text. Some of the stats have names in PKHeX that seem to have been made up for PKHeX itself rather than coming from the game's data (probably because some of them don't have any "official" names). I've left those names as they were in PKHeX - a few of them sound a bit ambiguous, and I'm not always 100% certain what the stats are actually referring to, so I don't want to alter their names to something that sounds more intuitive but is actually inaccurate.

You might not be able to tell because of how long the list is, but I did leave out some of the truly irrelevant statistics. The stats relating to the GTS or Battle Spot were obviously all zeros, as were the stats for the Global Missions in Festival Plaza that last ran over 8 years ago, so nobody needs to see them. The same applies for features I had no reason to engage with, like the Battle Tree or Battle Videos.

46-2.png

Behold, cheaty mode. There's not really any new information to be gleaned from Phart's data other than that it would have an Electric-type Hidden Power if it could learn it, and the same applies to all of my other Pokémon - I don't need to know how bad the IVs are on my shinies. Most of the numbers I'm interested in apply to the save file as a whole and can be found under the Trainer Info editor, so that's where I'll be looking.

I've tried to sort all the stats into rough categories because there's well over 100 of them, but some of them feel a little shoehorned into their groups, and I've still ended up with a Miscellaneous section anyway. At least I tried.

46-3.png

General Elio-related stats

There's a few numbers right there in that screenshot, so now I don't have to write some of them below. I never did reach maximum money in the end, but I knew long before the end of the challenge that I didn't need to grind money any more, so I was just having a bit of fun trying to reach it anyway. If I really cared, I could've just run around Poni Coast smashing up all the boulders with Tauros until the Stardusts/Star Pieces/Comet Shards they yielded covered the last $700k.

Also, it's funny to see that the play time doesn't even reach 180 hours, considering I spent a lot longer than that on the playthrough overall... just not always on actually playing it. Anyway, time for some more numbers courtesy of PKHeX:

Steps Taken: 516,380
Times Saved: 3,382
I always saved before battles where I thought Phart might lose, i.e. all of them.
Money Spent: $2,554,900
Mart Stack Purchases: 115
I'm assuming this is "most items bought in a single purchase". Can't remember what they actually were though. Maybe Max Potions?
Café Drinks Bought: 87 12 Poké Beans and a Full Heal-type item for $198. It was a good deal for a good chunk of the game.
Outfit Changes: 8
Salon Uses: 1
Loto-ID Wins: 1
Dishes eaten in Battle Buffet: 19
Times rested at home: 8
I don't remember bringing Phart home to be healed more than once, so I'm not sure why this is so high. Unless it counts the forced heals like at the beginning of the game or the start of Episode RR?
Pokémon Healed at Pokémon Center: 2 Pretty sure one of these was a muscle-memory hiccup on Melemele Island when my brain wasn't 100% in Phart mode. And I guess the other one must've been when I was still using Litten.
Battle Points Earned: 269 BP
Battle Points Spent: 264 BP


46-4.png

Pokémon encounters/Pokédex completion stats

73 species registered feels fairly impressive considering I was never actively trying to complete the Pokédex. I've made a little list of all the Pokémon I registered and how/why they got there:

Litten (starter)
Pikipek (Poké Pelago visitor)
Gumshoos (gift from Samson Oak)
Caterpie (caught for... some reason, but I honestly can't remember why)
Ledyba (caught to trade for Phart)
Pikachu (gift in Pikachu Valley, also a gift from the Surfing Association)
Vikavolt (gift from Samson Oak)
Munchlax (caught for its Leftovers)
Slowpoke (Poké Pelago visitor)
Wingull (Poké Pelago visitor)
Abra (caught to show to a Beauty for $10,000)
Mr. Mime (Poké Pelago visitor)
Hypno (caught during a sidequest with Ilima)
Crabrawler (caught to show to a Sightseer for $3,000)
Gastly (caught during the spooky scary sidequests in the Trainers' School)
Drifloon (caught during the spooky scary sidequests in the Trainers' School)
Honchkrow (Poké Pelago visitor)
Zubat (Poké Pelago visitor)
Noibat (received from an NPC trade for its Bright Powder)
Spearow (Poké Pelago visitor, also caught to trade for a Hawlucha)
Hawlucha (Poké Pelago visitor, also received from an NPC trade for its X Attack)
Cutiefly (Poké Pelago visitor)
Ribombee (gift from Samson Oak)
Jynx (Poké Pelago visitor)
Seel (Poké Pelago visitor)
Corsola (Poké Pelago visitor)
Lillipup (caught to trade for a Noibat)
Eevee (hatched from Egg received in Paniola Ranch)
Jolteon (evolved from Eevee to increase my Pokémon Evolved stat so I could gain more FC)
Flaaffy (Poké Pelago visitor)
Lurantis (gift from Samson Oak)
Marowak (gift from Samson Oak)
Bewear (caught during a sidequest in the Hau'oli City Mall)
Comfey (Poké Pelago visitor)
Pinsir (Poké Pelago visitor, also caught on Exeggutor Island)
Hoothoot (Poké Pelago visitor)
Noctowl (evolved from Hoothoot to increase my Pokémon Evolved stat so I could gain more FC)
Staryu (Poké Pelago visitor)
Starmie (evolved from Staryu to increase my Pokémon Evolved stat so I could gain more FC)
Omanyte (revived from a fossil)
Kabuto (revived from a fossil)
Lileep (revived from a fossil)
Anorith (revived from a fossil)
Cranidos (revived from a fossil)
Shieldon (revived from a fossil)
Archen (revived from a fossil)
Tirtouga (revived from a fossil)
Tyrunt (revived from a fossil)
Amaura (revived from a fossil)
Natu (Poké Pelago visitor)
Pyukumuku (Poké Pelago visitor)
Type: Null (gift from Wicke)
Poipole (gift from the Ultra Recon Squad)
Zygarde (caught in Resolution Cave, also a gift from Dexio)
Ditto (caught during a sidequest on Route 9)
Porygon (gift from an Aether Foundation Employee)
Mimikyu (gift from Samson Oak)
Banette (Poké Pelago visitor)
Frillish (caught during a sidequest on Route 14)
Snubbull (Poké Pelago visitor)
Lapras (Poké Pelago visitor)
Tropius (Poké Pelago visitor)
Litleo (Poké Pelago visitor)
Aerodactyl (gift from an Ace Trainer)
Tapu Koko (caught for fun)
Tapu Lele (caught for fun)
Tapu Bulu (caught for fun)
Tapu Fini (caught for fun)
Cosmog (I'll give you three guesses)
Solgaleo (caught for fun, but also to unlock the reverse world's time-changing feature)
Blacephalon (caught as part of the postgame story)
Necrozma (caught for fun)
Magearna (gift from a deliveryman)

Outside of the Alola Pokédex, I also caught a Litwick (from Island Scan), a Ralts (from Island Scan), a Grumpig (from Ultra Warp Ride) and an Electrode (from Team Rocket's Castle), so if these games had a National Pokédex then I'd be on 77 caught.

Checking through the Pokédex also made me curious about how much I could've filled it up without violating the rules of the challenge. It should still be quite easy to evolve Pokémon even if they can't enter battles - just stick them in Isle Evelup until they're one level from evolving, then buy a Rare Candy with Mantine Surf BP and use it - and as far as I can tell, there are no evolution methods that require any Pokémon to be used in battle (like Galarian Farfetch'd in later games, for example). So if I actually went for it and tried to fill up the Pokédex as much as possible whilst only using Phart to encounter wild Pokémon, I would end up with 394 seen and 367 caught, out of USUM's 403 Alola-native Pokémon.

Of course, trying to get Pokémon like the SOS-exclusive night-exclusive rain-exclusive 1%-appearance-rate Politoed to show up would be a nightmare without a dedicated team member for SOS chaining, but it's still possible to encounter and catch them, just not remotely fun. The Pokémon I wouldn't be able to register as caught are as follows:

Rowlet, Dartrix, Decidueye
Popplio, Brionne
(can't be seen), Primarina
Alakazam
Vullaby, Mandibuzz
Petilil, Lilligant
Machamp
Gigalith
Milotic
Magmortar
Oranguru
Porygon2, Porygon-Z
Electrike, Manectric
Electivire
Golem
Baltoy
(can't be seen), Claydol
Drampa
Sandshrew, Sandslash
Skrelp
(can't be seen), Dragalge
Scizor
Lunala
(can't be seen)
Stakataka (can't be seen)
Pheromosa (can't be seen)
Celesteela (can't be seen)
Marshadow (can't be seen)
Zeraora (can't be seen)

6 starter Pokémon, 18 version exclusives, 10 trade evolutions and 2 mythicals. That sounds about right. Also, since Primarina and Scizor can only be seen in the Title Defense battles against Kukui and Guzma respectively, poor Phart would have to go through another Pokémon League run in order to finish the Pokédex.

I'm glad I never felt compelled to complete the Pokédex as well. Moving on, here are some numbers plucked from my save file that mostly relate to wild Pokémon encounters:

Pokémon Caught: 34
Pokémon Caught (Highest): 6
"Highest" in this case means the most Pokémon I caught in a single day. There are a few stats with this designation in PKHeX, all of which were paired with a corresponding "Today" stat. Since I've now finished the challenge and stopped playing the game, all of the Today stats were zero and not worth including.
Pokémon Caught Fishing: 18
Balls Used: 102
Shiny Pokémon Encountered: 1
Seel probably doesn't count because it came from Poké Pelago rather than being encountered in the wild.
Failed Run Attempts: 33
Wild encounters that fled: 2
It's not easy catching Abra when you have no Quick Balls and your only Pokémon is a Cosmog.
Pokémon Evolved: 4
Pokémon Evolved (Highest): 4
Evolutions Cancelled: 58
Tedious, but so was everything else.
Eggs Hatched: 85
Bubbling Spot Encounters/Items: 13
Rustling Tree Encounters: 4
Water Splash Encounters: 4
Sand Cloud Encounters: 1
Rustling Bush Encounters: 1
Fly Shadow Encounters: 0
Rustling Grass Encounters: 1
Dirt Cloud Encounters: 7
This one's only higher than the others because of Verdant Cavern. I had to revisit it twice later on in the game and one of the dirt clouds is impossible to dodge, even with Tauros going at full speed.
Wimpod Chases: 0
Ambush-Smash post-battle items: 16
Fossils Restored: 143
16 Omanyte, 8 Kabuto, 19 Lileep, 15 Anorith, 24 Cranidos, 15 Shieldon, 8 Archen, 19 Tirtouga, 8 Tyrunt, and 11 Amaura. At first I wondered if they maybe made the fossils rarer in the game versions where they can only be found through Poké Pelago and not simply purchased in Konikoni, but it doesn't look like it - by that logic, I would expect to have more Anorith/Tyrunt than Lileep/Amaura.

46-5.png

Battles

I couldn't think of anything to screenshot in-game that would contain any useful statistics, but a picture of Ultra Necrozma just after it Struggled itself to death will suffice.

Total Battles: 899
Wild Pokémon Battles: 472
Ran From Battles: 407
Trainer Battles: 427
While this is the number of unique Trainers I defeated throughout the game, I'm not 100% sure how it ended up being 427.

I can subtract 7 Title Defense challengers from that figure because the only ones where I didn't reset the game after beating them were Hau, Gladion and Kukui... except my game actually crashed while I was taking screenshots of Kukui post-battle and I had to reset and lose to Hapu in order to escape the League, so that makes 8 "unfought" challengers and takes it down to 419. During the Pokémon League runs where I fought Gladion and Kukui, the Elite Four used the same rematch teams that I'd already beaten previously, so that adds on another 8 battles and brings it back to 427, but then I have to subtract 1 for Red because I reset after beating him in order to fight Blue.

Since I was already including the Battle Royal fight in those 427 battles, I have to assume the extra 1 that brings it back up from 426 is the Rainbow Rocket Grunt I fought under Battle Agency rules, who I didn't include in my Trainer list because there was no way for Phart to battle him. I'm hoping he's the missing Trainer in that total, otherwise I haven't a clue how it got to 427.

Trainers Battled (Highest): 15
Pokémon Defeated: 847
Pokémon Defeated (Highest): 30
Exp. Points Collected (Highest): 78,224
Moves Used: 4,485
Super Effective Moves Used: 6
Litten fought Hau's Rowlet twice and 2HKO'd it with Ember on both occasions, and I used a Battle Agency Barbaracle to hit a Raticate with Cross Chop and a Golbat with Stone Edge.
Z-Moves Used: 4
Times Splash used: 1,988
Times Struggle used: 2,477
I didn't hand-pick the stats for Splash and Struggle from the data or anything - they're literally the only two moves for which the game tracks every single use of them. How convenient! It's like the stats were designed with a Cosmog solo run in mind. A bit surprised to see a Splash number that isn't divisible by 40, but I suspect the Spite Dunsparce fought in Hau'oli City may be to blame for that.
Moves used with No Effect: 0 Strongly disagree. But this probably just refers to type-based immunities and maybe things like Levitate.
Champion Title Defense: 2 As I mentioned above, I had to reset after defeating Kukui because my game crashed, so this only counts Hau and Gladion.
Own Fainted Pokémon: 24 23 Double Battles in which Ralts fainted, plus Phart losing to Hapu so I could free myself from the Pokémon League.
Times attacked ally in battle: 0
Battle Royal Dome Battles: 1
Battle Royal Dome Wins: 1
It's nice to see that the game did record my win in the Battle Royal after all! Makes me feel vindicated in my decision to have it count as a Trainer battle for my checklist.
Battle Agency Battles: 1
Battle Agency Wins: 1
SOS Battle Allies Called: 42
Berry Tree Battles won: 1
Recording the number of times I defeated a wild Crabrawler eating berries seems weirdly specific, but that's what this appears to be.

46-6.png

Festival Plaza

I think the screenshot covers every value I would've otherwise pulled from PKHeX. In hindsight, I'm not sure spending over 22 hours completing type-matchup missions was the best use of my time, but oh well. Got some cool clothing colours out of it.

I didn't keep records of every single facility I ever hosted, but my final 7 were as follows:
  • Sinnoh Tent ★★★★★ (red)
  • Sinnoh Tent ★★★★★ (gold)
  • Kalos Tent ★★★ (red)
  • Sinnoh Tent ★★★ (blue)
  • Team Green ★★★★★
  • Team Purple ★★★★★
  • Team Orange ★★★★★
46-7.png

Poké Pelago

There isn't really any way to view Poké Pelago statistics within the game itself (apart from how many beans you have), so here's more stuff pulled from the save data:

Poké Beans Collected: 16,784
Poké Pelago Visits: 494
Poké Pelago Bean Trades: 3
Mohn only offers to trade if you have less than 300 Plain Beans, and that basically never happened except when I'd first unlocked Poké Pelago.
Poké Pelago Tapped Pokémon: 590
Poké Pelago Bean Stacks put in Crate: 349
Poké Pelago Levels Gained: 637
I got bored at one point and started throwing all my Lv. 1 Ralts into Isle Evelup because I was already at the Poké Bean cap and had nothing better to spend them on, hence the weirdly high number.
Poké Pelago Friendship Increased: 0
Poké Pelago Eggs Hatched: 0
Poké Pelago ???: 15
No idea what this is, and apparently nobody else does either, but I've done it 15 times! That's got to be a new personal best.
Pelago Treasure Hunts: 181
Pelago Training Sessions: 28
Pelago Hot Spring Sessions: 2
I don't remember this. Must've just thrown some random Pokémon in and then taken them out again? They certainly weren't in there long enough to get any friendship increases.
Berry Harvests: 1,202

46-8.png

Minigames

There aren't really enough stats to warrant this being an entire category, but I've made it into one anyway.

Mantine Surf Plays: 20
Mantine Surf BP Earned: 269 BP
Highest Mantine Surf BP Earned: 50 BP
Ultra Wormhole Travels: 29
Highest Wormhole Travel Distance: 5,580 light-years
And I still wasn't even close to facing Brock :(

46-9.png

Pokémon-related stats

I feel like these categories are getting increasingly nebulous. This one is supposed to be for things relating to the Pokémon that I caught or came into possession of during the challenge. But you could describe any stats in a Pokémon game as being "Pokémon-related" really.

Pokémon Refresh Accessed: 88
Pokémon Petted: 104
Beans Given: 24
Nicknames Given: 9
This was just to help ensure that whenever Selene asked me to compare stats in Festival Plaza, I'd have a better chance of beating her no matter which three categories I could choose from. Some poor Lileep died millions of years ago and was brought back to life for the sole purpose of being given 9 nicknames in a row and then sent to work in the mines of Isle Aphun.
Medicine Used: 3,603
Levels Raised: 0
Presumably this was only tracking Rare Candy usage, otherwise it would be on 3 from the Rare Kitchen I used at the start of the game.
Moves learned with TMs: 0
PP Raised: 17
Refer to the Nicknames Given stat for an explanation. I actually used the same Lileep as before for most of this bit - definitely the first time I've ever used PP Ups on Constrict!
Hyper Trainings Received: 1
Pokémon Rides: 1,601
RotomDex Interactions: 496
Roto Lotos: 344
Pokémon Storage System Log-outs: 297


46-10.png

Miscellaneous stats

Fuck it, here's everything else worth reading.

Ledges Jumped Down: 89
Times Twirled (Pirouette): 39
Cute that the game keeps a record of this, though I don't think it's used for anything?
Berry Piles (not full) Collected: 13
Berry Piles (full) Collected: 1
Full ones are the big piles that always have a Crabrawler, and not-full ones are, well, the smaller ones that don't always have a Crabrawler. I avoided the big piles for the most part because you can't pick up the berries without defeating or catching the Crabrawler first, and Phart didn't need the extra Exp. Points (and by the time I was in the postgame and didn't have to worry about obedience, there wasn't much need for collecting berries).
Stickers Collected: 100
Rock Smash Items: 17
Items Reeled In: 3
QR Code Scans: 11
Special QR Code Scans: 11
Island Scans: 2
Times laid down in Own Bed: 3
"The scent is somehow oddly comforting..."
Times laid down in Ilima's bed: 1 "It's just firm enough and the pure white sheets make you feel clean and comfy."
Times laid down in Guzma's bed: 0 "There is the sad, musty odor of an old bed that no one has slept in for a long time..."
Times laid down in Kiawe's bed: 0 "The bed looks fresh and clean, but you can still detect a faint whiff of...sweat?"
Times laid down in Lana's bed: 0 "It's so relaxing...as though you were wrapped in the fresh scent of the sea breeze..."
Times laid down in Mallow's bed: 0 "There's a faint smell of spices, sauces, and other fragrant things..."
Times laid down in Olivia's bed: 0 "It is a surprisingly firm mattress. You could sleep easy here, free from burdens."
Times laid down in Hapu's bed: 1 "The sun is so warm... You could sleep feeling safe here..."
Times laid down in Lusamine's bed: 1 "It is so soft and enveloping that it feels as though you could sink right into the bed..."

I've seen people make fun of Elio/Selene for their near-permanent :) face plenty of times, but not so much for their willingness to climb into other people's beds just to see how they feel, and sometimes to see how they smell. And they'll still do this if the bed's owner is right there in the room with them! I don't know why the game is capable of recording the exact number of uses of each bed, nor do I have any idea where, if anywhere, those numbers are used. Frankly I'm not sure I want to know.


Lastly, some other assorted stats from things I've been tracking myself:

Passport Stamps obtained: 6/15 Got the stamp for becoming a Pokémon Trainer, the four stamps for clearing the grand trials, and the stamp for finishing my island challenge. I was missing the 5 stamps for Pokédex completion, the 3 stamps for Battle Tree streaks, and the stamp for fully upgrading the Poké Finder. No surprises there apart from me deciding the Poké Finder stuff was too tedious even for this playthrough.
Z-Crystals obtained: 30/35 Missing the Z-Crystals for Alolan Raichu, Snorlax, Mew, Mimikyu and Marshadow. Mew and Marshadow obviously aren't in USUM unless you trade them in, and Alolan Raichu and Snorlax required catching/evolving those Pokémon and showing them to the person who'd give you their crystals, and I didn't think it would be worth the effort for items I had no way of using. As for Mimikyu... I forgot it existed.
TMs obtained: 71/100 All the missing ones were from Poké Marts: 10 from Seafolk Village, 5 from Heahea City, Konikoni City and Malie City, and 4 from Royal Avenue. I could cope with picking up useless TMs off the ground, but I drew the line at spending money to acquire them.
Number of Trainer battles beaten with a Cosmog: 424
Number of Trainer battles beaten while Phart was disobedient: 76
Number of times Phart fainted: 15
Number of forced heals: 39
This only includes the ones to which Phart was subjected - I know there must've been at least one before trading was unlocked but I don't care too much about that.
Total number of Pokémon in the PC: 388
Shiny Pokémon obtained: 2
Species of Fossil Pokémon revived: 10/10
Species of Poké Pelago visitors obtained: 23/25
I was only missing Misdreavus and Houndour by the end. They both showed up on Isle Abeens at least once but never wanted to stick around.
Acts of incest overseen: 56 I swear it was optimal.
Pictures of two men kissing drawn: 1
Total length of challenge: 186 days
Plus another 5 days for all these bonus posts, but the actual playthrough was finished in 186.
Total size of my screenshots/images folder: 848 MB
Total word count: 207,449
Regrets: some


I expect there was probably a better way to format this post... too late now though. Some of the stats still don't seem that interesting even after I ditched the blatantly worthless ones, but my logic was that if I was going to dive into PKHeX to check out things like how many times Splash or Struggle were used, or how often I saved the game, I may as well include all the other stats that were right there alongside them. The bed statistics alone may have been worth the effort.

I'm officially out of numbers to pore over or game mechanics to reflect upon now! Just a short post coming up about why I bothered with the challenge in the first place and how I found it overall, and then I promise that'll be the last of this thread.
 
47-1.png

Final thoughts

At last, I'm finally free!

I'd had the idea of a Cosmog solo run floating around in my head for at least a few years before this thread. It seemed a fairly simple concept - solo runs can be hard, solo runs with bad Pokémon are harder, so what would happen if someone tried a solo run with one of the worst Pokémon of all time? Yet when I looked online, I couldn't seem to find anyone who'd actually attempted it. I did find someone who'd beaten the Pokémon League rematch teams in SM with a Lv. 70 Cosmog, which is definitely impressive, but not the all-encompassing playthrough I was hoping for. I even tried searching in Japanese just in case, but nope, still nothing.

It was around the end of last year that I started putting more serious thought into the idea. How would a solo run even work with Cosmog? You'd have to trade it in no matter which game you were playing, so disobedience would be an issue. Would it actually be worth using Struggle, or would it be better to just item spam your way through every battle? How would it interact with Z-Moves, or Dynamax, or Terastallization? Would a solo run be possible at all? Lots of questions, all of which I couldn't answer because nobody else seemed to have tried it.

I eventually decided that, nearly a decade on from the release of the first games to include Cosmog, if no one else had attempted a Cosmog solo run or was going to attempt one... I may as well do it myself. And if I was going to try it, I probably ought to document every last step of the challenge in excessive detail, just to prove it could be done (or why it couldn't, if I failed). And if I was going to do that, then I should at least try to make it all slightly entertaining to read. And so this wretched thread was born.

My expectation in the first post was that the challenge would be very grindy and tedious, and in that regard I was absolutely correct. Some other parts of the challenge definitely surprised me though. The Totem Pokémon (and even Ultra Necrozma!) were easier than I expected, but the Totems clawed back some difficulty through Phart's Struggle targeting Pokémon at random. Most attacks weren't dangerous with all Phart's X items set up unless they landed critical hits, but moves like Curse and Leech Seed were much more deadly than under normal circumstances. And despite me picking Ultra Sun as the game for this challenge on the basis of it having extra resources from Roto Loto and Mantine Surf, I didn't even use them particularly often at all! It makes me wonder if the other games where Cosmog exists could be completed as well with the same ruleset. Probably SM, SwSh seems easy enough too, and maybe SV if you're willing to slog through three regions, one of which focuses on Double Battles, in a game where battle animations can't be turned off.

All of those surprises I ran into helped make the run less miserable than it could've been. Don't get me wrong, it was still very boring in many parts, but somehow I managed to have some actual fun playing it! More importantly, I answered a question that's been bugging me on-and-off for years now. So if I see a video on YouTube with a title like "Can I Beat ULTRA SUN With ONLY COSMOG?", I now know what the answer will be: yes, if you use a shitload of X items, otherwise no.

It feels sort of fitting that I should finish this thread on 18th October, as today marks the 10-year anniversary of the Pokémon Sun and Moon Special Demo Version's release. Exactly 10 years after first stepping foot into the Alola region, I can put to rest a lengthy playthrough of that very region with one of the worst self-imposed restrictions I've ever concocted. Now I can get on with my life again.

I hope you enjoyed reading!


"Know your Cosmog, know yourself, and know you should definitely fear the result of a hundred battles."
—Ultra Sun Tzu

47-2.gif
47-3.gif
​
 
Back
Top