


Welcome to my second RMT. After getting a bunch of very good feedback on my first RMT, I was stoked to make my second RMT on the forums. This RMT is all about my two new favorite mons in this tier: Zeraora and Aegislash. Enjoy and feel free to leave any feedback as I greatly appreciate it! This team is heavily inspired by mncmt his Smogon tournement finals team which featured all the mons on the format. After studying the replay I got a good thought of how the team was supposed to work, and I tried to recreate it so it would also work on the ladder. This team isn't perfect, and with some bad luck half the mons are useless in some games. That being said, I have a ton of fun on the ladder with this, and the amount of pressure these mons are able to put on your opponent is insane.
The team:
Wishport ban pls (Clefable) @ Leftovers
Ability: Magic Guard
Shiny: Yes
EVs: 252 HP / 4 SpA / 252 SpD
Sassy Nature
IVs: 0 Atk / 30 Spe
- Wish
- Protect
- Teleport
- Moonblast
Is there really something to be said about this mon that we don't know yet? It is fat, nullifies chip, special defensive wall and is almost always able to yeet out while healing your switch ins. To not waste your time saying how good Clefable is I should honestly just put nothing but 3 lines of words saying how good Clefable is at its job simply doesn't even justify it. While I prefer LO Clef with 3 attacks the most, this mon is pretty much mandatory to make sure the stars of the show are able to shine. I run 30 Speed IV's on it to make sure I have the slow Teleport to prevent me getting fucked by Teleporting first on other Clefs as that can make or break a game every now and then. My Clef is also special though, as somehow every DD Dragapult I run in to has a +Speed nature in stead of +Attack meaning it survives a +1 Steel Wing. I guess it has a gaydar or something and only matches me up with either Specpults or dumb Pult sets. TY Clef.
Not uber (Aegislash) @ Choice Specs
Ability: Stance Change
Shiny: Yes
EVs: 4 Def / 252 SpA / 252 Spe
Modest Nature
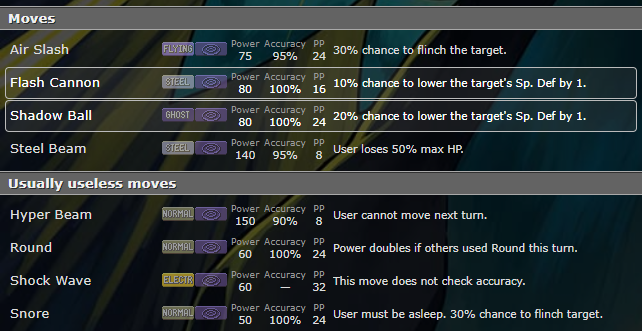
- Shadow Ball
- Flash Cannon
- Toxic
- Shadow Sneak / Whatever you want
Forget about any special attacker you know. This savage is the real deal and it absolutely emberrasses SpecPult and Hydreigon. It is able to break every fucking defensive core in the game, 50/50 a Conk from full HP, make Clefable unable to wish pass due to you getting a SpD drop on it which forces Clef to switch out and let something else bar Mandibuzz take guaranteed at least 50%.
Shadow Ball is the easiest move to spam on it due to being able to fish for that 20% SpD drop while still being able to hit almost every mon. Flash cannon is there to deal with pesky Fairy's/Normals (who the fuck runs normal lmao)/Hydreigons you predict. Toxic is when you know something is about to switch in that you want to cripple, think of mons like Hydreigon/Mandibuzz/Togekiss or anything else you want to chip long term. This thing is literally a driveby. You often can switch in relatively safe due to its shield form bulk, bully something and switch out to another mon. Once that process is done, you just play patiently to get into a scenario where it can switch in again and repeat. I'm confident this mon is responsible for the driveby that killed Tupac. The last move can be whatever you want honestly, I don't see myself using Shadow Sneak a lot unless Aegi is going to die or it has to do the last 15-20% on something. It's special movepool is dogshit so idk. I guess u could run something funny such as Destiny Bond but not sure if that would have use. Just look at the calcs of common switch ins/mons it faces.
Clefable:
252+ SpA Choice Specs Aegislash-Blade Shadow Ball vs. 252 HP / 252+ SpD Clefable: 177-208 (44.9 - 52.7%) -- guaranteed 3HKO after Leftovers recovery (Keep in mind you're fishing for SpD drops here)
252+ SpA Choice Specs Aegislash-Blade Flash Cannon vs. 252 HP / 252+ SpD Clefable: 354-416 (89.8 - 105.5%) -- 37.5% chance to OHKO
Conkeldurr:
252+ SpA Choice Specs Aegislash-Blade Shadow Ball/Flash Cannon vs. 0 HP / 4 SpD Conkeldurr: 322-379 (91.7 - 107.9%) -- 50% chance to OHKO
Hydreigon:
252+ SpA Choice Specs Aegislash-Blade Shadow Ball vs. 0 HP / 4 SpD Hydreigon: 123-146 (37.8 - 44.9%) -- guaranteed 3HKO
252+ SpA Choice Specs Aegislash-Blade Flash Cannon vs. 0 HP / 4 SpD Hydreigon: 247-292 (76 - 89.8%) -- guaranteed 2HKO
Zeraora:
252+ SpA Choice Specs Aegislash-Blade Shadow Ball vs. 0 HP / 0 SpD Zeraora: 273-322 (86.1 - 101.5%) -- 12.5% chance to OHKO
252+ SpA Choice Specs Aegislash-Blade Flash Cannon vs. 0 HP / 0 SpD Zeraora: 136-161 (42.9 - 50.7%) -- 3.1% chance to 2HKO
Pexio Ramos:
252+ SpA Choice Specs Aegislash-Blade Shadow Ball vs. 252 HP / 4 SpD Toxapex: 168-198 (55.2 - 65.1%) -- guaranteed 2HKO after Black Sludge recovery
252+ SpA Choice Specs Aegislash-Blade Shadow Ball vs. 252 HP / 252+ SpD Toxapex: 127-151 (41.7 - 49.6%) -- guaranteed 3HKO after Black Sludge recovery
Seismitoad:
252+ SpA Choice Specs Aegislash-Blade Shadow Ball vs. 252 HP / 4 SpD Seismitoad: 288-339 (69.5 - 81.8%) -- guaranteed 2HKO after Leftovers recovery
252+ SpA Choice Specs Aegislash-Blade Flash Cannon vs. 252 HP / 4 SpD Seismitoad: 144-169 (34.7 - 40.8%) -- 62.9% chance to 3HKO after Leftovers recovery
Court Change:
252+ SpA Choice Specs Aegislash-Blade Shadow Ball vs. 0 HP / 4 SpD Cinderace: 288-339 (95.6 - 112.6%) -- 75% chance to OHKO
252+ SpA Choice Specs Aegislash-Blade Flash Cannon vs. 0 HP / 4 SpD Cinderace: 144-169 (47.8 - 56.1%) -- 83.2% chance to 2HKO
Better Skarmory:
252+ SpA Choice Specs Aegislash-Blade Shadow Ball vs. 252 HP / 4 SpD Corviknight: 259-306 (64.7 - 76.5%) -- guaranteed 2HKO after Leftovers recovery
252+ SpA Choice Specs Aegislash-Blade Shadow Ball vs. 252 HP / 252+ SpD Corviknight: 183-216 (45.7 - 54%) -- 2.3% chance to 2HKO after Leftovers recovery
Ferrothorn:
252+ SpA Choice Specs Aegislash-Blade Shadow Ball vs. 252 HP / 4 SpD Ferrothorn: 199-235 (56.5 - 66.7%) -- guaranteed 2HKO after Leftovers recovery
252+ SpA Choice Specs Aegislash-Blade Shadow Ball vs. 252 HP / 252+ SpD Ferrothorn: 148-175 (42 - 49.7%) -- guaranteed 3HKO after Leftovers recovery
Also an agent (Mandibuzz) @ Heavy-Duty Boots
Ability: Overcoat
EVs: 252 HP / 160 Def / 96 Spe
Impish Nature
- Foul Play
- Roost
- U-turn
- Defog
I never really liked Mandibuzz as a Defogger. However I would like to apologize to the bird as it is so goddamn strong. It can survive pretty much any physical hit and hurt back with Foul Play, doing good chunks to physical staples such as Bisharp, Dragapult, el Luchador and Zeraora. U-Turn is to grab momentum, as it can usually take a hit and send in the murderer of Tupac. Roost and Defog are pretty selfexplainatory I guess. Make sure this thing doesn't get crippled or Knocked. Sometimes there are situations where that has to happen so be prepared for it. I personally don't value its HDB higher than the other items on my team, so this is often the first sacrifise I make if I have to lose an item. 96 Speed EVs to outrun Aegislash, the rest on HP/Defense to be a tanky fucker. I prefer this over a SpD investment as my team is otherwise 6-0'd by any physical mon. See below why I prefer FP over Knock.
Excadrill:
252 Atk Mandibuzz Foul Play vs. 0 HP / 4 Def Excadrill: 240-283 (66.4 - 78.3%) -- guaranteed 2HKO after Leftovers recovery
+2 252 Atk Mandibuzz Foul Play vs. 0 HP / 4 Def Excadrill: 480-565 (132.9 - 156.5%) -- guaranteed OHKO
Bisharp:
+2 252+ Atk Mandibuzz Foul Play vs. 0 HP / 4 Def Bisharp: 165-194 (60.8 - 71.5%) -- guaranteed 2HKO
252+ Atk Mandibuzz Foul Play vs. 0 HP / 4 Def Bisharp: 82-97 (30.2 - 35.7%) -- 40.7% chance to 3HKO
Dragapult:
252+ Atk Mandibuzz Foul Play vs. 0 HP / 0- Def Dragapult: 456-536 (143.8 - 169%) -- guaranteed OHKO
0- Atk Mandibuzz Foul Play vs. 0 HP / 0 Def Dragapult: 272-324 (85.8 - 102.2%) -- 12.5% chance to OHKO
Zeraora:
252 Atk Mandibuzz Foul Play vs. 0 HP / 0- Def Zeraora: 198-234 (62.4 - 73.8%) -- guaranteed 2HKO
0- Atk Aegislash-Blade Shadow Sneak vs. 0 HP / 0- Def Zeraora: 75-88 (23.6 - 27.7%) -- 80.3% chance to 4HKO (Added Shadow Sneak in here to show you that a LO or chipped Zeraora can be killed by Aegislash if you pivot into it on Plasma Fists, high risk medium reward)
Conkeldurr:
252+ Atk Mandibuzz Foul Play vs. 0 HP / 0 Def Conkeldurr: 93-111 (26.4 - 31.6%) -- 39.7% chance to 3HKO after burn damage
Agent (Seismitoad) @ Leftovers
Ability: Water Absorb
EVs: 252 HP / 252 Def / 4 SpA
Bold Nature
IVs: 0 Atk
- Stealth Rock
- Toxic / Knock Off
- Earth Power
- Scald
Pretty much the standard set to not lose to Vish at the matchup. I prefer Earth power over quake because I don't know really. Haven't really faced a moment yet where I thought 'Damn, EQ would've saved me here', but I guess thats a possible option. I prefer Toxic over Knock Off so I can support my end-game mons better, however it does make me somewhat useless to Clef but I take that for granted. This thing sets rocks, cripples mons with status and makes sure I don't lose to Vish. Isn't that basically what causes this fucker to be top 5 usage? Don't really have to show calcs to prove it tanks and walls a lot, you all know it.
Dragapult @ Choice Band
Ability: Infiltrator
Shiny: Yes
EVs: 252 Atk / 4 SpA / 252 Spe
Naive Nature
- U-turn
- Dragon Darts
- Phantom Force
- Fire Blast / Anything
Banded Dragapult is awesome. It has a superb U-Turn and 2 great physical STABs in Dragon Darts and Phantom Force. Dragon Darts is super spammable and OHKO/2HKO's most mons in the current meta bar resists and the fat fuckers above. The last moveslot is open for a lot of variation. I used to have Steel Wing there, but I found that I have no good (reliable) way of threatening Ferrothorn, thus I switched it up to Fire Blast to cook it. You can run a variety of moves (Steel Wing, Flamethrower, Fire Blast, Sucker Punch, Will-O-Wisp, Psychic Fangs) depending on whatever u want a stronger matchup on. I would love to show calcs for its moves but there's just so many possible calcs I'd waste my and your time. Just believe me for this time pls. I have been doubting for Scarf to be more reliable vs Zeraora, but I'm not sure if the loss in power vs other mons is worth it. I would love your opinions on this.
Zeraora @ Life Orb / Expert Belt / Leftovers
Ability: Volt Absorb
EVs: 252 SpA / 4 SpD / 252 Spe
Timid Nature
IVs: 0 Atk
- Calm Mind
- Thunderbolt
- Grass Knot
- Aura Sphere / Focus Miss
I guess you didn't really expect this set huh? Calm Mind Zeraora was unexpected in the Smogon finals and is also unexpected on the ladder. Electric / Grass / Fight is amazing coverage in the current meta, and the only safe switch in is Dragapult that still takes a fair amount of damage. Calm mind is there to boost up and potentially sweep (which it is very capable of late game). Due to Calm Mind it can also put Clefable in a very tough spot. Thunderbolt is there as Electric is a fantastic offensive typing and it is its most reliable move, giving STAB and being spammable as heck. Grass Knot is there for fat fuckers such as Hippo and Seismitoad, which usually scare the cat out, but now the furry can fuck these mons up. Before Aura Sphere I used to have Focus Blast on it for mons weak to Fight/Rotom-Heat and other Zeraoras, but honestly that move is dogshit so use Aura Sphere which also gets the job done. I changed Expert Belt to Life Orb to make up for the loss in power with Focus Miss, and I feel that with Wish/U-Turn support it's much better than LO. If you want more longevity on your furry you could go for Leftovers but I don't think it's worth it. You want to use Calm Mind whenever you can (which is often is easily able to due to the defensive meta and people suspecting a physical set but sike) to make sure you get the most out of Zeraora
Ferrothorn:
252 SpA Life Orb Zeraora Aura Sphere vs. 252 HP / 4 SpD Ferrothorn: 169-200 (48 - 56.8%) -- 34.8% chance to 2HKO after Leftovers recovery
+1 252 SpA Life Orb Zeraora Aura Sphere vs. 252 HP / 4 SpD Ferrothorn: 252-299 (71.5 - 84.9%) -- guaranteed 2HKO after Leftovers recovery
252 SpA Life Orb Zeraora Aura Sphere vs. 252 HP / 252+ SpD Ferrothorn: 125-148 (35.5 - 42%) -- 83.9% chance to 3HKO after Leftovers recovery
+1 252 SpA Life Orb Zeraora Aura Sphere vs. 252 HP / 252+ SpD Ferrothorn: 187-221 (53.1 - 62.7%) -- guaranteed 2HKO after Leftovers recovery
Rotom-Heat:
252 SpA Life Orb Zeraora Aura Sphere vs. 248 HP / 0 SpD Rotom-Heat: 91-108 (30 - 35.6%) -- 30.3% chance to 3HKO
+1 252 SpA Life Orb Zeraora Aura Sphere vs. 248 HP / 0 SpD Rotom-Heat: 136-161 (44.8 - 53.1%) -- 32% chance to 2HKO
252 SpA Life Orb Zeraora Thunderbolt vs. 248 HP / 0 SpD Rotom-Heat: 77-90 (25.4 - 29.7%) -- guaranteed 4HKO
+1 252 SpA Life Orb Zeraora Thunderbolt vs. 248 HP / 0 SpD Rotom-Heat: 114-135 (37.6 - 44.5%) -- guaranteed 3HKO
Clefable:
252 SpA Life Orb Zeraora Thunderbolt vs. 252 HP / 252+ SpD Clefable: 125-148 (31.7 - 37.5%) -- 0.1% chance to 3HKO after Leftovers recovery
+1 252 SpA Life Orb Zeraora Thunderbolt vs. 252 HP / 252+ SpD Clefable: 187-222 (47.4 - 56.3%) -- 28.9% chance to 2HKO after Leftovers recovery
+2 252 SpA Life Orb Zeraora Thunderbolt vs. 252 HP / 252+ SpD Clefable: 250-294 (63.4 - 74.6%) -- guaranteed 2HKO after Leftovers recovery
0 SpA Clefable Moonblast vs. 0 HP / 4 SpD Zeraora: 118-139 (37.2 - 43.8%) -- guaranteed 3HKO
0 SpA Clefable Moonblast vs. +1 0 HP / 4 SpD Zeraora: 79-94 (24.9 - 29.6%) -- 100% chance to 4HKO
0 SpA Clefable Moonblast vs. +2 0 HP / 4 SpD Zeraora: 58-70 (18.2 - 22%) -- possible 5HKO
Conkeldurr:
252 SpA Life Orb Zeraora Thunderbolt vs. 0 HP / 4 SpD Conkeldurr: 230-270 (65.5 - 76.9%) -- guaranteed 2HKO after burn damage
+1 252 SpA Life Orb Zeraora Thunderbolt vs. 0 HP / 4 SpD Conkeldurr: 341-403 (97.1 - 114.8%) -- 87.5% chance to OHKO
252+ Atk Guts Conkeldurr Mach Punch vs. 0 HP / 0 Def Zeraora: 144-171 (45.4 - 53.9%) -- 42.2% chance to 2HKO
252+ Atk Conkeldurr Mach Punch vs. 0 HP / 0 Def Zeraora: 97-115 (30.5 - 36.2%) -- 54.4% chance to 3HKO
Seismitoad:
252 SpA Life Orb Zeraora Grass Knot (80 BP) vs. 252 HP / 4 SpD Seismitoad: 484-572 (116.9 - 138.1%) -- guaranteed OHKO
252 SpA Life Orb Zeraora Grass Knot (80 BP) vs. 252 HP / 252+ SpD Seismitoad: 333-395 (80.4 - 95.4%) -- guaranteed 2HKO after Leftovers recovery (FULL SPD)
Hippo:
252 SpA Life Orb Zeraora Grass Knot (120 BP) vs. 252 HP / 4 SpD Hippowdon: 374-442 (89 - 105.2%) -- 31.3% chance to OHKO
+1 252 SpA Life Orb Zeraora Grass Knot (120 BP) vs. 252 HP / 4 SpD Hippowdon: 559-660 (133 - 157.1%) -- guaranteed OHKO
Bisharp:
252 SpA Life Orb Zeraora Aura Sphere vs. 0 HP / 0 SpD Bisharp: 515-608 (190 - 224.3%) -- guaranteed OHKO
252 SpA Life Orb Zeraora Thunderbolt vs. 0 HP / 0 SpD Bisharp: 218-257 (80.4 - 94.8%) -- guaranteed 2HKO
Corviknight:
252 SpA Life Orb Zeraora Thunderbolt vs. 252 HP / 4 SpD Corviknight: 369-437 (92.2 - 109.2%) -- 56.3% chance to OHKO
252 SpA Life Orb Zeraora Thunderbolt vs. 252 HP / 252+ SpD Corviknight: 260-307 (65 - 76.7%) -- guaranteed 2HKO after Leftovers recovery
Zeraora:
252 SpA Life Orb Zeraora Aura Sphere vs. 0 HP / 0 SpD Zeraora: 116-136 (36.5 - 42.9%) -- guaranteed 3HKO
+1 252 SpA Life Orb Zeraora Aura Sphere vs. 0 HP / 0 SpD Zeraora: 173-204 (54.5 - 64.3%) -- guaranteed 2HKO
Small note: A full HP Zeraora is always able to tank a Knock off into Close Combat, so you are guaranteed a hit on it. Even though I know that's not ideal scenario and our Zeraora will always win the speedtie, now u know.
Excadrill:
252 SpA Life Orb Zeraora Aura Sphere vs. 0 HP / 0 SpD Excadrill: 273-322 (75.6 - 89.1%) -- guaranteed 2HKO after Leftovers recovery
+1 252 SpA Life Orb Zeraora Aura Sphere vs. 0 HP / 0 SpD Excadrill: 408-481 (113 - 133.2%) -- guaranteed OHKO
Dracovish:
252 SpA Life Orb Zeraora Thunderbolt vs. 4 HP / 0 SpD Dracovish: 195-230 (60.5 - 71.4%) -- guaranteed 2HKO
252 SpA Life Orb Zeraora Grass Knot (120 BP) vs. 4 HP / 0 SpD Dracovish: 173-204 (53.7 - 63.3%) -- guaranteed 2HKO
+1 252 SpA Life Orb Zeraora Thunderbolt vs. 4 HP / 0 SpD Dracovish: 292-344 (90.6 - 106.8%) -- 43.8% chance to OHKO
+1 252 SpA Life Orb Zeraora Grass Knot (120 BP) vs. 4 HP / 0 SpD Dracovish: 259-305 (80.4 - 94.7%) -- guaranteed 2HKO
Threatlist:

As with any team, a well played Conkeldurr can cost you a mon. I often manage to pivot around it but U-Turning with Mandibuzz and using Toad, a well-read Knock Off will render one of my mons potentially useless. Be careful around Conk.
Zeraora will always be dangerous due to it's highly effective movepool against me and a well played Zeraora is a true bitch. Rocks must be up ASAP before this thing can punch holes in my team. My best bet is pivoting around or Inshallah the speedtie and finishing it off with something else.

Togekiss can be annoying as fuck, but I haven't really lost games because of it. Usually Zeraora can shrug it off.

Closyer has the unique skill of being dogshit in game A, and 6-0'ing in game B. If it gets a smash, pray to Jaweh you kept your Aegi at +80% and it won't flinch otherwise gg mate.
Importable:
https://pokepast.es/ae47f16bc14295a0


 -->
-->  to help deal with both of these mons, i suggest changing your
  with the removal of dragapult,