
Hello and welcome to my second RMT. I seem to be developing a bad habit of sharing these so late towards the end of a meta that it doesn't matter very much, but again I feel like sharing this one regardless not because it's exceptionally amazing or in desperate need of improving or anything in particular, but it is the team I've found to be one of my better ones in post-DLC meta so if people find a way to improve it further then that's only a benefit. Conversely, if this RMT helps any of you guys improve your own building in some way then even better. This is also my 50th post 'special', so leave a like for no reason! Enjoy.

Being far from what one would call an especially good player, and even further from one with a lot of free time to play, I took it upon myself to build the most brain-dead easiest to use team I could possibly conceive, and the final result was this lot. Pivot-spam in general is such a simple style to utilise at the moment thanks to the massive number of offensive and defensive pivots available, you can construct a team chaining pivots together to take as much prediction-reliance out of your games as possible; boring as it may be, it's very simple. I can only imagine that with the return of mons like Koko, Lando, Torn, etc, that this will continue to be a trend well into DLC2 as well to at least some degree or other.


Team Building:
The 'Team Building' section in most RMTs is typically totally useless for a lot of people. It'll generally cover the basic synergy of the team, but they're all often built on a lot of fundamentals that are expected to be understood already. There is really not much need to go into a basic outline of a team as boring and standard as this, a lot of those details should already be apparent to anyone who builds and plays often, so instead I'll take this opportunity to go as in-depth as possible on the overall team building fundamentals that I personally consider when building any team in general. Hopefully this'll help newer builders cover some details a little better and improve their own builds, be it standard or something more unconventional, so if that's anything you're interested in or might find useful then enjoy the waffle.
In-Depth:

Clefable (F) @ Leftovers
Ability: Magic Guard
EVs: 252 HP / 232 Def / 24 Spe
Bold Nature
- Moonblast
- Knock Off
- Soft-Boiled
- Stealth RockVery standard Rocks Clef leading things off. This thing is a lot of utility compression that a lot of balance and BO builds generally want or need, so as boring an option as it is, it's necessary. It acts as the main Fu check which is mandated particularly on a team that can allow it free opportunities to come in like this one where it can force out Zone, Blissey, Pult, and Corv. While part of me wanted to consider Tricky Barb in order to limit the longevity of Amoongus and Corv who can both drag games on for a while depending on their support, considering this is the team’s only Fu check as well as a check to other threats such as Zeraora and Pult, Clef needed the Leftovers for the overall longevity. Knock still does a good job of removing Amoongy's AV which opens up Zone much more by actually no longer allowing it to switch into Analytic Flash Canon. Knock is also a great supporting move in general against a whole slew of things this team would appreciate having the items removed for, such as Blissey, Rotom-Heat, Volc, and others and makes it much more dicey to switch in to. The speed investment allows this Clef to outspeed a Paralysed Fu once it's been caught by either Pult or, more likely, Blissey. As the only momentum-draining mon on my team with no pivoting move, it really appreciates being able to rely on Corv and Blissey to fall back on against its checks, such as Exca, opposing Zone, Heatom, and Amoongy as examples, and allow the rest of the team to start picking up momentum again.

Corviknight (M) @ Rocky Helmet
Ability: Pressure
EVs: 252 HP / 56 Def / 200 Spe
Impish Nature
- Defog
- Roost
- Brave Bird
- U-turnThis team had no reason to forego hazard removal as it's not detrimental to the overall game plan; in fact, this team is liable to be worn down by hazards over time which made a hazard remover absolutely vital. Corv is capable of bearing the brunt of mons such as Exca and Rillaboom when Clef and Zone allow them in and lets the team regain a good position from there. Corv also has an advantage over Mandibuzz, who is also a top contender for this role as a more direct support vs Dragapult, in being able to come in vs mons often running Toxic such as Hippo, Amoongy, and some Exca variants, and be unaffected. Each of those mons come in freely on Zone and getting Rilla or another breaker in vs them is ideal if done indirectly at risk of suffering chip or status; losing Rilla means breaking through those becomes exponentially more complicated, and losing my pivot to bring Rilla in vs them means putting him at risk every time the team wants to create that match-up. Corv's better ability to stay in vs common Rockers like Clef, T-Tar, and the aforementioned Hippo is also a roll in its favour. You could make a case for Mandi who is able to support the team vs the common mixed Hex Pult who has no long-term direct answers as Clef and Bliss are both susceptible to it after a little wear throughout the match, while it's not quite a threat and outplayable you could definitely make a case for Mandi here for that reason; I personally prefer Corv. As is the case with any team that relies only on a metal bird as their means of Rillaboom support, this team is somewhat susceptible to the rising RillaZone cores around. As such, 200 speed is needed in order to outspeed Zone and escape the trapping via U-Turn. Generally it's not ideal in other cases due to the hard compromise in defence investment and not being able to run minus speed means that getting switch initiative with a slow U-Turn and Roosting safely vs Hippowdon are no longer possible, but at the cost of potentially auto-losing those match ups otherwise, it's a worthwhile compromise. Silver lining is that Corv can now run Helmet without need for Shed Shell which lets you rack up chip vs annoying physical hitters.

Blissey (F) @ Heavy-Duty Boots
Ability: Natural Cure
EVs: 252 HP / 252 Def / 4 SpD
Bold Nature
IVs: 0 Spe
- Soft-Boiled
- Teleport
- Thunder Wave
- Seismic TossNever thought I'd be running a team with Blissey on it on ladder, but here we are. Blanket special sponge, Ghost immunity, status-spammer, status sponge, and pivot. Bliss has pulled its weight surprisingly well in its ability to switch hard vs big threats like Kyurem, Magnezone, Volc, Prim, and others and wall them consistently. Bliss can take advantage of the forced switches by T-Waving incoming threats such as Urshifu, Rillaboom, Pult, etc, to comfortably limit their effectiveness and offer my own offence the opportunity to get a leg up. Teleport also keeps it from being the typical useless blob of the old days and creates safer switch-in opportunities for the rest of the team, allowing Clef to bypass the 50/50 of potentially having to stomach a Poison Jab vs Fu or having to bring in Pult hard vs Volc. Though it’s passive support, it doesn't drain momentum or keep the team forced into a defensive position. One of the best positioning assets on this team. Toxic was on here originally over T-Wave in order to better threaten the longevity of mons such as Volc and Heatom as well as some defensive nuisances such as Tangy and Gastro, but it felt wholly unnecessary as the defensive threats that it would be ideal to Toxic can already be caught by Zone or defeated by other means, and it helped very little vs offensive switch-ins like Fu who can still do very consistent damage even when Toxiced and would be more ideal to have T-Waved so my offence can remove them as quickly as possible rather than trying to stall their longevity slowly. 0IVs in speed allows for the slowest Teleport possible for switch initiative vs other Blisseys.

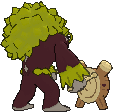
Rillaboom (M) @ Choice Band
Ability: Grassy Surge
Shiny: Yes
EVs: 252 Atk / 4 SpD / 252 Spe
Adamant Nature
- Grassy Glide
- Superpower
- Knock Off
- U-turnRillaboom's slot had a few sets, but this was ultimately the one I stuck with in the latest version of this team. Needless to say that RillaZone, even without Magnet Pull, is a phenomenal combination. Allowing Magnezone safe switch-ins vs birds to begin grinding things down with hard Analytic damage, Rillaboom creates a lot of comfortable opportunities to do as much damage as possible and acts as a consistent win-con in and of itself depending on the match up. There is no Wood Hammer here. As much as it's nice on standard Banded Boom to run its unga bunga STAB nuke, the specificity of purpose of Superpower is more ideal here. Without Magnet Pull, BlissBird cores could theoretically wall my offence as they can endlessly pivot between Bliss and Bird and outlive my offence. Without Superpower, the team's only way around this is to just keep grinding things down with Zone, and while 5 Analytic Volt Switches in Terrain will kill Blissey eventually, all Bliss would need is one opportunity to get a Soft Boiled off and the cycle gets reset, this is particularly simple with a Volt Switch sponge like Amoongus or Gastro, forcing Zone to go for Flash Canon or Toxic to make progress, which at that point becomes mind-games for Bliss to find an opportunity to shrug those off and recover. As such, having a secondary option to help break that cycle is very helpful for these match ups:
Knock Off, and maybe a few U-Turns or Clef's Moonblasts and these are no longer reliable supportive answers to Rillaboom. This is also not the most reliable support vs these defensive cores, obviously there's still some glaring limitations, but it's great contingency; I had very rarely ever found myself clicking Wood Hammer on other teams, so there's no need to forego a possible advantage against an otherwise unfavourable match up for it. Superpower is also needed for Ferro and ID variants of Zone who risk just sitting out chipping away. SD Superpower was run in the early stages of this team for greater damage with Superpower at +2 instead of having to rely on the predictions or rolls, SD was run over Knock, but I hardly ever found myself clicking SD and the lack of immediate power from Rilla was quite annoying given how easy it was to get him in so often, so he was made Band with Knock Off over SD for additional coverage and secondary support vs AV Amoongy.

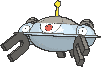
Magnezone @ Choice Specs
Ability: Analytic
EVs: 32 HP / 252 SpA / 224 Spe
Modest Nature
IVs: 0 Atk
- Flash Cannon
- Thunderbolt
- Volt Switch
- ToxicAnalytic Zone is the best mon in the tier. The current saviour of OU. None of that Magnet Pull shit, hard Analytic damage. This is standard Zone, one of the foundational pieces of this team. Having Rilla, Pult, and to a more limited degree Bliss create safe switch-in opportunities for it against Corv, Clef, Prim, etc, and having Bliss, Corv, and Clef there as fallback against switch-ins like Gastro, Exca, Heatom, etc, and revengers such as Fu, Zera, Volc, Rilla, etc and restarting the cycle again, Zone is comfortably supported by its teammates here and is free to do as much damage as it can whenever it can. Toxic was chosen in the last slot to limit the longevity of Gastro, Hippo, Heatom, and others. The speed is enough to outspeed Adamant Daunt and 210 Prim, which are the only relevant things below it in the speed tiers, the bulk doesn't help with any direct calcs I believe but it's worth the longevity over unnecessary speed I'd think (it also still outspeeds max speed Paralysed Pult which is nice I guess).

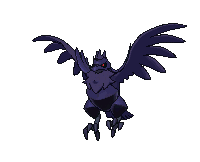
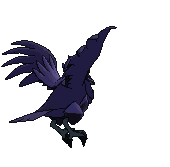
Dragapult (M) @ Heavy-Duty Boots
Ability: Infiltrator
Shiny: Yes
EVs: 68 Atk / 188 SpA / 252 Spe
Mild Nature
- Dragon Darts
- Hex
- U-turn
- Thunder WaveDragapult was the other mon in the original core on which this team was founded, and it pulls its weight quite nicely. While not overly powerful compared to the monster duo above, it is still able to build on the opportunities created by the two main breakers of the team to revenge kill threats and walls that had been thoroughly worn down using its mixed offensive capabilities such as Blissey, Clef, Amoongy, Gastro, etc. The mixed set also allows it to handle Volc and Zam before they get out of hand. Pult also supports the team with its T-Wave spam which is good support to have against opposing offence to make my not-so fast breakers more threatening as well as to help cheese through some interactions to speed up the process some. I feel like this spread is the most ideal one for its job, I know there’s others floating around with more Atk investment, but I feel like that weakens the impact of Hex unnecessarily, I don’t think it’s worth the trade-off. I played around with -SpD nature as well to better take Grassy Glides and other such hits if it had to be done, but the SpD is very nice for interactions with Heatom and Volc and such.
Threats and tough match ups:


Terrakion, Keldeo, mixed Aegislash, DD 3 attacks Dragapult:
While in theory there's no safe switch in to these here, I'd personally never had much trouble with these. I'm sure in the hands of a good player these are all capable of abusing their positions, but they've been comfortably outplayable so far with the preservation of my offensive answers and some good predicting. Mixed Aegi's been the most awkward of these, but none had been awful.
 +
+

Marowak-Alola + Trick Room:
A-Wak under Trick Room can 6-0. Gimmicky playstyle, not around a lot, but if it's there then click X.

Hawlucha:
You'll never be able to preserve Clef at full health against a team with this on it since it's typically accompanied by Fu, Pult, maybe Zera, all of which you want Clef for. Best bet is to not let it set up, get it Para'd if you can. Get creative.
 +
+
 +
+

Blissey + Bird + Amoongus:
This was mentioned above. It's a managable, you have the tools to overwhelm them, but they can be a somewhat disruptive combination with Amoongy being able to sponge both Rillaboom's and Zone's onslaught for the most part. Get that removed first if you can, the rest becomes just grinding down. Gastro with Heal Bell support is a similar situation, though uncommon.


Spike stackers:
They will impede your mindless pivot spamming. Get them removed.


Closing words:
There is a lot of waffle here. A lot of waffle. If you took the time to read through it all then thank you, I hope you took value from it. Obviously this team is already one foot out the door already with DLC2 right around the corner, hopefully that'll spice the meta up from its current somewhat repetitive stateor maybe I'm just unoriginal, idrk. Stay tuned for my next RMT coming 2 days before Gen 9, but for now let's look forward to what DLC2 will have to offer!
Importable
Being far from what one would call an especially good player, and even further from one with a lot of free time to play, I took it upon myself to build the most brain-dead easiest to use team I could possibly conceive, and the final result was this lot. Pivot-spam in general is such a simple style to utilise at the moment thanks to the massive number of offensive and defensive pivots available, you can construct a team chaining pivots together to take as much prediction-reliance out of your games as possible; boring as it may be, it's very simple. I can only imagine that with the return of mons like Koko, Lando, Torn, etc, that this will continue to be a trend well into DLC2 as well to at least some degree or other.
Team Building:
The 'Team Building' section in most RMTs is typically totally useless for a lot of people. It'll generally cover the basic synergy of the team, but they're all often built on a lot of fundamentals that are expected to be understood already. There is really not much need to go into a basic outline of a team as boring and standard as this, a lot of those details should already be apparent to anyone who builds and plays often, so instead I'll take this opportunity to go as in-depth as possible on the overall team building fundamentals that I personally consider when building any team in general. Hopefully this'll help newer builders cover some details a little better and improve their own builds, be it standard or something more unconventional, so if that's anything you're interested in or might find useful then enjoy the waffle.
There are three fundamentals in team building that I like working with when raking a crew together, and I'll go through each of them in depth one by one.
Those three are:
I've never really liked the idea of building around one specific mon. I feel like that's way too small a starting point and I feel like when I, or others, try building around that basis it lacks a proper direction since often the overall concept isn't developed properly. It's fine having a mon you'd like to try using but that alone isn't even a pure starting point. I like thinking of teams as expanded cores, cores being a pair or trio of mons that work together to accomplish a specific goal, at the centre of any good team is going to be a good core, not a stand-alone mon. What defines a core as well is not just how good they look on paper, I've seen a lot of people when building take a mon and then just tack on another mon that 'covers its checks' and then dive right into the checklist, and they never work out well. There's no use having two mons that can theoretically kill everything together if you're just looking at their functions from a 1v1 perspective, if starting mon X is checked by mon A, and mon Y breaks that mon but is checked by mon B which mon X breaks, then you've got a core, but not quite... If that's all there is to it, what's stopping your opponent from endlessly switching between mons A and B over and over? How are you actually intending to make progress? It's generally a loose pairing on its own since it's only assessing what they cover individually on paper and not how they play. How will these mons support each other practically? Does one mon get my other mon, who is a potent meta breaker, consistently good switch-ins to allow it to force progress over time from a good position? Does one mon remove threats for my other mon by use of lures (which can be much more reliable than expecting your opponent to just sac their check to your main breaker willingly) to force progress? You could have defensive cores that force progress through spreading status or setting up a lot of hazards, how do they support each other in ensuring they can cover as many things as possible with their status-spreading? How do you ensure that your hazards can consistently stay up? Of course the rest of your team is also meant to help support all of these (and we'll cover this in functional synergy), but if it's not in your foundation then you're effectively building on unstable grounds; until this is answered beyond just 1v1 depth it's a loose starting point, and the best way to develop a core is tosteal one from the Good Cores thread play a lot of games. As you get used to how people generally tend to react to certain situations, you likely won't be able to develop an effective one. If you're at this stage, then use some sample teams to get that experience in. If you want to build with a specific mon then consider how that mon works in depth, what does it do well against and what are its weaknesses? Work out how it plays (Can it function as a pivot? Does it rely on a Choice item? Does it need to get a boost off to make progress? Does it rely on massive damage at a time or incremental progress? Can it switch in safely vs a lot of things or will it require support for that? Etc) then develop a strategy (how will you get it in safely? How will you create set-up opportunities for it? How will you safely get it out against a check or a revenger? How will you remove its checks? Etc). Long story short, start with a core and make that your game plan. You can develop a core around a specific mon you want to use, but it must be functional.
The starting point of this team came from another team I was using during the Magearna meta which started with a pairing of Zone and Sub DD Pult. This fell squarely in the camp of the paragraph above in that they should look good on paper, but in practice it was less effective. Zone was meant to remove things like Clef, Mandi, and Pex in order for Pult to effectively set up and sweep. Conversely, Zone lured in Chansey and Blissey which it could Volt Switch on to bring in Pult who could use them as set-up fodder. What actually ended up happening was that Pult typically didn't get to set up DDs unless it was an auto-win situation; what I discovered instead was just how amazing Analytic Zone was in its ability to effectively break through its checks over time with consistent pressure, often just by spamming Volt Switch. Zone typically did more damage to more teams than Pult did and I often found myself using Pult as double-fodder to bring Zone in safely to kill everything rather than the other way around as originally intended, at that point I figured a U-Turn set for Pult would be more suitable for this pairing. That started the game plan of 'get Analytic Zone in and out as safely and often as possible'.
+

The checklist:
The checklist is just the list of basic requirements a team needs to generally work. The checklist is, to quote Captain Barbossa from Pirates of the Caribbean, more like what you'd call guidelines as opposed to actual rules; your team will be better the more of these points you hit provided that you do not compromise your team's ability to function (this will also be explained further in functional synergy). Not all of these points need to be met, and these points will vary based on the play-style and meta. There is no strict template for this, but from person to person it'll at least be very similar. The checklist I use is as follows:
Functional synergy:
In non-nerd terms, this is just making sure your team plays well. Going back to what I said in the game plan section, a team is basically just an expanded core; the rest of the team must still be chosen with the intention of supporting the function of your original core to the fullest. Your remaining mons shouldn't just be chosen to tick the boxes in the checklist if they serve no actual purpose in the team's overall usability; it's great being able to theoretically check everything and break everything but if you don't account for how they're actually gonna do that then you're stuck, even the most busted breakers require support. Similar to how a core should function as a unit beyond just two or three individuals playing the 1v1 game, you want to consider the consequences of their use; using Zone is going to result in a lot of Excadrill, Gastro, Blissey switch-ins so being up against these is an inevitable position you will find yourself in often so you need to capitalise on it. Corv could be a defensive solution to these or Rillaboom could be an offensive solution; likewise, these two both bring in Rotom-Heat among others, you're going to need something that can get you out of this position, like Pult or Blissey as offensive and defensive solutions respectively. Other examples are how the team can work together to cover its offensive holes, if you run Blissey then it's liable to becomes set-up fodder for Sub DD Pult or Safeguard Volc or anything on the big list of breakers and sweepers who can then proceed to blow through you, you'll need counter-play to limit those. Each of these should also have some support towards your game plan along the way as well, such as chaining together interactions to get the main breaker, Zone, in often and safely, and helping it break through it checks such as AV Amoongy; Knock Off Clef can lure in Amoongy and get rid of its Assault Vest after your Blissey pivots out vs an Urshifu to bring it in safely as an example scenario, among many other possibilities.
Each mon is selected to cover multiple overlapping roles and selected to interact both with what's in front of them and to rely on their teammates to get the end-game they want, this is what defines a team from just 6 individuals. While there's no real quantifiable way to determine functional synergy on paper since it's all just hypothetical till it hits the battle field, you won't know when the balance is right until you run it up and it'll feel right to use, and in practice it will feel different than in the mental games you run through to develop the team. Even so, synergy still starts in the builder and is developed in practice and it starts by asking these three main questions:
Taking this team as an example, we have established that the game plan would be to get Analytic Zone in and out as safely and as often as possible, and the main method of doing so would be with a variant of U-Turn Pult who can bring Zone in vs Clef, Mandi, and others safely, as well as safely come in vs some checks such as Rotom-Heat and Amoongy after it Volt switches out, this is our starting point and given the options available to us making a pivot-chain that can consistently funnel traffic back towards Zone would be an ideal way to continue this plan. From this we can split the threats to the following:
The next stage is to assess the strengths and re-establish why Zone is the best mon in the meta:
With this in mind, the last thing to assess after all this information is the following:
All that said though, functional synergy is not the be-all end-all of a team. Your members must be able to create opportunities for each other and develop those opportunities as the game progresses, but having everything planned out in your head to a degree of precision that even an electron microscope couldn't measure will also only hurt you; this line of thinking will get you well past the point of reliance to the point of total dependence, and at that point it'll be incredibly easy to disrupt the flow of your team with a bad match-up or some weird plays, both of which you will encounter plenty often. While going into a game with a strategy and a goal in mind is beneficial, you'll never be able to precisely calculate how you'll reach that goal from turn 1, as much as we'd all like to wish we're Superman at times it's just not realistic to believe that's even possible for the best of players; at some points you'll need to just wing it and feel things out turn by turn, it's a necessary part of the game and you must allow yourself that wiggle room. Helping limit that issue is what the checklist is for, but balance between both of these tools is needed; the disappointing truth is that there is no way to identify that balance in builder, you won't know when you've truly hit the right balance till you test and test and test again.
Conclusion:
There is a lot of long boring shit here, but boiling it all down the TL;DR version is to ensure that your team, as fully as possible, applies the three fundamentals:
Those three are:
- The game plan.
- The checklist.
- Functional synergy.
I've never really liked the idea of building around one specific mon. I feel like that's way too small a starting point and I feel like when I, or others, try building around that basis it lacks a proper direction since often the overall concept isn't developed properly. It's fine having a mon you'd like to try using but that alone isn't even a pure starting point. I like thinking of teams as expanded cores, cores being a pair or trio of mons that work together to accomplish a specific goal, at the centre of any good team is going to be a good core, not a stand-alone mon. What defines a core as well is not just how good they look on paper, I've seen a lot of people when building take a mon and then just tack on another mon that 'covers its checks' and then dive right into the checklist, and they never work out well. There's no use having two mons that can theoretically kill everything together if you're just looking at their functions from a 1v1 perspective, if starting mon X is checked by mon A, and mon Y breaks that mon but is checked by mon B which mon X breaks, then you've got a core, but not quite... If that's all there is to it, what's stopping your opponent from endlessly switching between mons A and B over and over? How are you actually intending to make progress? It's generally a loose pairing on its own since it's only assessing what they cover individually on paper and not how they play. How will these mons support each other practically? Does one mon get my other mon, who is a potent meta breaker, consistently good switch-ins to allow it to force progress over time from a good position? Does one mon remove threats for my other mon by use of lures (which can be much more reliable than expecting your opponent to just sac their check to your main breaker willingly) to force progress? You could have defensive cores that force progress through spreading status or setting up a lot of hazards, how do they support each other in ensuring they can cover as many things as possible with their status-spreading? How do you ensure that your hazards can consistently stay up? Of course the rest of your team is also meant to help support all of these (and we'll cover this in functional synergy), but if it's not in your foundation then you're effectively building on unstable grounds; until this is answered beyond just 1v1 depth it's a loose starting point, and the best way to develop a core is to
The starting point of this team came from another team I was using during the Magearna meta which started with a pairing of Zone and Sub DD Pult. This fell squarely in the camp of the paragraph above in that they should look good on paper, but in practice it was less effective. Zone was meant to remove things like Clef, Mandi, and Pex in order for Pult to effectively set up and sweep. Conversely, Zone lured in Chansey and Blissey which it could Volt Switch on to bring in Pult who could use them as set-up fodder. What actually ended up happening was that Pult typically didn't get to set up DDs unless it was an auto-win situation; what I discovered instead was just how amazing Analytic Zone was in its ability to effectively break through its checks over time with consistent pressure, often just by spamming Volt Switch. Zone typically did more damage to more teams than Pult did and I often found myself using Pult as double-fodder to bring Zone in safely to kill everything rather than the other way around as originally intended, at that point I figured a U-Turn set for Pult would be more suitable for this pairing. That started the game plan of 'get Analytic Zone in and out as safely and often as possible'.
The checklist:
The checklist is just the list of basic requirements a team needs to generally work. The checklist is, to quote Captain Barbossa from Pirates of the Caribbean, more like what you'd call guidelines as opposed to actual rules; your team will be better the more of these points you hit provided that you do not compromise your team's ability to function (this will also be explained further in functional synergy). Not all of these points need to be met, and these points will vary based on the play-style and meta. There is no strict template for this, but from person to person it'll at least be very similar. The checklist I use is as follows:
- Hazard setter - [Rocks/Spikes/T-Spikes setters to punish switches and continue to force progress through chip]
- Hazard remover - [Support to remove opposing hazards to limit the chip you suffer throughout the game]
- Speed control - [Ability to revenge kill or force a switch and reclaim offensive pressure]
- Blanket special defence - [Blanket check to specially offensive threats in the meta]
- Blanket physical defence - [Blanket check to physically offensive threats in the meta]
- Immediate power - [A mon(s) that can force immediate progress without needing to spend a turn(s) setting up to do so]
- Boosted power - [A mon that can force greater progress than your immediate power source after boosting]
- Status support - [A mon(s) that can spread Poison to gain passive damage vs defence, Burn to limit opposing physical breakers, and Paralysis to support vs opposing speed control; each as applicable]
- Status sponge - [A mon(s) that can be used to switch into and absorb status ailments]
- Defensive pivot - [A mon(s), that eases predictions and allows you to escape restrictive scenarios, ensuring that you are not forcibly stuck in a defensive position and are able to freely bring in your offensive presence with little risk]
- Priority - [Offensive support that consistently bypasses speed control and boosters]
- Counter-play to common and potent meta threats
Functional synergy:
In non-nerd terms, this is just making sure your team plays well. Going back to what I said in the game plan section, a team is basically just an expanded core; the rest of the team must still be chosen with the intention of supporting the function of your original core to the fullest. Your remaining mons shouldn't just be chosen to tick the boxes in the checklist if they serve no actual purpose in the team's overall usability; it's great being able to theoretically check everything and break everything but if you don't account for how they're actually gonna do that then you're stuck, even the most busted breakers require support. Similar to how a core should function as a unit beyond just two or three individuals playing the 1v1 game, you want to consider the consequences of their use; using Zone is going to result in a lot of Excadrill, Gastro, Blissey switch-ins so being up against these is an inevitable position you will find yourself in often so you need to capitalise on it. Corv could be a defensive solution to these or Rillaboom could be an offensive solution; likewise, these two both bring in Rotom-Heat among others, you're going to need something that can get you out of this position, like Pult or Blissey as offensive and defensive solutions respectively. Other examples are how the team can work together to cover its offensive holes, if you run Blissey then it's liable to becomes set-up fodder for Sub DD Pult or Safeguard Volc or anything on the big list of breakers and sweepers who can then proceed to blow through you, you'll need counter-play to limit those. Each of these should also have some support towards your game plan along the way as well, such as chaining together interactions to get the main breaker, Zone, in often and safely, and helping it break through it checks such as AV Amoongy; Knock Off Clef can lure in Amoongy and get rid of its Assault Vest after your Blissey pivots out vs an Urshifu to bring it in safely as an example scenario, among many other possibilities.
Each mon is selected to cover multiple overlapping roles and selected to interact both with what's in front of them and to rely on their teammates to get the end-game they want, this is what defines a team from just 6 individuals. While there's no real quantifiable way to determine functional synergy on paper since it's all just hypothetical till it hits the battle field, you won't know when the balance is right until you run it up and it'll feel right to use, and in practice it will feel different than in the mental games you run through to develop the team. Even so, synergy still starts in the builder and is developed in practice and it starts by asking these three main questions:
- What are the threats to your game plan?
- What are the strengths of your game plan?
- What mons can cover the threats while at the same time building on its strengths and how?
Taking this team as an example, we have established that the game plan would be to get Analytic Zone in and out as safely and as often as possible, and the main method of doing so would be with a variant of U-Turn Pult who can bring Zone in vs Clef, Mandi, and others safely, as well as safely come in vs some checks such as Rotom-Heat and Amoongy after it Volt switches out, this is our starting point and given the options available to us making a pivot-chain that can consistently funnel traffic back towards Zone would be an ideal way to continue this plan. From this we can split the threats to the following:
- What can blanket check Magnezone? - [Gastrodon, Blissey, Chansey, SpD Excadrill, Rotom-Heat, Ferrothorn, AV Amoongus]
- What can safely come in against its Electric STABs? - [Hippowdon, Quagsire, Diggersby, Rhyperior, Tyranitar, Kommo-o, Amoongus, Zeraora, A-Wak]
- What can safely come in vs its Steel STAB? - [Corviknight, Skarmory, Aegislash, Scizor, Jirachi, Toxapex, Mantine]
- What can revenge kill Zone? - [Dragapult, Urshifu, Rillaboom, Volc, Excadrill, Zeraora, Hydreigon, Kyurem, Alakazam, Hawlucha, Conk, Keldeo, Terrakion, Weavile]
The next stage is to assess the strengths and re-establish why Zone is the best mon in the meta:
- What can Zone beat 1v1? - [Clefable, Corviknight, Toxapex, Mandibuzz, Mantine, Slowbro, Skarmory, Rhyperior, non-EQ defensive Tyranitar, Crawdaunt, Primarina, Reuniclus, non-Flamethrower Togekiss, Azumarill, Hatterene, Gweezing]
With this in mind, the last thing to assess after all this information is the following:
- What can come in vs each of Zone's checks and either kill or force out?
- What mons bring in mons Zone can beat 1v1?
- What other threats come in against the mons that answer the above question that are not answered by Zone?
- What mons can come in vs those threats that simultaneously force them out and bring in mons Zone can beat 1v1?
- What mons can come in vs those threats that simultaneously force them out and bring in mons another member can beat 1v1?
All that said though, functional synergy is not the be-all end-all of a team. Your members must be able to create opportunities for each other and develop those opportunities as the game progresses, but having everything planned out in your head to a degree of precision that even an electron microscope couldn't measure will also only hurt you; this line of thinking will get you well past the point of reliance to the point of total dependence, and at that point it'll be incredibly easy to disrupt the flow of your team with a bad match-up or some weird plays, both of which you will encounter plenty often. While going into a game with a strategy and a goal in mind is beneficial, you'll never be able to precisely calculate how you'll reach that goal from turn 1, as much as we'd all like to wish we're Superman at times it's just not realistic to believe that's even possible for the best of players; at some points you'll need to just wing it and feel things out turn by turn, it's a necessary part of the game and you must allow yourself that wiggle room. Helping limit that issue is what the checklist is for, but balance between both of these tools is needed; the disappointing truth is that there is no way to identify that balance in builder, you won't know when you've truly hit the right balance till you test and test and test again.
Conclusion:
There is a lot of long boring shit here, but boiling it all down the TL;DR version is to ensure that your team, as fully as possible, applies the three fundamentals:
- The game plan - [Start with an effective core which works towards a specific outcome, this will serve as the foundation for the rest of your team]
- The checklist - [Ensure that your team contains as many of the structural requirements as possible without compromising functionality]
- Functional synergy - [Ensure that the rest of your team is selected to support the function of your game plan as fully as possible without omitting too much from the checklist]
In-Depth:
Clefable (F) @ Leftovers
Ability: Magic Guard
EVs: 252 HP / 232 Def / 24 Spe
Bold Nature
- Moonblast
- Knock Off
- Soft-Boiled
- Stealth Rock
Corviknight (M) @ Rocky Helmet
Ability: Pressure
EVs: 252 HP / 56 Def / 200 Spe
Impish Nature
- Defog
- Roost
- Brave Bird
- U-turn
Blissey (F) @ Heavy-Duty Boots
Ability: Natural Cure
EVs: 252 HP / 252 Def / 4 SpD
Bold Nature
IVs: 0 Spe
- Soft-Boiled
- Teleport
- Thunder Wave
- Seismic Toss
Rillaboom (M) @ Choice Band
Ability: Grassy Surge
Shiny: Yes
EVs: 252 Atk / 4 SpD / 252 Spe
Adamant Nature
- Grassy Glide
- Superpower
- Knock Off
- U-turn
252+ Atk Choice Band Rillaboom Superpower over 2 turns vs. 252 HP / 28 Def Corviknight: 325-384 (81.2 - 96%)
252+ Atk Choice Band Rillaboom Superpower over 2 turns vs. 252 HP / 56+ Def Corviknight: 288-340 (72 - 85%)
252+ Atk Choice Band Rillaboom Superpower over 2 turns vs. 252 HP / 252+ Def Corviknight: 243-287 (60.7 - 71.7%)
252+ Atk Choice Band Rillaboom Superpower over 2 turns vs. 252 HP / 252+ Def Skarmory: 198-235 (59.2 - 70.3%)
252+ Atk Choice Band Rillaboom Superpower over 2 turns vs. 248 HP / 160+ Def Mandibuzz: 263-310 (62.1 - 73.2%)
252+ Atk Choice Band Rillaboom Superpower over 2 turns vs. 248 HP / 200+ Def Mandibuzz: 255-300 (60.2 - 70.9%)
Magnezone @ Choice Specs
Ability: Analytic
EVs: 32 HP / 252 SpA / 224 Spe
Modest Nature
IVs: 0 Atk
- Flash Cannon
- Thunderbolt
- Volt Switch
- Toxic
Dragapult (M) @ Heavy-Duty Boots
Ability: Infiltrator
Shiny: Yes
EVs: 68 Atk / 188 SpA / 252 Spe
Mild Nature
- Dragon Darts
- Hex
- U-turn
- Thunder Wave
Threats and tough match ups:
Terrakion, Keldeo, mixed Aegislash, DD 3 attacks Dragapult:
While in theory there's no safe switch in to these here, I'd personally never had much trouble with these. I'm sure in the hands of a good player these are all capable of abusing their positions, but they've been comfortably outplayable so far with the preservation of my offensive answers and some good predicting. Mixed Aegi's been the most awkward of these, but none had been awful.
Marowak-Alola + Trick Room:
A-Wak under Trick Room can 6-0. Gimmicky playstyle, not around a lot, but if it's there then click X.
Hawlucha:
You'll never be able to preserve Clef at full health against a team with this on it since it's typically accompanied by Fu, Pult, maybe Zera, all of which you want Clef for. Best bet is to not let it set up, get it Para'd if you can. Get creative.
Blissey + Bird + Amoongus:
This was mentioned above. It's a managable, you have the tools to overwhelm them, but they can be a somewhat disruptive combination with Amoongy being able to sponge both Rillaboom's and Zone's onslaught for the most part. Get that removed first if you can, the rest becomes just grinding down. Gastro with Heal Bell support is a similar situation, though uncommon.
Spike stackers:
They will impede your mindless pivot spamming. Get them removed.
There is a lot of waffle here. A lot of waffle. If you took the time to read through it all then thank you, I hope you took value from it. Obviously this team is already one foot out the door already with DLC2 right around the corner, hopefully that'll spice the meta up from its current somewhat repetitive state
Importable
