Battle Maison Discussion & Records

Thanks mate!

I ended up changing my team into:

Kangaskhan @ Kangaskhanite
Abillity: Scrappy
Nature: Jolly
6x 31IV
EV: 4 HP, 252 Atk, 252 Spe

- Return
- Sucker Punch
- Fake Out
- Drain Punch


Eelektross @ Assault Vest
Abillity: Levitate
Nature: Modest
6x 31IV
EV: ~252 HP, 252 SpA, 4 Spd

- Flamethrower
- Thunderbolt
- Giga Drain
- Volt Switch


Barbaracle @ Life Orb
Abillity: Tough Claws
Nature: Adamant
6x 31IV
EV: 252 Atk, 4 HP, 252 Spd

- Shell Smash
- Stone Edge
- Razor Shell
- Dual Chop


Heatran @ Air Balloon
Abillity: Flash Fire
Nature: Modest
6x 31IV
EV: 252 SpA, 252 HP, 4 Spd

- Heat Wave
- Earth Power
- Flash Cannon
- Protect


Is this any better?
Your new team has three weaknesses to the Fighting-type, and Eelektross can't take them very well. I'd suggest replacing one of your back-ups(or maybe even both) to fix that. Some good options are Aegislash, Talonflame, Togekiss, and the Latis. I'm personally using Aegislash and Togekiss in my team to cover Kangaskhan's Fighting-type weakness(it's hilarious when you switch Aegislash into a HJK aimed at Kangaskhan). Kangaskhan would also appreciate something to deal with opposing Ghosts with status moves such as Froslass and Dusknoir, as she's pretty much unable to hit them after mega evolving.

I strongly recommend that you replace Barbaracle or change its set, as it's rather hard to set up in Doubles(unless you're MegaKhan or have Mat Block support), even more so with a move that lowers your defenses. Stone Edge is very unreliable, so you should replace it with Rock Slide(which isn't that reliable either, but it's the best option). Also, why use Dual Chop over Dragon Claw? The only Dragon-type pokemon that uses Substitute in the Maison is Goodra1, which isn't common after battle 40 and is beaten by Dragon Claw anyway, and the only Dragon that has a Focus Sash is Garchomp4, which is actually a pretty good reason, but Barbaracle has a very low chance of OHKOing from full health with an unboosted Dual Chop:
252+ Atk Life Orb Tough Claws Barbaracle Dual Chop (2 hits) vs. 0 HP / 0 Def Garchomp: 156-188 (85.2 - 102.7%) -- approx. 6.3% chance to OHKO
And the actual chance is even lower due to the 90% accuracy.
It's not worth trading 10% accuracy for the ability to break substitutes and Focus Sashes, especially because Kangaskhan can do the same, and with accurate moves.

It would also help us if you could describe the pokemon's EVs, natures, and moves a bit, why you chose them, what are their roles in the team, etc :)

Also yeah what cant say said
 

NoCheese

"Jack, you have debauched my sloth!"
is a Site Content Manager Alumnusis a Forum Moderator Alumnusis a Contributor Alumnus
I'm having a lot of fun with Cottonee/Greninja, but I'd love to hear ideas to improve the bench. This team has taken on the Chatelaine, but always falls shortly after. I'd love to take Cottonee to 100 wins!
Well, Cottentee, while fun, seems like a weaker Aron, since it survives one fewer attack thanks to no Berry Juice + Sturdy, and is vulnerable to sand damage. But since you're enjoying your lead pair, I won't mess with that.

Stallish-bulky waters like Milotic and Suicune, though good in maison singles, just don't excite me as much in faster paced doubles. It's just a lot harder to wall and stall when you are facing multiple foes at once. Salamence naturally likes partners that resist its 4x Ice-type weakness, though, so Water-types like Azumarill or Rotom-W might serve better than Milotic, providing good type synergy and coverage with better offensive presence. Sadly, there aren't a lot of Water-type Pokemon that resist both Water- and Rock-type attacks (Empoleon is unexciting, but an option), so it's hard to both cover the Ice-type weakness and provide resilience against Rock Slide, a huge threat in doubles, especially with Salamence's weakness to it.

Edit:
Another clear option would thus be to use a strong Steel-type. You'd gain resistance to Ice-, Rock-, and Fairy-type attacks, which all can scare Salamence, while Mence covers their Fighting-, Fire-, and Ground-type weaknesses. I already mentioned Empoleon as a mediocre Water-type option, but Scizor fits the Steel-type partner role even better. Aegislash can do good work too.

Edit2: Read turskain's post below, since as usual, his analysis and data are just awesome. I guess if friendly fire from Mence's Earthquake is an issue, there's always the sort-of fix of Air Balloon, which I found to be okay on Triples Aegislash, especially since I find Leftovers recovery less exiting in doubles and triples than in singles.
 
Last edited:

turskain

activated its Quick Claw!
is a Community Contributor Alumnus
Hello! I've been following this thread for quite some time, and have been playing around with a super doubles team that I'd appreciate feedback on:

Lv. 1 Cottonee @ Focus Sash
Ability: Prankster
IVs/EVs/Nature: Not important
- Endeavor
- Protect
- Encore
- Memento

Greninja @ Life Orb
Ability: Protean
EVs: 4 HP / 252 SA / 252 Spe
Timid Nature
IVs: 31/x/31/31/31/31
- Mat Block
- Dark Pulse
- Surf
- Ice Beam

I'm a huge fan of Lv.1 cheese strategy, and I wanted to use something other than the ubiquitous Aron. I've had tons of fun Encoring Fake Out users and the like, and Memento finds lots of uses as well. I sometimes think that Helping Hand would be useful, but I'm not sure what to remove. Greninja is stupidly fast and strong. Dark Pulse hits the ghosts that Cottonee can't. I had trouble deciding what the last two moves should be, but I landed on Ice Beam to clear Dragons for Salamence and Grass types for Milotic and Surf to hit multiple opponents. I sometimes find myself longing for Scald to avoid freeze hax, but Surf has been pretty helpful. Many battles begin Mat Block + Endeavor and then Protect + Surf for two KOs.

Salamence @ Salamencite
Ability: Intimidate
EVs: 252 Atk / 4 SpD / 252Spe
Adamant Nature
IVs: 31/31/31/x/31/31
- Protect
- Dragon Dance
- Return
- Earthquake

Pretty standard 'Mence. Return is really scary powerful, but I wonder if I should run Jolly and/or Double Edge instead.

Milotic @ Leftovers
Ability: Marvel Scale
EVs: 252 HP / 156 Def / 100 SpD
Bold Nature
IVs: 31/x/31/31/31/31
- Scald
- Icy Wind
- Toxic
- Rest

Milotic was the tacked-on last member of the team, chosen for Ice resist and strong Special Defense. She's pretty much Suicune with Higher Special Defense and better Defense when Resting. The EVs are pretty arbitrary, and any guidance would be appreciated. Milotic usually comes in with Salamence and enjoys an Intimidate drop, so I felt like I could afford to invest in Special Defense. I can see where Pressure would be helpful, and would much rather use one once I catch a 'Cune with good IVs. In the interim, I've got Milotic, who's done quite well in most circumstances. However, one-on-one she is quite sub-par, and I would appreciate any suggestions for a replacement, Suicune or otherwise. Edit: No Calm Mind, either :(

I'm having a lot of fun with Cottonee/Greninja, but I'd love to hear ideas to improve the bench. This team has taken on the Chatelaine, but always falls shortly after. I'd love to take Cottonee to 100 wins!

Thanks!
Memento isn't that great and also kills Cottonee, preventing it from tanking a hit at 1HP. For a move to use before dying, Tailwind would probably be the best bet to secure the speed advantage for the rest of the team. With Prankster Encore and Prankster Tailwind, Cottonee almost starts looking like a viable alternative to Aron.

For the back-ups, covering things that threaten Greninja would be the order, along with benefiting from Tailwind support when Cottonee fires it off. Milotic shares its weaknesses, only provides redundant coverage and is pretty passive.

Mence looks okay, but the second back-up is harder - with Life Orb taken by Greninja already, Scizor wouldn't be as effective as usual. Most other fast things would like the Life Orb as well. Not really sure what you'd use here - friendly fire from Earthquake is a concern no matter what you pick.


Rock Slide and non-STAB Stone Edge (even with a crit) aren't much of a concern to Mega Salamence from my experience due to its gargantuan base 130 Defense, before even counting the possible Intimidate and its high Speed preventing most flinches. An example:

252+ Atk Donphan Stone Edge vs. 4 HP / 0 Def Salamence on a critical hit: 144-170 (84.2 - 99.4%)
 
I think 196/28/28 on Aegislash is a mistake. The reason is that you lose out on overall bulk thanks to Shield Form's 60/150/150 defenses, and maximized Leftovers efficiency does nothing of value most of the time; the potentially risky match-ups for Aegislash usually involve surviving 1-4 hits before KOing the enemy with boosts, or surviving STAB super-effective attacks and crits - and maximum immediate bulk with 252 HP will do more in those cases.

A quick calc suggests that 196/28/28 would need somewhere around 18-20 turns of Leftovers recovery for it to become more efficient. The method I used to estimate that is simulating Leftovers recovery by adding base HP to Aegislash in increments of 10 (one turn of Leftovers recovery) and comparing a calc with 252/0 and 196/28. For a faster, automated way to calculate this, you can also try something like a defense EV calculator and increase base HP in increments of 10 before it starts considering investing in Defense more valuable. This one starts suggesting 196/28/28 when you set base HP to 253, or 19.3 turns of Leftovers recovery; right around the spot where the manual calcs arrived.

Now, the 196/60SDef spread proposed by iamfanboy is much more sane than 196/28/28; the special bulk allows it to exceed 252/0 against Special attackers after just 3-4 turns of Leftovers recovery (note: exceed means mostly "not being worse"; the difference is still very marginal at that point). Howewer, you still lose out on immediate survivability and physical bulk; I don't think that spread is worth it, either, as the immediate bulk is usually worth more in a pinch.


In short, 196/28/28 sucks (as should be obvious when you look at Aegislash's 60/150/150 defenses even without calcing it), and I embarrassingly used a 196/60 spread myself on Dragonite/Aegislash/Greninja V1 before I knew better. Additionally, I'd strongly suggest 79 Speed on it over 81 Speed. 81 Speed does NOT outspeed Umbreon (85 Speed prior to it using Curse) or Regigigas (60 Speed during Slow Start), or any Confuse Ray user for that matter; I examined this in more detail in the write-up for Dragonite/Aegislash/Greninja V2.
Here are my opinions on Aegislash:

- I agree with you that 196/28/28 is never an optimal Aegislash spread (the few times is it, it probably wouldn't make a difference anyways)

- 252/0 is not necessarily the best defensive spread, at least not for all teams. Take suicune based teams as an example. It walls almost any physical attacker, but fares much worse against special attackers that can screw it up with fliches etc. Yanmega and other "hax based" pokemon can be quite scary because of the hax element, which you need to account for (to a certain degree) when builing a team. Dropping some HP EV's in favor of extra sp.def. will give extra insurance against such threats. As you said, it only takes a few turn to Make a 196/60 spread slightly more effective. Due to Suicune's bulk, Aegislash rarely misses it's slight loss in physical bulk, while if finds itself fighting special attackers more often than it will on a more defensice "balanced" team. That's why my favorite spread for Aegislash on my team (Dragonite + Aegi + Suicune, not on the leaderbord) is 196/252/4/x/52/4 (for the speed EV, se below). The only reason to be "embarassed" of such a spread is if it's not made with specific threats in mind, in which case the mistake is in the players head, not in the streak, lol.

- I reccomend 81 speed over 79 speed. One do not always have max boosts in attack, and the 50 % extra damage from sacred sword is well appreciated, since a few of the 80 speed pokes are quite bulky. It is also a good thing to outspeed whiscash before it fissures you. Magnezone is pretty much the only set4 poke I'd prefer 79 speed against, but even then, there is a chance that it doesn't have sturdy (in other words, it will have sturdy all the time...hehe). It should also be said that Aegislaash shouldn't stay in and set up against swampert etc. in the first place. Most of the times, Aegislash's job is to sweep past them, and it's not always with +6 in attack. However, just like the defensive EV's it partly comes down to the team (as you specified in your write-up), and what you need Aegislash to handle.

To conclude, I think 252/0 is clearly the best spread in general on Aegislash, but other spreads (like 196/60 for example) could be considered if you team require it, but only then ;).
 
Last edited:

turskain

activated its Quick Claw!
is a Community Contributor Alumnus
Here are my opinions on Aegislash:

- I agree with you that 196/28/28 is never an optimal Aegislash spread (the few times is it, it probably wouldn't make a difference anyways)

- 252/0 is not necessarily the best defensive spread, at least not for all teams. Take suicune based teams as an example. It walls almost any physical attacker, but fares much worse against special attackers that can screw it up with fliches etc. Yanmega and other "hax based" pokemon can be quite scary because of the hax element, which you need to account for (to a certain degree) when builing a team. Dropping some HP EV's in favor of extra sp.def. will give extra insurance against such threats. As you said, it only takes a few turn to Make a 196/60 spread slightly more effective. Due to Suicune's bulk, Aegislash rarely misses it's slight loss in physical bulk, while if finds itself fighting special attackers more often than it will on a more defensice "balanced" team. That's why my favorite spread for Aegislash on my team (Dragonite + Aegi + Suicune, not on the leaderbord) is 196/252/4/x/52/4 (for the speed EV, se below). The only reason to be "embarassed" of such a spread is if it's not made with specific threats in mind, in which case the mistake is in the players head, not in the streak, lol.

- I reccomend 81 speed over 79 speed. One do not always have max boosts in attack, and the 50 % extra damage from sacred sword is well appreciated, since a few of the 80 speed pokes are quite bulky. It is also a good thing to outspeed whiscash before it fissures you. Magnezone is pretty much the only set4 poke I'd prefer 79 speed against, but even then, there is a chance that it doesn't have sturdy (in other words, it will have sturdy all the time...hehe). It should also be said that Aegislaash shouldn't stay in and set up against swampert etc. in the first place. Most of the times, Aegislash's job is to sweep past them, and it's not always with +6 in attack. However, just like the defensive EV's it partly comes down to the team (as you specified in your write-up), and what you need Aegislash to handle.

To conclude, I think 252/0 is clearly the best spread in general on Aegislash, but other spreads (like 196/60 for example) could be considered if you team require it, but only then ;).
"Doing better against special attackers" is what I thought when I was using 196/60 - but I was wrong. The calcs show how negligible the difference is:

252+ SpA Rhyperior Earth Power vs. 196 HP / 60 SpD Aegislash-Shield: 68-84 (42.5 - 52.5%)
252+ SpA Rhyperior Earth Power vs. 252 HP / 0 SpD Aegislash-Shield: 72-86 (43.1 - 51.4%)

With six turns of Leftovers recovery (around the upper end of what you can expect to get when alternating King's Shield):

252+ SpA Rhyperior Earth Power vs. 252 HP / 0 SpD 120HP Aegislash-Shield: 72-86 (31.7 - 37.8%)
252+ SpA Rhyperior Earth Power vs. 196 HP / 60 SpD 120HP Aegislash-Shield: 68-84 (30.9 - 38.1%)

196/60 takes around 0.4% less of its virtual maximum HP in this case. Let's go all the way to twelve turns of recovery, just to be sure:

252+ SpA Rhyperior Earth Power vs. 252 HP / 0 SpD 180HP Aegislash-Shield: 72-86 (25 - 29.9%)
252+ SpA Rhyperior Earth Power vs. 196 HP / 60 SpD 180HP Aegislash-Shield: 68-84 (24.2 - 30%)

With more recovery than you will ever stay in for (barring stalling or being frozen for days, which should be handled by Suicune), you still get very little even in the best case. The defense EV calculator tells a similar story: the difference between 196/60 and 252/0 remains extremely small, no matter how much Lefties you stack on top of it.

I'll give you that 81 vs 79 is definitely dependent on the team - with Suicune taking on Empoleon, it might be worth it to go to 81. Sturdy Zone is the biggest threat in the base 60 tier (that also threatens Suicune) in my opinion, so I still like the sound of 79, but the issue is not as clear-cut as it is with my team.

If you wanted to make Aegislash more specially bulky, you should cut Attack in favor of Special Defense for a spread like 252/196/0/0/60/0 or something along those lines. Redistributing EVs between HP and SDef will get you absolutely nothing.
 
do someone have an entei or, better, a typhlosion at their AI nintendo id for the multi battle?
i need one of these pokemon for the tactic mega-charizard y - eruption
 
Hi everyone! This is my first post here, though I'm a long-time lurker of this thread :]

Just finished 50 wins in every mode ; I hope this picture is good enough proof. My in game name is N, but I can confirm by adding a piece of paper on the side with my friend code or Smogon username.

Maison.jpg


If anyone cares, these are the teams I used: (not tagging the users because I don't want to annoy them :o)
Singles: StarKO's team
Doubles: turskain's team
Triples: turskain's team
Rotations: CarlMcQ's team
Multi's: theyen's team

These teams are really fast (and almost guaranteed) victories in the Maison (if you're paying attention haha). I had to restart my streaks in doubles and multi's due to hax, but other than that, it was pretty smooth sailing. Hope this helps anyone else trying to go for all 5 trophies.

Also thanks to turskain for helping me on IRC chat. :]

Happy New Year!
 

cant say

twitch.tv/jakecantsay
is a Site Content Manager Alumnusis a Team Rater Alumnusis a Top Social Media Contributor Alumnusis a Senior Staff Member Alumnusis a Community Contributor Alumnusis a Contributor Alumnusis a Battle Simulator Moderator Alumnus
do someone have an entei or, better, a typhlosion at their AI nintendo id for the multi battle?
i need one of these pokemon for the tactic mega-charizard y - eruption
Contact user a0161613, he has both in the same team (Scarf Typhlosion + Sitrus Berry Entei). Although I have tried to make this team work with several combinations, I've never been able to get higher than 50...
 
Hi everyone! This is my first post here, though I'm a long-time lurker of this thread :]

Just finished 50 wins in every mode ; I hope this picture is good enough proof. My in game name is N, but I can confirm by adding a piece of paper on the side with my friend code or Smogon username.


If anyone cares, these are the teams I used: (not tagging the users because I don't want to annoy them :o)
Singles: StarKO's team
Doubles: turskain's team
Triples: turskain's team
Rotations: CarlMcQ's team
Multi's: theyen's team

These teams are really fast (and almost guaranteed) victories in the Maison (if you're paying attention haha). I had to restart my streaks in doubles and multi's due to hax, but other than that, it was pretty smooth sailing. Hope this helps anyone else trying to go for all 5 trophies.

Also thanks to turskain for helping me on IRC chat. :]

Happy New Year!
Always happy to see that my team managed to help someone get a trophy! it is glad to see that i have helped out somebody and that my words did not go to waste. Do have to admit that i honestly was not expecting that team to make it past 40, never mind 186 haha. Thank God Steven has two pretty powerful pokemon

Nonetheless, i am trying to improve upon my streak and need some advice as to a good 4th pokemon for Multis. Gardevoir/Aerodactyl/MegaMetagross themselves create several issues that no one pokemon cannot address

I tried using Assault Vest Gyarados but it just does not have the kiiling power and cannot stop rock and Electric threats from demolishing Steven

Contact user a0161613, he has both in the same team (Scarf Typhlosion + Sitrus Berry Entei). Although I have tried to make this team work with several combinations, I've never been able to get higher than 50...
I used lead Mega Kangashkhan with Fake Out/sucker Punch/Return/Crunch to pair off with Typhlosion. Fake out and Sucker Punch is essential priority, checking the few pokemon that resist Eruption and can cause Massive damage to typhlosion, like Aerodactyl. Khan, as everyone knows also has enough power on its own to pull its weight if typlosion takes damage

The backup i use was Sash Gengar. Ghost type is good to adsorb SE fighting attacks that attack Kanga and not Typhlo. It has Energy ball for those pesky weathers and Destiny Bond for the ultimate panic buttion
 
Last edited:

turskain

activated its Quick Claw!
is a Community Contributor Alumnus
Posting a streak of 266 in ORAS Super Triples.

Looks a bit modest... except for the fact that 27 different teams were used during the streak, all of which were randomly generated from a box of Pokémon to be used with Trick Room support. Yes, this is the long-awaited imitation of ReptoAbysmal's infamous Battle Factory-esque style.

This streak is not directly comparable with those of RA, as the pool of Pokémon is much smaller at this point in time (29 species, to be exact) and the rules of rolling are different due to the much smaller pool. Specifically:
  • I roll six random Pokémon from the list of 29.
  • If I get a team with one Trick Room setter on it, that's the team to be used for the next 10 battles.
  • If I get a team with no Trick Room setters or two Trick Room setters, I roll again until exactly one setter comes up.
The difference from RA's style is that there is no Mega slot, and it is possible to roll multiple Mega Evolution-capable mons as a result, in which case alternate non-Mega Stone items are used on some of them. Another difference is that ReptoAbysmal has a Trick Room setter slot but does not restrict "setter species" from showing up in the rest of the team, since he has alternate sweeping sets for most of them. I have no alternatives (yet), so setters are exclusive to their slot.


Now on the details: here is a list of all 29 Pokémon in the pool with brief comments.

Cofagrigus @ Mental Herb
Ability: Mummy
Nature: Relaxed
IVs: 31/3/30/30/30/0
EVs: 252 HP, 40 Def, 216 SDef
-Shadow Ball
-Hidden Power [Fighting]
-Power Split
-Trick Room

Trick Room setter. Cofagrigus is chosen for its Ghost-typing, giving it immunity to Explosion.

Power Split is quite neat for neutralizing physical attackers if you have nothing better to do with Cofagrigus's 50 base Attack and a nearly perfect Attack IV. Cofagrigus's movepool is a bit barren, and crippling enemies before they move seems preferable to using Disable; though it only works on physical attackers. Note that it can also cripple Cofagrigus's Special Attack stat, howewer. In retrospect, this move is somewhat useless, but Cofagrigus's movepool is not very exciting for the Maison.

The EV spread allows Cofagrigus to survive Tyrantrum4 Strong Jaw Crunch, with the rest of the EVs dumped into SDef. It dies to Clawitzer4 Mega Launcher Dark Pulse.


Musharna @ Mental Herb
Ability: Telepathy
Nature: Relaxed
IVs: 31/1/31/30/30/0
EVs: 252 HP, 252 Def
-Psychic
-Hidden Power [Ground]
-Helping Hand
-Trick Room

Trick Room setter. Musharna is chosen for Telepathy, allowing it to survive Explosion and Earthquake to support the Weakness Policy Explosion gimmick.

Hidden Power Ground lets it activate Weakness Policy. Its usefulness for coverage is limited, but Musharna is often better off using Helping Hand anyway.

Relaxed with 252 Defense EVs allows it to survive Escavalier4 Megahorn. Clawitzer4 Mega Launcher Dark Pulse will OHKO it, howewer. Psychic typing is quite terrible defensively, and it is suspectible to Fake Out; it's definitely less reliable than Cofagrigus at setting up TR.


Sudowoodo @ Weakness Policy
Ability: Sturdy
Nature: Brave
EVs: 244 HP, 252 Atk, 4 SDef, 8 Spe
-Rock Slide
-Wood Hammer / Sucker Punch
-Explosion
-Protect

Weakness Policy Explosion with Sturdy.

Musharna and Cofagrigus, the two setters, carry HP Ground and HP Fighting respectively to hit Weakness Policy users super-effectively. After Weakness Policy Activates, they can use +2 Explosion to clear the field while the setter is immune to it. With Sturdy, the risk of Weakness Policy not working is low; you can also let the enemy activate Weakness Policy instead of hitting the user yourself. With Musharna, Helping Hand Explosion is also a safe, weaker option if there's a risk.

Wood Hammer and Sucker Punch are the options for the second move. Hitting Waters seems more useful as the teams often end up being weak to Water, so I use Wood Hammer.

The Speed EVs let it outspeed Cofagrigus by one point so HP Fighting moves before it.

Sudowoodo's niche in this position is its very low Speed (30) and unique movepool. Gigalith would have better stats all around, but outside Rock Slide its movepool is nonexistent and the extra stats "aren't needed" when mostly using +2 Explosion. Gigalith would also need to be bred in White due to it requiring a weird Speed IV to hit 31 Speed, where acquiring its egg moves would be a pain.


Kecleon @ Expert Belt
Ability: Protean
Nature: Brave
EVs: 252 HP, 252 Atk, 4 Def
-Fake Out
-Shadow Sneak
-Drain Punch
-Fire Punch

Side position. The last two moves can be changed depending on what coverage is desired; Thunder Punch does decently to alleviate a Water-type weakness, for example.


Dragalge @ Choice Specs
Ability: Adaptability
Nature: Quiet
EVs: 252 HP, 4 Def, 252 SAtk
-Dragon Pulse
-Sludge Bomb
-Thunderbolt
-Scald

Adaptability Dragon Pulse hits very hard across the field. Choice Specs boosts it further, making it around as powerful as Life Orb Latias Draco Meteor.

Thunderbolt and Scald are filler. HP Fire or HP Ground could be better, but locking into either would be a bad idea and Dragon Pulse hits really hard, so they would seldom be needed.


Abomasnow @ Abomasite / Focus Sash
Ability: Snow Warning
Nature: Quiet
EVs: 252 HP, 252 SAtk, 4 SDef
-Blizzard
-Grass Knot
-Shadow Ball
-Protect

Center. If the Mega Stone is taken, give it Sash; Blizzard is quite nice and if you have Abomasnow on the team, you can slash Ice Beam for Blizzard where applicable. (It never is with this pool, but maybe in the future...)


Eelektross @ Life Orb / Expert Belt / Choice Specs
Ability: Levitate
Nature: Quiet
EVs: 252 HP, 4 Def, 252 SAtk
-Thunderbolt
-Grass Knot
-Flamethrower
-Hidden Power [Ice] / Protect

I'm not really sold on this Pokémon. STAB Thunderbolt isn't bad, but it seems very mediocre and nondescript - which also makes it effective at these random teams. It doesn't synergize in a great way with anything with its decent at best stats and lack of strengths, but it doesn't really introduce any gaping weaknesses into the line-up either. As a result I consider it mostly trash for serious teams with little value to it, but very decent filler that can be put in any position for randomly generated Trick Room teams.


Golem @ Weakness Policy
Ability: Sturdy
Nature: Brave
EVs: 252 HP, 252 Atk, 4 Def
-Earthquake / Rock Slide
-Sucker Punch
-Explosion
-Protect

Weakness Policy Explosion with Sturdy. Earthquake vs Rock Slide depends on lead partners; Earthquake is preferred with Musharna as the TR setter and an EQ-immune ally.

Earthquake + Rock Slide could also be an option, but since Sucker Punch is a 4th gen tutor that I don't want to get rid of, I'd have to breed a new Golem for it.


Steelix @ Weakness Policy
Ability: Sturdy
Nature: Brave
IVs: 2 Speed
EVs: 252 HP, 252 Atk, 4 SDef
-Gyro Ball
-Earthquake
-Explosion
-Protect

Weakness Policy Explosion with Sturdy. The Speed IV gives it 31 Speed, outspeeding Cofagrigus by one point.

Steelix is surprisingly powerful. Its bulk and typing often let it use Weakness Policy without friendly fire, and spamming Earthquake is very effective when viable and can sweep teams on its own - especially with both Weakness Policy active and a Helping Hand boost on top.


Ferrothorn @ Iron Ball
Ability: Iron Barbs
Nature: Brave
EVs: 252 HP, 252 Atk, 4 SDef
-Gyro Ball
-Seed Bomb
-Explosion
-Protect

I wanted a boosting item over Rocky Helmet or a berry. Iron Ball is picked to increase Iron Ball's base power to 150 against anything with 66 or more Speed. Since Gyro Ball is its main move, it seemed like a good option.

Explosion as the third move to go out with a bang when the situation calls for it. It isn't the strongest Explosion, but it beats wasting turns when it can't harm the opponents.


Conkeldurr @ Assault Vest
Ability: Iron Fist
Nature: Brave
EVs: 108 HP, 252 Atk, 4 Def, 144 SDef
-Drain Punch
-Knock Off
-Ice Punch
-Mach Punch

EV spread lifted from Eppie's Conkeldurr. Conkeldurr is amazingly powerful, and I can see why it is used in the top Doubles team.


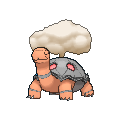
Torkoal @ Choice Specs
Ability: Shell Armor
Nature: Quiet
EVs: 252 HP, 252 SAtk, 4 SDef
-Eruption
-Earth Power
-Flamethrower
-Protect

With Specs boosting its Special Attack to 225, Torkoal's Eruption is slightly stronger Mega Camerupt's Eruption while being equally slow at 20 base Speed. The other moves are never used.


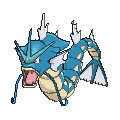
Gyarados @ Power Item
Ability: Intimidate
Nature: Brave
EVs: 252 HP, 252 Atk, 4 SDef
-Waterfall
-Return
-Rain Dance
-Protect

Rain Dance in the third slot to support Water Spout users, which I don't have any of yet. Its movepool is quite barren, so there's not much to put in this slot.


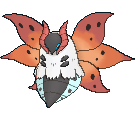
Volcarona @ Power Item
Ability: Flame Body
Nature: Quiet
EVs: 252 HP, 4 Def, 252 SAtk
-Fiery Dance
-Bug Buzz
-Giga Drain
-Protect

Same as ReptoAbysmal's Volcarona, except with Protect to use it as a lead and capitalize on its weaknesses over Hurricane. Credit to him for coming up with the idea to give a Power item to Volcarona of all things; it sounds so bad, but in practice it is much stronger than you'd expect.

Better than expected for something as seemingly weak as Volcarona isn't that much, though - if it gets a boost from Fiery Dance, it can perform, but it's very unreliable and bottom-of-the-barrel if you don't get a boost in 1-2 attacks.


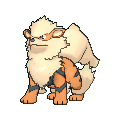
Arcanine @ Power Item
Ability: Intimidate
Nature: Brave
EVs: 252 HP, 252 Atk, 4 SDef
-Flare Blitz
-Close Combat
-Crunch
-Protect

I'm not really sure where I want to go with this thing just yet, or if I even want to keep it in the pool - it seems like a pretty bad power item user.


Staraptor @ Power Item
Ability: Reckless / Intimidate
Nature: Brave
EVs: 252 HP, 252 Atk, 4 SDef
-Brave Bird
-Double-Edge
-Close Combat
-Protect

Cross-field Brave Bird is very strong. Staraptor is picked over Talonflame since it can actually use its coverage moves under Trick Room while holding a Power item, while Talonflame is just too fast to get away with Flare Blitz. Reckless increases damage output, and is generally preferred; I have one with Intimidate, but never picked it over Reckless.

This is the strongest Power Item user in the pool of the ones I have so far. Brave Bird is just a great move to spam, even with something as un-TR-like as Staraptor.


Azumarill @ Assault Vest
Ability: Huge Power
Nature: Brave
EVs: 252 HP, 252 Atk, 4 SDef
-Play Rough
-Waterfall
-Aqua Jet
-Superpower

Assault Vest chosen for longevity. "Don't use Play Rough."


Salamence @ Power Item
Ability: Intimidate
Nature: Brave
EVs: 252 HP, 252 Atk, 4 SDef
-Dragon Claw
-Earthquake
-Flamethrower
-Protect

Intimidate. Aside from Dragon Claw and Earthquake, its accurate movepool is quite barren, so I went mixed without investment. This is not terribly effective, and I might just scrap it altogether and use Dragonite instead.


Tyranitar @ Focus Sash
Ability: Sand Stream
Nature: Brave
EVs: 252 HP, 252 Atk, 4 SDef
-Crunch
-Rock Slide
-Low Kick
-Protect

Focus Sash lets it survive an attack, and will almost always stay intact thanks to Sand Stream. Low Kick is preferred over Superpower to avoid Attack drops so it doesn't have to switch out prematurely.


Scrafty @ Assault Vest / Sitrus Berry
Ability: Intimidate
Nature: Brave
EVs: 252 HP, 252 Atk, 4 SDef
-Drain Punch
-Knock Off
-Ice Punch
-Fake Out

Standard Scrafty. Focusing on survivability with Assault Vest / Sitrus seems good, but I'm not entirely sure.


Machamp @ Assault Vest / Life Orb / Expert Belt
Ability: No Guard
Nature: Brave
EVs: 252 HP, 252 Atk, 4 SDef
-Dynamic Punch
-Knock Off
-Ice Punch
-Stone Edge

Machamp is decent with Assault Vest, but Conkeldurr and Scrafty generally make better use of it. If it can't get the vest, it uses a boosting item decently.


Clawitzer @ Life Orb
Ability: Mega Launcher
Nature: Quiet
EVs: 252 HP, 252 SAtk, 4 SDef
-Aura Sphere
-Dark Pulse
-Water Pulse
-Ice Beam

Aura Sphere is a great attack, and Clawitzer is very strong - its main flaw is its rather high base 59 Speed. It's pretty much the "Mega Lucario of Trick Room".


Reuniclus @ Life Orb
Ability: Magic Guard
Nature: Quiet
EVs: 252 HP, 252 SAtk, 4 Def
-Psychic
-Energy Ball
-Shadow Ball
-Helping Hand

Reuniclus seems to suck for the most part. STAB Psychic is a powerful attack, but other than that it contributes very little. If it loses out on Life Orb due to item conflicts, it goes from mediocre to worse with a Regenerator Assault Vest sideboard that does very little.


Mawile @ Mawilite
Ability: Intimidate
Nature: Brave
EVs: 252 HP, 252 Atk, 4 SDef
-Iron Head
-Play Rough
-Sucker Punch
-Protect

Play Rough's inaccuracy hurts a lot, and Iron Head isn't half as good. It uses the Mega slot decently, but I'd rather have a Weakness Policy Explosion user or even Torkoal as a back-up to sweep faster.

Rolling this Pokémon causes a lot of item conflicts, as unlike all other Megas in the pool, Mawile's Mega Stone is non-negotiable. If I add any more Megas to the pool, it will probably be necessary to add a Mega slot or at least a restriction for problematic Megas like Mawile and Ampharos to avoid the most disastrous conflicts.


Camerupt @ Cameruptite / Choice Specs
Ability: Solid Rock
Nature: Quiet
EVs: 252 HP, 252 SAtk, 4 SDef
-Eruption
-Earth Power
-Flamethrower
-Protect

Eruption is a good move. If the Mega slot is taken, Specs Camerupt can be run as a faster, harder-hitting Specs Torkoal in the back.


Slowbro @ Slowbronite
Ability: Own Tempo
Nature: Sassy
EVs: 252 HP, 4 SAtk, 252 SDef
-Scald
-Iron Defense
-Calm Mind
-Rest

Mega Slowbro come in after an ally is KO'd and Trick Room is active into a side position; from there, it can begin boosting with the Speed advantage and hopefully reach enough boosts to become invincible before Trick Room runs out while allies create space. If succesful, it has the potential to sweep 1v6 barring OHKO moves. Rest over Slack Off to avoid losing to Toxic.


Crawdaunt @ Choice Band
Ability: Adaptability
Nature: Brave
EVs: 252 HP, 252 Atk, 4 SDef
-Knock Off
-Waterfall
-Superpower
-Aqua Jet

Choiced back-up. Hits hard, but is a bit fast and not that great it locks into something other than Knock Off.


Rhydon @ Eviolite
Ability: Lightning Rod
Nature: Brave
EVs: 100 HP, 156 Atk, 252 SDef
-Drill Run
-Rock Slide
-Earthquake
-Protect

Rhydon is used over Rhyperior for Lightning Rod. Drill Run is accurate-ish and doesn't hit allies, and Megahorn isn't really missed. Having both Drill Run and EQ lets it always use a Ground STAB.

I intended to EV it with a spread of 108/156/0/0/244/0, but forgot about that when EV training and it ended up a bit off. I lifted the idea of cutting its Attack from a VGC report on Nugget Bridge and the intended spread is identical to that one (it simply drops Attack by 10 points, hitting a 185->187 Nature boost point) but for slightly different reasons: Rock Slide and Drill Run are both inaccurate and not that powerful, so prioritizing bulk and the ability to spam them for as long as possible over maximizing their (unimpressive) power could be worth it. I also wanted to differentiate it from Rhyperior (to be added to the pool), which has higher Attack and will likely maximize it and can utilize a boosting item or Wide Lens to take advantage of it.


Aegislash @ Life Orb / Leftovers
Ability: Stance Change
Nature: Brave
EVs: 252 HP, 252 Atk, 4 SDef
-King's Shield
-Iron Head
-Sacred Sword
-Shadow Sneak
I'm not convinced this is the way to go for Aegislash in a Trick Room team, but I had one so I threw it on.


Next, the full notes on all teams used during the streak. Close battles are also briefly described.
run02_01-10_roll

Rhydon
Tyranitar
Azumarill
Musharna
Volcarona
Staraptor

Lead with Musharna/Rhydon/Staraptor to possibly capitalize on Lightning Rod

Set of 10 was uneventful; the front-line was very capable, TR went up every time, and the back-ups saw almost no action.

---------

run02_11-20_roll

Camerupt
Slowbro
Volcarona
Staraptor
Musharna
Clawitzer

Lead with Musharna/Volcarona/Staraptor (double Rock weak, yay!); going with Mega Slowbro as a win condition; Specs on Camerupt since Slowbro holds the Mega Stone.

Mega Camerupt leading with Specs Slowbro would be an alternative, but Slowbro seems like a safer bet even at the cost of a weaker frontline.

Battle 17: Musharna flinched by Rock Slide. TR succeeds on Turn 2.

---------

run02_21-30_roll

Staraptor
Rhydon
Musharna
Sudowoodo
Camerupt
Reuniclus

Lead with Musharna/Sudowoodo/Rhydon to use Weakness Policy Explosion; Rhydon will have no trouble surviving it. Very weak to Water and nothing can switch into them; let's hope Explosion will kill them all!

---------

run02_31-40_roll

Ferrothorn
Slowbro
Crawdaunt
Musharna
Tyranitar
Azumarill

No great centers. Lead with Musharna/Tyranitar/Ferrothorn.

Tyranitar and Ferrothorn worked quite well. TR went up in every batttle.

---------

run02_41-50_roll

Torkoal
Musharna
Gyarados
Azumarill
Crawdaunt
Steelix

Lead with Musharna/Steelix/Gyarados. Steelix can EQ freely with Telepathy/Flying. Follow up with Specs Torkoal after Explosion.

Battle 43: Gothitelle4 uses Flatter on Musharna. Trick Room goes up on Turn 3.

Battle 44: Infernape4 uses Fake Out on Musharna. Trick Room goes up on Turn 2.

---------

run02_51-60_roll

Clawitzer
Salamence
Staraptor
Crawdaunt
Machamp
Cofagrigus

Lead with Cofagrigus/Salamence/Staraptor. This team looks like trash.

Assault Vest on Machamp since Choice Band and Life Orb are already taken.

---------

run02_61-70_roll

Scrafty
Torkoal
Musharna
Conkeldurr
Rhydon
Sudowoodo

Lead with Musharna/Sudowoodo/Rhydon.

TR went up in every battle; no complications.

---------

run02_71-80_roll

Reuniclus
Cofagrigus
Steelix
Eelektross
Azumarill
Scrafty

Lead with Cofagrigus/Steelix/Eelektross for Levitate. Giving Eelektross Protect over HP Ice to allow it to function as a lead.

With Azumarill taking Assault Vest, Scrafty holds Sitrus Berry; Reuniclus hold Life Orb; Eelektross gets Expert Belt due to a lack of options.

TR went up in every battle. Eelektross died to Explosion a couple of times, but it's a decent trade.

---------

run02_81-90_roll

Gyarados
Dragalge
Slowbro
Mawile
Ferrothorn
Cofagrigus

Lead with Cofagrigus/Mawile/Gyarados.

Slowbro runs Life Orb with an alternate Quiet 4-attack set due to Mawile taking up the Mega slot and Dragalge holding Specs.

TR went up in every battle.

---------

run02_91-100_roll

Torkoal
Conkeldurr
Cofagrigus
Slowbro
Volcarona
Gyarados

Lead with Cofagrigus/Gyarados/Volcarona.

Battle 96: Clawitzer4 KOs Cofagrigus on Turn 1. With a lucky match-up and favorable plays from the AI, the Trick Room squad wins with Mega Slowbro ensuring victory in the end, though it didn't end up being necessary. The battle video is listed in this post.

Battle 101: I accidentally played 11 battles instead of 10 with this team. As a result, the next set will be 9 battles long.

---------

run02_102-110_roll

Aegislash
Eelektross
Sudowoodo
Cofagrigus
Kecleon
Reuniclus

Lead with Cofagrigus/Sudowoodo/Kecleon. Kecleon turns into Ghost-type with Shadow Sneak to avoid Explosion.

Items: Reuniclus holds Life Orb, Eelektross gets Specs, Aegislash will make do with Leftovers.

Moves: tutored Low Kick and Knock Off on Kecleon to cover Explosion resistors. HP Ice on Eelektross over Protect, which was previously slashed to run it as a lead.

Battle 105: misplay against Damp Kingdra, getting Sudowoodo killed without doing anything. Luckily, the battle was recoverable.

Battle 107: misplay against Damp Poliwrath, getting both Sudowoodo and Kecleon killed.

Battle 108: Zoroark(disguised as Gigalith)/Walrein/Exeggutor frontline. Fake Out Walrein, Exeggutor cancels Trick Room on Turn 1, then Explodes. Sudowoodo down before it gets to attack. Luckily, Zoroark did not go for a Dark Pulse 2HKO on Cofagrigus, instead opting to use Focus Blast on Sudowoodo. Walrein also missed Fissure on Turn 2.

Battle 110: Exeggutor cancels Trick Room for two turns in a row. It eventually goes up on Turn 3.

This set got dangerous at many points, fueled by misplays and nasty opposition. Luckily, I made it through; there's an argument for trying to let the enemy set TR for you, but Exeggutor4 is such a Explosion/Wood Hammer-happy fellow that it's hard to predict its moves.

---------

run02_111-120_roll

Musharna
Dragalge
Staraptor
Volcarona
Crawdaunt
Eelektross

Lead with Musharna/Volcarona/Staraptor.

Battle 114: Bronzong4 cancels Trick Room and chooses to attack on the next turn, flinching Musharna. Musharna goes down without Trick Room going up and the battle is nearly lost. The battle video is uploaded in this post.

Battle 119: TR goes up, but misplays get a couple of mon killed; luckily, the last Pokémon was Metagross4

---------

run02_121-130_roll

Machamp
Mawile
Tyranitar
Musharna
Camerupt
Sudowoodo

Lead with Musharna/Sudowoodo/Tyranitar.

Items: Mawile @ Mawilite, Camerupt @ Choice Specs, Machamp @ Assault Vest

---------

run02_131-140_roll

Salamence
Torkoal
Gyarados
Reuniclus
Steelix
Cofagrigus

Lead with Cofagrigus/Steelix/Gyarados to spam Earthquake; Cofagrigus can afford to take a couple of hits.

---------

run02_141-150_roll

Cofagrigus
Mawile
Tyranitar
Machamp
Rhydon
Abomasnow

Lead with Cofagrigus/Tyranitar/Rhydon.

Items: Abomasnow @ Life Orb, Mawile @ Mawilite, Tyranitar @ Focus Sash

Abomasnow is stuck with an unoptimal item and no Mega Stone, but with both Mawile and Tyranitar needing theirs more, it can't be helped. With an internal weather conflict on top, it will probably be deadweight.

Battle 150: Clawitzer lead. I attack on Turn 1 and go for Trick Room, hoping it will use Aura Sphere on Tyranitar. It behaves as intended, breaking Tyranitar's Sash instead of KOing Cofagrigus.

Accidentally played 11 battles with this team; the next set will be 9 battles long to compensate.

---------

run02_152-160_roll

Tyranitar
Kecleon
Musharna
Reuniclus
Camerupt
Machamp

Lead with Musharna/Camerupt/Kecleon.

Moves: tutored Thunder Punch over Low Kick on Kecleon to better cover the Water-types that Camerupt fears, for a moveset of: Fake Out / Shadow Sneak / Thunder Punch / Knock Off.

---------

run02_161-170_roll

Camerupt
Musharna
Sudowoodo
Kecleon
Torkoal
Gyarados

Lead with Musharna/Sudowoodo/Kecleon.

The combination of Mega Camerupt and Specs Torkoal in the back should be immense.

Moves: Kecleon keeps Thunder Punch / Knock Off from the previous team, as this line-up also could use a little extra against Water-types.

Battle 164: very close battle against a runaway Zapdos2 with a very high Evasion rate. Mega Camerupt eventually delivers the killing blow with a miraculous Flamethrower crit on a +6 Evasion Zapdos that KOs it after the game was all but lost.

---------

run02_171-180_roll

Slowbro
Arcanine
Staraptor
Cofagrigus
Reuniclus
Abomasnow

First time I get to use Arcanine - the Growlithe was unevolved prior to this.

Lead with Cofagrigus/Abomasnow/Arcanine.

Items: Abomasnow @ Focus Sash, Slowbro @ Slowbronite - Slowbro is not very good without its Mega Stone, while Abomasnow is still okay

Battle 180: Brozong runs around canceling Trick Room. Hail boosts the enemy's Froslass. Abomasnow is garbage and Mega Slowbro gets frozen. With favorable luck, I was able to barely win. The battle video is uploaded.

---------

run02_181-190_roll

Musharna
Rhydon
Volcarona
Reuniclus
Eelektross
Gyarados

Lead with Musharna/Rhydon/Gyarados. Lightning Rod and Helping Hand Earthquake spam abound.

Items: Eelektross @ Choice Specs, Reuniclus @ Life Orb

Battle 190: Rain Dance used on Gyarados to help it break Blissey4 with Helping Hand Waterfall. It wasn't necessary, though, as Magic Guard Reuniclus eventually stall it out anyway.

---------

run02_191-200_roll

Torkoal
Ferrothorn
Musharna
Kecleon
Machamp
Volcarona

Lead with Musharna/Volcarona/Kecleon.

Moves: keeping Thunder Punch / Knock Off on Kecleon since this team also doesn't mind Electric-type coverage.

---------

run02_201-210_roll

Gyarados
Mawile
Cofagrigus
Sudowoodo
Clawitzer
Eelektross

Lead with Cofagrigus/Sudowoodo/Eelektross. Leading with Gyarados on the side could also work, but Eelektross looks nicer for now.

Moves: Protect over HP Ice on Eelektross to run it as a lead

Items: Clawitzer @ Life Orb, Eelektross @ Expert Belt - giving Clawitzer its best item takes priority over buffing up Eelektross which sucks anyway.

Battle 205: Aurorus4 KOs Cofagrigus on Turn 1. Thanks to awful opposition (Spiritomb4 center and Aurorus being out for a turn after using Hyper Beam), the battle is easily won without Trick Room.

Battle 207: Walrein4 KOs Cofagrigus on Turn 1. Clawitzer luckily avoids Fissure on Turn 2 and finishes it off with Aura Sphere after it had taken a friendly Earthquake. The rest of the enemy team gets taken down swiftly with Magmortar and Mamoswine dying on Turn 1, a triple KO on Turn 1, and finally Dragonite being focused with three attacks on Turn 3.

---------

run02_211-220_roll

Azumarill
Eelektross
Camerupt
Crawdaunt
Musharna
Volcarona

Lead with Musharna/Camerupt/Eelektross.

Items: Eelektross @ Life Orb, Azumarill @ Assault Vest, Crawdaunt @ Choice Band

Battle 212: Slowking + Slowbro lead pair, five Pokémon fall on Turn 2 to turn the battle into a 3v3

Battle 213: Walrein4 lead, targeted Camerupt which used Protect

Battle 214: Bronzong4 cancels TR on Turn 1, dies to Eruption on Turn 2 and TR goes up

---------

run02_221-230_roll

Camerupt
Abomasnow
Scrafty
Cofagrigus
Gyarados
Steelix

Lead with Cofagrigus/Steelix/Gyarados.

Items: Camerupt @ Cameruptite, Abomasnow @ Focus Sash, Scrafty @ Assault Vest

Battle 224: after a freeze and misplays, Scrafty sweeps 1v3. Battle video uploaded.

---------

run02_231-240_roll

Abomasnow
Musharna
Staraptor
Kecleon
Slowbro
Golem

Lead with Musharna/Golem/Staraptor to enable Earthquake. This is the first time I get to run Golem, after several rounds of Sudowoodo/Steelix already.

Items: Abomasnow @ Focus Sash, Slowbro @ Slowbronite, Kecleon @ Life Orb

Moves: Kecleon keeps Thunder Punch / Knock Off since it still fits.

Battle 235: Walrein4 uses Fissure on Musharna on Turn 1, it misses. The battle ended up being close anyway thanks to Bronzong4 accompanying the Walrein.

Golem did good work with Sucker Punch, but I'm not convinced SlideQuake wouldn't be better. Being walled entirely by Wide Guard would suck, though, and I'd have to breed a new Golem for it.

---------

run02_241-250_roll

Musharna
Kecleon
Camerupt
Clawitzer
Reuniclus
Mawile

Lead with Musharna/Mawile/Kecleon.

This team isn't that bad, but the item conflicts are ridiculous. Mawile taking the Mega Stone forces it into the lead over Camerupt, and Clawitzer's desire for Life Orb will make Reuniclus a little deadweight. At least Camerupt can function with Specs.

Items: Mawile @ Mawilite, Camerupt @ Choice Specs, Clawitzer @ Life Orb, Kecleon @ Expert Belt, Reuniclus @ Assault Vest

Ablities: Reuniclus swapped for an alternative one with Regenerator, since it will never suffer Life Orb damage.

Moves: Reuniclus's alternate set is Psychic / Shadow Ball / Grass Knot / Signal Beam. This looks like a set the AI would run. Kecleon keeps Thunder Punch / Knock Off to "cover" its "teammates".

Donphan4 appeared twice in this set, but luckily failed to activate its Quick Claw or hit Fissure.

---------

run02_251-260_roll

Abomasnow
Clawitzer
Cofagrigus
Scrafty
Kecleon
Conkeldurr

Lead with Cofagrigus/Abomasnow/Scrafty.

Items: Abomasnow @ Abomasite, Scrafty @ Sitrus Berry, Conkeldurr @ Assault Vest, Kecleon @ Expert Belt, Clawitzer @ Life Orb

Moves: Kecleon keeps Thunder Punch to roast some birds and Knock Off is a good move.

Battle 258: Clawitzer4 lead. Distrupted with Fake Out.

---------

run02_261-270_roll

Azumarill
Torkoal
Salamence
Musharna
Abomasnow
Crawdaunt

Lead with Musharna/Abomasnow/Salamence.

Battle 267: The loss. Bronzong4/Slowbro4 lead, I lose track of Trick Room and end up barely losing after repeated Confusion self-hits prevent CB Crawdaunt from getting off a miraculous comeback sweep with Aqua Jet.

---------


You can skip that mostly uninteresting wall of text and go straight to the battle videos:
Battle 42: DE4W-WWWW-WWWR-HDTT - Cofagrigus/Camerupt/Salamence/Volcarona/Machamp/Abomasnow vs. Chandelure/Zoroark/Yanmega/Vaporeon/Drifblim/Gardevoir

The loss of my first attempt at pseudo-random teams - I started at battle 41, so it happened on the second battle. Afterwards, I started this run from battle 1. Zoroark flinches Musharna nicely to prevent Trick Room, and it never goes up.


Battle 96: JGTW-WWWW-WWWR-H8SC - Cofagrigus/Gyarados/Volcarona/Slowbro/Torkoal/Conkeldurr vs. Clawitzer/Vaporeon/Seismitoad/Barbaracle/Tangrowth/Gerrothorn

Cofagrigus is KO'd by Clawitzer4 on Turn 1. The battle gets quite close.


Battle 114: 6VFG-WWWW-WWWR-H8ZX - Musharna/Volcarona/Staraptor/Crawdaunt/Dragalge/Eelektross vs. Dugtrio/Scizor/Bronzong/Steelix/Carracosta/Probopass

Bronzong cancels Trick Room and things get a little rough.


Battle 180: GREW-WWWW-WWWR-H8QW - Cofagrigus/Abomasnow/Arcanine/Staraptor/Reuniclus/Slowbro vs. Chandelure/Espeon/Bronzong/Gardevoir/Reuniclus/Froslass

Bronzong makes another apperance, and cancels some more Trick Room.


Battle 224: 9JAG-WWWW-WWWR-H8FS - Cofagrigus/Steelix/Gyarados/Abomasnow/Camerupt/Scrafty vs. Espeon/Glaceon/Flareon/Umbreon/Leafeon/Vaporeon

A very close battle against a Furisode Girl involving misplays and a freeze, with Scrafty sweeping three Eevees alone in the end.


Battle 267: E9ZW-WWWW-WWWR-H8DV - Musharna/Abomasnow/Salamence/Azumarill/Crawdaunt/Torkoal vs. Reuniclus/Slowbro/Bronzong/Gothitelle/Drifblim/Alakazam

Slowbro and Bronzong cancel Trick Room, and I lose track of it and lose as a result. Even so, a miraculous Aqua Jet sweep nearly happens with Crawdaunt to make a comeback, but a very effective Flatter from Gothitelle (combined with wrong target prioritization) spells the end after all the mistakes.


This was a very lucky streak, as the loss in the very second battle of the first run and the many close calls show. But there are improvements to be made to the pool that could improve the odds significantly.

As seen in the loss and a couple of other close battles, opposing Trick Room setters can get very obnoxious and result in unpleasant situations and frequent misplays with the AI being difficult to predict. Adding Imprison to setters, increasing the number of Fake Out users, and adding Prankster Taunt and other utilities to the pool could go a long way towards decreasing the risk of such match-ups, and also distrupt Clawitzer4/Aurorus4/Walrein4 from nuking TR setters. There are dozens of viable Pokémon to add, and I'll be sure to return for a third run at some point in the future.
 
Last edited:

Lumari

empty spaces
is a Site Content Manageris a Top Social Media Contributoris a Member of Senior Staffis a Community Contributoris a Top Contributoris a Top Smogon Media Contributoris an Administrator Alumnus
TFP Leader
A question of my own regarding abilities: if a Pokemon has only one regular ability, is the ratio regular ability:hidden ability 1:1 or 2:1? (e.g. is the ratio Torrent Greninja:Protean Greninja 1:1 or 2:1; on the one hand, the game could simply pick between two abilities, resulting in a 1:1 ratio; on the other hand, the game could pick between three ability slots, two of which happen to be the same ability, resulting in a 2:1 ratio). Just asking because I remember reading about a 50-50 ratio somewhere in this thread, yet in my experience regular abilities seem to be more common on these mons, and I was wondering if it has ever been actually researched or if it was simply assumed to be 1:1.
 
Last edited:
YEY!!! I got my Lansat Berry for getting a win streak of 100. Sadly though on new years eve I bred my self a 5iv Cloyster to celebrate the new year and iv'e been wrecking trainers with skill link, icicle spear. I say "Sadly though" because I tried so hard to make Torkoal with shell smash work, but as I mentioned in my last post on the previous page, I fell short on my best Torkoal run at battle 69 :(
Apart from Torkoal being replaced by Cloyster the team is pretty much the same. Durant now has Aerial Ace over protect now, since it NEVER uses protect, and gives me an option for Breloom (because I hate Breloom)

So here's how my Super Singles team looks ATM

Durant (male) *Flik
Ability: Truant
Nature: Jolly
Held item: Choice Scarf
Iv's: 31/31/31/**/31/31
evs: hp/ def and speed. Mixed spreads
Entrainment
X-scissor
Iron Head
Aerial Ace

Cloyster (female) *Moon Pearl
Ability: Skill Link
Nature: Adamant
Held Item: Focus Sash
Iv's: 31/31/31/**/31/31
Ev's: 4hp. 252 atk. 252 speed
Shell smash
Protect
Icicle Spear
Rock blast

Mega Altaria (female) *MoominDreams
Ability: Natural Cure
Nature: Adamant
Held item: Altarianite
Iv's 31/31/31/**/31/31
EV's: 4 hp. 252 atk. 252 speed
Dragon Dance
Protect
Return
Earthquake

Altaria has barely been used at all in the 100 battles. Cloyster has done all the work. The only times Altaria comes out is for lead sandstorm from Tyranitar or Hippowdon, or if a Drapion Forretress, or Tentacruel set up spikes/ toxic spikes. Or if the lead Pokemon uses protect, then during the turn of loafing around they reveal a ground type move. Had a funny match with a Lopunny that only had dig, mirror coat, switcheroo and protect, and couldn't touch Altaria at all (I didn't mega) and it killed its self with a flame orb. wish I saved that match. It was really funny.

I do sometimes think about changing/ breeding a Cloud nine Altaria, but the weather damage doesn't bother me too much, and if I havn't mega'ed already I can switch to Durant to remove any status it would have (if its still alive).

I do see lots of people using mega Salamance though, but I like Mega Altaria's fairy typing, even if it does loose ground resistance.

well anyway, you guys will want proof over my 100th win, so heres my match.

YFBG-WWWW-WWWR-JF7T

A really easy match with a Veteran. After Entrainment, and setting up with Cloyster, it sweeps poor Veteran Howell's team in 12 turns. (would be 11 but I always go for extra protect after 3 shell smash in case a Pokemon survive's 5 hits, though there isn't much of an excuse against a Virizion for that.
 

NoCheese

"Jack, you have debauched my sloth!"
is a Site Content Manager Alumnusis a Forum Moderator Alumnusis a Contributor Alumnus
Apart from Torkoal being replaced by Cloyster the team is pretty much the same. Durant now has Aerial Ace over protect now, since it NEVER uses protect, and gives me an option for Breloom (because I hate Breloom)
Protect lets you get a completely free switch against opposing leads with Trace or Truant. Without it, Durant or your switch-in has to take a hit on the first turn. With it, you can just Protect, switch on the loaf turn, and set up like normal. Though it doesn't come up that frequently, I'd wager it still proves useful more often than an additional attack does. But good luck on the streak. It's always nice to see new pokes like Mega Alatria get some Maison love.
 
The Mega-Salamence/Suicune/Aegislash team is, uh, pretty brutal. I'm at 57 wins quite handily, and I plan to see how far I can go with it - seriously, how did I ever get to 50 on X/Y without that chart of movesets?

After I did some calcs (well, OK, forcing the pokemon calculator to reflect the stats of Megasally), I realized that Return was just as good at +1 as Double-Edge, as well as netting me some more life for margin. Return +1 vs. Cresselia1 (the physically bulkiest poke I could think of that doesn't resist Flying) is 113% damage minimum. Earthquake+1... isn't even fair to Steel types.

For some reason, the AI doesn't anticipate Salamence as a setup pokemon; I've hit five or six starters faster than Sally with Taunt in their moveset and not once have they used it. I've seen it used on Aegislash and Suicune, so I know they WILL use it... just not on Salamence.
 
Posting a streak of 266 in ORAS Super Triples.

Looks a bit modest... except for the fact that 27 different teams were used during the streak, all of which were randomly generated from a box of Pokémon to be used with Trick Room support. Yes, this is the long-awaited imitation of ReptoAbysmal's infamous Battle Factory-esque style.

This streak is not directly comparable with those of RA, as the pool of Pokémon is much smaller at this point in time (29 species, to be exact) and the rules of rolling are different due to the much smaller pool. Specifically:
  • I roll six random Pokémon from the list of 29.
  • If I get a team with one Trick Room setter on it, that's the team to be used for the next 10 battles.
  • If I get a team with no Trick Room setters or two Trick Room setters, I roll again until exactly one setter comes up.
The difference from RA's style is that there is no Mega slot, and it is possible to roll multiple Mega Evolution-capable mons as a result, in which case alternate non-Mega Stone items are used on some of them. Another difference is that ReptoAbysmal has a Trick Room setter slot but does not restrict "setter species" from showing up in the rest of the team, since he has alternate sweeping sets for most of them. I have no alternatives (yet), so setters are exclusive to their slot.


Now on the details: here is a list of all 29 Pokémon in the pool with brief comments.

Cofagrigus @ Mental Herb
Ability: Mummy
Nature: Relaxed
IVs: 31/3/30/30/30/0
EVs: 252 HP, 40 Def, 216 SDef
-Shadow Ball
-Hidden Power [Fighting]
-Power Split
-Trick Room

Trick Room setter. Cofagrigus is chosen for its Ghost-typing, giving it immunity to Explosion.

Power Split is quite neat for neutralizing physical attackers if you have nothing better to do with Cofagrigus's 50 base Attack and a nearly perfect Attack IV. Cofagrigus's movepool is a bit barren, and crippling enemies before they move seems preferable to using Disable; though it only works on physical attackers. Note that it can also cripple Cofagrigus's Special Attack stat, howewer. In retrospect, this move is somewhat useless, but Cofagrigus's movepool is not very exciting for the Maison.

The EV spread allows Cofagrigus to survive Tyrantrum4 Strong Jaw Crunch, with the rest of the EVs dumped into SDef. It dies to Clawitzer4 Mega Launcher Dark Pulse.


Musharna @ Mental Herb
Ability: Telepathy
Nature: Relaxed
IVs: 31/1/31/30/30/0
EVs: 252 HP, 252 Def
-Psychic
-Hidden Power [Ground]
-Helping Hand
-Trick Room

Trick Room setter. Musharna is chosen for Telepathy, allowing it to survive Explosion and Earthquake to support the Weakness Policy Explosion gimmick.

Hidden Power Ground lets it activate Weakness Policy. Its usefulness for coverage is limited, but Musharna is often better off using Helping Hand anyway.

Relaxed with 252 Defense EVs allows it to survive Escavalier4 Megahorn. Clawitzer4 Mega Launcher Dark Pulse will OHKO it, howewer. Psychic typing is quite terrible defensively, and it is suspectible to Fake Out; it's definitely less reliable than Cofagrigus at setting up TR.


Sudowoodo @ Weakness Policy
Ability: Sturdy
Nature: Brave
EVs: 244 HP, 252 Atk, 4 SDef, 8 Spe
-Rock Slide
-Wood Hammer / Sucker Punch
-Explosion
-Protect

Weakness Policy Explosion with Sturdy.

Musharna and Cofagrigus, the two setters, carry HP Ground and HP Fighting respectively to hit Weakness Policy users super-effectively. After Weakness Policy Activates, they can use +2 Explosion to clear the field while the setter is immune to it. With Sturdy, the risk of Weakness Policy not working is low; you can also let the enemy activate Weakness Policy instead of hitting the user yourself. With Musharna, Helping Hand Explosion is also a safe, weaker option if there's a risk.

Wood Hammer and Sucker Punch are the options for the second move. Hitting Waters seems more useful as the teams often end up being weak to Water, so I use Wood Hammer.

The Speed EVs let it outspeed Cofagrigus by one point so HP Fighting moves before it.

Sudowoodo's niche in this position is its very low Speed (30) and unique movepool. Gigalith would have better stats all around, but outside Rock Slide its movepool is nonexistent and the extra stats "aren't needed" when mostly using +2 Explosion. Gigalith would also need to be bred in White due to it requiring a weird Speed IV to hit 31 Speed, where acquiring its egg moves would be a pain.


Kecleon @ Expert Belt
Ability: Protean
Nature: Brave
EVs: 252 HP, 252 Atk, 4 Def
-Fake Out
-Shadow Sneak
-Drain Punch
-Fire Punch

Side position. The last two moves can be changed depending on what coverage is desired; Thunder Punch does decently to alleviate a Water-type weakness, for example.


Dragalge @ Choice Specs
Ability: Adaptability
Nature: Quiet
EVs: 252 HP, 4 Def, 252 SAtk
-Dragon Pulse
-Sludge Bomb
-Thunderbolt
-Scald

Adaptability Dragon Pulse hits very hard across the field. Choice Specs boosts it further, making it around as powerful as Life Orb Latias Draco Meteor.

Thunderbolt and Scald are filler. HP Fire or HP Ground could be better, but locking into either would be a bad idea and Dragon Pulse hits really hard, so they would seldom be needed.


Abomasnow @ Abomasite / Focus Sash
Ability: Snow Warning
Nature: Quiet
EVs: 252 HP, 252 SAtk, 4 SDef
-Blizzard
-Grass Knot
-Shadow Ball
-Protect

Center. If the Mega Stone is taken, give it Sash; Blizzard is quite nice and if you have Abomasnow on the team, you can slash Ice Beam for Blizzard where applicable. (It never is with this pool, but maybe in the future...)


Eelektross @ Life Orb / Expert Belt / Choice Specs
Ability: Levitate
Nature: Quiet
EVs: 252 HP, 4 Def, 252 SAtk
-Thunderbolt
-Grass Knot
-Flamethrower
-Hidden Power [Ice] / Protect

I'm not really sold on this Pokémon. STAB Thunderbolt isn't bad, but it seems very mediocre and nondescript - which also makes it effective at these random teams. It doesn't synergize in a great way with anything with its decent at best stats and lack of strengths, but it doesn't really introduce any gaping weaknesses into the line-up either. As a result I consider it mostly trash for serious teams with little value to it, but very decent filler that can be put in any position for randomly generated Trick Room teams.


Golem @ Weakness Policy
Ability: Sturdy
Nature: Brave
EVs: 252 HP, 252 Atk, 4 Def
-Earthquake / Rock Slide
-Sucker Punch
-Explosion
-Protect

Weakness Policy Explosion with Sturdy. Earthquake vs Rock Slide depends on lead partners; Earthquake is preferred with Musharna as the TR setter and an EQ-immune ally.

Earthquake + Rock Slide could also be an option, but since Sucker Punch is a 4th gen tutor that I don't want to get rid of, I'd have to breed a new Golem for it.


Steelix @ Weakness Policy
Ability: Sturdy
Nature: Brave
IVs: 2 Speed
EVs: 252 HP, 252 Atk, 4 SDef
-Gyro Ball
-Earthquake
-Explosion
-Protect

Weakness Policy Explosion with Sturdy. The Speed IV gives it 31 Speed, outspeeding Cofagrigus by one point.

Steelix is surprisingly powerful. Its bulk and typing often let it use Weakness Policy without friendly fire, and spamming Earthquake is very effective when viable and can sweep teams on its own - especially with both Weakness Policy active and a Helping Hand boost on top.


Ferrothorn @ Iron Ball
Ability: Iron Barbs
Nature: Brave
EVs: 252 HP, 252 Atk, 4 SDef
-Gyro Ball
-Seed Bomb
-Explosion
-Protect

I wanted a boosting item over Rocky Helmet or a berry. Iron Ball is picked to increase Iron Ball's base power to 150 against anything with 66 or more Speed. Since Gyro Ball is its main move, it seemed like a good option.

Explosion as the third move to go out with a bang when the situation calls for it. It isn't the strongest Explosion, but it beats wasting turns when it can't harm the opponents.


Conkeldurr @ Assault Vest
Ability: Iron Fist
Nature: Brave
EVs: 108 HP, 252 Atk, 4 Def, 144 SDef
-Drain Punch
-Knock Off
-Ice Punch
-Mach Punch

EV spread lifted from Eppie's Conkeldurr. Conkeldurr is amazingly powerful, and I can see why it is used in the top Doubles team.


Torkoal @ Choice Specs
Ability: Shell Armor
Nature: Quiet
EVs: 252 HP, 252 SAtk, 4 SDef
-Eruption
-Earth Power
-Flamethrower
-Protect

With Specs boosting its Special Attack to 225, Torkoal's Eruption is slightly stronger Mega Camerupt's Eruption while being equally slow at 20 base Speed. The other moves are never used.


Gyarados @ Power Item
Ability: Intimidate
Nature: Brave
EVs: 252 HP, 252 Atk, 4 SDef
-Waterfall
-Return
-Rain Dance
-Protect

Rain Dance in the third slot to support Water Spout users, which I don't have any of yet. Its movepool is quite barren, so there's not much to put in this slot.


Volcarona @ Power Item
Ability: Flame Body
Nature: Quiet
EVs: 252 HP, 4 Def, 252 SAtk
-Fiery Dance
-Bug Buzz
-Giga Drain
-Protect

Same as ReptoAbysmal's Volcarona, except with Protect to use it as a lead and capitalize on its weaknesses over Hurricane. Credit to him for coming up with the idea to give a Power item to Volcarona of all things; it sounds so bad, but in practice it is much stronger than you'd expect.

Better than expected for something as seemingly weak as Volcarona isn't that much, though - if it gets a boost from Fiery Dance, it can perform, but it's very unreliable and bottom-of-the-barrel if you don't get a boost in 1-2 attacks.


Arcanine @ Power Item
Ability: Intimidate
Nature: Brave
EVs: 252 HP, 252 Atk, 4 SDef
-Flare Blitz
-Close Combat
-Crunch
-Protect

I'm not really sure where I want to go with this thing just yet, or if I even want to keep it in the pool - it seems like a pretty bad power item user.


Staraptor @ Power Item
Ability: Reckless / Intimidate
Nature: Brave
EVs: 252 HP, 252 Atk, 4 SDef
-Brave Bird
-Double-Edge
-Close Combat
-Protect

Cross-field Brave Bird is very strong. Staraptor is picked over Talonflame since it can actually use its coverage moves under Trick Room while holding a Power item, while Talonflame is just too fast to get away with Flare Blitz. Reckless increases damage output, and is generally preferred; I have one with Intimidate, but never picked it over Reckless.

This is the strongest Power Item user in the pool of the ones I have so far. Brave Bird is just a great move to spam, even with something as un-TR-like as Staraptor.


Azumarill @ Assault Vest
Ability: Huge Power
Nature: Brave
EVs: 252 HP, 252 Atk, 4 SDef
-Play Rough
-Waterfall
-Aqua Jet
-Superpower

Assault Vest chosen for longevity. "Don't use Play Rough."


Salamence @ Power Item
Ability: Intimidate
Nature: Brave
EVs: 252 HP, 252 Atk, 4 SDef
-Dragon Claw
-Earthquake
-Flamethrower
-Protect

Intimidate. Aside from Dragon Claw and Earthquake, its accurate movepool is quite barren, so I went mixed without investment. This is not terribly effective, and I might just scrap it altogether and use Dragonite instead.


Tyranitar @ Focus Sash
Ability: Sand Stream
Nature: Brave
EVs: 252 HP, 252 Atk, 4 SDef
-Crunch
-Rock Slide
-Low Kick
-Protect

Focus Sash lets it survive an attack, and will almost always stay intact thanks to Sand Stream. Low Kick is preferred over Superpower to avoid Attack drops so it doesn't have to switch out prematurely.


Scrafty @ Assault Vest / Sitrus Berry
Ability: Intimidate
Nature: Brave
EVs: 252 HP, 252 Atk, 4 SDef
-Drain Punch
-Knock Off
-Ice Punch
-Fake Out

Standard Scrafty. Focusing on survivability with Assault Vest / Sitrus seems good, but I'm not entirely sure.


Machamp @ Assault Vest / Life Orb / Expert Belt
Ability: No Guard
Nature: Brave
EVs: 252 HP, 252 Atk, 4 SDef
-Dynamic Punch
-Knock Off
-Ice Punch
-Stone Edge

Machamp is decent with Assault Vest, but Conkeldurr and Scrafty generally make better use of it. If it can't get the vest, it uses a boosting item decently.


Clawitzer @ Life Orb
Ability: Mega Launcher
Nature: Quiet
EVs: 252 HP, 252 SAtk, 4 SDef
-Aura Sphere
-Dark Pulse
-Water Pulse
-Ice Beam

Aura Sphere is a great attack, and Clawitzer is very strong - its main flaw is its rather high base 59 Speed. It's pretty much the "Mega Lucario of Trick Room".


Reuniclus @ Life Orb
Ability: Magic Guard
Nature: Quiet
EVs: 252 HP, 252 SAtk, 4 Def
-Psychic
-Energy Ball
-Shadow Ball
-Helping Hand

Reuniclus seems to suck for the most part. STAB Psychic is a powerful attack, but other than that it contributes very little. If it loses out on Life Orb due to item conflicts, it goes from mediocre to worse with a Regenerator Assault Vest sideboard that does very little.


Mawile @ Mawilite
Ability: Intimidate
Nature: Brave
EVs: 252 HP, 252 Atk, 4 SDef
-Iron Head
-Play Rough
-Sucker Punch
-Protect

Play Rough's inaccuracy hurts a lot, and Iron Head isn't half as good. It uses the Mega slot decently, but I'd rather have a Weakness Policy Explosion user or even Torkoal as a back-up to sweep faster.

Rolling this Pokémon causes a lot of item conflicts, as unlike all other Megas in the pool, Mawile's Mega Stone is non-negotiable. If I add any more Megas to the pool, it will probably be necessary to add a Mega slot or at least a restriction for problematic Megas like Mawile and Ampharos to avoid the most disastrous conflicts.


Camerupt @ Cameruptite / Choice Specs
Ability: Solid Rock
Nature: Quiet
EVs: 252 HP, 252 SAtk, 4 SDef
-Eruption
-Earth Power
-Flamethrower
-Protect

Eruption is a good move. If the Mega slot is taken, Specs Camerupt can be run as a faster, harder-hitting Specs Torkoal in the back.


Slowbro @ Slowbronite
Ability: Own Tempo
Nature: Sassy
EVs: 252 HP, 4 SAtk, 252 SDef
-Scald
-Iron Defense
-Calm Mind
-Rest

Mega Slowbro come in after an ally is KO'd and Trick Room is active into a side position; from there, it can begin boosting with the Speed advantage and hopefully reach enough boosts to become invincible before Trick Room runs out while allies create space. If succesful, it has the potential to sweep 1v6 barring OHKO moves. Rest over Slack Off to avoid losing to Toxic.


Crawdaunt @ Choice Band
Ability: Adaptability
Nature: Brave
EVs: 252 HP, 252 Atk, 4 SDef
-Knock Off
-Waterfall
-Superpower
-Aqua Jet

Choiced back-up. Hits hard, but is a bit fast and not that great it locks into something other than Knock Off.


Rhydon @ Eviolite
Ability: Lightning Rod
Nature: Brave
EVs: 100 HP, 156 Atk, 252 SDef
-Drill Run
-Rock Slide
-Earthquake
-Protect

Rhydon is used over Rhyperior for Lightning Rod. Drill Run is accurate-ish and doesn't hit allies, and Megahorn isn't really missed. Having both Drill Run and EQ lets it always use a Ground STAB.

I intended to EV it with a spread of 108/156/0/0/244/0, but forgot about that when EV training and it ended up a bit off. I lifted the idea of cutting its Attack from a VGC report on Nugget Bridge and the intended spread is identical to that one (it simply drops Attack by 10 points, hitting a 185->187 Nature boost point) but for slightly different reasons: Rock Slide and Drill Run are both inaccurate and not that powerful, so prioritizing bulk and the ability to spam them for as long as possible over maximizing their (unimpressive) power could be worth it. I also wanted to differentiate it from Rhyperior (to be added to the pool), which has higher Attack and will likely maximize it and can utilize a boosting item or Wide Lens to take advantage of it.


Aegislash @ Life Orb / Leftovers
Ability: Stance Change
Nature: Brave
EVs: 252 HP, 252 Atk, 4 SDef
-King's Shield
-Iron Head
-Sacred Sword
-Shadow Sneak
I'm not convinced this is the way to go for Aegislash in a Trick Room team, but I had one so I threw it on.


Next, the full notes on all teams used during the streak. Close battles are also briefly described.
run02_01-10_roll

Rhydon
Tyranitar
Azumarill
Musharna
Volcarona
Staraptor

Lead with Musharna/Rhydon/Staraptor to possibly capitalize on Lightning Rod

Set of 10 was uneventful; the front-line was very capable, TR went up every time, and the back-ups saw almost no action.

---------

run02_11-20_roll

Camerupt
Slowbro
Volcarona
Staraptor
Musharna
Clawitzer

Lead with Musharna/Volcarona/Staraptor (double Rock weak, yay!); going with Mega Slowbro as a win condition; Specs on Camerupt since Slowbro holds the Mega Stone.

Mega Camerupt leading with Specs Slowbro would be an alternative, but Slowbro seems like a safer bet even at the cost of a weaker frontline.

Battle 17: Musharna flinched by Rock Slide. TR succeeds on Turn 2.

---------

run02_21-30_roll

Staraptor
Rhydon
Musharna
Sudowoodo
Camerupt
Reuniclus

Lead with Musharna/Sudowoodo/Rhydon to use Weakness Policy Explosion; Rhydon will have no trouble surviving it. Very weak to Water and nothing can switch into them; let's hope Explosion will kill them all!

---------

run02_31-40_roll

Ferrothorn
Slowbro
Crawdaunt
Musharna
Tyranitar
Azumarill

No great centers. Lead with Musharna/Tyranitar/Ferrothorn.

Tyranitar and Ferrothorn worked quite well. TR went up in every batttle.

---------

run02_41-50_roll

Torkoal
Musharna
Gyarados
Azumarill
Crawdaunt
Steelix

Lead with Musharna/Steelix/Gyarados. Steelix can EQ freely with Telepathy/Flying. Follow up with Specs Torkoal after Explosion.

Battle 43: Gothitelle4 uses Flatter on Musharna. Trick Room goes up on Turn 3.

Battle 44: Infernape4 uses Fake Out on Musharna. Trick Room goes up on Turn 2.

---------

run02_51-60_roll

Clawitzer
Salamence
Staraptor
Crawdaunt
Machamp
Cofagrigus

Lead with Cofagrigus/Salamence/Staraptor. This team looks like trash.

Assault Vest on Machamp since Choice Band and Life Orb are already taken.

---------

run02_61-70_roll

Scrafty
Torkoal
Musharna
Conkeldurr
Rhydon
Sudowoodo

Lead with Musharna/Sudowoodo/Rhydon.

TR went up in every battle; no complications.

---------

run02_71-80_roll

Reuniclus
Cofagrigus
Steelix
Eelektross
Azumarill
Scrafty

Lead with Cofagrigus/Steelix/Eelektross for Levitate. Giving Eelektross Protect over HP Ice to allow it to function as a lead.

With Azumarill taking Assault Vest, Scrafty holds Sitrus Berry; Reuniclus hold Life Orb; Eelektross gets Expert Belt due to a lack of options.

TR went up in every battle. Eelektross died to Explosion a couple of times, but it's a decent trade.

---------

run02_81-90_roll

Gyarados
Dragalge
Slowbro
Mawile
Ferrothorn
Cofagrigus

Lead with Cofagrigus/Mawile/Gyarados.

Slowbro runs Life Orb with an alternate Quiet 4-attack set due to Mawile taking up the Mega slot and Dragalge holding Specs.

TR went up in every battle.

---------

run02_91-100_roll

Torkoal
Conkeldurr
Cofagrigus
Slowbro
Volcarona
Gyarados

Lead with Cofagrigus/Gyarados/Volcarona.

Battle 96: Clawitzer4 KOs Cofagrigus on Turn 1. With a lucky match-up and favorable plays from the AI, the Trick Room squad wins with Mega Slowbro ensuring victory in the end, though it didn't end up being necessary. The battle video is listed in this post.

Battle 101: I accidentally played 11 battles instead of 10 with this team. As a result, the next set will be 9 battles long.

---------

run02_102-110_roll

Aegislash
Eelektross
Sudowoodo
Cofagrigus
Kecleon
Reuniclus

Lead with Cofagrigus/Sudowoodo/Kecleon. Kecleon turns into Ghost-type with Shadow Sneak to avoid Explosion.

Items: Reuniclus holds Life Orb, Eelektross gets Specs, Aegislash will make do with Leftovers.

Moves: tutored Low Kick and Knock Off on Kecleon to cover Explosion resistors. HP Ice on Eelektross over Protect, which was previously slashed to run it as a lead.

Battle 105: misplay against Damp Kingdra, getting Sudowoodo killed without doing anything. Luckily, the battle was recoverable.

Battle 107: misplay against Damp Poliwrath, getting both Sudowoodo and Kecleon killed.

Battle 108: Zoroark(disguised as Gigalith)/Walrein/Exeggutor frontline. Fake Out Walrein, Exeggutor cancels Trick Room on Turn 1, then Explodes. Sudowoodo down before it gets to attack. Luckily, Zoroark did not go for a Dark Pulse 2HKO on Cofagrigus, instead opting to use Focus Blast on Sudowoodo. Walrein also missed Fissure on Turn 2.

Battle 110: Exeggutor cancels Trick Room for two turns in a row. It eventually goes up on Turn 3.

This set got dangerous at many points, fueled by misplays and nasty opposition. Luckily, I made it through; there's an argument for trying to let the enemy set TR for you, but Exeggutor4 is such a Explosion/Wood Hammer-happy fellow that it's hard to predict its moves.

---------

run02_111-120_roll

Musharna
Dragalge
Staraptor
Volcarona
Crawdaunt
Eelektross

Lead with Musharna/Volcarona/Staraptor.

Battle 114: Bronzong4 cancels Trick Room and chooses to attack on the next turn, flinching Musharna. Musharna goes down without Trick Room going up and the battle is nearly lost. The battle video is uploaded in this post.

Battle 119: TR goes up, but misplays get a couple of mon killed; luckily, the last Pokémon was Metagross4

---------

run02_121-130_roll

Machamp
Mawile
Tyranitar
Musharna
Camerupt
Sudowoodo

Lead with Musharna/Sudowoodo/Tyranitar.

Items: Mawile @ Mawilite, Camerupt @ Choice Specs, Machamp @ Assault Vest

---------

run02_131-140_roll

Salamence
Torkoal
Gyarados
Reuniclus
Steelix
Cofagrigus

Lead with Cofagrigus/Steelix/Gyarados to spam Earthquake; Cofagrigus can afford to take a couple of hits.

---------

run02_141-150_roll

Cofagrigus
Mawile
Tyranitar
Machamp
Rhydon
Abomasnow

Lead with Cofagrigus/Tyranitar/Rhydon.

Items: Abomasnow @ Life Orb, Mawile @ Mawilite, Tyranitar @ Focus Sash

Abomasnow is stuck with an unoptimal item and no Mega Stone, but with both Mawile and Tyranitar needing theirs more, it can't be helped. With an internal weather conflict on top, it will probably be deadweight.

Battle 150: Clawitzer lead. I attack on Turn 1 and go for Trick Room, hoping it will use Aura Sphere on Tyranitar. It behaves as intended, breaking Tyranitar's Sash instead of KOing Cofagrigus.

Accidentally played 11 battles with this team; the next set will be 9 battles long to compensate.

---------

run02_152-160_roll

Tyranitar
Kecleon
Musharna
Reuniclus
Camerupt
Machamp

Lead with Musharna/Camerupt/Kecleon.

Moves: tutored Thunder Punch over Low Kick on Kecleon to better cover the Water-types that Camerupt fears, for a moveset of: Fake Out / Shadow Sneak / Thunder Punch / Knock Off.

---------

run02_161-170_roll

Camerupt
Musharna
Sudowoodo
Kecleon
Torkoal
Gyarados

Lead with Musharna/Sudowoodo/Kecleon.

The combination of Mega Camerupt and Specs Torkoal in the back should be immense.

Moves: Kecleon keeps Thunder Punch / Knock Off from the previous team, as this line-up also could use a little extra against Water-types.

Battle 164: very close battle against a runaway Zapdos2 with a very high Evasion rate. Mega Camerupt eventually delivers the killing blow with a miraculous Flamethrower crit on a +6 Evasion Zapdos that KOs it after the game was all but lost.

---------

run02_171-180_roll

Slowbro
Arcanine
Staraptor
Cofagrigus
Reuniclus
Abomasnow

First time I get to use Arcanine - the Growlithe was unevolved prior to this.

Lead with Cofagrigus/Abomasnow/Arcanine.

Items: Abomasnow @ Focus Sash, Slowbro @ Slowbronite - Slowbro is not very good without its Mega Stone, while Abomasnow is still okay

Battle 180: Brozong runs around canceling Trick Room. Hail boosts the enemy's Froslass. Abomasnow is garbage and Mega Slowbro gets frozen. With favorable luck, I was able to barely win. The battle video is uploaded.

---------

run02_181-190_roll

Musharna
Rhydon
Volcarona
Reuniclus
Eelektross
Gyarados

Lead with Musharna/Rhydon/Gyarados. Lightning Rod and Helping Hand Earthquake spam abound.

Items: Eelektross @ Choice Specs, Reuniclus @ Life Orb

Battle 190: Rain Dance used on Gyarados to help it break Blissey4 with Helping Hand Waterfall. It wasn't necessary, though, as Magic Guard Reuniclus eventually stall it out anyway.

---------

run02_191-200_roll

Torkoal
Ferrothorn
Musharna
Kecleon
Machamp
Volcarona

Lead with Musharna/Volcarona/Kecleon.

Moves: keeping Thunder Punch / Knock Off on Kecleon since this team also doesn't mind Electric-type coverage.

---------

run02_201-210_roll

Gyarados
Mawile
Cofagrigus
Sudowoodo
Clawitzer
Eelektross

Lead with Cofagrigus/Sudowoodo/Eelektross. Leading with Gyarados on the side could also work, but Eelektross looks nicer for now.

Moves: Protect over HP Ice on Eelektross to run it as a lead

Items: Clawitzer @ Life Orb, Eelektross @ Expert Belt - giving Clawitzer its best item takes priority over buffing up Eelektross which sucks anyway.

Battle 205: Aurorus4 KOs Cofagrigus on Turn 1. Thanks to awful opposition (Spiritomb4 center and Aurorus being out for a turn after using Hyper Beam), the battle is easily won without Trick Room.

Battle 207: Walrein4 KOs Cofagrigus on Turn 1. Clawitzer luckily avoids Fissure on Turn 2 and finishes it off with Aura Sphere after it had taken a friendly Earthquake. The rest of the enemy team gets taken down swiftly with Magmortar and Mamoswine dying on Turn 1, a triple KO on Turn 1, and finally Dragonite being focused with three attacks on Turn 3.

---------

run02_211-220_roll

Azumarill
Eelektross
Camerupt
Crawdaunt
Musharna
Volcarona

Lead with Musharna/Camerupt/Eelektross.

Items: Eelektross @ Life Orb, Azumarill @ Assault Vest, Crawdaunt @ Choice Band

Battle 212: Slowking + Slowbro lead pair, five Pokémon fall on Turn 2 to turn the battle into a 3v3

Battle 213: Walrein4 lead, targeted Camerupt which used Protect

Battle 214: Bronzong4 cancels TR on Turn 1, dies to Eruption on Turn 2 and TR goes up

---------

run02_221-230_roll

Camerupt
Abomasnow
Scrafty
Cofagrigus
Gyarados
Steelix

Lead with Cofagrigus/Steelix/Gyarados.

Items: Camerupt @ Cameruptite, Abomasnow @ Focus Sash, Scrafty @ Assault Vest

Battle 224: after a freeze and misplays, Scrafty sweeps 1v3. Battle video uploaded.

---------

run02_231-240_roll

Abomasnow
Musharna
Staraptor
Kecleon
Slowbro
Golem

Lead with Musharna/Golem/Staraptor to enable Earthquake. This is the first time I get to run Golem, after several rounds of Sudowoodo/Steelix already.

Items: Abomasnow @ Focus Sash, Slowbro @ Slowbronite, Kecleon @ Life Orb

Moves: Kecleon keeps Thunder Punch / Knock Off since it still fits.

Battle 235: Walrein4 uses Fissure on Musharna on Turn 1, it misses. The battle ended up being close anyway thanks to Bronzong4 accompanying the Walrein.

Golem did good work with Sucker Punch, but I'm not convinced SlideQuake wouldn't be better. Being walled entirely by Wide Guard would suck, though, and I'd have to breed a new Golem for it.

---------

run02_241-250_roll

Musharna
Kecleon
Camerupt
Clawitzer
Reuniclus
Mawile

Lead with Musharna/Mawile/Kecleon.

This team isn't that bad, but the item conflicts are ridiculous. Mawile taking the Mega Stone forces it into the lead over Camerupt, and Clawitzer's desire for Life Orb will make Reuniclus a little deadweight. At least Camerupt can function with Specs.

Items: Mawile @ Mawilite, Camerupt @ Choice Specs, Clawitzer @ Life Orb, Kecleon @ Expert Belt, Reuniclus @ Assault Vest

Ablities: Reuniclus swapped for an alternative one with Regenerator, since it will never suffer Life Orb damage.

Moves: Reuniclus's alternate set is Psychic / Shadow Ball / Grass Knot / Signal Beam. This looks like a set the AI would run. Kecleon keeps Thunder Punch / Knock Off to "cover" its "teammates".

Donphan4 appeared twice in this set, but luckily failed to activate its Quick Claw or hit Fissure.

---------

run02_251-260_roll

Abomasnow
Clawitzer
Cofagrigus
Scrafty
Kecleon
Conkeldurr

Lead with Cofagrigus/Abomasnow/Scrafty.

Items: Abomasnow @ Abomasite, Scrafty @ Sitrus Berry, Conkeldurr @ Assault Vest, Kecleon @ Expert Belt, Clawitzer @ Life Orb

Moves: Kecleon keeps Thunder Punch to roast some birds and Knock Off is a good move.

Battle 258: Clawitzer4 lead. Distrupted with Fake Out.

---------

run02_261-270_roll

Azumarill
Torkoal
Salamence
Musharna
Abomasnow
Crawdaunt

Lead with Musharna/Abomasnow/Salamence.

Battle 267: The loss. Bronzong4/Slowbro4 lead, I lose track of Trick Room and end up barely losing after repeated Confusion self-hits prevent CB Crawdaunt from getting off a miraculous comeback sweep with Aqua Jet.

---------


You can skip that mostly uninteresting wall of text and go straight to the battle videos:
Battle 42: DE4W-WWWW-WWWR-HDTT - Cofagrigus/Camerupt/Salamence/Volcarona/Machamp/Abomasnow vs. Chandelure/Zoroark/Yanmega/Vaporeon/Drifblim/Gardevoir

The loss of my first attempt at pseudo-random teams - I started at battle 41, so it happened on the second battle. Afterwards, I started this run from battle 1. Zoroark flinches Musharna nicely to prevent Trick Room, and it never goes up.


Battle 96: JGTW-WWWW-WWWR-H8SC - Cofagrigus/Gyarados/Volcarona/Slowbro/Torkoal/Conkeldurr vs. Clawitzer/Vaporeon/Seismitoad/Barbaracle/Tangrowth/Gerrothorn

Cofagrigus is KO'd by Clawitzer4 on Turn 1. The battle gets quite close.


Battle 114: 6VFG-WWWW-WWWR-H8ZX - Musharna/Volcarona/Staraptor/Crawdaunt/Dragalge/Eelektross vs. Dugtrio/Scizor/Bronzong/Steelix/Carracosta/Probopass

Bronzong cancels Trick Room and things get a little rough.


Battle 180: GREW-WWWW-WWWR-H8QW - Cofagrigus/Abomasnow/Arcanine/Staraptor/Reuniclus/Slowbro vs. Chandelure/Espeon/Bronzong/Gardevoir/Reuniclus/Froslass

Bronzong makes another apperance, and cancels some more Trick Room.


Battle 224: 9JAG-WWWW-WWWR-H8FS - Cofagrigus/Steelix/Gyarados/Abomasnow/Camerupt/Scrafty vs. Espeon/Glaceon/Flareon/Umbreon/Leafeon/Vaporeon

A very close battle against a Furisode Girl involving misplays and a freeze, with Scrafty sweeping three Eevees alone in the end.


Battle 267: E9ZW-WWWW-WWWR-H8DV - Musharna/Abomasnow/Salamence/Azumarill/Crawdaunt/Torkoal vs. Reuniclus/Slowbro/Bronzong/Gothitelle/Drifblim/Alakazam

Slowbro and Bronzong cancel Trick Room, and I lose track of it and lose as a result. Even so, a miraculous Aqua Jet sweep nearly happens with Crawdaunt to make a comeback, but a very effective Flatter from Gothitelle (combined with wrong target prioritization) spells the end after all the mistakes.


This was a very lucky streak, as the loss in the very second battle of the first run and the many close calls show. But there are improvements to be made to the pool that could improve the odds significantly.

As seen in the loss and a couple of other close battles, opposing Trick Room setters can get very obnoxious and result in unpleasant situations and frequent misplays with the AI being difficult to predict. Adding Imprison to setters, increasing the number of Fake Out users, and adding Prankster Taunt and other utilities to the pool could go a long way towards decreasing the risk of such match-ups, and also distrupt Clawitzer4/Aurorus4/Walrein4 from nuking TR setters. There are dozens of viable Pokémon to add, and I'll be sure to return for a third run at some point in the future.
It's freaking awesome that someone else has begun trying this. I'll comment on a few of your Pokes and some of the issues you've had with them, but first I want to point out an easy way to avoid having to reroll for a setter, which is what I use:

Since all pokes' "standard" sets are arranged in numerical order, I just set the parameters for the first roll to pick a number from 1-12. Slowbro is the earliest setter in the box, so it'd be #1, obviously, and Carbink happens to be #12. Depending on the roll, I just quickly skim the boxes and select the corresponding poke. Your description makes it sound like you roll the entire team at once the way I do, so it'll prevent most of those conflicts.

Edit: In hindsight, integrating that with the rest of your methods doesn't prevent the other five rolls from drawing the same setter or another one, so... please ignore me >_>

Individual poke comments:

-Abomasnow without a Mega Stone seems a little hard to justify, even for me, though it would still get a lot of mileage out of that Protect. Since you have an extremely narrow pool of setters, consider dropping Shadow Ball for Earthquake, since with Helping Hand it OHKOs most of the more benign fire types you'll see in abundance. I still fought a lot of Enteis and such in my 100-streak with the Snow team, but the slightly different method of handling them is simple.

-I haven't had a chance to use my Arcanine yet, but team-wide Intimidate has been extremely beneficial to my setters and discourages a lot of targeting from the likes of Heracross & Co. It helps to have your center poke be especially vulnerable to types like fighting, rock, and ground, because a poke like Arcanine will draw Armaldo4's Stone Edge and dissuade it from attempting an X-Scissor on Musharna, landing a crit. My Arcanine also has Helping Hand, but even with your fondness for Explosion I probably have more general use for that move. Its coverage moves have enough situational usage that I figured it could do well in spite of its base power. But, we'll see if and when it comes up.

Another thing I noticed with a lot of my Intimidate leads is that when the -1 drop takes OHKOs off the table, a lot of physical threats seem more keen on using STABless Earthquake for its spread damage to which the AI is seemingly attracted, which combined with the debuff deals shit damage and makes for smoother sailing.

-That Salamence sucks because it has no real power outside of the occasional HH Earthquake. Its coverage won't do much. The set I use for Mence looks extremely gimmicky (did you select a bunch of pokes because my own pool intrigued you? They certainly don't jump out as viable TR candidates, which is why they weren't a part of my original sets...) but is devastating if not killed its first turn. Mega Aggron with its unintuitive Hone Claws set blew me away with how effective and lasting it was that I decided to try it with Mence and the stronger physical attacks in its pool, and it did not disappoint. Intimidate is missed, but Moxie has given me a ton of OHKOs I wouldn't have had otherwise.

If that sort of gimmick doesn't sit well with you for the same reason inaccurate moves don't, then yeah, absolutely use a Dragonite instead. Or a Druddigon. I'm surprised you actually made a Kecleon but not a Druddigon, as Sheer Force LO has made it a more dominant sweeper than Dragonite ever has, and I roll both of them often.

-Clawitzer's real claim to fame is cockblocking the AI's own TR setters, which is why Clawitzer4 is also a real problem for you. There are only a few pokes run by Mara or a Psychic that Clawitzer can't OHKO guaranteed, and they take so much damage that their bulk is irrelevant. When you look at those speed tiers plus the things that outspeed it, its speed really doesn't hinder the team or otherwise get it killed by anything that isn't already an issue for any TR team, like Escavalier/Golem4.

I've usually been lucky when Clawitzer4 comes up as a lead and I've got a poke with a 4x weakness to one of its moves, as unlike other enemies with multiple KO options, Clawitzer seems to go for the highest BP on top of the kill potential. I wonder if it's related to their penchant for using Focus Blast/Frenzy Plant on a 3HP target when any of their drawback-less moves will do the same job and better.

-I don't know what to say about Reuniclus. In all my usage of it, it's chewed through just about everything and is statistically more powerful with its neutral attacks than the high-end megas I use like Ampharos, another favorite of mine. Of all pokes to let me down in a difficult battle, Reuniclus has never been one of them.

-For Aegislash, it takes some getting used to, but an all-out attacker and suicide set has done me a lot of good. Destiny Bond plus those defenses after it hits something will often draw offense, and it's a magnet for Sucker Punch, which will not only fail but allow you to attack freely the next turn and kill them if they attempt it again, or continue slaughtering if you don't.

I also run mixed for Aegislash since its Shadow Ball and Iron Head are handy. One of my Aegis knows Head Smash, which actually gets more use than you think (mostly against things like Volcarona.) I see King's Shield as being useful or incredibly worthless. Neuter Flare Blitz users while your teammate puts them into KO range of Shadow Ball, and pokes that'll be a tad too bulky to OHKO with Sacred Sword, like Bouffalant. It also blocks Fling, which pops up just enough to be relevant. Having said that, against things like Bouffalant or bulky pokes with nasty surprises like Custap berries, if they come in clean as a check to Aegislash, I often found it more useful to bait the Payback and let it kill me, offing them simultaneously with DB.

Fun stuff! My own streak hasn't failed yet, and while I haven't settled on a reliable team to carry me to 200, the past several teams have been really synergetic (some to my surprise) and fun to use. RNG has been kind to me.
 
Last edited:

turskain

activated its Quick Claw!
is a Community Contributor Alumnus
It's freaking awesome that someone else has begun trying this. I'll comment on a few of your Pokes and some of the issues you've had with them, but first I want to point out an easy way to avoid having to reroll for a setter, which is what I use:

Since all pokes' "standard" sets are arranged in numerical order, I just set the parameters for the first roll to pick a number from 1-12. Slowbro is the earliest setter in the box, so it'd be #1, obviously, and Carbink happens to be #12. Depending on the roll, I just quickly skim the boxes and select the corresponding poke. Your description makes it sound like you roll the entire team at once the way I do, so it'll prevent most of those conflicts.

Individual poke comments:

-Abomasnow without a Mega Stone seems a little hard to justify, even for me, though it would still get a lot of mileage out of that Protect. Since you have an extremely narrow pool of setters, consider dropping Shadow Ball for Earthquake, since with Helping Hand it OHKOs most of the more benign fire types you'll see in abundance. I still fought a lot of Enteis and such in my 100-streak with the Snow team, but the slightly different method of handling them is simple.

-I haven't had a chance to use my Arcanine yet, but team-wide Intimidate has been extremely beneficial to my setters and discourages a lot of targeting from the likes of Heracross & Co. It helps to have your center poke be especially vulnerable to types like fighting, rock, and ground, because a poke like Arcanine will draw Armaldo4's Stone Edge and dissuade it from attempting an X-Scissor on Musharna, landing a crit. My Arcanine also has Helping Hand, but even with your fondness for Explosion I probably have more general use for that move. Its coverage moves have enough situational usage that I figured it could do well in spite of its base power. But, we'll see if and when it comes up.

-That Salamence sucks because it has no real power outside of the occasional HH Earthquake. Its coverage won't do much. The set I use for Mence looks extremely gimmicky (did you select a bunch of pokes because my own pool intrigued you? They certainly don't jump out as viable TR candidates, which is why they weren't a part of my original sets...) but is devastating if not killed its first turn. Mega Aggron with its unintuitive Hone Claws set blew me away with how effective and lasting it was that I decided to try it with Mence and the stronger physical attacks in its pool, and it did not disappoint. Intimidate is missed, but Moxie has given me a ton of OHKOs I wouldn't have had otherwise.

-If that sort of gimmick doesn't sit well with you for the same reason inaccurate moves don't, then yeah, absolutely use a Dragonite instead. Or a Druddigon. I'm surprised you actually made a Kecleon but not a Druddigon, as Sheer Force LO has made it a more dominant sweeper than Dragonite ever has, and I roll both of them often.

-Clawitzer's real claim to fame is cockblocking the AI's own TR setters, which is why Clawitzer4 is also a real problem for you. There are only a few pokes run by Mara or a Psychic that Clawitzer can't OHKO guaranteed, and they take so much damage that their bulk is irrelevant. When you look at those speed tiers plus the things that outspeed it, its speed really doesn't hinder the team or otherwise get it killed by anything that isn't already an issue for any TR team, like Escavalier/Golem4.

-I don't know what to say about Reuniclus. In all my usage of it, it's chewed through just about everything and is statistically more powerful with its neutral attacks than the high-end megas I use like Ampharos, another favorite of mine. Of all pokes to let me down in a difficult battle, Reuniclus has never been one of them.

-For Aegislash, it takes some getting used to, but an all-out attacker and suicide set has done me a lot of good. Destiny Bond plus those defenses after it hits something will often draw offense, and it's a magnet for Sucker Punch, which will not only fail but allow you to attack freely the next turn and kill them if they attempt it again, or continue slaughtering if you don't.

I also run mixed for Aegislash since its Shadow Ball and Iron Head are handy. One of my Aegis knows Head Smash, which actually gets more use than you think (mostly against things like Volcarona.) I see King's Shield as being useful or incredibly worthless. Neuter Flare Blitz users while your teammate puts them into KO range of Shadow Ball, and pokes that'll be a tad too bulky to OHKO with Sacred Sword, like Bouffalant. It also blocks Fling, which pops up just enough to be relevant. Having said that, against things like Bouffalant or bulky pokes with nasty surprises like Custap berries, if they come in clean as a check to Aegislash, I often found it more useful to bait the Payback and let it kill me, offing them simultaneously with DB.

Fun stuff! My own streak hasn't failed yet, and while I haven't settled on a reliable team to carry me to 200, the past several teams have been really synergetic (some to my surprise) and fun to use. RNG has been kind to me.
I roll by clicking a button on a list of Pokémon repeatedly until a setter appears in the result, which takes around 10-15 seconds. I'll definitely have to complicate the roll slightly in the future if I add Pranksters and other things you don't want more than one of on a team; compartmentalizing the "one only" stuff like you do seems appropriate, though for non-essential harmful duplicates it would only come in play if rolling too many of them (rather than being a static setter / Mega slot) - could also have a compartment like that for weather setters to avoid dumb wars.

Abomasnow seems hard to justify even with a Mega Stone, to be fair. Focus Sash seems marginally more reliable - even with Mega Evolution, Blizzard's power isn't enough and Sash lets it bait better as you say. Hail is also a dreadful weather that you never really want to have, activating abilities like Snow Cloak and wearing down your own Pokémon while boosting the AI's Blizzard on top. EQ could be useful, but without STAB it doesn't look all that impressive... maybe with a 252 Atk / 252 SAtk set, but even so my faith in the abominable snowman is low.

I bred Salamence because of Intimidate. Most of the Power Item holders I have were picked just for that. Reckless Staraptor has been great and Gyarados has been good, so I'd keep them, but Salamence and Arcanine seem pretty bad outside Intimidate, so I might scrap them.

Kecleon is there for Fake Out - while its physical bulk and typing are bad compared to others, the wide pool of STAB coverage moves lets it plug offensive holes half-decently. I've also considered a Jolly Greninja with Mat Block / Shadow Sneak / Water Shuriken to guarantee the TR setter + center position's safety with Mat Block and then attack with priority, or just get it killed as soon as possible to get it out of the way.


The preliminary "stuff to add" list for now is:

1) Imprison on both Musharna and Cofagrigus - there's moveslots to burn for Cofagrigus, and Musharna can probably afford to drop Psychic or Hidden Power
2) Eviolite Dusclops for a third setter that retains Explosion compatibility
3) Hitmontop, Hariyama, Meowstic, Liepard - Fake Out and strongmons in the first two and Prankster utility with Fake Out as reliable distruption for the latter two
4) Octillery for some Water Spout action, and with it the possibility of slashing Rain Dance on occasion
5) More Weakness Policy Explosion: Gigalith and Regirock (Clear Body to prevent Intimidate and gigantic enough bulk to have reliability even without Sturdy in a lot of cases) will definitely be making an appereance in the role, with a possibility of Snorlax, Ferrothorn, Registeel and maybe even Boldore and Graveler joining in (hey, Sudowoodo works great; why not NFEs with similar BST?). Explosion is by far my favorite approach to the center, as you noticed.
6) A bunch of non-specific things like Sylveon, Rhyperior, Marowak, Bronzong (guess the move) and more

I wish Avalugg learned Explosion. It seems like it would fit its brand of shittiness with all the other mons sharing similar qualities and it could be a nice change of pace with all the Rock-types, but it doesn't get the move.
 
Been battling all day and I finally got the Starf Berry. Do you know what that means... I got my 200 wins in Super singles :D
Nothing changed from the post I made yesterday. The Pokemon items, moves and so on are all exactly the same so i'm not going to go over them again.

Heres the code for match number 200:
HYWW-WWWW-WWWS-3DAA

An easy win. Was expecting a Veteran trainer for every 100 battles, but a pokemon ranger... i guess the trainers where just random then.

I did have a scary near miss, which could of cost me then run, against a Veteran on match 188, which I did save. the code is:
JKDW-WWWW-WWWS-3D55

In this match, the lead Regirock, used explosion on the first turn after I had switched into Cloyster after using Entrainment, and going for Protect, meaning I had no set up. this meant that the 2nd Pokemon, Moltres outsped me and used over heat, braking my focus sash. Rock blast hit. had a few near misses where rock blast missed but thankfully not here. The last Pokemon was Suicune. I go for shell smash for some reason. no idea why, as surf kos me. I thought I would get protect or something. when Durant comes back in.... it uses protect. I must wait another 2 turns before I get the chance to use Entrainment again, and Durant dies with his job succeeded.
With this Suicune having truant I have this match won. I send out Altaria, but what do I do... I go for protect, when its loafing around and go for dragon dance right after, right when it uses BLIZZARD.

My heart literately froze as I realized the mishap I had made, not only had I been using the moves in the wrong order but I didn't mega evolve Altaria to remove my X4 weakness to ice. But my eyes where wide in shock as I saw the message "The attack missed" appear on my screen. I jumped for joy, and mega'ed right away and used return and protected the turn after. The second return koed it. That's what I call a close shave. The match would of gone even more horrible if that regirock had used explosion on Durant, that's for sure.

EDIT. My run has come to a halt at match 205. I lost to a Veteran who's lead Thunderus with Taunt was faster than my Durant. The whole match was a disaster.

so turn 1. Prankster taunt on my Durant. Nothing I can do. switch to Altaria.
take a discharge. protect and mega evolve. return reduces its hp to 1. and it kos me shortly afterwards.
Durant comes in I attack, and it taunts again. Thunderus is dead.
Cobalion comes out. psych up. Switch to Cloyster. Switch back to Durant. Cobalion uses swagger on me. I hit myself in confusion, it uses psych up as I loaf around and I hit myself in confusion again. the match is pretty much lost now. Durant dies.
Cloyster uses Protect and it uses substitute. Then uses swagger on me, as I try a shell smash, but I get hit by confusion. I try another protect but hit myself again and that's the game.

4 confusion hits.... REALLY GAME
the code for this REALLY HAXY match is RTRG-WWWW-WWWS-462Z

I could of let Durant die early and given myself a free switch into Altaria, who could then tank the first discharge hit, heck even set up 1 dance. if it was going to keep spamming discharge for days. this game really hates me.

makes me want to use a Pokemon that can counter Thunderus really well, like a ground type, or my own Prankster pokemon, to prevent taunt
 
Last edited:
Abomasnow seems hard to justify even with a Mega Stone, to be fair. Focus Sash seems marginally more reliable - even with Mega Evolution, Blizzard's power isn't enough and Sash lets it bait better as you say. Hail is also a dreadful weather that you never really want to have, activating abilities like Snow Cloak and wearing down your own Pokémon while boosting the AI's Blizzard on top. EQ could be useful, but without STAB it doesn't look all that impressive... maybe with a 252 Atk / 252 SAtk set, but even so my faith in the abominable snowman is low.
It doesn't help that the only instance in your streak that I can see which included Abomasite Abomasnow plus Musharna in a lead combo was the one you lost, and a mere seven battles. The other instances, you had it with Cofagrigus and holding a Focus Sash at times. It is indeed difficult to appreciate a poke when it didn't have enough of a chance to be played to its strengths.

Whether you saw my compilation of Abomasnow team battles is pretty moot since I didn't save battles that consisted of Turn 2 + 3 HH Blizzard sweeps, but the majority of battles played out that way. Hail is by and far the least desireable weather but M-A made an extremely strong and reliable core. I couldn't have asked for better support on part of Azumarill and Chandelure, though Azumarill deserves far more credit between the two. To be sure, HH Water Spout in the rain is going to hit much harder, but the problems a core like that would face is so different to Abomasnow that the two aren't very comparable.

Earthquake was used only against enemies like Probopass and of course fire types. With Helping Hand and only 4 Atk EVs, the damage was more than enough for OHKOs (Darmanitan, Ninetales, Chandelure, Heatran to name a few) and Hail damage put the likes of Sturdy Probo to bed. But then again, I have three Abomasnows, and I'm fairly certain you do not. I used one with Earthquake because I rolled Musharna and had HH at my disposal. I also had absolutely no intention of using Abomasnow without the Abomasite, which sacrifices a ridiculous amount of offensive power.

Your mega predicament is the reason they not only have their own roll but aren't mixed with the regular abusers. The mega-capable pokes that chill with the abusers run different sets also, such as all-out offensive Scizor.
 
I did have a scary near miss, which could of cost me then run, against a Veteran on match 188, which I did save. the code is:
JKDW-WWWW-WWWS-3D55

In this match, the lead Regirock, used explosion on the first turn after I had switched into Cloyster after using Entrainment, and going for Protect, meaning I had no set up. this meant that the 2nd Pokemon, Moltres outsped me and used over heat, braking my focus sash. Rock blast hit. had a few near misses where rock blast missed but thankfully not here. The last Pokemon was Suicune. I go for shell smash for some reason. no idea why, as surf kos me. I thought I would get protect or something. when Durant comes back in.... it uses protect. I must wait another 2 turns before I get the chance to use Entrainment again, and Durant dies with his job succeeded.
With this Suicune having truant I have this match won. I send out Altaria, but what do I do... I go for protect, when its loafing around and go for dragon dance right after, right when it uses BLIZZARD.

My heart literately froze as I realized the mishap I had made, not only had I been using the moves in the wrong order but I didn't mega evolve Altaria to remove my X4 weakness to ice. But my eyes where wide in shock as I saw the message "The attack missed" appear on my screen. I jumped for joy, and mega'ed right away and used return and protected the turn after. The second return koed it. That's what I call a close shave. The match would of gone even more horrible if that regirock had used explosion on Durant, that's for sure.
Yeah, you run into a lot of patience-trying situations like that with these kinds of teams. There are definitely a lot of times when +0 Cloyster can easily go 1-on-2 if the lead takes itself out, but the safest play is usually going to be leaving Cloyster in to die or sacrificing your 3rd team member so Durant can come in if the 2nd Pokemon is something it can definitely use Entrainment on. As that situation showed, you don't want to risk the 3rd member being something trickier - if Suicune got a critical hit on Durant the turn after it used Protect, you'd have been in big trouble.

All Durant teams have this problem to some extent (as seen in the discussion a few pages back about Emboar coming in 2nd if Drapion doesn't have good boosts), but the nice thing about Cloyster is that between its numerous weaknesses, Icicle Spear allowing you to break through Subs, and its low Special Defense inviting a lot of things to go for the KO, there are fewer things willing or able to set up on it in a way that'd prevent you from going back to Durant.
 
I finally got the Multi battle trophy with Blaze Typhlosion and Steadfast Lucario after 3 losses to Terricon between 40 and 50 with a mega khan/salamence team, a loss due to bright power zapdos with a aron/salamence team, and 2 losses pre 40 with a gredinja/mence team due to being flinched by areodactly, once by rock slide and the other by thunderfang.

I finaly ended up deciding to use a different team for battles 1-39 and 40-50 because Kahn/mence loses to terricon and gredija/mence loses to aerodactly.

team 1-39

Mega Kangashkan
@ kangashkanite
adamant
4/252/0/0/0/252
-return
-crunch
-sucker punch
-power up punch

Crunch is to status using ghosts

Salamence
@ Focus sash
adamant
4/252/0/0/0/252
-dragon dance
-dragon claw
-crunch
-earthquake

I used mence because Lucario likes to use EQ and my parterns team is ground weak so I needed a ground imune poke. My current wifi is 3DS incompatable and I cant breed Dninte with E-speed or multiscale ATM, nor do I have access to gale wings Talonflame, lati@s, or gengar (trade to evolve). I considered using a CB set with rock tomb instead of dd but didn't want to lock myself in. I honestly couldt think of a good hold item, sash get no use.

team 40+
Gredinja * Ninja
@ Focus sash
timid
4/0/0/252/0/252
-mat block
-ice beam
-grass knot
-scald

The idea here is mat block gives typhosion a free eruption and Ninja can hit most things that resist fire pretty well

Salamence
@ Yache berry
adamant
4/252/0/0/0/252
-dragon dance
-dragon claw
-crunch
-earthquake

Because Ninja has the sash.

Battle 50 went smoothly. Here in a turn by turn summary


Turn 1
they send out Landorus and Virizion
Landorus hits Ninja with focus blast. sash activates.
Typhosion uses eruption and knocks Virizion into the red and deal irrelivent damage to Landorus.
Ninja uses Ice beam and K.O.s Landorus. Landorus outspeeds us and therefore must die.
Virizion uses sacred sword and K.O.s Ninja. You have done well and your scarafice will be remembered, Ninja.

Turn 2
Thundorus replaces Landorus
Typhlosion uses eruption and K.O.s Virizion.
Thundorus uses wild charge and takes Typhosion into the red.
Salamence uses dragon dance. I wanted to outspeed Thundorus next turn.

Turn 3
Latias replaces Virizion. O hell no. You're not hitting mence with dragon pulse.
Typhosion wins the speed ties and eruption hits both pokes for about 1 damage.
Salamence uses dragon claw. I get VERY lucky and hit with dragon claw (only 90% chance. This is the mansion we are talking about.) Latias faints.
Thundorus uses wild charge and K.O.s Typhlosion. You have done well and your scarafice will be remembered, Typhlosion.

Turn 4
Salamence uses dragon claw and K.O.s Thundorus.

GG.

I will upload proof pics later and the battle video when I go back to college. I plan to continues the streak and submit it to the leader board and then I am done with multies with AI partner probably forever. Seriously I'll buy another 3DS and complete the multies by my self before doing this again.
 
Did some damage calcs with Mega Altaria VS Thundurus:
252+ Atk Pixilate Mega Altaria Return vs. 0 HP / 0 Def Thundurus: 285-336 (95.3 - 112.3%) -- 68.8% chance to OHKO

And after a Dragon Dance:
+1 252+ Atk Pixilate Mega Altaria Return vs. 0 HP / 0 Def Thundurus: 426-502 (142.4 - 167.8%) -- guaranteed OHKO

In my last match, I could of gone for a dance, and not only would I of ouspeed Thundurus, but I would of had a guaranteed OHKO.
the fact that I attacked unboosted and got the 31.2% failed OHKO was a big blow for me.

If Thundurus had used Taunt on the switch in, all the better, since...

252 SpA Magnet Thundurus Discharge vs. 4 HP / 0 SpD Mega Altaria: 73-87 (25 - 29.7%) -- guaranteed 4HKO

So in Hindsight i could of potentially won this match. Mega Altaria would of Koed Thundurus, and done over half of Cobalions HP. and then depending on what moves it used, let Altaria die. If it used sub, I would of then attempted to brake the sub with Cloysters Icicle Spear, and switch back to Durant to set up an Entrainment on the Cresselia, who i never got to fight, but its there in the battle replay preview.
 

turskain

activated its Quick Claw!
is a Community Contributor Alumnus
Posting an XY Triples streak update: 5500 ongoing wins.

Teams used:
Lucario/Greninja for Triples (#0001 - #3303)
Greninja/Charizard for Triples V4 (#3304 - #3820)
Mega Gardevoir with Triple Fake Out (#3821 - #4540)

Greninja/Charizard for Triples V5/V6 (#4541 - #4777)
Mega Gardevoir with Triple Fake Out V2 (#4778 - #5000)

Greninja/Charizard for Triples V6 (#5001 - #5060)
Lucario/Greninja for Triples (#5061 - #5120)
Greninja/Charizard for Triples V6 (#5121 - #5200)
Mega Gardevoir with Triple Fake Out V2 (#5201 - #5300)
Lucario/Greninja for Triples (#5301 - #5500)

Total win counts:
3563 wins using Lucario/Greninja for Triples
894 wins using Greninja/Charizard for Triples
1043 wins using Mega Gardevoir with Triple Fake Out

I'll try to keep track of what's uploaded.

Battle video: #1665 - LX8W-WWWW-WWWA-4Q8T vs. Alakazam/Trevenant/Dusknoir/Mismagius/Claydol/Spiritomb

Battle video: #3805 - LJRW-WWWW-WWWA-CX3M vs. Latias/Regigigas/Terrakion/Raikou/Zapdos/Thundurus

Battle video: #4000 - 92WW-WWWW-WWWA-CX39 vs. Talonflame/Volcarona/Golem/Chesnaught/Carracosta/Typhlosion

Battle video: #4694 - G99G-WWWW-WWWY-47UC vs. Registeel/Landorus/Latias/Entei/Heatran/Terrakion

Battle video: #5000 - UCMW-WWWW-WWWA-KYM6 vs. Avalugg/Barbaracle/Abomasnow/Cryogonal/Porygon2/Vaporeon

Battle video: #5500 - NL8W-WWWW-WWWS-CZHM vs. Luxray/Gliscor/Altaria/Braviary/Skarmory/Hawlucha


The last 500 battles had a bit of shuffling, followed by a return to Lucario/Greninja, which I intend to stick for now. I also tweaked the team very slightly.


Lucario/Greninja for Triples (final)
Lucario's 4 HP EVs moved to 4 Def. Ability to Inner Focus. Same as in Doubles.

Rotom-W replaced with a flawless 31/0/30/30/31/31 one bred in White. 4 SDef EVs added for one extra point of SDef as a result of the perfect Speed IV, along with an Attack IV of 0 to minimize confusion self-hit damage.

Greninja from 12 HP to 4/4/4. Same as in Doubles.

Talonflame unchanged.

Garchomp's EV spread changed from 4/252/0/0/0/252 to 12/236/4/0/4/252.

Scizor unchanged.
Lucario @ Lucarionite ** Zica Charger
Nature: Timid
EVs: 4 Def, 252 SAtk, 252 Spe
Ability: Inner Focus
-Aura Sphere
-Flash Cannon
-Nasty Plot
-Protect

Rotom-W @ Choice Specs ** Mega Pulse
Nature: Modest
IVs: 31/0/30/30/31/31
EVs: 172 HP, 120 SAtk, 4 SDef, 212 Spe
Stats: 147/76/127/154/127/133
Ability: Levitate
-Thunderbolt
-Hidden Power [Water]
-Discharge
-Volt Switch

Greninja @ Focus Sash ** Zinglon
Nature: Timid
EVs: 4 HP, 4 Def, 252 SAtk, 4 SDef, 244 Spe
Ability: Protean
-Ice Beam
-Grass Knot
-Dark Pulse
-Mat Block

Talonflame @ Sharp Beak ** U-Ship
Nature: Adamant
EVs: 252 HP, 252 Atk, 4 SDef
Ability: Gale Wings
-Brave Bird
-Flare Blitz
-Tailwind
-Protect

Garchomp @ Life Orb ** SuperCarrot
Nature: Jolly
EVs: 12 HP, 236 Atk, 4 Def, 4 SDef, 252 Spe
Ability: Rough Skin
-Dragon Claw
-Earthquake
-Swords Dance
-Protect

Scizor @ Choice Band ** Camanis
Nature: Adamant
EVs: 252 HP, 164 Atk, 4 Def, 44 SDef, 44 Spe
Ability: Technician
-Bullet Punch
-U-Turn
-Superpower
-Quick Attack
The changes are very minor.

Lucario survives Aerodactyl4 EQ 100% of the time with 4 Def, and Inner Focus comes into play even less in Triples.

Rotom-W has one more point in SDef, and minimum Attack helps it survive if it gets Confused before it can run off wit Volt Switch.

Greninja has marginally more bulk.

Garchomp's change cuts Attack by two points to gain one point each in HP, Def and SDef. This would increase the odds of winning a battle like #3186 that comes down to Garchomp's survival by a 1/16th or 2/16th margin at best, while not losing out on KOs I'm interested in. Most notably, Tyrantrum4 is KO'd 15/16 of the time with 252 Attack, and 13/16 of the time with 236; since it is not a threat to this team, I'm fine with that. Gengar may also survive.


Some calcs:

252 Atk Choice Band Aerodactyl Earthquake vs. 0 HP / 4 Def Mega Lucario: 122-144 (84.1 - 99.3%)

252+ Atk Lickilicky Explosion vs. 172 HP / 0 Def Rotom-W: 124-147 (84.3 - 100%) -- 6.3% chance to OHKO
252+ SpA Typhlosion Solar Beam vs. 172 HP / 4 SpD Rotom-W: 126-150 (85.7 - 102%) -- 12.5% chance to OHKO
252 Atk Virizion Leaf Blade vs. 172 HP / 0 Def Rotom-W: 116-138 (78.9 - 93.8%)

0 SpA Milotic Ice Beam vs. 12 HP / 4 SpD Garchomp: 156-184 (84.3 - 99.4%)
0 SpA Slowbro Blizzard vs. 12 HP / 4 SpD Garchomp: 140-168 (75.6 - 90.8%)

0 SpA Zapdos Heat Wave vs. 252 HP / 44 SpD Scizor: 148-176 (83.6 - 99.4%)
120+ SpA Choice Specs Rotom-W Discharge vs. 252 HP / 44 SpD Scizor: 73-87 (41.2 - 49.1%)
The threat list is the same as before, but with some new comments and ordered by threat level.


Regice4 is the single largest threat for this team by a huge margin, and the only one that could be considered a flaw. With STAB Blizzard, it can't be ignored, and its massive special bulk lets it shrug off nearly any special attack. When it appears, it will basically always cripple Lucario, Greninja, or both of those two with Thunder Wave and prevent Garchomp from switching in its vicinity.

The good thing is that Regice4 is rare, and doesn't force Protect/switch paranoia like Scarf sets. With 6-Pokémon teams in Super Triples, the chance of encountering a particular Set3-4 Veteran Pokémon is around 0.45% for each battle; or 9 times out of 2000 battles. In Super Doubles, you will on average meet a particular Set3-4 Veteran Pokémon 3 times out of 1000 battles. Regice4 is also not as much of a problem as a back-up (especially if Lucario is at +2 when it comes in), so you could slash those odds in half for it in particular to discount the cases where the AI does not lead with it.


Entei3 and Heatran4 (the Choice Scarf sets) force Lucario out while causing a lot of grief with Eruption and Magma Storm. They also punish Scizor's Choice Band. Unlike Regice4 which excels in the lead position, these guys usually perform best when the AI keeps them hidden and forces switches, possibly even nuking Garchomp with Dragon Pulse in Heatran4's case. It's no coincidence that the extremely close #3186 simultaneously featured a Regice4 lead and a Heatran4 back-up, with "the only Veteran set that OHKOes Rotom-W" Latios3 and "good luck with that Scizor you've got there" Zapdos2.

The other Scarfed Fire-types are Darmanitan4, Charizard3, and the rare Typhlosion3. Aside from Typhlosion3 which is neutralized by virtue of its poor teammates, they are easily killed off in Darmanitan4's case and not very damaging in Charizard3's case.


Luxray4 and Zebstrika4 use Thunder Wave. While they are far less threatening than Regice4, they're the most common paralysis-inducing threats and can cripple Lucario or Greninja easily while being difficult to kill before they do so with high bulk on Luxray, and Focus Sash with high Speed on Zebstrika. Zebstrika may also jab Garchomp with Me First Dragon Claw, so stick to Earthquake when facing it to let it hit its allies instead.


Aura Sphere is good against Lax Incense and Brightpowder and most other forms of evasion hax. But not against Latias1, Latios1 and Zapdos2, as they resist Fighting and have great bulk while dodging attacks with their hax items, and Roost/Recover to add insult to the injury. Garchomp does well against Zapdos and outspeeds Lati@s1, but Static, Lax Incense, Bright Powder and Heat Wave burns may throw a wrench in that; Swords Dance is preferred against Zapdos2 to OHKO it 9/16 of the time (guaranteed with any prior damage) to avoid Static and minimize the amount of times it may evade a hit.

Latios3 and Latias3 are the only two sets Veterans run that can OHKO Rotom-W without a crit. Mat Block works against them, but they can take you by surprise like in #3186.


Crobat4 and Altaria4 in the left-side position, choosing Hypnosis/Sing multiple times to put multiple Pokémon to sleep.

Crobat4 is usually just an annoyance that distrupts Mat Block, since it is OHKO'd by both Rotom-W and Greninja and usually just wastes its time with Taunt. But in the left-side position, if it uses Hypnosis on Rotom-W, it avoids getting KO'd and keep using it on Lucario and others.

Fortunately, it needs considerable luck to do this, as usually it uses Taunt and when it uses Hypnosis, it seldom goes for it twice - and the move is very inaccurate to boot.

Altaria is similar to Crobat in that in the left-side position, it may sometimes use Sing multiple times to take out both Rotom-W and Lucario. Since it is often ignored because of its bulk and low influence outside Sing, it gets more opportunities to use it.

Incidentally, the otherwise unexciting battle 5500 featured Altaria4 putting Rotom-W to sleep for three turns and taking down Lucario with Sing some time after.


Finally, a brief anecdote about the Shift command. After playing other Triples teams for some time, I've realized that it has more utility on Lucario/Greninja than I had thought. For example:

-Shifting Talonflame out of the center with Greninja - particularly effective if Greninja is Fighting-type after using Mat Block, and resists a Rock attack targeted at Talonflame. Grass-typing to resist Electric and Water also works.

-Shifting Rotom-W with Garchomp when it is locked into Discharge - I mentioned it before, but it allows the drawbacks of Discharge to be negated with less cost than a switch in some cases.

-Shifting Scizor out of a Fire attack - it may not have Protect, but if you're got a Greninja, Talonflame or Garchomp that can outspeed the offender and tank a hit, you can still keep Scizor in with Shift.

Of course, a lot of the time you could also just attack to take them out. Using Shift defensively is mostly a possible option when the threat is diagonally opposite to the Shift user - a Stone Edge user that Lucario cannot KO in the left-side position threatening Talonflame while Greninja is on the right, for example.
 
Last edited:
I often need to remind myself that Shift is a viable option in dire situations, especially since I've gone back and watched replays of some losses that could have been easily salvaged had I done so.

And ever since the mechanics change of Explosion in Gen V, I'd been pretty heavily disuaded from using Explosion in the subway, but after running some calcs with Helping Hand and without, always including Weakness Policy (since a number of my pokes that already use it as their main item can detonate) and, wow. You've made a believer of me, turskain.

Having said that, my distaste for including Protect on just about everything basically means that very few pokes will be rebred/revamped to accommodate it, such as Gigalith and Golem. Maybe Ferrothorn, since sometimes it pops up on teams with little need for Gravity. This also gives me incentive to catch a decent Regirock in OR.
 
I have a request, if it's not much of an issue. Does anybody have a replay video against Morgan and Dana to share?

Thanks in advance, I could only find XY ones but not ORAS? (Or those work in ORAS as well?)
 

turskain

activated its Quick Claw!
is a Community Contributor Alumnus
I have a request, if it's not much of an issue. Does anybody have a replay video against Morgan and Dana to share?

Thanks in advance, I could only find XY ones but not ORAS? (Or those work in ORAS as well?)
The opposition is identical in ORAS (including the Chatelaines) aside from a few trainer names, so the XY ones should work fine. Consider that they may lead with different Pokémon than in the battle video, howewer.

You can play XY Maison videos in ORAS, but playing ORAS Maison videos in XY is not possible (the search function tells you that the video can't be played back).


Regarding the probability of HA, I don't know of any research on the matter - all abilities being equally likely with HAs being possible seems like a reasonable assumption to make, but confirming if that's the case couldn't hurt.


ReptoAbysmal, Weakness Policy is indeed the factor that makes using Explosion as a main move viable again, in addition to it hitting three Pokémon in Triples instead of just two with six Pokémon on your team making yours more expendable on top. With +2, it's pretty much as powerful as it was prior to GenV.
 

Users Who Are Viewing This Thread (Users: 1, Guests: 7)

Top