
MADRE TERRA - AN SANDSTORM TEAM
Quick Glance


Introduction
Once exiled to distant lands by whom feared my power
Once forgotten by the world, forced to recreate my own destiny
Now retured, here I stand, I, mechanical menace
To wreak revenge on all fearing my eminent throne
For Madre Terra itself bolsters my claim
Followers of old, seeking new allegiance
For here I stand, once on the precipice of ruin
Power heightened; bells of beginning toll
Hey guys. Tabby here, otherwise known as BST, bringing my first RMT on the judging panel. I figured it would be best to begin my Generation 6 debut with a balance team. The main reason I’m posing this RMT is to emphasise Genesect as a metagame-breaking threat, now even more so than last generation. Though the “metal menace” wasn't included in the first row of bans, I sincerely believe that Genesect is far higher than OU material when used correctly. Though its old Scarf set continues to thrive, the set I’m taking up here is the Shift Gear variant. Though Rock Polish Genesect had already been a great sweeper, Shift Gear takes it up a notch by, with a correct Download boost, give it 2 Dragon Dances. Combined with Genesect’s natural bulk and power, it has the potential to run through many commonly seen teams. However, most teams I’ve seen in the RMT forum had been underusing Genesect’s sheer power (though I admit some were quite successful). I’ll like to remedy that by showcasing one of my most successful teams that has served me quite well on the ladder. On the other hand, I am well aware that there are many flaws in the team. Just to make it clear, my purpose isn't to brag. On the contrary, I seek to bring back ways to make this team better while (attempting to) create a constructive discussion for Genesect and how powerful it really is. This RMT isn’t one of the shorter ones (in fact, I do believe it exceeds 5000 words), and so I’ll understand if you don’t feel the motivation to read it all. However, please read the specific area carefully before posting criticism. Also, I’ve taken quite a lot of time to write up this RMT, so please respect that.
The Team
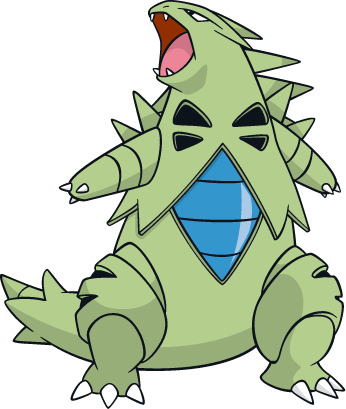
Tyranitar (F) @ Leftovers
Trait: Sand Stream
EVs: 216 HP / 72 Atk / 176 SDef / 44 Spd
Lonely Nature (+Atk, -Def)
- Stealth Rock
- Fire Blast
- Crunch
- Roar
Tyranitar is the ideal lead for the team because it activates sandstorm and sets up Stealth Rocks. It’s ultimate function is to ensure that sandstorm is always available when Garchomp has a troublesome wall it needs to shut down. Though the weather nerf in generation 6 has taken its toll on the usability of field effects, sandstorm is still by far an extremely viable play style in the current metagame. However, its role has changes somewhat from BW; instead of solely using it to build residual damage on opponents and giving resistant types the upper hand, this team utilises it by different means. First and most importantly, sandstorm gives a 1.5 times boost to Garchomp’s main STAB and coverage moves. This allows me to break through troublesome walls, such as Gastrodon and Jellicent, that would otherwise completely wall this team. Combined with Mega Garchomp’s stellar attack, it has the potential to break open many sweeps.
Next, sandstorm allows me to counter opposing weather teams. Since this team lacks a sturdy water and fire resist outside of Rotom-W (and Tyranitar for the latter), opposing rain and sun team can easily bulldoze the game. By inducing sandstorm more tactically, it gives me a wild card to stop any weather rampage. It can also abuse sandstorm’s effect of lengthening Solar Beam by switching it into Charizard Y, and then switch out to a grass resist to force it out. Oftentimes, if I suspect the opponent will lead with Charizard, I’ll send in Rotom-W to force them to evolve and then send in Tyranitar to cancel the sun (and hopefully stop a Solar Beam). On the other hand, though it is quite risky to switch Tyranitar directly into Politoed, the lack of physical attacks and it’s garangutan Special Defence allows it to take at least one Scald comfortably and force it out with Roar or set up on it with Stealth Rock. However, a Specs Hydro Pump will cripple this Pokémon badly, if not outright KO it. Since often I need to preserve Rotom-W for late-game, it is usually necessary to play around carefully such powerful attacks.
Tyranitar also sets up Stealth Rock, which is a valuable asset to the team. With Defog’s popularity rising and new Rapid Spinners such as Avalugg (and old stars Excadrill), it is more important than ever to have a Stealth Rock user bulky enough to set it up multiple times a match. Because of the prevalence of metagame-defining threats such as Talonflame, Charizard and Volcarona, the damage Stealth Rock brings to the table is vital. Genesect can ExtremeSpeed most of these Pokémon to hell and back, but it gets taken out 1v1 without the half damage induced by Stealth Rocks. Furthermore, Rotom-W and Gliscor’s tendencies to cause switches can be abused even further with this move, allowing me to build up residual damage for an easier Genesect sweep.
Tyranitar also has a star place in this team as a premier special wall. Because of the physical metagame, special attackers are very sparse in numbers; but when they do come out, they often wreck teams just because of the lack of special sponges. Though lacking reliable recovery, Tyranitar usually lasts most of the match, keeping a leash on some of the most powerful special attackers in the metagame. Threats such as Latios and Noivern both gets hard countered by Tyranitar. Though the former’s Choice Specs Draco Meteor will hurt Tyranitar, it can easily avoid a 3HKO (Taking into account Leftovers and the Special Attack drop) and 2HKO back with a powerful Crunch. On the other hand, Noivern’s lacklustre Special Attack stat doesn’t do it any favours, and because Tyranitar resists most of its moves, it often becomes dead weight for the opponent’s team as long as Tyranitar is sitting at a comfortable range of health.
Finally, Tyranitar is the sole phaser in the team. Though it requires prediction, it allows me to phase any Mega Pinsir or Heracross that attempts to set up in Tyranitar’s face. A +2 Pinsir can 2HKO everything on my team (Adamant 252EV +2 Pinsir’s Quick Attack even 2HKO’es Gliscor after Stealth Rocks!), which means I’ll have to prioritise keeping Pinsir from setting up rather than trying to keep Tyranitar alive for later. Furthermore, two switch ins to Stealth Rock (one with a two times weakness, one with four) allows me to KO it easily with either Azumarill’s Aqua Jet or Genesect’s ExtremeSpeed. It also gives me a good option to use when I’ve hard countered a threat. A common example is Talonflame. As it U-Turns out, I can Roar something in, basically toppling over the opponent’s confidence and disrupting their strategy, as well as force Talonflame to take another batch of Stealth Rocks upon switch in, meaning a KO upon switch-in or one turn of Sandstorm to take it out. Though Dragon Tail would usually be the more appealing choice, Roar is necessary to stop things such as Cosmic Power Clefable; though Genesect can usually boost alongside it and break through, as well as Garchomp if it has not acquired enough boosts, the free turn Tyranitar gives it is detrimental to the success of the team. Roar gives me a chance to better respond when it switches in once again.
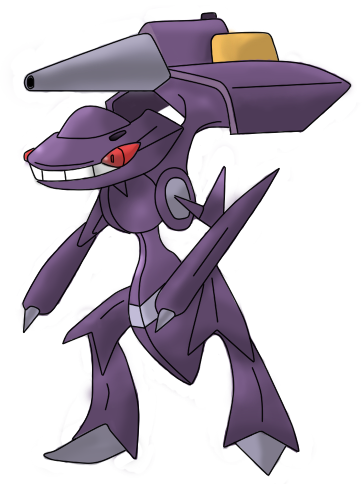
Genesect @ Leftovers
Trait: Download
EVs: 234 HP / 252 Atk / 24 Spd
Hasty Nature (+Spd, -Def)
- Shift Gear
- Blaze Kick
- Iron Head
- Extreme Speed
Genesect is the focal point of the team’s support because it is capable of doing the most damage. Shift Gear allows it to boost its Speed to terrifying levels, easily destroying most offensive Pokémon. In a generation where fast threats such as Talonflame run amok, speed is more important than ever. 46 Speed EVs and a boosting nature allow me to to outspeed Venusaur and neutral Gyarados without a boost, letting me KO with Blaze Kick and ExtremeSpeed, respectively. Furthermore, Shift Gear also grants Genesect a +1 boost in its attack. Combined with a timely Download boost, Genesect has the potential to easily sweep even defensive teams.
Though Genesect suffers from extreme four-moveslot syndrome, this moveset allows for maximum damage output, utility and coverage. Iron Head is a superior STAB compared to X-Scissor. The 30% filch rate, though should not be relied on, is a great way to escape clutch situations. It is vital to recognise how important weakening or taking out the opposing Pokémon is, and if it is worth it to try and get a flinch and perhaps, in the worst-case scenario, let Genesect die. This team is built to try and reduce the luck factor as much as possible. Though teams archetypes relying on luck on a larger scale have potential of running through other teams easily, they can as easily get swept if luck fails to favour them. In the name of consistency and balance, this team tries to reduce the chance factor as much as possible. The bonus chance of a flinch or a miss lets the game snowball into my favour.
Once you start using Genesect, you’ll realise how tempting it is just to attempt to set up early game on setup fodder. However, you must be aware of the omnipresent chance of a critical hit or paralysis (and even freeze). This team isn’t meant to rely on luck on a fundamental level, and attempting to sweep early-game is just asking for a hax-y loss. Oftentimes, I’ll let the opponent weaken my core players just to take out or cripple Genesect’s checks, and bring the game to a win from a 3-1 situation. This team isn’t about 6-0ing others. Conversely, it’s about tactically weakening the opponent’s players while giving the opponent a false sense of security, then sweeping after a single Shift Gear. However, it’s vital to adapt to the situation. If the opponent’s team consists of hard hitters and simply “weakening” them isn’t possible, you may want to change the game plan to a Download-boosted ExtremeSpeed sweep. Balance is the embodiment of versatility, and that’ the goal that every balance team should have; being able to respond to nearly any situation and come out on top.
Genesect also takes on a revenge-killing role early on in the game. ExtremeSpeed has a +2 priority bracket, indicating that it always goes before common priority moves, such as Shadow Sneak, Talonflame’s Brave Bird, and Aqua Jet. This is what’s stopping the team from being utterly swept by Swords Dance Talonflames and Belly Drum Azumarills. ExtremeSpeed, combined with a potential +1 boost from Download, has much more power behind it than one may expect. To put this into context, a boosted Extreme Speed will handily KO Volcarona, Talonflame and Charizard after Stealth Rocks, as well as KOing Mega Lucario after Gliscor’s Earthquake. Though in many teams a certain Pokémon is defined as the “glue” of the team, the situation is quite different in this case. For this team, the ability to easily stop rampaging sweepers is the element that keeps the team from falling apart.
With all that said, however, Genesect is extremely easy to set up. Just the Download boost can send opponents running for the hills, giving it a chance to boost up. Genesect’s good defensive typing doesn’t harm its prowess as well. 234 EVs and already decent defensive stats allow Genesect to tank almost all neutral attacks. However, keep in mind that Genesect doesn’t have any reliable recovery other than the minuscule amounts of health regained from Leftovers. Because of this, only attempt to set up in front of an incoming attack when a sweep is eminent.
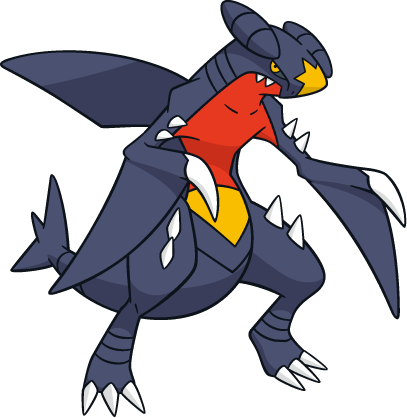
Garchomp (M) @ Garchompite
Trait: Rough Skin
EVs: 60 HP / 252 Atk / 196 Spd
Naughty Nature (+Atk, -SDef)
- Earthquake
- Dragon Claw
- Fire Blast
- Stone Edge
Garchomp is a key player in the team in the sense that it is the only real member preventing this team from being demolished by stall. Tyranitar’s sandstorm boosts Garchomp’s STAB by 50%, allowing it to 2HKO almost every relevant threat in the metagame. Garchomp supports Tyranitar in turn by luring in and killing Tyranitar’s counters; mainly special walls. It’s one of the main reasons supporting this team’s success, and why this team just won’t function in the hands of a player not used to this kind of strategic playstyle. It is absolutely vital to use sandstorm tactically. Sandstorm cannot be “renewed” within its five turns of effectiveness, meaning you have to plan ahead and think carefully when to activate sandstorm, since that’ll greatly affect Garchomp’s wallbreaking prowess. Garchomp, however, still lacks the offensive coverage needed to finish off some walls. Skarmory, for example, greatly hampers Garchomp because it can easily take a Fire Fang at half health and Roost back to full health. There are two main strategies when dealing with Skarmory. The first is to wear it down with residual damage from Stealth Rock and smart switching, forcing it to relinquish Roosting to switch out by threatening it with a Volt Switch from Rotom-W. It also helps to bluff a mix or choice set with Genesect at the beginning of the match. The second is to use Fire Blast and Earthquake to put Skarmory in a checkmate position. If you manage to take Skarmory down to a level of HP where Fire Fang will 2HKO, you can Fire Blast followed by Earthquake (when it Roosts, its flying typing is negated), bringing it down to its Sturdy at worst, where you can KO the next turn, since Fire Blast's accuracy is sometimes unreliable.. Though I’ve gone on a somewhat long Skarmory tangent, this is how Garchomp deals with most walls.
A very important decision in every battle is the timing to mega evolve Garchomp. Since this team lacks speed outside of priority, Garchomp often takes the role of fast tank early-game. Though by evolving Garchomp gains more much-needed firepower and some bulk, it loses a large amount of speed, allowing it to be easily outsped by Base 100s and some Base 90s. Because of this, the correct timing is critical in ensuring a victory. Oftentimes, if I see bulky attackers weak to my STABs sitting around the aforementioned base speeds, I’ll usually hold off evolving until they’re gone or I’m absolutely sure that they can be taken care of without being outsped. Since I don’t usually bring in Garchomp to take hits, the fact that Garchomp’s mega evolution has more bulk doesn’t bother me that much. On the other hand, if my Gliscor/Rotom-W is gone or there’s the risk of Scizor Swords Dancing, I’ll mega evolve on the spot to take the potential Bullet Punch better and to ensure a KO on even the bulkiest variants with Fire Blast, since Mega Garchomp gains an exceptional boost to special attack.. Garchomp is great for weathering common priority attacks such as Talonflame’s Brave Bird, Aegislash’s Shadow Sneak, and Azumarill’s Aqua Jet, as Mega Garchomp’s extra bulk allows it to take these attacks comfortably and hit back with respective moves. However, since Garchomp doesn’t have reliable recovery, it is often better to force such opponents out and 2HKO the switch-in with a potentially boosted move.
Garchomp also has one of the best move-sets coverage wise in this team, and is often allocated the role of being sent out at double-switches or in turns where both pokemon have been taken out. Its versatility means that it can threaten most pokemon in the metagame (provided that they don’t outspeed. Also, it has a very large game presence. What I mean by that is that Garchomp is such a threatening pokemon that opponents usually are unwilling to “play the risk” and risk mispredicting and losing one of their key members. Because of this, it’s often a easy matter to switch another teammate in to sponge the opponent’s attacks. Garchomp also has several miscellaneous roles in the team. First and foremost, it takes most Knock Offs if Gliscor has not activated Toxic Orb yet. Though after Gliscor has been poisoned it’s the best switch-in to Knock Off, in the rare case that that hasn’t been done, Garchomp can take most easily with its bulk and inability to lose its item. Next, it’s this team’s prime candidate for dealing with Mega Manectric, since it resists most of its moves. Garchomp can even take the rare HP Ice, and KO back with Earthquake even after Intimidate and without sandstorm, a feat that makes it a better immediate check than Gliscor, which fails to bring it into KO range even after two switch-ins to Stealth Rocks. Finally, sometimes it comes down to a choice between sacking Gliscor or Garchomp to a runaway Mamoswine or Scarf Genesect for something else to revenge-kill in the end-game. In this case, it depends on what team members the opponent has left. Gliscor is a great stalling tool for physical attackers without recovery, and in such cases Garchomp, sadly, would be the one to bite the dust. Most of the time, however, Garchomp is a much more potent threat end-game where all the opposing pokemon slower than Garchomp is 1HKO’ed by its moveset.
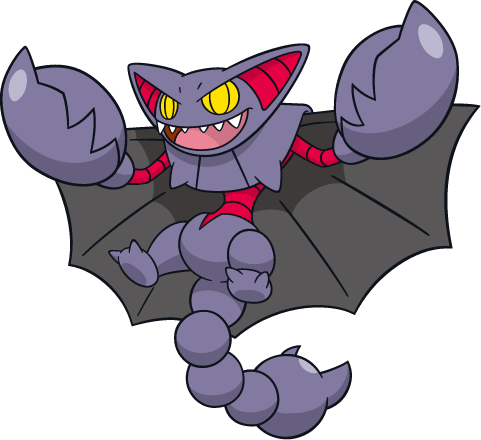
Gliscor (M) @ Toxic Orb
Trait: Poison Heal
EVs: 252 HP / 200 Def / 56 Spd
Impish Nature (+Def, -SAtk)
- Earthquake
- Knock Off
- Toxic
- Taunt
Gliscor is the physically defensive juggernaut of the team. Its main role is to lock down game-breaking threats such as Garchomp, Excadrill and some physical Lucario. Poison Heal coupled with Toxic Orb allows Gliscor to recover 1/8th of its health every turn. This is twice as much as Leftovers and lets Gliscor heal off all Stealth Rock damage in one turn, as well as absorbing status. The key decision in using Gliscor successfully is the timing in which to activate Toxic Orb. Keeping Gliscor unToxic’ed too late in the game can really hurt when you need that 1/8th recovery after switching into a threat that can potentially 2HKO Gliscor, since Poison Heal doesn’t recover health the turn Toxic Orb is activated. This also goes for Knock Off. Gliscor makes for a great counter for Knock Off since it doesn’t lose anything by losing its item once it’s poisoned and can shut down most Knock Off users. However, if Gliscor is forced to take a Knock Off before its Orb can activate, it becomes useless for the remainder of the game. Because of this, it is optimal to activate poison as early as possible in the game. When I begin a new battle, I always look at the Team Preview to see any potential “set-up bait” for Gliscor, which is a pokemon that doesn’t have attacks that can seriously hurt Gliscor or one which Gliscor counters.
Gliscor also takes on a different role than the standard SubToxic variant commonly seen in Generation 5. It is designed to take on stall teams, while still being able to wall offensive ones unlike its more specific partner Reuniclus. Toxic Orb ensures that it can’t be worn down in any way (it also has an immunity to sandstorm and still recovers health in the rare Hail). Taunt stops many pokemon looking to wall Gliscor cold, and is great for shutting down annoying Leech Seeders like the omnipresent duo Trevenant and Gourgeist. It also works well against Smeargle leads, since they usually try to shut Gliscor down in turn by Sporing it before Toxic Orb activates. On the other hand, Knock Off is great for rendering useless many common switch-ins to Gliscor, such as Rotom-W and regular Venusaur. Its boost in power means that Gliscor can also comfortably wall almost all Aegislash variants, which is currently one of the most common pokemon in the metagame. Swords Dance variants can be Taunted, followed by a Knock Off which will harm any potential switch-ins while still dealing out a massive amount of hurt on Gliscor. Special variants can leave Gliscor at about half health, but can still be countered by the combination of Knock Off, making them lose firepower originally boosted due to Life Orb, followed by a fast Earthquake, since King’s Shield doesn’t deliver the attack drop on non-contact moves. When I suspect that a King’s Shield is coming first turn, I’ll usually Taunt anyway since it goes through the pseudo-Protect. It’s really about a game of prediction with Aegislash, but with the proper strategy you drastically increase your chance on coming through without any stat drops and near full health.
Gliscor, though very good at walling physical attackers, works best on slow, boosting tanks. For example, it’ll take a large amount of damage from a Swords Danced Mega Garchomp’s Dragon Claw. In such cases, it’s better to rely on resistances than pure bulk. It’s extremely easy to get Gliscor’s health back to full with smart switching. This also puts pressure on smart opponents to set up Stealth Rock as fast as possible, as double switches are common in high-level play and Gliscor can easily abuse that with its double recovery rate. Gliscor in, in a way, the commando of the team. Though it can’t hit as hard as Garchomp, or KO so many pokemon like Genesect, it has the versatility to deal with threats itself. The combination of Taunt, Earthquake and Knock Off gives it so many options, and combined with its fast recovery speed and bulk, it can take on a variety of metagame threats. For example, it is fully capable of shutting down the more common Psyshock Reuniclus with the combination of Taunt stopping it from recovering and Knock Off, to kill any passive recovery from Leftovers or attack boosts from Life Orb. Though Gliscor isn’t going to sweep anytime soon, it usually leaves any pokemon it switches into crippled, if not worse.

Rotom-W @ Choice Specs
Trait: Levitate
EVs: 168 HP / 252 SAtk / 88 Spd
Modest Nature (+SAtk, -Atk)
- Hydro Pump
- Volt Switch
- Will-O-Wisp
- Trick
Rotom-W is the current metagame’s definition of reliability and stability - with a twist. Choice Specs Rotom-W is an extremely unusual but excellent variation in the current metagame. Rotom-W’s claim to fame is its ability to switch in and take on most variants of Talonflame, Scizor and Azumarill, and leave them with a giant dent with either Volt Switch or Hydro Pump. This Rotom-W is specifically designed to outspeed opposing standard Scizor and cripple it with Will-O-Wisp as it attempts to U-Turn out. Though a Choice item may seem ungainly on a balance team, it works surprisingly well in this case. First of all, the most popular Rotom-W sets currently are the physically defensive variants. Because of this, combined with the fear of Will-O-Wisp, opposing players will more often than not bring in their special attackers, only to be met with a punishing Volt Switch to a counter. This easily cripples their main attackers. However, Rotom-W can, unlike other surprise Choice pokemon, can adapt to different situations as well. If the opponent is “trained” to fear a Volt Switch, they’ll usually change their plan to switching in their special wall. Trick cripples them heavily, and giving potential leeway for Genesect setting up if they attempt to still get some milage out of it. With heavy HP investment, and if it gains a Leftovers on Trick (which is highly likely against any typical wall or tank other than NFE Eviolite users), it can also serve as a typical defensive Rotom-W late game. Will-O-Wisp is quite unexpected on a TrickSpecs set, but can use that surprise to its advantage. Other than the aforementioned Scizor scenario, multiple other pokemon often stay in, such as Aegislash once Rotom-W’s Specs are gone, only to be irreversibly crippled. This Rotom-W needs to be played much more strategically than the standard defensive variant, but pays off hundredfold if used correctly.
Rotom-W has two main stages; one with holding Specs and the second after Tricking it away (preferably receiving a Leftovers or at least a Lum Berry / Rocky Helmet). Each plays significantly different than the other, which can often confuse many opponents. In the first stage, the main objective is to deal as much damage as possible while maintaining momentum with Volt Switch. With maximum investment, its STABs hit ridiculously hard. Its counterpart, Hydro Pump, is the typical “nuke” on the set. Though it doesn’t get the benefit of permanent rain, it still OHKO’es every bulky Ground type that isn’t immune courtesy of ability. It also does a large amount of damage against every potential switch-in. which makes it the best move when you're afraid of losing momentum against a bold ground-type. The intermediate stage, as I call it, is the timing of Tricking. The target should be preferably a physical wall that greatly hampers Genesect’s sweepability; Skarmory and Heatran come to mind. Furthermore, Rotom-W gains freedom of move choice afterwards, which means it can KO/deal heavy damage against both of those threats with respective STAB moves. This is, in my opinion, the ultimate method to take back momentum. Not only has the wall been crippled, it's also simultaneously challenged by a Rotom-W with freedom of move choice, meaning it's practically forced out. Again, Rotom-W loses nothing by going for the SE move, since it can just as easily Volt Switch out later.
The final stage is the playstyle of Rotom-W after Tricking. Rotom-W is a great check to most slow ground-types such as defensive Gliscor, non-Mold Breaker Excadrill and Hippowdon. Unfortunately, faster Toxic-stalling Gliscor can stall out Hydro Pump’s meagre 8PP (or even worse, bank for a miss) and render Rotom-W useless. It’s best to not get into the situation in the first place, because either way it’s a free Substitute for Gliscor. The optimal strategy to execute when you're forced into a stall war is to predict the Protects. If you’re lucky, Hydro Pump won’t miss just enough for the opponent to use Protect, and you can switch into Azumarill to force it out with the threat of super effective Aqua Jet. Indeed, ironically enough faster Gliscor is one of Rotom-W’s best checks, just because Rotom can’t Volt Switch out and break the Substitute simultaneously. On the other hand, grass-types such as Venusaur and Trevenant can still wall Rotom-W and hit hard with their STABs, making Rotom-W somewhat of a hindrance in such situations. However, Genesect can take advantage of resisted Grass attacks to set up, and unless the grass-type in question isn’t a dedicated Leech Seed staller with Protect or Substitute, Genesect can still come clean with over half health still left and several boosts under its belt. Genesect must be wary of Sleep Powder, however, as it can easily ruin any chance of a sweep. Rotom-W excels at creating momentum for the team. Since most members do not have reliable recovery, faster Volt-Turn teams can easily wear this team down. Rotom-W can sponge most momentum moves from faster pokemon (except the likes of Choice Band Genesect) and fire off its own Volt Switch, allowing me to get the momentum back. It’s also a great pokemon to bring in blind switches next to Gliscor, just because of the sheer number of pokemon Rotom-W can check. Volt Switch also allows me to bring in faster but frailer teammates such as Garchomp and Genesect in much easier.

Azumarill (F) @ Leftovers
Trait: Huge Power
EVs: 248 HP / 252 Atk / 8 Def
Adamant Nature (+Atk, -SAtk)
- Aqua Jet
- Waterfall
- Play Rough
- Knock Off
Azumarill’s spot was the one that could never be decided fully. Switching between Venusaur, Aegislash and a brief tangent in Gourgeist, its primary role was to revenge-kill and potentially wall fast powerhouses with so many powerful coverage moves that my overly slow team could not deal with it, common examples being Alakazam and Gengar. Azumarill, however, isn’t just limited to revenge-killing. A major aspect that differentiated it from Aegislash was its utility. Though King’s Shield is a great support move, it can easily be predicted and taken advantage of. Azumarill’s powerful Knock Off allows it to out damage Waterfall first turn in attacking bulky Ghost and Psychics such as Reuniclus. However, the true power of Knock Off lies in its context. The current metagame is dominated with slow, bulky, powerful tanks. Shredding their Leftovers and Lum Berries are critical in wearing them down successfully with the combination of Tyranitar’s sandstorm and Rotom-W’s repeated Volt Switches. It also gives me a catch-all move when I know the opponent will switch out, but it is unclear what to. The only pokemon that doesn’t mind losing their item is Gliscor and the Mega Evolutionary variants. However, Azumarill can 1HKO even the most defensive Gliscor with Waterfall, and can still do massive amounts of damage with Aqua Jet if Gliscor attempts a stall. On the other hand, even if opponent predict the Knock Off and switches in their Mega, I can use the information that the pokemon indeed is a mega. For example, for threats that can be used both with and without their mega form such as Garchomp, knowing which set they run can help greatly in planning out how to deal with them in the future.
Azumarill also is an excellent wallbreaker, going hand-to-hand at walls such as Skarmory and Gliscor. Garchomp has trouble breaking through those two commonly seen defensive threats, while Azumarill handily 2HKO’es, or even 1HKO for the latter, while Garchomp deals with water resists such as Jellicent and Vaporeon that Azumarill may have trouble getting past. Following my game plan, the main intent here is to batter the opponent’s physical walls so that they are weakened enough for a final Genesect sweep. The combination of Waterfall and Play Rough defeat most commonly seen tanks and walls, being able to power through even the likes of Mega Aggron when paired with Earthquake from Garchomp in Sandstorm. However, Azumarill’s selling points aren’t just in its offence. Its fairy typing gives the team a solid Dragon check outside the shaky Genesect (which shouldn’t be used to wall attacks anyway). Combined with a resistance to Fire and neutrality to Ground, Azumarill can take almost any hit from common physically-based dragon sweepers such as Dragonite, Garchomp and Salamence and strike back with a fatal Play Rough. Though special attackers such as Latios and Noivern are still a problem, Tyranitar reliably counters both in the sand and at worst 3HKO’es with Ice Beam.
Final Notes
If you have, thank you for reading this lengthy RMT. I hope something good will come out of it, or at the very least spark a meaningful discussion concerning the metal menace.
PS. If anybody has better size sprites for Rotom-W and Azumarill, please post a link. Thanks!
Major Contributions:
Importable
Quick Glance


Introduction
Once exiled to distant lands by whom feared my power
Once forgotten by the world, forced to recreate my own destiny
Now retured, here I stand, I, mechanical menace
To wreak revenge on all fearing my eminent throne
For Madre Terra itself bolsters my claim
Followers of old, seeking new allegiance
For here I stand, once on the precipice of ruin
Power heightened; bells of beginning toll
Hey guys. Tabby here, otherwise known as BST, bringing my first RMT on the judging panel. I figured it would be best to begin my Generation 6 debut with a balance team. The main reason I’m posing this RMT is to emphasise Genesect as a metagame-breaking threat, now even more so than last generation. Though the “metal menace” wasn't included in the first row of bans, I sincerely believe that Genesect is far higher than OU material when used correctly. Though its old Scarf set continues to thrive, the set I’m taking up here is the Shift Gear variant. Though Rock Polish Genesect had already been a great sweeper, Shift Gear takes it up a notch by, with a correct Download boost, give it 2 Dragon Dances. Combined with Genesect’s natural bulk and power, it has the potential to run through many commonly seen teams. However, most teams I’ve seen in the RMT forum had been underusing Genesect’s sheer power (though I admit some were quite successful). I’ll like to remedy that by showcasing one of my most successful teams that has served me quite well on the ladder. On the other hand, I am well aware that there are many flaws in the team. Just to make it clear, my purpose isn't to brag. On the contrary, I seek to bring back ways to make this team better while (attempting to) create a constructive discussion for Genesect and how powerful it really is. This RMT isn’t one of the shorter ones (in fact, I do believe it exceeds 5000 words), and so I’ll understand if you don’t feel the motivation to read it all. However, please read the specific area carefully before posting criticism. Also, I’ve taken quite a lot of time to write up this RMT, so please respect that.
The Team

Tyranitar (F) @ Leftovers
Trait: Sand Stream
EVs: 216 HP / 72 Atk / 176 SDef / 44 Spd
Lonely Nature (+Atk, -Def)
- Stealth Rock
- Fire Blast
- Crunch
- Roar
Tyranitar is the ideal lead for the team because it activates sandstorm and sets up Stealth Rocks. It’s ultimate function is to ensure that sandstorm is always available when Garchomp has a troublesome wall it needs to shut down. Though the weather nerf in generation 6 has taken its toll on the usability of field effects, sandstorm is still by far an extremely viable play style in the current metagame. However, its role has changes somewhat from BW; instead of solely using it to build residual damage on opponents and giving resistant types the upper hand, this team utilises it by different means. First and most importantly, sandstorm gives a 1.5 times boost to Garchomp’s main STAB and coverage moves. This allows me to break through troublesome walls, such as Gastrodon and Jellicent, that would otherwise completely wall this team. Combined with Mega Garchomp’s stellar attack, it has the potential to break open many sweeps.
Next, sandstorm allows me to counter opposing weather teams. Since this team lacks a sturdy water and fire resist outside of Rotom-W (and Tyranitar for the latter), opposing rain and sun team can easily bulldoze the game. By inducing sandstorm more tactically, it gives me a wild card to stop any weather rampage. It can also abuse sandstorm’s effect of lengthening Solar Beam by switching it into Charizard Y, and then switch out to a grass resist to force it out. Oftentimes, if I suspect the opponent will lead with Charizard, I’ll send in Rotom-W to force them to evolve and then send in Tyranitar to cancel the sun (and hopefully stop a Solar Beam). On the other hand, though it is quite risky to switch Tyranitar directly into Politoed, the lack of physical attacks and it’s garangutan Special Defence allows it to take at least one Scald comfortably and force it out with Roar or set up on it with Stealth Rock. However, a Specs Hydro Pump will cripple this Pokémon badly, if not outright KO it. Since often I need to preserve Rotom-W for late-game, it is usually necessary to play around carefully such powerful attacks.
Tyranitar also sets up Stealth Rock, which is a valuable asset to the team. With Defog’s popularity rising and new Rapid Spinners such as Avalugg (and old stars Excadrill), it is more important than ever to have a Stealth Rock user bulky enough to set it up multiple times a match. Because of the prevalence of metagame-defining threats such as Talonflame, Charizard and Volcarona, the damage Stealth Rock brings to the table is vital. Genesect can ExtremeSpeed most of these Pokémon to hell and back, but it gets taken out 1v1 without the half damage induced by Stealth Rocks. Furthermore, Rotom-W and Gliscor’s tendencies to cause switches can be abused even further with this move, allowing me to build up residual damage for an easier Genesect sweep.
Tyranitar also has a star place in this team as a premier special wall. Because of the physical metagame, special attackers are very sparse in numbers; but when they do come out, they often wreck teams just because of the lack of special sponges. Though lacking reliable recovery, Tyranitar usually lasts most of the match, keeping a leash on some of the most powerful special attackers in the metagame. Threats such as Latios and Noivern both gets hard countered by Tyranitar. Though the former’s Choice Specs Draco Meteor will hurt Tyranitar, it can easily avoid a 3HKO (Taking into account Leftovers and the Special Attack drop) and 2HKO back with a powerful Crunch. On the other hand, Noivern’s lacklustre Special Attack stat doesn’t do it any favours, and because Tyranitar resists most of its moves, it often becomes dead weight for the opponent’s team as long as Tyranitar is sitting at a comfortable range of health.
Finally, Tyranitar is the sole phaser in the team. Though it requires prediction, it allows me to phase any Mega Pinsir or Heracross that attempts to set up in Tyranitar’s face. A +2 Pinsir can 2HKO everything on my team (Adamant 252EV +2 Pinsir’s Quick Attack even 2HKO’es Gliscor after Stealth Rocks!), which means I’ll have to prioritise keeping Pinsir from setting up rather than trying to keep Tyranitar alive for later. Furthermore, two switch ins to Stealth Rock (one with a two times weakness, one with four) allows me to KO it easily with either Azumarill’s Aqua Jet or Genesect’s ExtremeSpeed. It also gives me a good option to use when I’ve hard countered a threat. A common example is Talonflame. As it U-Turns out, I can Roar something in, basically toppling over the opponent’s confidence and disrupting their strategy, as well as force Talonflame to take another batch of Stealth Rocks upon switch in, meaning a KO upon switch-in or one turn of Sandstorm to take it out. Though Dragon Tail would usually be the more appealing choice, Roar is necessary to stop things such as Cosmic Power Clefable; though Genesect can usually boost alongside it and break through, as well as Garchomp if it has not acquired enough boosts, the free turn Tyranitar gives it is detrimental to the success of the team. Roar gives me a chance to better respond when it switches in once again.

Genesect @ Leftovers
Trait: Download
EVs: 234 HP / 252 Atk / 24 Spd
Hasty Nature (+Spd, -Def)
- Shift Gear
- Blaze Kick
- Iron Head
- Extreme Speed
Genesect is the focal point of the team’s support because it is capable of doing the most damage. Shift Gear allows it to boost its Speed to terrifying levels, easily destroying most offensive Pokémon. In a generation where fast threats such as Talonflame run amok, speed is more important than ever. 46 Speed EVs and a boosting nature allow me to to outspeed Venusaur and neutral Gyarados without a boost, letting me KO with Blaze Kick and ExtremeSpeed, respectively. Furthermore, Shift Gear also grants Genesect a +1 boost in its attack. Combined with a timely Download boost, Genesect has the potential to easily sweep even defensive teams.
Though Genesect suffers from extreme four-moveslot syndrome, this moveset allows for maximum damage output, utility and coverage. Iron Head is a superior STAB compared to X-Scissor. The 30% filch rate, though should not be relied on, is a great way to escape clutch situations. It is vital to recognise how important weakening or taking out the opposing Pokémon is, and if it is worth it to try and get a flinch and perhaps, in the worst-case scenario, let Genesect die. This team is built to try and reduce the luck factor as much as possible. Though teams archetypes relying on luck on a larger scale have potential of running through other teams easily, they can as easily get swept if luck fails to favour them. In the name of consistency and balance, this team tries to reduce the chance factor as much as possible. The bonus chance of a flinch or a miss lets the game snowball into my favour.
Once you start using Genesect, you’ll realise how tempting it is just to attempt to set up early game on setup fodder. However, you must be aware of the omnipresent chance of a critical hit or paralysis (and even freeze). This team isn’t meant to rely on luck on a fundamental level, and attempting to sweep early-game is just asking for a hax-y loss. Oftentimes, I’ll let the opponent weaken my core players just to take out or cripple Genesect’s checks, and bring the game to a win from a 3-1 situation. This team isn’t about 6-0ing others. Conversely, it’s about tactically weakening the opponent’s players while giving the opponent a false sense of security, then sweeping after a single Shift Gear. However, it’s vital to adapt to the situation. If the opponent’s team consists of hard hitters and simply “weakening” them isn’t possible, you may want to change the game plan to a Download-boosted ExtremeSpeed sweep. Balance is the embodiment of versatility, and that’ the goal that every balance team should have; being able to respond to nearly any situation and come out on top.
Genesect also takes on a revenge-killing role early on in the game. ExtremeSpeed has a +2 priority bracket, indicating that it always goes before common priority moves, such as Shadow Sneak, Talonflame’s Brave Bird, and Aqua Jet. This is what’s stopping the team from being utterly swept by Swords Dance Talonflames and Belly Drum Azumarills. ExtremeSpeed, combined with a potential +1 boost from Download, has much more power behind it than one may expect. To put this into context, a boosted Extreme Speed will handily KO Volcarona, Talonflame and Charizard after Stealth Rocks, as well as KOing Mega Lucario after Gliscor’s Earthquake. Though in many teams a certain Pokémon is defined as the “glue” of the team, the situation is quite different in this case. For this team, the ability to easily stop rampaging sweepers is the element that keeps the team from falling apart.
With all that said, however, Genesect is extremely easy to set up. Just the Download boost can send opponents running for the hills, giving it a chance to boost up. Genesect’s good defensive typing doesn’t harm its prowess as well. 234 EVs and already decent defensive stats allow Genesect to tank almost all neutral attacks. However, keep in mind that Genesect doesn’t have any reliable recovery other than the minuscule amounts of health regained from Leftovers. Because of this, only attempt to set up in front of an incoming attack when a sweep is eminent.

Garchomp (M) @ Garchompite
Trait: Rough Skin
EVs: 60 HP / 252 Atk / 196 Spd
Naughty Nature (+Atk, -SDef)
- Earthquake
- Dragon Claw
- Fire Blast
- Stone Edge
Garchomp is a key player in the team in the sense that it is the only real member preventing this team from being demolished by stall. Tyranitar’s sandstorm boosts Garchomp’s STAB by 50%, allowing it to 2HKO almost every relevant threat in the metagame. Garchomp supports Tyranitar in turn by luring in and killing Tyranitar’s counters; mainly special walls. It’s one of the main reasons supporting this team’s success, and why this team just won’t function in the hands of a player not used to this kind of strategic playstyle. It is absolutely vital to use sandstorm tactically. Sandstorm cannot be “renewed” within its five turns of effectiveness, meaning you have to plan ahead and think carefully when to activate sandstorm, since that’ll greatly affect Garchomp’s wallbreaking prowess. Garchomp, however, still lacks the offensive coverage needed to finish off some walls. Skarmory, for example, greatly hampers Garchomp because it can easily take a Fire Fang at half health and Roost back to full health. There are two main strategies when dealing with Skarmory. The first is to wear it down with residual damage from Stealth Rock and smart switching, forcing it to relinquish Roosting to switch out by threatening it with a Volt Switch from Rotom-W. It also helps to bluff a mix or choice set with Genesect at the beginning of the match. The second is to use Fire Blast and Earthquake to put Skarmory in a checkmate position. If you manage to take Skarmory down to a level of HP where Fire Fang will 2HKO, you can Fire Blast followed by Earthquake (when it Roosts, its flying typing is negated), bringing it down to its Sturdy at worst, where you can KO the next turn, since Fire Blast's accuracy is sometimes unreliable.. Though I’ve gone on a somewhat long Skarmory tangent, this is how Garchomp deals with most walls.
A very important decision in every battle is the timing to mega evolve Garchomp. Since this team lacks speed outside of priority, Garchomp often takes the role of fast tank early-game. Though by evolving Garchomp gains more much-needed firepower and some bulk, it loses a large amount of speed, allowing it to be easily outsped by Base 100s and some Base 90s. Because of this, the correct timing is critical in ensuring a victory. Oftentimes, if I see bulky attackers weak to my STABs sitting around the aforementioned base speeds, I’ll usually hold off evolving until they’re gone or I’m absolutely sure that they can be taken care of without being outsped. Since I don’t usually bring in Garchomp to take hits, the fact that Garchomp’s mega evolution has more bulk doesn’t bother me that much. On the other hand, if my Gliscor/Rotom-W is gone or there’s the risk of Scizor Swords Dancing, I’ll mega evolve on the spot to take the potential Bullet Punch better and to ensure a KO on even the bulkiest variants with Fire Blast, since Mega Garchomp gains an exceptional boost to special attack.. Garchomp is great for weathering common priority attacks such as Talonflame’s Brave Bird, Aegislash’s Shadow Sneak, and Azumarill’s Aqua Jet, as Mega Garchomp’s extra bulk allows it to take these attacks comfortably and hit back with respective moves. However, since Garchomp doesn’t have reliable recovery, it is often better to force such opponents out and 2HKO the switch-in with a potentially boosted move.
Garchomp also has one of the best move-sets coverage wise in this team, and is often allocated the role of being sent out at double-switches or in turns where both pokemon have been taken out. Its versatility means that it can threaten most pokemon in the metagame (provided that they don’t outspeed. Also, it has a very large game presence. What I mean by that is that Garchomp is such a threatening pokemon that opponents usually are unwilling to “play the risk” and risk mispredicting and losing one of their key members. Because of this, it’s often a easy matter to switch another teammate in to sponge the opponent’s attacks. Garchomp also has several miscellaneous roles in the team. First and foremost, it takes most Knock Offs if Gliscor has not activated Toxic Orb yet. Though after Gliscor has been poisoned it’s the best switch-in to Knock Off, in the rare case that that hasn’t been done, Garchomp can take most easily with its bulk and inability to lose its item. Next, it’s this team’s prime candidate for dealing with Mega Manectric, since it resists most of its moves. Garchomp can even take the rare HP Ice, and KO back with Earthquake even after Intimidate and without sandstorm, a feat that makes it a better immediate check than Gliscor, which fails to bring it into KO range even after two switch-ins to Stealth Rocks. Finally, sometimes it comes down to a choice between sacking Gliscor or Garchomp to a runaway Mamoswine or Scarf Genesect for something else to revenge-kill in the end-game. In this case, it depends on what team members the opponent has left. Gliscor is a great stalling tool for physical attackers without recovery, and in such cases Garchomp, sadly, would be the one to bite the dust. Most of the time, however, Garchomp is a much more potent threat end-game where all the opposing pokemon slower than Garchomp is 1HKO’ed by its moveset.

Gliscor (M) @ Toxic Orb
Trait: Poison Heal
EVs: 252 HP / 200 Def / 56 Spd
Impish Nature (+Def, -SAtk)
- Earthquake
- Knock Off
- Toxic
- Taunt
Gliscor is the physically defensive juggernaut of the team. Its main role is to lock down game-breaking threats such as Garchomp, Excadrill and some physical Lucario. Poison Heal coupled with Toxic Orb allows Gliscor to recover 1/8th of its health every turn. This is twice as much as Leftovers and lets Gliscor heal off all Stealth Rock damage in one turn, as well as absorbing status. The key decision in using Gliscor successfully is the timing in which to activate Toxic Orb. Keeping Gliscor unToxic’ed too late in the game can really hurt when you need that 1/8th recovery after switching into a threat that can potentially 2HKO Gliscor, since Poison Heal doesn’t recover health the turn Toxic Orb is activated. This also goes for Knock Off. Gliscor makes for a great counter for Knock Off since it doesn’t lose anything by losing its item once it’s poisoned and can shut down most Knock Off users. However, if Gliscor is forced to take a Knock Off before its Orb can activate, it becomes useless for the remainder of the game. Because of this, it is optimal to activate poison as early as possible in the game. When I begin a new battle, I always look at the Team Preview to see any potential “set-up bait” for Gliscor, which is a pokemon that doesn’t have attacks that can seriously hurt Gliscor or one which Gliscor counters.
Gliscor also takes on a different role than the standard SubToxic variant commonly seen in Generation 5. It is designed to take on stall teams, while still being able to wall offensive ones unlike its more specific partner Reuniclus. Toxic Orb ensures that it can’t be worn down in any way (it also has an immunity to sandstorm and still recovers health in the rare Hail). Taunt stops many pokemon looking to wall Gliscor cold, and is great for shutting down annoying Leech Seeders like the omnipresent duo Trevenant and Gourgeist. It also works well against Smeargle leads, since they usually try to shut Gliscor down in turn by Sporing it before Toxic Orb activates. On the other hand, Knock Off is great for rendering useless many common switch-ins to Gliscor, such as Rotom-W and regular Venusaur. Its boost in power means that Gliscor can also comfortably wall almost all Aegislash variants, which is currently one of the most common pokemon in the metagame. Swords Dance variants can be Taunted, followed by a Knock Off which will harm any potential switch-ins while still dealing out a massive amount of hurt on Gliscor. Special variants can leave Gliscor at about half health, but can still be countered by the combination of Knock Off, making them lose firepower originally boosted due to Life Orb, followed by a fast Earthquake, since King’s Shield doesn’t deliver the attack drop on non-contact moves. When I suspect that a King’s Shield is coming first turn, I’ll usually Taunt anyway since it goes through the pseudo-Protect. It’s really about a game of prediction with Aegislash, but with the proper strategy you drastically increase your chance on coming through without any stat drops and near full health.
Gliscor, though very good at walling physical attackers, works best on slow, boosting tanks. For example, it’ll take a large amount of damage from a Swords Danced Mega Garchomp’s Dragon Claw. In such cases, it’s better to rely on resistances than pure bulk. It’s extremely easy to get Gliscor’s health back to full with smart switching. This also puts pressure on smart opponents to set up Stealth Rock as fast as possible, as double switches are common in high-level play and Gliscor can easily abuse that with its double recovery rate. Gliscor in, in a way, the commando of the team. Though it can’t hit as hard as Garchomp, or KO so many pokemon like Genesect, it has the versatility to deal with threats itself. The combination of Taunt, Earthquake and Knock Off gives it so many options, and combined with its fast recovery speed and bulk, it can take on a variety of metagame threats. For example, it is fully capable of shutting down the more common Psyshock Reuniclus with the combination of Taunt stopping it from recovering and Knock Off, to kill any passive recovery from Leftovers or attack boosts from Life Orb. Though Gliscor isn’t going to sweep anytime soon, it usually leaves any pokemon it switches into crippled, if not worse.

Rotom-W @ Choice Specs
Trait: Levitate
EVs: 168 HP / 252 SAtk / 88 Spd
Modest Nature (+SAtk, -Atk)
- Hydro Pump
- Volt Switch
- Will-O-Wisp
- Trick
Rotom-W is the current metagame’s definition of reliability and stability - with a twist. Choice Specs Rotom-W is an extremely unusual but excellent variation in the current metagame. Rotom-W’s claim to fame is its ability to switch in and take on most variants of Talonflame, Scizor and Azumarill, and leave them with a giant dent with either Volt Switch or Hydro Pump. This Rotom-W is specifically designed to outspeed opposing standard Scizor and cripple it with Will-O-Wisp as it attempts to U-Turn out. Though a Choice item may seem ungainly on a balance team, it works surprisingly well in this case. First of all, the most popular Rotom-W sets currently are the physically defensive variants. Because of this, combined with the fear of Will-O-Wisp, opposing players will more often than not bring in their special attackers, only to be met with a punishing Volt Switch to a counter. This easily cripples their main attackers. However, Rotom-W can, unlike other surprise Choice pokemon, can adapt to different situations as well. If the opponent is “trained” to fear a Volt Switch, they’ll usually change their plan to switching in their special wall. Trick cripples them heavily, and giving potential leeway for Genesect setting up if they attempt to still get some milage out of it. With heavy HP investment, and if it gains a Leftovers on Trick (which is highly likely against any typical wall or tank other than NFE Eviolite users), it can also serve as a typical defensive Rotom-W late game. Will-O-Wisp is quite unexpected on a TrickSpecs set, but can use that surprise to its advantage. Other than the aforementioned Scizor scenario, multiple other pokemon often stay in, such as Aegislash once Rotom-W’s Specs are gone, only to be irreversibly crippled. This Rotom-W needs to be played much more strategically than the standard defensive variant, but pays off hundredfold if used correctly.
Rotom-W has two main stages; one with holding Specs and the second after Tricking it away (preferably receiving a Leftovers or at least a Lum Berry / Rocky Helmet). Each plays significantly different than the other, which can often confuse many opponents. In the first stage, the main objective is to deal as much damage as possible while maintaining momentum with Volt Switch. With maximum investment, its STABs hit ridiculously hard. Its counterpart, Hydro Pump, is the typical “nuke” on the set. Though it doesn’t get the benefit of permanent rain, it still OHKO’es every bulky Ground type that isn’t immune courtesy of ability. It also does a large amount of damage against every potential switch-in. which makes it the best move when you're afraid of losing momentum against a bold ground-type. The intermediate stage, as I call it, is the timing of Tricking. The target should be preferably a physical wall that greatly hampers Genesect’s sweepability; Skarmory and Heatran come to mind. Furthermore, Rotom-W gains freedom of move choice afterwards, which means it can KO/deal heavy damage against both of those threats with respective STAB moves. This is, in my opinion, the ultimate method to take back momentum. Not only has the wall been crippled, it's also simultaneously challenged by a Rotom-W with freedom of move choice, meaning it's practically forced out. Again, Rotom-W loses nothing by going for the SE move, since it can just as easily Volt Switch out later.
The final stage is the playstyle of Rotom-W after Tricking. Rotom-W is a great check to most slow ground-types such as defensive Gliscor, non-Mold Breaker Excadrill and Hippowdon. Unfortunately, faster Toxic-stalling Gliscor can stall out Hydro Pump’s meagre 8PP (or even worse, bank for a miss) and render Rotom-W useless. It’s best to not get into the situation in the first place, because either way it’s a free Substitute for Gliscor. The optimal strategy to execute when you're forced into a stall war is to predict the Protects. If you’re lucky, Hydro Pump won’t miss just enough for the opponent to use Protect, and you can switch into Azumarill to force it out with the threat of super effective Aqua Jet. Indeed, ironically enough faster Gliscor is one of Rotom-W’s best checks, just because Rotom can’t Volt Switch out and break the Substitute simultaneously. On the other hand, grass-types such as Venusaur and Trevenant can still wall Rotom-W and hit hard with their STABs, making Rotom-W somewhat of a hindrance in such situations. However, Genesect can take advantage of resisted Grass attacks to set up, and unless the grass-type in question isn’t a dedicated Leech Seed staller with Protect or Substitute, Genesect can still come clean with over half health still left and several boosts under its belt. Genesect must be wary of Sleep Powder, however, as it can easily ruin any chance of a sweep. Rotom-W excels at creating momentum for the team. Since most members do not have reliable recovery, faster Volt-Turn teams can easily wear this team down. Rotom-W can sponge most momentum moves from faster pokemon (except the likes of Choice Band Genesect) and fire off its own Volt Switch, allowing me to get the momentum back. It’s also a great pokemon to bring in blind switches next to Gliscor, just because of the sheer number of pokemon Rotom-W can check. Volt Switch also allows me to bring in faster but frailer teammates such as Garchomp and Genesect in much easier.

Azumarill (F) @ Leftovers
Trait: Huge Power
EVs: 248 HP / 252 Atk / 8 Def
Adamant Nature (+Atk, -SAtk)
- Aqua Jet
- Waterfall
- Play Rough
- Knock Off
Azumarill’s spot was the one that could never be decided fully. Switching between Venusaur, Aegislash and a brief tangent in Gourgeist, its primary role was to revenge-kill and potentially wall fast powerhouses with so many powerful coverage moves that my overly slow team could not deal with it, common examples being Alakazam and Gengar. Azumarill, however, isn’t just limited to revenge-killing. A major aspect that differentiated it from Aegislash was its utility. Though King’s Shield is a great support move, it can easily be predicted and taken advantage of. Azumarill’s powerful Knock Off allows it to out damage Waterfall first turn in attacking bulky Ghost and Psychics such as Reuniclus. However, the true power of Knock Off lies in its context. The current metagame is dominated with slow, bulky, powerful tanks. Shredding their Leftovers and Lum Berries are critical in wearing them down successfully with the combination of Tyranitar’s sandstorm and Rotom-W’s repeated Volt Switches. It also gives me a catch-all move when I know the opponent will switch out, but it is unclear what to. The only pokemon that doesn’t mind losing their item is Gliscor and the Mega Evolutionary variants. However, Azumarill can 1HKO even the most defensive Gliscor with Waterfall, and can still do massive amounts of damage with Aqua Jet if Gliscor attempts a stall. On the other hand, even if opponent predict the Knock Off and switches in their Mega, I can use the information that the pokemon indeed is a mega. For example, for threats that can be used both with and without their mega form such as Garchomp, knowing which set they run can help greatly in planning out how to deal with them in the future.
Azumarill also is an excellent wallbreaker, going hand-to-hand at walls such as Skarmory and Gliscor. Garchomp has trouble breaking through those two commonly seen defensive threats, while Azumarill handily 2HKO’es, or even 1HKO for the latter, while Garchomp deals with water resists such as Jellicent and Vaporeon that Azumarill may have trouble getting past. Following my game plan, the main intent here is to batter the opponent’s physical walls so that they are weakened enough for a final Genesect sweep. The combination of Waterfall and Play Rough defeat most commonly seen tanks and walls, being able to power through even the likes of Mega Aggron when paired with Earthquake from Garchomp in Sandstorm. However, Azumarill’s selling points aren’t just in its offence. Its fairy typing gives the team a solid Dragon check outside the shaky Genesect (which shouldn’t be used to wall attacks anyway). Combined with a resistance to Fire and neutrality to Ground, Azumarill can take almost any hit from common physically-based dragon sweepers such as Dragonite, Garchomp and Salamence and strike back with a fatal Play Rough. Though special attackers such as Latios and Noivern are still a problem, Tyranitar reliably counters both in the sand and at worst 3HKO’es with Ice Beam.
Final Notes
If you have, thank you for reading this lengthy RMT. I hope something good will come out of it, or at the very least spark a meaningful discussion concerning the metal menace.
PS. If anybody has better size sprites for Rotom-W and Azumarill, please post a link. Thanks!
Major Contributions:
Epiconic, for giving me the original inspiration for the team and playtesting it extensively.
Indigo5, for also being a major playtester and helping this team advance through the beta stages (Where I was still unhappily using Trevenant; hats off to you!).
Ogami, for being one of the instrumental players to the growth and improvement of the team. You helped out a lot, thanks!
Calm_Mind_Latias, for a suggestion of Waterfall > Aqua Tail on Azumarill.
Importable
Code:
Tyranitar (F) @ Leftovers
Trait: Sand Stream
EVs: 216 HP / 72 Atk / 176 SDef / 44 Spd
Lonely Nature (+Atk, -Def)
- Stealth Rock
- Fire Blast
- Crunch
- Roar

Genesect @ Leftovers
Trait: Download
EVs: 234 HP / 252 Atk / 24 Spd
Hasty Nature (+Spd, -Def)
- Shift Gear
- Blaze Kick
- Iron Head
- Extreme Speed

Garchomp (M) @ Garchompite
Trait: Rough Skin
EVs: 60 HP / 252 Atk / 196 Spd
Naughty Nature (+Atk, -SDef)
- Earthquake
- Dragon Claw
- Fire Blast
- Stone Edge

Gliscor (M) @ Toxic Orb
Trait: Poison Heal
EVs: 252 HP / 200 Def / 56 Spd
Impish Nature (+Def, -SAtk)
- Earthquake
- Knock Off
- Toxic
- Taunt

Rotom-W @ Choice Specs
Trait: Levitate
EVs: 168 HP / 252 SAtk / 88 Spd
Modest Nature (+SAtk, -Atk)
- Hydro Pump
- Volt Switch
- Will-O-Wisp
- Trick

Azumarill (F) @ Leftovers
Trait: Huge Power
EVs: 248 HP / 252 Atk / 8 Def
Adamant Nature (+Atk, -SAtk)
- Aqua Jet
- Waterfall
- Play Rough
- Knock Off
Last edited:


