
-
Welcome to Smogon! Take a moment to read the Introduction to Smogon for a run-down on everything Smogon, and make sure you take some time to read the global rules.
-
Congrats to the winners of the 2023 Smog Awards!
Challenge Super Mystery Dungeon 100%: No Vitamins, Revives, or Wondermail Codes [COMPLETED]
- Thread starter Its_A_Random
- Start date


I guess this is the last update Hope you enjoy!
Restrictions:
-No Permanent Stat Boosts (Codification: No Vitamins, Drinks, Life Seeds, or using Sitrus Berries at full HP)
-No using Emeras on Pokémon mid-dungeon (Temporary Stat Boosts) or using Oran Berries/Energy Seeds at Full HP (Essentially softcapping Max HP at over 100 HP)
-No Revives (No Reviver Seeds, Tiny Reviver Seeds, Revive All Orbs, or equipping Ally Reviver)
-No Wondermail Codes
-No Getting Rescued
UPDATE #12 - 100% COMPLETION
Buried Ruins [Yveltal]
So the first thing you can do the moment you get to Grand Master Rank is that you can go directly to the Tree of Life and talk to Xerneas. Doing this allows you to connect with it and gain the Sky Looplet. This is a pretty good treasure as it boosts the holder's speed by a whopping 50 points, and this matters when you consider that speed is a factor in accuracy and evasion in this game.
But anyways, onto Buried Ruins. Way back then, the first proper Gates Floor dungeon was Sheer Mountain Range, generally considered the longest dungeon in the main story largely due the long, large floors that no other story dungeon had. Buried Ruins has this same tileset as that dungeon, but now it's by far the fastest of the Gates Floors layouts. Why? Because we have access to things that can fly, and this dungeon has no walls, just random peaks protruding from the ground. This means that we can just pack a team full of flying Pokémon and just not care about the layouts.
So we bring Moltres (Sea Looplet), Zapdos (Tempest Looplet), and Drifloon along. In terms of the power level, it's nothing bad as most things give around 100 Exp, so the 20 floor flight to the end is not very difficult. Using the Sea Looplet to use item locations as points to where to go, we end up breezing through to the end, only needing to replenish hunger once. At the end, we meet up with Yveltal who is ready to atone for its mistakes. We get its connection and the Darkness Looplet, which boosts Attack and Special Attack by 20 points.
Apex Mountain [Zygarde]
Apex Mountain is definitely the more difficult of the two new dungeons, but compared to the Never Hungries dungeons, it's fairly easy. This dungeon consists of 31 Gates Floors, with walls added in, and comprises mostly of Rock-types, some Water-types, and a couple of loose ends. We bring along Smeargle/Entei/Heatran for this dungeon, and the only thing to worry about is Sturdy for the sake of Sheer Cold. There are a few other random things to worry about like Omastar and Gyarados, but they are nothing that we cannot dismiss.
Anyways, our floor luck was mostly mixed throughout the 31 floor journey, and we did get one Monster House, but yeah, compared to the Never Hungries, the dungeon is basically a breeze. Getting Trap Proof helps with that as well. At the end we meet up with Zygarde and get its connection. We also pick up our final Treasure in the Time Looplet, which boosts Special Defence by 40 points. Nothing too useful, but for completing the treasures, we get the Ancient Crown and the Completion Crown. Yay. They are also functionally useless, but provide proof. We also unlock Destiny Tower, which is where the grand finale will take place. But there's no point going there now, first we need to finish...
The Long Road to 778 Connections
... And what a long road it is with 686 connections at this point in the game. The last 100 connections in general are generally the slowest 100 in the game, so what I am going to do is list dungeon, missions + extras, and what I connect, so you folks can see the unlucky Pokémon that had to wait until the very end of this run to join up. Here we go:
Gentle Slope Cave (1 Mission) [Poliwhirl, Qwilfish, Tentacool]
Longfield Cave (1 Mission) [Dugtrio]
Sunbathed Garden (1 Mission, 1 Traveller, 1 Fainted) [Froslass, Scizor, Shroomish, Slaking, Swinub]
Serpentine Mountain Trail (1 Mission) [Chimecho, Diglett]
Uprise Range (1 Mission, 1 Traveller) [Ambipom, Mantine, Zangoose]
Mystical Forest (1 Mission) [Illumise, Volbeat]
Mysterious Plains (1 Mission, 1 Fainted) [Cascoon, Foongus, Silcoon]
Mysterious Plains (1 Mission) [Kakuna]
Small Sand Dune (1 Mission) [Buizel-F, Diggersby, Floatzel-F, Floatzel-M]
Berry Forest (1 Mission) [Conkeldurr]
Berry Forest (1 Mission) [Vigoroth]
Forest of Bounty (1 Mission) [Spritzee]
Abundant Pass (3 Missions, 1 Traveller) [Blissey, Delcatty, Delphox, Grotle, Mamoswine]
Mystery Jungle (2 Missions, 1 Traveller) [Avalugg, Doublade, Houndour, Meowstic-F]
Sunny Spot Hill (1 Mission, 1 Traveller, 1 Fainted) [Delibird, Ivysaur, Metang]
Friendly Meadow (1 Mission) [Ferroseed]
Small Sand Dune (1 Mission) [Lunatone, Staryu, Starmie]
Stealth Cavern (2 Missions) [Nincada, Solrock]
Crystalline Maze (1 Mission) [Ninjask]
Little Canyon (1 Mission) [Rhyhorn]
Spiral Vortex (1 Mission) [Glalie]
Midnight Sun Gorge (2 Missions) [Shuckle, Skarmory]
Forest of Fairies (2 Missions) [Hariyama, Hitmontop, Meditite, Mismagius]
Flagstone Cave (1 Mission, 1 Traveller) [Kricketune, Sliggoo]
Frozen Mountain (2 Missions) [Porygon, Togetic]
Flagstone Cave (1 Mission) [Pumpkaboo]
Frozen Falls (1 Mission) [Tyrantrum], 1 Reset to Client death
Gooey Bog (1 Mission) [Hoothoot]
Sand Dune of Spirits (1 Mission) [Pidgey, Tangela, Venomoth]
At this point, we hit 750 connections, which is enough to finally recruit Kecleon for free at the Kecleon Shop. Kecleon basically makes reference to how it's normally the last one to get connected and all that jazz, but yeah. It also gains the ability to sell treasures or something like that. Kecleon also joins at Lv1 and levels up really fast until a certain point and then takes forever to level up or something. It's one of those Pokémon. We will not be using Kecleon this run as all the good exp places are behind us. You could expedite the process with Golden Bananas but we are not going to to do that. Anyways, back to the missions:
Valley of Strong Winds (1 Mission, 1 Traveller, 1 Fainted) [Bronzor, Kabuto, Muk]
Thirsty Desert (1 Mission) [Burmy-G, Burmy-S, Scatterbug, Wormadam-G, Wormadam-S]
Secret Quarry (1 Mission) [Probopass]
Golden Suite (1 Mission) [Cacnea, Volcarona]
And with Golden Suite, that is all the regular missions done. However, that puts us at 762 connections, which means we still have 16 Travellers, Fainteds, and Pumped Ups left to do. However, with all the missions done, the connection orb will now tell us where the remaining Pokémon are, two at a time. So now it is time to pick them up:
Headwater Hollow (1 Fainted) [Paras]
Electric Wasteland (1 Traveller) [Kadabra]
Super Apple Forest (2 Fainteds) [Geodude, Numel]
Cape of Wonders (2 Travellers) [Ariados, Musharna]
Elegant Gorge (1 Traveller, 2 Fainteds) [Escavalier, Granbull, Slakoth]
Abundant Pass (1 Fainted) [Shiftry]
Mysterious Plains (1 Traveller, 1 Fainted) [Camerupt, Roggenrola]
Hall of Magic (1 Traveller) [Cradily]
Sandy Cave (1 Fainted) [Tirtouga]
Cave of Training (1 Fainted) [Ducklett]
Holey Meadow (1 Pumped Up) [Larvesta]
And this takes us to 778 connections. This will unlock the final mission of the game, and that is to meet up with Arceus at the end of Destiny Tower. Before we do that however, there's some other things we need to do...
Those Ten Dungeons We Did Not Need to Visit
So we have ten dungeons we did not need to visit at all and we are going to visit them to fulfill the requirements for 100%. The game does not care whether or not we complete these dungeons, so we are going to simply visit them and then hit "Give Up", after storing all our items of course. In order:
Bustling Valley
Moonlit Cave
Frosty Tree Steps
Deep Ocean Tunnel [Level Reset]
Temple Remains [Level Reset]
Sacred Ruins [Level Reset]
Hidden Cave
Fresh Meadow
Freedom Coast
Pumpkaboo Forest
Of course, we also have to wait for Smeargle to become available, so we do one extra Give Up in Open Pass. After that, it is time.
Destiny Tower [Arceus]
And what a final dungeon we have on our hands. First things first, this is a 99F dungeon, the only one in the entire game. Secondly, this dungeon has the highest power level in the entire game, with average levels going into the 90's minorly stepping up from the Never Hungries dungeons. Third, we have the main gimmick of the dungeon, where every five floors (with a minor error with the music/background changing on 70F and 75F instead of 71F and 76F, also Dodrio shows up on the Ground-type floors), the dominant type changes (alongside background and music). It goes like this:
1-5F: Electric ~ Gentle Slope Cave
6-10F: Normal ~ Tree of Life: Roots
11-15F: Fire ~ Fire Island Volcano
16-20F: Water ~ Submerged Cave
21-25F: Grass ~ Lush Forest
26-30F: Bug ~ Open Pass
31-35F: Fairy ~ Purifying Cave
36-40F: Ice ~ Tree of Life: Trunk
41-45F: Flying ~ Showdown Mountain
46-50F: Rock ~ Sheer Mountain Range
51-55F: Poison ~ Calm Craggy Area
56-60F: Psychic ~ Prehistoric Ruins
61-65F: Ground ~ Revelation Mountain
66-70F: Steel ~ Ancient Barrow
71-75F: Dark ~ Cave of the Deep
76-80F: Dragon ~ Mystery Jungle
81-85F: Ghost ~ Abyssal Badlands
86-90F: Fighting ~ Road to Primeval Forest
91-98F: Any Type ~ Reverse Mountain
And then for the final eight floors before Arceus, every type is around. Furthermore, the music is different for each five floors starting with Gentle Slope Cave for the first five floors and ending with Reverse Mountain for the last eight. The last two floors of each five floor block also have limited visibility, making Sea Looplet really helpful. Mercifully there is no boss fight at the end of it all; just talk to Arceus and its done.
It goes completely without saying that with no vitamin buffs and no revivers that we absolutely need to be as safe as we can as one mistake means it's all over. Clearly to be as safe as we can be, we need to be able to dismiss enemies when possible, which means using Smeargle with the Sea Looplet. As for teammates, we will go for Entei with the Wildfire Looplet, and Heatran with the Tempest Looplet. We also stock a bunch of safeties. All the good wands (and Guiding Wands), all the Decoy Seeds, all the Pure Seeds, and what have you. With all this in mind, it is time to take the monstrous climb to the peak.
Anyways, onto the trek itself. We mostly employ the same strats as the Never Hungries dungeons, with Perish Song, Sheer Cold, all that jazz. We do manage to find a few good emera along the way. Tunnel for Smeargle to create some shortcuts, Sun's Blessing to bring out the sun and power up Entei and Heatran, PP Restore to save on Elixirs. For Entei we got things like Better Odds, Power Boost Y, Type Bulldozer, and eventually Go For Broke!. We did not get as useful things for Heatran, but its damage helped out. At the start it was mostly a case of not being in the same room as enemies but eventually, as we got the Emera, Entei was becoming strong enough to one shot things with Sacred Fire. There were a couple of close calls however. Smeargle tried to cover a Vacuum Wave and somehow dodged. I also walked into a Gunk Shot on 91F and somehow dodged it. I also hit a Grimy Trap which made some Perfect Apples go bad, but there's enough Apples around that hunger is not a major issue. We also had two early Monster Houses in the first ten floors. But try as some might, we make it to the end. First try.
Anyway, at the top we connect with Arceus, the final recruit of this long and arduous run. But for 100%, we have to do one final thing, and that's to talk to the Nexus. For visiting every dungeon in the game, we gain... the ability to instantly enter whatever dungeon we want. A bragging rights reward I guess, but the run is finally over.


---
Connections: 779/779 [100%]
Treasures: 25/25 [100%]
Dungeons Explored: 100%
Black / White Kyurem: 100%
Deaths: 48
STARTER/PARTNER + OTHERS USED THIS UPDATE

Meganium
Lv: 67
-Petal Blizzard
-Razor Leaf
-Petal Dance
-Synthesis

Emboar
Lv: 62
-Rollout
-Flamethrower
-Arm Thrust
-Heat Wave

Drifloon
Lv: 63
-Constrict
-Ominous Wind
-Shadow Ball
-Gust

Entei
Lv: 67
-Sacred Fire
-Eruption
-Extrasensory
-Flamethrower

Heatran
Lv: 62
-Heat Wave
-Iron Head
-Earth Power
-Magma Storm

Moltres
Lv: 62
-Heat Wave
-Hurricane
-Agility
-Flamethrower

Smeargle
Lv: 91
-Perish Song
-Mind Reader
-Sheer Cold
-Agility

Zapdos
Lv: 62
-Discharge
-Agility
-Thunder Wave
-Drill Peck
---
FINAL THOUGHTS
So that's the end of the run. The final ingame time is just over 64 hours, but that does not account for deaths so the real total is probably around the 70 Hour mark. I had definitely wanted to do another challenge run since my previous challenge run of Ultra Sun and had completed the living dex for Rescue Team DX. So I decided after four years since last playing it to go do a 100% run. As for restrictions, No Vitamins is an interesting restriction as it means you cannot just pump up two or three Pokémon and go to town. I did talk about the Golden Banana and Golden Seed when I got them but the reason I did not just get a bunch and level up a lot was just to keep things interesting, as otherwise I could just instantly get Lv100 and just steamroll things.
No Revivers however, is the more interesting restriction, as it forces you to get good at the game, when you have no second chances if you lose all your health. It means you have to pay attention at all times, especially later on. It means you have to concentrate and think about every move you make. One mistake could mean you cannot finish a dungeon. Sometimes, cheap deaths can happen, like in Altar of Ice: Depths with random Blizzard snipes. But in general, deaths are mostly on you, which is fair. I tried as much as I can to capture with what methods I have at my disposal. No Wondermail just means no wondermail.
As for some of the strats, I do not blame anyone who thinks they got progressively lamer and cheesier as the run goes on, but for bosses, there's a lot of ways to cheese he fights. I tried to keep things as insteresting as I can, but PMD has never been that great in the boss department. Perish cheese is definitely "boring, but practical" and there's definitely some alternatives out there. But generally I found it better to just play it safe and take the path of least resistance.
As far as the run itself, it was alright. I did make a few mistakes and there was definitely a few things that were not super optimal out there. For instance, if you want to do this run and be really optimal, Pikachu is a better partner choice due to Thunder Wave actually being broken in boss fights and can contribute much more in the postgame than Tepig can (I did use Emboar for general mission days alongside Meganium). Chikorita is definitely the optimal hero, however. In terms of favourite strats, I liked the Darkrai strat the most in terms of having really neat applications such as Uproar, Hawlucha, Hammer Arm to maximise turns, and later on with Primal Groudon doing a single movement to maximise attacks as well, so something like Tornadus-T could allow three rounds per boss attack with something like move > Tailwind Alliance > Hammer Arm Alliance each turn.
In terms of one-upping this run, you can definitely try if you want to. There certainly exists some harder challenges for this game, just don't try itemless Super Mystery Dungeon unless you love having really low chances of making it past certain story bosses (especially mob bosses). Super Mystery Dungeon is still my favourite PMD casually, but I will not lie and say that 100% does feel like a checklist in a way that I will probably not do another 100% run for some time yet. I don't know if I will do another challenge run on this forum yet and if I do, it won't be for a few months at the very least. I guess I could do a Sacred Ruins run if some of you are interested in what is good for that dungeon.
Other than that, I am considering this challenge run project done. Thank you for reading.
Its_A_Random
Restrictions:
-No Permanent Stat Boosts (Codification: No Vitamins, Drinks, Life Seeds, or using Sitrus Berries at full HP)
-No using Emeras on Pokémon mid-dungeon (Temporary Stat Boosts) or using Oran Berries/Energy Seeds at Full HP (Essentially softcapping Max HP at over 100 HP)
-No Revives (No Reviver Seeds, Tiny Reviver Seeds, Revive All Orbs, or equipping Ally Reviver)
-No Wondermail Codes
-No Getting Rescued
UPDATE #12 - 100% COMPLETION
Buried Ruins [Yveltal]
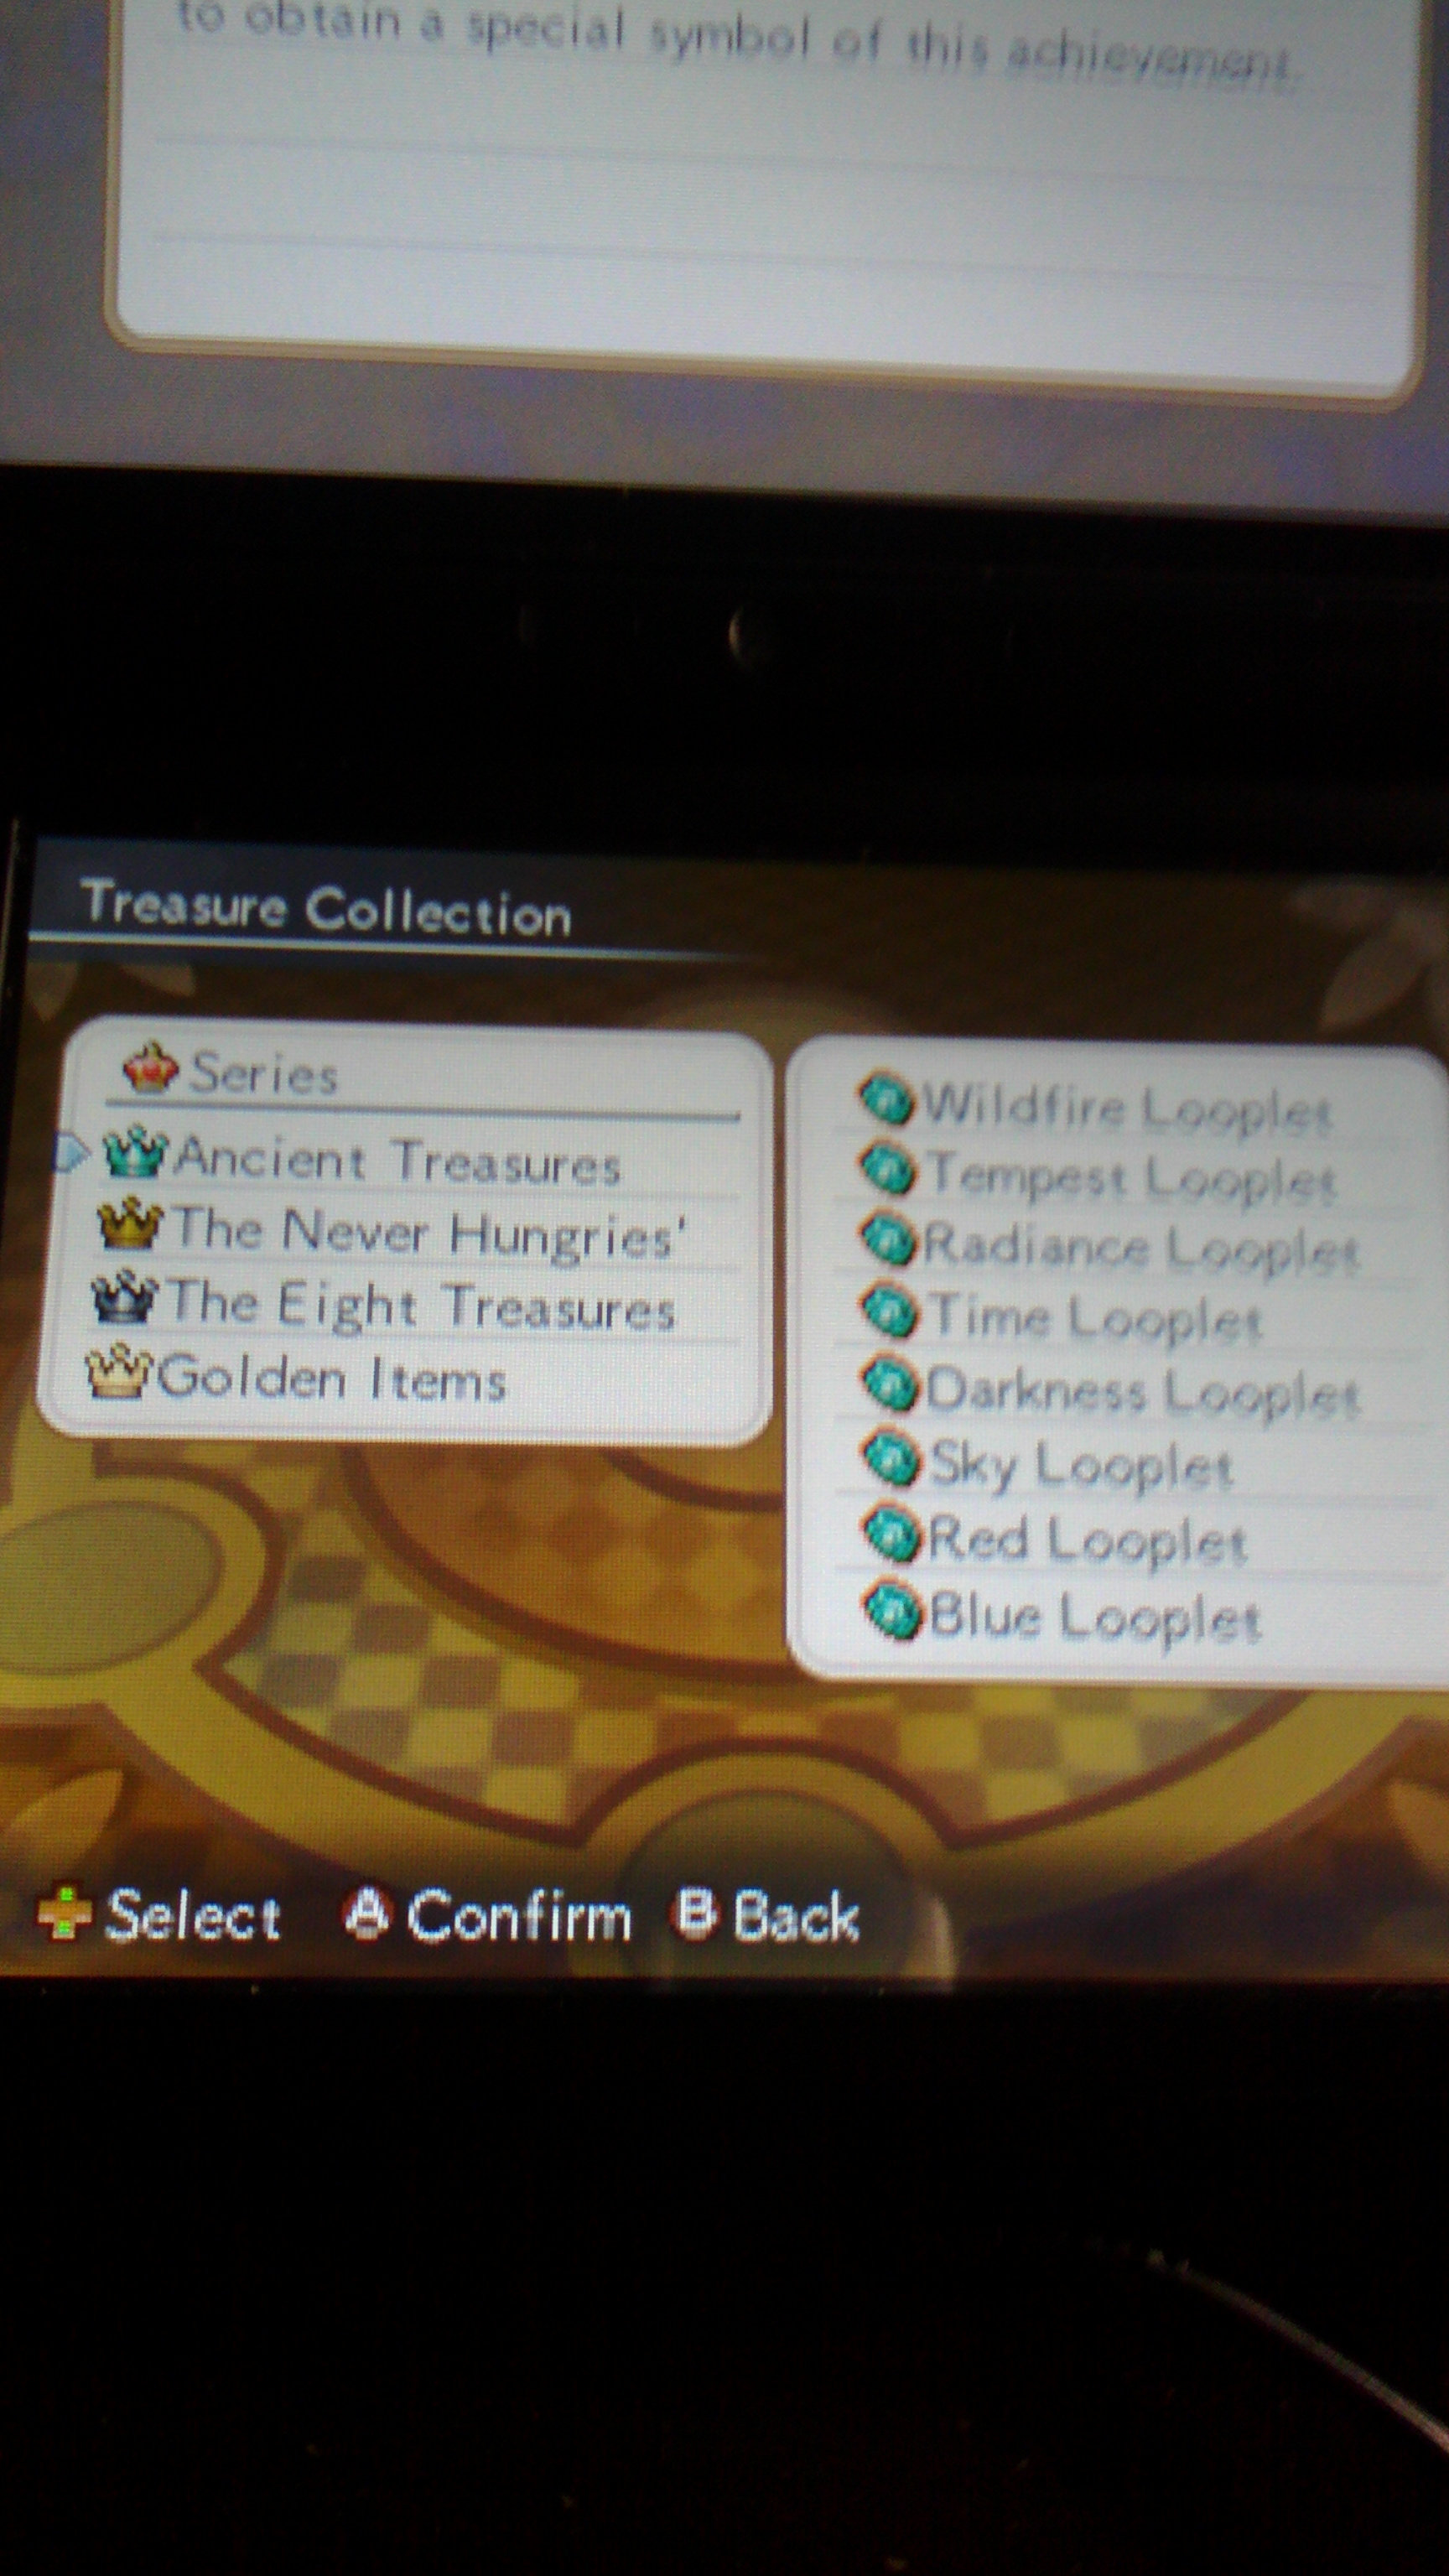
So the first thing you can do the moment you get to Grand Master Rank is that you can go directly to the Tree of Life and talk to Xerneas. Doing this allows you to connect with it and gain the Sky Looplet. This is a pretty good treasure as it boosts the holder's speed by a whopping 50 points, and this matters when you consider that speed is a factor in accuracy and evasion in this game.
But anyways, onto Buried Ruins. Way back then, the first proper Gates Floor dungeon was Sheer Mountain Range, generally considered the longest dungeon in the main story largely due the long, large floors that no other story dungeon had. Buried Ruins has this same tileset as that dungeon, but now it's by far the fastest of the Gates Floors layouts. Why? Because we have access to things that can fly, and this dungeon has no walls, just random peaks protruding from the ground. This means that we can just pack a team full of flying Pokémon and just not care about the layouts.
So we bring Moltres (Sea Looplet), Zapdos (Tempest Looplet), and Drifloon along. In terms of the power level, it's nothing bad as most things give around 100 Exp, so the 20 floor flight to the end is not very difficult. Using the Sea Looplet to use item locations as points to where to go, we end up breezing through to the end, only needing to replenish hunger once. At the end, we meet up with Yveltal who is ready to atone for its mistakes. We get its connection and the Darkness Looplet, which boosts Attack and Special Attack by 20 points.
Apex Mountain [Zygarde]
Apex Mountain is definitely the more difficult of the two new dungeons, but compared to the Never Hungries dungeons, it's fairly easy. This dungeon consists of 31 Gates Floors, with walls added in, and comprises mostly of Rock-types, some Water-types, and a couple of loose ends. We bring along Smeargle/Entei/Heatran for this dungeon, and the only thing to worry about is Sturdy for the sake of Sheer Cold. There are a few other random things to worry about like Omastar and Gyarados, but they are nothing that we cannot dismiss.
Anyways, our floor luck was mostly mixed throughout the 31 floor journey, and we did get one Monster House, but yeah, compared to the Never Hungries, the dungeon is basically a breeze. Getting Trap Proof helps with that as well. At the end we meet up with Zygarde and get its connection. We also pick up our final Treasure in the Time Looplet, which boosts Special Defence by 40 points. Nothing too useful, but for completing the treasures, we get the Ancient Crown and the Completion Crown. Yay. They are also functionally useless, but provide proof. We also unlock Destiny Tower, which is where the grand finale will take place. But there's no point going there now, first we need to finish...
The Long Road to 778 Connections
... And what a long road it is with 686 connections at this point in the game. The last 100 connections in general are generally the slowest 100 in the game, so what I am going to do is list dungeon, missions + extras, and what I connect, so you folks can see the unlucky Pokémon that had to wait until the very end of this run to join up. Here we go:
Gentle Slope Cave (1 Mission) [Poliwhirl, Qwilfish, Tentacool]
Longfield Cave (1 Mission) [Dugtrio]
Sunbathed Garden (1 Mission, 1 Traveller, 1 Fainted) [Froslass, Scizor, Shroomish, Slaking, Swinub]
Serpentine Mountain Trail (1 Mission) [Chimecho, Diglett]
Uprise Range (1 Mission, 1 Traveller) [Ambipom, Mantine, Zangoose]
Mystical Forest (1 Mission) [Illumise, Volbeat]
Mysterious Plains (1 Mission, 1 Fainted) [Cascoon, Foongus, Silcoon]
Mysterious Plains (1 Mission) [Kakuna]
Small Sand Dune (1 Mission) [Buizel-F, Diggersby, Floatzel-F, Floatzel-M]
Berry Forest (1 Mission) [Conkeldurr]
Berry Forest (1 Mission) [Vigoroth]
Forest of Bounty (1 Mission) [Spritzee]
Abundant Pass (3 Missions, 1 Traveller) [Blissey, Delcatty, Delphox, Grotle, Mamoswine]
Mystery Jungle (2 Missions, 1 Traveller) [Avalugg, Doublade, Houndour, Meowstic-F]
Sunny Spot Hill (1 Mission, 1 Traveller, 1 Fainted) [Delibird, Ivysaur, Metang]
Friendly Meadow (1 Mission) [Ferroseed]
Small Sand Dune (1 Mission) [Lunatone, Staryu, Starmie]
Stealth Cavern (2 Missions) [Nincada, Solrock]
Crystalline Maze (1 Mission) [Ninjask]
Little Canyon (1 Mission) [Rhyhorn]
Spiral Vortex (1 Mission) [Glalie]
Midnight Sun Gorge (2 Missions) [Shuckle, Skarmory]
Forest of Fairies (2 Missions) [Hariyama, Hitmontop, Meditite, Mismagius]
Flagstone Cave (1 Mission, 1 Traveller) [Kricketune, Sliggoo]
Frozen Mountain (2 Missions) [Porygon, Togetic]
Flagstone Cave (1 Mission) [Pumpkaboo]
Frozen Falls (1 Mission) [Tyrantrum], 1 Reset to Client death
Gooey Bog (1 Mission) [Hoothoot]
Sand Dune of Spirits (1 Mission) [Pidgey, Tangela, Venomoth]
At this point, we hit 750 connections, which is enough to finally recruit Kecleon for free at the Kecleon Shop. Kecleon basically makes reference to how it's normally the last one to get connected and all that jazz, but yeah. It also gains the ability to sell treasures or something like that. Kecleon also joins at Lv1 and levels up really fast until a certain point and then takes forever to level up or something. It's one of those Pokémon. We will not be using Kecleon this run as all the good exp places are behind us. You could expedite the process with Golden Bananas but we are not going to to do that. Anyways, back to the missions:
Valley of Strong Winds (1 Mission, 1 Traveller, 1 Fainted) [Bronzor, Kabuto, Muk]
Thirsty Desert (1 Mission) [Burmy-G, Burmy-S, Scatterbug, Wormadam-G, Wormadam-S]
Secret Quarry (1 Mission) [Probopass]
Golden Suite (1 Mission) [Cacnea, Volcarona]
And with Golden Suite, that is all the regular missions done. However, that puts us at 762 connections, which means we still have 16 Travellers, Fainteds, and Pumped Ups left to do. However, with all the missions done, the connection orb will now tell us where the remaining Pokémon are, two at a time. So now it is time to pick them up:
Headwater Hollow (1 Fainted) [Paras]
Electric Wasteland (1 Traveller) [Kadabra]
Super Apple Forest (2 Fainteds) [Geodude, Numel]
Cape of Wonders (2 Travellers) [Ariados, Musharna]
Elegant Gorge (1 Traveller, 2 Fainteds) [Escavalier, Granbull, Slakoth]
Abundant Pass (1 Fainted) [Shiftry]
Mysterious Plains (1 Traveller, 1 Fainted) [Camerupt, Roggenrola]
Hall of Magic (1 Traveller) [Cradily]
Sandy Cave (1 Fainted) [Tirtouga]
Cave of Training (1 Fainted) [Ducklett]
Holey Meadow (1 Pumped Up) [Larvesta]
And this takes us to 778 connections. This will unlock the final mission of the game, and that is to meet up with Arceus at the end of Destiny Tower. Before we do that however, there's some other things we need to do...
Those Ten Dungeons We Did Not Need to Visit
So we have ten dungeons we did not need to visit at all and we are going to visit them to fulfill the requirements for 100%. The game does not care whether or not we complete these dungeons, so we are going to simply visit them and then hit "Give Up", after storing all our items of course. In order:
Bustling Valley
Moonlit Cave
Frosty Tree Steps
Deep Ocean Tunnel [Level Reset]
Temple Remains [Level Reset]
Sacred Ruins [Level Reset]
Hidden Cave
Fresh Meadow
Freedom Coast
Pumpkaboo Forest
Of course, we also have to wait for Smeargle to become available, so we do one extra Give Up in Open Pass. After that, it is time.
Destiny Tower [Arceus]
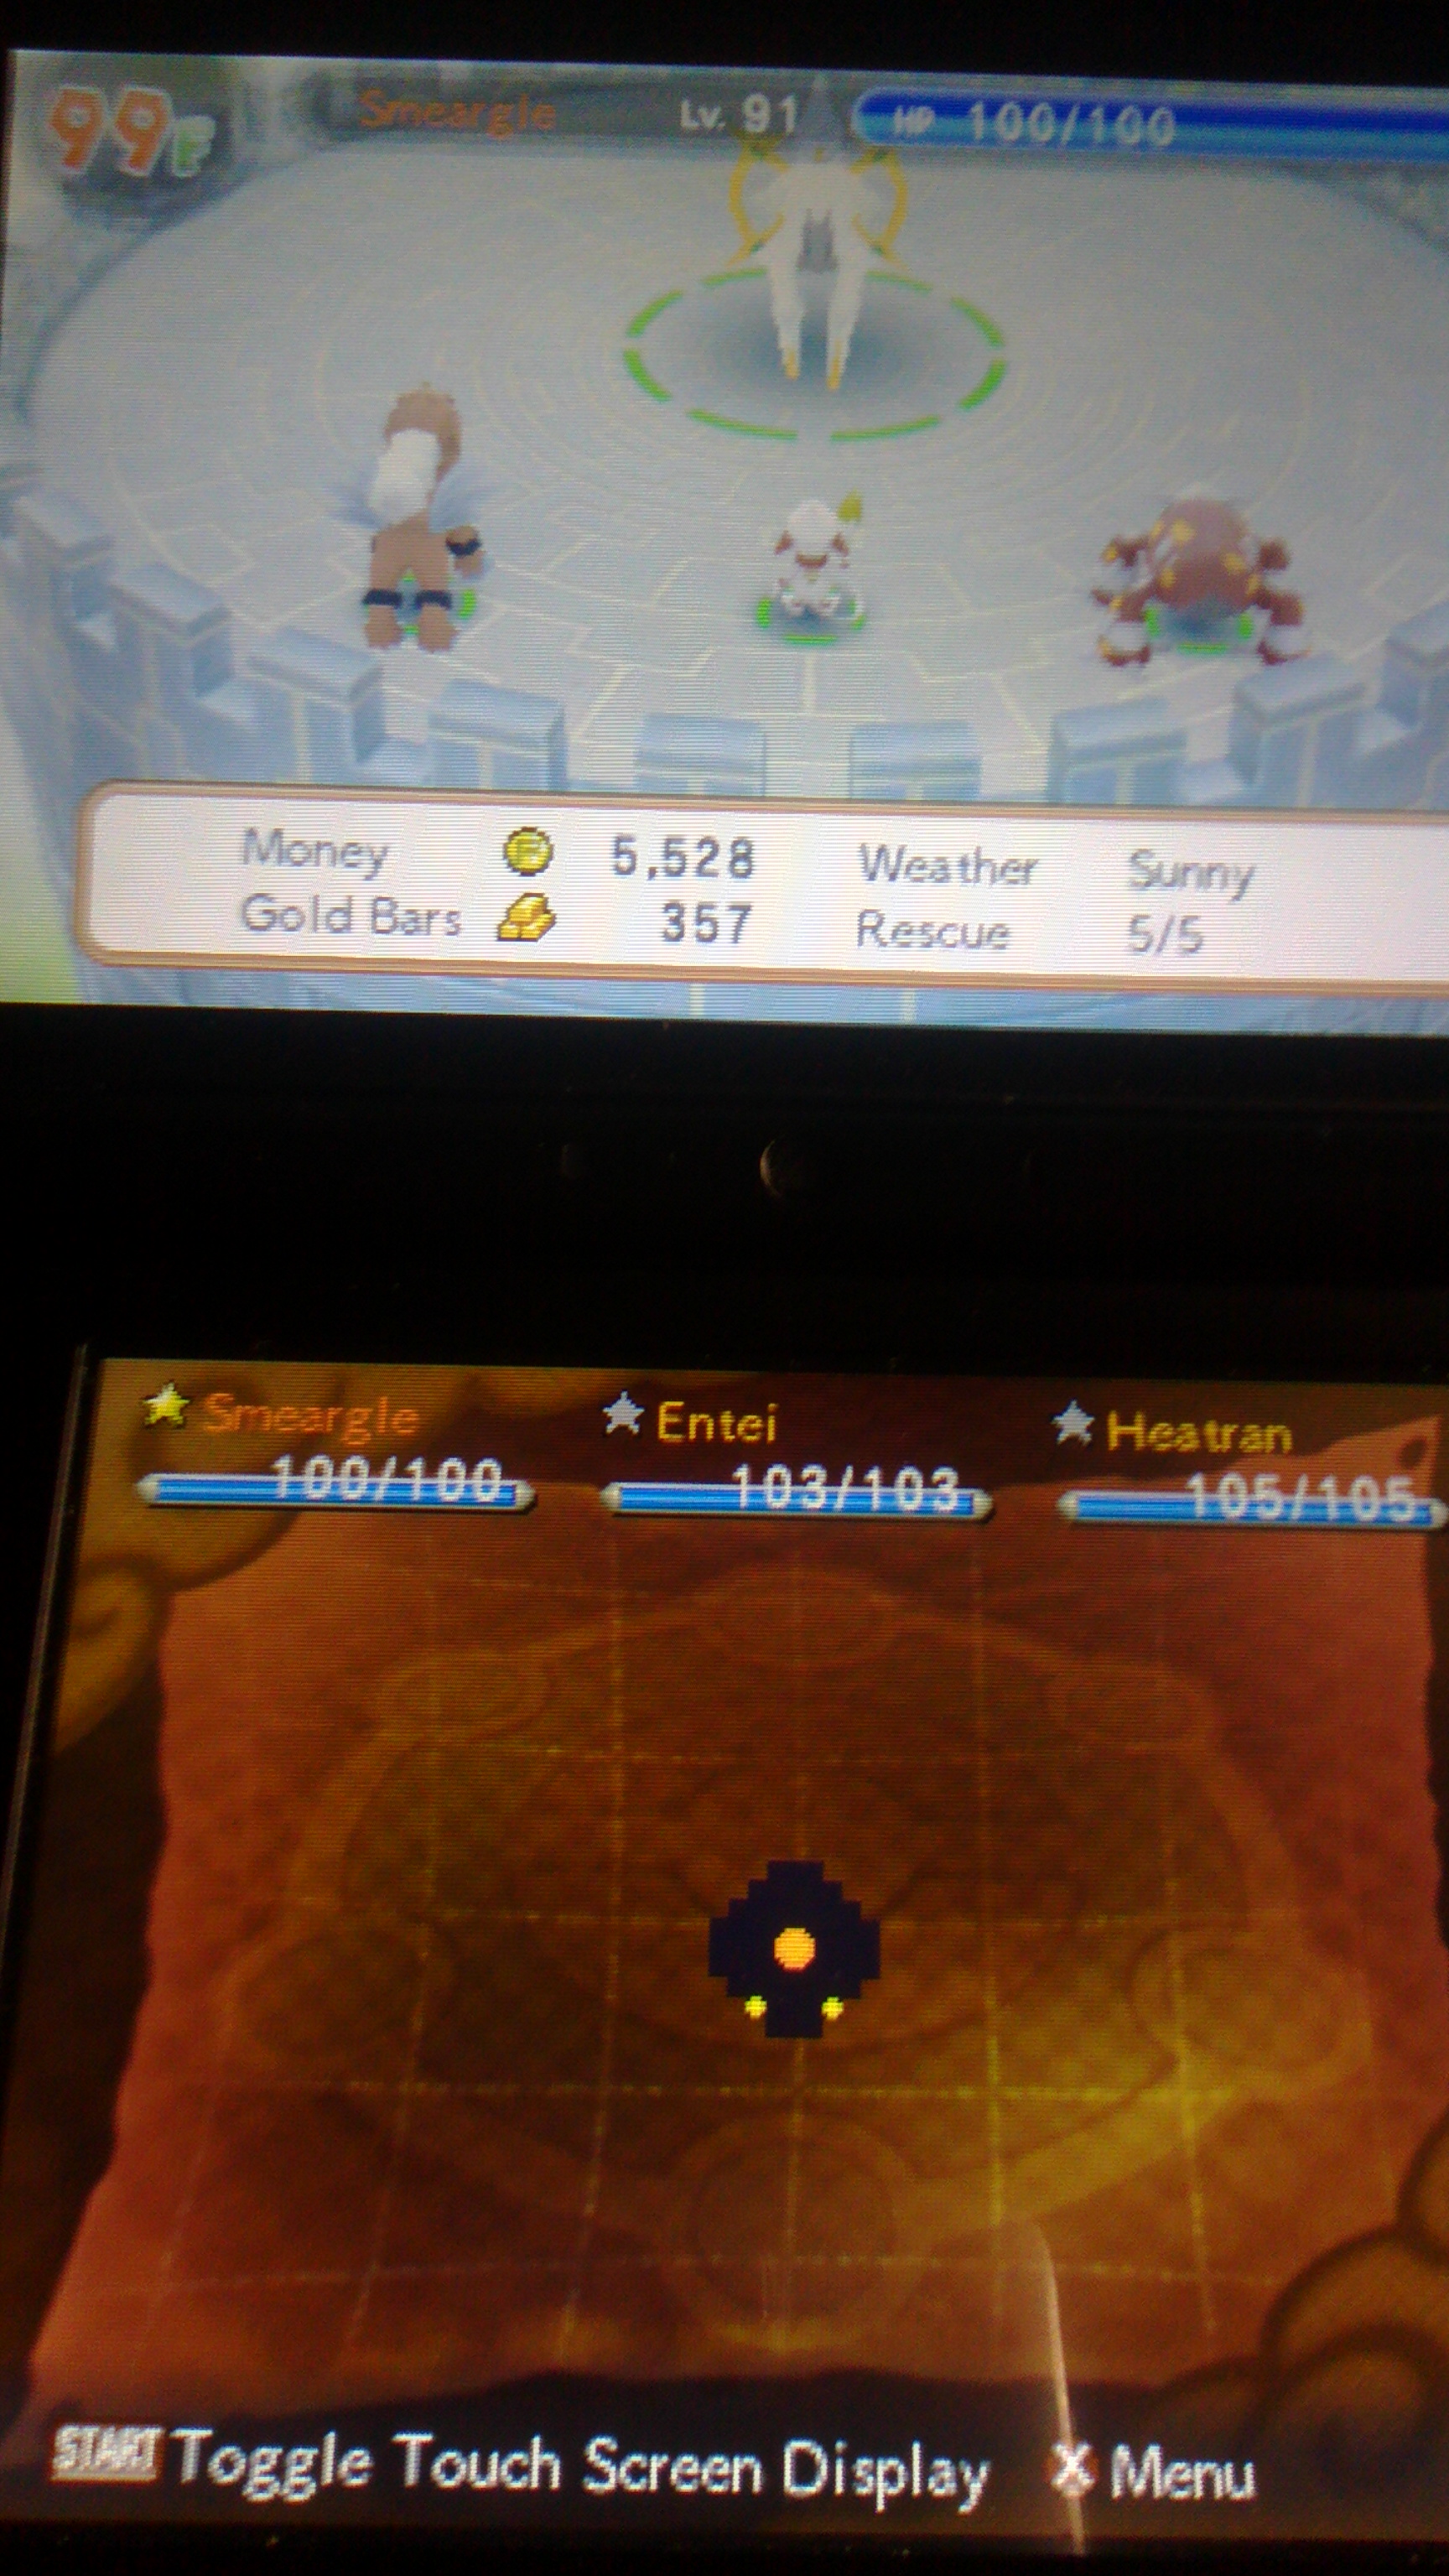
And what a final dungeon we have on our hands. First things first, this is a 99F dungeon, the only one in the entire game. Secondly, this dungeon has the highest power level in the entire game, with average levels going into the 90's minorly stepping up from the Never Hungries dungeons. Third, we have the main gimmick of the dungeon, where every five floors (with a minor error with the music/background changing on 70F and 75F instead of 71F and 76F, also Dodrio shows up on the Ground-type floors), the dominant type changes (alongside background and music). It goes like this:
1-5F: Electric ~ Gentle Slope Cave
6-10F: Normal ~ Tree of Life: Roots
11-15F: Fire ~ Fire Island Volcano
16-20F: Water ~ Submerged Cave
21-25F: Grass ~ Lush Forest
26-30F: Bug ~ Open Pass
31-35F: Fairy ~ Purifying Cave
36-40F: Ice ~ Tree of Life: Trunk
41-45F: Flying ~ Showdown Mountain
46-50F: Rock ~ Sheer Mountain Range
51-55F: Poison ~ Calm Craggy Area
56-60F: Psychic ~ Prehistoric Ruins
61-65F: Ground ~ Revelation Mountain
66-70F: Steel ~ Ancient Barrow
71-75F: Dark ~ Cave of the Deep
76-80F: Dragon ~ Mystery Jungle
81-85F: Ghost ~ Abyssal Badlands
86-90F: Fighting ~ Road to Primeval Forest
91-98F: Any Type ~ Reverse Mountain
And then for the final eight floors before Arceus, every type is around. Furthermore, the music is different for each five floors starting with Gentle Slope Cave for the first five floors and ending with Reverse Mountain for the last eight. The last two floors of each five floor block also have limited visibility, making Sea Looplet really helpful. Mercifully there is no boss fight at the end of it all; just talk to Arceus and its done.
It goes completely without saying that with no vitamin buffs and no revivers that we absolutely need to be as safe as we can as one mistake means it's all over. Clearly to be as safe as we can be, we need to be able to dismiss enemies when possible, which means using Smeargle with the Sea Looplet. As for teammates, we will go for Entei with the Wildfire Looplet, and Heatran with the Tempest Looplet. We also stock a bunch of safeties. All the good wands (and Guiding Wands), all the Decoy Seeds, all the Pure Seeds, and what have you. With all this in mind, it is time to take the monstrous climb to the peak.
Anyways, onto the trek itself. We mostly employ the same strats as the Never Hungries dungeons, with Perish Song, Sheer Cold, all that jazz. We do manage to find a few good emera along the way. Tunnel for Smeargle to create some shortcuts, Sun's Blessing to bring out the sun and power up Entei and Heatran, PP Restore to save on Elixirs. For Entei we got things like Better Odds, Power Boost Y, Type Bulldozer, and eventually Go For Broke!. We did not get as useful things for Heatran, but its damage helped out. At the start it was mostly a case of not being in the same room as enemies but eventually, as we got the Emera, Entei was becoming strong enough to one shot things with Sacred Fire. There were a couple of close calls however. Smeargle tried to cover a Vacuum Wave and somehow dodged. I also walked into a Gunk Shot on 91F and somehow dodged it. I also hit a Grimy Trap which made some Perfect Apples go bad, but there's enough Apples around that hunger is not a major issue. We also had two early Monster Houses in the first ten floors. But try as some might, we make it to the end. First try.
Anyway, at the top we connect with Arceus, the final recruit of this long and arduous run. But for 100%, we have to do one final thing, and that's to talk to the Nexus. For visiting every dungeon in the game, we gain... the ability to instantly enter whatever dungeon we want. A bragging rights reward I guess, but the run is finally over.
---
Connections: 779/779 [100%]
Treasures: 25/25 [100%]
Dungeons Explored: 100%
Black / White Kyurem: 100%
Deaths: 48
STARTER/PARTNER + OTHERS USED THIS UPDATE

Meganium
Lv: 67
-Petal Blizzard
-Razor Leaf
-Petal Dance
-Synthesis

Emboar
Lv: 62
-Rollout
-Flamethrower
-Arm Thrust
-Heat Wave

Drifloon
Lv: 63
-Constrict
-Ominous Wind
-Shadow Ball
-Gust

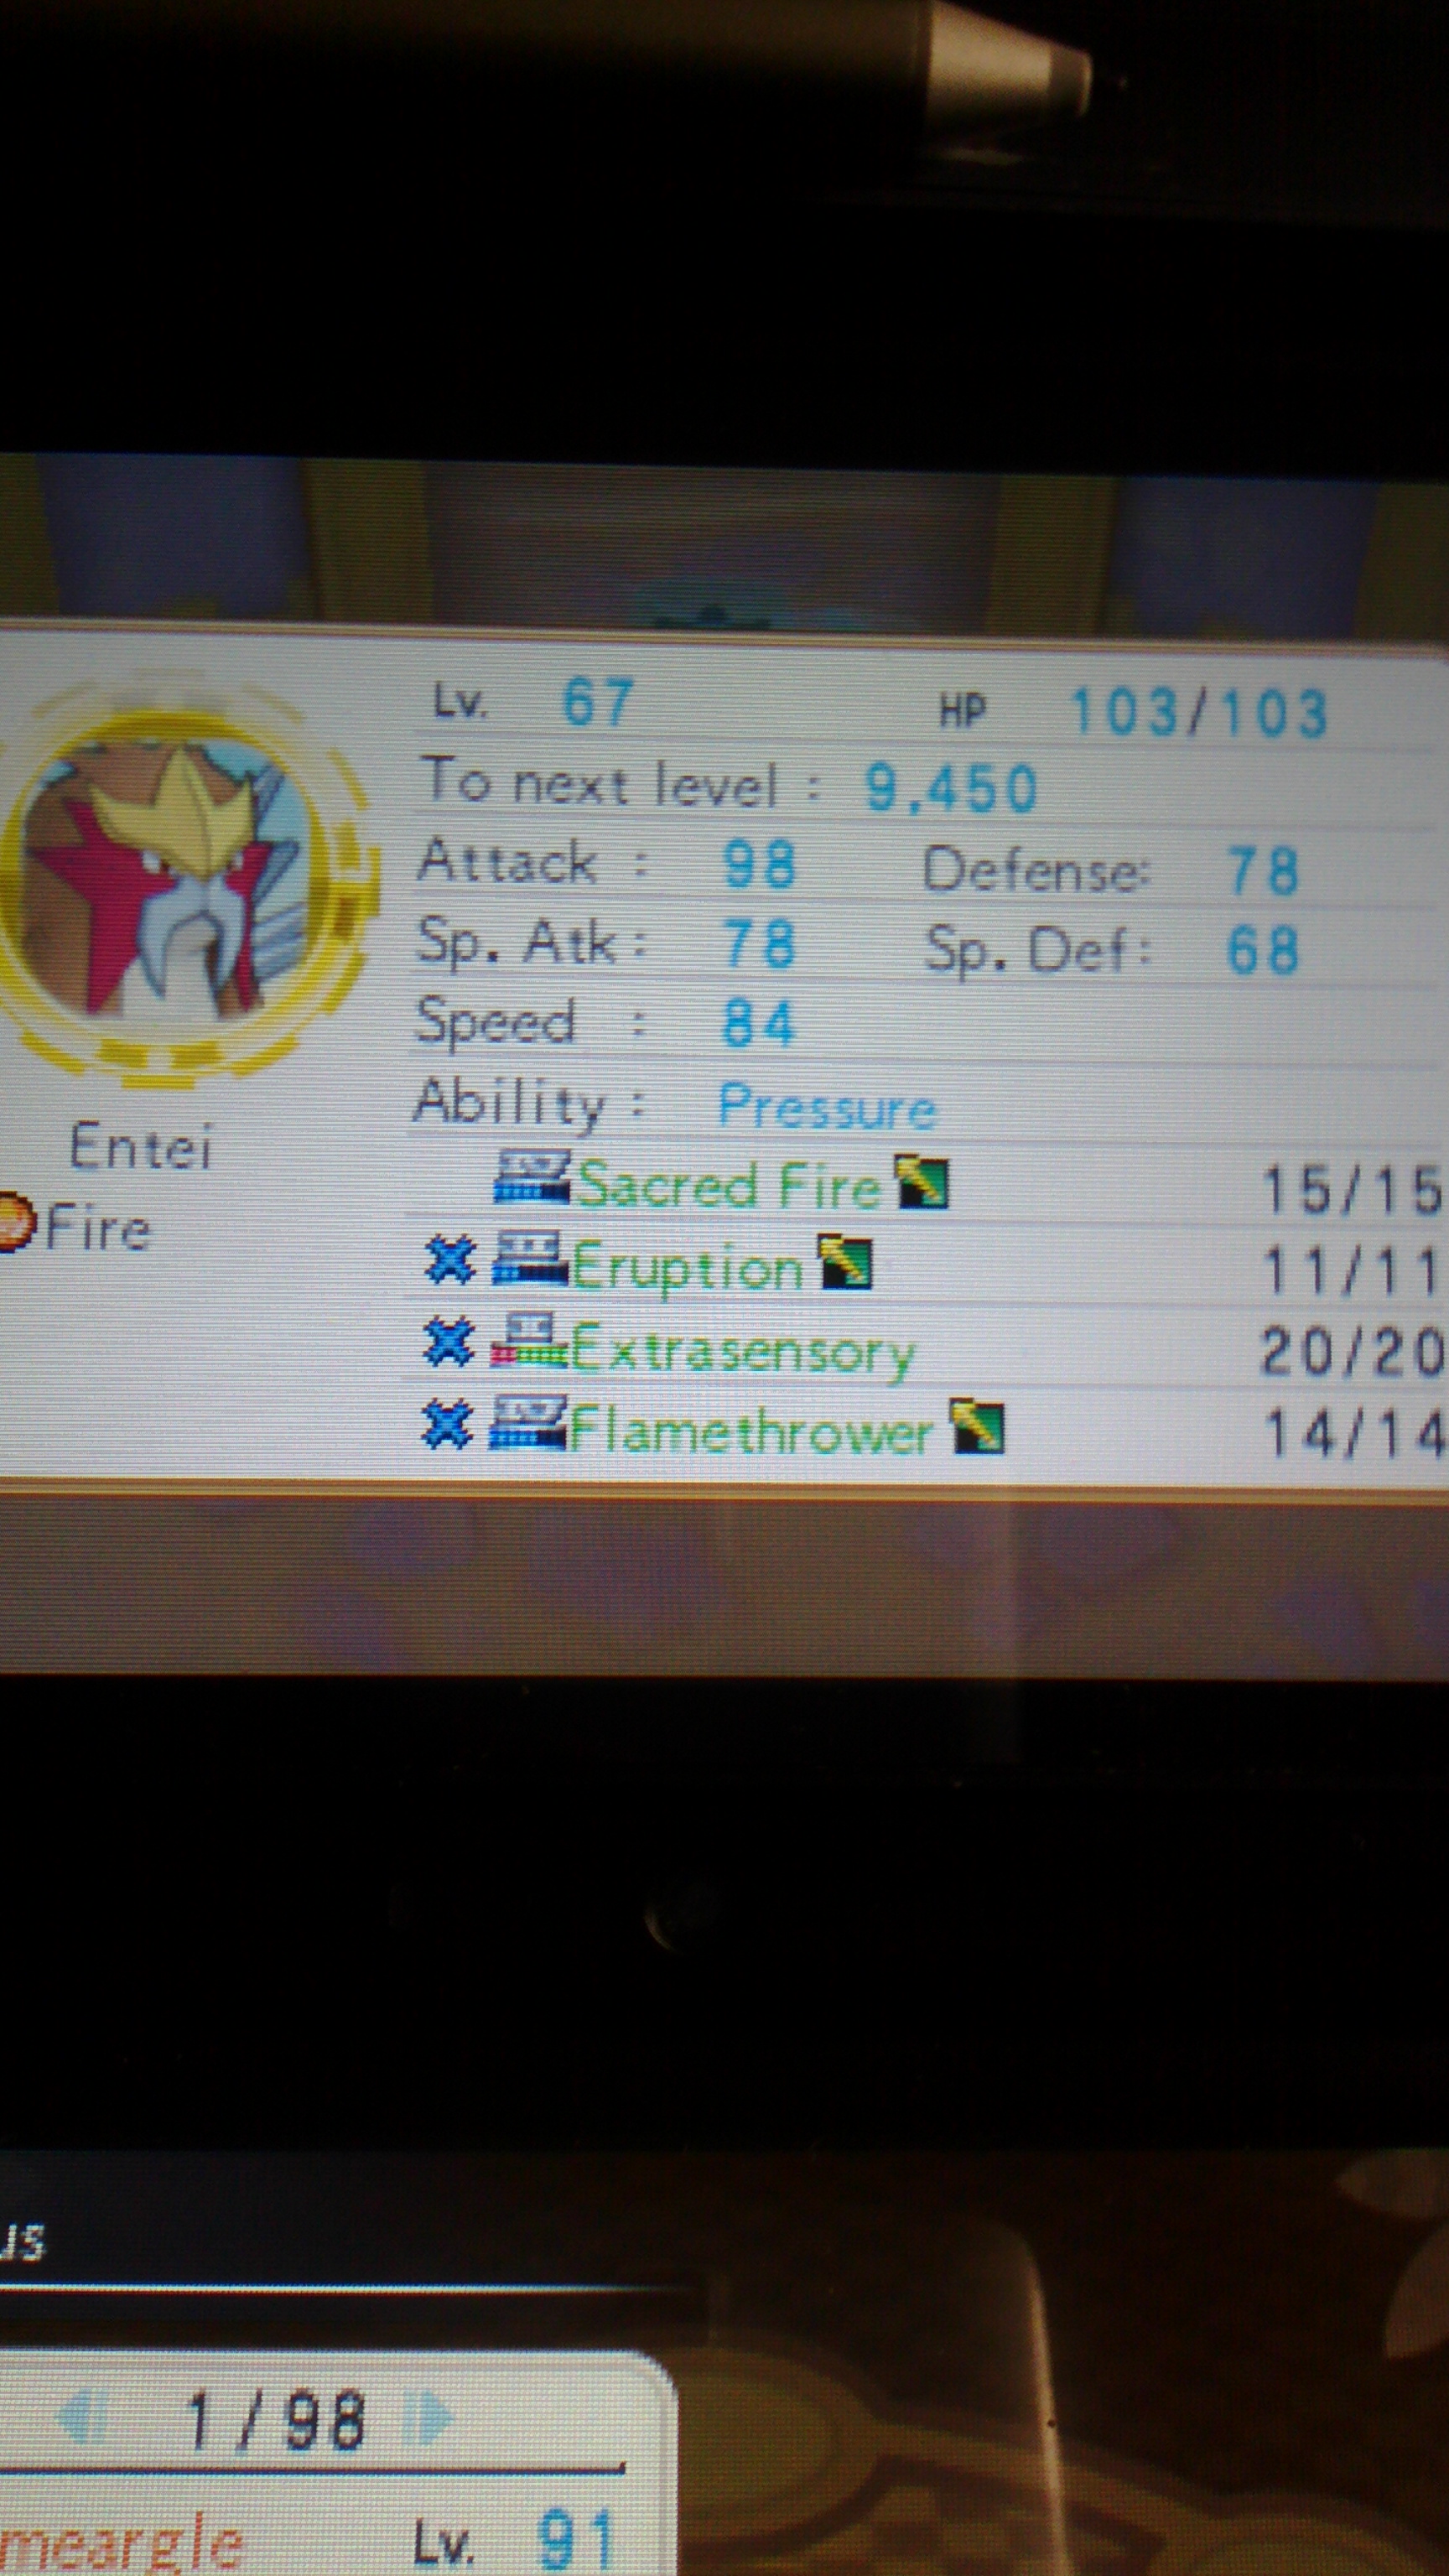
Entei
Lv: 67
-Sacred Fire
-Eruption
-Extrasensory
-Flamethrower

Heatran
Lv: 62
-Heat Wave
-Iron Head
-Earth Power
-Magma Storm

Moltres
Lv: 62
-Heat Wave
-Hurricane
-Agility
-Flamethrower

Smeargle
Lv: 91
-Perish Song
-Mind Reader
-Sheer Cold
-Agility

Zapdos
Lv: 62
-Discharge
-Agility
-Thunder Wave
-Drill Peck
---
FINAL THOUGHTS
So that's the end of the run. The final ingame time is just over 64 hours, but that does not account for deaths so the real total is probably around the 70 Hour mark. I had definitely wanted to do another challenge run since my previous challenge run of Ultra Sun and had completed the living dex for Rescue Team DX. So I decided after four years since last playing it to go do a 100% run. As for restrictions, No Vitamins is an interesting restriction as it means you cannot just pump up two or three Pokémon and go to town. I did talk about the Golden Banana and Golden Seed when I got them but the reason I did not just get a bunch and level up a lot was just to keep things interesting, as otherwise I could just instantly get Lv100 and just steamroll things.
No Revivers however, is the more interesting restriction, as it forces you to get good at the game, when you have no second chances if you lose all your health. It means you have to pay attention at all times, especially later on. It means you have to concentrate and think about every move you make. One mistake could mean you cannot finish a dungeon. Sometimes, cheap deaths can happen, like in Altar of Ice: Depths with random Blizzard snipes. But in general, deaths are mostly on you, which is fair. I tried as much as I can to capture with what methods I have at my disposal. No Wondermail just means no wondermail.
As for some of the strats, I do not blame anyone who thinks they got progressively lamer and cheesier as the run goes on, but for bosses, there's a lot of ways to cheese he fights. I tried to keep things as insteresting as I can, but PMD has never been that great in the boss department. Perish cheese is definitely "boring, but practical" and there's definitely some alternatives out there. But generally I found it better to just play it safe and take the path of least resistance.
As far as the run itself, it was alright. I did make a few mistakes and there was definitely a few things that were not super optimal out there. For instance, if you want to do this run and be really optimal, Pikachu is a better partner choice due to Thunder Wave actually being broken in boss fights and can contribute much more in the postgame than Tepig can (I did use Emboar for general mission days alongside Meganium). Chikorita is definitely the optimal hero, however. In terms of favourite strats, I liked the Darkrai strat the most in terms of having really neat applications such as Uproar, Hawlucha, Hammer Arm to maximise turns, and later on with Primal Groudon doing a single movement to maximise attacks as well, so something like Tornadus-T could allow three rounds per boss attack with something like move > Tailwind Alliance > Hammer Arm Alliance each turn.
In terms of one-upping this run, you can definitely try if you want to. There certainly exists some harder challenges for this game, just don't try itemless Super Mystery Dungeon unless you love having really low chances of making it past certain story bosses (especially mob bosses). Super Mystery Dungeon is still my favourite PMD casually, but I will not lie and say that 100% does feel like a checklist in a way that I will probably not do another 100% run for some time yet. I don't know if I will do another challenge run on this forum yet and if I do, it won't be for a few months at the very least. I guess I could do a Sacred Ruins run if some of you are interested in what is good for that dungeon.
Other than that, I am considering this challenge run project done. Thank you for reading.
Its_A_Random
That would be "delightfully" evil. >:)Excellent, well done.
I am kind of shocked they didnt have you fight Arceus anyway. Imagine dealing with that at the end of a 98 floor treck
Anyways, congrats Random on finishing this! I wouldn't be crazy enough to ever try beating this game without Vitamins or Revivers... Hats off to you being crazy enough to do so.