

:sm/charjabug: :sm/togedemaru:
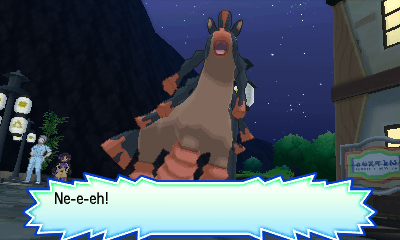
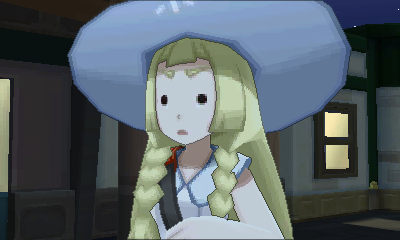
I arrive at Malie Library just in time to watch Lillie get stomped by an angry Mudsdale. Not really, it's Hapu's. She leaves after offering to help Lillie out with her ruin expeditions, and the two of us head inside the library to track down some book she's after. There's not much in here for me aside from a Fly TM from a lady on holiday from Johto, so I just head upstairs to help Lillie with the book-wrangling... except Acerola is already there and just brings Lillie the book she was after. Saves me the fuss, I suppose.
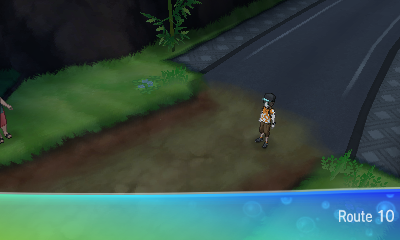
5 Trainers here, plus 8 Stufful to track down as part of a sidequest, not to mention the usual assortment of bag fodder. But there are some things here that definitely aren't fodder - EV-reducing berries! You get 3 random ones per day from the berry pile on the route, but since I can grow them at Poké Pelago, I soft-reset a few times until I get 3 different berries (Kelpsy, Hondew and Grepa), then go and visit Mohn to develop the rest of the islands.
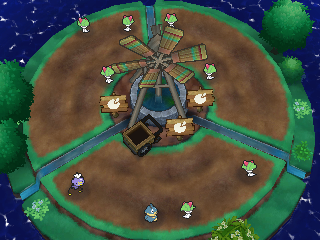
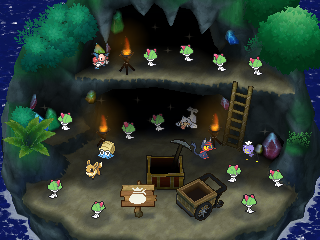
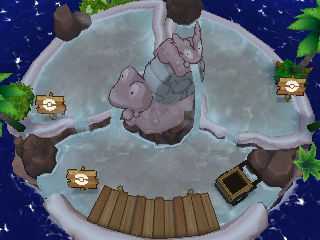
He gives me 10 Rainbow Beans to say thanks for helping him perfect Poké Pelago. Once everything's sorted, I plant my new berries and send my minions off into Isle Aphun to look for treasure, though they'll probably just come back with Hard Stones. I return to the berry pile the next day for more soft-resetting, having to catch a Crabrawler this time before I can pick up the remaining Pomeg, Qualot and Tamato Berries, then plant each of those as well. Last up is a quick flight to Route 8 to stock up on X items, then I can begin properly clearing out Route 10.
Once I'm back, I pick up a Lemonade and a Super Potion off the ground (which are apparently still safe to drink?), followed by a Tiny Mushroom, and then run into a Firefighter.
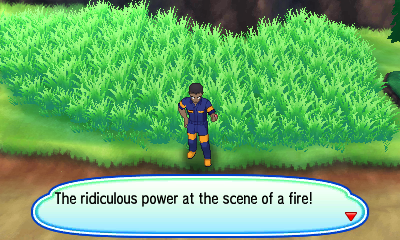
Firefighter Alex
Octillery Lv30 (Psybeam/Aurora Beam/Bubble Beam, IVs: All 25)
Struggle deals very little damage once again, but Bubble Beam isn't doing much more, so I use an X Attack. The battle's made a bit more annoying when Bubble Beam gets a Speed drop, meaning Phart has to be a bit higher on HP before it can commit to the final Struggle, but Octillery ultimately goes down in 5 hits with help from some Moomoo Milk. I have to dodge the rustling trees along the route to avoid the wild Fearow (with how fast they are, it's hard to escape any encounters unscathed), but manage to make my way to a Max Revive and a Beauty without disturbing any wild Pokémon.
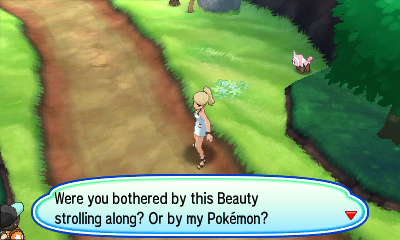
Beauty Andrea
Flaaffy Lv29 (Charge/Take Down/Electro Ball/Confuse Ray, Ability: Static, IVs: All 15)
Phart actually does a decent bit of damage with Struggle on turn 1... except it was a critical hit, and now it's paralysed and confused. A Full Heal fixes them both, and the incoming Electro Ball only does 10 damage, leaving Phart free to activate Static again with its next attack. Flaaffy grants us a few extra turns by repeatedly using Charge without actually attacking, and so it gets taken down by Phart's fifth Struggle. A little further along the path, I find a Police Officer in the grass.
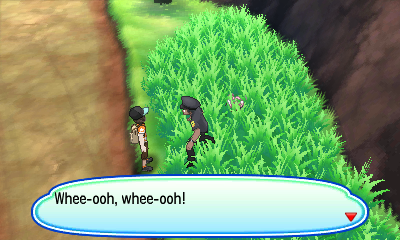
Police Officer Mitchell
Growlithe Lv30 (Fire Fang/Take Down/Flame Burst/Agility, Ability: Intimidate, IVs: All 25)
I start with an X Attack to offset the stat drop from Intimidate, and Growlithe deals 21 damage with Flame Burst - enough to notice, but not a big worry since it can't do anything to increase that damage output. Phart manages to 4HKO Growlithe with help from a Lemonade and two Moomoo Milks.
I've managed to round up all 8 Stufful that were scattered along the route, and the lady who asked me to find them gives me $15,000 and a Muscle Band. I doubt I'll use it, but at least Phart actually can use it for something. That's more than I can say for most items in my bag.
While I can't proceed past Route 11 until I've cleared my next trial, I can still explore it right now, and there are a few more battles to cross off the list. A quick search by the route's entrance unearths a Big Mushroom and a Stardust, and as I head along the path, Rotom decides to activate a Roto Prize Money power. A nice idea in theory, but considering the Trainers on the route amount to two Black Belts, a Preschooler, a Youngster and a Lass, they're not going to be forking over much cash even with the boost. Still, may as well try to squeeze in a couple of battles.
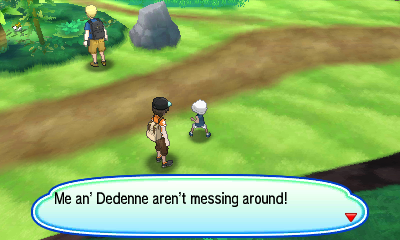
Preschooler Hayden
Dedenne Lv28 (Parabolic Charge/Nuzzle/Thunder Wave/Volt Switch, IVs: All 0)
With zero IVs and random move choices, I think they are messing around. Dedenne spends most of its time using Nuzzle even while Phart is already paralysed, and despite it being unable to move for a few turns, Phart lands a critical hit to KO Dedenne after 4 Struggles. Up next is a Black Belt who's using his master, a Bewear, as his battling Pokémon. That's an interesting relationship.
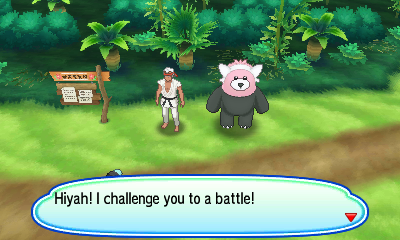
Black Belt Alvaro
Bewear Lv30 (Brutal Swing/Flail/Payback/Take Down, Adamant nature, IVs: 15/31/15/15/15/15, EVs: 252 Atk)
This might hurt. After an X Defense, Phart dodges two Take Downs and lands possibly the weakest Struggle I've seen to date. So I switch to an X Attack, and Bewear lands a Take Down for 24 damage, but Struggle still doesn't hit very hard - I think it might be on par with the Take Down recoil. But at least we're making progress, so I have Phart carry on Struggling, chipping it away between frequent Moomoo Milks while Bewear ignores its Dark moves. I do shit myself a bit when Take Down lands a crit, reducing Phart to 3/127 HP, but the high recoil softens Bewear enough for another Struggle to take it out.
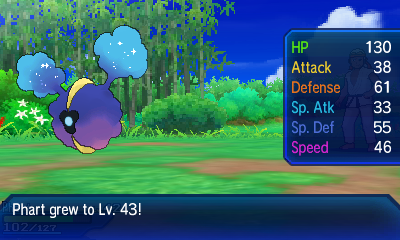
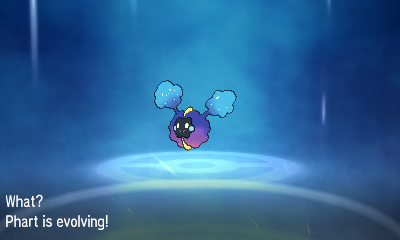
ABSOLUTELY NOT.
It's not as if Cosmoem would actually be any better at dealing damage - in fact, it might be worse, since it keeps the same 29/29 offenses but loses the ability to ignore its foes' Defense boosts with Unaware - but this is a Cosmog solo run, for better or worse. Since Phart is now past the level where it can evolve, the Exp. Points it gains from battles will be increased by around 20%, which sounds nice until you remember the obedience cap is only 7 levels away. Oh dear.
Anyway, Alvaro rewards me with the Payback TM for beating his master in combat. Despite my best efforts, I can't quite reach the next Trainer before the Roto Prize Money wears off, leaving the extra $1,920 I would've earned from beating him unclaimed. Not to worry, I don't really need money and I still have 38 Roto Prize Moneys in my bag.
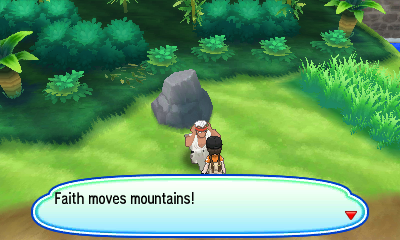
Black Belt Clayton
Hariyama Lv30 (Knock Off/Vital Throw/Belly Drum/Smelling Salts, Adamant nature, IVs: 15/31/15/15/15/15, EVs: 252 Atk)
See, a Cosmoem would be shitting itself at the prospect of a +6 Knock Off, but Cosmog doesn't care about Belly Drum at all. I use an X Attack as Hariyama chops its HP in half, then Struggle for a little under 25%. Knock Off still hits hard even with Unaware, but Phart's HP stays above the red, and it dodges an incoming Smelling Salts to take out Hariyama with two Struggles.
I can't get much further past Clayton before a Trial Guide stops me, since I don't have the Electrium Z yet. So I head back to Malie, gathering up the last few items as I go: a Quick Ball, a Big Mushroom, a Star Piece, a Stardust, a Tiny Mushroom, and TM74 Gyro Ball. In other words, free cash! There's still one more battle on Route 11, but unfortunately it's a Double Battle, so I have to go and fetch Ralts first.
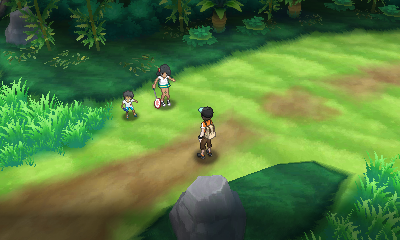
"If you really wanna see what we can do, you've gotta have two healthy Pokémon!"
"If you really wanna see what we can do, you've gotta have two healthy Pokémon!"
Yes, they both have exactly the same line. That's new.

Athletic Siblings Alyssa and Sho
Lilligant Lv28 (Mega Drain/Synthesis/Teeter Dance/Quiver Dance, IVs: All 20)
Whimsicott Lv28 (Mega Drain/Cotton Spore/Gust/Tailwind, IVs: All 20)
Ralts faints quickly as always, and Phart vaguely tickles Whimsicott with Struggle while Lilligant goes for Quiver Dance. This is clearly going to take a while, so I use an X Sp. Def, which reduces the damage from the subsequent Mega Drains to single digits. Once I've used an X Attack as well, I try Struggle again, and despite Lilligant confusing Phart with Teeter Dance, it still manages to hit Whimsicott - a bit harder this time - while still leaving it above yellow HP. I heal it up, it lands a Struggle on Lilligant for decent damage... and then Lilligant wipes it away with Synthesis immediately. The battle plods on like this for a few turns, Phart and Whimsicott occasionally stopping to hit themselves in confusion, before Whimsicott eventually falls to a Struggle. Lilligant holds out a bit longer thanks to Synthesis, but it too is knocked out once it exhausts its PP.
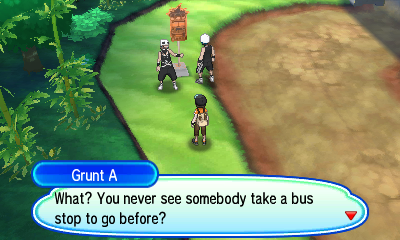
Back on Route 10 again, Team Skull are waiting for a bus up to the observatory. They seem to take offense to my mere presence, so it's time for another battle.
Team Skull Grunt
Houndour Lv29 (Bite/Odor Sleuth/Beat Up/Fire Fang, IVs: All 15)
This one's an easy 3HKO with Struggle, only needing one Moomoo Milk to keep Phart active. The real difficulty (if you can call it that) comes from the fact that it leads straight into a fight with the other grunt.
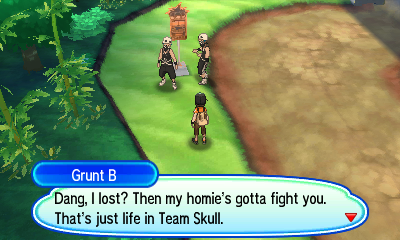
Team Skull Grunt
Golbat Lv29 (Confuse Ray/Air Cutter/Swift/Poison Fang, IVs: All 15)
Despite dodging the first Air Cutter, Phart's Struggle doesn't do enough damage to justify not using an X Attack, so I heal it up and use one. Though it can't avoid getting struck by Confuse Ray and hitting itself in confusion, it manages to KO Golbat with another 3 Struggles to end the battle.
Team Skull decide to head back to their mansion after losing, running past Kukui as he rolls up to the bus stop. This is my cue to catch the bus up to Mount Hokulani, but first, I'll be rattling through some more Festival Plaza missions - I got lucky with the fortune-teller bonuses and can now earn 39 FC from each mission instead of 36 FC for the rest of the day.
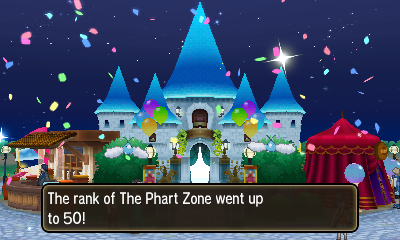
This is technically an achievement, I think? Certainly feels like one with how many times I've mashed my way through the type-matchups mission. Instead of offering me another facility, Sophocles gives me the option to change the castle's appearance to a "Glitz" theme. Does it look any good?
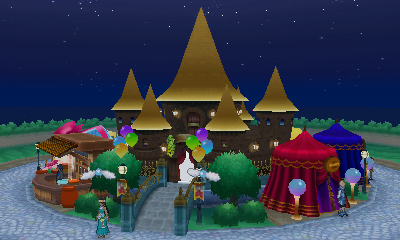
...I suppose? But the basic theme doesn't particularly impress me either, so I'll keep this one as a sort of status symbol. Anyway, I've got a bus to catch.
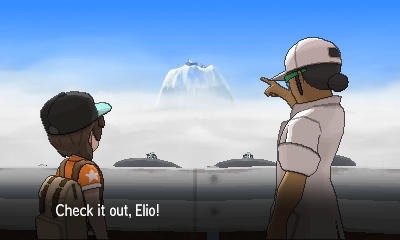
Kukui's got some plans to give Alola its very own Pokémon League, and what better place to build it than on the sacred land atop Mount Lanakila? Clearly nothing has been learnt from the incident with the old Thrifty Megamart. Apparently I'll be battling all the kahunas there after I've finished the island challenge, so let's hope Tapu Bulu hasn't smashed the shit out of it by the time I arrive.
As per usual, I'll be avoiding the story stuff for now in favour of gathering items and fighting Trainers. The Pokémon Center here sells vitamins, but I'd rather just buy them with BP, and even that will probably just be a one-off thing for when I properly EV-train Phart. There are a couple of Apricorn Balls at the top of the mountain, then I start making my way down the road in search of a fight or two.
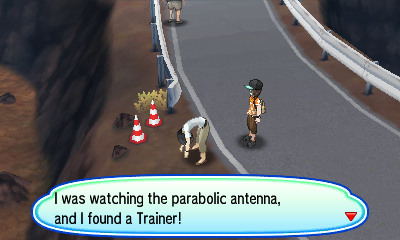
Office Worker Jessica
Clefairy Lv30 (Bestow/Wake-Up Slap/Minimize/Stored Power, IVs: All 15)
One more level and Clefairy would've known Metronome, which might have been more interesting. Alas, it just gets a 5HKO from Struggle while dealing scratch damage in return and using Minimize to no avail.
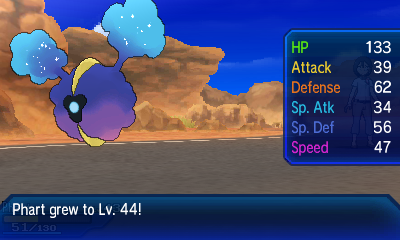
Heading further down the mountain leads to the Volt Switch TM, a Fast Ball and a Rare Candy, followed by a Hiker.
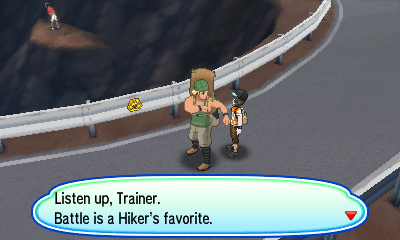
Hiker Thomas
Alolan Geodude Lv30 (Thunder Punch/Self-Destruct/Stealth Rock/Rock Blast, IVs: All 15)
Geodude uses Thunder Punch a couple of times while Struggle deals rather poor damage back. Once Phart gets close to red HP, I use a Moomoo Milk, at which point Geodude uses... Self-Destruct??? And it didn't even do that much damage. Nice move.
Continuing onwards (or rather, downwards), I go to pick up a Heavy Ball but get spotted from a very, very long way away by a Golfer. The screenshot doesn't do it justice, but I can assure you Elio is nowhere near what's on screen here.
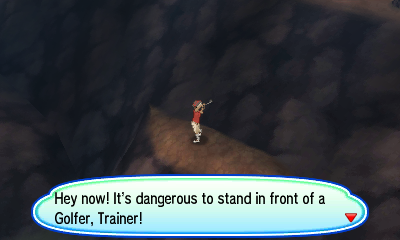
Golfer Sky
Blue Core Minior Lv30 (Tackle/Rollout, Ability: Shields Down, IVs: All 15)
Yellow Core Minior Lv30 (Take Down/Rollout, Ability: Shields Down, IVs: All 15)
Red Core Minior Lv30 (Double-Edge/Rollout, Ability: Shields Down, IVs: All 15)
Well, there's no chance of these ones blowing themselves up thanks to those movesets, but I'd rather not see Phart eating a turn-5 Rollout. I lead with an X Defense and an X Attack, and the first Rollout deals 4 damage while Phart dodges the second, breaking the combo before it even starts. Phart's Struggles deal around 25%, and Shields Down activates after the second hit, pushing the Rollout damage even higher. Luckily Phart dodges the third Rollout hit and KOs the first Minior before it gets going again. The other two Minior go down with less fuss, as the AI chooses Double-Edge and Take Down over Rollout due to their higher base powers.
Once I finally pick up that Heavy Ball I found earlier, I carry on to the last regular Trainer in the area.
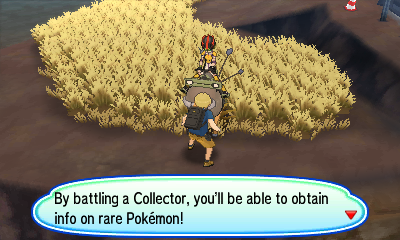
Collector Todd
Passimian Lv30 (Scary Face/Take Down/Bestow/Thrash, Ability: Receiver, IVs: All 15)
Oranguru Lv30 (Psych Up/Feint Attack/Nasty Plot/Zen Headbutt, IVs: All 15)
Since neither opponent is particularly frail, I start off with an X Attack while Passimian hits for 27 damage with Thrash. Struggle is still only a 5HKO from the looks of it, and Phart needs healing already, but luckily Passimian is now confused, turning the 5HKO into a 4HKO by hitting itself. Oranguru enters the battle and uses Nasty Plot despite having no special attacks, alternating between that and fairly weak Feint Attacks until Phart scores another 4HKO. Why on earth didn't it use Psych Up to copy the X Attack boost?
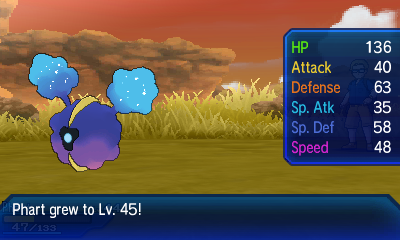
This little power boost arrives just in time for the final Trainer, one who wouldn't fight me until I'd beaten everyone else. I couldn't remember if there's an actual in-game term for these sorts of Trainers, but apparently they're called "skilled Trainers"? But that's probably more of a generic description than an actual label.
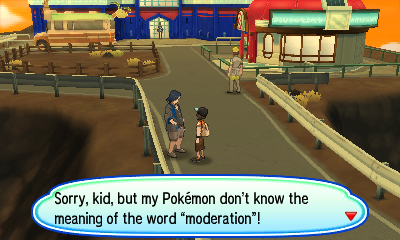
Veteran Akira
Alolan Persian Lv33 (Fake Out/Feint Attack/Screech, Ability: Technician, Adamant nature, IVs: 30/30/20/20/20/30, EVs: 252 Atk / 252 Spe)
Absol Lv33 @ Darkinium Z (Night Slash/Slash/Quick Attack, Ability: Super Luck, Adamant nature, IVs: 30/30/20/20/20/30, EVs: 252 Atk / 252 Spe)
This is probably going to hurt. Persian is not a big threat (though I don't exactly want it using Screech), but Absol has a high chance of landing critical hits that ignore any Defense boosts I put onto Phart, and a crit on Black Hole Eclipse will just outright KO it if I'm unlucky. I'll have to play it carefully.
I start with an X Defense as Persian goes for Fake Out while it still can, dealing almost nothing. I then try a Dire Hit to see what Persian does next, and it uses Feint Attack, dealing 32 damage but more importantly leaving Phart's Defense boost intact. A couple of X Attacks are squeezed in before it tries to Screech, but Phart dodges it, buying me more time for setting up. This consists of a third X Attack and an X Speed - it's still not enough to outspeed Persian, but it will outspeed Absol, the bigger threat. Once the final two X Defenses go on, Phart is ready to attack, and I'm surprised to find Persian still doesn't want to Screech the boosts away. I'm even more surprised when Phart lands a critical hit and OHKOs it right off the bat.
And then the nasty one comes out. Now, Absol actually has the exact same HP and Defense as Persian, so Struggle might OHKO it as well... but I didn't expect Phart to land the OHKO on Persian, so if it falls short against Absol, it's leaving itself open to a KO from a crit Night Slash. Then again, a crit Black Hole Eclipse can KO it no matter what I do, unless I roll the 25% chance of surviving with 1 HP from the affection bonuses. So what do I do here?
Well, Phart is on 66/136 HP, so it'd make sense to heal it now. I use a Moomoo Milk to heal it to full, and Absol goes straight for the nuke button, but the only way it can KO is if it lands a critical hit and Phart fails to activate its affection magic.
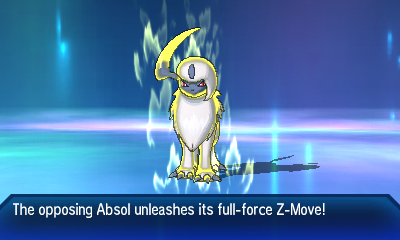
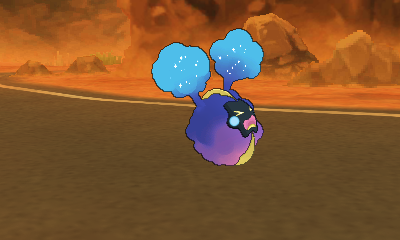
Fuck's sake.
I actually went and calced it afterwards: Phart had a 12.5% chance to OHKO it with Struggle, whereas Black Hole Eclipse would only deal about 35% without that critical hit... which also had a 12.5% chance of landing. Funny.
Nothing to do but reset and try again, I suppose... Persian is a bit more willing to use Screech on the second attempt, but once Phart is at +6 Attack, +6 Defense, +2 Speed and with a Dire Hit active, it 2HKOs Persian with Struggle. I heal up Phart as Absol comes out, since even Struggle recoil will KO it when it's on 20 HP, and Absol goes for Night Slash this time, taking Phart to 112/136 HP with a non-crit. This time, I decide to be a bit riskier and use Struggle, but it doesn't quite KO Absol, and it uses Black Hole Eclipse once more. But it can't land a critical hit this time around, and so I heal up Phart to full so it can use one last Struggle... except Absol simply OHKOs it from full with a mere Night Slash. Double fuck!
I won't bother writing up the third attempt in full detail. Just know that I remembered Guard Spec. exists, used those to block Persian's Screeches, nearly lost to a critical hit from Persian this time, Phart got a 2HKO on it, missed the OHKO on Absol, just about tanked a non-crit Black Hole Eclipse, then beat it with another Struggle after it tried to finish off Phart with Quick Attack instead of Night Slash. NEVER AGAIN.
I receive TM95 Snarl for winning, but it's not nearly enough to make up for the emotional turmoil. What does help somewhat is being reminded that you don't have to battle Molayne to enter the Hokulani Observatory in USUM, as he just hands over a Steelium Z without a fight.
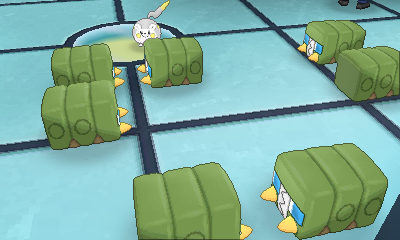
Instead, I have to help round up the Charjabug that are used to power the observatory after they've been fed. I basically just walk up to a couple of bushes, press A, find a Charjabug each time, examine another bush, fail to find the last Charjabug, then watch it very slowly and conspicuously shuffle across the screen in the distance as Molayne wonders where it's gone. Once I "find" it, we can move on to the interesting stuff.
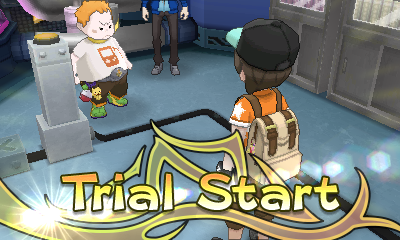
The trial's not too complicated. You press the buttons on a little rotating panel machine to line up the Charjabug in rows of three so they can power the Totem-summoning Pinger machine, and every time you form a line, a Pokémon attacks. There are only two wild Pokémon battles before the Totem Pokémon, and there's an opportunity to heal up between each battle, so there's no chance of Phart having to limp into the Totem fight.
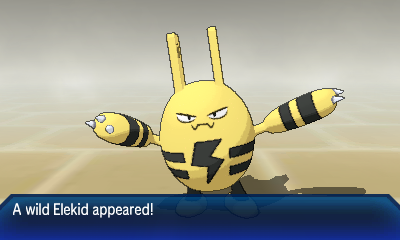
Elekid
Lv29 (Quick Attack/Thunder Punch/Low Kick/Leer, Ability: Static, Jolly nature, IVs: All 0)
Mostly just an appetiser for what's to come, though it does give me some trouble by using Leer and activating Static on turn 1. I have to use a Moomoo Milk on Phart mid-battle, but it still goes down fairly easily after 3 Struggles. Once another row of bus-shaped bugs have been lined up, I can fight the next trial Pokémon.
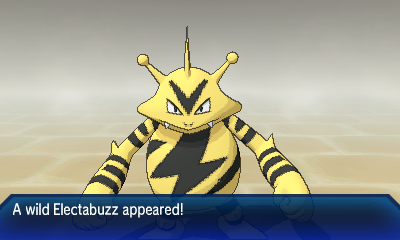
Electabuzz
Lv30 (Electro Ball/Light Screen/Swift/Thunder Wave, Ability: Static, Timid nature, IVs: All 0)
I wonder why their IVs are all 0 all of a sudden? The trial Pokémon had completely random IVs when I was on Akala. Anyway, this fight's not too difficult either. Electabuzz gets a 4HKO from Struggle, with the only real issue being that I had to use a Full Heal as soon as Static activated to avoid Phart getting smacked by a max-power Electro Ball. Once Electabuzz is down, I can set up the final line of Charjabug to summon the Totem Pokémon.
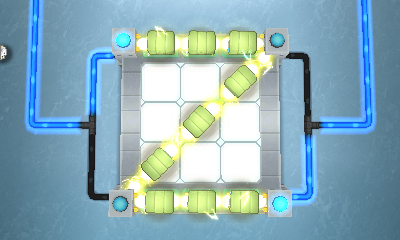
The Pinger is fully powered-up at last, which turns out to be a bad thing as it's now broken free of its cables and is about to fry all the Charjabug. Sophocles's Togedemaru jumps in to absorb the electricity via Lightning Rod, but even that immunity won't protect it for long - the Pinger must be aiming for the horn. Fortunately the Totem Pokémon arrives just in time, leaping down from the ceiling to absorb the rest of the electricity and challenge me to a battle.
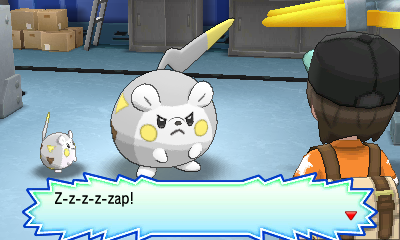

Totem Togedemaru
Aura: +2 Defense
Lv33 @ Sitrus Berry (Zing Zap/Spiky Shield/Iron Head/Bounce, Ability: Lightning Rod, Bold nature, IVs: 31/15/31/1/31/31, EVs: 252 HP / 252 Def / 6 Spe)
Ally Skarmory
Lv32 (Stealth Rock/Steel Wing/Tailwind/Torment, Ability: Sturdy, Sassy nature, IVs: All 15)
Ally Dedenne
Lv31 (Super Fang/Eerie Impulse/Charm/Discharge, Ability: Pickup, Calm nature, IVs: All 31)
Togedemaru will summon Skarmory at the end of turn 1, and then summon Dedenne once it has less than 66% of its HP left.
At the risk of sounding overconfident, Totem Togedemaru seems like it'll be annoying rather than threatening. Spiky Shield can punish Phart if it randomly selects the wrong target with Struggle, and the possibility of Zing Zap/Iron Head flinches and invulnerable Bounce turns means it'll be tricky to hit it at all if Phart isn't moving first... and thanks to Skarmory's Tailwind, nothing short of +6 Speed will guarantee that. But the Totem's side has no way to increase their damage output, and given that none of them are exactly offensive powerhouses, I don't think anything other than Dedenne's Super Fang is going to be taking off much of Phart's HP.
I start with an X Defense, and Totem Togedemaru's Spiky Shield fails to do anything before it summons Skarmory. On turn 2, Phart dodges Iron Head and gets struck by Torment, though this has no tangible effect on a Pokémon that's already forced to use Struggle. Once all 3 X Defenses are in place, Skarmory hits for a mere 6 damage with Steel Wing while the Totem uses Spiky Shield again. Satisfied that anything less than a critical hit won't do much to Phart, I use 3 X Attacks and a Dire Hit, with the incoming attacks reducing it to 91/136 HP.
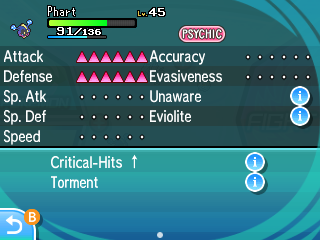
It'd probably be safer to use X Speeds here, but I'll see how it goes without them first. Totem Togedemaru uses Zing Zap, fails to flinch, and Phart takes Skarmory straight into yellow HP with its first Struggle, ending the turn on 42 HP. I heal it up and attack again, Phart avoiding an Iron Head flinch and hitting the Totem this time. It too falls into yellow HP, but its Sitrus Berry brings it back up to around 75%. Phart manages a third Struggle on the next turn, putting Totem Togedemaru into KO range at the cost of needing another Moomoo Milk, but it finally gets a flinch in via Zing Zap before the next Struggle can land. After avoiding another Iron Head flinch, Phart KOs the Skarmory with Struggle, bringing the second ally into the fight.
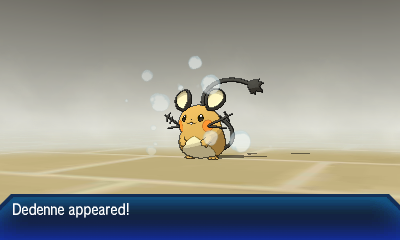
Phart needs healing now, and as I do so, Dedenne uses Charm to take it down to +4 Attack. Rather than using a Guard Spec. here, I decide to just attack in case Dedenne goes for Super Fang instead of a status move. It does, and Totem Togedemaru uses Spiky Shield, except it fails because it used it last turn as well. Phart then uses Struggle, targets the Totem, and knocks it out, growing to Lv. 46 in the process!
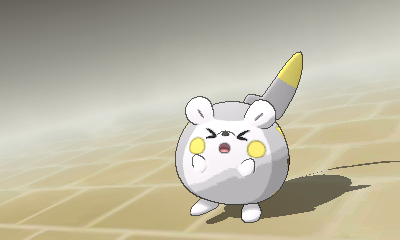
This does leave Phart quite low on HP again, so I use another Moomoo Milk as Dedenne goes for Super Fang again. Now, I could go for Struggle here, but if Dedenne uses Discharge first and lands a crit, that might be the end for Phart. Instead, I use an X Sp. Def, followed by a Guard Spec. after Dedenne uses a second Charm. I then get stuck in a loop of using Moomoo Milks while Dedenne spams Super Fang, until it eventually uses Discharge, paralyses Phart, and Phart gets fully paralysed. After a few more heals, Phart manages to dodge two Super Fangs and ignore the paralysis to 2HKO Dedenne with Struggle. Victory!
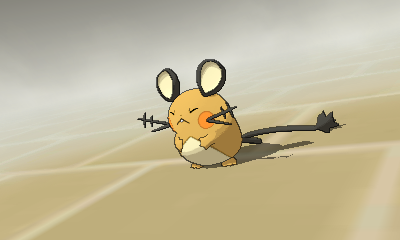
Dedenne was such a nuisance, it made me forget to take a screenshot of the "You defeated Totem Togedemaru!" message. Mind you, Togedemaru had been knocked out long before that message came up, and Dedenne was probably the bigger threat across the fight, so maybe it didn't deserve that honour anyway.

Whee! One more for the collection. I think that makes half of all the regular Z-Crystals I've obtained now. No free Poké Balls from the trial captain this time, but Sophocles does whisk me off to Festival Plaza to check out a shiny new feature.
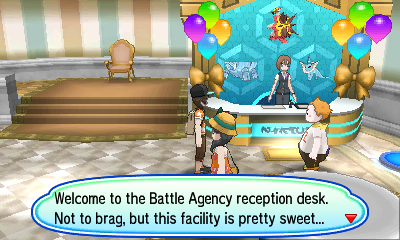
Maybe not so sweet now that the online functions are dead.
The Battle Agency might be a nice way for me to grind FC, at least until my grade starts to rise and the Festival Fan NPCs' Lv. 50 Pokémon can't keep up with the increasing levels of the opponents. However, the format revolves around using rental Pokémon, and I'm obviously not about to use anything other than Phart if I can help it. So I'll just be ignoring it for this playthrough - I can get Festival Coins and Rare Candies elsewhere whenever I need them.
Also, I'm assuming this must be the point where the Switcheroo facilities become available in Festival Plaza? I've made it to rank 51 without Sophocles ever offering me one, and it'd be weird to offer the player a facility they can't possibly use, but I suppose it's possible it was already in the pool of potential facilities and just never got selected. Either way, it'll be an instant rejection if Sophocles ever offers me one.
Once I'm back in the real world, Molayne asks me to return some sort of mask to Professor Kukui in Malie Garden, so it looks like that's where I'll be going next. Let's hope there are no big bad gang bosses in the area when I arrive.
Trainers defeated: 166/427
I arrive at Malie Library just in time to watch Lillie get stomped by an angry Mudsdale. Not really, it's Hapu's. She leaves after offering to help Lillie out with her ruin expeditions, and the two of us head inside the library to track down some book she's after. There's not much in here for me aside from a Fly TM from a lady on holiday from Johto, so I just head upstairs to help Lillie with the book-wrangling... except Acerola is already there and just brings Lillie the book she was after. Saves me the fuss, I suppose.
5 Trainers here, plus 8 Stufful to track down as part of a sidequest, not to mention the usual assortment of bag fodder. But there are some things here that definitely aren't fodder - EV-reducing berries! You get 3 random ones per day from the berry pile on the route, but since I can grow them at Poké Pelago, I soft-reset a few times until I get 3 different berries (Kelpsy, Hondew and Grepa), then go and visit Mohn to develop the rest of the islands.
He gives me 10 Rainbow Beans to say thanks for helping him perfect Poké Pelago. Once everything's sorted, I plant my new berries and send my minions off into Isle Aphun to look for treasure, though they'll probably just come back with Hard Stones. I return to the berry pile the next day for more soft-resetting, having to catch a Crabrawler this time before I can pick up the remaining Pomeg, Qualot and Tamato Berries, then plant each of those as well. Last up is a quick flight to Route 8 to stock up on X items, then I can begin properly clearing out Route 10.
Once I'm back, I pick up a Lemonade and a Super Potion off the ground (which are apparently still safe to drink?), followed by a Tiny Mushroom, and then run into a Firefighter.
Firefighter Alex
Octillery Lv30 (Psybeam/Aurora Beam/Bubble Beam, IVs: All 25)
Struggle deals very little damage once again, but Bubble Beam isn't doing much more, so I use an X Attack. The battle's made a bit more annoying when Bubble Beam gets a Speed drop, meaning Phart has to be a bit higher on HP before it can commit to the final Struggle, but Octillery ultimately goes down in 5 hits with help from some Moomoo Milk. I have to dodge the rustling trees along the route to avoid the wild Fearow (with how fast they are, it's hard to escape any encounters unscathed), but manage to make my way to a Max Revive and a Beauty without disturbing any wild Pokémon.
Beauty Andrea
Flaaffy Lv29 (Charge/Take Down/Electro Ball/Confuse Ray, Ability: Static, IVs: All 15)
Phart actually does a decent bit of damage with Struggle on turn 1... except it was a critical hit, and now it's paralysed and confused. A Full Heal fixes them both, and the incoming Electro Ball only does 10 damage, leaving Phart free to activate Static again with its next attack. Flaaffy grants us a few extra turns by repeatedly using Charge without actually attacking, and so it gets taken down by Phart's fifth Struggle. A little further along the path, I find a Police Officer in the grass.
Police Officer Mitchell
Growlithe Lv30 (Fire Fang/Take Down/Flame Burst/Agility, Ability: Intimidate, IVs: All 25)
I start with an X Attack to offset the stat drop from Intimidate, and Growlithe deals 21 damage with Flame Burst - enough to notice, but not a big worry since it can't do anything to increase that damage output. Phart manages to 4HKO Growlithe with help from a Lemonade and two Moomoo Milks.
I've managed to round up all 8 Stufful that were scattered along the route, and the lady who asked me to find them gives me $15,000 and a Muscle Band. I doubt I'll use it, but at least Phart actually can use it for something. That's more than I can say for most items in my bag.
While I can't proceed past Route 11 until I've cleared my next trial, I can still explore it right now, and there are a few more battles to cross off the list. A quick search by the route's entrance unearths a Big Mushroom and a Stardust, and as I head along the path, Rotom decides to activate a Roto Prize Money power. A nice idea in theory, but considering the Trainers on the route amount to two Black Belts, a Preschooler, a Youngster and a Lass, they're not going to be forking over much cash even with the boost. Still, may as well try to squeeze in a couple of battles.
Preschooler Hayden
Dedenne Lv28 (Parabolic Charge/Nuzzle/Thunder Wave/Volt Switch, IVs: All 0)
With zero IVs and random move choices, I think they are messing around. Dedenne spends most of its time using Nuzzle even while Phart is already paralysed, and despite it being unable to move for a few turns, Phart lands a critical hit to KO Dedenne after 4 Struggles. Up next is a Black Belt who's using his master, a Bewear, as his battling Pokémon. That's an interesting relationship.
Black Belt Alvaro
Bewear Lv30 (Brutal Swing/Flail/Payback/Take Down, Adamant nature, IVs: 15/31/15/15/15/15, EVs: 252 Atk)
This might hurt. After an X Defense, Phart dodges two Take Downs and lands possibly the weakest Struggle I've seen to date. So I switch to an X Attack, and Bewear lands a Take Down for 24 damage, but Struggle still doesn't hit very hard - I think it might be on par with the Take Down recoil. But at least we're making progress, so I have Phart carry on Struggling, chipping it away between frequent Moomoo Milks while Bewear ignores its Dark moves. I do shit myself a bit when Take Down lands a crit, reducing Phart to 3/127 HP, but the high recoil softens Bewear enough for another Struggle to take it out.
ABSOLUTELY NOT.
It's not as if Cosmoem would actually be any better at dealing damage - in fact, it might be worse, since it keeps the same 29/29 offenses but loses the ability to ignore its foes' Defense boosts with Unaware - but this is a Cosmog solo run, for better or worse. Since Phart is now past the level where it can evolve, the Exp. Points it gains from battles will be increased by around 20%, which sounds nice until you remember the obedience cap is only 7 levels away. Oh dear.
Anyway, Alvaro rewards me with the Payback TM for beating his master in combat. Despite my best efforts, I can't quite reach the next Trainer before the Roto Prize Money wears off, leaving the extra $1,920 I would've earned from beating him unclaimed. Not to worry, I don't really need money and I still have 38 Roto Prize Moneys in my bag.
Black Belt Clayton
Hariyama Lv30 (Knock Off/Vital Throw/Belly Drum/Smelling Salts, Adamant nature, IVs: 15/31/15/15/15/15, EVs: 252 Atk)
See, a Cosmoem would be shitting itself at the prospect of a +6 Knock Off, but Cosmog doesn't care about Belly Drum at all. I use an X Attack as Hariyama chops its HP in half, then Struggle for a little under 25%. Knock Off still hits hard even with Unaware, but Phart's HP stays above the red, and it dodges an incoming Smelling Salts to take out Hariyama with two Struggles.
I can't get much further past Clayton before a Trial Guide stops me, since I don't have the Electrium Z yet. So I head back to Malie, gathering up the last few items as I go: a Quick Ball, a Big Mushroom, a Star Piece, a Stardust, a Tiny Mushroom, and TM74 Gyro Ball. In other words, free cash! There's still one more battle on Route 11, but unfortunately it's a Double Battle, so I have to go and fetch Ralts first.
"If you really wanna see what we can do, you've gotta have two healthy Pokémon!"
"If you really wanna see what we can do, you've gotta have two healthy Pokémon!"
Yes, they both have exactly the same line. That's new.
Athletic Siblings Alyssa and Sho
Lilligant Lv28 (Mega Drain/Synthesis/Teeter Dance/Quiver Dance, IVs: All 20)
Whimsicott Lv28 (Mega Drain/Cotton Spore/Gust/Tailwind, IVs: All 20)
Ralts faints quickly as always, and Phart vaguely tickles Whimsicott with Struggle while Lilligant goes for Quiver Dance. This is clearly going to take a while, so I use an X Sp. Def, which reduces the damage from the subsequent Mega Drains to single digits. Once I've used an X Attack as well, I try Struggle again, and despite Lilligant confusing Phart with Teeter Dance, it still manages to hit Whimsicott - a bit harder this time - while still leaving it above yellow HP. I heal it up, it lands a Struggle on Lilligant for decent damage... and then Lilligant wipes it away with Synthesis immediately. The battle plods on like this for a few turns, Phart and Whimsicott occasionally stopping to hit themselves in confusion, before Whimsicott eventually falls to a Struggle. Lilligant holds out a bit longer thanks to Synthesis, but it too is knocked out once it exhausts its PP.
Back on Route 10 again, Team Skull are waiting for a bus up to the observatory. They seem to take offense to my mere presence, so it's time for another battle.
Team Skull Grunt
Houndour Lv29 (Bite/Odor Sleuth/Beat Up/Fire Fang, IVs: All 15)
This one's an easy 3HKO with Struggle, only needing one Moomoo Milk to keep Phart active. The real difficulty (if you can call it that) comes from the fact that it leads straight into a fight with the other grunt.
Team Skull Grunt
Golbat Lv29 (Confuse Ray/Air Cutter/Swift/Poison Fang, IVs: All 15)
Despite dodging the first Air Cutter, Phart's Struggle doesn't do enough damage to justify not using an X Attack, so I heal it up and use one. Though it can't avoid getting struck by Confuse Ray and hitting itself in confusion, it manages to KO Golbat with another 3 Struggles to end the battle.
Team Skull decide to head back to their mansion after losing, running past Kukui as he rolls up to the bus stop. This is my cue to catch the bus up to Mount Hokulani, but first, I'll be rattling through some more Festival Plaza missions - I got lucky with the fortune-teller bonuses and can now earn 39 FC from each mission instead of 36 FC for the rest of the day.
This is technically an achievement, I think? Certainly feels like one with how many times I've mashed my way through the type-matchups mission. Instead of offering me another facility, Sophocles gives me the option to change the castle's appearance to a "Glitz" theme. Does it look any good?
...I suppose? But the basic theme doesn't particularly impress me either, so I'll keep this one as a sort of status symbol. Anyway, I've got a bus to catch.
Kukui's got some plans to give Alola its very own Pokémon League, and what better place to build it than on the sacred land atop Mount Lanakila? Clearly nothing has been learnt from the incident with the old Thrifty Megamart. Apparently I'll be battling all the kahunas there after I've finished the island challenge, so let's hope Tapu Bulu hasn't smashed the shit out of it by the time I arrive.
As per usual, I'll be avoiding the story stuff for now in favour of gathering items and fighting Trainers. The Pokémon Center here sells vitamins, but I'd rather just buy them with BP, and even that will probably just be a one-off thing for when I properly EV-train Phart. There are a couple of Apricorn Balls at the top of the mountain, then I start making my way down the road in search of a fight or two.
Office Worker Jessica
Clefairy Lv30 (Bestow/Wake-Up Slap/Minimize/Stored Power, IVs: All 15)
One more level and Clefairy would've known Metronome, which might have been more interesting. Alas, it just gets a 5HKO from Struggle while dealing scratch damage in return and using Minimize to no avail.
Heading further down the mountain leads to the Volt Switch TM, a Fast Ball and a Rare Candy, followed by a Hiker.
Hiker Thomas
Alolan Geodude Lv30 (Thunder Punch/Self-Destruct/Stealth Rock/Rock Blast, IVs: All 15)
Geodude uses Thunder Punch a couple of times while Struggle deals rather poor damage back. Once Phart gets close to red HP, I use a Moomoo Milk, at which point Geodude uses... Self-Destruct??? And it didn't even do that much damage. Nice move.
Continuing onwards (or rather, downwards), I go to pick up a Heavy Ball but get spotted from a very, very long way away by a Golfer. The screenshot doesn't do it justice, but I can assure you Elio is nowhere near what's on screen here.
Golfer Sky
Blue Core Minior Lv30 (Tackle/Rollout, Ability: Shields Down, IVs: All 15)
Yellow Core Minior Lv30 (Take Down/Rollout, Ability: Shields Down, IVs: All 15)
Red Core Minior Lv30 (Double-Edge/Rollout, Ability: Shields Down, IVs: All 15)
Well, there's no chance of these ones blowing themselves up thanks to those movesets, but I'd rather not see Phart eating a turn-5 Rollout. I lead with an X Defense and an X Attack, and the first Rollout deals 4 damage while Phart dodges the second, breaking the combo before it even starts. Phart's Struggles deal around 25%, and Shields Down activates after the second hit, pushing the Rollout damage even higher. Luckily Phart dodges the third Rollout hit and KOs the first Minior before it gets going again. The other two Minior go down with less fuss, as the AI chooses Double-Edge and Take Down over Rollout due to their higher base powers.
Once I finally pick up that Heavy Ball I found earlier, I carry on to the last regular Trainer in the area.
Collector Todd
Passimian Lv30 (Scary Face/Take Down/Bestow/Thrash, Ability: Receiver, IVs: All 15)
Oranguru Lv30 (Psych Up/Feint Attack/Nasty Plot/Zen Headbutt, IVs: All 15)
Since neither opponent is particularly frail, I start off with an X Attack while Passimian hits for 27 damage with Thrash. Struggle is still only a 5HKO from the looks of it, and Phart needs healing already, but luckily Passimian is now confused, turning the 5HKO into a 4HKO by hitting itself. Oranguru enters the battle and uses Nasty Plot despite having no special attacks, alternating between that and fairly weak Feint Attacks until Phart scores another 4HKO. Why on earth didn't it use Psych Up to copy the X Attack boost?
This little power boost arrives just in time for the final Trainer, one who wouldn't fight me until I'd beaten everyone else. I couldn't remember if there's an actual in-game term for these sorts of Trainers, but apparently they're called "skilled Trainers"? But that's probably more of a generic description than an actual label.
Veteran Akira
Alolan Persian Lv33 (Fake Out/Feint Attack/Screech, Ability: Technician, Adamant nature, IVs: 30/30/20/20/20/30, EVs: 252 Atk / 252 Spe)
Absol Lv33 @ Darkinium Z (Night Slash/Slash/Quick Attack, Ability: Super Luck, Adamant nature, IVs: 30/30/20/20/20/30, EVs: 252 Atk / 252 Spe)
This is probably going to hurt. Persian is not a big threat (though I don't exactly want it using Screech), but Absol has a high chance of landing critical hits that ignore any Defense boosts I put onto Phart, and a crit on Black Hole Eclipse will just outright KO it if I'm unlucky. I'll have to play it carefully.
I start with an X Defense as Persian goes for Fake Out while it still can, dealing almost nothing. I then try a Dire Hit to see what Persian does next, and it uses Feint Attack, dealing 32 damage but more importantly leaving Phart's Defense boost intact. A couple of X Attacks are squeezed in before it tries to Screech, but Phart dodges it, buying me more time for setting up. This consists of a third X Attack and an X Speed - it's still not enough to outspeed Persian, but it will outspeed Absol, the bigger threat. Once the final two X Defenses go on, Phart is ready to attack, and I'm surprised to find Persian still doesn't want to Screech the boosts away. I'm even more surprised when Phart lands a critical hit and OHKOs it right off the bat.
And then the nasty one comes out. Now, Absol actually has the exact same HP and Defense as Persian, so Struggle might OHKO it as well... but I didn't expect Phart to land the OHKO on Persian, so if it falls short against Absol, it's leaving itself open to a KO from a crit Night Slash. Then again, a crit Black Hole Eclipse can KO it no matter what I do, unless I roll the 25% chance of surviving with 1 HP from the affection bonuses. So what do I do here?
Well, Phart is on 66/136 HP, so it'd make sense to heal it now. I use a Moomoo Milk to heal it to full, and Absol goes straight for the nuke button, but the only way it can KO is if it lands a critical hit and Phart fails to activate its affection magic.
Fuck's sake.
I actually went and calced it afterwards: Phart had a 12.5% chance to OHKO it with Struggle, whereas Black Hole Eclipse would only deal about 35% without that critical hit... which also had a 12.5% chance of landing. Funny.
Nothing to do but reset and try again, I suppose... Persian is a bit more willing to use Screech on the second attempt, but once Phart is at +6 Attack, +6 Defense, +2 Speed and with a Dire Hit active, it 2HKOs Persian with Struggle. I heal up Phart as Absol comes out, since even Struggle recoil will KO it when it's on 20 HP, and Absol goes for Night Slash this time, taking Phart to 112/136 HP with a non-crit. This time, I decide to be a bit riskier and use Struggle, but it doesn't quite KO Absol, and it uses Black Hole Eclipse once more. But it can't land a critical hit this time around, and so I heal up Phart to full so it can use one last Struggle... except Absol simply OHKOs it from full with a mere Night Slash. Double fuck!
I won't bother writing up the third attempt in full detail. Just know that I remembered Guard Spec. exists, used those to block Persian's Screeches, nearly lost to a critical hit from Persian this time, Phart got a 2HKO on it, missed the OHKO on Absol, just about tanked a non-crit Black Hole Eclipse, then beat it with another Struggle after it tried to finish off Phart with Quick Attack instead of Night Slash. NEVER AGAIN.
I receive TM95 Snarl for winning, but it's not nearly enough to make up for the emotional turmoil. What does help somewhat is being reminded that you don't have to battle Molayne to enter the Hokulani Observatory in USUM, as he just hands over a Steelium Z without a fight.
Instead, I have to help round up the Charjabug that are used to power the observatory after they've been fed. I basically just walk up to a couple of bushes, press A, find a Charjabug each time, examine another bush, fail to find the last Charjabug, then watch it very slowly and conspicuously shuffle across the screen in the distance as Molayne wonders where it's gone. Once I "find" it, we can move on to the interesting stuff.
The trial's not too complicated. You press the buttons on a little rotating panel machine to line up the Charjabug in rows of three so they can power the Totem-summoning Pinger machine, and every time you form a line, a Pokémon attacks. There are only two wild Pokémon battles before the Totem Pokémon, and there's an opportunity to heal up between each battle, so there's no chance of Phart having to limp into the Totem fight.
Elekid
Lv29 (Quick Attack/Thunder Punch/Low Kick/Leer, Ability: Static, Jolly nature, IVs: All 0)
Mostly just an appetiser for what's to come, though it does give me some trouble by using Leer and activating Static on turn 1. I have to use a Moomoo Milk on Phart mid-battle, but it still goes down fairly easily after 3 Struggles. Once another row of bus-shaped bugs have been lined up, I can fight the next trial Pokémon.
Electabuzz
Lv30 (Electro Ball/Light Screen/Swift/Thunder Wave, Ability: Static, Timid nature, IVs: All 0)
I wonder why their IVs are all 0 all of a sudden? The trial Pokémon had completely random IVs when I was on Akala. Anyway, this fight's not too difficult either. Electabuzz gets a 4HKO from Struggle, with the only real issue being that I had to use a Full Heal as soon as Static activated to avoid Phart getting smacked by a max-power Electro Ball. Once Electabuzz is down, I can set up the final line of Charjabug to summon the Totem Pokémon.
The Pinger is fully powered-up at last, which turns out to be a bad thing as it's now broken free of its cables and is about to fry all the Charjabug. Sophocles's Togedemaru jumps in to absorb the electricity via Lightning Rod, but even that immunity won't protect it for long - the Pinger must be aiming for the horn. Fortunately the Totem Pokémon arrives just in time, leaping down from the ceiling to absorb the rest of the electricity and challenge me to a battle.
Totem Togedemaru
Aura: +2 Defense
Lv33 @ Sitrus Berry (Zing Zap/Spiky Shield/Iron Head/Bounce, Ability: Lightning Rod, Bold nature, IVs: 31/15/31/1/31/31, EVs: 252 HP / 252 Def / 6 Spe)
Ally Skarmory
Lv32 (Stealth Rock/Steel Wing/Tailwind/Torment, Ability: Sturdy, Sassy nature, IVs: All 15)
Ally Dedenne
Lv31 (Super Fang/Eerie Impulse/Charm/Discharge, Ability: Pickup, Calm nature, IVs: All 31)
Togedemaru will summon Skarmory at the end of turn 1, and then summon Dedenne once it has less than 66% of its HP left.
At the risk of sounding overconfident, Totem Togedemaru seems like it'll be annoying rather than threatening. Spiky Shield can punish Phart if it randomly selects the wrong target with Struggle, and the possibility of Zing Zap/Iron Head flinches and invulnerable Bounce turns means it'll be tricky to hit it at all if Phart isn't moving first... and thanks to Skarmory's Tailwind, nothing short of +6 Speed will guarantee that. But the Totem's side has no way to increase their damage output, and given that none of them are exactly offensive powerhouses, I don't think anything other than Dedenne's Super Fang is going to be taking off much of Phart's HP.
I start with an X Defense, and Totem Togedemaru's Spiky Shield fails to do anything before it summons Skarmory. On turn 2, Phart dodges Iron Head and gets struck by Torment, though this has no tangible effect on a Pokémon that's already forced to use Struggle. Once all 3 X Defenses are in place, Skarmory hits for a mere 6 damage with Steel Wing while the Totem uses Spiky Shield again. Satisfied that anything less than a critical hit won't do much to Phart, I use 3 X Attacks and a Dire Hit, with the incoming attacks reducing it to 91/136 HP.
It'd probably be safer to use X Speeds here, but I'll see how it goes without them first. Totem Togedemaru uses Zing Zap, fails to flinch, and Phart takes Skarmory straight into yellow HP with its first Struggle, ending the turn on 42 HP. I heal it up and attack again, Phart avoiding an Iron Head flinch and hitting the Totem this time. It too falls into yellow HP, but its Sitrus Berry brings it back up to around 75%. Phart manages a third Struggle on the next turn, putting Totem Togedemaru into KO range at the cost of needing another Moomoo Milk, but it finally gets a flinch in via Zing Zap before the next Struggle can land. After avoiding another Iron Head flinch, Phart KOs the Skarmory with Struggle, bringing the second ally into the fight.
Phart needs healing now, and as I do so, Dedenne uses Charm to take it down to +4 Attack. Rather than using a Guard Spec. here, I decide to just attack in case Dedenne goes for Super Fang instead of a status move. It does, and Totem Togedemaru uses Spiky Shield, except it fails because it used it last turn as well. Phart then uses Struggle, targets the Totem, and knocks it out, growing to Lv. 46 in the process!
This does leave Phart quite low on HP again, so I use another Moomoo Milk as Dedenne goes for Super Fang again. Now, I could go for Struggle here, but if Dedenne uses Discharge first and lands a crit, that might be the end for Phart. Instead, I use an X Sp. Def, followed by a Guard Spec. after Dedenne uses a second Charm. I then get stuck in a loop of using Moomoo Milks while Dedenne spams Super Fang, until it eventually uses Discharge, paralyses Phart, and Phart gets fully paralysed. After a few more heals, Phart manages to dodge two Super Fangs and ignore the paralysis to 2HKO Dedenne with Struggle. Victory!
Dedenne was such a nuisance, it made me forget to take a screenshot of the "You defeated Totem Togedemaru!" message. Mind you, Togedemaru had been knocked out long before that message came up, and Dedenne was probably the bigger threat across the fight, so maybe it didn't deserve that honour anyway.
Whee! One more for the collection. I think that makes half of all the regular Z-Crystals I've obtained now. No free Poké Balls from the trial captain this time, but Sophocles does whisk me off to Festival Plaza to check out a shiny new feature.
Maybe not so sweet now that the online functions are dead.
The Battle Agency might be a nice way for me to grind FC, at least until my grade starts to rise and the Festival Fan NPCs' Lv. 50 Pokémon can't keep up with the increasing levels of the opponents. However, the format revolves around using rental Pokémon, and I'm obviously not about to use anything other than Phart if I can help it. So I'll just be ignoring it for this playthrough - I can get Festival Coins and Rare Candies elsewhere whenever I need them.
Also, I'm assuming this must be the point where the Switcheroo facilities become available in Festival Plaza? I've made it to rank 51 without Sophocles ever offering me one, and it'd be weird to offer the player a facility they can't possibly use, but I suppose it's possible it was already in the pool of potential facilities and just never got selected. Either way, it'll be an instant rejection if Sophocles ever offers me one.
Once I'm back in the real world, Molayne asks me to return some sort of mask to Professor Kukui in Malie Garden, so it looks like that's where I'll be going next. Let's hope there are no big bad gang bosses in the area when I arrive.


