Flying is one of the few types where all three playstyles are viable, and relatively easy to use. Most Flying teams consist of a 2 Pokemon core, Skarmory and Zapdos. They both have decent bulk, and good movepool, so they can be tailored depending on the playstyle.
Balance
On balanced teams, Skarmory generally sets rocks, while Zapdos defogs. They cover each other nicely, Skarmory takes physical Ice and Rock moves with ease, while Zapdos covers Skarmory’s weak Special Defense. It also provides a valuable neutrality to Electric moves. This core is able to wall a lot of types with ease.
Here are some mons that work well with the core above.
Togekiss is my personal favorite. One of the core’s weakness is Dragon + Fire Blast spam (Garchomp), and strong special attackers (such as Specs Keldeo and LO Latios). Togekiss is able to tank it all fairly well while providing Heal Bell support. It also gets Thunder Wave for speed control, and Air Slash just for general annoyance. Another option is a Scarf set, it allows Togekiss to cripple common switch ins like Chansey who also threaten the Flying core.
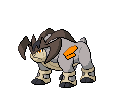
Landorus-T is another good mon, it reduces the amount of pressure on Skarmory (Intimidate and decent bulk), and it has Stealth Rock, so you can run Spikes on Skarmory. A Choice Scarf set makes it a good check to Electric teams because of its immunity, and STAB Earthquake. U-turn allows it to threaten out Physics and scout. However, it is very weak to HP Ice.
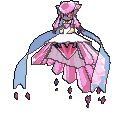
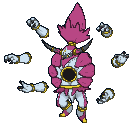
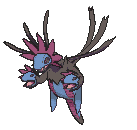
Lando-I is an excellent special attacker. A combo of Earth Power and Focus Blast dismantles Steel teams, and Sludge Wave and Psychic let it beat Fairies and Mega Venusaur.
Dragonite is another option as well. Flying types generally lack priority, but Dragonite has a good one in the form of Extremespeed. Band gives Dragonite a ton of power, but at the cost of being locked into a move (Outrage). Another option is a Dragon Dance set, it’s a good set, but preserving Multiscale is important.
Tornadus-T has a good balance between offense and defense if wearing an AV, and its high speed paired with U-turn and Regenerator make it pretty annoying to face. Its main STAB Hurricane isn’t that reliable because of its shaky accuracy, but it has good coverage moves in the form of Focus Blast, Heat Wave, and Knock Off. A LO set is also an option because of Regenerator, and without an AV, it can use Taunt, and deal a lot of damage to Heatran with Superpower.
Thundurus-I has a high base speed, and good base attack. Prankster Thunder Wave is good for paralyzing threats, and Taunt effectively shuts down passive walls, letting you boost with Nasty Plot. Thundurus also has the moves it needs to be good, Thunderbolt and HP Ice has great coverage, and Grass Knot, Focus Blast and Psychic make good coverage
Mandibuzz is another option for Defog even though it doesn’t have Zapdos’s typing, it has better mixed bulk, and access to moves such as Taunt and Foul Play.
Gliscor is generally seen more on Stall teams, but a Swords Dance set is excellent for teams that have trouble beating Mega Sableye and Fairies.
The Megas
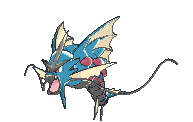
Gyarados is interesting, once it mega evolves, it loses its 4x weakness to Electric, 2x weakness to Rock, and it gains a resistance to Ice moves and it gains a boost on its special side making it easier to set up. Its Dark typing and Crunch allows it to sweep Physic monos with ease if you find a time to set up a Dragon Dance. Substitute and Taunt make it easier, if you can find passive mons to set up on. Gyarados also gets Earthquake to hit Rotom-W (Mold Breaker), and Ice Fang to 1HKO Dragonite at full health. Normal Gyarados with Bounce is also viable if you struggle against Fighting Monotypes.
Charizard-Y is a great wallbreaker. Drought, and a 159 base special attack makes sure anything that isn’t named Chansey is 1-2HKOed. Solarbeam beats Water types, and Focus Blast kills Tyranitar.
Stall
Not as common as Balance, but still just as viable. The mons are almost the same, but sets may be a bit different. Almost everything has recovery, and it relies on status and hazards to net kills. Skarmory and Zapdos sets stay the same.
Togekiss is the same as balance, but it’ll be a Heal Bell set, not a scarf set.
Tornadus-T will be an AV pivot. (Same as above)
(Normal) Gyarados is generally a status absorber and shuffler (great Keldeo + Mega Sab counter!). Intimidate lowers attack, and it has a good typing. Scald burns switch ins, Thunder Wave cripples fast mons, Dragon Tail shuffles (Roar is another option), and Rest heals back your HP. Sleep Talk is also an option, but you have to give something up
Articuno is another option if you’re looking for special walls. Haze removes buffs, and it has access to Heal Bell. Freeze Dry also damages Water types, and Toxic puts things on a timer. However, you must be very careful as it is 4x weak to SR.
Gliscor is an amazing mon because of Toxic Heal. It is seen on both Balance and Stall but more on defensive teams. Gliscor is generally a stallbreaker, effectively breaking mons like Chansey, and Skarmory. However, another set would be a Swords Dance set if you struggle with Mega Sab.
Mandibuzz is the same as balanced, it eases pressure on Skarmory, and threatens physical setup sweepers.
Both megas are good if you’re running a semi-stall team, but a full stall team doesn’t need a mega since the best Stall megas are banned. (Mega Altaria and Charizard-X :c )
Hyper Offensive
Some HO teams have the Flying core while others don’t, but sets will be different. This is the hardest playstyle for Flying teams imo, since it’ll be hard to keep rocks off the field without losing momentum.
Zapdos is here for emergency Defog, but some teams don’t even carry it. However, Zapdos can gain momentum by Baton Passing Subs or Volt Switch. HO Flying generally has trouble against Ferrothorn (If you’re not running Lando-I), but Zapdos has access to Heat Wave.
Skarmory is generally used as a suicide Custap lead. Apply as many hazards as possible before Brave Birding yourself to death for momentum. However, some teams have Aerodactyl for this because of its fast speed and a fast Taunt.
(Normal) Aerodactyl is used as an alternate suicide lead. It only gets Stealth Rock, but chances are they’re going to stay because of its base 130 speed. Stone Edge, and Earthquake provide good coverage, and they hit decently hard.
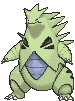
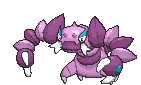
Archeops is another suicide lead, it has a decent base speed (110), access to Taunt, Endeavor, and a stronger suicide move (Head Smash). Good choice if you want momentum, but a faster mon than Skarmory.
Mega Aerodactyl is used as a Hone Claws sweeper. It’s one of the fastest Pokemon (tied with Mega Alakazam) so it’s bound to go first. Ariel Ace is good STAB and is boosted by Tough Claws but after a Hone Claws boost, Stone Edge is a better choice.
Thundurus-T used to be good on balance teams, but the return of Zapdos, and Thundurus-I’s speed + Prankster has cut down its viability. However, it’s good on HO teams with a Scarf. Fast Volt switches, and a switch in to Thunderbolt / T-wave make it a decent choice. It has the same attacks as Thundurus-I but you need to be careful as you are move locked.
Landorus-T is the same as balance, but bulky sets aren’t used. Double Dance sets are common here as well. (Swords Dance + Agility).
Landorus-I is the same as balance.
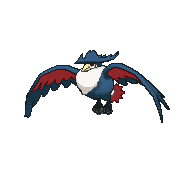
Staraptor (<3) is used as a fast Brave Bird spammer, and an answer to Electric monos. Reckless Brave Bird hurts, and Electric types are generally Specially Defensive so a Double Edge will hurt.
Tornadus-T is the same as balance, but LO sets are more common.
Togekiss is the same as balance, but only Scarf sets.
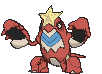
Honchkrow is an interesting choice. It’s slow compared to everything else, but it has a priority in the form of Sucker Punch, and Brave Bird hurts like crazy. It also has Heat Wave and Superpower for Steel types, and Moxie makes it very hard for your opp to stop it once it gets a boost or two.
The 2 general Megas are good, and can be used successfully, however, Gyarados is generally the better choice because of its resistance to Ice and access to a set up move. Mega Aerodactyl is also good here.