• Follow our Instagram!
  • Curious about what we're currently doing about bots? Check out the latest updates from staff in this thread.

Challenge Ultra Sun: Cosmog vs. the Alola region

Sizeable Barry

formerly MarisaK
:sm/cosmog: :sm/necrozma-ultra:

Cosmog vs. the Alola region
or: How to Use a Video Game Intended for 7 Year Old Children as an Improvised Torture Device


This is a fairly horrendous ambitious idea I've had floating around in my head for a few months, and I've decided to not only give it a try, but also share my Struggles with some (hopefully) more sensible people.

The basic idea is that it's a Cosmog solo run of Ultra Sun, but with a few tweaks and extra restrictions in place.

Rules:
  • No cheating or save editing is allowed. By extension, this means I'll be trading in the Cosmog from a different game as soon as trading is available.
  • Once I acquire Cosmog, that is my team for the rest of the game: one Cosmog.
  • Cosmog must be the only Pokémon in my party whenever I enter a battle, unless this is completely unavoidable (e.g. before trading is available, or for Double Battles). I have some ideas for how to handle those unavoidable situations, but no firm plans - I'll figure things out as I go along.
  • Cosmog cannot evolve. It seems a waste to turn an otherwise difficult challenge into stomping everything with Solgaleo once it reaches Lv. 53.
  • Catching other Pokémon is fine for use in Poké Pelago or whatever, as long as my party only contains Cosmog when I get into a battle (unless this is impossible to do).
  • Any other game mechanics are fair game as well, apart from interacting with other games after I've imported my Cosmog.

In summary, I'll essentially be trying to solo one of the harder vanilla Pokémon titles with a Pokémon that has the same base stat total as Magikarp, can't attack outside of using Struggle, and might disobey me if its level gets too high.

That's obviously a grim prospect, so the "easiest" way to do it would probably be to skip every Trainer battle I can... but that wouldn't stop the run from being massively grindy regardless. And since beating the game requires battling lots of Trainers already, I may as well go all in on the combat aspect. With that in mind, the run is only complete when Cosmog has defeated every Trainer in the Alola region, not counting battle facilities.

(This requirement is why I'm playing Ultra Sun instead of Ultra Moon: the Ultra Forest where Kartana is found also has two Trainers to fight, whereas Ultra Moon has no extra Trainers to be fought in Pheromosa or Celesteela's dimensions. It also means that I get to fight Sophocles instead of Dark-type user Nanu during Mina's trial and don't have to deal with the weird 12-hour offset that features in Ultra Moon, but they're not as important.)

By my count, which might be wrong, there are 427 Trainer battles in the game - that's counting Trainers like Hau once for each battle, and Double/Multi Battles as one single opponent. Beating them all with a mere Cosmog will be a very, very grindy and tedious process at best (assuming it's even possible), and I don't know if it'll be much fun to read about either. But it would be kind of impressive if I actually managed it, right? So here goes.


:sm/solgaleo: :sm/lunala:
If you've played these games before - or even if you haven't - you might recall that Cosmog isn't available in USUM until the post-game. I'll need another Gen 7 game with a completed save file before I can get started.

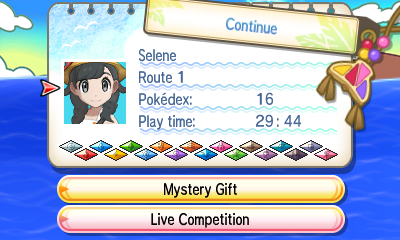
0-1.png

Here's one I made earlier! It's an Ultra Moon save with basically everything completed in terms of storyline, but no legendaries caught or received, Cosmog included. However, in order to actually access the Lake of the Moone where Cosmog is found, I'll need to find a Lunala and bring it to the Altar of the Moone. I seem to remember Lillie having one of those?

0-2.png

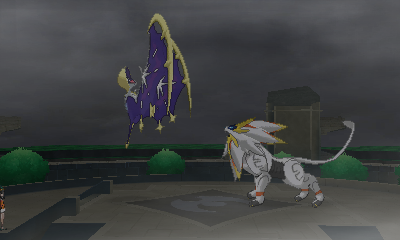
Luckily she was willing to part with it. Before I get started, though, I'll need to make some preparations in order to soft-reset for a good Cosmog - after all, Gen 7 only lets you do Hyper Training after becoming Champion (and your Pokémon needs to be Lv. 100 to boot), and there are no Mints at all. So I scoop up a wild Abra and Ditto, throw them in the Nursery until they've made a boxful of eggs, hatch them until I get the right Nature/Ability combination, and then pop over to the Battle Tree to unlock the Judge function. Now I can leap into the reverse world and put my Impish Synchronize Abra to use.

0-3.png

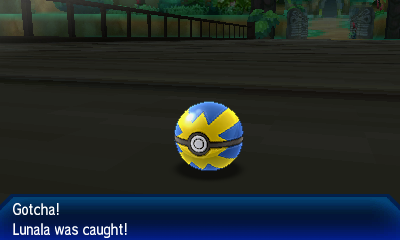
The camera pans away while the box legendaries complete their secret cosmic mating ritual, and not long afterwards, a new Cosmog pops into existence.

0-4.png

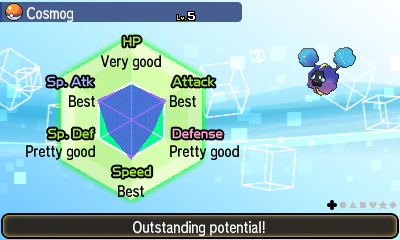
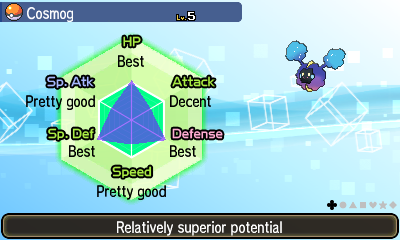
The Synchronize mechanics in this game mean it's guaranteed to be Impish, and it also comes with the customary 3 perfect IVs - it's just a matter of them going into the right stats. Time to fly to a Pokémon Center and check them out.

0-5.png

Normally I wouldn't be bothered about IVs for in-game purposes, but since this is Cosmog I'm dealing with, I don't really want to settle for suboptimal defenses... so I soft-reset and try again.

But before I can even brace myself for the possibility of an eternity spent checking IVs, the next Cosmog comes out looking like this:

0-6.png

Would've liked higher Attack, but this one will do. The Special Attack is irrelevant because it can't learn any special attacks, Attack is only useful for Struggle (which might do more damage to Cosmog than its opponent), and Speed would be very useful for attacking first if those attacks weren't limited to Struggle, Teleport and Splash. In other words, the defensive stats are my main concern, and this one has perfect IVs in all of them. I went with an Impish nature because I felt like physical attacks would be more of an issue for Cosmog than special ones, especially in the early parts of the game - you tend to see more things with Bite than with Snarl, for example.

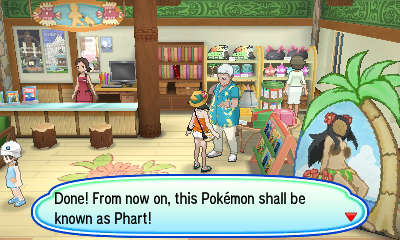
Now to bestow a suitable name upon this hopeful champion.

0-7.png

A clever combination of photon and fart, referencing its gaseous nature and the light-themed abilities of its evolutions. It also serves as a subtle reference to how useful it will probably be.

Phart is finally ready to roll, so now I can start the actual playthrough in Ultra Sun. But not until my next post. And it'll probably take me the entire post just to get to the point where Phart can be traded over. But after that, the real "fun" begins.
 
Last edited:
:sm/yungoos: :sm/spearow:
1-1.png

At last, I can enter a sensible world where 1pm isn't in the middle of the night.

1-2.png

Not feeling especially inspired, so I just go with his "canon" name and appearance.

I forgot to take a screenshot of the intro cutscene, but you probably know how it goes: Lillie runs away from some evil Aether staff, she gets intercepted by a couple of alien people, then Nebby warps her to safety despite not learning Teleport until Lv. 23. After that, I'm finally free to navigate the world. There's a bit of dialogue with my mother before I get dressed and make my exit, running off to Route 1 to be mauled to death by an angry Yungoos.

1-3.png

What an embarrassing way to go - it doesn't even need to have its eyes open to kill me.

1-4.png

Luckily I'm saved by the timely intervention of a friendly starter trio. Kukui catches up a few moments later, and after a little chat, he offers me one of these Pokémon to take with me. Obviously I've got different plans in mind for who I want to use, but there's still a choice that needs to be made here, so which Pokémon should I take?

1-5.png

I decide to go with Litten after a bit of thinking. I won't actually be using it much at all, of course, but by choosing Litten, I get to keep Incineroar out of Hau and Kukui's hands during the Pokémon League battles. This feels important because, from what I can imagine, I'll be relying quite heavily on X items to boost Cosmog's stats and stall out my opponents in this run. Incineroar's Darkest Lariat would outright ignore any Defense boosts in addition to being super effective on Cosmog, so I definitely don't want to deal with that.

Kukui sends me off to Iki Town to say thanks to Hala, since it's his Pokémon that just saved me from an untimely demise. Fair enough. Hopefully I'm not forced into battling too many Trainers before I unlock trading...

1-6.png

Boo. I barely have time to pick up a Potion before Hau comes running up for the first Trainer battle. Oh well, it's not like I could avoid all of them.

1-7.png

Pokémon Trainer Hau
Rowlet Lv5 (Tackle/Leafage/Growl, Ability: Overgrow, IVs: All 10)

I'm planning to include the data of all the Trainers I face in this format, as a way to show exactly what I'm going up against in each battle. Obviously it doesn't matter for this one, as Litten just uses Ember twice for an easy victory, but it'll be more useful once Phart takes the wheel.

With my first battle ticked off the list, I head to Iki Town, picking up a Paralyze Heal as I go. It seems Hala's not around, so I get sent off to Mahalo Trail instead, where I happen to come across some poor cloud of gas being attacked by birds.

1-8.png

It's basically the same event as in SM, with you stepping up to save Nebby on Lillie's behalf - except because you've already received your starter by this point in USUM, one of the Spearow actually battles you.

1-9.png

It's only Lv. 4 though, so three Embers knock it out. As a random piece of trivia, this Spearow only knows Pursuit and Leer. Presumably they thought it'd be a little unfair on any Rowlet users if it knew Peck.

With that out of the way, the rest of the scene proceeds as in SM: Nebby nukes the bridge in a rare display of utility and we both plummet to our doom, only for Tapu Koko to bail us out and give me a cool rock. Then it's back to Iki Town, where Hala shows up at last and takes my cool rock away, and finally back home for the evening. The next day, Kukui gives me a crash course on catching Pokémon en route to a festival, as well as 10 Poké Balls and 5 Potions. Much appreciated, though I'll save catching stuff until later - it's bad enough having to use one Pokémon that isn't a Cosmog, let alone two. Onwards to the festival, then. I pick up a Poké Ball off the ground when all of a sudden...

1-10.png

Yuck, another unavoidable battle. Unless I can double back to my house and take the western path along Route 1?

1-11.png

That's a no then. Ah well, cat-based combat it is.

1-12.png

"A Pokémon battle!"
(That was her next line, for reference. I didn't actually reply to her IRL. I'm not that stupid, despite what the premise of this thread may suggest.)

Lass Audrey
Buneary Lv3 (Defense Curl/Splash/Pound/Foresight, IVs: All 0)

I'm not sure exactly what its Ability is because I'm taking the data from pk3DS, which lists its Ability as "Any (1 or 2)". However, it also lists Buneary's gender as "- / Genderless/Random", yet Bulbapedia seems confident enough to list it as female. Whatever the case, it's got either Run Away or Klutz, neither of which are relevant in this battle.

But once again, none of that matters, as I just click Ember twice and win. Pokémon battles are quite easy when you can just attack your opponent, huh? Anyway, with that battle done, I proceed to Iki Town, picking up a Potion as I go. Mercifully I'm allowed to dodge the other two Trainers on the route, leaving them for later on. After a brief encounter with the Ultra Recon Squad, it's finally time for the festival, and my third Phart-less fracas.

1-13.png

Pokémon Trainer Hau
Pichu Lv6 (Thunder Shock/Charm/Tail Whip, Ability: Static, IVs: All 10)
Rowlet Lv7 (Tackle/Leafage/Growl, Ability: Overgrow, IVs: All 15)

I see Hau's been using PKHeX to modify his Rowlet's IVs since the last battle, the cheating sod. No matter - Pichu goes for Charm and then Thunder Shock, dealing 7 damage as I 3HKO it, and Rowlet decides to use Growl while getting 2HKO'd, Litten finishing things off with a totally necessary critical hit. Hopefully that's the last of the no-Cosmog battles.

Hala bestows a Z-Power Ring upon me after I emerge victorious, though it's basically a decoration at this point without any Z-Crystals. Then it's off to bed again, and onto Kukui's house in the morning, but not before Mom hands me $30,000 of pocket money! That's equivalent to 150 Potions. Almost as good as the ORAS dual pack. Unfortunately there's nowhere I can spend it just yet, so I'm forced to continue on with the journey to the Pokémon Research Lab, dodging all the Trainers in the area courtesy of a well-placed ledge.

1-14.png

Kukui briefs me on how the Pokédex works before thrusting upon me this insufferable beast. Sure, I'll probably appreciate the Rotom Powers throughout my torturous journey, but the wretched thing just never shuts up.

1-15.png

Where's the "None of the above" option?

Anyway, back to the story. Some more explaining, Hau turns up, something about an Island Challenge, then we head outside just in time for the land of Alola to be swallowed up by darkness! It's alright, though, because it only lasts for like 10 seconds. I'm sure it's fine. Certainly has no relevance to the plot. I pick up a hidden Pearl on the beach and an Awakening a little further towards my house, dodging all the Trainers once again, and follow Lillie into the Pokémon Center. After hearing her explanations of stuff I already knew, I open my menu, and at last...

1-16.png

I can trade! Well, not quite yet. Any old chump could tell you that you need two Pokémon in your party to trade. So I pop back to the main part of Route 1 and shuffle around in the grass for a few seconds.

1-17.png

Went in on the first ball at full HP, which was nice. I didn't want to try having Litten lower its HP because I never really wanted to use Litten in the first place. Now equipped with two Pokémon, I warm up my second 2DS and get trading.

1-18.png

And so it begins. No more playing on easy mode where I can just rely on OP mechanics like "having multiple Pokémon" or "dealing damage" or "using Magikarp". This is serious business. Nuzlockers can't even begin to compare to Phart's ambitions.

(This playthrough might actually kill me.)
Trainers defeated: 3/427
 
Last edited:
:sm/meowth: :sm/shroomish:
Now that I'm ready to commence the challenge properly, I'll begin with a quick overview of what resources I'm working with - there's no point rushing to the Trainers' School because I'll just get demolished.

Let's start with Phart itself.

2-1.png

2-2.png

I mean, it's awful. It's got perfect defensive IVs and a fairly optimal nature, with its remaining IVs ranging from 2 to 15 in Attack, 16 to 21 in Special Attack, and 16 to 25 in Speed. But that does almost nothing to offset its base stats: 43/29/31/29/31/37 is pretty low even at the start of the game, putting its BST on par with Magikarp, Feebas and Scatterbug, and it'll only get worse as I continue through Alola.

In terms of movepool, it's stuck with Splash for now, learning Teleport at Lv. 23 and literally nothing else. Struggle is available if I can burn through Splash's 40 PP, but that's easier said than done - you could find wild Metapod on Route 1 in SM, but they've been removed in USUM, not appearing until Melemele Meadow. So I can't even spam Splash against wild Pokémon right now without risking being attacked in return. I did have a think about Z-Moves too, but they're not looking so good; Z-Splash does give a +3 Attack boost, but an X Attack still gives +2 without using up Phart's item slot. Z-Teleport seems even worse, as it simply restores Phart to full HP, which sounds cool until you remember Max Potions exist.

So what else does Phart bring to the table? Well, there's its Psychic typing. Probably not a good game for that type, as Alola has its fair share of Dark- and Ghost-types, not to mention your boy Guzma. At least it can resist Hala's favourite attacks in an early-game fight where I don't have access to as many resources? Perhaps the only positive trait on offer, though, is the Unaware Ability. Unaware lets it ignore any boosts to its opponents' attacking stats, which should be handy when dealing with Totem Pokémon and their pesky auras, not to mention any other foes who feel like setting up on Phart. It doesn't come close to making up for all the other problems, of course, but I'm glad Game Freak didn't decide to give Cosmog Run Away or something.

With my in-depth Cosmog analysis complete, time for a look at what else I'm carrying.

2-3.png

A decent wedge of cash, plus 10 Poké Balls, 10 Potions, a Paralyze Heal, an Awakening, a Pearl that I haven't got round to selling yet, and a Z-Power Ring. All useful, but I'll certainly need more supplies than that to get me through the game. Which reminds me - there are a couple more items I can pick up from home.

2-4.png

Climbing into my bed prompts the family Meowth to wake me back up with sharp claws and medicine. I can also receive a Poké Ball from Mom the first time I heal with her on a given day, but she doesn't seem to be handing it over... oh, of course. Phart's already fully healed, that's why. I let a wild Yungoos duff it up a bit and successfully claim another Poké Ball.

Now, where was I? Right, I was going to look over the other menu options I've unlocked. So far I've got:
  • Battle Video. I don't think there's any way this can be useful.
  • QR Scanner. Definitely useful if you want to use starter Pokémon from other regions, but I don't, so this is probably worthless for me.
  • Pokémon Refresh. Now this is useful. With Phart being so useless on its own, getting some affection bonuses should help it slog through battles a little easier.
  • Festival Plaza. Also looks quite useful, though probably just for scooping up some extra items and maybe some EVs/Levels, depending on what facilities I get.
I decide to venture into Festival Plaza first, just to see what's on offer.

2-5.png

Ugh. Almost forgot about the tutorial section. It's not as bad as I feared, though, and I end up finding my Ultra Moon character loitering in the castle, bragging about how she traded her Cosmog for a Ledyba. She hands me 90 FC outside after a short conversation, which was a pleasant surprise.

Once the tutorial's over, I seem to have a decent selection of facilities: a lottery shop, two food stalls, two goody shops, and two haunted houses. Time to start browsing.

2-6.png

Both of the food stalls appear to employ a Shroomish, which makes sense given the food theme, but it's sort of a funny choice because Shroomish isn't available in any of the Gen 7 games without importing one from Bank. Anyway, one of them is a Battle Table, and lets me spend 60 FC on putting 10 EVs into Phart's HP, Defense and Sp. Def, while the other is a Rare Kitchen and boosts Phart up to Lv. 8 in exchange for 12 FC. Not bad.

The goody shops aren't so useful - one of them only sells Poké Balls, and the other one only has some basic healing items, which I buy anyway. I can't even afford the haunted houses now, but I try the lottery before I leave, ultimately emerging from Festival Plaza with 12 Fresh Waters, 4 Rage Candy Bars, and a Max Elixir that I'll probably end up selling. Now, on to Pokémon Refresh!

2-7.png

I'm probably not alone in not knowing the finer details of how affection works - playing with my Pokémon is certainly cute, but the idea of it being tied to affection bonuses really puts me off bothering with it in most playthroughs, especially since there's no way to disable them once they're unlocked (at least in the games where affection and friendship are separate things). Luckily, Bulbapedia has a nice table of what does what.

2-8.png

It seems as though Phart won't eat anything when its fullness is maxed out (makes sense), and if its enjoyment is maxed out, then being petted won't raise its affection until its enjoyment is lowered. With no access to Rainbow Beans, malasadas or the Photo Club, the best course of action seems to be feeding it Poké Beans until it's full, petting its favoured spot - the yellow bits above and below its face - until its enjoyment is maxed out (shown when the hearts flying out of it turn into a musical note), then sending it into a wild battle and seeing if I can feed/pet it again afterwards.

2-9.png

After running away from two wild battles, it does seem to have worked - Phart is willing to slowly eat another Poké Bean and gains affection from being petted. This is just enough to get its affection to level 2 before I need to run down its fullness and enjoyment again. Right then, now that I've figured out a strategy, it's time for a fairly unconventional grinding session...

2-10.png

About a couple of hours after I started (with a break in the middle, to be fair), its affection level is finally maxed out, and Phart is probably living up to its name after scoffing 22 Poké Beans. So what has all of that earned me? Well, Phart is now subject to the following bonuses:
  • It gains 20% more Exp. Points from battles
  • It has a 25% chance to survive any knockout blow with 1 HP, including from hitting itself in confusion
  • It has a 20% chance to cure itself of a status condition at the end of every turn
  • It has a 10% higher chance of dodging attacks (the 10% is subtracted from the usual accuracy, e.g. Focus Blast has a 60% chance to hit it)
  • Its critical hit ratio is doubled, increasing to 1 in 12 under normal circumstances (notably, if I use a Dire Hit on it, Struggle will always land a critical hit)
You'll note that apart from the boosted Exp. Points and Dire Hit shenanigans, all of those bonuses are luck-based, with no real consistency to them. Still, Phart needs every bit of help it can get, so I'm not complaining.

But that's enough messing around with cutesy stuff. I yearn for blood. There are 5 Trainers that remain undefeated across Route 1, so who should I take on first?

2-11.png

I settle for this Youngster after checking over all of their teams. No prizes for guessing which Pokémon he uses.

2-12.png

Youngster Jimmy
Caterpie Lv3 (Tackle/String Shot, IVs: All 0)

A gentle start to an awful run. Caterpie has 75 PP before it has to use Struggle, 35 of which can deal damage. Meanwhile, Phart has 560 HP of healing items behind it, and all the affection bonuses. Let's see how Phart fares.

Not having anything better to do, I start using Splash. Caterpie opens with Tackle, dealing 2 damage, and mixes it up with a few String Shots from then onwards. Jimmy doesn't seem to avoid using String Shot once Phart is at -6, probably due to having only basic AI. Phart continues Splashing, taking 3 HP damage from a crit Tackle, and manages to last 28 turns before needing a Potion. Once I burn through all my Splash PP, I decide to try waiting it out rather than using Struggle, and start wasting turns by trying to use a Paralyze Heal on the distinctly un-paralysed Phart. After having to use a second Potion, I realise it's probably futile and give Struggle a try, nearly KOing Caterpie with a critical hit but taking notable damage in return. One more Struggle defeats it, leaving Phart on 4 HP but winning its first battle!

I weigh up whether to heal at the Pokémon Center or not. Obviously it's nice getting my HP back without having to use items, but it also restores all of Phart's Splash PP, and having to burn through it all before it can Struggle again is not ideal. Ultimately I decide not to heal up, and just press on with the remaining Trainers - I still have more than enough money for Potions.

2-13.png

Preschooler Oliver
Alolan Rattata Lv3 (Tackle/Tail Whip, IVs: All 0)

I'll definitely need to go on the offensive for this one, as his Rattata knows Tail Whip and I don't have access to X Defenses yet. No quantity of Potions will save me from getting one-shotted, after all. Phart enters the battle with 24 HP, outspeeds Rattata and knocks it into the yellow with Struggle, taking 7 HP in recoil damage. Rattata's Tackle only deals 3 HP back, so I'm free to KO it with Struggle on turn 2 for a quick victory.

I can now move on to the Trainers near Kukui's lab, though unfortunately they're all a little higher-levelled.

2-14.png

Youngster Kevin
Inkay Lv6 (Tackle/Peck/Constrict/Reflect, IVs: All 0)

Does Inkay even have kneecaps?

Another battle I'll have to Struggle through, not least because Inkay has a whopping 125 PP in total. I outspeed and land Struggle, which looks to be a 5HKO, and Inkay's Tackle deals 2 HP back. The second Struggle knocks me down to 8/27 HP, a bit too close for my liking, so I use a Potion while Inkay uses... Reflect. That's not good. Luckily Phart's next attack lands a critical hit, bypassing the screen and knocking Inkay down to red, but its fourth Struggle doesn't quite score a KO, forcing me to use another Potion. Phart repays the kindness by dodging Inkay's Peck and KOing it with Struggle number five.

Phart now sits on 19/27 HP. It's obviously not in peak condition, but using a Potion seems wasteful, and I'm not letting the Pokémon Center restore all its Splash PP either. I decide to just try the next Trainer battle.

2-15.png

Lass Madison
Yungoos Lv6 (Tackle/Leer, IVs: All 0)

Again, I'll want to wrap this one up before it can drop my Defense stat too low. Phart outspeeds and looks set for a 3HKO with Struggle, dodging Yungoos's Tackle in return. I risk another Struggle and Phart falls to 5 HP as Yungoos uses Leer, meaning I'm forced to heal up because Phart's now in KO range from its own Struggle. Yungoos's next Tackle does 9 HP, leaving me plenty of room to KO with a third Struggle on the next turn. Phart ends the battle on 9/27 HP, so I'm happy this time to use a Potion on it before taking on the final Trainer of Route 1.

2-16.png

Swimmer Natasha
Wingull Lv7 (Growl/Water Gun/Supersonic, IVs: All 0)

Wingull outspeeds and uses Supersonic on turn 1, but Phart dodges - it only has 45% accuracy after factoring in the affection bonus. The first Struggle lands a critical hit but can't quite 2HKO it, Wingull uses Supersonic again and hits this time, but Phart avoids hitting itself and brings Wingull into the yellow, taking itself down to 13/27 HP from recoil. I risk one more Struggle, but Wingull uses Water Gun first and takes me down to 7 HP... where Phart promptly KOs itself with Struggle recoil. Oops.

I reset and try again, armed with a better knowledge of Water Gun's damage. The next attempt goes similarly, with another missed Supersonic and another crit Struggle, but Phart ultimately prevails after 5 turns this time, using up one more Potion in the process.

2-17.png

The first proper level-up! I definitely needed the power boost from the Rare Kitchen meals, though. The food stall only grants three levels a day and they don't work past Lv. 29, so it's not as if I'll just be leaning on them for the rest of the game.

With Phart now "caught up" on all the Trainers I skipped over at the start of the game, I'm almost ready to subject myself to the Trainers' School. But first, I stop by the Pokémon Center - not to heal Phart, of course, but to buy 10 Potions, as I'm down to just one of them after all those battles. I still have 12 Fresh Waters too, but I'd rather save those for more important battles later on when Phart's maximum HP is a bit higher.

I also stop by the Pokémon Center Café to see what's on offer, but before I can even order anything...

2-18.png

Nice! I order a Lemonade, which Elio unfortunately chooses to drink rather than saving it for Phart, and the café owner hands me a Sweet Heart and 12 Poké Beans as well - not quite as useful as the Rare Candy, but still good. Speaking of which, I'm curious about what triggers the café owner to hand out Rare Candies, as he doesn't always seem to do so, so I check Bulbapedia once more.

2-19.png

What in the fuck? One hundred thousand?

Just to put that into perspective, if you completely filled up your party and PC boxes, then went through and fed every single one of them Poké Beans until they refused to eat any more, you would still be 97,102 beans short of the final milestone.

Clearly a Cosmog solo run is far from being the most tedious thing you can do in these games. Anyway, that table suggests that I've reached the third milestone, so I speak to the café owner again and he does indeed hand me a second and third Rare Candy. I'll hang on to those for now. Café business completed, I briefly return to Festival Plaza, where my Ultra Moon character still seems to be hanging around for some reason. Sophocles offers me the chance to replace the fairly useless Ball Store with a more useful-sounding Pharmacy, which I gladly accept.

2-20.png

Handy. Hyper Potions are probably overkill at this point in the game, but it's nice to have a back-to-max-HP button for emergencies. I buy the Hyper Potions, but leave the 4-pack of Full Heals, as I already have a few Rage Candy Bars in my bag. Apparently they heal status conditions instead of HP starting in Gen 7. I wonder why they didn't change the Sweet Heart as well?

Anyway, that seems like a good place to leave things for now. I've finished everything I wanted to do on Route 1, and the Trainers' School has another 5 battles to navigate, so I'll leave them for next time rather than cramming even more stuff into this post.
Trainers defeated: 8/427
 
Last edited:
Curious to see if there's going to be EV routing, though I suppose that's for if/when the playthrough gets to Pelago or Route 10 where the EV-reset berries are.
That's a good point about EVs, actually. I had thought about using Poké Pelago as a way of deleting unwanted EVs (once I get hold of the right berries), but it'll probably be easier to do that if I keep track of Phart's EV gains as I go along. I'll start keeping a record of them in Excel - should be easy enough, since it's unlikely that I'll accidentally KO any wild Pokémon without paying attention.


:sm/ekans: :sm/popplio:
Another day, another chance to buy stuff from Festival Plaza. Selene (my Ultra Moon character) still seems to be hanging around, and a quick conversation with her triggers another rank-up.

3-1.png

Ooh, I don't have a 2-star facility yet. I ditch one of the haunted houses to make room, as they mostly seem to give Hard Stones and other stuff I don't really need. Unfortunately it turns out the 2-star General Store offers exactly the same items as the 1-star General Store I already have, except it also sells 4 Lava Cookies for 10 FC.

I'm a little low on FC, so I have to do a quick Festival Plaza mission to grind enough FC to pay for the EV-boosting meals, putting another 10 EVs into Phart's HP, Defense and Sp. Def. Then I stop by the lottery shop and "win" the bottom prize, a Berry Juice. There's nothing more to do here, so it's onwards to the Trainers' School, which Lillie has been standing outside for, let's see, almost 2 days?

3-2.png

Please don't. I can't even buy X items yet.

3-3.png

Somehow I don't see this making the solo run any easier. But I'll probably switch it off anyway, more out of habit than anything.

I was a little worried that Lillie might heal Phart for me and restore all its Splash PP, but it seems like she only does that if you choose to talk to her, which is a relief. Now I can turn my attention to picking up all the items strewn about the school: a hidden Poké Ball near the entrance, two Potions by the main building entrance, a hidden Great Ball in the middle of a battlefield (it's not just for speedruns!), and an Antidote and a Paralyze Heal amidst the tall grass. Inside, I receive the first useful item for Phart to hold, a Quick Claw - it's not amazing, but it might save Phart from taking an additional blow here and there.

With no reason to put off battling any longer, I pick out the nearest Trainer and get started.

3-4.png

Youth Athlete Hiromi
Bonsly Lv7 (Fake Tears/Flail, Ability: Rock Head, IVs: 5/0/5/0/5/0)

Hiromi's also carrying a Potion, and between Bonsly's high Defense and the high power of a low-HP Flail, I'm a little worried. I start with Struggle and can only manage what looks to be an 8HKO, Phart taking more damage in recoil than it deals out, while Bonsly wastes a turn using Fake Tears. That's not good. Looks like I'll have to stall this one out... Flail only has 15 PP at least, and it only has 20 power when Bonsly is this close to full HP. Bonsly's first Flail only deals 2 damage to Phart, taking it down to 20/29 HP as I spam an Antidote to waste turns. I use one Potion during the stalling, then another once Bonsly finally resorts to using Struggle. It takes another 6 Struggles from Bonsly before it faints, with Hiromi using her Potion and forcing me to use a third Potion in return, but victory is ours.

1 down, 4 to go. I use another Potion on Phart to heal it back to 100%, then head across the schoolyard and wade through the tall grass to begin the next battle.

3-5.png

Youngster Joey (no, not that one)
Alolan Grimer Lv7 (Pound/Poison Gas, Ability: Gluttony, IVs: 5/0/5/0/5/0)

I do have ways to heal poisoning, but it could be a tricky fight, since there's only one method to deal damage but three ways to take damage in return (Pound, poison damage, and Struggle recoil). Phart outspeeds it, but Struggle looks like a 5HKO at best, and Grimer lands a Poison Gas in return... only for Phart to immediately expel the poison! The next Poison Gas does stick around, dealing 3 HP of damage and leaving Phart on 12/29 HP. I use a Potion, taking 6 damage from a crit Pound and 3 more from poison, then bring Grimer into the yellow with a third Struggle, falling down to 6/29 HP in the process. After a second Potion and another Struggle, Phart is on 5/29 HP but Grimer looks to be in KO range. Phart heals its own poisoning after a third Potion, narrowly missing out on the KO but dodging the last Poison Gas, leaving it with plenty of HP to finish off Grimer with a sixth Struggle.

3-6.png

Still pretty poor, but I'll take what I can get. I mix things up a bit and use my Sweet Heart on Phart instead of a Potion, bringing it to 30/32 HP, and head back inside to take on the third Trainer.

3-7.png

Preschooler Mia
Metapod Lv7 @ Oran Berry (Harden/Tackle, Ability: Shed Skin, IVs: 5/0/5/0/5/0)

She wasn't lying - that certainly is a Metapod with an Oran Berry. And it knows Tackle too, which kills any hopes I had of stalling it out. Oh well. Phart's first Struggle falls just short of a 4HKO, and Metapod responds with Tackle, dealing very little damage. The second Struggle knocks it into yellow, but activates its Oran Berry, putting it almost back to full HP while Phart falls to 10/32 HP. I use a Potion as Metapod sets up a Harden, but Phart's next Struggle bypasses the boost with a critical hit as it uses Harden again. Two Struggles, a Potion and another Struggle later, Phart is able to strike it down.

Having looked at the data of the next Trainer, I'm not feeling at all optimistic, but I decide to heal Phart up with a Berry Juice and give it a go regardless.

3-8.png

Rising Star Joseph
Ekans Lv8 (Wrap/Bite, Ability: Intimidate, IVs: All 15)

Never mind Intimidate, it's Bite that's got me worried. Ekans outspeeds Phart and deals a whopping 14 damage with Bite, taking pitiful damage from Struggle in return. I try using a Potion, but it responds with Wrap, and the combination of Bite, Struggle and Wrap damage knocks out Phart on turn 3. This doesn't look good at all...

After resetting and having a little think, I swap Phart's Quick Claw for an Oran Berry, reasoning that keeping its HP up is probably more important in this battle, and try again to see if RNG will be kinder to me this time. Luckily, Ekans chooses to go for Wrap on a turn where Bite would've scored a KO, and Phart lands a crit Struggle.

3-9.png

Joseph can only look on in bewildered horror as I pour 3 Potions, a Fresh Water and an Oran Berry down the mouth of a Cosmog. We're not done yet though, and after another 2 Fresh Waters, Phart dodges a Bite and lands another Struggle, bringing both sides down to red. As I heal Phart back up with yet another Fresh Water, the stars align - it dodges another Bite on the same turn that Wrap wears off, leaving Ekans open to a knockout blow from Struggle.

3-10.png

That's the power of affection bullshit friendship for you!

Joseph rewards me with TM01 Work Up for my efforts, and even throws in an explanation of how it works.

3-11.png

You have no idea how far up the creek I am.

The school bell sounds, and I'm summoned to the office on 2F. This gives me a chance to pick up a Potion from a boy in one of 2F's classrooms, as I couldn't reach him earlier due to the stairs being blocked off. Phart is currently on 21/32 HP after the Ekans fight, so I dump the Potion onto it immediately before heading to the final battle in this area.

3-12.png

Teacher Emily
Popplio Lv10 (Pound/Water Gun, Ability: Torrent, IVs: 30/10/20/10/30/20)

While Emily uses a Magnemite and an Alolan Meowth in SM, she switches things up in USUM and uses the starter that has a type advantage over yours. Unfortunately for me, Popplio seems to have the highest damage output of the three with STAB Water Gun, and Phart takes 10 damage from its Water Gun while barely chipping it with Struggle. It takes 3 Fresh Waters to bring Popplio into yellow HP, even after factoring in a dodged Water Gun, and as I use a 4th one, I wonder how I should proceed - knocking Popplio into Torrent range could be dangerous, but it's not like I can stall it out either. I eventually decide to Struggle again, leaving Popplio two hits (or one crit) away from fainting, but with Torrent now active. Phart heals up to full with another Fresh Water, but Torrent-boosted Water Gun brings it right down to 17/32 HP, leaving no room for it to Struggle without KOing itself.

Fresh Water no. 6 into Popplio's next Water Gun leaves it on 17 HP again, Fresh Water no. 7 is even worse as the next Water Gun brings Phart to 16 HP, and on the 8th and final Fresh Water, Water Gun lands a critical hit, knocking Phart down to 11 HP. I have to resort to using 2 Hyper Potions before Phart finally dodges another Water Gun, nearly KOing Popplio with Struggle, and after using up my final 2 Hyper Potions, I'm completely out of healing items and Phart's on 17/32 HP. But at the last possible moment before I'd be forced to reset, Phart pulls through by activating its Quick Claw, finally knocking out Popplio before Water Gun can put it into fainting range from Struggle recoil.

3-13.png

Well, I'll take it. I burned through an awful lot of items, yes, but I'm not going to reset over my victory just because it wasn't clean enough. Replacement stuff can always be bought later on. I'm awarded 5 Great Balls by Emily for overcoming such tremendous odds, and Kukui shows up with Captain Ilima to sing my praises some more. That concludes the Trainers' School segment! Everyone comes to say well done and wave me off before Lillie leads me towards Hau'oli City.

3-14.png

Disaster! It seems I must have been given a free heal at some point, PP included, so now I'll need to run through all that Splash PP again before Struggle becomes available. Phart looks just as furious as I am. Luckily the next Trainer battle isn't for a while yet, so there's no rush - time to have a look around the city.

3-15.png

I'm off to the beach straight away, not for leisure but for picking up more items: a Poké Ball, a Fresh Water and a Pearl. A woman by the main road hands me a Potion, and that's pretty much it for the beach area, so I proceed to the shopping district.

3-16.png

That's not normal behaviour, surely.

Hau runs up and drags me off to the Tourist Bureau to receive a Poké Finder. Inside, I try the lottery and fail miserably, and speak to a Scientist who wants to see my Pokédex after I've registered 10 species. I'll probably reach that milestone at some point, and he offers 10 Ultra Balls if I can pull it off, so I might pop back later on. Once I head back outside, Mr. Karate Chop pesters me into taking photos of a wild Pikachu, and I go along with it, partly out of fear that he'll snap my neck or something if I refuse.

3-17.png

Somehow this shoddy photo gets 733 thumbs up on the Poké-Internet. Is this the power of the franchise mascot?

Onwards we go. Lillie hands me a Lens Case, another lady bestows upon me a Silk Scarf, and I pick up a Tiny Mushroom lying near some tall grass. Running into a wild Furfrou causes a little panic as I double back through the grass, but it's only Lv. 6, so Phart escapes unscathed. Ilima stops me outside the Pokémon Center to explain the concept of Totem Stickers, and a Sightseer hands me a Heal Ball before I enter the Pokémon Center, running straight to the Poké Mart to check out what's in stock.

3-18.png

Yesss. Being able to put +2 onto any stat, guarantee Struggle lands critical hits, or temporarily block stat drops is a massive boost for Phart. The main issue is the price - I don't have access to any fast methods of grinding money yet, so I'll have to be selective with my X item usage. With that in mind, I'll save buying them for later. I instead dive into Festival Plaza just before midnight to buy 24 Fresh Waters with my FC, refilling my bag after the Trainers' School disaster.

3-19.png

Lastly, I put the Lens Case to use by turning my eyes green, representing my jealousy towards literally every other Pokémon in existence. I may not have sufficient funds to spend on clothing, but at least swapping my eye colour is free. Silliness aside, I'll leave the rest of Hau'oli City for later. There's a fairly nasty-looking battle coming up soon...
Trainers defeated: 13/427
 
Last edited:
:sm/buneary: :sm/smeargle:
4-1.png

Back to Festival Plaza again. It's proving a lot more useful than I expected, honestly.

Selene is still here, and her presence seems to be preventing any of the Festival Fan NPCs from spawning, meaning she's the only way of earning FC apart from missions. To make matters worse, she only awards me 15 FC per conversation, and only if I manage to guess a random facility she'd like to visit. However, I do have 8 Festival Tickets, so I decide to do some missions and grind some FC. Completing three missions triggers Festival Plaza's rank to increase to 9, and Sophocles rewards me with a particular type of bouncy house that can raise HP and Speed EVs, so I replace the haunted house with it.

4-2.png

Am I not allowed to compliment people's clothing until Sophocles gives me permission?

Anyway, I rank up further to 11, Sophocles offers me some 4-star facility that didn't seem appealing, so I reject it and get a Big Pearl instead. Once I've used up all my Festival Tickets, I'm on 282 FC. I spend 75 FC on stuff that boosts Phart's EVs, giving it an extra 22 EVs in HP, 10 in Defense, and 10 in Sp. Def. After winning a Full Heal from the lottery, I'm done here for now, so it's back to Hau'oli.

4-3.png

This Beauty wants me to catch an Abra and show her its Pokédex entry, promising to pay me for my efforts. I'm not exactly loaded but I do have 37 Poké Balls, so I head into the tall grass just outside, where Abra has a 20% encounter rate.

4-4.png

The first two Abra flee, and Phart's HP gets chipped by other wild Pokémon whilst trying to seek out a third, but the next Abra is more cooperative. I'm paid $10,000 for the hassle and quickly banish Abra to the PC, healing up Phart while I'm there - it already had full Splash PP, so there was no downside to being healed.

Time to start making my way towards the next battle. I scoop up more items along the way: a Revive, an Ether, a Lumiose Galette, another Revive, and a Stardust. Hau emerges from the malasada shop to tell me how good malasadas are, but we're interrupted when a couple of Team Skull Grunts make their appearance.

4-5.png

Hau explains to me that Team Skull is formed of hardened criminals, notorious for such despicable acts as stealing stickers and getting in the way. The conversation seems to be leading towards a battle, but perhaps I'll just sneak past them and pick up some more items...

4-6.png

...or not. As much as I'd love to knock some skulls together, Phart still has 40 Splash PP, and I don't want to spend half the battle running through them before I can attack. So I run back home - turns out you're allowed to run away from Team Skull, just not past them - and head to the patch of grass on Route 1 where I received Litten. This grass features Buneary at a 30% encounter rate, at Lv. 2-3 (I'm not sure how the game determines the level, but it's probably just 50:50?), and they know Defense Curl, Splash, Pound and Foresight. With only a 25% chance of Buneary attacking each turn, this seems like the best way to burn through Splash PP while taking minimal damage, at least until I can encounter wild Metapod.

4-7.png

It doesn't take long for a Lv. 2 Buneary to show up, so Phart starts Splashing around. 40 turns later, it's ready to Struggle again, and Buneary has only taken 11 HP off it with 7 Pounds, 2 of those being critical hits. I flee from the encounter and run all the way back to Hau'oli City to take on Team Skull at last.

4-8.png

Team Skull Grunt
Zubat Lv9 (Absorb/Supersonic/Astonish, Ability: Inner Focus, IVs: All 0)

Astonish is super effective and confusion is never ideal, but it's an easier battle than the last two. Phart goes into the battle with 24/35 HP, outspeeds with Struggle and seems like it'll probably just miss the 3HKO, but the combination of Struggle recoil and Astonish takes it down to 9 HP. I drop a Potion as Zubat uses Astonish again, taking off 6 HP. After the second Struggle, I use a Fresh Water, and Zubat fails to connect a Supersonic. From there, Phart tanks another Astonish and uses Struggle twice for the win. The grunts go running off, and after Hau makes his exit, Ilima comes over for a chat.

4-9.png

Noooooo. Now I have to go bunny hunting again.

Ilima challenges me to a battle as well, but I'm allowed to decline for now and keep exploring. Just as well, really, because his team looks even trickier than the demon Popplio from earlier. A wander along to the marina nets me TM49 Echoed Voice, an X Attack, an X Defense, and a Super Potion. I then head back to the Pokémon Center to stock up on X items for the Ilima fight: 2 X Attacks, 5 X Defenses, 3 X Sp. Defs, and an X Speed, plus 5 more Potions. Costly, and maybe a bit excessive, but I did sell my useless stuff like Pearls and Stardust to make up for it.

After a quick trip to Route 1 to flop around in front of a Buneary, it's finally time to face Ilima. I'm not feeling at all confident about this, but at least I can reset if things don't work out. So here goes...

4-10.png

Captain Ilima
Items: Potion, Full Heal
Yungoos Lv10 (Tackle/Pursuit/Leer, Ability: Stakeout, Adamant nature, IVs: 30/25/25/25/30/25, EVs: 252 Def / 252 SpD)
Smeargle Lv11 (Water Gun/Tackle, Ability: Technician, Hasty nature, IVs: 30/25/25/25/25/25, EVs: 170 HP / 170 Atk / 170 SpA)

First of all, I do like that the trial captains still use the original SM Trainer battle theme in USUM. Makes them stand out a bit more. As for everything else... you can see from the data above that Ilima is a step above anyone else I've fought so far. He's the first opponent with two Pokémon that Phart's had to face, and both of them look like they'll hit pretty hard. But I'm also equipped with better items now.

Yungoos can either drop Phart's Defense with Leer or smack it with Pursuit, so I lead with an X Defense. Pursuit takes Phart down to 27/35 HP once it's at +2, which is better than I expected, and Phart still has 17 HP left once it reaches +6. I switch to X Attacks, bringing Phart to +6 Attack as it tanks two Pursuits and dodges a third. After a Fresh Water, Phart gets hit with a crit Pursuit, knocking it to 13/35 HP, so I use a second one as Phart dodges another Pursuit. I use 3 X Sp. Defs before Yungoos lands another crit, leaving Phart in need of another Fresh Water. Lastly, I use my single X Speed, bringing Phart's Speed high enough to outrun both Yungoos and Smeargle, and finally go on the offensive.

Phart outspeeds Yungoos, but even at +6, it can only just scrape a 2HKO, so I have to drop a Potion on it. The second Struggle scores the KO, and Ilima sends in Smeargle. Phart's on 21/35 HP, so I use another Potion to help gauge how hard Smeargle hits - Tackle does a mere 3 HP to Phart, letting Phart Struggle twice for an expensive victory!

4-11.png

Perhaps I did go a bit overboard on the items, but I definitely would've needed some of them no matter what. Yungoos never chose to use Leer for some reason, which also helped quite a bit, because I was free to just spam X items once I got to +6 Defense and only had to worry about critical hits.

Ilima bids me Alola and sets off to organise my upcoming trial or something. As I head to Route 2, Lillie stops me and hands over 3 Revives, which won't help at all in a solo run, but at least they sell for $1,000 each. There's one last roadblock in the form of Tauros, and after grabbing its horns, it decides to play tag with Hala rather than violently goring me as you might expect. Next time, I'll be getting stuck into the many battles that still lie before the first trial.

I might see about making the next posts a bit longer than the ones I've done so far and taking more time to post them, rather than churning out a new update almost every day. The slog-tastic nature of this playthrough means it's never going to be the most captivating tale regardless of how it's formatted, but I think doing bigger chunks might be better than one or two tiny milestones per update.
Trainers defeated: 15/427
 
Last edited:
:sm/drowzee: :sm/murkrow:
Back to Festival Plaza yet again. Selene has started occasionally asking me to compare records with her, and only gives me FC if I can beat her in a particular category (Eggs hatched, BP spent, etc.). Given that she comes from a save file that's completed the entire game whereas I'm still on Route 2, it's safe to say I'm not getting much FC from her. It's alright, because I can still get 108 FC per day from completing missions.

Today's trip consisted of replacing the lottery shop with another 2-star bouncy house, then visiting all the facilities that raise EVs, putting an extra 34 HP, 10 Defense and 10 Sp. Def EVs into my "trusty" partner. Not very exciting, but the extra defenses should come in handy.

5-1.png

Now, back to the story. It's a fairly long way to Verdant Cavern, so I bring Phart up to 34/38 HP with a Potion and get started. A Beauty blocks us from progressing any further than the first grass patch.

5-2.png

Beauty Krystal
Cutiefly Lv9 (Absorb/Fairy Wind/Stun Spore, IVs: All 0)

No Bug-type attacks, thankfully. Phart dodges an Absorb and does about 25% with Struggle, but gets paralysed and fails to attack for 2 turns, before managing to heal its own paralysis. The rest of the battle proceeds without much issue: Cutiefly is 4HKO'd and Phart only needs one Potion to win, but it does end the battle still paralysed. A quick Paralyze Heal and Fresh Water brings it back to peak health.

Wading through some tall grass leads to a Heal Ball as well as the entrance to Hau'oli Cemetery. I'm not going in there just yet - I've got more pressing matters to attend to, such as beating up a random child.

5-3.png

Preschooler Dylan
Drifloon Lv8 (Constrict/Minimize/Astonish/Gust, IVs: All 0)

Astonish might sting and Minimize is annoying, but I'm not expecting a Preschooler's AI to make particularly good choices. I'm quickly proven wrong when it uses Astonish twice as Phart Struggles away, taking it down to 2 HP. It switches to Gust as I use a Fresh Water, then Astonish again, forcing me to heal once more. A final Struggle finishes it off, leaving Phart in the yellow after Aftermath activates.

5-4.png

Every little helps, as they say in Tesco. I'd love to continue on to Verdant Cavern from here, but someone else has other ideas...

5-5.png

Behold, Ultra Changes! There's a shiny new beach area nearby that wasn't in SM, so this is my opportunity to go check it out. There's a Super Potion and a hidden Repel nearby, and a Collector in one of the motel rooms hands me 2 Nest Balls. Before I head down to the beach, I heal up Phart to take on another Trainer.

5-6.png

Surfer Carlton
Delibird Lv9 (Present, IVs: All 0)

pk3DS doesn't tell me whether it has Vital Spirit or Hustle, but I'm hoping for the former, as a high-power Present might hurt. Struggle takes a quarter of Delibird's health, and its Present only does 3 damage. Presumably that particular attack must have had 40 power, so I'd expect the strongest 120-power Present to do about 9 damage, which is alright. Phart dodges the next Present and Struggles back, but falls to 17/40 HP, so I heal it to full on the next turn. Delibird's next Present does 6 damage, the next one does only 3 damage, and Phart finishes it off with a Quick Claw activation into Struggle.

I've been using my Fresh Waters a little more quickly than I'd hoped, so I nip back to Hau'oli and buy 10 Potions to keep us going, then head down to the beach.

5-7.png

Cue funky music. I quite enjoy the majority of USUM's new tracks, actually. I pick up a couple of hidden Pearls and a Fresh Water buried in the sand (courtesy of Bulbapedia's item lists), then check out the BP shops. Obviously I can't use them yet as I have precisely 0 BP, and the Move Tutor is not gonna be able to salvage a Cosmog, but the other shop looks very nice.

5-8.png

Berry Juices, Ethers, Max Revives and PP Ups aren't much help, but everything else looks good. The vitamins are not only useful for pumping up Phart's defenses, but also for selling: they fetch $5,000 each, meaning I can essentially convert every Battle Point I earn into $2,500 if needed. The Max Potions and Full Heals might also be handy if I'm running low on cash and don't want to buy medicine from the shops, but as I say, the vitamins mean I shouldn't have to worry about money so much. Lastly, while Rare Candies look very expensive, it is possible to earn 50 BP from a Mantine Surf session, so they sort of work as an emergency power-up option if I can bear the grind. They'd probably work best in the postgame, when obedience is no longer an issue and I can just level Phart up to 100.

What I'm basically saying is that Mantine Surf will make resource management a lot less of an issue once it's unlocked. Provided I can make it past Hala, of course...

5-9.png

Uh-oh, here come the bad guys. In keeping with their fairly mundane acts of trouble-making, they want to ride on Mantine's back and bust some sick dance moves as they've done before, even though this usually results in them falling into the water. Someone needs to teach them a lesson (after using a Potion on their Cosmog, at least).

5-10.png

Team Skull Grunt
Drowzee Lv9 (Pound, Ability: Insomnia, IVs: All 0)

Literally just Pound? That's harsh. Each one only does 3 HP of damage, so Phart scores a fairly easy 4HKO after using a Potion and dodging one Pound at the end.

5-11.png

At least he's under no illusion that his Drowzee knows Confusion.

The resident Swimmer lady gives me a Fresh Water as a reward for driving off Team Skull, and now that she's moved a little bit, a path has opened up to the eastern half of the beach. I pick up a hidden Pearl and Soda Pop, as well as a White Herb, before doubling back to Route 2 and entering the cemetery.

5-12.png

Three more Trainers to battle here, but first, Phart's on 2/40 HP and needs a couple of Potions. I grab a hidden Great Ball, a Paralyze Heal and TM100 Confide before getting into the first fight.

5-13.png

Pokémon Breeder Ikue
Pikachu Lv9 (Tail Whip/Thunder Shock/Growl/Play Nice, Ability: Static, IVs: All 10)

Hey, anime reference. And non-zero IVs, too! Thunder Shock only knocks Phart down to 34/40 HP and Struggle takes a quarter of Pikachu's HP, but Static activates in the process. However, Phart's next Struggle lands a critical hit while Pikachu uses Play Nice. I drop a Potion, Pikachu uses Thunder Shock and Growl, and Phart doesn't quite achieve the KO with its next attack, but one last Struggle does the job.

5-14.png

Phart's now on 4 HP and paralyzed, so a few items go into fixing it up before the next Trainer spots us.

5-15.png

Office Worker Jeremy
Pikipek Lv9 (Peck/Growl/Echoed Voice/Rock Smash, IVs: All 10)

Should be alright as long as it doesn't get too Echoed Voice-happy. Phart outspeeds and Struggle is set for a 3HKO, while Pikipek responds with, uh, Rock Smash? And then uses Rock Smash again? If you insist... I'm not going to turn my nose up at an easy victory. A couple more Potions fix up Phart's recoil damage before I take on the last remaining Trainer.

5-16.png

Preschooler Malia
Happiny Lv8 (Pound/Charm/Copycat, IVs: All 0)

Happiny's damage output is even worse than Phart's, so this should go smoothly, and it does - Phart scores a rare 2HKO with Struggle while Happiny tries to use Copycat and fails. Turns out Copycat doesn't work on Struggle. Who knew? With all the battles completed, all that remains is to pick up a Big Mushroom, a Super Potion and a hidden Ether before exiting Hau'oli Cemetery.

Back on Route 2, I stop to help a man who's lost his Meowth, coaxing it out from under a vehicle by avoiding eye contact. He hands me a trio of items for helping out: an X Attack, an X Sp. Atk, and the favourite item of all cat Pokémon, an X Pspspspspeed. I use my last Potion on Phart to bring it to 41/43 HP and make my way past where I got blocked off by a Crabrawler earlier. Sadly, I only manage a few steps before the next Trainer.

5-17.png

Gentleman Stanley
Items: Full Restore
Murkrow Lv10 (Peck/Astonish/Pursuit, IVs: All 0)

Murkrow outspeeds, and Pursuit deals heavy damage as expected, bringing Phart within KO range immediately. Phart's Struggle does land a critical hit, but even that falls short of knocking Murkrow into yellow HP. I use a Fresh Water and Phart Struggles again as Murkrow switches to Astonish and Peck, taking it down to 16/43 HP. After another Fresh Water, Murkrow uses Astonish twice, putting Phart back on 16 HP. I use a third Fresh Water... only for Stantley to use his Full Restore, rendering all our efforts futile. To add insult to injury, Murkrow then lands a crit Pursuit, and Phart knocks itself out via Struggle recoil afterwards.

Tough little bird, I'll give it that. I reset, and this time start the battle with an X Defense. It certainly helps, but Murkrow still keeps Phart in check with a critical-hit Peck, and it takes two Fresh Waters before we can make Stanley burn his Full Restore. Phart does manage to dodge one Peck though, and after a couple more Fresh Waters, Murkrow is finally knocked out. Stanley pays out $2,000 on being defeated, so at least I can cover the item losses with that.

5-18.png

Another little detour. No Trainers here, but a few items to pick up: 3 Oran Berries, a Persim Berry, a Sitrus Berry, a Paralyze Heal, a Big Mushroom, a Repel, a Silver Powder, and a Revive that a Delibird pulled out of its tail-sack. That's everything, so it's back to Route 2, where a couple of aliens dressed in strange suits are talking about something called the Blinding One. They're too busy to stop and introduce themselves, so I just carry on until a Lass challenges me to a duel, Fresh Watering my Pokémon up to full HP first.

5-19.png

Lass Isabella
Yellow Flower Flabébé Lv9 (Tackle/Vine Whip/Fairy Wind, Ability: Flower Veil, IVs: All 0)

Phart tanks a Tackle and a Fairy Wind to deliver a swift 3HKO, taking itself down to 1 HP in the process. I pick up a Super Potion next to Isabella and head a little further down the path, where a familiar friendly face lurks.

5-20.png

It feels sort of odd to abbreviate Pokémon Center, doesn't it? As far as I can tell, Hau calls it the PMC twice in SM/USUM, as well as one random NPC in Mount Hokulani(?), but nobody else seems to call it that, either in Alola or any other games. So it's not even a "cool kids abbreviating things" thing, it's just a Hau thing. Strange child. Once we head inside, Hau hands me 3 Revives as if I can actually use them, and then pesters me into trying something called a Roto Loto.

5-21.png

To be fair, some of the Rotom Powers might be useful. Roto Boost stands out as basically being an "X Omniboost", but HP Restore, Stealth and Bargain seem to have relevant benefits as well.

The Verdant Cavern trial looms, but there's still a few items to pick up and a Trainer to fight first. I start by buying 15 Potions from the Poké Mart, then have a little wander around the Pokémon Center and talk to people. There's a Lass who wants to trade her Hawlucha for a Spearow (genuinely why?) and a Sightseer who'd like to see a Crabrawler, so maybe I'll poke around in the tall grass outside. Back in the outdoors, I find a hidden Stardust and a Revive, as well as the last Trainer of the route.

5-22.png

Pokémon Breeder Jay
Rockruff Lv10 (Tackle/Leer/Sand Attack/Bite, IVs: All 10)

Boo, why couldn't Rockruff learn Rock Throw a bit earlier instead of Bite? Phart comes into battle with 41/43 HP, Struggle seems to be a 5HKO, and it needs a Potion after the first Bite. Two Sand Attacks come next, but Phart lands another couple of Struggles and takes a Bite before I use a Fresh Water. Phart shrugs off a Tackle and a Leer, finishing off Rockruff with two more Struggles.

5-23.png

That level-up gave Phart 2 more Defense points! Good, because I'll need every boost I can get if I want to come out of Verdant Cavern alive.

There's a pile of berries under a nearby tree, and while I do pick up an Oran, a Leppa, and a Chesto Berry, there's no sign of any wild Crabrawler, so I run around in the nearby tall grass for a bit.

5-24.png

Took 3 Poké Balls and nearly KO'd Phart with Pursuit, but the affection bonuses let Phart tough it out with 1 HP. I bring Spearow inside the Pokémon Center and trade it for Hawlucha, who is immediately thrown into the PC.

5-25.png

Did I really do all of that just to get a free X Attack? Absolutely.

It'll take more than that to get me through the trial though, so I heal up Phart with a Potion-Fresh Water combo and head to the Poké Mart, sell all my useless valuable items, then get to work on buying supplies. I buy 4 X Attacks, 10 X Defenses (every single wild Pokémon in the trial knows Leer), 2 Guard Specs., 2 Dire Hits, and 2 X Accuracies. Instead of buying healing items with cold hard cash, of which I now have not very much, I pop to Festival Plaza to buy 4 Hyper Potions and 24 Fresh Waters, and also put another 34 HP, 10 Defense, and 10 Sp. Def EVs into Phart before heading back to Route 2.

5-26.png

5-27.png

Can this little Cosmog truly take on a mighty Totem Pokémon and win? I hope so, otherwise that's the thread fucked.

Rotom offers me a few words of encouragement and some useless Roto Friendships before I meet up with Ilima outside the trial site. There's no leaving the trial once it's started, which is why I was so keen to fill my bag up with items earlier.

5-28.png

So, a quick overview of what's up ahead: I have to defeat two wild Yungoos (Yungees?), a Team Skull Grunt, and a wild Gumshoos before I can take on the Totem Pokémon. I can leave the area, technically, but that resets all the progress I've made through the trial, so there's no point. Even if I do somehow need more items, Festival Plaza is still accessible mid-trial, which is quite amusing.

There's a Super Potion near the first den, and after picking it up, I stick my head in front of the den to lure out the first trial Pokémon.

5-29.png

Yungoos #1
Lv11 (Sand Attack/Tackle/Hyper Fang/Leer, Ability: Strong Jaw, IVs: All 0)

Strong Jaw Hyper Fang is kind of nasty, but hopefully as a wild Pokémon it won't be too smart with its move choices. Phart outspeeds and deals around 33% with Struggle as it uses Leer. After the second Struggle, it uses Tackle, leaving Phart on 12/46 HP. Struggle would KO Phart at this point, so I drop a Fresh Water on it and KO Yungoos the next turn.

Also, I double-checked online and it turns out Struggle bypasses accuracy checks as of Gen IV, so I wasted money on those X Accuracies earlier. Oops! Oh well, lesson learned. A quick Potion is used before Phart heads onto the second wild Yungoos, picking up a hidden Revive along the way.

5-30.png

Yungoos #2
Lv11 (Sand Attack/Tackle/Super Fang/Leer, Ability: Strong Jaw, IVs: All 0)

Hyper Fang is now Super Fang, but otherwise it's much the same as before. Struggle threatens a 3HKO as it uses Super Fang, I use a Fresh Water while it uses Sand Attack, and two more Struggles finish it off before it can make use of Leer. Phart downs another Potion before carrying on. The last trial Pokémon is being a pain and won't come out to battle, but this gives me a chance to pick up TM31 Brick Break, a Super Potion and an X Defense.

5-31.png

An unlikely source of help arrives, allegedly to mess up my trial. One of the grunts decides a battle would help them with that.

5-32.png

Team Skull Grunt
Drowzee Lv11 (Pound, Ability: Insomnia, IVs: All 0)

It's the same Drowzee as before, right down to still having just Pound. Phart has to settle for a 4HKO and use of a Fresh Water mid-battle, but otherwise, it goes as you'd expect. Team Skull decides to station themselves in front of the dens, granting me the opportunity to take on the final trial Pokémon (once Phart's healed up, of course).

5-33.png

Gumshoos
Lv11 (Sand Attack/Bite/Super Fang/Leer, Ability: Adaptability, Mild nature, IVs: All 0)

This looks tricky. Phart's Struggle is maybe a 6HKO, but it does dodge the first Super Fang. The second Struggle takes Phart down to 22 HP, where Gumshoos uses Bite and knocks it out. Well, at least I wasn't wrong about it being tricky?

Attempt two... I lead with an X Defense this time, Bite taking Phart down to 36/46 HP - a definite improvement. It uses Leer then Sand Attack as Phart heals up, then Super Fang. Another Fresh Water, and Bite does 14 HP damage this time. Phart Struggles, taking Gumshoos into the yellow, and dodges a Sand Attack before healing up again. Gumshoos uses Leer followed by Sand Attack, leaving Phart free to land two more Struggles and emerge victorious.

5-34.png

That's the trial Pokémon defeated at last. I confirm that I've beaten them all with the Trial Guide and he steps aside, granting me access to the Totem's Den.

5-35.png

Might have to leave the Totem for next time though. I'm not sure if there's a limit on how many images I can attach to one post, and it'd be a shame if I had to stop mid-battle.
Trainers defeated: 26/427
 
Last edited:
Might have to leave the Totem for next time though. I'm not sure if there's a limit on how many images I can attach to one post, and it'd be a shame if I had to stop mid-battle.
The limit is currently 100 (unsaved attachments) as I recently observed in Smogoff's Xenforo upgrade/official Pokemon.com forums mechanics research threads (originally 50), but you can post and then edit to insert more images if needed like in the Guardian Signs Assist Compendium.
 
The limit is currently 100 (unsaved attachments) as I recently observed in Smogoff's Xenforo upgrade/official Pokemon.com forums mechanics research threads (originally 50), but you can post and then edit to insert more images if needed like in the Guardian Signs Assist Compendium.
Forgot to reply earlier, but thanks! That should be more than enough. I can't see myself going any higher than 50 per update without getting bored just putting the post together.


:sm/gumshoos: :sm/crabrawler:
Before I charge into battle, I take a moment to consider Phart's held item. The Quick Claw isn't really that useful, since I still get hit by my opponent's attack even after it activates, unless I KO them with Struggle first. I do have a White Herb, which could offer a one-time negation of a Leer, but the Totem Pokémon can use Scary Face, and I'm not nearly as worried about Speed drops. By process of elimination, a Sitrus Berry seems to be the best choice, so I stick one on Phart.

Once we've finished crapping ourselves, I step forward to the pedestal and summon the Totem.

6-1.png

6-2.png

Totem Gumshoos
Aura: +1 Defense
Lv12 @ Pecha Berry (Super Fang/Bite/Tackle/Scary Face, Ability: Adaptability, Modest nature, IVs: All 0, EVs: 60 Def / 100 SpD)

Ally Yungoos
Lv10 (Leer/Tackle/Pursuit/Odor Sleuth, Ability: Stakeout, Timid nature, IVs: All 0)

A few small mercies: Phart's Unaware ignores the Totem's Defense boost, I have one turn before Yungoos arrives and turns the battle into a 2v1, and Game Freak were kind enough to give both Pokémon Attack-lowering natures. But other than that, it's looking grim. I reckon the best strategy would be to get my X items set up, KO the Yungoos first, then work on Totem Gumshoos.

I start with an X Defense, and the Totem uses Scary Face as Yungoos arrives. Not wanting to assume Phart can tank their Bite and Pursuit, I use another X Defense - Yungoos's Pursuit deals 4 damage, while Phart manages to dodge the Totem's Super Fang. X Defense no. 3 is met with another Pursuit, dealing only 2 damage, but Totem Gumshoos lands a critical hit on Bite, dealing 24 damage and activating the Sitrus Berry. Not good, but at least now I've got an idea of what HP ranges are "dangerous" for Phart to be in.

Next, I use a Guard Spec. to block any Leers/Scary Faces for a little bit, with Phart dodging a Bite and not being bothered by Yungoos's Odor Sleuth. After an X Attack, Phart tanks a Pursuit/Bite combo but falls to 23/49 HP, so I use a Fresh Water and take 8 damage in return. A second X Attack is deployed, another 8 damage taken, and after the third X Attack, Phart sits on 25/49 HP, but the Guard Spec. wears off. I use another Fresh Water, and Phart gets hit with another Bite but dodges a Pursuit.

6-3.png

It's not going to get much better than this, so I decide to attack. Unfortunately, I'm quickly reminded of a slightly obscure mechanic - if you use Struggle in a Double Battle, it targets a random opponent. Phart dodges a Pursuit and a Bite, landing its Struggle on Totem Gumshoos instead of my intended target of Yungoos... but takes it straight into yellow HP! Phart still has 31 HP, so I risk another Struggle, with Phart dodging another Bite and shrugging off a Pursuit before retaliating with a OHKO on Yungoos.

6-4.png

Now down to 17 HP, I use another Fresh Water on Phart, followed by an Oran Berry to briefly bring it to max HP before the Totem's next Bite. Phart tanks one last Bite before using Struggle again, utterly obliterating the Totem Pokémon of Verdant Cavern.

6-5.png

6-6.png

Totem Gumshoos? More like Scrotum Gumshoos amirite lmao

6-7.png

Z-Splash get! I mentioned in an earlier post that it's probably not worth using over the X Attack's +2 Attack and freed-up item slot, but it is an option that's now available to me, so that's nice. Ilima shows me the "elegant pose" I have to strike to use Z-Moves, then hands me 10 Great Balls.

6-8.png

Bah, there goes Struggle. Looks like I'm heading back to Route 1 before anything else. The strange alien people from earlier come to examine my Z-Crystal, introducing themselves as the Ultra Recon Squad, before leaving almost as suddenly as they arrived. Back on Route 2, Ilima has the barricade in front of Route 3 moved aside for me, and Kukui treats me to a demonstration of Breakneck Blitz, a move I'll never have the opportunity to use myself. It seems Lillie's got lost somewhere, so I agree to help search for her on Route 3, and then immediately run off to the other side of the island to drain Splash's PP.

6-9.png

Oh, of course, wild Pokémon can do this now that I've cleared my first trial. It might make PP-wasting battles against wild Pokémon take a bit longer, but it's probably fine - this particular Buneary took 36 turns to actually summon an ally. With Struggle "unlocked" once more, I loop round Melemele and pop into Route 2's Pokémon Center, selling 2 useless X Accuracies and buying 5 X Sp. Defs. At last, I can carry on with the story.

6-10.png

There are 5 Trainer battles on this route, but most of them require a detour into Melemele Meadow before I can access them. I start by picking up a Stardust and a Sharp Beak, then pick my way through some grass to find a Heal Ball. From there, I head back to take on the first Trainer.

6-11.png

Rising Star Ian
Psyduck Lv12 (Water Gun, Modest nature, IVs: 30/15/15/30/15/30, EVs: 252 SpA)

Only one attack, but he's put a lot of effort into making it count. Phart takes 12 damage from the first Water Gun and deals around 20% with Struggle. I use a Potion, a Fresh Water and another Potion to keep up, with the third Struggle taking Psyduck into yellow HP. After another Fresh Water, Phart dodges a Water Gun, then dodges another, finally KOing it with a Quick Claw-boosted Struggle after attacking five times. Phart downs another Fresh Water and an Oran Berry after the battle before we make our way to the next one.

6-12.png

Rising Star Tatiana
Cottonee Lv12 (Mega Drain, Modest nature, IVs: 30/15/15/30/15/30, EVs: 252 SpA)

The setup is similar to Ian's Psyduck, but with the added issue of Cottonee restoring its own HP via Mega Drain. I decide not to take any chances and lead with an X Sp. Def, Cottonee dealing 6 damage with Mega Drain. Phart's Struggle only looks like a 6HKO, so I decide to change up my strategy - rather than try to KO Cottonee, I'll stall out its 15 PP and let it KO itself. I use another X Sp. Def and a Potion, with Mega Drain only doing 4 damage per hit. After stalling for a few turns with a Paralyze Heal, Cottonee lands a crit, forcing a Fresh Water to be used. Cottonee lands another crit, but I stick with my strategy, using another Potion when Phart grows weaker. Eventually, Cottonee starts using Struggle and faints soon afterwards, only dealing 3 damage with each blow.

6-13.png

There's not much more to do on Route 3 just yet. An Ace Trainer offers to battle me if I defeat every Trainer on the route, but one of those Trainers lies past the bridge, which Kukui is currently blocking off. I pick up a Soothe Bell from a friendly Breeder and head into Melemele Meadow.

6-14.png

Seems like Nebby's wandered off again, venturing into Seaward Cave where Lillie can't reach it. So naturally it falls to me to retrieve it.

6-15.png

Imagine that. Imagine that.

I use a Fresh Water on Phart and start to make my way towards the cave, only for Rotom to pop out and decide to use a Roto Exp. Points power. I may as well take advantage of it while it lasts, so I spray on a Repel and make my way to the only Trainer in the meadow.

6-16.png

Actor Meredith
Pom-Pom Style Oricorio Lv12 (Peck/Growl/Pound, Ability: Dancer, IVs: All 20)

Oricorio outspeeds and uses Growl, causing Phart's Struggle to deal pitiful damage. I use a Dire Hit on the second turn, thus guaranteeing that Struggle will land a critical hit every time and ignore Phart's Attack drops. Oricorio's Pound only deals 5 damage, so Phart Struggles again, taking off about 25% of Oricorio's HP. I use two Fresh Waters to heal up to full, Phart Struggles twice more, and after another Fresh Water, one last Struggle defeats our opponent.

There's a few items scattered around Melemele Meadow that I pick up: a Poison Barb, two Yellow Nectars, three Honeys, a Net Ball, and a Great Ball, while Rotom also manages to produce a couple of Roto Boosts. Before continuing on to Seaward Cave, I pop back to the Pokémon Center and buy another Dire Hit - a quick look at the upcoming battles convinces me that I'll need 2 of them before I should proceed.

6-17.png

I pick up an Escape Rope near the entrance and head a little further into the cave, where Nebby greets me. The Ultra Recon Squad aren't far behind, and Dulse challenges me to a battle to see if I'm strong enough to protect this mysterious Blinding One he keeps talking about.

6-18.png

Ultra Recon Squad Dulse
Furfrou Lv13 (Growl/Sand Attack/Baby-Doll Eyes/Headbutt, Ability: Fur Coat, IVs: All 20)

Probably would've helped if I'd remembered to heal before the fight... I start with a Fresh Water and Furfrou uses Headbutt, dealing 15 damage, so I switch to an X Defense. Phart dodges a Baby-Doll Eyes, and while I could start attacking now, I doubt I'll do much damage thanks to Fur Coat, and things will get even worse if Furfrou lands a Growl or Baby-Doll Eyes. So I use a Dire Hit instead, with Phart dodging a Headbutt, then try a Struggle.

6-19.png

Well, that's awful. Guess I'm stalling it out then? I pop a couple more X Defenses and a Fresh Water, then start wasting turns by spamming a Paralyze Heal while Furfrou very slowly wastes away its PP, eventually using another Fresh Water after it Headbutts Phart one too many times. After about 6 or 7 minutes of compelling gameplay, Furfrou Struggles itself unconscious and brings the battle to an end, with Phart reaching Lv. 18 in the process.

6-20.png

I feel like I've maybe not given Dulse the best first impression there.

Dulse and Zossie leave after a short conversation, so I take the opportunity to pick up some items in Seaward Cave. There's a Heal Ball, an Expert Belt, a Star Piece, a Super Potion, a Stardust and a Never-Melt Ice, as well as a Dive Ball in the tiny section of Kala'e Bay I can access. Now, time to save the game and talk to Nebby - the next sequence of events will be quite interesting as far as this playthrough goes.

6-21.png

Lillie's obviously grateful for Nebby's return, so she heals up my team as a way of saying thanks. Obviously that's not good, as Phart now has 40 Splash PP again, so ideally I'd like to find a wild Metapod and start using it up...

6-22.png

...but without so much as a chance to open the menu, I'm dragged out of the meadow and into a battle with Hau. Also not good.

6-23.png

Pokémon Trainer Hau
Rowlet Lv13 @ Sitrus Berry (Leafage/Growl/Peck/Astonish, Ability: Overgrow, IVs: All 20)
Noibat Lv11 (Supersonic/Tackle/Absorb/Gust, Ability: Infiltrator, IVs: All 10)
Pikachu Lv12 (Thunder Shock/Growl/Play Nice/Quick Attack, Ability: Static, IVs: All 10)

It's hardly the end of the world, since Hau's team isn't particularly optimised or anything, but I could be here a while. I begin with 3 X Defenses as Rowlet does some chip damage with Astonish and Peck, then commence the Splashing. Phart gets through 13 Splashes before needing a Fresh Water, another 14 Splashes before I use a second, but then Rowlet gets a bit crit-happy and I use a third Fresh Water after 10 more Splashes. At last, Phart uses up the last 3 PP, so I use a Dire Hit (as Rowlet did lower its Attack a fair bit with Growl) and go on the offensive.

Even with guaranteed critical hits, Phart's Struggle only manages a 4HKO on Rowlet, and even that is technically a 5HKO factoring in the Sitrus Berry. Still, 3 Fresh Waters is enough to vanquish Rowlet, and Noibat is sent out. Phart takes it straight to yellow with the first Struggle, but Noibat lands a Supersonic, forcing another Fresh Water in case Phart smacks itself in the face. Luckily the next Struggle connects for an easy KO, and Hau sends out Pikachu. Pikachu outspeeds, Thunder Shock does a little damage, Phart manages to avoid hitting itself, but Struggle is only a 3HKO and Static paralyses it. I heal up again, and Phart dodges Quick Attack and breaks free of paralysis in one swift move, letting it KO Pikachu with a couple more Struggles. Phew!

Kukui catches up to us and invites me to head to Iki Town for the grand trial, but I've still got a couple more battles to complete first. Before that, though, I nip to Festival Plaza, complete one mission for some FC, and put an additional 34 HP / 10 Def / 10 SpD of EVs into Phart. Then it's back to Route 3 again.

6-24.png

Great, I must've undergone another forced heal without noticing. Time to venture into Melemele Meadow and find a Metapod. It doesn't take long for one of them to show up, and Phart works on getting rid of its PP.

6-25.png

But then disaster strikes, as Metapod summons a Caterpie that deals 3 HP of damage with a single Tackle, and Phart's only used up 10 PP so far. I decide Metapod probably isn't worth it and run back to Route 1, burning the rest of Splash's PP on a good old Lv. 2 Buneary. Back on Route 3, I pick up a Nest Ball and a Super Potion before approaching a Trainer I had to dodge earlier.

6-26.png

Rising Star Joshua
Growlithe Lv12 (Ember, Ability: Flash Fire, Modest nature, IVs: 30/15/15/30/15/30, EVs: 252 SpA)

You'll notice that his Growlithe isn't actually holding an item.

Growlithe outspeeds and Ember not only deals 12 damage, but burns Phart, whose Struggle deals very little damage back. Phart does heal its burn on the same turn, so at least that's alright. I use a Fresh Water and Phart lands a Struggle, still not quite bringing Growlithe below 50%. After another Fresh Water, Phart nearly faints when Ember burns it again, and I'm forced to use my only Soda Pop. Another 2 Fresh Waters go into keeping Phart afloat, but it eventually defeats Growlithe after dodging an Ember.

With Joshua defeated, I've now defeated all the other Trainers on Route 3, apart from one. As luck would have it, he's the toughest one by far, so I heal up Phart to full and take him on.

6-27.png

Ace Trainer Makana
Slowpoke Lv14 (Confusion/Water Gun/Yawn, Ability: Own Tempo, Modest nature, IVs: All 30, EVs: 252 HP / 252 SpD)
Butterfree Lv14 (Silver Wind/Roost, Ability: Tinted Lens, Timid nature, IVs: All 30, EVs: 252 SpA / 252 Spe)

There's surely no way Phart can survive a fully-invested Silver Wind, so I'm going to have to set up X items on Slowpoke, then hope I can last until Butterfree uses up all its PP.

I start by using 3 X Sp. Defs, while the "Ace Trainer" commands his Slowpoke to use Yawn twice in a row, followed by a Confusion that deals 1 HP damage. Okay? Then I put 3 X Attacks onto Phart, Slowpoke continuing to not do very much in the meantime, and Phart sleeps for another turn before eventually shaking itself awake. Even at +6, Struggle is still only a 3HKO on the heavily-EV'd Slowpoke, and Yawn puts Phart to sleep on the same turn that Confusion confuses it. A quick Fresh Water and a turn of sleeping later, Phart wakes up and KOs Slowpoke, gaining a timely level in the process.

6-28.png

Onto the scary Butterfree. I heal Phart to full with a Fresh Water, and the first Silver Wind takes Phart down to 46/58 HP. There's not much I can do at this point but wait for it to run out of PP and pray it doesn't crit, so I waste turns by using a Paralyze Heal. Phart dodges the next Silver Wind and tanks the next three comfortably, forcing Butterfree to uselessly Roost until it runs out of PP, then Struggle until it faints. It turns out stalling by spamming unusable items is quite an effective strategy.

I receive TM19 Roost as a prize for winning, which would be useful in any other playthrough, but not this one. Now, I'm not quite ready for the grand trial, but I'll head to Iki Town anyway and stop just short of starting the battle - after all, there might be another forced heal somewhere in all the dialogue. Luckily there isn't one, so I can go back to preparing myself and stocking up on items.

A Berry tree on Route 3 yields a few extra items, including another Sitrus Berry. That's probably going to be Phart's held item when I'm going up against Hala. The other tree over on Route 2 gives a few more status-healing berries, but that's it. I was hoping for a Crabrawler so I could show it to a nearby Sightseer for a quick $3,000, but oh well. At the Pokémon Center, I sell a couple of Stardusts, a Star Piece and an X Sp. Atk, giving me some much-needed cash to cover my next purchases: 8 Super Potions, 3 X Attacks, and a Dire Hit.

6-29.png

Money's running low again, so I do a quick mission in Festival Plaza and spend the FC on 4 Hyper Potions and 12 Fresh Waters. It sounds a bit excessive, but Phart's maximum HP is now 58, so Fresh Waters aren't quite as effective as they used to be. It's back to Iki Town afterwards, where I receive a Stardust for bringing a message in a bottle I found in Kala'e Bay to its intended recipient.

Phart downs a Fresh Water and I swap its Quick Claw for a Sitrus Berry, then we head over to Hala for our first grand trial.

6-30.png

It's worth mentioning at this point that the game silently heals you before the battle starts, so I'm going into the battle completely unable to attack. It's also worth mentioning that I discovered this after the battle started. This should be fun...

6-31.png

Island Kahuna Hala
Items: Super Potion, Full Heal
Machop Lv15 (Karate Chop/Revenge/Focus Energy, Ability: Guts, Adamant nature, IVs: All 30, EVs: 252 HP / 252 Spe)
Makuhita Lv15 (Arm Thrust/Sand Attack/Fake Out, Ability: Thick Fat, Adamant nature, IVs: All 30, EVs: 252 HP / 252 SpD)
Crabrawler Lv16 @ Fightinium Z (Pursuit/Power-Up Punch/Leer, Ability: Iron Fist, Adamant nature, IVs: All 30, EVs: 252 HP / 252 Def)

His team wouldn't exactly be a pushover even if I could attack straight away, but at least there's a few positives, like the lack of Attack EVs and Makuhita generally looking a bit easier than the others. Guess I'll just have to hope for the best.

6-32.png

Machop is probably the worst of the three. Once it's used Focus Energy, Karate Chop is a guaranteed critical hit, and therefore ignores any Defense boosts I apply to Phart. And yet there's no way to get rid of Machop until either it or Phart start to Struggle... right?

Well, I'll need the stat boosts at some point in the battle, so I start with 3 X Defenses. Machop uses Revenge, dealing 5 damage, then Focus Energy, then tries Revenge again but Phart manages to dodge it. Next, I start on the 3 X Attacks, while Machop still seems fixated on using Revenge - maybe Hala's AI doesn't recognise that going for a guaranteed crit would be better? I round out the X items by using a Dire Hit and an X Speed, which ensures Phart can outspeed Hala's entire team. Machop lands a critical hit with a Revenge, but even that only does 13 damage, just barely activating Phart's Sitrus Berry.

Time to start Splashing. Revenge and Karate Chop have a combined 35 PP, so Machop will be reduced to just Focus Energy before Phart can Struggle. It's a tedious process, requiring the use of 9 Fresh Waters, but Machop eventually exhausts all of its attacking PP, prompting Hala to switch Pokémon.

6-33.png

I am concerned about the possibility of a crit Pursuit or getting hit with too many Leers, but Crabrawler is slightly less of a threat in my opinion - Phart's Unaware lets it ignore any boosts it gets from Power-Up Punch.

Unfortunately I've slightly fucked myself over by not bringing any extra X Defenses. However, I do have a Guard Spec., so I use that while Crabrawler's Pursuit hits for 8 damage. It's back to Splashing for now, with 21 PP still left to burn, and Hala decides to use All-Out Pummeling, dealing a whopping 4 damage to Phart. Crabrawler has taken Phart down to 17/58 HP once the Guard Spec. wears off, so I use the last Fresh Water.

Things immediately get worse as Crabrawler tries to use Leer, Phart managing to dodge it before Crabrawler switches back to Pursuits. But there's still 16 Splash PP to go before it can attack. It eventually needs a Super Potion, then a second, but luckily Crabrawler seems to have abandoned the idea of using Leer. After a third Super Potion, Crabrawler finally uses Leer and lands it this time, so I counter it with a Roto Boost as it uses... Power-Up Punch? Crabrawler now seems very keen on using Leer, so perhaps it's out of Pursuit PP. Luckily, Phart uses up its last Splash PP just in time, and 2HKOs Crabrawler with Struggle before it can drop any lower than +2 Defense.

6-34.png

I mentioned earlier that Makuhita seems to be the weakest of Hala's Pokémon from Phart's perspective - Fake Out only works once, Arm Thrust is resisted and has variable power, and Struggle ignores the accuracy drops of Sand Attack. Even so, I'm in a weaker position than I'd hoped I'd be in right now, so better not get cocky.

Phart is on 28/58 HP, so I use a Super Potion as Makuhita uses up its one Fake Out, dealing 4 damage. The very first Struggle takes Makuhita straight to red, and Makuhita wastes its turn using Sand Attack, causing Hala to use his Super Potion on the next turn. But Phart immediately puts it into red HP again, and knocks it out with a third Struggle.

Hala finally sends in Machop, but as it's only able to use Focus Energy, it's little more than a victory lap for us. I heal Phart up with one last Super Potion, then Struggle twice for the KO, granting us the win!

6-35.png

And just reaching the obedience cap before it gets raised to Lv. 35, too. Glad I didn't use my Rare Candies earlier.

6-36.png

Hala shows me his fancy Z-Move pose, then Tauros shows up, and I'm granted the ability to ride on it around the Alola region. Definitely an improvement on having to run around using my own legs. Ilima turns up as well, having apparently been watching my struggles from afar.

6-37.png

Really? That's what impressed you about the battle?

Once Ilima's left again, Kukui hands me TM54 False Swipe, and everyone seems to think it's a good idea that I visit the Alola Photo Club. Personally, I'd quite like to beat up some more Trainers myself.

6-38.png

6-39.png

Looks like I've been forcibly healed again, so I'll have to take care of that before anything else.

The challenge seems to be going fairly well so far, but I am still on the first island, so nothing too scary has cropped up yet. I expect my opponents are going to start using more evolved Pokémon soon, and Phart can't keep gaining EVs forever... but that's a problem for later. Plus I'll have access to Mantine Surf before then, so that's nice.
Trainers defeated: 34/427
 
Last edited:
:sm/drifloon: :sm/tauros:
Even with Hala defeated, there's still quite a few places to see and Trainers to fight before I head to Akala Island. My first port of call is Festival Plaza - I've been neglecting the missions a little bit recently (but still picking up the 3 daily Festival Tickets), and Phart is hungry for some more defensive EVs.

7-1.png

Very nice! For reference, this is the bouncy house that trains HP and Speed EVs. I already have two 2-star versions of it, which can do 12 HP EVs per day for 15 FC, but this one can do 60 EVs a day for 60 FC. I swap out my Rare Kitchen for it - the Rare Kitchen meals won't work past Lv. 29, and I'm not sure I'd want to use them anyway, just in case Phart starts to disobey me before I beat Olivia.

Combined with the other facilities I already had, I'm able to put a massive 94 HP EVs into Phart, as well as 10 in Defense and Sp. Def. I also swap out one of the 2-star bouncy houses for a 3-star lottery shop, since I won't have any further use for them once Phart has max EVs in HP. The lottery is free, so I give it a quick try, and what do you know...

7-2.png

I'm pretty sure the music that played here is the same one as when you receive the diploma after completing the Pokédex, which feels almost hilariously excessive. You've painstakingly tracked down 400 different species of Pokémon? Nice job, that's as good as winning a big lump of metal.

With my Festival Ticket supply exhausted, I buy 4 Hyper Potions and 24 Fresh Waters, then head back to Melemele.

7-3.png

Spooky. I wonder what that could be all about? I'd better go have a look for myself... via Route 1, as Phart still has full Splash PP and there is one Trainer battle in amidst the spookiness. Once Phart's ready to Struggle again and a Fresh Water's been used on it, I head to the school. It's all eerily quiet when I arrive, with even the usual music gone, and only a Preschooler and a Drifloon in sight.

7-4.png

Long story short, there's some strange stuff going on at the Trainers' School that seems to be caused by ghosts or curses or monsters or whatever, but the actual explanations behind what's happening are usually more mundane. You'd probably be better off pulling up a YouTube video if you really want to see the events in full, but I'll put a brief explanation of what happens. The first of the seven mysteries seems to involve someone crying near a "burning place", so I check out the incinerator and get roped into battling a girl who was busy burning some letters.

7-5.png

Youth Athlete Deedra
Growlithe Lv14 (Ember/Leer/Odor Sleuth/Helping Hand, Ability: Flash Fire, IVs: All 20)

Growlithe isn't too much of a pain to deal with overall, taking four Struggles (one of them being a crit) and a Super Potion before it goes down. It turns out Deedra wrote some love letters to a boy she liked, but then he got with someone else, so apparently she decided the best way to get rid of the letters was to incinerate them in the middle of the night. Possibly overkill, but sometimes people do silly stuff when it comes to romance. Me, I'm still haunted by the time when someone I liked left me a Valentine's Day card and I totally blanked them because I wasn't sure if they were serious or not, and that was 13 years ago.

Anyway, with that mystery solved, the next one involves a seemingly cursed set of stairs that keep leading back to the same place. Afer deciphering some clues written on a piece of paper, I manage to escape the endless stairs but get attacked by a Gastly.

7-6.png

It's not quite a "regular" Lv. 19 wild Gastly, as it knows Lick instead of Mean Look and is shiny-locked, but it's not especially notable. There's nothing in my rules that says I can't catch it, so I chuck a Great Ball and save myself the trouble of battling it. Of course, actually entering battle with it is forbidden, so I run over to the Pokémon Center and chuck the little prankster in the PC, ticking the second of seven mysteries off the list.

7-7.png

The third mystery involves reading a "cursed" diary on a bookshelf, which causes spooky stuff to happen like weird noises and the lights going out, before a wild Drifloon attacks me. It's very similar to the wild Gastly overall: Lv. 19, shiny-locked, knows Constrict instead of Focus Energy, and is caught after a couple of Great Balls (and a Super Potion on an injured Phart), then thrown in the PC. The cursed diary turns out to be a work-in-progress horror story written in first-person, with Drifloon using it to play pranks on people.

The remaining mysteries don't require any sort of battling, but just in case you care:
  • Some creature called Lord Slimy is said to swallow up anything in its path, but it turns out to be a Grimer that works in cleaning.
  • A broadcast from beyond the grave can apparently be heard in the teacher's lounge, but it's actually just a repairman who got stuck in a room when his Slowpoke took a nap in front of the door.
  • There's supposed to be a classroom where ghostly children are taking a class, but in reality, they're all illusions created by a Hypno. Honestly, that one might have been less unsettling if they actually were ghosts...
  • As for the seventh mystery, the girl with the Drifloon doesn't seem to know what it is.
Once that's wrapped up, the girl gives me a pair of Wise Glasses to say thanks for clearing everything up. But suddenly...

7-8.png

A security officer asks me what I'm doing, and the girl and her Drifloon suddenly vanish without a trace. Did Drifloon take her away? And does that make her the seventh mystery? Was the little girl secretly a ghost all along?

Maybe the real mystery is why I thought Wise Glasses would be of any use to a Cosmog.

7-9.png

Whee! No need to teach Rock Smash to some rando in these games. I pick up a Nest Ball and a Nugget in this new section of Route 1, then run around in the tall grass for a bit until an exciting new Pokémon shows up.

7-10.png

It's a bit of a tricky one to bag given its catch rate of 45, but my Nest Balls come in handy here. Munchlax itself isn't much use to me, but it's guaranteed to come with a very useful item.

7-11.png

The Quick Claw had some occasional uses, but Leftovers provide a very convenient source of healing, especially when you consider that Phart takes quite a few turns to win nearly every battle. In fact, once I've boxed Munchlax, I'm able to find another wild Buneary and heal Phart from 53/65 HP back to full in 3 turns, just by stalling with a Paralyze Heal while Buneary uses status moves. I doubt that particular healing technique will really be necessary when I can just buy Super Potions, but it's a cool sort of party trick.

Now that I can use Tauros Charge, I do a little lap of Melemele to pick up a few extra items: TM83 Infestation, a Stardust, an Energy Root, TM46 Thief, and a Star Piece. Along the way, I also grab a Soda Pop from a Trial Guide whose shift manning the Route 3 barricade I had to cover, and a Hyper Potion from the Youngster who told me about all the mysteries of the Trainers' School.

7-12.png

I'm not sure why this line amused me so much, but it did.

A quick stop off in Hau'oli gets me a Fresh Water from a broken vending machine that Rotom fixes, and I try to pick up a Shell Bell from Hau'oli City Hall, but first, I get roped into saving some couple's marriage by, uh, fighting the woman's dad? To make matters worse, she heals me up before the battle starts. Brilliant.

7-13.png

Gentleman Reginald
Dunsparce Lv14 (Spite/Pursuit/Screech/Mud-Slap, IVs: All 20)

I still haven't got round to buying any X Defenses, so I might not have any hopes of winning if Dunsparce uses Screech early. I start on the 40 Splash PP and Dunsparce immediately tries to Screech, but Phart dodges it. Mud-Slap deals 3 damage and gets promptly healed off by Leftovers, but Dunsparce eventually lands a Screech, and its Pursuits are now dealing about 25% of Phart's health at -2 Defense. Not wanting to lose the battle if I can help it, I dump a few Roto Boosts onto Phart, and Dunsparce helpfully uses Spite a few times to burn through Splash's PP. After a few Super Potions, Phart finally manages to reach Struggle whilst at -1 Defense, largely thanks to Spite, and delivers a 3HKO before Screech can turn this into an unwinnable battle.

That one was awfully close. Probably would've lost if Reginald's AI had been able to recognise that using Spite to delete Splash PP was not a sound tactic. I receive a Nugget from Reginald after everything's resolved, and eventually grab the Shell Bell I was after all along from a Delibird. It's not even particularly useful compared to the Leftovers I already have, so had I known the Reginald battle was impossible to refuse once you enter the City Hall, I probably would've saved it for later.

7-14.png

Almost done with boring item-gathering! Ten Carat Hill may be large, but there's not much to it aside from more goodies to pick up, especially in USUM since Necrozma doesn't hang around here in the postgame. Within the cave portion, I pick up an X Attack, a Super Potion, an Ultra Ball, an Elixir and a Protein before heading into the hollow.

7-15.png

Excellent. I mean, I've got no use for it, but it looks nice on the save menu. Besides, even if I could use it, how can I do so without knowing the special pose that goes with it? There's no one around here to teach it to me.

7-16.png

7-17.png

I stand corrected. But who is this mysterious golfer, and how did she know I was here? Maybe a little birdie told her...

I do appreciate them making the Flyinium Z available much earlier than in SM, even if it came at the cost of the earlygame Acrobatics TM. With the Z-Crystal obtained, I go back into the cave and enter the main section of the hollow, which contains a Hard Stone, a Nugget, a Great Ball, a Burn Heal, a Star Piece, and TM23 Smack Down. That's everything, so I Escape Rope myself back to civilisation, head to Hau'oli City, and pop into the newly-opened mall to watch an exhibition of some Ride Pokémon, after which I'm handed 5 Great Balls. At last, no more items to collect!

7-18.png

A quick trip into Festival Plaza and one bouncy house session later, Phart's HP EVs are now maxed out, as indicated by it now being ineligible for HP-raising sessions. I pop another 10 EVs into Defense and Sp. Def, win a Berry Juice from the lottery, use up my daily Festival Tickets, replace a bouncy house with a café that can lower Attack EVs, then make a quick journey to Route 2 to stock up on X Defenses and X Sp. Defs - the last thing I need is another Dunsparce incident from some random Trainer.

7-19.png

One last stop before I continue with the story, but it's going to be quite a lengthy one. The Battle Buffet features a total of 15 Trainers, of whom only 4 randomly selected ones are available to battle at any time. It costs $1,200 to enter and I have 10 turns across all the battles before the buffet is over, so realistically, Phart is going to be defeating 1-3 Trainers per go. Thank goodness USUM lets you enter more than once per day.

I doubt I'll get enough food in 10 turns to earn anything more than the lowest-tier prize, but I may as well try, so I pick the highest-scoring dish and get challenged by the Lass who was loitering nearby.

7-20.png

Lass Salla
Petilil Lv13 (Growth/Leech Seed/Sleep Powder/Mega Drain, Ability: Chlorophyll, IVs: All 15)

A fairly nasty-looking set if the battle drags on, and indeed, Phart quickly ends up in a position where its Struggle can't outdamage Leech Seed and Mega Drain's recovery. I'm forced to reset and try again, with the second attempt going more smoothly - I lead with an X Attack and Phart 2HKOs Petilil with Struggle, dodging a Sleep Powder in the process. A Fresh Water heals up Phart after the battle before the next Trainer challenges us.

7-21.png

Preschooler Hannah
Drifloon Lv13 (Minimize/Astonish/Gust/Focus Energy, Ability: Aftermath, IVs: All 15)

Fairly easy, just need to heal up where appropriate and not leave myself in range of an Aftermath KO. Phart Struggles twice, uses a Fresh Water, then Struggles twice more, defeating Drifloon and ending on 1 HP (which was genuinely calculated, I promise). Two more Fresh Waters, then on to the next fight.

7-22.png

Rising Star Kainoa
Noibat Lv14 (Tackle/Absorb/Gust/Bite, Ability: Frisk, IVs: All 15)

A fairly easy one - Phart outspeeds and lands a 3HKO with Struggle, tanking a Gust and an Absorb in the process. That battle ends up bringing me to the 10-turn limit, so I'm forced to sit down and eat the food I've gathered. But was it enough to get me anything more than the worst possible prize?

7-23.png

No, it was not. To be fair, the prize for the next amount-of-food-eaten threshold was only a Big Mushroom, so it's hardly worth caring. Phart heals up with a couple more Fresh Waters, then it's back inside for round 2.

7-24.png

Black Belt Walter
Machop Lv14 (Focus Energy/Karate Chop/Foresight/Low Sweep, Ability: Guts, Adamant nature, IVs: 15/31/15/15/15/15)

It's like Hala all over again. Phart can only manage what looks like a 6HKO with its first Struggle, and Machop doesn't do much damage with Low Sweep, but does now outspeed Phart. I use a Fresh Water, Phart Struggles a couple more times, then another Fresh Water, but the next Struggle doesn't quite KO, so I end up using a Berry Juice to give Phart enough HP to safely KO Machop. Two more Fresh Waters afterwards, then on to the next Trainer.

7-25.png

Beauty Carolyn
Alolan Meowth Lv14 (Growl/Bite/Fake Out/Fury Swipes, Ability: Pickup, IVs: All 15)

Meowth surprises me by going for Fury Swipes instead of Fake Out on turn 1, but it misses anyway, and Phart's Struggle looks like an easy 3HKO. Unfortunately Meowth does turn that into a 4HKO with Growl, but a quick Fresh Water wins us the battle and brings this buffet to an end. A quick heal up, then back in for round 3.

7-26.png

Youngster Kai
Ledyba Lv13 (Swift/Light Screen/Reflect/Safeguard, Ability: Swarm, IVs: All 15)

A very easy 3HKO - Ledyba uses Safeguard and then Reflect, but it was already in red HP after the first two hits, so the screen couldn't save it. Two more Fresh Waters before the next tussle.

7-27.png

Pokémon Breeder Savannah
Pichu Lv14 (Charm/Tail Whip/Sweet Kiss/Nasty Plot, Ability: Static, IVs: All 15)

Pichu has no way of damaging me outside of confusion damage, and while Sweet Kiss does land, it doesn't protect it from a Struggle 2HKO. Static activates after the second hit, so I add in a Cheri Berry alongside my Fresh Water in the post-fight healing process. Once that battle's over, it seems the other Trainers at the buffet are all ones I've already fought, so I exit the buffet early, then start over for round 4.

7-28.png

Sightseer George
Grimer Lv14 (Poison Gas/Harden/Mud-Slap/Disable, Ability: Sticky Hold, IVs: All 15)

Struggle is a fairly quick 5HKO with a Fresh Water thrown in, as Grimer never chose to attack until its last turn, when it used Poison Gas and Phart immediately cured the poisoning. Another quick heal before I pick out the only Trainer who I haven't fought yet in the current lineup.

7-29.png

"What do you think you're doing?! I saw it first! You think I'm just gonna let you take it?!"
Sightseer Amy
Diglett Lv14 (Growl/Astonish/Mud-Slap/Magnitude, Ability: Sand Veil, IVs: All 15)

Phart narrowly misses out on the 2HKO when Diglett uses Growl, but it's no big deal. A couple more Fresh Waters and a quick exit-and-enter to refresh the Trainers, then I challenge an Office Worker I haven't fought yet.

7-30.png

Office Worker Kristen
Roggenrola Lv14 (Harden/Sand Attack/Headbutt/Rock Blast, Ability: Sturdy, IVs: All 15)

This one's a bit trickier, as Phart's Struggle doesn't do much but Rock Blast certainly can. However, Roggenrola only uses Rock Blast once and it only lands 2 hits, so after a crit Struggle, Phart is able to manage a 5HKO. All of the remaining Trainers at the buffet have been fought before, so Phart heals up and we re-enter the buffet yet again.

7-31.png

"Ooh, so before we partake of the main course, we can start off with an appetizer of a Pokémon battle!"
Madame Kathleen
Items: Full Restore
Seel Lv14 (Growl/Water Sport/Icy Wind/Encore, Ability: Thick Fat, IVs: All 15)

The Full Restore will make this take a bit longer, but Seel only has one non-STAB attack, so there's no real danger. Phart manages 4 Struggles before needing a Super Potion, at which point Kathleen uses her Full Restore, and it takes another 7 Struggles and 2 Fresh Waters to finish off Seel. Annoyingly Phart managed a critical hit on the very last Struggle, the one time where it wouldn't have mattered. We're immediately kicked out of the buffet because the battle took over 10 turns, so after restocking my Fresh Waters in Festival Plaza, I head back inside again.

7-32.png

Office Worker Cody
Magnemite Lv14 (Thunder Shock/Thunder Wave/Magnet Bomb/Light Screen, Ability: Magnet Pull, IVs: All 15)

I forgot to heal up Phart before this battle, but we managed regardless. Struggle was a clean 4HKO, it only took a couple of Fresh Waters, and Phart was able to shake off the paralysis from Thunder Wave. I heal it up once more and have to re-enter the buffet again to get a "new" Trainer to appear.

7-33.png

Cook Carver
Magikarp Lv14 @ Leftovers (Splash, Ability: Swift Swim, IVs: 30/15/15/15/15/15)

A laughably weak Pokémon that's holding Leftovers and only knows Splash? That sounds familiar. Since it can't damage me, I decide to just let it waste all its PP and Struggle until it faints. Very slow, but it does save me having to heal Phart. We get ejected from the buffet for our disgraceful stalling tactics and have to reset a few times before the penultimate Trainer appears.

7-34.png

Gentleman Ronald
Items: Full Restore
Spearow Lv14 (Growl/Leer/Pursuit/Fury Attack, Ability: Keen Eye, IVs: All 15)

Another Full Restore user, but at least it's only a Spearow. Two Struggles are enough to make Ronald use the Full Restore, Phart needs a Super Potion after the third, and another three Struggles are enough to secure victory after a couple of Growls. The Ace Trainer that we haven't battled yet isn't here, so I heal up Phart and get back to resetting for the final time.

7-35.png

Ace Trainer Tori
Growlithe Lv15 (Ember/Leer/Odor Sleuth/Helping Hand, Ability: Intimidate, IVs: 15/30/15/15/15/30)

Phart does not appreciate the Intimidate, as Struggle appears to be a 7HKO after the Attack drop, but I'm glad this Growlithe doesn't know Bite. Things get a bit more chaotic when Growlithe manages to burn Phart twice, and so 3 Fresh Waters, 2 Super Potions and a Burn Heal go into making the battle a rather messy 10HKO. At least it's fitting that the last Trainer ended up being the most difficult.

Finally, I'm free! I never have to come back to this awful place again... until the postgame, when they all get new teams and I have to hunt down all 15 of them again. Boo. Phart's on 17/71 HP and burned, so I run back to Route 1 and let its Leftovers revitalise it while I stall against another wild Buneary. After that, I head back to Hau'oli City to continue on with the story at last. As far as I can tell, there aren't any other points in the game where so much optional stuff opens up at once (apart from the postgame, I suppose), so I don't think I'll have to make many other posts that are entirely dedicated to optional things like this one.

7-36.png

I'm pushed into taking some photos of Phart at the Alola Photo Club, which doesn't have any real purpose mechanics-wise (it would give +10 affection for every saved photo if Phart wasn't already at maximum affection), but it is rather cute. The lady at the counter also gives me a Photo Album so I can see all the pretty pictures I saved, i.e. none of them.

7-37.png

Hau's waiting outside, and it looks like he's evolved his Rowlet. Kukui and Lillie show up as well, and the professor has got his boat ready to take us all to Akala Island, but Hau would rather get there by riding on a Mantine. He'd also like to see me riding one, and because I have no free will of my own, it seems I'm now destined to surf to the next island. Fellow Cosmog enjoyer Lillie asks me for help in getting Nebby back home somehow, and I begrudgingly agree - I'm far too invested in drawing out Cosmog's maximum battling potential to spend very much time working out where they live.

7-38.png

I've never been on a boat before either, can't I try that first?

7-39.png

Just before I can head down to Big Wave Beach, rocking up two islands earlier than in SM is Samson Oak, full-time researcher and part-time surfer. He asks me to collect Totem Stickers and seek him out on Heahea Beach once I've found 20 of them. I have actually been collecting them as I made my way across Melemele Island, but I didn't bother writing about them because that seemed too boring even for this thread. The line's got to be drawn somewhere.

7-40.png

7-41.png

Phart's level is a bit higher than I'd hoped by this point, because Akala Island has quite a few more Trainers to fight before the obedience cap increases from Lv. 35 to Lv. 50 (76 Trainers, compared to Melemele's 31 that Phart battled). It's quite possible Phart will become disobedient for a bit, which would certainly complicate the battling process, but I guess I'll have to just hope for the best and deal with that if/when it becomes an issue.

Melemele Island is finally complete! Next time, surf will most definitely be up.
Trainers defeated: 51/427
 
Last edited:
:sm/mantine: :sm/dartrix:
8-1.png

8-2.png

Ah, Mantine Surf. On one hand, a decently fun minigame in my opinion, a nice way to make BP available early on without having to battle, and also a nice way to grind BP even in the postgame, with a maximum of 50 BP per go. On the other hand, Sharpedo.

Luckily the early courses don't have any demon sharks, so the first attempt goes alright despite me completely failing to spot a Wailmer and crashing into it.

8-3.png

The land is certainly ahoy, oh boy. (Don't mind the sudden nighttime, I've been playing at odd hours recently.) Despite my little mistake in Mantine Surf, I still manage to set a new high score, earning me a Star Piece and 9 BP. I'm also taught how to perform a Lanturn 360 the next time I go surfing - not to be confused with a Lanturn 180, which is what happens when it uses Volt Switch.

Now, I could just get stuck in with all the stuff on Akala Island, but I'd like to earn some more BP first, since it's now my main source of income. So I hop back on Mantine and surf back to Melemele on the Akala course, which is longer than the first one but also incorporates those dreadful Sharpedo.

8-4.png

Apparently, any score between 40,000 and 70,000 will net you 10 BP, and that is indeed what I get. The nice man at the beach also gives me a Pearl String and teaches me the Primarina Twist trick for setting another high score. Another round of the Melemele course earns me 10 BP (it's too short to earn 11+ without access to more tricks), and another run on the Akala course scores 78,683 points, equating to... 11 BP. Seems I'll have to wait until Ula'ula to start getting the proper big numbers, but that's fine.

40 BP equals 20 vitamins, so I buy 10 Irons and 10 Zincs. Phart is able to drink 2 of each, but no more, as its Defense and Special Defense EVs now both exceed 100. The rest of them are sold alongside a few useless valuables, bringing my money up to $164,032 - more than enough to buy a big pile of X items while I'm still on Melemele.

8-5.png

Dull as it may be, it's still a bit useful, so I find myself in Festival Plaza once again. Phart is able to gain another 10 EVs in Defense from a café despite the fact that my calculations should put it at 510 EVs by now, so I've obviously fucked up somewhere along the line. It's somewhere around 252 HP / 19 Atk / 105 Def / 10 SpA / 106 SpD / 21 Spe, at least. Hopefully it shouldn't matter that it's not 100% optimal. I buy 4 Hyper Potions, 24 Fresh Waters and 8 Rage Candy Bars, Sophocles replaces my last HP/Speed EV bouncy house with a Defense/Sp. Def one, and I manage to bring Festival Plaza to Rank 20 just before I leave.

8-6.png

As a prize for enduring all those tedious missions, Sophocles grants me the opportunity to rename Festival Plaza. I of course immediately make him regret this decision.

Done at last with grinding (for now), I head back to Heahea Beach, where I pick up a Revive, a Soda Pop, and a Pearl. A roadblock of sleepy Pyukumuku forces me on to the main road of Heahea City, where Kukui and Lillie have arrived via boat like I wanted to. We're briefly introduced to Mallow and Olivia before they wander off to do their own thing, and I get pointed in the direction of Paniola Town on the way to my next trial. Before that, though, I pick up a Premier Ball and a Rare Candy from some nearby NPCs.

8-7.png

Now that I have actual cash to speak of, I stop by the apparel store in search of a mysterious substance known as "drip". The closest thing I can find is the protagonist's original hat from SM, which I definitely prefer over the USUM one. I'd still like to change most of the other clothes, but none of the other stuff on sale here caught my eye, so I'll leave that as a low-priority issue for a later date. For now, I begin to make my way towards Route 4, but as I approach the entrance, I'm stopped right there by a couple of tourists.

8-8.png

One of the little changes USUM makes is that Sina and Dexio strike a pose after they introduce themselves, the music cuts out, and then they just carry on with the conversation like nothing happened. No purpose to it whatsoever. don't they kind of resemble the letters x and y

Since I'm playing Ultra Sun, Dexio is the one to challenge me to battle instead of Sina, and I have to accept before I can continue, though I am at least allowed to prepare myself first.

8-9.png

Pokémon Trainer Dexio
Mime Jr. Lv15 (Confusion/Pound, Ability: Filter, IVs: 30/15/15/15/15/15)
Espeon Lv15 (Psybeam/Quick Attack, Ability: Synchronize, IVs: 30/15/15/15/15/30)

Phart resists their STABs and their secondary attacks don't look too painful, but you never know. I start with an X Sp. Def and an X Defense - both of Mime Jr.'s attacks do so little damage that Phart's Leftovers heal it back to full. Four Struggles do it in, and Espeon enters battle as I use a Soda Pop, its Psybeam only doing a couple HP of damage after Leftovers. The stage is set for a fairly slow victory, with Phart KOing Espeon after 5 Struggles, a Berry Juice and a Fresh Water.

8-10.png

After that little power boost, I'm rewarded with a Full Restore (yay) and a free heal (boo). Sina and Dexio take their leave, allowing me to dwell on a very unusual dilemma that's come about as a result of that battle.

8-11.png

When Phart reached Lv. 23, it learned its second attack, Teleport. Now, the immediate downside of this should be obvious - Teleport is useless in battles, so I now have 60 PP to burn through before Phart can access a useful move instead of 40. I can fix this fairly quickly, because the Move Deleter is available in Hau'oli City to delete one of those moves. However, since the Move Relearner is all the way on the top of Mount Lanakila, there's no way to go back on my choice until the very end of the (pre-credits) story, meaning my choice will affect a huge portion of the challenge. Having both of them will only make battling more tedious, so the question is: do I keep Splash or Teleport?

The best way to decide is obviously through tedious comparison of the two moves, so I'll start with their usefulness in battle. Splash is utterly worthless by design, having changed very little since it was conceived as a way to make Magikarp even more of a flop. It becomes unselectable if Gravity is in effect, but that's very niche. As for Teleport... it fails in Trainer battles, it fails in trials, and it fails if you're fighting more than one wild Pokémon. Even in situations where it can succeed, you can replicate its effects by using a Poké Toy (which, as an item, comes with priority as well!), or you can literally just press Run, the only issue being that it might take a few turns against faster Pokémon. Also, Repels make wild encounters much less of an issue. Overall, neither move is at all useful, but Teleport probably wins out by having a use.

As for their Z-Move versions, neither seem good, particularly given that Phart has to forgo its Leftovers to use them (or possibly its Eviolite once I get one). Z-Splash's +3 Attack boost isn't much use when I have access to X Attacks, whereas Z-Teleport restores all of Phart's HP, but isn't even available until after Totem Mimikyu, yet I have access to Max Potions that do the same thing right now. I think Z-Splash wins here, but it's really a case of being "less shit" rather than "good".

When it comes to burning through their PP - arguably the most important factor since I'd always rather be using Struggle - Teleport has 20 PP compared to Splash's 40, so you might think Teleport would be the more convenient choice. However, using up Splash's PP is a lot faster once I actually enter a battle with a weak wild Pokémon, so wasting 40 turns in one battle is usually faster than initiating 20 battles that last 1 turn each, since Teleport will automatically end the battle every time Phart uses it. Technically, I could wait for a wild Pokémon to summon an ally first, since Teleport fails when it's used against multiple wild Pokémon, but I know from past experience that it can take dozens of turns for a wild Pokémon to successfully call for help when they're at full HP (and if Phart's still trying to gain access to Struggle, they will be). So despite initial appearances, I think Splash will be more convenient than Teleport overall.

The last point to consider would be battles, but as you'll have seen by now, the usual strategy is to burn up Phart's PP before every battle so it can use Struggle instead. The only time the choice between Splash and Teleport would matter during a battle is in one where I get healed up immediately beforehand, with no opportunity to waste PP prior to battle - those sorts of battles are mercifully rare, but they do exist, with one of them coming up in Paniola Town fairly soon. In those cases, Teleport would definitely the be better choice, as I'd be able to use Struggle a lot sooner. But would that make up for the loss of convenience from dropping Splash?

I suppose it would be useful to outline the sort of scenario where Teleport would definitely be better than Splash. For Splash to be the inferior choice of move, Phart would have to be in a battle with the following properties:
  • Phart is automatically healed before the battle, with no opportunity to waste PP beforehand
  • The opposing Pokémon's moveset/ability/etc. are such that the battle will be more difficult if Phart has to spend 40 turns using Splash before it can attack
  • However, even if the battle would become more difficult if Phart had to use Splash 40 times, it'd need to do so after 20 turns, otherwise Teleport wouldn't save Phart from a more difficult battle
  • The battle also needs to be one where Phart using Struggle would actually deal meaningful damage - otherwise, I'd be better off fully stalling out my opponents with items and letting them Struggle themselves for the KO, in which case it wouldn't matter which move Phart knows since it's not going to use it
Ultimately, it seems like most battles that'd be harder to win with Splash would still be hard to win with Teleport, and I can't think of any likely scenarios where Teleport would have a notable advantage. Setup sweepers? Unaware already ignores their boosts. Critical hit abusers? They only need 1 turn to use Focus Energy or whatever before they reach their peak damage output. Defense/Sp. Def drop spammers? Not a problem, we can assume I have access to infinite items as long as I prepare properly. So unless they can disable Phart's Unaware and set up on it, I think I'd rather have the slightly greater convenience of Splash.

8-12.png

Well, hopefully this was a good idea. At least I can't possibly regret the decision more than actually starting this challenge in the first place. Since I'm in the area, I head to Route 1 to waste all Phart's Splash PP, then surf back to Akala, with the trip there and back earning me 20 BP. My next stop is the Tide Song Hotel to pick up a few more random items. Now, you might think that's a waste of time. However...

8-13.png

I disagree. Colress is too wrapped up in his own ramblings to even notice me, but there's a Revive and a Health Wing that I pick up from his room, as well as a Heart Scale, an Oran Berry, a Fresh Water, a Swift Wing and a Revival Herb from elsewhere in the hotel. There's not really anything else to do in Heahea City right now, so I finally make a start on Route 4, immediately getting slapped with a Trainer battle.

8-14.png

Bellhop Jody
Fomantis Lv14 (Fury Cutter/Leafage/Razor Leaf/Growth, Ability: Leaf Guard, IVs: All 15)

Fomantis actually has the potential to do some damage here, especially with Fury Cutter, but luckily Phart dodges the first one and scores a quick 3HKO with Struggle. I pour a couple of Fresh Waters over Phart and pick up a Great Ball, a Tiny Mushroom, and a Super Potion before the next battle.

8-15.png

Collector Bryan
Munchlax Lv14 (Tackle/Defense Curl/Amnesia/Lick, IVs: All 15)
Bagon Lv14 (Ember/Leer/Bite/Dragon Breath, Ability: Rock Head, IVs: All 15)

Phart's first Struggle would've been a 6HKO on Munchlax had it not used Defense Curl, so I decide to limit the recoil damage by using a Dire Hit. Munchlax never actually stops using Defense Curl after that point, so three crit Struggles are enough to take it down. A quick Super Potion heals Phart to full while Dragon Breath does scratch damage, and from there, Phart manages another Struggle 3HKO, getting paralysed in the process but only needing one Fresh Water to earn the victory. There's a Revive behind Bryan and a Dire Hit further along the route, and after healing up Phart, a pair of Sightseers loom.

8-16.png

Sightseer Scotty
Rattata Lv14 (Quick Attack/Focus Energy/Bite/Pursuit, IVs: All 15)

Phart can only manage a 3HKO and needs a quick Fresh Water, but not even Bite did very much damage - the real danger came from Struggle recoil. Another quick heal, then on to the next fight.

8-17.png

Sightseer Perdita
Meowth Lv14 (Growl/Bite/Fake Out/Fury Swipes, IVs: All 15)

Fake Out doesn't do much, Bite does a little more and makes Phart flinch, and then Meowth uses Growl to make Struggle deal less than 25% to it. It doesn't really feel worth using a Dire Hit, though, so I settle for a 5HKO made possible through 3 Fresh Waters. Heading further towards Paniola Town, there's an Adrenaline Orb - I can't buy them from the Poké Mart until after Kiawe's trial, but I'm not sure if I'll have any use for this one in the meantime. One last Trainer to finish off the route, once Phart is ready for battle.

8-18.png

Cook Ernie
Cutiefly Lv14 @ Leftovers (Fairy Wind/Stun Spore/Struggle Bug/Silver Wind, Ability: Honey Gather, IVs: 30/15/15/15/15/15)

Not looking forward to two super-effective STAB attacks. Cutiefly outspeeds but decides to use Fairy Wind first, dealing very little damage, while Phart narrowly misses a 2HKO with a crit Struggle. Cutiefly then uses Silver Wind, dealing around 20 HP and granting it the 10% stat boost I was dreading, while Phart is left very low after recoil damage. I give it an Energy Root and an X Sp. Def, while Cutiefly is content to try out Fairy Wind and Struggle Bug, not dealing very much after the Sp. Def boost, and two more Struggles are enough to KO it before anything bad happens. After scooping up a replacement Energy Root, a Big Mushroom, and some fairly unremarkable berries from off the ground nearby, I double back to visit another USUM-exclusive location.

8-19.png

Nice to see a criminally underrated Pokémon finally getting its day in the limelight. There's not an awful lot to do here apart from admire the Pikachu, but it's still worth a quick trip. There's a Magnet lying around, as well as a Pikachu-themed shirt and cap that I receive for acing a Pikachu quiz - they probably look even tackier than my current attire, but it's good to have options.

8-20.png

I also picked up this Pikachu using a special QR Code, along with a Pikashunium Z that I'll never use. Probably won't use the Pikachu for anything either, but at least now I've got another Poké Pelago minion tucked away in the PC.

I take the opportunity to stock up for an upcoming battle, buying 20 Super Potions (Fresh Water doesn't always cut it mid-battle) and heading back to Melemele again to buy a load of X items. I also pick up 10 Ultra Balls from a Scientist in Hau'oli City - he wanted to see a Pokédex with 10 species registered, and Pikachu gave me my 10th entry. The Mantine Surfing trips there and back add another 20 BP to my total, though I briefly shit myself when I hit the waves a bit too hard and the rubber top comes off the Circle Pad on my 2DS. Luckily it slotted back on without issue. Onwards to Paniola Town!

8-21.png

There's barely time to hear the new music before Hau comes running up for a battle. And worse still...

8-22.png

Pokémon Trainer Hau
Dartrix Lv16 @ Normalium Z (Razor Leaf/Peck/Tackle, Ability: Overgrow, IVs: All 25, EVs: 252 HP / 252 Atk)
Pikachu Lv15 (Electro Ball/Quick Attack, Ability: Static, IVs: All 15, EVs: 252 Spe)
Noibat Lv14 (Tackle/Bite, Ability: Infiltrator, IVs: All 15, EVs: 252 Spe)
Eevee Lv14 (Baby-Doll Eyes/Quick Attack, Ability: Run Away, IVs: All 15, EVs: 252 Atk)

Surprise! Forced heal straight into a fully-EV'd starter holding a Z-Crystal that's evolved a level earlier than it's supposed to. At least his other Pokémon are a little bland in comparison. It's kind of funny how the game ends up screwing me over by offering small acts of mercy in the form of free heals.

8-23.png

Obviously the bigger threat, and of course Hau has to lead with it. Still, best I can do is open with an X Defense, and he decides to use Tackle for some reason, which deals so little damage that Leftovers instantly heals it off. A second X Defense, and Razor Leaf only deals 2 HP after Leftovers recovery, and the next Razor Leaf fails to move Phart's HP at all once it's at +6, though of course a crit is always possible. I set up 3 X Attacks, a Dire Hit, an X Sp. Def and an X Speed, with Dartrix landing 2 crit Razor Leafs that bring Phart to 35/74 HP - faring a lot better than I expected. After a Fresh Water, I get to work on the 40 Splash PP. Dartrix uses Breakneck Blitz fairly early on, but without a critical hit to back it up, it barely outpaces the Leftovers healing. It fails to land any more crits before Splash runs out of PP, meaning Phart can start Struggling without needing to heal first - at +6 Attack and with guaranteed critical hits, it's a clean 2HKO.

8-24.png

Noibat comes out next, and earns the dubious honour of being OHKO'd by a Cosmog. Pikachu's next, and Phart is on 30/77 HP, so I heal up with a Fresh Water rather than risking a crit Electro Ball knocking it out. Pikachu is also OHKO'd, leaving just Eevee, who is similarly pulverised in a single hit while dealing 3 HP with Quick Attack.

8-25.png

Well, Hau, I used a little trick I like to call "pk3DS".

Hau hands me a Dire Hit before running on ahead to Paniola Ranch. I wasn't expecting that battle to be quite so easy, but then again, Phart is almost perfectly EV trained at this point, and I dumped $13,000 of X items into it during the fight. Not to mention Hau essentially had one good Pokémon and 3 flimsy NFEs. It'll be interesting to see how long I can keep managing these sorts of wins before the game catches up to me.
Trainers defeated: 58/427
 
Got myself a shiny new username! Exciting times.

:sm/abra: :sm/type-null:
9-1.png

Time to pick up more random crap. There's a Revive and a Fresh Water lying around, a Breeder hands me some Moomoo Milk, and a Magmar pulls out a Quick Ball from some unspecified orifice. I can also battle a Team Skull Grunt here, but unfortunately it seems I was healed after the Hau battle, so I'll need to find a weak wild Pokémon first.

9-2.png

Igglybuff is not quite as "optimal" as a Buneary on Route 1, especially not when it knows Sweet Kiss, but since I don't have access to Charizard Glide yet, I'd rather not backtrack to Melemele Island every single time I happen to get healed. Their overall damage output isn't too bad as they can only use Pound (and Copycat-into-Pound), and Phart is able to flee with 66/77 HP once it's out of Splashes. Now it's up to me to rescue a poor Vulpix from Team Skull, who seem intent on stealing its Bottle Cap for their own nefarious ends.

9-3.png

Team Skull Grunt
Alolan Rattata Lv14 (Quick Attack/Focus Energy/Bite/Pursuit, IVs: All 15)

Struggle can't quite 2HKO and Bite hurts a little, but a Fresh Water puts things right. Phart dodges the second Bite and 3HKOs it without much fuss. The grunts make themselves scarce, and Vulpix runs away not long afterwards, apparently having had enough of humans for one day. I can come back tomorrow for a little reward, but for now, it's best to press on with the journey.

9-4.png

Madame Elizabeth
Items: Full Restore
Carbink Lv15 (Harden/Rock Throw/Sharpen/Smack Down, IVs: 15/15/0/15/0/15)

Even Game Freak seemed to think this one might be tricky, as they dropped its IVs to take 2 points out of its defenses. I lead with a Dire Hit and an X Defense, while Phart dodges a Smack Down and Carbink sets up a Harden, which Phart will gladly ignore. The first Struggle deals about 20%, but Smack Down is only dealing about 4 HP back, so that's alright. A few Struggles bring both Pokémon into the red, and I use a Super Potion while Elizabeth uses her Full Restore. Further Struggles and a quick Fresh Water are enough to KO Carbink, though I do feel kind of lucky that it never tried setting up with Sharpen.

9-5.png

Walking a little further along causes me to be brought into Moomoo Paddock where I meet up with Mallow again. She gives me access to Stoutland Search, which will help with (literally) sniffing out hidden items - I've been using Bulbapedia as a reference, so I haven't been missing out on any of them so far, but using Stoutland will be a lot easier than fumbling around Big Wave Beach mashing the A button to find a random Pearl or something.

I put my Stoutland to work in the paddock, rooting out a Moomoo Milk, a Fresh Water and a Repel. A friendly Breeder also hands me 5 Adrenaline Orbs, and another one of them gives me a Scope Lens... after I take on a rowdy Tauros, that is.

9-6.png

Pokémon Breeder Wesley
Tauros Lv15 (Rage/Horn Attack/Scary Face/Pursuit, Ability: Anger Point, IVs: All 20)

Well, a Dire Hit is certainly out of the question unless I want to eat a +6 Horn Attack. I use an X Attack instead, with Tauros's first Horn Attack dealing 15 damage. It then uses Rage, and Phart's Struggle only deals around 25%, raising Tauros's Attack in the process. Not ideal. I use a Fresh Water, and Phart squeezes out two Struggles before Pursuit and recoil damage force me to heal it up. One last Struggle does it in and leaves Phart at half HP.

Out of the paddock and into the ranch, there's a Super Repel, a Paralyze Heal and an X Defense, plus another Pokémon Breeder to battle.

9-7.png

It's just the one 'mon, actually.

Pokémon Breeder Glenn
Mudbray Lv15 (Mud Sport/Rototille/Bulldoze/Double Kick, Ability: Own Tempo, IVs: All 15)

Struggle is only a 5HKO, but Bulldoze doesn't do enough damage to make it an issue, not least because Mudbray only uses Bulldoze once and spends the rest of the fight using Double Kick and Mud Sport. Two Fresh Waters are enough to take it out. I think Bulldoze and similar moves have this problem in a lot of games, from what I remember - something about the AI considering Speed-lowering attacks only in terms of speed control, and not really considering their "does damage" bit when choosing the best move to use.

Whatever the case, it was a fairly easy battle. I pick up a Soda Pop nearby and stick my head in the Nursery, receiving TM10 Hidden Power. The lady who gave me it offers to check Phart's Hidden Power type, but apparently she refuses to tell you if you choose a Pokémon that's incapable of learning it. Shame, I just wanted to fantasise about being able to attack properly. The lady behind the counter hands me a Pokémon Egg, and Rotom is even nice enough to activate a Roto Hatch power to speed things along, so I head outside and jam Tauros into a small section of fence while it incubates.

9-8.png

Once again, not something I'll be using to battle, but it'll look cute in Poké Pelago. Back in the Nursery, I show off my Eevee and get offered a Fire, Thunder or Water Stone. They can all be freely purchased in Konikoni City and I don't have any real need for any of them, so I just take the Fire Stone and box Eevee. Back outside, I pick up an X Sp. Def, a Heal Ball, a Big Mushroom and an Amulet Coin before the next Trainer spots me.

9-9.png

Rising Star Micah
Lillipup Lv15 (Bite/Baby-Doll Eyes/Helping Hand/Take Down, Ability: Vital Spirit, IVs: All 15)
Magnemite Lv16 (Thunder Shock/Thunder Wave/Magnet Bomb/Light Screen, Ability: Sturdy, IVs: All 15)

With two Pokémon to Struggle through and the prospect of Baby-Doll Eyes weakening Phart, I open with a Dire Hit. Lillipup does go for Baby-Doll Eyes, which is now rendered worthless, and Phart nearly manages a 2HKO with Struggle, coming so close that Lillipup knocks itself out with Take Down recoil. Magnemite comes out and uses Light Screen (not very useful) while Phart heals up with a Super Potion, and its subsequent Thunder Wave isn't enough to save it from a 3HKO - Phart is fully paralysed on one turn, but shakes it off and emerges with 18 HP left, reaching Lv. 25 as well. One last Trainer before Route 5 now.

9-10.png

Gentleman Gerald
Items: Full Restore
Sableye Lv15 (Night Shade/Astonish/Fury Swipes/Detect, IVs: All 15)

The first Struggle does about 20%, so factoring in the Full Restore, this will likely take 9 attacks to defeat. Phart needs a Super Potion after landing two attacks, but manages to land a crit, pushing Sableye into Full Restore range earlier than I expected. Another two Super Potions are enough to do it in, with Night Shade's consistent damage keeping Phart busy but never really threatening it.

But before I carry on, time for a quick trip to Festival Plaza The Phart Zone. I burn through my Festival Ticket supply, swapping out a café for another 3* lottery shop in the process, and stock up on the usual Fresh Waters and Hyper Potions, also bagging 2 Max Revives from the lotteries. Then I head to Route 5.

9-11.png

"You've got just one Pokémon? At that count, we can't fight."
"You've got just one Pokémon? Then sorry, we can't battle."


And here it is - the first Double Battle of the game. As you can tell from their dialogue, they won't challenge me unless I have at least two Pokémon, regardless of whether I want to use multiple Pokémon or not. There's simply no way to fight them with only Phart, and yet it seems a waste to just not fight them at all. So if I am going to battle them, how should I go about doing it? I had a few ideas about how to approach things:
  • Catch a random low-level Pokémon and let it get KO'd on turn 1. Certainly the easiest option, but it still feels sort of cheat-y. It'd be drawing attacks away from Phart, and even if I had Phart knock it out itself with Struggle, Phart would then be getting hit by attacks that weren't aimed at it originally. Suppose I brought a Yungoos, then Phart might get lightly damaged by resisted Fighting-type attacks that were meant for Yungoos, and that doesn't feel right.
  • Wait until the postgame to fight any Double Battle Trainers, then bring along the Cosmog from the Lake of the Sunne as my second Pokémon. While it's certainly the cutest option, it does mean I'll be incredibly overlevelled for most of the battles, removing any semblance of difficulty. Also, there's a mandatory Double Battle outside Po Town against a couple of Team Skull Grunts, so I'd still need to find another workaround in order to progress with the story.
  • Use a Pokémon that knows a self-KO move to remove itself from the battle. Explosion and Self-Destruct are out as I don't want it actually damaging my opponents, and Healing Wish and Lunar Dance don't work unless you have a conscious Pokémon on standby (i.e. not already in battle), so that leaves Memento and Final Gambit. The earliest available user is Litwick, who learns Memento at Lv. 33, but even that's a big ask right now - I'm forbidden from using Litwick in battle, so even if I did catch one, I'd have to grind 960 BP to have enough Rare Candies to bring it to Lv. 33. Once I gain access to the training features of Poké Pelago, however, this will be a more viable option.
For now, it seems the best option is to pick some low-level fodder Pokémon and have Phart dispose of it on turn 1, before my opponents can "waste" an attack on it. Ideally I'd want one that's the same type as Phart, so that when my opponents' attacks get redirected to Phart, they'll probably match the attacks that they would've targeted Phart with if it'd been a 1v2 battle from the start. So, what I'm looking for is a Psychic-type Pokémon with very poor physical bulk...

9-12.png

Here's one I caught earlier! With a Brave nature and at a mere Lv. 6, this Abra is certainly slow and frail enough to faint to Phart's Struggle before it can act. I double-check the Trainers and it seems Phart outspeeds both of their Pokémon, so there's no chance of them wasting a move KOing Abra. With my begrudging preparations complete, I return to Route 5 and pick a fight with two small children.

9-13.png

Twins Isa and Nico
Cottonee Lv15 (Growth/Leech Seed/Stun Spore/Mega Drain, IVs: All 15)
Petilil Lv15 (Growth/Leech Seed/Sleep Powder/Mega Drain, IVs: All 15)

Before I start strategising about how to handle two Pokémon at once, I'll need to KO Abra and get it out of the way. However, my careful plans immediately run into a massive issue that I completely overlooked earlier - you can't target your own Pokémon with Struggle. Well, that's shit. What do I do now?

I already outlined my other options earlier, and I'm certainly not doing 90 Mantine Surf runs just to get a Memento Litwick, so I'm not really in a position to do anything other than skip the battle for now, which feels like a cop-out. However, there is one last idea I have, and I decide to give it a try instead of resetting the game - I have Phart and Abra waste their turns by using Awakenings despite being awake, essentially pausing the battle until Abra is out of the picture. Unfortunately, both Cottonee and Petilil decide to target Phart with Mega Drain, so I decide to just reset and try again until they KO Abra on turn 1.

It takes a couple of attempts, but I manage to get Cottonee and Petilil to 2HKO Abra with Mega Drain on turn 1, making it as if the battle was a 1v2 all along minus a couple of PP. Now for the strategising... well, there's not much point, as Struggle targets a random opponent when used. I use an X Sp. Def to bolster Phart's bulk while Cottonee hits it with Leech Seed - Petilil also uses Leech Seed, but it fails as Phart's already seeded. Next, I use an X Attack while both opponents deal scratch damage with Mega Drain, and then use Struggle, hitting Petilil for >50% while Phart gets paralysed. After a Soda Pop, Phart lands another Struggle on Petilil, KOing it, before healing its paralysis. It takes another 2 Super Potions to defeat Cottonee, as Leech Seed restores a big chunk of its HP every turn, but Phart eventually proves victorious.

I did at least try to avoid making it so messy, but there's only so much I could do to sidestep the game's mechanics. Luckily there are only 2 more Double Battles before I unlock Poké Pelago, at which point I can see how well that Memento Litwick strategy works. I run back to Paniola Ranch to consign Abra to the PC once more, heal Phart's wounds, then carry on with Route 5. After finding a Super Potion, a Star Piece and TM41 Torment, I come across another Trainer, this one fortunately being open to a Single Battle.

9-14.png

Pokémon Breeder Yuka
Morelull Lv16 (Astonish/Flash/Moonlight/Mega Drain, Ability: Effect Spore, IVs: All 15)
Ledyba Lv16 (Light Screen/Reflect/Safeguard/Mach Punch, IVs: All 15)

When its type is Grass/Fairy and its stats aren't too scary, that's amorelull. Phart's first Struggle does around 25%, but it's immediately put to sleep by Effect Spore, and Astonish does a little damage in return. I use an Awakening and have Phart Struggle twice, nearly KOing, but Effect Spore triggers again and poisons it. A quick Super Potion spares Phart an untimely demise and allows it to defeat Morelull, bringing out Ledyba. Phart expels its poisoning and deals around 33% while Ledyba uses... boo, Reflect. I use a couple of Fresh Waters and Phart wins after another 3 Struggles, with Mach Punch dealing exactly 1 HP of damage per hit. Poor Ledyba.

I'd like to cut through a patch of tall grass to head towards the Pokémon Center, but a couple of Team Skull Grunts are doing squats, blocking me from taking that path. How strange. It's almost like I'm being forced into taking a particular path for some reason.

9-15.png

Ah, that'd explain it. Having just wiped the floor with Hau, Gladion introduces himself as a member of Team Skull and challenges me to a battle, refusing to take no for an answer. He's so intent on fighting me that he doesn't even give me a Yes/No text box for him to disregard.

9-16.png

Team Skull Gladion
Zorua Lv17 (Feint Attack/Scratch, Ability: Illusion, IVs: All 15)
Type: Null Lv18 (Tackle/Pursuit, Ability: Battle Armor, IVs: All 30)
Zubat Lv17 (Bite/Wing Attack, Ability: Inner Focus, IVs: 15/15/15/15/15/30)

Viewing the Trainer data like this does spoil the surprise of his Zorua lead a little bit, but then again, so does me remembering his team from the last time I played USUM. I lead with an X Defense, since everyone carries super-effective physical attacks, and "Zubat" deals fairly minor damage with Feint Attack that is mostly healed by Leftovers. Phart breaks through the Illusion and manages a fairly comfortable 3HKO on Zorua after a Super Potion. The real Zubat is sent out next and suffers much the same fate, getting a 3HKO from Struggle at the cost of a Super Potion.

With its allies out of the picture, Type: Null enters the battle in all its chimeric glory. It deals 2 HP of damage with Pursuit after Leftovers recovery while Phart barely even scratches it with Struggle - this is a battle between two actual Legendary Pokémon, just in case you forgot. Gonna need a couple of X Attacks for this one, so I apply those along with a Fresh Water, and Phart deals a more respectable chunk of damage this time. Another Super Potion and 2 Struggles is enough to defeat Gladion. He has a less-than-amicable conversation with the Team Skull Grunts from earlier before going off to brood somewhere, then Hau hands me 3 Revives and runs off as well.

Nearly at the Pokémon Center now, but first, there's a Revive to pick up and another Trainer to fight.

9-17.png

Pokémon Breeder Cory
Paras Lv16 (Scratch/Stun Spore/Poison Powder/Absorb, IVs: All 15)
Spinarak Lv16 (Absorb/Infestation/Scary Face/Night Shade, IVs: All 15)

Phart gets paralysed by Stun Spore on turn 1, but still manages to 4HKO Paras with Struggle and grow to Lv. 26, never shaking off the paralysis but not getting fully paralysed either. Being on 10/82 HP when Spinarak comes out, it needs a quick Super Potion, then another one as it takes a third off Spinarak's HP with Struggle. The third and final Struggle lands only after a Fresh Water, as Night Shade did a fairly good job of whittling away Phart's HP throughout the battle. A nearby pile of berries yields 2 Cheri and 1 Rawst, and a man inside the Pokémon Center hands me a Super Potion as well.

9-18.png

"This is a 2-on-2 Pokémon battle! You don't have enough healthy Pokémon."
"You've gotta have two Pokémon to battle with us as a duo!"


I think I might make a habit of including the dialogue from all the Double Battle Trainers when they refuse to battle me, as I personally find it sort of interesting. I never see these lines in normal playthroughs because I'm always carrying more than one Pokémon, and I imagine that's the same for most people (unless you're doing a solo run/speedrun, and in the latter case, you're not exactly gonna stop and talk to them). Now that I've got their lines noted down, I lift Abra out of the PC so I can actually battle them.

9-19.png

Rising Star Duo Lauren and Justin
Vullaby Lv17 (Leer/Fury Attack/Pluck/Nasty Plot, IVs: All 15)
Rufflet Lv17 (Leer/Fury Attack/Wing Attack/Hone Claws, IVs: All 15)

I start with a double (useless) Chesto Berry to let my opponents take Abra out of the battle, and sure enough, Vullaby KOs it with Wing Attack while Phart dodges Vullaby's Leer. Now, Phart's Unaware can ignore the boosts from Hone Claws, but it can't ignore Leer, so I use a Guard Spec. to block it for a few turns. The first Struggle targets Rufflet and unfortunately doesn't even look like a 4HKO, so I use an X Attack and a Super Potion before I try again - this one deals a lot more to Rufflet, and another hit will now knock it out. I reapply the Guard Spec. once it wears off and use another Super Potion, then land another Struggle on Rufflet, taking it out and turning the battle into a 1v1. After one last Super Potion, Phart is able to 3HKO Vullaby with Struggle with 18 HP to spare. Back into the box, Abra - I've another Trainer to fight.

9-20.png

Trial Guide Bronson
Slowpoke Lv24 (Confusion/Water Gun/Yawn, Timid nature, IVs: 30/20/20/30/30/20, EVs: 252 HP / 252 SpA)
Mr. Mime Lv24 @ Psychium Z (Psywave/Double Slap/Light Screen/Reflect, Modest nature, IVs: 20/20/20/30/30/30, EVs: 252 SpA / 252 Spe)

Bronson initially wouldn't battle me until I'd defeated all the other Trainers in the area, but now that I've done so, we can have a little Psychic-type showdown. Phart's first Struggle deals piddly damage even with a crit, so I use an X Attack and a Dire Hit while Phart succumbs to Yawn. Water Gun actually hurts a bit with all those EVs, so I have to use a Fresh Water whilst Phart is dozing, and then another when it rolls the maximum number of sleep turns. Even then, Struggle still does very little, so I use a Super Potion and my last X Attack, finally dealing some decent damage with Struggle as Phart falls asleep again. With an Awakening and another Super Potion, Phart takes the chance to KO Slowpoke, falling asleep yet again as Mr. Mime enters the battle.

Mr. Mime immediately uses Z-Reflect to set up a screen and boost its Defense by 1 stage, but since Phart is guaranteed to land critical hits, it can simply ignore those effects... once it wakes up, that is. When Phart finally comes round, it's able to score an easy 2HKO while Mr. Mime wastes its turns using Double Slap instead of Psywave. Bronson hands me TM96 Nature Power for winning, either unaware of the fact that I can't use it or simply not bothered.

9-21.png

Once that's done, I press on to the next trial in Brooklet Hill. Just before the gates to the trial site, I find a Net Ball and a Fisherman to battle.

9-22.png

Fisherman Ernest
Barboach Lv16 (Water Sport/Water Gun/Mud Bomb/Amnesia, IVs: All 15)
Goldeen Lv16 (Supersonic/Horn Attack/Flail/Water Pulse, IVs: All 15)

Not too tricky - Struggle is a simple 4HKO on Barboach with a Fresh Water thrown in, and with help from another Fresh Water and a Super Potion, Phart gets a 4HKO on Goldeen as well, growing to Lv. 27 halfway through the battle.

Lana stands waiting at the gates for any hopeful trial-goers, and once I've agreed to take part, the trial is officially underway!

9-23.png

Well, actually, no.

9-24.png

Lana gave me access to Lapras Paddle just now, mostly just for use in her trial, but it also means I'm now able to reach various other places around Melemele Island. So the next Totem can wait until later - time for a good ol' backtrack! (In the next post, anyway.)
Trainers defeated: 71/427
 
Always looking forward to these!

Great fun to read about the relative merits of Splash versus Teleport in this setting. It's not very often we see Splash compare favourably to any other move!
Thanks! Yeah, I certainly didn't expect to find myself choosing Splash over another move before I started this challenge. Nor did I realise how many strange little mechanics and interactions would come up when using Struggle. I guess having so few options available really forces me to get acquainted with the ones I do have.


:sm/lapras: :sm/araquanid:
10-1.png

Back in The Phart Zone once more. Sophocles offers me a 1-star Soft Drink Parlor when my rank goes up again - this one offers 12-item bundles of all the drinks you can get from vending machines, as well as 24 Moomoo Milks for 30 FC, which is pretty huge. I replace my old 1-star General Store as it's almost a direct upgrade over it. Since I had around 700 FC and nothing in particular to save it up for, I splurged and bought every HP-restoring item available before I left, which will hopefully keep Phart healthy throughout Akala Island.

Having said that, Akala is taking a backseat for now, as I'm heading back to Melemele to ride Lapras in new and exciting places. Nothing massively interesting, but it does tick off 7 more Trainer battles, which are the main focus of this challenge after all. So I start by making my way back to Heahea.

10-2.png

A quick catch while I'm on Route 4. Useless on its own, of course, but it'll allow me to complete a trade later on that may prove mildly useful.

10-3.png

It occurred to me as I was getting ready to surf back to Melemele that I never spoke with Samson Oak earlier, so I take the opportunity to do so now. He gives my Totem Stickers a count and hands over an oversized Gumshoos. This too shall be Poké Pelago fodder - I've no need for a pretend Totem Pokémon, especially not if it's designed in the image of one that lost to a Cosmog. Gumshoos goes into the PC along with Lillipup before I hop aboard Mantine and make the journey to Big Wave Beach.

10-4.png

Inside this little cave located underneath Route 2, I find a Big Pearl... and that's it. I can come back later in the game for another couple of items, but there's nothing else to Sandy Cave apart from those couple of items, which sort of sums up my general feelings on this location being created for USUM: it's cool, but why?

Aside from the Big Pearl, here's what else the cave has to offer:
  • Wild Zubat and Psyduck. Admittedly Psyduck is quite nice, as despite being featured in the Melemele Pokédex, you couldn't actually catch it until Brooklet Hill in SM, because it was only available as a surfing encounter. But even then, USUM also adds it as a non-surfing encounter in Seaward Cave, so it's not like Sandy Cave is the only place you can now bag one early on. As for Zubat, you can already find them in Hau'oli Cemetery by this point.
  • A Light Clay, once you've unlocked Sharpedo Jet. This isn't the only one available in SM or USUM, as you can find them at a 5% rate on wild Mudbray or Mudsdale (plus Golett/Baltoy in USUM) or find one through Poké Pelago, but it is nice to be handed one without having to go down a grindy route. Still, if you actually wanted to use Light Clay for in-game purposes, you'd probably be lifting one off a wild Mudbray long before Sharpedo Jet becomes accessible.
  • TM24 Thunderbolt, once you've unlocked Machamp Shove. Now this is definitely good stuff, especially since it was postgame only in SM, but considering how many TMs had their locations shuffled around between SM and USUM, I do wonder if it could've been slotted in somewhere else, in a location that already existed.
Don't get me wrong, I'm not one to bemoan a minor bit of extra content - I wouldn't have bothered coming here at all if it were truly useless - but I've always felt like Sandy Cave was sort of a strange addition. It feels like they simply added it to USUM because it'd be cute or fun (which is valid), because it just kind of exists with no particular purpose. Still, there are more confusing additions elsewhere in the game... as you might see very shortly.

For now, though, I exit the cave and run around to Melemele Meadow, cutting through to Seaward Cave where I'm now able to reach TM79 Frost Breath, a welcome sight if you happen to be using an Ice-type at this early point in the game.

10-5.png

There's nothing else to find in Seaward Cave, so I head outside to Kala'e Bay. We all know by now that this area is twice as big as it was in SM, so naturally there should be quite a few items to pick up. I start by heading south towards a...

...hang on, what was that? Twice as big?

10-6.png

Yep! This completely optional area from the original games has now nearly doubled in size, and remains just as optional as before. What's particularly odd is that there's still not much to it - they shifted around the items a little bit, replaced a Net Ball with a Prism Scale, and added in a Star Piece and a Hyper Potion, plus a message in a bottle that can earn you a Stardust if you speak to the intended recipient in Iki Town, but that's really about it. Even the wild Pokémon are the same apart from the addition of Remoraid and Mantyke, both of whom can also be found in the rest of Melemele's sea areas.

Again, not complaining, just seems an odd thing to change and an odd change to make. The items I find here include TM05 Roar, a Big Pearl, a Star Piece, a Hyper Potion, a Pearl, and finally a Prism Scale, brought forward from its original location all the way on Exeggutor Island (which was always pretty horrible, considering Feebas is caught in Brooklet Hill). As I say, there's not much else to do in Kala'e Bay, so I loop back round to Hau'oli City and head into Melemele Sea, which is teeming with Swimmers (and one stray Black Belt) to take on.

10-7.png

Swimmer Portia
Luvdisc Lv17 (Agility/Draining Kiss/Lucky Chant/Water Pulse, Ability: Swift Swim, IVs: All 15)
Luvdisc Lv17 (Agility/Draining Kiss/Lucky Chant/Water Pulse, Ability: Swift Swim, IVs: All 0)

Not sure why the second Luvdisc has worse IVs. Anyway, Phart manages to land a 4HKO after a Fresh Water on the first Luvdisc, who seemed more interested in spamming Lucky Chant than using more than one Water Pulse. The second Luvdisc is more keen on using Draining Kiss, restoring its HP as it goes, but all that ultimately achieves is turning its own 4HKO into a 5HKO. Phart earns itself the victory after downing a Lemonade, proving that love doesn't always win, especially not with those base stats. I pick up a hidden Rare Candy from the nearby beach before moving on to the next battle.

10-8.png

Never mind being too hot, it looks ridiculous. But it's better than having my clothes clip through the Ride Pokémon. Probably.

Swimmer Jade
Clamperl Lv18 (Clamp/Water Gun/Whirlpool/Iron Defense, Ability: Shell Armor, IVs: All 15)

Phart's Struggle deals around 20% and it gets hit with Clamp on turn 1, adding some passive damage alongside its recoil issues. Still, a couple of Super Potions is enough to keep it from fainting until Clamp wears off, KOing with Struggle on the next turn. A quick heal up, then we move on.

10-9.png

Swimmer Shelby
Corsola Lv18 (Recover/Bubble Beam/Refresh/Ancient Power, IVs: All 15)

Between Corsola's fairly good Defense and access to Recover, I'm not going to be breaking through it without X items, so I lead with an X Attack. Ancient Power does a small amount in return, so I have Phart Struggle, dealing just under 50% with a critical hit. A second Struggle puts Corsola very close to red HP, but Phart can't Struggle again without fainting, so I use a Lemonade. Despite having a chance to heal itself with Recover, Corsola instead opts for Ancient Power, leaving it open to a KO from another crit Struggle. That went more smoothly than I expected - time to paddle forth to another Swimmer.

10-10.png

Swimmer Kelsie
Finneon Lv17 (Water Gun/Attract/Rain Dance/Gust, IVs: All 15)

A fairly simple 4HKO - Finneon uses Rain Dance on the first turn, and its Water Guns do enough damage to necessitate healing after 3 Struggles, but there was never any real danger. I heal Phart up again and proceed to the only non-Swimmer in the area.

10-11.png

Black Belt Francis
Hawlucha Lv18 (Karate Chop/Wing Attack/Roost/Aerial Ace, Adamant nature, IVs: 15/31/15/15/15/15, EVs: 252 Atk)

Francis has gone all-in on the Attack stat, and Hawlucha's moveset isn't too bad either, considering it's just pulled from the default level-up moves. I might get lucky like with Corsola earlier and have it not use Roost when it's low on HP, but considering Hawlucha hits a lot harder than Corsola, I start with an X Defense. Hawlucha chooses Roost, apparently anticipating an attack, and wastes its turn. I then use an X Attack while Hawlucha responds with a crit Wing Attack, dealing well over 33% to poor Phart.

I heal Phart up a little with a Fresh Water, Hawlucha landing a non-crit Wing Attack that deals 12 HP this time. The first Struggle looks to be a 4HKO, and Hawlucha wastes another turn by outspeeding with Roost, but it can undo the damage at any point now, so I use another X Attack as it Roosts up. Even at +4 Attack, Struggle can't manage a 2HKO, so I use a Super Potion and a third X Attack. Struggle is now a certain 2HKO at +6, and after trying one last Roost, Hawlucha succumbs to a trio of Struggles.

10-12.png

Not a particularly pretty fight overall, but Phart won regardless. It was perhaps tempting fate for me to think that the other battles in Melemele Sea had been quite easy. Phart's on 12/88 HP, so I give it a Lemonade and pick a fight with the penultimate Trainer, fishing a Super Repel out of the water in the process.

10-13.png

Swimmer Kalani
Mareanie Lv17 (Peck/Bite/Toxic Spikes/Wide Guard, IVs: All 15)
Remoraid Lv17 (Water Gun/Lock-On/Psybeam/Aurora Beam, IVs: All 15)

Struggle is a 4HKO on Mareanie and Bite only deals 12 damage, so it's knocked out fairly quickly, with only a Soda Pop needed to keep Phart active. Remoraid comes in as I use a second Soda Pop, and wastes a turn using Lock-On, handing Phart a crit-assisted 2HKO with Struggle. Nearly there now - just one battle left. I heal Phart to full and scoop up a Soft Sand before making myself known.

10-14.png

Swimmer Yasu
Wishiwashi Lv17 (Helping Hand/Feint Attack/Brine/Aqua Ring, Ability: Schooling, IVs: All 15)

Without Schooling able to activate until Lv. 20, Wishiwashi is even weaker than a Cosmog, and it's only able to save itself from a 2HKO by using Aqua Ring. Even then, Feint Attack manages only 8 damage before it goes down. All done! Time to head back to Brooklet Hill.

10-15.png

If you've not played Mantine Surf between 5pm and 6pm before, I'd highly recommend it. Pretty colours galore.

On the way back through Akala Island, I stop off in Paniola Town and receive a Bottle Cap from a lady who saw me save that Alolan Vulpix a few days ago. It's useless to me right now, but once I become Champion, and get Phart to Lv. 100, I'll be able to, uh, make it slightly faster or hit a tiny bit harder. Still, better than nothing. I also grab another free Moomoo Milk before continuing on through Paniola Ranch.

10-16.png

A Rising Star in the Pokémon Center on Route 5 trades me this Noibat for the Lillipup I caught earlier. It comes with a Bright Powder, which is what I'm really after, as there might be times when I'd rather make Phart harder to hit in the first place than restore its HP after it gets hurt. Probably not, but you never know.

There is one thing that bothers me about that Rising Star, though. He mentioned that he has Noibat in case he gets into trouble at Brooklet Hill, which implies that Noinoi might be useful there, such as during the upcoming trial. Back in SM, he traded you a Bounsweet instead, and while Bounsweet is a bit too weak to accomplish much, Steenee could certainly help against Totem Wishiwashi with Z-Splash leading into Razor Leaf. So even though Noibat's stats are pretty low like Bounsweet's, maybe it too could help in USUM's version of the trial? Maybe it can use Supersonic Skystrike and then stick around for a couple more turns, since it resists Totem Araquanid's STABs?

10-17.png

Oops! Maybe not. Might need more than a Yache Berry for this one. It's a pity Noibat can't be like Golbat and Woobat and evolve from being happy instead of languishing until Lv. 48.

Granted, it's not like using a Cosmog is much better for this trial, but that's what I'm stuck with. So I stop by the Poké Mart and buy a few extra Super Potions and X items, which will hopefully be enough to outlast the Totem. Heading towards the trial site, I stop to visit a tiny island that holds a Rare Candy and a Fisherman.

10-18.png

Fisherman Hal
Tentacool Lv16 (Constrict/Acid/Toxic Spikes/Water Pulse, IVs: All 15)

Tentacool's bulk is largely focused on its Special Defense, so after Phart dodges Water Pulse, it gets a swift 3HKO from Struggle. Now, onwards to the trial!

10-19.png

And for real this time.

USUM's take on this trial is fairly similar to the one in SM: you basically just have to defeat two wild Wishiwashi as you make your way through Brooklet Hill, with the second one summoning an extra Wishiwashi to help. There are also a couple of wild Dewpider that serve as "decoys", in that you don't get anything from fighting them and the trial only progresses when the Wishiwashi are knocked out. Since this challenge is about defeating Trainers with Phart, not wild Pokémon, I'll be ignoring the Dewpider and not fighting them at all. What I will be fighting, aside from the mandatory trial Pokémon, are the three Trainers scattered throughout the trial site.

Heading through the tall grass, I pick up an Elixir before Lana stops me and finally has the decency to ask for my name. Better late than never, I suppose. She points me towards some splashing in the water, but I ignore her and go wandering off on dry land, picking up an X Sp. Atk and challenging a Backpacker to a fight.

10-20.png

Backpacker Mikiko
Fletchling Lv16 (Quick Attack/Peck/Agility/Flail, Ability: Big Pecks, IVs: All 15)

Another easy 3HKO - I didn't even have to worry about Flail after the second hit, because Struggle did just enough damage to ensure it never dropped to red HP. A quick heal, then we challenge another nearby Trainer.

10-21.png

Fisherman Herbert
Poliwag Lv16 (Water Gun/Hypnosis/Bubble/Double Slap, IVs: All 15)

Poliwag outspeeds and deals scratch damage with Bubble, while Struggle deals just over 33% back. Unfortunately Hypnosis then lands and puts Phart to sleep for a couple of turns, but it shakes itself back awake, and dodges a second Hypnosis to secure the 3HKO. Once Phart is healed up again, I prepare to take on the might of a Solo Form Wishiwashi.

10-22.png

Wishiwashi #1
Lv17 (Helping Hand/Feint Attack/Brine/Aqua Ring, Ability: Schooling, IVs: Random)

Struggle is a 2HKO. Next!

There's a Revive lying on the path to the next lake, as well as a Max Repel. The second Wishiwashi draws ever closer, and while I'd like to leave it for now in favour of ticking off the last Trainer on my list, Lana won't let me proceed until it's defeated. Feeble fish it is, then.

10-23.png

Wishiwashi #2
Lv18 (Helping Hand/Feint Attack/Brine/Aqua Ring, Ability: Schooling, IVs: Random)

Much the same as before, except this Wishiwashi will summon another Wishiwashi with identical properties at the end of every turn, if it doesn't already have an ally Pokémon. This might present a slight problem since I can't choose which Wishiwashi will be targeted with Struggle, but it ends up being fine. Phart lands a crit Struggle on turn 1, as you can probably tell, and hits the same Wishiwashi again on turn 2, knocking it out. The ally Wishiwashi is unable to call for help itself, so it's simply taken out after three Struggles, leaving me free to battle the remaining Fisherman at last.

10-24.png

Fisherman Carl
Magikarp Lv16 (Splash/Tackle, IVs: All 15)

I was slightly worried for a few seconds when I saw three Poké Ball icons at the start of the battle, but no, it's just a watered-down version of the full-team-of-Magikarp Trainers from other games. Magikarp actually has a vaguely decent Defense stat, so Struggle is a 3HKO, except Phart manages to land a critical hit on a couple of the Magikarp to score two 2HKOs, stopping for a quick Soda Pop in between. After picking up the Charge Beam TM - a step down from the Scald TM of the previous games, but certainly of more immediate use to most players - it's finally time to enter the Totem's Den.

10-25.png

Lana comes running up to confirm that the slightly bigger splashing in this lake is in fact the Totem Pokémon. I pick up a Hyper Potion nearby, which I may very well need if this battle doesn't pan out, and make my way to the centre of the lake. The Wishiwashi start to form a big scary school, but immediately scarper at the sight of a giant spider coming out of nowhere. Honestly quite relatable.

10-26.png

10-27.png

Totem Araquanid
Aura: +1 Speed
Lv20 @ Wacan Berry (Leech Life/Bubble/Bite/Aurora Beam, Ability: Water Bubble, Bold nature, IVs: 31/1/31/1/31/1, EVs: 252 Def)

Ally Dewpider
Lv18 (Sticky Web/Rain Dance/Bug Bite/Bubble, Ability: Water Bubble, Serious nature, IVs: All 0)

Ally Masquerain
Lv18 (Scary Face/Stun Spore/Tailwind/Bug Bite, Ability: Intimidate, Timid nature, IVs: All 0)

Araquanid will summon Dewpider at the end of turn 1, and then summon Masquerain after Dewpider faints if it has less than 50% HP left.
Also, it's raining.

Well, Araquanid is probably going to want to use its super-effective Leech Life first, and there's certainly no point trying to attack while it can still recover HP. So I start with an X Defense, and Leech Life brings Phart down to 70/88 HP (75/88 after Leftovers) before Araquanid calls for help.

10-28.png

I'm a little concerned that Bubble might also hurt with rain and Water Bubble boosting it, so I use an X Sp. Def next, resulting in the Totem's Bubble dealing 13 damage while Dewpider's Bubble gets dodged entirely. After a second X Defense, Leech Life does 12 damage and Dewpider's Bug Bite takes off 6 HP. Phart's now on 54/88 HP, so I heal it with a Soda Pop, wanting to keep it out of KO range from a crit Leech Life. The two spiders switch to using Bubble, apparently smart enough to recognise it'll do more damage, so I use a second X Sp. Def. Back down to 55/88 HP after a Leech Life and Bubble, I use a Fresh Water, then another after Dewpider scores a crit on Bubble. With Phart still holding up well enough, I use another X Defense to bring it to +6, use a Soda Pop after Dewpider lands another crit Bubble, then an X Sp. Def, maxing out its defensive stats.

10-29.png

Totem Araquanid still has 2 Leech Life PP remaining, so I'll wait that out before I think about attacking. A couple of Fresh Waters later, they're used up, so now I think about attacking. Having a little think leads me to conclude that Struggle will do very little to Araquanid right now, so I switch to using X Attacks. Phart manages to dodge a Bubble and a Bug Bite after the first, so I use a second, and then a third when Totem Araquanid's Bite only does 6 damage. Last up, a Dire Hit and a Fresh Water, and Phart's ready to attack at last!

10-30.png

Dewpider gets promptly obliterated by a +6 crit Struggle, the recoil bringing Phart down to 57/88 HP. Araquanid will automatically summon Masquerain once it falls below 50% HP, and I don't want Phart at low HP when that happens, so I use another Fresh Water before it Struggles again, just about taking the Totem into the yellow.

10-31.png

Intimidate immediately activates, ruining any hopes I had of a clean 2HKO on Araquanid. Never mind. I try another Struggle anyway, and Masquerain uses Stun Spore, paralysing Phart but not stopping its Struggle from landing on the totem, bringing it into red HP. Phart breaks through its paralysis on its own, but needs a Soda Pop to heal back to full from 39/88 HP. Masquerain's next Stun Spore misses, and Phart lands a third Struggle on Totem Araquanid, knocking it out and growing to Lv. 29!

10-32.png

We're now left in the slightly anticlimactic scenario of the Totem having been defeated but the battle not being over yet, because its ally Masquerain is still knocking about. Luckily Struggle lands a KO and brings things to an end before it can get awkward.

10-33.png

The rain miraculously eases off as soon as the Totem battle is over, and Lana calls me back over to hand me my next Z-Crystal that I can't use.

10-34.png

Alongside that, she also gives me a slightly more useful Fishing Rod and 10 Dive Balls. I take her up on her offer to warp me back to Route 5, saving myself a bit of fuss navigating all those lakes again, and am delighted to find that she didn't heal up my Pokémon at any point. That leaves me free to carry on to Royal Avenue next time without needing to waste all of Phart's PP again.
Trainers defeated: 82/427
 
:sm/poipole: :sm/rockruff:
11-1.png

Ooh, how mysterious. This Veteran won't battle me unless it's raining in the overworld. Apparently, it will always be raining in Brooklet Hill between 5pm and 6pm, so I'll be coming back later for this fight. Until then, I'll just resume my usual activities, starting with another trip to The Phart Zone.

The lottery shops win me a Berry Juice and a Nugget, and completing some more missions earns me 216 FC, enough to rank up twice. I reject Sophocles's offers of a purple dye house and a haunted house, buy some Moomoo Milks and Lemonades, and head back to the real world. (Festival Plaza is set in cyberspace, a fact that I somehow failed to recognise until quite recently. You'd think the part of Episode RR where Sophocles boots all the Rainbow Rocket Grunts out with his admin powers would've tipped me off, but apparently not?)

11-2.png

The sight of my shiny new Waterium Z sends these Sudowoodo running for the hills, clearing the path to Route 6. It's not as if Phart can actually make use of it, but they certainly weren't sticking around to find out. The Ultra Recon Squad have been watching from a distance and come over once they've scurried off, with Dulse commenting on how cool and interesting Alolan Pokémon are before suddenly challenging me to battle. Zossie is a bit more familiar with basic etiquette and asks if I actually want to battle, so I say no, just to double-check if Phart is ready to roll. It is, so I speak to her again and get started.

11-3.png

Ultra Recon Squad Dulse
Items: X Defense, Super Potion
Poipole Lv20 (Acid/Fury Attack/Venoshock/Charm, Ability: Beast Boost, Lax nature, IVs: All 30)

Still my favourite battle theme in the franchise, even if it is mildly wasted on a Trainer who swaps his Furfrou for an Ultra Beast and manages to make his team worse in the process.

Dulse has an X Defense, but decides not to use it on turn 1 like I expected, instead dealing 19 damage with Venoshock - it stings, but it's not awful. I use a Dire Hit on Phart so that it can ignore any possible Attack drops from Charm, then try a Struggle, dealing around 20% to Poipole. It does indeed try Charm, but another Venoshock leaves Phart in need of a Lemonade, followed by a Soda Pop after its third Struggle. Dulse uses his Super Potion as I use a second Soda Pop, healing both sides back to full HP and rendering the preceding events quite pointless. Two more Struggles, another Lemonade, a third Struggle, and a Soda Pop later, Poipole runs out of Venoshock PP and switches to Fury Attack and Acid, dealing low enough damage that Phart can Struggle twice more for the win.

Dulse reflects on his poor understanding of Poipole and battling in general before leaving with Zossie to conduct more research. Me, I'm heading back to Brooklet Hill now that it's gone 5pm. As was foretold on the Internet, it's raining when I arrive.

11-4.png

The Veteran tells me his team is perfectly tailored for the rain, and since he is a Veteran, this could be trickier than my usual fights.

11-5.png

Veteran Johnny
Wingull Lv19 @ Damp Rock (Water Pulse/Wing Attack/Rain Dance, Ability: Hydration, Hasty nature, IVs: 15/30/15/30/15/30, EVs: 252 SpA / 252 Spe)
Mantyke Lv19 @ Damp Rock (Water Pulse/Headbutt/Wing Attack/Rain Dance, Ability: Swift Swim, Hasty nature, IVs: 15/30/15/30/15/30, EVs: 252 Atk / 252 Spe)
Barboach Lv19 @ Damp Rock (Mud Bomb/Water Pulse/Rain Dance, Ability: Hydration, Hasty nature, IVs: 15/15/15/30/30/30, EVs: 252 SpA / 252 Spe)

Yeah, that seems about right. Everyone has rain-boosted STAB Water Pulses to contend with, so I use an X Sp. Def right away. Phart dodges Wingull's first Water Pulse, so I use an X Attack on the free turn I've been granted, and the next Water Pulse brings Phart to 83/91 HP after Leftovers, which seems alright. Phart dodges another Water Pulse and lands a Struggle, bringing Wingull to red HP, but the next turn almost ends in disaster - Wingull lands a crit Water Pulse and confuses Phart, and while it does manage to KO with Struggle, the recoil brings it down to 3 HP!

Johnny sends in Mantyke next, and it doesn't take a genius to work out that I use a healing item instead of attacking again. After taking a Lemonade and dodging a Wing Attack, Phart is back up to 83/91 HP, so it's safe to Struggle again. It manages to land twice through confusion, knocking out Mantyke, and leaving Phart just above the red as Barboach is sent out. Another Lemonade and a fairly-weak Water Pulse later, Phart is back in action, and scores another 2HKO with Struggle, ending the battle. There's no reward for beating him, just a bit of vaguely tragic backstory about how his Pokémon used to belong to an old friend, so I head back towards Route 6.

11-6.png

Another 5 Trainer battles to contend with here, and as you can probably see, there's a Double Battle right by the entrance. Luckily there's a PC just back on Paniola Ranch, so after letting them complain that I've only got one Pokémon, I head back and retrieve Abra to use as a sacrificial lamb. (Lamb? Creature? Thingy? I've never really thought about what sort of animal Abra's supposed to be.)

"You'll have to bring more Pokémon if you want to dance!"
"If you want to practice dancing with us, you need at least two Pokémon!"


11-7.png

Dancing Family Jen and Fumiko
Jigglypuff Lv17 (Play Nice/Disarming Voice/Disable/Double Slap, IVs: All 0)
Igglybuff Lv16 (Defense Curl/Pound/Sweet Kiss/Copycat, IVs: All 0)

I start with a double Rage Candy Bar to waste my turn so Abra can be knocked out, but they instead opt for Play Nice and Defense Curl. It works on turn 2 though, as a combination of Disarming Voice and Pound is enough to KO Abra while leaving Phart at 100% after Leftovers.

Phart's first Struggle hits Jigglypuff for a likely 3HKO, taking minimal damage from the two 'puffs in return, but Jigglypuff uses Play Nice after the next Struggle, eliminating that 3HKO chance. A third Struggle targets Jigglypuff yet again and leaves it in the red, but Phart is now in the red itself and confused via Sweet Kiss. A Lemonade revitalises it, with Struggle getting past the confusion to target Igglybuff, dealing 33%-ish while taking a little more damage from its opponents. Phart snaps out of confusion on the next turn and KOs Igglybuff with a crit Struggle, leaving Phart with just enough HP to KO Jigglypuff as well afterwards.

11-8.png

It's looking more and more like Phart is going to exceed the Lv. 35 obedience cap and become unruly for a bit, as we've still got 2 trials and 43 Trainers to crush before the cap is raised to Lv. 50. Still, it's not as if it's impossible for a disobedient Pokémon to attack, it's just less likely. All I can do for now is press on with battling every Trainer that crosses my path (after I box Abra again, of course). Moving further down the route, I find a Revive and a Breeder finds me.

11-9.png

Pokémon Breeder William
Bounsweet Lv17 (Play Nice/Rapid Spin/Razor Leaf/Sweet Scent, IVs: All 15)
Mareep Lv17 (Thunder Wave/Thunder Shock/Cotton Spore/Charge, Ability: Static, IVs: All 15)

Struggle is a quick 3HKO on the fairly puny Bounsweet, and after a Super Potion, Phart manages to 3HKO Mareep as well, shaking off the first Thunder Wave after one turn and dodging the second. There's a little path past William that leads to a small area of Paniola Town, in which I pick up TM88 Sleep Talk and a Super Repel, and then I get spotted by a Beauty whilst trying to sneak past a little story event.

11-10.png

Beauty Brittney
Cubone Lv17 (Bone Club/Headbutt/Leer/Focus Energy, IVs: All 15)

Cubone's quite sturdy on the physical side, so Struggle can only manage a 5HKO with a Super Potion in the middle, but it doesn't really pose much of an issue - despite using Focus Energy early on, it never managed to land a critical hit on Phart. Elsewhere on the route, I pick up a Rare Candy, a Carbos, and an X Speed, before challenging a stray Dancer practicing her moves.

11-11.png

Dancer Maika
Pa'u Style Oricorio Lv17 (Peck/Helping Hand/Air Cutter/Baton Pass, Ability: Dancer, IVs: All 15)

This one goes quite similarly in that it's a 5HKO with Struggle, except I need two Super Potions this time because Air Cutter hurts a little bit, especially when it crits. The bottom end of Route 6 connects to Heahea City, and in a new section that I couldn't access on my first trip, there lies a Super Repel and a Big Mushroom. A couple of items can be found inside one of the buildings as well: a mysterious Poké Ball that's been separated from its Trainer in an Aether Foundation outpost, and a Lemonade inside the office of a little company called "GAME FREAK".

11-12.png

On a blank section of the board, I begin to write the phrase "difficulty options" when a ceiling tile suddenly comes crashing down onto my head, killing me instantly.

11-13.png

Back on Route 6, a girl of ambiguous age asks me for a hand in beating up the Team Skull Grunts I kept running into on Melemele Island, as they're now bullying a Drifloon and probably trying to steal it as well. Last time, they seemed to have nothing but a Drowzee that only knew Pound, so let's see if anything's changed.

11-14.png

Team Skull Grunt
Drowzee Lv17 (Disable/Confusion/Headbutt/Poison Gas, Ability: Insomnia, IVs: All 0)

The bar for improvement was essentially set on the floor, so it's not really an achievement that he's progressed onto using multiple moves. The rock-bottom IVs across the board give Phart an easy 3HKO with Struggle, helped along by Drowzee trying to Disable Struggle, which fails on account of Struggle already being the move you're forced to use when all your other moves are Disabled.

The two Grunts are still standing their ground after losing, but they quickly change their tune once Hapu suggests we simply murder them with her horse. Yeah, that'll do it. She departs atop her Mudsdale not long after, remarking that we'll probably meet again during our travels.

11-15.png

Aside from the Battle Royal Dome, which will serve as the stage for an interesting battle shortly, there are a few items to pick up: two Pink Nectars, a Rare Candy, and an Ultra Ball. There's more stuff near the Thrifty Megamart, but first, I get to watch Gladion humph his way into the dome.

11-16.png

Past the dome, I pick up a Soda Pop and an HP Up outside, then head inside the Thrifty Megamart for a few more bits. I receive a Tamato Berry from a member of staff, TM44 Rest from a man disguising himself as a Hypno to try and trick people into giving him money(?!), and a Lemonade from the Drifloon I rescued earlier.

It's also worth noting that the discounts in the Thrifty Megamart grant me access to infinite money - I can buy 10 Poké Balls, get them at half price with the coupon they gave me, receive a free Premier Ball for buying 10 at once, then sell all 11 Balls back for a $100 profit, repeating this process around 99000 times to max out my money. There are a couple of problems with that process, though, the first being that you can do that at any Poké Mart in USUM by using a Roto Bargain first, and there's less dialogue that way because there's no coupon involved. The second issue is that I think I'd rather die.

11-17.png

An aspiring actress that I previously met in Melemele Meadow happens to be in the area, and asks me for another battle so she can get into the mindset of a different sort of character.

11-18.png

Actor Meredith
Pa'u Style Oricorio Lv18 (Air Cutter/Growl/Pound, Ability: Dancer, IVs: All 20)

Oricorio outspeeds and uses Growl, and even though Phart dodges it, Struggle still only looks like a 6HKO. I try a Dire Hit while Oricorio lightly tickles Phart with Pound, and the next two Struggles deal much better damage, bringing Oricorio close to red HP. A Super Potion and another Struggle is enough to end the fight, with Meredith leaving to resume her acting studies.

As for me, I save my game just outside the entrance to the Battle Royal Dome before heading in, quickly finding myself speaking to some sort of pro wrestler.

11-19.png

Funny looking guy. No clue who he could be though. Was there anything in the Teraleak about him?

He's come to explain to me how the Battle Royal works - four Trainers, three Pokémon each, and they battle it out until one of them runs out of Pokémon. Right, okay. Three Pokémon each. So naturally that means I can't participate, yeah? Whether or not Hau and Gladion are willing to join the Masked Royal, I obviously don't have to come along too, because I've only got one Pokémon... right?

11-20.png

Oh.

It's probably worth reviewing the rules I wrote for this challenge. I stated that the run would be complete once Phart's defeated every Trainer in Alola, excluding battle facilities. The reasoning behind that exclusion should be fairly obvious: you need multiple Pokémon to enter those battle facilities, which goes against the point of a solo run, not to mention Cosmog as a species is banned from the Super courses at the Battle Tree anyway. In fact, it's completely banned from the Battle Royal Dome under normal circumstances, so how Phart even got let in to the dome just now is a mystery.

11-21.png

However, this "tutorial" fight is unique in several ways, so I think it deserves to be treated accordingly. You've already seen that Cosmog is allowed in (I'm assuming other "box legendaries" or mythicals are allowed too), and that everyone has brought 1 Pokémon instead of 3. Aside from a couple of minor details, like there being no adjustments to your Pokémon's level and no reward or acknowledgement for winning, there are two particular reasons that I've decided this fight counts as a "proper" Trainer battle:
  • Unlike a regular Battle Royal - or pretty much any battle facility fight - my Pokémon wasn't healed up before the battle began. This makes it feel more like a standard Trainer battle, and also means that Phart can use Struggle straight away. Had it been healed before the Battle Royal, it'd have to wait 41 turns until it could attack, and there's basically no way the other three Pokémon would let me wait that long.
  • In the game's data, there's a list of all the possible Battle Royal Trainers and their Pokémon pools, but Hau, Gladion and the Masked Royal aren't listed there with the Pokémon they use in this fight. Instead, they're in with the 400+ regular Trainers, and their data is formatted in exactly the same way, but with a "BattleRoyal" bit set to let their AI behave like they're in a Battle Royal.
11-22.png

However, as I mentioned earlier, the game doesn't actually acknowledge the outcome of this battle in any way. Whether you win or lose, there's no reward, and the dialogue basically amounts to "that was fun, wasn't it? now get back to your island challenge, cousin". So in order to "win", I'll have to meet the requirements for winning if this were an actual Battle Royal, i.e. score more points than my three opponents. And how exactly are things scored again?
  • Knocking out an opponent scores you one point.
  • Whoever has the most points when one Trainer runs out of Pokémon is the winner.
  • If there's a tie, the Trainer who has the most remaining Pokémon wins.
  • If that's a tie as well, the winner is the Trainer whose Pokémon have the most remaining HP. (Bulbapedia doesn't say whether that's actual HP count or percentage of max HP, but Phart has higher HP than all its opponents, so it doesn't matter.)
  • You cannot win if all your Pokémon faint, unless all of your opponents have all of their Pokémon faint too. Even so, all I'd manage in this particular fight is a tie under those circumstances, not a win.
11-23.png

In summary, the possible ways I can "win" this battle are as follows:
  • Phart KOs one opponent with Struggle, does not faint, and no other Pokémon faint during the battle.
  • Phart KOs one opponent with Struggle, does not faint, and a second opponent KOs the third opponent, but Phart finishes with a greater HP percentage than the remaining opponent.
  • An opponent KOs another opponent, and Phart then KOs that opponent, and does not faint.
The main issues here are that I can't use any items and that Struggle targets a random opponent, so it's basically up to Phart to make sensible choices and hope my opponents make questionable ones. In a way, it's sort of refreshing - I don't have to stress about losing, even though I'll have to reset and try again, because I never had any real control over the battle in the first place.

11-24.png

Pokémon Trainer Hau
Dartrix Lv20 @ Normalium Z (Razor Leaf/Peck/Tackle, Ability: Overgrow, IVs: All 25, EVs: 252 HP / 252 Atk)

Pro Wrestler The Royal
Rockruff Lv20 (Rock Throw/Bite/Protect, IVs: All 15)

Team Skull Gladion
Type: Null Lv20 (Tackle/Pursuit, Ability: Battle Armor, IVs: All 30)

I don't like the look of any of them, to be honest, but I imagine I'd stand a decent chance if Phart can target Rockruff on turns where it's not using Protect.

11-25.png

Turn 1: Rockruff protects itself, Type: Null brings Phart down to 76/94 HP with Pursuit, Phart fails to hit Rockruff with Struggle, and Dartrix uses Razor Leaf to lightly damage Phart and Null.
Turn 2: Null uses Tackle on Dartrix, Phart uses Struggle on Rockruff, taking it to 75%ish, Rockruff brings Dartrix into yellow with Rock Throw, Dartrix uses Razor Leaf and nearly KOs Rockruff.
Turn 3: Rockruff uses Protect, Null and Phart fail to hit it, Dartrix damages both of them with Razor Leaf.
Turn 4: Null KOs Rockruff with Pursuit, winning the battle. Phart's attack fails to hit anyone, meaning it targeted Rockruff again.

Oh well, time to reset and start over. Kind of weird that Phart targeted Rockruff 4 times in a row, but it could just be a coincidence. Let's see what happens on attempt 2...

Turn 1: Null hits Phart with Pursuit, Phart uses Struggle on Dartrix, Null dodges Rockruff's Rock Throw, Dartrix uses Razor Leaf. Phart dodges it, Rockruff takes a critical hit and falls to red HP.
Turn 2: Null KOs Rockruff with Pursuit, winning the battle.

Bah. At least now I know Phart isn't stuck targeting Rockruff. Attempt 3?

Turn 1: Rockruff protects itself, Null's Tackle fails to hit it, Phart uses Struggle on Dartrix, who uses Razor Leaf on Null and Phart.
Turn 2: Null uses Tackle on Rockruff, Phart uses Struggle on Dartrix, Rockruff hits Phart with a crit Bite and takes it to red, Dartrix uses Razor Leaf and takes Rockruff to red.
Turn 3: Null KOs Rockruff with Pursuit, winning the battle. Phart faints to another Razor Leaf in the aftermath.

Okay, one last go before I start considering my life choices alternative strategies.

Turn 1: Rockruff Protects, Null fails to hit it with Pursuit, Phart Struggles on Dartrix, Dartrix uses Razor Leaf.
Turn 2: Null uses Pursuit on Rockruff, Phart Struggles on Dartrix again, Rockruff uses Rock Throw on Null, Dartrix uses Razor Leaf, KOing Rockruff with a crit and winning the battle.

This clearly isn't getting me anywhere. However, I can take away some information from these failures: there's basically no chance of Type: Null or Dartrix being knocked out, meaning that "all" Phart has to do is be the one to KO Rockruff and then survive the turn to win. I also know that Phart's Leftovers aren't going to be much use here, since it survived three of my attempts with decent HP and only fainted once because it took a critical hit. So perhaps I can swap the Leftovers for something else.

11-26.png

Phart's Struggles aren't doing an awful lot, but they might fare better at +3 Attack, and I certainly don't have anything better to do on turn 1. But since Splash is out of PP, I have to use an Ether to restore 10 PP, then head to Route 7 and fish up a Wishiwashi to use up all but one Splash. With the preparations complete, I save inside the Battle Royal Dome and try again.

11-27.png

>:)

At +3 Attack, Phart's Struggle does a little under 50%, though unfortunately to Dartrix rather than Rockruff, and Rockruff then finishes the job on Dartrix with a crit Rock Throw. Still, things look a bit more promising than before. Sixth time lucky, perhaps?

Turn 1: Rockruff Protects, Null uses Pursuit on Phart, Phart Z-Splashes, Dartrix uses Razor Leaf.
Turn 2: Null uses Pursuit on Rockruff, Phart uses Struggle on Dartrix, Rockruff uses Bite on Dartrix, Dartrix uses Razor Leaf. Rockruff and Dartrix are both in the yellow, as is Phart.
Turn 3: Null uses Tackle on Rockruff, bringing it into the red, Phart just barely misses the KO on Dartrix with Struggle, Rockruff uses Rock Throw on Null, Dartrix KOs Phart and Rockruff simultaneously with Razor Leaf.

Close, but not quite good enough. A critical hit would've won that for us, so it's certainly possible. On to attempt 7.

Turn 1: Null uses Pursuit on Rockruff, Phart Z-Splashes, Rockruff uses Rock Throw on Null, Dartrix uses Razor Leaf and brings Rockruff down to red HP.
Turn 2: Rockruff Protects, Null uses Pursuit on Phart, Phart fails to hit Rockruff, Dartrix uses Razor Leaf.
Turn 3: Null uses Tackle on Dartrix, Phart uses Struggle on Dartrix, Rockruff uses Bite on Dartrix, Dartrix uses Razor Leaf and KOs Rockruff for the win.

Another close call - had Phart targeted Rockruff, I might have won. Time for another round of mashing through the Masked Royal's waffling.

Turn 1: Rockruff Protects, Null uses Pursuit on Phart, Phart Z-Splashes, Dartrix uses Razor Leaf.
Turn 2: Null uses Pursuit on Dartrix, Phart Struggles on Dartrix, Rockruff uses Rock Throw on Dartrix, Dartrix uses Razor Leaf. Dartrix is in yellow, and Rockruff is in red.
Turn 3: Rockruff Protects, Null and Phart fail to hit Rockruff, Dartrix uses Razor Leaf, leaving Phart low enough that using Struggle will knock it out.

This one's sadly been rendered unwinnable, so I just reset and move on to attempt number 9.

Turn 1: Rockruff Protects, Null fails to hit it with Pursuit, Phart Z-Splashes, Dartrix uses Razor Leaf.
Turn 2: Null uses Pursuit on Rockruff, Phart uses Struggle on Dartrix, Dartrix uses Razor Leaf.
Turn 3: Null uses Tackle on Rockruff, who falls to just above 50%. Phart targets Rockruff with Struggle and knocks it out! Dartrix uses one last Razor Leaf, but can't quite KO Phart, meaning that under the "normal" Battle Royal rules, victory is ours!

11-28.png

If you ever wondered why Cosmog is banned from battle facilities, let this be your answer. Definitely the hardest battle yet, largely because I couldn't use any items at all, and yet there's no reward whatsoever for winning. That does sting a bit.

11-29.png

"Fun time"? Fuck off.

A second shirtless man approaches, but it's just Kiawe, who's come to compliment my battling skills and invite me to take part in his trial. Kiawe returns to Wela Volcano Park about 10 seconds after arriving, Gladion goes off to practice his poses or something, and the Masked Royal literally just vanishes when the screen fades to black, leaving Hau stood by the reception desk. Speaking of which, the receptionists sell a few items for BP here, so I'll have a quick look at what's on offer.

11-30.png

The first counter just sells stuff that I can already buy at the beaches, and I've partly-obscured the items that either I already have or that seem completely useless to me. Even the remaining items seem mostly inferior to Leftovers, with Metronome sounding cool in theory until I remember that Phart will be unconscious after 4 Struggles. The Power Belt/Band might be useful later on, as they grant Phart 8 Defense/Sp. Def EVs whenever it defeats a Pokémon in battle - could be handy when I want to fully optimise its EV spread, since vitamins can only add up to 100 EVs in each stat in Gen 7.

Since it's Saturday, I can currently catch a Litwick in Hau'oli Cemetery via Island Scan, which could help make future Double Battles less of a pain. Riding on Tauros and Mantine gets me back to Melemele fairly quickly.

11-31.png

I reset over the first few until I get one with a fairly decent Speed IV, so that it can take itself out of battles with Memento a little faster. Not that it'd be especially fast either way, given it's got base 20 Speed, but it might help ever so slightly. Litwick makes itself at home in the PC box as I head back to Royal Avenue, ready to continue on with this wretched adventure. One quick trip to The Phart Zone first...

11-32.png

Nice! Now I can end things on a high note.
Trainers defeated: 91/427
 
:sm/marowak-alola: :sm/charizard:
12-1.png

Another Island Scan capture, this time on Route 6. It occurred to me that while I can use a Memento Litwick to make Double Battles into 1v2s more easily, that requires grinding the Litwick up to Lv. 33, which feels a bit too strong for something meant to be a "sacrifice". So I've changed my plan a little: I'll bring Litwick to Lv. 33 once Poké Pelago is unlocked, then breed it with this female Ralts I just caught. That will give me a Lv. 1 Ralts with Memento, weak enough to be easily KO'd by its opponents, but also able to KO itself if the opponents target Phart instead.

Now for some more Festival Plaza dullness. I have 12 tickets to use up on missions, and during the process of going up to Rank 30, Sophocles offers me a 5-star dye house, specifically one that dyes things orange. Not my favourite colour, but I'll take it - anything to get away from the default clothes. I ditch the Friendship Parlor to make room, as the only thing it's useful for is lowering Attack EVs, but I merely have to wait until the start of Ula'ula Island to gain access to Kelpsy Berries anyway.

12-2.png

Oh, of course. I'd forgotten how they worked. (To be fair, it has been about 8 years since I last dyed any clothes in Gen 7.) Well, since I've already gone to the trouble of adding the dye house, I may as well stop to play dress-up for a bit. Totem Marowak can wait!

12-3.png

The shirt's got stars on it, which I guess is thematically appropriate for a Cosmog solo run? Not really, but it'll do for now. None of the bags looked any good apart from the ones that cost like $400,000, money that I absolutely do not have at this point, so I'll make do with the default one until later. Back to actual exploration and battles now - I make a stop at the Route 5 Pokémon Center first to stock up on X items again, with a Roto Bargain coming in handy to reduce the cost.

12-4.png

It's a quick path to Wela Volcano Park, but there are a few Trainers lurking in the waters of Route 7, so I'll take them on first. The first one comes swimming up after I pick up a Net Ball.

12-5.png

Swimmer Dakota
Blue-Striped Basculin Lv18 (Aqua Jet/Chip Away/Take Down/Crunch, IVs: All 15)
Psyduck Lv18 (Water Gun/Confusion/Fury Swipes/Water Pulse, IVs: All 15)

Basculin learns good moves at really low levels for some reason - a couple more and it would've known Aqua Tail as well. Crunch does enough damage for a 4HKO on Phart, and Struggle is only a 5HKO in return, so I have to use one, two, three Lemonades. The next Crunch then scores a critical hit and Phart is left with 5 HP after recoil damage, but a fourth Lemonade is enough to bring down Basculin.

Psyduck is naturally easier to take out, even though it manages to confuse with Water Pulse on its first turn. Another couple of Lemonades and a crit Struggle is enough to 3HKO it. I surf north from there, pick up a Pearl, a Star Piece and a Max Repel, and stumble upon another Swimmer.

12-6.png

Swimmer Tiare
Alomomola Lv19 (Aqua Ring/Aqua Jet/Double Slap/Heal Pulse, IVs: All 15)

Forgot to heal up after the last fight, but I imagine we'll be fine. I start with a Lemonade and an X Attack while Alomomola deals very little with its damaging attacks. Unfortunately Struggle still only looks like a 5HKO, so I use another X Attack, bringing Alomomola into yellow HP after the next attack... but only briefly, as it uses Aqua Ring. A Soda Pop heals Phart back to a healthy level, and two more Struggles are enough to finish the job.

12-7.png

Whee, minor power boost. There's an Antidote lying in the water nearby before the next battle.

12-8.png

Swimmer Casey
Surskit Lv18 (Quick Attack/Sweet Scent/Water Sport/Bubble Beam, IVs: All 15)

No Bug moves? That's unfortunate. Struggle dishes out a quick 3HKO while it wastes time using Water Sport and Sweet Scent. There's a slight change of scenery as I land on a small island, picking up TM32 Double Team (if only I could use it!) and letting the final Trainer spot me.

12-9.png

Swimmer Vanessa
Shellder Lv18 (Withdraw/Supersonic/Icicle Spear/Protect, IVs: All 15)

I don't know for certain that it has Skill Link, but considering it used Icicle Spear 3 times and got 5 hits on all of them, it seems likely. A Lemonade and a Soda Pop are needed to keep Phart healthy enough to land a 5HKO.

Time to move on. Wela Volcano Park has a few Trainers outside of the trial itself, so naturally I'll be taking care of those first. The first of them, a Sightseer, is just past a Hyper Potion near the park's entrance.

12-10.png

Sightseer Mariah
Meowth Lv19 (Bite/Fake Out/Fury Swipes/Screech, IVs: All 15)

Meowth uses Fury Swipes on turn 1, wasting its chance for a Fake Out, and Struggle takes it into yellow with a critical hit. It Screeches on the next turn, only to be knocked out by another critical hit. Go Phart!

The first tunnel I come to takes me right to the top of the volcano, but there's some more stuff to see if I make my way down an optional path. I find an Antidote and a Float Stone as I leap over several ledges, eventually entering another tunnel that plops me near an Ace Trainer.

12-11.png

Ace Trainer Jim
Noibat Lv20 (Wing Attack/Bite/Supersonic, IVs: 15/30/15/15/15/30)
Kadabra Lv21 (Psybeam/Disable, IVs: 15/15/15/30/15/30)

...why did he lead with Noibat if he wanted to show me his Kadabra?

The curated movesets and boosted IVs don't really save Jim here - Struggle is a 3HKO on Noibat, with Bite not doing enough to force a heal until after it faints, and after a quick couple of Lemonades, Kadabra also suffers a 3HKO. (It seems like Struggle confuses the AI a little, as it tried to use Disable twice despite it not working on Struggle.) The Rock Tomb TM is just past a patch of grass, along with another Trainer.

12-12.png

Hiker Calhoun
Roggenrola Lv19 (Sand Attack/Headbutt/Rock Blast/Mud-Slap, Ability: Sturdy, IVs: All 15)

I was hoping for Weak Armor so I could get some Defense drops on it, but oh well. Phart achieves a 5HKO with help from a Soda Pop, with Rock Blast not landing enough hits to be much of a threat. A few more ledges down the side of the volcano lead to a Burn Heal, and ultimately land me right back at the first tunnel entrance. With all the items picked up and Trainers defeated, all that remains is the trial itself, so I'd better go and find Kiawe.

12-13.png

12-14.png

We'll get there eventually, little buddy. Though if you could ease up on the advice and maybe stop spewing out so many useless Roto Friendships, we might be able to get there a little bit faster. Now, up to the Totem's Den we go!

12-15.png

According to Kiawe, I might find this trial to be a bit different from the other ones I've attempted so far. He's certainly right, and not just because of the spot-the-difference dancing minigame thingy: the trial is essentially a gauntlet consisting of a wild Alolan Marowak, a Trainer (with one Pokémon, a Magmar), and the Totem Pokémon, all faced back-to-back with no chance to heal. That's not to say it'll be unbeatable, but I'll have to prepare for the likelihood of Phart being slightly injured going into the Totem fight.

12-16.png

With my powers of basic memory, I'm able to deduce that the middle Marowak is looking up instead of down like in the first dance, triggering the first battle.

12-17.png

Alolan Marowak
Lv16 (Flame Wheel/Bone Club/Tail Whip/Growl, Ability: Cursed Body, IVs: Random)

According to the game data, it's either Relaxed or Brave - there are two wild Marowak listed, and I think the other one gets used if you pick the wrong Marowak? Either way, the IVs are completely random. Struggle barely does anything and Marowak uses Growl right away, so I'm basically forced to use a Dire Hit. The damage output still isn't great, but after 6 Struggles, 2 Soda Pops and a Lemonade, Marowak goes down. Phart is now on 72/96 HP going into the next fight.

12-18.png

In USUM, the Hiker shows up in the first dance of this section as well; he simply pulls a different face in the second dance. The spot-the-difference aspect remains about as hard as it was in SM, i.e. it isn't.

12-19.png

Hiker David
Magmar Lv19 (Smokescreen/Feint Attack/Fire Spin/Clear Smog, Ability: Flame Body, IVs: All 15)

Flame Body makes this a bit tricky. Struggle is a contact move, so if Phart attacks it, there's a good chance it will be going into the Totem fight with a burn as well as ~75% HP, which is especially bad because the Totem Pokémon knows Hex. As boring as it may be, I decide the best approach is to let Magmar run out of PP and KO itself with Struggle.

After using an X Defense, Feint Attack does 10 damage to Phart, with 8 HP being recovered by Leftovers. Unfortunately I'm immediately reminded that it knows Clear Smog, and Phart's boosts are wiped away in an instant. Oops! Guess I'll just have to stall with healing items. 4 Soda Pops, 6 Lemonades, and 70 turns later, Magmar finally starts Struggling, and Phart is able to carry 87/96 HP into the final fight once it faints.

12-20.png

12-21.png

Totem Marowak
Aura: +2 Speed
Lv22 @ Thick Club (Hex/Flame Wheel/Brick Break/Detect, Ability: Cursed Body, Careful nature, IVs: 31/31/31/1/31/1, EVs: 252 HP / 106 Def / 152 SpD)

Ally Salazzle
Lv20 (Poison Gas/Venoshock/Flame Burst/Torment, Ability: Corrosion, Calm nature, IVs: 15/1/31/15/31/1)

Marowak only has one ally, who'll be summoned at the end of turn 1. Even so, this looks like it could get awkward, as Phart will be taking both physical and special attacks in addition to possible poison damage. The Totems are fairly smart, and I think Flame Wheel would do more damage than Hex with the Thick Club, so I start with an X Defense. Totem Marowak instead uses Detect, wasting a turn as its help arrives.

12-22.png

Instead of Salazzle summoning an unlimited supply of Salandit to help her, now she's the one being summoned instead. What is it, a reverse-reverse harem? Or would that just be a regular harem? Answers on a postcard.

Since Phart's now facing two opponents with special attacks, I use an X Sp. Def. It takes a Flame Burst and a Hex fairly well, falling to 74/96 HP. After a second X Sp. Def, it's able to dodge both Poison Gas and Flame Wheel in a single turn thanks to the power of affection bullshit. Though I get in a second X Defense on the next turn, Phart can't manage any more dodges, getting poisoned and taking a spot of damage from Flame Wheel. A Pecha Berry fixes it up, with Marowak failing to use Detect and Salazzle dealing less than it hoped with Venoshock. A third X Sp. Def brings Phart to +6, but after its opponents' attacks, it's now on 39 HP and poisoned. I heal Phart to full with a Lemonade, it tanks the boosted Venoshock and Hex fairly well, and expels its own poisoning, allowing me to put the final X Defense on it.

12-23.png

Next up will be the attack boosts - Struggle recoil will sting no matter what, so I'll have to make each use count. The first X Attack goes alright, with Phart falling to around half HP but expelling its poisoning. It then dodges Poison Gas as I use a second, taking a little damage from Flame Wheel. I don't want to risk a critical hit, so I use a Soda Pop to heal Phart to 100% as it gets poisoned again. Phart is left on 49 HP once I use a third X Attack, and still poisoned. Another Soda Pop gives me the opportunity to use a Dire Hit, maxing out its damage output.

I'd rather not have Phart be poisoned when it starts attacking, but Salazzle is keen to use Poison Gas every time I heal it, so I stall with Fresh Waters for a few turns until Phart can expel the poisoning itself. Once it manages to do so, I have it strike at last - it vaporises Salazzle with a single Struggle and grows to Lv. 32 in the process.

12-24.png

Even on its own, Totem Marowak could still bring down Phart with a critical hit if I don't keep its HP up. I cure it of Salazzle's last-ditch Poison Gas with a Pecha Berry before using a Soda Pop, bringing it back to full. Struggle can't quite manage a 2HKO thanks to Marowak's considerable EVs, leaving Phart in need of a Lemonade after losing half its health to recoil damage, but a third and final Struggle is enough to secure another victory over another Totem Pokémon!

12-25.png

12-26.png

get boned nerd

12-27.png

Kiawe marvels at my ability to detect the fine differences in all the dances (sorry, fine differences? Were we watching the same trial?) and bestows upon me the Firium Z, a fine addition to my collection of shiny useless tat. He also hands over 10 Quick Balls, which are probably the best way for me to catch anything in this challenge, and allows me to use Charizard Glide. Result!

Back down on Route 7, I can now head through the Dividing Peak Tunnel towards the next trial. But first, a large man with a vaguely familiar-looking haircut comes over from the beach.

12-28.png

At last, the final menu option is unlocked! Now the menu options will stop getting re-arranged every time I unlock something new. (Why does that happen in the Gen 7 games, anyway? Surely there must've been some way to code it so the new options just get put at the end.)

I've mentioned it before, but Poké Pelago does have a few useful features that might help me with the challenge, so I'll head over now and see what's what.

12-29.png

12-30.png

Mohn gives me a quick tutorial and asks for my help in developing the islands into something cooler. I accept his offer, since I'm looking to make use of the islands myself, but those plans are brought to a halt when it turns out I don't have enough Pokémon in my PC to renovate anything. Even the cheapest upgrades require 15 Pokémon, and I've only got 12 at the moment. Looks like I'll have to wait until next time to begin any developments.

Overall, Poké Pelago is about the same in USUM as it was back in SM: a nice way to passively farm and grind a few things. Some of the visiting wild Pokémon were changed, and they fixed the "every activity completes at once when the month changes" glitch that was present in SM at launch, but that's about it. The most obvious change is that Mohn's wearing different-coloured clothes, but that's clearly just a cosmetic change. There's no significance to it at all.


...


...right?


12-31.png

??????
Trainers defeated: 99/427
 
:sm/ralts: :sm/litwick:
13-1.png

First, a quick look at the different islands of Poké Pelago and what they do. They're a bit like Festival Plaza in that there are multiple locations that each offer different "services", but here I get to help Mohn develop the islands to permanently upgrade their functions, rather than relying on luck to have Sophocles bring me better facilities.
  • Isle Abeens has the Poké Beanstalk, the thing that actually produces the Poké Beans that serve as currency here. Wild Pokémon can also show up here, and potentially join my party after a while if RNG wills it. Fully upgrading the island requires 30 Pokémon.
  • Isle Aplenny is for growing Berries. Not much more to say, really. Fully upgrading it requires 45 Pokémon.
  • Isle Aphun lets me send my Pokémon into a cave to bring back random items. There seems to be one path that mostly yields shards, one that yields evolution stones, and one that yields high-value stuff like Pearls and Nuggets with the occasional fossil. Fully upgrading it requires 60 Pokémon.
  • Isle Evelup lets me leave Pokémon to play and increase their EVs or gain Exp. Points, depending on what sort of drink they're given. Fully upgrading it requires 75 Pokémon.
  • Isle Avue features hot springs that can increase a Pokémon's friendship or be used to hatch Eggs. Fully upgrading it requires 90 Pokémon.
Since all the upgrades also require Poké Beans, my first goal should be to fully upgrade Isle Abeens and get the islands operating at maximum beanage. After that, I'll want to upgrade Isle Evelup so I can start training up my Litwick, then Isle Aplenny for when I get hold of the EV-lowering Berries. Isle Aphun probably isn't necessary but could maybe help with generating a little extra cash, and Isle Avue seems useless for my purposes, but I might upgrade it anyway if I can spare the beans.

Whatever my plans are, I'll need to acquire a lot more Pokémon before I can get started. But how do I do that? Catching 60+ Pokémon without having any easy way to weaken them will be boring and tedious, not to mention it will award Phart with unwanted Exp. Points, pushing it closer to the obedience cap. So I can forget about shuffling around in the tall grass.

13-2.png

Here's a better idea. I've already got my Litwick/Ralts pair lined up to pass down Memento later on, so I can use them now to fill up a couple of boxes with eggs. Once they're placed in the care of the Nursery, I head outside and let them get on with it.

13-3.png

Despite Litwick and Ralts being compatible, the rate of egg production is slower than I'd hoped, probably because they're different species caught by the same Trainer (me) and therefore have the slowest breeding rate. In an effort to speed things along, I end up going full Habsburg and sticking two of the Ralts in the Nursery, which works a treat - not only does the incest make the breeding rate more optimal, it also frees up Litwick to help hatch the eggs even faster via Flame Body.

13-4.png

13-5.png

A wild Staryu showed up on Isle Abeens and decided to stick around, so now I've got another peon for throwing into the mines or having build new islands. I don't really need it, though, because I'll already have a total of 95 Pokémon in my boxes once I hatch all of the eggs. Actually hatching them proves a bit tedious, but between Litwick's Flame Body and a Roto Hatch power, it's over before I get too bored.

13-6.png

13-7.png

Isle Abeens is now fully developed, meaning more beans for everywhere else. Next up is starting work on Isle Evelup so I can level up Litwick - I'll need to fully develop this island as well in order for the Exp. gains to be at the highest level. I get to the second phase of development, but don't quite have enough beans for the third phase, so I have to trade some of the rarer beans with Mohn in order to fund it.

13-8.png

13-9.png

The basic idea of Isle Evelup is that you leave your Pokémon here for 1 to 99 "play sessions", each of which last 30 minutes, and they gain EVs or Exp. depending on what sort of training course you chose. At this final stage of development, each session equates to 4 EVs or 300 Exp. Points. I want to bring Litwick from Lv. 9 to Lv. 33 so it can learn Memento, which translates to 29,530 Exp. Points, or 99 sessions. That would take 49.5 hours, which isn't great, but I can also fill a nearby create with Poké Beans that will make Litwick work twice as fast.

13-10.png

All set! I might need to top up the bean supply at some point, but provided Litwick doesn't burn the place to the ground, it should be done in around 24 hours.

13-11.png

Eh? Must've miscalculated something, I guess. Still, no matter, it knows Memento now and that's all I was after. I stick it back in the Nursery alongside Ralts, run around a bit until they produce an egg, then run around a bit more to hatch it.

13-12.png

I think that's probably the best I'll get for a sacrifice Pokémon for Double Battles. It has a 20% of activating Quick Claw and immediately taking itself out of the fight with Memento, neutering Phart's Attack but otherwise not having any effect on the opponents. Failing that, any single attack from its opponents will KO it. Failing that, it'll still get to use Memento at the end of turn 1.

With all the egg-hatching sorted, I make another visit to Festival Plaza, completing a fair few missions that I had stockpiled. I get to swap my 2-star General Store for a 4-star one, and replace the 1-star Soft Drink Parlor with a 2-star one. The new General Store is still fairly crap unless I want status-healing items, but the Soft Drink Parlor now lets me buy 48 Moomoo Milks a day instead of 24. Considering Phart doesn't even have 100 HP yet, that's probably going to cover HP restoration for quite a while.

One last stop before I continue on with the story: finding another wild Buneary on Route 1. Phart needs to burn its Struggle PP again, but at least this time it wasn't from a forced heal, but rather from me putting it in the PC while I was hatching eggs.

13-13.png

Dividing Peak Tunnel exists as a proper location in these games instead of being something you're just implied to walk through. Granted, it's still not very interesting on account of being a literal hallway, but it's the only place you can find a wild Kecleon, and there's a catch-up with the Ultra Recon Squad on your first trip through it.

It turns out Dulse has never seen a tunnel before. Just how badly did Necrozma fuck up their world?

13-14.png

9 Trainers here, one of which is a Double Battle, not to mention a few more on the northern half of Route 5. I'd better get started.

I pick up a Max Repel by the sea before bumping into Colress, who's been chatting with fellow fashion disasters Dulse and Zossie just before I arrived. He gives me TM43 Flame Charge - nice, but useless to me. Less useless are the Big Pearl and the Backpacker I find just past him.

13-15.png

Backpacker Kiana
Eevee Lv20 (Quick Attack/Bite/Swift/Refresh, IVs: All 15)

A fairly simple 4HKO with Struggle, plus a Lemonade to stop Phart from KOing itself. Net up is a Rising Star - perhaps he'll have a slightly more competent team?

13-16.png

Rising Star Mikey
Phantump Lv20 (Astonish/Growth/Ingrain/Feint Attack, IVs: All 15)
Trumbeak Lv21 (Rock Smash/Supersonic/Pluck/Roost, IVs: All 15)

He'll probably know to use Roost on Trumbeak at sensible moments, so I start with an X Attack. Phart dodges Phantump's Astonish and scores a 2HKO with Struggle. I heal it to full with a Super Potion as Trumbeak uses Pluck, dealing 15 damage - not really enough to trouble Phart. Struggle would be a 2HKO here, except Supersonic lands and Phart smacks itself in the face, giving Trumbeak an opportunity to Roost. Still, a Lemonade fixes up the damage, and a few more Struggles are enough to defeat it after one of them breaks through the Roost cycle with a critical hit.

There's a Hyper Potion nearby, a Miracle Seed across a patch of grass, and a little further along the road, another Rising Star is waiting to pounce on unsuspecting Trainers.

13-17.png

Rising Star Nicki
Stufful Lv21 (Bide/Baby-Doll Eyes/Brutal Swing/Flail, IVs: All 15)

Baby-Doll Eyes is annoying and Bide might potentially screw me over if I blindly attack, so I use a Dire Hit first. Stufful leads with Bide, which I wait out by failing to use an Antidote before having Phart use Struggle, which looks to be a 3HKO. Stufful uses Brutal Swing next, but it doesn't do enough damage to put Phart in self-KO range from Struggle recoil, leaving it free to finish off that 3HKO. The next battle doesn't take too long to initiate, as a Scientist spots me a few paces away.

13-18.png

Scientist Tyrone
Items: X Attack
Amaura Lv20 (Rock Throw/Take Down/Aurora Beam, Ability: Refrigerate, IVs: All 30)
Omanyte Lv20 (Rollout/Bite/Water Gun, IVs: All 30)

Ooh, surprise potential difficulty bump. A +2 Refrigerate Take Down sounds unpleasant, so I use an X Attack on turn 1 as Tyrone uses... Aurora Beam? I thought they usually went for their X items straight away? It doesn't help that Phart dodges the attack either. Struggle manages to 2HKO Amaura after landing a crit with the second strike, bringing out Omanyte. Struggle deals around 33% to it, but it uses Rollout, dealing 6 damage but locking it in to stronger Rollouts. I heal Phart to full with a Moomoo Milk, the second Rollout takes it down to 89/99 HP, and Phart is able to weather the 19 HP of damage from the third Rollout and KO with Struggle.

Defeating Tyrone brings my Trainers-defeated count up to 103. Since 3 of those were beaten by Litten because I hadn't unlocked trading yet, this means that I've now defeated 100 Trainers using a Cosmog! So even if the run crashes and burns at some point in the future, at least I'll still have that.

Once the sheer excitement of that milestone wears off, I continue onwards, finding an Ultra Ball and an Adrenaline Orb just off to the side of the road, and an Iron just further along. The nearby Fossil Restoration Center also has an Awakening and a Rare Bone, but with no fossils in my bag, I've not got much use for it right now.

13-19.png

If you've made it to this point in USUM without having used Festival Plaza at all, the game makes you go through the tutorial for it at this point. I'm more than familiar with it by now, so no need for that. I sell some crap at the nearby Pokémon Center, buy a few more X items, then take on a Preschooler who's borrowing his brother's Pokémon for this fight.

13-20.png

Preschooler Kaleb
Kangaskhan Lv19 (Fake Out/Reversal/Facade/Fling, Ability: Scrappy, IVs: 30/0/30/0/30/0, EVs: 252 Def / 252 SpD)

Just to confirm, yes, that is a hand-picked moveset rather than one pulled from Kangaskhan's level-up moves. The itemless Kangaskhan has been given the move Fling.

It's certainly very bulky though, as Struggle doesn't even move its HP bar past the gender icon. An X Attack helps remedy that, and the battle is made easier by Kaleb's total lack of AI, as he's throwing out random Flings and low-power Reversals instead of using Facade consistently. The recoil damage does force me to use a couple of Lemonades, but Phart manages a 6HKO to win the battle. Kaleb's older brother shows up, gives him a lecture on how he's bound to lose like this if he doesn't let his Pokémon fight properly, and hands me a Lum Berry for my troubles.

13-21.png

:(

There's a Dive Ball behind the motel where Gladion's staying, not to mention another Trainer.

13-22.png

Golfer Alan
Hoothoot Lv20 (Confusion/Echoed Voice/Zen Headbutt/Psycho Shift, IVs: All 15)

Thanks to Hoothoot's puny Defense and Alan deciding to use Confusion twice, this is an easy 3HKO. A quick Lemonade brings Phart back to near-full health before we take on another Golfer in the car park.

13-23.png

Golfer Maile
Natu Lv20 (Teleport/Lucky Chant/Stored Power/Ominous Wind, IVs: All 15)

Another fairly flimsy bird, but Natu is actually faster than Phart and uses Ominous Wind twice, requiring me to use a Lemonade. The brief spurt of difficulty fades away when Maile decides it's time to (fail to) use Teleport, leaving Phart to defeat the Golfer with a fore-hit KO. Past the end of the road lies a small section of water, containing a Water Stone as well as a potential Double Battle.

13-24.png

"If you only have one Pokémon that can fight, please come back later."
"If you only have one Pokémon that can fight, I must ask you to leave."


Time to retrieve Ralts from the PC and see how it fares as a sacrifice.

13-25.png

Karate Family Samuel and Guy
Machop Lv21 (Karate Chop/Leer, IVs: 31/0/0/0/0/0, EVs: 252 HP)
Machop Lv19 (Karate Chop/Foresight, Adamant nature, IVs: All 31, EVs: 252 Atk / 252 Spe)

Kind of funny to see perfect IVs and full EVs on a Lv. 19 Machop, but without Knock Off in either of their movesets, I don't think I'm in danger. I use an X Attack on Phart while Ralts targets it with Memento, but both Machop use Karate Chop first, KOing Ralts before it can move and dealing chip damage to Phart. Honestly, that works fine too. The first Struggle targets the Lv. 21 Machop, hitting for just under 50% while the opponents use Leer and Foresight. Struggle number two brings it into yellow, but two Karate Chops leave Phart low enough to need healing. Phart's next Struggle sadly targets the Lv. 19 Machop, not quite achieving a 2HKO... or so I thought, but it lands a crit Struggle on the next turn to KO that Machop.

13-26.png

The knockout blow does leave Phart on very low HP, however, so I give it a Moomoo Milk and let it finish off the other Machop. It's sort of a shame that Ralts didn't get to use Memento, but it still worked as intended by fainting quickly - Memento would've just been a cool way to ensure that happened. With the Double Battle completed and all but one of the other Trainers on the route defeated, I box Ralts and double back to an Ace Trainer I skipped over earlier, who previously wouldn't battle me until I'd defeated everyone else.

13-27.png

Ace Trainer Eileen
Fletchinder Lv23 (Ember/Peck/Quick Attack, Ability: Gale Wings, Timid nature, IVs: 20/20/20/30/30/30, EVs: 252 SpA / 252 Spe)
Fearow Lv23 @ Flyinium Z (Aerial Ace/Pursuit/Fury Attack, Ability: Keen Eye, Jolly nature, IVs: 30/30/20/20/20/30, EVs: 252 Atk / 252 Spe)

Hardly a pushover, but Fletchinder seems a little watered-down by its EVs and nature, so I use it as a chance to drop an X Defense and an X Attack. It responds by using Ember twice, bringing Phart down to 77/102 HP and burning it, so I use a Rage Candy Bar to cure the burn. Struggle falls short of a 2HKO again, but a Lemonade keeps Phart healthy enough to just about KO Fletchinder with 10 HP remaining.

Fearow comes out, and I obviously heal back up to full in anticipation of a Z-Move. Fearow instead opts for Pursuit, dealing only 14 damage. Its Aerial Ace deals slightly more, but I'm not sure why Eileen isn't using Supersonic Skystrike, considering she's now looking at a 3HKO from Struggle. Only after Phart barely misses the 3HKO and leaves Fearow with a tiny sliver of health does she finally use the Z-Move, but even that's not enough, as Phart limps out victorious with 5 HP left. We receive TM58 Sky Drop for winning, but more importantly, we tick off another Trainer on the list.

That's the end of Route 8, but there's still the top half of Route 5 to contend with before the trial. Stoutland helps me sniff out a PP Up before I leap down a ledge and come across a Youngster.

13-28.png

Youngster Caleb
Charjabug Lv20 (Bite/Bug Bite/Spark/Acrobatics, Ability: Battery, IVs: All 15)

Bug Bite actually stings quite a bit, dealing nearly 25% to Phart. It takes a Super Potion and a Lemonade to keep Phart healthy long enough for the AI to pick the weaker Spark, but even when it's not making optimal choices, a crit Acrobatics forces me to heal Phart for a third time. Phart manages to avoid a Bite and land a 6HKO with exactly 1 HP remaining. Phew! Moving along from Caleb nets me a Nugget and a euphemism.

13-29.png

Hiker Gabriel
Makuhita Lv21 (Fake Out/Force Palm/Whirlwind/Knock Off, IVs: All 15)
Mudbray Lv21 (Rototiller/Bulldoze/Double Kick/Stomp, Ability: Own Tempo, IVs: All 15)

If I can KO Makuhita before it can remove Phart's Leftovers, that'd be nice. I start with an X Attack, figuring that I'll need one anyway if Mudbray has Stamina, but Makuhita immediately uses Knock Off to deal a decent chunk and remove its item. Boo. On the plus side, Struggle is a guaranteed 2HKO, so Phart disposes of Makuhita after healing up, shaking off some Force Palm paralysis in the process. Striking Mudbray with Struggle reveals that it's actually got Own Tempo, so after another Lemonade, it succumbs to a 3HKO. Once I've picked up a Full Heal, TM59 Brutal Swing, and a Hyper Potion, the only thing left to do here is fight an Ace Trainer.

13-30.png

Ace Trainer Alexis
Goomy Lv22 (Dragon Breath/Bide, Ability: Sap Sipper, IVs: 30/15/30/15/15/15)
Sylveon Lv23 (Draining Kiss/Swift, Ability: Cute Charm, IVs: 15/15/15/30/15/30)

I lead with an X Sp. Def, as Draining Kiss will probably be annoying later on. Goomy uses Bide, I stall it out with an Antidote and Phart Struggles after it unleashes its stored-up nothingness, dealing a bit under 33%. Goomy doesn't go for Bide again, so 3 Struggles are enough to finish it off and bring in Sylveon.

Once Phart's healed up to full, Sylveon deals around 25% with a crit Swift, followed by 10 HP with Draining Kiss. While it's good that it's not hitting very hard, neither are Phart's Struggles, and Draining Kiss heals off most of their damage. An X Attack is enough to fix that, and with help from a few more Lemonades, Struggle 7HKOs Sylveon and ends the battle.

13-31.png

With all the random Trainers crushed and Phart a little stronger than before, it's about time for the trial in Lush Jungle, though I'll be leaving it until the next post. It seems like I can skip every battle apart from the Totem fight in the trial, but that fight still looks iffy, so I'd better check I've got enough supplies. I've been buying Moomoo Milks from Festival Plaza fairly often - will they cover it?

13-32.png

Ehh. Could go either way.
Trainers defeated: 111/427
 
Great one as always!

Preschooler Kaleb
Kangaskhan Lv19 (Fake Out/Reversal/Facade/Fling, Ability: Scrappy, IVs: 30/0/30/0/30/0, EVs: 252 Def / 252 SpD)

Just to confirm, yes, that is a hand-picked moveset rather than one pulled from Kangaskhan's level-up moves. The itemless Kangaskhan has been given the move Fling.
Gotta wonder if it initially held Toxic Orb, but it was found to be too powerful during playtesting or something like that.
 
Gotta wonder if it initially held Toxic Orb, but it was found to be too powerful during playtesting or something like that.
Yeah, I was wondering along those lines myself. It would've paired well with Facade and might explain the nerfed IVs as well. My other thought was that maybe it's supposed to be bad - the NPC dialogue after the battle mentions that Pokémon can't unleash their full power if you don't let them fight properly, so maybe they thought giving situational moves like Fake Out and Fling to a small child who can't use them properly might help demonstrate that.

But even then, I'm not sure if that really teaches the human player anything other than "Fling sucks"... which, to be fair, has been largely true since 2006. Game Freak remains an enigma.


:sm/lurantis: :sm/clamperl:
14-1.png

The basic idea of the Lush Jungle trial is that you run around foraging for ingredients to bring to Mallow, which she then uses to cook a dish that lures the Totem Pokémon out of hiding. While SM had the trial set up so that wild Pokémon would attack you during the process of gathering the ingredients, USUM handles it a little differently: you're placed in three scenarios where you have to pick out the "right" ingredient from a few other "wrong" ingredients. Every time you pick the wrong ingredient, it adds a wild Pokémon that you have to fend off in battle immediately before the Totem fight. If you really screw up your item choices (deliberately or otherwise), you end up having to fight a Fomantis, another Fomantis or a Comfey, a Sudowoodo, and Totem Lurantis back-to-back, which sounds unpleasant even if you're playing without any self-imposed challenges.

Luckily for me, I don't need to contend with any of the extra Pokémon, since they're not used by Trainers. Beating Lurantis is all I need. But that doesn't excuse me from doing the trial - time to go foraging!

14-2.png

Mallow whisks me off to the northwest section of the jungle to look for a Mago Berry. Once I've picked up a Super Potion, I identify a sour-smelling Mago Berry and take it with me to the next section. After I leave with Mallow, a little scene plays out of two Fomantis emerging from hiding and looking happy. It seems I've not been marked for death on this occasion.

14-3.png

Thanks, that's not at all ominous. Running around in this grassy area earns me a Hyper Potion, a Revival Herb and a Max Revive, and I can reach TM86 Grass Knot by climbing through a little tunnel under a tree. All that remains is to acquire some Honey for the trial, and by taking it from a bush with only a few flowers, I avoid incurring the wrath of the local Fomantis and Comfey.

14-4.png

This part's easy enough, as one of the "Sudowoodo" has actual leaves, roots instead of feet, and is missing the yellow markings on its back. I scoop up an X Defense and a Heal Powder before taking the Big Root from under the real tree. While there are a few more items to pick up in the jungle, it seems like I'm not able to reach them until after the trial is over, so I guess I'll just finish up the foraging.

14-5.png

...is it meant to be that colour? And despite what Mallow says, the game describes it as having a "unique aroma". Still, while it might not be especially edible by human standards, the Totem Pokémon seems keen enough, and I have the misfortune of standing in its way.

14-6.png

14-7.png

14-8.png

Totem Lurantis
Aura: +2 Speed
Lv24 @ Power Herb (Low Sweep/X-Scissor/Solar Blade/Synthesis, Ability: Leaf Guard, Bold nature, IVs: 31/31/31/1/31/31, EVs: 252 HP / 64 Def / 64 SpD / 130 Spe)

Ally Kecleon
Lv22 (Sunny Day/Ancient Power/Dizzy Punch/Screech, Ability: Color Change, Jolly nature, IVs: 30/10/30/10/30/10)

Ally Comfey
Lv22 (Sunny Day/Floral Healing/Flower Shield/Magical Leaf, Ability: Flower Veil, Timid nature, IVs: All 30)

Lurantis will summon Kecleon at the end of turn 1, and then summon Comfey after Kecleon faints if it has less than 66% HP left.

There's a lot to contend with here. Totem Lurantis has a super-effective X-Scissor and a Solar Blade that actually outdamages it, plus its ally Kecleon can undo the effects of my X Defenses with Screech. To make matters worse, the Totem carries Synthesis, and since Struggle chooses a random target, it's very likely that Kecleon will the first to faint... and its second ally, Comfey, will do a good job of propping up Totem Lurantis with its status moves if it gets summoned.

Regardless of how things may go, I'll almost certainly want to lead with an X Defense, rather than expose Phart to an unrestrained attack. So I do just that. Totem Lurantis uses up its Power Herb to launch Solar Blade, taking Phart down to 83/105 HP, or 89 HP after Leftovers recovery. That's actually not too bad, though of course the cavalry is about to arrive.

14-9.png

Since I'd rather not lose the Defense boosts straight away, I use a Guard Spec. The Totem uses Solar Blade just before Kecleon can use Sunny Day, meaning the attack still needs to charge and the turn passes without any damage. Did they not discuss tactics beforehand? Anyway, I use a second X Defense, and a combination of Solar Blade and Dizzy Punch takes Phart to 78 HP and confuses it. The third X Defense goes on without much issue, with Phart still in green HP, but Kecleon at least has the brains to switch to Ancient Power.

Now at +6 Defense, I move on to X Attacks, using two of them before Phart drops into yellow HP and the Guard Spec. wears off. I use another one, and the opponents fumble the Sunny Day/Solar Blade timing again, giving me a chance to heal up Phart with a Lemonade. Now fairly safe even from critical hits, I use a third X Attack and a Dire Hit, with Phart now fully statted up and almost ready to roll.

14-10.png

I say "almost" because it's still confused, and the Guard Spec. is about to deactivate. To remedy that, I use a Full Heal followed by another Guard Spec., and as I expected, our foes mess up the timing of Sunny Day yet again and give us a free turn. Even so, it's not exactly safe to Struggle when a crit Solar Blade might bring Phart into KO range, so I use another Lemonade... only for Kecleon to confuse it again with Dizzy Punch. But I'm feeling lucky, so I have Phart try Struggle anyway. It doesn't work. The second attempt is rather more successful, KOing Kecleon in a single hit!

14-11.png

This does leave Phart on 44 HP, however, so I have to heal it up again. Totem Lurantis continues on as before, dealing scratch damage with Solar Blade as the sunlight fades away. Phart is able to strike through its confusion and deal approximately 40% to Lurantis with a +6 crit Struggle, just enough to summon the next ally. Uh-oh.

14-12.png

Not having much else to do, I try Struggle again. Totem Lurantis heals itself to full with Synthesis first, and Comfey uses Flower Shield to raise Lurantis's Defense (though Phart will ignore this with Unaware). Phart shakes off its confusion but can only bring Lurantis back to where its HP was before, and brings itself down to 49/105 HP. I use a Super Potion, Phart gets lightly scratched by X-Scissor, and Comfey heals Lurantis up to full with Floral Healing. I guess it'll be a matter of waiting for Struggle to hit Comfey enough times to KO it...

Comfey reactivates Sunny Day on the next turn and Phart is able to target it with Struggle, bringing it straight into red HP - with no way to restore its own HP, the next Struggle will take it out. Unfortunately, Phart targets Totem Lurantis with the next Struggle, but Comfey decides to use Magical Leaf instead of helping out with Floral Healing. After using Magical Leaf again, Struggle takes Comfey out for good.

14-13.png

Nearly there. I heal Phart up again and Totem Lurantis follows suit with Synthesis. It then lands a critical hit with X-Scissor, knocking Phart into red HP after Struggle recoil, which at least justifies me playing it so cautiously by splurging on X items the whole battle. A Lemonade later, Phart manages to knock Lurantis into the red, which prompts it to use Synthesis. I have to heal Phart again to keep it out of KO range, and after another couple of Struggles, Lurantis is out of Synthesis PP. A final Super Potion is enough to make it safe to Struggle again, smashing Totem Lurantis into oblivion.

14-14.png

14-15.png

A fairly fun fight, even if I did play it very carefully as usual. It was just a shame to see that Solar Blade + Sunny Day non-combo play out three times when it would've been much smarter for Lurantis to use X-Scissor instead. I know the enemy AI is prone to shitting the bed when it's controlling more than one Pokémon, and that's hardly exclusive to Totem fights, but still... it does suck when the "smart" AI fails to take into account a decision it's literally just made on the same turn.

14-16.png

Another shiny lump of tat to decorate the save menu! Mallow gives me 10 Nest Balls as well, then tries to convince Lana and Kiawe to try some of her remaining purple slurry that Lurantis didn't get round to eating. They're about as keen on the idea as I am, so she takes it off to Olivia instead and the three captains make their exit.

14-17.png

"Woo, yeah, cousin! Four trials! Oh yeah!"

Not actual dialogue, but it certainly could've been. Kukui gives me the Smart Strike TM and points me towards the Dimensional Research Lab in Heahea City. Before that, though, I'll pick up a few more items in Lush Jungle: a Tiny Mushroom, an X Attack, a PP Up, a Big Mushroom, and a Big Root. Largely crap, but extra stuff is extra stuff.

14-18.png

And speaking of extra stuff, another trip to The Phart Zone wins me another grand prize. I think that's my third Big Nugget now? Pity I couldn't win at the lottery shop that gives out Master Balls. The rest of my visit doesn't amount to much - I upgrade a 2-star bouncy house to its 3-star equivalent, but I don't have any real need for it right now. A trip to Poké Pelago isn't much more exciting, though I do get a Lv. 11 Jynx to join my team, which pleases me as an enjoyer of underlevelled Pokémon. Maybe I should take Kukui's advice and carry on with the story.

14-19.png

Haha, silly Lillie! Imagine trying to use a Cosmog in battle. Foolish girl.

She tells me the professor is waiting inside for me and asks how my trials have been going. So of course I tell her they were all too easy, and she figures that's why my Pokémon looks so content.

14-20.png

There's a few points throughout the game like this, where someone you're speaking to will refer to the first Pokémon in your party. I know the game can't account for every possibility, but it's kind of amusing to see Lillie referring to my Cosmog so nonchalantly. She's gone to such efforts to hide Nebby because it's a secret mysterious stolen Pokémon that can't fight on its own, and yet not only do I have the very same Pokémon myself, I've been using it to smash the shit out of the entire island challenge.

14-21.png

Oh hey, it's that lady from that spin-off game. I get a bit more context on Lillie's situation while I'm here, and I also get a Zoom Lens, for those times when Struggle's perfect accuracy isn't accurate enough. Once I'm done learning new stuff, I head outside again, only to be met with... a crack in the sky? That's what it looks like, at least for the few seconds before it fades away again. A little concerning, but it's not like I can do anything about it personally.

14-22.png

Another gift from Samson Oak for collecting 40 Totem Stickers. I don't need it, but since it's free and I was in the area, I thought I may as well. Time to head through Diglett's Tunnel now - these ones are nice Diglett that don't have Arena Trap, so maybe it won't be so bad.

14-23.png

Olivia's spent her time as a roadblock up until now, not letting me through until I'd defeated all three of Akala Island's trials, but now I'm allowed past her at last. I come across an Escape Rope and a Dusk Ball, as well as a Worker in a dead-end area.

14-24.png

Worker Frank
Shieldon Lv22 (Taunt/Metal Sound/Take Down/Iron Defense, Ability: Sturdy, IVs: All 15)

It may be bulky, but none of its status moves affect Phart, and Take Down hurts it as well. 4 Struggles bring it into the yellow, but Phart naturally needs healing after that, and then another 2 Struggles are enough to do it in. Back along the proper path to Route 9, there's an X Attack, a Fire Stone and a Hyper Potion, plus a brief encounter with some Aether Foundation Employees who've been sorting out problems with the local Diglett population. Past all of that lies another Trainer.

14-25.png

Worker Vaclav
Archen Lv22 (Scary Face/Pluck/Ancient Power/Agility, Ability: Defeatist, IVs: All 15)

Since I forgot to heal Phart after the last battle, it can only manage one Struggle before needing healing, taking around 25% of Archen's HP. It does require healing once more before it can achieve the 4HKO, but it's a fairly easy battle overall thanks to Defeatist kicking in. There's a Nugget just next to Vaclav, then I have to backtrack to a Trainer that I missed earlier.

14-26.png

Worker Jeff
Alolan Diglett Lv22 (Mud-Slap/Magnitude/Bulldoze/Sucker Punch, IVs: All 15)

Can't help but notice neither of them know Dig.

The battle is easy enough either way - both Diglett are fixated on using Sucker Punch, which means Phart needs healing twice, but Struggle is a 2HKO on both of them thanks to Diglett's negative bulk. That's the last of the Workers, but there is one more battle before I can leave, and it's a little more interesting than the others.

14-27.png

14-28.png

Team Skull Grunt and Team Skull Grunt
Ekans Lv23 (Glare/Acid/Bite, Ability: Shed Skin, IVs: All 15)
Salandit Lv23 (Ember/Dragon Rage, Ability: Corrosion, IVs: All 15)

A couple of Team Skull Grunts were loitering by the exit and decided to challenge me. But luckily for me, Hau showed up as well, so I get to fight them in my first Multi Battle.

Pokémon Trainer Hau (Multi Battle partner)
Eevee Lv23 (Bite/Quick Attack, Ability: Run Away, IVs: All 15, EVs: 252 Atk)
Pikachu Lv24 (Quick Attack/Electro Ball, Ability: Static, IVs: All 15, EVs: 252 Spe)
Noibat Lv23 (Wing Attack/Bite, Ability: Infiltrator, IVs: All 25, EVs: 252 Atk / 252 Spe)
Dartrix Lv25 @ Grassium Z (Razor Leaf/Pluck, Ability: Overgrow, IVs: All 0, EVs: 252 HP / 252 Atk)

While I'd obviously rather do the fight as a 1v2, there's nothing I can do to avoid it, nor do I have any way of targeting Hau's Pokémon myself, so I'll just accept the free help. Phart dodges Salandit's Ember and hits Ekans for around 33%, Eevee uses Bite on Salandit and deals a bit more than Phart did, and Ekans paralyses Phart with Glare. The next Struggle hits Ekans again, and Eevee gets ganged up on and fails to attack due to flinching. After exchanging more attacks on turn 3, everyone is looking weak, with both opponents in the red. I use a Lemonade on Phart as Eevee KOs Salandit with Bite, then it finishes the job on Ekans with Quick Attack right afterwards.

14-29.png

Team Skull decide to call it a day and retreat, and Hau hands me a Max Ether, just in case I ever miss using Splash. Not that it would help me right now, as I've been silently healed after that battle - I was expecting it, because free heals tend to be a thing with Multi Battles, but it burdens us all the same. Phart is not exactly up for fighting anyone with 40 Splash PP, so I ninja my way past the Trainer on Route 9 (stopping off for a quick chat with Looker in the process) and make my way to Konikoni City, mostly so I can fly back to it later on.

14-30.png

Ooh, pretty! Now let's go somewhere else.

I stick with the tried-and-tested method of finding a Buneary on Route 1 and draining all of Splash's PP against it, keeping Phart healthy in the process thanks to Leftovers. However, I do keep exactly 1 PP left for Splash, as there's a battle coming right up in which it may prove useful. 39 Splashes later, I flee the battle and fly back to Konikoni.

14-31.png

This man needs the courage to confess his feelings to someone, and the way to do that is by seeing me use a Z-Move, apparently? I guess I can do that. I can technically beat him without a Z-Move and the battle will still count, it just wouldn't complete the sidequest. But I may as well do it properly since I'm here, so I equip Phart with a Normalium Z and get started.

14-32.png

Office Worker Dugal
Clamperl Lv23 @ Eviolite (Iron Defense/Scald, Ability: Shell Armor, Calm nature, IVs: All 31, EVs: 252 HP / 252 SpD)

Clamperl is built to do one thing and one thing only: tank. Phart's lucky that it gets to use Z-Splash. Less lucky is that it gets hit with a crit Scald and is burned, but it manages to immediately cure the burn and balance the scales. The first Struggle looks like a 5HKO, and Clamperl uses Iron Defense, though Phart remains blissfully Unaware of its boosts. I use a Super Potion and squeeze out a couple more Struggles, only for Clamperl to land another critical hit Scald and KO Phart. Oops! Let's reset and pretend that didn't happen.

I'll be a bit more cautious this time. Phart gets the Z-Splash boost as Clamperl uses Iron Defense, then manages 2 Struggles before needing a Moomoo Milk. I heal it again after the third Struggle, but Clamperl uses Iron Defense twice more, giving it the opportunity to land another couple of Struggles to win the battle. Dugal gives me a Max Revive and runs off to confess his love. He gets rejected, runs back to me for a moment, then runs off again to find his next true love. The restraining order practically writes itself.

While I'm busy licking my wounds after losing to some random Trainer from who knows where, I take a look around Konikoni to see what's available. I'd normally make a beeline to the TM shop in a normal playthrough, but Phart obviously doesn't need any of them. The Incenses aren't much use either, as no type-boosting item is going to help Struggle, and the Lax Incense is redundant when I already have a Bright Powder. So the shops are a bit of a letdown, though I do buy a decent-looking white bag with the intention of dyeing it in Festival Plaza later on. The real good stuff can be found simply lying on the ground behind a bench.

14-33.png

Jackpot! While the passive recovery from Leftovers is always nice, the Eviolite probably outclasses it most of the time. A 50% boost to both defenses is pretty big, essentially being the same as a +1 stat boost in both Defense and Sp. Def, and it doesn't even get reset by stuff like Haze or Clear Smog or switching out. What I'm basically saying is that Cosmog is objectively superior to Zamazenta.

Inside Olivia's store, her Probopass delivers me a letter asking me to meet her at the Ruins of Life, as well as a Max Potion. Since I'm here, I also buy a set of five Fossils to revive later on. I had some cash to spare for them, and while I don't need any fossil Pokémon for anything, it's nice to see a bit of variety in Poké Pelago besides my slightly inbred Ralts brigade. Anyway, that's basically it for Konikoni City, so I'll finish up on Route 9 now.

14-34.png

Police Officer Haruki
Herdier Lv24 (Helping Hand/Take Down/Work Up/Crunch, Ability: Intimidate, IVs: All 25)

I don't envisage Phart hitting very hard at -1 Attack, so I use an X Attack on the first turn. Herdier spends the turn using Work Up, and Crunch brings Phart down to 86/108 HP afterwards, which would be alright if not for it getting the Defense drop too. With Struggle falling short of a 4HKO, I use an X Defense and a Super Potion, then have Phart Struggle twice again as Herdier uses a couple more Work Ups. A second Super Potion into a crit Struggle is just enough to KO Herdier.

I heal Phart up, then head towards the coastal part of the route. There's a Net Ball and an X Accuracy, but more importantly, a Fisherman who's up for a battle.

14-35.png

Fisherman Mike
Chinchou Lv23 (Water Gun/Confuse Ray/Bubble Beam/Spark, IVs: All 15)
Tentacool Lv23 (Toxic Spikes/Water Pulse/Wrap/Acid Spray, IVs: All 15)

Phart immediately gets outsped and paralysed by Spark, but at least the attack didn't do much damage, and Struggle should be a 4HKO at worst. Thanks to the second Struggle landing a critical hit, that ends up being a 3HKO with help from a Lemonade. Tentacool is sent out and uses Acid Spray, putting Phart on 11/108 HP after Struggle recoil and now at -2 Sp. Def. Not great. I heal up with a Moomoo Milk and Phart takes a second Acid Spray, though it's still not hitting especially hard. I decide to just go for the 3HKO with Struggle instead of fiddling with X items, and the strategy pays off - it takes another Lemonade to KO Tentacool, but even a Water Pulse into -6 Sp. Def can't break through the Eviolite.

14-36.png

Another 5 Trainers to contend with here. We'll be able to defeat them without much effort, because Phart will obey my commands faithfully throughout, as always. Hopefully. I pick up a Heal Powder and an Adrenaline Orb before the first of five fights.

14-37.png

Gentleman Smith
Items: Full Restore
Jolteon Lv24 (Baby-Doll Eyes/Quick Attack/Double Kick/Thunder Fang, Ability: Volt Absorb, IVs: All 15)

I use a Guard Spec. and an X Attack before Jolteon can get any ideas about lowering Phart's Attack, with Baby-Doll Eyes getting blocked and the follow-up Quick Attack getting dodged. Phart's Struggle can only manage a 3HKO, which means Smith uses his Full Restore before the third hit, and I have to use a Moomoo Milk to keep it conscious. It's alright though, because Jolteon doesn't go for Baby-Doll Eyes, leaving it open to a KO from two more Struggles. There's a Preschooler to battle just off to the right, but I skip ahead and take on a Madame first.

14-38.png

Madame Sayuri
Items: Full Restore
Matron Trim Furfrou Lv24 (Baby-Doll Eyes/Headbutt/Tail Whip/Bite, Ability: Fur Coat, IVs: All 15)
Comfey Lv24 (Magical Leaf/Growth/Wrap/Sweet Kiss, Ability: Triage, IVs: All 15)

Yuck. This one seems almost tailor-made to eat up X items. I really can't be bothered with Furfrou's Defense, so I use a Guard Spec., three X Attacks, and a Dire Hit, followed by a Lemonade to heal off the Headbutt/Bite damage. Even after all that, Struggle just misses out on the 2HKO, so I have to use a Moomoo Milk as Sayuri uses her Full Restore. Furfrou finally goes down after a second Moomoo Milk, and Comfey falls soon after to a 2HKO from Struggle.

14-39.png

Well, it's finally happened. Phart's gone rogue. I still have 7 battles to complete before the obedience cap increases from Lv. 35 to Lv. 50, so until then, I'll be fighting with a disobedient Cosmog.

I'm not sure exactly how the disobedience mechanics work (and I was actually planning on doing a bit of research myself in time for the next part), but if I'm understanding what I've read correctly, Phart will have just under a 50% chance of using Struggle whenever I tell it to, and will disobey me and waste its turn otherwise. Whatever the case, I still have more fights to win, so I'll just crack on and see what happens. Let's start with that Preschooler I skipped over earlier.

14-40.png

Preschooler Liam
Magby Lv23 (Feint Attack/Fire Spin/Clear Smog/Flame Burst, Ability: Flame Body, IVs: All 10)
Ledian Lv23 (Reflect/Safeguard/Mach Punch/Silver Wind, IVs: All 10)

I've not done myself any favours by forgetting to heal before this battle, but it's nothing a Moomoo Milk can't fix. Magby deals chip damage between Flame Burst and Clear Smog, and as expected...

14-41.png

Nothing in particular happens, Phart just does nothing for this turn. It does execute Struggle on the next turn for 40%-ish of Magby's HP, but needs healing again afterwards, and it simply turns away on the next turn instead of attacking. I use a Super Potion, and Phart chooses to land a Struggle, but needs its HP topping up once more in the aftermath - the Fire Spin damage is starting to add up. After spending a turn loafing around, Phart lands the third Struggle and KOs Magby, bringing out Ledian.

A quick Lemonade as Ledian uses Reflect, then a Dire Hit to help ignore the screen. Ledian continues to spam Reflect as Phart slowly lands two Struggles, needing just one more for the KO, but its HP falls low enough that a Silver Wind might knock it out. One last Lemonade solves that problem, and the third Struggle connects without issue. Once the battle's over, I pick up a Cleanse Tag, a Super Repel, a Dusk Ball and a Revival Herb before a Punk Girl comes into view.

14-42.png

Punk Girl Melissa
Ariados Lv24 (Scary Face/Night Shade/Shadow Sneak/Fury Swipes, IVs: All 15)

Phart begins by pretending not to notice me as Ariados uses Scary Face twice, and the eventual Struggle only threatens a 6HKO. Since attacking has now become more difficult, I use an X Attack to make the successes more impactful, and Phart is able to bring Ariados into yellow with a successful Struggle on the next turn, though it needs a Moomoo Milk right afterwards. It manages another Struggle, bringing Ariados into the red, and then stays obedient enough to land the fourth Struggle and KO it. Past Melissa, I find a Hyper Potion and a Spell Tag, but it seems there's trouble brewing up ahead.

14-43.png

Team Skull have apparently decided they're going to sell this Slowpoke, and neither the Aether Foundation Employee nor her begoggled boss seem up for defending it, so it falls to me as the only person with a spine to save Slowpoke.

14-44.png

Team Skull Grunt
Alolan Raticate Lv24 (Pursuit/Hyper Fang/Assurance/Crunch, IVs: All 15)

Not exactly a grunt-mon I was hoping to see, especially not at a time like this. I start with an X Defense to protect against Crunches, and Phart is able to dodge the first one, giving me time to use an X Attack. The second Crunch does land, but only takes it down to 96/110 HP, so I try to order a Struggle. Phart deals 33%-ish after one turn of disobeying, but the next Crunch lowers its Defense, forcing a Lemonade to be used. Then another Crunch gets another Defense drop, so I have to use another X Defense. Phart manages to land a second Struggle, heals back to full with a Moomoo Milk, and has enough time to loaf around for a turn before KOing Raticate with Struggle number three.

Team Skull abandon their Slowpoke project and flee the scene, leaving me to be praised by the Aether staff. The totally-not-suspicious one with the goggles invites me to the Hano Grand Resort after my grand trial so I can see something cool. Even Rotom doesn't seem to think much of him. But the grand trial can wait for now... I've got to swot up on disobedience mechanics. The last thing I need is Phart throwing a tantrum in front of the kahuna.
Trainers defeated: 123/427
 
:sm/lycanroc-midnight: :sm/pyukumuku:
Right then, obedience. Not a mechanic I've ever "had" to learn about in much detail, because I very rarely play any of the games in a way that makes it relevant. I once used the traded Onix you get in Violet City in a Gen 2 playthrough, and I wanted to use Hisuian Growlithe in a run of Violet so I had to cheese Bloodmoon Ursaluna with a team of high-level disobedient ghosts in order to get it... and I think that's it? So I've not much experience of being ignored by my own Pokémon. Thankfully there are people on the internet who know more than me.

15-1.png

I knew it was possible for Pokémon to choose a different move from the one you selected, but I didn't know that stopped being a thing after Gen 4. (Not that Phart would've had any different moves to choose anyway.) So according to this table, there are 6 actions a Pokémon can take when it disobeys you in USUM: it can fall asleep, hit itself as though it were taking confusion damage, or simply skip its turn, with the last one coming in 4 exciting flavours. Cosmog can't learn Snore or Sleep Talk, so that seventh tick is not relevant here.

That's all well and good, but what are the actual odds of Phart disobeying me? Bulbapedia's obedience formulae only go up to Gen 4, so I have to look elsewhere, but I did come across this post here on Smogon by Amras Anarion that has the most-likely obedience formula for Gen 5 onwards. A bit of fiddling around in Excel later, I cobbled together a chart that (hopefully) shows the obedience rates at each level and for each number of Stamps earned by defeating the kahunas.

15-2.png

I know it cuts off at the bottom, but it wouldn't all fit on the screen at once, and those missing values aren't relevant to me. If Phart reaches Lv. 92 before Olivia I will actually eat my game cartridge.

So as it stands, with one kahuna defeated and Phart at Lv. 36, it has a 48.61% chance of obeying me, which seems about accurate. I wasn't recording the exact rate of obedience/disobedience in the last part, but if you told me it was about 50:50, I'd believe you based on my experience. It also looks like the obedience rate will get a bit lower if it grows to Lv. 37 before Olivia, but not to any degree that I'd expect to notice, so that should be fine.

Referring to the linked post once again, when a Pokémon does decide to disobey, it seems as though the game starts by calculating if the Pokémon will take a nap. In Phart's case, as a Pokémon one level above the obedience cap, there is a 1 in 256 chance it will decide to put its non-existent feet up. Failing that, the game then runs the check to see if the Pokémon will hit itself in confusion - it uses the same formula as the taking-a-nap check, but with an extra x2 multiplier, so Phart would have a 1 in 128 chance of hitting itself in the face. If that also fails to happen, then the Pokémon simply chooses an action that skips its turn, apparently at random.

15-3.png

I'm not 100% certain I've read things correctly, so I decide to do a bit of testing to confirm. I get into fights with 5 separate wild Buneary, have Phart use Splash all 40 times in each fight, and record how often it disobeyed and what actions it took when it was acting up.

In total, Phart disobeyed me 201 times while using 200 Splashes, putting its obedience rate at 49.88%, which is very close to the actual rate of 48.61%. Its choices of actions were as follows:
  • 56 turns where it was loafing around
  • 49 turns where it pretended not to notice
  • 49 turns where it turned away
  • 47 turns where it wouldn't obey
  • 0 turns where it hurt itself in confusion
  • 0 turns where it took a nap
It seems I got a bit lucky having Phart avoid the last two options throughout all those turns, but they are very unlikely to happen, so I don't doubt the formula or anything.

In summary: when Phart is disobedient, it has a <50% chance to attack. When it decides not to attack, it will usually just skip its turn, with a very small chance of falling asleep or hitting itself in confusion. For every level it gains past the obedience cap, the odds of it choosing sleep/confusion increase slightly, and the overall odds of it obeying me decrease slightly.

Right, enough of that. Something about a grand trial?

15-4.png

There are still 3 Trainers I need to defeat here before I can move on to Olivia, the first of whom is a Fisherman staring out to sea.

15-5.png

Fisherman Vernon
Wishiwashi Lv24 (Aqua Ring/Brine/Take Down, Ability: Schooling, IVs: 30/15/30/15/30/15)

As this Wishiwashi has reached Lv. 20, it immediately transforms into the far more fearsome School Form, meaning Phart will not be doing much damage even if it does obey me.

I use an X Attack, and Wishiwashi uses Aqua Ring in response, not attacking just yet. Phart's first Struggle only does about 20%, not enough given Aqua Ring is active, and Take Down deals 18 damage in response. So I use another X Attack, followed by a Lemonade as Phart dips into yellow HP, lest it get oblierated by Brine. The second Struggle knocks Wishiwashi into yellow, but Phart requires healing again afterwards. Another Struggle can't quite KO, but it does cause Schooling to deactivate, weakening Wishiwashi to the point where Phart can spend 3 turns ignoring me before KOing with a final Struggle.

That was trickier than I expected, but I suppose it did have 620 BST. I pick up the Leech Life TM just past Vernon, heal Phart back to full, then take on the next challenger.

15-6.png

Black Belt Kenji
Crabrawler Lv25 (Leer/Pursuit/Bubble Beam/Power-Up Punch, Adamant nature, IVs: 15/31/15/15/15/15, EVs: 252 Atk)

Phart is immediately struck by Pursuit, falling to 90/110 HP, and pretends not to hear me for 2 turns before eventually Struggling, dealing about 20% once again. That's not really enough, so I use a Lemonade and an X Attack, and once Phart decides to attack again, it leaves Crabrawler in range of a KO. Actually getting that KO takes a few more turns of grumpy pouting, but Phart finally knocks it out with a third Struggle.

I stop for a bit of foraging in the grass, picking up two Tiny Mushrooms and a Big Mushroom before heading on to the Ruins of Life. But I don't get very far, as my criminal past soon catches up to me.

15-7.png

By "criminal past", I of course mean my past experiences beating the snot out of wannabe criminals, not any rule-breaking on my part. Word of my exploits has reached Plumeria, Team Skull's resident big sister, and she's tracked me down to deliver some payback.

15-8.png

Team Skull Admin Plumeria
Golbat Lv26 (Poison Fang/Wing Attack/Confuse Ray, Ability: Inner Focus, Jolly nature, IVs: All 30, EVs: 252 Atk / 252 Spe)
Salandit Lv27 (Flame Burst/Dragon Rage/Poison Gas, Ability: Corrosion, Hasty nature, IVs: All 30, EVs: 252 Atk / 252 Spe)

I know by now that a disobedient Phart is not going to be winning without X items, so I lead with an X Defense and an X Attack. Golbat lands a Confuse Ray and a Wing Attack, dealing 10 damage, but as you'd expect, the combination of disobedience and confusion makes it very difficult for Phart to attack. It eventually deals 20%-ish with Struggle, so I use a second X Attack while Phart handily dodges a couple of Wing Attacks. The second Struggle does more respectable damage, though it takes another 6 turns before Phart can land another blow, and it falls just short of KOing Golbat. Another Lemonade and some loafing around later, Golbat finally faints, bringing out Salandit.

With Phart on 52/110 HP, Struggle will KO it if Salandit uses Dragon Rage, so I heal it up once more as it dodges a Poison Gas. It can't dodge two in a row, though, and after knocking Salandit into yellow with Struggle, a Flame Burst leaves Phart in KO range again. Luckily, a single Lemonade is all that's needed for Phart to use a second Struggle and defeat Salandit, ending the battle just shy of Lv. 37.

Plumeria flounces off somewhere, and I trail after her to go and buy more X items - it turns out using them in every single battle causes them to run out quite quickly. But it's only the X Attacks that are really running low, so I just buy 10 more of them and head back to Akala Outskirts.

15-9.png

Can't I just complete my grand trial in peace? At least Burnet clears off fairly quickly to go watch the Masked Royal. Lillie, on the other hand, has the audacity to fully heal Phart without asking. Yeah, thanks.

15-10.png

And here comes Olivia at the worst possible moment. However, she's kind enough to let me decline the battle so I can get ready, which in my case means telling Phart to use Splash several dozen times and having it pretend not to hear me around 50% of those times.

Once that's out of the way, the battle can finally begin. Let's hope I don't get silently healed again like when I fought Hala.

15-11.png

15-12.png

Island Kahuna Olivia
Items: Super Potion, Full Heal
Anorith Lv27 (Bug Bite/Smack Down/Metal Claw, Ability: Battle Armor, Careful nature, IVs: All 30, EVs: 252 Atk / 252 Spe)
Lileep Lv27 (Giga Drain/Ancient Power/Brine, Ability: Suction Cups, Impish nature, IVs: All 30, EVs: 252 Def / 252 SpD)
Midnight Form Lycanroc Lv28 @ Rockium Z (Bite/Rock Tomb, Ability: Vital Spirit, Adamant nature, IVs: All 30, EVs: 252 Atk / 252 Spe)

Phart's PP remains at zero this time, which is good news. I'm honestly not too worried about this fight, as Olivia's team consists of straightforward damage-dealers with no status trickery, and I've got enough Moomoo Milks to last a lifetime. Actually getting Phart to cooperate may be a problem though.

15-13.png

The battle begins with us facing down a washed-up decrepit old fossil, who sends out her Anorith. Bug Bite will obviously sting a bit, so I open with 3 X Defenses. Phart is on 56/110 HP after this, with Bug Bite dealing 12 damage at +6 Defense - a crit will hurt, but it shouldn't KO from full or anything. After a quick Lemonade, I start putting on the X Attacks, followed by a Dire Hit (which won't work against Anorith thanks to Battle Armor, but her other Pokémon will certainly feel it). One more Lemonade, then an X Speed to outpace Olivia's entire team, and Phart is ready for (in)action.

It actually chooses to land Struggle on the first attempt, leaving Anorith just above red HP, but it needs a Lemonade to bring itself out of KO range. Olivia of course uses this as an opportunity for her Super Potion, fully healing the Struggle damage. Phart then uses a second Struggle, but loses interest by the third attempt and refuses to obey. Another Lemonade later, it regains that interest and uses Struggle once more, KOing Anorith.

15-14.png

That 48.61% chance it had to obey me has now fallen to 47.30%. Probably too small for my human brain to notice, but it certainly doesn't help matters.

15-15.png

Olivia sends in her ace Lycanroc next, a nice change of pace from all the games where opponents are often forced to save their Mega/Dynamax/Tera for last. I don't know how much damage it'll deal, so I heal Phart to full again... which proves to be a very wise choice, as it immediately goes for Continental Crush. Sure, it only deals 18 damage, but a critical hit would've been a guaranteed KO had I not healed.

Phart chooses to loaf around as Lycanroc uses Rock Tomb, slowing down Phart to the point where Lycanroc outspeeds it. Not good when Bite has a 30% flinch chance. Still, Phart manages to hit it with Struggle straight afterwards, taking out 60%-ish of its HP. Once it's healed back up to full, Phart dodges Lycanroc's next Bite and obeys long enough to hit with another Struggle, taking the big scary dog thing out of the fight.

15-16.png

Last up is Lileep, the only special attacker on Olivia's team, though you'd be forgiven for thinking otherwise given the lack of Sp. Atk EVs and the Impish nature. A deliberate nerf, or an accidental oversight? It's hard to tell sometimes.

Whatever the case, I heal Phart to full to gauge the strength of its attacks. Giga Drain, its strongest attack, deals 16 damage to Phart, and it doesn't even have any Sp. Def boosts offsetting that damage. So I decide to just go on the offensive, not bothering with any more X items. Unfortunately Phart is not on board with my plans, and spends several turns pouting and ignoring me before finally using Struggle, landing a possible 2HKO if the damage rolls are kind to me. The Lemonades continue to flow while Phart messes around some more, and at last, Lileep gets hit by a second Struggle, KOing it and winning the battle!

15-17.png

Not nearly as bad as Hala's grand trial, but my resources were more limited back then and Phart didn't have such a big level advantage. Still, the main reward is that it's now obedient again, at least until Lv. 51.

Olivia shows off another fancy Z-Move pose that I won't need, then has a talk with Lillie about the enigmatic gasbag known as Nebby.

15-18.png

Yes, and you don't get shitstomped by them every day either, but here we are.

Hau shows up for his own grand trial next, and Lillie sticks around to watch, apparently not keen on following me to Hano Grand Resort to meet up with the Aether Foundation people. It's not like I'm in any rush to track down Faba either, not while there are Trainers to fight around the resort.

15-19.png

A bit of beach-combing here unearths 3 Pearls, 2 Soda Pops and 2 Heart Scales. But more importantly, there's a fair few Swimmers knocking about in the water, so I'll sink my teeth into them now. The first one is right next to a soggy Antidote.

15-20.png

Swimmer Chelsea
Pyukumuku Lv26 (Safeguard/Counter/Purify/Curse, Ability: Innards Out, IVs: All 15)

This one might be a bit tricky, as a well-timed Counter can KO Phart from full HP if it hits Pyukumuku hard enough, and if it doesn't, then it still has to be mindful of Innards Out. But since Pyukumuku doesn't actually have any conventional damaging moves, I decide to save my brainpower and just fully stall it out by spamming useless Full Heals, letting it burn through 75 PP and KO itself via Struggle. Hardly the most interesting gameplay, but it works. Maybe the next Trainer will be a little more conventional?

15-21.png

Swimmer Roddy
Gyarados Lv25 (Bite/Thrash/Leer/Twister, Ability: Intimidate, IVs: All 15)

Conventional, yes, but a bit stronger than I'd hoped. Gyarados immediately uses Thrash, hitting for a decent 24 damage, while Phart's Struggle proves to be pathetic in comparison. I have to use a Lemonade, and Gyarados gets confused after the second Thrash, though it still manages to Leer on the next turn (which Phart dodges) as I use an X Attack. The next Struggle hits harder but still doesn't do much, I use a second Lemonade, and Gyarados causes Phart to flinch with Bite. Things get a bit worse when it lands a Leer, making its attacks hit harder, but Phart manages to squeeze out 4 more Struggles between frequent heals to win the battle.

Once I've picked up a Dive Ball, it's on to the next battle.

15-22.png

Swimmer Laura
Goldeen Lv25 (Flail/Water Pulse/Aqua Ring/Fury Attack, IVs: All 15)
Staryu Lv25 (Swift/Bubble Beam/Camouflage/Gyro Ball, IVs: All 15)

Goldeen sets up Aqua Ring straight away, and Phart's Struggle only looks like a 5HKO, even worse than that once Goldeen restores some HP. Things look better when the next two Struggles land critical hits, but that leaves Phart on a mere 9 HP, so I stop for a refreshing bottle of milk before Phart uses two more Struggles for the KO. I use another Moomoo Milk once Staryu comes out, who falls victim to a fairly swift 4HKO from Struggle. To be fair, the AI fucked it over by trying to use Camouflage twice, in an attempt to turn it from a Water type into, um, a Water type. Now, who's next?

15-23.png

Swimmer Lawrence
Red-Striped Basculin Lv25 (Take Down/Crunch/Aqua Tail/Soak, IVs: All 15)
Poliwhirl Lv25 (Bubble/Double Slap/Rain Dance/Body Slam, IVs: All 15)

Another fairly heavy hitter in the form of Basculin, though it instantly neuters itself by using Soak, causing Phart to resist its Aqua Tail and take neutral damage from Crunch. Nice move. Phart manages a 5HKO with help from a couple of Lemonades, growing to Lv. 38 in the process and bringing Poliwhirl into the fray. It opens with Rain Dance as I use a Moomoo Milk, and while its Body Slams do force me to heal Phart again, they don't save it from a second 5HKO.

I come across some Black Glasses on a little island, then, in a slight change of pace, challenge a Black Belt instead of yet another Swimmer.

15-24.png

I wish I could stand on rocks like that. The sequence-breaking potential would be enormous.

Black Belt Ross
Mankey Lv26 (Seismic Toss/Swagger/Cross Chop/Assurance, Adamant nature, IVs: 15/31/15/15/15/15, EVs: 252 Atk)

Not bad for generic level-up moves. Mankey outspeeds and takes Phart down to 90/116 HP with Assurance, while Struggle does about a third of its HP in return. It uses Swagger as I heal up Phart, but rather than causing it to hit itself in confusion, it simply results in the second Struggle nearly KOing Mankey. A third and final Struggle does it in, a belated critical hit on Assurance not proving enough to fell Phart. One last Trainer before I'm done with beach battles.

15-25.png

Swimmer Alicia
Pelipper Lv25 (Mist/Water Pulse/Payback/Brine, Ability: Drizzle, IVs: All 15)

Pelipper opens with Mist, Phart uses Struggle twice and does very little. However, Pelipper speed ties Phart, and it moves on the second turn after Phart has recoiled itself to half HP, very nearly KOing it with a rain-boosted 130-power Brine. Oops! Time to heal up. I play a bit more cautiously until the rain expires, then let Phart get a bit more Struggle-happy. Even then, a critical hit on Brine at an untimely moment manages to reduce Phart to 1 HP, with it only surviving thanks to its affection bonus kicking in. After I heal it one last time, it defeats Pelipper with a seventh Struggle, finishing off the last Trainer after a messy fight.

I manage to ninja my way between a couple of angry Tentacool to pick up a Pearl String in the water, but they still just ambush me right afterwards. Luckily there's nothing stopping me from fleeing the encounters.

15-26.png

Tourists apparently don't like seeing Pyukumuku all over the beach, so they're hiring people to chuck them back into the water when they wander ashore. Completing my shift is simply a matter of tracking down 6 Pyukumuku along the beach and tossing them off into the distant sea - it's a slippery gooey job, but someone's got to do it. I get paid a cool $20,000 for helping out, and I can come back once a day to repeat the work, making it a nice source of income if I need it.

Now done with Hano Beach, I double back to the outside of Hano Grand Resort, where I receive a Rose Incense after watching a mock-wedding between two Pikachu. I also come across another Pikachu, this one seemingly some sort of celebrity, being bothered by a nosy Reporter.

15-27.png

Reporter Rita
Miltank Lv26 (Milk Drink/Bide/Rollout/Body Slam, IVs: All 20)

Milk Drink and Bide present a bit of a dilemma: either don't boost Phart's Attack and fail to break through it, or boost Phart's Attack and risk getting splatted by Bide. I start with an X Defense instead, since Body Slam might hurt no matter what, and Miltank uses Bide. This gives me a chance to use an X Attack and get a free hit in, which sadly only does about 20%. So I try another X Attack, and Miltank locks itself into Rollout, dealing 3 damage. Phart gets in 2 Struggles before Rollout misses, bringing both Pokémon into the red, and I heal Phart as Miltank uses Milk Drink. It then goes for Rollout again, and by hitting 3 times in a row, it can't use Milk Drink to prevent Phart from 3HKOing this time.

Rita runs off, leaving Master Chuuster to express his gratitude by gifting me a Pikanium Z and teaching me the pose. I mean, even if I did want to use a Pikachu, I'd just give it a Light Ball, but thanks anyway?

15-28.png

Faba's waiting for me in the lobby, as promised. He'd like to whisk me away to Aether Paradise to show me how cool it is, but I've still got battles to complete, so he gets very stroppy when I decline his request for now. I'll let him seethe for a bit while I finish up here. First on my list is a battle against a travelling songwriter.

15-29.png

Veteran Kiara
Trumbeak Lv27 (Echoed Voice/Supersonic/Screech/Growl, Ability: Keen Eye, Modest nature, IVs: 30/15/15/30/15/30, EVs: 252 SpA / 252 Spe)

The musical theme is cute, but it might get dangerous if it chooses Echoed Voice enough times. Trumbeak leads with Growl and renders Struggle almost useless, so I use a Dire Hit to bypass the Attack drop. It then opts for Supersonic, and Phart hits itself once before dealing a decent chunk with Struggle. Phart does need healing after this, and though another Struggle brings Trumbeak into the red, it's now hitting quite hard with Echoed Voice. However, the AI blows it by trying to reapply Supersonic instead of continuing the Echoed Voice chain, letting Phart KO with one more Struggle. We receive a Metronome as our prize for winning.

The next Trainer is a bit like the man with the Clamperl from the last part, in that you need to use a Z-Move during the battle to properly "complete" it for the purpose of the sidequest. So I fly back home once again, heal up, find a Buneary, use Splash 39 times, fly back, give Phart a Normalium Z, then proceed with the battle.

15-30.png

Dancer Ronda
Crabrawler Lv26 (Power-Up Punch/Pursuit/Dizzy Punch, Impish nature, IVs: All 31, EVs: 252 HP / 252 SpD)

Crabrawler gets in a Dizzy Punch before the Z-Splash, knocking Phart down to 96/116 HP, and Struggle only manages a 3HKO despite the +3 Attack. Even so, a couple of Lemonades helps Phart emerge victorious, and we receive a whopping 5 Full Heals for inspiring Crabrawler to show a little more confidence.

Phart ditches the Normalium Z for its Eviolite before we move on to the final battle, a couple of Golfers who are getting a bit too excited over a Machamp's muscles. Unfortunately, they're not willing to take turns battling me...

"Are you even serious about this? You've only got one Pokémon that can fight!"
"There's no point in even battling someone like you!"


Retrieving Ralts from the PC is easy enough, so I'm back and ready to battle in no time at all.

15-31.png

Golf Buddies Tara and Tina
Pom-Pom Style Oricorio Lv26 (Feather Dance/Double Slap/Air Cutter, Ability: Dancer, IVs: All 20)
Pa'u Style Oricorio Lv26 (Feather Dance/Double Slap/Air Cutter, Ability: Dancer, IVs: All 20)

Odds are one of them will use Feather Dance at some point, and the other one will immediately use it as well via Dancer, so I lead with a Dire Hit to ignore the Attack drops. Ralts is quickly taken out by Air Cutter, and Phart falls to 71/116 HP after the second Air Cutter scores a crit. I heal it with a Soda Pop, but two Air Cutters bring it back to where it was, so I try Struggle next. It deals a paltry 20% to the Pa'u Oricorio, and I can't even increase that damage because X Attacks won't be able to offset the Feather Dance drops. Not good.

Instead, I try healing Phart to full again and using an X Sp. Def - not a perfect strategy given Air Cutter's high critical-hit ratio, but it does help. After a couple more X Sp. Defs, Phart is only taking 4 damage from each Air Cutter, a notable improvement. This gives it the chance to land a Struggle on each Oricorio as they switch to using Double Slap. A couple of Moomoo Milks later, Phart manages to KO the Pa'u Oricorio with a lucky Struggle.

15-32.png

The battle is much easier from this point onwards, with Phart still needing a couple of Lemonades but otherwise having no issue landing a 5HKO on the remaining Oricorio. The Golfers depart after their loss, the mood ruined for them, and the "Machamp" reveals itself to be a man in a costume, trying to earn some cash by acting as a Machamp caddy. Somehow he was able to pass as a real Machamp. Surely any costume that convincing would cost far more money than he could ever hope to earn? He gives me the Attract TM and tells me to clear off so as not to blow his cover.

15-33.png

I'm now essentially done with Akala Island, the only things I haven't touched being a few sidequests that lead to wild Pokémon encounters. Given that they're not Trainer battles, the items they reward me with aren't very useful, and they'd award Phart with more Exp. Points and push it closer to disobeying me, I'm choosing to skip over them. But I do stop to revive the fossils I bought earlier, adding a bit more variety to my PC boxes and Poké Pelago.

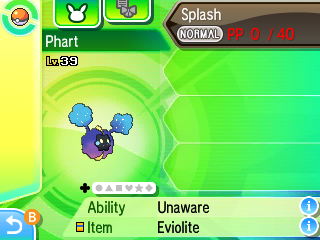
15-34.png

15-35.png

Two islands down, two (plus Aether Paradise) to go! I have to say, I've been a bit surprised by how easy I found Akala Island relative to what I was expecting. There have been some challenges, of course (the Battle Royal springs to mind), but it's mostly been a case of "spam X items, use healing items, spam Struggle, use healing items" until the opponent is dead. I suppose that's partly because of all the extra resources that I've had access to post-Melemele: Mantine Surf, better Festival Plaza facilities (which now cover pretty much every healing item I use), Poké Pelago, things like the Eviolite, more money from fighting more Trainers, Pyukumuku-chucking, and probably other stuff I've forgotten. The only things I've really needed to buy from regular shops are X items.

Still, I don't think I'll be changing my playing style. Phart will probably just lose if I don't pump X items into it during important fights, and with Splash as its only move, it's not like I can play it any differently. Well, technically I could go full item spam and let its opponents KO themselves with Struggle instead of having Phart do it - and that might actually be a better strategy when it starts to disobey again - but it's not like that would make things any less repetitive or tedious. So I'll just slog on as usual. After all, this was never meant to be about "fun".
Trainers defeated: 137/427
 
:sm/nihilego: :sm/machoke:
I've gathered up plenty of Festival Tickets since the last time I bothered doing any missions, and yet I don't really get anything interesting from using them all up. But I do swap out a general store and a bouncy house for two fortune-telling tents, as the fortune-readings can sometimes increase the amount of FC I get from doing missions, and the other facilities weren't doing anything useful for me.

16-1.png

Having achieved maximum milk, I probably won't have to worry about HP restoration for now. There will eventually come a point where Phart has too much HP for Moomoo Milks to be anywhere near a full heal in battle (it's already on 119 HP), but that shouldn't be for a while yet.

16-2.png

Back to the story. Faba whisks me off to Aether Paradise alongside Hau, and we get to enjoy a tour of all the facilities. It's quite interesting from a story/lore perspective, but for the purpose of this challenge, it's just an exercise in mashing the A button.

16-3.png

Immersion ruined. I was so invested in RPing Elio as a man in his forties, and then this happens.

Once Wicke has taken us through the entrance floor, we move up to the conservation area, where I'm finally given control over my character again. Phart has been fully healed at some point during the change of scene - not good when there's a fight coming up that I need to win in 5 turns. Fortunately I'm able to return to the docks and catch a ferry back to Heahea, then fly back home for the usual PP-draining strategies.

Once Splash is down to 1 PP, I give Phart the Normalium Z again and return to Aether Paradise. Getting back to the conservation area doesn't take too long, and Hau and I get to meet President Lusamine.

16-4.png

milf real????

16-5.png

16-6.png

But there's barely time to process that revelation before a wild ??? appears out of nowhere. I double-check that I can still leave the conservation area during this part (I can), just in case I need to switch up my strategy, then save my game and take on the ???.

16-7.png

???
Aura: +2 Defense
Lv27 (Clear Smog/Psywave/Headbutt/Venoshock, Ability: Beast Boost, Calm nature, IVs: 31/1/31/1/31/31)

Alright, that's enough of the pretend mystery. We all know it's a Nihilego.

The main problem with this fight is that Nihilego will automatically flee on turn 5 if it's in a position to do so. While I don't have to defeat it as part of my self-imposed restrictions, or even just to continue with the story, I'd like to try anyway because it's a mandatory encounter and fairly plot-relevant.

Nihilego's first Venoshock knocks Phart down to 86/119 HP as it uses Z-Splash. After the second Venoshock and a Struggle, Phart is now in KO range, whereas Nihilego has lost maybe 33%? That's not good enough, especially once it clears the +3 Attack boost with Clear Smog as I heal up Phart. Time to reset.

Attempt 2... it opens with Venoshock again, then Psywave. I use a Moomoo Milk on turn 3, and it wipes the boosts with Clear Smog again, ruining another attempt. However, it seems as though when it flees on turn 5, it does so with negative priority, which means Phart can get another attack in if it lasts long enough. So at least I learned something from this go.

Attempt 3 is even worse as it uses Clear Smog on turn 2. Attempt 4 fails after another Clear Smog, but I am able to confirm at last that it flees after Phart attacks on the fifth turn. Attempt 5 plays out in much the same way, not dealing enough damage to Nihilego before it escapes. This might take a while...

16-8.png

Attempt 12 comes very close to success, as you can see above, but it still falls short - Phart's HP was too low to use Struggle on turn 5, meaning Nihilego got away again while I was using a Moomoo Milk. Still, I'm gradually learning more about how Nihilego acts. It's not quite as stupid as wild Pokémon since it never goes for Headbutt, but its choice of attacks seems to be fairly random with a preference for Venoshock. It didn't use Clear Smog at all on this attempt, which is good news since it's basically an instant-loss button for me.

Since Nihilego never seems to open with Clear Smog, maybe it only prefers to use it when Phart has stat boosts for it to remove. This gives me an idea for a different strategy: use a Dire Hit on turn 1, then Z-Splash, then a Moomoo Milk, and hopefully 2HKO it with Struggle. It's still risky, but this way there should only be 2 turns where it might choose Clear Smog instead of 3. I give it a try, and a few more runs grind to a halt when it chooses Clear Smog anyway, but the 16th attempt proves lucky enough for Phart, who finally lands the KO on Nihilego before it flees. Hurrah!

16-9.png

Well, that could've gone worse. Nihilego warps back home after the battle ends, and the Ultra Recon Squad show up (minus their goggles) to tell us about lots of things with Ultra in their names. Also something called Necrozma, which is going to arrive one day and steal all of Alola's light. Fantastic.

Between the random alien invasion and the prospect of Alola being plunged into darkness, the tour of Aether Paradise has really run its course. Wicke takes Hau and I to the docks to catch a ferry, handing me a Psychic TM before we depart.

16-10.png

16-11.png

Third island ahoy. And unlike SM, you don't get immediately thrust into a battle with Hau in these games, which is nice, though there's not much else to do before the battle's forced upon me regardless. I get a Nugget from a man in the ferry terminal, a Totem Sticker on the wall outside it, and then have to fly home again because I got healed at some point after vanquishing Nihilego.

16-12.png

Oh, and the Pokémon Center nurse decides to take a break with me. I don't get much out of this event aside from some more Poké Beans, but it caught me by surprise, and it was kind of cute.

16-13.png

As I said, there's nothing else left to do, so I can stop putting off this battle now.

Pokémon Trainer Hau
Dartrix Lv30 @ Grassium Z (Razor Leaf/Pluck, Ability: Overgrow, IVs: All 25, EVs: 252 HP / 252 Atk)
Vaporeon Lv28 (Water Pulse/Quick Attack, Ability: Water Absorb, IVs: All 20, EVs: 252 Atk / 252 SpA)
Noibat Lv28 (Wing Attack/Bite, Ability: Infiltrator, IVs: All 20, EVs: 252 Atk / 252 Spe)
Tauros Lv28 (Pursuit/Horn Attack, Ability: Intimidate, IVs: All 20, EVs: 252 Atk / 252 Spe)
Alolan Raichu Lv29 (Electro Ball/Quick Attack/Psychic, Ability: Surge Surfer, IVs: All 20, EVs: 252 SpA / 252 Spe)

Five Pokémon is a lot, even if one of them's a Noibat. I naturally start with an X Defense, Dartrix landing a crit Pluck that takes Phart to 88/119 HP. That feels safe enough, so I use two more X Defenses, causing Dartrix to deal a whopping 10 damage with its Z-Move. I'm then free to put 3 X Attacks and a Dire Hit onto Phart, healing it a couple of times after critical hits from Razor Leaf, at which point it's able to 2HKO Dartrix with Struggle.

Hau sends out Noibat next, with Phart on 47 HP. It could probably take a crit Bite + Struggle, but I'd have to reset if it didn't, so I use a Lemonade first before attacking. Bite deals 6 damage, then significantly more when it crits and flinches at the same time, but Phart OHKOs it right afterwards.

Up next is Tauros. I use another Lemonade, its Pursuit and Horn Attack deal single-digit damage, and it gets a 2HKO from Struggle in return, bringing in Vaporeon. Phart dodges the first Water Pulse as I heal it, then a second as I use an X Sp. Def. The third Water Pulse does hit, but only for 15 damage, and Vaporeon also suffers a 2HKO after failing to confuse Phart.

16-14.png

Last up is Hau's Raichu, whose first Psychic misses Phart thanks to its affection bonuses going into overdrive in this battle. It deals scratch damage after choosing Psychic again - I guess the AI doesn't know how to read the power of Electro Ball? - and its flimsy physical bulk sees it taken out by a single +6 crit Struggle.

After losing, Hau tells me had his breath held throughout the whole battle, which seems unlikely as he's not dead. He then hands over a Lycanium Z that he doesn't need since he doesn't plan on using a Lycanroc. Neither do I, to be fair, but maybe his bag doesn't have unlimited space like mine.

16-15.png

Kukui is supposed to be somewhere in Malie Garden, so I'd better go looking for him, otherwise Lillie will be stuck blocking off the rest of Malie City til the end of days. After another trip home to undo another forced heal, I set off through the garden. A dead-end path to the right leads to a Sightseer.

16-16.png

Sightseer Mitch
Raticate Lv28 (Pursuit/Hyper Fang/Assurance/Crunch, IVs: All 15)

Very heavy on the Dark moves, considering it's not the Alolan form. Assurance deals around 20 damage per hit, but Mitch is luckily not bright enough to recognise that Crunch would be a better option, leaving Phart to 5HKO Raticate after a couple of Moomoo Milks. A Grassy Seed lies at the very end of the dead end, but it's still a dead end, so I have to head back to the entrance and take the path to the left. There's a Luxury Ball, a Rare Bone, and another Trainer to fight along this section.

16-17.png

Preschooler Nancy
Cleffa Lv27 (Sing/Sweet Kiss/Copycat/Magical Leaf, IVs: All 15)

Not a particularly hard battle - it gets a 3HKO from Struggle while lightly grazing Phart in the process. I eventually come across Kukui in the middle of the garden, but decide to ignore him for now in favour of picking up a Rage Candy Bar and a Big Mushroom. The last item left lying around is a Thunder Wave TM, but I can't get to it without taking on a Sightseer first.

16-18.png

Sightseer Akali
Raichu Lv28 (Thunder Shock/Tail Whip/Quick Attack/Thunderbolt, Ability: Static, IVs: All 15)

This one looks like a 5HKO, maybe a 6HKO if I get unlucky, but I'm more inclined to expect the latter when Phart is unlucky enough to activate Static on turn 1. It ends up being a 5HKO after all, and Phart only gets paralysed twice across the 5 hits, eating up a Full Heal and two Lemonades in the process.

With the garden mostly cleared out, I catch up with Professor Kukui alongside Hau, letting him know that we've seen aliens and wormholes and stuff. He's suitably impressed, and points us both in the direction of Mount Hokulani for the next trial.

16-19.png

16-20.png

Always makes me laugh.

16-21.png

"Hello there, Trainer! Oh, you only have one Pokémon ready for battle?"
"Why don't we battle two Pokémon at a time?"


That's my cue to go and fetch Ralts from the PC boxes. It doesn't take too long to get back, even though I'm not allowed to ride Tauros inside Malie Garden.

16-22.png

Tourist Couple Landon and Yuriko
Alolan Vulpix Lv28 (Mist/Feint Attack/Hex/Aurora Beam, Ability: Snow Cloak, IVs: All 15)
Vulpix Lv28 (Will-O-Wisp/Feint Attack/Hex/Flame Burst, Ability: Flash Fire, IVs: All 15)

Ralts gets immediately taken out by a Hex, and Phart hits the Kantonian Vulpix for around a third of its HP. It then manages another Struggle that does slightly less to the Alolan Vulpix before needing a Moomoo Milk. After another Struggle and a Lemonade, the Kantonian Vulpix is down to red HP, but Phart prolongs the suffering by targeting the Alolan Vulpix instead of KOing it. It does get the KO after another heal, though, and finishes off the Alolan Vulpix with a couple more Struggles.

Lillie stops roadblocking me now that I've found Kukui. She's heading off to the library to look for a book, but I think I'll busy myself with other stuff first. I start with the Community Center, where I receive a Strange Souvenir and a set of weather-related rocks, none of which will help me. I try checking out the flea market to see if they've got much on offer, but a Team Skull Grunt seems to think I'm about to snap up something she wanted, and so I get dragged into combat.

16-23.png

Team Skull Grunt
Mareanie Lv28 (Toxic Spikes/Wide Guard/Toxic/Venoshock, IVs: All 20)

Phart is not hitting very hard at all, but it manages 3 Struggles before needing a Moomoo Milk, and doesn't get hit by Toxic during the onslaught. It manages a 5HKO in the end, levelling up in the process.

16-24.png

The grunt loses interest in shopping after having to hand over her pocket money, so I check out what the lady was selling now that I actually have a chance. There's a replica of Ash's hat, plus a few pricier hats with colours based on various shiny Pokémon. I fork over $25,000 for the shiny Zygarde hat because it vaguely goes with my eyes. I think.

Back outside, I ignore Lillie for now and return a Dartrix that I'd been carrying around since Lana's trial to its owner, receiving a Mental Herb for my troubles. Then I head north towards the recycling plant, which holds some more tat to scoop up: an Antidote, a Nugget, an X Speed, and a Friend Ball from Samson Oak. It also holds a few Trainers, one of whom is a random Janitor by the grass.

16-25.png

Janitor Melvin
Trubbish Lv28 (Sludge/Stockpile/Swallow/Take Down, IVs: All 15)

Yep, two identical Trubbish. Phart manages two Struggles before the first Trubbish uses Stockpile, and since it's getting low on HP from recoil anyway, I heal it up and then use a Dire Hit. The guaranteed crits allow it to achieve a 4HKO, but not without getting poisoned first. Against the second Trubbish, I focus on HP restoration and Struggling, in the hopes that Phart will expel its own poison. That never actually happens, but after a few Moomoo Milks and a close call where Trubbish fully heals itself with Swallow at the last second, Phart eventually wins the battle.

16-26.png

I forgot I could do this - a bit of medicine via Pokémon Refresh fixes up Phart and heals its poisoning, saving me a Full Heal. Once that's sorted, I can take on another Janitor outside the recycling plant.

16-27.png

Janitor Shawn
Alolan Muk Lv28 (Acid Spray/Poison Fang/Minimize/Fling, IVs: 15/15/30/15/30/15)

I use an X Attack straight away, since Phart's not going to be breaking through those defenses on its own power, and it takes a bit of damage from Poison Fang while avoiding getting poisoned. Even at +2, Struggle only deals around 20%, and I have to heal it after a couple of attacks. Luckily we're granted some free turns when Muk switches to Minimize, and Struggle's perfect accuracy lets it deliver a 5HKO before Acid Spray can melt through it.

Once Shawn's defeated, his son is up next.

16-28.png

Ace Trainer Chase
Alolan Grimer Lv30 (Poison Fang/Minimize/Fling/Knock Off, IVs: 15/15/30/15/30/15)

I start with an X Defense this time as Phart will most likely be losing its Eviolite, and it immediately gets swatted down, falling to 100/124 HP after the Knock Off. Struggle barely does anything, so I have to follow up with an X Attack. That improves the damage output quite nicely, letting Phart finish off Grimer with 3 Struggles while dodging its attacks. Seeing his son take me on despite knowing he'd probably lose inspires Shawn to hire him, and he gives me a Twisted Spoon to show his gratitude. Thanks, it's useless.

16-29.png

A few more battles to be fought in this strange take on the Vermilion Gym. I have to cough up before I'm allowed in, but I do at least get a Soda Pop as compensation. Time to get started.

16-30.png

Kantonian Gym Lee
Minccino Lv29 (Swift/Sing/Tail Slap/Charm, IVs: All 20)

Ah yes, my favourite Kanto Pokémon. I use a Dire Hit in case Minccino tries Charm, and Phart dodges 3 Sings before getting put to sleep by the fourth. I give it the Soda Pop while it dozes, it shakes itself awake afterwards, and Minccino gets a 3HKO from Struggle. Who's next then?

16-31.png

Kantonian Gym Blair
Cutiefly Lv29 (Silver Wind/Draining Kiss/Sweet Scent/Bug Buzz, IVs: All 20)

Struggle deals roughly 25% to Cutiefly, and Silver Wind does almost as much back to Phart, so Bug Buzz will be even worse. I use an X Sp. Def while it fixes itself up with Draining Kiss, then heal up Phart and let it Struggle some more. It lands 3 hits before needing another Moomoo Milk, and the fourth is more than enough to KO Cutiefly, so we move on to our next fight.

16-32.png

Kantonian Gym Adrian
Smoochum Lv29 (Sing/Heart Stamp/Mean Look/Fake Tears, IVs: All 20)

Thanks to Smoochum's pathetic Defense and the fact it can only attack with Heart Stamp, this one's over in 2 turns. Only one more Gym Trainer to go.

16-33.png

Kantonian Gym Dallas
Fomantis Lv29 (Growth/Ingrain/Leaf Blade/Synthesis, Ability: Leaf Guard, IVs: All 20)

With Struggle looking like a 4HKO and Fomantis immediately setting up Ingrain, I use a Dire Hit to speed things along. Unfortunately, Fomantis proves quite good at timing Synthesis to keep itself afloat, so I essentially have to PP stall it before it goes down, but that doesn't take too long with Struggle hitting for 40%-ish each time. With all the minions defeated, I can move on to their interpretation of a Gym Leader.

16-34.png

Kantonian Gym Leader
Machoke Lv29 (Revenge/Knock Off/Vital Throw/Wake-Up Slap, Adamant nature, IVs: 15/31/15/15/15/15, EVs: 252 Atk)

Honestly expected a bit more, but at least a fully-invested Knock Off is worth preparing for. I use an X Defense on turn 1, and the incoming Knock Off deals 26 damage, though Phart's Struggle does piddly damage in return. For some reason, Machoke doesn't seem to want to use Knock Off again, so it settles for chipping away with Revenge and Vital Throw while Phart slowly works its way to a 7HKO. The prize for winning is some sort of novelty badge, along with 10 Soda Pops and some Poké Beans - actually more useful than the Z-Crystals I've been getting from trials!

I'm not quite done with the Kantonian Gym, as Ryuki has now appeared in the Gym and can be battled during each subsequent challenge. But I can't just go charging in to fight him now, because you can only take on the Gym once per day, so I have to wait until the clock strikes midnight.

16-35.png

Pokémon Trainer Ryuki
Turtonator Lv29 (Flamethrower/Dragon Tail/Iron Defense, Ability: Shell Armor, IVs: 20/20/25/20/25/20)
Drampa Lv29 (Glare/Echoed Voice/Dragon Breath, Ability: Berserk, IVs: 25/20/20/25/20/20)
Gabite Lv29 (Dual Chop/Take Down/Sand Tomb, Ability: Sand Veil, 20/20/25/20/25/20)

See, that's the sort of stuff I was expecting from the "Gym Leader", not a single Machoke. As you can imagine, Struggle does basically nothing to Turtonator, and its Flamethrower stings. So I use an X Sp. Def followed by my last X Attack, heal Phart to full with a Moomoo Milk, then try attacking again. It still doesn't do a great deal, but with help from more Moomoo Milks, Phart limps its way to a 7HKO.

Gabite comes out next, missing with its first two Take Downs, apparently not aware that Dual Chop will hit harder. Thanks to a timely critical hit and the Take Down recoil, it only takes 3 Struggles this time before Gabite faints.

16-36.png

Drampa is last out, and seems as though it'll be a 6HKO from Struggle. It starts off by paralysing Phart with Glare, leaving it unable to attack for a turn, then reapplies the status once Phart shakes it off. Berserk activates once its HP dips into the yellow, but thanks to the X Sp. Def, it still fails to deal much damage with its Dragon Breaths, and a couple more Struggles take it out.

Ryuki hands me a Dragon Scale after the battle. It's the only one available before the postgame in USUM, but I'm obviously not planning on acquiring a Kingdra, so it can sit in my bag for now. With Ryuki defeated, I've now ticked off all the Trainers in Malie City, so I'll be finishing Lillie's bit of storyline and getting stuck into another trial next time.
Trainers defeated: 152/427
 
Back
Top