• Follow our Instagram!
  • Curious about what we're currently doing about bots? Check out the latest updates from staff in this thread.

Challenge Ultra Sun: Cosmog vs. the Alola region

:sm/charjabug: :sm/togedemaru:
17-1.png

17-2.png

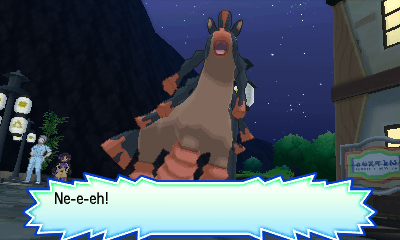
I arrive at Malie Library just in time to watch Lillie get stomped by an angry Mudsdale. Not really, it's Hapu's. She leaves after offering to help Lillie out with her ruin expeditions, and the two of us head inside the library to track down some book she's after. There's not much in here for me aside from a Fly TM from a lady on holiday from Johto, so I just head upstairs to help Lillie with the book-wrangling... except Acerola is already there and just brings Lillie the book she was after. Saves me the fuss, I suppose.
17-3.png

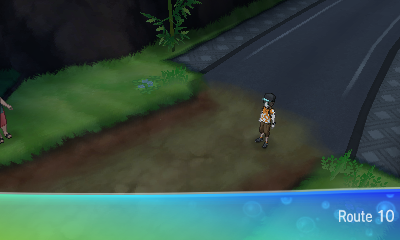
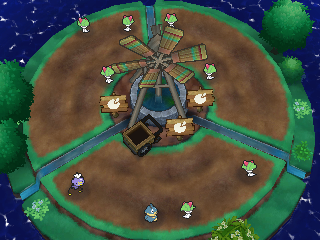
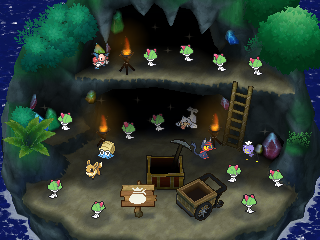
5 Trainers here, plus 8 Stufful to track down as part of a sidequest, not to mention the usual assortment of bag fodder. But there are some things here that definitely aren't fodder - EV-reducing berries! You get 3 random ones per day from the berry pile on the route, but since I can grow them at Poké Pelago, I soft-reset a few times until I get 3 different berries (Kelpsy, Hondew and Grepa), then go and visit Mohn to develop the rest of the islands.
17-4.png

17-5.png

17-6.png

He gives me 10 Rainbow Beans to say thanks for helping him perfect Poké Pelago. Once everything's sorted, I plant my new berries and send my minions off into Isle Aphun to look for treasure, though they'll probably just come back with Hard Stones. I return to the berry pile the next day for more soft-resetting, having to catch a Crabrawler this time before I can pick up the remaining Pomeg, Qualot and Tamato Berries, then plant each of those as well. Last up is a quick flight to Route 8 to stock up on X items, then I can begin properly clearing out Route 10.

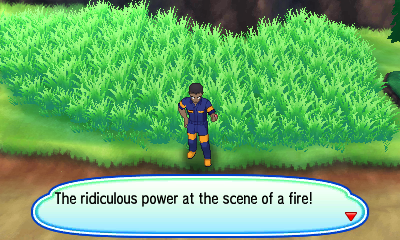
Once I'm back, I pick up a Lemonade and a Super Potion off the ground (which are apparently still safe to drink?), followed by a Tiny Mushroom, and then run into a Firefighter.
17-7.png

Firefighter Alex
Octillery Lv30 (Psybeam/Aurora Beam/Bubble Beam, IVs: All 25)

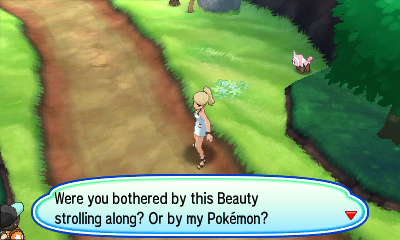
Struggle deals very little damage once again, but Bubble Beam isn't doing much more, so I use an X Attack. The battle's made a bit more annoying when Bubble Beam gets a Speed drop, meaning Phart has to be a bit higher on HP before it can commit to the final Struggle, but Octillery ultimately goes down in 5 hits with help from some Moomoo Milk. I have to dodge the rustling trees along the route to avoid the wild Fearow (with how fast they are, it's hard to escape any encounters unscathed), but manage to make my way to a Max Revive and a Beauty without disturbing any wild Pokémon.
17-8.png

Beauty Andrea
Flaaffy Lv29 (Charge/Take Down/Electro Ball/Confuse Ray, Ability: Static, IVs: All 15)

Phart actually does a decent bit of damage with Struggle on turn 1... except it was a critical hit, and now it's paralysed and confused. A Full Heal fixes them both, and the incoming Electro Ball only does 10 damage, leaving Phart free to activate Static again with its next attack. Flaaffy grants us a few extra turns by repeatedly using Charge without actually attacking, and so it gets taken down by Phart's fifth Struggle. A little further along the path, I find a Police Officer in the grass.
17-9.png

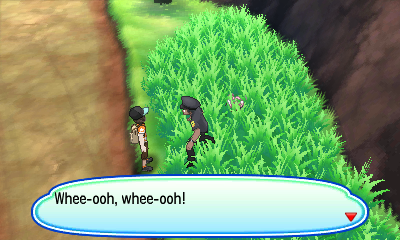
Police Officer Mitchell
Growlithe Lv30 (Fire Fang/Take Down/Flame Burst/Agility, Ability: Intimidate, IVs: All 25)

I start with an X Attack to offset the stat drop from Intimidate, and Growlithe deals 21 damage with Flame Burst - enough to notice, but not a big worry since it can't do anything to increase that damage output. Phart manages to 4HKO Growlithe with help from a Lemonade and two Moomoo Milks.

I've managed to round up all 8 Stufful that were scattered along the route, and the lady who asked me to find them gives me $15,000 and a Muscle Band. I doubt I'll use it, but at least Phart actually can use it for something. That's more than I can say for most items in my bag.
17-10.png

While I can't proceed past Route 11 until I've cleared my next trial, I can still explore it right now, and there are a few more battles to cross off the list. A quick search by the route's entrance unearths a Big Mushroom and a Stardust, and as I head along the path, Rotom decides to activate a Roto Prize Money power. A nice idea in theory, but considering the Trainers on the route amount to two Black Belts, a Preschooler, a Youngster and a Lass, they're not going to be forking over much cash even with the boost. Still, may as well try to squeeze in a couple of battles.
17-11.png

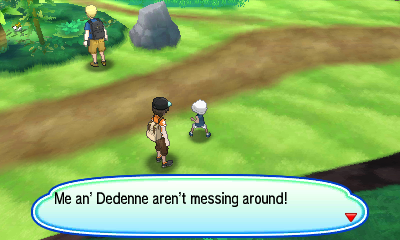
Preschooler Hayden
Dedenne Lv28 (Parabolic Charge/Nuzzle/Thunder Wave/Volt Switch, IVs: All 0)

With zero IVs and random move choices, I think they are messing around. Dedenne spends most of its time using Nuzzle even while Phart is already paralysed, and despite it being unable to move for a few turns, Phart lands a critical hit to KO Dedenne after 4 Struggles. Up next is a Black Belt who's using his master, a Bewear, as his battling Pokémon. That's an interesting relationship.
17-12.png

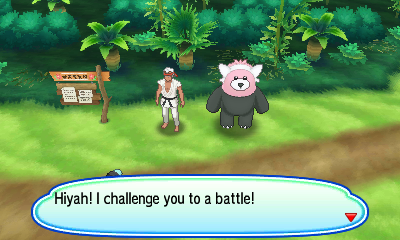
Black Belt Alvaro
Bewear Lv30 (Brutal Swing/Flail/Payback/Take Down, Adamant nature, IVs: 15/31/15/15/15/15, EVs: 252 Atk)

This might hurt. After an X Defense, Phart dodges two Take Downs and lands possibly the weakest Struggle I've seen to date. So I switch to an X Attack, and Bewear lands a Take Down for 24 damage, but Struggle still doesn't hit very hard - I think it might be on par with the Take Down recoil. But at least we're making progress, so I have Phart carry on Struggling, chipping it away between frequent Moomoo Milks while Bewear ignores its Dark moves. I do shit myself a bit when Take Down lands a crit, reducing Phart to 3/127 HP, but the high recoil softens Bewear enough for another Struggle to take it out.
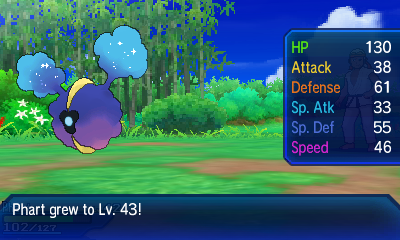
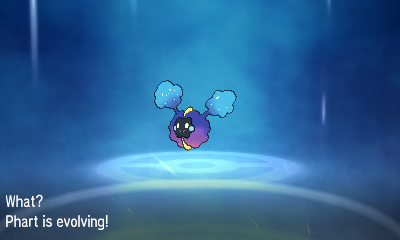
17-13.png

17-14.png

ABSOLUTELY NOT.

It's not as if Cosmoem would actually be any better at dealing damage - in fact, it might be worse, since it keeps the same 29/29 offenses but loses the ability to ignore its foes' Defense boosts with Unaware - but this is a Cosmog solo run, for better or worse. Since Phart is now past the level where it can evolve, the Exp. Points it gains from battles will be increased by around 20%, which sounds nice until you remember the obedience cap is only 7 levels away. Oh dear.

Anyway, Alvaro rewards me with the Payback TM for beating his master in combat. Despite my best efforts, I can't quite reach the next Trainer before the Roto Prize Money wears off, leaving the extra $1,920 I would've earned from beating him unclaimed. Not to worry, I don't really need money and I still have 38 Roto Prize Moneys in my bag.
17-15.png

Black Belt Clayton
Hariyama Lv30 (Knock Off/Vital Throw/Belly Drum/Smelling Salts, Adamant nature, IVs: 15/31/15/15/15/15, EVs: 252 Atk)

See, a Cosmoem would be shitting itself at the prospect of a +6 Knock Off, but Cosmog doesn't care about Belly Drum at all. I use an X Attack as Hariyama chops its HP in half, then Struggle for a little under 25%. Knock Off still hits hard even with Unaware, but Phart's HP stays above the red, and it dodges an incoming Smelling Salts to take out Hariyama with two Struggles.

I can't get much further past Clayton before a Trial Guide stops me, since I don't have the Electrium Z yet. So I head back to Malie, gathering up the last few items as I go: a Quick Ball, a Big Mushroom, a Star Piece, a Stardust, a Tiny Mushroom, and TM74 Gyro Ball. In other words, free cash! There's still one more battle on Route 11, but unfortunately it's a Double Battle, so I have to go and fetch Ralts first.
17-16.png

"If you really wanna see what we can do, you've gotta have two healthy Pokémon!"


Yes, they both have exactly the same line. That's new.
17-17.png

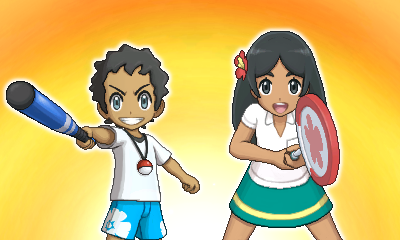
Athletic Siblings Alyssa and Sho
Lilligant Lv28 (Mega Drain/Synthesis/Teeter Dance/Quiver Dance, IVs: All 20)
Whimsicott Lv28 (Mega Drain/Cotton Spore/Gust/Tailwind, IVs: All 20)

Ralts faints quickly as always, and Phart vaguely tickles Whimsicott with Struggle while Lilligant goes for Quiver Dance. This is clearly going to take a while, so I use an X Sp. Def, which reduces the damage from the subsequent Mega Drains to single digits. Once I've used an X Attack as well, I try Struggle again, and despite Lilligant confusing Phart with Teeter Dance, it still manages to hit Whimsicott - a bit harder this time - while still leaving it above yellow HP. I heal it up, it lands a Struggle on Lilligant for decent damage... and then Lilligant wipes it away with Synthesis immediately. The battle plods on like this for a few turns, Phart and Whimsicott occasionally stopping to hit themselves in confusion, before Whimsicott eventually falls to a Struggle. Lilligant holds out a bit longer thanks to Synthesis, but it too is knocked out once it exhausts its PP.
17-18.png

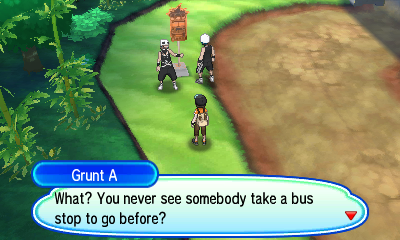
Back on Route 10 again, Team Skull are waiting for a bus up to the observatory. They seem to take offense to my mere presence, so it's time for another battle.

Team Skull Grunt
Houndour Lv29 (Bite/Odor Sleuth/Beat Up/Fire Fang, IVs: All 15)

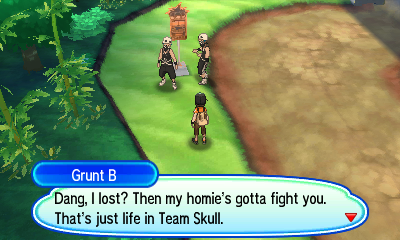
This one's an easy 3HKO with Struggle, only needing one Moomoo Milk to keep Phart active. The real difficulty (if you can call it that) comes from the fact that it leads straight into a fight with the other grunt.
17-19.png

Team Skull Grunt
Golbat Lv29 (Confuse Ray/Air Cutter/Swift/Poison Fang, IVs: All 15)

Despite dodging the first Air Cutter, Phart's Struggle doesn't do enough damage to justify not using an X Attack, so I heal it up and use one. Though it can't avoid getting struck by Confuse Ray and hitting itself in confusion, it manages to KO Golbat with another 3 Struggles to end the battle.

Team Skull decide to head back to their mansion after losing, running past Kukui as he rolls up to the bus stop. This is my cue to catch the bus up to Mount Hokulani, but first, I'll be rattling through some more Festival Plaza missions - I got lucky with the fortune-teller bonuses and can now earn 39 FC from each mission instead of 36 FC for the rest of the day.
17-20.png

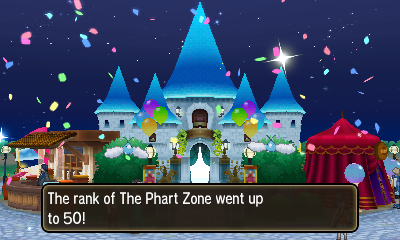
This is technically an achievement, I think? Certainly feels like one with how many times I've mashed my way through the type-matchups mission. Instead of offering me another facility, Sophocles gives me the option to change the castle's appearance to a "Glitz" theme. Does it look any good?
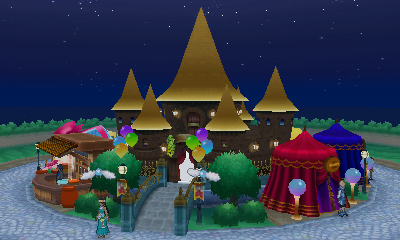
17-21.png

...I suppose? But the basic theme doesn't particularly impress me either, so I'll keep this one as a sort of status symbol. Anyway, I've got a bus to catch.
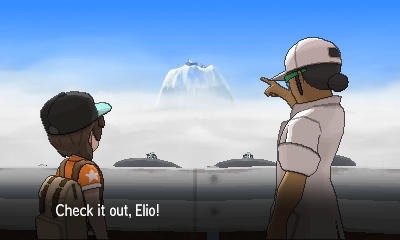
17-22.png

Kukui's got some plans to give Alola its very own Pokémon League, and what better place to build it than on the sacred land atop Mount Lanakila? Clearly nothing has been learnt from the incident with the old Thrifty Megamart. Apparently I'll be battling all the kahunas there after I've finished the island challenge, so let's hope Tapu Bulu hasn't smashed the shit out of it by the time I arrive.

As per usual, I'll be avoiding the story stuff for now in favour of gathering items and fighting Trainers. The Pokémon Center here sells vitamins, but I'd rather just buy them with BP, and even that will probably just be a one-off thing for when I properly EV-train Phart. There are a couple of Apricorn Balls at the top of the mountain, then I start making my way down the road in search of a fight or two.
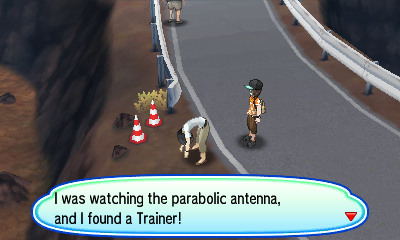
17-23.png

Office Worker Jessica
Clefairy Lv30 (Bestow/Wake-Up Slap/Minimize/Stored Power, IVs: All 15)

One more level and Clefairy would've known Metronome, which might have been more interesting. Alas, it just gets a 5HKO from Struggle while dealing scratch damage in return and using Minimize to no avail.
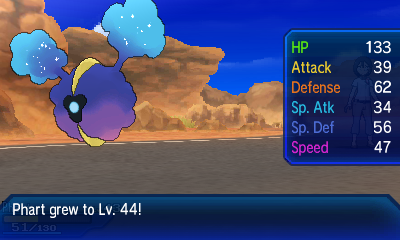
17-24.png

Heading further down the mountain leads to the Volt Switch TM, a Fast Ball and a Rare Candy, followed by a Hiker.
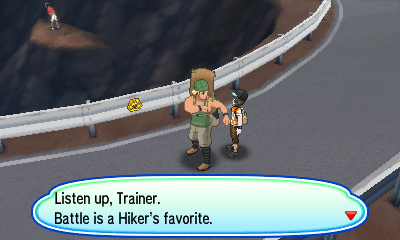
17-25.png

Hiker Thomas
Alolan Geodude Lv30 (Thunder Punch/Self-Destruct/Stealth Rock/Rock Blast, IVs: All 15)

Geodude uses Thunder Punch a couple of times while Struggle deals rather poor damage back. Once Phart gets close to red HP, I use a Moomoo Milk, at which point Geodude uses... Self-Destruct??? And it didn't even do that much damage. Nice move.

Continuing onwards (or rather, downwards), I go to pick up a Heavy Ball but get spotted from a very, very long way away by a Golfer. The screenshot doesn't do it justice, but I can assure you Elio is nowhere near what's on screen here.
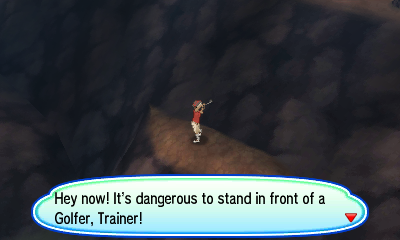
17-26.png

Golfer Sky
Blue Core Minior Lv30 (Tackle/Rollout, Ability: Shields Down, IVs: All 15)
Yellow Core Minior Lv30 (Take Down/Rollout, Ability: Shields Down, IVs: All 15)
Red Core Minior Lv30 (Double-Edge/Rollout, Ability: Shields Down, IVs: All 15)

Well, there's no chance of these ones blowing themselves up thanks to those movesets, but I'd rather not see Phart eating a turn-5 Rollout. I lead with an X Defense and an X Attack, and the first Rollout deals 4 damage while Phart dodges the second, breaking the combo before it even starts. Phart's Struggles deal around 25%, and Shields Down activates after the second hit, pushing the Rollout damage even higher. Luckily Phart dodges the third Rollout hit and KOs the first Minior before it gets going again. The other two Minior go down with less fuss, as the AI chooses Double-Edge and Take Down over Rollout due to their higher base powers.

Once I finally pick up that Heavy Ball I found earlier, I carry on to the last regular Trainer in the area.
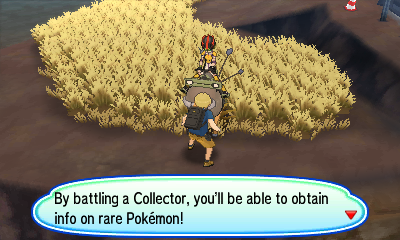
17-27.png

Collector Todd
Passimian Lv30 (Scary Face/Take Down/Bestow/Thrash, Ability: Receiver, IVs: All 15)
Oranguru Lv30 (Psych Up/Feint Attack/Nasty Plot/Zen Headbutt, IVs: All 15)

Since neither opponent is particularly frail, I start off with an X Attack while Passimian hits for 27 damage with Thrash. Struggle is still only a 5HKO from the looks of it, and Phart needs healing already, but luckily Passimian is now confused, turning the 5HKO into a 4HKO by hitting itself. Oranguru enters the battle and uses Nasty Plot despite having no special attacks, alternating between that and fairly weak Feint Attacks until Phart scores another 4HKO. Why on earth didn't it use Psych Up to copy the X Attack boost?
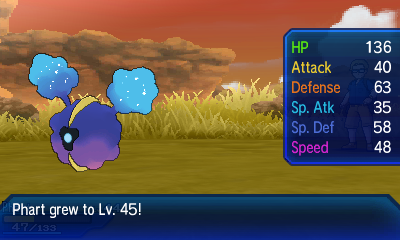
17-28.png

This little power boost arrives just in time for the final Trainer, one who wouldn't fight me until I'd beaten everyone else. I couldn't remember if there's an actual in-game term for these sorts of Trainers, but apparently they're called "skilled Trainers"? But that's probably more of a generic description than an actual label.
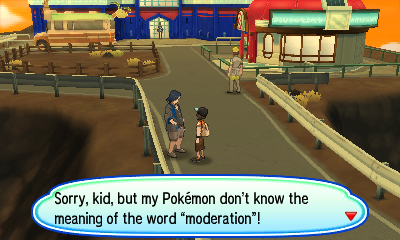
17-29.png

Veteran Akira
Alolan Persian Lv33 (Fake Out/Feint Attack/Screech, Ability: Technician, Adamant nature, IVs: 30/30/20/20/20/30, EVs: 252 Atk / 252 Spe)
Absol Lv33 @ Darkinium Z (Night Slash/Slash/Quick Attack, Ability: Super Luck, Adamant nature, IVs: 30/30/20/20/20/30, EVs: 252 Atk / 252 Spe)

This is probably going to hurt. Persian is not a big threat (though I don't exactly want it using Screech), but Absol has a high chance of landing critical hits that ignore any Defense boosts I put onto Phart, and a crit on Black Hole Eclipse will just outright KO it if I'm unlucky. I'll have to play it carefully.

I start with an X Defense as Persian goes for Fake Out while it still can, dealing almost nothing. I then try a Dire Hit to see what Persian does next, and it uses Feint Attack, dealing 32 damage but more importantly leaving Phart's Defense boost intact. A couple of X Attacks are squeezed in before it tries to Screech, but Phart dodges it, buying me more time for setting up. This consists of a third X Attack and an X Speed - it's still not enough to outspeed Persian, but it will outspeed Absol, the bigger threat. Once the final two X Defenses go on, Phart is ready to attack, and I'm surprised to find Persian still doesn't want to Screech the boosts away. I'm even more surprised when Phart lands a critical hit and OHKOs it right off the bat.

And then the nasty one comes out. Now, Absol actually has the exact same HP and Defense as Persian, so Struggle might OHKO it as well... but I didn't expect Phart to land the OHKO on Persian, so if it falls short against Absol, it's leaving itself open to a KO from a crit Night Slash. Then again, a crit Black Hole Eclipse can KO it no matter what I do, unless I roll the 25% chance of surviving with 1 HP from the affection bonuses. So what do I do here?

Well, Phart is on 66/136 HP, so it'd make sense to heal it now. I use a Moomoo Milk to heal it to full, and Absol goes straight for the nuke button, but the only way it can KO is if it lands a critical hit and Phart fails to activate its affection magic.
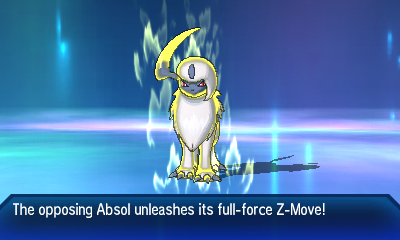
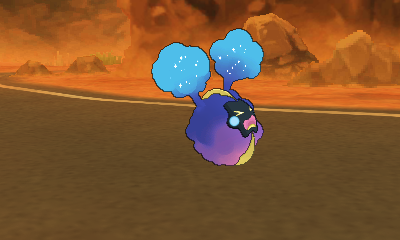
17-30.png

17-31.png

Fuck's sake.

I actually went and calced it afterwards: Phart had a 12.5% chance to OHKO it with Struggle, whereas Black Hole Eclipse would only deal about 35% without that critical hit... which also had a 12.5% chance of landing. Funny.

Nothing to do but reset and try again, I suppose... Persian is a bit more willing to use Screech on the second attempt, but once Phart is at +6 Attack, +6 Defense, +2 Speed and with a Dire Hit active, it 2HKOs Persian with Struggle. I heal up Phart as Absol comes out, since even Struggle recoil will KO it when it's on 20 HP, and Absol goes for Night Slash this time, taking Phart to 112/136 HP with a non-crit. This time, I decide to be a bit riskier and use Struggle, but it doesn't quite KO Absol, and it uses Black Hole Eclipse once more. But it can't land a critical hit this time around, and so I heal up Phart to full so it can use one last Struggle... except Absol simply OHKOs it from full with a mere Night Slash. Double fuck!

I won't bother writing up the third attempt in full detail. Just know that I remembered Guard Spec. exists, used those to block Persian's Screeches, nearly lost to a critical hit from Persian this time, Phart got a 2HKO on it, missed the OHKO on Absol, just about tanked a non-crit Black Hole Eclipse, then beat it with another Struggle after it tried to finish off Phart with Quick Attack instead of Night Slash. NEVER AGAIN.

I receive TM95 Snarl for winning, but it's not nearly enough to make up for the emotional turmoil. What does help somewhat is being reminded that you don't have to battle Molayne to enter the Hokulani Observatory in USUM, as he just hands over a Steelium Z without a fight.
17-32.png

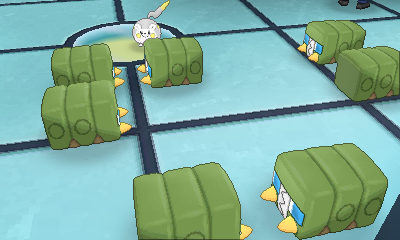
Instead, I have to help round up the Charjabug that are used to power the observatory after they've been fed. I basically just walk up to a couple of bushes, press A, find a Charjabug each time, examine another bush, fail to find the last Charjabug, then watch it very slowly and conspicuously shuffle across the screen in the distance as Molayne wonders where it's gone. Once I "find" it, we can move on to the interesting stuff.
17-33.png

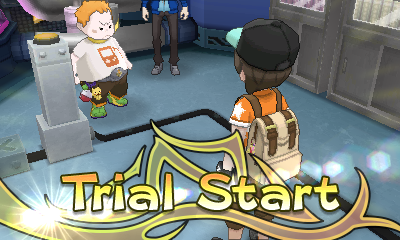
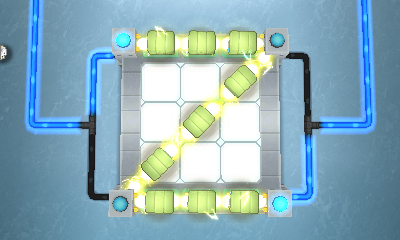
The trial's not too complicated. You press the buttons on a little rotating panel machine to line up the Charjabug in rows of three so they can power the Totem-summoning Pinger machine, and every time you form a line, a Pokémon attacks. There are only two wild Pokémon battles before the Totem Pokémon, and there's an opportunity to heal up between each battle, so there's no chance of Phart having to limp into the Totem fight.
17-34.png

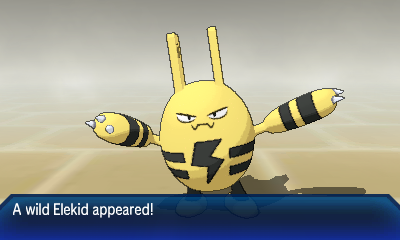
Elekid
Lv29 (Quick Attack/Thunder Punch/Low Kick/Leer, Ability: Static, Jolly nature, IVs: All 0)

Mostly just an appetiser for what's to come, though it does give me some trouble by using Leer and activating Static on turn 1. I have to use a Moomoo Milk on Phart mid-battle, but it still goes down fairly easily after 3 Struggles. Once another row of bus-shaped bugs have been lined up, I can fight the next trial Pokémon.
17-35.png

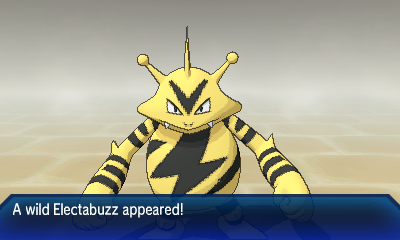
Electabuzz
Lv30 (Electro Ball/Light Screen/Swift/Thunder Wave, Ability: Static, Timid nature, IVs: All 0)

I wonder why their IVs are all 0 all of a sudden? The trial Pokémon had completely random IVs when I was on Akala. Anyway, this fight's not too difficult either. Electabuzz gets a 4HKO from Struggle, with the only real issue being that I had to use a Full Heal as soon as Static activated to avoid Phart getting smacked by a max-power Electro Ball. Once Electabuzz is down, I can set up the final line of Charjabug to summon the Totem Pokémon.
17-36.png

The Pinger is fully powered-up at last, which turns out to be a bad thing as it's now broken free of its cables and is about to fry all the Charjabug. Sophocles's Togedemaru jumps in to absorb the electricity via Lightning Rod, but even that immunity won't protect it for long - the Pinger must be aiming for the horn. Fortunately the Totem Pokémon arrives just in time, leaping down from the ceiling to absorb the rest of the electricity and challenge me to a battle.
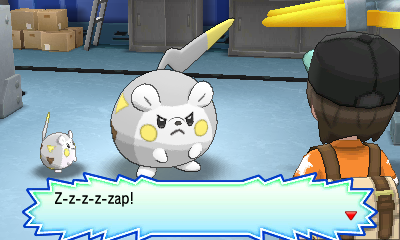
17-37.png

17-38.png

Totem Togedemaru
Aura: +2 Defense
Lv33 @ Sitrus Berry (Zing Zap/Spiky Shield/Iron Head/Bounce, Ability: Lightning Rod, Bold nature, IVs: 31/15/31/1/31/31, EVs: 252 HP / 252 Def / 6 Spe)

Ally Skarmory

Lv32 (Stealth Rock/Steel Wing/Tailwind/Torment, Ability: Sturdy, Sassy nature, IVs: All 15)

Ally Dedenne
Lv31 (Super Fang/Eerie Impulse/Charm/Discharge, Ability: Pickup, Calm nature, IVs: All 31)

Togedemaru will summon Skarmory at the end of turn 1, and then summon Dedenne once it has less than 66% of its HP left.

At the risk of sounding overconfident, Totem Togedemaru seems like it'll be annoying rather than threatening. Spiky Shield can punish Phart if it randomly selects the wrong target with Struggle, and the possibility of Zing Zap/Iron Head flinches and invulnerable Bounce turns means it'll be tricky to hit it at all if Phart isn't moving first... and thanks to Skarmory's Tailwind, nothing short of +6 Speed will guarantee that. But the Totem's side has no way to increase their damage output, and given that none of them are exactly offensive powerhouses, I don't think anything other than Dedenne's Super Fang is going to be taking off much of Phart's HP.

I start with an X Defense, and Totem Togedemaru's Spiky Shield fails to do anything before it summons Skarmory. On turn 2, Phart dodges Iron Head and gets struck by Torment, though this has no tangible effect on a Pokémon that's already forced to use Struggle. Once all 3 X Defenses are in place, Skarmory hits for a mere 6 damage with Steel Wing while the Totem uses Spiky Shield again. Satisfied that anything less than a critical hit won't do much to Phart, I use 3 X Attacks and a Dire Hit, with the incoming attacks reducing it to 91/136 HP.
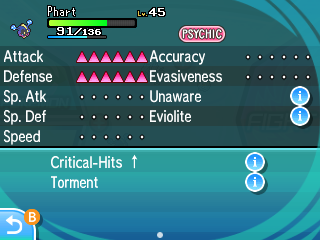
17-39.png

It'd probably be safer to use X Speeds here, but I'll see how it goes without them first. Totem Togedemaru uses Zing Zap, fails to flinch, and Phart takes Skarmory straight into yellow HP with its first Struggle, ending the turn on 42 HP. I heal it up and attack again, Phart avoiding an Iron Head flinch and hitting the Totem this time. It too falls into yellow HP, but its Sitrus Berry brings it back up to around 75%. Phart manages a third Struggle on the next turn, putting Totem Togedemaru into KO range at the cost of needing another Moomoo Milk, but it finally gets a flinch in via Zing Zap before the next Struggle can land. After avoiding another Iron Head flinch, Phart KOs the Skarmory with Struggle, bringing the second ally into the fight.
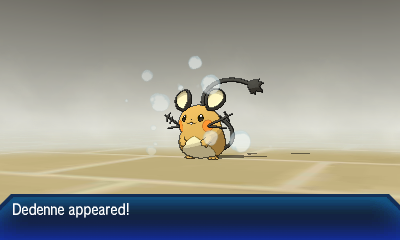
17-40.png

Phart needs healing now, and as I do so, Dedenne uses Charm to take it down to +4 Attack. Rather than using a Guard Spec. here, I decide to just attack in case Dedenne goes for Super Fang instead of a status move. It does, and Totem Togedemaru uses Spiky Shield, except it fails because it used it last turn as well. Phart then uses Struggle, targets the Totem, and knocks it out, growing to Lv. 46 in the process!
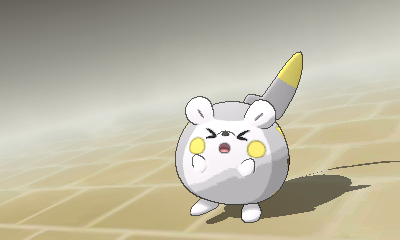
17-41.png

This does leave Phart quite low on HP again, so I use another Moomoo Milk as Dedenne goes for Super Fang again. Now, I could go for Struggle here, but if Dedenne uses Discharge first and lands a crit, that might be the end for Phart. Instead, I use an X Sp. Def, followed by a Guard Spec. after Dedenne uses a second Charm. I then get stuck in a loop of using Moomoo Milks while Dedenne spams Super Fang, until it eventually uses Discharge, paralyses Phart, and Phart gets fully paralysed. After a few more heals, Phart manages to dodge two Super Fangs and ignore the paralysis to 2HKO Dedenne with Struggle. Victory!
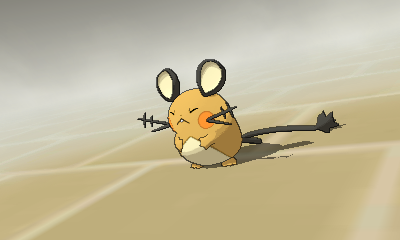
17-42.png

Dedenne was such a nuisance, it made me forget to take a screenshot of the "You defeated Totem Togedemaru!" message. Mind you, Togedemaru had been knocked out long before that message came up, and Dedenne was probably the bigger threat across the fight, so maybe it didn't deserve that honour anyway.
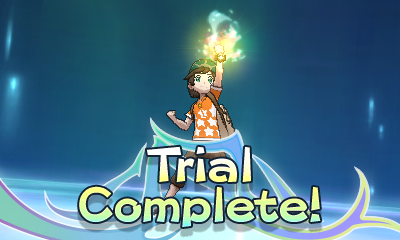
17-43.png

Whee! One more for the collection. I think that makes half of all the regular Z-Crystals I've obtained now. No free Poké Balls from the trial captain this time, but Sophocles does whisk me off to Festival Plaza to check out a shiny new feature.
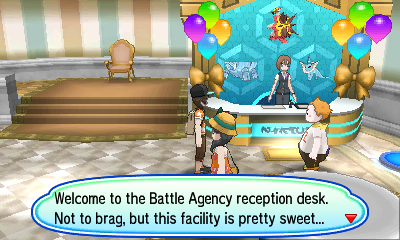
17-44.png

Maybe not so sweet now that the online functions are dead.

The Battle Agency might be a nice way for me to grind FC, at least until my grade starts to rise and the Festival Fan NPCs' Lv. 50 Pokémon can't keep up with the increasing levels of the opponents. However, the format revolves around using rental Pokémon, and I'm obviously not about to use anything other than Phart if I can help it. So I'll just be ignoring it for this playthrough - I can get Festival Coins and Rare Candies elsewhere whenever I need them.

Also, I'm assuming this must be the point where the Switcheroo facilities become available in Festival Plaza? I've made it to rank 51 without Sophocles ever offering me one, and it'd be weird to offer the player a facility they can't possibly use, but I suppose it's possible it was already in the pool of potential facilities and just never got selected. Either way, it'll be an instant rejection if Sophocles ever offers me one.

Once I'm back in the real world, Molayne asks me to return some sort of mask to Professor Kukui in Malie Garden, so it looks like that's where I'll be going next. Let's hope there are no big bad gang bosses in the area when I arrive.
Trainers defeated: 166/427
 
:sm/golisopod: :sm/krokorok:
18-1.png

First port of call is gathering some new Pokémon to spice up Poké Pelago, just for fun. As well as this make-believe Totem Lurantis, I revive a Lileep and an Archen from some fossils that my minions dug up on Isle Aphun.

I also rattle through a few more Festival Plaza missions, swapping out a Pharmacy for another lottery shop (it's not like I can't buy Hyper Potions in any old Pokémon Center). Then, in a slightly confusing move given the choice I've just made, I swap out a lottery shop for a 5-star fortune teller - the lottery shop I got rid of had Master Balls as the grand prize, whereas the other two have the comparatively more useful Big Nuggets as their top prize, and having an extra fortune teller should hopefully give me better chances of being able to earn more FC from missions. Not that I especially need more FC. Or better facilities, for that matter. I don't really need anything from Festival Plaza apart from Moomoo Milk. What am I even doing here any more?

18-2.png

Ooh, it's golden! That's rare! I retract my earlier crisis, this is cool as hell.

18-3.png

I also make the very wise decision to spend $378,000 on a fancy bag and then dye it pastel orange. I think that'll probably be it for clothing changes, as I can't see anything else that I like the look of. Maybe if I get another 5-star dye house, but that's very unlikely. Now for something a little more important.

18-4.png

Isle Aplenny has lived up to its name by letting me grow EV-reducing berries aplenty, and I now have at least 40 of each of them. Time for some EV training!

I did try to keep track of Phart's EVs during the early stages of the game, but I messed up the counting somewhere along the line and never knew the precise values. Phart definitely has 252 HP EVs, and over 100 EVs in both Defense and Sp. Def, but the remaining 58 points are a bit of a mystery. Rather than trying to work them out, I think I'll just wipe everything (apart from HP) and start from scratch with some vitamins.

Once all of those EVs have been cleared, I head to Big Wave Beach and pay a fairly reasonable 38 BP for all the vitamins I can use, then pour them down Phart's throat to give it back 100 Defense and Sp. Def EVs. I can't keep using vitamins past the 100-EV mark as that's a Gen 8+ thing, so I'll have to look elsewhere to earn the remaining points.

18-5.png

18-6.png

Fighting wild Pokémon would award Exp. Points that Phart really doesn't want, so I use Isle Evelup to get the last few EVs instead. It earns 4 EVs in a chosen stat per 30-minute session, and that time can be halved by loading up the island's crate with Poké Beans. A bit of training over the course of an afternoon brings Phart up to 252 HP / 128 Def / 130 SpD, which I think is a good EV spread for just generally tanking whatever attacks the game throws at us. And if it turns out that's not enough for a particular fight, I can always use more berries and training sessions to reallocate those EVs.

Now that's Phart's all defense-d out, time to carry on with the plot. Kukui's dealing with a couple of Team Skull Grunts in Malie Garden, suggesting they all go at it in a Battle Royal to settle things. A Battle Royal, which, quite famously, requires four participants, not three. A fourth person actually does happen to show up, but it's just the grunts' boss Guzma, and he's not up for it.

18-7.png

Guzma doesn't agree with Kukui's idea for an Alolan Pokémon League, nor does he seem particularly impressed to see me, a child kitted out with a Z-Power Ring who's knee-deep in their island challenge.

18-8.png

Not really???

Anyway, I basically get forced into battling Guzma by Kukui, even though he was so keen on taking on Team Skull himself a few moments ago. Thanks, pal. This ought to be unpleasant.

18-9.png

Team Skull Boss Guzma
Golisopod Lv34 (Sucker Punch/Razor Shell/First Impression, Ability: Emergency Exit, Adamant nature, IVs: All 30, EVs: 252 Atk)
Masquerain Lv34 (Air Slash/Bug Buzz/Icy Wind, Ability: Intimidate, Modest nature, IVs: All 30, EVs: 252 SpA / 252 Spe)

Yuck. I imagine Golisopod will spend 5 turns spamming Sucker Punch if Phart survives First Impression, so at least there might be some time for setting up. But this looks like an exercise in praying for no crits, because I don't envisage Phart tanking fully-invested super effective critical hits from either opponent. Doesn't help that it's raining, which amps up the Razor Shell damage.

I use an X Defense as Golisopod uses up its First Impression, taking Phart to 88/138 HP. Phew, that's alright. Golisopod does use one Sucker Punch while I put a couple more X Defenses on, but then it switches to Razor Shell, which does little damage but gets a Defense drop. I ignore it to use an X Sp. Def, and at +5 Defense, a rain-boosted Razor Shell deals a decent 21 damage. I then heal up Phart and use a couple more X Sp. Defs and a Guard Spec., while Golisopod lands a crit Razor Shell, taking off over 100 HP and leaving Phart dangerously low - not good.

Fortunately Razor Shell only has 10 PP, and Golisopod won't be able to hurt Phart once it runs out, so I stall with some healing items between applying X Attacks. Not long after Phart reaches +6 Attack with a Dire Hit active, Guzma resorts to ordering more First Impressions, suggesting Golisopod is out of PP for its other moves. So I count the remaining First Impressions, using a single X Speed along the way, and on the turn after Golisopod completely runs out of PP, I have Phart use Struggle.

18-10.png

18-11.png

Masquerain takes a Struggle to the face as it comes in, and Phart happens to be 1 point faster than it after the X Speed, letting it land an easy 2HKO with no danger of taking a Bug Buzz. This leaves just Golisopod, who suffers an undignified loss after flailing about with Struggle for a few turns. Victory!

18-12.png

I don't know, why did you use First Impression 9 times in a row instead of just switching out?

Guzma storms off, making some snippy comment to Hau as he leaves. As for me, I get given an Incinium Z by Kukui as he takes back the mask I was meant to give him. Thank goodness the handing-over-the-mask part is scripted, because I'd genuinely forgotten I even had it by this point. Anyway, this leaves me free to continue on to Route 12 and my next trial, but I'm not setting off just yet - there are more Trainers to fight in Malie Garden, and after a quick exit and enter of the area, they pop into existence. First up is a Lass who's trying to get along with her Dewpider a bit better.

18-13.png

Lass Lisa
Dewpider Lv28 (Bug Bite/Bubble Beam/Bite/Aqua Ring, Ability: Water Bubble, IVs: All 20)

Not too tricky - it uses Aqua Ring early on, but still gets a 5HKO from Struggle as its attacks just don't hit hard enough to threaten Phart. I get 5 Net Balls from her to say thanks. Probably won't use them, but they're there.

18-14.png

Another six battles here in the form of... a Nugget Bridge tribute act? Okay, I can cope with that. But Malie Garden has more to it than a single bridge, so I wonder what happens if I take the long way around and skip all the battles.

18-15.png

Heh.

With that question answered, I loop back round and start on the actual challenge.

18-16.png

Rising Star Elijah
Caterpie Lv30 (Tackle/String Shot/Bug Bite, Ability: Shield Dust, IVs: All 15)
Weedle Lv31 (Poison Sting/String Shot/Bug Bite, Ability: Shield Dust, IVs: All 15)

Vaguely interesting to note that these Trainers use exactly the same Pokémon as the Nugget Bridge Trainers from the Kanto games, even the ones like Weedle and Pidgey that aren't native to Alola. That's notable because nearly every other Trainer in the game sticks to the 403 species in the Alola Pokédex - you've got Red with the three Kanto starters, Gladion eventually gets one of them too, and there's also the Rainbow Rocket leaders, but nobody else ventures outside of those 403. Even SM!Anabel managed to field a team of 5 Pokémon from the smaller regional dex of those versions, and she came from a different universe!

That aside, it's a rare treat to see something weaker than Phart at this stage of the game. It still can't manage more than a 3HKO on Caterpie or Weedle, but they both go down with little fuss beyond a couple of Moomoo Milks.

18-17.png

Lass Rika
Pidgey Lv30 (Whirlwind/Twister/Feather Dance/Agility, IVs: All 15)
Nidoran♀ Lv30 (Poison Sting/Fury Swipes/Bite/Helping Hand, IVs: All 15)

The only real issue with Pidgey is the Feather Dance debuffs, so I lead with a Dire Hit as Pidgey goes for it. Even with guaranteed crits, Phart still can't 2HKO it, but Twister only deals 4 damage back before Pidgey faints regardless. Nidoran♀ comes out, I use a Moomoo Milk, and it too gets a 3HKO, but not before activating Poison Point and landing some slightly painful Bites. Still, nothing another quick heal couldn't fix.

18-18.png

Youngster Tyler
Rattata Lv30 (Assurance/Crunch/Sucker Punch/Super Fang, IVs: All 15)
Ekans Lv30 (Stockpile/Swallow/Spit Up/Acid Spray, Ability: Shed Skin, IVs: All 15)
Zubat Lv30 (Air Cutter/Swift/Poison Fang/Mean Look, Ability: Inner Focus, IVs: All 15)

Taking into account Rattata's selection of super-effective attacks and Ekans's Stockpile, I decide to lead with a Dire Hit. The crits are enough to 2HKO Rattata (after a quick reset, because someone forgot it had Super Fang and let Phart KO itself), bringing out Ekans. An Acid Spray leaves Phart fairly low and with neutered Sp. Def, so I use a Guard Spec. and a Moomoo Milk before it 3HKOs with Struggle. Zubat doesn't really get a chance to make an impression, failing to deal much damage with Air Cutter before getting two-shotted.

18-19.png

Getting towards the obedience cap again... oh well, not much I can do but carry on.

18-20.png

Lass Emmy
Pidgey Lv30 (Whirlwind/Twister/Feather Dance/Agility, IVs: All 15)
Nidoran♀ Lv30 (Poison Sting/Fury Swipes/Bite/Helping Hand, IVs: All 15)

The only real issue with Pidgey is the Feather Dance debuffs, so I lead with a Dire Hit as Pidgey opts for Agility instead. With guaranteed crits, Phart manages a 2HKO on it. Nidoran♀ comes out, I use a Moomoo Milk, and it gets a 3HKO whilst failing to activate Poison Point or land any Bites.

...hang on, didn't I already do this fight? Two battles ago, in fact. Did two of the Nugget Bridge Trainers in Kanto really use the exact same Pokémon?

18-21.png

So they did! I suppose Game Freak were never going to copy their actual levels over to these games too (unless they decided to put them in Brooklet Hill or something?), so they just end up having identical teams. Not that I'm complaining.

18-22.png

Rising Star Sean
Mankey Lv32 (Swagger/Cross Chop/Assurance/Punishment, IVs: All 15)

Alola doesn't have any Jr. Trainers or Campers, but a Rising Star looks close enough with all the green clothing. Phart gets outsped, hit with Swagger, and hurts itself in confusion on turn 1, so I give it a Full Heal afterwards while Mankey opts for a 100-power Punishment, taking 34 HP from Phart. That stings a bit, but on the plus side, the +2 Attack gives Phart enough power to 2HKO Mankey with Struggle after healing up again. That's the last Trainer defeated, so what's my prize?

It's not just a Nugget, it's a Big Nugget! Adjusted for inflation, perhaps? But there's a catch, as the man who gave me it starts pressuring me into joining some obscure group called Team Rocket.

18-23.png

Veteran Don
Ekans Lv33 (Swallow/Spit Up/Acid Spray/Mud Bomb, Ability: Shed Skin, Adamant nature, IVs: 30/30/15/15/15/30, EVs: 252 Atk / 252 Spe)
Zubat Lv33 (Swift/Poison Fang/Mean Look/Leech Life, Ability: Inner Focus, Jolly nature, IVs: 30/30/15/15/15/30, EVs: 252 Atk / 252 Spe)

They've got maxed-out EVs and custom natures, but then just use the default level-up moves. That works out quite well for Zubat, but not so much for Ekans, who's got 2 moves it can't use at all and another 2 running off the wrong attacking stat.

I start with a Guard Spec., and Ekans's Mud Bomb deals a 7 damage in return. Phart easily defeats it after 4 Struggles and a Moomoo Milk, moving on to Zubat. The fully-invested Leech Life hits for 28 damage - less than I expected, but then again, it is a Zubat. So I simply have Phart start Struggling some more, getting in a couple of hits before being badly poisoned and falling to red HP. Two more Struggles are enough to knock out Zubat, as for some reason, Don never ordered it to use Leech Life after its first turn. Some Veteran he is.

As it turns out, he wasn't in Team Rocket at all, it was all just part of the Nugget Bridge act. Don and his companions clear out soon afterwards, leaving me to carry on with the story again. Off to Route 12!

18-24.png

The terrain on this route is far too treacherous for me to cross on foot, but luckily Hapu arrives and allows me to ride her Mudsdale. I wonder how things would have gone if she hadn't shown up just now. Would that have been the end of my island challenge?

Unlike Tauros and Lapras, there aren't any areas I've visited so far that Mudsdale can help me explore, so no need for backtracking. I just go galloping across the rocks atop Mudsdale, stopping to pick up a Burn Heal, then immediately having to backtrack anyway when I encounter a pair of Trainers who want to fight in a Double Battle.

Normally I'd put a screenshot of them in the overworld here, but I must've forgotten to take one, so feel free to enjoy their dialogue instead:

"Hey! There's no way you can battle against us with just one Pokémon."
"Hey! We can't battle you if you've got just one Pokémon."


I fly to Malie City and Ralts myself up, then run all the way along Route 11 and across the rocky terrain again to start the battle.

18-25.png

Punk Pair Yoko and Lane
Pancham Lv32 (Comet Punch/Slash/Circle Throw/Vital Throw, IVs: All 15)
Krokorok Lv32 (Embargo/Swagger/Crunch/Dig, Ability: Intimidate, IVs: All 15)

This might actually be quite tricky. Krokorok has STAB Crunch that'll probably hurt, but it also has Embargo, which will lock me out of healing Phart for 5 turns. I'll have to keep an eye on Phart's HP.

Ralts fails to activate its Quick Claw and gets a KO from Pancham's Slash, while Krokorok goes for Dig instead. Phart receives an X Defense boost as this happens, ending the turn unscathed. I then use a second X Defense, and the combination of Dig and Slash deals only 11 damage. It's still not exactly "safe" to attack, though, as the Intimidate means Phart's attacks will hit with all the strength of a wet tissue. So I use an X Attack, and despite Krokorok's Crunch getting a Defense drop, Phart still sits at a fairly healthy 111/141 HP.

After using a Guard Spec. to block more Defense drops, I heal Phart back to full and let it Struggle. The first one hits Pancham, but looks like it might not even be a 4HKO. Another Moomoo Milk, then a second X Attack when Krokorok grants us a free turn with Dig, then Phart strikes again. This one hits Krokorok for just over 50%, and after healing once more, the next Struggle KOs it... but not before it uses Embargo and gets another Defense drop. Phart now stands at 82/141 HP and +2 Defense, but cannot be healed and can't use its Eviolite.

This puts me in an unusual situation. If Phart did ~25% to Pancham with a +1 Struggle, it's probably going to need two +3 Struggles to KO it. And while it does have enough HP to endure that recoil damage, it might not if Pancham lands a crit Slash. My normal strategy here would be to just heal Phart and then attack, but Embargo prevents me from doing that, and I can't even stall out the Embargo turns by spamming useless items, because, again, I can't use any items. However, while I can't use items on Phart, there's nothing stopping me from using them on Pancham...

18-26.png

18-27.png

Gonzap would be proud.

A few more turns of attempted kidnap later, the Embargo wears off - Pancham actually did land a critical hit on Slash during that time, so my concerns were justified. Phart is finally able to down a Moomoo Milk and deliver a couple more blows to defeat Pancham, winning the battle.

Once Ralts's unconscious body is thrown back in the PC, I continue along Route 12, encountering a Rising Star after wading through some grass.

18-28.png

Rising Star Leilani
Tirtouga Lv33 (Smack Down/Crunch/Aqua Jet, IVs: All 15)

Phart's not getting past a Tirtouga's defenses on its own power, so I use an X Attack. It chooses to deal scratch damage with Smack Down and Aqua Jet instead of going for Crunch, but Struggle isn't doing much either, hitting for less than 25%. Still, a couple of Moomoo Milks are enough to achieve a 5HKO. There's an Elixir just past Leilani, then I loop round to take on another Rising Star.

18-29.png

Rising Star Matthew
Cranidos Lv33 (Assurance/Chip Away/Rock Tomb, Ability: Mold Breaker, IVs: All 15)

Phart happens to be 1 point slower than Cranidos, which is a relief because it prevents it from hitting with a 120-power Assurance on turns where Phart Struggles. It still hits for a respectable 30 damage even at 60 power, though, so it takes another couple of Moomoo Milks before Cranidos goes down. I pick up a Hyper Potion towards the coast, then carry on south to an X Attack and another battle.

18-30.png

Scientist Jayson
Items: X Defense
Porygon Lv32 (Agility/Recover/Magnet Rise/Signal Beam, Ability: Trace, IVs: All 30)
Magneton Lv32 (Spark/Mirror Shot/Metal Sound/Electro Ball, IVs: All 30)

Ah, a fellow X item enjoyer. I'm immediately off to a bad start as Porygon copies Unaware, meaning Phart is now facing a fairly bulky Pokémon with 10 Recover PP and the ability to ignore any X Attacks I use. But I can use a Dire Hit, which also lets Phart ignore the X Defense that Jayson just used.

Sadly, even a crit Struggle is only doing about 20%, and Porygon knows when to use Recover. I smell a stall war. Phart gets a couple of X Sp. Defs before I remember that Porygon has Unaware, then I switch to spamming Antidotes and using Moomoo Milks where necessary. Porygon eventually runs out of Signal Beams, but with 9 Recover PP left, there's still no point in attacking. At last, it exhausts its Recovers and is met with a 5HKO. Magneton is almost trivial in comparison, falling to another 5HKO whilst failing to shift Phart's HP very much.

There's a Collector here who's willing to battle me once I've beaten everyone else on Route 12. I'm almost there now, with only a couple more fights to go, so I start with the nearby Surfer.

18-31.png

Surfer Robert
Remoraid Lv32 (Bubble Beam/Focus Energy/Water Pulse/Signal Beam, IVs: All 15)
Sandygast Lv32 (Mega Drain/Bulldoze/Hypnosis/Iron Defense, Ability: Water Compaction, IVs: All 15)

Remoraid goes down fairly easily to 4 Struggles, even though a crit Signal Beam does take out 40% of Phart's HP in one go. Sandygast is less trivial - it does offer us a few free turns while it uses Iron Defense, but its natural bulk and frequent use of Hypnosis mean Phart has to settle for plodding its way to a 7HKO, though it does get another level out of it.

18-32.png

Now, where's that last Trainer? Down by the beach, as it turns out.

18-33.png

Swimmer Sara
Starmie Lv32 (Water Gun/Rapid Spin/Recover/Swift, IVs: All 15)

Great, another Recover user. At least this one's not packing Signal Beam. I start with an X Attack, and Phart's Struggle deals about 30% or so at +2. This does give Starmie a window to use Recover, but it seems Sara isn't much of a battler, as she just lets it get knocked out while spamming Swift to no avail. I pick up a PP Up just past Sara, then head back to the Collector, who's ready to take me on now.

18-34.png

Collector Andrew
Larvesta Lv35 (Flame Charge/Bug Bite, Ability: Flame Body, Adamant nature, IVs: 30/30/20/20/20/30, EVs: 252 Atk / 252 Spe)
Pinsir Lv35 @ Buginium Z (X-Scissor/Brick Break/Swords Dance, Ability: Hyper Cutter, Adamant nature, IVs: 30/30/30/20/20/20, EVs: 252 Atk / 252 Def)

With a fully-invested Pinsir that's happy to blast Phart with a Savage Spin-Out, this particular Andrew is making me sweat. Fortunately Larvesta isn't too bad, with its Bug Bites only taking Phart to 80/144 HP as I apply 3 X Defenses. I use a Dire Hit and an X Attack next, heal up Phart, then use another couple of X Attacks and an X Speed. Once Phart is healed to full again, a crit Flame Charge takes around 40 HP from it, but it immediately OHKOs with Struggle and avoids geting burned in the process.

Pinsir enters the fray, and as I drop another Moomoo Milk, it launches its Savage Spin-Out right away. Luckily there's no critical hit here, so it simply takes 48 HP away and becomes unusable for the rest of the battle. Phart falls just short of a 2HKO with Struggle, but after tanking two X-Scissors and dodging a third, Pinsir is vanquished, and Andrew hands me TM82 Dragon Tail for winning.

18-35.png

I'm just getting ready to dip into Ula'ula Beach when Samson Oak appears once more - not for anything important, just a polite bit of conversation. He's off again after a few lines of dialogue, so I hit the beach and scoop up some items. I didn't think to note what berries I got from the tree, but they were all status-healing ones, and the remainder of the beach contained a Revive, a Dive Ball, two Pearls and two Big Pearls. Standard stuff really.

18-36.png

This is a bit more interesting... there's a letter in here addressed to a Trainer who can apparently be found at Malie City's cape. It also asks me to battle him when I deliver the letter. Well then, guess I have to go in that case.

18-37.png

Rising Star Nainoa
Delibird Lv29 (Present/Drill Peck, IVs: All 20)
Mudbray Lv28 (Double Kick/Stomp/Bide/High Horsepower, Ability: Own Tempo, IVs: All 20)

Delibird is easily dispatched with 3 Struggles, only using up one Moomoo Milk. Mudbray is more of a nuisance between decently-strong High Horsepowers and its higher Defense, but since this one doesn't have Stamina, it still ends up being a 5HKO without any X items. Nainoa hands me a Pearl String as payment for playing delivery boy, and I'm certainly not going to turn my nose up at a free $15,000.

Stopping off at the beach turns out to have been quite a good decision, as I can just fly back there instead of traipsing across two whole routes again. So I make use of that, and since I'm here, I decide to go Mantine Surfing for the first time in a while - there's another high score to be beaten on this course.

18-38.png

Despite overestimating how many tricks I could do in one go, going too far up the waves and becoming airborne when I wasn't at max speed, and offering myself up to a Sharpedo, I still somehow managed to set the high score, earning me 12 BP and a Big Nugget. I'm almost tempted to do another run to see how much I can score with access to Starmie 720s, but the desire to not get vored by angry sharks wins out.

18-39.png

Not an awful lot to do here, but there's still a few bits and bobs. I pick up a Zinc, a Timer Ball and a Sun Stone outside, receive an Embargo TM from a Scientist and a Lure Ball from Samson Oak inside the power plant, then head back outside to take on the only Trainer here.

18-40.png

Office Worker Shane
Electrike Lv32 (Bite/Thunder Fang/Quick Attack, IVs: All 15)
Electabuzz Lv32 (Thunder Punch/Quick Attack/Low Kick, Ability: Static, IVs: All 15)

Phart manages a 4HKO against Electrike, who doesn't deal much damage with its Thunder Fangs - not even a lucky paralysis lasted for very long before Phart shook it off. Electabuzz is less forgiving, taking less than 25% from each hit and activating Static after 2 Struggles. But while its Thunder Punches certainly hit a bit harder, they're not enough to keep it from getting a 5HKO once Phart stops being fully paralysed.

18-41.png

I take a few steps into Route 13 before Hau catches up to me, having just beaten off Totem Togedemaru, and hands me a Max Potion. Then Gladion emerges from the motel, asking if we know anything about a Pokémon called Cosmog. Can't say it rings a bell.

18-42.png

Oh, really? That's something Phart can do? That would've been nice to know, let's see, 65 hours of play time ago?

Gladion leaves after urging us to protect Cosmog at any cost, albeit in his usual cryptic fashion. As for Hau, he's already run off ahead to the next trial, but I think I'll leave following him until next time. After all, what better place to stop for a rest than at a motel?
Trainers defeated: 183/427
 
:sm/mimikyu: :sm/banette:
Another exciting(?) day at Festival Plaza, when one of the fortune-tellers predicts I'll be a whole ton luckier if I try doing some missions. I earn just shy of 1,300 FC in total once all my tickets are used up, and after various crap facilities get rejected, Sophocles offers something a bit more interesting.

19-1.png

Obviously I can defeat my opponents with or without purple clothing, but it's nice to see a bit more of my favourite colour, especially since you can't buy purple clothes anywhere else in Ultra Sun. So I think I'll be hosting this particular facility.

Weirdly, even though the Alola games make clothing colours version-exclusive in both regular shops and dye shops, it's not always the same colours that are exclusive across both types of shop. For example, in Ultra Sun, I can't get any blue, navy blue or grey clothes without interacting with other players. I also can't get green or purple clothes from normal shops, but I can get those colours from their respective dye shops, while Ultra Moon players will never see those dye shops in Sophocles's offerings. You can also just bring specific berries to any colour of dye shop to get pastel/dark shades of any clothing colour, but the bright colours are only available from 5-star dye shops of that particular colour.

TL;DR: you can't get purple clothes in Ultra Sun without dye shops, but you can't get bright purple clothes in Ultra Moon without hosting another player's 5-star purple dye shop, and that's kind of weird.

Alas, I'm not done waffling yet, because there's also the matter of choosing which facility to delete. I'd rather not bin my 5-star orange dye shop, because you can only have one dyed version of each unique clothing item at once, and I doubt I'll ever be offered access to bright orange clothes again. Since I want to keep my fortune-tellers to maximise my FC gains and want my lottery shops for the occasional (Big) Nuggets, I decide to ditch the Soft Drink Parlor. I will miss the unlimited Moomoo Milks, but I still have nearly 1,000 of them in my bag, and Phart's long grown past the point where a single Moomoo Milk restores all of its HP. Besides, Max Potions will be available to buy once I clear the next trial.

19-2.png

I come out of Festival Plaza having reached rank 61, and as my reward for reaching rank 60, Sophocles lets me change the castle to this fairy tale theme. I'm not a fan, to be honest, so I keep its current glitzy golden theme.

19-3.png

Dye activated! I've changed everything over to purple, but now I sort of miss the slightly garish orange... still, at least I kept the orange dye shop just in case. Feel free to write in if you have any opinions on my clothing colours. Even if that opinion is that I should stop fucking around playing dress-up and just get on with the actual challenge.

19-4.png

Route 13 always felt a bit weird to me, probably because it doesn't have any Trainers or wild Pokémon like you'd expect from a route. (There are a couple of fishing spots, but that's all - no tall grass.) It feels more like a small town/settlement if anything. Whatever it is, it certainly has a few items to gather up. I pick up a Rare Candy, a Moon Stone and a Guard Spec. outside, then receive TM12 Taunt from a man inside one of the caravans. That appears to be it for now, so off I go to Tapu Village.

19-5.png

There's not much to see in Tapu Village on account of Tapu Bulu having nuked it a long time ago. However, I do catch up with the Ultra Recon Squad again - apparently Tapu Village is where Necrozma first came to Alola and battled against the tapu in the distant past. That's interesting.

I can dip into the very beginning of Mount Lanakila here, but there are no items in that section, so it's of little use to someone who's not looking to evolve a Crabrawler. Tapu Village itself doesn't have a great deal either, to be honest. If I had 50 TMs, I could receive a Razor Claw from a Scientist here, but I've only got 36 and I'm hardly rushing to buy more. However, there is a Veteran who's willing to battle me.

19-6.png

Glad I'm not the only one who's been counting! Technically I'm on 183, but I suspect the one-off Battle Royal didn't count because it was in a battle facility.

Veteran Angus
Shelgon Lv36 (Zen Headbutt/Dragon Claw/Brick Break/Double-Edge, Ability: Rock Head, Impish nature, IVs: 30/30/30/15/15/15, EVs: 252 HP / 252 Def)
Sliggoo Lv36 (Dragon Pulse/Thunderbolt/Sludge Bomb, Ability: Sap Sipper, Calm nature, IVs: 30/15/15/30/30/15, EVs: 252 HP / 252 SpD)
Gabite Lv36 (Dragon Claw/Iron Head/Earthquake/Shadow Claw, Ability: Rough Skin, Adamant nature, IVs: 30/30/15/15/15/30, EVs: 252 Atk / 252 Spe)

I've sometimes had issues with Angus even in regular playthroughs, so I expect a single Cosmog might have trouble here too. Gabite's Shadow Claw looks like the biggest threat, having a fully-invested Attack stat backing it up and a high chance to bypass any X Defenses with a critical hit.

May as well treat this like a "proper" battle and go all in on X items. I start with 3 X Defenses, and Phart falls to 119/144 HP after taking two Dragon Claws from Shelgon, dodging the third one. Then I use 3 X Sp. Defs for when Sliggoo comes out, a Dire Hit, 3 X Attacks, and finally 2 X Speeds to outspeed Gabite - Phart would be 1 point slower than it with one X Speed, which is a little annoying.

Having not been struck by any critical hits yet, Phart only needs one Moomoo Milk to heal to full, then it's time to go on the offensive. Even after all the X items, Shelgon's EVs mean that Struggle is only a 4HKO, but it eventually falls.

19-7.png

Maybe I didn't need 2 X Speeds after all.

Gabite is up next, so I use a Moomoo Milk and see how much damage Shadow Claw deals. It does 14 damage with a non-crit while Phart is at +6 Defense. That means that with no Defense boosts, it'd deal around 56 damage, and therefore around 84 with a critical hit. Factoring in Struggle recoil and Rough Skin damage, Phart is never really going to be "safe" to attack Gabite while it still has Shadow Claw PP, but stalling it out seems a bit boring. So I take a risk and have Phart use Struggle, knocking Gabite straight into the red, while it chooses Earthquake instead. I guess it's technically stronger than Shadow Claw after STAB, but when your opponent is at +6 Defense, surely you'd rather go for a crit? Oh well, Phart outspeeds and KOs with Struggle.

Sliggoo is last out, but it's nowhere near as threatening as Gabite. A couple of Moomoo Milks bring Phart back up from red HP, and Sliggoo goes down to a 2HKO. Angus rewards me with a pair of Choice Specs for winning, which would be nice in any other playthrough, but are quite useless in this one.

Since there's nothing else in Tapu Village, I move on to Route 15, though I leave the story events at the Aether House alone for now. Just one item to pick up here (a Hyper Potion) before I take on an Ace Trainer.

19-8.png

Ace Trainer Yuki
Gible Lv34 (Dragon Claw/Slash, Ability: Rough Skin, IVs: 30/15/30/15/15/15)
Alolan Marowak Lv35 (Shadow Bone/Bonemerang/Flame Wheel, Ability: Cursed Body, IVs: 15/30/15/15/15/30)

Struggle fails to muster even a 5HKO against Gible, and thanks to Rough Skin, Phart is almost into yellow HP after a single turn. So I drop an X Attack and a Moomoo Milk before trying again, dealing far more respectable damage. Phart still can't quite KO with its third Struggle, but since Gible isn't doing much damage with its Dragon Claws, I take the opportunity to use an X Defense before the next Struggle strikes it down.

I heal up as Marowak comes in to gauge how strong Shadow Bone is, only for my efforts to be thwarted when it uses Flame Wheel for some reason. Phart then deals 20% with Struggle as it goes for Bonemerang, Struggles again after another Bonemerang misses, heals up as it uses Flame Wheel, then finally gets struck by Shadow Bone for 30 damage, plus a Defense drop. Even though Marowak starts using more Shadow Bones at this point, it's too late, as another couple of Struggles knock it out. With Yuki defeated, I move on to a Swimmer out in the water.

19-9.png

Swimmer Kyra
Seaking Lv35 (Aqua Ring/Fury Attack/Agility/Waterfall, IVs: All 15)
Lumineon Lv35 (Water Pulse/Captivate/Safeguard/Aqua Ring, IVs: All 15)

Aqua Ring on two evolved Pokémon? This could be a slow one. I use an X Attack as Seaking sets up its Aqua Ring, then watch Phart Struggle twice, landing a crit and a non-crit to take Seaking into the yellow. Seaking's Fury Attacks don't trouble Phart's HP too much, letting it fall to 2 more Struggles. Lumineon sets up Safeguard and Aqua Ring while Phart takes off maybe 20% with Struggle, but thanks to Aqua Ring's healing and some Water Pulse confusion, it takes 7 blows before Lumineon is defeated at last.

I'm not getting any further along Route 15 without a Sharpedo to smash through the rocks, so I head into Aether House with Hau. Unfortunately this results in us being ambushed by small children.

19-10.png

Preschooler Hunter
Elekid Lv32 (Thunder Wave/Electro Ball/Light Screen/Thunder Punch, Ability: Static, IVs: All 15)

Since Hunter is a Preschooler running on no AI and just choosing random moves, this isn't too difficult at all. Elekid receives a 4HKO from Struggle, using up a Moomoo Milk and a Full Heal in the process.

19-11.png

Acerola shows up after the battle ends, revealing herself to be the captain of my upcoming trial. Guess it's time to make my way over to the trial site!

19-12.png

Guess again, I need to save Lillie first.

Team Skull Grunt
Drowzee Lv33 (Meditate/Psybeam/Wake-Up Slap/Psych Up, Ability: Forewarn, IVs: All 15)

Easy peasy. Phart cruises to a 4HKO while Drowzee tickles it with Psybeam and copies its non-existent stat boosts with Psych Up. Lillie gives me 5 Luxury Balls afterwards, which I probably won't use for anything, but it's a nice gesture.

19-13.png

Still a few Trainers to go before the trial site, so the joys of taking on a Totem Pokémon with a presumably-disobedient Cosmog will have to wait just a little longer. I pick up a Pearl and a Max Potion, then try to ninja my way past a Collector and fail miserably.

19-14.png

Collector Kawika
Larvitar Lv34 (Rock Slide/Scary Face/Thrash/Dark Pulse, Ability: Guts, IVs: All 30)

It takes a couple of Moomoo Milks, but Phart lands 5 Struggles to KO Larvitar after it hits itself in confusion thanks to Thrash. Moving further along the beach, I find a Max Revive and a Big Pearl, and also receive a Stardust after helping a wild Sandygast find a beach that isn't covered in black sand like this one. That seems to be it for the beach items, so I move on to battling a Fisherman.

19-15.png

Fisherman Hisato
Feebas Lv34 (Splash/Tackle/Flail, Ability: Swift Swim, IVs: All 15)
Gyarados Lv34 (Twister/Ice Fang/Aqua Tail/Scary Face, Ability: Intimidate, IVs: All 15)

It's raining on Route 14, and while I can live with Feebas being twice as fast, I don't like the idea of Gyarados's Aqua Tails being powered up. So I use an X Defense while Feebas is active, as well as an X Attack for Intimidate, then Phart OHKOs Feebas with Struggle. Gyarados opts for Scary Face and Ice Fang while Phart Struggles once and heals up, dealing 20%-ish to the big fish. Phart dodges an Aqua Tail and takes scratch damage from Twister, landing another 2 Struggles before it needs another Moomoo Milk, and when Gyarados finally lands an Aqua Tail, it only deals 27 damage. Another 3 Struggles and a Moomoo Milk are enough to take out Gyarados.

I've done everything worth doing on the land portion of Route 14, so I hop aboard Lapras and get started on the water section, beginning with a Swimmer.

19-16.png

Swimmer Keoni
Pyukumuku Lv34 (Purify/Curse/Gastro Acid/Pain Split, Ability: Innards Out, IVs: All 15)

Pyukumuku is a funny one, because it's easier to just stall it out than to even bother attacking it. However, I do need to bear in mind that it'll be at +6 Attack when it uses Struggle, and Phart won't have Unaware to protect it thanks to Gastro Acid. So I pop on an X Defense and then spam Antidotes for a good few minutes, letting Pyukumuku exhaust its 60 PP. Having initially reduced Phart to 86/150 HP with Pain Split, its Struggles only deal around 14 damage each before it faints, handing us the victory without needing a single Moomoo Milk.

19-17.png

Further along, I come across a Swimmer who's got himself into a bit of a situation with some Frillish, no longer able to move. Naturally, the way to resolve this is through combat, and so one of the Frillish attacks me when I get closer. A Quick Ball spares me the bother of fighting it, and the Swimmer hands me a Destiny Knot to say thanks once the Frillish have dispersed. After a quick flight to deposit Frillish into the PC and a Tauros ride back to Route 14, I take on a Veteran who's become accessible now that the little Frillish event has been resolved.

19-18.png

Veteran Brone
Whiscash Lv36 (Scald/Earth Power, Ability: Anticipation, Sassy nature, IVs: 30/15/30/15/30/15, EVs: 252 Def / 252 SpD)
Honchkrow Lv36 (Night Slash/Aerial Ace/Steel Wing, Ability: Super Luck, Adamant nature, IVs: 30/30/15/15/15/30, EVs: 252 Atk / 252 Spe)

Much like the Veteran with the Absol on Mount Hokulani, Brone carries a Honchkrow that can easily obliterate Phart with a crit Night Slash no matter how many X items I pour into it. Whiscash is hardly a piece of cake either, not with rain-boosted Scalds that can burn Phart and chop its damage output in half. Let's see if I can get through this fight in one attempt...

I start with 3 X Sp. Defs to make it easier to set up on Whiscash, and it immediately burns Phart on turn 1, though it stays in green HP regardless. I squeeze in a couple of X Defenses before healing up, then use a third along with a Dire Hit, and Phart heals its own burn, then does so again when Scald burns it a second time. Whiscash exhausts its Scald PP not long after I use 3 X Attacks and an X Speed - while Phart is fully set up now and ready to attack, I decide to let Whiscash stall itself out instead, so that Phart can carry as much HP as possible into Honchkrow.

A bit of Antidote stalling later, Whiscash runs out of PP, but instead of using Struggle until it faints, Brone has Whiscash use it exactly once before hard-switching to Honchkrow. Uh-oh. I decide to just risk it and have Phart use Struggle, figuring that a crit Night Slash might KO it no matter what. Honchkrow falls into red HP but survives the attack, and obviously uses Night Slash, but it misses the 50% crit chance and deals fairly trivial damage. Phew! The fight is basically won at this point, as Phart KOs Honchkrow with Struggle and drinks a Moomoo Milk while Whiscash KOs itself with Struggle. No prize from Brone for winning this battle, but it does let me pick up TM30 Shadow Ball nearby, which will do.

19-19.png

Trial time at last! Acerola tweaks my Poké Finder a little bit for the purpose of the trial, gives me a quick rundown on what I'm supposed to do, then lets me head into the supermarket building to get started.

19-20.png

A dilapidated ruin teeming with ghouls? Not a problem, I've been to Hartlepool before.

19-21.png

The trial's the same in SM and USUM in terms of battles, and it's not particularly difficult. You head through the old Thrifty Megamart, whip out the Poké Finder every time you come across something vaguely spooky, take a picture of a ghost, battle said ghost, then move on. This Gastly is the first one up.

19-22.png

Gastly
Lv30 (Curse/Confuse Ray/Mean Look/Hypnosis, Ability: Levitate, Timid nature, IVs: All 15)

Not even remotely difficult. Gastly uses Confuse Ray on turn 1 and Phart spends a turn hitting itself, but after Gastly uses Curse on the next turn, Phart KOs it with Struggle before it can take any curse damage. I move on from the mysterious moving conveyor belt until I come across a mysterious moving shopping trolley.

Haunter
Lv30 (Lick/Night Shade/Sucker Punch/Hypnosis, Ability: Levitate, Rash nature, IVs: All 15)

No screenshot because I forgot, but it's another fairly easy one. Phart dodges a Hypnosis, deals around 33% with Struggle, takes light damage from Sucker Punch and Lick, lands another Struggle, heals up, then lands a critical hit on its third Struggle for the win.

19-23.png

What excellent timing! Phart is now disobedient again, and will remain so until Kahuna Nanu is defeated. I had some trouble using Phart the last time it went rogue, and that was only for 7 Trainer battles until I defeated Olivia. This time I'll have to ferry it through, Totem excluded, a total of... 37 battles?! Christ.

Still, complaining isn't going to get me anywhere, so there's nothing to do but crack on. There are some mysterious moving dolls up ahead, and opening the Poké Finder reveals the cause to be a wild Gengar, who's strutting around in the air like it didn't lose Levitate nearly 10 years ago.

19-24.png

Gengar
Lv30 (Night Shade/Shadow Punch/Shadow Ball/Hypnosis, Ability: Cursed Body, Quiet nature, IVs: All 15)

Shadow Ball deals a hefty 60 damage, and Phart pretends I didn't ask it to use Struggle. Not ideal. I heal it up and use an X Sp. Def, and luckily Gengar's wild Pokémon AI causes it to choose Shadow Punch a couple of times instead, but that still does nothing to help me get Phart to attack, especially after Hypnosis puts it to sleep. I try using an X Attack and then waking it back up, and this time it manages to hit Gengar for half its HP. After some more dicking about, Phart lands a second Struggle and just falls short of the KO, but fairly quickly agrees to land the finishing blow.

19-25.png

Acerola's stood before the door to the back room, but she's acting very strange all of a sudden, especially since I haven't actually finished my trial yet...

19-26.png

19-27.png

19-28.png

19-29.png

19-30.png

"Acerola" vanishes without a trace once I take a picture of her, and when I head into the back room, the Poké Finder boots up on its own. So of course I try looking around for any ghosts to photograph, and who should show up behind me but the Totem Pokémon?

19-31.png

19-32.png

Totem Mimikyu
Aura: +1 Attack, +1 Defense, +1 Sp. Atk, +1 Sp. Def, +1 Speed
Lv35 @ Lum Berry (Shadow Claw/Play Rough/Leech Life/Slash, Ability: Disguise, Impish nature, IVs: 31/8/31/15/31/15, EVs: 198 HP / 124 Def / 104 SpD / 84 Spe)

Ally Banette
Lv32 (Screech/Will-O-Wisp/Feint Attack/Curse, Ability: Insomnia, Jolly nature, IVs: 31/15/31/15/31/15)

Ally Jellicent
Lv33 (Water Pulse/Snore/Spite/Night Shade, Ability: Cursed Body, Naughty nature, IVs: All 0)

Mimikyu will summon Banette at the end of turn 1, and then summon Jellicent after Banette faints if it has less than 66% HP left.

Before I go into the difficulty of this fight, I'd like to first acknowledge Snore Jellicent. Just why???

Moving on. Phart certainly benefits from ignoring Totem Mimikyu's stat boosts (barring Speed), but it still has two high-crit-ratio moves, one of which has STAB, and Leech Life too. However, the really big issue here is Banette. Curse puts Phart in a permanent bind, draining 25% of its HP every turn for the entire fight, and to make matters worse, I can't simply stall it out with healing items because it knows Screech - too many of those and Mimikyu might just drop Phart with Shadow Claw. And even if I find a balance between Moomoo Milks, X Defenses and Guard Specs., I still have to contend with Will-O-Wisp burns, disobedience, and Mimikyu's Disguise before I have any hope of knocking my opponents out.

I start with an X Defense, and Totem Mimikyu lands a non-critical Shadow Claw, dealing 20 damage. From that, I can infer that a Shadow Claw would deal 40 damage if Phart had no Defense boosts, and therefore a crit would deal around 60 damage. Hardly pleasant, but after dealing with Night Slashes from the likes of Honchkrow and Absol recently, I'll take it. Let's see if the incoming Banette can make me regret saying that...

19-33.png

I imagine Banette is going to Curse right away rather than try Screech, but it's probably best to set up a Guard Spec. while I have a chance, so I do that. It does indeed use Curse, and Totem Mimikyu lands another Shadow Claw, bringing Phart into the yellow after curse damage. I heal it up, it takes another Shadow Claw, Banette burns it Will-O-Wisp but it heals the burn immediately, and it ends the turn on 90/152 HP. I use a second X Defense while it seems safe to do so, but another Shadow Claw + Will-O-Wisp combo reduces Phart to 29 HP and with an active burn. Luckily I have one Full Restore, so I use that to fix everything, and Shadow Claw + Feint Attack puts Phart back on 90 HP again. I risk another X Defense, the opponents go for Shadow Claw + Feint Attack again with no crits, and the Guard Spec. wears off.

19-34.png

It feels very hard to make progress here... any attempt at Struggling will probably KO Phart by the end of the turn, assuming it even obeys me. Perhaps I'll have to hope I can PP stall to victory. I use a Roto HP Restore to bring Phart back to full, and it dodges a Shadow Claw while not dodging a Feint Attack (obviously). Now at 106/152 HP, it feels safe to use a Guard Spec. again, so I try one - Banette goes for Will-O-Wisp over Screech and Totem Mimikyu lands another Shadow Claw, leaving Phart at 47 HP with a burn. I don't have any more Full Restores, so I just use a Hyper Potion and leave the burn to fester. The opponents use Shadow Claw + Feint Attack again - no crits - and Phart finishes up with 85 HP and a burn.

19-35.png

actual footage of me trying to figure out what the fuck i'm supposed to do

I use a Moomoo Milk to heal Phart back to full, as nothing else feels like a good option. Shadow Claw + Feint Attack land again, putting it back on 85 HP. So I use another Moomoo Milk. Shadow Claw + Feint Attack yet again, dropping it to 83 HP this time. A third Moomoo Milk, the same combo of attacks, back down to 83 HP, and the Guard Spec. wears off. Banette will probably Screech now (Curse + Will-O-Wisp are already active, and Feint Attack doesn't do much), but Phart's HP puts it in range of a KO from a crit Shadow Claw + curse damage, so it's not safe to reapply the Guard Spec. even though I kind of need to. Make it stop :(

I decide to just heal up and let the Screech come if it comes - Phart would still be at a decent +4 Defense, and a critical hit wouldn't care if I'm at +6 or +0. They actually use the Shadow Claw + Feint Attack combo again despite my assumptions, but it's Banette that lands a critical hit, bringing Phart to 55 HP once all is said and done. That's enough to reach 100% from a Moomoo Milk, so I use another. For reasons I can't fathom, they use the Shadow Claw + Feint Attack combo yet again, Phart dropping to 85 HP. One more Moomoo Milk, and Banette finally uses Screech, while Mimikyu uses... Slash? Do my eyes deceive me? Is it out of PP at last? Let's heal up and check what happens.

19-36.png

??????

I'd been counting Shadow Claw PP throughout the battle, and I had it down as having 1 PP left, but when it used Slash I thought I might've miscounted. Nope, just the AI doing, uh, something. 14 Shadow Claws in a row, then right before it runs out of PP, switching to Slash for one single turn?

...was it trying to trick me into believing I'd miscounted and it was out of PP, so that I'd use a Guard Spec. instead of healing and it could try to KO Phart with its last Shadow Claw? Almost certainly not, but god, that would've been fantastic.

Anyway, the final Shadow Claw fails to land a crit, Banette uses Feint Attack again, and Phart heals its burn to end on 90 HP. I finally use the Guard Spec., with Totem Mimikyu now switching to Leech Life while Banette sticks with Feint Attack. I heal up, use an X Defense with Phart on 99 HP, then start counting down the rest of Mimikyu's PP as it switches between Leech Life and Slash. It's never a stress-free process, but there's a little more wiggle room now that Totem Mimikyu's biggest weapon is no longer looming over us.

19-37.png

At the point where Totem Mimikyu still has 26 PP left, Banette chooses to use Will-O-Wisp on Phart while it's already burned and has a Guard Spec. active, which almost certainly means it's out of Feint Attack PP. Yet the battle still "rages" on, just with Phart taking slightly less damage each turn and usually ending them on around 100 HP. I'm now reliably blocking a Screech from Banette every time I use a Guard Spec., a clear indication that it's running out of options.

19-38.png

At last, the beginning of the end! It looks like the Totem will faint before Banette does, meaning I won't have to bother fighting Jellicent at all. Another 4 turns pass in a blur of milk and muffled screeching (not always from Banette), and sure enough, Totem Mimikyu Struggles itself out of the fight, its Disguise still perfectly intact and doing nothing to save it.

19-39.png

As for Banette, it still has quite a few turns to go - Screech has 40 PP - and I'm not planning on risking things by trying to attack it directly with Phart. One wrong move here could mean having to restart the entire battle. So I play it as safe as I possibly can, using a Guard Spec. every time the last one wears off and a Moomoo Milk on every other turn. Finally, Banette exhausts its PP and uses Struggle, then KOs itself after using it again, finally bringing the most stressful battle of the entire challenge so far to an end after 88 turns!

19-40.png

19-41.png

Turns out Phart can't ignore my orders if I don't give it any.

19-42.png

God, I really hope there aren't any other Curse users in the rest of the game.

Acerola gives me 10 Dusk Balls so I can go and catch Pokémon inside the trial site if I want (I do not). She tries telling me that she wasn't in the trial site with me, and that there isn't any sort of back room in the building, which I guess is supposed to be a spooky mystery or something. Frankly, I'm too exhausted to care after everything I've just been through. Maybe I should stop for a rest at the Aether House.

19-43.png

So much for resting. I don't know what Team Skull are planning, but Plumeria won't let me past without a battle, so I'll have to take her on.

19-44.png

Team Skull Admin Plumeria
Golbat Lv37 (Wing Attack/Poison Fang, Ability: Inner Focus, Jolly nature, IVs: All 30, EVs: 252 Atk / 252 Spe)
Salazzle Lv38 (Dragon Pulse/Flamethrower/Sludge Bomb, Ability: Corrosion, Hasty nature, IVs: All 30, EVs: 252 SpA / 252 Spe)

I start off with 2 X Defenses, and Golbat seems more interested in using weak Wing Attacks than trying to badly poison Phart with Poison Fang, so I take it as a chance to add on 2 X Sp. Defs, 2 X Attacks and a Dire Hit. Phart ends up loafing around when I want it to attack, so I spend a few more turns restoring its HP and curing an unlucky poisoning. Once it eventually lands a Struggle, it does just under 50%, but the next Struggle comes along fairly quickly and nets a 2HKO on Golbat.

Next up is Salazzle, whose Sludge Bomb deals a paltry 13 damage and fails to poison. Phart lands a Struggle early on and almost takes Salazzle into the red, so it's just a matter of using Moomoo Milks while it disobeys me for a long, long while until it eventually lands a second Struggle and takes out Salazzle as well.

19-45.png

Okay, so Team Skull have kidnapped a Yungoos from here and taken it off to their base, and I have to go there by myself if we want to get it back. I guess I could find time for that... but I really must be having that rest first. It's a long way to Po Town.
Trainers defeated: 193/427
 
:sm/sharpedo: :sm/frillish:
It's occurred to me after my last post that I don't really need Festival Plaza for anything any more. I have enough Moomoo Milks to cover Phart for a good while, I don't need any EV-reducing cafés because I've got berries for that, and the lottery shops aren't that useful for grinding money when I can get more cash more quickly from Isle Aphun and Pyukumuku-chucking. So I don't feel especially bad when I replace one of the lottery shops with another 5-star fortune-teller - I'm mostly just trying to see how high I can get my Festival Plaza rank at this point.

20-1.png

No Trainers here, just a few items and some rather annoying wild Pokémon zooming around at high speeds. But I'm armed with 8 Max Repels and a map I found online, so this shouldn't take too long.

The lady who was guarding the barricade hands me a Fresh Water and an Adrenaline Orb before I enter, and that Fresh Water is soon handed over to a man in the desert who seems a bit dehydrated. Once he's made his way back to the motel on Route 13, I carry on towards a Max Potion and a Hyper Potion, then stumble upon a random pedestal with no Totem Pokémon guarding it.

20-2.png

One of the two Z-Crystals I can actually use! But as I've said before, Z-Teleport is basically useless, as its effect (restoring Phart's HP to full) can be easily replicated with a Max Potion. Not to mention Phart doesn't know Teleport and can't relearn it until just before the Pokémon League. Also, nobody's around to show me the Psychic-type Z-Move pose, so how would I know how to activate it in a battle?

Further into the desert lies a Comet Shard, a Big Nugget and TM85 Dream Eater, and of course the Ruins of Abundance. However, I can't get much further than the entrance without being able to ride Machamp, and I don't think Tapu Bulu would find me interesting enough to show up even if I did get past the boulders. At least now I can just fly back here next time instead of wandering through the desert again. So I head back to Route 13, receive 10 Fresh Waters from the man I rescued earlier, then return to Route 15 to get on with the story.

20-3.png

Yeah, definitely doing alright for money with or without Festival Plaza. I do spend a large chunk of it on X items, Max Potions and Max Repels immediately after taking that screenshot, but even so, I've still got $550,000 to spare.

20-4.png

Grimsley's fallen on hard times, having lost his Elite Four title and turned to surfing instead. He flips a coin and makes me guess whether it'll be heads or tails beforehand (or neither), but no matter which choice I pick, I end up being the winner and having Sharpedo added to my Ride Pager. Result!

There's a tiny bit of backtracking I do first, heading to Melemele Island to pick up a Light Clay and TM64 Explosion from some areas that were previously locked behind rocks I can now smash. Both useless, as you can imagine, but it scratches a completionism itch. With that out of the way, I hop aboard Sharpedo once more and blast my way along the southern part of Route 15, stopping to take on a Surfer on a nearby island.

20-5.png

Surfer Jennis
Mantine Lv36 (Air Slash/Surf, IVs: 15/15/15/30/15/30)

I suppose it would be weird if a Surfer had the Pokémon that you Surf on in USUM and it didn't know Surf. Said Surf takes Phart down to 124/152 HP while it pretends not to hear me, and when it eventually lands a Struggle, it deals piddly damage. After an X Attack and two Moomoo Milks, it deals a bit more damage with Struggle, but it still takes another 3 blows from there to get the KO.

20-6.png

The obedience rate has now fallen from 49.02% to 48.08%! How awful. I finish up on the little island by picking up an Acrobatics TM and a Totem Sticker, then set out on Sharpedo once again until I encounter another Trainer.

20-7.png

Swimmer Jared
Tentacruel Lv35 (Acid Spray/Bubble Beam/Barrier/Poison Jab, IVs: All 15)

Bleh, lots of stat-changing effects there. I start with a Guard Spec. to block Acid Spray drops, then a Dire Hit to bypass the Barrier that Tentacruel just set up. Phart manages two Struggles in a row, taking Tentacruel to just above 50% before I need to use a Hyper Potion, then I reapply the Guard Spec. while Phart farts around doing nothing. A stray Poison Jab inflicts poisoning, making it harder to find opportunities to try Struggle, but I'm eventually able to coax Phart into landing 3 more attacks to defeat Tentacruel.

Back on the water again, I reach another section of land with a Dive Ball, as well as a pair of Swimmers - I'll have to come back to fight them once I've dragged Ralts out of hibernation. For now, I'll settle for fighting another lone Swimmer.

20-8.png

Swimmer Alexandria
Bruxish Lv36 (Psywave/Crunch/Aqua Tail/Screech, IVs: All 15)

Can't tell if it has Dazzling or Strong Jaw, but Crunch will hurt regardless. I manage a Guard Spec., an X Defense and an X Attack before needing to heal, and Phart lands a Struggle, dealing about 25%. It manages another Struggle before getting stroppy and refusing to attack for a few turns, then lands another one, then gets stroppy again. But with all the Guard Specs. I've been using, there's no real way for Bruxish to break through, so it inevitably faints once Phart gets its act together for one last Struggle.

At last, I reach the beach that lies just before Route 16. There's a Fisherman here who'll give me a Comet Shard if I bring a Pokémon that knows Tickle, so that he can... stop his Starmie from competing in staring contests? Sadly I don't have any Tickle users to hand, but I do have an Omanyte that will learn it at Lv. 43, so I throw it into Isle Evelup for some much-needed grinding - guess I'll be coming back here in a few days. I wrap up the beach stuff by picking up a Pearl and a Normal Gem and battling an Ace Trainer.

20-9.png

Ace Trainer Karla
Alolan Sandshrew Lv36 (Iron Head/Ice Ball, Ability: Snow Cloak, IVs: 15/30/15/15/15/30)
Haunter Lv36 (Shadow Ball/Dark Pulse, Ability: Levitate, IVs: 15/15/15/30/15/30)
Wigglytuff Lv37 (Hyper Voice/Dazzling Gleam, Ability: Competitive, IVs: 30/15/15/30/15/15)

Three Pokémon will be rough, especially with Phart disobeying me. I use an X Defense, an X Sp. Def and an X Attack to give it some actual stats, then try to go on the offensive while Sandshrew launches weak Ice Balls back. Phart manages a couple of Struggles without issue, bringing Sandshrew into yellow, and surprises me by landing another two Struggles for the KO, not showing any signs of disobedience at all.

I use a Moomoo Milk when Haunter comes out, and Dark Pulse hits for around 25 damage, with a follow-up Shadow Ball dealing around 35. Phart continues its streak of listening by hitting Haunter for 50% with Struggle, then listens again and knocks it out on the next turn! It does eventually start loafing around against Wigglytuff, but it still manages to squeeze out a 4HKO with little fuss.

20-10.png

"You've gotta have two Pokémon if you wanna battle us!"
"You've got just one Pokémon? That will make it too tough for you to fight with us."


Too tough? If only they knew. I dip into Route 16's Pokémon Center for a moment, then return with Ralts in my party to take them on.

20-11.png

Swimmers Yumi and Jake
Frillish Lv35 (Surf/Ominous Wind, Ability: Water Absorb, IVs: 30/15/30/15/30/30, EVs: 252 HP / 252 Spe)

Thanks to Water Absorb, both Frillish will restore 25% of each other's HP every time they use Surf, and getting Phart to attack frequently enough to break past that might be difficult. So maybe it'd be better if I just stalled them out instead?

I use an X Sp. Def on Phart, and Ralts tries to target it with Memento but gets knocked out by a Surf before it can attack. The other Frillish also uses Surf, leaving Phart at 132/155 HP after both attacks. The two of them continue spamming Surf after this, so I pop a couple more X Sp. Defs on to maximise Phart's special bulk, and each hit now does 4-6 damage. This lets me begin the slow process of stalling with an Antidote for 20 turns, with a Water Absorb activation message popping up every time Surf is used. Both of the Frillish get a boost from Ominous Wind along the way, but Unaware renders them useless, and they both eventually succumb to Struggle recoil and faint. I'm pretty sure I spent more time watching Water Absorb activate than actually choosing what to do in that battle...

20-12.png

With Ralts thrown back into the PC, I can pick a few more fights in an exciting new location. The first one is actually inside the Pokémon Center, where a Team Skull Grunt seems a bit too excited about drinking Moomoo Milk.

20-13.png

Team Skull Grunt
Trubbish Lv35 (Swallow/Take Down/Sludge Bomb/Clear Smog, Ability: Stench, IVs: All 20)

Nothing too bad, although Clear Smog puts me off using any X items. Phart has only managed 2 Struggles by the time Trubbish uses all 10 Sludge Bombs, not even taking it into yellow HP, but at least now it's starting to damage itself with Take Down. After quite a bit of healing, Phart eventually lands another 3 attacks to win the battle, causing the grunt to scarper.

Once that's resolved, the café owner hands me a Moomoo Milk, and a lady nearby gives me a Lemonade. Also nearby is an Aether Foundation Employee who's looking for someone to help her do some research. It seems she'll pay me handsomely if I can help out, so let's ask what Pokémon she wants to see.

20-14.png

lmao

Moving on. There's an Aether Base outside, but with Zygarde being relegated to a postgame encounter in USUM, it doesn't have any purpose right now. The best I can do is climb underneath it to reach a hidden area, but said area has already been claimed by a Preschooler who's looking for a battle.

20-15.png

Preschooler Kindra
Mimikyu Lv34 (Mimic/Feint Attack/Charm/Slash, Ability: Disguise, IVs: All 15)

Much easier than Totem Mimikyu, that's for certain. I use a Dire Hit to protect Phart from any Charms, and Mimikyu's Feint Attack deals 24 damage in return. Phart obeys straight away and breaks the Disguise with Struggle, dealing just under 25% with a second hit on Mimikyu itself. It does go rogue for a bit and ignore my orders, but it doesn't take too long to get 4 Struggles out and defeat Mimikyu.

20-16.png

There's a universe out there where Phart would be evolving into Solgaleo right now and I'd breeze through the rest of the game. This is not that universe. (Also, Phart probably wouldn't be Lv. 53 now if I had evolved it into Cosmoem, because it'd miss out on the 20% Exp. boost from staying as a Cosmog past Lv. 43, but you get my point.) I pick up the X-Scissor TM that's nestled away here, climb back under the Aether Base, pick up a PP Up, then take on the last Trainer in the area.

20-17.png

Scientist Reid
Items: X Sp. Def
Charjabug Lv35 (Spark/Acrobatics/Crunch/X-Scissor, Ability: Battery, IVs: All 30)
Alolan Muk Lv35 (Minimize/Fling/Knock Off/Crunch, IVs: All 30)

Some vaguely heavy hitters, one of whom will happily remove Phart's Eviolite, so I'd better be prepared.

I lead with an X Defense and X Attack, expecting Charjabug to go for X-Scissor, but it's more interested in using Acrobatics for 10 damage each time. Oh, and paralysing Phart with Spark. Once the status is healed and a Struggle is executed, it's still only a 5HKO, so I use another X Attack. This certainly helps increase the damage output - not quite enough to KO Charjabug in 2 Struggles, but good enough for 3. Muk comes in and immediately bats away Phart's Eviolite with Knock Off, and a subsequent Crunch deals 44 damage. Luckily Phart is cooperative enough to land 3 Struggles fairly quickly, one of them a critical hit, and takes down Muk before it gets any Defense drops with Crunch.

20-18.png

What's Faba doing out here in Ula'ula Meadow? He's thinking about how to deal with Necrozma, apparently. And here I was bracing for another battle.

There are a few other fights to be won in the meadow - 5 in total - so at least Phart will see some action here even if Faba's too busy for a scrap. The Golfer by the entrance won't battle me until I've beaten everyone else, so I set off across the bridges until I reach a Dancer.

20-19.png

Dancer Mireille
Red Flower Floette Lv36 (Wish/Magical Leaf/Grassy Terrain/Petal Blizzard, Ability: Flower Veil, IVs: All 15)

I start with an X Attack, Magical Leaf deals a paltry 12 damage, and Struggle lands a quick 2HKO thanks to a critical hit. And no obedience issues! This lets me quickly move on to pick up a Red Nectar and a Repeat Ball, then battle another Trainer.

20-20.png

Office Worker Michelle
Torkoal Lv36 (Flame Wheel/Rapid Spin, Ability: Drought, IVs: All 15)
Whimsicott Lv36 (Energy Ball/Dazzling Gleam, Ability: Prankster, IVs: All 15)

Behold, Prankster Whimsicott with no status moves!

As funny as that may be, Torkoal's bulk is no joke, so I use a couple of X Attacks while it deals moderate damage back with sun-boosted Flame Wheels. Phart goes rogue for a few turns and doesn't attack, while Torkoal switches to harmless Rapid Spins, letting the sunlight fade away. Struggle eventually lands for what looks like a 4HKO, and once Phart cooperates enough to actually land 4 hits, Torkoal goes down. Whimsicott's first Energy Ball gets a Sp. Def drop, then it gets another while Phart ignores my orders, so I use an X Sp. Def and wait for Phart to eventually deliver a 3HKO, bringing me to a total of 200 Trainer battles won using a Cosmog so far.

Heading further north, there's another Red Nectar and an Adrenaline Orb in a patch of flowers, and an X Sp. Def to replace the one I just used at the end of a small path. That's the last of the items here, so I take on a nearby Lass.

20-21.png

Lass Rylee
Sneasel Lv35 (Hone Claws/Beat Up/Screech/Slash, IVs: All 15)
Komala Lv35 (Yawn/Slam/Flail/Sucker Punch, Ability: Comatose, IVs: All 15)

A Guard Spec. first to block any Screeches, then an X Attack. Neither of Sneasel's attacks hit very hard, and it goes down to 3 Struggles. Komala's Slam and Sucker Punch do a bit more damage, but it too falls to a 3HKO from Struggle, with Yawn unable to put Phart to sleep before it lands the finishing blow. The Exp. Points are just enough to push Phart up to Lv. 54 as well.

20-22.png

I also make a quick trip to the Lake of the Moone while I'm here. It's huge, it's mysterious, and it's... largely irrelevant. All that's here now is TM03 Psyshock, and I can get another Cosmog in the postgame if I want (though even that is technically from the Lake of the Sunne), and that's about it. This is also where the Ultra Recon Squad station themselves after the storyline is resolved, so you can get a couple more lines of dialogue from them if you want. As I say, not much to do here, so I head back to Ula'ula Meadow.

20-23.png

Another battle against the upcoming actress lady I've fought before on the previous islands. She's still just using one Oricorio, so it shouldn't be too bad.

20-24.png

Actor Meredith
Baile Style Oricorio Lv36 (Air Slash/Double Slap/Teeter Dance/Roost, Ability: Dancer, IVs: All 20)

I stand corrected, that moveset looks quite annoying actually. I start with an X Attack, and Air Slash deals 39 damage with a crit - not too bad, but it's the flinches that are the bigger nuisance. After a Dire Hit and a Moomoo Milk, Phart manages to bypass disobedience and Teeter Dance confusion to land a Struggle, but it's not even a 2HKO... and of course Oricorio Roosts itself back to full on the next turn. So I use a second X Attack, which lets Phart deal well over 50% when it lands another Struggle, but does nothing to stop Oricorio healing itself again. It's only thanks to Oricorio inexplicably going for a Teeter Dance at low HP that Phart can break through it, and Meredith leaves to lick her wounds afterwards.

With everyone else defeated, I can go back and challenge the Golfer now. Technically I don't think I needed to defeat Meredith to battle him, since she was only added to the area in USUM, but I was gonna fight her eventually so it's no big deal.

20-25.png

Golfer Dean
Hariyama Lv39 @ Flame Orb (Knock Off/Fake Out/Arm Thrust, Ability: Guts, IVs: 30/20/30/20/30/20, EVs: 252 HP / 252 SpD)
Alakazam Lv39 @ Flame Orb (Recover/Psybeam/Trick, Ability: Magic Guard, IVs: 30/20/20/30/20/30, EVs: 252 SpA / 252 Spe)

He's certainly not wrong about the Flame Orbs. In summary, Phart is probably going to have its Eviolite removed, then get slapped with Guts-boosted Knock Offs, then Alakazam will give it a burn once Hariyama goes down. Fun times!

I use an X Defense to start with, and Hariyama forgoes Fake Out in favour of using Knock Off on turn 1, taking Phart to 131/161 HP just before the Flame Orb burns it. So I apply a couple more X Defenses, only for Hariyama to decide one Knock Off is enough and start spamming Arm Thrust. Is this another one of those cases like with Bulldoze/Icy Wind/etc., where the AI sees a damaging attack as a "utility" move and forgets that it can deal damage too? Whatever the case, it works in my favour. I take the opportunity to use a couple of X Attacks and an X Sp. Def, heal Phart to full with a Moomoo Milk, then try Struggle. It doesn't hit particularly hard, but thanks to the burn damage, Hariyama's HP is low enough after 2 Struggles that I can just heal Phart and let it faint to its own burn.

Alakazam comes in and tries to use Trick, but Phart actually dodges it, only to loaf around instead of attacking. It only manages to deal 50% with Struggle on the second turn, and then gets burned by the Flame Orb, halving that damage output for the rest of the fight - as it turns out, even if Phart heals its own burn with affection magic, the Flame Orb reactivates immediately afterwards. In an attempt to break through Alakazam, I use a Dire Hit and a third X Attack, while the incoming Psybeams deal unimpressive damage. But even that's not enough, as Struggle deals around 50% again, so I resort to just PP stalling Alakazam until it KOs itself.

Well, that was unpleasant. Dean hands me a Flame Orb for winning, which I can't imagine will be of any use to me at all. Time to move on.

20-26.png

You can tell I'm getting close to the bad guys because the weather has got worse all of a sudden. Route 17 is the last proper route in Alola before the wilderness of Poni Island, and in keeping with most of the other routes, it's basically a straight line to the story stuff with some optional bits off to the side. But before I tackle any of that...

20-27.png

Omanyte's training session in Poké Pelago has taught it how to use Tickle, letting me claim that Comet Shard I skipped over earlier by tickling a Starmie into submission.

20-28.png

So much for never seeing one of these again. Since I still have an identical facility in Festival Plaza and there's absolutely no advantage to having duplicates, I reject this one and get back to ticking more battles off the list. I don't have to walk very far into Route 17 before a Team Skull Grunt comes into view.

20-29.png

Team Skull Grunt
Alolan Rattata Lv36 (Sucker Punch/Super Fang/Double-Edge/Endeavor, IVs: 30/15/15/15/15/15)
Haunter Lv36 (Confuse Ray/Sucker Punch/Payback/Shadow Ball, Ability: Levitate, IVs: 30/15/15/15/15/15)

That's a slightly novel IV spread. Wonder why they didn't just go for all 15s like usual? It shouldn't matter too much though, as Rattata and Haunter aren't the bulkiest of Pokémon.

I use an X Attack before Phart lands a Struggle without issue, not quite getting the OHKO on Rattata and taking some Sucker Punch damage in return. This makes things a bit tricky, as Rattata is faster and knows Endeavor - if it uses that, a successful Struggle on the same turn will KO Phart. So I make rare use of an X Speed instead, heal up with a Moomoo Milk, then let Phart KO Rattata after a disobedience hiccup.

Haunter pops up next, and given that Shadow Ball is quite scary, I use an X Sp. Def. Haunter immediately lands a Shadow Ball for 32 damage, plus a Sp. Def drop, so I heal Phart again. The next Shadow Ball takes it to 113/161 HP, it refuses to obey, and then gets struck by Confuse Ray. I find that Haunter really loves those Shadow Balls, so I end up using a second X Sp. Def, but Phart eventually ends the battle with another 2HKO from Struggle. Heading up the path by the mountain lets me scoop up an X Attack, a Lemonade, a Full Heal and a Nest Ball before I find the next grunt.

20-30.png

Team Skull Grunt
Mareanie Lv36 (Toxic/Venoshock/Spike Cannon/Recover, IVs: 30/15/15/15/15/15)
Alolan Grimer Lv36 (Minimize/Fling/Knock Off/Crunch, IVs: 30/15/15/15/15/15)

There's the weird IVs again. Maybe they're just trying to add some bulk to the unevolved crap the grunts are throwing out.

Given that Mareanie is fairly bulky, has Recover, and I don't want Phart suffering from Toxic for too long, I start with two X Attacks this time. Luckily Mareanie just goes for weak Venoshocks that barely reach double-digit damage, and Phart manages a fairly quick 2HKO without taking any poison damage. I use a Hyper Potion when Grimer comes out, it wastes a turn using Minimize, and Phart manages another speedy 2HKO with Struggle while taking moderate damage from one Crunch.

Once she's defeated, I head back up the mountainside path again and jump down some different ledges this time, leading to TM80 Rock Slide. Which is obviously useless, so I don't know why I did that. What's less useless is the next grunt I come across once I head back down onto the main path.

20-31.png

Team Skull Grunt
Ekans Lv36 (Spit Up/Acid Spray/Mud Bomb/Gastro Acid, Ability: Intimidate, IVs: 30/15/15/15/15/15)

The usual X Attack to begin with, and Ekans uses Gastro Acid, though I don't think disabling Unaware will actually do anything in this fight - Ekans has ways to lower Phart's stats, but it can't raise its own. I use a Guard Spec. after the first Acid Spray lands while Phart throws another tantrum, and when Struggle eventually hits, it falls a little short of a 2HKO. But Ekans's damage output isn't especially high, so there's plenty of time to squeeze in 2 more Struggles and claim victory.

Just outside the entrance to Po Town, I find a hidden Dire Hit at the base of a lamppost, then brace myself to take on the two grunts that are standing guard by the door.

20-32.png

Of course, with there being two of them, you can probably guess what her next line will be.

20-33.png

While I have done 9 Double Battles by myself so far, all of them were entirely optional battles against random route Trainers, so I could've skipped them entirely if I wanted. These two grunts, however, are not optional - even if I'd decided to make this a "true" solo run and skip over every battle I couldn't enter with only Phart, I'd have to bend those rules in order to proceed here, so I'm glad I didn't do that. A quick flight back to Route 16 lets me bring along Ralts so I can fight my way into Team Skull's lair.

20-34.png

Team Skull Grunts
Pawniard Lv36 (Scary Face/Metal Claw/Slash/Assurance, IVs: 30/15/15/15/15/15)
Scraggy Lv36 (Brick Break/Chip Away/High Jump Kick/Scary Face, IVs: 30/15/15/15/15/15)

Phart gets an X Defense to start with, and for the first time this playthrough, Ralts's Quick Claw activates, letting it use Memento on Phart before an opponent can KO it first. I didn't actually want Phart's Attack lowered, of course, but getting Ralts out of battle ASAP is more important.

A combination of Metal Claw and High Jump Kick deals a total of 16 damage to Phart, giving me plenty of time to use 2 X Attacks and wait for it to Struggle. The first hit deals around 33% to Scraggy before leaving Phart in need of a Moomoo Milk. A second Struggle comes out right afterwards, dealing another 33% but to Pawniard this time (and incidentally, its Assurances are dealing around 18 damage each - hardly enough to cause a problem). Phart cooperates well enough to hit Pawniard twice more and KO it without disobeying me, then acts up a little bit before hitting Scraggy twice as well to win the battle. I'd hoped to watch Scraggy obliterate itself with a High Jump Kick miss, but alas, I have to settle for the equally humiliating act of beating it with a Cosmog.

20-35.png

The grunts decide to just head back into Po Town after losing and lock the door behind them, but luckily Nanu arrives to open it back up again. He even offers his corpse delivery services free of charge, because he's just that nice. In we go then.

20-36.png

20-37.png

Christ, even Galar isn't this bleak.

Route 17 already had its fair share of grunts knocking about, but Po Town is balls-deep in Team Skull territory, as the graffiti on the nearby sign tells me. There are still 14 battles to go before I reach Guzma, although once your boy is defeated, there'll only be another 4 battles before I'm done with Ula'ula Island - if all goes well, I'll be cramming all of that into the next post.
Trainers defeated: 210/427
 
:sm/houndour: :sm/persian-alola:
21-1.png

The grunts have set up some barricades to block me from accessing the rest of Po Town, but it seems they neglected to block off the rather large hole in the hedge a few metres away. Getting through it is no problem, but they're not about to let me waltz past them without a fight.

21-2.png

Team Skull Grunt
Spinarak Lv36 (Sucker Punch/Spider Web/Agility/Pin Missile, IVs: 30/15/15/15/15/15)

Phart immediately lands a Struggle while Spinarak opts for Agility, but it doesn't even look like a 3HKO, so I drop an X Attack. While I do run into some obedience issues again, Spinarak seems more interested in Agility and Spider Web than actually attacking, and so it only lands one Sucker Punch before fainting to another 2 Struggles.

21-3.png

No time for celebration, however, as the other grunt also wants to battle.

21-4.png

Team Skull Grunt
Trubbish Lv36 (Take Down/Sludge Bomb/Clear Smog/Toxic, IVs: 30/15/15/15/15/15)

I run into the issue here of not wanting to use X items due to Clear Smog being there, but with Struggle only looking like a 6HKO, it's tricky. Phart is reasonably obedient at least, but being struck by Toxic while it's already low on HP is less than ideal. Trubbish ends up using all its Sludge Bomb PP and helping out by chipping its own HP with Take Down, letting Phart sort-of-5HKO it after a lot of healing.

With both grunts defeated, they resign themselves to keeping watch over the barricade, allowing me to explore Po Town a bit more. The Pokémon Center has been overrun by Team Skull just like the rest of the town, charging me the princely sum of $10 if I want to heal my Pokémon, and they make some vague threat when I decline their offer. Hey, not my fault Phart can't fight unless it's out of PP. With nothing else but a Totem Sticker in here, I head back outside and continue along until another grunt spots me.

21-5.png

Team Skull Grunt
Drowzee Lv37 (Psybeam/Wake-Up Slap/Psych Up/Synchronoise, IVs: 30/15/15/15/15/15)

Synchronoise actually has a decent 120 power, but given that it's resisted and Drowzee is, well, Drowzee, it still only hits for 11 damage. Its other moves are even less helpful, so there's no real threat at all to Phart, who eventually lands a critical hit to 4HKO Drowzee after stopping for a quick Moomoo Milk.

21-6..png

"Oh? You don't have two Pokémon? In that case, we can't take you on."


(Yes, they both had the same line.) These two grunts are supposed to ambush you the instant you crawl through this hedge under normal circumstances, but since I've only got Phart with me, they decide that's too dishonourable and let me in without any fuss. Aside from a Full Restore, this area is an empty dead end, so all that's left to do is bring along Ralts and pretend to be taken by surprise when they challenge me.

21-7.png

Team Skull Grunts
Alolan Raticate Lv37 (Assurance/Crunch/Sucker Punch/Super Fang, IVs: 30/15/15/15/15/15)
Golbat Lv37 (Swift/Poison Fang/Mean Look/Leech Life, Ability: Inner Focus, IVs: 30/15/15/15/15/15)

I start with an X Defense on Phart while Ralts targets it with Memento as usual. Both opponents try to target Ralts for an easy KO - Raticate fails because it went for Sucker Punch, but Golbat's Poison Fang knocks it out quickly enough.

One more X Defense once Ralts is down, and the combination of Leech Life and Crunch takes Phart to 140/164 HP after I use it. This is bearable enough for me to pop a couple of X Attacks before ordering a Struggle, which successfully hits Golbat for just under 50%. Phart needs a couple of Moomoo Milks to stay healthy, but lands a second Struggle on Golbat before starting to disobey. Luckily that only lasts for one turn before it hits Golbat a third time to KO it, leaving just Raticate. The assortment of Dark attacks prove a bit annoying, especially when it lands a crit Sucker Punch, but "annoying" isn't enough to save it from another 3HKO in the end.

That battle also marked the first time this playthrough that Phart's disobedience caused it to take a nap... except it immediately shook itself awake on the same turn. Fun stuff. Anyway, Ralts goes back in the PC and I go on to the next battle.

21-8.png

Team Skull Grunt
Ekans Lv37 (Spit Up/Acid Spray/Mud Bomb/Gastro Acid, Ability: Intimidate, IVs: 30/15/15/15/15/15)
Salandit Lv37 (Flame Burst/Toxic/Nasty Plot/Venoshock, Ability: Corrosion, IVs: 30/15/15/15/15/15)

As with the last Ekans Phart faced, I use a Guard Spec. to block the Acid Spray drops, then an X Attack to offset the Intimidate drop. Ekans barfs up a Gastro Acid, which isn't an issue now, but might be if Salandit gets a chance to use Nasty Plot later, as Unaware can no longer ignore those boosts. I decide to use a second X Attack to try and smash through Salandit ASAP when it comes out, but unfortunately Phart decides it's time for another nap. A quick Awakening sorts that out, and Ekans eventually goes down to a Struggle 2HKO. Phart manages one Struggle on Salandit before needing healing, but manages to cure itself of a Toxic and deliver another 2HKO before any Nasty Plots can be devised.

Phew, not as bad as it could've been. I've almost reached the mansion now, but there's still one more Trainer outside to pummel.

21-9.png

Team Skull Grunt
Fomantis Lv37 (Leaf Blade/Synthesis/Slash/Sweet Scent, Ability: Leaf Guard, IVs: 30/15/15/15/15/15)
Mareanie Lv37 (Venoshock/Spike Cannon/Recover/Poison Jab, IVs: 30/15/15/15/15/15)

Two X Attacks to start with this time, since both opponents have recovery moves, then Phart lands a Struggle that very nearly one-shots Fomantis. This impressive feat is slightly ruined when Phart refuses to obey for a few turns, as Fomantis uses 3 Synthesises (Syntheses?) in the interim to heal itself back into green HP - though not quite to 100%, as the rain literally dampens its recovery. Another Struggle does eventually hit for the KO, bringing in Mareanie. The first Struggle takes it into yellow, but fortunately it passes up on an opportunity to use Recover while Phart ignores me, fainting to a second Struggle on the next turn.

There's a Smoke Ball off in a corner of Po Town that I pick up. Theoretically could be useful for not getting bothered by fast wild Pokémon... but then what would all those Max Repels I bought earlier be for? Also, even if I do give it to Phart, I just know I'll forget to swap back the Eviolite afterwards and it'll get absolutely fucked by a crit Crunch or something.

21-10.png

Another batch of grunts lurks within the Shady House (to be fair, they do kind of live here), with 8 in total separating me from Guzma and the Yungoos I'm supposed to be rescuing. Hopefully they're not getting too bored - it's been almost 2 weeks IRL since Yungoos got abducted, and I can't rule out the possibility that Guzma's been sat waiting in his room the entire time. At least he's got his laptop to keep him occupied.

You can see a grunt right there in the screenshot, and sure enough, he picks a fight as soon as I come into his line of sight.

21-11.png

Team Skull Grunt
Drowzee Lv38 (Psybeam/Wake-Up Slap/Psych Up/Synchronoise, IVs: 30/15/15/15/15/15)

This looks awfully similar to the Drowzee I fought outside a little earlier, except with one extra level added. As you can imagine, that's not nearly enough to save it from a 5HKO, especially since it spends most of its time spamming Psych Up instead of trying to score some chip damage. I head outside afterwards, to a small area with an empty swimming pool and a couple of items: an Ice Stone and a Rare Candy, plus three Totem Stickers piled on top of one another.

Nothing else outside except for a stray grunt who's a bit lost in thought - I'll be coming back to him once I beat Guzma - so I head back indoors for now. I'm quickly spotted by another grunt patrolling the corridor.

21-12.png

Team Skull Grunt
Salandit Lv38 (Flame Burst/Toxic/Nasty Plot/Venoshock, Ability: Corrosion, IVs: 30/15/15/15/15/15)
Fomantis Lv38 (Leaf Blade/Synthesis/Slash/Sweet Scent, Ability: Leaf Guard, IVs: 30/15/15/15/15/15)

We've faced both these Pokémon very recently so I know what to expect, but at least I don't have to worry about Salandit's Nasty Plot this time. Phart heals itself of a Toxic on turn 1 as I use an X Attack on it, then narrowly misses out on a 2HKO despite being on its best behaviour for a couple of turns. Still, Salandit's attacks don't hit hard enough to require more than one Moomoo Milk before a third Struggle takes it out. Fomantis proves more difficult - Phart does hit hard enough to 2HKO it, but refuses to hit frequently enough to actually pull that off before Synthesis fixes it up. Thankfully Fomantis gets bored after 2 rounds of Synthesis and decides to use Sweet Scent at low HP instead, allowing Phart to Struggle to victory.

There are a couple of rooms off to the side of this corridor, so I dip into the furthest one first and come across a secret Team Skull password on a scrap of paper. The other room has a Max Revive and another grunt, but no need to battle as he's fast asleep. Into the next part of the house we go, and this time there's a grunt who's wide awake and ready to kick my teeth in.

21-13.png

Team Skull Grunt
Trubbish Lv38 (Take Down/Sludge Bomb/Clear Smog/Toxic, Ability: Stench, IVs: 30/15/15/15/15/15)
Houndour Lv38 (Beat Up/Fire Fang/Feint Attack/Embargo, IVs: 30/15/15/15/15/15)

There's a mild dilemma here in that I can't really use X items against Trubbish because it has Clear Smog, but I want Phart's Defense boosted before Houndour comes out in case it uses Embargo to block me from healing. Hopefully Houndour's base stats will make that less of an issue.

As expected, Trubbish gives me some grief between the constant poisoning and Struggle being a mere 6HKO. Phart's refusal to obey slows things down even more, but also causes me to stumble upon an interesting mechanic: a disobedient Pokémon can take a nap even while it's poisoned, overwriting the poison status with sleep. Cool! But not very useful. A bit of Moomoo Milk and Full Heal juggling eventually brings down Trubbish, leaving Phart on 96/164 HP when Houndour comes in, but also badly poisoned. However, I did manage to squeeze in one X Defense beforehand without getting Clear Smogged.

I haven't got any Full Restores in my bag, so I have to prioritise healing the poisoning (Phart can expel its poison by itself via affection magic, but that's unreliable at best). As expected, Houndour goes for Embargo right away, and any hope of healing Phart is gone for 5 turns. It certainly won't survive that long if it uses Struggle now, and since I can't even stall out those turns with ineffective healing items, I have to resort to the Snagem Special.

21-14.png

Houndour's Feint Attack deals 20 damage, which isn't good at all - if it keeps spamming Feint Attack, it risks KOing Phart before it can be healed. Sure enough, it does spam Feint Attack, reaching up to 24 damage with its next blow. Phart falls to 24/164 HP with one Embargo turn left, and I've still got no option but to keep chucking Poké Balls at the opponent. Houndour lands another Feint Attack, hitting for 24 damage once again, and just when all seems lost...

21-15.png

I love you, anime bullshit!

Obviously I use a Max Potion straight away, and Houndour goes for Beat Up as its would-be finishing move, dealing a paltry 2 damage now that Phart's Eviolite is active again. I take no chances and use 2 X Defenses, reducing the Feint Attack damage to 8-ish per hit, along with an X Attack before Embargo blocks off the items again. I stall the Embargo out with Poké Balls once more, then heal Phart to full with a Lemonade as Embargo reactivates. More Poké Balls, a brief scare from a crit Feint Attack, but the Embargo ends with Phart still having 68 HP. Then Embargo is used again. Once that one wears off, Houndour grants me a couple of turns to bring Phart's Attack to +6, and once Phart stops disobeying me for a second, it vaporises Houndour with a single Struggle. Result!

You can imagine how quickly I saved my game after that. Heading through into some sort of storage room, I come across a Heal Powder and another secret password. That appears to be it for the ground floor, so I head upstairs and encounter yet another grunt.

21-16.png

Team Skull Grunt
Scraggy Lv38 (Brick Break/Chip Away/High Jump Kick/Crunch, IVs: 30/15/15/15/15/15)

Scraggy happens to learn Crunch at Lv. 38 exactly, so this one is just strong enough to not be a pushover. I use an X Defense while it opts for Scary Face, and after my X Attack on the second turn, Scraggy's Crunch hits for 24 damage. That's not too bad. Sadly Phart chooses not to obey for long enough that Crunch gets a Defense drop, and Struggle only seems like a potential 3HKO. I heal up, endure Phart's antics until it lands a second Struggle, heal a second time, then Scraggy falls to a third Struggle thanks to some favourable damage rolls.

There are three rooms off to the left here. The northernmost one seems to be Plumeria's room, as it's very tidy compared to the rest of Po Town, but the only item available here is a Sludge Bomb TM (there's no option to steal her mascara unfortunately). I skip over the middle room for now and enter the southernmost one, which contains an Iron and a third secret password... but I can't reach them until I beat up a grunt.

21-17.png

Team Skull Grunt
Haunter Lv38 (Confuse Ray/Sucker Punch/Payback/Shadow Ball, Ability: Levitate, IVs: 30/15/15/15/15/15)
Alolan Grimer Lv38 (Fling/Knock Off/Crunch/Screech, IVs: 30/15/15/15/15/15)

Boo, more super effective attacks. I start with an X Sp. Def, then when Haunter goes for Confuse Ray, I decide to use an X Defense to make life a little easier against Grimer (Haunter also has two physical attacks, but I imagine it'll prefer Shadow Ball). Phart is then struck for 36 damage from the first Shadow Ball, and I use an X Attack and a Moomoo Milk before attempting to have it attack. It eventually manages to overcome confusion and disobedience to take Haunter into yellow HP with its first blow, then repeats the feat on the next turn to score the KO.

21-18.png

Once Grimer comes out, uses Screech to undo the X Defense as I use a Hyper Potion on Phart, so I follow up with a Guard Spec. to stop that happening again. But since Crunch does 42 damage, I have to reapply the X Defense fairly quickly. Phart hits with Struggle on the first attempt, dealing around 33%, and shakes off its confusion before hitting a second time. It takes a few Moomoo Milks and Guard Specs., but Phart ultimately takes down Grimer with one last Struggle for thw win.

Time to check out the middle room. I initially skipped over it because you get dragged into two back-to-back battles with Team Skull Grunts as soon as you enter. But now that Phart's reached Lv. 56, surely those extra couple of Defense points will make all the difference.

21-19.png

Team Skull Grunt
Alolan Rattata Lv38 (Sucker Punch/Super Fang/Double-Edge/Endeavor, IVs: 30/15/15/15/15/15)

A slightly annoying moveset, as Super Fang and Endeavor don't care about X Defenses, but at least it's just a Rattata. I use an X Attack as Rattata's first Sucker Punch fails, but it subsequently lands 3 of them in a row while Phart refuses to attack. The final Sucker Punch PP gets used up as I use a Moomoo Milk, prompting Rattata to take Phart down to 82 HP with Endeavor. Struggle hits at last, leaving Rattata just above the red, and it chips itself with Double-Edge while I heal up Phart again. Rattata then switches to Super Fang for a bit as I keep healing, but eventually opts for Endeavor followed by Double-Edge - once I heal Phart again, it repeats the combo and knocks itself out with recoil damage. Right then, who's up next?

21-20.png

Team Skull Grunt
Alolan Raticate Lv38 (Assurance/Crunch/Sucker Punch/Super Fang, IVs: 30/15/15/15/15/15)

Same as above, but fatter and with more annoying moves - no chance of Raticate KOing itself, that's for certain. I use an X Defense, Phart dodges a Crunch, I use a Guard Spec., and Phart dodges another Crunch. No such luck after a second X Defense, but now Crunch only deals 20 damage. Next up are a couple of X Attacks, helped along by a third dodge (presumably it's got Hustle, but I can't tell for certain), then a Moomoo Milk and a reapplication of the Guard Spec. At last, Phart is ready to attack! Or not, as it pretends not to notice me for a few turns. But once it does hit, it deals a respectable 33% to Raticate before taking a nap on the next turn. After being roused with a Full Heal, Phart decides to cooperate and delivers a couple more Struggles, taking out Raticate.

No prizes for winning or anything - the grunts simply go back to lolling around, leaving just one of them left to defeat before Guzma. The last one is out on the roof, but I can't get onto the roof without giving the secret passwords. That's not too difficult, as I rattle off Plumeria's favourite move (Poison Jab), favourite Pokémon (Bounsweet) and favourite drink (Tapu Cocoa), then confirm my answers with a hearty "No!" at the end like any good Team Skull member. There's an Escape Rope on the roof, but more importantly, there's also that last grunt I was after.

21-21.png

What, the rooftop of a dilapidated mansion in a gang-occupied town surrounded by giant walls where it never ever stops raining? It's about as romantic as a wet fart.

Team Skull Grunt
Spinarak Lv38 (Sucker Punch/Spider Web/Agility/Pin Missile, IVs: 30/15/15/15/15/15)
Pawniard Lv38 (Metal Claw/Slash/Assurance/Metal Sound, IVs: 30/15/15/15/15/15)
Golbat Lv38 (Swift/Poison Fang/Mean Look/Leech Life, Ability: Inner Focus, IVs: 30/15/15/15/15/15)

Three Pokémon is obviously a bit of a slog, but it does mean I can load up on X items on the lead Spinarak and (hopefully) smash through each opponent one by one. So I do just that, using an X Defense and 3 X Attacks while Spinarak fails to do any damage with its Sucker Punches. After a Dire Hit, Spinarak opts for Spider Web on the one turn where it could've dealt damage, and Phart promptly obliterates it with a single Struggle. Golbat is up next, dealing only slight damage with its Leech Lifes but managing to tank a +6 crit Struggle, forcing me to heal Phart before it can attack again. Golbat goes down to a second Struggle without any obedience issues, and Pawniard suffers the same fate, with Phart dodging its Assurance before OHKOing it in return.

Nothing left but Guzma now, so I head back inside and past the grunts guarding the door to his room. As expected, he's waiting for me with Yungoos in his clutches.

21-22.png

Guzma is less than impressed that I came all this way for something other than a fight against him, especially since it's just to retrieve a Yungoos, and so he initiates the battle himself.

21-23.png

Team Skull Boss Guzma
Golisopod Lv41 (Sucker Punch/Razor Shell/First Impression, Ability: Emergency Exit, Adamant nature, IVs: All 30, EVs: 252 Atk / 252 Def)
Masquerain Lv41 (Air Slash/Bug Buzz/Icy Wind, Ability: Intimidate, Modest nature, IVs: All 30, EVs: 252 SpA / 252 Spe)
Pinsir Lv41 (Throat Chop/Storm Throw/X-Scissor, Ability: Mold Breaker, Impish nature, IVs: All 30, EVs: 252 Def / 252 SpD)

Aside from the obvious level difference and the addition of Pinsir, the only change Guzma's made since the Malie Garden battle is adding Defense EVs to his Golisopod, which will certainly bulk it up a bit but won't help it if I resort to PP stalling like last time. As for Pinsir, it doesn't look too bad - its EVs and nature don't contribute to its Attack stat at all, and while Mold Breaker could've been threatening if it had Bulk Up or Swords Dance, it has neither.

The obvious first move is to use an X Defense, and Golisopod's First Impression brings Phart down to 104 HP. That's safe enough to let me use 2 more X Defenses, with a Sucker Punch failing and a Razor Shell hitting for minimal damage, though it does get a Defense drop. From there, it's simply a matter of piling on more X items, healing where necessary, and using Guard Specs. to block further Defense drops.

21-24.png

Phart's basically set now, and Golisopod has started using (ineffective) First Impressions now that it's used up all its other PP. As with the last Guzma fight, I count down the remaining PP, then have Phart try to attack on the turn after it runs out of First Impressions.

21-25.png

21-26.png

Not the most impressive damage output, but hey, at least Phart didn't decide to take a nap. It outspeeds thanks to the X Speed and manages to land a second Struggle on the next turn, while Pinsir's X-Scissor deals 20 damage, bringing Phart down to 62 HP. I use a Hyper Potion, and Phart chooses to use Struggle for a third time, knocking out Pinsir with little fuss.

Masquerain comes out next (not surprising, considering the other option was a Golisopod with no PP), and Intimidate takes Phart down to a mere +5 Attack. I heal it up to assess the Bug Buzz damage, but Masquerain goes for Icy Wind instead since it's slower, dealing 8 damage but putting it ahead of Phart in Speed. In hindsight, I probably should've seen that coming... oh well. I use an X Speed on the next turn, and Masquerain does go for Bug Buzz this time, dealing 30 damage and getting a Sp. Def drop. Now outspeeding it again, Phart hits with Struggle to take Masquerain well into yellow, and while it won't obey for the finishing blow, the X Speed baits Masquerain into using Icy Wind again. I use a Hyper Potion and another X Speed, Phart neglects to attack, I use two more X Speeds after Masquerain starts outspeeding again, and Phart eventually pulls itself together to KO Masquerain with a second Struggle.

21-27.png

The reappearance of Golisopod is basically a victory lap, since it's going to faint to Struggle in 4 turns and has little hope of breaking through Phart at +6 Defense. I give Phart a quick Moomoo Milk to bring it back from low HP, just in case Golisopod does go on a crit spree, then stall with ineffective Full Heals until the battle is over, with Phart growing to Lv. 57 in the process.

21-28.png

...could it be that you went for 9 failed First Impressions in a row again instead of just switching out? You know, I'm really starting to get a sense of why he never became a captain.

Guzma hands over Yungoos, who immediately goes running off, then heads off himself after swearing that one day he's going to get me and my little 'smog too. I'm just about ready to leave as well, but before I do...

21-29.png

There was a big box full of them right there, and I doubt Guzma's going to miss just one crystal, so why not? Makes the save menu look even prettier now. I head back outside through a side door to revisit the grunt I met earlier who had something on his mind. It turns out he's thinking of leaving Team Skull because he can't get their pose right, but a couple of other grunts walk up during the conversation and mistake this for me trying to convince him to leave Team Skull. So of course I get dragged into a battle.

21-30.png

Team Skull Grunt
Scraggy Lv40 (Chip Away/High Jump Kick/Scary Face/Crunch, IVs: All 20, EVs: 252 HP)

It's got more stats to it than the last Scraggy we faced, but it's still only a Scraggy. An X Defense and an X Attack are used without any issues as Scraggy spams Scary Face, but once Phart's first Struggle hits, it still seems like a 5HKO at best. Another X Attack helps out somewhat, with the next Struggle placing Scraggy firmly in the yellow while its Crunches hit for 25-ish damage each. Phart refuses to obey for a bit and then narrowly misses the 3HKO before taking another nap, but with Scraggy still insisting on using Scary Face even while it's at -6 Speed, it doesn't take long for the fourth Struggle to end the battle.

The grunt explains himself to his homies in the aftermath and finally gets the hang of the Team Skull pose, much to everyone's delight. He hands me a Full Restore to say thanks before the three of them set off, leaving me to depart the Shady House at last.

21-31.png

Nanu has Yungoos with him, so at least now I know it didn't get captured by even more bad guys after running away earlier. While I don't actually know he's the kahuna at this point in the story, he doesn't seem in any particular hurry to let me know, let alone allow me to take him on in my next grand trial.

21-32.png

Quite the opposite, actually, as he instead makes it harder for me to take part in any battles at all. Fantastic! Acerola comes running up to Nanu's clear displeasure, then she leaves for Aether House with Yungoos, telling me to come along too when I'm done. That's certainly something I intend to do, but first up is a trip back to Route 1 to find a wild Buneary so I can very slowly drain Phart's Splash PP again. Using the same move 40 times is dull enough, but it's even worse when Phart only has a 43.86% chance of actually using said move each turn.

We get there in the end, though, and then it's back to Po Town again for one final battle. For once it's not a member of Team Skull, but rather a mysterious and secretive Office Worker. He has some sort of "merchandise" to offer, but wants to battle me to see if I can be trusted first.

21-33.png

Office Worker Royce
Elgyem Lv40 (Simple Beam/Zen Headbutt/Psych Up/Psychic, IVs: All 20, EVs: 252 HP)
Metang Lv40 (Miracle Eye/Zen Headbutt/Scary Face/Psychic, Ability: Clear Body, IVs: All 20, EVs: 252 HP)

Both of them only have resisted STAB attacks, so this shouldn't be too tricky. I lead with a Dire Hit, and Elgyem copies its effect with Psych Up. Phart then manages a Struggle that deals around 20% before growing unruly, while Elgyem goes for Simple Beam, overwriting Unaware with Simple. This means that I could use an X Attack here to put Phart at +4 Attack... but then Elgyem might copy it with Psych Up. But after giving it some thought, a +4 Zen Headbutt doesn't sound too awful, so I go for it. The worst-case scenario immediately plays out - Elgyem uses Psych Up, Phart disobeys, and then Elgyem lands a crit Zen Headbutt - but even that only deals 45 damage. Once Phart gets its act together, another 2 Struggles take out Elgyem.

Metang comes out next, but with no way to boost its own Attack, it has to settle for piddly 11-damage Zen Headbutts. Three hits from Phart are enough to secure victory. Royce reveals what his "merchandise" really is after being defeated: a Big Nugget, for the price of $5,000. Obviously I take it, as they sell for $20,000 each and there's no reason to decline. I can come back and battle him again tomorrow for another opportunity to buy a Big Nugget at the same price, but since that means loading more Exp. Points onto Phart (not to mention I'm hardly short on cash anyway), I'll not be doing that.

21-34.png

Disaster! While I was off on my little quest to rescue Yungoos, Plumeria swooped in to the Aether House and kidnapped Lillie and Nebby. (Well, technically Lillie went with her willingly, but I don't think getting whisked away by Team Skull was on her to-do list beforehand.)

Hau's beating himself up for failing to protect Lillie despite him being the Trainer of the two, Acerola's shocked and appalled that Aether House gets attacked every time she leaves, the Preschoolers are handling it about as well as you'd expect from Preschoolers, and Elio is... just smiling like a dumbfuck as always. Things get even worse when Gladion comes charging in, realises he's failed to protect Cosmog, and vents his considerable frustration through the medium of Pokémon battling. Against another Cosmog. Is he sure that's wise?

21-35.png

Team Skull Gladion
Golbat Lv42 (Acrobatics/Poison Fang/Venoshock, Ability: Inner Focus, IVs: 25/25/25/25/25/30, EVs: 252 Spe)
Zoroark Lv42 (Snarl/Hyper Voice, Ability: Illusion, IVs: 25/25/25/25/25/30, EVs: 252 Spe)
Type: Null Lv43 (Pursuit/Crush Claw/X-Scissor, Ability: Battle Armor, IVs: All 30, EVs: 252 Atk)

He's no pushover, but those movesets and EVs could've been worse. I begin with an X Defense and an X Sp. Def - Golbat's Acrobatics deals 21 damage, and the follow-up Venoshock only manages 8 HP. Next up are a couple of X Attacks and a Moomoo Milk, with Phart dodging an Acrobatics in the meantime, and then it's ready to attack. The first Struggle hits for more than 33%, but Phart loses interest and loafs around afterwards, then takes a power nap and immediately shakes itself awake. The obedience issues continue to slow things down, but Phart eventually lands another two Struggles to knock out Golbat.

21-36.png

Is it really Type: Null, or is it merely Zoroark in disguise? Actually, there's a reason you can tell it's not Zoroark: Illusion can't mimic a Pokémon's level, and Zoroark is only Lv. 42. I'll not be outfoxed that easily, thank you very much!

I heal up Phart, and Type: Null goes for a fairly weak Pursuit instead of the more sensible X-Scissor. I was hardly about to switch out, was I? Phart then decides it's time for another nap while Type: Null flip-flops between Pursuit and X-Scissor. Once it eventually decides to use Struggle, it only looks like a 5HKO, so it takes a lot of Moomoo Milks to keep Phart conscious long enough to get the KO. Type: Null actually runs out of X-Scissor PP first and resorts to Crush Claws instead, but it doesn't last much longer after that before fainting.

Last up is Zoroark, not even bothering to disguise itself now that its teammates are down. I heal Phart to full as it uses Snarl, taking it back down to 133/169 HP. That's not too scary, so I have Phart hit it with a Struggle (after ignoring me 7 times in a row, of course...), leaving Zoroark just above 50%. With Zoroark's Snarls not hitting hard enough and Hyper Voice being an even worse option, Phart inevitably lands two more hits on it in the end and Gladion is defeated.

21-37.png

Once it's all over, Gladion apologises for putting us both through a completely pointless battle. To be fair to him... actually, no, it really was pointless. He demands that I come with him to the ferry terminal so we can hunt down Lillie and Cosmog, but I tell him I'm not ready yet so that I can check on Phart and possibly heal it up. Lo and behold, it's already been fully healed after that battle! That's annoying, but I'm glad I didn't charge blindly into the Nanu fight with 40 PP.

Back aboard the Buneary train for another exciting round of Splashing, then I fly to Malie City to catch up with Gladion at the ferry terminal. And I'm not the only one heading here either...

21-38.png

Surprise surprise, he's not just a police officer after all. I suppose from a story perspective I don't really have to battle Nanu here, because going off to Aether Paradise with Gladion isn't part of the island challenge, and Nanu himself says he'll happily just go home if I don't want to fight. But even if it were possible to skip Nanu (which it isn't), Phart won't obey me again until after I complete his grand trial. Seems we've got no choice but to take him on.

21-39.png

21-40.png

Island Kahuna Nanu
Items: Hyper Potion, Full Heal
Sableye Lv43 (Power Gem/Shadow Ball/Fake Out, Ability: Keen Eye, Impish nature, IVs: All 30, EVs: 252 SpA / 252 SpD)
Krokorok Lv43 (Crunch/Assurance/Swagger/Earthquake, Ability: Intimidate, Jolly nature, IVs: All 30, EVs: 252 Atk / 252 Spe)
Alolan Persian Lv44 @ Darkinium Z (Power Gem/Fake Out/Dark Pulse, Ability: Fur Coat, Timid nature, IVs: All 30, EVs: 252 SpA / 252 Spe)

Actually not too bad, I think? He could've been carrying a lot worse: 4 Pokémon, something with Night Slash, Krookodile instead of Krokorok, a nature that doesn't lower Sp. Atk on a special attacking Sableye, etc. But I'm still using an unruly Cosmog against a Dark-type user, so no getting cocky just yet.

21-41.png

Sableye has one Fake Out as its only source of physical damage, so I let it use that for 11 damage while I use a few X Sp. Defs. At +6, Sableye's Shadow Ball can only take off 20 HP, leaving me free to pile on more X items: a Dire Hit and 3 X Attacks before Phart requires a Hyper Potion, then 3 X Defenses, 2 X Speeds (enough to outspeed Persian later), and another X Sp. Def after one of the Shadow Balls gets a stat drop. After healing once more, Phart's ready to dish out damage!

Or loaf around. You can guess which option it picked. But it does Struggle on the second attempt, taking Sableye straight into yellow, and then lands another blow a few turns later, KOing Sableye without giving Nanu a chance to use his Hyper Potion.

21-42.png

Krokorok's Intimidate brings Phart back down to +5 Attack, but since it also carries Swagger, there's probably no need for an X Attack. But there is need for a Max Potion unless I want to risk Phart fainting to Crunch, so I use one - Krokorok's Crunch deals 24 damage, so it would've just about survived, but it's not like it could've used Struggle or done anything else useful on that turn. Phart manages to use Struggle on the very next turn, knocking Krokorok straight into the red, but it loses interest in my orders afterwards as Nanu uses his Hyper Potion. I use a Moomoo Milk so it can try again, only for Krokorok to use Swagger, so I have to use a Full Heal as well. It lands a +6 crit Struggle right afterwards, just missing out on the KO, but manages to take out Krokorok after a bit more disobeying.

21-43.png

Nearly there now! Phart's obedience rate falls further to 43.1%, but there's just one more opponent to go before it'll start listening to me again for a few levels.

21-44.png

I'd rather not fall at the last hurdle to a crit, so I use a Moomoo Milk while Persian deals a whopping 3 damage with Fake Out. I follow up with a Berry Juice, wanting Persian to burn its Z-Move so it's out of the way, and it goes for Black Hole Eclipse straight away... leaving Phart with 128/172 HP! Phew, crisis averted. A Dark Pulse deals 24 damage after I heal Phart again, and it manages to hit with Struggle straight away, taking off a third of Persian's HP. Thanks to all the X items I used earlier, Persian is unable to break through even while Phart wastes its turns not attacking, and so it eventually falls to another couple of Struggles. Hurrah!

21-45.png

At last, I can unleash the full "potential" of Cosmog again! Just as well really, because Nanu healed Phart after the battle without asking first. At least burning all the Splash PP will be faster now it's fully obedient.

As for the grand trial itself... not too bad overall. Sableye was mostly setup fodder, Krokorok didn't have enough bite (hurr hurr) to it, and Persian wasn't much of a heavy hitter either after the Z-Move was used up. To be fair, I think a critical hit on Black Hole Eclipse would have been a guaranteed KO even at full HP, so it wasn't completely without risk.

Now then, let's have Nanu do the honours of demonstrating the Z-Move pose...

21-46.png

21-47.png

Amazing.

He's off soon afterwards, but not before suggesting Gladion maybe doesn't need Team Skull to help himself get stronger. Hau arrives to help out with the matter of tracking down Lillie and her wimpy pacifist of a Cosmog, and Gladion informs us she'll be at Aether Paradise before immediately dragging us off there - no yes/no prompt, no fancy cinematic, just a fade to black and then boom, we're at the harbour. I wasn't ready! I had stuff I wanted to do first, you bellend!

21-48.png

Hau and Gladion presumably run on ahead in search of the abductees, but there's a nice Aether Foundation lady who lets me take the boat back to Malie City, so I do just that. Once I arrive back in Malie, it's not the same lady who's waiting there at the ferry terminal for when I'm ready to go back to Aether Paradise... nope, it's Gladion again. Did he take the boat back with me? You'd think he'd be more interested in tracking down his kidnapped sister than following me around everywhere.

Unlike with Hala and Olivia, there aren't any new Trainer battles that become available after clearing the grand trial, but there are a few largely useless items, which I'm mostly just gathering for the sake of it. The tat consists of a Reaper Cloth, an Air Balloon, the TMs for Frustration and Return, and some Safety Goggles, plus a total of 9 Plates scattered across Melemele Island, which will prove useful if Cosmog suddenly evolves into Arceus. I don't see myself putting any of them to use in this playthrough, but still, free shit is free shit.

21-49.png

21-50.png

Still holding up quite well, all things considered. I think Phart's basically set for the rest of the game unless I need to reallocate its EVs, and Poké Pelago has me covered if that becomes necessary. Definitely had a few tricky fights on Ula'ula Island - the Veteran on Mount Hokulani and Totem Banette Mimikyu spring to mind - but resources are basically not an issue any more, as I've got well over $1,000,000 to hand and 37 Roto Bargains for any shopping sprees. So yeah, about the same as Akala overall, just with more time spent watching Phart refuse to listen.

And speaking of disobedience... ouch, Lv. 58 already. The obedience cap is now at Lv. 65 after beating Nanu, and considering I've got 19 battles in Aether Paradise coming up before I so much as start on Poni Island, I might not even get to Vast Poni Canyon before Phart goes rogue again. That'd be alright if this were SM, where Hapu fights you just before the entrance to Vast Poni Canyon, but since this is USUM, I've got to squeeze in two Totems and an angry prism before her grand trial, with Phart presumably flailing about all the while.

Oh well. Time for a little rest before I get stuck into the not-so-little rescue mission.
Trainers defeated: 229/427
 
:sm/hypno: :sm/bewear:
(Warning: this is a fairly long one. I tried to cram the entire Aether Paradise segment into one single post, figuring that 19 battles should be easy enough to fit into it. Unfortunately I failed to consider that there's also an actual storyline going on between those battles.)

22-1.png

Aether Paradise, now with 400% more boss fights!

Well, maybe not - that depends on whether a battle against someone who uses a single Hypno/Poipole counts as a boss fight. Either way, there's certainly more fighting to do this time, compared to the single wild Nihilego on my last visit. The full list is as follows:
  • 6 Aether Employees
  • Faba
  • 3 Aether Employees, back-to-back
  • 2 Multi Battles against Aether Employees (with Hau)
  • A Multi Battle against Aether Employees (with Gladion)
  • A Multi Battle against Faba and an Aether Employee (with Hau, back-to-back with the previous battle)
  • 2 Team Skull Grunts
  • Guzma
  • Dulse
  • Lusamine
Guzma and Lusamine are quite strong in general, but the back-to-back Multi Battles also worry me a bit due to them not being especially Phart-friendly. You get automatically healed after every Multi Battle, which means Phart will have to go into the second one on 40 Splash PP and therefore unable to attack. Hopefully Hau can cover for me in that fight.

For now, I'd better get stuck into the first few Employees wandering around the docks. I barely get round the first corner before the first one spots me.

22-2.png

Aether Foundation Employee
Alolan Dugtrio Lv40 (Sucker Punch/Mud Bomb/Earth Power/Dig, Ability: Sand Veil, IVs: All 25)
Toucannon Lv40 (Fury Attack/Screech/Drill Peck/Bullet Seed, IVs: All 25)

First up is an X Attack, and Dugtrio fails to land its Sucker Punch. But it lands a critical hit on the second attempt, taking Phart down to 118/172 HP, while a +2 Struggle can't even manage a 2HKO against Dugtrio's flimsy physical bulk. I use a couple of Moomoo Milks and Phart lands a second Struggle, causing Dugtrio to run out of Sucker Punches and switch to an unimpressive Earth Power before it goes down.

Toucannon's 40 Screeches are no match for my 73 Guard Specs., and I use one right away to intercept its Screech. Drill Peck deals 27 damage to Phart, whose Struggle deals less than 25% and leaves it in the red after recoil damage. Once Phart's back to full HP courtesy of a Max Potion, it's a matter of juggling Moomoo Milks and Guard Specs, throwing in a quick Struggle when an opportunity arises. Just before it goes down, Toucannon manages to use Screech while I'm healing Phart and then lands a crit Drill Peck for over 100 damage, but that doesn't spare it from a 5HKO afterwards.

The next employee isn't too hard to track down, patrolling to and fro amongst all the crates full of god-knows-what.

22-3.png

Aether Foundation Employee
Kecleon Lv40 (Slash/Camouflage/Shadow Claw/Screech, Ability: Color Change, IVs: All 25)
Stoutland Lv40 (Work Up/Crunch/Roar/Retaliate, Ability: Sand Rush, IVs: All 25)

I use a Guard Spec. on turn 1 in case Kecleon gets any ideas about using Screech, and it does, so that worked out nicely. Next up is an X Defense to cut Shadow Claw's damage down to 18 HP (though of course it can still crit), and then an X Attack. Phart's Struggle is still only a 4HKO after all that, but it eventually gets there after a couple of Max Potions, while Kecleon could only manage one critical hit on a Slash.

Now Phart faces Stoutland, and I have to reapply the Guard Spec. in case Crunch gets any Defense drops. Luckily Stoutland is unaware of Unaware and chooses Work Up instead, followed by a few Retaliates. Even after a second X Attack, Phart can only manage a 4HKO on Stoutland as well, but since it seems to prefer Retaliate over Crunch for some reason, it doesn't take too long for it to go down as well. On we go, past another assortment of crates, until we encounter another employee.

22-4.png

Aether Foundation Employee
Arbok Lv40 (Swallow/Spit Up/Acid Spray/Mud Bomb, Ability: Shed Skin, IVs: All 25)
Lurantis Lv40 (Leaf Blade/Synthesis/Slash/Sweet Scent, Ability: Leaf Guard, IVs: All 25)

She's like a Team Skull Grunt that actually evolved her Pokémon! Acid Spray is still annoying, and Synthesis is also still annoying, so I lead with a Guard Spec. before popping a couple of X Attacks and an X Defense onto Phart. Arbok's Mud Bombs only deal chip damage, and once I heal up Phart and reapply the Guard Spec., it gets a 3HKO from Struggle. Lurantis comes out afterwards, and the first Struggle deals... 33%. That's not going to break through Synthesis. So I use a Moomoo Milk, then a third X Attack and a Dire Hit, and the subsequent Struggle very nearly KOs Lurantis. It does immediately use Synthesis, but since Phart is faster, it can't save itself from a KO on the next turn.

22-5.png

Finally past the crater maze and out into the open section of the docks, there's a Rare Candy waiting for me by the wall. There's also another employee waiting for me, which is probably more important.

22-6.png

Aether Foundation Employee
Parasect Lv40 (Fury Cutter/Spore/Slash/Growth, IVs: All 25)
Drifblim Lv40 (Hex/Swallow/Spit Up/Shadow Ball, Ability: Aftermath, IVs: All 25)
Sudowoodo Lv40 (Block/Rock Slide/Counter/Sucker Punch, IVs: All 25)

Three of them? That's no fun. Guess I'll have to do lots of setting-up against Parasect.

Using 3 X Defenses proves fairly easy, as Parasect uses Spore twice along with a useless Growth while Phart shakes itself awake. Next up are a couple of X Sp. Defs for Drifblim, during which time Parasect begins to spam Fury Cutter until the damage reaches fairly threatening levels. Then it decides to neuter itself by switching to Growth instead. What was the point of that? Still, it gives me a chance to use 3 X Attacks and a Dire Hit, then have Phart smack Parasect for an easy 2HKO.

I heal Phart as Drifblim comes out, and it immediately gets a Sp. Def drop with Shadow Ball whilst dealing 24 damage. That's not ideal, as I need Phart's HP to stay as high as possible - since Drifblim has Aftermath, Phart will be stripped of 50% of its HP when it knocks it out with Struggle, not to mention Drifblim will outspeed and get in a Shadow Ball beforehand. So I use another X Sp. Def, heal Phart to full, then try Struggle. It brings Drifblim to just above the red, and it gets a second Sp. Def drop in the meantime. But with the next Shadow Ball only bringing Phart to 151/175 HP, it feels safe enough to knock it out, so I have Phart Struggle again, and it KOs Drifblim with 40 HP to spare.

Sudowoodo is last up, and fails to land its Sucker Punches as I use two Moomoo Milks. I'm more concerned about Counter though, as Sudowoodo has 116 HP, and any hit that deals 66 HP of damage to it (around 57%) will allow Counter to KO Phart after recoil damage. Suddenly all those X items don't seem like such a good idea... oh well. I decide to just stall it out instead, as it only has 10 Rock Slides to damage Phart if it chooses not to attack Sudowoodo. With each Rock Slide dealing around 9 damage, I don't even need to heal Phart before Sudowoodo KOs itself with Struggle recoil.

Free at last from the agony, I catch sight of Hau and Gladion waiting for me at the elevator. They can keep waiting where they are, as I've still got a couple of employees to crush before I move on.

22-7.png

Aether Foundation Employee
Primeape Lv40 (Assurance/Punishment/Thrash/Close Combat, IVs: All 25)

Punishment is quite interesting. It starts off with 60 power and gains an extra 20 for every stat boost Phart possesses (capping at 200), so maybe best not to try muscling past it. I can probably get away with using 3 X Defenses though, quadrupling Phart's Defense in exchange for pushing Punishment's power up to 180... not that it matters, as it turns out, because Primeape would rather use Assurance and Thrash. Maybe it's reading Punishment's base power as 1 since it doesn't have a "default" base power listed? Whatever the case, it gives Phart an opportunity to use a few Struggles, landing 4 of them before Primeape faints thanks to hitting itself twice in confusion. Once Primeape is down, I head further along the docks to the last remaining employee, who's kitted out in some fancy science clothes.

22-8.png

Aether Foundation Employee
Items: X Attack
Arcanine Lv41 (Roar/Odor Sleuth/Fire Fang/Extreme Speed, Ability: Intimidate, IVs: All 30)

Arcanine's movepool is pulled from its level-up moveset, and since it's a stone evolution, there's not much to be found there. Both sides use an X Attack on turn 1 - Arcanine's has no effect thanks to Unaware, but Phart's only brings it to +1 courtesy of Intimidate - which opens Arcanine up to a 7HKO from Struggle if all goes well. That naturally takes a few Moomoo Milks to pull off, not helped by a Fire Fang burn turning it into an 8HKO, but Phart eventually lands its final Struggle to finish off the last Trainer in the docks.

At the very end of the docks lies TM06 Toxic, and back towards the elevator is an X Sp. Atk that I must've skipped past earlier in my haste to pick another fight. Neither of them are of any use to Phart, but at least I can sell the X Sp. Atk? For a whopping $500?? When I've already got over $1,600,000 on me??? I'll probably do it anyway, but I certainly won't be rushing.

22-9.png

Caught up with the gang at last. Gladion's being his usual cryptic self, but he does at least let us know that we'll now be going upwards because we can't go downwards. So we all head up to the entrance area, only to be immediately ambushed by Faba. He's too busy huffing his own farts to tell us anything useful like where Lillie and Nebby are, so we'll have to force it out of him through honourable combat.

22-10.png

22-11.png

Aether Branch Chief Faba
Hypno Lv43 (Psychic/Hypnosis/Disable/Nightmare, Ability: Insomnia, Timid nature, IVs: 25/25/25/30/25/30)

Faba describes himself as "Aether's last line of defense", and looking at his team, I can understand that. If you get down to your last line of defense then you're probably fucked anyway, so having it be absolutely worthless doesn't matter too much.

I start with an X Speed, allowing Phart to outspeed and attack even on turns where Hypnosis hits. Hypno opens with a 17-damage Psychic that also gets a Sp. Def drop, and Phart's unboosted Struggle deals pathetic damage back. An X Attack improves the damage output a bit, with Phart dodging Hypnosis twice and being unaffected by Disable in the meantime, and another two Struggles leave both sides just above red HP. Hypno ultimately goes down to a couple more blows from Struggle, having failed to land a single Hypnosis throughout the battle (I think it used it 5 times in all?) or even deal much damage with Psychic.

Now thoroughly trounced, Faba suggests to us that Cosmog (the other one) might be downstairs in the secret lab area where they do all sorts of experiments. Since the labs are off-limits to filthy outsiders like us, Faba fiddles with the elevator on our behalf and sends us on our way. What a nice man!

22-12.png

Surely this can't be some sort of ruse.

Once we arrive, Gladion tells us that there are two secret labs we need to investigate down here, and not only that, they're literally called Secret Lab A and Secret Lab B. Hau and I are to check out Secret Lab B, and he hands me a Max Revive before darting off through the doors. I'd love to follow after him, but unfortunately I've got to fight my way through a gauntlet of scientists first.

22-13.png

Aether Foundation Employee
Items: X Defense
Alolan Muk Lv41 (Knock Off/Crunch/Screech/Gunk Shot, Ability: Poison Touch, IVs: All 30)

I've not really enjoyed having Phart fight any Alolan Grimer or Muk thus far, and this one is no exception. I start with an X Defense, as it'll either reduce the damage from an incoming attack or offset the stat drop from a Screech... or neither, as the employee instead uses their own X Defense. Forgot about that. I try popping on a Guard Spec. next in case Crunch gets a Defense drop, and while Muk does use Crunch, it gets a crit instead, taking Phart straight down to 67/175 HP from full! Definitely not good, so I use a couple more X Defenses, reducing the non-crit Crunch damage to a much less scary 18 HP.

But before I can get comfy, Muk switches to a Knock Off to remove Phart's Eviolite, activating Poison Touch for good measure. I heal it to full with a Moomoo Milk, letting the poison linger for now, and squeeze in an X Attack while Phart expels its poisoning. Muk lands another crit Crunch just after I use another Moomoo Milk, this time reducing Phart to 41 HP from full. There's not much I can safely do apart from cycling Guard Specs. and HP restoration until Muk runs out of Crunch PP, so I give that a try. Phart dodges a couple of Crunches, allowing me to sneak in two more X Attacks, and then I have it Struggle once Muk switches to Gunk Shot - it's still only a 3HKO even at +6, but Phart manages to shake off a second round of poisoning to take out Muk without KOing itself too.

22-14.png

A little power boost to celebrate a hard-fought victory, but there's no time to enjoy it before we're thrust into another battle, not even getting a chance to heal off that Struggle recoil.

22-15.png

Aether Foundation Employee
Items: X Sp. Def
Magneton Lv41 (Metal Sound/Electro Ball/Flash Cannon/Screech, Ability: Sturdy, IVs: All 30)

Certainly easier than Muk, though Metal Sound means I'll have to burn through some more Guard Specs. in this fight as well. Magneton opts for a Flash Cannon as I use my first Guard Spec., dealing 39 damage, which subsequently falls to 13 after a couple of X Sp. Defs. I heal Phart with a Moomoo Milk, reapply a Guard Spec., then pop on two X Attacks before having it unleash its first Struggle. It takes a good third off of Magneton's HP while it fails to deal much back with Flash Cannon or Electro Ball (barring a one-off crit), leaving Phart free to 3HKO it after a bit more healing.

Two down, one to go. It does make me wonder though: if these scientists were already waiting here to block me from going any further, and this section of Aether Paradise is a dead-end corridor connecting to two equally dead-end secret labs... how on earth did Gladion and Hau get past them?

22-16.png

Aether Foundation Employee
Items: X Speed
Porygon2 Lv41 (Magnet Rise/Signal Beam/Recycle/Discharge, Ability: Download, IVs: All 30)

Porygon2 starts the battle with a Sp. Atk boost courtesy of Download, which is promptly ignored courtesy of Unaware. I do have to immediately use a Moomoo Milk to heal Phart's wounds that carried over from the previous fight, but luckily our opponent would rather use an X Speed than attack an unboosted Phart. After an X Sp. Def, Porygon2's Signal Beam hits for 24 damage - low enough to give me time for a couple of X Attacks and a Struggle, which can't quite 3HKO unfortunately. But Porygon2 can't do much either apart from vaguely trouble Phart with one crit Signal Beam, and then use Magnet Rise for some strange reason. A couple more rounds of healing bring it down and release us from the gauntlet.

The scientists clear off after they've all been defeated. Gladion is staring dramatically at the door to Secret Lab A and won't let me in, so Secret Lab B it is.

22-17.png

Despite the whole dead-end corridor thing I mentioned earlier, somehow Hau enters the lab after me. Where was he this whole time? Was there a malasada shop I didn't notice or something? At least he's arrived just in time to chip in for a Multi Battle.

22-18.png

Aether Foundation Employees
Huntail Lv41 (Dive/Baton Pass/Crunch/Aqua Tail, Ability: Swift Swim, IVs: All 25)
Gorebyss Lv41 (Dive/Baton Pass/Psychic/Aqua Tail, Ability: Swift Swim, IVs: All 25)

Pokémon Trainer Hau (Multi Battle partner)
Alolan Raichu Lv42 (Electro Ball/Quick Attack/Psychic, Ability: Surge Surfer, IVs: All 20, EVs: 252 SpA / 252 Spe)
Vaporeon Lv41 (Water Pulse/Quick Attack, Ability: Water Absorb, IVs: All 20, EVs: 252 Atk / 252 SpA)
Noivern Lv41 (Dragon Pulse/Air Cutter, Ability: Infiltrator, IVs: All 20, EVs: 252 SpA / 252 Spe)
Tauros Lv41 (Pursuit/Horn Attack, Ability: Intimidate, IVs: All 20, EVs: 252 Atk / 252 Spe)
Decidueye Lv43 @ Grassium Z (Razor Leaf/Spirit Shackle, Ability: Overgrow, IVs: All 30, EVs: 252 HP / 252 Atk)

Once I get over the underlevelled Noivern (seriously, who thought Lv. 48 was a good evolution level? Just make it a high-friendship evolution like the other bats and move on), it's clear to see that I can just sit back and let Hau win this battle for me. I use an X Defense on turn 1 as Raichu outspeeds and OHKOs Huntail with Electro Ball, while Gorebyss goes for Dive, preventing Raichu from hitting it on the next turn. But it only manages to deal 13 damage to Phart when it resurfaces, and gets a 2HKO from Psychic + Electro Ball afterwards.

Despite us beating the employees, they point out that this doesn't mean they're required to help us, and so they leave without giving us any hint as to where Lillie and Nebby might be. Fair enough. Hau suggests that we split up and search for clues inside the lab.

22-19.png

God, imagine if Phart was stuck with Beast Boost. It's not exactly the snowball-y sweeper type, and I'd miss having Unaware against all the Totem Pokémon, not to mention literally anything else that can boost its own attacking/defending stats.

Hau briefs Gladion on our newfound Cosmog knowledge, and we come to the conclusion that Faba tricked us by sending us the wrong way in our search for Lillie and Nebby. And he seemed like such a trustworthy character, too! Once Gladion runs off again, I can now enter Secret Lab A, which contains a few files regarding Type: Null as well as a Full Restore. That's actually quite useful, as I've only got 2 of them and I can't purchase them from shops just yet.

22-20.png

An unfortunate side-effect of the Multi Battle is that Phart is now fully healed again, Splash PP and all. This feels like a bit of an issue because I'll be dragged into another Multi Battle as soon as I return to 1F (the entrance floor). However, it becomes much more trivial once I discover I can simply use the elevator to return to the docks instead - this lets me catch the boat back to Malie City and then waste all of Phart's PP against wild Pokémon as usual. While I'm off making preparations, I also stop at a Pokémon Center to buy some more X items, as I'm down to 30 X Attacks now (largely because an unboosted base 29 Attack is becoming increasingly shit as the game progresses).

Once everything's sorted and Phart is all Splashed out, I head back to Aether Paradise for another Multi Battle after our little group gets ambushed by another batch of employees. Then I get to do it all over again afterwards! How exciting.

22-21.png

Aether Foundation Employees
Lileep Lv41 (Giga Drain/Gastro Acid/Amnesia/Energy Ball, Ability: Suction Cups, IVs: All 25)
Anorith Lv41 (Bug Bite/Brine/Slash/Crush Claw, Ability: Battle Armor, IVs: All 25)

Pokémon Trainer Hau (Multi Battle partner)
Alolan Raichu Lv42 (Electro Ball/Quick Attack/Psychic, Ability: Surge Surfer, IVs: All 20, EVs: 252 SpA / 252 Spe)
Vaporeon Lv41 (Water Pulse/Quick Attack, Ability: Water Absorb, IVs: All 20, EVs: 252 Atk / 252 SpA)
Noivern Lv41 (Dragon Pulse/Air Cutter, Ability: Infiltrator, IVs: All 20, EVs: 252 SpA / 252 Spe)
Tauros Lv41 (Pursuit/Horn Attack, Ability: Intimidate, IVs: All 20, EVs: 252 Atk / 252 Spe)
Decidueye Lv43 @ Grassium Z (Razor Leaf/Spirit Shackle, Ability: Overgrow, IVs: All 30, EVs: 252 HP / 252 Atk)

Hau's using the exact same team as before, but interestingly the game doesn't reuse his Trainer data from the previous fight - there's a separate entry for Hau's team in this Multi Battle, with the only difference between the two Trainer parties being the Money value used to calculate the prize money after winning (it was 15 for his other party, and 20 for this one). But since I'm fighting with Hau, not against him, I don't think either of those values get used for anything. Is any of this actually interesting? Probably not.

It's not like the fight itself is much more entertaining - Hau's Raichu doesn't have as good a matchup here as it did against Huntail and Gorebyss, but there's still no danger of us losing. I start with an X Defense, Raichu takes Lileep into yellow with Psychic, both opponents gang up on Phart and bring it to 131/178 HP. Next up is an X Sp. Def, and Raichu KOs Lileep with another Psychic while Phart dodges Anorith's Bug Bite. Raichu falls a little short of one-shotting Anorith with Psychic, but a Quick Attack on the next turn finishes it off.

22-22.png

As per usual, beating the employees causes them to flee, and Wicke wanders over to say hi. Normally I'd roll my eyes at the prospect of a forced heal like this, but since I've just come out of a Multi Battle, it doesn't make any difference because Phart will have already been fully healed... though this also means that Wicke's generosity is utterly useless from a gameplay perspective.

Wicke tells us that Lillie's probably hanging out with Lusamine, so we're finally getting somewhere in terms of tracking her down. There is the small matter of the door leading to Lusamine's mansion being locked, but that's nothing that can't be resolved by chucking a few Pokémon towards the bad guys. Of course, I have to head back to Route 1 first to drain all the Splash PP again, then it's back to the bad guys thing.

22-23.png

Faba's brought more minions along to slow us down, and this time I get to watch Gladion pulverise them instead of Hau.

22-24.png

Aether Foundation Employees
Magmar Lv42 (Confuse Ray/Fire Punch/Lava Plume/Sunny Day, Ability: Flame Body, IVs: All 25)
Houndoom Lv42 (Beat Up/Fire Fang/Feint Attack/Embargo, IVs: All 25)
Electabuzz Lv42 (Light Screen/Thunder Punch/Discharge/Screech, Ability: Static, IVs: All 25)
Manectric Lv42 (Bite/Discharge/Roar/Wild Charge, IVs: All 25)

Team Skull Gladion (Multi Battle partner)
Type: Null Lv44 (Pursuit/Crush Claw/X-Scissor/Iron Head, Ability: Battle Armor, IVs: All 30, EVs: 252 Atk)
Golbat Lv43 (Acrobatics/Poison Fang/Venoshock/Steel Wing, Ability: Inner Focus, IVs: 25/25/25/25/25/30, EVs: 252 Spe)
Zoroark Lv43 (Snarl/Hyper Voice/Grass Knot, Ability: Illusion, IVs: All 25, EVs: 252 Spe)

Well, maybe "pulverise" was a bit optimistic... there's quite a lot going on there, and both sides have the same number of Pokémon in total. But at least there's no chance of Gladion wasting time on status moves instead of dealing damage.

Since I'll want to keep Gladion's Pokémon active as long as possible, I start with a Guard Spec., as this protects both Phart and Type: Null from Electabuzz's Screeches. Electabuzz immediately tries and fails to Screech while Magmar goes for Sunny Day, and Type: Null almost takes Electabuzz straight into the red with a Crush Claw. Next up is an X Sp. Def, as a sun-boosted Lava Plume might hurt - the opponents use Discharge and Lava Plume, with the latter burning Type: Null at the cost of taking out Electabuzz. Phart sits comfortably at 146/178 HP after these attacks, but Type: Null unfortunately misses with Crush Claw as Manectric comes out.

I use an X Defense next, since both opponents carry physical and special attacks that I need to protect Phart against. Magmar lands a Fire Punch on Phart for 21 damage, while Type: Null hits Magmar back with Crush Claw to bring it to roughly 33%. Manectric opts to blow away Type: Null with a Roar, dragging out Zoroark - maybe not a wise decision, as Type: Null was burned and couldn't hit very hard. With Phart at +2 on both defenses, I heal it with a Moomoo Milk and let Zoroark use Hyper Voice, chipping Manectric and almost KOing Magmar. Magmar responds with a Lava Plume that burns Phart and heavily damages Manectric and Zoroark, while Manectric... uses Roar again, bringing in Golbat. What exactly is this achieving? With both opponents in the red, I use another Moomoo Milk on Phart while Golbat KOs Magmar with Acrobatics, but it triggers Flame Body in the process.

22-25.png

Manectric finally decides to actually attack and uses Discharge, not really troubling Phart but bringing Golbat down to 46 HP. Houndoom enters the battle, forcing me to use a Full Restore in case it goes for Embargo - it uses Feint Attack instead, hitting Phart for 20 damage just after Golbat takes down Manectric. Gladion should be able to take care of things from here, but just in case, I use another couple of X Defenses. Golbat manages to bring Houndoom into yellow before getting knocked out by a Fire Fang, but Zoroark comes back in to finish the job with two Hyper Voices. Result!

All that remains now is to beat down Faba and his last remaining employee, and I'll be teaming up with Hau again for this one.

22-26.png

22-27.png

Aether Branch Chief Faba and Aether Foundation Employee
Items: X Defense (Faba)
Claydol Lv44 (Earth Power/Extrasensory/Ancient Power/Grass Knot, Ability: Levitate, Relaxed nature, IVs: 30/25/30/25/25/25, EVs: 252 HP)
Bruxish Lv44 (Aqua Jet/Crunch/Psychic Fangs/Waterfall, Ability: Strong Jaw, Adamant nature, IVs: 25/30/25/25/25/30, EVs: 252 Atk)
Hypno Lv45 (Psychic/Hypnosis/Focus Blast/Nightmare, Ability: Insomnia, Timid nature, IVs: 25/25/25/30/25/30, EVs: 252 Spe)
Ledian Lv42 (Light Screen/Reflect/Bug Buzz/Air Slash, Ability: Swarm, Timid nature, IVs: All 30, EVs: 252 Spe)
Pupitar Lv42 (Snarl, Ability: Shed Skin, Bold nature, IVs: All 25, EVs: 252 Def)

Pokémon Trainer Hau (Multi Battle partner)
Alolan Raichu Lv43 (Electro Ball/Quick Attack/Psychic, Ability: Surge Surfer, IVs: All 20, EVs: 252 SpA / 252 Spe)
Vaporeon Lv42 (Water Pulse/Quick Attack, Ability: Water Absorb, IVs: All 20, EVs: 252 Atk / 252 SpA)
Noivern Lv42 (Dragon Pulse/Air Cutter, Ability: Infiltrator, IVs: All 20, EVs: 252 SpA / 252 Spe)
Tauros Lv42 (Pursuit/Horn Attack, Ability: Intimidate, IVs: All 20, EVs: 252 Atk / 252 Spe)
Decidueye Lv44 @ Grassium Z (Razor Leaf/Spirit Shackle, Ability: Overgrow, IVs: All 30, EVs: 252 HP / 252 Atk)

Hau's team remains the same as before, except each of his Pokémon are now 1 level higher. I'm worried that might not be enough, as this looks like it could be a nasty fight - Phart can't attack due to being healed after the last battle, and Hau's team might have trouble winning on their own what with Faba's coverage moves and Ledian's screens. Bruxish in particular seems like it could just OHKO Phart with a crit Crunch. And if I lose this fight, then I'll probably have to go through the previous battle all over again... so let's hope it doesn't come to that.

First up is a Guard Spec. - quite a few of our opponent's moves can cause stat drops, and I reckon Phart can survive a turn without any stat boosts. Faba uses his X Defense on Claydol, Raichu targets Ledian with Psychic to take it into the yellow (and gets a Sp. Def drop too!), and Ledian hits back with Bug Buzz, taking Raichu into the yellow as well. Next, I use an X Sp. Def since both opponents are special attackers. Raichu takes down Ledian with a second Psychic, and Claydol uses Earth Power as I expected... but on Phart, rather than the Raichu that was clearly in KO range. Oh well, maybe taking 16 HP off a Cosmog is part of some cunning strategy beyond my comprehension.

22-28.png

Phart seems comfortable enough at +2 Sp. Def, so I use an X Defense next, mainly to help prevent Bruxish from obliterating it later on. Raichu takes a good 66% off Pupitar with a final Psychic before succumbing to Earth Power, and Pupitar lightly tickles Phart with a Snarl. Decidueye is Hau's next choice of 'mon, and as I use a second X Defense, it KOs Pupitar with Razor Leaf whilst also chipping Claydol, taking the Aether Foundation Employee out of the battle. Claydol launches another Earth Power at Phart for minimal damage, leaving it on 136/180 HP.

There's plenty of opportunity for a third X Defense, so I use one while Decidueye hits Claydol with a Spirit Shackle - it looks like it'll take two more hits to KO it from here, but you never know. I reactivate a Guard Spec. once the first one wears off, and Decidueye misses out on the KO with its next attack but gets it on the following turn as I use a Moomoo Milk. Faba sends in Bruxish, and there's not really anything I can do but hope Decidueye can knock it out... but fortunately, it does! Bruxish hits Phart for 24 damage with a non-crit Crunch before getting one-shotted with Spirit Shackle. The rest of the battle is a cakewalk, as Hypno comes in, misses its Hypnosis on Decidueye, and then also gets one-shotted by another Spirit Shackle.

22-29.png

Well, that was a lot easier than I expected. To be fair, if Ledian had set up Reflect or Light Screen then things would be very different, but it didn't, so here we are. I'm certainly not complaining.

22-30.png

Having exhausted his supply of minions (both human and Pokémon), Faba has no choice but to hand over the key to the door and let us pass. By "us", I mean Hau and Gladion. I have to head back to Route 1 yet again to find another wild Buneary, but once that's done and Struggle is usable again, I head back to Aether Paradise for what I'm really hoping is the final time.

22-31.png

We're greeted with a horde of Team Skull Grunts as soon as we step outside. Gladion's not in the mood for dealing with them, and he finally gives me an answer to the question I posed earlier about how he got past all those Aether scientists in the labs: by running really fast. Since my leg muscles have atrophied from relying on Tauros too much, I can't replicate his impressive feat, meaning I'll have to mash my way through all those grunts before I can reach Guzma.

22-32.png

Lusamine's nearby. I can tell.

There are actually a couple of dead-end sections of Aether Paradise I can reach from here, and both of them turn out to contain a Full Heal. Not very exciting, but it was worth a look. Now I can move on to grunt-punting.

22-33.png

Team Skull Grunt
Golbat Lv42 (Poison Fang/Mean Look/Leech Life/Haze, Ability: Inner Focus, IVs: All 15)

After all the gauntlets and Multi Battles and battles against multiple Pokémon, this is a welcome change of pace. Though I can't say I'm too thrilled about Haze, as now I can't reliably use most of my X items.

It seems Dire Hits aren't affected by Haze, so I lead with one of those while Golbat wastes a turn on Mean Look. Phart dodges a Leech Life before dealing a little under 25% with Struggle, actually taking more damage itself from the recoil. Golbat then opts for Haze, which indeed does nothing to clear the Dire Hit boost, while I pour a Moomoo Milk down Phart's throat. The battle is drawn out a bit longer once Golbat actually starts landing Leech Lifes, hitting for around 30 damage apiece, but a bit of HP restoration helps Phart land 5 more Struggles to defeat it and win the battle. Now we can take a few steps forward and fight another grunt.

22-34.png

Team Skull Grunt
Alolan Raticate Lv42 (Crunch/Sucker Punch/Super Fang/Double-Edge, IVs: All 15)

Starting with an X Defense seems sensible enough. Phart dodges the first Crunch, so I use a second X Defense, and Raticate's second attempt at Crunch hits for 24 damage. Next up is an X Attack, followed by another X Defense after Crunch gets a Defense drop, and Phart lands its first Struggle for what looks to be just shy of a 3HKO. Luckily it lands a critical hit with its second Struggle after I heal it up, so it ends up getting a 3HKO after all.

There's one grunt left, but he takes one look at me and decides not to pick a fight, figuring there's no way he could win. Thank goodness he didn't look at my Pokémon instead. With all the grunts either defeated or else not up for a battle, all that remains is Guzma.

22-35.png

Gladion's having a little crisis because all his efforts in running away from home and training to become stronger have seemingly been for nothing, now that he's gone and lost to Guzma. But hey, at least he can still strike a dramatic pose mid-breakdown. Time to see if I can manage a third win against the big bad boss of Team Skull!

22-36.png

Team Skull Boss Guzma
Golisopod Lv45 (Sucker Punch/Razor Shell/First Impression, Ability: Emergency Exit, Adamant nature, IVs: All 30, EVs: 252 Atk / 252 Def)
Masquerain Lv45 (Air Slash/Bug Buzz/Icy Wind, Ability: Intimidate, Modest nature, IVs: All 30, EVs: 252 SpA / 252 Spe)
Pinsir Lv45 (Throat Chop/Storm Throw/X-Scissor/Stone Edge, Ability: Mold Breaker, Modest nature, IVs: All 30, EVs: 252 Atk / 252 Spe)
Vikavolt Lv45 (Flash Cannon/Thunderbolt/Bug Buzz/Energy Ball, Ability: Levitate, Adamant nature, IVs: All 30, EVs: 252 HP / 252 SpA)

No held items, a couple of empty moveslots, and Pinsir and Vikavolt have been nerfed with bad natures. But aside from that... genuinely quite impressive across the board, even without being viewed through the lens of a challenge run.

Luckily Golisopod is still somewhat exploitable in terms of how it attacks, as long as I count its PP usage. So I start with an X Defense, Golisopod uses its First Impression, and christ almighty, it's a critical hit! Phart's only still standing because the affection magic kicked in and let it survive with 1 HP. (To be fair, if Phart's going to be obliterated with a crit at any point, I'd rather it be on turn 1 so I can just reset. But it survived the attack on this occasion, so let's not worry about that.)

A Max Potion is practically mandatory after that disaster, and Golisopod switches to Razor Shell, dealing 30 damage and getting a Defense drop. Now it's a matter of piling on the X items like the previous Guzma battles: 2 X Defenses, an X Sp. Def, a Guard Spec. and another X Defense after Razor Shell gets another Defense drop, then 2 more X Sp. Defs. Now Phart's defenses are maxed-out, so I can make a start on the more offensive X items.

22-37.png

After some careful PP counting, this is Phart's status on the turn where Golisopod uses its last attack. I only needed 2 X Speeds to be able to have Phart outpace Guzma's entire team, but by giving it an extra one on top of that, I have more fuel for trying to bait Masquerain into using Icy Wind instead of Bug Buzz. Now, Golisopod's about to switch out and let one of its allies take a Struggle to the face, so it's time for an exciting game of Name That Switch-In! I'm going with Vikavolt.

22-38.png

Fuck!

Actually, that's alright too. Pinsir and Vikavolt feel equally scary, as both of them will probably risk OHKOing Phart if they land a crit with their STAB moves, but at least this lets Pinsir suffer a 2HKO without having any opportunity to attack back.

Masquerain is Guzma's next choice, which surprises me as I assumed he'd just choose his heaviest hitter next. Intimidate activates as it enters the battle, but since the Guard Spec. is still in effect, it fails to do anything. I heal Phart to full with a Moomoo Milk, and Masquerain goes for an Icy Wind even though the Guard Spec. prevents it from getting a Speed drop. It does, however, land a critical hit, but even that only brings Phart down to 148/183 HP. From there, it's another easy 2HKO with Struggle, as Masquerain goes for a second Icy Wind that deals pathetic damage before it faints.

22-39.png

Last up is the newbie Vikavolt - I know Golisopod's still lurking in the back, but it's no longer any sort of threat. Phart definitely needs healing, but I need to wrap this up quickly before Vikavolt can land a critical hit. Its first Bug Buzz deals 36 damage, and Phart's Struggle can only muster a 3HKO in response, so I have to cross my fingers with every single Bug Buzz that it doesn't crit. But it appears Guzma used up all his luck on turn 1, as Phart tanks a second, third, and fourth Bug Buzz without incident before KOing back with Struggle. All I have to do from here is use a Max Potion and watch Golisopod recoil itself into the ground, and victory is ours!

22-40.png

Look, we've discussed this before. It's the First Impressions. This isn't Pokémon Champions, you've got to choose to stop using it after the first turn.

I leave Guzma to contemplate his choices where he is, but rather than head straight into the mansion, I wander around the outside in search of an item that I'm sure is around here somewhere. Except there's nothing there. So why did I think there was? I do a bit of searching online, and it turns out there is something here... in SM, not USUM, in the form of a Zygarde Cell. Never mind! Time to head inside, I reckon.

22-41.png

Seems like the Ultra Recon Squad don't want me interfering with whatever Lusamine is planning, so despite still being fairly crap at battling, Dulse takes me on with his Poipole again.

Ultra Recon Squad Dulse
Items: X Defense, Hyper Potion
Poipole Lv47 (Nasty Plot/Poison Jab/Toxic/Fell Stinger, Ability: Beast Boost, Lax nature, IVs: All 30, EVs: 252 HP / 252 Def)

Fun(?) fact: While Dulse's Poipole is set up to be physically defensive, Soliera's Poipole that she uses in her equivalent battles in Ultra Moon is specially defensive instead - it has a Gentle nature and 252 EVs in Sp. Def instead of Defense, and she even uses an X Sp. Def on it instead of an X Defense. Not that either flavour of Poipole is particularly hard to beat, but still.

There's not much to worry about here. Both sides use an X Defense on turn 1, then I use an X Attack while Poipole lands a Toxic that Phart immediately brushes off. Phart does it again with a second Toxic, then takes limited damage from a Poison Jab afterwards, but that doesn't change the fact that its Struggles aren't doing much to Poipole. So I use another X Attack, then a Moomoo Milk, then have it Struggle again - things take a bit longer than I hoped thanks to Dulse packing a Hyper Potion, but Poipole eventually faints after a total of 9 Struggles.

22-42.png

Having lost, Dulse explains that the plan is to use Cosmog (not that one, the other one) to send strong Trainers through an Ultra Wormhole so they can go and kick the snot out of Necrozma. Since all I've got is a Cosmog (yes, that one, not the other one), presumably he's on about someone like Lusamine when he speaks of strong Trainers. But given all the scary stuff I've heard Cosmog is capable of, perhaps we should double-check with Lusamine that this is actually a good idea?

22-43.png

Lo and behold, it's Lillie! Finally, after slogging my way through half the Foundation, I've found the person I was looking for. But where's Nebby?

Well, it seems Lusamine's got it tucked away somewhere, and plans to use it to force open an Ultra Wormhole. And Nebby may well die during the process, but she doesn't see that as anything more than a necessary sacrifice to protect Alola from being swallowed up by darkness. Lusamine might be losing a few teeth once Phart catches up to her...

22-44.png

I chase after Lusamine through the teleporter she just used, Lillie trailing along behind me, and we prepare to face off agai-... sorry, what the fuck has she done to that Pikachu???

I do like the fact that while USUM Lusamine is generally a bit more, uh, hinged than her SM incarnation, she still apparently finds time to maintain a collection of cryogenically frozen Pokémon in her house. There's no explanation given for why they're here apart from so she can "love" them, and it seems even Lillie wasn't aware of her little collection until just now. That's one way to handle grief, I suppose.

22-45.png

Hau and Gladion catch up to us, and there's a not-so-happy family reunion between Lusamine and her two runaway children. Despite their best efforts to convince her not to risk killing Nebby and getting lost in an Ultra Wormhole like their father, Lusamine presses on with her plans.

22-46.png

The wormhole opens up, only to fizzle out after a few seconds - even though it's trapped in a crate and forced to use its full power, Nebby's doing its best to resist. But Lusamine's not giving up either, and now Guzma's arrived as well to join her on the quest to beat up Necrozma.

22-47.png

Finally, we're getting to the combat bit! Lusamine concedes that maybe her children are actually just worried about her safety rather than actively trying to sabotage her efforts to be everyone's saviour, and decides that beating me in a Pokémon battle should convince them that she'll be alright. I know I can technically lose this battle and still continue on with the story, but that would leave one of the Trainers on my big list forever unticked, and I can't have that, can I?

22-48.png

Aether President Lusamine
Clefable Lv47 (Moonblast/Charm/Psychic/Hyper Voice, Ability: Magic Guard, Calm nature, IVs: All 30, EVs: 252 SpA / 252 SpD)
Lilligant Lv47 (Petal Dance/Teeter Dance/Stun Spore, Ability: Own Tempo, Modest nature, IVs: All 30, EVs: 252 SpA / 252 Spe)
Lopunny Lv47 (Dizzy Punch/Thunder Punch/Ice Punch/Fire Punch, Ability: Cute Charm, Adamant nature, IVs: All 30, EVs: 252 Atk / 252 Spe)
Milotic Lv47 (Hydro Pump/Icy Wind/Flail/Dragon Pulse, Ability: Marvel Scale, Modest nature, IVs: All 30, EVs: 252 SpA / 252 Spe)
Bewear Lv47 (Zen Headbutt/Drain Punch/Take Down/Dual Chop, Ability: Fluffy, Adamant nature, IVs: All 30, EVs: 252 HP / 252 Atk)

milf strong????

22-49.png

None of her team seem like pushovers, but a few factors make this fight easier than it could've been: she doesn't make use of any items, none of her Pokémon carry any moves that would be super effective against Phart, and Clefable is slightly more passive than most of her other Pokémon, making it a bit easier to set up against.

First up is an X Sp. Def, after which Lusamine, who apparently has an "Expert" AI bit set in her data, orders her Clefable to use Psychic. It deals an impressive 9 damage. She does get her act together and pick Moonblast on the next turn, moving up to 19 damage against a +4 Phart. Once it's at +6, I start on the other X items, leaving X Attacks for last because Clefable is packing Charm.

22-50.png

It actually only took 3 Moomoo Milks to get to this point, largely thanks to Clefable not using Moonblast as much as you'd expect from a smart Trainer like Lusamine. Phart's ready to go now, so let's see how much damage it can do with Struggle.

22-51.png

Oh. That's not good. I don't recall Lillie mentioning healing my Pokémon or hearing the healing-item sound effect at any point, so there must've been another silent heal somewhere after the Dulse battle.

Time for a new plan: spam Splash! It seems to go fairly well at first, as Clefable isn't dealing much damage outside of critical hits and is throwing in a couple of Charms as well. But then it runs out of attacking PP, and unlike Guzma, Lusamine would rather withdraw her Pokémon than have it waste time using non-damaging moves.

22-52.png

The plan to spam Splash remains unchanged, though I do need to be mindful of Milotic's Hydro Pumps as they'll hit harder than anything Clefable could muster. Phart dodges two of them and the other three fail to land any critical hits, so there's plenty of opportunity to waste Splash PP while Milotic tickles Phart with its other special attacks. It eventually has to resort to using Flail, taking away a single HP with each blow, and I'm able to use up the last few Splashes, boost Phart's Attack back up to +6, then launch a Struggle at long last. As Milotic has no defensive EVs, it's an easy 2HKO.

22-53.png

Definitely need to heal here, as Lilligant's Petal Dance is even stronger than Milotic's Hydro Pump. It locks itself into Petal Dance right away, hitting for 24 damage with a non-crit, so I take the chance to use an X Speed on Phart to bring it back to +3 Speed. It's now faster than all of Lusamine's Pokémon once again, having been slowed down by a few Icy Winds from Milotic earlier. Lilligant then ruins that immediately by using Stun Spore, but this gives Phart a window to strike with Struggle, taking it down to 33%-ish. It goes for Petal Dance again, stays locked into it for another turn, then tries a Teeter Dance, but Phart manages to get through the paralysis and confusion to KO Lilligant with a second Struggle.

22-54.png

Bewear is both rather powerful and quite bulky thanks to Fluffy, but the strongest move it can use against Phart (Take Down) also damages it a little, so that helps. I heal Phart back to full with a Moomoo Milk, it dodges a Take Down, and I cure its paralysis while there's an opportunity. Bewear hits with its second Take Down for 19 damage, so I'm looking at around 114 HP being lost if it lands a crit. I try having Phart hit it with Struggle... and it does barely anything. Not even sure if it'd be an 8HKO. But with no better strategy, I have to resort to using Moomoo Milks to keep Phart out of KO range from a crit Take Down, using Struggle whenever it gets a chance. Thanks in part to the Take Down recoil, Bewear eventually faints to Phart's limp onslaught.

22-55.png

Lopunny is not nearly as threatening as the Mismagius from SM that it replaced on Lusamine's team, especially to a Cosmog. I heal Phart back to full, watch it take 8 damage from an Ice Punch, then have it outspeed and 2HKO Lopunny with Struggle.

Nearly there now. Clefable comes back in, and since Charm is its only option now, I use a Guard Spec. to preserve Phart's +6 Attack before using a Moomoo Milk on it. All I have to do then is tap the Fight button twice, and Phart 2HKOs with Struggle for the win!

22-56.png

22-57.png

Not even losing to a mere Cosmog can convince Lusamine that going off to fight Necrozma is a bad idea. With no option to physically restrain her, I'm instead treated to a little cinematic of her forcing Nebby to re-open the wormhole before gracefully entering it backwards. And then Guzma comes sprinting across the room so he can leap into the wormhole just before it closes. He even shoves Lillie out of the way as he's running! I hadn't noticed that bit until this playthrough, and I'm a little miffed that I couldn't get a screenshot of it.

Everyone's a bit lost for words that they actually went and did it. It's not every day your mum goes off to space to fight an alien with a gang leader/your boss. But what about Nebby? Opening an Ultra Wormhole like that is dangerous for a little Cosmog... has it survived?

22-58.png

NOOOOOOOOOOOOOOOOOOOOOOO

Man, that sucks. Now Phart is like the Pokémon equivalent of Lonesome George (as long as you pretend this is 2022 and Terapagos doesn't exist). But at least Nebby is floating in place rather than lying on the floor, so whatever state it's in, it's probably not dead?

Gladion suggests we head back out to the entrance room, which seems like a good idea. Wicke's there to greet me, and the Ultra Recon Squad turn up soon afterwards, with Dulse fuming that Lusamine's only gone to fight Necrozma for her own selfish satisfaction. He explains what the plans were going to be before she waltzed off to another world, and it's mentioned that heading to the altar on Poni Island might let us open up another Ultra Wormhole.

Wicke offers us all some beds so we can get some rest before deciding what to do next. Considering how long it took to get through this section (which I was somehow convinced would be fairly short), that's also a very good idea. Poni Island can wait a little longer, along with whatever lies beyond the wormholes.


Meanwhile, in an alternate universe...


22-59.png
Trainers defeated: 248/427
 
:sm/pikachu: :sm/pinsir:
23-1.png

No sign of Lillie when I go to look for her in the mansion, but Wicke informs me she's waiting outside. Better head out and check.

23-2.png

Nice clothes! Good to know I'm not the only one who's gone off their default attire. Lillie declares this to be her Z-Powered form, the first step towards being able to do stuff on her own.

23-3.png

Gladion's been rummaging around Paradise and came across this Moon Flute, instrumental in the summoning of the Legendary Pokémon that might be able to take us to Necrozma's world. He also found a Master Ball - not sure if/when I'll use it, but it's certainly good to have one.

Hau's decided that he needs to do more training and Gladion's stuck cleaning up the mess at Aether Paradise, so that leaves me and Lillie as the only ones to head to Poni Island. But Gladion is at least willing to give us a lift there before drowning himself in admin. Before that, I'll have a little look around the rest of Aether Paradise now that it's not locked down. There doesn't seem to be anything apart from a Heal Ball and a Hyper Potion, so I head down to the docks where the boat is waiting.

23-4.png

Whee, final island. While there were a total of 51 Trainers on Melemele Island, 86 on Akala and 92 on Ula'ula, the Poni Island section of the story only has 38, increasing to 56 if you include Mount Lanakila and the Pokémon League. And there's the last two Totems and Necrozma, of course. Considering Phart's already verging on the obedience cap, it's probably just as well there aren't so many battles here.

23-5.png

Gladion drops us off at Seafolk Village and then gets going, leaving us to figure out where the island's kahuna is. (There isn't one because he's dead, but we don't know that yet.) Before I get stuck into anything new, I have to head back to Route 1 once again to burn through Splash PP, because Phart was fully healed by our little sleepover at Aether Paradise. Apart from that, I also pick up a couple extra Totem-sized Pokémon from Samson Oak (Vikavolt and Mimikyu), but it'll be a while before I can claim the last one as the final Totem Sticker is stuck outside the Battle Tree.

Right, back to Poni... via ferry, as I can't fly to the Pokémon Center because I didn't get that far before I left earlier. A man inside one of the boats hands me a Magmarizer and an Electirizer, while an Ace Trainer gives me an actual live Aerodactyl. Always felt a bit weird to me that the Gen 7 games contain revive-able fossils but not the Old Amber, especially since USUM includes literally every other fossil in Poké Pelago.

There's also a lady who's trying and failing to remember the name of an Electric Pokémon that looks like three things stuck together. That'll be Magneton, I take it. Showing her one will be tricky because they don't appear in the wild in Alola, meaning I'd have to evolve a Magnemite first, but maybe there's a useful reward for doing so?

23-6.png

...

Let's move on.

23-7.png

Standing on top of a Wailord-shaped boat seems a bit dangerous, but Mina's simply too cool to care. Once she climbs down, she tells Lillie and I that we should probably look for Hapu first if we're needing the kahuna. So I finish up the last of the item-gathering in Seafolk Village - just a Lucky Punch and a Flash Cannon TM, so nothing useful - and then we set off for Hapu's house.

23-8.png

Poni Wilds has a total of 6 battles waiting for Phart, one of which is a Double Battle. It's also a little smaller than in SM, as the beach area has been split off to form Poni Beach, which I'll be poking around first. There's a Max Repel, a Pearl and two Big Pearls to be found here, not to mention the final Mantine Surf course. Time to get murdered by Sharpedo again? Absolutely.

23-9.png

23-10.png

Just about managed to break 100k after a couple of shark attacks, earning me a Comet Shard and 16 BP. I'm pointed in the direction of Heahea City's Surf Association now that I've set the high scores on all four courses, where I'm further rewarded with an extra surfing trick and this special Pikachu. Excellent! Now get in the PC. I've got Trainers to fight in Poni Wilds and I've no need for backup.

23-11.png

Ace Trainer Elwood
Tropius Lv45 (Solar Beam, IVs: 15/15/15/30/15/0)
Lilligant Lv46 (Solar Beam, IVs: 15/15/15/30/15/0)

Famously, when we get a new TM and want to try it out, the best way to do so is by deleting all the other moves from our Pokémon.

I get to use 2 X Sp. Defs before Tropius can land its Solar Beam, so it only squeezes out 16 damage against Phart. It does at least manage to tank 5 Struggles before fainting, but most of the damage Phart took was dealt to itself via recoil.

23-12.png

Lilligant isn't much better - it can manage 24 damage with its Solar Beams, but since it's not as bulky as Tropius, it goes down to a 4HKO.

Moving on, there's a Rare Candy in the northwestern section, plus a Berry tree with a few random type-related berries lying at its base. Nothing Phart can use, sadly. Since I can't battle the Capoeira Couple that are here without bringing Ralts along, I'll leave them alone for now and beat up another Ace Trainer.

23-13.png

Ace Trainer Lindsey
Garbodor Lv45 (Toxic/Gunk Shot/Protect/Body Slam, Ability: Weak Armor, IVs: 15/30/30/15/15/15)
Toxapex Lv46 @ Poisonium Z (Poison Jab/Liquidation/Pin Missile, Ability: Merciless, IVs: 15/15/30/15/30/15

I think this is the only time in the game you face a "random" Trainer with a Z-Move? Every other Z-Crystal (outside of battle facilities) is either on an important story-relevant Trainer, or one of the "bosses" on random routes who you have to actively seek out by beating everyone else in the area first. But I don't think a Pokémon with base 63 Attack is perhaps the best user of Acid Downpour.

I use an X Defense as Garbodor lands a Toxic on Phart, then another one as its Protect fails, Phart taking a total of 33 damage from the poisoning. Garbodor poisons it again with a Gunk Shot as I cure it, so after a second Full Heal, I finally get the chance for an X Attack. Phart lands its first Struggle, and while it can barely manage 20%, it does trigger Weak Armor and makes its subsequent attacks a bit stronger. After some mild spamming of healing items, Garbodor goes down to another 4 Struggles.

Reading back over that paragraph as I get ready to make this post, I realise that Unaware ignored the Defense drops from Weak Armor, so they didn't help Phart at all. Duh.

Phart is poisoned and on 93/189 HP when Toxapex comes out. Thanks to Merciless, it will land a guaranteed crit with every attack as long as the poison remains, so I go for a Full Heal over a Moomoo Milk. Phart then dodges its Liquidation, meaning I get to use that Moomoo Milk after all. The problem I now have is that Phart's Struggles are even weaker than against Garbodor, but on the other hand, Toxapex isn't hitting very hard either - even its Acid Downpour only takes out 15 HP. 7 Struggles end up being enough to win the battle, and so I can move on to the next one.

23-14.png

Ace Trainer Kekoa
Granbull Lv45 (Play Rough/Ice Fang/Fire Fang/Thunder Fang, Ability: Intimidate, IVs: 15/30/30/15/15/15)
Sharpedo Lv45 (Aqua Jet/Night Slash/Liquidation, Ability: Rough Skin, IVs: 15/30/15/15/15/30)
Ampharos Lv46 (Discharge/Power Gem/Dragon Pulse, Ability: Static, IVs: 30/15/15/30/15/15)

Ooh, he's got good stuff. That's annoying. But at least Granbull isn't packing Crunch, so I lead with a couple of X Defenses followed by a couple of X Attacks, while it tries and fails to inflict some sort of status with its non-STAB attacks. At +3 Attack, Phart just about manage a 4HKO against Granbull, and knocks it out without it ever attempting to use Play Rough.

Sharpedo is understandably next up - why wouldn't you go for a STAB Night Slash user against a Psychic-type at +4 Defense? I heal up with a Max Potion, while Kekoa seems to think he could finish off Phart's remaining 40 HP with an Aqua Jet... not quite, as it does 7 damage. A non-crit Night Slash takes Phart down to 163/189 HP, while its Struggle deals 50% in return. Probably not a good idea to Struggle again, as if Night Slash gets a critical hit, then the Struggle recoil combined with Rough Skin damage will spell doom for Phart afterwards. So how can I avoid that? With an X Speed, of course! Phart comfortably outspeeds Sharpedo at +2 and KOs it with plenty of HP to spare.

Down to just Ampharos now, and given that even a non-STAB Dragon Pulse deals 35 damage to Phart, it's a good idea to use an X Sp. Def here. Now shielded from the incoming attacks, Phart is able to 5HKO Ampharos for the win, only getting paralysed once and immediately shaking it off. Moving on, there's a Max Potion up against the northern edge of Poni Wilds, plus another couple of Berry trees. One of them gives me a Coba Berry, which will prove ever-so-slightly useful in a bit, but I'll take on a nearby Cook first.

23-15.png

Too late, I've already raided all the trees in the area. Mwahaha etc.

Cook Fil
Exeggcute Lv44 @ Leftovers (Confusion/Worry Seed/Natural Gift/Solar Beam, Ability: Chlorophyll, IVs: 30/15/15/15/15/15)
Ribombee Lv44 @ Leftovers (Sweet Scent/Bug Buzz/Dazzling Gleam/Aromatherapy, Ability: Honey Gather, IVs: 30/15/15/15/15/15)

The only real issue here is Ribombee's Bug Buzz, as it doesn't matter if Phart is struck by Worry Seed because neither opponent has any way to boost their stats. Against Exeggcute, I use 2 X Sp. Defs and an X Attack, while it tries a Worry Seed in response and then spams useless Natural Gifts for no discernible reason. Thanks to its Leftovers, Phart has to settle for a 5HKO, but that's acceptable when Exeggcute managed a total of 3 HP of damage in return from a single Confusion.

23-16.png

A quick Moomoo Milk as Ribombee is sent out, but instead of attacking with Bug Buzz, it wastes its turn on a Sweet Scent. Then another. Then another! Meanwhile, Phart lands a crit Struggle and a regular Struggle, bringing Ribombee to red HP before I need to heal it, then takes 26 damage from a Bug Buzz and KOs it with a third Struggle.

There's a Dusk Stone not too far from Fil, plus a Dancer who won't battle me until I beat everyone else in the area. The only other remaining fight is a Double Battle, so I'll head to a PC and fetch Ralts, via the Battle Royal Dome.

23-17.png

This Incineroar has been losing Battle Royals to its new rival Machamp, so I give it a hand by teaching it Acrobatics and I'm handed a Power Belt as thanks. I definitely don't need it right now because Phart is fully-EV'd already, but if I need to redo its EVs for some boss fight later on then it might come in useful.

The rival Machamp shows up afterwards, feeling down because now it's started losing to Incineroar, and I receive a Bulk Up TM after giving it my Coba Berry so it can come out on top again. I must've got the order of these two events muddled up, because I was convinced I needed the Coba Berry to get the Power Belt, but apparently not. Whoops.

23-18.png

"We're going to show you two Pokémon. It'd be unfair if you didn't show us two, as well!"
"Oh, only one Pokémon? You need a bigger party than that!"


You probably know how it goes by now - fly to a Pokémon Center, pick up my trusty sacrifice Ralts, then fly back here again. By returning here via Poni Beach, I can avoid having to wade through any tall grass, which is nice.

23-19.png

Capoeira Couple Cara and Douglas
Mienfoo Lv44 (Swords Dance/High Jump Kick/U-turn/Helping Hand, IVs: 30/15/30/15/30/30, EVs: 252 Spe)
Mienfoo Lv45 (Swords Dance/High Jump Kick/U-turn/Helping Hand, Adamant nature, IVs: 30/31/30/15/30/15, EVs: 252 Atk)

I use an X Defense on Phart, Ralts gets obliterated by a High Jump Kick before it can cast Memento on its ally, and the other Mienfoo hits for 28 damage with U-turn. They both use U-turn after a second X Defense, so I heal up Phart and use an X Attack before having it launch a series of Struggles. The first one targets the Lv. 44 Mienfoo and hits for just under 50%, the second attack hits it again, but the third and fourth Struggles target the other Mienfoo. Bit of a shame that Phart couldn't take one of them out early on, but this does mean the next two Struggles KO both opponents one after another, with no threat to Phart's HP at any point.

With that Double Battle ticked off the list, I can put Ralts back in the PC and beat up the final Trainer in the area.

23-20.png

Dancer Julia
Baile Style Oricorio Lv46 @ Focus Sash (Air Slash/Revelation Dance/Teeter Dance, Ability: Dancer, IVs: 30/20/20/30/20/30)
Pom-Pom Style Oricorio Lv46 @ Focus Sash (Air Slash/Revelation Dance/Teeter Dance, Ability: Dancer, IVs: 30/20/20/30/20/30)
Pa'u Style Oricorio Lv46 @ Focus Sash (Air Slash/Revelation Dance/Teeter Dance, Ability: Dancer, IVs: 30/20/20/30/20/30)
Sensu Style Oricorio Lv46 @ Focus Sash (Air Slash/Revelation Dance/Teeter Dance, Ability: Dancer, IVs: 30/20/20/30/20/30)

I don't think there was any chance of Phart going on a one-shotting spree, so the Focus Sashes won't make much difference. I start with 2 X Sp. Defs, and after Phart manages to dodge both of Oricorio's Air Slashes, I decide I may as well use a third. Next up is an X Attack, but Phart gets confused via Teeter Dance - since I'm not using any X Defenses on it, hitting itself in confusion with a boosted Attack stat might sting. However, I can sidestep that by using an X Speed so that Phart outspeeds everyone, meaning I'll always know if it's confused or not before it tries to attack.

Once the X Speed goes on and the confusion is cured, Phart's all set for clobbering some birds... or so I thought, but it can't even manage a 4HKO at +2 Attack. So I use a second X Attack, which lets it knock out the first Oricorio with a couple more blows. The Pom-Pom Oricorio comes out next and suffers a 3HKO, then the Pa'u Oricorio gets the same treatment, and finally the Sensu Oricorio is vanquished with another 3 Struggles. It did mix things up a bit by using a few super-effective Revelation Dances over the Air Slash/Teeter Dance combo of its allies, but even they only took off around 25 HP each.

Julia hands over a Focus Sash after being trounced by a Cosmog. It might be useful, but there's the obvious downsides of it being a one-use item and having to forgo Phart's Eviolite in order to use it. So I'll leave that in my bag for now, and if I do end up in a tricky situation, hopefully Phart's affection magic will let it tank any fatal blows. On to Ancient Poni Path!

23-21.png

A little catch-up with Hapu, who tells us to follow her to the Ruins of Hope. And there aren't too many battles for me to complete along the way, so I might actually get through the story at a decent pace for once.

23-22.png

Scratch that, it's time to push some rocks!

As per usual, there's not really anything useful to be gained from backtracking with Machamp Shove in the few places it can be used, but I enjoy the completionism. I end up with a Rare Candy, a Hyper Potion and a Big Pearl, plus the TMs for Thunderbolt, Energy Ball and Will-O-Wisp. At least I can use the Hyper Potion and sell the Big Pearl, and to vaguely paraphrase Meat Loaf, two out of six isn't complete shit.

Back to Ancient Poni Path now, and there are a few items in and around Hapu's house too: an Awakening, a Heart Scale, a Revival Herb, an Adrenaline Orb, a Shiny Stone, a Max Potion and a Scald TM. But far more importantly, there's a Collector poking his head through a broken section of wall near Poni Grove.

23-23.png

Collector Raymond
Turtonator Lv44 (Flamethrower/Body Slam/Shell Smash/Dragon Pulse, Ability: Shell Armor, IVs: All 15)
Drampa Lv44 (Dragon Breath/Safeguard/Extrasensory/Dragon Pulse, Ability: Sap Sipper, IVs: All 15)

Going to need 2 X Attacks for this one - Turtonator is a tough cookie. I stick on a couple of X Sp. Defs first, then the X Attacks, then let Phart go wild (i.e. 4HKO Turtonator at the cost of 2 Hyper Potions). Drampa is up next, and since it's not quite as physically bulky as its counterpart, Struggle ends up being a 3HKO this time.

23-24.png

23-25.png

Oh well, only 31 Trainers to go before the obedience cap is raised to Lv. 80. And two Totems obviously. And Necrozma. And Necrozma again. Fuck's sake.

I grab a PP Up that's lying next to Raymond, dip into Poni Grove before being turned away because I'm not a Champion yet, then continue along the path to the Ruins of Hope.

23-26.png

Couple more battles here and then I'll be done. There's a Max Revive out in the water (though I'm ambushed by a wild Clawitzer and a Wailmer on my way there), and a Sightseer wandering around in circles by the water's edge.

23-27.png

Sightseer Jamie
Sandshrew Lv44 (Dig/Gyro Ball/Swords Dance/Sandstorm, Ability: Sand Veil, IVs: All 15)
Persian Lv44 (Taunt/Power Gem/Slash/Nasty Plot, IVs: All 15)

Neither of them are especially bulky or powerful, so it'll probably be disobedience that's the main issue in this fight. I begin with an X Defense and an X Attack, while Sandshrew deals a paltry 4 damage with Gyro Ball followed by 12 damage from Sandstorm. Phart uses its first Struggle without issue, hitting for around 33%, only for Sandshrew to hide itself with Dig. It doesn't hit much harder than the Sandstorm damage, but it slows down the battling process even more when it makes itself un-hittable for a turn. Even once it gets past its obedience issues and attacks again, Phart still can't manage a 3HKO on Sandshrew, having to settle for finishing it off with a fourth Struggle.

Persian eventually comes out once Sandshrew faints, and while I still can't get Phart to obey me, it's not as if Persian's attacks are doing much more than Sandshrew's were. It's slowly whittled down and defeated with another 3 Struggles, its only achievement being landing a crit Slash for 30 damage at one point. On we go, picking up a Pearl String and a Calcium just before the other Trainer battle.

23-28.png

Swimmer Derek
Dragalge Lv44 (Toxic/Aqua Tail/Sludge Bomb/Hydro Pump, Ability: Poison Point, IVs: All 15)

Dragalge lands a Toxic as I use an X Sp. Def, but Phart immediately cures itself, letting me use an X Defense as well. Then it dodges an Aqua Tail, so I use an X Attack, and then another one after it instantly heals itself of a second Toxic. Go Phart! The luck fizzles out a bit once it comes to actually obeying me, but when it does use Struggle, it takes off a third of Dragalge's HP easily. I just have to keep Phart healthy now and wait for it to attack again, and sure enough, it eventually lands two more hits to KO Dragalge.

23-29.png

Once we all arrive at the Ruins of Hope, Lillie tries moving the rocks by herself, with predictable results. Then again, she is lugging a 999-kg Cosmoem around in her bag at the moment, so perhaps I shouldn't be so quick to write her off? But this is really a job for Machamp, so I summon one and clear a path.

23-30.png

23-31.png

New kahuna just dropped! I was fully prepared to try and contact her grandfather with a Ouija board, but this will save us all a lot of effort.

Kahuna Hapu, as she's now known, tells us that the Legendary Pokémon Solgaleo might be able to be summoned at the altar if we bring the Sun and Moon Flutes. The latter is currently in Lillie's bag, and the former can be found on Exeggutor Island, so that's where we're off to next. By "we", I mean me - the wild Pokémon there are too crazy and dangerous for Lillie to come along too, so maybe she can share her tragic backstory with Mina or something in the meantime.

23-32.png

The chief of the seafolk takes me out here on his little boat, where the local Exeggutor seem a bit more lively than usual. Examining them reveals this is because they're being attacked by some Pinsir, and of course, this means I have to fight them myself.

23-33.png

The Pinsir are treated like standard wild Pokémon in terms of randomness, apart from having fixed levels. This one's Lv. 42, giving it a moveset of X-Scissor/Submission/Storm Throw/Swords Dance.

Phart's not exactly built for tanking X-Scissors, and it's also not suited to fighting while it's disobedient. But since this is a wild Pinsir, there's another option available: catch it! Pinsir's base 45 catch rate isn't ideal, but this one goes into a Quick Ball without any fuss. It's a quick flight back to Seafolk Village to deposit Pinsir in the PC, then I take the boat back over to Exeggutor Island again.

The next Pinsir is Lv. 43, meaning it knows Thrash instead of X-Scissor, but it's rendered irrelevant when I catch this one on the first ball too. Back to the PC once again, then I return to rescue the final Exeggutor - this Pinsir is Lv. 42 again so it knows X-Scissor, but to my surprise, this one also goes in after a single Quick Ball! A bit of searching online suggests that Quick Balls had a 40.878% chance of working against each Pinsir, so I suppose I wasn't unfathomably lucky to get them all on the first try, but it was certainly handy.

23-34.png

One of the Exeggutor gives me a lift up to a higher section of the island, where I come across the last Totem Sticker I can collect before the postgame. Good to know I haven't missed any. Aside from that, there's also a Revive, a Big Pearl and a PP Up scattered about, but the thing I actually came here for lies a little further ahead.

23-35.png

Right, on to Vast Poni Canyon then. There's nothing else I need to do apart from chuck the third Pinsir into the PC, and that's easily done. So Lillie and I make our way back to Ancient Poni Path, only to be rudely interrupted by a group of Team Skull Grunts who'd really like their boss back.

23-36.png

Team Skull Grunt
Ekans Lv45 (Gastro Acid/Belch/Haze/Coil, Ability: Shed Skin, IVs: 30/15/15/15/15/15, EVs: 252 HP)

Game Freak were nice enough to give Ekans a boost in the form of a higher HP IV, and they even threw in a load of HP EVs for good measure, but I guess they must've overlooked the fact that it literally can't attack!

What it can do, however, is switch off Phart's Unaware with Gastro Acid and then make itself a bit bulkier with Coil. So I use a Dire Hit on Phart and watch it throw a tantrum for a few turns before taking 33% of Ekans's HP with Struggle, then continue disobeying until the second blow. Since there's another battle coming up right after this one, I heal Phart to full before it KOs Ekans with a third Struggle, letting it carry 75% of its HP over instead of 25%.

The lone female grunt runs off, but as I said, there's no opportunity to rest or heal before Phart's dragged back into combat again.

23-37.png

Team Skull Grunt
Fomantis Lv45 (Synthesis/Slash/Sweet Scent/Solar Beam, Ability: Leaf Guard, IVs: 30/15/15/15/15/15, EVs: 252 HP)
Mareanie Lv45 (Recover/Poison Jab/Venom Drench/Pin Missile, IVs: 30/15/15/15/15/15, EVs: 252 HP)
Houndour Lv45 (Feint Attack/Embargo/Foul Play/Flamethrower, IVs: 30/15/15/15/15/15, EVs: 252 HP)
Golbat Lv45 (Mean Look/Leech Life/Haze/Venoshock, Ability: Inner Focus, IVs: 30/15/15/15/15/15, EVs: 252 HP)
Alolan Raticate Lv45 (Sucker Punch/Super Fang/Double-Edge/Endeavor, IVs: 30/15/15/15/15/15, EVs: 252 HP)

Considering the wording of his dialogue, the way all 5 of the grunts strike their pose at once when the battle starts, and the fact that this grunt suddenly has 5 Pokémon (when the rest of the game features a single grunt with 3 Pokémon and all of the others carrying 1 or 2)... this was meant to be a Horde Battle at some point in development, wasn't it? Certainly seems like it. I can only guess why that might've changed, but considering how much the framerate dips whenever I enter a Multi Battle, I imagine my 2DS would probably catch fire if it tried to display 12 models all at once.

Enough waffling - I've got an almost-full team to beat. Given that there's 5 of them, that Phart's not obeying me, and that there's some tricky things like Embargo and Haze in their movesets, I don't feel bad about throwing a load of X items out. It's made easier by the fact that Fomantis insists on only using Solar Beam, as this means Phart only takes minor damage every other turn (or not at all, on the 2 occasions where it simply dodges the attack).

23-38.png

Struggle is as strong as it can be, Phart is faster than all of its opponents, and it's got the bulk to stomach a few physical attacks before needing to be healed. Once it finally decides to listen, it scores an easy OHKO on the weak Fomantis, then another OHKO on Houndour before it can become a nuisance with Embargo. Golbat is up next, and while Phart does land a Struggle that brings it to just above the red, it immediately uses Haze and wipes away all those boosts (minus the Dire Hit). Boo!

To make matters worse, Leech Life is taking decent chunks out of Phart and healing Golbat at the same time. A couple more Struggles leaves it very close to fainting, but it's agonising watching Phart refuse to obey for multiple turns, knowing that a single Leech Life will bring Golbat back out of KO range. But it decides to use Haze instead for several turns, letting it get knocked out once Phart gets its act together again.

Next up is Raticate - they've historically been a bit of a pain to fight, but since this one only has Sucker Punch as its source of Dark-type damage, it essentially grants me 5 free turns to heal Phart and reapply some X items. Once they're up, it uses a couple of Endeavors to leave Phart low on HP, but two Struggles in a row are good enough to take it out. That leaves just Mareanie, who proves to be a nuisance with Recover and constant poisoning, but ultimately gets two-shotted by Struggle when the obedience mechanics finally favour me.

23-39.png

Even after losing, the lead grunt won't give up and asks us again to save Guzma, but he's interrupted by Plumeria, who helpfully points out that we can't do that if he's getting in our way. The remaining grunts head home, there's a bit of discussion about Guzma and Lusamine, and Plumeria apologises for kidnapping Lillie earlier (not to worry, it's easily done) before asking us to save Guzma as well.

23-40.png

She also gives me this useless crystal for my collection of useless crystals. In fairness, even she doesn't seem convinced I'll need it, but it's a nice present nonetheless. With Plumeria heading off home as well, it's time to carry on to the altar.

23-41.png

Here we are - Alola's original not-Victory Road! 17 Trainers and a Totem Pokémon are waiting in here, so that's definitely not going to fit into this post. I'll save all of that for next time, but at least I know there's nothing that can stop me or interrupt me or otherwise hold me back from doing all those battles.

Well, nothing apart from Lillie's "kindness". She healed Phart again without asking. Back to Route 1 we go...
Trainers defeated: 259/427
 
Last edited:
:sm/gengar: :sm/kommo-o:
24-1.png

A little congregation forms by the dead tree at the entrance to Vast Poni Canyon, then I'm straight in at the deep end with a boss battle before I can even enter the caves. But it's only Dulse, so it's more like the deep end of a paddling pool.

Ultra Recon Squad Dulse
Items: X Defense, Hyper Potion
Poipole Lv49 (Nasty Plot/Poison Jab/Toxic/Fell Stinger, Ability: Beast Boost, Lax nature, IVs: All 30, EVs: 252 HP / 252 Def)

Basically the same as the Aether Paradise fight, except Poipole's two levels higher. We both use our X Defenses on turn 1, then I use a second while Phart is struck by Toxic, followed by a couple of X Attacks. Once Phart's healed to full and ready to attack, I get to watch it mess around for a few turns before eventually using Struggle, dealing a little under 20%. It does land a crit with its next Struggle, taking Poipole below 50%, but thanks to Dulse bringing a Hyper Potion, it'll take a while yet before Poipole goes down. He uses the Hyper Potion after 2 more Struggles, but Phart gets some timely critical hits and Poipole ends up fainting after another 3 strikes.

Once Poipole goes down for the third and final time this playthrough, Hapu offers to help our otherworldly visitors with their little Necrozma issue, and we promise not to betray them like Lusamine did. Whether a Cosmog will actually do well in battle against Necrozma is another matter, but it's the thought that counts. Probably.

There's a slightly twisted bit of tree I can climb under to reach TM93 Wild Charge just outside the cave entrance, but apart from that, nothing here. I'd better start making my way towards the altar. And I'll need to avoid speaking to Lillie at all costs unless I want to be granted 40 Splash PP again. So I'll just walk past her right now... oh wait, she's starting a conversation with me, giving me a Max Revive, and-

24-2.png

FUCK

Back to hunting wabbits for a bit, then I return to the entrance and head inside. I manage perhaps a dozen steps before an unskippable encounter with a Veteran.

24-3.png

Veteran Harry
Beheeyem Lv47 (Psychic/Signal Beam/Shock Wave, Ability: Synchronize, Modest nature, IVs: 30/15/15/30/15/30, EVs: 252 SpA / 252 Spe)
Banette Lv47 (Sucker Punch/Phantom Force, Ability: Insomnia, Adamant nature, IVs: 30/30/15/15/15/30, EVs: 252 Atk / 252 Spe)

I didn't really want to see full EVs or super effective moves, let alone both, but I suppose he is a Veteran. At least Banette's not packing Shadow Claw?

Signal Beam takes Phart down to 159/197 HP after an X Sp. Def, then knocks off a further 24 HP after the second one. A couple of X Attacks and X Defenses (I'd rather not set up against Banette), plus a bit of healing, and Phart is now ready to strike back. Struggle takes out Beheeyem with 3 hits after some loafing around, bringing in Banette. It leads with Phantom Force, so I use the charging turn as an opportunity for a third X Defense that reduces the damage to 32. Phart can't manage anything better than a 3HKO here either, but at least it obeys me quickly enough to stop it from getting splatted by a crit.

There's nothing interesting immediately past Harry, just a slight uphill trek leading into a fight with a Backpacker.

24-4.png

Backpacker Perdy
Spinda Lv45 (Sucker Punch/Teeter Dance/Uproar/Psych Up, IVs: All 15)

Now this is closer to Phart's power level! Spinda goes for Teeter Dance straight away and follows it up with a slew of useless Psych Ups. You can imagine how tricky it is for Phart to hit while it's confused and disobedient, but once it does, it manages to take off 20% even without any X items - I'm not using them because I don't want Spinda to copy any boosts. Even the rare Sucker Punches can only do around 25 damage each, so it's just a matter of time before Phart hits another 5 times to KO Spinda.

Moving on from Perdy, I can smash through a few rocks to reach a Protein, then a Max Potion a bit further along and a Nugget not too far away. But I run into a little problem just before I reach the next outside section.

24-5.png

"You need two Pokémon that can battle! That's our request to you."


The good news is that this is the only Double Battle in Vast Poni Canyon, and the fact that it comes this early on helps as well - less running back and forth for me. Time to Ralts myself up!

24-6.png

Ace Duo Kent and Aimee
Alolan Sandslash Lv47 (Icicle Spear/Metal Claw/Slash, Ability: Snow Cloak, IVs: 15/30/15/15/15/30)
Alolan Ninetales Lv47 (Dazzling Gleam/Ice Beam/Ice Shard, Ability: Snow Warning, IVs: 15/15/15/30/15/30)

They don't look too bad overall (famous last words), but since Ninetales seems to have the stronger attacks of the two, I start with an X Sp. Def on Phart. Ralts's Quick Claw fails to activate, so it simply gets taken out by a Dazzling Gleam that also deals 12 damage to Phart, while Sandslash goes for Metal Claw, bringing Phart down to 152/197 HP after hail damage. Next is an X Defense, followed by a quick heal and 2 X Attacks, after which the hail peters out.

On to attacking at last, and Phart is able to land Struggle on the first attempt, though it only deals 20% to Sandslash. It then goes rogue for a few turns before Struggling on Ninetales, but it scores a critical hit, taking it into the yellow. Just a matter of time and copious amounts of Moomoo Milk now - Phart's next Struggle leaves Ninetales with a sliver of HP, then its next couple of attacks target Sandslash instead of finishing the job on Ninetales, but another crit simply KOs Sandslash instead. With Ninetales running out of useful PP and forced to spam Ice Shard, there's plenty of time for Phart to loaf around before taking it out.

Ralts is stashed away in the PC for now, and then I retrace my steps through the cave until I'm back where I was before. Then it's on to the second outdoor portion - no Trainers here, just a Max Revive and an X Attack - then back indoors to a section where I'll need Mudsdale to cross some tricky terrain. An X Defense lies behind a rock near the entrance, and just past the rocky terrain bit is a Hiker.

24-7.png

Hiker Zachary
Kabutops Lv46 (Endure/Aqua Jet/Mega Drain/Metal Sound, IVs: All 15)
Tyrantrum Lv46 (Dragon Tail/Crunch/Dragon Claw/Thrash, Ability: Strong Jaw, IVs: All 15)

A Strong Jaw-boosted Crunch from Tyrantrum doesn't sound very nice, but Kabutops isn't quite so threatening, and it's up first. So I use it as an opportunity to set up X items, using 3 X Attacks, 3 X Defenses and an X Speed while Kabutops responds with seemingly random moves that don't deal much damage at all. Even at +6 Attack, Phart still can't manage a 2HKO on Kabutops, so I use a Dire Hit to allow its next attack to take it out with a guaranteed crit.

Before Phart delivers the knockout blow, I make sure a Guard Spec. is active so Crunch can't lower its Defense. Just as well really, because it decides to take some time off from listening to me and refuses to attack, letting Tyrantrum bombard it with Crunches that luckily only chip off around 22 HP each. Once it finally uses Struggle, it falls just short of a 2HKO again (to be fair, I was expecting that since Tyrantrum's bulkier than Kabutops), but we're helped somewhat by Tyrantrum locking itself into Thrash for a few turns, giving Phart the opportunity to KO it.

24-8.png

200 HP now! If only Hyper Potions hadn't been nerfed in this generation.

Once the fight's over, I head back outside, then immediately back into the same section of cave via a different entrance. This way leads to a couple of Trainers and some more items, starting with an Escape Rope and a Veteran (boo, they've usually got tricky teams).

24-9.png

Veteran Lynn
Xatu Lv48 (Psychic/Air Slash, Ability: Synchronize, Timid nature, IVs: 30/15/15/30/15/30, EVs: 252 SpA / 252 Spe)
Dewgong Lv48 (Aqua Ring/Protect/Aqua Jet/Ice Shard, Ability: Thick Fat, Calm nature, IVs: 30/15/30/15/30/15, EVs: 252 HP / 252 SpD)
Kangaskhan Lv48 (Dizzy Punch/Crunch/Fake Out, Ability: Scrappy, Adamant nature, IVs: 30/30/15/15/15/30, EVs: 252 HP / 252 Atk)

Xatu has Air Slash flinches, Dewgong will be a pain to break through, and Kangaskhan carries Crunch - everyone's annoying to some extent, but there's nothing horrendous as far as I can tell. Xatu's Air Slashes only deal around 15 damage after 2 X Sp. Defs, so I stick on 3 X Attacks and a Dire Hit to help with Dewgong later on, plus an X Defense for Kangaskhan. Once Phart stops messing around, it very nearly OHKOs Xatu with a Struggle, and a second hit knocks it out shortly after it runs out of Air Slash PP.

Lynn sends in her Kangaskhan, and I immediately use a Guard Spec. in anticipation of Crunch. Nope, it's Fake Out, but it only deals 13 damage. Crunch deals a more impressive 34 damage, but it should still be safe to Struggle after healing Phart to full. It surprises me by immediately landing Struggle on the first attempt, taking a solid 50% of Kangaskhan's HP away, and then lands the second hit after a Moomoo Milk with no fuss at all, moving straight on to Dewgong. Aqua Ring goes up immediately and Struggle is just shy of a 2HKO, but thanks to Protect and disobedience, the KO may take a while. However, Dewgong decides to go for Ice Shards and Aqua Jets that deal single-digit damage instead of Protecting again, so after a bit of loafing around, Phart takes out Dewgong to win the battle.

A little trot across another bit of Mudsdale-only ground, and it's straight on to the next fight.

24-10.png

Ace Trainer Junko
Mawile Lv47 (Stockpile/Swallow/Spit Up/Iron Head, Ability: Hyper Cutter, IVs: All 30)
Weavile Lv48 (Night Slash/Snatch/Punishment/Dark Pulse, Ability: Pressure, IVs: 15/30/15/15/15/30)

Again, nothing awful, but I'll have to be mindful of Punishment. Weavile will probably prefer Night Slash since the AI seemed to have trouble reading Punishment's base power the last time I encountered it, but given Phart's obedience issues, it's quite possible Weavile will run out of Night Slash PP and switch to Punishment afterwards.

For now, Mawile is a relatively easy foe. I use 3 X Defenses now because Phart will want them against Weavile anyway, then a Dire Hit, since it doesn't power up Punishment. Phart's Struggle looks to be a 6HKO on Mawile, but it's doing paltry damage to Phart in return, only landing any decent damage with the occasional Spit Up. Unfortunately it seems Struggle can't do damage quickly enough to get past the HP recovery of Swallow - I instead resort to PP stalling, spamming useless Full Heals until Mawile runs out of damaging attacks and is withdrawn in favour of Weavile.

I heal Phart to full and Weavile actually goes for Punishment, hitting for 50 damage with a 180-power attack into +6 Defense. Phart refuses to attack for a while and then hits for a fairly puny 20% with its Struggle, so once Weavile is out of Punishment PP, I use an X Attack and wait for it to obey me again. Weavile's Night Slashes are doing around 20 damage each, meaning as long as I can keep Phart's HP high, it'll be safe to use one Struggle without ending up in self-KO range if Night Slash lands a crit. Weavile starts to dabble in Dark Pulses just before Struggle lands twice more to KO it, and the toothless Mawile is sent out again, failing to achieve anything with Spit Up and Swallow before taking itself out with Struggle recoil.

Just past Junko is a dead-end area that contains a Dazzling Gleam TM and an X Sp. Def. No Trainers to be found here, so I double back and carry on until I reach a bridge over part of the canyon. Lillie catches up to me here, and mentions that the bridge reminds her of the one outside the Ruins of Conflict, where we first met and I had to bail out Nebby. She was too scared to do anything back then, but thanks to the power of character development, things will be different this time.

24-11.png

24-12.png

Success! Not even being bothered by a few Murkrow (who don't actually live here in USUM - they've moved to Hau'oli Cemetery) could do more than slowing her down a bit. We cross the bridge, the Murkrow depart, and we're ready to carry on. Now please don't heal me. Please don't heal me.

24-13.png

...I could throw you off this bridge right now and no one would suspect a thing.

Back to Route 1 we go, yet again... but it doesn't take too long to get through all the Splash PP, and then I return to where I was and enter a brand spanking new bit of cave. There's a Nugget and a Full Restore in this section, as well as a Dusk Ball in a small dead-end area I can access outside. Continuing along the "proper" path leads me up a ladder and directly into a battle with a Scientist.

24-14.png

Scientist Ikaika
Items: X Sp. Atk
Magnezone Lv46 (Electro Ball/Flash Cannon/Screech/Discharge, Ability: Sturdy, IVs: All 30)

I use a couple of X Sp. Defs followed by a couple of X Attacks, and rather than trying to use an X Sp. Atk that won't have any effect against Phart, Magnezone goes for Screech(???) and follows it up with a few Electro Balls and Flash Cannons. None of them do more than about 16 damage each, and once Phart hits with a Struggle, it takes off about 25% of Magnezone's HP. 2 Moomoo Milks later, Magnezone is taken out with Struggle number 4.

Moving on from that refreshingly easy battle, I head back outside and immediately enter a Punk Girl's line of sight.

24-15.png

Punk Girl Anna
Scrafty Lv46 (High Jump Kick/Scary Face/Crunch/Facade, IVs: All 15)

I still don't like Crunch, but at least there's only one opponent in this fight. 2 X Defenses, a Guard Spec. and 2 X Attacks to begin with, and Scrafty's Crunches deal exactly 20 damage each in return. After a Moomoo Milk, Phart is nice enough to land a Struggle on the first attempt, scoring a critical hit but not quite dealing 50%. It's now just a case of waiting for Phart to attack again and using Moomoo Milks/Guard Specs. where necessary, and it eventually hits twice more to defeat Scrafty and win the battle.

There's another bridge to cross once Anna is defeated, but no Lillie shenanigans on this occasion, so I can simply run straight across it and into a fight with a Punk Guy this time.

24-16.png

Punk Guy Adam
Pangoro Lv46 (Vital Throw/Body Slam/Crunch/Entrainment, Ability: Iron Fist, IVs: All 15)
Crawdaunt Lv46 (Razor Shell/Taunt/Swords Dance/Crunch, IVs: All 15)

I forgot to heal Phart after the last battle, so the first step is using a Moomoo Milk to prevent it getting picked off by Crunch, then the 2 X Defenses I intended to use. A Crunch at this point only inflicts 26 damage, but Pangoro uses Entrainment to overwrite Unaware with the useless Iron Fist - this doesn't affect the Pangoro matchup, but Crawdaunt may be more difficult now that Phart cannot simply ignore its Swords Dance boosts. But that's a problem for later, so for now, I bring Phart to +3 Attack and use a Dire Hit, which is enough to let it 2HKO Pangoro once it gets round to actually using Struggle.

24-17.png

hehe

Crawdaunt wastes its opening turn on a Taunt (what was Phart going to do, thwart your plans by using Splash?) before hitting for 23 damage with Crunch, so about as hard as Pangoro. But it does use Swords Dance as I feared, and suddenly that damage is looking a bit nastier. It then gets a Defense drop with Crunch, forcing me to use another X Defense, and Phart can manage one Struggle to take Crawdaunt below 50% but refuses to attack again. Ultimately, it's Crawdaunt itself that proves to be its undoing, as it tries to reapply its Taunt and hands Phart a free turn to finally Struggle again for the win.

Yet another bridge up ahead, this one leading to a PP Max and a load of twisted tree branches that take me down to the bottom of the canyon. Not much further to go in terms of distance, but still 7 Trainers to battle. Off to the right on the bottom level lies a Full Heal and a Black Belt.

24-18.png

Black Belt Curtis
Poliwrath Lv47 (Hypnosis/Double Slap/Dynamic Punch/Mind Reader, Adamant nature, IVs: 15/31/15/15/15/15, EVs: 252 Atk)

Impressive Attack investment, but the actual moveset is a little less so. I start with just one X Defense this time as Phart dodges a Dynamic Punch, followed by an X Attack and a Dire Hit as it dodges a Hypnosis and a second Dynamic Punch. If only Poliwrath had some way of guaranteeing it could land a hit! Phart refuses to attack for a couple of turns, but dodges another two Dynamic Punches before hitting with Struggle for just under a 3HKO. Poliwrath finally uses Mind Reader and connects its fifth and final Dynamic Punch, but a Full Heal wipes away the confusion and allows Phart to fail to attack on its own terms. Poliwrath's Double Slaps hit about as hard as you'd expect, giving Phart plenty of opportunity to use 3 more Struggles and claim victory over the hench tadpole.

24-19.png

That's the path to the altar up ahead, but there's a couple of detours to make before I get my teeth stuck into that mini-gauntlet. The first is to head back to the first cave section and move a boulder with Machamp's help, letting me skip over the majority of Vast Poni Canyon if I should ever need to return here (and I might need to, if Lillie ambushes me with another Max Elixir in the near future).

Once that's sorted, I return to where I was standing in that screenshot and crawl underneath a tree off to the left, leading to an encounter with a Team Skull Grunt of all things! What's he doing out here?

24-20.png

Ah, that's what he's doing: crime. I may not have any use for my Buginium Z, but I don't plan on being robbed of it.

Team Skull Grunt
Pawniard Lv46 (Assurance/Metal Sound/Embargo/Iron Defense, IVs: All 15)

Embargo is a nuisance as always, but Pawniard only has 10 attacking PP from Assurance, so perhaps I can use that to my advantage...

I start with an X Defense while Pawniard uses Iron Defense to achieve the same stat boost, then squeeze in a second one just before it uses Embargo. Oh well, no more items for now. But I don't particularly want Phart to try attacking either - aside from the fact that it has no boosts to its damage output, it also speed ties with Pawniard, meaning Phart is liable to be smacked with a 120-power Assurance if it goes first and uses Struggle. With no other good options available, I have to resort to chucking Poké Balls at Pawniard to pass the turns.

24-21.png

The absolute audacity of this man to have a go at me about stealing.

Pawniard's Assurance brings Phart down to 179/203 HP, so unless it goes on a crit spree, it should be safe to wait out the Embargo turns. I throw another few balls, and Pawniard switches things up by using Metal Sound for some reason, but eventually lands a crit Assurance that deals 60 damage before using Embargo again. That's easily fixed with a Moomoo Milk just before the Embargo, and after a few more rounds of ball-stalling, Pawniard is out of Assurance PP. A quick X Attack on Phart essentially renders the battle unwinnable for Pawniard, as Phart 3HKOs it with Struggle and has too much HP remaining to KO itself with Struggle recoil.

There's a hidden X Defense lying on the floor near the grunt, and after picking it up, I head back inside to the last cave section I haven't explored yet. Nothing interesting right by the entrance, but crossing a bit of water leads to another Black Belt.

24-22.png

Black Belt Terry
Crabominable Lv47 (Reversal/Ice Hammer/Iron Defense/Dynamic Punch, Adamant nature, IVs: 15/31/15/15/15/15, EVs: 252 Atk)

Ice Hammer is likely to hurt, so I use a couple of X Defenses and bring its damage down to 31 when Crabominable eventually uses it. Then it's 2 X Attacks, a Moomoo Milk, and lots of clicking the Fight button and watching Phart ignore me. It eventually starts hitting for around 40% with each Struggle, and shortly after Crabominable runs out of Ice Hammers and starts missing with Dynamic Punch instead, Phart takes it out with its third attack.

My Moomoo Milk supply is down to exactly 500 after that encounter. Considering I got rid of the Soft Drink Parlor that sold them just before I reached Tapu Village, that means I've used 499 of them across a section of the game that covered 89 Trainers and 1 Totem Pokémon, which sounds... about right, given that I'm using one Cosmog. Not that it's really a big deal, since I've got plenty of money and access to Max Potions in the shops, but it'll be sad to see the milk supply eventually dry up one day.

Anyway, on with the exploring. Smashing through some rocks in the water leads to a Rare Candy and a Flamethrower TM, and the final Trainer aside from the ones I walked past earlier: a Surfer.

24-23.png

Surfer Joshah
Golduck Lv47 (Soak/Psych Up/Amnesia/Hydro Pump, IVs: All 15)

Golduck is at an unfortunate level to have its moves pulled from its level-up moveset, as it only has 5 attacking PP. Not helping matters is the fact that it goes for Soak on turn 1, ensuring Phart resists all 5 of those Hydro Pumps and making the X Sp. Def I used seem a bit unnecessary. It copies Phart's boosts after I use an X Attack on it, but none of those stat changes will make a difference, and Phart simply shrugs off its Hydro Pumps before slowly working its way towards a 4HKO.

It's a dead-end past Joshah, and I've finished exploring every last nook and cranny of Vast Poni Canyon now, so it's time to launch Phart at the final three Trainers and their presumably-decent Pokémon.

24-24.png

Ace Trainer Hiroshi
Alolan Graveler Lv47 (Stealth Rock/Rock Blast/Discharge/Explosion, IVs: 15/30/30/15/15/15)
Lapras Lv48 (Ice Beam/Brine/Safeguard/Hydro Pump, Ability: Water Absorb, IVs: 30/15/15/15/30/15)

With any luck, Graveler will just blow itself up and Phart won't have to attack it at all, so I use an X Defense and a Dire Hit while I'm waiting to see what it does. It misses with a Rock Blast on turn 1, then does indeed use Explosion afterwards, knocking itself out whilst dealing a mere 35 damage to Phart.

Lapras's attacks will likely require an X Sp. Def, and its Hydro Pump takes off 22 HP after I pop one on. That seems alright - just need to keep Phart's HP above 50% in case Brine gets a critical hit. An X Attack gives Phart the last boost it needs, and after a spell of pretending not to notice my orders, it hits with a Struggle that takes off a little over 25% from Lapras. Not even taking a nap for a turn can stop Phart from winning now, as Lapras can't deal enough damage to stop 3 Struggles from eventually knocking it out. On we go!

24-25.png

Veteran Heather
Talonflame Lv48 (Quick Attack/Will-O-Wisp/Flame Charge/Aerial Ace, Ability: Flame Body, Adamant nature, IVs: 30/30/15/15/15/30, EVs: 252 Atk / 252 Spe)
Wailord Lv48 (Heavy Slam/Bounce/Liquidation, Ability: Oblivious, Lax nature, IVs: 30/15/30/15/30/15, EVs: 252 HP / 252 Def)
Glaceon Lv48 (Frost Breath/Mirror Coat/Quick Attack/Ice Shard, Ability: Snow Cloak, Calm nature, IVs: 30/15/15/30/30/15, EVs: 252 HP / 252 SpD)

Talonflame seems a bit underpowered. I know it doesn't learn Brave Bird until Lv. 64 in these games, but Aerial Ace? Really? Surely they could've gone with Acrobatics or even Fly instead.

At least it makes life a little easier for Phart. I start with 2 X Defenses and 2 X Attacks while Talonflame proves me wrong by landing a crit Aerial Ace, followed by a burn from Will-O-Wisp. But even that only brings Phart down to 99/203 HP. Once I add a Dire Hit and fix it up with a Full Restore, it delivers a fairly swift 3HKO to Talonflame.

24-26.png

Up next is a tiny little Wailord! Either that or Heather is secretly a giant. I wouldn't trust Phart to survive a critical hit with so little HP remaining, so I use a Moomoo Milk on it and wait to see how hard its Struggles hit. Thanks to Wailord's EV spread, Struggle is a 4HKO at best, and now I have to start using Guard Specs. as well after Liquidation gets a Defense drop. But it's not too difficult to cycle through X items, Moomoo Milks and attempted Struggles, and after a few more turns of disobedience, Wailord faints once Phart manages to use 3 Struggles.

24-27.png

Last out is Glaceon, whose Frost Breath hits a little harder than I'd like thanks to it being a guaranteed crit - X Sp. Defs won't save me here as the critical hits simply ignore them. The first Frost Breath as I heal Phart deals 54 damage, which is fairly strong but does leave some wiggle room for Phart to strike back... in theory. What actually happens is that it loafs around and refuses to obey for long enough that Glaceon nearly runs out of Frost Breath PP, and only then does it Struggle to take a third of Glaceon's HP off. Once the Frost Breaths are exhausted, Glaceon resorts to pathetic Ice Shards that take out 4 HP each before Phart puts it out of its misery at last.

The end is in sight! Sort of, anyway - there's still the whole trial portion to contend with, but the Trainers are nearly complete, with this upcoming Veteran being the 17th and final Trainer of Vast Poni Canyon. He's carrying 4 Pokémon, but I've dealt with worse before and still come out on top.

24-28.png

Veteran Eric
Noctowl Lv48 (Reflect/Tailwind/Magic Coat/Air Slash, Ability: Insomnia, Calm nature, IVs: 30/15/15/15/30/30, EVs: 252 SpD / 252 Spe)
Gengar Lv48 (Dark Pulse/Shadow Ball, Ability: Cursed Body, Timid nature, IVs: 30/15/15/30/15/30, EVs: 252 SpA / 252 Spe)
Slowking Lv48 (Psychic/Scald, Ability: Own Tempo, Calm nature, IVs: 30/15/15/30/30/15, EVs: 252 SpA / 252 SpD)
Flygon Lv48 (Dragon Rush/Earthquake, Ability: Levitate, Adamant nature, IVs: 30/30/15/15/15/30, EVs: 252 Atk / 252 Spe)

2 X Sp. Defs while Noctowl sets up Reflect and Tailwind, followed by 3 X Attacks, 2 X Defenses, 2 X Speeds and a Dire Hit. With Noctowl's Air Slashes barely reaching double-digit damage, it can't even bring Phart into yellow HP in the meantine. Reflect does nothing to protect it from the guaranteed crits of Struggle, allowing Phart to OHKO it(!) and bring in the rather more menacing Gengar. While Phart will normally outspeed it thanks to the X Speeds, I'll have to wait 2 turns first so the Tailwind can wear off - in the meantime, its Shadow Balls both hit for 42 damage. I heal up, it uses Shadow Ball again for similar damage, Phart outspeeds and refuses to attack on the first attempt...

24-29.png

...and Gengar lands a critical hit. Oh dear.

Attempt 2. I set up all the X items against Noctowl like before, but this time I use 3 X Sp. Defs instead of 2 to give a little extra cushioning against Gengar. I also wait until the final turn of Tailwind before trying to KO Noctowl, so that Phart doesn't have to worry about Gengar outspeeding it at any point.

Noctowl gets one-shotted by Struggle again, and Gengar comes in once more. Given everything I've done to prepare, the only way I can lose again is if Phart chooses not to attack, Gengar gets another critical hit, and Phart's affection fails to kick in and save it from the KO.

24-30.png

......

Refer to attempt 2 for a description of how attempt 3 started out, except Noctowl barely survived a Struggle this time (which didn't affect much other than making it take a few more turns to faint) and Gengar failed to land a critical hit, instead getting the OHKO from Struggle that I wanted. Phew!

Eric still has a couple of other Pokémon, of course, but there's a reason he went with Gengar first over them. Flygon's up next, and despite the fact that it's carrying the equally-strong Earthquake, it decides to use the inaccurate Dragon Rush as its source of chip damage against Phart. I know it's got a chance to flinch, but that's not much help when its opponent is faster. Struggle 2HKOs it after a bit of disobedience, and Slowking suffers a similar fate, not even managing a Scald burn before fainting. Finally, nothing can stop me from proceeding to the trial site.

24-31.png

CHRIST

As if the previous fight wasn't bad enough! Lillie catches up to me just before the cave entrance and slaps another 40 PP onto Phart's Splash, forcing me all the way back home to use it up again. But we end up back here soon enough, and the shortcut I made earlier with Machamp's help proves very useful in making my return.

24-32.png

24-33.png

There's not much to say about this trial other than that it's very simple. You walk forwards, fight a Jangmo-o, walk forwards some more, fight a Hakamo-o, walk forwards some more, fight Totem Kommo-o, then you're done. Probably the most boring of all the trials, but it is run by wild Pokémon instead of an actual captain, so I can't fault them for not making it more interesting. Time to let them ambush me and then beat them up in return.

24-34.png

Jangmo-o
Lv42 (Bide/Tackle/Leer/Headbutt, Ability: Bulletproof, Naughty nature, IVs: All 31)

Honestly kind of pathetic. Perfect IVs are cool, but we're 10-15 minutes away from the climax of the story and you're running Tackle??? As if that wasn't bad enough, not only is it a lower level than every single Jangmo-o I can possibly encounter in the tall grass here (since they're Lv. 43-46), but they all know Dragon Claw! And yet the one that actually plays a part in the trial, nope, you're stuck with Headbutt as your best move.

Of course, Phart's abysmal stats and refusal to obey mean it's hardly a more competent battler on its own power, but it still manages to 5HKO Jangmo-o without any X items. Even Bide wasn't much of an issue, as I couldn't even get it to attack twice in a row under normal circumstances, let alone during Bide's charging period. Once that fight's over with, I pick up a Dragon Claw TM just off to the side before getting attacked by a slightly more imposing dragon.

24-35.png

Hakamo-o
Lv44 (Headbutt/Autotomize/Work Up/Sky Uppercut, Ability: Bulletproof, Brave nature, IVs: All 31)

Still a distinct lack of Dragon-type moves, but at least it's an improvement. I start with an X Defense and an X Attack, while Hakamo-o sloughs off half its body with Autotomize before dealing a whopping 8 damage with Headbutt. Yeah, I think we'll be alright. Phart achieves a 4HKO without too many obedience hiccups, only needing to stop for a Moomoo Milk once.

Also, if the game's mechanics are taken as fact, then Hakamo-o's use of Autotomize decreased its weight from 103.6 lbs to 0.2 lbs. No wonder the poor thing wasn't hitting very hard.

That's the last of the trial Pokémon, so all that remains now is the big fella and its cronies. Much like my very first trial back on Melemele Island, I have to approach the pedestal containing the Z-Crystal before the Totem Pokémon comes crashing out of the sky to challenge me.

24-36.png

24-37.png

Totem Kommo-o
Aura: +1 Attack, +1 Defense, +1 Sp. Atk, +1 Sp. Def, +1 Speed
Lv49 @ Roseli Berry (Drain Punch/Dragon Claw/Thunder Punch/Poison Jab, Ability: Soundproof, Calm nature, IVs: 31/1/31/1/31/31, EVs: 120 HP / 138 Def / 252 SpD)

Ally Noivern
Lv48 (Boomburst/Screech/Dragon Pulse/Air Slash, Ability: Infiltrator, Timid nature, IVs: All 31)

Ally Scizor
Lv46 (Light Screen/Pursuit/Bullet Punch/X-Scissor, Ability: Technician, Brave nature, IVs: All 15)

Totem Kommo-o will summon Noivern at the end of turn 1, and then summon Scizor after Noivern faints if it has less than 66% HP left.

Compared to the horrors of the Mimikyu/Banette partnership at my last trial, Totem Kommo-o seems... unremarkable, I think is how I'd describe it? Its coverage moves don't cover Psychic-types like Phart, so it's only going to be dealing neutral damage, and since Phart automatically ignores its aura with Unaware, all those attacks are coming off an Attack IV of 1 with no EVs and a hindering nature. It does have Noivern to provide Screech support and output some special damage, which means I'll need a bit more variety in my X item usage, but that's the only real issue I can identify.

Time to see how Phart fares. An X Defense is the natural choice on turn 1, and Totem Kommo-o responds with an equally natural Dragon Claw, bringing Phart to 188/206 HP before its first backup dancer arrives.

24-38.png

I'm expecting Noivern to go for either Screech or Boomburst. I think its Boomburst might actually be stronger than anything the Totem can muster, so I use an X Sp. Def - the opponents hit back with Dragon Claw and Boomburst (with the latter not hurting the Totem thanks to Soundproof), leaving Phart on 153 HP now. Next up is a Guard Spec. so that Screech can't undo the boosts, and then I begin to alternate between X Sp. Defs and X Defenses.

However, that little plan is brought to a screeching (god I'm so funny) halt when Noivern uses Screech anyway and successfully lowers Phart's Defense. How'd it manage that? Well, as I've now learnt at this inopportune moment, not only can Infiltrator bypass screens and substitutes when its user attacks another Pokémon, it can also bypass Mist... and as far as the game's concerned, the Guard Spec. essentially is Mist in item form. So I can't stop it from using Screech, and if anything, I've probably encouraged it to use Screech more often by weakening all its other attacks. Not good at all.

On the plus side, Phart is still at +2 Defense, which is enough to reduce Totem Kommo-o's damage output to ~20 HP per turn. As long as I can keep its HP up and keep some Defense boosts on it, I should be able to set up the rest of its X items, in theory. Another X Defense and a Max Potion give me a window for that setting-up, and for whatever reason, Noivern seems to abandon the idea of Screeching and opts for Boombursts and Dragon Pulses that hardly trouble Phart's HP at all.

24-39.png

That's about as good as it can get. Phart's faster than both opponents (plus Scizor, obviously) and has some boosts stockpiled in case Noivern does go back to using Screech. The only concern is that Totem Kommo-o has presumably run out of Dragon Claw PP, as it's now switched to using Poison Jab - poison damage will probably hurt Phart more than anything else it can throw out, so hopefully we'll get lucky and avoid it.

Phart may be ready to attack in body, but not in mind, as it decides to loaf around instead. The opponents throw out Thunder Punch and Screech, so I use another X Defense before trying again. This time, Phart actually uses Struggle, taking a good third away from Totem Kommo-o's HP and only receiving minimal damage in return. I try again after a Moomoo Milk, but it loses interest in the battle and takes a crit Air Slash. No luck on the next turn either. But then it Struggles on Totem Kommo-o again, leaving it in KO range at the cost of taking another Screech. Another X Defense + Moomoo Milk, Phart dodges two Screeches in a row, then hits Totem Kommo-o for the third and final time, taking it out of the battle!

24-40.png

24-41.png

Apologies to Scizor, as it won't be able to make an appearance now, but there's still Noivern to get past before the trial is truly complete. I no longer need to worry about Screech as Noivern itself doesn't have any physical attacks, so with Phart on 138/208 HP, I'm safe to just click Fight and hope for the best. Phart does its own thing for 3 turns, including smacking itself in the face and receiving the equivalent of confusion damage, but its Struggle deals well over 50% to Noivern once it lands. A quick Moomoo Milk keeps it safe from any crit-induced disasters, and after another bout of disobedience, it Struggles one last time and victory is ours!

24-42.png

24-43.png

Sound!

Totem Kommo-o flees to some distant part of the canyon, and with no trial captain around to heap praise upon me or describe my accomplishments in great detail, all that's left to do is to take my new Z-Crystal from the pedestal.

24-44.png

The Dragonium Z itself is, as you might expect, useless in this challenge, but completing my 7th trial means that I can now purchase Full Restores from the Poké Marts, which ought to be much more useful. I'm sure there've been a few times before where I've had to choose between restoring HP or curing a status condition, and now I don't have to.

All the stuff that takes place at the altar (and beyond) can wait until next time. In the meantime, I need to go and watch a video of all the upcoming cutscenes so I know when the best moments to grab screenshots will be. After all, I'd rather not spoil the climax of the story by accidentally taking screenshots of the ground with a small bit of Necrozma's leg off in the corner.
Trainers defeated: 276/427
 
:sm/necrozma-dusk-mane: :sm/necrozma-ultra:
25-1.png

God, it's like I'm back in Mesagoza. At least the altar's actually in sight now, and Tauros should get me up there quickly enough. Lillie and Hapu catch up with me and give me a verbal pat on the back for clearing yet another trial.

25-2.png

Not this shit again. As usual, I fly halfway across the Alola region to track down a wild Buneary and torment it with a Lv. 71 Legendary Pokémon that can only use Splash for dozens of turns. Once Phart regains access to Struggle, it's a quick flight back to Vast Poni Canyon and a mad dash through the cave section back to where I was, luckily not bumping into any wild Pokémon along the way. Now we can finally head up to the altar. Look lively, Lillie!

25-3.png

It's 9pm.

Lillie trots off ahead with the Moon Flute and stations herself at the designated flute-playing zone. Once I get to my own position, we wait until the sun's out and give the flutes a toot to try and summon the Legendary Pokémon.

25-4.png

25-5.png

doooot doooot, doot doot dyoot-doot-doooot dyoooot

25-6.png

25-7.png

25-8.png

I don't recall this being mentioned as part of the ritual. Isn't that a bit dangerous?

25-9.png

25-10.png

25-11.png

It turns out the Legendary Pokémon was with us all along! All we had to do was believe in ourselves play a little tune and Nebby evolved into Solgaleo. Enjoy not being able to use the Eviolite any more, nerd.

Well, not quite what we were expecting, but it still works - Lillie asks Nebby to whisk us off to wherever Lusamine's gone so we can help her out. Now we're getting somewhere.

25-12.png

25-13.png

Oh no! An Ultra Wormhole opens up right in front of us and Guzma is unceremoniously dumped onto the ground, with Lusamine being splatted on top of him shortly afterwards. There are certainly worse fates that can befall a man, but still, that's got to hurt.

25-14.png

Oh no again! Necrozma has shown up to steal all of Alola's light. So much for Lusamine saying she'd be able to defeat it. There's a brief pause while Necrozma looks down upon us all, then it catches sight of Nebby and a fight breaks out.

25-15.png

25-16.png

25-17.png

I don't think that could've gone much worse. Nebby gets overpowered and subsumed in about 10 seconds flat, and Necrozma uses its newfound powers to blast open a load of wormholes across Alola. I'm treated to a montage of the kahunas (and Hau) squaring off against a few Ultra Beasts, then I'm thrown into a battle with the big fucker itself.

25-18.png

25-19.png

Dusk Mane Necrozma
Lv50 (Sunsteel Strike/Morning Sun/Psycho Cut/Night Slash, Ability: Prism Armor, Impish nature, IVs: All 31, EVs: 6 HP / 252 Def / 252 SpD)

The Dusk Mane/Dawn Wings battle usually pales in comparison to Ultra Necrozma, coming with no stat boosts and running on wild Pokémon AI (i.e. none). The first time I played Ultra Moon, it went for Moongeist Beam against my Raticate and immediately got one-shotted by Crunch! Phart will obviously have a few more problems than that, but aside from Morning Sun recovery and Night Slash, it should be fine.

Ideally I would've remembered to heal Phart earlier and not have it enter the battle on 152/208 HP... oh well. Psycho Cut does 12 damage after an X Defense, and once it's at +6 Defense, even Sunsteel Strike doesn't hit especially hard (though I've yet to see Night Slash). The random move choices also screw over Necrozma by using up all 5 Morning Suns before Phart even attempts to attack, so once it's had 3 X Attacks, a Dire Hit and an X Speed, it's ready to roll.

Phart actually uses Struggle on the first attempt, though it's only a 4HKO against Necrozma's considerable bulk. It strikes back with its first Night Slash of the battle, but with it only dealing 18 damage, nothing short of a critical hit will really be an issue. Just have to use a Moomoo Milk after each attack and it'll be fine. The second Struggle takes Necrozma into yellow, the third one comes immediately afterwards and takes it into the red, and Phart strikes a final time to KO Necrozma without any obedience issues at all. Hurrah!

25-20.png

25-21.png

Having been thoroughly embarrassed by a Cosmog in front of everyone, Necrozma calls it a day and drags Nebby back home with it, along with all of Alola's light.

25-22.png

Gee, it's kinda dark. Good news is Lusamine and Guzma are alright now and the Ultra Recon Squad are here to help out. Dulse seems to think that Necrozma looked interested in my Z-Power Ring, so maybe I should be the one to go chasing after it this time.

25-23.png

You have access to a Lunala and you never thought to use it in any of our battles? Not that Phart would've appreciated having to fight it, but still, would've been better than a single Poipole. Anyway, saving the world from being plunged into eternal darkness is more important than that, so off I go to another dimension to beat the shit out of Necrozma again.

25-24.png

25-25.png

25-26.png

I did contemplate whether or not to include all the Ultra Warp Ride legendaries as extra opponents for Phart to face, but it didn't seem worth it: they're not Trainers, they award Exp. Points that Phart definitely doesn't need, and hunting them all down feels too grindy even for me. Kartana's world does have a couple of Trainer battles, but since it's accessed through a white warp hole, I can't currently visit it as all the white warp holes lead to Rome Ultra Megalopolis. So they'll have to wait a little bit.

Speaking of warp hole colours, Bulbapedia tells me something interesting about them:

"Before the player arrives at Ultra Megalopolis for the first time, all white warp holes will lead there rather than to Ultra Beast homeworlds. If the player lands in a warp hole of a different color at this point, they have the chance to catch a level 60 wild Pokémon there, but on their next trip through Ultra Warp Ride, the white warp holes will be more frequent. After landing in other warp holes four times, the fifth trip features only white warp holes, guaranteeing that the player will end up in Ultra Megalopolis."

So even if I did want to go legendary-hunting, that mechanic would've stopped me fairly quickly. I decide to test it out by deliberately diving into the wrong warp holes a few times, and as expected, the game eventually bombards me with nothing but white warp holes and forces me into Ultra Megalopolis.

25-27.png

25-28.png

It's nice to see that the Ultra Recon Squad consists of more than one man and one small child. They tell me that Necrozma's up ahead atop the Megalo Tower, so off I go. There's not exactly much else to do here.

25-29.png

25-30.png

Slightly disturbing to see a prism bigger than Nebby's head emerging from said head, but alright.

25-31.png

Here's the star of the show! Right, time to turn battle animations on. Normally I wouldn't bother because they slow down progress even more than usual, but I don't mind for a fairly quick 1v1 like this.

25-32.png

Ultra Necrozma
Aura: Threatening
Lv60 (Photon Geyser/Smart Strike/Power Gem/Dragon Pulse, Ability: Neuroforce, Bold nature, IVs: 31/31/31/0/31/31, EVs: 96 HP / 252 Def / 162 SpD)

How about that? Ultra Necrozma, the Blinding One, the Light That Burns the Casuals... does all of that with a rock-bottom Sp. Atk IV and a Bold nature. Having an aura that gives it +1 to all its stats means you don't really notice the nerfs while it's nuking your Vikavolt with Power Gem.

25-33.png

But as always, Phart just ignores those stat boosts (minus Speed), which is a rare sight in this fight as it's normally quite difficult to access Unaware in a regular playthrough - the only Unaware users available "natively" in USUM are Pyukumuku and Clefable, both of which have it as their Hidden Ability and therefore require SOS chaining to get hold of it. So Cosmog actually has a niche! Sort of. I still have to worry about crit Dragon Pulses, and Photon Geyser also ignores Unaware (though it's still resisted by Phart), but the battle isn't quite as difficult as one might think.

Looking at that moveset, it's got to be an X Sp. Def first, hasn't it? So I pop one on just before it uses Dragon Pulse to start things off.

25-34.png

25-35.png

160/208 HP left after that blast. It looks like a crit Dragon Pulse would do around 150 damage, so it'll be alright to use a second X Sp. Def here. The next attack brings Phart down to 127 HP, a Moomoo Milk heals it back to full, and Necrozma decides to switch to some physical damage with Smart Strike.

25-36.png

25-37.png

166 HP after that one, so I probably don't need to use any X Defenses at all. I stick a third X Sp. Def on instead for when it runs out of Smart Strike PP, then switch to X Attacks, healing Phart up when it falls in range of a KO from a crit Dragon Pulse - it does take a critical hit from Smart Strike at one point, but it deals a relatively unimpressive 63 damage.

25-38.png

One last item in the form of a Dire Hit and Phart's all set, just as Necrozma switches back to Dragon Pulse. When that fails to deal much damage, it opts for the more visually spectacular Photon Geyser...

25-39.png

25-40.png

...for a whopping 20 HP of damage. This is easier than half the totem fights!

It's still not easy to find an opportunity to attack though - Struggle will deal 52 damage to Phart, and if it's struck by a crit on the same turn then it might faint from the recoil damage. But what if I used X Speeds on it? That way, it'd Struggle before Necrozma attacks, and then it'd have both the chance of dodging Necrozma's attack and the chance of tanking a fatal blow to help shield it (I'm pretty sure the affection magic doesn't work on KOs via recoil, anyway). Since Necrozma's quite speedy even before its +1 boost, I have to use 3 X Speeds to let Phart outpace it.

25-41.png

25-42.png

Power Gem doesn't really help it either, given that it's weaker than Dragon Pulse even without factoring in STAB. With Phart at +6 Speed now, it's time to go on the offensive.

25-43.png

u wot

When did THAT happen? I don't remember hearing any "you've been healed" sound effects... unless it was another silent heal. Either way, that's a bit unfortunate. There's no way Phart can use up all its PP before Necrozma does, so I'll have to just stall it out and watch it Struggle itself to death instead.

25-44.png

25-45.png

Drained of all its PP, the mighty Blinding One can only flail about for a few turns before running out of HP and keeling over.

25-46.png

Well that was embarrassing. I went to all the effort of screenshotting all the fancy cutscenes so I could make this into a fancy post where I defeat the bad guy and save Alola, only to get fucked over by the game healing me so Phart couldn't even fight its opponent. Oh well. Victory regardless!

25-47.png

25-48.png

And everything's back to normal now. Necrozma's been drained of its light and reverted to a Pink Floyd album cover, Nebby's alright despite the ordeal, Alola has an actual sun again, and Ultra Megalopolis will probably be fine eventually. Not that I'll ever get to see it in-game.

25-49.png

Another one for the PC. I've not actually used Poipole in USUM before, probably because you get it so late and then it still can't evolve until the Pokémon League. This run will be no exception.

Now then, back to my home dimension! You can actually call Charizard to take you off to Poké Pelago even while you're in Ultra Megalopolis, which is quite amusing, but I have to speak to Phyco and borrow one of his Pokémon before I can properly return home. Everyone's waiting for me, there's a bit more backstory and info on Necrozma (why should I care about that chump?), and Lusamine hands me a few Beast Balls in case I run into any Ultra Beasts on my travels. I suspect I will rather soon, but I won't be catching any of them until later on.

25-50.png

Nebby's still a bit battered after getting Necrozma'd earlier, and Lillie's off to help it recover at Aether Paradise with her mother. Probably a nicer ending from her perspective than in SM, but it does make Lonely Lillie feel a bit out-of-place being played during this scene.

25-51.png

Right, of course, there's still a trial to complete. Mina whisks me off to Seafolk Village in a flash, though I'll not be starting on her trial just yet. I need to throw Poipole into the PC before I do anything else. Off to the Pokémon Center...

25-52.png

25-53.png

25-54.png

25-55.png

25-56.png

Ah, that's nice. I was aware this existed, but I'd never actually seen it myself because I don't usually play Pokémon on my birthday - too busy kissing all the girls.

Once I've picked all the residual confetti out of my hair, I throw Poipole into the PC as I originally intended, but I think I'll leave the final trial (as well as using up all that Splash PP from earlier) until the next post. I've already crammed far too many images into this one, and besides, I've got cake to cut.
754 BST Legendaries humiliated: 1/1
 
:sm/tsareena: :sm/ribombee:
26-1.png

When I wasn't busy dimension-hopping or taking screenshots last time, I also managed this impressive useless feat. But what does this earn me aside from bragging rights?

26-2.png

...nothing, it would appear. Bragging rights it is.

Now, next on my list of battles are the two Trainers in Kartana's world, but I'd like to switch off the motion controls before I set foot in the wormhole again.

26-3.png

And the way to turn them off is obviously to talk to the Aether person who shows up in Game Freak's office in Heahea City after you enter the wormhole for the first time. Duh.

Seriously though, who came up with that idea? It might not be as bad as the Hi-Tech Earbuds in Sword and Shield (which aren't quite so out-of-the-way in comparison, but one control setting for one mostly optional minigame isn't as important as volume settings that affect every aspect of the game), but it's still a pain to have the worse settings thrust upon you and then have to track down an unintuitively-placed NPC to switch to the better ones. And you already have to visit Phyco (or Zossie in Ultra Moon) if you want to swap between using Solgaleo or Lunala for Ultra Warp Ride, so why couldn't they be the ones in charge of the control settings as well?

Oh well. I've changed over to the Circle Pad now, so I may as well hop back through the wormhole until I find Kartana's world. It's not quite as vanishingly rare as Guzzlord's dimension, but it's still not a common sight unless I find a white warp hole with 2 or 3 rings, which are far from guaranteed to appear.

26-4.png

After 4 failed attempts which mostly served to remind me that Ultra Warp Ride isn't very fun if you're searching for a specific Pokémon, I stumble into the Ultra Forest. It's one of the handful of other dimensions that contains humans (or are they human-shaped aliens? What makes something "human" in the Pokémon world, really?), and it's the only one where they'll challenge any visitors like me.

26-5.png

Ultra Forest Kartenvoy
Kartana Lv48 (Night Slash/Swords Dance/Leaf Blade/X-Scissor, Ability: Beast Boost, IVs: All 15)

Probably just as well Kartana doesn't come with EVs or anything fancier than the default level-up moves, as X-Scissor takes Phart straight down to 126/208 HP without even landing a critical hit! Mind you, part of that was my fault because I forgot to heal Phart before the battle, meaning I used a Moomoo Milk on turn 1 instead of an X Defense. Phart manages to dodge a Night Slash while I stick a couple of X Defenses onto it, then 2 X Attacks as well, giving it much-needed boosts to its physical stats.

Kartana's attacks are dealing ~30 damage at this point, so I give Struggle a try - the first one fails due to disobedience, which was lucky as Kartana struck it with a crit Night Slash on the same turn, putting Phart just 12 HP above KOing itself if Struggle had connected. I heal it up and try again, and it deals around 25% after some more loafing around. Just a matter of time now. Phart dodges a couple of Night Slashes in between ignoring my orders, and while its next 3 Struggles are far from quick, they eventually land to KO Kartana. Now I can move on to the second Kartenvoy.

26-6.png

Ultra Forest Kartenvoy
Kartana Lv48 (Night Slash/Swords Dance/Leaf Blade/X-Scissor, Ability: Beast Boost, IVs: All 15)

Another interesting thing about these Kartenvoys is that they don't seem to use Poké Balls, instead just sending their Kartana directly into battle like Hau often does with his starter. Kind of cool that they can apparently tame Ultra Beasts like that. And I'm glad to have something interesting to write here, because this Kartana appears to be completely identical to the one Phart just fought.

The same strategies as before should therefore be effective, except I use 3 X Defenses instead of 2 this time to give Phart a little more cushioning. At +4 Attack, it once again scores a 4HKO against the origami alien thingy, getting a useless critical hit on the last strike.

26-7.png

All that remains now is the actual wild Kartana, which I don't need to fight (and don't want to fight, given that it awards Exp. Points). But it seems a bit of a waste to just ignore it, especially given it was a bit of a pain getting here in the first place. So I've got a new plan: I'll fight it, defeat it, then reset my game before I leave, so it'll be like the fight never happened. Call it "fun" or something.

26-8.png

Kartana
Aura: +2 Attack
Lv60 (Leaf Blade/X-Scissor/Detect/Air Slash, Ability: Beast Boost, IVs: Random; at least 3 of them are 31)

Nothing too fancy since it's basically just a regular wild Pokémon, albeit an Ultra Beast with the appropriate aura. Unaware lets Phart bypass that, which is good because a +2 Kartana would genuinely be quite scary otherwise. Now I only have to worry about X-Scissor.

26-9.png

Much like the previous battles, I start with 2 X Defenses, and the first X-Scissor takes Phart to 175/211 HP. 2 X Attacks later, Phart hasn't taken any further damage, so I start on the process of getting it to Struggle - no luck for the first few turns, and when Phart does attack, it's only a 6HKO thanks to this Kartana being 12 levels higher. But with no way to boost its damage output, Kartana inevitably folds to another 5 Struggles once Phart starts to listen to me.

26-10.png

*resheathes kartana*
nothin personnel...kid...

26-11.png

Once the game's reset and the Exp. Points are unawarded, I head over to Royal Avenue and speak to this Youngster, who needs me to regale him with tales of my bravery so that he can build up his own courage. I could've spoken to him as soon as I first visited Royal Avenue, but it's only after telling him about my trip to Ultra Megalopolis that he gains enough courage to challenge me, so there wasn't much point until now.

26-12.png

Youngster Kenway
Midday Form Lycanroc Lv48 (Scary Face/Crunch/Rock Climb/Stone Edge, IVs: All 30)

Kenway mentions that this is his first battle against another Trainer, and appropriately enough he doesn't have any of the Trainer AI flags set, so his Lycanroc will just use moves at random like a wild Pokémon. It still manages to pick Crunch on turn 1 after I use an X Defense, but it neither deals much damage nor gets a Defense drop. After an X Attack, Phart loafs around for a bit before landing a crit Struggle that nearly takes Lycanroc below 50%. A couple more Struggles are enough to defeat Lycanroc from there, and Kenway hands me a Dawn Stone, wrapping up the little sidequests for now. On with the island challenge!

26-13.png

In theory, this trial is meant to consist of me going round and battling all the trial captains one-by-one before I can take on the Totem Pokémon. That's not quite how it's going to pan out, but Mina wastes no time in initiating the first battle, barely fitting in a single dialogue box before the fight begins.

26-14.png

Captain Mina
Mawile Lv51 (Iron Head/Play Rough/Sucker Punch, Ability: Intimidate, IVs: All 30, EVs: 252 Atk / 252 Spe)
Granbull Lv51 (Stone Edge/Play Rough/Earthquake, Ability: Intimidate, IVs: 30/30/25/25/25/30, EVs: 252 Atk / 252 Spe)
Ribombee Lv51 @ Fairium Z (Pollen Puff/Dazzling Gleam/Psychic, Ability: Shield Dust, IVs: 25/25/25/30/30/30, EVs: 252 SpA / 252 Spe)

Two Intimidate users and a fully-invested STAB Pollen Puff user. Not exactly trivial, but Mawile knowing Sucker Punch means I should get 5 free turns to set up X items before Phart takes any damage.

...or at least that's what I thought would happen. Mawile actually uses Play Rough on the second turn, but it only deals 16 damage so it's not much of an issue. It then seems to pick its attacks at random until it runs out of Sucker Punch PP, giving me plenty of time to maximise Phart's defenses, use a Dire Hit on it and bring it to +5 Attack before it needs healing. Of course, having all of those boosts doesn't mean it actually wants to attack, but I'm able to persuade it to 2HKO Mawile after about 10 turns of doing nothing.

Next up is Ribombee, because Mina is bright enough to understand type matchups. I use a Max Potion in time for the first Pollen Puff, which leaves Phart on 179/211 HP - a critical hit will probably KO it, but it's not like it'll be very difficult to reach this point again if Phart does get knocked out, so I think I'll just risk it. The risk pays off, as Phart tanks 4 Pollen Puffs without receiving any crits and uses both its Struggles right away to 2HKO Ribombee. Granbull doesn't achieve much when it makes its appearance, only getting an Attack drop with Play Rough and requiring a couple of heals before 3 Struggles finish it off.

26-15.png

I think all the "Pink Petal" jokes had already been made by about December 2017, so I'll simply acknowledge it here and move on.

Right then, who's next? Ilima should be somewhere around Route 2 according to Mina, which means I'll have to fire up the ol' Charizard once more and fly over there.

26-16.png

Not who I was after, but it's nice to see Hau again, and also nice to hear that Ilima's probably in the area. Hau hands me a Max Elixir with the instruction to use it when a battle is dragging on, which... really won't help Phart in any situation. Nice of him to offer though. Once he and his Decidueye have run off, I track down Ilima a little further inside Hau'oli Cemetery and get started on the next round of combat.

26-17.png

Captain Ilima
Gumshoos Lv51 (Crunch/Hyper Fang/Super Fang, Ability: Stakeout, Adamant nature, IVs: 30/25/30/25/30/25, EVs: 252 Def / 252 SpD)
Smeargle Lv51 (Extreme Speed/Flamethrower/Surf/Energy Ball, Ability: Technician, Hasty nature, IVs: 30/30/25/30/25/30, EVs: 252 Atk / 252 SpA)
Komala Lv51 @ Normalium Z (Sucker Punch/Wood Hammer/Slam, Ability: Comatose, Careful nature, IVs: 30/30/25/25/30/25, EVs: 252 Atk / 252 SpD)

He's added a Komala to his team since the last battle over 3 months ago, but Smeargle looks a lot punier now than at the start of my island challenge, so it's more like a team of 2½ Pokémon. A couple of X Defenses reduce the damage from Gumshoos's Crunches to the mid-20s, and with a Guard Spec. to keep Phart's Defense at that level, I'm free to add on 3 X Attacks and a Dire Hit. Even a critical hit from Crunch only strips away around 80 HP, so once Phart gets its act together and attacks, Gumshoos goes down in two hits.

Ilima sends in Komala, presumably in the hopes of landing a Sucker Punch or five, but I foil his plans by stalling until it runs out of PP. Komala then resorts to a Wood Hammer that hits about as hard as Gumshoos's Crunch (i.e. not very) and takes a Struggle, surviving with a little over 20% of its HP. Even its Breakneck Blitz can't do more than about 40 damage, and it promptly faints to another Struggle. As for Smeargle... down in one hit. Boring!

26-18.png

Five more to go. Ilima warps me over to Lush Jungle in search of the next petals, and after chasing after Mallow towards the back of the jungle, I come across her enjoying some sort of aromatherapy session while Lana watches on. Somehow this leads to a battle.

26-19.png

Captain Mallow
Trevenant Lv51 (Horn Leech/Shadow Claw/Leech Seed, Ability: Natural Cure, IVs: 30/25/30/25/30/25, EVs: 252 Def / 252 SpD)
Shiinotic Lv51 (Moonblast/Giga Drain/Spore, IVs: 30/25/30/25/30/25, EVs: 252 Def / 252 SpD)
Tsareena Lv51 @ Grassium Z (Trop Kick/Low Sweep/U-turn, IVs: 30/30/25/25/25/30, EVs: 252 Atk / 252 Spe)

This looks like another job for X Defenses. From what I could tell while I was using 2 of them, Trevenant's Shadow Claw should do around 108 damage with a critical hit, which is only around 50% of Phart's HP. But that's not accounting for Leech Seed, which will prove to be a nuisance as it saps away a chunk of HP every single turn for the rest of the fight. I do manage to get 3 X Attacks and a Dire Hit on like last time, but even with all that, Phart still can't manage a 2HKO, and it certainly won't with Leech Seed constantly healing Trevenant. Boring as it may be, I'm forced to take the only practical option: stall out all of Trevenant's attacking PP until Mallow gives up and switches to Tsareena.

I did use the stalling process as an opportunity for 2 X Sp. Defs (for Shiinotic) and 3 X Speeds (to try and bait Tsareena into using Low Sweep), so it wasn't entirely unproductive. But Phart chooses to ignore me and Tsareena goes for U-turn, switching to Shiinotic before it can get too comfortable. Phart does successfully use Struggle on the first attempt this time, taking 50% of Shiinotic's HP away... only for Leech Seed to restore about a third of the damage. God, I'm going to have to stall out another opponent here, aren't I? Between the constant Leech Seed recovery, Spore putting Phart to sleep, and the ever-present menace that is disobedience, there's no real alternative to letting Shiinotic use up its attacking PP and forcing Mallow to switch back to Tsareena.

Phart was fast asleep when Tsareena came back in, so I had to spend a turn waking it up while Tsareena went for a Low Sweep, taking a Speed stage off but dealing pathetic damage. It uses Low Sweep again, Phart refuses to attack, then Phart takes a nap right as Tsareena uses Bloom Doom. Yeah, nice timing, you bellend. It does survive the attack with 46 HP, so after a Full Restore it's happy and healthy again, though just as unwilling to attack as ever. To make matters worse, Tsareena has used enough Low Sweeps to outspeed Phart and is now eating at its Attack boosts with Trop Kick, so now I have to Guard Spec. up and reapply the boosts. But before I can get very far, Tsareena uses U-turn again and switches back to Shiinotic. Christ, will someone please just let me KO them?

Mallow's AI has clearly broken down at the sight of the immovable Cosmog, as she immediately switches back to Tsareena again. It gets in a couple of Trop Kicks before U-turning back to Shiinotic, then coming straight back in, then U-turning again. I can't even catch it on the switch because Phart refuses to attack! Another 6 switches later, Phart FINALLY hits Tsareena with a Struggle, taking it into yellow for a brief moment before the Leech Seed recovery. After it U-turns again, Shiinotic decides to use Spore for once instead of immediately switching... ironically on the one turn where Phart actually hits it with Struggle, activating Effect Spore and paralysing itself before Spore can land.

26-20.png

Nothing to say here, I just needed something to break up the wall of text.

So. Phart has a 45.14% chance of actually attacking every turn, Leech Seed only takes 3 turns to completely heal off that damage, and it's losing HP every turn to that very Leech Seed in addition to Tsareena's attacks and Struggle recoil... you know what, fuck it, let's stall out Tsareena's PP as well.

I just want this to end.


And thanks to a well-timed critical hit from Tsareena's U-turn, it does!


26-21.png

26-22.png

I hate this game.


Right, round 2... I'll not bore you with all the details of this attempt, but in summary: I decide not to attack at all and just max out Phart's defenses with X items, then completely stall out Mallow's entire team until they all faint to their own Struggles. If the five paragraphs I already wrote during the first attempt didn't tip you off, this takes a very very very long time.

26-23.png

Even once they run out of PP, the Leech Seed recovery is so high that the opponents still take 10 to 14 Struggles each before they faint. And I have to keep healing Phart the entire time. And Phart growing to Lv. 73 halfway through the battle doesn't do an awful lot to help.

But it's over at long last! And I never have to battle her again... until the postgame, when she uses the exact same team again but with slightly different movesets. Her Shiinotic has Ingrain in that battle. God help me when that one comes around.

26-24.png

26-25.png

On the plus side, Lana hands over her petal as well and I don't have to battle her. Had I been playing Ultra Moon, she would've taken Mallow's place here (if only, eh?), but just in case you were curious, this is what her team would have been:

Captain Lana (in another dimension)
Lanturn Lv51 (Discharge/Hydro Pump/Thunder Wave, Ability: Volt Absorb, IVs: 30/25/25/30/25/30, EVs: 252 SpA / 252 Spe)
Cloyster Lv51 (Spike Cannon/Icicle Crash/Spikes, Ability: Skill Link, IVs: 30/25/30/25/30/25, EVs: 252 Def / 252 SpD)
Araquanid Lv51 @ Waterium Z (Liquidation/Leech Life/Crunch, Ability: Water Bubble, IVs: 30/30/25/25/25/30, EVs: 252 Atk / 252 Spe)

No pivoting moves there, and certainly no Leech Seed users, but it's not like I had a choice of who to fight. Time to move on to Wela Volcano Park - Kiawe's not here at the moment, but his Hiker friend is filling in for the 10 seconds it takes him to arrive. I can't imagine Kiawe will be packing many forms of HP recovery, so hopefully he shouldn't be such a slog.

26-26.png

Captain Kiawe
Arcanine Lv51 (Crunch/Flare Blitz/Extreme Speed, Ability: Intimidate, IVs: 25/30/30/25/30/25, EVs: 252 Atk / 252 SpD)
Talonflame Lv51 (Quick Attack/Flame Charge/Brave Bird, Ability: Flame Body, IVs: 25/30/25/30/25/30, EVs: 252 Atk / 252 Spe)
Alolan Marowak Lv51 @ Firium Z (Flame Wheel/Shadow Bone/Bonemerang, Ability: Cursed Body, IVs: 30/30/25/25/25/30, EVs: 252 Atk / 252 Spe)

2 X Defenses to start with, and while I was expecting to need a Guard Spec. to protect Phart against Crunch, Arcanine instead goes for the slightly stronger Flare Blitz. That works for me, as the recoil damage will make it easier to take out (even if a critical hit does leave Phart a little lower on HP than I'd hoped). A couple of burns from Flare Blitz slow down the setup process a bit, but by the time Phart is at +5 Attack and has a Dire Hit active, Arcanine only has a sliver of HP left and is easily dispatched with a Struggle.

Marowak is next, and I do use a Guard Spec. this time while it deals 30 damage back with Shadow Bone. Phart lands a Struggle on it without too much fuss, but it's just short of a 2HKO, so this might take a while yet. Once the 10 PP of Shadow Bone has been depleted, Marowak resorts to an Inferno Overdrive that doesn't achieve much, getting knocked out shortly afterwards. That leaves just Talonflame, whose Brave Birds deal enough damage to itself that Phart only needs to hit it once before it faints.

All done? Nope, his Hiker friend wants a go as well.

26-27.png

Hiker David
Magmar Lv48 (Confuse Ray/Fire Punch/Lava Plume/Sunny Day, Ability: Flame Body, IVs: All 15)

Facing these two back-to-back is still probably easier than facing Mallow at all. But Magmar does carry both a physical and a special STAB attack, so I have to use an X Defense and an X Sp. Def lest Phart be obliterated by a sun-boosted crit. Then it's 2 X Attacks, followed by Phart quickly striking it down taking a nap while Magmar whittles down its health in ~30 HP chunks. It eventually wakes up and brushes off Confuse Ray to 2HKO Magmar with Struggle.

26-28.png

Now we're all done. Three battles have earned me three petals on Akala (even if one of them wasn't against Lana like it probably should've been), so it's time to be whisked off to Ula'ula in search of the last couple.

Kiawe dumps me at the entrance to Hokulani Observatory, and once I head inside, it seems like Sophocles is a bit sad because Molayne's going away for a while. But not so sad that he isn't up for a battle with me - that level of depression is exclusive to Ultra Moon.

26-29.png

Captain Sophocles
Togedemaru Lv51 (Fell Stinger/Zing Zap/Spiky Shield, Ability: Iron Barbs, IVs: 30/30/25/25/25/30, EVs: 252 Atk / 252 Spe)
Magnezone Lv51 (Flash Cannon/Discharge/Tri Attack, Ability: Analytic, IVs: 25/25/30/30/30/25, EVs: 252 Def / 252 SpA)
Alolan Golem Lv51 @ Electrium Z (Stone Edge/Steamroller/Thunder Punch, Ability: Sturdy, IVs: 25/30/30/25/30/25, EVs: 252 Atk / 252 SpD)

Togedemaru is mostly setup bait at first, as it keeps using Spiky Shield even in the face of my excessive X item usage, but actually hitting it with Struggle is another matter. Phart refuses to attack, then it attacks into a Spiky Shield, then it flinches from a Zing Zap! Very frustrating. The good news is that Togedemaru has pretty low bulk and doesn't hit especially hard either, so the first Struggle almost OHKOs it and a second one comes along shortly afterwards to finish it off.

The mighty Golem is next out, and while this could've been a rare opportunity to see the move Steamroller in action, it's so underpowered that a neutral STAB Stone Edge does more damage to Phart. And by "more", I mean 24 HP. Struggle is only a 3HKO on Golem, but Phart avoids all the possible crits from its Stone Edges and tanks a Gigavolt Havoc in the meantime, giving it a chance to take a little nap before KOing it and moving on to Magnezone. Thanks to a couple of X Sp. Defs I set up against Togedemaru earlier, it's not hitting very hard either (though it does get some stat drops from Flash Cannon), so it too goes down to a 3HKO.

26-30.png

26-31.png

Almost there now - Sophocles warps me over to Aether House to collect the final petal, though it looks like I'll have to deal with Team Skull one last time as well.

26-32.png

Or not? No battling this time, just a thank you regarding all the Necrozma stuff and a free Grip Claw. Once he runs off, I head inside.

26-33.png

I'm supposed to be battling Acerola for this petal, but she's busy doing something else and I have to fight Nanu instead, except he's just fought Hau and can't be bothered with me as well. So I end up not fighting anyone at all, bringing the string of battles to a rather abrupt and anticlimactic end. In case you care, here's what I would have been up against in Ultra Moon:

Island Kahuna Nanu (in another dimension)
Sableye Lv52 (Power Gem/Dark Pulse/Shadow Ball, Ability: Keen Eye, Impish nature, IVs: All 30, EVs: 252 SpA / 252 SpD)
Absol Lv52 (Night Slash/Psycho Cut/Sucker Punch, Ability: Super Luck, Jolly nature, IVs: All 30, EVs: 252 Atk / 252 Spe)
Alolan Persian Lv53 @ Darkinium Z (Power Gem/Fake Out/Dark Pulse, Ability: Fur Coat, Timid nature, IVs: All 30, EVs: 252 SpA / 252 Spe)

Somehow I think Nanu might actually have been easier than Mallow if I had a choice of who to fight - Absol may be a crit machine, but as long as it can't outright OHKO Phart then I'd be able to stall it out, which would be much easier without having to deal with Leech Seed every single turn. As for his other Pokémon, Persian only has one chance at doing real damage with its Z-Move, and Sableye has the stats of a Sableye. Funny to think that the Dark-type user might have been the easier option.

Oh well. I've got the petals now and that's what matters, as far as story progression is concerned. Better bring them all back to Mina so she can do... something with them?

26-34.png

Oh, that's quite pretty. Even the Totem Pokémon agrees, as it immediately lets itself in to have a look at it.

26-35.png

26-36.png

26-37.png

Totem Ribombee
Aura: +2 Attack, +2 Defense, +2 Sp. Atk, +2 Sp. Def, +2 Speed
Lv55 @ Occa Berry (Bug Buzz/Draining Kiss/Quiver Dance/Dazzling Gleam, Ability: Shield Dust, Impish nature, IVs: 31/1/31/1/31/31, EVs: 100 HP / 252 Def / 158 SpD)

Ally Pelipper
Lv52 (Stockpile/Scald/Spit Up/Seed Bomb, Ability: Drizzle, Timid nature, IVs: 15/31/15/15/15/31)

Ally Blissey
Lv53 (Heal Pulse/Light Screen/Helping Hand/Dazzling Gleam, Aility: Serene Grace, Naughty nature, IVs: 15/0/0/0/0/0)

Totem Ribombee will summon Pelipper at the end of turn 1, and then summon Blissey after Pelipper faints if it has less than 66% HP left.

Another instance of Unaware sticking a big middle finger up at the Totem's aura, leaving Ribombee's attacks a lot weaker than they're "supposed" to be and taking all the threat out of Quiver Dance. The only thing Totem Ribombee does keep is its Speed, which is admittedly very high - Phart will never outspeed it, even if I use 3 X Speeds before it uses Quiver Dance, so it'll always be taking an attack before trying to Struggle. Its allies have decent sets, with Scald burns to neuter Phart or Heal Pulse to keep it topped up, but Totem Ribombee itself is not as awful as it could've been.

The best way to start off is obviously with an X Sp. Def, but Totem Ribombee goes for Quiver Dance instead of attacking, seemingly unaware of Unaware. Nice to get a free turn like that, but its incoming ally might not be so kind to Phart.

26-38.png

Pelipper's Drizzle causes it to start raining once it shows up. Won't that damage Mina's painting equipment? Come to think of it, why are her parents letting her turn the house into a battlefield in the first place?

Well, as long as I don't cause their house to sink into the ocean it should be fine. Totem Ribombee uses Quiver Dance again as I put a second X Sp. Def on Phart, while Pelipper goes for Stockpile. So I use a third X Sp. Def, and they go for the same moves again. Are either of them going to attack Phart at all? Nope! They do it again while I'm using a Dire Hit! It's only once Ribombee reaches +6 that it finally uses Bug Buzz, taking Phart aaaaaall the way down to 197/217 HP, and Pelipper chips in with a Scald that takes another 16 HP off. Even Pelipper's 300-power Spit Up doesn't trouble Phart very much, and it has to give up all its stat boosts to use it.

26-39.png

26-40.png

Phart has all the stats it needs (I don't think Pelipper's Seed Bomb is worth stressing over), while Totem Ribombee has far more stats than it needs and can't benefit from most of them anyway. But it does have an effective Speed stat of 632 now, so it can deal scratch damage at an incredibly fast pace.

And speaking of damage, Phart's just about ready to attack after I heal it up to full. It chooses to loaf around for a few turns as usual, and after Totem Ribombee and Pelipper hit it with another round of lackluster attacks, it dozes off out of what I assume is sheer boredom. The Bug Buzz PP eventually runs out and Phart is instead struck for a pathetic 7 damage from Draining Kiss, then finally uses its first Struggle to leave Totem Ribombee just above 50%. It does immediately restore some of that lost HP with a crit Draining Kiss, but a second Struggle leaves it in KO range right afterwards.

It feels like the battle's almost won at this point, but Phart's next attack targets Pelipper instead and leaves it in KO range as well. And by the time it stops disobeying me and hits Ribombee again, it's restored enough HP with Draining Kiss to barely tank the hit, and Phart goes straight back to ignoring me afterwards. It's not until Totem Ribombee totally runs out of attacking PP and starts using Quiver Dance again that Phart finally puts it out of its misery with Struggle.

26-41.png

That also takes Blissey out of the picture by extension, leaving poor Pelipper all alone. To be honest, it's not been a very good ally to the Totem - boosting its own defenses with Stockpile didn't do much to help out (never mind that Unaware ignored the boosts), and once Phart got to +6 Sp. Def, it basically gave up on using Scald in favour of Seed Bomb, which didn't even hit very hard. Burning Phart was probably the best it could do as an "ally", and yet it barely even bothered trying! Silly bird.

Phart loafs around for a couple more turns and then knocks it out with Struggle, easy peasy. There's not a lot else to say, other than that I'm very glad I didn't have to deal with Blissey's Heal Pulse.

26-42.png

26-43.png

Buzzing!

26-44.png

I'm rapidly running out of useless crystals to add to my collection of useless crystals. Only two more to go now, and one of them doesn't even come with the fancy Z-Crystal Get! animation because it's simply sat on a random pedestal with no Totem.

26-45.png

Just Hapu left to go and that'll be me done with Poni Island at last. More importantly, Phart will actually listen to me again for a few levels! I doubt it'll last all the way through to the credits, but I'll take what I can get, and I won't have to worry about it ever again once I reach the postgame. God, it feels weird to think that I'm nearly there now.
Trainers defeated: 285/427
 
Last edited:
:sm/mudsdale: :sm/forretress:
Nothing new seems to be unlocked after beating Totem Ribombee - even the man at the Poké Mart has to admit that I can't buy any new items after clearing 8 trials - so I may as well head off to Exeggutor Island for my last grand trial.

27-1.png

27-2.png

Island Kahuna Hapu
Items: Hyper Potion, Full Heal
Golurk Lv53 (Hammer Arm/Earthquake/Shadow Punch/Stealth Rock, Ability: No Guard, IVs: All 30, EVs: 252 HP / 252 Atk)
East Sea Gastrodon Lv53 (Muddy Water/Mud Bomb/Recover, Ability: Sticky Hold, IVs: All 30, EVs: 252 HP / 252 SpA)
Flygon Lv53 (Earth Power/Dragon Breath, Ability: Levitate, IVs: All 30, EVs: 252 SpA / 252 Spe)
Mudsdale Lv54 @ Groundium Z (Heavy Slam/Earthquake/Double Kick/Payback, Ability: Stamina, IVs: All 30, EVs: 252 Atk / 252 Def)

Flygon with only two moves, one of which is Dragon Breath? No Storm Drain on Gastrodon on a mono-Ground team? Shadow Punch Golurk with No Guard??? I know USUM isn't actually some romhack-tier behemoth despite generally being more difficult than SM, but still... coming off the back of Ultra Necrozma and a Totem Pokémon with a +2 omniboost, Hapu's always felt like a bit of a breather in my normal playthroughs of USUM. And I'm not sure the final grand trial before the Pokémon League necessarily should feel that way.

27-3.png

Having said all that, using a Cosmog against her may prove to be a rather different experience. I naturally start with an X Defense against Golurk, who takes the +2 Phart down to 169/217 HP with Shadow Punch in response. So, about 144 damage if it gets a critical hit? That's doable. A couple more X Defenses bring its non-crit Shadow Punches down to 30-ish damage each, and then I can start on the remaining X items.

Although a crit Shadow Punch does reduce Phart to 65 HP at one point, Golurk's fists aren't enough to prevent me from fully setting up. With +6 Attack, maxed-out defenses, +4 Speed to outspeed Flygon and a Dire Hit active, it's now a case of getting Phart to actually attack its foe. This takes long enough for Golurk to run out of Shadow Punch PP, so of course it's going to use Earthquake now... right? Nope! Hammer Arm hits for a pathetic 6 damage, and then it randomly flip-flops between Earthquake and Hammer Arm, as if there's no difference between the two. Meanwhile, Phart takes it down to red with 2 Struggles, and Hapu uses her Hyper Potion to bring it back up to 66%. But that only prolongs the inevitable, and a couple more Struggles knock it out shortly afterwards.

27-4.png

Phart doesn't have to worry about Stamina thanks to Unaware, but Mudsdale's Payback ought to hit quite hard with all those Attack EVs and Phart outspeeding it (to be fair, it outsped it even before the X Speeds). So I heal it to full and gauge Payback's damage. It takes off 28 HP, and while that itself isn't too bad, it means a critical hit would almost certainly KO Phart if it had taken Struggle recoil beforehand. Since Mudsdale is so physically bulky, I decide to just stall out Payback's PP before trying to damage it - Hapu has it use up Tectonic Rage during this period, but without a critical hit, the damage isn't worth noting. Mudsdale switches to 20-ish-damage Earthquakes and Heavy Slams after this, while Phart spends most of its time fooling around but eventually delivers a 3HKO to the unfortunate Mudsdale.

27-5.png

Whatever accuracy drops Gastrodon might score with its mud-wielding powers will be useless against the perfect accuracy of Struggle. Not to mention Muddy Water only deals 16 damage. But it's not a complete pushover, as Struggle isn't quite a 2HKO and it's got Recover, so what follows is a rather frustrating cycle of Phart attacking it, then loafing around and letting it heal off the damage, then attacking once again before slacking off. And of course I have to heal off Phart's damage too unless I want it to recoil itself into the ground. So despite Gastrodon being far less threatening than its predecessors, it still squeezes out 6 Recovers before it runs out of damaging moves, causing Hapu to switch to Flygon.

27-6.png

The poor thing walks right into a Struggle as it comes in and falls straight into KO range. As funny as it might be to 2HKO it without it getting an attack in, I can't risk losing Phart to a crit Earth Power, so I have to be sensible and heal Phart instead. Earth Power can only muster 15 damage, and it immediately gets taken out by a second Struggle from a lightly-scuffed Phart.

The battle is essentially over now, but Gastrodon isn't unconscious yet. That can be arranged - with its only remaining PP consisting of 4 Recovers, it quickly uses them up and ends up Struggling itself down to a tiny fraction of its HP. Phart decides to finish the job itself even though it didn't have to, and the final kahuna is defeated!

27-7.png

Enjoy this screenshot for a moment, because this is the last time you'll see it.

Once I've received the lump of earthy magic that is the Groundium Z, Hapu shows me her special Z-Move pose, which doesn't help me at all but delights the local Exeggutor that were watching us. She then explains how the final part of my island challenge will take place atop Mount Lanakila before we take the boat back to Seafolk Village. I take the chance to heal Phart's injuries now before I forget - the last thing I need is to go charging into the next battle with a half-dead Cosmog.

27-8.png

27-9.png

Poni Island is officially complete! It's safe to say the biggest threat to Phart here was Phart itself, as it went rogue again before I even reached the Ruins of Hope and spent the majority of the section being its usual temperamental self. That's not to say that there weren't any difficult fights, because there were... just not the ones you might have expected. Ultra Necrozma? Nope, it Struggled itself to death. Totem Ribombee? Nah, ended up dealing single-digit damage to Phart before falling to a 3HKO. Yet Mallow's team had to be entirely PP-stalled thanks to one single Leech Seed, Phart went down twice to a random Gengar in Vast Poni Canyon, and while Lillie wasn't really a battle as such, her unskippable heals forced me to have a disobedient Phart use Splash 200 times against wild Buneary.

But Phart emerged victorious anyway, and now it's back to obeying my commands until it reaches Lv. 81. There are only 13 Trainers between now and the Pokémon League, plus another 5 once I get there, but obviously most of them are going to have fully-evolved Pokémon that give out lots of Exp. Points. I'm not really expecting Phart to stay under the cap right through to the credits, but hopefully I can squeeze in at least some of the Elite Four.

Right then, time to get started. Unlike all the captains during Mina's trial, Hapu does not offer me a lift to my next destination, so I have to manually fly to Ula'ula like the peasant that I am. Then I just have to take the lift up to the higher sections of Mount Lanakila.

27-10.png

But alas, the local edgelord has got there first, and apparently the only way he can express his thanks for helping out his family is through battle. Couldn't you just give me like 3 Full Restores and move on?

27-11.png

Pokémon Trainer Gladion
Crobat Lv53 (Acrobatics/Cross Poison, Ability: Inner Focus, IVs: All 30, EVs: 252 Atk / 252 Spe)
Zoroark Lv53 @ Darkinium Z (Night Daze/Hyper Voice/Grass Knot, Ability: Illusion, IVs: All 30, EVs: 252 SpA / 252 Spe)
Water Silvally Lv55 @ Water Memory (Crunch/Crush Claw/X-Scissor/Multi-Attack, Ability: RKS System, IVs: All 30, EVs: 252 Atk / 252 Spe)
Lucario Lv55 (Aura Sphere/Metal Claw/Quick Attack, Ability: Inner Focus, IVs: All 30, EVs: 252 Atk / 252 Spe)

He gets a different battle-intro background now that he's left Team Skull, one that somehow looks more evil than before. But I guess that's how he'd want it. And aside from the empty moveslots, his team's coming along quite nicely! Glad I don't have to worry about obedience for this one.

3 X Defenses to start with, and Crobat manages to poison Phart on its first Cross Poison, but the attack itself only does around 10 damage without a critical hit. Acrobatics isn't much better, reaching 18 HP per hit, so there's more than enough time to max out Phart's defenses and Attack stat, pop on a Dire Hit, and give it 2 X Speeds so none of Gladion's team can outspeed it. One last Moomoo Milk, and then Phart effortlessly dispatches Crobat with 2 Struggles.

27-12.png

Next up is the Lv. 53 Lucario. Hang on, what was that? Lv. 53? It seems as though poor Zoroark's Disguise has been let down by Gladion's uneven training methods. But knowing who Phart's up against isn't enough to protect it from Black Hole Eclipse, so I use a Max Potion on it and pray for no crit... and it worked, as the Z-Move merely takes Phart down to 158/220 HP. Then I use a Moomoo Milk, Phart takes 36 damage from a Night Daze, and Zoroark faints a couple of turns later after nearly getting an OHKO from Struggle.

Now Gladion sends in his Water-type Silvally, all specially configured to deal super-effective damage to the Litten that I stopped using before I'd even got past Route 1. When it becomes apparent that Multi-Attack won't help it, it settles for a crit Crunch that rips out 102 HP, then a less impressive 20 damage from X-Scissor. Meanwhile, Phart can't manage a 2HKO against the little lab experiment, but a 3HKO proves quite doable. That leaves only Lucario, who musters a total of 22 damage across 2 uses of Metal Claw before getting splatted as well. Battling's a lot easier when your Pokémon actually listens to you, as it turns out.

27-13.png

Ooh, an acknowledgement that I'm only using one Pokémon. Much appreciated.

Gladion tells me that Lillie was heading to Mahalo Trail for some reason, and hands me a PP Max on her behalf. Presumably because she wants me to spend even more time having to use Splash after she heals me? Wretched girl. Anyway, I can technically go and fight/capture Nebby now if I wanted, but I'd rather save that until the postgame when I don't have to be so mindful of Exp. Points. Lillie can just stay on Mahalo Trail until her legs go to sleep in the meantime.

Coming out of the Gladion fight, I have a total of 8 X Defenses, which is not going to get me through Mount Lanakila. So I take the opportunity to restock my bag with all the items I could possibly need: 150 Max Potions, 50 Full Restores and 100 of each of the X items that I actually use on Phart. And thanks to all the valuable crap my Poké Pelago minions bring me, I still have over $3,150,000 to spare! So I'm quite safe to proceed for now, but even if I do somehow run low on supplies, I'll still be alright.

27-14.png

Alola's second not-Victory Road. A dozen more battles before the Pokémon Center, and some of those are Double Battles, so a bit of backtracking will be required. Better get started.

There's an Escape Rope lying past the tall grass outside, but that's all that can be found here, so I have to head into the cave section. It's here that I encounter the first Ace Trainer just by the entrance.

27-15.png

Ace Trainer Seth
Scyther Lv51 (X-Scissor/Night Slash/Double Hit/Air Slash, IVs: 15/30/15/15/15/15)
Malamar Lv52 (Psycho Cut/Slash/Night Slash/Superpower, Ability: Contrary, IVs: 15/30/15/15/15/15)

Not keen on some of those moves, but at least they have no EVs behind them. I start with an X Defense while Scyther uses... Air Slash? Alright then. It only dealt 25 damage, so I let it use it again while applying a second X Defense, then an X Attack. Only then does Scyther try Night Slash, but with Phart at +4 Defense it's now worse than Air Slash. A few Moomoo Milks keep Phart healthy while it starts Struggling, taking out Scyther in 4 hits.

Malamar's Night Slash obviously gets STAB as well, but it still deals just 24 damage without a crit, so Phart's quite comfortable using Struggle. Pity it only looks like a 7HKO. An X Attack and a well-timed critical hit help improve that to a 3HKO, and on we go past this loser. No new items quite yet, just another Ace Trainer.

27-16.png

Ace Trainer Kailee
Shiinotic Lv51 (Strength Sap/Spore/Moonblast/Dream Eater, Ability: Effect Spore, IVs: 15/15/30/15/15/15)
Clefable Lv52 (Sing/Double Slap/Minimize/Metronome, Ability: Cute Charm, IVs: 15/15/15/30/15/15)

I'm not sure how to approach Shiinotic. It's not a big threat, but Strength Sap has the potential to be quite annoying, especially since a Guard Spec. would only block the Attack drop and not the actual healing. Dire Hit, perhaps? That would guarantee Struggle landing critical hits, which would bypass whatever negative Attack stat Phart may have. Yeah, that sounds plausible.

I start with that Dire Hit, while Shiinotic leads with a Moonblast that takes it to 180/220 HP. Not too bad for an unboosted Sp. Def stat, so I try Struggle next, but it's only a 6HKO unfortunately. Maybe a Guard Spec. followed by an X Attack will help out - as expected, Shiinotic heals itself to full with Strength Sap but is unable to lower Phart's Attack, and Struggle is now a 3HKO, if Shiinotic doesn't heal itself first. Luckily it goes for Spore instead, and Phart dodges a crucial Moonblast to preserve enough HP for its final Struggle to KO Shiinotic rather than itself.

Can you tell that Clefable has its default level-up moveset? Hopefully Double Slap was a big clue. While it's probably not much of a threat either, I do have to bear in mind that Metronome could randomly pull something horrible like Perish Song, so I use a quick Max Potion and have Phart wail on it before that can happen. It Sings Phart to sleep, only for it to wake up on the same turn, following up with a couple of Metronomes. But neither of its chosen attacks (Retaliate and Block) are of any help to it, so Phart simply 3HKOs Clefable and averts a possible crisis. Phew.

There's a fork in the road past Kailee, and rather than taking the path that leads onwards to the summit, I take the other one and encounter a Veteran.

27-17.png

Veteran Alonsa
Lickitung Lv52 (Power Whip/Rollout/Chip Away, Ability: Own Tempo, Timid nature, IVs: 30/15/30/15/15/15, EVs: 252 HP / 252 Def)
Goodra Lv52 (Aqua Tail/Power Whip/Outrage, Ability: Sap Sipper, Adamant nature, IVs: 30/30/15/15/15/15, EVs: 252 HP / 252 Atk)

Custom movesets, custom natures and full EVs - Veterans clearly have to earn their title. The only thing I'd query is why she's using an unevolved Lickitung at all, let alone one that knows the very move it uses to evolve.

Slapping on a couple of X Defenses seems a good opening move, and while I'm doing so, Lickitung rears up for a Rollout chain. Unfortunately it misses on the second turn and deals a total of 3 damage. It then switches to the more sensible Chip Away, bypassing the Defense boosts whilst still not actually doing very much, while I use an X Attack before having Phart start Struggling. The first hit was frankly pathetic thanks to Lickitung's EVs, so I use another X Attack and try again - a bit better, but Lickitung still has around 66% HP remaining. Fortunately its own damage output is still quite poor, so 4 Struggles and 2 Max Potions go into taking it out.

Goodra's Outrage ought to be stronger than anything Lickitung could throw out... not that I can tell yet, as it's too busy missing Phart with Aqua Tail while I heal it up again. It hits with Outrage for 28 damage on the next turn, with Struggle taking a quarter of its HP in return, so I use a Moomoo Milk and let it get confused from fatigue. Goodra immediately hurts itself in confusion, Phart's second Struggle leaves it in KO range, and hitting its next Outrage can't stop it from fainting to a third and final Struggle afterwards.

27-18.png

Past Alonsa is a tiny dead-end section outside that holds TM84 Poison Jab. But that's all, so it's back inside for me and along the "proper" path this time. There's a hidden Rare Candy overlooking some boulders that Machamp can move, and although my highly-developed brain can solve the boulder puzzle with ease, I can't physically move the boulders into place without walking into the sight of another Trainer.

27-19.png

Worker Ovid
Relicanth Lv50 (Yawn/Rest/Hydro Pump/Double-Edge, Ability: Rock Head, IVs: All 15)

Right, Phart will need some hefty boosts in order to avoid getting stuck in a Rest cycle. Relicanth opens with Yawn as I use up 3 X Attacks, followed by missing one Hydro Pump and hitting for 27 damage with another. Phart's affection bonuses sadly fail to wake it up for me, but an Old Gateau does the trick, and now it's got a Dire Hit active as well. But it still can't manage a 2HKO! Fortunately it outspeeds Relicanth, so once it uses Rest and falls asleep, Phart can just hit it 3 times in a row and KO it before it wakes up.

Now back to solving the puzzle, I have Machamp push the last boulder into place and grant me access to a Max Elixir and a Max Revive. That's all for this bit of cave, so I head on outside and come across a Full Restore in some grass, followed by a couple of Trainers. Actually, no - a couple of couples of Trainers.

27-20.png

"You need more Pokémon if you want to face us!"

"You need more Pokémon if you want to face us!"


I know these lines of dialogue for Double Battles that you can't participate in due to only having 1 Pokémon are pretty obscure by definition, but come on. Did all four of them have to have the exact same line? Booooo.

At least it's only a short return trip from Tapu Village once I've picked up Ralts. Let's see what these Black Belts are carrying.

27-21.png

Sparring Partners Allon and Eimar
Mienfoo Lv51 (U-turn/Quick Guard/Bounce/High Jump Kick, Adamant nature, IVs: 15/31/15/15/15/15, EVs: 252 Atk)
Machamp Lv51 (Dual Chop/Submission/Bulk Up/Cross Chop, Ability: Guts, Adamant nature, IVs: 15/31/15/15/15/15, EVs: 252 Atk)
Bewear Lv51 (Take Down/Hammer Arm/Thrash/Pain Split, Adamant nature, IVs: 15/31/15/15/15/15, EVs: 252 Atk)

Standard stuff for Black Belts in terms of having big Attack stats, but only one move that's super-effective against Phart. Nevertheless, I open with an X Defense on it, and Ralts gets taken out by Bewear's Thrash before it can use Memento on Phart. Mienfoo goes for Bounce, so now I know exactly what's coming on the next turn. Another X Defense allows Phart to take 30 damage from Thrash while dodging Bounce, and after the third one, it barely feels Mienfoo's U-turn or the third Thrash.

Now for X Attacks. Phart dodges Machamp's Cross Chop while I'm still setting up, thereby revealing it has Guts, then further insults it by dodging a second one. Once Phart's at +6 Attack, I let it go wild with Struggle - the first strike takes a good third off Bewear's HP, only for it to Pain Split itself back to near-full. It then hits Bewear again, followed by Machamp (who does get hit harder than Bewear, just not enough for a 2HKO), and actually gets slightly healed by Pain Split this time. Its next 2 Struggles target Machamp and KO it, followed by one on Bewear who heals it off, but Phart takes out Bewear on the next Struggle after it locks itself into Thrash. This leaves only Mienfoo, so after another Max Potion, Phart's no longer forced to choose its target at random and can quickly 2HKO it for another victory.

27-22.png

Of course, I can't just charge straight into the next Double Battle, as they only take on opponents with 2 or more healthy Pokémon. So for the first time this playthrough, I use a Revive! Now Ralts is wide awake and ready to be shitstomped once more.

27-23.png

Sparring Partners Craig and Jason
Crabominable Lv51 (Ice Hammer/Iron Defense/Dynamic Punch/Close Combat, Adamant nature, IVs: 15/31/15/15/15/15, EVs: 252 Atk)
Hawlucha Lv51 (Endeavor/Feather Dance/High Jump Kick/Sky Attack, Adamant nature, IVs: 15/31/15/15/15/15, EVs: 252 Atk)
Pangoro Lv51 (Body Slam/Crunch/Entrainment/Parting Shot, Ability: Iron Fist, Adamant nature, IVs: 15/31/15/15/15/15, EVs: 252 Atk)

This one's a bit harder, and Hawlucha in particular can screw me over with Endeavor if Phart falls just short of KOing it, as I won't be able to heal it before Crabominable gets an attack in. I can't just take out Crabominable first either thanks to Struggle's random targeting. Not to mention Feather Dance and Pangoro's Crunch, or the fact that it's started hailing.

The same opening strategy as before is probably best: X Defense on Phart, Memento on Phart, and get Ralts out of the way. Hawlucha decides to charge up a Sky Attack while Crabominable splats Ralts with Ice Hammer, and the hail does its thing and inflicts some chip damage. A couple more X Defenses bring Crabominable's Ice Hammer damage down to 27 HP, and Hawlucha spends another turn charging up Sky Attack. Maybe I could stall it out with hail damage... ah, but then it'd wreck Phart with Endeavor once it got low on HP.

I decide to use a Dire Hit for some reason, and although Hawlucha still has about 75% of its HP left, it uses Endeavor to bring Phart to just below 50%. That gives me an idea - if I keep healing Phart, perhaps I can bait Hawlucha into using up its Endeavor PP before the move would put Phart into KO range. And it works! Hawlucha uses 3 Endeavors in a row, stops for a quick Sky Attack, then uses up the last Endeavor afterwards. Crabominable's Ice Hammer and hail damage take away some additional HP too, but Phart just about survives.

27-24.png

So now what? Aside from the obvious Max Potion, I should start setting up Phart to attack now that Hawlucha's been neutralised. So I use a Guard Spec. to protect Phart from Feather Dance, then use 3 X Attacks. By this point, Crabominable has run out of Ice Hammers and is now trying its other attacks at random, and Hawlucha has finally succumbed to hail damage, bringing in Pangoro. I reapply the Guard Spec. just before Crunch lands for 32 damage, which is more than I'd hoped, as a critical hit could prove disastrous. We'd better go on the offensive before that can happen.

Phart's first Struggle takes Crabominable into the yellow, and it dodges Pangoro's Crunch before I heal it back to full. But a small disaster strikes when Crabominable lands a crit Dynamic Punch, dealing heavy damage and confusing Phart - using a Full Restore is easy enough, but it burns the final turn of Guard Spec.'s protection. Might have to just risk it and attack. With 166/222 HP remaining and the threat of a crit Crunch KO looming, Phart Struggles onto the hail-beaten Pangoro and just misses out on a KO, leaving it wide open to a retaliatory... Entrainment??? What. Why. Crabominable promptly misses its Dynamic Punch and Pangoro faints to hail damage, letting me use a Moomoo Milk on the next turn and watch Phart KO Crabominable for the win.

Still not quite sure what happened at the end there, but I'll take it. A quick flight back to Tapu Village lets me stash away Ralts for now (but I'm not done with it yet), then I retrace my steps and run past the Black Belts into the next section. It seems like some sort of crater lies ahead... and what's that in the middle of it?

27-25.png

It's Necrozma!

The game tells me it has fallen to the ground, weak and drained of power after our earlier encounter in Ultra Megalopolis. It's not even able to fight in this state, but by sharing the light of my Z-Power Ring with it, perhaps then it could be battled and captured.

27-26.png

Fuck that. What do you think I am, a charity? You can stay here and think about what you've done.

There's a dead-end path just past the crater that leads to an X Sp. Def, then another cave entrance. This section contains an ice-covered rock that would be terrific if I wanted a Glaceon, and circling said rock is a Backpacker.

27-27.png

Backpacker Peren
Emolga Lv51 (Encore/Volt Switch/Agility/Discharge, Ability: Static, IVs: All 15)

Using the X Sp. Def I just picked up cuts Discharge's damage to 16 HP, and that's Emolga's best attack, so this ought to be quick. After an X Attack, Phart does quite comfortably 3HKO Emolga with Struggle, only having to stop for a Max Potion after a crit from Discharge.

That was a nice change of pace, but it's time to move on again. I'll ignore the section that leads to the summit and take a detour off to the side of the cavern, skipping over a Veteran for now and continuing on to pick up a boring old Ice Beam TM. Who would ever need something as useless as that? Not me, and certainly not this Collector that I find further down the path.

27-28.png

Collector Minty
White Flower Florges Lv51 (Misty Terrain/Moonblast/Petal Dance/Aromatherapy, Ability: Flower Veil, IVs: All 15)

Indeed, Florges can't learn Ice Beam. But it does learn Moonblast, and that might sting without any X Sp. Defs, so I use one on Phart as well as an X Attack. Florges wastes a turn on Misty Terrain before Moonblast hits for 24 damage, so Phart's free to let loose some Struggles. It was on track for an easy 4HKO, and only missed out on that thanks to Florges locking itself into Petal Dance, getting confused afterwards, and dealing the final blow to itself through confusion damage.

27-29.png

The path I'm on leads back outside and on to another dead end, but at least there's a PP Max here and a Hiker to take on.

27-30.png

Hiker Anuhea
Gigalith Lv51 (Rock Slide/Stealth Rock/Sandstorm/Stone Edge, Ability: Sturdy, IVs: All 15)

It would've been really funny if Gigalith had Explosion and I could just wait for it to blow itself up, but alas, it doesn't learn it until Lv. 55. X items it is - one X Defense and one X Attack while Gigalith sets up Sandstorm and deals 27 damage with Stone Edge. It does even less with its Rock Slides, but Phart isn't hitting very hard either and has to rely on hail chip damage once the sandstorm wears off. Luckily for me, Gigalith never reactivates the sandstorm, and so 4 Struggles combined with hail damage knocks it out.

Back into the cave again, and this time I take the path that passes by a Veteran I ignored earlier. There's no way of getting around her, but given the objectives of this run, that would be quite pointless anyway.

27-31.png

Veteran Ella
Pyroar Lv53 (Hyper Voice/Flamethrower, Ability: Rivalry, Timid nature, IVs: 15/15/15/30/15/30, EVs: 252 SpA / 252 Spe)
Claydol Lv53 (Extrasensory/Earth Power, Ability: Levitate, Modest nature, IVs: 15/15/15/30/30/15, EVs: 252 SpA / 252 SpD)
Milotic Lv53 (Hydro Pump/Blizzard, Ability: Marvel Scale, Modest nature, IVs: 15/15/15/30/30/15, EVs: 252 SpA / 252 SpD)

There are no super-effective attacks or other fancy moves across her 3 Pokémon, so I just set up 3 X Sp. Defs and an X Attack while Phart takes a total of 89 damage from Pyroar's attacks. Once it's healed back to full, Struggle is a 4HKO on Pyroar at the cost of 2 Max Potions. Milotic is up next, but with its Hydro Pump dealing a mere 22 damage, the only thing it really achieves is taking 5 Struggles to defeat instead of 4. Claydol also falls to a 5HKO, not helped by its inexplicable decision to use Extrasensory most of the time over Earth Power. Flinching your opponent to death is a possible strategy, yes, but it's not a very good one when your attack of choice has a 10% flinch chance, and definitely not when it deals 6 damage per hit!

Freed from that slightly disappointing battle, I continue on until I come across an unmanned pedestal.

27-32.png

27-33.png

Full house! The Z-Crystals are sorted in accordance with what seems to be the most common "official" order of the 18 types. I do wonder if they could have done something more exciting with them though. Since rainbows seem to be a big thing in the Alola games, maybe I could try shuffling them around to resemble one?

27-34.png

Now I'm sort of sad it isn't like this in the games.

Oh well, on we go. There's a Full Restore nearby in yet another dead end, leaving the only unexplored path as the one leading directly to the summit. Another Ace Trainer stands ready to challenge me once I come into view.

27-35.png

Ace Trainer Jada
Vanilluxe Lv52 (Acid Armor/Ice Beam/Hail/Mirror Coat, Ability: Ice Body, IVs: 15/15/15/15/30/15)
Mismagius Lv53 (Growl/Psywave/Spite/Astonish, Ability: Levitate, IVs: 15/15/15/15/15/30)

Vanilluxe has done alright with its default level-up moveset, but Mismagius got rather shafted. It's a pity because all of its moves are learnt at Lv. 1, but the good ones are right at the top of the list (and the game selects 4 moves from the bottom), meaning it misses out on stuff like Phantom Force, Mystical Fire and Power Gem in favour of the crap you can see listed above. Poor Jada.

I start with an X Sp. Def and an X Attack against Vanilluxe, and it achieves nothing in response by using Acid Armor and Mirror Coat, so I'm off to a good start. But then it uses Hail, which is particularly annoying because now it can restore its HP with Ice Body, and Phart's Struggle was barely a 5HKO even before that healing. So I use another X Attack, heal up with a Moomoo Milk, then try again. It's a 3HKO this time, and thanks to the hail running out, Vanilluxe can't restore enough HP to save itself. The unfortunate Mismagius actually does some decent damage thanks to Psywave, but it suffers a 2HKO all the same.

27-36.png

"Only one partner?! Impressive, but you need at least two Pokémon if you want to face us!"


Boo, more duplicate dialogue. It's hit-or-miss whether Double Battle Trainers have unique lines or not, but I'm fairly sure there have been more that did than those that didn't. Not that it really matters.

I'm not going to double back to Tapu Village this time, because these two are the last Trainers before the Pokémon Center, so it'd be much easier to just carry on ahead and then come back for them once I've got Ralts. There's one last patch of grass outside once I pass them, with a Max Revive off to the side, and then the final lift up to the peak and its Pokémon Center. I'm sure Ralts will be looking forward to a little break from being pulverised after this last fight.

27-37.png

Master & Apprentice Breon and Kaimana
Glalie Lv53 (Blizzard/Freeze-Dry/Ice Shard/Dark Pulse, Ability: Inner Focus, Modest nature, IVs: 15/15/15/30/15/30, EVs: 252 SpA / 252 Spe)
Bisharp Lv53 (Iron Head/Night Slash/X-Scissor/Aerial Ace, Ability: Defiant, Adamant nature, IVs: 15/30/15/15/15/30, EVs: 252 Atk / 252 Spe)
Tyranitar Lv53 (Earthquake/Crunch/Stone Edge, Ability: Sand Stream, Adamant nature, IVs: 15/30/15/15/30/15, EVs: 252 Atk / 252 SpD)
Vikavolt Lv52 (Bug Buzz/Dig/Zap Cannon/Agility, Ability: Levitate, IVs: 15/15/15/15/30/15)
Forretress Lv53 (Explosion/Iron Defense/Gyro Ball/Double-Edge, Ability: Sturdy, IVs: 15/30/15/15/15/15)

Okay, fair enough, the final battle before the Elite Four probably should be hard. At least they open with Glalie and Vikavolt so I can focus on Phart's Special Defense first.

To that end, I start with an X Sp. Def on Phart while Ralts attempts to cast Memento on it. Its Quick Claw fails to activate, but Glalie instead hits Phart with Dark Pulse for around 35 damage while Vikavolt's Zap Cannon completely misses Ralts, so it does get its Memento off in the end! That's not great news for me, because now Phart's at -2 Attack, but getting Ralts off the field on turn 1 without it actually contributing to the fight is more important than not fucking myself over.

Better use the other 2 X Sp. Defs now. For some reason, despite carrying Bug Buzz and Dark Pulse, the opponents go for Agility and Ice Shard instead and barely hurt Phart at all, then try Blizzard and Bug Buzz, which certainly hit harder but still leave Phart above 50%. They seem to just be choosing their moves at random, which works for me as it lets me dump another load of X items onto Phart.

27-38.png

Might be overkill, but it is a 1v5 in a Double Battle. Vikavolt still outspeeds Phart thanks to using Agility, but everyone else is now slower than it, so it's time to start attacking. The first Struggle fails by targeting Vikavolt after it used Dig, but the next attempt takes a good 75% off Glalie at the cost of a crit Dark Pulse leaving Phart with 29 HP. So I use a Max Potion, and now it's Vikavolt that lands a critical hit with Bug Buzz, this time leaving Phart on 39 HP. Cheeky. No crit on its next Bug Buzz, however, and Phart disposes of Glalie with a second Struggle before it can attack.

Bisharp replaces Glalie, and its Night Slash will be more of an issue than anything Glalie had, provided it actually uses it. I can't let Phart attack on only 91 HP, so I heal it up again while Vikavolt takes it to 193/225 HP with Bug Buzz and Bisharp's Night Slash misses. Then Vikavolt uses Dig, but this time Phart targets its ally Bisharp instead and takes it into the yellow, tanking its Night Slash with ease. I have a bit of a think about whether to attack or not on this turn - Phart has 111 HP, so it could Struggle now and potentially take out Bisharp before it can attack, but if Struggle targets Vikavolt instead then Bisharp's Night Slash might crit and KO it. Ultimately I decide to risk it, and it pays off, with Dig dealing 6 damage to Phart and Struggle eliminating Bisharp before it can move.

27-39.png

27-40.png

Not entirely sure what to do here, but the first turn has to be spent on a Max Potion no matter what. Phart then dodges a Zap Cannon, takes 10 damage from Earthquake, and a further 14 damage from the sandstorm. Since it's mostly unscathed, I use a Guard Spec. on it so Bug Buzz and Crunch can't lower its defenses for a bit. Tyranitar's Crunch deals 36 damage without a critical hit, so it is a bit risky letting it attack like this, but it's mostly choosing random moves and I don't have any better ideas. Once Vikavolt goes for another Dig, I have Phart Struggle on the turn it emerges, taking about half of Tyranitar's HP off (but it looks like a low damage roll might miss the 2HKO). It uses Dig again on the next turn, so Phart Struggles again and this time nearly KOs Vikavolt, dodging Tyranitar's Crunch in the process. When it uses a third Dig, I have to question if it's deliberately throwing the match, but I don't let that stop Phart from Struggling again to KO Vikavolt.

It's now Forretress and Tyranitar vs. Phart. Gyro Ball deals a whopping 9 damage, so I don't feel particularly threatened by the new arrival, but I still have to be mindful of Crunch. It's fully capable of KOing Phart with a critical hit if it uses Struggle on the same turn, and even if Struggle hits Tyranitar, it looks like it might just survive. If only there were some way of inflicting chip damage on Tyranitar to guarantee the KO, and also some way of guaranteeing Struggle wouldn't target Forretress instead...

27-41.png

Oh! That'll do.

Having lost only 15 HP to the Explosion, Phart is quite happy to KO Tyranitar on the next turn and win the battle. Maybe this is why Kaimana is only an apprentice.

27-42.png

Another Double Battle with a confusing and slightly anticlimactic finish, but my little checklist doesn't discriminate between wins I understand and wins I don't, so I can just throw Ralts back into the PC again and call it a day.

Now I'd better start prepping for the Pokémon League... as much as one can "prep" when they're doing a solo run with a Pokémon that has one move. But I shall leave no stone unturned in my quest to figure out what I can actually do to prepare.
Trainers defeated: 299/427
 
Last edited:
:sm/dugtrio-alola: :sm/mandibuzz:
Following on from the previous post, I've spent roughly 10 minutes thinking about how to prepare for the Pokémon League and concluded that there isn't an awful lot I can do. So I'll just tie up a few loose ends in terms of uncollected items, then restock my supplies and get started on the final battles. Championhood awaits!

28-1.png

I tried to sneak around these two because I'm not interested in catching Nebby right now, but Lillie decides to shout at me over the side of a Solgaleo. Nevertheless, I ignore her request to catch it and cross the bridge to pick up an Electric Seed, as well as... oh, that's it. Visiting the Ruins of Conflict doesn't give me anything useful, as Tapu Koko has no interest in a non-Champion pleb like me.

Also interesting(?) to note that the Plank Bridge is fixed as soon as you fight Ilima during Mina's trial in USUM, compared to during the credits sequence in SM. I initially had an entire paragraph typed up here where I speculated why that might be the case, but I found it a bit too boring and tedious to keep in, which is really saying something.

Anyway, apart from that Electric Seed, the only other items I haven't picked up yet are a PP Up from the Aether House and a PP Max back on Mount Lanakila. Neither of them are very useful. So where might I find items that realistically could serve a purpose, however niche?

28-2.png

After an embarrassingly poor first run at the Ula'ula course, I swot up on the scoring system online and make a more convincing attempt, scoring the maximum of 50 Battle Points this time. This leaves me with more than enough BPs to buy 10 of each vitamin (minus Calcium for obvious reasons), just in case any of the Pokémon League battles prove so difficult that I need to edit Phart's EVs between fights. They shouldn't, but you never know.

And in case you were wondering how I'd use those vitamins when Phart is already fully EV-trained...

28-3.png

Poké Pelago strikes again! I think Mohn is basically my adoptive father now with how much time I've been spending at his place.

But really, if I want useful items I'm going to have to visit a Pokémon Center, so I fly back to the one on top of Mount Lanakila. Its Poké Mart happens to be one of the few that sells X items, so after cracking open a Roto Bargain, I top up my supplies to the excessive tune of:
  • 100 Full Restores
  • 250 Max Potions
  • 221 Moomoo Milks (can't buy these any more, but I still have some)
  • 866 Lum Berries (thanks dad)
  • 100 X Attacks
  • 100 X Defenses
  • 100 X Sp. Defs
  • 100 X Speeds
  • 100 Dire Hits
  • 100 Guard Specs.
And if there are any pesky Embargo users ready to lock me out of using those items, I have 163 miscellaneous Poké Balls I can throw at them instead. That ought to do the trick.

28-4.png

Phart can finally relearn Teleport! Never mind, I just remembered: it's shit. While it's obviously nice to have the choice available to me, Teleport is just as useless as Splash - or worse when factoring in Z-Moves - and burning through its PP against wild Pokémon is a longer process overall. If there was a forced heal somewhere in the Pokémon League, then Teleport would be better in that Phart would only have to wait 20 turns to attack during the battle immediately after said heal instead of 40... but there isn't a forced heal, so against all common wisdom, Splash remains the superior choice.

Now that I'm absolutely certain there's nothing left to do, I start to make my way up to the shiny new Pokémon League building. Judging by the lack of Tapu Bulu-shaped holes in the walls, I can assume this was built with the local guardian deity's approval.

28-5.png

Kukui congratulates me on overcoming the odds, dressed in his usual attire and apparently not suffering from the cold at all. I'd better talk to him from a safe distance lest I be cleaved in two by his steely nipples. Nothing too interesting is said, just a ramble about how the Pokémon League was built to honour the Legendary Pokémon (who is currently slacking off near a bridge two islands away) and a bit of reminiscing about his days in Kanto, then he heads inside.

28-6.png

28-7.png

28-8.png

In hindsight, it was possibly a bit cruel of me to drag Litten out of the PC just to trigger the "look how far we've come together!" scene and then immediately box it again. But to be fair, it would've been legitimately impossible to get this far without it, even if that's just because of how trading works in these games rather than any of Litten's own qualities. So, uh, thanks for setting Hau's Rowlet on fire a couple of times.

Right, this is it. I doubt it'll actually be as difficult as all those preparations might suggest, but I really don't want to risk one of the battles being unwinnable - if I have to give up and accept a loss without soft-resetting so I can prepare some more, then Phart will have to keep any Exp. Points it gained before I whited out, which is not ideal. Fingers crossed it won't come to that.

28-9.png

28-10.png

You'll see one move and you'll be thankful for it.

I think the general concept of an Elite Four doesn't need explaining here, though it is worth noting that Alola is one of the regions where you can choose the order in which you fight them. I normally just go from left to right, but that's maybe not optimal this time - Phart sits at Lv. 78, and is exactly 60,671 Exp. Points away from becoming disobedient again. It might make it to the Champion fight before that happens, but just in case it doesn't, I should probably do the harder Elite Four battles first and save the easier ones for later.

Steel, Rock, Ghost and Flying are my options. Any good type chart will tell you Psychic is weak to Ghost (Gen 1 quirkiness aside), so that's where I'll start.

28-11.png

Nanu has opted not to become an Elite Four member on top of his day job as a police officer and his begrudging title of kahuna, which is quite reasonable. The position is instead filled by the strongest child from the local orphanage, which is... maybe not so reasonable. But here we are.

28-12.png

28-13.png

Elite Four Acerola
Items: Full Restore, Full Restore, Full Heal
Banette Lv56 (Shadow Claw/Feint Attack/Infestation/Screech, Ability: Insomnia, IVs: 30/30/25/25/25/30, EVs: 252 Atk / 252 Spe)
Drifblim Lv56 (Ominous Wind/Focus Energy/Amnesia/Baton Pass, Ability: Aftermath, IVs: 30/25/30/25/30/25, EVs: 252 Def / 252 SpD)
Dhelmise Lv56 (Slam/Shadow Ball/Energy Ball/Whirlpool, Ability: Steelworker, IVs: 30/25/30/25/30/25, EVs: 252 Def / 252 SpD)
Froslass Lv56 (Blizzard/Shadow Ball/Confuse Ray/Ice Shard, Ability: Snow Cloak, IVs: 30/25/25/30/25/30, EVs: 252 SpA / 252 Spe)
Palossand Lv57 @ Ghostium Z (Shadow Ball/Earth Power/Giga Drain/Iron Defense, Ability: Water Compaction, IVs: 30/25/25/30/30/25, EVs: 252 HP / 252 SpA)

Oh not another fucking Banette. At least this one won't lay any curses on Phart (nor will any of her other team members for that matter), and Drifblim and Dhelmise seem unlikely to deal much damage by themselves. So that leaves one heavy hitter in Palossand and a slightly-less-heavy hitter in Froslass, both of which are preceded by a lead Banette that might not be very easy to set up on. Could've been worse, but it certainly could've been better.

28-14.png

Turn 1 is spent on an X Defense while Banette attacks with Shadow Claw, taking Phart down to 172/228 HP. So I'm looking at about 168 HP of damage from a crit... yeah, should be alright to use a second X Defense. The second Shadow Claw fails to land a crit in response, so I heal Phart with a Moomoo Milk before a third X Defense and a Guard Spec., keeping its Defense firmly secured at +6 for now. When I heal it again, it does take a critical hit this time but only falls to 76/228 HP, which is higher than I expected. No complaints from me!

Aside from another crit knocking it down to 40 HP at one point, Phart is able to have its stats maxed out without incident, reaching +6 in its Attack and both defenses and +4 in Speed with a Dire Hit active. Banette has long run out of Shadow Claws by this point, and to my surprise it never attempted to use Screech, even on turns where the Guard Spec. wasn't active. So it simply takes 3 hits from Struggle before going down, with Acerola burning one Full Restore to let it squeeze in another puny Feint Attack first.

28-15.png

I wonder what goes into the AI's decision on who to send in next when everyone has a super-effective move? I thought it'd prioritise high damage, but Dhelmise has no offensive EVs or anything. But it might not need any EVs to wipe away the remaining 42 HP, so I use a Max Potion and let it throw out a Shadow Ball for 20 damage. Phart's Struggle is a 3HKO in return, so after a couple more Max Potions it takes out its second opponent, along with Acerola's other Full Restore. This does come at the cost of Shadow Ball getting a Sp. Def drop, but hopefully +5 Sp. Def will still be enough.

28-16.png

It's a similar procedure to Dhelmise here in that I use a Max Potion and see how hard Shadow Ball hits - down to 196/228 HP this time. That's alright, so Phart hits it with Struggle and leaves it just above red HP, but gets hit by Confuse Ray in return. Annoying, yes, but it means Froslass passes up on an opportunity to KO with a crit Shadow Ball and guarantees Phart will tank the next one after I use a Full Restore. Shadow Ball takes Phart to exactly 196 HP again while Struggle takes Froslass to exactly 0 HP.

28-17.png

There's the ace Pokémon with the big nuke button. I decide I'm going to spam HP restoration until it uses up its Never-Ending Nightmare, but the idea of "spamming" items proves unnecessary when it goes for the Z-Move on its first turn. And it hits for... 66 damage! Not bad, and Shadow Ball only deals 38 damage as I heal off Phart's injuries. Struggle is still only a 3HKO though, and Phart suffers another Sp. Def drop after its first Struggle, but that gives me an excuse to use an additional X Sp. Def now that it's down to +4. Without any critical hits to pierce the boosts, Palossand crumbles to another couple of blows.

28-18.png

I don't rate Drifblim very highly, seeing as it has exactly one damaging attack. But it does go for Focus Energy on the first turn, and while the first Ominous Wind misses, the second one lands a crit for 96 damage! It gets an omniboost with the third attack, the fourth one is simply a regular (weak) hit, the fifth one is another critical hit, and after that it's out of PP for attacking. Oops. Struggle is an effortless 3HKO from there, with the only concern being the Aftermath damage added on to the finishing blow - nothing another Max Potion can't resolve.

28-19.png

Only 13,699 Exp. Points gained from that battle, so Phart might not lose its obedience until the middle of the Champion battle at this rate. That'd be nice.

If that's the case, I guess I can just fall back to my usual left-to-right system of Elite Four crushing? So, off we go to see what mechanical monstrosities await us.

28-20.png

Had I been playing the original Sun and Moon, old Hala would be here to make me holler. But this is Ultra Sun, so Big Mo is here to make me his ho.

28-21.png

28-22.png

Elite Four Molayne
Items: Full Restore, Full Restore, Full Heal
Klefki Lv56 (Spikes/Thunder Wave/Flash Cannon/Reflect, Ability: Prankster, IVs: 30/25/30/25/30/25, EVs: 252 Def / 252 SpD)
Bisharp Lv56 (Night Slash/Iron Head/X-Scissor/Metal Sound, Ability: Defiant, IVs: 25/30/30/25/25/30, EVs: 252 Atk / 252 Def)
Magnezone Lv56 (Flash Cannon/Thunderbolt/Tri Attack/Screech, Ability: Sturdy, IVs: 30/25/30/30/25/25, EVs: 252 Def / 252 SpA)
Metagross Lv56 (Hammer Arm/Meteor Mash/Bullet Punch/Zen Headbutt, Ability: Clear Body, IVs: 30/25/30/25/30/25, EVs: 252 Def / 252 SpD)
Alolan Dugtrio Lv57 @ Steelium Z (Earthquake/Iron Head/Sucker Punch/Fissure, Ability: Tangling Hair, IVs: All 30, EVs: 252 Atk / 252 Spe)

Kind of funny to have a team that includes a Metagross and yet go for Alolan Dugtrio as your ace. Even Game Freak seem to agree, as it's been given slightly higher IVs than the rest of Molayne's team to compensate for its thin sliver of bulk. Aside from that, he looks like an easier fight than Acerola, with Bisharp's Night Slash being the only thing that jumps out at me.

28-23.png

I get to spice things up a bit and start with X Sp. Defs thanks to Klefki's only damaging attack being Flash Cannon. It only hits Phart for 10-12 damage per hit once it's brought to +6, so there's not much Klefki can do to stop me dumping the usual pile of X items. Even a stray crit only puts Phart at 92 HP once it's fully set-up, and that's quickly healed along with the Thunder Wave paralysis by a Full Restore.

Taking it out is pretty easy too - a quick 2HKO with guaranteed-crit Struggles that bypass Reflect before it wears off. But it does squeeze in another Prankster Thunder Wave before fainting, so it wasn't totally useless... except Phart shakes off the paralysis on the same turn. At least you tried.

28-24.png

As expected, it's Bisharp next. After a Max Potion, its Night Slash takes off 30 HP, so a crit Night Slash would probably KO Phart after Struggle recoil. But since it's only Molayne's second Pokémon, it shouldn't take too long to get back to this point if I do have to reset, so I'd rather risk it than stall out its Night Slash PP. Phart's Struggle leaves it just above 50%, so it would be a 3HKO if not for Molayne's Full Restores, one of which he uses after the second Struggle. He throws out his second Full Restore afterwards, but after having no luck at all fishing for crits, Bisharp goes down regardless to a total of 7 Struggles.

28-25.png

I thought he might send in one of the two machine-mons first, but nope, it's Dugtrio. Is it going to spam Sucker Punch then? Nope again, it's going to use Earthquake and Phart will dodge it. Mind you, STAB Earthquake is stronger than non-STAB Sucker Punch after the latter got nerfed in Gen 7, so that makes sense. It tries to go for Sucker Punch anyway on the next turn, but Phart dodges again and uses its first Struggle on Dugtrio.

28-26.png

Pathetic! Those extra IVs did nothing. And I don't think Tangling Hair is likely to prevent Phart from outspeeding Metagross either.

28-27.png

Not that I can check just yet, as I've got to deal with its even slower companion first. Magnezone has Screech, and while it doesn't have any physical attacks of its own, I don't want it weakening Phart on behalf of Metagross, so I use a Guard Spec. here. Rather than Screeching, it hits with Thunderbolt for 24 damage, and now I can simply heal Phart with a Moomoo Milk and let it 3HKO Magnezone with more Struggles.

28-28.png

I expected Metagross to use Bullet Punch to try and finish off Phart while I used a Max Potion, but it tries Meteor Mash instead and misses. Then Phart outspeeds as expected and 3HKOs Metagross without issue, somehow turning a pseudo-legendary Pokémon into a relative joke.

Another 15,760 Exp. Points from that fight (over half of which came from Magnezone and Metagross), meaning Phart will reach Lv. 80 during the next Elite Four battle. So I guess now I change my strategy again and take on the easier member first so Phart can level up and gain a few more stat points before the harder one? This is getting confusing. But of the remaining two Trainers, one of them leads with an Armaldo that has 252 Attack EVs and a super-effective STAB X-Scissor, and the other one... doesn't. So this ends up being a fairly quick decision.

28-29.png

The mysterious lady who showed me how to use the Flyinium Z ages ago introduces herself as Kahili. But what's a golfer doing here at the Pokémon League? Maybe she misunderstood and thought Kukui said "Elite Fore".

28-30.png

28-31.png

Elite Four Kahili
Items: Full Restore, Full Restore, Full Heal
Braviary Lv56 (Crush Claw/Brave Bird/Air Slash/Scary Face, Ability: Sheer Force, IVs: All 30, EVs: 252 Atk / 252 Spe)
Hawlucha Lv56 (Flying Press/Throat Chop/Dual Chop/Poison Jab, Ability: Mold Breaker, IVs: All 30, EVs: 252 Atk / 252 Spe)
Baile Style Oricorio Lv56 (Revelation Dance/Teeter Dance/Air Slash/Feather Dance, Ability: Dancer, IVs: All 30, EVs: 252 SpA / 252 Spe)
Mandibuzz Lv56 (Bone Rush/Brave Bird/Punishment/Flatter, Ability: Big Pecks, IVs: All 30, EVs: 252 Def / 252 SpD)
Toucannon Lv57 @ Flyinium Z (Bullet Seed/Rock Blast/Beak Blast/Screech, Ability: Skill Link, IVs: All 30, EVs: 252 Atk / 252 Spe)

She's done her own island challenge before and has a strong team to show for it, though I'm not sure why all of them have 30 IVs across the board when Acerola and Molayne's teams (Dugtrio aside) all had 3 IVs set at 30 and the rest at 25. But I'm not especially worried about Kahili, as there seem to be several things holding her team back from being proper threats: Braviary can't fish for Defense drops with Crush Claw because Sheer Force removes them, Hawlucha has Mold Breaker but no attacks that benefit from it ignoring Unaware, and Mandibuzz's Punishment caps at 200 power once Phart has 7 or more positive stat stages (I thought it'd just keep going up like Stored Power, but apparently not).

28-32.png

Whether it can lower Phart's Defense or not, Braviary is pretty strong so I'd better use X Defenses first. Its first Brave Bird deals 48 damage, then the second deals 34, and then it switches to a 36-HP Air Slash once it twigs that special damage might be better now. Pity I can just use 3 Sp. Defs and make it switch back to physical attacks. The rest of the setup process goes smoothly, with the only issue being that Scary Face interferes with the X Speeds a bit, but Phart makes it to +4 Speed and promptly one-shots Braviary with Struggle, largely thanks to Brave Bird recoil having taken a big chunk off its HP already.

28-33.png

Hawlucha does have Throat Chop and 252 Attack EVs, but it can't be that hard-hitting, can it? I give Phart a quick Moomoo Milk to find out, and indeed, it takes a meagre 18 HP of damage from Throat Chop. 2 Struggles dispose of it rather quickly, managing to keep it out of Full Restore range in the process. That went well.

28-34.png

Mandibuzz has Punishment, but as I said earlier, it's capped at 200 power, not to mention it's coming off a base Attack stat of 65. Not going to risk losing Phart to a critical hit though, so I use a Max Potion, and the first Punishment takes it down to 193/231 HP. Oh no. That's a bit more than I expected, and it might be enough to OHKO Phart from full with a crit. But it's only got 4 shots at doing so, and I don't think it'd be a guaranteed OHKO even then, and Phart has affection bonuses too... so I'll try stalling out its PP. I start spamming Moomoo Milks, and Mandibuzz goes for Flatter on the first turn before using Punishment again. No crit. Third Punishment, no crit. Fourth Punishment, also no crit. Just one more attempt remaining, aaand...

28-35.png

28-36.png

All according to my calculations. Obviously. Ahem.

One clean pair of trousers and a Full Restore later, Mandibuzz is reduced to using Brave Bird, hitting for only 12 damage and mildly hurting itself as well. Flatter also proves annoying, but all I have to do to manage it is use a Full Heal whenever it lands and have Phart Struggle at every other opportunity. This is a good enough strategy for a 3HKO on Mandibuzz, and it happens to keep its HP out of Full Restore range too and avoids dragging things on.

28-37.png

Right, Phart is now at the obedience cap with 13 Pokémon to go before the credits. Any disobedience should therefore be confined to the final battle, which is nice.

28-38.png

Toucannon obviously has its Z-Move ready to go, so I'll heal Phart and let it use that up before I think about anything else. It goes for Supersonic Skystrike straight away and deals 33 damage. Not much of an issue. Next is a Guard Spec. in case it wants to Screech (but it would rather use Beak Blast for 21 damage), then another Moomoo Milk and Phart can start attacking. Its first Struggle takes Toucannon comfortably into yellow HP - this might be the third opponent where Kahili has no chance to use a Full Restore - but gets burned by Beak Blast in the process. No worries, I can just heal it up with my own Full Restore, waste a turn so I can reapply the Guard Spec., then let Toucannon faint to the second Struggle.

28-39.png

Oricorio's Feather Dance is the reason I wanted to keep the Guard Spec. up, and now that it's not a concern for a few turns, I can just heal Phart and let it strike! Or not, thanks to Teeter Dance. After I heal that and Phart loses 15 HP to an Air Slash, now it can strike, yet again bringing its opponent into the sweet spot where it's in KO range but not Full Restore range. It even dodges the next Teeter Dance, meaning it's free to take out Oricorio immediately without having to fret about confusion.

Perhaps I underestimated Mandibuzz just a tiny bit, but never mind - the battle's won now. Phart gained 14,463 Exp. Points from that lot and has another 16,749 Exp. Points to go before Lv. 81, so unless the next battle contains 4 Pokémon that award roughly as much experience as Metagross, it will remain obedient throughout.

28-40.png

Olivia's the only one of the kahunas to actually take up a position in the Elite Four, even though the island challenge used to end with all four kahunas being fought in a row. Maybe her lacking love life means she has enough spare time to humour Kukui's ideas.

28-41.png

28-42.png

Island Kahuna Olivia
Items: Full Restore, Full Restore, Full Heal
Armaldo Lv56 (Crush Claw/X-Scissor/Rock Blast, Ability: Battle Armor, IVs: All 30, EVs: 252 Atk / 252 Spe)
Cradily Lv56 (Rock Tomb/Energy Ball/Stealth Rock, Ability: Suction Cups, IVs: All 30, EVs: 252 Def / 252 SpD)
Gigalith Lv56 (Stone Edge/Bulldoze/Iron Head, Ability: Sand Stream, IVs: All 30, EVs: 252 HP / 252 Def)
Probopass Lv56 (Earth Power/Power Gem/Thunder Wave/Sandstorm, Ability: Sturdy, IVs: All 30, EVs: 252 HP / 252 SpD)
Midnight Form Lycanroc Lv57 @ Rockium Z (Crunch/Stone Edge/Counter/Rock Climb, Ability: Keen Eye, IVs: All 30, EVs: 252 HP / 252 Def)

Olivia's Pokémon are blessed with 30 IVs across the board like Kahili, but for some reason most of them don't have full movesets. I don't necessarily dislike the idea of giving them empty moveslots to reduce the Elite Four's difficulty/make them less likely to choose bad moves/whatever, but it's weird that only Olivia gets that treatment out of the four of them. That aside, I mentioned earlier that her Armaldo is pretty nasty as a lead Pokémon, but the silver lining is that if it KOs Phart at any point, I can just reset and face it again without having to wade through any of Olivia's other Pokémon first.

28-43.png

Phart gets knocked down to 166/234 HP by its first X-Scissor, 122 HP after its second, and 86 HP from the third. There's not much I can do apart from keeping Phart as healthy as possible, using all the usual X items, and hoping it doesn't take any critical hits (but after 125+ hours of play time, that's not exactly a new strategy). One crit X-Scissor does leave Phart looking a bit pale on 14 HP, but the setup goes well apart from that, as Phart reaches +6 in all the relevant stats and has a Dire Hit boost active.

It's also got a Guard Spec. active, as once Armaldo ran out of X-Scissor PP I thought it might try Crush Claw, but it's more interested in Rock Blasts. Since they're not hitting very hard (a critical hit isn't much use to a move with 25 power per hit), I can tap the Fight button twice and watch Phart bring Armaldo into KO range, then finish the job with another Struggle when it turns out Armaldo wasn't quite weak enough to have a Full Restore used on it.

28-44.png

Lycanroc looks like a problem. It has a total of 216 HP and knows Counter, and taking into account the recoil damage of Struggle, Counter will KO Phart if Lycanroc takes 88 HP of damage and Counters on the same turn. Considering Phart has +6 Attack and a Dire Hit boost, that basically describes any attack it dishes out, so it won't be safe to Struggle as long as Lycanroc can use Counter. PP stalling time? Looks like it.

There's a slight issue in that Lycanroc doesn't want to just spam Counter and let Phart KO it afterwards. It's using Crunch instead, though ironically it doesn't have much bite to it thanks to a lack of Attack EVs and only does 16-ish damage per hit. Its one use of Continental Crush takes off 27 HP, and after a total of 51 turns mostly spent spamming Guard Specs. with the occasional Max Potion, Lycanroc finally runs out of Counter PP. Now reduced to Rock Climbs that barely reach double-digit damage, Lycanroc is put out of its misery by 7 Struggles. Yes, 7 of them - Olivia apparently felt that this was the correct time to use her Full Restores!

28-45.png

Sand Stream does its thing as Gigalith enters the field and summons 5 turns' worth of chip damage. But Gigalith's EVs are focused entirely on its physical defense, so barring Stone Edge crits it's not going to be able to hurt Phart very much. I use a Max Potion on Phart and decide to wait out the sandstorm, which proves quite easy when it turns out even a crit Stone Edge can't deal 50% to Phart. Gigalith is knocked out after 4 Struggles - a testament to its bulk, but not so much its damage output.

28-46.png

Cradily's best source of damage is an uninvested Energy Ball, making Gigalith seem like a nuke in comparison. 2 Rock Tombs deal 7 damage each, Energy Ball does 12, and it faints to 3 Struggles. I suppose they were better choices than Stealth Rock.

28-47.png

Nearly there now. Probopass's Sp. Atk is even lower than Cradily's, but it does have Thunder Wave and Sandstorm to interfere with Phart's sweeping process. It summons a Sandstorm straight away, lands a Thunder Wave only for Phart to cure itself on the same turn, and then misses with a Power Gem. Meanwhile, Phart is revitalised with a Max Potion and batters it with Struggle for a 3HKO. Victory!

And as if that victory wasn't sweet enough, it means I've now defeated 300 Trainers using a Cosmog! Bit of a shame the milestone didn't coincide with the actual Champion battle, but it's an achievement nonetheless.

28-48.png

28-49.png

Behold, the final stats going into the final battle before the final obedience cap rise where I finally don't have to care about obedience any more. It looks like Phart will be able to defeat exactly one Pokémon before reaching Lv. 81 and going rogue for the remainder of the fight, which ought to make things interesting. Or frustrating. Wonder if there's any way I can strategise around that.

Can Elio and Cosmog reach the summit of the Pokémon League and become Alola's first-ever Champions? Find out next time on Objectively Bad Life Decisions!
Trainers defeated: 303/427
 
It's extremely weird to me that getting the last stamp doesn't lift the level cap. I never had a traded Pokemon this high for it, mind you, but...still.

I guess there could be something about not wanting you to just trade over a level 100 and go to town but even a level 70 would probably function similarly and its not like they did anything like this after. Odd!
 
It's extremely weird to me that getting the last stamp doesn't lift the level cap. I never had a traded Pokemon this high for it, mind you, but...still.

I guess there could be something about not wanting you to just trade over a level 100 and go to town but even a level 70 would probably function similarly and its not like they did anything like this after. Odd!
Yeah, I'd sort of assumed they realised fully-obedient Lv. 100 Pokémon snap every game's Victory Road/Pokémon League segment in half, and tried to nerf that in Gen 7 by tailoring the obedience caps to players' expected levels a bit better. But Phart's levels have still been all over the place relative to the caps (it was under the cap before Hala, then went over by 2 levels before Olivia, 8 before Nanu, 9 before Hapu, and will just go 1 over before the cap's lifted for good post-credits), so I don't know how well they actually managed that, if that's even what they were going for. Definitely not something I missed in the Switch games when obedience went back to how it worked before.


:sm/raichu-alola: :sm/decidueye:
There's no sign of Kukui when I return to the lobby after beating Olivia, but the ground where he was standing has turned into a warp panel. Maybe he's gone further ahead?

29-1.png

Still no sign of him at the summit, but there's a fancy chair up ahead, and attempting to sit in it is what prompts Kukui to show his face again.

29-2.png

Oh really? Just like that?

29-3.png

Much better! This is the series formula I've come to know and love. So who is this mystery opponent?

29-4.png

29-5.png

29-6.png

I already knew about this little twist before I first played USUM so it never had the chance to surprise me, but I wonder if it would've got me if I'd done a blind playthrough. Probably not? The game makes a point of telling you how strong Hau's been getting towards the end of the story, and he explicitly tells you that you're both going to have a serious battle after your island challenges are finished, only for SM's final battle against him on Mount Lanakila to be conspicuously absent in USUM. So it really points to him either being the actual "Champion" battle or a post-Champion fight like AZ/Brendan/May/Tapu Koko in previous games, and the latter would be a bit of a letdown (also, imagine beating Kukui to become Champion and then immediately losing to Hau).

But never mind that. Time to stop waffling and crush his spirit without further ado.

29-7.png

29-8.png

29-9.png

Pokémon Trainer Hau
Items: Full Restore, Full Restore, Full Restore, Full Restore
Alolan Raichu Lv59 (Thunderbolt/Quick Attack/Psychic/Focus Blast, Ability: Surge Surfer, IVs: All 30, EVs: 252 SpA / 252 Spe)
Vaporeon Lv58 (Hydro Pump/Quick Attack/Charm/Baby-Doll Eyes, Ability: Water Absorb, IVs: All 30, EVs: 252 SpA / 252 Spe)
Tauros Lv58 (Zen Headbutt/Iron Head/Earthquake/Double-Edge, Ability: Intimidate, IVs: All 30, EVs: 252 Atk / 252 Spe)
Noivern Lv58 (Dragon Pulse/Air Slash/Dark Pulse/Super Fang, Ability: Infiltrator, IVs: 30/15/30/30/30/30, EVs: 252 SpA / 252 Spe)
Crabominable Lv59 (Power-Up Punch/Ice Hammer/Stone Edge/Dizzy Punch, Ability: Iron Fist, IVs: All 30, EVs: 252 Atk / 252 Spe)
Decidueye Lv60 @ Grassium Z (Spirit Shackle/Leaf Blade/Smack Down, Ability: Overgrow, IVs: All 30, EVs: 252 HP / 252 Atk)

I'm not going to take anything for granted when I'm facing a full team of 6, especially since Hau has 4 Full Restores and I'll have to deal with disobedience at some point. But things could have been a lot worse. Only Decidueye and Noivern are packing super-effective moves, so the rest of his team are limited to (admittedly strong) neutral damage, and there's nothing especially unorthodox apart from Super Fang and a few potential Attack drops. Just a case of keeping Phart healthy and not making any mistakes throughout a fairly lengthy battle.

29-10.png

What, you're not even going to turn back towards me and nod in understanding? I thought this was a serious battle! Rude.

Still not entirely sure how to proceed, but the usual shitload of X items would be a good start. The X Sp. Defs go on first, and Raichu's Thunderbolts deal 37, 24 and 19 damage in response. Then it's 3 X Defenses, even though I don't think Quick Attack will actually be stronger than Thunderbolt even at +6 Sp. Def (and sure enough, it keeps on using Thunderbolt), then all the other boosts. Aside from one critical hit on Thunderbolt bringing Phart to 23 HP, Raichu isn't much of a danger during setup.

29-11.png

Phart won't get much better than this - +4 Speed is enough to outspeed Noivern, the fastest member of Hau's team, and the paralysis isn't much of an issue when Phart has a chance to heal itself automatically and Raichu only has 1 Thunderbolt PP left. It'll be cured before Noivern comes in, one way or another.

So everything's in place now and Phart can presumably 2HKO Raichu and move on... right? Well, yes, it can, but then it'll level up and stop listening to me. Since 2 of Hau's other Pokémon are definitely bigger threats than Raichu, that would not be ideal. However, I've learnt throughout my island challenge that opposing Trainers will usually switch out their Pokémon when they run out of useful attacking PP (i.e. when they're forced to spam useless status moves). And if the battles against Guzma's Golisopod are any indication, they will switch out even if they could've continued attacking with Struggle.

So now I have a new strategy: completely stall out Raichu's PP, then have Phart Struggle on the turn where I would expect it to switch out. If it does, then Phart gets a free attack on the next Pokémon (hopefully Decidueye or Noivern) and Raichu will become a non-issue for the rest of the fight, essentially leaving Phart with 4 Pokémon to fight whilst disobedient instead of 5. If it doesn't switch out, then at least it should faint to Struggle regardless.

Time to see if that works. I pop on a Guard Spec. while Raichu uses up its last Thunderbolt, since its other special attacks can both trigger Sp. Def drops, and let it do its worst with Psychic and Focus Blast. When two of the latter deal 7 damage and then 8 damage, Raichu tries Quick Attack instead, only for Phart to dodge it - this should give you an indication of how threatening it is to Phart now. Another Quick Attack deals 4 damage, a Psychic manages 9, and then it's a case of counting down the PP until it runs out. Once it's finally out of attacks, I tap the Fight button and wait to see what happens.

29-12.png

29-13.png

29-14.png

Gotcha! One of Hau's trickier team members is knocked straight into KO range as it enters the battle, and since Phart is faster, Noivern doesn't even get a chance to attack before it faints on the next turn.

29-15.png

29-16.png

But as expected, it comes with a cost - Phart now only has a 49.38% chance of obeying me for the rest of the battle. At least that little bit of strategy proved useful.

29-17.png

I'm not surprised to see Decidueye next, but that doesn't mean I have a good plan for dealing with it. Spirit Shackle is obviously a super-effective STAB attack, Leaf Blade has a high crit rate, and it also has a Bloom Doom ready to go, plus all its EVs being in HP and Attack is probably the worst possibility for Phart. The best immediate plan would be to use a Max Potion and see how strong its attacks are.

29-18.png

29-19.png

Shit.

That was from a single Spirit Shackle while Phart was at full HP. I'm very glad it only has 10 PP, because clearly Phart's not remotely safe trying to attack until Decidueye's out of Spirit Shackles. So now I'll just spam Max Potions/Moomoo Milks until that's the case, then see where to go from there.

29-20.png

Bloom Doom has 175 power coming off Leaf Blade, but without a critical hit it can only manage 34 damage. A non-crit Spirit Shackle outdoes that to reach 36 damage, and once its PP runs out, Smack Down does 8 damage while Leaf Blade manages 18 without a crit. But I mustn't forget that Overgrow can boost that damage if Phart knocks it below 33%, as a critical hit with Overgrow active would be dangerous. With Phart on 228/236 HP, I decide to try Struggle and see how hard it hits (if it hits).

29-21.png

Better than I expected! It might actually be able to manage a 2HKO on Decidueye... though if it doesn't, it'll leave Overgrow active for that turn before Hau presumably uses a Full Restore. However, Decidueye seems to be choosing between Smack Down and Leaf Blade at random, as if they're remotely similar in strength, so Phart might get lucky and be struck by Smack Down instead even if it misses the KO. And if Decidueye does land a crit Leaf Blade whilst in Overgrow range, a bit of mental number-crunching suggests that Phart might just tank it after the Struggle recoil if it was at nearly 100% HP beforehand. So I heal Phart with a Moomoo Milk, then another one when Decidueye uses Leaf Blade, and then stop after it uses Smack Down to put Phart at 228/236 HP again. Phart refuses to attack for a few turns, so I keep topping up its HP until it dodges a Leaf Blade and finally strikes again...

29-22.png

Oh no.

29-23.png

Oh fuck.

29-24.png

Oh yeah!

That also happened to be Decidueye's last Leaf Blade, as it burnt through a lot of PP during the period where I was waiting for Phart's best opportunity to attack, so now it's down to just 8 Smack Downs. Phart immediately chugs another Moomoo Milk, but to my surprise, Hau orders another Smack Down instead of using a Full Restore. So I use another couple of Moomoo Milks, and Decidueye uses Smack Down twice more. Does he maybe recognise that it's dead weight at this point and not want to waste an item on it? Whatever the reason, it's no longer a threat to Phart, so I decide to stall out the rest of its PP and see if Phart will cooperate enough to hit another enemy Pokémon as they switch in.

29-25.png

29-26.png

29-27.png

Bah. Worth a try at least.

Phart doesn't have to worry about Power-Up Punch courtesy of Unaware, but Ice Hammer is still a strong attack and Stone Edge is another high-crit-ratio move. Guess I'll gauge how hard they hit before trying to have Phart attack back. The first Stone Edge is dodged, but Ice Hammer hits for 27 damage, which I think falls into the "might just survive a crit after Struggle recoil" range again. And since Stone Edge has the same power but without STAB, that will also be tank-able. So I heal up Phart and have it attack after it dodges another Stone Edge.

29-28.png

Not as bulky as all that fluff would suggest. Perhaps if Hau hadn't put 252 Speed EVs onto a Pokémon with base 43 Speed and had invested them in HP instead, it might have gone differently. Crabominable then follows up with a Power-Up Punch of all things, and it doesn't even hit thanks to Phart dodging it! It takes a few more turns for it to choose Power-Up Punch again and give Phart an opening to attack between Moomoo Milks, but it seizes the opportunity and KOs Crabominable without disobeying this time.

29-29.png

29-30.png

Tauros is another fairly heavy hitter, but can't use its strongest attack in Double-Edge without hurting itself as well. I heal Phart to full and let Tauros attack it - it's a Double-Edge that deals 22 damage - before trying to convince it to use Struggle. One turn of loafing around forces another Moomoo Milk to be used, but Phart regains its fighting spirit and attacks on the next turn.

29-31.png

Excellent, that puts Tauros firmly into KO range... provided Phart actually attacks again before Double-Edge recoil pushes it into range of Hau's Full Restores. Luckily it does so right away after a Max Potion, so that small crisis is averted.

29-32.png

29-33.png

3 down, 3 to go. But Vaporeon is the only one that actually has any PP remaining, so it's a lot better than that sounds. Another Moomoo Milk heals Phart back to full, Vaporeon deals 22 damage with Hydro Pump, then a Guard Spec. is used to block Vaporeon from using Charm and Baby-Doll Eyes. Hydro Pump is its only real source of damage, and after a remarkable bout of luck where Phart dodges 3 of them in a row, the final Hydro Pump hits for 24 damage and Vaporeon is now down to just Quick Attack. The end is in sight!

The first Quick Attack takes off a whopping 3 HP while Phart refuses to obey, and as I reapply the expired Guard Spec. on the next turn, Vaporeon tries Baby-Doll Eyes to no avail. Just a matter of time now. Phart lands a Struggle that doesn't quite deal 50%, but since Tauros had knocked it down to +5 Attack with Intimidate earlier, I use an X Attack and try again. The extra stat stage makes all the difference, as the next Struggle takes Vaporeon out before Hau can even think about his Full Restores.

29-34.png

29-35.png

Raichu returns to the battlefield with zero PP, so all I have to do is watch Phart take it straight into red with Struggle before Raichu Struggles back and faints to its own recoil damage...

29-36.png

29-37.png

...and that leaves just Decidueye, who is also devoid of PP and would crumble to a light breeze at such low health. But Hau has one final trick up his short sleeves.

29-38.png

I bet he's glad he saved it for a time like this, eh? Perhaps he can still make a comeback from here, with those mighty 8-HP Struggles Decidueye is now throwing out. But Phart puts Hau's hopes and dreams to rest by bringing Decidueye below 25% with its own Struggle, forcing the poor bird to knock itself out with Struggle recoil before it can be healed. Victory is ours!

29-39.png

29-40.png

Phart the Cosmog is officially a Champion!

29-41.png

What a lovely and touching sentiment. It sounds like just the sort of thing a MASSIVE LOSER would say! wheyyyyyy

29-42.png

29-43.png

29-44.png

29-45.png

Nice to see another little acknowledgement in Kukui's dialogue that I'm only using one Pokémon (he talks about your "beloved team's achievement" if you have more than one). And also funny to see the camera panning around all the empty space where my other 5 Pokémon would be if I had them.

29-46.png

All the Elite Four members come to pat me on the back and tell me I'm so cool and talented. But Molayne has nothing to say at all - in SM, Hala is the first one to speak to the player after the four of them arrive ("You've entered the Hall of Fame! Spectacular! Much as the sun shines upon the moon, illuminating it, so have the friends you made during your island challenge illuminated your life. You have grown so much!"), and then Acerola, Olivia and Kahili all say their lines. Obviously Hala's speech would feel a bit out-of-character coming from Molayne, but rather than giving him his own dialogue, USUM just skips over him entirely and makes him stand there in silence while the other three recite their lines, starting from Acerola. That's harsh.

29-47.png

29-48.png

Cue credits! I'll not torture myself further by trying to screenshot everything here, so feel free to open up YouTube and find someone else's playthrough if you're that fussed.

29-49.png

There are a couple of little nods to postgame stuff though. Apart from brief cameo appearances by Zygarde and Tapu Koko, Gladion is also waved off by half the staff of the Aether Foundation (specifically the female half from the looks of it) as he sails away on a boat to Kanto. He'd better come back soon, or else I'll have trouble finishing off my checklist of Trainers.

There's also a scene of Colress looking confused/thoughtful as he watches Faba take the lift to the lower levels of Aether Paradise, but I'm sure this has no relevance to the plot.

29-50.png

Once that credits sequence has wrapped up, I'm thrown into another credits sequence, this one just displaying the Totem Pokémon in dancing pixel-art form instead of all the human characters going about their lives. At least it's cute.

29-51.png

29-52.png

Oh, if only... I'm sure I can squeeze a good few more posts out of the postgame battles. Maybe I can pop these two screenshots at the end of the very final post, once it really is The End.

29-53.png

As is tradition, I'm booted back to my bedroom to kick off the postgame. Now I just need to figure out which bits of it I'm going to do first. There's still well over 100 battles to go, and the postgame stuff is not quite as linear as the main storyline, so planning that out ought to be fun.
Trainers defeated: 304/427
 
:sm/hariyama: :sm/tapu-koko:
30-1.png

The astute observer will have already worked out that there are exactly 123 Trainer battles left to complete in the postgame, not to mention a few legendaries and other non-Trainer fights. So where on earth do I begin? It'd probably help to try and loosely categorise them all, so here's (roughly) what I'm looking at:
  • Rematches with a few of the captains and kahunas
  • Battling a handful of Legendary Pokémon (Nebby, the tapu and Zygarde)
  • Totem Gumshoos rematch
  • The eastern half of Poni Island
  • Episode RR stuff (mostly Team Rocket's Castle but also things like catching Blacephalon/the Festival Plaza takeover)
  • Elite Four rematches
  • Title Defense
  • Elite Four rematches again because there are 10 Title Defense challengers and the first one is always Hau
There's other stuff as well that will tick a lot of Trainers off the list (the Battle Buffet, the Eevee users, the Kantonian Gym, etc.), plus a few trivial sidequests that I skipped over during the story because they featured wild Pokémon and Phart didn't want their Exp. Points. Quite a lot to get through, some of it interesting, some of it not so much.

As for where to start, I know I'll be jumped by the Ultra Recon Squad as soon as I step outside, and that will lead into the Episode RR stuff if I go with them to Poni Grove. But it'd feel a bit lame, getting all the Rainbow Rocket stuff out of the way first and then spending however many posts just beating up randos. I also considered trying to battle everyone in ascending order of levels (so starting with random wild Pokémon, then lower-level Trainers, then stronger ones like Red/Blue and all the Pokémon League fights last), but that still doesn't get rid of the boring "beating up randos" section... it just sticks it at the start of the postgame stuff instead of the end.

So rather than taking either of those approaches, I thought I'd start by exploring Melemele Island all over again, following the same path as I did during the main storyline and battling anyone I come across along the way, then doing the same for Akala, Ula'ula and Poni. Sort of like a second island challenge! Once I've seen everything new Poni Island has to offer, I can start on the Rainbow Rocket bits and leave the Title Defense battles as the final section of the challenge (if only because Gladion doesn't come back from Kanto until a month after Episode RR is completed). This way I get to space out the less interesting battles between more important ones like the trial captains.

(I'm not doing all the Ultra Warp Ride legendaries/UBs though. That's just too far.)

30-2.png

It's probably worth acknowledging these things for a moment. With no obedience issues to hold Phart back any more, I could easily just do 3 rounds of Mantine Surfing and buy 3 more Rare Candies with the resulting BP, then take it straight to Lv. 100. But that feels a bit cheap. I didn't need to use any of them throughout the storyline (minus 3 levels gained from a Rare Kitchen at the very beginning), so why start now? It feels like that would make the Cosmog solo run too easy, if such a thing could ever be possible. So I'll just leave the Rare Candies in my bag and start off with my Lv. 81 Phart a mere 15-25 levels above its opponents.

30-3.png

30-4.png

As expected, there they are. It seems a few Ultra Beasts have made their way through the wormholes and are currently wreaking havoc on Poni Island. I'll wish Hau and the Ultra Recon Squad the best of luck with that catastrophe while I spend the next few weeks exploring literally every other part of Alola first.

30-5.png

Nearly forgot about this amid all the excitement of becoming Champion - there must have been a free heal somewhere between Hau wiping away his loser tears and me regaining control of Elio. I happen to be on Route 1 already, so it's easily rectified with a bit of shuffling through the nearby tall grass and spamming the A button against the local Buneary. Now on to Iki Town.

30-6.png

Of all the battles to kick off the postgame, Hala seems quite a fitting choice given that he used to be part of the Elite Four before USUM came out. But before I get started, I need to make a quick trip to, uh, Seafolk Village???

30-7.png

A spot of fishing nets me a surprise tool that will help us later. By that, of course, I mean "right now".

30-8.png

Island Kahuna Hala
Hariyama Lv63 (Fake Out/Close Combat/Knock Off/Heavy Slam, Ability: Thick Fat, Adamant nature, IVs: All 30, EVs: 252 Atk / 252 SpD)
Machamp Lv63 (Cross Chop/Thunder Punch/Ice Punch/Fire Punch, Ability: Guts, Adamant nature, IVs: All 30, EVs: 252 Atk / 252 Spe)
Bewear Lv63 (Hammer Arm/Brutal Swing/Dragon Claw/Shadow Claw, Ability: Fluffy, Adamant nature, IVs: All 30, EVs: 252 Atk / 252 Def)
Poliwrath Lv63 (Waterfall/Brick Break/Poison Jab/Payback, Ability: Water Absorb, Adamant nature, IVs: All 30, EVs: 252 Atk / 252 SpD)
Crabominable Lv63 @ Fightinium Z (Ice Hammer/Close Combat/Stone Edge/Earthquake, Ability: Iron Fist, Adamant nature, IVs: All 30, EVs: 252 Atk / 252 Def)

A bit of a jump in levels from pseudo-Champion Hau, and apart from not having any Full Restores, he's got a team that definitely would've fitted in within a world where he wasn't replaced with Molayne. 3 users of super-effective moves, one of which is Knock Off on the lead Hariyama, so poor Phart has to go without its Eviolite for the entire fight!

30-9.png

But that's where the Sticky Barb comes in. After all, if Phart has no way to prevent Hariyama from removing its held item, why not lean into that and punish it for using Knock Off? The move deals 94 damage whilst making contact, attaching the Sticky Barb to Hariyama and forcing it to lose 12.5% of its HP. So now I can just set up X items on Phart and occasionally heal it while Hariyama is whittled away in the background. It ignores Knock Off from this point onwards because Phart no longer has an item to remove (despite the damage it'd inflict), so it simply throws out a few Heavy Slams for 33-ish damage each before going down.

Next up is Bewear, admittedly quite a threat with its Shadow Claw that threatens to land crits against an Eviolite-less Cosmog. Even a non-crit Shadow Claw deals 40 damage, so a critical hit risks OHKOing Phart from full, and attacking it doesn't seem much better - aside from the fact that Bewear outspeeds Phart (I didn't use any X Speeds in order to prevent Poliwrath from getting a boost to Payback's power), meaning Phart will KO itself with Struggle recoil even if it tanks a crit Shadow Claw on the same turn, I don't expect a Pokémon with Fluffy and 252 Defense EVs to fold to 2 or 3 Struggles. I decide to just try and stall out the Shadow Claw PP with my slew of healing items before doing anything else.

30-10.png

In hindsight, not a very good decision.

I may have to just try and muscle through Bewear before it can get lucky enough to crit again. On attempt 2, Hariyama goes for Fake Out instead of leading with Knock Off into my X Defense, which works out quite nicely - it only deals 21 damage and still removes Phart's Sticky Barb, damaging Hariyama whilst also stopping it from using Knock Off at all. So I use X items to get Phart's stats to where they were before (+6 Attack and Defense, plus a Dire Hit), and also use an X Speed so that Bewear will move second.

Once Hariyama succumbs to Sticky Barb damage, Bewear emerges once again. Unfortunately Phart's Struggle is rather pathetic, looking like a 7HKO at best, but at least now that it outspeeds Bewear I'll always know what its HP will be before it executes a given Struggle. This time around, Bewear can't manage any critical hits at all and takes 7 critical hits in return before fainting.

Poliwrath is sent in next, who sadly has access to 100-power Paybacks as a consequence of Phart being at +2 Speed. Healing Phart to full allows the first Payback to land for 46 damage, almost certainly enough for a critical hit to be an instant OHKO again. Old Hala isn't making things easy for me... but Payback does have a much lower chance of scoring a crit than Shadow Claw, so I may as well let Phart attack it and hope for the best. Struggle deals much more damage to the distinctly un-Fluffy Poliwrath, taking it down in 3 hits.

30-11.png

Perhaps the Crabominable that comes out next will provide some relief from those deadly attacks? Nuh-uh! Ice Hammer may only deal neutral damage to Phart, but it's still strong enough to erase 38 HP in one blow, making Crabominable yet another foe who can insta-kill with a critical hit. But it gets a 3HKO from Struggle regardless, wasting its potential by going for a Stone Edge on one of its turns instead of sticking to Ice Hammers. Maybe it wanted to prioritise attacks that had a higher crit rate but lower damage over ones that offered a guaranteed KO but had a much lower crit rate? Kind of funny to think that Stone Edge of all things was viewed as a more consistent move, if that was indeed the case. But who knows. That leaves just Machamp, who was rightfully ignored until now because it's not as much of a threat. It can pick whichever elemental punch it wants to use, but they all deal roughly 22 damage, and Phart can easily 3HKO it thanks to its lack of defensive EVs.

Well, that was harder than I expected. Hala hands over a Decidium Z and a Primarium Z as my prizes, which are doubly useless to me in that I can't even get hold of the Pokémon I'd have no interest in using them on without trading, and I return the Sticky Barb to my bag. I think that battle demonstrated why I won't be removing the Eviolite again any time soon, but if I happen to run into any other Trainers with a Knock Off lead, perhaps I can use that little party trick on them.

Next stop is the Plank Bridge and the attempted capturing of Nebby (during nighttime, as wrong as that may feel).

30-12.png

Just in case I doubted Solgaleo's power as an emissary of the sun, it demonstrates its full potential to me by triggering a wildfire alert on my phone as I start the battle.

Solgaleo
Lv60 (Sunsteel Strike/Cosmic Power/Crunch/Zen Headbutt, Ability: Full Metal Body, IVs: Random; at least 3 of them are 31)

It's still a fairly normal wild Pokémon otherwise, so I guess I'll just weaken it a bit and then chuck some Ultra Balls. I pop an X Defense on Phart while it takes 34 damage from Sunsteel Strike, then an X Attack, then have it Struggle... for absolutely pathetic damage. But that's alright for once, since I'm not looking to KO Solgaleo. Meanwhile, the AI roulette sees it spamming Cosmic Power even after it's reached +6 and despite Unaware ignoring all of the boosts, so once Phart has Struggled it into yellow HP, I use a Roto Catch and start chucking Ultra Balls.

30-13.png

It's just the one Ultra Ball actually, since Solgaleo has a catch rate of 45 in these games.

Naturally I nickname it Nebby - would be cruel not to after clearing the storyline with a nicknamed Cosmog of my own. Lillie hands me a Solganium Z and gives a little speech to Nebby about how I'll be raising it from now on as its father, as if I won't be shoving it straight into a box once the conversation ends.

Once Lillie heads off to god knows where, I make a quick stop at the Thrifty Megamart to cram an extra 50 Timer Balls into my bag, since the other legendary Pokémon floating around Alola have rather less forgiving catch rates. Once of them may be about to demonstrate this to me, in fact.

30-14.png

Tapu Koko
Lv60 (Nature's Madness/Discharge/Agility/Electro Ball, Ability: Electric Surge, IVs: Random; at least 3 of them are 31)

More standard wild Pokémon stuff, but it does have the ingredients to fire off a very strong Electro Ball or two. Starting off with 3 X Sp. Defs cushions those blows quite well, and it doesn't manage to get Phart any further down than 155/239 HP before its terrain wears off. Phart can then hit it with a few +2 Struggles, taking Tapu Koko down to red HP with 4 attacks, after which I use up another Roto Catch and break out the Timer Balls.

30-15.png

But once again, I was wrong to pluralise my balls! Tapu Koko goes in straight away and I can save my remaining supplies for the next guardian deity. With it being the first one of the four I've caught, I also receive a Tapunium Z for catching it. Back to Route 1 we go.

30-16.png

I haven't been explicitly trying to complete my Pokédex, but between me accepting every gift Pokémon on offer and catching the occasional wild Pokémon because it was easier than defeating them, I've ended up registering 57 species and can claim this Lucky Egg from Kukui. Not something I envisage myself having any use for, but still cool. (He also hands me a Substitute TM, but that one really is useless.)

Sticking with Alola's massive Route 1 for just a little longer, I return to the Trainers' School to take on the principal. Or at least that was my plan - it seems I'll have to get past this man standing guard outside her office first.

30-17.png

Black Belt Duane
Primeape Lv56 (Close Combat/Screech/Stomping Tantrum/Outrage, Adamant nature, IVs: 15/31/15/15/15/15, EVs: 252 Atk)
Heracross Lv56 (Take Down/Megahorn/Close Combat/Reversal, Adamant nature, IVs: 15/31/15/15/15/15, EVs: 252 Atk)

The upcoming Heracross's Megahorn kills any hopes I had of just breezing through this fight, so I use a Guard Spec. to block Primeape's Screech and then stick a load of other X items on Phart like it's a proper boss battle. Meanwhile, Primeape spams Outrage to the point where it nearly faints from confusion damage, and Phart gently taps it with Struggle for the KO. Once Heracross comes in, I heal Phart to full to assess how hard Megahorn hits (48 damage) and then let it go wild with Struggle again, dodging the next Megahorn for an easy 2HKO.

Fun fact: if Primeape had been just one level higher it would've known Final Gambit. Very glad I didn't have to deal with it using that on turn 1 and forcing me to set up on Heracross instead. Anyway, now I can charge into the principal's office as I originally intended.

30-18.png

Principal Asuka
Granbull Lv57 (Play Rough/Crunch/Charm/Payback, Ability: Intimidate, Adamant nature, IVs: 31/31/15/15/15/15, EVs: 252 Atk)
Stoutland Lv57 (Ice Fang/Thunder Fang/Fire Fang/Retaliate, Ability: Intimidate, Adamant nature, IVs: 31/31/15/15/15/15, EVs: 252 Atk)
Arcanine Lv57 (Reversal/Extreme Speed/Outrage/Flare Blitz, Ability: Intimidate, Adamant nature, IVs: 31/31/15/15/18/15, EVs: 252 Atk)

I see Asuka has also attended the Black Belts' School of Enormous Attack Stats, not to mention having perfect HP IVs on all her Pokémon as well. And a Sp. Def IV of 18 on her Arcanine instead of 15. That's got to be a typo, surely? I don't think I've seen an IV of 18 on anything so far in this run. Very strange.

Granbull's Intimidate knocks Phart's Attack down a stage before it can even think of Struggling, but there's no time to fix that just yet when Payback is looming. So I use 3 X Defenses, taking Payback's damage down to 26 on the third hit, then apply all the usual damage-boosting X items on top (plus a couple of Guard Specs. for Charm). Once Phart is at +6 Attack and all set, 2 Struggles take down Granbull. Arcanine's Intimidate fails to work as it comes in thanks to a Guard Spec. still being active, so it settles for spamming Flare Blitz instead, only taking off around 24 HP each time. The recoil damage doesn't make much difference because it also goes down comfortably to 2 Struggles.

30-19.png

Stoutland's Intimidate also fails, and once it's dealt out 31 damage with its opening Retaliate, it no longer poses any sort of threat and faints to the third 2HKO of the battle. I'm rewarded with a King's Rock, which is better than most held items in that it can actually be utilised by a Cosmog, but it's no replacement for a good old Eviolite.

On to Hau'oli City! More specifically, on to the mall, as that's where the majority of the battles can be found.

30-20.png

30-21.png

Not sure if the first one really counts as it was only a wild Lv. 28 Bewear, but I saved the cowering citizens from a bear attack and got a free Max Potion out of it. The Quick Ball I tried using didn't work, so I had to chip it down instead. It never looks good when your legendary Pokémon takes 7 hits to KO something 55 levels lower than it.

30-22.png

Bougie box filler. The poor thing ended up with an Adamant nature as well.

30-23.png

I seem to recall never wanting to see this place again, and yet here I am. Again.

The Battle Buffet's still the same as before: 15 Trainers, 4 of which are present at any given time, and 10 turns before I get kicked out on each attempt. The pool of opponents remains the same, but their Pokémon are now fully evolved and all at Lv. 55, so no more breezing through the likes of Magikarp and Pichu for me.

Being recognised as the Champion doesn't net me any sort of discount, so I cough up the usual $1,200 entry fee and get started. A Rising Star is my first target.

30-24.png

Rising Star Kainoa
Noivern Lv55 (Tailwind/Whirlwind/Super Fang/Air Slash, Ability: Frisk, IVs: All 15)

An X Sp. Def and an X Attack, then Phart works its way to a 4HKO with Struggle. I'm not sure why Noivern tried Super Fang exactly once and then decided to stick with Air Slashes that dealt around 20 damage each, but I can't complain.

The battle took so long that the 10 turns are up already, and I receive a Honey as my "prize". Not to worry, I can just charge right back in and try again.

30-25.png

Or not?

Actually, it's fine. The buffet queen has turned up and will challenge me to an eating contest every time I enter the Battle Buffet until I beat her. There's no danger of that happening, and the buffet becomes free of charge while she's here, so that's nice. Back to beating up my fellow customers!

30-26.png

Cook Carver
Gyarados Lv55 @ Leftovers (Dragon Dance/Hurricane/Rain Dance/Hyper Beam, Ability: Intimidate, IVs: 30/15/15/15/15/15)

Intimidate sucks, but Gyarados's awful moveset means there's plenty of time to use an X Sp. Def and 2 X Attacks. It sets up Rain Dance only after using Hurricane, its one move that actually benefits from rain, then Dragon Dances itself all the way to +6 and uses Hyper Beam, getting KOd by 5 Struggles in return. I think its Leftovers did more to help it than any of its attacks.

The buffet queen's presence makes the end-of-buffet dialogue take slightly longer, but it's nothing too bad, so I just carry on as usual afterwards.

30-27.png

Youngster Kai
Ledian Lv55 (Agility/Bug Buzz/Air Slash/Double-Edge, Ability: Swarm, IVs: All 15)

X Sp. Def, X Attack, Phart uses 2 Struggles, I heal it up, then it KOs with a third Struggle. Ledian's smart enough to stick with Bug Buzz throughout, but that doesn't help when it only deals 26 damage.

30-28.png

Lass Salla
Lilligant Lv55 (Teeter Dance/Quiver Dance/Petal Dance/Petal Blizzard, Ability: Chlorophyll, IVs: All 15)

It technically can attack on both the physical and special side, but only the latter really concerns me, so I use an X Sp. Def and an X Attack again. Lilligant uses a couple of Quiver Dances that don't help it and then locks into Petal Dance, hitting for 34 damage. Despite a few turns lost to Teeter Dance, Phart eventually 4HKOs Lilligant with Struggle.

30-29.png

Ace Trainer Tori
Arcanine Lv55 (Roar/Odor Sleuth/Fire Fang/Extreme Speed, Ability: Intimidate, IVs: 15/30/15/15/15/30)

Another buffet attempt, another Intimidate user. But this Arcanine is nowhere near as strong as the one I fought at the Trainers' School earlier - Fire Fang can't even take 20 HP off Phart after an X Defense - so Struggle is an easy 3HKO at +3 Attack.

30-30.png

Office Worker Cody
Magnezone Lv55 (Screech/Discharge/Lock-On/Magnet Rise, Ability: Magnet Pull, IVs: All 15)

X Sp. Def, X Attack, then Struggle. Magnezone wastes a lot of turns on its status moves and only deals 25 damage when it does use Discharge, so despite it taking 6 Struggles before it faints, it wasn't especially difficult. The 10 turns are up after this battle, but I'm straight back in as always.

30-31.png

Beauty Carolyn
Yellow Flower Florges Lv55 (Misty Terrain/Moonblast/Petal Dance/Aromatherapy, Ability: Flower Veil, IVs: All 15)

Tiny bit of trivia: Carolyn is the only Battle Buffet Trainer who doesn't use the evolved form of the Pokémon on her pre-Champion team, which was an Alolan Meowth. It's not even like Game Freak just forgot to edit one of her SM teams, because she used a Cutiefly and then a Ribombee in those games, so this seems to be a case of someone messing up whilst changing her old teams.

Not that Phart minds, as it'd rather face a Florges than an Alolan Persian. It's about the same as the previous battles, with me using an X Sp. Def and an X Attack on Phart, Florges dealing mid-20s damage with its Moonblasts, and Struggle getting a 3HKO with help from a critical hit. Once that battle's done with, the only Trainer currently at the buffet that I haven't fought already is a female Sightseer.

30-32.png

Sightseer Amy
Dugtrio Lv55 (Dig/Slash/Earthquake/Fissure, Ability: Sand Veil, IVs: All 15)

I don't bother with any X Defenses this time and just use an X Attack. Earthquake takes away just under 50 HP per hit and Phart 2HKOs with Struggle after a Max Potion. Easy!

30-33.png

Back out and in again for another round of buffeting. This isn't very interesting, but I'll take that over it being difficult.

30-34.png

Preschooler Hannah
Drifblim Lv55 (Spit Up/Shadow Ball/Amnesia/Baton Pass, Ability: Aftermath, IVs: All 15)

X Sp. Def and X Attack again. As a Preschooler, you'd expect her to pick her moves at random, but Hannah is specifically set to have expert AI for this battle only. The end result is that Phart is bombarded with a load of unexpected Shadow Balls, but none of them manage to wipe away more than 20% of its HP, so Drifblim is taken down with 3 Struggles and Aftermath fails to KO Phart. Once she's beaten, there's only one unfought Trainer standing at the buffet, a Black Belt.

30-35.png

Black Belt Walter
Machamp Lv55 (Submission/Bulk Up/Cross Chop/Scary Face, Ability: Guts, Adamant nature, IVs: 15/31/15/15/15/15)

Without the usual EVs that Black Belts have on their Pokémon, Machamp is a bit lacking, especially when limited to STAB attacks. Cross Chop only deals 34 damage even without me using an X Defense, so Phart doesn't have much difficulty 4HKOing it at +2 Attack with help from a Max Potion.

5 battles to go, and another attempt at the buffet queen's challenge results in the male Sightseer showing up.

30-36.png

Sightseer George
Muk Lv55 (Screech/Gunk Shot/Acid Armor/Belch, Ability: Sticky Hold, IVs: All 15)

This time, I get to start with a Guard Spec. to intercept Muk's Screech! That's almost interesting. I don't bother with X Defenses this time, because even though Gunk Shot does hit harder than most attacks so far (about 60 HP), it's only got 5 PP and then Muk is completely useless. A couple of Max Potions keep Phart healthy so it can 4HKO Muk once it runs out of damaging attacks. I really think Belch ought to have like 60 power and just double in power if the user's eaten a berry, rather than be literally unusable if they haven't eaten one. You're telling me Pokémon can't burp on cue? Even I can do that!

Everyone at the buffet is someone I've already fought, so now I have to exit and re-enter in the hopes that someone will show up. Sadly not, but a few soft-resets spits out a Madame at me.

30-37.png

Madame Kathleen
Items: Full Restore
Dewgong Lv55 (Take Down/Dive/Aqua Tail/Ice Beam, Ability: Thick Fat, IVs: All 15)

Didn't heal Phart before this one, but it'll be alright - even an Aqua Tail into Phart's unboosted physical defense only does 33 damage. It's just a bit of a slog, especially since Kathleen has a Full Restore. Bringing Phart to +4 Attack lets it 6HKO Dewgong after it just misses out on a knockout blow that would've bypassed the Full Restore. Back to resetting for a bit until a new face shows up.

30-38.png

Pokémon Breeder Savannah
Alolan Raichu Lv55 (Thunder Shock/Tail Whip/Quick Attack/Thunderbolt, Ability: Surge Surfer, IVs: All 15)

Thunderbolt deals 22 and 21 damage while I use an X Sp. Def and an X Attack, then Struggle is a 3HKO after a Max Potion. I don't think I can make this sound any more interesting than it is. I have to leave again and brace myself for a load of soft-resetting, but a Gentleman pops into existence on my first attempt.

30-39.png

Gentleman Ronald
Items: Full Restore
Fearow Lv55 (Focus Energy/Roost/Drill Peck/Drill Run, Ability: Keen Eye, IVs: All 15)

Fearow sets up Focus Energy and deals around 50 damage with its crit Drill Pecks. I really can't be bothered with the Full Restore and 10 Roost PP at this point, so I just use 3 X Attacks and a Dire Hit and Phart OHKOs with Struggle. Catharsis!

There's only one Trainer to go, and while she isn't currently at the buffet, she also shows up on my first attempt after exiting and entering.

30-40.png

Office Worker Kristen
Gigalith Lv55 (Stealth Rock/Sandstorm/Stone Edge/Explosion, Ability: Sturdy, IVs: All 15)

I treat myself by using 3 X Defenses and watching Gigalith set up Sandstorm twice, miss 3 of its Stone Edges, and finally use Explosion for a whopping 26 damage. More catharsis! That's everyone defeated at last, so now I can leave the Battle Buffet and the buffet queen's silly little challenge behind forever. She can suck on my Hoenn ramen for all I care.

Maybe not the most exciting way to kick off the postgame stuff... I needed to fight them at some point though, and at least I've taken a big chunk out of the remaining battles early on. Perhaps next time I'll go and bother Ilima or someone else important.
Trainers defeated: 322/427
 
Yeah, I'd sort of assumed they realised fully-obedient Lv. 100 Pokémon snap every game's Victory Road/Pokémon League segment in half, and tried to nerf that in Gen 7 by tailoring the obedience caps to players' expected levels a bit better. But Phart's levels have still been all over the place relative to the caps (it was under the cap before Hala, then went over by 2 levels before Olivia, 8 before Nanu, 9 before Hapu, and will just go 1 over before the cap's lifted for good post-credits), so I don't know how well they actually managed that, if that's even what they were going for. Definitely not something I missed in the Switch games when obedience went back to how it worked before.


:sm/raichu-alola: :sm/decidueye:
There's no sign of Kukui when I return to the lobby after beating Olivia, but the ground where he was standing has turned into a warp panel. Maybe he's gone further ahead?

View attachment 855273
Still no sign of him at the summit, but there's a fancy chair up ahead, and attempting to sit in it is what prompts Kukui to show his face again.

View attachment 855274
Oh really? Just like that?

View attachment 855275
Much better! This is the series formula I've come to know and love. So who is this mystery opponent?

View attachment 855276
View attachment 855277
View attachment 855278
I already knew about this little twist before I first played USUM so it never had the chance to surprise me, but I wonder if it would've got me if I'd done a blind playthrough. Probably not? The game makes a point of telling you how strong Hau's been getting towards the end of the story, and he explicitly tells you that you're both going to have a serious battle after your island challenges are finished, only for SM's final battle against him on Mount Lanakila to be conspicuously absent in USUM. So it really points to him either being the actual "Champion" battle or a post-Champion fight like AZ/Brendan/May/Tapu Koko in previous games, and the latter would be a bit of a letdown (also, imagine beating Kukui to become Champion and then immediately losing to Hau).

But never mind that. Time to stop waffling and crush his spirit without further ado.

View attachment 855279
View attachment 855280
View attachment 855281
Pokémon Trainer Hau
Items: Full Restore, Full Restore, Full Restore, Full Restore
Alolan Raichu Lv59 (Thunderbolt/Quick Attack/Psychic/Focus Blast, Ability: Surge Surfer, IVs: All 30, EVs: 252 SpA / 252 Spe)
Vaporeon Lv58 (Hydro Pump/Quick Attack/Charm/Baby-Doll Eyes, Ability: Water Absorb, IVs: All 30, EVs: 252 SpA / 252 Spe)
Tauros Lv58 (Zen Headbutt/Iron Head/Earthquake/Double-Edge, Ability: Intimidate, IVs: All 30, EVs: 252 Atk / 252 Spe)
Noivern Lv58 (Dragon Pulse/Air Slash/Dark Pulse/Super Fang, Ability: Infiltrator, IVs: 30/15/30/30/30/30, EVs: 252 SpA / 252 Spe)
Crabominable Lv59 (Power-Up Punch/Ice Hammer/Stone Edge/Dizzy Punch, Ability: Iron Fist, IVs: All 30, EVs: 252 Atk / 252 Spe)
Decidueye Lv60 @ Grassium Z (Spirit Shackle/Leaf Blade/Smack Down, Ability: Overgrow, IVs: All 30, EVs: 252 HP / 252 Atk)

I'm not going to take anything for granted when I'm facing a full team of 6, especially since Hau has 4 Full Restores and I'll have to deal with disobedience at some point. But things could have been a lot worse. Only Decidueye and Noivern are packing super-effective moves, so the rest of his team are limited to (admittedly strong) neutral damage, and there's nothing especially unorthodox apart from Super Fang and a few potential Attack drops. Just a case of keeping Phart healthy and not making any mistakes throughout a fairly lengthy battle.

View attachment 855282
What, you're not even going to turn back towards me and nod in understanding? I thought this was a serious battle! Rude.

Still not entirely sure how to proceed, but the usual shitload of X items would be a good start. The X Sp. Defs go on first, and Raichu's Thunderbolts deal 37, 24 and 19 damage in response. Then it's 3 X Defenses, even though I don't think Quick Attack will actually be stronger than Thunderbolt even at +6 Sp. Def (and sure enough, it keeps on using Thunderbolt), then all the other boosts. Aside from one critical hit on Thunderbolt bringing Phart to 23 HP, Raichu isn't much of a danger during setup.

View attachment 855283
Phart won't get much better than this - +4 Speed is enough to outspeed Noivern, the fastest member of Hau's team, and the paralysis isn't much of an issue when Phart has a chance to heal itself automatically and Raichu only has 1 Thunderbolt PP left. It'll be cured before Noivern comes in, one way or another.

So everything's in place now and Phart can presumably 2HKO Raichu and move on... right? Well, yes, it can, but then it'll level up and stop listening to me. Since 2 of Hau's other Pokémon are definitely bigger threats than Raichu, that would not be ideal. However, I've learnt throughout my island challenge that opposing Trainers will usually switch out their Pokémon when they run out of useful attacking PP (i.e. when they're forced to spam useless status moves). And if the battles against Guzma's Golisopod are any indication, they will switch out even if they could've continued attacking with Struggle.

So now I have a new strategy: completely stall out Raichu's PP, then have Phart Struggle on the turn where I would expect it to switch out. If it does, then Phart gets a free attack on the next Pokémon (hopefully Decidueye or Noivern) and Raichu will become a non-issue for the rest of the fight, essentially leaving Phart with 4 Pokémon to fight whilst disobedient instead of 5. If it doesn't switch out, then at least it should faint to Struggle regardless.

Time to see if that works. I pop on a Guard Spec. while Raichu uses up its last Thunderbolt, since its other special attacks can both trigger Sp. Def drops, and let it do its worst with Psychic and Focus Blast. When two of the latter deal 7 damage and then 8 damage, Raichu tries Quick Attack instead, only for Phart to dodge it - this should give you an indication of how threatening it is to Phart now. Another Quick Attack deals 4 damage, a Psychic manages 9, and then it's a case of counting down the PP until it runs out. Once it's finally out of attacks, I tap the Fight button and wait to see what happens.

View attachment 855284
View attachment 855285
View attachment 855286
Gotcha! One of Hau's trickier team members is knocked straight into KO range as it enters the battle, and since Phart is faster, Noivern doesn't even get a chance to attack before it faints on the next turn.

View attachment 855287
View attachment 855288
But as expected, it comes with a cost - Phart now only has a 49.38% chance of obeying me for the rest of the battle. At least that little bit of strategy proved useful.

View attachment 855289
I'm not surprised to see Decidueye next, but that doesn't mean I have a good plan for dealing with it. Spirit Shackle is obviously a super-effective STAB attack, Leaf Blade has a high crit rate, and it also has a Bloom Doom ready to go, plus all its EVs being in HP and Attack is probably the worst possibility for Phart. The best immediate plan would be to use a Max Potion and see how strong its attacks are.

View attachment 855290
View attachment 855291
Shit.

That was from a single Spirit Shackle while Phart was at full HP. I'm very glad it only has 10 PP, because clearly Phart's not remotely safe trying to attack until Decidueye's out of Spirit Shackles. So now I'll just spam Max Potions/Moomoo Milks until that's the case, then see where to go from there.

View attachment 855292
Bloom Doom has 175 power coming off Leaf Blade, but without a critical hit it can only manage 34 damage. A non-crit Spirit Shackle outdoes that to reach 36 damage, and once its PP runs out, Smack Down does 8 damage while Leaf Blade manages 18 without a crit. But I mustn't forget that Overgrow can boost that damage if Phart knocks it below 33%, as a critical hit with Overgrow active would be dangerous. With Phart on 228/236 HP, I decide to try Struggle and see how hard it hits (if it hits).

View attachment 855293
Better than I expected! It might actually be able to manage a 2HKO on Decidueye... though if it doesn't, it'll leave Overgrow active for that turn before Hau presumably uses a Full Restore. However, Decidueye seems to be choosing between Smack Down and Leaf Blade at random, as if they're remotely similar in strength, so Phart might get lucky and be struck by Smack Down instead even if it misses the KO. And if Decidueye does land a crit Leaf Blade whilst in Overgrow range, a bit of mental number-crunching suggests that Phart might just tank it after the Struggle recoil if it was at nearly 100% HP beforehand. So I heal Phart with a Moomoo Milk, then another one when Decidueye uses Leaf Blade, and then stop after it uses Smack Down to put Phart at 228/236 HP again. Phart refuses to attack for a few turns, so I keep topping up its HP until it dodges a Leaf Blade and finally strikes again...

View attachment 855294
Oh no.

View attachment 855295
Oh fuck.

View attachment 855296
Oh yeah!

That also happened to be Decidueye's last Leaf Blade, as it burnt through a lot of PP during the period where I was waiting for Phart's best opportunity to attack, so now it's down to just 8 Smack Downs. Phart immediately chugs another Moomoo Milk, but to my surprise, Hau orders another Smack Down instead of using a Full Restore. So I use another couple of Moomoo Milks, and Decidueye uses Smack Down twice more. Does he maybe recognise that it's dead weight at this point and not want to waste an item on it? Whatever the reason, it's no longer a threat to Phart, so I decide to stall out the rest of its PP and see if Phart will cooperate enough to hit another enemy Pokémon as they switch in.

View attachment 855297
View attachment 855298
View attachment 855299
Bah. Worth a try at least.

Phart doesn't have to worry about Power-Up Punch courtesy of Unaware, but Ice Hammer is still a strong attack and Stone Edge is another high-crit-ratio move. Guess I'll gauge how hard they hit before trying to have Phart attack back. The first Stone Edge is dodged, but Ice Hammer hits for 27 damage, which I think falls into the "might just survive a crit after Struggle recoil" range again. And since Stone Edge has the same power but without STAB, that will also be tank-able. So I heal up Phart and have it attack after it dodges another Stone Edge.

View attachment 855300
Not as bulky as all that fluff would suggest. Perhaps if Hau hadn't put 252 Speed EVs onto a Pokémon with base 43 Speed and had invested them in HP instead, it might have gone differently. Crabominable then follows up with a Power-Up Punch of all things, and it doesn't even hit thanks to Phart dodging it! It takes a few more turns for it to choose Power-Up Punch again and give Phart an opening to attack between Moomoo Milks, but it seizes the opportunity and KOs Crabominable without disobeying this time.

View attachment 855301
View attachment 855302
Tauros is another fairly heavy hitter, but can't use its strongest attack in Double-Edge without hurting itself as well. I heal Phart to full and let Tauros attack it - it's a Double-Edge that deals 22 damage - before trying to convince it to use Struggle. One turn of loafing around forces another Moomoo Milk to be used, but Phart regains its fighting spirit and attacks on the next turn.

View attachment 855303
Excellent, that puts Tauros firmly into KO range... provided Phart actually attacks again before Double-Edge recoil pushes it into range of Hau's Full Restores. Luckily it does so right away after a Max Potion, so that small crisis is averted.

View attachment 855304
View attachment 855305
3 down, 3 to go. But Vaporeon is the only one that actually has any PP remaining, so it's a lot better than that sounds. Another Moomoo Milk heals Phart back to full, Vaporeon deals 22 damage with Hydro Pump, then a Guard Spec. is used to block Vaporeon from using Charm and Baby-Doll Eyes. Hydro Pump is its only real source of damage, and after a remarkable bout of luck where Phart dodges 3 of them in a row, the final Hydro Pump hits for 24 damage and Vaporeon is now down to just Quick Attack. The end is in sight!

The first Quick Attack takes off a whopping 3 HP while Phart refuses to obey, and as I reapply the expired Guard Spec. on the next turn, Vaporeon tries Baby-Doll Eyes to no avail. Just a matter of time now. Phart lands a Struggle that doesn't quite deal 50%, but since Tauros had knocked it down to +5 Attack with Intimidate earlier, I use an X Attack and try again. The extra stat stage makes all the difference, as the next Struggle takes Vaporeon out before Hau can even think about his Full Restores.

View attachment 855306
View attachment 855307
Raichu returns to the battlefield with zero PP, so all I have to do is watch Phart take it straight into red with Struggle before Raichu Struggles back and faints to its own recoil damage...

View attachment 855308
View attachment 855309
...and that leaves just Decidueye, who is also devoid of PP and would crumble to a light breeze at such low health. But Hau has one final trick up his short sleeves.

View attachment 855310
I bet he's glad he saved it for a time like this, eh? Perhaps he can still make a comeback from here, with those mighty 8-HP Struggles Decidueye is now throwing out. But Phart puts Hau's hopes and dreams to rest by bringing Decidueye below 25% with its own Struggle, forcing the poor bird to knock itself out with Struggle recoil before it can be healed. Victory is ours!

View attachment 855311
View attachment 855312
Phart the Cosmog is officially a Champion!

View attachment 855313
What a lovely and touching sentiment. It sounds like just the sort of thing a MASSIVE LOSER would say! wheyyyyyy

View attachment 855314
View attachment 855315
View attachment 855316
View attachment 855317
Nice to see another little acknowledgement in Kukui's dialogue that I'm only using one Pokémon (he talks about your "beloved team's achievement" if you have more than one). And also funny to see the camera panning around all the empty space where my other 5 Pokémon would be if I had them.

View attachment 855321
All the Elite Four members come to pat me on the back and tell me I'm so cool and talented. But Molayne has nothing to say at all - in SM, Hala is the first one to speak to the player after the four of them arrive ("You've entered the Hall of Fame! Spectacular! Much as the sun shines upon the moon, illuminating it, so have the friends you made during your island challenge illuminated your life. You have grown so much!"), and then Acerola, Olivia and Kahili all say their lines. Obviously Hala's speech would feel a bit out-of-character coming from Molayne, but rather than giving him his own dialogue, USUM just skips over him entirely and makes him stand there in silence while the other three recite their lines, starting from Acerola. That's harsh.

View attachment 855322
View attachment 855323
Cue credits! I'll not torture myself further by trying to screenshot everything here, so feel free to open up YouTube and find someone else's playthrough if you're that fussed.

View attachment 855324
There are a couple of little nods to postgame stuff though. Apart from brief cameo appearances by Zygarde and Tapu Koko, Gladion is also waved off by half the staff of the Aether Foundation (specifically the female half from the looks of it) as he sails away on a boat to Kanto. He'd better come back soon, or else I'll have trouble finishing off my checklist of Trainers.

There's also a scene of Colress looking confused/thoughtful as he watches Faba take the lift to the lower levels of Aether Paradise, but I'm sure this has no relevance to the plot.

View attachment 855325
Once that credits sequence has wrapped up, I'm thrown into another credits sequence, this one just displaying the Totem Pokémon in dancing pixel-art form instead of all the human characters going about their lives. At least it's cute.

View attachment 855327
View attachment 855328
Oh, if only... I'm sure I can squeeze a good few more posts out of the postgame battles. Maybe I can pop these two screenshots at the end of the very final post, once it really is The End.

View attachment 855329
As is tradition, I'm booted back to my bedroom to kick off the postgame. Now I just need to figure out which bits of it I'm going to do first. There's still well over 100 battles to go, and the postgame stuff is not quite as linear as the main storyline, so planning that out ought to be fun.
Trainers defeated: 304/427
I really enjoyed the environmental story telling of this battle taking so long due to all the stalling and lucky rolls that the battleground goes from day, afternoon, sunset and night.
 
:sm/kecleon: :sm/tapu-lele:
31-1.png

I've found Ilima in his bedroom, and he wants to test out his battle research with me, whisking me off to the Trainers' School once I agree.

31-2.png

Captain Ilima
Items: Full Restore, Full Heal
Gumshoos Lv60 (Crunch/Hyper Fang/Super Fang, Ability: Stakeout, Adamant nature, IVs: 30/25/30/25/30/25, EVs: 252 Def / 252 SpD)
Smeargle Lv60 (Extreme Speed/Fire Blast/Hydro Pump/Power Whip, Ability: Technician, Hasty nature, IVs: 30/30/25/30/25/30, EVs: 252 Atk / 252 SpA)
Komala Lv60 @ Normalium Z (Sucker Punch/Wood Hammer/Slam/Zen Headbutt, Ability: Comatose, Careful nature, IVs: 30/30/25/25/30/25, EVs: 252 Atk / 252 SpD)

Before the battle begins, Ilima states that it's not the results of battles that interest him, but rather the "carefully-thought-out strategies" and "novel tactics" that go into them. Perhaps that would explain the mixed offensive Smeargle.

You can tell that I forgot to heal Phart before this fight, but it's almost at full HP anyway so it should be fine. Gumshoos has no Attack EVs and its Crunches end up dealing 20 damage once Phart is at +6 Defense (though that's not much help against Super Fang), so it's not particularly hard to set up all the X Attacks and a Dire Hit afterwards. Since none of his team are very fast, one X Speed is enough for Phart to outspeed everyone, and now it's ready to sweep!

Gumshoos goes down in 2 hits, not getting a chance to be healed by Ilima's Full Restore. Next up is Komala - I use a Max Potion to heal Phart's recoil damage, then fruitlessly attempt to use it again 4 times in a row to stall out Sucker Punch's PP. Once that's done, Phart knocks Komala straight into the red with one Struggle. And what does it use in return? Surely it must be Breakneck Blitz? Nope, Zen Headbutt! Phart loses 5 HP to this devastating blow and KOs Komala on the next turn, with Ilima not even bothering to use his Full Restore. Smeargle is one-shotted.

31-3.png

This apparently translates to unlocking the "Left-handed style", but to be honest, his left-handedness was not the main thing I noticed about how Ilima looked in our battle. Have you ever squatted over a public toilet so you didn't have to touch the lid? His idle animation reminded me of that.

Back in his room, Ilima hands me an Everstone, which would've been useful if I could somehow passively apply its effect to Phart without it having to hold the thing. Alas, this is not possible. Time to move on from Ilima and do something else.

31-4.png

It's Ilima! Haven't seen him in a while.

This is a little sidequest that I could've done at any point after clearing Olivia's grand trial, but I left it until now since it doesn't feature any Trainer battles. Ilima's trying to deduce which one of these Hypno stole his Nugget, and I have to help him by picking which one sounds like the culprit based on which moves they know. No matter which one is chosen, the Hypno gets upset at being accused and attacks me.

31-5.png

31-6.png

Just a normal Lv. 29 Hypno, but they do have varying movesets depending on which one you picked out: Hypnosis/Nightmare/Poison Gas/Headbutt, Nasty Plot/Psybeam/Disable/Poison Gas, or Confusion/Disable/Pound/Meditate. The Nasty Plot one would probably be best for in-game purposes since Hypno doesn't learn it until Lv. 53 normally, but it doesn't make much difference to me. More useless trivia: the third Hypno's attack is translated as being Psychic instead of Confusion, but only in the English and German versions. So don't pick that Hypno unless you want a nasty surprise!

Once that's over, Ilima solves the mystery of the stolen Nugget (it was all three of them working together) and lets the Hypno keep the Nugget as long as they promise to be good. He also gives me a Big Nugget for helping him out. Now that everything's sorted, I can definitely leave Ilima behind and move on to other things, such as... a rematch with Totem Gumshoos. Which requires a Normalium Z from the trial captain of Verdant Cavern.

31-7.png

I can't get away from him, can I?

Getting through Verdant Cavern is a lot easier when there's no trial to deal with, just a random wild Yungoos that flew out of its den at me faster than Tauros could run. So I head through to stick the Z-Crystal where it belong, and just like the Trial Guide warned me along the way, the Totem attacks once I get close enough to the pedestal.

31-8.png

31-9.png

Totem Gumshoos
Aura: +2 Attack, +2 Defense, +2 Sp. Atk, +2 Sp. Def, +2 Speed
Lv60 @ Chople Berry (Hyper Fang/Ice Fang/Protect/Crunch, Ability: Strong Jaw, Impish nature, IVs: 31/29/31/31/31/31, EVs: 96 HP / 166 Def / 248 SpD)

Ally Yungoos
Lv58 (Yawn/Mud-Slap/Torment/Super Fang, Ability: Stakeout, Jolly nature, IVs: 31/31/31/0/31/31)

Totem Gumshoos will summon Yungoos at the end of every turn if it doesn't already have an ally.

Certainly a step up from the initial battle in terms of strength: the Totem is no longer held back by 0 IVs and a Modest nature, and both it and its constant stream of allies have far better movesets. Plus, y'know, the +2 omniboost. But just like every other Totem, Phart ignores all of those boosts minus Speed, and a couple of Yungoos's moves (Mud-Slap and Torment) essentially don't work on it thanks to the weird and wacky side-effects of only using Struggle.

An X Defense is mandatory on turn 1 in case Totem Gumshoos goes for Crunch, but it chooses to waste its turn on Protect. When that predictably fails, it calls for backup instead.

31-10.png

More X Defenses? More X Defenses! Phart takes 34 damage from a Strong Jaw-boosted Crunch at +4 Defense, but it also gets a Defense drop, and Yungoos renders Phart drowsy with Yawn. Not ideal, but it's nowhere near ready to attack right now, so perhaps it'll shake itself awake in the meantime. The next Crunch deals 30 damage at +5 Defense, with Yungoos following up with a useless Torment. Now I can focus on other X items. Phart wakes up and then gets put back to sleep while I'm boosting its other relevant stats, but rather than take advantage of this with a constant stream of Super Fangs and Crunches, Totem Gumshoos stops to use Protect every now and then while its ally spams Mud-Slap.

31-11.png

Getting to this stage only took one Max Potion's worth of HP recovery, and Crunch only deals around 26 HP per hit at this point, so Phart can go on the offensive now. I stall for a turn, then reapply the Guard Spec., use a Full Restore, and start having it Struggle - the first hit takes Totem Gumshoos into yellow but might not be enough for a 2HKO if it gets a low damage roll. The second Struggle hits the ally Yungoos, taking it out instantly!

31-12.png

31-13.png

Sadly that's not much help when the Totem can just summon a replacement whenever it wants.

31-14.png

Phart is now on 69 HP, has fallen asleep, and its Guard Spec. is due to expire at the end of the turn. That's easily remedied with another Full Restore and Guard Spec., even if the replacement Yungoos does leave Phart on 110 HP with Super Fang. Totem Gumshoos leaves itself exposed on the next turn where Phart attacks, but it emerges unscathed when Phart targets its ally again for another OHKO.

31-15.png

31-16.png

Phart's on 18 HP this time, so I use a Max Potion while it takes 24 damage from Crunch and gets hit by Yawn yet again. Hopefully it'll just target Totem Gumshoos this time for a possible KO...

31-17.png

This might take a while.

The Yawn takes effect as Yungoos #4 enters the battle, so I have to use another Full Restore. Then the Guard Spec. wears off, but I decide not to reapply it - Totem Gumshoos surely can't have that many Crunches left, and Phart doesn't care about Mud-Slap. So I just let it attack again.

31-18.png

Ooh, nearly. And to confirm my suspicions, the Totem uses Hyper Fang on the same turn, which it'd have no reason to do unless it was out of Crunch PP. Phart is left drowsy once more, but squeezes in another Struggle before it falls asleep, targeting Totem Gumshoos... directly into its Protect. Boo. Another Full Restore fixes it up again, and it attacks again, only for it to thud into a second Protect. Totem Gumshoos risks a double Protect, but the move fails, and Phart lands another Struggle to KO its opponent!

31-19.png

Wrong opponent, you dick!

Yungoos #5 enters the battle directly into the path of Phart's Struggle, fainting before it can move. This is getting silly now.

31-20.png

Phart is currently on 91 HP, and I don't want it fainting to a crit Hyper Fang after Struggle recoil, so I have to risk it being hit by Yungoos #6's Yawn as I use a Max Potion. Sure enough, it ends up growing drowsy, but that doesn't stop it from Struggling again. And at last, it hits Totem Gumshoos and defeats it for the second time!

31-21.png

Phart has a lovely 3-turn nap afterwards and then disposes of the final Yungoos once it wakes up, formally ending the fight. I don't think Yungoos's 4-HP Mud-Slaps were ever going to turn the tide of battle, but there's no victory screen until it's knocked out.

31-22.png

More tedious than difficult, but it was slightly funny watching Phart summon an endless stream of Yungoos by repeatedly attacking the wrong Pokémon.

I pop the Normalium Z on its pedestal after the battle, and it's not Ilima who comes to congratulate me on my victory, but the local Trial Guide. He also gives me a Trial Guide cap and shirt, although I don't think I'll bother trying them on. I quite like my current clothes. I think that's everything relevant done on Melemele Island, so once I've stuck my head in Guzma's house and received a Swagger TM from his mother, it's off to Akala.

31-23.png

The usual battle against Game Freak's Morimoto is slightly different in these games, as he pairs up with USUM director Iwao. And you know what that means...

"But you don't have two Pokémon that can fight!"

Luckily, Ralts is here to get absolutely demolished by some random attack on turn 1 and clear the field for Phart.

31-24.png

GAME FREAK Morimoto and GAME FREAK Iwao
Gengar Lv57 (Shadow Ball/Dark Pulse/Sludge Bomb/Psychic, Ability: Cursed Body, Modest nature, IVs: 31/15/15/31/15/31, EVs: 252 SpA / 252 Spe)
Machamp Lv57 (Dynamic Punch/Stone Edge/Poison Jab/Dual Chop, Ability: No Guard, Adamant nature, IVs: 31/31/15/15/15/31, EVs: 252 Atk / 252 Spe)
Dragonite Lv57 (Hurricane/Draco Meteor/Thunder/Blizzard, Ability: Multiscale, Modest nature, IVs: 31/15/15/31/15/31, EVs: 252 SpA / 252 Spe)
Kecleon Lv56 (Sucker Punch/Shadow Claw/Rock Slide/Brick Break, Ability: Protean, Jolly nature, IVs: 15/15/15/15/15/31)
Ambipom Lv56 (Double Hit/Dual Chop/U-turn/Aerial Ace, Ability: Technician, Adamant nature, IVs: 15/31/15/15/15/15)
Blissey Lv56 (Fire Blast/Thunder/Blizzard/Dazzling Gleam, Ability: Serene Grace, Calm nature, IVs: 15/15/15/15/31/15)

Morimoto's lineup is a lot stronger than Iwao's mono-Normal team, which fits with him saying that the director isn't as good at battling as he is. Sort of a cute little detail considering they're both self-inserts who don't "need" to be of any particular strength level. And both of them lead with STAB (factoring in Protean) attacks that are super-effective on Phart! That's not cute at all.

Gengar is clearly a bigger threat than Kecleon, so I don't need to put much thought into what to do first - it's got to be an X Sp. Def. Gengar targets Ralts with Sludge Bomb and reduces it to a smear on the floor of Game Freak's office, and Kecleon winds up for a Shadow Claw but misses Phart entirely. No such luck after I use an X Defense on the next turn, as Shadow Ball takes Phart straight to 176/248 HP, and Shadow Claw knocks it down even further to 146 HP. This won't be easy...

Healing Phart with a Max Potion doesn't achieve much. It actually seems to make it worse, as Shadow Ball gets a Sp. Def drop and then Shadow Claw brings its HP down to roughly where it was before. Luckily Phart dodges another Shadow Claw on the next turn while I use an X Sp. Def to bulk it up a bit more. What follows is a rather stressful attempt at keeping Phart's HP up whilst also continuing to boost its defenses and making a start on boosting its Attack and trying to ignore the fact that a crit Shadow Ball at any point will probably be instant death.

31-25.png

A stroke of luck allows Phart to dodge both Shadow Ball and Shadow Claw on one turn (at a 1% chance!), but this is balanced out when Gengar lands the dreaded crit Shadow Ball right afterwards, bringing Phart down to a mere 46 HP and then falling even further when Shadow Claw hits. Nevertheless, it survives for now and I carry on chucking the entire contents of my bag at it. Once its defenses are both at +6, I can spam Max Potions for a bit until Shadow Ball and Shadow Claw both run out of PP, leaving both opponents a little less threatening.

31-26.png

What I can't quite understand is how the opponent's AI works after their preferred moves are out of PP - Kecleon switches to Sucker Punch, which makes sense as it's a super-effective attack, but Gengar seems to pick its moves at random despite Dark Pulse clearly being the best remaining option. It even uses Psychic a few times, hitting with all the force of a wet noodle. Still, with Dark Pulse only dealing around 28 damage when it does use it, I manage to get Phart's stats boosted to the levels you can see above without much difficulty. The worst I have to endure is a few cases of Sludge Bomb poisoning, but that's what Full Restores are for.

Now comes the fighting bit! I'd like to be rid of Gengar more than Kecleon, but as the Totem Gumshoos fight reminded me, I have no control over who gets targeted by Struggle. Phart's goals clearly do not align with mine, because it's Kecleon who falls first.

31-27.png

Morimoto's Gengar uses its extra turn to deal single-digit damage with Psychic again as Iwao sends in Ambipom. I don't really fear a non-STAB U-turn with no Attack EVs behind it, but Phart has been slightly hurt by Struggle recoil, so I heal it to full with a Moomoo Milk before attacking again. Ambipom immediately goes for U-turn and exits the battle as soon as it enters, chipping off 14 HP and dragging in Blissey. With 208/248 HP on its next turn, Phart is healthy enough to Struggle again, this time taking out Gengar at last.

After a 60%-accurate Thunder from Blissey misses its target, Dragonite is sent out to replace Gengar. Healing Phart with a Max Potion gives Dragonite a chance to screw itself over with Draco Meteor, only managing 24 damage and trashing its Sp. Atk in the process, while Blissey hits with Thunder and paralyses Phart. Another Full Restore removes that thorn from Phart's side, letting it Struggle on the next turn to banish Blissey and its Serene Grace-fuelled bullshit from the battle.

31-28.png

Not bad for something 29 levels lower than Phart.

Even though the big threats are out of the picture, the battle might take a while yet - Dragonite's Multiscale means it barely loses 25% of its HP to a Struggle. The returning Ambipom is not so lucky and gets one-shotted the next time Struggle targets Iwao's side, so now it's a simple 1v1. A couple more Struggles take down Dragonite, and Machamp is nothing more than a speedbump, dealing a total of 30 damage across 2 Stone Edges before fainting.

31-29.png

Defeating the two Game Freak employees nets me an Oval Charm! Oh, and a free heal. Gee, thanks, Iwao. I go to all the trouble of sweeping 6 Pokémon with a Cosmog in a 2v1 battle, and you reward me by taking away the move that made that possible? That's just rude. The next stop on my tour of Akala Island is supposed to be Paniola Town, but it seems I'll have to visit Route 1 first to get rid of this unwanted Splash PP.

31-30.png

Once that's sorted, I head to Paniola Town and pick up a Protector from Kiawe's dad before running into Kiawe himself. He asks me to follow him to the Thrifty Megamart, as he's got some business to attend to, and I arrive just in time to see him lose his job. Perhaps getting destroyed in a Pokémon battle will cheer him up.

31-31.png

Captain Kiawe
Items: Full Restore, Full Heal
Arcanine Lv60 (Crunch/Flare Blitz/Extreme Speed, Ability: Intimidate, Adamant nature, IVs: 30/25/30/25/30/25, EVs: 252 Atk / 252 SpD)
Talonflame Lv60 (Quick Attack/Flare Blitz/Brave Bird, Ability: Flame Body, Adamant nature, IVs: 25/30/25/30/25/30, EVs: 252 Atk / 252 Spe)
Alolan Marowak Lv60 @ Firium Z (Flare Blitz/Shadow Bone/Bone Rush, Ability: Cursed Body, Adamant nature, IVs: 30/30/25/25/25/30, EVs: 252 Atk / 252 Spe)

Basically the same as his team from Mina's trial, except they've all got Adamant natures now and Marowak has Flare Blitz instead of Flame Wheel (plus Bone Rush instead of Bonemerang). Also, his Arcanine has somehow swapped a couple of its IVs around. Kiawe didn't strike me as the sort of person to use PKHeX. Maybe that's why he got fired?

Arcanine's big dollop of EVs means that I have to use 3 X Defenses right away, and Phart ends up on 127/250 HP with a burn after 3 Flare Blitzes. But hey, at least I don't have to worry about any special attacks in this battle - I can just heal Phart and stick on more X items while Arcanine chips away at its own HP with recoil. I bring it up to +6 Attack, +6 Defense and +4 Speed with a Dire Hit active, and Arcanine has reduced itself to around 50% HP in the meantime.

My initial plan was to have Phart Struggle at this point and presumably KO Arcanine, but it scores another burn with Flare Blitz and then lands a critical hit as I'm healing it, knocking itself into range of Kiawe's Full Restore. Not what I expected, but not much of an issue either, as Phart simply uses 2 Struggles to KO it instead of 1. Kiawe sends in Marowak next, and its Shadow Bone deals 30 damage while I'm healing Phart. A Guard Spec. protects against any lucky Defense drops, allowing Phart to score another 2HKO with 34 HP to spare. That leaves just Talonflame, whose ability to choose between Flare Blitz or Brave Bird doesn't matter when they both deal ~25 damage and it's outsped and two-shotted by Struggle. The surprise Flame Body activation just before it fainted was quite amusing though.

Poor Kiawe is not having a good day today. He wanders off without giving me any sort of item for winning, but I do unlock a new battle style, so that's nice. Now where do I go next? As it so happens, I don't need to go very far at all - despite Kiawe's sidequest dragging me from Paniola Town over to Royal Avenue, there doesn't seem to be anything that I've missed out on in the areas I skipped over, so I just stick my head in the Battle Royal Dome to acquire an Effort Ribbon for Phart, then head to the Thrifty Megamart to begin another miniature gauntlet of battles.

31-32.png

Kagetora the Eevee User, as he used to be called, would like me to go and beat up some Trainers that he knew back in his heyday. They all use one Eeveelution and nothing else, so Phart shouldn't have too much trouble with any of them.

I'm still planning on touring through Alola in sequence rather than dashing around battling all of them right now, but a few of them are found in places on Melemele and Akala that I've already passed by, so I'd better pop back and beat those ones. The first of them - Rea the Glaceon User - is found in Iki Town, and she's far more interested in spending time with her family than battling these days. But she'll make an exception for me.

31-33.png

Glaceon User Rea
Items: Full Restore
Glaceon Lv55 (Mirror Coat/Hail/Last Resort/Blizzard, Ability: Snow Cloak, IVs: All 15)

I'll start off by saying that these Trainers are all pretty disappointing as actual battles. I know, they've all been out of practice for decades because they've moved on from Pokémon battling, but their teams are very generic. Default level-up moves, no EVs, no natures, IVs all set to 15, no held items, and they only get a Full Restore if they happen to have the Gentleman/Madame model. Surely they could be a bit better than this if they've all got special unique titles that go before their names?

Phart, however, welcomes the idea of facing weak and unimpressive opponents. An X Sp. Def on turn 1 weakens any incoming Blizzards, but I'll have to wait to see because Glaceon uses Hail instead. One of them lands for 34 damage on the next turn, plus 15 damage from the hail, and Phart seems to be on track for a 4HKO with Struggle at +2 Attack. But a few unlucky damage rolls cause it to become a 5HKO and allow Rea to use her Full Restore. Not that it stops her from losing - Blizzard quickly runs out of PP and Glaceon has to waste a turn on Mirror Coat before it can attack with Last Resort, and that's only about as strong as Blizzard was, so Phart only needs a couple of Max Potions to outlast it and KO.

Now it's time for another trip to the Trainers' School, where Polly the Vaporeon User now works as a window cleaner.

31-34.png

Vaporeon User Polly
Items: Full Restore
Vaporeon Lv55 (Haze/Muddy Water/Last Resort/Hydro Pump, Ability: Water Absorb, IVs: All 15)

Same approach as before: X Sp. Def, then X Attack, then Struggle. The first Hydro Pump does 31 damage, and after that... Haze wipes the boosts away. Fuck. Probably should've thought about that before trying to set up. I have to settle for a Dire Hit because it's not affected by Haze, but since critical hits only give a 50% damage boost in these games, Struggle is only a 5HKO without any Attack boosts on Phart. And of course Polly has a Full Restore ready to go once Vaporeon's HP gets low enough. But as always, Phart proves victorious in the end, even if this battle does eat up 5 Max Potions from my supply.

The next stop is Hau'oli Cemetery to track down Braiden the Umbreon User, who was rumoured to be immortal in his youth. A quick conversation with him clears up that mystery - in the good old days before social media, if you spent enough time in the hospital, people would quite reasonably assume you'd died and come back to life if you showed up again.

31-35.png

Umbreon User Braiden
Items: Full Restore
Umbreon Lv55 (Moonlight/Mean Look/Last Resort/Guard Swap, Ability: Synchronize, IVs: All 15)

You'd be forgiven for thinking the Dark-type Umbreon might have an advantage over the Psychic-type Phart, but no, it doesn't have any STAB attacks at all! Most of its "threat" comes from being very bulky and having 5 Moonlights and a Full Restore to top it up. To get around that, I just use 3 X Attacks and a Dire Hit before letting Phart Struggle. Umbreon can't attack in the meantime - Last Resort won't work until it's used Moonlight, which it obviously won't use at full HP - so I can freely set up and then let Phart attack. Struggle is still just a 2HKO even after all that, but Phart gets Umbreon to burn through all its recovery options and then defeats it after some lackluster Last Resorts fail to slow it down.

One battle to go before I can carry on working my way through Akala, this time at the Tide Song Hotel. Chad the Flareon User is done with being a magician and with Pokémon battling as well, but like Rea, he's willing to humour me just this once.

31-36.png

Flareon User Chad
Flareon Lv55 (Smog/Lava Plume/Last Resort/Flare Blitz, Ability: Flash Fire, IVs: All 15)

No Full Restore this time, but the trade-off is that Flareon has both physical and special attacks, meaning I can't weaken all of them with one single X item. So I settle for just an X Sp. Def, figuring that letting it do more damage to itself with Flare Blitz might work to my advantage. After missing a Smog on turn 1, Flareon does use Flare Blitz, taking Phart down to 175/250 HP and burning it but losing a chunk of its own HP. A Full Restore and an X Attack from there is enough to take out Flareon in two hits with help from a crit.

Phew! That's half of Kagetora's list ticked off. The other 4 Trainers are found in parts of Alola that I haven't got to yet, so I'll leave them for later. After Royal Avenue, there's not really anything new in the postgame until Konikoni City, but there is one event on Route 9 that I skipped over during the main storyline.

31-37.png

31-38.png

As you may have guessed, it's another one that revolves around wild Pokémon, specifically a group of troublemakers known as the Ditto Five who are impersonating people in and around Konikoni. Dealing with them (i.e. catching them all) earns me $100,000 and a Focus Band.

Actually catching them proves somewhat difficult. Ditto has a catch rate of 35, and Transform only gives it 5 PP for Splash, so I have 6 turns to catch each Ditto before they start Struggling and losing their HP. A bit of a nuisance, but I only have to reset and try again for one of the Ditto, while the other four go in before they run out of PP. (As for why I bothered catching them at all when defeating them would've worked too? I, uh, genuinely forgot that was an option. Silly me.)

31-39.png

Lana would be next on my list of battles if not for the fact that I have to fight her little sisters first. But they only want to fight in a moldy battle Multi Battle, so I get the usual sort of dialogue instead:

"Come on! You can't fight without enough Pokémon!"

So I go and fetch Ralts like always and bring it here. It may be pleased to know that there are only 5 more battles after this one where I need to use it as a sacrifice, and then it can retire from dying horribly all the time.

31-40.png

Twins Harper and Sarah
Luvdisc Lv56 (Hydro Pump/Blizzard/Charm, Ability: Swift Swim, Timid nature, IVs: 30/15/15/30/15/30, EVs: 252 HP / 252 Spe)
Corsola Lv56 (Earth Power/Power Gem/Scald, Calm nature, IVs: 30/15/30/15/30/15, EVs: 252 HP / 252 SpD)

See, if two literal Preschoolers can have custom moves and full EVs on their Pokémon, why couldn't the Eeveelution users?

But they are using a Luvdisc and a Corsola, so I still don't expect too much from them. Ralts's Quick Claw doesn't activate, so it gets knocked out by Power Gem before it can use Memento, and Luvdisc's Hydro Pump misses Phart entirely. Since Luvdisc also knows Charm, I stick a Guard Spec. on before using another X Sp. Def and 2 X Attacks, then use a Full Restore (two lucky crits and a Scald burn have brought Phart down to 58 HP by this point). Once I've stuck the Guard Spec. back on, Phart quickly 2HKOs Luvdisc with Struggle, then settles for a 4HKO on Corsola after it gets back-to-back Scald burns.

Lana walks in just after the battle's wrapped up, and her sisters persuade her to take me on. Apparently we have to go to Brooklet Hill for this, or else she'd have an unfair advantage from being familiar with her bedroom's layout. I'm sure that's the reason we came here and it's got nothing to do with the fact that it's frequently raining at Brooklet Hill.

31-41.png

Captain Lana
Items: Full Restore, Full Heal
Lanturn Lv60 (Discharge/Hydro Pump/Thunder Wave/Icy Wind, Ability: Volt Absorb, Modest nature, IVs: 30/25/25/30/25/30, EVs: 252 SpA / 252 Spe)
Cloyster Lv60 (Spike Cannon/Icicle Crash/Smart Strike/Spikes, Ability: Skill Link, Careful nature, IVs: 30/25/30/25/30/25, EVs: 252 Def / 252 SpD)
Araquanid Lv60 @ Waterium Z (Liquidation/Leech Life/Crunch/Frost Breath, Ability: Water Bubble, Adamant nature, IVs: 30/30/25/25/25/30, EVs: 252 Atk / 252 Spe)

It seems I've escaped the rain this time, but Lana still has a solid-looking team regardless. I get to work right away by setting up 3 X Sp. Defs against Lanturn, who deals 42 damage with a Hydro Pump and then has to use Thunder Wave twice in a row after the first one is shaken off by Phart. With Lanturn unable to hit very hard and constantly either missing its Thunder Waves entirely or having them shaken off again, I have a lot of free time for setting up Phart. In fact, by the time it's reached the levels of power I wanted (+6 Attack, Defense and Sp. Def, +2 Speed, Dire Hit active, and Guard Spec. active in case of Icy Winds), it's still got 112 HP left and I haven't had to heal it once!

I do give it a quick Full Restore before it starts attacking, since it was eventually hit by a Thunder Wave that stuck around. But once it does begin to fling Struggles, Lanturn is knocked out in two hits without falling into Full Restore range.

31-42.png

The recoil leaves Phart with 81 HP after that victory, and I don't fancy its chances of surviving whatever the incoming Araquanid throws at it. So I heal it with a Max Potion, and wait to see how much it takes from... Frost Breath??? Fair enough, a guaranteed crit lets it bypass Phart's X item boosts, but it still only does 20 damage. (Why does Lana even have Frost Breath on a Pokémon with zero Sp. Atk investment and an Adamant nature? At least Scald would've had a burn chance and Water Bubble boost if she really wanted one special attack.) Phart is definitely safe to attack again, and its next Struggle takes Araquanid just below 50%. Only a Leech Life can save it from a 2HKO now, so when it goes for Frost Breath again and misses, that's Cloyster's cue to come in. Its Icicle Crash deals a paltry 12 damage to Phart, meaning it has no hope of stopping Phart from 3HKOing it and leaving Lana's Full Restore to gather dust.

Once everyone's headed back to Konikoni, Lana hands me a Deep Sea Tooth and a Deep Sea Scale before heading off to do boat-related stuff. I also acquired a new battle style from watching her during our battle, much like the one I got from Kiawe earlier. While I'm still in Konikoni, there are a few other useless items I can receive in the restaurant (a Whipped Dream, a Sachet and a Dragon Fang), but once they're gathered up it's back to hunting down Trainers for me.

Now, I'd mentioned a few posts ago that I really wasn't looking forward to the postgame rematch with Mallow, as the battle against her during Mina's trial was an absolute nightmare thanks to her Leech Seed Trevenant lead. With the addition of Ingrain to her Shiinotic on a team that I'd already had to entirely PP stall before, the rematch would probably be even worse. However, there's a crucial detail that I completely forgot about back then: the Mallow rematch is exclusive to Ultra Moon! I get the much easier Kiawe rematch instead as an Ultra Sun player, and I've already won that one, so I suppose my next stop is now the Ruins of Life to enslave another island guardian.

31-43.png

Tapu Lele
Lv60 (Nature's Madness/Extrasensory/Flatter/Moonblast, Ability: Psychic Surge, IVs: Random; at least 3 of them are 31)

It's a regular wild Pokémon with regular wild Pokémon AI (read: none), so I can't expect any consistency in how it attacks. But the good news is that Nature's Madness is its only "strong" attack after I use an X Sp. Def, as Moonblast only does about 30 damage. Using a Dire Hit on Phart while not using any X Attacks turns out to be quite useful - its Struggles aren't very powerful, but by guaranteeing that they always land critical hits, Phart can chip away at Tapu Lele's HP without having to worry that Struggle might randomly get a 50% power boost and KO it. 5 Struggles leave the guardian deity with a tiny amount of HP, and then I use a Roto Catch and start with the Timer Balls.

31-44.png

Straight in on the first ball yet again! Pulling up a catch rate calculator suggests the chances are about 18.5% per ball in these circumstances, so maybe that's not so surprising. In my head I always imagine catching legendary Pokémon to be like it is in Gen 3 where you have no Pass/O-/Rotom/Meal Powers and your Timer Balls take 30 turns to actually work properly.

Nearly done with Akala now - just need to visit a few people around the Hano Grand Resort. Popping into the hotel lobby earns a Footprint Ribbon for Phart from a Pokémon Breeder, plus a Trick Room TM from Kahili. Then I head out to Hano Beach and track down Linnea the Leafeon User, sunning herself by the water's edge. Mind you, it's 11pm, so I guess she's technically... mooning herself? Hmm.

31-45.png

Leafeon User Linnea
Leafeon Lv55 (Synthesis/Sunny Day/Last Resort/Leaf Blade, Ability: Leaf Guard, IVs: All 15)

Linnea's clearly spent a lot more time trying to keep herself looking youthful than trying to keep her Leafeon competent, yet somehow it's ended up with a decent moveset just from what it learns by levelling up. Synthesis will be annoying if Phart can't power through it, so I use an X Defense followed by 3 X Attacks and a Dire Hit. Leaf Blade deals around 24 damage with each non-crit, but despite all the X items, I run into the same problem as with the Umbreon User - Phart can only 2HKO Leafeon, who is faster and knows Synthesis. This time, I decide to get around that with an X Speed, letting Phart attack first and KO Leafeon before it gets a chance to heal itself.

And with that, Akala Island comes to a slightly anticlimactic end. Oh well, they can't all be exciting. There doesn't appear to be an awful lot to do on Ula'ula Island or the pre-Champion areas of Poni - certainly no trial captains or Totem Pokémon looking for a rematch - so I'll probably squash them both into one post if there's room. Might even venture into Episode RR stuff as well.
Trainers defeated: 332/427
 
:sm/tapu-bulu: :sm/tapu-fini:
32-1.png

Over on Ula'ula Island, a girl in Malie City's Community Center is so impressed by the bonds forged between Elio and Phart that she awards it a Best Friends Ribbon. With the only other three Ribbons obtainable in Alola being unavailable to it (the Battle Tree Master and Battle Royal Master ones are impossible for a Cosmog to get because it's classed as a special Pokémon, and while it can enter the regular Battle Tree courses in USUM to earn the Battle Tree Great Ribbon, that would still require using at least 1 other Pokémon), I think this makes Phart the least accomplished Ribbon Master of all time.

While I'm here, I can also battle Jane the Jolteon User. She doesn't seem to remember who Kagetora was, but she'll happily battle me regardless.

32-2.png

Jolteon User Jane
Items: Full Restore
Jolteon Lv55 (Thunder Wave/Discharge/Last Resort/Thunder, Ability: Volt Absorb, IVs: All 15)

Jolteon's actually ended up with an okay moveset given that I'm not using any Ground-types. Phart gets paralysed by Thunder Wave as I use an X Sp. Def, then Discharge hits for 24 damage before Phart cures itself of paralysis. It dodges one Thunder, takes around 30 damage from a second one that hits, then knocks Jolteon into Full Restore range with a couple of Struggles that would've scored a 3HKO otherwise. Phart needs a Max Potion after all of that, then another one as it starts attacking again, but it does get the 3HKO this time since Jolteon can't heal itself.

32-3.png

Another pile of Trainers to go up against. Everyone at the Kantonian Gym has stronger teams now that I've become Champion, but maybe "teams" isn't the right word to use, as all of them apart from Ryuki still just use one Pokémon. At least Ryuki sort of makes up for that by having 3 pseudo-legendaries on his team. The Gym works the same as it did before, so I just walk up to a random Trainer and start the first battle.

32-4.png

Kantonian Gym Blair
Ribombee Lv55 (Bug Buzz/Dazzling Gleam/Aromatherapy/Quiver Dance, IVs: All 15)

X Sp. Def, then Ribombee does 21 damage with a Dazzling Gleam instead of the far more sensible Bug Buzz. After consulting the type chart while I use an X Attack, it does go for Bug Buzz this time and manages 42 damage, but gets a 3HKO from Struggle not long after that. Certainly didn't help that it stopped to use a Quiver Dance that had no effect against the Unaware Phart. On to the next Trainer!

32-5.png

Kantonian Gym Lee
Cinccino Lv55 (Helping Hand/Tickle/Sing/Tail Slap, IVs: All 15)

I do wish the Rocky Helmet wasn't locked away in the Battle Tree, because this would've been the perfect time to stick it on Phart. Never mind. Phart dodges a Tail Slap while I use a Guard Spec., but Cinccino decides to use Tickle anyway and fails thanks to said Guard Spec. Once Phart's at +2 Attack and Defense, it Struggles twice to leave Cinccino just above red, then gets put to sleep by Sing while I'm healing it, but the affection bonuses wake it up and let it KO with a third Struggle. Time for another battle then.

32-6.png

Kantonian Gym Adrian
Jynx Lv55 (Avalanche/Body Slam/Wring Out/Perish Song, Ability: Forewarn, IVs: All 15)

Jynx deals 49 damage with a max-power Wring Out as I use an X Attack, then 15 damage with Body Slam while Phart deals over 50% with a single Struggle. Just before the second Struggle takes it out, Jynx uses Perish Song, but it's far too late for it to work properly.

I'm not saying that battle was difficult, because it wasn't, but I cannot overstate how lucky I am that this Jynx is (as far as I can tell) the only Perish Song user in the game. In a challenge run like this one where I can only use one very weak Pokémon, Perish Song is absolutely lethal - if it ever gets used, Phart either ends the battle in 3 turns or it dies. There's no dodging it, no tanking it with 1 HP, no curing it, no preventing it from working, nothing. The only thing I can do is hope that the opponent is either too stupid to use it, or frail enough that they can reliably be knocked out (along with any teammates they may have) before the perish count reaches 0. Jynx met both of those criteria, but if, for example, Acerola led with a Perish Song Mismagius in her Elite Four fight... I think the run would probably end right there.

But as I say, that Jynx seems to be the only Perish Song user I'll have to deal with, so never mind what could have been. There's still one more Beauty left to fight before the Gym Leader (and Ryuki).

32-7.png

Kantonian Gym Dallas
Lurantis Lv55 (Slash/Sweet Scent/Solar Blade/Sunny Day, Ability: Leaf Guard, IVs: All 15)

X Defense, X Attack, then Struggle. Lurantis wastes a turn on Sweet Scent before a critical hit on Slash manages 33 damage, and two Struggles from Phart bring it below 50%. The recoil leaves Phart on 82 HP, and I don't want to see if it can tank a Solar Blade now that Sunny Day's been set up, so I use a Max Potion. But the Solar Blade that Lurantis immediately uses is actually weaker than its first Slash, only taking away 28 HP, so Phart Struggles twice more for the win.

I can't remember if you automatically get booted out of the Kantonian Gym once you beat the leader, but since I haven't battled Ryuki yet, I'd rather not go and find out. May as well just fight him first.

32-8.png

Pokémon Trainer Ryuki
Garchomp Lv58 (Dragon Claw/Crunch/Earthquake/Poison Jab, Ability: Sand Veil, IVs: 25/30/25/25/25/30)
Drampa Lv58 (Dragon Pulse/Hyper Voice/Blizzard/Thunder, Ability: Berserk, IVs: 30/25/25/30/25/25)
Turtonator Lv58 (Overheat/Dragon Pulse/Fire Blast/Focus Blast, Ability: Shell Armor, IVs: 25/25/30/25/30/25)
Dragonite Lv58 (Hurricane/Dragon Rush/Fire Punch/Thunder Punch, Ability: Inner Focus, IVs: 25/30/25/30/25/25)
Kommo-o Lv58 (Clanging Scales/Focus Blast/Flash Cannon/Flamethrower, Ability: Bulletproof, IVs: 25/25/25/30/25/30)

Well, they don't have any EVs or natures, but pretty strong stuff otherwise. This ought to gobble up a few X items.

After an initial X Defense, Garchomp's Crunch brings Phart down to 215/253 HP, and then I use a Guard Spec. so it doesn't end up chewing through all my lovely Defense boosts. Crunch's damage falls to 20 HP per hit once Phart is at +6 Defense, and I give it the usual stat-maxing treatment while Garchomp fails to break through, eventually running out of Crunch PP and switching to Earthquake. At +6 Attack, Phart's Struggle just about manages a 2HKO at the cost of being poisoned by a rogue Poison Jab. Turtonator is next up, missing its first Overheat while I'm busy using a Full Restore and then only dealing 18 damage with its second one, ruining its Sp. Atk and getting a 3HKO from Struggle.

32-9.png

49 HP is probably enough to tank one hit from the new arrival Drampa, but then how would Phart Struggle back without KOing itself? So I heal it up again. Dragon Pulse deals 16 damage, Phart knocks Drampa below 50% with Struggle and activates Berserk (which is no use against Unaware), and Hyper Voice only does 2 HP more than the Dragon Pulse. I heal Phart again when Dragonite comes out, Hurricane hits for 16 damage, and Dragonite goes down in two hits thanks to not having Multiscale. Finally, Kommo-o does 9 damage with Focus Blast before missing Flamethrower and also fainting to two Struggles. Easy! Now there's just the Gym Leader to deal with.

32-10.png

Kantonian Gym Leader
Machamp Lv56 (Submission/Bulk Up/Cross Chop/Scary Face, Adamant nature, IVs: 15/31/15/15/15/15, EVs: 252 Atk)

I think he's actually got worse since the first fight - Machamp used to know Knock Off as a Machoke, and even though the AI is weird and doesn't seem to like using it more than once, it surely would've been better than everything else on its current moveset. Oh well. Phart gets to +2 Attack and Defense while Machamp wastes time on its status moves, then lands a crit Cross Chop for 64 damage, which happens to be exactly the amount of HP Phart loses when it uses Struggle! Speaking of which, 5 Struggles are enough to defeat Machamp.

Since I already received my novelty Surge Badge the last time I cleared the Kantonian Gym, the leader offers to replace it with a newer one. Then he saves me 5 seconds of walking by ejecting me from the building. On we go.

I was definitely right to think I could probably fit both Ula'ula and Poni into one post, because I'm already about to take on the final Trainer of Ula'ula Island. Up on Blush Mountain, Ishaan the Espeon User still seems to be working at the power plant like Kagetora remembers from 30 years ago, and he's happy to have a battle with me.

32-11.png

Espeon User Ishaan
Espeon Lv55 (Morning Sun/Psychic/Last Resort/Power Swap, Ability: Synchronize, IVs: All 15)

Espeon seems a bit tricky, as it could easily steal my X Attack boosts with Power Swap... but I suppose there's nothing stopping me from using another X Attack in that case. So I try using an X Attack, and it actually uses Power Swap on turn 1 despite both sides having no stat boosts at the time. Once I use another X Attack, Power Swap can no longer do anything other than swap two +2 Attack boosts between Espeon and Phart, so it has to try out attacks that are actually useful like Psychic and Morning Sun. But it still keeps spamming Power Swap even when it's in range of a KO from Struggle, and it ends up going down after 5 hits. Oops!

Next stop is the Ruins of Abundance - I may be done with Trainer battles on this island, but there are still a couple of legendary Pokémon to be found and caught, starting with infamous supermarket hater Tapu Bulu.

32-12.png

Tapu Bulu
Lv60 (Nature's Madness/Zen Headbutt/Megahorn/Skull Bash, Ability: Grassy Surge, IVs: Random; at least 3 of them are 31)

Grassy Surge's HP restoration seems like it might be annoying at first, but then I remember Phart probably won't be ready to attack until after it's already run out. I give it a couple of X Defenses and a Dire Hit, use a Max Potion after it gets hit by 2 Nature's Madnesses, then use a Roto Catch. The terrain wears off after this, so I give Struggle a try, but it seems a bit weaker than I was hoping. Easily fixed with an X Attack though, and another 2 Struggles leave Tapu Bulu just above red HP.

32-13.png

My perfect legendary-catching streak is broken when Tapu Bulu takes 4 Timer Balls before being caught. To be fair, I could've weakened it a bit more if I hadn't used an X Attack to speed things up, so I only have myself to blame for that. Now, I believe there's a certain prismatic prick that I left on the naughty step halfway up Mount Lanakila.

32-14.png

Yep, there it is, right where I left it before. I think it's had enough punishment now for its lion-hijacking light-stealing antics, so perhaps it's time to try breaking the proverbial ice.

Hey, Necrozma! What's your favourite kind of floor covering?

32-15.png

32-16.png

Necrozma
Lv65 @ Ultranecrozium Z (Photon Geyser/Iron Defense/Power Gem/Night Slash, Ability: Prism Armor, IVs: Random; at least 3 of them are 31)

Necrozma actually has a custom moveset unlike the guardian deities, as it'd normally know Autotomize and Stealth Rock at Lv. 65 instead of Power Gem and Night Slash. This would make for a potentially challenging battle against a strong Pokémon with decent coverage moves, if not for one other alteration...

32-17.png

Necrozma's catch rate was raised from 3 to a whopping 255 in USUM, on par with such mighty behemoths as Caterpie and Yungoos, so it's impossible for it not to be caught by a Dusk Ball at nighttime, even at full HP. No need for any fighting here, and certainly no need to worry about Necrozma fainting to hail damage while I'm trying to catch it.

32-18.png

Colress was watching my battle against Necrozma (all 12 seconds of it) and hands me an N-Solarizer and an N-Lunarizer so that I can fuse it with a Solgaleo or a Lunala if I wanted. Not really my style, to be honest. I'd rather keep Nebby and Necrozma separate so that I can put both of them to work down in the mines of Isle Aphun. Much more ethical!

There's nothing else I can currently do on Ula'ula Island, so it's time to fly over to Seafolk Village and get started on the Poni Island stuff. I head into the Pokémon Center to deposit my shiny new Necrozma, and speaking of shiny things, there's a Sightseer here who wants to show me something.

32-19.png

Sightseer Marcus
*~★ Shiny ★~* Exeggcute Lv55 (Natural Gift/Solar Beam/Extrasensory/Bestow, Ability: Chlorophyll, IVs: All 15)

I think Marcus is more interested in showing off his cool shiny Pokémon than having an actual serious battle, and Exeggcute's moveset seems to support that view, so I crack open an X Attack and let Phart scramble its way to a 4HKO. There are some difficult battles to be found in USUM's postgame, and this is certainly not one of them. But the 6 free Nuggets we got for winning are nice.

Before I go charging off into the wilderness, I need to find Sakura the Sylveon User as part of Kagetora's quest, and the Steelix-shaped boat here in Seafolk Village seems to be where she resides. I know Linnea the Leafeon User has had some work done over the years, but Sakura takes that to a whole new level. She looks like an actual child!

32-20.png

Sylveon User Kira
Sylveon Lv54 (Light Screen/Moonblast/Last Resort/Psych Up, Ability: Cute Charm, IVs: All 15)

Whoops, my bad, she is an actual child. Sakura died last year; this is her granddaughter Kira. She's not quite as good at battling as her grandmother was, so I can get away with using a single X Attack on Phart and then having it 3HKO Sylveon without being hit by a single attack (it only used Moonblast once and Phart dodged it).

32-21.png

Sakura/Kira represented the last Trainer on Kagetora's list, so I head back to the Thrifty Megamart to report back to him. He's sad to hear how cruel time has been to everyone he once knew, and asks for one final battle before he can let go of the past.

32-22.png

Eevee User Kagetora
Eevee Lv57 (Baton Pass/Double-Edge/Last Resort/Trump Card, IVs: All 15)

I don't even bother with X items at all for this one - 2 Struggles, then a Max Potion, then 2 more Struggles for the win. Eevee spams Trump Card and throws out one vaguely decent Double-Edge just before fainting, but Phart did far more damage to itself with Struggle recoil.

Losing in this fashion allows Kagetora to finally move on with his life, and he gives me his Eevium Z as thanks. That's right. He had an Eevee, it was his only Pokémon, he'd spent 30+ years clinging to his title of Kagetora the Eevee User, his Eevee knew Last Resort, he had an Eevium Z, and in the final battle of his career, he didn't even bother using it!

32-23.png

Over on Poni Breaker Coast, a couple of HM makers from Kalos have come over to Alola to try selling their HMs as regular old TMs, and they want me to battle them for some sort of promotional video. Fair enough, I can do that. But they're fussy and don't want me using just Phart against them.

"Um, you do know that there's, like, a certain number of Pokémon you need for Multi Battles?"

Sorry, Ralts, but you know how it is.

32-24.png

Swimmer Girls Kylie and Ashlyn
Lumineon Lv48 (Surf, IVs: 15/15/15/30/15/30, EVs: 252 SpA / 252 Spe)
Lanturn Lv49 (Waterfall, Ability: Water Absorb, IVs: 15/30/15/15/15/30, EVs: 252 Atk / 252 Spe)

Cute that they only know their HM moves, and nice that they've got custom IVs/EVs, but why are their levels so low? All the other postgame Trainers use stuff that ranges from about 55 to 70, and then there's these two, whose levels are on par with the randos on Mount Lanakila (actually even lower than that). It's the same in SM too, but their levels were slightly lower there - 45 compared to the usual 55 - 65 range in their postgame. Makes me wonder if they were ever intended to be available to fight on the initial trip through Poni Island.

Anyway, let's see if Phart can defeat 2 Pokémon that are 40 levels lower than it. I use an X Sp. Def on it just in case, and Lumineon KOs Ralts with Surf while dealing 12 damage to Phart, followed by 28 damage from Lanturn's Waterfall. Then I pop on a couple of X Attacks and have it use Struggle, dealing well over 50% to Lumineon. Two flinches from Lanturn's Waterfalls slow it down, but Phart eventually hits Lumineon again and KOs it, letting it focus on Lanturn without having to worry about Lumineon's Surf activating its Water Absorb. Another pair of Waterfall flinches only put a brief pause on Phart 2HKOing Lanturn as well.

This must be a pretty awful promotional video if two of their signature HM moves failed to topple a 200-BST ball of flatulence. But the Hidden Maidens hand over their TMs for Waterfall and Surf regardless, so perhaps it wasn't so bad after all. Once Ralts is back in the PC, I can turn my attention to the Ruins of Hope in search of the final guardian deity.

32-25.png

Tapu Fini
Lv60 (Nature's Madness/Muddy Water/Aqua Ring/Hydro Pump, Ability: Misty Surge, IVs: Random; at least 3 of them are 31)

X Sp. Def, then an X Attack, then a Dire Hit, then a Roto Catch, then a Max Potion, then Phart attacks. Getting Tapu Fini low on HP is a pain when it has Aqua Ring active, the only consolation being that Hydro Pump and Muddy Water do very little to Phart. The best I can do is get it to just above red and hope the Timer Balls work as well as they have done previously.

32-26.png

32-27.png

In on the first ball again! That's a relief, because it was the only tapu that had a permanent source of HP recovery and I was worried the battle could go on for a while.

32-28.png

Bringing Nebby to the Altar of the Sunne during nighttime lets me access the reverse world, a sort of alternate-universe Alola where everything is the same except it's daytime during nighttime (and vice versa), the Altar of the Sunne is now the Altar of the Moone, and the Lake of the Moone likewise becomes the Lake of the Sunne.

...that's weird, isn't it? Literally everything about the reverse world is the same except for those three things. All of Elio's friends and family are still here and recognise him, all of his Pokémon are still there in the PC/Poké Pelago, and any changes he makes to this world will be carried over once he returns to his own world. So presumably there's got to be some alternate version of Elio from this world who's simultaneously running around in Elio's own world and perfectly mimicking his every action so everything stays the same across the two worlds.

Maybe I'm thinking about this too hard. I don't have any good reason to change night to day at the moment, so I'll just make a quick stop at the Lake of the Sunne to pick up another Cosmog before I head back to Elio's home world. Bringing Nebby out to the middle of the lake causes a Lunala to show up from some other dimension.

32-29.png

I'm struck by a strange feeling of déjà vu while the box legendaries complete their secret cosmic mating ritual, and not long afterwards, a new Cosmog pops into existence.

32-30.png

Totally unnecessary, yet sort of fun. Oh, and it also came with a Lunalium Z. I considered nicknaming it something like Phart II or Phart Jr. but decided against it - that's a big legacy to live up to, and it's perfectly fine if this Cosmog wants to become a Solgaleo or a Lunala when it grows up instead. Once Nebby and the new Cosmog are stashed away in the PC, I head back to the Altar of the Moone and then through the wormhole to the Altar of the Sunne from which I originally came.

The wormhole is still accessible at the Altar, and with it, the option to throw myself at the Ultra Warp Ride minigame. I still stand by my previous assessment that hunting down and defeating/catching all 23 legendary Pokémon and 5 Ultra Beasts that are available in Ultra Sun would be far too boring to include - even just searching for a Guzzlord would be miserable enough, if my experience completing the Pokédex back in 2017/18 is any indication. But it seems a waste to just completely ignore the feature... so I've decided that instead of looking for legendaries/UBs, I'm going to look for the other thing Ultra Warp Ride is good for: shiny Pokémon! The shiny rates on regular Pokémon found here are ridiculously high, reaching up to 36% at their most optimal, so I'm going to subject myself to the minigame until I find a shiny and catch it.

My first attempt sees me travel 3,728 light-years from this world and encounter an ordinary Barbaracle. Attempt two reaches 4,664 light years and a regular Grumpig. Then 4,365 leads to a Yanmega, 4,944 for a Lombre, and 4,913 for some legendary Pokémon whose identity I didn't even bother checking. This might have been a bad idea. 4,423 is another legendary, an embarrassing 3,324 nets me the non-shiny Swanna I deserve, 4,259 is an Audino, 3,538 is a Stunfisk, 3,589 is a Nuzleaf and we're into double digits! 4,263 is another legendary, accidentally hitting a wormhole at 2,601 gets me another Yanmega, 4,152 is yet another legendary, 4,948 is a second Audino, 5,322 is a Swellow, 3,995 is a Crustle, an accidental 2,718 is a Heliolisk, 3,406 is a Quagsire...

32-31.png

19th time lucky, as they say? A warp hole 4,924 light-years away blesses me with a shiny just as I was starting to give up on the idea. Phart wears it down with some Struggles and I catch it in a Premier Ball like a true professional.

I've done everything there is to do around Melemele, Akala and Ula'ula, plus everything on the parts of Poni that I've seen before, so that leaves just the parts I haven't seen yet. And I do recall Hau and the Ultra Recon Squad going off to contain some UBs in Poni Grove, so maybe I'll run into them.

32-32.png

Wicke gives me another Type: Null specimen that Gladion left for me before he went off to Kanto, plus a big pile of memories in case it ever evolves into Silvally. She's also got a couple of Big Malasadas for me and Hau, but it appears Gladion didn't leave us anything else, much to Hau's disappointment. Once I've put Type: Null in the PC - a slight step up in quality from its previous eternal cryogenic sleep - I head into Poni Grove to see what's going on.

32-33.png

Es ist ein Desaster! A group of Blacephalon are wreaking havoc on this little grove. You can't see any of them or any signs of damage in the overworld, but things must be serious because the music's changed. Zossie hands me 5 Beast Balls to add to the 3 I still have from Lusamine, and then I have to run around in the grass until one of them shows up. Starting to regret using a Max Repel before that tiny patch of grass on Ancient Poni Path now. The first encounter I get is just a random Buneary, but one of the clowny fellas shows up right afterwards.

32-34.png

Blacephalon
Aura: +2 Sp. Atk
Lv60 (Fire Blast/Shadow Ball/Trick/Mind Blown, Ability: Beast Boost, IVs: Random; at least 3 of them are 31)

Phart might be able to ignore Blacephalon's aura, but STAB super-effective Shadow Balls coming off a Sp. Atk stat of 151? Not so easily overlooked. And since it can nuke its own HP by using Mind Blown, it'd probably be best to just use a Roto Catch straight away and then chuck Beast Balls until either it's caught or Phart faints.

32-35.png

Straight in on the first Beast Ball, and just as well because Shadow Ball is a clean 2HKO on Phart. My self-imposed restrictions mean I have to leave and put Blacephalon in the PC before I can try hunting down another one, but that's a fairly quick process and I'm back in battle with another UB before too long. The second Blacephalon very helpfully removes half its HP with Mind Blown for me and is caught with a critical capture.

While I was busy with those encounters, Hau managed to find and capture a third Blacephalon on his own, and the Ultra Beasts have now all been contained! Excellent. There's no special feast to celebrate our successful mission, just some thank-yous from Dulse and Zossie, so it's back home for now. Then the screen fades to black and the Pokémon Center healing jingle plays. Fuuuck.

32-36.png

But I don't get a chance to burn through Splash's PP or even box the second Blacephalon before Sophocles shows up in a terrible panic. Horror of horrors, some strange people have taken control of Festival Plaza! This is unforgivable. If anyone's touched my 5-star dye shops there'll be hell to pay.

32-37.png

Phew, my facilities are still intact, it's just the aesthetics that've been rendered all ominous. Better head inside the castle and see what's up.

32-38.png

Team Rainbow Rocket (who are still calling themselves Team Rocket here for some reason) have made it so neither Elio nor Sophocles can use their own Pokémon to fight. Luckily the Battle Agency is located in this very room, so we can borrow some rental Pokémon for a quick fight with a grunt. Since I've got no choice but to use something that isn't Phart for this battle and the grunt in question isn't even listed in the game's data for regular Trainers (he's in the Battle Tree data instead), I'm not including him in my list of Trainers to defeat, but the battle remains mandatory whether I count it or not.

Once Sophocles reboots the Battle Agency's reception program, I get to pick out my rental Pokémon from the random options on offer:

Barbaracle Lv50 @ Razor Claw (Stone Edge/Razor Shell/Cross Chop/Shadow Claw, Ability: Sniper, Adamant nature, IVs: All 31, EVs: 252 Atk / 252 Def)
Venusaur Lv50 @ Salac Berry (Energy Ball/Sludge Bomb/Grass Knot/Protect, Ability: Overgrow, Timid nature, IVs: All 31, EVs: 252 SpA / 252 Spe)
Magnezone Lv50 @ Steelium Z (Metal Sound/Flash Cannon/Thunderbolt/Magnet Rise, Ability: Sturdy, Rash nature, IVs: All 31, EVs: 252 HP / 252 SpA)

My initial plan was to choose the most Phart-like of the available options (a Psychic-type, an Unaware user, something generally quite weak, etc.), but... none of them really fit that description. Barbaracle has a set that revolves around critical hits, and Phart is very good at getting crits when I use a Dire Hit on it, so I guess that's as good a reason as any. Barbaracle it is.

32-39.png

I'm not really paired up with them in the traditional Multi Battle sense - they each have their own Pokémon, but I control them as if they were part of my team. The Battle Agency is weird.

32-40.png

32-41.png

Team Rainbow Rocket Grunt
Arbok Lv50 @ Lum Berry (Poison Sting/Bite/Glare/Wrap, Ability: Shed Skin, Mild nature, IVs: All 31, EVs: 252 Def / 252 SpA)
Raticate Lv50 @ Oran Berry (Super Fang/Quick Attack/Bite/Focus Energy, Modest nature, IVs: All 31, EVs: 252 Def / 252 SpA)
Golbat Lv50 @ Rocky Helmet (Screech/Bite/Wing Attack/Toxic, Quiet nature, IVs: All 31, EVs: 252 SpA / 252 SpD)

Festival Fan and Festival Fan (Multi Battle partners... sort of?)
Tangrowth Lv50 @ Big Root (Leech Seed/Ingrain/Giga Drain/Toxic, Ability: Chlorophyll, Bold nature, IVs: All 31, EVs: 170 HP / 170 Def / 170 SpD)
Weezing Lv50 @ Black Sludge (Sludge Bomb/Thunder/Fire Blast/Shadow Ball, Ability: Levitate, Modest nature, IVs: All 31, EVs: 252 HP / 252 SpA)

I went to all the trouble of typing out all those sets, but it feels like it wasn't worth the effort - the Rainbow Rocket Grunt has been given a custom team of hand-crafted dogshit. I guess they didn't want players getting shafted by bad luck on their rental options, but surely it would've been better to just force the Battle Agency to generate 3 specific Pokémon sets for this fight? It'd be a lot harder to lose if you could just pick Choice Specs Latios or whoever and steamroll everything.

Anyway, time to take back Festival Plaza. Arbok deals 2 damage with Wrap before Barbaracle OHKOs it with a crit Razor Shell. Raticate manages 12 damage with Bite while Cross Chop misses, then uses Focus Energy and gets taken out when the second Cross Chop connects. Golbat uses Toxic, Stone Edge misses, then Barbaracle gets its revenge by dodging Screech and delivering a third OHKO. Easy!

Sophocles manages to boot out the Rainbow Rocket Grunts and restore all the Festival Plaza staff just before we get mobbed, and he also adds the castle's new creepy design to the list of themes for Festival Plaza. Finally, he gives me an Eject Button and we head back home.

32-42.png

32-43.png

The family Meowth turns on the TV to reveal that some shit appears to be going down at Aether Paradise. A press conference has been interrupted by the opening of an Ultra Wormhole (which I forgot to screenshot because I'm an idiot), and a mysterious man's legs appear, with his out-of-shot mouth claiming that Team Rainbow Rocket will find the Aether Foundation's technology to be very useful.

Should I go and help them? Probably. But I've still got half of Poni Island to explore, so I'm sure Lusamine can handle this strange situation in the meantime. What's the worst that could happen, they knock her out and try to mind-control her?
Trainers defeated: 344/427
 
:sm/alakazam: :sm/zygarde-10:
33-1.png

I didn't get a chance to properly explore Poni Grove last time thanks to the small alien invasion I was dealing with, but now that they've been contained, I can poke around and fight some people. There's a Max Potion off to the side and an X Sp. Atk up against the northern rocky wall bit, plus a Black Belt.

33-2.png

Black Belt Roy
Mienshao Lv56 (U-turn/Wide Guard/Bounce/High Jump Kick, Adamant nature, IVs: 15/31/15/15/15/15, EVs: 252 Atk)

U-turn takes Phart to 221/259 HP after an X Defense, then a Struggle deals about 40% in return after an X Attack. My hopes of just using one Max Potion and winning are dashed when Mienshao lands a critical hit, but that just means I have to use an extra one before Phart 3HKOs.

You wouldn't think I'd be almost done with Poni Grove after just one battle, but I am! It's not very big at all. There's just a Max Elixir and an Ace Trainer to go before the entrance to Poni Plains.

33-3.png

Ace Trainer Jackson
Huntail Lv56 (Crunch/Aqua Tail/Coil/Hydro Pump, Ability: Swift Swim, IVs: 15/30/30/15/15/15)
Alolan Marowak Lv56 (Fling/Stomping Tantrum/Endeavor/Flare Blitz, IVs: 15/30/15/15/15/30)
Braviary Lv57 (Air Slash/Crush Claw/Sky Drop/Whirlwind, IVs: 15/30/15/15/15/30)

Bleh, why does everything seem to know Crunch in Alola? Despite the type advantage, Huntail goes for Aqua Tail instead and does 22 damage to the +2-Defense Phart. A follow-up Crunch doesn't deal much more than that but does get a Defense drop, but rather than capitalise on this, Huntail uses Coil instead and misses a Hydro Pump, then misses another. These questionable choices lead to it getting a 3HKO once Phart is at +4 Attack.

The Struggle recoil leaves Phart at 18 HP when Marowak is sent out, not nearly enough to keep attacking, so I heal it up in time for Marowak to deal 15 damage with Stomping Tantrum. Struggle looks like it'll get another 3HKO here, but Endeavor slows down the process by leaving Phart too low on HP to attack a third time. Once Phart's healed again and Marowak is splatted, Braviary misses an Air Slash, hits with two Sky Drops for about 50 damage in total, and completes the set by also going down to a 3HKO.

It's great that I've won and all, but now I'm down to 5 X Attacks! That simply won't do when I've got 23 battles left on Poni Island. I fly back to Akala in search of a shop that sells X items, stock up on supplies, then fly back to the Ruins of Hope and run all the way back to Poni Grove. I thought entering Poni Plains for a brief moment would have been enough to unlock it as a fly location, but it seems I was mistaken.

33-4.png

Poni Plains is rather large and has the usual array of items and Trainers to work through, but it's also notable for having four separate types of "ambush" encounters dotted around that don't care for my Max Repels. There are Pokémon that'll jump out of the trees at me, Pokémon that'll jump out of the bushes at me, Pokémon that'll crash into me while I'm wading through the tall grass, and Pokémon that'll swoop down at me from the sky, so I shall have to tread carefully. No one wants to find a Scyther in their bush.

The nearby Ace Trainer won't fight me until I've beaten everyone else in the area, so I wander off to the right until I reach the sea and head down towards a different Ace Trainer, one who's less picky about her opponents.

33-5.png

Ace Trainer Angela
Gorebyss Lv58 (Psychic/Aqua Tail/Coil/Hydro Pump, Ability: Swift Swim, IVs: 15/15/30/30/15/15)
Lurantis Lv59 (Slash/Sweet Scent/Solar Blade/Sunny Day, Ability: Leaf Guard, IVs: 15/30/15/15/15/30)

I decide not to use any X Sp. Defs despite Gorebyss having Hydro Pump, figuring it might go for Coil or Aqua Tail instead and even an actual Hydro Pump would have a 30% chance of missing Phart. What I wasn't expecting was for it to use Psychic, on account of it being not very effective and Angela being an "Ace Trainer". The loss of 18 HP is easily shrugged off and Phart 3HKOs Gorebyss at +4 Attack while it uses everything other than Hydro Pump.

33-6.png

The recoil from those 3 Struggles has started to add up by the time Lurantis comes out. I have to heal Phart while it uses Sunny Day, but 31 damage from its Solar Blade is not enough to stop it going down to a 3HKO as well. The bit of land behind Angela is a dead-end containing a Carbos, which I'll be taking before I turn around. I have to dodge some mysterious Pokémon that's running in circles around a tree to pick up a PP Max, then run all the way across the plains, up into a rocky section, and into an equally mysterious cave.

33-7.png

The Plains Grotto contains this one pedestal and literally nothing else. Not even any wild Pokémon! That was a quick trip.

Back outside, I find a Power Anklet in the rocky area along with a Police Officer. There can't be much for him to do here, out in a field that contains maybe 10 people at most on the least-populated island of Alola, so I'm not surprised he wants a battle.

33-8.png

Police Officer Sheriff
Stoutland Lv58 (Roar/Retaliate/Reversal/Last Resort, Ability: Intimidate, IVs: All 25)

Just the usual level-up moveset for Stoutland, who learns Crunch far too early to have access to it in this fight, but it's balanced somewhat by it having Intimidate and me forgetting to heal Phart before the battle. Still, 160/262 HP isn't a terrible starting position, and Phart won't be taking very much damage if the 2 HP it lost from Stoutland's Reversal at +2 Defense is any indication. I use a couple of X Attacks, heal it to full, and Stoutland faints to 4 Struggles. But I've barely left that battle before I run straight into a Hiker's line of sight and trigger another one.

33-9.png

Hiker Ryan
Aerodactyl Lv57 (Crunch/Take Down/Sky Drop/Iron Head, Ability: Pressure, IVs: All 15)

Oh no, not Pressure! Now Phart will lose its PP twice as fast and be forced to... never mind. With help from an X Defense and X Attack, Phart 3HKOs Aerodactyl while it cycles through all of its moves except the Dark-type one.

Also, Phart dodged a Sky Drop. It was taken up into the air on the first turn like normal, but then somehow managed to dodge the act of being dropped out of the sky???

Moving on, there's a Comet Shard in the rocky section that I missed earlier on due to the one-way ledges leading me down a different path. Once I've picked that up, I dodge a couple more Pokémon waiting to ambush me and head towards the Poni Coast entrance, finding an X Defense lying around not too far from a Veteran.

33-10.png

Veteran Leon
Skarmory Lv59 (Slash/Night Slash/Sky Drop, Ability: Sturdy, Adamant nature, IVs: 30/30/15/15/15/30, EVs: 252 Atk / 252 Spe)
Araquanid Lv59 (Liquidation/Lunge/Crunch, Ability: Water Bubble, Adamant nature, IVs: 30/30/15/15/15/30, EVs: 252 Atk / 252 Spe)
Electivire Lv59 (Fire Punch/Thunder Punch/Brick Break, Ability: Motor Drive, Adamant nature, IVs: 30/30/15/15/15/30, EVs: 252 Atk / 252 Spe)

Ouch. Might have to treat this one like a proper boss fight in terms of X item usage. In this case, that means using 3 X Defenses while Skarmory misses one Night Slash, hits for 22 damage with a second and then misses a third. Then it's 3 X Attacks and a Dire Hit, followed by a Max Potion as one of the Night Slashes got a critical hit and took a good 33% off Phart's HP. All that's left now is to boost Phart's Speed so it can attack before everyone, and as it turns out, a single X Speed puts it exactly 1 point faster than Electivire. How very convenient.

The first Struggle isn't quite strong enough for a 2HKO. Fair enough, Skarmory is known for being a little bit bulky, but it means I have to use a Moomoo Milk on Phart before it Struggles again, unless I want to risk it fainting to another crit Night Slash. Once that's done, the next Struggle hits Skarmory and knocks it right out! Must've been some funny damage rolls. Araquanid is next up, so I use a Guard Spec. on Phart to protect it from Lunge's guaranteed Attack drops. The neutered Lunge still deals 26 damage, but it doesn't prevent Araquanid from being two-shotted in return. Finally, Electivire deals an 18 damage with its Thunder Punch and just barely avoids the embarrassment of a Cosmog-induced OHKO.

33-11.png

Looker and Anabel aren't actually blocking off the path to Poni Coast - they only prevent you from going past them if you haven't finished the Blacephalon/Stakataka-catching mission in Poni Grove - but I've still got other things to do before I head that way. I'll pretend the area is cordoned off for now and battle that Ace Trainer from earlier.

33-12.png

Ace Trainer Cole
Druddigon Lv58 (Dragon Claw/Night Slash/Slash, Ability: Rough Skin, Modest nature, IVs: 30/30/20/20/20/30, EVs: 252 Atk / 252 Spe)
Dragalge Lv58 (Dragon Pulse/Hydro Pump/Sludge Bomb, Ability: Poison Point, Modest nature, IVs: 30/20/20/30/20/30, EVs: 252 Spe)
Kommo-o Lv59 @ Dragonium Z (Dragon Claw/Close Combat/Dragon Dance, Ability: Soundproof, Modest nature, IVs: 30/20/20/30/30/20, EVs: 252 SpA / 252 SpD)

What's going on here? 3 Modest natures, but only Dragalge actually uses special attacks, and it's only got one stat's worth of EVs. And Kommo-o, the big scary Z-Move user, doesn't have any Attack EVs at all! I don't think there's much need to nerf Trainers that can't even be accessed until the postgame, especially not the "beat everyone else first if you want to challenge me" ones, so it's a bit confusing/disappointing to see this sort of stuff.

Having said all of that, Druddigon can still do some damage with its Night Slashes, taking off 32 HP even at +2 Defense. Phart decides that's too much for it and dodges 3 of them while I'm setting up its X items, then delivers a 2HKO to Druddigon at the cost of 75% of its HP (having to take Struggle recoil and Rough Skin damage is, well, rough). Dragalge replaces it and immediately scores a critical hit with Sludge Bomb, bringing Phart down to 178/262 HP right after I heal it. The next hit deals 52 damage after I've healed it again - if that seems like a lot, it's because I didn't use any X Sp. Defs at all. Phart knocks Dragalge into the red with Struggle, tanks a Sludge Bomb without getting poisoned, and then Struggles again to take it out, surviving with 29 HP after the recoil damage.

33-13.png

Oops! Sludge Bomb might not have poisoned Phart, but Poison Point did, and no amount of affection lets it survive that.

On the second attempt, I throw the same X items at Phart as before but add an X Sp. Def as well, putting it at +6 Attack, +6 Defense, +2 Sp. Def and +2 Speed (and don't forget the Dire Hit). Druddigon is two-shotted again, while Dragalge misses its first Sludge Bomb, activates Poison Point after the first Struggle only for Phart to cure itself on the same turn, and then faints to a second Struggle without Phart fainting this time. This leaves only Kommo-o - it goes for Devastating Drake as soon as it enters the battle, its 160-power nuke wiping out 18 HP in total. It manages another 10 damage from a Dragon Claw before going down to 2 more Struggles.

I think that loss was more my fault for forgetting about Poison Point rather than a reflection of the opponent's strength, because like I said, his Pokémon sets were very odd. I'm rewarded (technically) with a Quash TM for my efforts, and can now move on to a battle with a familiar face.

33-14.png

Sina and Dexio catch me trying to enter Poni Meadow and start talking about something called Mega Evolution before Dexio decides it'd be easier to just show it to me in battle. If Phart can defeat an Ultra Necrozma, surely it can handle some random Pokémon with an extra 100 BST slapped on it.

33-15.png

Pokémon Trainer Dexio
Espeon Lv60 (Psychic/Shadow Ball/Dazzling Gleam/Power Swap, Ability: Synchronize, IVs: All 30, EVs: 252 SpA / 252 Spe)
Alolan Raichu Lv60 (Psychic/Thunderbolt/Light Screen/Reflect, Ability: Surge Surfer, IVs: All 30, EVs: 252 SpA / 252 Spe)
Slowking Lv60 (Psychic/Power Gem/Ice Beam/Flamethrower, Ability: Own Tempo, IVs: All 30, EVs: 252 HP / 252 SpA)
Metagross Lv60 (Meteor Mash/Zen Headbutt/Bullet Punch/Brick Break, Ability: Clear Body, IVs: All 30, EVs: 252 Atk / 252 Def)
Alakazam Lv60 @ Alakazite (Psychic/Psyshock/Focus Blast/Energy Ball, Ability: Synchronize, IVs: All 30, EVs: 252 SpA / 252 Spe)

Nice that there's only one Shadow Ball user considering how many Psychic-types can learn the move, but of course it had to be on Dexio's lead. And Espeon has Power Swap as well, so Phart may find its Attack boosts mysteriously vanishing during setup.

I start with an X Sp. Def, and Espeon's Shadow Ball... gets ignored in favour of a completely useless Power Swap. Then another one. And another! Only when Phart is at +6 Sp. Def does it finally use Shadow Ball, by which point it can only reach 26 damage, so I just carry on boosting Phart's other stats apart from Attack. After a couple more X items, Espeon manages to land a critical hit with another Shadow Ball, but Phart can afford to lose that 144 HP as I've got plenty of Max Potions on standby.

33-16.png

33-17.png

Power Swap only has 10 PP (something I didn't know until now because it's quite a niche move), so Espeon's insistence on spamming it meant that by the time a Power Swap actually would've helped it, it couldn't even use the move any more! Phart takes it out with a rare OHKO, then does the same thing to Alolan Raichu before it can even attack.

33-18.png

By the time Slowking comes out, Phart has suffered two bouts of recoil damage and would like to be healed. Slowking's Ice Beam does 11 damage and so does its Flamethrower, but it does manage to tank a single Struggle unlike its teammates. Once it faints, Metagross makes a slightly more impressive attempt by dealing 18 damage with its Meteor Mashes and taking 3 Struggles to defeat, though the Attack boost it gets from a Meteor Mash doesn't help against an Unaware user. That leaves only Alakazam, and knowing how physically frail it is, this should be another easy OHKO.

33-19.png

33-20.png

Oh, that's not good.

I was healing Phart on the Mega-ing turn and it dodged Alakazam's first Energy Ball, so neither side's actually taken any damage yet, but Trace makes things far less simple. Mega Alakazam is now able to ignore all of Phart's boosts except for its Speed and critical-hit rate, meaning my Epic Cosmog Sweep is not as inevitable as it was 30 seconds ago. I guess I stall for a turn and see how much damage Energy Ball deals? If it's an OHKO then I'm probably screwed anyway, so it shouldn't hurt to check.

33-21.png

Okay, that's not as bad as I feared. Phart's Struggle can only manage slightly more than 20% back thanks to its Attack boosts being neutralised, but since Alakazam doesn't have any better options than Energy Ball, it's knocked out in the end and we emerge victorious.

Not often I see Phart brought down to earth like that... but at least Mega Alakazam wasn't the one carrying Shadow Ball. Dexio hands me a Key Stone and an Alakazite in case I ever want to play around with Mega Evolution (I don't), then he leaves along with Sina. Once they've cleared off, I briefly enter Poni Meadow for the sole purpose of unlocking Poni Plains as a location I can fly to, then make a quick trip to Mount Lanakila.

33-22.png

Now that I've battled all of Alola's Trainers who wouldn't battle me until I'd battled all the other Trainers in their respective areas, I can now battle another Trainer who wouldn't battle me until I'd battled all of them.

33-23.png

Veteran Aristo
Carbink Lv65 @ Light Clay (Stealth Rock/Light Screen/Reflect, Ability: Clear Body, Calm nature, IVs: All 30, EVs: 252 Def / 252 SpD)
Torkoal Lv65 @ Heat Rock (Fire Blast/Solar Beam, Ability: Drought, Calm nature, IVs: All 30, EVs: 252 Def / 252 SpD)
Pelipper Lv65 @ Damp Rock (Hydro Pump/Hurricane, Ability: Drizzle, Modest nature, IVs: All 30, EVs: 252 SpA / 252 Spe)
Alolan Ninetales Lv65 @ Icy Rock (Blizzard/Dazzling Gleam, Ability: Snow Warning, Modest nature, IVs: All 30, EVs: 252 SpA / 252 Spe)
Gigalith Lv65 @ Smooth Rock (Stone Edge/Earthquake, Ability: Sand Stream, Adamant nature, IVs: All 30, EVs: 252 Atk / 252 Def)

Sort of like a less-bad version of Raihan's Champion Cup team overall. Four weather setters that have moves (or a type in Gigalith's case) to take advantage of that weather, plus actual non-zero EVs, which are very rare in Galar unless you happen to be Piers's Obstagoon. The lead Carbink is questionable though - rocks are nice, Light Clay screens are nice, but having no damaging attacks at all (not even Explosion to force it off the field) is a bit weird.

This becomes particularly apparent when Carbink faces off against Phart. As I begin by putting X Defenses and X Sp. Defs onto it, Carbink sets up Reflect, sets up Light Screen... and then has to use Light Screen again because it's already out of things to do. Stealth Rock is useless against a team of one, and to make matters worse, Phart's guaranteed critical hits (courtesy of a Dire Hit) will cause it to bypass Reflect, resulting in Carbink being dead weight against a goddamn Cosmog! Aristo's AI doesn't even seem to notice this, because he just keeps Carbink spamming its useless moves instead of switching out like I expected he would. Once Phart's fully set up against this dipshit, Struggle easily 3HKOs Carbink, and I even get the chance to heal it back to full after the second Struggle so it can carry 75% of its HP over to the next opponent.

This next opponent turns out to be Torkoal. The harsh sunlight charges up its Solar Beam instantly, but does nothing to boost its damage beyond 12 HP, so it doesn't achieve much before fainting to 4 Struggles. Pelipper manages a more respectable 41 damage with Hydro Pump but falls to only 2 Struggles. Then Ninetales starts with Dazzling Gleam instead of its perfect-accuracy Blizzard and deals 16 damage (exactly the same as the end-of-turn hail damage), but chooses Blizzard on the next turn and manages to freeze Phart. A quick Full Restore leads to it getting a 2HKO like Pelipper, and now there's just Gigalith left. Earthquake deals 18 damage and the sandstorm chip does 16, then a Stone Edge manages 30 HP while Phart deals around 30% with Struggle. The threat of a Stone Edge crit combined with base 135 Attack means it's probably the most dangerous of Phart's opponents, but it goes down in 4 hits regardless. The "critical" never happen.

For defeating Aristo, I receive the coveted Life Orb! It's normally a welcome addition to my bag, but I think Phart has enough issues with recoil damage already. Time to head back to Poni Island.

33-24.png

Poni Meadow is mostly just somewhere I have to walk through on the way to Resolution Cave, as there's nothing relevant here. The items aren't especially useful - the Max Potion I pick up first is the best of the lot, as 2 Purple Nectars, a Power Lens, an Overheat TM, a Power Herb and a Max Revive are all wasted on a Cosmog. As for battles, there's just one: it's Meredith, the actress that I've bumped into a few times throughout my misadventures. She wants to battle me in order to try imitating yet another Oricorio style in her acting.

33-25.png

Actor Meredith
Sensu Style Oricorio Lv57 (Revelation Dance/Air Slash/Teeter Dance/Roost, Ability: Dancer, IVs: All 20)

Theoretically the hardest battle against her yet, just by virtue of it being a Ghost-type with STAB and recovery. But it goes for Air Slash on its first turn, dealing 18 damage after an X Sp. Def, then confuses Phart with Teeter Dance as I use a second one. Meredith then proceeds to have her Oricorio use Teeter Dance 3 times in a row against a Pokémon that's already confused! Starting to think she should stick to acting. Phart has reached +4 Attack in the meantime, so I have it launch a couple of Struggles, but they don't quite reach a 2HKO and Oricorio Roosts off the damage. One final X Attack ensures that the next 2 Struggles do it in.

Once Phart's dealt with the ghastly bird, she recalls her Oricorio and gives me a Swords Dance TM. (I think I preferred it when I could just buy it in Malie City for $10,000, but that's Ultra Changes for you.) Then Meredith leaves Poni Meadow to continue her acting, never to be seen again in this playthrough.

33-26.png

A trip to Resolution Cave is in order, not just to rough up some more unsuspecting Trainers but also to track down yet another legendary Pokémon. Mudsdale lugs me across the rocky terrain towards a Veteran to get me started.

33-27.png

Veteran Leticia
Ribombee Lv61 (Dazzling Gleam/Bug Buzz, Ability: Shield Dust, Modest nature, IVs: 15/15/15/30/30/30, EVs: 252 SpA / 252 Spe)
Bewear Lv61 (Hammer Arm/Double-Edge, Ability: Fluffy, Adamant nature, IVs: 30/30/30/15/15/15, EVs: 252 Atk / 252 Def)

Ribombee's fully-invested Bug Buzz is as strong as I feared, knocking Phart straight down to 190/264 HP even after an X Sp. Def. That's not very nice. But with no Attack boosts currently on Phart, there's no option but for it to stand there and take them. 2 more X Sp. Defs bring the damage down to around 36 HP per hit, but given how much damage a critical hit might deal, I decide to spam Moomoo Milks to stall out the remaining Bug Buzz PP before trying anything else. This leaves Ribombee with only Dazzling Gleams that deal 16 damage, and I boost Phart up to +4 Attack to let it 2HKO with Struggle.

33-28.png

I didn't use any X Defenses before Bewear was sent out because I thought it might be worth letting it damage itself a bit with Double-Edge recoil (Struggle won't hit very hard thanks to Fluffy). Double-Edge deals 106 damage after healing Phart to full again, though the recoil is not as spectacular as I'd hoped... maybe a 7HKO? But the damage dealt to Phart actually works quite nicely by being so close to 100, so I spam more Moomoo Milks for a few turns, letting Bewear knock itself out with 7 Double-Edges' worth of recoil. I must be better at reading HP bars than I thought.

Nothing past Leticia but a dead-end, although a discarded HP Up and Power Weight liven things up a bit. I have to let Mudsdale lead me deeper into the cave across more jagged rocks before I come across another human.

33-29.png

Backpacker Maria
Manectric Lv59 (Roar/Wild Charge/Charge/Thunder, IVs: All 15)

Despite me forgetting to heal Phart before this fight, I think it'll be fine. Manectric connects with Thunder while I'm using a Max Potion, dealing 57 damage and paralysing Phart, which obviously stings a bit but suggests that even a crit Charge-boosted Thunder won't be lethal. Phart has no issue dodging 3 Thunders while I set up some X items and cure its injuries, then takes out Manectric in 3 hits. There are a couple of dead-end paths past Maria that lead to equally useless items: a Terrain Extender and an Earthquake TM, the latter of which feels weird to describe as useless. Just a Hiker to go before I'm done with this section of the cave.

33-30.png

Hiker Travis
Alolan Dugtrio Lv59 (Dig/Iron Head/Earthquake/Fissure, Ability: Sand Veil, IVs: All 15)
Mudsdale Lv59 (Heavy Slam/Counter/Earthquake/Mega Kick, Ability: Stamina, IVs: All 15)

Counter on Mudsdale could be a problem. It's far too bulky to go down in one hit and Counter will KO Phart (after Struggle recoil) if it deals 100 or more damage in one hit. Mudsdale has 195 HP, so it's not unrealistic to think a Struggle at +4 or +6 Attack would do just over 50% to it.

Luckily its teammate has worse physical bulk than a Togepi, so I can just use 3 X Defenses against Dugtrio and render its attacks useless - Dig only reaches 10 damage - then have Phart wear it down Struggle, achieving a 4HKO without any Attack boosts whatsoever. Mudsdale's attacks are about as strong as Dugtrio's were, so it's just a case of chipping away its HP... and it really is a case of chipping, because Phart's Struggle only takes off 19 HP (as measured by Counter's damage), not even a 10HKO! But at least there's no risk of Counter obliterating Phart, and it doesn't need to worry about Stamina either thanks to Unaware, so it very slowly whittles down Mudsdale's HP and knocks it out.

Past Travis is an entrance to another section of the cave, one that ever-so-slightly resembles the area of Kalos's Terminus Cave where Zygarde can be found, if you squint hard enough. The resemblance is made even more apparent by the actual live Zygarde in the middle of this cave.

33-31.png

33-32.png

Zygarde 50% Forme
Lv60 (Land's Wrath/Glare/Safeguard/Dragon Breath, Ability: Aura Break, IVs: Random; at least 3 of them are 31)

Zygarde's usual level-up moveset at Lv. 60 would be Haze/Crunch/Earthquake/Camouflage, so I think Phart prefers the custom one it's been given. Land's Wrath deals 24 damage at +2 Defense, Struggle chips off small bits of Zygarde's HP like I'd want when trying to catch a legendary, and perhaps most crucially, I don't have to worry about Nature's Madness for once! Once it's down to red HP, I use a Roto Catch and make a start on lobbing Timer Balls.

33-33.png

Took 5 goes, making it just slightly more of a nuisance than Tapu Bulu, but it could've been worse. I wonder if Zygarde noticed I was wearing a shiny Zygarde cap while we were battling?

There's just a few more items to pick up around this area before I'm finished with Resolution Cave entirely: an Adrenaline Orb, a Big Nugget, a Toxic Orb and a Light Ball. Then I Escape Rope myself out of the cave and fly over to the Aether Base on Route 16.

33-34.png

These two again? And how did they find out I'd caught Zygarde? That was like 5 minutes ago at most.

Apparently they've caught their own Zygarde as well, so maybe it told them about mine. Dexio offers to give me that shiny new Zygarde so I can try combining it with my own, but only if I can beat him. Again. Maybe he'll use a different team this time?

33-35.png

Pokémon Trainer Dexio
Espeon Lv63 (Psychic/Shadow Ball/Dazzling Gleam/Power Swap, Ability: Synchronize, IVs: All 30, EVs: 252 SpA / 252 Spe)
Alolan Raichu Lv63 (Psychic/Thunderbolt/Light Screen/Reflect, Ability: Surge Surfer, IVs: All 30, EVs: 252 SpA / 252 Spe)
Slowking Lv63 (Psychic/Power Gem/Ice Beam/Flamethrower, Ability: Own Tempo, IVs: All 30, EVs: 252 HP / 252 SpA)
Metagross Lv63 (Meteor Mash/Zen Headbutt/Bullet Punch/Brick Break, Ability: Clear Body, IVs: All 30, EVs: 252 Atk / 252 Def)
Alakazam Lv63 (Psychic/Psyshock/Focus Blast/Energy Ball, Ability: Synchronize, IVs: All 30, EVs: 252 SpA / 252 Spe)
Zygarde 10% Forme Lv63 (Crunch/Earthquake/Camouflage/Dragon Pulse, Ability: Aura Break, IVs: All 30, EVs: 252 Atk / 252 SpA)

Oh. Well, they're all 3 levels higher at least and he's brought along the aforementioned Zygarde as well, but it would appear the Alakazite he gave me earlier was the only one he had.

Since his team's basically the same as last time, the battle proceeds in the same way as before. Espeon completely fails to grasp the mechanics of Power Swap and gives Phart plenty of free turns for X items, then goes down in 2 hits. Things look interesting for a moment when Dexio's Zygarde is sent out, but 22 damage from Crunch is not going to cut it, nor is using Camouflage just before it faints to a second Struggle from Phart. Raichu goes down in one hit, Slowking takes two, Metagross manages a decent showing again by taking 3 Struggles, and Alakazam can't even stomach a single hit without its precious Mega Stone.

33-36.png

He's not the most competent of Trainers, but Dexio does keep his word and hands me his Zygarde afterwards. Then Sina immediately launches into an explanation of the Reassembly Unit and how to build my very own legendary. It all sounds very complicated and requires the use of something called a Zygarde Cube, but surprise surprise, Sina presents one to me before the two of them take their leave.

33-37.png

I've not played Z-A yet, but as I understand it, Zygarde will eventually return to the Kalos region, fuse together into a giant robot, and nuke the Eiffel Tower by turning half its body into the fattest blunt you've ever seen. So I'll have to keep them safe and sound in the meantime. They can busy themselves with a bit of gardening in Poké Pelago.

33-38.png

33-39.png

something something "aura farming"

33-40.png

Aaand I'm back on Poni Island again. Just like the last time we met, Looker has a fairly useless item to give me in the form of a Red Card. Anabel introduces herself, says she's going to the Battle Tree, then leaves for the Battle Tree. And that's her entire contribution to the plot! Quite a step down from taking part in all the Ultra Beast missions in SM.

Her departure (and Looker begrudgingly trailing after her) leaves me free to wade through Poni Coast and Poni Gauntlet. They'll mostly be the usual stuff in terms of random Trainers, but there are a few Double Battles as well, the last of which will see poor Phart fending off another full team of 6 Pokémon. Then it gets to celebrate that victory by going up against two Champions from the Kanto region. And then it gets to topple an interdimensional criminal organisation all by itself. Hell of a schedule.
Trainers defeated: 358/427
 
I don't think people give the poni island post game enough credit. Sure it's nothing incredible but it's a nice chunk of post game stuff to wander around in. Has some nice flavor to the island.

Z-A posits that Zygarde was likely in Alola to, at the very least, recover from the blast (that it took, off screen) during XY's climax.
 
Back
Top