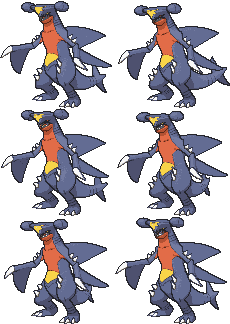
Happy to report a streak of 105 wins in Super Doubles with Mega Ampharos!

As part of my effort to get leaderboard eligible Lansat berry streaks of Megas that aren't on the leaderboard yet, I brainstormed a bunch of ideas with various megas. One of the more obvious Megas to teambuild for was Mega Ampharos - the 45 base speed makes it ideal for a Trick Room team. So after researching the many TR teams on the leaderboard, I made a team and started grinding...only to find that Mega Ampharos IS on the leaderboard, just hidden behind the randomizer submissions. Still, if this is eligible, then Ampharos would be directly seen on the leaderboard, which is what I'm hoping for. Everyone deserves to be there and be seen.



I've got several teams cooking in the Showdown Teambuilder with the rest of the Megas now, and I hope to see all of them on the Leaderboard one day :)
As part of my effort to get leaderboard eligible Lansat berry streaks of Megas that aren't on the leaderboard yet, I brainstormed a bunch of ideas with various megas. One of the more obvious Megas to teambuild for was Mega Ampharos - the 45 base speed makes it ideal for a Trick Room team. So after researching the many TR teams on the leaderboard, I made a team and started grinding...only to find that Mega Ampharos IS on the leaderboard, just hidden behind the randomizer submissions. Still, if this is eligible, then Ampharos would be directly seen on the leaderboard, which is what I'm hoping for. Everyone deserves to be there and be seen.
The Team
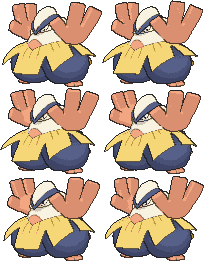
Since I had no prior experience with building and piloting Trick Room, I didn't know what setter would be best for Mega Ampharos. So rather than agonize over a good setter and backline for M-Ampharos, I decided to use the Oranguru/Hariyama shell so featured on the leaderboard to simplify matters. It was obvious that it was a proven strategy, and simplified teambuilding since I'd only need to pick 1 more teammate to cover Ampharos specifically.
Winston (Oranguru) @ Lum Berry
Ability: Inner Focus
EVs: 212 HP / 164 Def / 132 SpD
Relaxed Nature
IVs: 2 Spe
- Trick Room
- Instruct
- Psychic
- Protect
Physically defensive set as seen on other teams. Oranguru's abilities as a TR setter have been expounded upon by players far more knowledgeable about Trick Room than I am, so I don't have much to say. It was very reliable with the combination of invested bulk, Inner Focus and Lum Berry to set up Trick Room. I must say, Instruct spam is really fun. Seeing teams crack open with multiple Close Combats a turn was very enjoyable. I liked the fact that it was the slowest to move in Trick Room, so it would always Instruct second and allow for its partner to choose its move properly. For example, you can't Instruct Fake Out (as I found in the middle of battle and lost for it), so I really can't have that be the last move chosen.
Ferrus Manus (Hariyama) @ Flame Orb
Ability: Guts
EVs: 32 HP / 252 Atk / 108 Def / 116 SpD
Brave Nature
IVs: 1 Spe
- Fake Out
- Knock Off
- Heavy Slam
- Close Combat
Hariyama, as part of the Oranguru/Hariyama TR Shell was the main damage dealer/TR support of this run, with its spread also lifted from other teams that used this pair. Many, many battles were decided by Hariyama demolishing teams with Close Combat with Instruct support. One of my prior attempts at this team actually didn't have the correct speed IV since I didn't think it would be that relevant - but min-speed Hariyama has a speed stat of 49, which underspeeds sets like Steelix4 and Slowtwins3 at 50, which meant that I had to rebreed for min speed after finding out. Still, it struggled to deal with -Speed base 30s and below, such as Shiinotic34, Slowking4 and Slowbro4 (45 or below), which is where my backline steps in.
Valor (Ampharos-Mega) @ Ampharosite
Ability: Static
EVs: 248 HP / 252 SpA / 8 SpD
Quiet Nature
IVs: 0 Atk / 5 Spe
- Thunderbolt
- Dragon Pulse
- Focus Blast
- Power Gem
The centerpiece Mega of this run, Mega Ampharos was built to hit hard under Trick Room. While not outstanding in its role, it was slower than Hariyama and could check other 45 speed sets like the Slowtwins. It did hit hard, especially with Instruct support, was fairly bulky due to the HP investment, and the 4 attacks gave solid coverage overall. While I avoided using Focus Blast wherever possible, with Instruct, the odds of missing were much lower when Focus Blast was necessary. Overall, I had a good time using it, even if it wasn't the star of the team.
Crowe (Dhelmise) @ Grassium Z
Ability: Steelworker
EVs: 252 HP / 246 Atk / 12 Def
Brave Nature
IVs: 0 Spe
- Anchor Shot
- Power Whip
- Shadow Claw
- Protect
To round out the team, we have a pick I'm rather proud of, Dhelmise. In the original iteration of this team, my idea for the last team slot was an anti-Ground check to clear Ground types for Mega Ampharos. I also wanted a Z-move nuke to blast threats outright and pierce through evasion shenanigans. My first choice was Tapu Bulu, reasoning that Grassy Terrain would be an excellent way to counter Earthquake and would power up the grass moves I wanted.
Unfortunately, after about a 100 battles and 3 failed runs in the mid-30s, I realized that Z-Bulu was pretty terrible as a Trick Room mon. It was too fast, and the lack of spammable coverage hindered me greatly (Wood Hammer having recoil and Superpower lowering stats). I struggled against Fairy types greatly, since my only coverage option against them was Hariyama's Heavy Slam, something that wouldn't be available by the time the backline hit the field (Mega Altaria was a huge pain because of this). Also, Hariyama is outsped by Shiinotic under Trick Room, so even with proper play Shiinotic would counter Hariyama perfectly. Hariyama also was vulnerable to Psychic types during the initial TR setup - while TR would go off, Bulu and Amphy are not equipped to deal with Psychic types. I also still wanted an anti-Ground check with a Z-move nuke.
After a lot of research, I realized that the best pick in this case was Dhelmise. Grass type that resists Ground? Check. Z-Power Whip for a nuke? Check (which also got around Power Whip's abysmal accuracy). Steelworker to provide Steel STAB to check Fairy types with? Check. Ghost type to revenge Psychic types with? Check. And as a bonus, its also the slowest Pokemon on the team at 40, which meant it was both the fastest under Trick Room and perfectly revenged Shiinotic and nuked the Slowtwins. Its EV spread was taken from another team, and tiny trade of attack for bulk came through in a rather dramatic way. Overall, I'm really pleased with my experience using Dhelmise in this team - I believe it fit the team perfectly and proved its worth quite quickly (got upto 74 on its 1st run before rebreeding Hariyama from 54 to 49 speed).
Winston (Oranguru) @ Lum Berry
Ability: Inner Focus
EVs: 212 HP / 164 Def / 132 SpD
Relaxed Nature
IVs: 2 Spe
- Trick Room
- Instruct
- Psychic
- Protect
Physically defensive set as seen on other teams. Oranguru's abilities as a TR setter have been expounded upon by players far more knowledgeable about Trick Room than I am, so I don't have much to say. It was very reliable with the combination of invested bulk, Inner Focus and Lum Berry to set up Trick Room. I must say, Instruct spam is really fun. Seeing teams crack open with multiple Close Combats a turn was very enjoyable. I liked the fact that it was the slowest to move in Trick Room, so it would always Instruct second and allow for its partner to choose its move properly. For example, you can't Instruct Fake Out (as I found in the middle of battle and lost for it), so I really can't have that be the last move chosen.
Ferrus Manus (Hariyama) @ Flame Orb
Ability: Guts
EVs: 32 HP / 252 Atk / 108 Def / 116 SpD
Brave Nature
IVs: 1 Spe
- Fake Out
- Knock Off
- Heavy Slam
- Close Combat
Hariyama, as part of the Oranguru/Hariyama TR Shell was the main damage dealer/TR support of this run, with its spread also lifted from other teams that used this pair. Many, many battles were decided by Hariyama demolishing teams with Close Combat with Instruct support. One of my prior attempts at this team actually didn't have the correct speed IV since I didn't think it would be that relevant - but min-speed Hariyama has a speed stat of 49, which underspeeds sets like Steelix4 and Slowtwins3 at 50, which meant that I had to rebreed for min speed after finding out. Still, it struggled to deal with -Speed base 30s and below, such as Shiinotic34, Slowking4 and Slowbro4 (45 or below), which is where my backline steps in.
Valor (Ampharos-Mega) @ Ampharosite
Ability: Static
EVs: 248 HP / 252 SpA / 8 SpD
Quiet Nature
IVs: 0 Atk / 5 Spe
- Thunderbolt
- Dragon Pulse
- Focus Blast
- Power Gem
The centerpiece Mega of this run, Mega Ampharos was built to hit hard under Trick Room. While not outstanding in its role, it was slower than Hariyama and could check other 45 speed sets like the Slowtwins. It did hit hard, especially with Instruct support, was fairly bulky due to the HP investment, and the 4 attacks gave solid coverage overall. While I avoided using Focus Blast wherever possible, with Instruct, the odds of missing were much lower when Focus Blast was necessary. Overall, I had a good time using it, even if it wasn't the star of the team.
Crowe (Dhelmise) @ Grassium Z
Ability: Steelworker
EVs: 252 HP / 246 Atk / 12 Def
Brave Nature
IVs: 0 Spe
- Anchor Shot
- Power Whip
- Shadow Claw
- Protect
To round out the team, we have a pick I'm rather proud of, Dhelmise. In the original iteration of this team, my idea for the last team slot was an anti-Ground check to clear Ground types for Mega Ampharos. I also wanted a Z-move nuke to blast threats outright and pierce through evasion shenanigans. My first choice was Tapu Bulu, reasoning that Grassy Terrain would be an excellent way to counter Earthquake and would power up the grass moves I wanted.
Unfortunately, after about a 100 battles and 3 failed runs in the mid-30s, I realized that Z-Bulu was pretty terrible as a Trick Room mon. It was too fast, and the lack of spammable coverage hindered me greatly (Wood Hammer having recoil and Superpower lowering stats). I struggled against Fairy types greatly, since my only coverage option against them was Hariyama's Heavy Slam, something that wouldn't be available by the time the backline hit the field (Mega Altaria was a huge pain because of this). Also, Hariyama is outsped by Shiinotic under Trick Room, so even with proper play Shiinotic would counter Hariyama perfectly. Hariyama also was vulnerable to Psychic types during the initial TR setup - while TR would go off, Bulu and Amphy are not equipped to deal with Psychic types. I also still wanted an anti-Ground check with a Z-move nuke.
After a lot of research, I realized that the best pick in this case was Dhelmise. Grass type that resists Ground? Check. Z-Power Whip for a nuke? Check (which also got around Power Whip's abysmal accuracy). Steelworker to provide Steel STAB to check Fairy types with? Check. Ghost type to revenge Psychic types with? Check. And as a bonus, its also the slowest Pokemon on the team at 40, which meant it was both the fastest under Trick Room and perfectly revenged Shiinotic and nuked the Slowtwins. Its EV spread was taken from another team, and tiny trade of attack for bulk came through in a rather dramatic way. Overall, I'm really pleased with my experience using Dhelmise in this team - I believe it fit the team perfectly and proved its worth quite quickly (got upto 74 on its 1st run before rebreeding Hariyama from 54 to 49 speed).
Highlights
The final run had a bunch of relevant highlights, all compiled into a proper video.
Battle #50 - Vs Blue
Battle #100 - Vs Mallow
Milestone battles which also demonstrate how effective the lead pair is.
Battle #92 - Vs Colby
Going up against the Trick Room Breeder Colby, it was quite the involved battle to ensure I didn't blindly give up field advantage to the opponent by setting up Trick Room too early. Hence, I went with attempting to kill Ferrothorn first (who unfortunately Exploded on me, killing Hariyama), and only set up Trick Room after I was able to confirm the Avalugg was Avalugg3 and wouldn't outspeed me under Trick Room. Musharna being Musharna4 also helped in this regard.
Battle #95 - Vs Xio
This battle was where Dhelmise's EV spread proved its worth, due to this singular calculation -
252+ Atk Huge Power Mega Mawile Sucker Punch vs. 252 HP / 12 Def Dhelmise: 148-176 (83.6 - 99.4%) -- guaranteed 2HKO
The game rolled for max damage here, leaving Dhelmise with 1 HP left. Overall, a very good showing of Dhelmise's inclusion on the team, sweeping her entire team with Anchor Shot spam.
Battle #101 - Vs Samantha
The fact that I survive this battle right after hitting my goal is nothing short of a miracle. Regice-4 paralyses my entire team while I try to take out the team, and the team suffers from paralysis on multiple turns. Truly nailbiting.
Battle #102 - Vs Cadel
Hot on the heels of Samantha, Cadel shows up with a sillier battle - between Oranguru, Cofagrigus3 and Dusknoir4, we were constantly flipping Trick Room on and off. Luckily, every turn spent setting and unsetting Trick Room was a turn where the rest of the team could hit the opponent, so it was rather easy overall.
Battle #50 - Vs Blue
Battle #92 - Vs Colby
Going up against the Trick Room Breeder Colby, it was quite the involved battle to ensure I didn't blindly give up field advantage to the opponent by setting up Trick Room too early. Hence, I went with attempting to kill Ferrothorn first (who unfortunately Exploded on me, killing Hariyama), and only set up Trick Room after I was able to confirm the Avalugg was Avalugg3 and wouldn't outspeed me under Trick Room. Musharna being Musharna4 also helped in this regard.
Battle #95 - Vs Xio
This battle was where Dhelmise's EV spread proved its worth, due to this singular calculation -
252+ Atk Huge Power Mega Mawile Sucker Punch vs. 252 HP / 12 Def Dhelmise: 148-176 (83.6 - 99.4%) -- guaranteed 2HKO
The game rolled for max damage here, leaving Dhelmise with 1 HP left. Overall, a very good showing of Dhelmise's inclusion on the team, sweeping her entire team with Anchor Shot spam.
Battle #101 - Vs Samantha
The fact that I survive this battle right after hitting my goal is nothing short of a miracle. Regice-4 paralyses my entire team while I try to take out the team, and the team suffers from paralysis on multiple turns. Truly nailbiting.
Battle #102 - Vs Cadel
Hot on the heels of Samantha, Cadel shows up with a sillier battle - between Oranguru, Cofagrigus3 and Dusknoir4, we were constantly flipping Trick Room on and off. Luckily, every turn spent setting and unsetting Trick Room was a turn where the rest of the team could hit the opponent, so it was rather easy overall.
Threats
<=49 Speed - While the team could handle sets slower than this benchmark, Hariyama at 49 did not outspeed these sets under Trick Room. Essentially, this meant that the team would have to play around the fact that Hariyama was going to lose to sets like Shiinotic34, Mega Slowbro, Slowking4, Iron Ball users (Cresselia4, Cofagrigus4), many of which could also set up Trick Room to nullify Oranguru's Trick Room. This is the generally agreed upon weakness of using Hariyama as a Trick Room mon, as it would lose quite badly to Slowtwins and Shiinotic.
Registeel-4 - If not taken out early enough, the team lacks the kind of power to break through Registeel-4's Double Team and bulk, especially if Hariyama goes down. The other Registeel sets are easier, but Registeel13 can snowball with all the defense boosts as well, but Hariyama can muscle through those with Instruct spam.
Sleep/Paralysis - Thunder Wave and Spore have shown themselves to be very annoying when encountered, as shown by my replay highlights where each status played a pivotal role in the difficulty of the battle. Spore especially was responsible for my loss, as not properly accounting for it was deadly once Trick Room ran out.
Oddly enough, I barely struggled with any Taunt users regarding Trick Room. Also, proper turn ordering/targeting regarding Instruct was important - you want to use Hariyama's turn on the naturally slower target, while the Instruct turn targeted the faster target - this prevents situations where the target is faster than Oranguru but slower than Hariyama under TR and is able to send off an attack.
Registeel-4 - If not taken out early enough, the team lacks the kind of power to break through Registeel-4's Double Team and bulk, especially if Hariyama goes down. The other Registeel sets are easier, but Registeel13 can snowball with all the defense boosts as well, but Hariyama can muscle through those with Instruct spam.
Sleep/Paralysis - Thunder Wave and Spore have shown themselves to be very annoying when encountered, as shown by my replay highlights where each status played a pivotal role in the difficulty of the battle. Spore especially was responsible for my loss, as not properly accounting for it was deadly once Trick Room ran out.
Oddly enough, I barely struggled with any Taunt users regarding Trick Room. Also, proper turn ordering/targeting regarding Instruct was important - you want to use Hariyama's turn on the naturally slower target, while the Instruct turn targeted the faster target - this prevents situations where the target is faster than Oranguru but slower than Hariyama under TR and is able to send off an attack.
The Loss
Battle #106 - Vs Tony
I unfortunately underestimated how threatening Spore was and how much Tony could spread out. Ultimately, I lost to bad piloting. I did a mock battle after and won handily - I should have just disrupted Amoongus and should have prioritized Breloom over its partner.
I've got several teams cooking in the Showdown Teambuilder with the rest of the Megas now, and I hope to see all of them on the Leaderboard one day :)
Last edited: