


Proof of Peak
Introduction
Hi there! This is my first time posting a RMT, and I’m pretty sure my first time posting on these forums. I’ve been playing BH seriously for a couple weeks now, and it has to be my favorite metagame. This is a team based around one of the most fun sets I’ve used, Dazzlesmash MMX. The main gameplan with the team is to pick off checks with MegaTTar and Refrigirate MMX in order to allow my Dazzlesmashers to sweep. Since using this team (at the time it was still a WIP), I’ve shot up the ladder up to where I’m currently at in a matter of about a month
The Team
Mewtwo-Mega-X @ Focus Sash
Ability: Dazzling
EVs: 252 HP / 252 Atk / 252 Def / 252 SpA / 252 SpD / 252 Spe
Adamant Nature
IVs: 30 HP
- Close Combat
- Power Trip
- Shell Smash
- Photon Geyser
Mewtwo-Mega-X @ Focus Sash
Ability: Dazzling
EVs: 252 HP / 252 Atk / 252 Def / 252 SpA / 252 SpD / 252 Spe
Adamant Nature
IVs: 30 HP
- Close Combat
- Power Trip
- Shell Smash
- Photon Geyser
Tyranitar-Mega (M) @ Choice Band
Ability: Adaptability
EVs: 252 HP / 252 Atk / 252 Def / 252 SpD / 252 Spe
Adamant Nature
IVs: 30 HP
- Knock Off
- Diamond Storm
- Pursuit
- Sucker Punch
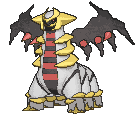
Giratina @ Safety Goggles
Ability: Prankster
Shiny: Yes
EVs: 252 HP / 252 Atk / 252 Def / 252 SpA / 252 SpD
Sassy Nature
IVs: 30 HP / 0 Atk
- Strength Sap
- Core Enforcer
- Defog
- Haze
Dialga @ Steelium Z
Ability: Magic Bounce
EVs: 252 HP / 252 Atk / 252 Def / 252 SpA / 252 SpD / 252 Spe
Modest Nature
IVs: 30 HP / 0 Atk
- Core Enforcer
- Doom Desire
- Tail Glow
- Stealth Rock
Mewtwo-Mega-X @ Rocky Helmet
Ability: Refrigerate
EVs: 252 HP / 252 Atk / 252 Def / 252 SpA / 252 SpD / 252 Spe
Naive Nature
IVs: 30 HP
- Boomburst
- Extreme Speed
- Close Combat
- Bolt Strike
Ability: Dazzling
EVs: 252 HP / 252 Atk / 252 Def / 252 SpA / 252 SpD / 252 Spe
Adamant Nature
IVs: 30 HP
- Close Combat
- Power Trip
- Shell Smash
- Photon Geyser
Mewtwo-Mega-X @ Focus Sash
Ability: Dazzling
EVs: 252 HP / 252 Atk / 252 Def / 252 SpA / 252 SpD / 252 Spe
Adamant Nature
IVs: 30 HP
- Close Combat
- Power Trip
- Shell Smash
- Photon Geyser
Tyranitar-Mega (M) @ Choice Band
Ability: Adaptability
EVs: 252 HP / 252 Atk / 252 Def / 252 SpD / 252 Spe
Adamant Nature
IVs: 30 HP
- Knock Off
- Diamond Storm
- Pursuit
- Sucker Punch
Giratina @ Safety Goggles
Ability: Prankster
Shiny: Yes
EVs: 252 HP / 252 Atk / 252 Def / 252 SpA / 252 SpD
Sassy Nature
IVs: 30 HP / 0 Atk
- Strength Sap
- Core Enforcer
- Defog
- Haze
Dialga @ Steelium Z
Ability: Magic Bounce
EVs: 252 HP / 252 Atk / 252 Def / 252 SpA / 252 SpD / 252 Spe
Modest Nature
IVs: 30 HP / 0 Atk
- Core Enforcer
- Doom Desire
- Tail Glow
- Stealth Rock
Mewtwo-Mega-X @ Rocky Helmet
Ability: Refrigerate
EVs: 252 HP / 252 Atk / 252 Def / 252 SpA / 252 SpD / 252 Spe
Naive Nature
IVs: 30 HP
- Boomburst
- Extreme Speed
- Close Combat
- Bolt Strike
Team Building
First off, we have the core of this team: Two MMX’s with Dazzlesmash. Somebody used this set against me back when I first started, and I was completely helpless against it. After that, I decided to optimize it as much as possible and build a full team around it. Having two of them helps accomplishes a few main goals. First off, it allows me to scout out potential counterplay and figure out how to work around it in case my sweep is ended. Secondly, it serves as a backup in case something happens that crippled one of them. Lastly, it serves as a way to catch my opponent off guard, as they likely won’t expect a second Dazzlesmash set.
I decided to have a counter to the main problem I was running into: Prankster-Haze Gira. MegaTTar serves to check him, and quite a few other mons I’ll go more into detail on later.
Another mon that was giving my sweeps trouble was Zyg. Prankster and Unaware specifically were putting a halt to my plans. In order to counteract this, I settled on using a Refrig MMX with Boomburst (ESpeed serves to deal damage against Soundproof users)
Prankster Gira was added primarily as a way to improof my Dazzlesmashers
I chose Dialga as a way to force switches and give my Dazzlesmashers an easier time to get in and set up.
The Movesets
The stars of the show themself are none other than a pair of identical MMX’s. Normally, I’d be strongly against running two identical mons, but Dazzlesmash is something special. With a Focus Sash, they’re able to always pull off a Shell Smash. It also acts as a self improof if it’s still intact after setting up. After that, they have Close Combat, Photon Geyser, and Power Trip for coverage. Dazzling allows them to sweep without having to worry about being attacked themself. They are able to OHKO nearly anything after a Shell Smash, including walls such as Gira, PKyogre, Solgaleo, and Necrozma Dusk. Without a Shell Smash, they can still OHKO standard bulky mons they’re supereffective against like Dialga and Registeel in case they happen to get hazed. Dazzling also allows for easy setup if you’re up against an obvious priority user like MDiance, KyuB, or Shed.
Prankster Giratina is the main wall and anti-setup mon of this team. Strength Sap allows him to heal and to cripple physical attackers. Core Enforcer allows for decent damage and ability negation on enemy PHeals, Defog is used to get rid of any pesky hazzards that may otherwise take away the Dazzlesmasher’s sashes. Haze allows for him to properly improof my Dazzlesmashers.
Refrigirate MMX is the team’s only Mixed Attacker. Boomburst allows for easy kills on mons like Zyg and Gira. ESpeed acts as a priority move to take out MRay and as a way to deal with Soundproof Zyg. Close Combat serves to check any Steel or Dark types by being an easy OHKO. Bolt Strike allows for me to deal with mons like PKyogre easily and as a way to pressure Aegislash and Ho-oh.
MegaTTar is an incredibly powerful attacker with good bulk. Choice Band and Adaptability boost his damage to immense levels. Knock Off is a strong attack that also can cripple many mons. Pursuit is mainly used for chasing Gira and Aegislash. Sucker Punch is priority and can OHKO basically any Psychic mon. Diamond Storm is an easy way to kill Shuckle, Ho-oh, MRay. It can also pressure MAudino.
Lastly, we have MBounce Dialga, the team’s lead. MBounce is a great counter to enemy Spore Users and hazard setters, and it grants me ample time to get a Tail Glow or Doom Desire set up. Tail Glow serves to boost its damage to insane levels. Core Enforcer is good damage and ability negation. Doom Desire can deal great damage and force defensive switches. Stealth Rock takes care of enemy sashes and Sturdininja. Corkscrew Crash with Steelium-Z allows Dialga to work as a better wallbreaker by landing it at the same time as Doom Desire. It also makes for a quick burst of Steel damage that I am otherwise lacking.
The Gameplan
This team plays a lot differently than other teams, so it’s kinda hard to get used to. You have to be much more willing to sack some of your mons than usual, all to reach the team’s ultimate goal: A Dazzlesmash sweep. You want to try to play defensively with Dialga and Gira while pressuring walls with Refrig MMX and MTT in order to take out as many checks as you can before starting the sweep. Now, I’m going to go into detail about what to do with each individual mon
Dialga
Dialga is the lead of this team, and should almost always be sent out first. Start by setting up a Tail Glow, unless you think you’ll be 2HKO’d. In that case, either switch or use one of your offensive moves. Core Enforcer is great at forcing opponents to switch by removing their ability. Doom Desire can deal great damage, and it can also force switches even after you are killed. It can force opponents to switch in Registeel or other Steel-resists to take the hit, which gives you time to either switch and setup a Dazzlesmash, secure the kill either Corkscrew Crash or Core Enforcer, or simply switch and lay them to waste with MTTar or Refrig MMX. Stealth rocks let you deal with the switch-heavy defensive teams that dominate the meta. This is going to be your best mon against fairy-heavy stall teams because of its powerful steel type moves, so protect it in that matchup. In certain matchups, however, Dialga will be mostly just used as fodder to allow you to get a free switch. If you get Impostered, stay in and try to set up a Doom Desire right before you die. After you faint, switch in a Dazzlesmash. If they stay in, they’ll get set up on and killed. If they switch, a Shell Smash still gets set up, but now they have to deal with Doom Desire and your Focus Sash.
Dazzlesmash Mega Mewtwo X
The main wincondition of the team, these mons are going to need to be kept incredibly safe until a sweep is ready. Use Gira to clear off hazzards and Dialga to prevent them so they can have their Sash up. The best time to switch them in is after another mon is killed or when you know an enemy will use a priority move. It’s ok to use your sash setting up a Shell Smash, especially if you know the opponent’s mon doesn’t have any status. Photon Geyser should be used as your main attack in order to avoid contact effects and to take out Sturdininja and Unawares. If you get Impostered, without Focus Sash, it’s best to just try to win the speed tie and get some damage in. IMPORTANT: YOU WILL NOT KILL THE OPPONENT’S CHANSEY EVEN IF YOU WIN THE SPEED TIE. With no shell smashes, you will die in two hits and the Imposter will die in 3-4. With one Shell Smash, you will die in one hit and the Imposter will die in two. With two shell smashes, which is very rare, you and the Chansey will both OHKO eachother. This is the optimal situation. Don’t worry about losing your MMX to Imposter, that’s why you have a spare. Use your first Dazzlesmash to help scout/lure out potential counters and then take them out before using your other. A big wall to this will be the opponent switching in either Gira or Aegislash. If you suspect they will be Prankster Haze, then switch to MTTar. If you’ve already done this before, you can attempt to read an attack and kill them outright with power trip. This is a very high-risk high-reward move and will usually decide the game.
Mega Tyranitar
Mega Tyranitar hits incredibly hard and can take a hit as well. His main usage is to kill Prankster Ghosts, so let’s cover that first. After switching in to a haze, you have two options. You can either try to predict a switch and use Pursuit, or you can predict a stay and use Knock Off (Knock off can also be used on a switch to cripple/damage a different mon, but it will sometimes let the Gira get away). Coupled with a choice band and a Adaptability, Pursuit will OHKO Gira nearly every time on switch. If Gira stays in, however, he can usually manage to outheal your damage by negating your Adaptability with Core Enforcer. Knock Off will always OHKO Prankster Ghosts if they’re holding an applicable item. If MegaTTar gets a free switch into MRay, he can take any hit but a fighting type move and counter with his own OHKO from Diamond Storm. He can also Sucker Punch in order to take out a great deal of offensive threats. Mega TTar is able to take hits and dish out incredible damage to most neutral types as too, specifically enemy Walls. If you get Impostered, just spam Knock Off (or whatever attack your choiced to) and use the free switch upon your death to get a Dazzlesmash set up.
Giratina
Giratina is your main improof to Dazzlesmash. He can Haze and then follow up with a Core Enforcer to negate its ability. After that, you’ll be able to alternate between using Strengh Sap, Core Enforcer, and Haze to Wall it out until it dies or it switches. Gira can also take hits incredibly well and go toe to toe with many MRay sets. Gira is also your only hazard removal, so keep him safe until hazards are completely out of the picture. Against more defensive teams who can normally kill Gira, you can use him to bait out an enemy Imposter and then switch into MegaTTar. Mega TTar will still be able to OHKO with Knock Off, but Pursuit on switch will only do about 70-80%, which is still a big hit to the opponent’s best tool against this team.
Refrigirate MMX
This set is used as a priority user that can serve as a check to NormGar and as a way to destroy Zyg. He can shred through any Dragons with Boomburst and ESpeed, while using Close Combat and Bolt Strike as coverage. Him and MTTar serve as the team’s wallbreakers as well. If he gets Impostered, stay and fight. He gets 2HKO’d by Boomburst, so use Boomburst and then ESpeed. After your MMX dies, use the free switch to set up a Dazzlesmash.
Threatlist
I figured I’d add this part to better show the weaknesses of this team for a more accurate rating and for better advice for what could be fixed up. Here, I’ll cover common threats and the best way to deal with them.
Imposter Chansey
I won’t go into to much detail here, considering I’ve already described the best ways to deal with each mon getting Impostered, but Chansey is a real pain to deal with. If Dazzlesmash gets Impostered, you’re down a sweeper, so just make sure to take out Chansey before sweeping.
NormGar
NormGar is definitely a troublesome set to deal with, and while at first it seems like my team is helpless against it, I do have a few tricks. First off, if your opponent is feeling a hit Brave, you can Sucker Punch them with MegaTTar. However, this won’t work if they play smart and Normalize you every switch. If you are able to set up a Shell Smash without already being normalized, then you can just sweep. NormGar can’t stop a seeep that’s already started because it can’t outspeed Shell Smashed MMX. Your best tool, other than setting up before it comes out, is ESpeed on Refrig MMX. Using ESpeed before Gengar sets up deals a little over half of its health. After that, you can sack a mon and have Refrig switch back in and finish him off. If Refrig is dead and you’re against a smart opponent, your only option is to switch a bunch and go for an incredibly long PP Stall to get rid of their entrainment. MegaTTar is the best at taking hits. This is definitely the team’s biggest weakness, so be incredibly careful whenever you spot a MGar
Edit: Thanks to fwqef, I now know that Corkscrew Crash still works after a Normalize. Considering Dialga’s bulk and Gengar’s weak defensive stats, this makes for a very easy counter, assuming you have Dialga alive. Dialga should be kept incredibly safe against teams with MegaGar. I’d recommend sacking Gira to get a switch because Gira can make sure NormGar doesn’t have any time to set up with Haze Spam. After that, Corkscrew Crash should be an easy kill
Edit Edit: I also kinda forgot that Normalize Bounces back Entrainment. This lets Dialga absolutely destroy MegaGar with a free switch without any worries.
TriRay
TriRay is only a real threat if you haven’t set up Dazzlesmash and it has spore and is already set up. If it manages to get set up, Dialga is your best bet. MBounce has a good chance of winning you the fight outright, but it may be carrying Safety goggles. Just use a Core Enforcer, and if you end up dying switch in Refrig and kill with ESpeed. If you don’t have Dialga, you’ll need to use Giratina. Get Gira in safely and fight it as long as possible. Make sure you’re able to land at least one Core Enforcer. After your Gira faints, switch in Refrig MMX and kill with ESpeed. If you’re missing all of those options, TTar should be able to take a hit and kill with Diamond Storm. If you get spored, pray for good sleep RNG.
Sturdinja
I decided to add this one in after further testing on ladder. After getting destroyed by a Stall team using Sturdinja pivot (thanks Onyx Onix :P), I decided to modify the team a bit due to how unbelievably bad my team is against this matchup. I decided to add Stealth rocks to Dialga in place of recover, allowing to remove enemy Sashes, allow for more conistent sweeps, and take out Sturdinja. The Dazzlesmashers can kill him with Photon Geyser, but they risk taking an Endeavor which could possibly cripple them. Because of this, I gave a Rocky Helmet to Refrig MMX to get some easy kills on Shed. If it has Protective Pads, use Knock Off on MTTar first. This mon can be dealt with, but it’s incredibly lethal to this team if left unchecked.
Contact Effects
Contact effects that can hinder a Dazzlesmash sweep involve Rocky Helmet/Rough Skin (if you already used your sash), Baneful Bunker, and Spiky Shield. The best way to play around these is to either predict them based on obvious sets that run them or just use Photon Geyser instead. You’ll definitely drop quite a few sweeps to these, but that just allows you to scout another threat to your sweep and prepare better with your other Dazzlesmash.
Conclusion
Well, this took quite a bit longer to make than I expected. Please excuse any typos as it’s currently 4:00 AM. Also, sorry if this guide is a bit drawn out, but I wanted to be positive to cover everything. This team had taken a lot of work to make and a lot of testing to optimize, so I’m looking forward to hearing your ratings and recommendations for improvements!
Special thanks to:
fqwef for the advice about Normalize and Z-Moves
NidoTheKing, Regirock, Ransei, Case47, and Pikselthedemigawd for teambuilding advice and help testing the team!
Changelog:
Edit 1: Added extra ways to deal with MGar
Edit 2: Modified a few movesets slightly and added Sturdinja to the threatlist.
Replays:
Vs Stall with Normgar. Good showcase of how to deal with trappers using Dialga
Vs Full Stall example of working around Contact with Dazzlesmash and shows how to play against Chansey
Vs Triple MScept sample team (with bad rng on my side)
Vs Bulky Offense Shows off the immense bulk of MTTar and the comeback potential of Dazzlesmash
Vs Bulky Offense with their own Dazzlesmash MMX
Attachments

Last edited:


