

Introduction
In this hectic offense oriented metagame, I was looking for a way to make trick room team work. Hazards were the main overall issue that was proving to be problematic, especially with how annoying glimmora could be into most TR setters. Magic Bounce Hatterene immediately showed itself to me as being a staple on Trick Room as well as being able to stop hazards once, but they still proved to be extremely problematic even afterwards. That's when the stroke of genius happened, what if I had... 3 Hatterenes?
The Squad
This team is heavily momentum based, you need to have an understanding of your win conditions immediately during team preview.
Do one of your breakers lack defensive checks? If so, go all in with it, also try looking into which breaker is best suited to use it's Tera, as all of them greatly appreciate it for different reasons. Most of the time you won't have that easy of a time plowing through teams, which is why this team is mainly built around making trades. For each TR setter into Breaker combo, you should be able to get at least 2 kills, which in theory should win you the game (discounting Revival Blessing strategies).
The team is split into two sections, the Setters and the Breakers.
The Setters
Hattena


Hatenna @ Focus Sash
Ability: Magic Bounce
Tera Type: Dark
EVs: 248 HP / 8 SpA / 252 SpD
Sassy Nature
IVs: 0 Atk / 0 Spe
- Trick Room
- Reflect
- Light Screen
- Healing Wish
The first of our TR setters, a common thread shared between all of our Trick room setters is that they're all holding a focus sash. This is due to their abilities negating hazards, meaning most of the time, they'll be able to come in safely and get a trick room off without dying. Hatenna is commonly our lead against teams that don't have a glimmora, since it's offensive stats are so pitiful that it can't really do much anyway. This is why I slotted both screens instead of offensive moves, however be very careful as to wether it is a good idea to set screens up, Trick Room turns are very valuable and most of the time you'd rather just Healing Wish out and bring in a breaker.
Tera Explanation: The tera type doesn't super matter for any of the TR setters, there are however extremely niche cases where your sash is broken and you absolutely need to survive a hit to set TR up, in this case Steel tera makes Hattena able to resist both ghost and dark attacks, which it would normally be weak to.
Hattrem

Hattrem @ Focus Sash
Ability: Magic Bounce
Tera Type: Dark
EVs: 252 HP / 4 Def / 252 SpD
Calm Nature
IVs: 0 Atk / 0 Spe
- Healing Wish
- Trick Room
- Mystical Fire
- Psychic
TR Setter #2. It fulfills essentially the same role as Hatenna, but is somewhat more bulky, it tends to usually be the last TR setter to be used in the game, mainly for the fact that Hatenna is usually a lead, then Hatterene usually comes next because it can usually stomach at least one hit. Instead of screens, Hattrem instead has Mystical Fire and Psychic, two basic offensive moves that frankly won't do that much damage against most mons, but exist just in case you already have a stored Healing wish and you're pretty sure you're dying right after TR is set up. Hattrem @ Focus Sash
Ability: Magic Bounce
Tera Type: Dark
EVs: 252 HP / 4 Def / 252 SpD
Calm Nature
IVs: 0 Atk / 0 Spe
- Healing Wish
- Trick Room
- Mystical Fire
- Psychic
Tera Explanation: Same as Hatenna
Hatterene

Hatterene @ Focus Sash
Ability: Magic Bounce
Tera Type: Steel
EVs: 252 HP / 252 Def / 4 SpD
Relaxed Nature
IVs: 0 Atk / 0 Spe
- Healing Wish
- Psychic
- Mystical Fire
- Trick Room
Hatterene @ Focus Sash
Ability: Magic Bounce
Tera Type: Steel
EVs: 252 HP / 252 Def / 4 SpD
Relaxed Nature
IVs: 0 Atk / 0 Spe
- Healing Wish
- Psychic
- Mystical Fire
- Trick Room
Wow who could've guessed, Hatterene is our third and final TR setter. With actually usable stats, Hatterene is by far the most useful of the setters, being the only one that is 3hko'd by most moves in the metagame due to it's bulk. With usable offensive stats as well, Hatterene is usually going to be our lead of choice against Glimmora leads, as it can break lead Glimmora's sashes with a psychic after a trick room, and lead the way for Torkoal to come in, usually denying any hazard from going up. It's also able to switch into most hazard setters, like Garchomp, The Donphans and Ting Lu, deterring hazard as well as setting up TR.
Tera Explanation: This time we're running with a Steel Tera, this is to resist both steel and being immune to poison type moves. This can end up being surprisingly useful against Glimmoras. or Kingambit's that feel like they have a KO on you.
The Breakers
Torkoal


Torkoal @ Choice Specs
Ability: Drought
Tera Type: Fire
EVs: 248 HP / 252 SpA / 8 SpD
Quiet Nature
IVs: 0 Atk / 0 Spe
- Eruption
- Fire Blast
- Earth Power / Flamethrower
- Solar Beam
Torkoal
Torkoal @ Choice Specs
Ability: Drought
Tera Type: Fire
EVs: 248 HP / 252 SpA / 8 SpD
Quiet Nature
IVs: 0 Atk / 0 Spe
- Eruption
- Fire Blast
- Earth Power / Flamethrower
- Solar Beam
Our first main breaker, your button of choice 90% of the time is going to be eruption, Torkoal is heavily supported by the almost certain lack of hazards as well as healing wish being able to fill it back up to full HP if it ever needs to take damage, boosting back up the base power of eruption. Solar Beam hits Water types harder and Fire Blast is the main move of choice if Torkoal isn't at full HP, or needs to attack outside of Trick Room. The 3rd slot is a tossup, earth power can hit a few mons like Skeledirge and Tyranitar in a 1v1 better, but it's mainly for Ceruledge and Armarouge, which are the only real perfect switchins to Eruption. However one could also choose flamethrower, simply for the better accuracy fire move when damaged.
Tera Explanation: frankly, fire tera Eruption hits insanely hard, no water type in the game can realistically switch on the move, see these calcs below for a demonstration:
252+ SpA Choice Specs Tera Fire Torkoal Eruption (150 BP) vs. 252 HP / 252+ SpD Skeledirge in Sun: 262-309 (63.5 - 75%) -- guaranteed 2HKO
252+ SpA Choice Specs Tera Fire Torkoal Eruption (150 BP) vs. 252 HP / 252+ SpD Dondozo in Sun: 283-334 (56.1 - 66.2%) -- guaranteed 2HKO after Leftovers recovery
252+ SpA Choice Specs Tera Fire Torkoal Eruption (150 BP) vs. 252 HP / 252+ SpD Blissey in Sun: 352-416 (49.2 - 58.2%) -- 97.7% chance to 2HKO
252+ SpA Choice Specs Tera Fire Torkoal Eruption (150 BP) vs. 0 HP / 4 SpD Dragapult in Sun: 380-448 (119.8 - 141.3%) -- guaranteed OHKO
252+ SpA Choice Specs Tera Fire Torkoal Eruption (150 BP) vs. 252 HP / 0 SpD Cyclizar in Sun: 429-505 (124.7 - 146.8%) -- guaranteed OHKO
252+ SpA Choice Specs Tera Fire Torkoal Eruption (150 BP) vs. 252 HP / 252+ SpD Slowking in Sun: 204-241 (51.7 - 61.1%) -- guaranteed 2HKO
Iron Hands
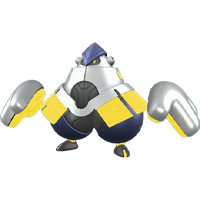

Iron Hands @ Booster Energy
Ability: Quark Drive
Tera Type: Flying
EVs: 248 HP / 252 Atk / 8 SpD
Brave Nature
IVs: 0 Spe
- Wild Charge
- Swords Dance
- Ice Punch
- Close Combat
Iron Hands is a great addition to Trick Room teams, very good offensive stats coupled with great bulk means that Iron Hands can usually tank most hits if it needs to fight outside of Trick Room. After an SD and the Booster Energy boost, Iron Hands should be able to OHKO the entire non-unaware metagame. Coverage options are quite obvious, with double stabs + ice punch to hit mons like Dragonite, Dragapult and most ground types that aren't hit by CC.Iron Hands @ Booster Energy
Ability: Quark Drive
Tera Type: Flying
EVs: 248 HP / 252 Atk / 8 SpD
Brave Nature
IVs: 0 Spe
- Wild Charge
- Swords Dance
- Ice Punch
- Close Combat
Tera Explanation: Tera Flying allows Iron Hands to keep a sweep going even if stuck outside of trick room against either of the Donphan Paradoxes, Garchomp or any mon with ground coverage. Additionally, in the event where toxic spikes have to go up due to glimmora, Tera Flying allows Iron Hands to avoid getting poisoned by them.
Kingambit
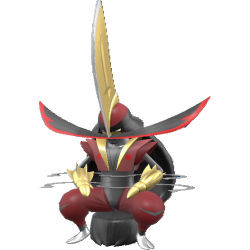

Kingambit @ Black Glasses
Ability: Supreme Overlord
Tera Type: Ghost
EVs: 252 HP / 252 Atk / 4 SpD
Brave Nature
IVs: 0 Spe
- Swords Dance
- Kowtow Cleave
- Iron Head
- Sucker Punch
Kingambit is an incredible breaker on it's own, but Trick Room really pushes it to the next level. Sucker Punch allows it to continue being a menace even outside of Trick Room, at best forcing 50/50's to KO mons. Supreme Overlord makes it so Kingambit will most of the time be a late game cleaner, gaining an insane power boost and benefitting a lot from the nature of sacking the TR setters.Kingambit @ Black Glasses
Ability: Supreme Overlord
Tera Type: Ghost
EVs: 252 HP / 252 Atk / 4 SpD
Brave Nature
IVs: 0 Spe
- Swords Dance
- Kowtow Cleave
- Iron Head
- Sucker Punch
Tera Explanation: Tera Ghost in this instance is used for a few different reasons, first of all, it allows it to ditch it's 4x fighting weakness meaning it can take on every fighting type in the tier. Additionally, Kingambit is able to stop Tera Normal Dragonite from spinning out of control of Espeed, being immune to the priority move as well as losing the Earthquake weakness.
Threats:
 :
:This mf is bulky for no reason, Torkoal and Iron Hands have a lot of difficulty breaking it down, meaning you kinda have to bring Kingambit in on a fire type, which always has risks. Even then, while Kowtow Cleave should kill Skeledirge, Tera Fairy sort of creates a 50/50 as to wether you should iron head or cleave, making Skeledirge a large annoyance.

One of the only real ways the opponent can get hazards off, against glimmora teams you should lead either Hatterene or Hattrem, as they both have psychic to deal damage to it without setting up tspikes. In the ideal world, they lead Glimmora and sack it as a lead trying to kill hatt, but wiser enemies won't do that, meaning you'll have to go all in with Torkoal at the start.
Pastes:
With nicks: https://pokepast.es/4de7150ce143fd43
No nicks: https://pokepast.es/2393aa62e8091d80
With nicks: https://pokepast.es/4de7150ce143fd43
No nicks: https://pokepast.es/2393aa62e8091d80
Thanks for reading! Feel free to give advice to improve the team, I understand that triple hats is probably not optimal on this kind of Trick Room team, but it would still be great to see how to build upon the skeleton and see how to optimize the squad.
Last edited:


