Battle Tree Discussion and Records

I did some mock battles to test this behaviour on the first battle video.

Test 1: Hitmonlee/Tapu Koko vs Electrode/Accelgor
I did 10 mock battles, going for Thunderbolt on Electrode on turn 1 and turn 2 (two electric hits in the slot) to see if the AI will switch in Volt Absorb Jolteon in either slot. It did not switch a single time in the mock battles I did - if this were the Maison I would expect a Volt Absorb switch, but the AI never switched at all, in either slot.

Test 2: Tapu Koko/Hitmonlee vs Electrode/Accelgor
Switched Tapu Koko to the front of the team, since atsync's video had it in that slot rather than as the second Pokémon. With this setup I immediately started seeing identical behaviour to atsync's description in around half of the mock battles I did, with T1: Fake Out into Accelgor - T-Bolt into Electrode Protect, T2: Accelgor switches out for Jolteon. I also saw the AI switching Jolteon into the Electrode slot, rather than the Accelgor slot, which corresponded with the AI not using Protect on Electrode and taking damage from Thunderbolt instead. It might be that Fake Out/Protect with Accelgor being the only enemy damaged, makes the AI confused as to which enemy was actually targeted since Electrode is still at full HP and Accelgor had taken damage from Fake Out.

I've still not done that many mock battles but this is very curious... it would seem that having your Pokémon at the front of the team (left slot) makes the AI react to your attacks with Volt Absorb prediction switches (sometimes in a different slot from the one you targeted), while the right-side slot doesn't provoke such behaviour. This would match with my experiences playing Hitmonlee/Tapu Koko in Doubles, where I've never had the AI switch its Pokémon out for a Lightning Rod user after using an Electric-type move with Tapu Koko in over 1000 battles.
Is it worth saving or showing my replays of (sort of) the opposite thing happening?

Hariyama is in my #2 slot and the AI has switched their Fake Out recipient for a Ghost type at least three times in 250 battles. I hesitate to lump it in with that phenomenon because it's purely a typing and not ability switch, and I would have noticed if it were the unscathed opponent that switched.

If I upload a QR team, does it apply the PP Ups exactly as I have them (as in, only the migrated Hariyama and Mawile have any moves with max PP?)
 
Last edited:

turskain

activated its Quick Claw!
is a Community Contributor Alumnus
Is it worth saving or showing my replays of (sort of) the opposite thing happening?

Hariyama is in my #2 slot and the AI has switched their Fake Out recipient for a Ghost type at least three times in 250 battles. I hesitate to lump it in with that phenomenon because it's purely a typing and not ability switch, and I would have noticed if it were the unscathed opponent that switched.

If I upload a QR team, does it apply the PP Ups exactly as I have them (as in, only the migrated Hariyama and Mawile have any moves with max PP?)
QR teams should carry over PP UPs, I think. I'm not sure how typing-based switches work exactly, but those have happened for me in the slot that's been hit on attacks coming from both of my Pokémon - while mock battling this test I used Close Combat (resisted) on Accelgor from slot 2 Hitmonlee, and Crobat was switched in on the next turn. Ghosts switching in after using Fake Out with Hitmonlee has occurred to me as well. So far I've only observed ability-based switching being seemingly absent, or behaving strangely.
 
*cracks knuckles* They say if something isn't broke, don't fix it. So with that, and a couple of leftover shinies with slightly less than perfect IVs from Omega Ruby, in mind I decided to reuse the team I used in Omega Ruby to reach a streak of 980 in Super Doubles, which is on the Battle Maison Discussion thread, and I've just used it to reach 391 in the Super Doubles Tree with two small changes to it.


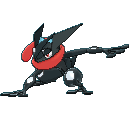
Greninja (M) ("Shadow") @ Life Orb
Ability: Protean
IVs: x/x/31/31/31/31
(HP Bottle capped)
EVs: 4 HP / 252 SpA / 252 Spe
Timid Nature
- Scald
- Ice Beam
- Dark Pulse
- Grass Knot

The first of two leads, nicknamed Shadow for obvious reasons that I really hope don't make me look like a Sonic Fanboy and hardly the most inventive spread of moveset in the world. Greninja can one-shot a large portion of the tree pokemon and can use it's lead partner's Fake Out to avoid dying to things it can't. Scald for things like Arcanine, Talonflame and Mega Camerupt, Ice Beam for such beasts as Garchomp, Tyrantrum and Gliscor, Dark Pulse for all those annoying Psychic and Ghost types that Mega Kangaskhan can't usually hit, and Grass Knot works wonders against things like Mega Swampert and Gastrodon. I've had this shiny sat in my Water Box in Omega Ruby for months and it's been absolutely glorious to finally get to use it, even if it didn't last nearly as long as it's predecessor in the Battle Maison. One day I'm going to find a lead that doesn't quake in it's webbed boots at the sight of Jolteon or Aerodactyl, as well as new checks like Mega Sceptile. Bottle Capped due to it's abysmal HP IV.


Mega Kangaskhan (F) ("Big Daughter") @ Kangaskhanite
Ability: Scrappy / Parental Bond
IVs: 31/31/31/x/31/31
EVs: 4HP / 252 Atk / 252 Spe
Adamant Nature
- Fake Out
- Sucker Punch
- Low Kick
- Double-Edge

The other lead, bred from my previous Battle Kangaskhan: Big Momma, this is where the Mega Kangaskhan nerf begins to annoy me. The fact that Double Edge and Low Kick can no longer one-shot quite as many Pokemon in the Tree as they could in the Maison annoys me but that doesn't stop Mega-Kangaskhan from being an absolute powerhouse. Fake Out is run for obvious control reasons against pokemon like Golisopod, Talonflame, Aerodactyl and other threats that outspeed Greninja. Sucker Punch is run for coverage and priority, and also specifically for killing Mega Alakazam which outspeeds Greninja by a mile. Low Kick deals with heavy Pokemon like non-Mega Aggron and Rampardos in one go, although the fact that it now can't knock out Sitrus carrying Bastiodon in one turn is tedious. Double-Edge is the real bread and butter of this whole team, although the fact that it now can't one-shot all variants of Aromatisse, Sylveon and Vaporeon, among other things, is more detrimental than one might think.


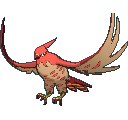
Talonflame (M) ("Firewind") @ Flyinium-Z
Ability: Gale Wings
IVs: 31/31/31/31/31/30
(Speed Bottle Capped)
EVs: 4HP / 252 Atk / 252 Spe
Adamant Nature
- Brave Bird
- Flare Blitz
- Aerial Ace
- U-Turn

("Firewind" after the band of the same name) An annoying spread of IVs considering that Adamant Talonflame needs max speed to outspeed a Durant, This was the major change. Thanks to Gale Wings being nerfed, Choice Band Brave Bird isn't quite as useful as it used to be, so I opted for a Flying Z-Move with base power 190 (stronger than a choice band) that didn't lower Talonflame's health and gave it a chance to get two Gale Wing boosted moves away. Flare Blitz is an obvious move, extremely useful against things like Escavalier, Scizor and Ferrothorn that Greninja and Mega Kang can't deal with quickly. Aerial Ace is for dealing with things that have set up evasiveness boosts left with low health like Cresselia or Blissey, and U-Turn now has a lot more utility as a hit-and-run move due to Talonflame not being choiced into it. That being said, the loss of Choice Band really hampers Talonflame's ability to do heavy one-shot damage more than once, and the number of turns where I'd bring it out to knock an opponent out only for it to instantly faint to a rock move straight after is probably best left unspoken about.


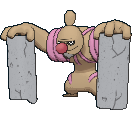
Conkeldurr (M) (Bad Company) @ Assault Vest
Ability: Iron Fist
IVs: 31/31/31/0/31/31
EVs: 108 HP / 252 Atk / 4 Def / 140 SpDef / 4 Spe
Adamant Nature
- Drain Punch
- Ice Punch
- Knock Off
- Mach Punch

An ever so slight change to the previous spread of 108/252/4/0/144/0, 4 useless EVs pulled out of Special Defense into Speed to allow Conkeldurr to outspeed other Conkeldurr. Much bulkier than the other three, the combination of Assault Vest and Drain Punch allows Conkeldurr to last much longer than the others in a long fought situation. Knock Off gives Conkeldurr a chance to hit Psychic types harder than they hit him, and Ice Punch deals with flying types quite hard, along with double weakness Pokemon like Garchomp or Altaria. Mach Punch is added because a STAB + Iron Fist boosted priority move is an immense boon in an endgame situation. However, I really hate the sight of a Brave Bird Crobat being sent out if I'm down to nothing but Conkeldurr, and Psyshock hits far harder than I'm comfortable with.

So the loss against Janitor Sika using Toxicroak, Mimikyu-4, Toxapex-3 and Aggron-3, which is uploaded with code KCCG-WWWW-WWW6-3TL6, was basically littered with mistakes and bad luck on my part. Sika with a Rocky Helmet Mimikyu and Toxicroak. Toxicroak 3 & 4 both get one shotted by Mega Kang's Double-Edge and don't run Fake Out so that was a no brainer. I made the mistake of using Grass Knot instead of Scald on the Mimikyu, which meant I got Rocky Helmet damage + my Life Orb damage and didn't get the chance of burning the Mimikyu, taking Greninja down to 14 health. As 14 is the amount of health Life Orb takes off and my opponent sent out Toxapex, which Greninja can hardly touch, I doubled down on the Mimikyu with Sucker Punch and Ice Beam, but as Mimikyu 4 runs Shadow Sneak that meant knocked out Greninja, only half dead Mimikyu and Toxapex using Venoshock on my Kangaskhan taking it down to 27 health, which should have been the first clue that Toxapex ran surf, not the best news for a Talonflame.

I switched Kangaskhan out for Conkeldurr to bait it into using Venoshock instead of Surf, meaning Talonflame could get a Brave Bird away on Mimikyu and knock it out while saving the Z-Move for Toxapex. On the next turn however my prayers for a Non-Mega Aggron that could easily be knocked out with one Drain Punch were not answered, and Toxapex used Baneful Bunker, therefore severely weakening my Z-Move and switching Talonflame out with it's Red Card, meaning my Mega-Kangaskhan got switched into a Stone Edge that killed it, the exact opposite of "Aggron kills Talonflame, Kangaskhan and Conkeldurr gang up on the Toxapex and then Conkeldurr take out the Mega-Aggron with Drain Punch one turn and Mach Punch the next".

I assumed that Aggron would use Stone Edge on Talonflame and Toxapex would use Venoshock on Conkeldurr, so the fact that Flare Blitz + Mach Punch didn't quite knock out Aggron followed by Stone Edge missing made me feel great. Followed by awful when Toxapex used Surf, knocking out Aggron and Talonflame. The next turn Toxapex used Baneful Bunker which poisoned Conkeldurr. If you're planning on trying to knock out a Toxapex using a poisoned Conkeldurr whose best move against Toxapex is Drain Punch, I wouldn't recommend it.

I've uploaded a few matches of either close calls or the team functioning just as it should to show how it usually clears through teams in 3 or 4 turns without any losses on my side to demonstrate it's capabilities below
WEFW-WWWW-WWW6-3UH2
8HQW-WWWW-WWW6-WSFP
HKRG-WWWW-WWW6-3UGH
4QEG-WWWW-WWW6-3UD2
KTCG-WWWW-WWW6-3UCL
YMWW-WWWW-WWW6-3UCX

Now that this debacle is over I'm off to fill in the Alola Dex, breed a team that I'll give full credit to my friend Mitfy for brainstorming, and cry in a corner if anyone ever mentions Toxapex to me again.
 
Experiencing a little bit of indecision again. I had wanted to try using Torkoal for a bit and even took the time to build a flashy one just like Mawile (for later giveaway purposes; they originated from SS so they could have rare balls, Safari and Moon respectively, then got their egg/final moves from OR) and as I was putting them all in their battle box, I passed by Heatran sitting with the other flunkies.

Oblivia Heatran hits an extremely good speed holding an Iron Ball (slower than Escavalier4 even) and kills the same things that are trouble for my core as Drought Eruption. Sunless Eruption is moderately weaker but the relevant KOs are still there. The main thing that stands out is Heatran still hits very hard and has decent coverage without relying on Eruption. Whereas Torkoal Earth Power is a fucking joke, Heatran's actually kills targets. It takes non-ground hits better than Torkoal and the things that easily dispatch Heatran do the same to Torkoal in spite of the latter getting a turn in, first, so it doesn't seem like such a bad trade. The only exception is Avalugg4.

On the other hand, generally barring bad situations, Torkoal is more helpful on paper just from having a stronger Eruption. With Grassnium Z its Solarbeam is a decent move with the weather working against it, and the lower speed is still more helpful against things that fall below 36, Heatran's benchmark. Torkoal would be used alongside Mawile which would mitigate some major problems with its inability to hurt many common, moderately bulky types. Heatran would require Araquanid.

Opinions, anyone? Particularly from those who used TR for their doubles streak?
 

Smuckem

Resident Facility Bot Wannabe
is a Community Contributor Alumnus
Torkoal, partly because your commentary has a hint of "I don't wanna restrict my teambuilding by requiring Araquanid to have Heatran around", partly because I will always vouch for Non-Legendary-Non-Evolves to be utilized in any way, shape or form, partly because I'm waiting to get one from PSIana's giveaway and will be testing it out as a member of Los Expertos (maybe) very soon.
 
I didn't mean Heatran requiring Araquanid as a downside, it was more an observation that its overall poor offensive presence is mitigated by an overpowered poke that'll kill much of the things it can't. Heatran has a similar relationship with Araquanid, who is still a really solid poke in its own right, and before mention of Torkoal I was considering having it used next to Mawile. And then there's Drampa, who I still hold in high regard.

Edit: regardless, these are my pals: https://3ds.pokemon-gl.com/rentalteam/BT-4AA7-8BEC

Oranguru/Hariyama/Araquanid/Drampa/Torkoal/Mawile. Araquanid has gotten minor move changes since my streak was posted, both due to and following its participation in the competition for Mawilite. Drampa hasn't been getting a positive reception in this topic, but it's worth repeating that I only ever used it as a pinch hitter, typically when there was either one turn of TR and one enemy, or two enemies one of whom really needing to immediately die. If you're sending it out thinking just "base 135 great movepool fuck yeah" you're only going to be bitten in the ass.
 
Last edited:

atsync

Where the "intelligence" of TRAINERS is put to the test!
is a Pokemon Researcheris a Contributor to Smogon
My doubles run just ended at 295 wins. A bit disappointed at the way I played in the final battle: I overlooked Sucker Punch from lead Mega Mawile and later let my Landorus die to a Dark Pulse unnecessarily. The 2 consecutive Quick Claw activations from Incineroar4 didn't help either.

Battle 296 vs. Punk Guy Etta: 4SUW-WWWW-WWW6-55XV

Still, I'm reasonably happy with this run, especially for a first attempt. This is actually my best run in doubles in any facility and I certainly wasn't expecting to get that far with this team. I might give this another shot in the future but for now this is what I have.

Team


Tapu Koko @ Choice Specs
Timid
Electric Surge
IVs: 31/1/31/31/31/31 (hyper trained)
EVs: 4/0/0/252/0/252

Thunderbolt
Dazzling Gleam
Grass Knot
Volt Switch

Fairly standard. Thunderbolt is the strongest move, but it's actually Volt Switch that gets the most mileage early in the battle. I prefer to let Tapu Koko leave the battle for a teammate after Electric Terrain is set as they tend to synergise better with Raichu type-wise. Thunderbolt sees more use later on when switching is no longer required but it will make an appearance during the first every now and again if I need to KO something dangerous right away (assuming Volt Switch isn't sufficient). Dazzling Gleam provides a secondary STAB and a spread damage move, and Grass Knot is only occasionally used for Ground-types although I'd prefer not to lock myself into it too early if I can help it.


Raichu-A @ Electrium-Z
Lonely
Surge Surfer
IVs: 31/31/31/31/31/31
EVs: 0/252/0/252/4/0

Volt Tackle
Psychic
Fake Out
Protect

The Tapu Koko + Raichu combo is well known. I found it to function similarly to Subway Politoed + Ludicolo in some ways, with Raichu acting in the Ludicolo role for Tapu Koko.

My Raichu is slightly different from other that have been posted here previously. Gigavolt Havoc has 190 base power when using Volt Tackle as the source move, and when you add STAB and Terrain boosts to that the power is pretty great. Volt Tackle itself is a strong STAB too, and the fact that it's a physical move adds a bit of variety to my lead combo as it compliments Tapu Koko's special offence. The downside is the recoil, which actually hasn't bothered me too much, Intimidate, and Volt Tackle's contact (but Gigavolt Havoc doesn't have contact which mitigates this somewhat).

Unfortunately, Raichu's physical movepool leaves a lot to be desired, so a mixed set with Psychic was in order. Raichu is fortunately fast enough to get away with this. Fake Out is essential for stage control and keeping threatening leads at bay. Last slot was a toss-up between Grass Knot and Protect. I opted for the latter and haven't looked back. Its most useful function is to counter greedy Sucker Punch spammers like Bisharp, but it also helps stall out Trick Room where necessary.

Raichu has 130 Speed with no investment, conveniently outspeeding Scarf Manectric in Terrain by 2 points. This allows full investment in Attack and Special Attack. Lonely was used as the nature since I couldn't use Adamant for obvious reasons, and Defense was the least salvageable defensive stat. The last 4 EVs go in Special Defense.

I think a similar set with Thunderbolt + Stoked Sparksurfer could be a reasonable replacement for this. I think I prefer the current set up but the alternative set would give Raichu guaranteed paralysis as well as the ability to invest more EVs into bulk. Intimidate would also be a non-issue. Food for thought.


Landorus @ Life Orb
Timid
Sheer Force
IVs: 31/10/30/31/31/31
EVs: 4/0/0/252/0/252

Earth Power
Sludge Bomb
Hidden Power [Ice]
Protect

I have always considered RNGing one of these and this team finally gave me an excuse to do so. Landorus is primarily helpful for its ability to deal with opposing Electric-types. The fact that Earth Power allows for this without harming my teammates is crucial for this team's success. Its immunity to Ground moves is another great reason to use Landorus as it gives me more options for deadling with incoming Ground moves and makes Landorus a decent Ground-type check. Sludge Bomb gives Landorus the ability to hit Fairy- and Grass-types and is actually not too bad as a back-up attack in its own right in situations where Earth Power is not appropriate. Hidden Power isn't used a lot but is useful for dealing with some Dragon-types and opposing Landorus/Gliscor. Protect is Protect. The moves can be altered to suit the team (Psychic and Grass Knot are other viable options) but overall this set up works for me. My only criticism of Landorus is that I wish it were just a bit faster, but it isn't difficult to work around this problem when everything else on the team is so fast.


Hawlucha @ Electric Seed
Adamant
Unburden
IVs: 31/31/31/x/31/31
EVs: 132/252/0/0/124/0

Acrobatics
Low Kick
Substitute
Tailwind

I'm rather proud of this set. I was worried that it would be too gimmicky and weak, but it exceeded my expectations and performed its role well.

There's a bit of a story behind how this came about. Initially I used a Mega Gyarados set (Jolly, Waterfall/Crunch/Ice Fang/Protect), based on Pav A Nice Day's team, as I had a Jolly Gyarados stored among my collection and it seemed like a good way to get started. I ultimately found it to be a bit underwhelming, but most importantly I found my team lacks ways to deal with Grass-types efficiently. So I went back into my collection and came across a Tornadus with Acrobatics/Tailwind/Taunt/Substitute - a set I had used in the Subway as a Flying Gem lead to decent success. The unavailability of Flying Gem meant this Tornadus ended up rotting in storage throughout 6th gen, but with the introduction of Electric Surge and Electric Seed it had another opportunity to shine. Tornadus actually did pretty well, but I also found it a bit limited in coverage (only one STAB hurts it a bit I think). This is where Hawlucha comes in.

When Hawlucha switches into Terrain, Electric Seed is consumed (despite Flying-types otherwise ignoring Terrain). Aside from boosting Defense, this also grants a full power Acrobatics and activates Unburden, sending Hawlucha's Speed skyrocketing. Hawlucha's main purpose from there is to smash Grass-types, but the additional Fighting STAB expands its targets beyond what Tornadus could acheive. Being able to destroy Tyranitar (Chople Berry be damned) is particularly nice.

Substitute is used as a pseudo-Protect to bait and avoid attacks (knowing full well that baiting in general doesn't seem to be quite as reliable). It's a strategy inherited from Tornadus but Hawlucha is fast enough to pull it off too. The advantages of Substitute over Protect include the ability to use it multiple times consecutively without chance of fail (HP permitting) and the potential for prolonged protection if the Substitute survives the turn. One strategy I used every now and again was to throw out a sub while Hawlucha's teammate KOed one of the opposing Pokemon. In this situation, either sub is broken and a stronger hit is avoided, or I mispredict and the partner Pokemon is hit instead but the sub is undamaged and able to protect Hawlucha for subsequent turns. However, Substitute requires sufficient HP to be used and (unlike Tornadus with Prankster) it doesn't have priority and won't help a great deal when stalling Trick Room.

Tailwind is filler. I only added it because I knew I wouldn't be able to access it once I transferred Hawlucha from ORAS (necessary for Low Kick), but it was only used once to deal with an opposing Tailwind from Whimsicott4. It's expendable. Protect, Taunt, Ally Switch, or an additional coverage move could also be used as a replacement.

Hawlucha doesn't really need Speed investment due to Unburden, so after maxing Attack, the remaining EVs go into bulk. The spread doesn't mean a lot - it was the suggested spread from the maximizing your defenses app. However, this spread does make it marginally bulkier on both sides than an uninvested Tornadus, while also having more Speed with Unburden. The Attack drop is minimized by being able to use Adamant over Jolly, and the difference is ultimately small (and arguably canceled out by Hawlucha's additional STAB allowing it to cover more Pokemon).

As an aside, I think that the Terrain/Seed combo (whether it be with Hawlucha or Tornadus or something else) has some potential in other contexts that may be worth exploring, possibly with other Tapus. Might be something I'll look into in the future.

Threats

The following is not meant to be exhaustive, but does cover the main threats.

Trick Room is a problem for this team. I usually have to do everything in my power to stop it going up, whether it be with Fake Out or through simply powering through potential setters (double targeting is sometimes necessary on very bulky setters). If Trick Room does go up, smart switching and stalling with Protect are usually required to survive. This team has to approach Scientists with caution simply because of Trick Room.

I have to always be on the lookout for Lightning Rod opponents. Marowak2 can be irritating due to its Fake Out immunity, resistance to all of Tapu Koko's moves, and ability to smash Raichu with Shadow Bone. Rhyperior can also be tricky with a bad partner. Grass Knot is tempting but the possibility of Focus Sash encourages double targeting. But what if it's set 4 instead, and it uses Protect to nullify your attacks and give its partner free reign? Straight switching to both back-ups is often a decent strategy, although if it's paired with an Ice-type (most can be dealt with using Electric moves but this won't work in the presence of Lightning Rod) this becomes incredibly risky.

Some Electric-types with particular secondary traits that nullify Earth Power. Eelektross comes to mind immediately - set 3 can be rough due to its resilience and its access to super-effective coverage on Raichu. Some Rotom sets are also difficult. Rotom-Frost is the worst Rotom for this team due to its powerful Blizzard discouraging switching and the general difficulty in KOing it quickly with the leads. Rotom-Heat is slightly easier to switch into but additionally walls Tapu Koko. Rotom-Mow cares the least about my Electric moves but is vulnerable to Sludge Bomb at least. Rotom-Wash and Rotom-Fan are the easiest to deal with (Gigavolt Havoc works well enough).

As alluded to above, Ice-types discourage switching but many are easy enough to remove. One Ice-type that does make me nervous is Glaceon. Similar to Rhyperior, set 3 has Focus Sash to encourage double targeting but set 4 has Detect to punish this strategy. With a bad partner, dealing with it can be a gamble. I find Dazzling Gleam to be useful in these situations - if Glaceon does block with Detect then at least the partner will take some damage. I imagine Abomasnow would be another Ice-type that would be a pain for similar reasons (plus it has an Electric resistance) but I was fortunate not to have to face one throughout this streak.
 
Last edited:
Well that was fun. Decided to seriously put together a team (instead of grabbing pokemon from my box and using them, my max doing that was previously 42) and cleared 100 wins in super singles with them. My streak ended at 118 wins against Sightseer Christian due to a combination of forgetting berserk was a possible Drampa ability and quick claw hax. Considering I normally use pretty silly team comps, I'm surprised I made it past 75 wins.

Team details:
Diggersby (M, Luggernaut) @ Choice Scarf
Adamant, Huge Power
IV's: 31/xx/31/31/31/31
EV's: 4HP/252Atk/252Spd
Earthquake/Return/U-turn/Knock Off
Comments: Brute #1. Return and Earthquake both deal absurd amounts of damage, and U-turn allows me to scout out potential sets. Knock Off is a situational move, but it has helped in a few places, such as removing leftovers from Regigias 1, allowing me more leg room to kill it. As. the lead, I generally look up if I can faint something using the helpful damage calc on the main post. If the answer is no and the opponent does have something that can possibly one-shot me, I'll U-turn out to scout if it actually does have that attack. Diggersby's bulk is somewhat mediocre, though it's oddly enough to still live a few things and KO back. Choice scarf provides immediate speed, which allows diggersby to get the jump on a LOT of faster threats that would otherwise kill it. I considered running agility with Rocknium-Z or Focus sash and a bulk investment, but neither option worked as reliably as choice scarf + 4 attacks.

Salamence (F, The SKILLR) @ Salamencite
Adamant, Intimidate/Aerilate
IV's: 31/xx/31/31/31/31
EV's: 252HP/252Atk/4Spd
Return/Dragon Claw/Dragon Dance/Earthquake
Comments: Brute #2. Why this thing's allowed in the tree I have no clue, but there aren't too many instances where I don't have a match instantly won when Salamence gets a dragon dance off. HP investment over speed might seem odd, but after a dragon dance, Mega Salamence outspeeds most unboosted pokemon anyway, so the extra bulk is helpful in tanking hits and allowing more dragon dances to be secured. (most notably, Passimian is outsped even with max investment + jolly, which would otherwise be a huge threat if it gets defiant) Intimidate is also surprisingly handy for nerfing a few threats, or adding opportunities to secure more dragon dances. Garchomp 3 in particular is an instant death-sentence without intimidate. A majority of the time, Return and earthquake are enough to secure a win after boosting, so I'm considering dropping dragon claw for another move, though I'm not sure what move exactly. (sub and roost are the two main options I'm thinking of) Overall, a very nice pivot for fighting moves (Diggersby) or grass moves (Rotom-W) which can allow for a free boost depending on the opponent.

Rotom (-, Motom) @ Assault Vest
Modest, Levitate
IV's: 31/xx/31/31/31/31
EV's: 252HP/252SpAtk/4Spd
Thunderbolt/Hydro Pump/Dark Pulse/Volt Switch
Comments: Just looking at those two during teambuilding I realized how much of a massive ice weakness I had, so my answer to that was a water-type. I had a few options for this one like Primarina and Slowking, but Rotom's access to volt switch as well as levitate helped it earn the "glue" spot on this team. Volt switch's utility with Diggersby's U-turn is also nice, even if it wasn't used very much. Dark pulse is mostly just filler (if I was willing to IV breed for hidden power, I'd probably try for HP grass to nail Gastrodons with water absorb) but it has helped out a few times against Cofagrigus in particular. I'm considering trying slowking over this in a future attempt due to better coverage, as well as hydro pump's iffy accuracy. (which I was getting pretty lucky with, all things considered) Assault vest may seem like a dumb item choice, but it does offer Rotom a surprising amount of special bulk. Combined with it's lone grass weakness, Most ice-types struggle to break through before rotom either faints them, or does enough damage for the other two members to clean up afterwards.

Use: Generally my main battle plan is to hit fast and hard with Diggersby and Mega Salamence, while using Rotom-W to tank anything that might have an ice-type move. As mentioned above, Mega Salamence at +1 is pretty much an instant win condition a good 80% of the time, so setting that up also tends to be a priority, especially if grass or fighting types enter the field. Salamence can easily boost up on both of those to secure a win, or just tank them and faint if boosting isn't an option. (like with switch-out users)

Threats:
GARCHOMP 3: Easily the biggest threat, this thing can easily sweep if Salamence is fainted or already mega evolved. Even with ideal conditions, it's still guaranteed to faint at least one team member, as intimidate abuse is my only way to bring it's power down to where it won't one-shot Mega Salamence. Garchomp 4 is also almost certain to get a kill, but it's much less likely to get a full sweep thanks to both Mega Salamence and Diggersby outspeeding it. Cynthia is easily the worst "area boss" to fight solely because of these two. (oddly enough on my 100th match, she didn't have either)
Mega Glalie 4: This would be pretty manageable if it weren't for Freeze dry. Unfortunately this requires both Rotom AND Diggersby being alive to take out, and one of the two has to faint to do so.
Mega Alakazam 3: Both Rotom-Wash and Mega-Salamence can faint it, but Both require free switch-ins to do so, and take hefty damage as well.
Anything with Double Team/Swagger/Hypnosis: This threatens every team, but is worth noting anyway because I have no Z-moves or Lum berries to really play against it. Crobats 1 and 4 (for hypnosis) and Regigias 1 (for double team) are both particularly annoying as they both are able to pull their strategies off 100% of the time thanks to their speed/bulk, respectively.
Trick room: Not as much of a threat as most teams, but I do still have to play around it a fair bit with Rotom-W and resists.
Those were the main ones I saw on my streak, but I'm sure there are other threats that I wasn't (un)lucky enough to encounter. (I'm playing on moon, so Mallow's almost a free win anytime she shows up as an area boss.)

Loss video + details: 4G4W-WWWW-WWW6-5ZPH
Pretty short, but Drampa 3 decided that it had enough of my streak. Started off with a U-turn to Rotom-W to scout which drampa it was (Drampa 4 carries focus blast), turns out it was 3. Volt switch back to Diggersby, Berserk activates, which results in Diggersby fainting from +1 hyper voice after failing to KO with return. Still salvageable. Send in Salamence to grab the kill. "Drampa's quick claw activated!" Cue dead Salamence, which means that Rotom had to sweep the team solo. It came pretty close, but Mega Gengar wasn't a possible kill unless I was at full health, and the crit at the end sealed the deal.
Going to try for a +200 streak in the future, because I'm interested in the potential starf berry loot.
 
Can we talk about Zapdos-2 please? Bright Powder+Double Team isn't the only problem it is also only weak to Ice and Rock. I have exactly one of those two types on my Garchomp/Fini/MegaScizor team that I'm using right now and of course its on Fini which is weak to Charge Beam. When my only guaranteed hit move (Devastating Drake) has already been used in the battle what am I supposed to do against it? Here is the Battle Video of my loss...

PBUW-WWWW-WWW6-6QC4

Any advice would be appreciated.
Chansey can PP stall it. Durant + an accuracy-boosting sweeper + Red Card Mimikyu to switch in in case Durant misses Entrainment a couple times and is on the verge of getting KOed works too. Other than that you just have to live with the possibility that certain evasion users can beat you with enough bad luck.

Although, without having watched the video yet, there are varying degrees of bad luck. That Zapdos only has 5 PP worth of moves that can damage Garchomp, so unless your team was severely weakened when Zapdos came out or it was getting Ancient Power boosts and crits left and right, the most likely scenario would be Zapdos getting some chip damage on Fini and Chomp before it's forced out (or maybe it would even stay in because it had evasion boosts and allow you to spam Swords Dance and Substitute without even having to worry about Outrage hitting).
 

Smuckem

Resident Facility Bot Wannabe
is a Community Contributor Alumnus
I didn't mean Heatran requiring Araquanid as a downside, it was more an observation that its overall poor offensive presence is mitigated by an overpowered poke that'll kill much of the things it can't. Heatran has a similar relationship with Araquanid, who is still a really solid poke in its own right, and before mention of Torkoal I was considering having it used next to Mawile. And then there's Drampa, who I still hold in high regard.

Edit: regardless, these are my pals: https://3ds.pokemon-gl.com/rentalteam/BT-4AA7-8BEC

Oranguru/Hariyama/Araquanid/Drampa/Torkoal/Mawile. Araquanid has gotten minor move changes since my streak was posted, both due to and following its participation in the competition for Mawilite. Drampa hasn't been getting a positive reception in this topic, but it's worth repeating that I only ever used it as a pinch hitter, typically when there was either one turn of TR and one enemy, or two enemies one of whom really needing to immediately die. If you're sending it out thinking just "base 135 great movepool fuck yeah" you're only going to be bitten in the ass.
Excellent, thank you for sharing! Although it won't be reflected on the Battle counters for that team, I've taken it for a spin to the tune of roughly 80 battles so far. Haven't gotten past 48 wins with it yet, but that has been entirely due to hubris (not using Fake Out Turn 1, using one coverage move when Instructed Close Combat would work better, not running my calcs, etc.), and I'm sure I'll get the hang of it eventually. My favorite, most successful variant so far has featured Torkoal/Drampa as the backups (easy way to blast through opposing weather, offensive synergy with Drought + Drampa Flamethrower).

Separate, very small note I would like to share with you all: my first-ever observation of Lilligant1 using Healing Wish against me, in any battle facility (this includes PWT Rental Masters): 7Y7W-WWWW-WWW6-6TFC
 
Last edited:
Chansey can PP stall it. Durant + an accuracy-boosting sweeper + Red Card Mimikyu to switch in in case Durant misses Entrainment a couple times and is on the verge of getting KOed works too. Other than that you just have to live with the possibility that certain evasion users can beat you with enough bad luck.

Although, without having watched the video yet, there are varying degrees of bad luck. That Zapdos only has 5 PP worth of moves that can damage Garchomp, so unless your team was severely weakened when Zapdos came out or it was getting Ancient Power boosts and crits left and right, the most likely scenario would be Zapdos getting some chip damage on Fini and Chomp before it's forced out (or maybe it would even stay in because it had evasion boosts and allow you to spam Swords Dance and Substitute without even having to worry about Outrage hitting).
Thanks for the advice, I'll keep that in mind. For this specific battle I believe that my Garchomp was already KOed when Zapdos came in last so I only had MegaScizor and Fini left.

Speaking of Chansey can you explain why the Chansey builds being used in the Tree all have the Nature as Timid? Chansey doesn't use a single Special Attack move and I'm confused.
 
Being able to have Chansey go first with Growl is a boon when it faces strong physical attackers, and regardless of whether you outspeed, having speed ties is a very bad thing when you're using Substitute, since you don't know if you'll be going first or second to plan your Substitute math around. The highest speed a Bold Chansey can reach while guaranteeing it won't tie with any opponent is 89 (the highest speed it can reach overall is 102), while making it Timid gives it access to the "gold standard" speed values for stall mons, especially Substitute users, of 107 and 109. There are 142 possible opponents on the list--a full one-seventh of the pool--that you can get the jump on at 107, for either a damage-reducing Growl or a status-blocking Sub right away, and wouldn't be able to get at 89. Compared to that, the jump from 107 to 109 only lifts you past five sets (six once Regigigas's Slow Start wears off), but they include all the Excadrills, so that unlike, say, a Suicune, Chansey really appreciates being able to get a head start on that.
 
Excellent, thank you for sharing! Although it won't be reflected on the Battle counters for that team, I've taken it for a spin to the tune of roughly 80 battles so far. Haven't gotten past 48 wins with it yet, but that has been entirely due to hubris (not using Fake Out Turn 1, using one coverage move when Instructed Close Combat would work better, not running my calcs, etc.), and I'm sure I'll get the hang of it eventually. My favorite, most successful variant so far has featured Torkoal/Drampa as the backups (easy way to blast through opposing weather, offensive synergy with Drought + Drampa Flamethrower).

Separate, very small note I would like to share with you all: my first-ever observation of Lilligant1 using Healing Wish against me, in any battle facility (this includes PWT Rental Masters): 7Y7W-WWWW-WWW6-6TFC
I haven't actually taken that Torkoal for a real spin yet. Does Bloom Doom see much use or do you think it'd have been better with something more broadly useful?

Drampa/Torkoal have a couple enemies that'll be more challenging to take down without expending Devastating Drake perhaps sooner than you like. I hadn't considered using them as pairs, but I'm interested in hearing more details as you see fit. Dunno if I should be amused or concerned that 48 is the best you've got, even while admitting to playing recklessly :P I've recently been thinking that my original backup set is still the way to go.

I don't know how the battle counter on the PGL page works, anyway; I kinda figured it was for battle spot and not the tree, because the tree would rapidly inflate the battle count, wouldn't it?
 

Smuckem

Resident Facility Bot Wannabe
is a Community Contributor Alumnus
Have only used Bloom Doom once, but I don't consider this a big enough sample size to be indicative of anything. Once my current Doubles run ends, I will return to this team and keep rolling with Torkoal.

You are correct in that the counter works for online battles only: I make sure to Game Sync every time I'm done using the team just to update said counter, but nothing doing there.

I've been kinda disappointed in Araquauid's power, enough that I would rank it as the "sixth 'mon" on the team: tbf, though, I'm just trying to make Torkoal worth a shit and haven't even used Megawile yet. I also suspect I have primarily tried to use it to land finishing neutral blows, which is probably not the way to go. Wide Guard has been handy a few times though, and having something secondary to take out the numerous TR setters/abusers weak to either Bug or Water has helped a couple of times. (Bubble-weak, I call them.)
 
I did some mock battles to test this behaviour on the first battle video.

Test 1: Hitmonlee/Tapu Koko vs Electrode/Accelgor
I did 10 mock battles, going for Thunderbolt on Electrode on turn 1 and turn 2 (two electric hits in the slot) to see if the AI will switch in Volt Absorb Jolteon in either slot. It did not switch a single time in the mock battles I did - if this were the Maison I would expect a Volt Absorb switch, but the AI never switched at all, in either slot.

Test 2: Tapu Koko/Hitmonlee vs Electrode/Accelgor
Switched Tapu Koko to the front of the team, since atsync's video had it in that slot rather than as the second Pokémon. With this setup I immediately started seeing identical behaviour to atsync's description in around half of the mock battles I did, with T1: Fake Out into Accelgor - T-Bolt into Electrode Protect, T2: Accelgor switches out for Jolteon. I also saw the AI switching Jolteon into the Electrode slot, rather than the Accelgor slot, which corresponded with the AI not using Protect on Electrode and taking damage from Thunderbolt instead. It might be that Fake Out/Protect with Accelgor being the only enemy damaged, makes the AI confused as to which enemy was actually targeted since Electrode is still at full HP and Accelgor had taken damage from Fake Out.

I've still not done that many mock battles but this is very curious... it would seem that having your Pokémon at the front of the team (left slot) makes the AI react to your attacks with Volt Absorb prediction switches (sometimes in a different slot from the one you targeted), while the right-side slot doesn't provoke such behaviour. This would match with my experiences playing Hitmonlee/Tapu Koko in Doubles, where I've never had the AI switch its Pokémon out for a Lightning Rod user after using an Electric-type move with Tapu Koko in over 1000 battles.
Great to know... I will always play my electric/water/fire users on the right side from now on (volt/water/fire absorb)

I wonder if this happens when your poké is "on the left side", (even after switch-in and out)
or just when it is your first, ( does not apply if 2 pokés already died and last 2 are in battle)
or when is before the other in your team choice (even if it is on the right side after some switch-in and out)


p.s. thanks guys for the help a few pages back (prior and post battle 40 changes)
 
Last edited:
Araquanid for me served mostly as a way to clean the floor enough that, should I need to, the remaining target can be felled easily by DD. I was really pleased with its power in that regard because without resistance, LO boosted Liquidations back to back kill most things. If it's weak to water, bulk is irrelevant (ask Mega Tyranitar.)

Because each turn of attacking costs 20% HP (at least when I was still using Lunge very sporadically) my priorities became things that could flirt with 80% damage on Araquanid. Fortunately its SpD is still really good uninvested, so it then became a matter of killing physical pokes or things with Electric moves. Stuff like Mega Ampharos has potential to be a major problem if it comes in when Hariyama is down and I can't safely get Drampa in (or reset TR if need be) but that hasn't come up yet. It's one of the reasons I've wanted Mawile, though, because Araquanid can't do a lot against a handful of dragons without things going its way and having Oranguru there, and I've fought multiple teams that used dragons exclusively (correct me if I'm wrong but I believe there are male and female veterans who use all of the pseudos in addition to legends, which is what I'm remembering.)

Anyway, if you do get around to trying Mawile, you'll want Araquanid as its preferred partner because of the issues it'll have with Fire types and Flame Body.
 
Being able to have Chansey go first with Growl is a boon when it faces strong physical attackers, and regardless of whether you outspeed, having speed ties is a very bad thing when you're using Substitute, since you don't know if you'll be going first or second to plan your Substitute math around. The highest speed a Bold Chansey can reach while guaranteeing it won't tie with any opponent is 89 (the highest speed it can reach overall is 102), while making it Timid gives it access to the "gold standard" speed values for stall mons, especially Substitute users, of 107 and 109. There are 142 possible opponents on the list--a full one-seventh of the pool--that you can get the jump on at 107, for either a damage-reducing Growl or a status-blocking Sub right away, and wouldn't be able to get at 89. Compared to that, the jump from 107 to 109 only lifts you past five sets (six once Regigigas's Slow Start wears off), but they include all the Excadrills, so that unlike, say, a Suicune, Chansey really appreciates being able to get a head start on that.
The only times Chansey would be facing a strong physical attacker slower than it are when it already has a sub and boosted evasion from defeating something prior, so it is free to safely Seismic Toss or spam Sub and Soft-Boiled to fish for a miss/PP stall the opponent's strongest move. Growl is basically useless on Chansey because the Pokemon it naturally pairs with have much more effective ways of lowering the opponent's Attack. If a Dragon Dancer comes out against Chansey, hitting it with Seismic Toss enough times for Aegislash to finish it off with Shadow Sneak is pretty much the worst-case scenario (which means you have a 2 on 1 with full health Aegislash and Salamence); much more common is that the opponent uses Dragon Dance a couple times and then either breaks the Sub or misses the turn Chansey KOs it (or it's something like Kommo-o that Aegislash can just switch in and set up on). Only real use for Growl would be to conserve PP against something that can DD and Rest, which nothing in the Tree has.

On a different note, my 2nd try with Durant/Glalie/Mimkyu is going better than the 1st. Actually made a minor change in the middle of the streak, moving Glalie's 4 Defense EVs to Special Defense after messing around with some calcs and seeing that they would ensure Glalie survives a max damage critical hit from Primarina-4's Sparkling Aria. I guess it also gives Porygons an Attack instead of a Special Attack boost, but if one were to somehow come in when Glalie didn't have enough boosts to OHKO (and also was at equal stages of Defense and Special Defense) I would just be thankful it wasn't a Porygon2 that Traced Moody.

TFEG-WWW-WWW6-82Z3 is the last battle I've done (#510), and it was kind of a weird one. I switched Durant out against Colress's Magnezone-3 (which Thunder Waved turn 1) and Red Card brought Klinklang in. It turned out to be Klinklang-4, a 2nd Pokemon that when leading can KO Durant without getting Entrained. Mimikyu got fully paralyzed when I selected Taunt, so my next plan was to switch back and forth to let Durant get into Thunderbolt KO range while trying to Entrain it. Klinklang Protected itself with Durant at 47 HP, which would obviously be a guaranteed KO, so I had to switch in Mimikyu once more and sacrifice it to give Durant one more shot at using Entrainment. Fortunately, Klinklang acquiesced the next time around and Glalie set up from there. Had Klinklang used Protect once more, I would have still liked my chances of setting up on it with Glalie if it used Protect the first turn out and gave Glalie a free Sub, but thankfully it didn't have to come to that.

The other battle from this streak I'd consider "close" came in the 160s where I faced my first Zen Mode Darmanitan lead and discovered Entrainment doesn't work against it. Oops. Mimikyu forced it out (it was Darmanitan-3 so was able to hit it with Thunder Wave first) and crippled Regigigas-3 enough for Glalie to set up on it easily without Truant. That now makes Darmanitan leads somewhat annoying since Sheer Force ones don't trigger the Eject Button and end up KOing both Mimikyu and Durant before Glalie has to set up on the remaining 12 Flare Blitzes.
 
Last edited:
Our Discharge and Earthquake users ended up as Zapdos and Garchomp. Both are fast at 102 and 100 base speed, dish out plenty of damage with spread moves they are both immune to, and are immune to a now-nerfed Gen VII but still annoying paralysis.
Most of the time, Zapdos and Garchomp with Life Orbs equipped sweep clean-through teams with their spread moves. But they can also KO other threats with either single-target moves or one single-target/double-target moves (thunderbolt/dragon claw, thunderbolt/earthquake, discharge/iron head, discharge/dragon claw). We ran hidden power ice on Zapdos to hit grass types and mons 4x weak to ice (Mence, Lando, etc.). *Worth mentioning that getting a double paralysis from discharge and cleaning up with earthquake NEVER ceases to be satisfying.
If we could not make Zapdos and Garchomp work from the start (“I see you dual ice leads, fast rock-slide flinching leads, and fast dragon attackers”), our team can rely on protect and/or switching in back-ups.
Why not use Thundurus-T over Zapdos? More SpA and also Electric Immunity. You can also run Sludge Bomb to hit Grass types better.
 
Ok well I will 'formally' report my streak of 99. Here is the team (same a before):

http://www.smogon.com/forums/threads/battle-tree-discussion-and-records.3587215/page-67#post-7246057

I lost on 100 to dumb Dexio. Felt bad. I misplayed.

Basically he led with Slowbro. I switch to Fini expecting a mega evolve and then it uses Amnesia, so I am hesitant to keep Fini in (I should have, probably). Anyway I pivot to Scizor (it hits me with Psychic), Mega Evolve and Bug Bite (hits me with Psychic again). I Bug Bite again and it dies. Out comes Braviary and I assume a Brave Bird is coming so I BP, take it to 50%, and Scizor dies to Brave Bird.

Chomp comes in, takes a Scarfed Bird, and kills it. Then out comes the one thing that I couldn't deal with at the time, which is Alola Ninetails. I make a dumbass move here and swithc out Chomp (Chomp is dead to this thing no matter what so why i did think I have no idea). Fini comes in and takes Freeze Dry to the face, Calm Minds, Protects, and Moonblasts. Does about 30-35% to Nintetails. I could have raced it here by cycling Protect and Moonblast, but that hit that it took when I switched it in spelled my doom. It also got a crit on me and then it was over.

So yeah. A dumbass play cost me battle 100. Lost on 73 in the next run because I tried to set up with Fini against Volcarona instead of Z-Moving it with Chomp.

Proof:
 
Last edited by a moderator:
Posting a completed streak of 280 wins in Doubles. Now that I'm home, I can do this properly.


Battle 281 was against Collector Dennis using Tauros3/Metagross3/Pinsir4/Porygon2-4. My own misplays stemmed from poor predictions that Metagross and later Pinsir held their Mega Stones, which neither did; because I faked out Metagross, Hariyama ate a Giga Impact and would not survive Bullet Punch the following turn.

In hindsight given that Tauros needed to recharge it would have been better to switch Hariyama for Mawile and take that risk, but I didn't. Mawile replaced Hariyama, and I attempted to get a flinch on Metagross via the second Iron Head, as the first would KO Tauros; no flinch, but its Earthquake did less than half its HP.

Pinsir appears and, wanting to preserve Oranguru (another bad decision knowing I could OHKO it with Drampa if TR were still up) I targeted it with Iron Head. No mega evolution, OHKO, no flinch on the Instruct, and Metagross' second Earthquake crits Mawile for the finish.

Even with only a third of its HP remaining, I got a low roll on Flamethrower and Instruct was needed to KO Metagross. My coffin was nailed shut when P2 fucking froze Drampa with Ice Beam. It wouldn't thaw after an attempt to Protect while TR was reset, and Oranguru had absolutely no way to come back from this. I was counting on Berserk DD to do most of the work- in fact a +1 DD would have been a guaranteed OHKO on both sets 3/4 of Porygon2, which are nearly indentical.

I did make a number of bad judgment calls, but I'm still placing most of the blame on the cancer that is freeze status.


Oranguru, Hariyama, and Drampa have not changed from the team posted here. Araquanid was used for the first 250 battles, at which point I began using Mega Mawile. Unlike the MM in the team I've uploaded to PGL, I was using one with Rock Slide for the additional coverage (instead of Protect.)

In addition to the problematic monsters I covered in my original writeup, the two pokes that came to scare me the most and subsequently scramble my original plans for the team, were Escavalier and Mega Camerupt. Both third and fourth sets had potential to be major issues, the latter so much so that I abandoned my desire to use Torkoal and nearly abandoned Mawile; fortunately, the only Camerupt I fought not only appeared while Hariyama was still alive, it missed with Heat Wave (fatty was at -3 already heh) and inflicted only moderate damage on Oranguru, so a CC-Psychic combo easily destroyed it.

Not a single Escavalier was encountered during this run, but my plan for it would have been to use Oranguru as bait while hitting it with Knock Off. If that weren't possible, I'd try to get an Intimidate in there and basically look for the first and safest opportunity to hit it with Flamethrower, a guaranteed OHKO.

Both Escavalier and Mega Camerupt will always be a concern no matter what TR team I'm using.

An honorable mention goes to Cobalion4. This fellow opened with Quick Guard, thwarting my Fake Out. This accomplished very little because my target ended up protecting itself (Suicune) but there are a lot of legends that easily destroy Hariyama if they take their turns; primarily the twins, the genies with access to Supersonic Skystrike, and Moltres2. I was lucky this time around.

EDRG-WWWW-WWW6-8RFK: Battle 266 vs Veteran Dooley
This battle demonstrates exactly why the more serious players don't want to use 90% accurate moves. Bit me in the ass pretty hard.

Z9QW-WWWW-WWW6-8RDL: Battle 281 vs Collector Dennis (loss)
While I got bored with this relatively braindead team, I'm still disappointed because I was sure I could have gone a lot farther with it. That said, it gives me incentive to try other things now (I did breed close to two dozen new pokes!)

My other replays consist of either my own documented incidences of the AI deciding to switch, or other battles that went badly because of dumb misplays. The one I uploaded was the closest of them, but there was another battle where Latias4 was allowed to Thunder Wave Oranguru, who spent most of the battle fully paralyzed. Looked very sad and sloppy.

Oh, and I still haven't gotten a suitable partner for Multis. Our favorite mistress Cynthia continued to lead with that goddamn Spiritomb.

NoCheese given that Mawile only fought in 31 battles and Araquanid deserves most of the recognition, perhaps instead of calling attention to the meager battle count, you could just list the two pokes as Araquanid/Mega-Mawile and then the link to either writeup will explain the rest for those curious?
 
Last edited:

NoCheese

"Jack, you have debauched my sloth!"
is a Site Content Manager Alumnusis a Forum Moderator Alumnusis a Contributor Alumnus
NoCheese given that Mawile only fought in 31 battles and Araquanid deserves most of the recognition, perhaps instead of calling attention to the meager battle count, you could just list the two pokes as Araquanid/Mega-Mawile and then the link to either writeup will explain the rest for those curious?
Can do! Done!
 
Last edited:

Smuckem

Resident Facility Bot Wannabe
is a Community Contributor Alumnus
Excellent work Repto, though your run is over I am sure that the repercussions will reverberate here for a while. To that end, I have been testing your QR team out again, this time using Araquanid/Megawile as backups. This team has pulled its most successful run (with me) yet, taking me to 70 wins as of now.

I cannot share the replay for some reason, but Battle #65 featured opposing leads of Drapion?/Megadrill?. With unknown backups waiting in the wings, I didn't try to save Oranguru from a potential 2HKO, instead Faking Out Megadrill and hoping Drapion wasn't a Sniper. The sage survived the ensuing Night Slash blow, and the rest of the battle rolled along from there (Amoongus3/Minior4 basically took themselves out). I know I likely made the incorrect opening play, and I am fortunate that it didn't cost me, but I feared switching in Megawile to take Oranguru's blows and be forced to spend several turns without TR. I ask the community-at-large: what would have been a safer/better Turn 1?

On the other hand, when things go right you get my Battle #70 (also currently cannot be shared for some reason): vs. Sina (Weak Armor Mandibuzz3/Glaceon4/A-Sandslash2/Drampa?) turned into a "flawless victory" when Mandibuzz3 got Faked Out, Glaceon4 Detected, Oranguru set TR, and Hariyama subsequently went to town. No damage taken, over in three turns, Drampa ate crit CC...about as perfect a battle as this variant of the team can muster.
 
Not entirely sure about the fail to uploads. No unreleased megas in either battle and I was able to upload one with MM which released alongside Beedrilite, so I don't think the stones would still cause a hiccup.

And I would have Faked Out Beedril simply because it's a guaranteed OHKO vs 50% of one IF Drapion has Sniper. Switching to Intimidate would have been a worse gamble IMO. For what it's worth, when I've fought Drapion4 on Grimsley's team, it opened with Swords Dance (was not a lead, just didn't get KOd by the Instructed attack.) That may have been the clearest indicator it wasn't Sniper. In ORAS during my Aron streak, the one battle Drapion4 opted to attack Slowbro its opening turn, it was obviously Sniper due to the ensuing OHKO. The AI may take the odds of the KO into consideration.

Speaking of Grimsley, I'd be interested to read of any run-ins you have with him, since on paper he has fairly decent potential to be disastrous.
 

Users Who Are Viewing This Thread (Users: 1, Guests: 6)

Top