


The Guild Alliance
{
 Data Thread |
  Rewards }
With their headquarters in Fortree City, the Guild Alliance oversees the defense of human settlements against wild Pokemon's incursions. While they have their own forces, they will often call upon Trainers to help them if the need arises, and many selfless Trainers answer their call. Recent attacks have been trickier to repel, a report says, and so they advertise for help throughout the continent.
The Guild Alliance tests your strategic prowess, where careful positioning and a united front are key to victory. Fight your way against waves of mooks and send your opponents packing!
Guild Alliance Summary
Playing in the Guild Alliance means more than just battling what's placed in front of you. To conquer the Maps of the Guild Alliance, you'll need to use your cunning to position your units to leverage their strengths and protect their weaknesses; and you'll need to prepare the field before the battle. With strategy and foresight, every fight will be on your terms!
Positioning on the map is your key form of matchup control during Guild Alliance tasks. You may find certain moves, abilities, and so on more or less effective than they would be in a standard match. Prepare your team, and defend the realm from foes great and small!
For Entry
- Players and referees must be T.Lv2 or higher.
- Maps are divided into three types:
- EXP-Rewarding Maps: Sign up for the Level you want to play; when taken, the Referee rolls which Map at that Level you'll play (equal odds among available Maps).
- Pokemon-Rewarding Maps: Sign up for the specific Map you want to play.
- Mega-Rewarding Maps: Sign up for the specific Map you want to play.
- Taking a Job with the Guild Alliance costs JC, depending on the Level of the Map challenged.
Level | 1 | 2 | 3 | 4 |
|---|---|---|---|---|
Player Entry Cost | 8  JC JC | 8 JC | 11 JC | 15 JC |
Default Format
EXP-Rewarding Maps: Bring 4, Pick 3 vs. Map
Pokemon/Mega-Rewarding Maps: Bring 3, Pick 3 vs. Map
Round Hours: 72 hours
Battle Hours (Player): 72 hours
Battle Hours (Referee): 120 hours
Backpack Size: 7
Step Count: 1
Substitutions: 3 per Team
Tech: Map Level - 1
Switching: Off


The Map
Battles of the Guild Alliance take place on the Map, which is an X by Y grid of Tiles. Maps contain Tile Types, Objects, and Objectives, each defined below. The Tile Types, Objects, and Objectives present for each Map will be defined within that Map's data.
Starting Positions: Each map specifies where the Challenger's Pokemon begin. When signing up, the Challenger indicates which of their Pokemon starts at each position. At the start of the battle, each of the Challenger's Pokemon, and the Referee's specified enemy Pokemon, are placed at their starting tiles.
Tile Types: Each tile on the Map has a Tile Type. Tile Types are defined on a per-map basis, though most maps include a default tile type with no effects. Tile Types may restrict movement, modify movement costs, provide effects when a Pokemon starts or ends their turn there, or other effects in the same vein.
Objects: Objects are neutral, tile-occupying game pieces. Some Objects can be interacted with (like switches), while others serve as obstacles (like pillars). Objects cannot be moved onto or through, under normal conditions.
Objectives: Each map specifies one or more Objectives that must be met to achieve victory. Objectives are either Main, which is the condition that must be completed to emerge victorious, or Side, non-essential objectives which provide additional rewards if completed. Once the Main Objective is completed, the Map ends.
Defeat Conditions: If this condition is met, the Map ends with Player loss. Players may still claim rewards they have earned up until the point of defeat, such as Progress and Milestone rewards, and completed Side Objective rewards. All Player Pokemon being Fainted is an assumed Defeat Condition for all maps, unless specified otherwise.


Battle Flow
Each battle progresses through a series of rounds, with players alternating as the active player. By default, the Challenger is the active player for Round 1. Battles are played with Switching: Off.
After each round completes, the active player role switches. End of Round effects only trigger if at least one Combat occurred during that round. Map-defined End of Round effects always trigger. This has no effect on Durations measured in rounds.

Movements & Orders
Each active Pokemon may receive up to one (1) Movement and one (1) Order in a round. Pokemon receiving an Order may conditioanlly also receive Substitutions. The total substitutions issued to Pokemon receiving orders in a round cannot exceed the team's Substitution limit.
Player orders are resolved one at a time, in the order listed in the post. Each Pokemon completes their Movement (if any), then their Order (if any), before moving on to the next Pokemon.
Movements
By default, each team has Movement available to them equal to their number of active Pokemon, plus one (1). Movement is in one of the four cardinal directions. No Pokemon may move more than two (2) tiles.
Pokemon who cannot move by map rule, or who move via special map rules rather than standard movement, do not contribute to or draw from their team's Movement pool.
Only one Pokemon may occupy a tile at a time. A Pokemon may pass through tiles occupied by allies but must end on an unoccupied tile. A Pokemon cannot pass through tiles occupied by enemies, Objects, or tiles for which it does not meet the requirements.
Orders
To receive an order, a Pokemon must be adjacent to an opponent or Object after their movement (or declining to move). For each order against an opposing Pokemon, that Pokemon gets a chance to receive an order and take a turn in response. This comprises a Step. Initiate Combat is a shorthand term for this process. The two Pokemon, the initiator and the responder, are said to be In Combat for the duration of that Step.
If that Pokemon is adjacent to multiple opponents, specify which opponent you are Initiating Combat against.
An order may contain Substitutions if that Pokemon Initiated Combat. Pokemon receiving an order to use a non-Combat Command cannot receive substitutions. Substitutions may only have targets in their result clauses that contain Pokemon in that Combat, their teams, or the battle.
Commands
There are a few commands exclusive to Guild Alliance tasks: Interact, Sabotage, Support, Rescue, Place, and Sneak. Full details for each Command can be found in the Data Audit.
The Initiative Token
The first time a Pokemon Initiates Combat each round, they claim the  Initiative Token for their Team. This token can be spent on the Sabotage and Support commands, which allow the use of moves outside of Combat.
Initiative Token for their Team. This token can be spent on the Sabotage and Support commands, which allow the use of moves outside of Combat.There can only ever be one Initiative Token at a time. When one team claims the Initiative Token, the other team loses it. Most maps start with no Initiative Token until one team Initiates Combat.
Initiative Token at a time. When one team claims the Initiative Token, the other team loses it. Most maps start with no Initiative Token until one team Initiates Combat.

Special Combat Rules
All Pokemon who haven't Fainted or left the map by other means are active. When a Combat begins, Pokemon do not enter play, nor do they exit play as Combat ends. As a reminder, Switching is Off.
Effects that trigger "At the end of the Switching Phase, if the user entered play this round; or when the user gains this ability" (or similar) now trigger "When this Pokemon Initiates Combat. Effects that trigger "When the user leaves play and becomes inactive" (or similar) now trigger "After Combat this Pokemon Initiated".
During any Combat, all Pokemon not involved in that Combat are considered Inactive.
By default, Objects cannot be targeted by actions other than Interact.
Entry Hazards
Moves and abilities that would create an Entry Hazard are modified to target an opposing Pokemon instead of an opposing Field (if applicable), and to inflicting a their condition as a Guild Hazard on the defender instead of creating an Entry Hazard on a field.
Each condition has a duration of "until the user declines their movement". Spikes and Toxic Spikes retain their stack limits. The effect of the Stealth Rock, Spikes, Toxic Spikes, and Sticky Web conditions occurs once for each tile the afflicted Pokemon moves.
Sign-up Template
Code:
[B]Thread:[/B] (thread)
[B]Map (Level):[/B] (map if you're going a Pokemon/Mega-Rewarding map, otherwise map level)
[B]Backpack:[/B] (7 items)
[B]Pokemon:[/B] (Pokemon profiles)
Last edited by a moderator:
 Cosmog
 Deoxys
 Iron Crown
  Iron Boulder
 RC x Number of Starting Pokemon
 TC x Number of Starting Pokemon
 Festive Voucher
 Academy Credit
 Comet Shard
 Artemis' Token of Esteem
 Star Piece
 Accolades
 Training Guild
 Unlock Mega Evolution for one challenging Pokemon.
 Big Game Guild
 A specified Restricted Pokemon.
 Defense Guild
 Recon Guild
 Rescue Guild
 Weakness Policy
 Lum Berry
 Enigma Berry
 Incineroar @
  Expert Belt
 Darmanitan-Galar @
  Choice Band
 Runerigus @
  Leftovers


 Mamo (Greendent)
 Razz Berry
 Bluk Berry
 Gumshoos
 Kommo-o
 Cursola
  Zoom Lens
 Duo (Greedent)
 Custap Berry
 Nomel Berry
 Anki the Lokix @
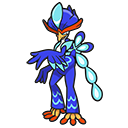
  Vmevej the Chesnaught @
  Life Orb
 Khety the Hariyama @
  Flame Orb


 Ring Target)


 Fort (Rotom)
 Kee Berry
 Watmel Berry
 Avalugg-Hisui @
  Black Belt
 Decidueye-Hisui @
  Blaziken @
  Fairy Feather


 Kelpsy Berry
 Tamato Berry
 Spidops holding
  holding
  Heavy-Duty Boots


 Lahaco holding
  Daimon holding
  Teju Jagua holding
  Choice Specs


 Empty
Empty
 Leaders
 Rewards

 Qualot Berry
 Anne the Mimikyu holding
  Azura the Quaquaval holding
  Macho Brace
 Nicoll-Dyson the Venusaur holding
  Miracle Seed


 Maxim (Celesteela)