SwSh Battle Facilities Discussion & Records

Psychic is a pretty tough type in this format. I managed to get a streak I'm happy with, but there were a lot of miserable failures to get there.

EcnWnxQUwAET-Le.jpg


Gallade (M) @ Shell Bell
Ability: Justified
EVs: 4 HP / 252 Atk / 252 Spe
Jolly Nature
- Low Kick
- Drain Punch
- Zen Headbutt
- Aerial Ace

Espeon @ Life Orb
Ability: Magic Bounce
EVs: 4 HP / 252 SpA / 252 Spe
Timid Nature
IVs: 0 Atk
- Psyshock
- Shadow Ball
- Dazzling Gleam
- Grass Knot

Musharna @ Leftovers
Ability: Synchronize
EVs: 252 HP / 252 Def / 4 SpD
Bold Nature
IVs: 0 Atk
- Toxic
- Protect
- Moonlight
- Healing Wish

It would be a bit tough to explain how I decided on each Pokemon, move, and item without listing the exact trial-and-error process I went through. I didn't take notes on that, but this should be pretty close to what my team progression looked like:

Starmie/Rapidash-G/Indeedee
Rapidash-G/Gardevoir/Indeedee
Gallade/Gardevoir/Indeedee
Gallade/Gardevoir/Hatterene
Gallade/Espeon/Hatterene
Gallade/Espeon/Musharna

I think Gallade is the best lead sweeper in this format (Gardevoir and Espeon are both decent as well, but really lack the moves to benefit from Dynamax affects - there are a lot of overlapping terrain moves). My original Gallade moveset was Low Kick/Aerial Ace/Earthquake/Leaf Blade. Eventually I realized that putting up Psychic Terrain with Max Mindstorm was HUGELY advantageous for a psychic team, as that stops First Impression, Sucker Punch, and Shadow Sneak from wrecking your team. Those first two moves are a huge problem for this team if Psychic Terrain isn't up. It's also STAB, and has a higher neutral BP than any Fighting move in Dynamax.

But Gallade was still underperforming a little bit. I thought to replace Low Kick (32 PP) with Drain Punch (16 PP), but at this point even Low Kick was regularly running low on PP. So I got rid of Leaf Blade, and never really missed it. Drain Punch replaced the need for the healing from Grassy Terrain. Usually in Dynamax, I would try to use one Airstream, one Knuckle, and one Mindstorm. You won't always be able to do that, but if you do it pretty much puts you in a position to beat nearly anything when Dynamax runs out. And if you have two Knuckles up - or one Knuckle and a Defiant boost - Drain Punch is set to heal a ton of HP back. I think my best run with Gallade alone was about 18ish wins. I was also incredibly lucky with Zen Headbutt hits - I think I missed only once or twice in all my attempts. But I only used it when absolutely necessary. There are also a small number of Pokemon - Beartic comes to mind - where you can lead the battle with a straight Low Kick.

Espeon has two main purposes: Revenge Killing for Gallade, and Magic Bouncing. With a Timid nature, you can swap into Froslass's Will-o-Wisp and OHKO with Shadow Ball. You can swap into Yawn, Thunder Wave, and even Disable. At first I gave it Leftovers, but found it was missing OHKOs by a little bit. I also tried Expert Belt, but its coverage isn't amazing so it wasn't that useful. I tried out Life Orb and found that most battles starting with Espeon were simply 3 OHKOs in Dynamax (in this case the best defense was a strong offense). Plus, Life Orb recoil in Dynamax is halved (percentage-wise) due to the increase in HP. And if you use a Max Overgrowth, it negates about 2/3 of the Life Orb damage each turn. I also tried Choice Scarf+Modest, since one of its main roles was to revenge kill for Gallade, but again, it didn't do enough damage. So for the first time, I used Life Orb on a team and found it to work better than anything else.

The absolute best thing to happen to this team was finding Musharna. I kinda figured Indeedee would be necessary for Ghost immunity, but it ended up holding me back. Its Special Attack and Speed are a bit too low to swap into Ghost moves and OHKO back, and it got flattened by dark moves. I had better luck with Hatterene with Healing Wish, but I found its lack of a recovery move to be very troublesome. So I transferred over a Toxic Musharna and gave it a try. Once I found out all of the matchups that Gallade can't handle, it became a perfect swap Pokemon. At first I used Kasib Berry, because Shell Bell and Leftovers were taken by Gallade and Espeon, but eventually I decided on Life Orb for Espeon which freed up Leftovers for Musharna.

Healing Wish is very useful. Not a lot of stuff 2HKOs Musharna (but there are some strong Ghost and Dark moves that will, so be careful), so if your main sweeper is hurting and/or afflicted with status, you can swap in and use it. I also tried one with Heal Bell over Healing Wish, but found that status was pretty easy to bounce back with Espeon. And lastly, you can swap Musharna into Trick Room users. It won't outspeed all of them though, unless you use a hindering nature and 0 IVs. Note that if you outspeed in Trick Room, the AI usually uses Trick Room again to nullify its affects. Also, don't look away when using this Musharna, as tempting as it may be. You'll get taunted and use struggle at some point.
 
So.... Rock types. I now understand why no one in this thread besides me has attempted it.

Ec12-OuU4AA1_sv.jpg


14 wins isn't as ludicrously high as some of these attempts have gotten, but with Rock, its a bit more impressive as you realize, because you know, Rock types suck, especially the selection that Sword & Shield give you.

A lot of them are really similar. Slow, physical tanks with subpar special stats. Rock STAB isn't particularly great either in a survival gauntlet because of the inaccurate accuracy and low PP of its strongest moves. Max Rockfall (Rock Slide) does hit with 130 base power, but 16 PP does go rather quick if you lack a secondary typing. A lot of these Pokemon having similar stats means that the same threats threaten your entire team, and leave little counter play.

Fast rock types like Silvally and Lycanroc make for terrible Dynamaxers because Silvally's Multi Attack actually becomes weaker when you Dynamax and Lycanroc loses its Tough Claws boost since all Max moves are non contact. Shell Smashers like Barbaracle and Crustle aren't hugely viable either because White Herb doesn't refresh unless you heal, and Power Herb users (Lunatone) for the same reason. There's just too much risk effectively giving up a turn.

Because of Rock's massive flaws, Terrakion is pretty much required for something like this.

Terrakion @ Shell Bell or Expert Belt
EVs: 252 att / 252 spd / 4 HP
Justified
Jolly
Sacred Sword
Rock Slide
Aerial Ace
Earthquake

Pretty much on turn one, you're gonna Dynamax and then Max Knuckle/Max Airstream for the snowball potential and depending on the opponent.. In many cases, Terrakion will solo the matches. Very self explanatory. Aerial Ace is of course for the bulky grasses.
Now whether you use Shell Bell or Expert Belt is up to you. Expert Belt does turn certain 2HKOs into OHKOs like a +1 Airstream against a Tangrowth. Shell Bell helps against bulky waters more as Terrakion can typically survive a hit from most water types and then recover the damage over the next few battles.


Tyranitar @ Assault Vest
EVs: 244 HP / 52 Sp.Att / 212 Def
Sand Stream
Brave
Rock Slide
Crunch
Flamethrower
Earthquake

Tyranitar is the tank, moreso the special one. Very little special attackers can threaten Tyranitar with the combination of Assault Vest and Sand Stream. Tyranitar is mostly there to handle pesky Psychic types that can outspeed Terrakion if it doesn't have the chance to Airstream. Flamethrower and the EVs are so that I can guarantee the OHKO on Tangrowth and Ferrothorn. Fire Blast is also an option but the accuracy is shaky.


Rhyperior @ Leftovers
EVs : 252 att / 252 HP / 4 def
Solid Rock
Impish
Rock Slide
Heavy Slam
Earthquake
Megahorn

Rhyperior is the physical tank. It's there to handle certain physical threats like Scizor, as well as other Rhyperior, who pretty much force Terrakion out all the time because of Bullet Punch or in Rhyperior's case, Weakness Policy. Rhyperior has very little issues taking out Scizor, and it shouldn't have problems with other Rhyperior either as long as you don't jump the gun and use Earthquake immediately. It's a nice backup to have due to its stats and ability.


The main problem with this team is that if Terrakion is forced out, it's hard to get it back in. In most cases, either Tyranitar or Rhyperior have to be KOed if Terrakion wants to get back in safely. There are also tons of Pokemon that threaten this team such as most ground and water types, Scizor, Tangrowth, some fighting types... the list just goes on. By far the biggest threat to this team is Kommo-o. If Terrakion isn't fully healthy and has less than two Dynamax turns left, its an auto loss, which has happened to me way too often, especially at around round 15.

I don't have much more to say about rock. It's definitely possible to get beyond 20 or even 30, but things just have to go consistently right, and rock types are easily wittled down due to lack of recovery/sustain. If Terrakion is forced out prematurely, you're sacking a Pokemon in most cases because Tyranitar and Rhyperior are so slow and you're pretty much using up a heal since you need all three of them alive and/or healthy.

Coalossal makes for an interesting replacement. It handles Steel and Grass types better, but then leaves you more susceptible to water types or ground types depending on who you replac.e. Drednaw is also decent as well since if it Dynamaxes, it sets up its own rain, but it has pretty bad snow ball potential due to the low power and lack of STAB on its Max Knuckle, and Max Geyser only boosts its water moves.
 
Rhyperior @ Leftovers
EVs : 252 att / 252 HP / 4 def
Solid Rock
Impish
Rock Slide
Heavy Slam
Earthquake
Megahorn

Rhyperior is the physical tank. It's there to handle certain physical threats like Scizor, as well as other Rhyperior, who pretty much force Terrakion out all the time because of Bullet Punch or in Rhyperior's case, Weakness Policy. Rhyperior has very little issues taking out Scizor, and it shouldn't have problems with other Rhyperior either as long as you don't jump the gun and use Earthquake immediately. It's a nice backup to have due to its stats and ability.
I haven't played Restricted Sparring much because I don't have a lot of battle ready mons, but I did try Excadrill / Flygon / Rhydon @ Eviolite for Ground because that's the only team I could field. Rhydon felt pretty bad. Even with Eviolite, it seemed to only notch one KO before it would die because it would consistently be hit first, often by 4x or on the special side. Rhyperior probably plays better with Solid Rock, but one of my favorite evolution lines seems ill-suited for this format. I'll have to to try them both some more to see how good they can be.

I like your set's coverage options and setup, so I might steal that.
Sadly, in general this format rewards hitting first and hard, OR being able to outheal the damage (via regenerator, drain or other means)

Slow pokemon tend to not perform well due to the lack of healing, and Trick Room isn't realistic since the setters would almost guaranteed take at least 2 hits (one to set, other to teleport out)
 

Eisenherz

ΡπέκΡινα της ουσίας
is a Forum Moderatoris a Community Contributoris a Tiering Contributoris a Top Social Media Contributor Alumnus
Moderator
I tackled Mono Flying yesterday!

PokΓ©mon Sword-Shield Screen Shot 2020-07-14, 12.43 AM.png


Preliminary tests were made without Gyarados, but adding it instantly made everything so much easier. While Emolga was very much necessary in my opinion, finding the right 3rd was difficult. I tried :braviary:, :sigilyph: and :pelipper:, and all of them did well enough, but :charizard: felt like it had slightly better synergy.

The team:
@

Jolly | Moxie
IVs: 31/31/31/31/31/31
EVs: 4 HP / 252 Atk / 252 Spe
Waterfall / Bounce / Power Whip / Earthquake
@

Timid | Solar Power
IVs: 31/0/31/31/31/31
EVs: 4 Def / 252 SpA / 252 Spe
Flamethrower / Air Slash / Solar Beam / Scorching Sands

@

Calm | Motor Drive
IVs: 31/0/31/31/31/31
EVs: 244 HP / 108 Def / 156 SpD

Thunderbolt / Toxic / Roost / Protect

Even though I'm pretty happy with 58, the run was definitely not smooth sailing. I was only able to get 10 battles out of the 2nd leg because Emolga got frozen by a Dusknoir Ice Punch on battle 35 (right away; I was not even Roost-stalling! ...yet). Even though I had entered that battle very healthy, taking out that Dusknoir after the freeze was very costly to Charizard's HP, and having only the first 2 around, with Charizard on low HP and no more Emolga to fall back on was way too risky, so I healed early. I had gotten 25 out of the 1st leg, so I was definitely hoping to go a lot longer before healing.
And then, on battle 48, as the team was still healthy (outside of regular PP depletion), Mamoswine crit and froze Charizard on the switch with Ice Beam (I pivoted into Emolga before since I knew it would Icy Wind first, and I didn't want to allow the speed drop on Charizard). I thought about thawing with Scorching Sands, but Mamoswine was at like 70% so it couldn't KO, and the next Ice Beam was definitely a KO, so I tried to Flamethrower, obviously didn't happen.
Gyarados and Emolga were able to keep carrying the 3rd leg on their own until 58, which considering I had healed at 35, is pretty amazing. You know you got everything you could out of your PokΓ©mon in this mode when you reach this state:

PokΓ©mon Sword-Shield Screen Shot 2020-07-14, 12.34 AM.png

Battle 58: I dynamaxed Gyarados with only 2 PP left overall (notice it's still at full HP!); got 2 KOs out of it – Golduck and Rotom – and 75% off 3rd PokΓ©mon Braviary with 2 Struggles!

PokΓ©mon Sword-Shield Screen Shot 2020-07-14, 12.39 AM.png

Battle 59: Emolga also made good use of almost all its PP!

Charizard could have gotten a few sweeps of its own here, after Gyarados had depleted its PP, so I'm definitely irritated that this run was twice hindered by freezes, both of them instant!

But overall, Gyarados and Emolga carried the team hard. While Emolga's function as an Electric switch-in is pretty obvious, I also used it a lot against bulkier stuff that Gyarados couldn't quickly break through as leads, stuff like Greedent or Musharna. Their synergy was excellent, and I would even say Emolga paired with Gyarados better than Gastrodon did on Mono Water, probably because of its speed, and the lack of a 4x weakness.

:gyarados: 
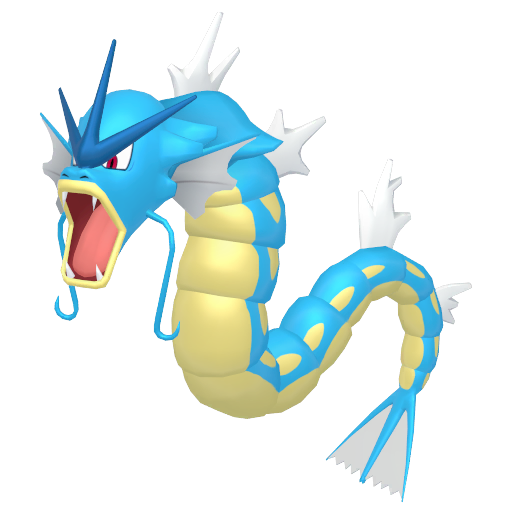
Gyarados' set is the good old Mono Water one, except this time with Shell Bell, which did absolute wonders for Gyarados. Moxie snowballs so quickly that Shell Bell can heal from the red all the way back to full within just a few battles. The main concern with Gyarados, as it was last time, is the low PP of Bounce. Unfortunately, some Grass types force Gyarados to use one, but after a boost or 2 in the rain, Max Geyser/Waterfall can thankfully pick up stuff like Lurantis and Lilligant. Twice, I went right to Emolga on an Eldegoss lead to toxic stall it, just to save 1 Bounce PP... that's how stingy I had to be about its management. Balancing PP usage was definitely tricky and really depends on what the game throws at you, in this run I was probably pretty lucky on legs 1 and 3.
However potent Gyarados is at sweeping, it's forced out by quite a few things (:magnezone:, :magneton:, :gyarados:, :dedenne:, :obstagoon: (Counter), :oranguru: (Thunder), :musharna:, etc.), and that's where his best friend comes into play...

:emolga: 
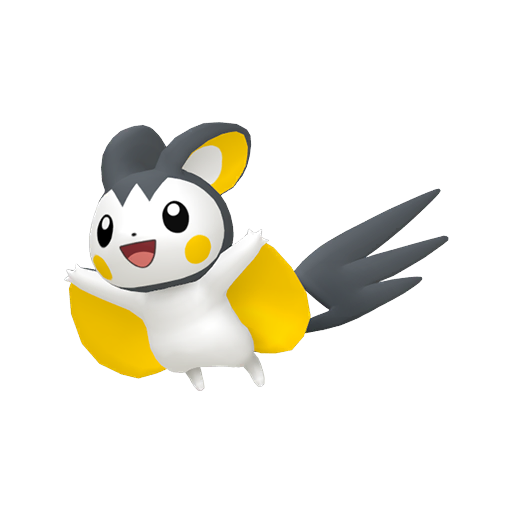
Emolga is the only Flying type currently available with an Electric immunity, yet it took me a while before I seriously considered I needed it for this team. I was afraid it would do nothing outside switching in on Electric moves. Since its offenses are so weak, sweeping with it sounded very unlikely. Sadly, its defenses are also pretty low... but whereas investment into low offensive stats rarely enable actual OHKOs, investment into low defensive stats tend to make things surprisingly tanky. Pair that with reliable recovery in Roost, and this is the only potential niche I could find Emolga: a tanky Toxic staller. I was not prepared for how well it would work! The lack of speed investment would usually make that a lot more shaky, but Motor Drive patched up that one issue, and Emolga became the rock that kept the team together and enabled Gyarados to hang around for this long. Also, it's extremely adorable!

Pokemon_Sword-Shield_Screen_Shot_2020-07-14_12.19_AM_2.png

He will toxic stall your entire team with a smile on his face :D

:charizard: As mentioned earlier, Charizard was kind of on a test run here, and the test run ended up working out. Sadly, it did basically nothing in the 3rd leg because of that freeze... I don't remember too precisely what it did earlier on, but I remember I had to use it several times in the first few battles, and it got chipped down very early, and I was concerned about losing it early. But then, I didn't need it for many battles, and it stuck around in the back, so I guess it did its job but simply had to do it earlier than expected; luck of the draw. It did feel the best out of all the PokΓ©mon I tried in that slot, but it's pretty hard to evaluate because a lot of the runs end up coming down to Gyarados and how long it can stick around. Typing-wise, having a Fire type on the team was really nice. It could switch in on Froslass' Will-O-Wisp, and I often used it against Magneton and Magnezone after pivoting into Emolga and breaking the potential Sturdy. Having a special sweeper also helped against Cotton Guard Dubwool and Slurpuff (though I usually toxic stalled the latter until the Misty Explosion).
I remember the Expert Belt allowing me to score OHKOs in non-Dynamax a few times, which was very nice, but I think I would test Assault Vest if I did another run. Dynamax + Assault Vest would definitely improve its longevity... when it doesn't get frozen, that is. I also noticed a few times that I was wary of Dynamaxing to Max Flare because it meant taking Solar Power chip... while that extra power comes in handy at times, it's definitely a tradeoff. I might test out Blaze in the future instead.
–––––––––––––––––––––––––––––––––––––––––––––––––––––––––––––––––––––––––––––––––––

Overall, a very fun team! I've gotten 50+ wins in both Poison and Ground as well, but I want to get higher numbers before reporting those teams, since I'm convinced both are capable of more, so I'll keep grinding for that, and probably get started on Mono Psychic too now!
 
Last edited:
I broke 50 with Normal

Ec_kbqaUMAImPa7.jpg


Braviary (M) @ Shell Bell
Ability: Defiant
EVs: 4 HP / 252 Atk / 252 Spe
Jolly Nature
- Brave Bird
- Thrash
- Close Combat
- Shadow Claw

Brave Birb is the main STAB in Dynamax, allowing it to run Adamant. Thrash is the main STAB outside Dynamax, where you usually only have to take out one Pokemon with it. And if it takes two turns, it still only uses one PP. Close Combat is important coverage for Rock/Steel, which is walled by Flying+Normal. Additionally, keep in mind it's even stronger outside Dynamax. Shadow Claw proved very useful against Ghosts after Dynamax wore off, where I didn't want to use a Brave Bird but couldn't use Thrash. Iron Head is another option for a little more defensive utility.


Porygon-Z @ Silk Scarf
Ability: Adaptability
EVs: 4 HP / 252 SpA / 252 Spe
Timid Nature
IVs: 0 Atk
- Tri Attack
- Uproar
- Dark Pulse
- Solar Beam

This thing is crazy with Adaptability, Silk Scarf, and Dynamax. I even tried running Hyper Beam, which OHKOs Toxapex with or without Dynamax. But it only has 8 PP, so I went with Tri Attack and Uproar. Like Thrash, Uproar can help conserve PP outside of Dynamax. Dark Pulse is for Ghosts (I chose it over Shadow Ball because the Dynamax effect is lowering Special Defense, which came very much in handy against Steel types). The normal moves will do more damage than coverage moves if there's only one "stage" difference in effectiveness, but sometimes there are two, or three in the case of Rhyperior. You don't HAVE to run Solar Beam, you could run Hyper Beam instead for an extra power when it is needed, but I found it useful for the Grassy Terrain healing whenever it was possible to use it without sacrificing an OHKO. It can get quite a few OHKOs.

I'd be interested in hearing about different strategies and movesets on Porygon-Z. You could try Hyper Beam, Round, Thunderbolt, or Ice Beam. I think Dark Pulse is a straight upgrade to Shadow Ball though.

Diggersby @ Leftovers
Ability: Huge Power
EVs: 4 HP / 252 Atk / 252 Spe
Jolly Nature
- Earthquake
- Low Kick
- Bounce
- Wild Charge

Diggersby has been talked about a couple times before. It's pretty good, but I don't think it's as good as the other two. I found the extra coverage of Wild Charge more useful than the STAB Body Slam. And I didn't use Fire Punch, because the coverage of Flying and Fire overlap quite a lot, and Flying is necessary for the Speed boost. I understand why one would use Fire Punch though, because Bounce doesn't have a lot of PP and has low accuracy outside of Dynamax, and Wild Charge has heavy recoil outside of Dynamax. So if you come across (e.g.) an Eldegoss or a Skarmory/Corviknight outside of Dyanamx, it would be useful to use Fire Punch rather than having to use Bounce or Wild Charge respectively. Anyway, Low Kick isn't totally necessary, but the coverage is quite good. These 4 moves hit over 75% of Pokemon super effectively.

It's a very straightforward team composed of 3 straightforward sweepers. Really the only swapping was Braviary into Diggersby when an Electric move or a reasonably weak Rock move was incoming. This was useful because it gave Diggersby with its many weaknesses some room to sweep without the danger of having to use it while it's the only Pokemon left alive, which is always risky and stressful. The 1-2 of Braviary and Porygon-Z can easily string together 15-20 wins without healing (my max was 24 before healing).

I'm working on Rock now. I'm shooting for 40. My best right now is 33, but it's a slow process and I'm losing interest so if I don't get there soon I'm gonna move on.
 
Last edited:
I just barely made my goal! My first heal during this run was at 22 wins, so there is certainly room for improvement. But it feels rather grindy, and I'm not interested in pursuing it further at the moment. As a group, we're pretty close to having 40 wins for every type. Unless I'm mistaken, Electric is the last one. I might do that next. Note: I didn't do both of these in the same day - it took me a couple days to post mono-Normal.

EdBGHaVUwAEn2Ch.jpg


I really wanted Shuckie to have a solid spot on the leaderboard, similar to the way Emolga now has one. But after spending many hours doing mono-Rock, I think it's safe to say that with the currently available roster (Nihilego looks to be a huge contender, but it will also benefit from Shuckle's support), a Rock team would need Shuckle to break ~30 wins. Rock has so many weaknesses that the odds of Terrakion - or any other Rock sweeper - being able to win 10 battles in a row without any support seems incredibly low. Shuckle can swap into many of its weaknesses and take care of them with Toxic+Infestation (or sometimes just Infestation, which is painful) and some boosts in its bulk.


Terrakion @ Shell Bell
Ability: Justified
EVs: 4 HP / 252 Atk / 252 Spe
Jolly Nature
- Sacred Sword
- Rock Slide
- Aerial Ace
- Earthquake


Drednaw @ Muscle Band
Ability: Swift Swim
EVs: 4 HP / 252 Atk / 252 Spe
Adamant Nature
- Waterfall
- Head Smash
- Superpower
- Crunch


Shuckle @ Leftovers
Ability: Contrary
EVs: 252 HP / 4 Def / 252 SpD
Calm Nature
IVs: 0 Atk
- Toxic
- Infestation
- Shell Smash
- Rest

Terrakion was already talked about at length a couple posts back, and I don't really have anything to add. It seems to be the best Rock sweeper currently. But it has 7 weaknesses, making it more difficult to use than most other lead Pokemon. To use it, you really have to have the damage calcs open for every battle to see what it can OHKO, what hits it can take, and what Shuckle is able to swap into. I don't see how you could be very successful without doing that. You will often have to swap it out mid-Dynamax in order to keep it alive. I think this is the first run where I have done that more than just once or twice. Also, always remember that your entire team gets a boost in Special Defense when sand is up. You can use Max Rockfall defensively when you know a Special attack is coming. You can do that with Earthquake as well, as always.

Drednaw has Swift Swim, and can set its own rain with Max Geyser. Use Waterfall, it has more PP than Liquidation, and I've actually gotten a few big flinches with it. Rock Slide is probably the best Rock move, but I decided to try Head Smash for this run, and it actually ended up winning me the 39th battle. I only had Drednaw left, and I OHKO'd Vileplume with Max Head Smash. Max Rock Slide wouldn't have KO'd, and I certainly would have gone down to Giga Drain (see below). There was never a time where I had to use Head Smash outside of Dynamax, though that could certainly happen and it would be awful. Superpower is for coverage and for the Attack boost. It's often used on the last Pokemon after Dynamax wears off, making it stronger. You have a few options for the last move. Crunch and Earthquake seem like the best options, but since Terrakion had Earthquake, I went with Crunch for the bulky Ghosts. Keep in mind that when Rain is up, oftentimes spamming Max Geyser/Waterfall has better damage output than the Super Effective coverage moves.

Head Smash: 252+ Atk Muscle Band Drednaw Max Rockfall vs. 252 HP / 0 Def Vileplume: 310-366 (87.5 - 103.3%) -- 25% chance to OHKO
Rock Slide: 252+ Atk Muscle Band Drednaw Max Rockfall vs. 252 HP / 0 Def Vileplume: 270-318 (76.2 - 89.8%) -- guaranteed 2HKO

I swapped the order and the items of Terrakion and Drednaw a bunch of times and to be honest, I think the team could do just as well with any permutation of items and order between Terrakion, Drednaw, Shell Bell, and whatever second item you go with. When I gave Drednaw the Shell Bell, I tried Expert Belt on Terrakion and that felt pretty good too. I gave Terrakion the Shell Bell for this run and went with Muscle Band on Drednaw. If it didn't work out, I may have tried Life Orb or Assault Vest on Drednaw next time. I also tried Tyranitar and Lycanroc a few times and found them to be pretty much abysmal.

The synergy between Drednaw and Shuckle is pretty amazing. Despite Rock having 5 weaknesses, these two Pokemon share exactly 0 weaknesses. For this reason, I originally planned on leading Drednaw with Shuckle as a swap-in, with Terrakion being my revenge killer and second sweeper for when Drednaw went down. And that worked well, I got 33 wins with that setup. Like I said, I feel the order is kind of a tossup. The run where I got 40, I just happened to be leading Terrakion.

I feel the Contrary+Shell Smash is the best Shuckle set for this, but I would be interested to see what other people come up with for Shuckle. It just doesn't really have the bulk to take repeated super-effective nukes without boosting its bulk. Of course, its biggest weakness is crits. I often would use Rest at 70% HP once I got 2-4 Shell Smashes up because a) a crit could potentially do 50-70% of Shuckle's HP and b) it saves PP when it's sleeping. Also, I would try to time Rest so that I would wake up around the time the opponent went down. Oftentimes, that means using a few Shell Smashes, then Toxic, then Rest, and then only using Infestation after waking up. If you use both before falling asleep, you'll be asleep when the next Pokemon comes in. This is also very important when it comes to ending a battle. You don't want to be asleep to start the next battle, but you also don't want to start the next battle at 50% HP. It took a bit of practice to get the hang of this. If I swapped Shuckle in at the beginning of the battle, I would usually get 3 or 4 Shell Smashes up before doing anything offensive, planning to use it for all 3 opposing Pokemon. But there are certain times you can switch back into another Pokemon to finish the battle, such as when Palossand is spamming Shore Up.

Oh, and I'm not really sure whether Defensive or Special Defensive investment is better. I went with Calm and max Special Defense because Drednaw has more Physical Defense. But you could also look at the fact that sand improves your whole team's Special Defense, making Bold and max Defense seem more desirable. There were times I wished I ran Bold, and there were times I was glad I ran Calm.

Off the top of my head here are what feel like the biggest counters to this team: Escavalier, Quagsire, and Kingler. There are more but these have completely ruined runs.

- Escavalier has Smart Strike which hits the whole team hard, even the neutral Drednaw. Shuckle needs to already have Shell Smashes up when it comes in in order to take care of it. And it's immune to Toxic, so it takes forever which increases the likelihood of a crit. But it can take it down slowly with infestation if need be. What I usually did was use Max Knuckle and then Max Rockfall on Terrakion. I believe that's always a 2HKO, but it has to take a Smart Strike and it needs to be Dynamaxed to do so. A Fire move would be helpful.

- Quagsire just has the exact right moves to counter the whole team, and Power-Up-Punch is a big problem. You also never know whether it has Water Absorb or Unaware, and that really affects how you approach it. Unaware Aqua Tail dominates Shuckle, regardless of boosts. On more than one occasion I blindly fired a Max Geyser at it, and it actually never backfired. If it doesn't have Water Absorb, two Max Geysers is a KO. But doing that is very risky. A Grass move would be helpful in dealing with it.

- Kingler is Kingler. It has a high Attack stat and a surprisingly high Defense stat, and spams Crabhammer. It also has High Horsepower for Drednaw. A Shuckle even with several Shell Smashes up can't deal with it due to the improved crit ratio of Crabhammer. A special attacker would be a good counter, but there really won't be any great ones until Nihilego.

- Rhyperior was mentioned in the previous post on Rock, so I thought I'd address it even though it didn't give me much trouble. Rhyperior is a big problem for Terrakion, but not for Drednaw. And I find that Rhyperior never uses Rock Wrecker on Terrakion, meaning at worst you swap Drednaw into a Breaking Swipe. You can still OHKO with Max Geyser at -1. I never faced a Rhyperior with Shuckle but I imagine it wouldn't be pretty unless it already had boosts up.

Don't fuckle with Shuckle.
Ec8PVpvVAAASXEo.jpg
 
Last edited:

Eisenherz

ΡπέκΡινα της ουσίας
is a Forum Moderatoris a Community Contributoris a Tiering Contributoris a Top Social Media Contributor Alumnus
Moderator
After many attempts, I was finally able to get a Mono Ground streak I was happy of!

PokΓ©mon Sword-Shield Screen Shot 2020-07-16, 5.56 PM.png


@

Jolly | Moxie
IVs: 31/31/31/31/31/31
EVs: 4 HP / 244 Atk / 4 Def / 4 SpD / 252 Spe
Knock Off / Earthquake / Low Kick / Aerial Ace
@

Jolly | Sand Force
IVs: 31/31/31/31/31/31
EVs: 252 Atk / 4 SpD / 252 Spe
Iron Head / Earthquake / Rock Slide / Aerial Ace

@

Calm | Storm Drain
IVs: 31/0/31/31/31/31
EVs: 212 HP / 156 Def / 140 SpD

Scald / Earth Power / Toxic / Recover


––––––––––––––––––––––
T E A M B U I L D I N G
––––––––––––––––––––––

After considering all options Ground offers, I concluded pretty quickly that the team doctordoak had chosen had, indeed, the best picks (well, with Gastrodon over Seismitoad, anyway). However, perhaps biased by my recent experience with Heracross and Gyarados, I saw more potential in Krookodile as the Shell Bell lead, if only because of Moxie. The lead sweeper often ends up being the one that does most of the work, so after deciding to change the dynamics of the team, I looked into the sets more in depth:

:krookodile: One of the great things about a Shell Bell is that if you can score OHKOs outside Dynamax, it can heal a lot of the HP very quickly (the process is a lot slower when Dynamaxed), allowing it to tank hits repeatedly throughout the run. Because of that, I didn't hesitate to go with Knock Off as the Dark move; its power as a regular move is significantly higher than Crunch or Throat Chop, and turns into several more OHKO opportunities. The tradeoff is a 120 BP max move rather than 130, which I didn't find to be significant considering I already had a 130 STAB for neutrals when needed, and with Moxie Snowballing, 120 + STAB hits hard enough regardless.

Aerial Ace felt necessary for Max Airstream on Grass and Fighting, but also to get to +1 asap, in case Froslass or Starmie is lurking in the backline. I spent a lot more time wondering about the last moveslot. I wasn't a fan of the Fangs because of their low power and how situational they appeared (Escavalier wouldn't even go down to Max Flare as a lead)... I strongly considered Iron Tail, which I still think would have helped several times against Fairies or generally just for Def boosts, but I settled for Low Kick, since Normal types abound in this format, and free Atk boosts always help out. I haven't looked back, and a look at my lead guide probably highlights how useful it ended up being!

:excadrill: Without a Shell Bell, I knew Excadrill's life span would be limited regardless, and because of that, hitting hard enough to get OHKOs on as many neutral targets as possible was my first concern. That's why I opted for Sand Force instead of Sand Rush; Excadrill's speed tier is already excellent for the format, especially when going Jolly. The Atk boost from Sand spares the need for Brick Break, which I wasn't keen on running due to its low BP both as max and non-max move. Without Sand Rush, Aerial Ace felt like a good compromise, where I could set up speed when really necessary, or when it was just free; thanks to Excadrill's high Atk, Airstream actually ends up OHKOing a lot of the Grass and Fighting types, some of which Krook couldn't OHKO.

But what really made this Excadrill click, after many tests, was the choice of Soft Sand as its item. I tried Expert Belt, but Excadrill needs to score its KOs at neutral a lot of the time, so it wasn't super helpful; then I tried Assault Vest, and while it did definitely tank more hits before going down, it just wasn't scoring those big OHKOs I needed, which kind of nullifies the point because it ends up having to soak in more hits. So I thought about Metal Coat or Soft Sand... at first Metal Coat sounded better since Steel has no immunities. But if I'm going to boost one move in order to score OHKOs, it just makes more sense to boost the strongest one, so I tried Soft Sand instead, and holy cow did it make a difference... with sand up, the power level of Max Quake / EQ is just obscene. Max Quake just OHKOs Milotic, without sand!! With sand, it goes down to just an EQ! As do Seismitoad, and Sandslash, and Marowak... the power is very impressive, and the fact it applies to the Max move too gives it a strong edge over, for example, a Choice Band. I'll definitely be more keen on using type-boosting items in this format in the future.

:gastrodon: I was entirely satisfied with Gastrodon's work on my Mono Water run, so I just rolled with the same set and EVs. I briefly considered changing Scald to Surf as doctordoak did, but in the end I think Scald is actually important, because Gastrodon will eventually be frozen by Milotic / Vanilluxe, and a tool to thaw feels too valuable to give up. I also can't overlook all the burns it scores; some of them make a big difference, and while they're unreliable, they're often the difference between ending an encounter injured or at full HP (for example against Crawdaunt, which I always Scald before Earth Powering since it doesn't go down to 1 hit regardless). So yeah, good old Gastrodon came back and did more of the same; switch in on what it's there to handle, handle it, and then hope the AI doesn't have a Grass type to revenge KO. In that regard, I've been more proactive this time to find ways to get my sweepers back in whenever possible to finish off threats. It's not often possible, but I grab every occasion I can of catching the AI using recovery moves while they're poisoned and such.

––––––––––––
T H E R U N
––––––––––––

I had several attempts before this run; I got a streak of 58 very quickly, but I really wanted 60 since I knew it was possible. Most following attempts were less convincing, and I ended up learning a lot on how to handle the different threats (some of which are just run-enders). I made this lead guide just in case anyone has interest in running the team or a similar one. One of my best attempts was cut short was letting Cloyster Shell Smash and using Max Rockfall to bring it down to the red, then switch Gastrodon in on the Razor Shell... then find out Skill Link Icicle Spear does KO Gasotrdon, and Cloyster will actually use it for lack of a better option (remember the AI sees it as a 25 BP move). If I had switched immediately on the Shell Smash, it would have attempted to Razor Shell first as I OHKOd with Earth Power; even then, after my misplay, I could still have won by sacrificing Excadrill to make sure the AI Razor Shells Gastrodon first. But that was a learning experience, and sure enough, this came into play when a Cloyster came out on battle 54.

I healed after battle 28 initially (a really good first leg, to the point where I was running low on PP), then again on battle 50 after a satisfactory 2nd leg. The final leg was really stressful: the first few battles saw all of the worst threats come out, including lead Tangrowth, which forced me to give away more than half of Excadrill's HP right away, and very shortly after, lead Sirfetch'd, which signed Excadrill's death warrant. Krookodile and Gastrodon still cruised along for a while, until battle 68, where Vanilluxe froze Gastrodon after it was already chipped (I was Recovering that turn). I took another Ice Beam, but forced to Scald, Gastrodon was too low to take another hit. However, Scald burned, and this did the exact chip I needed on Vanilluxe for Krook to OHKO it with Max Knuckle, which got me through battle 68! Battle 69 was looking up, until Skarmory got a crit Body Press on Dmax Krookodile, which mattered (and with Krook at +3 Atk at that point, I felt good about its chances to close it out). Regardless, I'm happy about the result, and consider Mono Ground done! *check*

––––––––––––––––––––––––––––––––––––––––––––––––––––––––––––––––––––––––

I already finalized a Mono Psychic team I'm happy with, so now I'll try to get a good streak with it!
 
Electric:
EdJdo9QU4AAMh2L.jpg


Dracozolt @ Shell Bell
Ability: Hustle
EVs: 4 HP / 252 Atk / 252 Spe
Jolly Nature
- Wild Charge
- Outrage
- Aerial Ace
- Low Kick


Heliolisk @ Life Orb
Ability: Dry Skin
Shiny: Yes
EVs: 4 HP / 252 SpA / 252 Spe
Timid Nature
IVs: 0 Atk
- Thunder
- Hyper Beam
- Surf
- Grass Knot


Rotom-Wash @ Leftovers
Ability: Levitate
EVs: 4 HP / 252 SpA / 252 Spe
Timid Nature
IVs: 0 Atk
- Thunderbolt
- Rising Voltage
- Hydro Pump
- Dark Pulse

Like Eisenherz said, this team is really run by Dracozolt, and it's already been talked about so I'm not gonna write more about it (other than to add that I found the extra PP from Wild Charge to be useful, and I never had to use it outside Dynamax). You'll need to support it though, and a Levitate user is a no-brainer for Ground moves. Rotom-W seems like the obvious choice for a Levitate user, but some of the other Rotom forms and Vikavolt also seem viable. There's also Emolga, but the main reason Emolga was useful in Flying is because there were no other options for immunity to Electric, and that's not the case here. I was using Magnezone (Thunderbolt/Rising Voltage/Flash Cannon/Hyper Beam) over Heliolisk and I'm pretty sure it was solely due to chance that I ended up getting a good run with Heliolisk instead. Magnezone has more resistances, but it also has an additional weakness to Fire and the Ground weakness becomes a double weakness. Heliolisk also has immunities to Water and Ghost which I found more useful than an immunity to Poison. They play differently though.

Heliolisk feels a little more niche and difficult to use than Magnezone, mainly due to how squishy it is and its dependence on Rain to stick around long enough to be useful. Magnezone is a little bit more passive due to its bulk and typing. There are two Phantom Force users, which make for an easy swap-in, and there are also an array of Poltergeist and Shadow Ball users. Its Water immunity isn't useful as a swap-in, since Dracozolt resists Water. But the AI will always try a Water move against Heliolisk, which heals it up a bit due to Dry Skin. Once a trainer sees the immunity, it won't use a Water move for the rest of the battle (including later Pokemon). But then of course, the next trainer will start using them again.

On this run I got 3 or 4 Water Absorbs. Most memorably was late in the streak where I ran into a Kingdra lead, which is a nightmare for Dracozolt, which was at about 50% HP. It would have been a guaranteed OHKO if I stayed in (unless I got the 10% chance for a miss). I swapped into a healthy Heliolisk to take the Draco Meteor (which does about 60% HP outside Dynamax), and then got a Water Absorb on the Surf on the next turn. I didn't OHKO it with Max Lightning on my first attacking turn, because I knew it would probably use Surf and I wanted to set up the Rain. Rain heals Heliolisk 1/8 max HP at the end of each turn (I believe it functions in Dynamax like all other healing, and becomes 1/16 HP).

That brings me to Heliolisk's moveset and item. The whole thing is based on hitting as hard as possible, since its Special Attack is only 109. I believe Life Orb was the right call since it needs the extra power, and it does get a good amount of healing from Dry Skin+Rain and Max Overgrowth. In hindsight, Thunder is too risky. If I were to use this again, I'd use Thunderbolt (Rising Voltage is also an option). I ran Thunder because I figured I would be trying to put up Rain as often as possible, but there are times where you won't be able to get it up, especially when you swap it in mid-battle. In the end I was forced to use non-Dynamax Thunder without Rain twice, and luckily both landed. Surf is for putting up the Rain, and also for coverage. Hyper Beam is for a useful strong second STAB. It doesn't survive long enough to bother using Hyper Voice for extra PP. In Dynamax, Hyper Beam gets 150 BP and has no drawbacks. Plus, ending a battle on a savage Hyper Beam just feels great. I originally had Dark Pulse as the 4th move since it has better coverage, but since Rotom had it, I thought I'd try Grass Knot or Solar Beam for the extra healing power. I went with Grass Knot since my entire moveset was already gimmicky enough outside Dynamax. I used it when I knew it would OHKO in Dynamax. This does leave a little bit of difficulty in trying to figure out which terrain you want up. The answer to that problem depends entirely on the situation.

On Rotom I went with Thunderbolt and Rising Voltage instead of one Electric move and Pain Split. RV has 140 BP in Dynamax, and also has 140 BP in Electric Terrain against opposing grounded Pokemon. The only drawback is that neither of these moves get the normal 1.3x damage with Electric Terrain up, because Rotom isn't grounded. Hydro Pump is the only Water move it gets, so that's that. I used Dark Pulse over Shadow Ball because the Dynamax effect lowers Special Defense, and as Rotom isn't super offensive, that can be very useful. It's pretty bulky and only has the one weakness to Grass, so using it as a swap-in I thought I'd go with Leftovers. I'd be interested in seeing if other people make use of the other forms, but this seemed to be the best. Its moves overlap with Heliolisk's a lot, which adds a small amount of synergy with the Rain, but it also sort of feels redundant. As I alluded to, the team was originally Dracozolt/Magnezone/Rotom but then fortune came my way when I used Heliolisk. I was also glad to use a team that was a bit different from Eisen's (not that there's anything wrong with that - there are only so many viable options for each type).
 

Jumpman16

np: Michael Jackson - "Mon in the Mirror" (DW mix)
is a Site Content Manager Alumnusis a Top Team Rater Alumnusis a Battle Simulator Admin Alumnusis a Smogon Discord Contributor Alumnusis a Researcher Alumnusis a Top Tiering Contributor Alumnusis a Top Contributor Alumnusis an Administrator Alumnus
2020071902123000-3C66B776DB1AA06323037049FACD96D3.jpg


Doublecross
Shell Bell

Heracross ** Doublecross @ Shell Bell
Jolly Nature
Ability: Guts
EVs: 4 HP / 252 Atk / 252 Spe
- Low Kick
- Pin Missile
- Bullet Seed
- Rock Slide

Firetwilight
Charcoal

Volcarona ** Twifirelight @ Charcoal
Modest Nature
Ability: Flame Body
EVs: 4 HP / 252 SpA / 4 Spe
- Fiery Dance
- Bug Buzz
- Giga Drain
- Quiver Dance

Scizor
Leftovers

Scizor ** Dr. Lapua @ Leftovers
Adamant Nature
Ability: Technician
EVs: 252 HP / 252 Atk / 4 Spe
- Bullet Punch
- Bug Bite
- Swords Dance
- Roost

it's good to be back

First things firstβ€”Eisenherz is the best. None of this would have been possible without your tireless and infectious attitude, dedication, intelligence, clarity, and comprehensiveness. To say you inspired me would be a massive understatement.

Also, shoutouts to EeveeTrainer, we live 13 minutes apart in Manhattan so he's had a front-row seat to all of this. Gave me key insight into moves and strategy as I was theorymonning and playing.

Anyway, I decided on Bug because I fell in love with Heracross after watching Eisenherz's Fighting video, and nobody had used it as a Bug lead yet. You all should already know how it worksβ€”Moxie is a little broken in this format, and Shell Bell is invaluable. I won't pretend to reinvent the wheel by typing more words about this that he hasn't already.

I decided on Pin Missile over Megahorn for three key reasons. First, I did not anticipate using "bug move" out of Dynamax very often at all, and the 10 difference in base power between Pin Missile's Max Flutterby of 130 vs Megahorn's 140 was negligible to me. Second, 95% accuracy over 85% was a 10 difference I did mind very much, should I have to use "bug move" out of Dynamax.

Third, and most important:

2020-07-19.jpg


This is battle 90. "Heracross, you deserve a good rest" has never been truer. Having eight more PP than Megahorn made all the difference in the world.

Volcarona pulled its weight much more than I thought I would. I knew I was using Scizor, but what should my third be? Having Shell Bell and Leftovers already locked up made the utility of all Bugs I could use decrease. But Volcarona is OU for a reason, and its ability to be a ridiculous threat after just one QD sold it for me. I thought long and hard about pokes like Golisopod, Araquanid, Crustle and Shuckle, but they didn't deal with the RS's threats as well as I liked. Volcarona did, offering another form of Max Overgrowth for the team in the process. Its QD was the primary way I planned to deal with Braviary and Starmie, two pokes my team didn't like very much. Debated Roost over Giga Drain and even Bug Buzz but decided the 16 extra attacking PP were more worth it (especially given the two ways Giga Drain can heal Volcarona), and Firetwilight did not disappoint.

Scizor...is amazing, and essentially required as far as I'm concerned for a Bug team. It shuts down so much garbage by way of its Poison immunity, lone weakness, Roost and priority, with a whopping 80 attacking PP over two moves, as you can see below:

2020-07-19 (2).jpg


Bullet Punch itself has the same attacking PP as all of Volcarona's attacking moves (THREE) combined. Attacking PP is very valuable in this format, and Scizor does very well on this front.

When Dynamaxing, we of course lose out on the priority of BP, which could have made a case for using Wing Attack on Scizor over Bug Bite. Wing Attack has a hilarious 35->56 PP, more than the Aerial Ace that's not needed in this format with no evasion abusers. The primary reason I stuck with Bug Bite initially is the same reason you don't see a nickname on my Scizorβ€”I imported it from Gen V, and was not free to overwrite things. I would lose Bug Bite forever (unless a Bug Bite Tutor comes back in the Crown Tundra DLC), and had only one "free nicknaming" of my poke, so I decided to see how things played out and let a name come to me. Sorry this team was too good to let me nickname it before losing a real battle after 5!

You may also notice that Scizor is paralyzed in that picture. When playing through, it became apparent that the Max Airstream that would have been the primary benefit of "flying move" would in fact not have been practical. Scizor really wants to SD up before attacking, so it can OHKO things like second-poke Volcarona and Dusknoir:

+6 252+ Atk Technician Scizor Bullet Punch vs. 0 HP / 0 Def Volcarona: 159-187 (99.3 - 116.8%) -- 93.8% chance to OHKO (93.8% chance to OHKO after accuracy)

+6 252+ Atk Technician Scizor Bullet Punch vs. 252 HP / 0 Def Dusknoir: 175-207 (115.1 - 136.1%) -- guaranteed OHKO (100.00% after accuracy)

This means that I would not be able to get more than +2 Speed at the most, since +6 Wing Attack does a lot to basically everything (it's essentially identical in power to BP). Scizor needed its HP EVs, and being at 121 speed after one Max Airstream to outpace stuff just wasn't appealing, especially with BP's priority being the main selling point of Scizor.

Bug Bite, further, gave me an opportunity to do this:

BugOff1.jpg

This basically settled Bug Bite for me. There's 33 berries in the RS of the known 150 pokes, and stealing things like Maranga Berry from Corviknight
is as hilarious as it is useful. Being able to steal Lum at battle #65 or so was clearly a streak-saver. Scizor itself shows how instrumental it is to the team, being able to take WoW here and avoid the 2HKO from Froslass's Poltergeist, which Volcarona does not (as I found out the hard way at battle #4 very early in testing).

So, when theorymonning the obvious threats to this team, Eisenherz already sold me on Rock Slide for Braviary (Adamant Brave Bird, Bulk Up), which is a bigger threat to Scizor than it is Ferrothorn. I used Volcarona over Golisopod or Araquanid because only Volocarona could threaten to kill Braviary by virtue of QD boosting its speedβ€”the other two hate Brave Bird and can't do anything about it no matter how "set up" they are, even +6 Aqua Jet Golisopod which "have fun getting to +6 with Emergency Exit".

I realized Starmie was more of a dick to "lead Hera" in Bug than to Eisenherz's Fighting team, as I didn't have an Urshifu to switch into Psychic and threaten the OHKO with Sucker Punch. Starmie does 57% min to Scizor with LO Surf, 103% min to Volcarona with the same move, and outspeeds both. It can't kill Dynamax Heracross, but I've had to tangle with Starmie out of Dynamax, where Psychic is a clean OHKO on an always-slower Heracross.

Pyukumuku (Toxic/Counter/Spite/Mirror Coat, with Innards Out or Unaware) would have been a threat...if Scizor didn't shit all over it with Toxic immunity. I faced this as a last poke at battle 50 or so, and though it was lame, I legit just switchstalled it, making sure Scizor was always in every other turn to take a potential Toxic.

That was the entire list as I began play in earnest...basically Braviary and Starmie. I would learn what indeed would become threats as I progressed.

My goal was 90, but only because I thought Eisen's record was 88, not 83 for some reason.

I had a pretty good run, being able to win the first few dozen battles without much incident. I was more interested in my PP on Hera, as I noted to ET:

i’m at b@24
hera has 7/12/21/11 pp left


So when I was able to get to 30 without a heal, I was thrilled. Battle 31 brought Starmie, though:

Annotation 2020-07-19 220837.jpg


I was able to get out of that by sacing my low PP Heracross, and survive Surf to ohko with Big Bite. I felt great that I was able to heal on my turns...and then this happened at Battle 35:

2020071502542300-3C66B776DB1AA06323037049FACD96D3.jpg


Lame...mainly because I had JUST healed. Added this to my threat list immediately, since Hera doesn't even close to KO even with +1 Low Kick (as we know from Eisen) and the rest of my team needs set up to avoid the paralysis.

But here's where Volcarona showed its mettle. I was determined to not heal until winning "a few" more battles wtih Volcarona, as something of a test as well since I knew I'd have to utilize Volcarona by itself when I eventually had no heals and Hera was dead. Volcarona was able to handily win nine battles from 36-44 essentially by itself, with excellent usage of Giga Drain and its incredible prowess even at +1 with Dynamax being on the table for it as my de facto lead. Case in point at battle ~39:

2020071503102700-3C66B776DB1AA06323037049FACD96D3.jpg


I would have died here without being able to Dynamax, but I'm never killed by Surf even with a CH. The proudest I ever was throughout the entire streak is how 40% Volcarona handled this battle. The next poke was Toxapex, which is obviously not fun with Surf and its defenses. But Max Flutterby dropped its SpA through Baneful Bunker, then I Max Guarded on its Surf as Dynamax ended. Scizor was able to clean it up, but took nontrivial Rocky Helmet chip to leave it at ~50%. This is where Volcarona really shone.

Out came Eldegoss. Through smart usage of Quiver Dance and Giga Drain, and Scizor's Leftovers, I was able to get Volcarona and Scizor to FULL HP due to Eldegoss' Grassy Terrain. This sold me on how good Volcarona could be when I had no heals later on.

I used my last heal at Battle 46 when Volcarona's attacking PP was well used (I had like seven attacking PP total). From there, it was a show of patience and smarts.

Three Poison-type leads highlight my run to ~65, the first being Scolipede. Though Max Rockfall always kills, I wanted to set up Scizor to preserve Heracross's PP. This was a mistake, as Scolipede used Iron Defense on the switch, was Speed Boost because of course, and then Baton Passed to Boltund, which has Fire Fang and threatens this on Scizor:

252 Atk Strong Jaw Boltund Fire Fang vs. 252 HP / 0 Def Scizor: 176-208 (99.4 - 117.5%) -- 87.5% chance to OHKO (83.125% chance to OHKO after accuracy)

Thankfully, Dynamax to the rescue, as I was able to always avoid being killed (75% max damage possible with a crit) or burned, and it ended up being Competitive anyway.

At Battle ~63, Hera was at 50% HP, and I had to kill a lead with Max Overgrowth. Then Salazzle came out. I Bitched aloud at Ian's place about why that thing, which I knew had Acrobatics, had to come out when I was low HP.

Salazzle.jpg

So that was unexpected. Who'd've thunk switching out a Dynamaxed, +1 Heracross to a Scizor on a Salazzle was the play? Battle 65 brought out Drapion as the third of the aforementioned Poison-types, and as I predicted it to use Acupressure and boost its Evasion on the switch, Ian and I laughed, as it boosted Evasion three times in four Acupressures (and Speed once), which Dynamax +6 Scizor could not care less about given that Dynamax guarantees I'll hit.

Realizing the record was 83, and not 88, the battles from 70 onward were all tense, given that my party's PP was good enough to perhaps even make it to 100. But I had to play conservatively, which meant that when Meteor Assault, Brave Bird, Leek Sirfetch'd came out around battle 70, I had to use my head.

252 Atk Sirfetch'd Meteor Assault vs. 252 HP / 0 Def Scizor: 132-156 (74.5 - 88.1%) -- guaranteed 2HKO after Leftovers recovery

This is without a crit, and its Leek lets it crit 50% of the time, which is not hax. Switching to Scizor was a given on a "guaranteed" Brave Bird, which took Scizor to around 55% HP. After much deliberation (should we Dynamax Scizor? Roost? Send in Volcarona on a hopeful Meteor Assault to be able to QD on the recharge?), we realized that the play was actually to switch right back into Heracross on the probably-but-not-guarateed Meteor Assault. I did that, and it CHed...and didn't kill, as we had calced:

252 Atk Sirfetch'd Meteor Assault vs. 4 HP / 0 Def Heracross: 83-98 (53.2 - 62.8%) -- guaranteed 2HKO

I was then able to get to +2 and win the rest of the battle somewhat handily, but my HP and PP were hurting on Hera. At battle 78, I was able to spar my way up to 82, 83, then 84 against lead Malamar for the record. At battle 85, lead Porygon2 finally gave me the bad fortune I'd evaded through the run. Max Knuckle doesn't do enough to threaten it, and after using TR, I had to switch out of a likely Psychic. It was able to paralyze Scizor with its second (and last) Tri Attack under Trick Room before I killed it with a "slower" Bug Bite. But at this point, I was okay with my standing. And I was even more OK with my old pal Eldegoss as a lead in Battle 86. I'd get to heal the HP on my team just like in Battle ~39. Here's how the strat works:

Eldegoss.jpg

Fun. I guess Zoroark is a threat to this team too. It had masqueraded as a Froslass in a very early, battle #6 attempt, roasting my Scizor with FT on the switch. Here's the thing, thoughβ€”even if I had KNOWN it was Zoroark. remember that paralysis picture? Look more closelyβ€”I had 5 SD and Roost PP left. And was freshly paralyzed, to boot. Scizor was essentially done. So this was fine with me.

I was able to eke out a few more wins before second-poke Skarmory, at Battle 90, killed +1 Heracross...which had no more than six attacking PP left that weren't Bullet Seed (~14). Last-poke Sturdy Magneton and its Thunder Wave made sure that the Volcarona that avenged its Sturdy Steel brother would be paralyzed and at 25HP, thanks to FPs, facing Krookodile at Battle 91, where I wasn't able to get a hit off before bowing out.

This has been a lot of fun. Hope you all are as motivated to post and theorymon now that Gen 8 finally has something worth sparring for.
 

Attachments

Last edited:
View attachment 263039

Doublecross
Shell Bell

Heracross ** Doublecross @ Shell Bell
Jolly Nature
Ability: Guts
EVs: 4 HP / 252 Atk / 252 Spe
- Low Kick
- Pin Missile
- Bullet Seed
- Rock Slide

Firetwilight
Charcoal

Volcarona ** Twifirelight @ Charcoal
Modest Nature
Ability: Flame Body
EVs: 4 HP / 252 SpA / 4 Spe
- Fiery Dance
- Bug Buzz
- Giga Drain
- Quiver Dance

Scizor
Leftovers

Scizor ** Dr. Lapua @ Leftovers
Adamant Nature
Ability: Technician
EVs: 252 HP / 252 Atk / 4 Spe
- Bullet Punch
- Bug Bite
- Swords Dance
- Roost

it's good to be back

First things firstβ€” Eisenherz is the best. None of this would have been possible without your tireless and infectious attitude, dedication, intelligence, clarity, and comprehensiveness. To say you inspired me would be a massive understatement.

Also, shoutouts to EeveeTrainer, we live 13 minutes apart in Manhattan so he's had a front-row seat to all of this. Gave me key insight into moves and strategy as I was theorymonning and playing.

Anyway, I decided on Bug because I fell in love with Heracross after watching Eisenherz's Fighting video, and nobody had used it as a Bug lead yet. You all should already know how it worksβ€”Moxie is a little broken in this format, and Shell Bell is invaluable. I won't pretend to reinvent the wheel by typing more words about this that he hasn't already.

I decided on Pin Missile over Megahorn for three key reasons. First, I did not anticipate using "bug move" out of Dynamax very often at all, and the 10 difference in base power between Pin Missile's May Flutterby of 130 vs Megahorn's 140 was negligible to me. Second, 95% accuracy over 85% was a 10 difference I did mind very much, should I have to use "bug move" out of Dynamax.

Third, and most important:

View attachment 263065

This is battle 90. "Heracross, you deserve a good rest" has never been truer. Having eight more PP than Megahorn made all the difference in the world

Volcarona pulled its weight much more than I thought I would. I knew I was using Scizor, but what should my third be? Having Shell Bell and Leftovers already locked up made the utility of all Bug I could use decrease. But Volcarona is OU for a reason, and its ability to be a ridiculous thret after just one QD sold it for me. I thought long and hard about pokes like Golisopod, Araquanid, Crustle and Shuckle, but they didn't deal with the RS's threats as well as I liked. Volcarona did, offering another form of Max Overgrowth for the team in the process. Its QD was the primary way I planned to deal with Braviary and Starmie, two pokes my team didn't like very much. Debated Roost over Giga Drain and even Bug Buzz but decided the 16 extra attacking PP were more worth it (especially given the two ways Giga Drain can heal Volcarona), and Firetwilight did not disappoint.

Scizor...is amazing, and essentially required as far as I'm concerned for a Bug team. It shuts down so much garbage by way of its Poison immunity, lone weakness, Roost and priority, with a whopping 80 attacking PP over two moves, as you can see below:

View attachment 263089

Bullet Punch itself has the same attacking PP as all of Volcarona's attacking moves (THREE) combined. Attacking PP is very valuable in this format, and Scizor does very well on this front.

When Dynamaxing, we of course lose out on the priority of BP, which could have made a case for using Wing Attack on Scizor over Bug Bite. Wing Attack has a hilarious 35->56 PP, more than the Aerial Ace that's not needed in this format with no evasion abusers. The primary reason I stuck with Bug Bite initially is the same reason you don't see a nickname on my Scizorβ€”I imported it from Gen V, and was not free to overwrite things. I would lose Bug Bite forever (unless a Bug Bite Tutor comes back in the Crown Tundra DLC), and had only one "free nicknaming" of my poke, so I decided to see how things played out and let a name come to me. Sorry this team was too good to let me nickname it before losing a real battle after 5!

You may also notice that Scizor is paralyzed in that picture. When playing through, it became apparent that Max Airstream that would have been the primary benefit of "flying move" would in fact not have been practical. Scizor really wants to SD up before attacking, so it can OHKO things like second-poke Volcarona and Dusknoir:

+6 252+ Atk Technician Scizor Bullet Punch vs. 0 HP / 0 Def Volcarona: 159-187 (99.3 - 116.8%) -- 93.8% chance to OHKO (93.8% chance to OHKO after accuracy)

+6 252+ Atk Technician Scizor Bullet Punch vs. 252 HP / 0 Def Dusknoir: 175-207 (115.1 - 136.1%) -- guaranteed OHKO (100.00% after accuracy)

This means that I would not be able to get more than +2 Speed at the most, since +6 Wing Attack does a lot to basically everything (it's essentially identical in power to BP). Scizor needed its HP EVs, and being at 121 speed after one Max Airstream to outpace stuff just wasn't appealing, especially with BP's priority being the main selling point of Scizor.

Bug Bite, further, gave me an opportunity to do this:

View attachment 263120

This basically settled Bug Bite for me. There's 33 berries in the RS of the known 150 pokes, and stealing things like Maranga Berry from Corviknight
is as hilarious as it is useful. Being able to steal Lum at battle #65 or so was clearly a streak-saver. Scizor itself shows how instrumental it is to the team, being able to take WoW here and avoid the 2HKO from Froslass's Poltergeist, which Volcarona does not (as I found out the hard way at battle #4 very early in testing).

So, when theorymonning the obvious threats to this team, Eisenherz already sold me on Rock Slide for Braviary (Adamant Brave Bird, Bulk Up), which is a bigger threat to Scizor than it is Ferrothorn. I used Volcarona over Golisopod or Araquanid because only Volocarona could threaten to kill Braviary by virtue of QD boosting its speedβ€”the other two hate Brave Bird and can't do anything about it no matter how "set up" they are, even +6 Aqua Jet Golisopod which "have fun getting to +6 with Emergency Exit".

I realized Starmie was more of a dick to "lead Hera" in Bug than to Eisenherz's Fighting team, as I didn't have an Urshifu to switch into Psychic and threaten the OHKO with Sucker Punch. Starmie does 57% min to Scizor with LO Surf, 103% min to Volcarona with the same move, and outspeeds both. It can't kill Dynamax Heracross, but I've had to tangle with Starmie out of Dynamax, where Psychic is a clean OHKO on an always-slower Heracross.

Pyukumuku (Toxic/Counter/Spite/Mirror Coat, with Innards Out or Unaware) would have been a threat...if Scizor didn't shit all over it with Toxic immunity. I faced this as a last poke at battle 50 or so, and though it was lame, I legit just switchstalled it, making sure Scizor was always in every other turn to take a potential Toxic.

That was the entire list as I began play in earnest...basically Braviary and Starmie. I would learn what indeed would become threats as I progressed.

My goal was 90, but only because I thought Eisen's record was 88, not 83 for some reason.

I had a pretty good run, being able to win the first few dozen battles without much incident. I was more interested in my PP on Hera, as I noted to ET:

i’m at b@24
hera has 7/12/21/11 pp left


So when I was able to get to 30 without a heal, I was thrilled. Battle 31 brought Starmie, though:

View attachment 263124

I was able to get out of that by sacing my low PP Heracross, and survive Surf to ohko with Big Bite. I felt great that I was able to heal on my turns...and then this happened at Battle 35:

View attachment 263125

Lame...mainly because I had JUST healed. Added this to my threat list immediately, since Hera doesn't even close to KO even with +1 Low Kick (as we know from Eisen) and the rest of my team needs set up to avoid the paralysis.

But here's where Volcarona showed its mettle. I was determined to not heal until winning "a few" more battles wtih Volcarona, as something of a test as well since I knew I'd have to utilize Volcarona by itself when I eventually had no heals and Hera was dead. Volcarona was able to handily win nine battles from 36-44 essentially by itself, with excellent usage of Giga Drain and its incredible prowess even at +1 with Dynamax being on the table for it as my de facto lead. Case in point at battle ~39:

View attachment 263126

I would have died here without being able to Dynamax, but I'm never killed by Surf even with a CH. The proudest I ever was throughout the entire streak is how 40% Volcarona handled this battle. The next poke was Toxapex, which is obviously not fun with Surf and its defenses. But Max Flutterby dropped its SpA through Baneful Bunker, then I Max Guarded on its Surf as Dynamax ended. Scizor was able to clean it up, but took nontrivial Rocky Helmet Chip to leave it at ~50%. This is where Volcarona really shone.

Out came Eldegoss. Through smart usage of Quiver Dance and Giga Drain, and Scizor's Leftovers, I was able to get Volcarona and Scizor to FULL HP due to Eldegoss' Grassy Terrain. This sold me on how good Volcarona could be when I had no heals later on.

I used my last heal at Battle 46 when Volcarona's attacking PP was well used (I had like seven attacking PP total). From there, it was a show of patience and smarts.

Three Poison-type leads highlight my run to ~65, the first being Scolipede. Though Max Rockfall always kills, I wanted to set up Scizor to preserve Heracross's PP. This was a mistake, as Scolipede used Iron Defense on the switch, was Speed Boost because of course, and then Baton Passed to Boltund, which has Fire Fang and threatens this on Scizor:

252 Atk Strong Jaw Boltund Fire Fang vs. 252 HP / 0 Def Scizor: 176-208 (99.4 - 117.5%) -- 87.5% chance to OHKO (83.125% chance to OHKO after accuracy)

Thankfully, Dynamax to the rescue, as I was able to always avoid being killed (75% max damage possible with a crit), and it ended up being Competitive anyway.

At Battle ~63, Hera was at 50% HP, and I had to kill a lead with Max Overgrow. Then Salazzle came out. I Bitched aloud at Ian's place about why that thing, which I knew had Acrobatics, had to come out when I was low HP.

View attachment 263133

So that was unexpected. Who'd've thunk switching out a Dynamaxed, +1 Heracross to a Scizor on a Salazzle was the play? Battle 65 brought out Drapion as the third of the aforementioned Poison-types, and as I predicted it to use Acupressure and boost its Evasion on the switch, Ian and I laughed, as it boosts Evasion three times in four Acupressures (and Speed once), which Dynamax +6 Scizor could not care less about given that Dynamax guarantees I'll hit.

Realizing the record was 83, and not 88 the battles from 70 onward were all tense, given that my party's PP was good enough to perhaps even make it to 100. But I had to play conservatively, which meant that when Meteor Assault, Brave Bird, Leek Sirfetch'd came out around battle 70, I had to use my head.

252 Atk Sirfetch'd Meteor Assault vs. 252 HP / 0 Def Scizor: 132-156 (74.5 - 88.1%) -- guaranteed 2HKO after Leftovers recovery

This is without a crit, and its Leek lets it crit 50% of the time, which is not hax. Switching to Scizor was a given on a "guaranteed" Brave Bird, which took Scizor to around 55% HP. After much deliberation (should we Dynamax Scizor? Roost? Send in Volcarona on a hopeful Meteor Beam to be able to QD on the recharge?), we realized that the play was actually to switch right back into Heracross on the probably-but-not-guarateed Meteor Assault. I did that, and it CHed...and didn't kill, as we had calced:

252 Atk Sirfetch'd Meteor Assault vs. 4 HP / 0 Def Heracross: 83-98 (53.2 - 62.8%) -- guaranteed 2HKO

I was then able to get to +2 and win the rest of the battle somewhat handily, but my HP and PP were hurting on Hera. At battle 78, I was able to spar my way up to 82, 83, then 84 against lead Malamar for the record. At battle 85, lead Porygon2 finally gave me the bad fortune I'd evaded through the run. Max Knuckle doesn't do enough to threaten it, and after using TR, I had to switch out of a likely Psychic. It was able to paralyze Scizor with its second (and last) Tri Attack under Trick Room before I killed it with a "slower" Bug Bite. But at this point, I was okay with my standing. And I was even more OK with my old pal Eldegoss as a lead in Battle 86. I'd get to heal the HP on my team just like in Battle ~39. Here's how the strat works:

View attachment 263134

Fun. I guess Zoroark is a threat to this team too. It had masqueraded as a Froslass in a very early, battle #6 attempt, roasting my Scizor with FT on the switch. Here's the thing, thoughβ€”even if I had KNOWN it was Zoroark. remember that paralysis picture? Look more closelyβ€”I had 5 SD and Roost PP left. And was freshly paralyzed, to boot. Scizor was essentially done. So this was fine with me.

I was able to eke out a few more wins before second-poke Skarmory, at Battle 90, killed +1 Heracross...which had no more than six attacking PP left that weren't Bullet Seed (~14). Last-poke Sturdy Magneton and its Thunder Wave made sure that the Volcarona that avenged its Sturdy Steel brother would be paralyzed and at 25HP, thanks to FPs, facing Krookodile at Battle 91, where I wasn't able to get a hit off before bowing out.

This has been a lot of fun> Hope you all are as motivated to post and theorymon now that Gen 8 finally has something worth sparring for.
Excellent read, excellent streak, and so glad you’re back into (public) facility play! I hope you’ll dabble in more types.
 
I'm wondering if someone will find a way to indefinitely play with a team of Recycle Rest + Leppa Berry Pokemon or something similar. Kind of like how in the past Battle Tower records were considered impressive in the several hundred wins until Entrainment Durant could cheese thousands of consecutive wins.


I finally got around to trying Restricted Sparring. I tried Dragon for one simple reason: I wanted to use Flapple. I originally paired it with Kingdra and Duraludon, but before even training them up I realized Turtonator did the Iron Defense/Body Press set I planned far better than Duraludon. Kingdra at least survived to playtesting, but I honestly didn't like it. I ran it with max HP and AV, but even with that it just got worn down super quickly with zero way to heal itself. I thought about it a bit, and decided on Kommo-o, who can heal itself with Drain Punch while still going for sweeps with Dragon Dance. With those changes, I like this team's backbone, but in all honesty I'm not 100% sold on Flapple itself - I suspect Dracozolt is better.

:flapple:
Flapple @ Shell Bell
Jolly/Hustle
252 Atk/252 Spd
Bullet Seed/Outrage/Fly/Dragon Dance

The star of the show. Hustle+Dynamax is an incredible combo, and Flapple is the strongest of any of them. Unfortunately, the rest of its stats are shit (except Special Attack...). It's at least fast enough with a Jolly nature to outspeed basically anything without investment (which is more than I expected, admittedly), but its defenses are still poor, and boy, does that 4x Ice weakness suck. I mentioned Dracozolt earlier who is very similar as a Hustlin' dragon that sets up a terrain that boosts its STAB with around 70 base speed, and while I think Flapple is ultimately worse it does have some nice perks. First is that Grassy Terrain provides extra healing, though the worse defenses tend to counteract this in practice. Its Airstream is noticeably stronger (130 BP off 110 base attack vs 110 BP off 100 base attack), and while I can't quantify how many extra Airstream OHKOs that gets over Dracozolt, I have to imagine it's a good amount. Its primary STAB also has an incredible 48 PP, and while I never exhausted all of it I did exhaust more than the 24 PP Dracozolt could have numerous times. The last advantage is Dragon Dance, which is really, really nice. There's a lot of passive sets that either provide a free or minimal cost DD (<50% HP taken), and with a DD victory is nearly assured. Some of the fatter mons and especially Steels can stop the sweep, but these usually aren't too bad to deal with.

But to get back to its flaws: that Ice weakness is damning. If Flapple can't get a speed boost from Airstream or DD, so many things can OHKO it straight through Dynamax, and while I can cover a decent amount of them, some of them are very sketchy to deal with (mainly the special ones). All things considered, Dragon as a type just really doesn't have the defensive backbone to deal with all the threats Flapple invites. But I tried!

:kommo-o:
Kommo-o @ Yache Berry
Jolly/Soundproof
252 Atk/4 SpD/252 Spd
Drain Punch/Dragon Dance/Outrage/Iron Head

You know you're desperate against Ice moves when you use a consumable in sparring (if you're unaware: these stay gone until you get a heal. and while items removed with Knock Off/Corrosive Gas usually restore after each battle, consumables do not, which sucks). A Muscle Band for some oomph on Drain Punch and Wyrmwind would be nice, but I wanted to prepare at least a little bit for the worst. The Yache Berry helps with Kingdra, Vanilluxe, and Starmie, all of which bop Flapple without a speed boost. For Kingdra, it switches in on Blizzard then OHKOs with Outrage or Wymwind (the former is a terrible risk that led to Kommo-o running face first into a Beheeyem). For Vanilluxe, it switches in on Ice Beam for ~half and OHKOs with Max Knuckle, or if lower in the streak (lower IVs), Drain Punch has a good chance to OHKO which leaves you in a solid position. And for Starmie, well, damn. Resisted Ice Beam+Dynamax-tanked Psychic is barely survivable (31 IV Starmie can KO with high rolls, but tbh this was the least of my worries), and Wyrmwind OHKOs. Now, this leaves me with almost no HP, Dynamax used, and no stat boosts which is just awful, but at least I might get through with no deaths. But what if Flapple already used my Dynamax? Oh, uh, look at the time haha, I need to talk about what I like about Kommo-o!

Kommo-o is good at setting up on a lot of things and taking little or no net damage from Drain Punch. I almost considered trying it as a lead instead of Flapple, but I'm doubtful that's actually a good idea due to its reliance on 16-PP Drain Punch giving it poor PP (Outrage isn't hot either, so Dragon Claw might be better in that scenario). Still, it's good at switching into a number of physically-bulky/Steel Pokemon Flapple is bad at dealing with, or Pokemon Flapple can defeat but not get any boosts off of, like Greedent, Tauros, Tangrowth, Exploud (thanks Soundproof), Gigalith (did you know that Flapple without dmax is OHKOd by Power Herb Meteor Beam?), Krookodile, Klinklang, Perrserker, Lycanroc-M, and Morpeko. It's also decent at dealing with Volcarona, switching in for free on Bug Buzz and resisting Heat Wave. Overall it works well as a secondary sweeper that's good at staying alive.

:turtonator:
Turtonator @ Leftovers
Bold/Shell Armor
252 HP/252 Def
Iron Defense/Body Press/Flamethrower/Rest

Turtonator is neutral to Ice with good defense, which lets it neutralize Weavile and Froslass, who are nightmares otherwise. Rest and a natural burn immunity let Turtonator tank status to some extent, which this team otherwise doesn't have any real way of dealing with. With Iron Defense, it can set up on many physical Pokemon with no crit risk due to Shell Armor, and take little net damage due to Rest and potentially sweep. While setting up with Flapple or Kommo-o is always preferred if possible, there's a number of Pokemon like Scizor, Dusknoir, and Gourgeist (and a lot more, I just don't want to scroll through the list again lol) that Turtonator has to take the reigns on. Special Pokemon can still deal a lot of damage when it's set up (special dragons are particularly bad, but that didn't happen to Turtonator this run), but most are OHKO'd by Body Press at least, and if another physical mon appears it can Rest back up. Flamethrower is another damage option for Ghosts and PP conservation. There might be a better option like Toxic, but I stuck with this. I usually prefer it for physical Pokemon, because even if Body Press is an OHKO it's a more valuable move.

Threats

:starmie: : Mentioned earlier, but this is a nightmare. If it comes in while Flapple is dynamaxed and has no speed boost, I straight-up lose. Even if I have dynamax available, the Yache strategy is frankly poor. I've ran into this twice on other runs: once I had a speed boost, the other time it swept me. Such is Starmie.
:kingdra: : Kommo-o needs the Yache Berry to switch in, otherwise something has to die. And regardless I'm left in a bad position.
:vanilluxe: : Same as Kingdra, but at least I'm left in a decent position if I have Yache.
:braviary: : Demolishes Flapple without speed. My strategy is to switch in Turtonator who takes around 40% from Brave Bird, then Body Press before it seems to invariably reveal its obnoxious quirk, Whirlwind, which prevents setting up Iron Defense. If Flapple comes back in I'm in a bad position and something probably has to die. If Kommo-o comes in it finishes it off.
:cinccino: : Fast and armed with Triple Axel, I'm usually forced to switch the Turtonator. But Rock Blast and Metronome makes setting up Iron Defense a losing proposition. In the end I think it's best to take roughly half damage and just OHKO with Body Press.
:ribombee: : No issue with a speed boost on Flapple, but without one I have to facetank a STAB for like 80% in dynamax. Turtonator can stop it in a pinch with Flamethrower, but takes around half its health.
:escavalier: : Walls Flapple, too strong for Kommo-o to set up on, and with Screech, Razor Shell (50% def drop), Occa Berry, and Metal Burst, is very awkward for even Turtonator. I usually use one Body Press, then try and net defense with Iron Defense, hoping for either Metal Burst or no def drop from Razor Shell.
:pyukumuku: : If Flapple is at high health, I usually just let it KO this and risk the Innards Out (only around half in dmax). Otherwise, I go to Turtonator. Here I would love Toxic, but I'm not running it. I usually chip it down with Body Press and Flamethrower and Rest when I need to, but this is very PP-intensive.
:magneton: / :magnezone: : Both stop Flapple, and Kommo-o has difficulty due to Thunder Wave and Steel Beam, respectively. That leaves Turtonator, who mercifully resists their STABs, but they're still Special Pokemon so it's left with around half HP afterwards.
:gyarados: : Very annoying if it gets Intimidate. Icy Wind isn't super dangerous to Flapple, but the speed neutering sucks. STAB Scald and Taunt destroys Turtonator, and Kommo-o needs a lot of set up that it can't really get due to Taunt. Flapple is the best option by going for DD first, but with Intimidate it still doesn't OHKO while being left with neutered speed.

The Run

My first heal was used after battle 13, where I ran into lead Vanilluxe. At a battle this low, I was going to go for the Drain Punch OHKO due to the low IVs. I was ecstatic to see my planning come to fruition, knowing that I had bested this icy bastard - but no, I got frozen. Kommo-o went down, and then I tried Flapple to see if the IVs were low enough to let it outspeed. They weren't. I didn't think they would be so I didn't even Dynamax. Now Turtonator was all that remained. For the first and only time, I had it Dynamax. Vanilluxe started with Light Screen so Max Flare 2HKOd, getting off an Ice Beam before it fainted. Exeggutor was next, and used 2 Psychics before I KOd it. The second was out of Dynamax, so I barely survived. What can Turtonator beat with ~20 HP? Cloyster, apparently. It went for Shell Smash, and Flamethrower OHKOd in the sun despite Light Screen still being up.

My second run was far more productive, going until battle 39. No one had fainted, but health was getting low. IIRC, Flapple was at 60% and poisoned, Kommo-o had most of its health, and Turtonator only had around 30%. Lead Porygon2 was terrifying in this situation. Normally, it will use Trick Room t1 as I go to Turtonator. This causes it to revert Trick Room, so I get free Body Press damage. Then it will usually spam Conversion as I swap between Body Press and Flamethrower, all before I go back to Flapple and finish with Airstream. But here, it had Download. That's not necessarily awful, but it meant when I swapped to Turtonator it didn't even try to TR, it just went straight for Tri Attack and finished it off. I went to Kommo-o. I Drain Punched before TR for a bit of damage. Then it used Conversion as it tended to do, but here I got awful luck, and the type it changed to of Fighting's 6 resistances was Psychic. This meant it now had a STAB Psychic, which with Download could OHKO Kommo-o. I Dynamaxed so I could survive and used Max Wyrmwind. From here TR had 2 turns left, so I was going to use Max Guard twice to stall it out then yolo with Outrage. But as it turns out Max Guard still stales (I thought it didn't), so that failed. Still, this meant TR finished when Flapple came back in, who had to sweep a whole team while playing Hustle roulette. It hit P2 which Bullet Seed, Scolipede with Fly, then Poliwrath came out. I did damage calcs and determined I needed a 3-hit Bullet Seed. I got the hit, but only 2 Bullets. My heart sank. But then, it channeled the spirit of Chuck - Dynamic Punch! And like Chuck, it failed spectacularly and whiffed. My next Bullet Seed hit again, and somehow I got past this fight.

My last run, of course, went until battle 56. Things went okay for the first 10 or so battles, though Turtonator and Kommo-o had some trouble keeping up health. I lost my first mon by playing like a dumbass against a Stoutland. It had Intimidate, but this is usually fine cause Flapple can set up a Dragon Dance despite Play Rough. But I only had around 60% HP which I thought would mean I would faint with the higher IVs now. The plan was to pivot off Turtonator to take Play Rough and bait Hyper Beam to Kommo-o, who would set up DD and Drain Punch (I was actually almost out just due to match-ups and an unfortunate Spite from Corviknight). But instead it used Work Up. First, this meant that Flapple probably could have set up Dragon Dance. Even so, my plan should still work. I went to Kommo-o, but nope, Work Up again. Here, I thought I could take a +2 Hyper Beam and still do my DD, completely forgetting it had Play Rough. RIP. Flapple KOs it without Intimidate at least, but what a dumb mistake. This was especially aggravating because Flapple probably could have just used DD on turn 1 and been at +1 Speed, likely to sweep.

A few battles later, I ran into Greedent. With max defense, Stuff Cheeks, Cheek Pouch, and Belch, this is awful for Flapple. If only I had a Kommo-o... Even without it, I would have at least been able to weaken Greedent enough before switching to Turtonator to finish, but it got a crit with Belch and KOd me at 60% through Dynamax. Turtonator won that battle, but the very next battle I ran into an Aromatisse lead and lost. I guess it's fitting that a Dragon run ends at a Fairy's hands.

Anyways, I didn't play perfectly of course, but overall I'm not sure how much better this team can realistically do. Even with poor play and some bad luck, I still got fairly lucky with not running into the biggest threats without speed boosts, except Vanilluxe once. And I really should not have won either of the matches before my heals, lol. Maybe I'll try this with Dracozolt sometime, but for now I think I want to try a different type.
 
Hey! Lots of Restricted Sparring stuff going on, so I'm sorry to interrupt it with this Battle Tower content. I'm here to report both a streak of 151 and an ongoing streak of 200! Both streaks do not use Dynamax. Let's begin....

The first streak is a completed streak of 151 wins. The entire streak was recorded and uploaded to YouTube and can be found in this handy-dandy playlist! Rental code found here! Now, let's get on with the details..
The team is basically just Endeavor bait stuff with Togedemaru and Dusclops with Dracozolt and Primarina rounding out the backline.


Dusclops @ Eviolite
Ability: Frisk
Level: 50
EVs: 252 HP / 68 Def / 188 SpD
IVs: 31/31/31/31/31/0
Relaxed Nature
- Night Shade
- Brick Break
- Trick Room
- Helping Hand

First up, we have Dusclops. We all know Dusclops. It's one of the bulkiest Trick Room setters out there thanks to its impressive Defense and Special Defense+Eviolite. I haven't really encountered anything that can take Dusclops out in one hit in the Battle Tower so far, and it can take a lot of abuse. The EVs are taken from Eppie's Battle Tree Dusclops but I believe any bulky spread can work quite well. Frisk is an amazing ability as it helps with scouting lead sets and allow me to adjust accordingly. Trick Room is pretty self explanatory and is the main reason the team works the way it does. Night Shade and Brick Break are mainly used to allow Dusclops to finish off anything Togedemaru Endeavors down and are pretty much the best attacks for this set. Brick Break is also useful for breaking screens if needed. With the loss of Foresight, I needed a new move to fill the 4th slot. I experimented with things such as Pain Split, Ally Switch, Gravity, and even Protect. But one thing I noticed is, Dusclops finally had access to Helping Hand via TM. So, I went with that to help the backline score KOs if ever needed. I think Ally Switch might have been the choice if HH wasn't possible.


Togedemaru @ Berry Juice
Ability: Sturdy
Level: 1
EVs: n/a
IVs: xx/xx/xx/xx/xx/xx
- Fake Out
- Endeavor
- Toxic
- Spiky Shield

Next up, we have the bait, Togedemaru. With Endeavor, Togedemaru is able to bring down even the bulkiest of Pokemon down to the point that the partners around it can finish off anything (except for Ghosts, but we'll get to that later). Fake Out is mainly used to help Dusclops set up Trick Room but can also be used to help the other two get off attacks if Trick Room is ever expired. Toxic is used to wear down bulkier foes, and also anything that can't be Endeavor'd. Spiky Shield is also used to stall out stuff if needed.


Dracozolt @ Iron Ball
Ability: Volt Absorb
Level: 50
EVs: 252 HP / 252 Atk / 4 SpD
IVs: 31/31/31/xx/HT/0
Brave Nature
- Bolt Beak
- Dragon Claw
- High Horsepower
- Protect

Why yes, that is Volt Absorb over Hustle. Obviously, since we are going for as many wins in a row and we are not using Dynamax at all, I needed to be able to accurately hit my attacks. Which is why we're running Volt Absorb. It can come in handy sometimes, as Dusclops attracts a lot of Thunder Waves from time-to-time. Anyway, Dracozolt is a beast of a Pokemon. Bolt Beak, like Fishious Rend, gets double damage is Dracozolt attacks before its target. Which is perfect for Trick Room+Iron Ball as it hits 36 speed. There's still some stuff slower than it, but eh, it works out in the end. Dragon Claw is secondary STAB. I believe Eisenherz suggested to me at one point Gravity+Dragon Rush would be a nice combo but having to rely on getting Gravity up consistently proved to be a little tough, so I stuck with the weaker Claw. It still does decent damage but of course, it would be fantastic if I had Hustle. Oh well. Finally, we have High Horsepower. I know, 95% accuracy. But I didn't want to run Earthquake and Stomping Tantrum was a little too weak for my liking, so I went with this. It still did ok damage, and I think I only clicked it 3 or 4 times throughout the whole streak. I have Bolt Beak to thank for that. Oh, and Protect is there for scouting, stalling, blah, blah, blah.


Primarina @ Room Service
Ability: Liquid Voice
Level: 50
EVs: 252 HP / 252 SpA / 4 SpD
IVs: 31/xx/31/31/31/0
Quiet Nature
- Hyper Voice
- Moonblast
- Energy Ball
- Protect

Finally, Primarina. I've always wanted to run Primarina under Trick Room. Just didn't really fit right on a lot of the Battle Tree stuff I planned back then, so it just sat on the shelf. Until now. First off, Liquid Voice is a pretty nice ability. It gives Primarina STAB Hyper Voice, which allows me to break through subs and deal some nice spread damage. Moonblast is here as secondary STAB and packs a decent punch if I need single target damage plus it's pretty good for finishing off battles since it is stronger than HV. Energy Ball is used for coverage for stuff such as Gastrodon and Seismitoad. Protect is protect. Yeah.

152 vs Madame Navin
Aegislash-1 / Gourgeist-4 / Kommo-o-? / Vanilluxe-2
The specific losing video can be found here. There really isn't a whole lot to say except the first Toxic miss sucked and Aegislash-1 sucks. It usually has a tendency to set up Swords Dance vs this lead (did it the last 3 or 4 times I've faced it, but that was with Leon). Vanilluxe also randomly using Avalanche over Ice Shard also threw me off (could have used Bolt Beak and killed it!)

You may think being able to set up Trick Room and having Togedemaru+Dusclops wipe out stuff is unstoppable, but it still has its problems...
Ghosts - Without Foresight, Togedemaru no longer has a way to hit these spooky fellas. I mean, I still have Toxic but that can miss (see loss video). And even then, I can't even touch Gengar or Aegislash with Togedemaru! A lot of them can carry Shadow Sneak as well so they can easily pick off the lil ball so being extra careful when facing Ghosts is crucial.
Trick Room - Opposing Trick Room isn't a huge problem, but can be annoying. The AI can also be unpredictable sometimes and choose to either reset the Room on me, or attack (usually Togedemaru... lol...).
Priority - As mentioned above, priority moves can be a pain in the ass to deal with. Togedemaru is attracts a lot of these since it's OHKO'd by everything in the Tower. Switching around or stalling with Spiky Shield is usually probably best.
Dynamax - This one isn't a huge issue but can be annoying. First off, they can't be flinched so Fake Out against a potential lead Dynamax user is useless. Secondly, Endeavor doesn't bring them all the way down to Togedemaru's HP, so Dusclops' Night Shade usually isn't enough. Also, Togedemaru can't Protect vs these behemoths. I didn't face many on this streak other than Leon's Charizard so I can't really speak on how dangerous each one is, but I can imagine stuff like Weavile and Hydreigon can be a problem. Oh, and the King's Rock Cinderace.
Hail - The only weather that can harm Togedemaru. Sometimes it's best to switch, but the culprits that have the ability to get Hail can usually come with something like Blizzard or Ice Beam, so switching can be hard. Sometimes, it's best to sac Togedemaru and try to finish the battle with the rest of the team.
Flame Body - Another really annoying thing. Since both Fake Out and Endeavor are contact moves, Togedemaru is susceptible to getting random burns, thus breaking its Sturdy permanently. It's best to try and avoid attacking potential Flame Body stuff until you can't help it anymore.
Bulky Grass-types - This team doesn't feature anything to hit Grass super effectively. If Togedemaru goes down early, it can be frustrating to finish them off! Trevenant and Gourgeist are especially threatening as Togedemaru can't even Endeavor them.
Quick Claw/Bright Powder - These itemscan be considered threatening to pretty much any team but I thought it'd be best to still include them here. It's pretty self-explanatory
Flinching - Flinch moves such as Rock Slide and Dark Pulse can be a little annoying too as they can stop Dusclops from setting Trick Room if its hit by these attacks.
Mold Breaker - Mons with this ability can be frustrating to handle as they completely ignore Togedemaru's Sturdy.

Anyway, that's team #1. Next up, LuchaDeedee! This team is an ongoing streak of 200 wins. This streak is also fully recorded and the playlist can be found here. Rental code found here!
So first off, the team above was made before the Isle of Armor DLC came out. This team was made after it and for me personally, it's a lot more fun. Also, yes! This is a SwSh version of my LuchaLele team from the Battle Tree! Anyway, here's the team:


Hawlucha @ Psychic Seed
Ability: Unburden
Level: 50
EVs: 252 HP / 252 Atk / 4 SpD
IVs: 31/31/31/xx/31/31
Adamant Nature
- Low Kick
- Acrobatics
- Tailwind
- Protect

This is the same Hawlucha from that Tree steak! Now taking residence in Galar, Lucha wanted to have another go at a facility and Galar's Battle Tower is probably the best place for it. The set is completely unchanged from the previous team but I'll still go over what it is. First up, with Psychic Seed and Unburden, Hawlucha will out-speed everything in the Battle Tower. Yes, everything; unless it gains an item or is switched out for whatever reason. Low Kick is used over Hawlucha's new TR move, Close Combat, as it has more PP and also doesn't lower my defenses. I did briefly consider CC, but the loss of the Special Defense boost from Psychic Seed proved to be a little problematic so I nixed the idea. Acrobatics is also used as it is Hawlucha's strongest accurate Flying-STAB. Tailwind is used for Speed control and it is FANTASTIC with gen 8's new auto-updating speed tiers. With it, Indeedee and friends can blast away and will have almost no need to protect themselves on the turn Hawlucha is Tailwinding. Protect is, as always, used for stalling out turns and scouting when necessary.


Indeedee @ Choice Specs
Ability: Psychic Surge
Level: 50
EVs: 4 HP / 252 SpA / 252 Spe
IVs: 31/xx/31/HT/31/31
Modest Nature
- Expanding Force
- Mystical Fire
- Energy Ball
- Dazzling Gleam

Alright, first of all, I do miss Tapu Lele, but Indeedee is a pretty nice replacement. I went with male Indeedee as it had more base Special Attack than the female variant. I went with Modest with max Special Attack to allow Indeedee to hit as hard as possible. The Psychic/Normal typing is pretty nice and protects Indeedee from dangerous Ghost-type attacks. Of course, most super effective Dark or Bug-type attacks can still destroy it but that's not so bad, right? I've been trying to get this guy to work since I found out it was the new Psychic Terrain setter, almost to the point of giving up. Leon's Charizard proved to be a problem and everything I tried just didn't work. Until the DLC happened... You see, there's a new move called Expanding Force. And what does it do? Well, it's a measly 80 BP move, but when Psychic Terrain is active, it gets a 1.5x boost in power in addition to the boost from the terrain itself and it becomes a spread move. What does this mean? Well, anything that isn't immune or doesn't resist Psychic is usually OHKO'd by Specs Indeedee. Most Dynamax stuff also goes down to EF+another attack. It's a huge buff to Indeedee's movepool. The other moves on Indeedee are rarely clicked though. I think so far, I've clicked Energy Ball once or twice and Mystical Fire is pretty nice for taking out some Steels but Expanding Force is usually better anyway as the partner can pick off what Indeedee doesn't OHKO. Finally, Dazzling Gleam is used to take out Dark-types that Indeedee can't kill with EF. It's pretty weak, but still does decent damage thanks to Choice Specs.


Marowak-Alola @ Thick Club
Abulity: Lightning Rod
Level: 50
EVs: 4 HP / 244 Atk / 4 Def / 4 SpD / 252 Spe
IVs: 31/31/31/xx/31/31
Jolly Nature
- Fire Punch
- Shadow Bone
- Bonemerang
- Protect

Another new the toy the DLC gave to me! Marowak might seem like a bit of an odd choice for a Tailwind team, but it's actually not so bad. Thanks to the lower IVs of the Tower Pokemon, Marowak can still get the jump on quite a bit after Tailwind is up. Plus, it can still take a hit or two. Thick Club is the best item for Wak as it doubles its Attack stat. Lightning Rod is also used to protect the team from things like Thunder Wave and other Electric-type attacks. Fire Punch is used over Flare Blitz as it doesn't hit Wak with recoil and still does ok damage to a decent chunk of the Tower roster. Shadow Bone is used as its Marowak's most accurate Ghost-type STAB. The chance to lower Defense is also pretty damn nice as well. Bonemerang is used for coverage as it hits twice. The 90% accuracy can be a bit of a pain sometimes, but it hasn't really been a huge issue (except for a Morpeko that I missed 3 times in a row...). With Tailwind, Marowak hits a decent speed tier of 212.


Duraludon @ Life Orb
Ability: Stalwart
Level: 50
EVs: 12 HP / 244 SpA / 252 Spe
IVs: 31/xx/31/31/31/31
Modest Nature
- Dragon Pulse
- Flash Cannon
- Thunderbolt
- Protect

And finally, we have Duraludon. I love this guy. I think Duraludon fit pretty well on the team, and I felt with Marowak's Ghost coverage, Hydreigon was no longer needed. Duraludon provides some pretty nice Steel-coverage though, which is sorely missed as Metagross was snapped along with Lele. First, I should maybe address Thunderbolt on a team that features Lightning Rod. Thanks to Duraludon's exclusive ability, Stalwart, I can ignore that Lightning Rod and have Duraludon still shock all the pesky Electrick-weak Pokemon for pretty big damage. Dragon Pulse and Flash Cannon are pretty damn good STABs to have. With Life Orb, Duraludon hits super hard and can take out a damn good chunk of the AI mons. The low Special Defense can be a bit of a problem sometimes though. 12 HP EVs are used so Duraludon can hit an odd-numbered HP stat for Life Orb recoil.

Trick Room - The team still struggles with Trick Room quite a bit. Most of the setters can be taken out with Indeedee, but a lot of the Psychic ones are a pain. Musharna is a big one that comes to mind. Mimikyu is another one as it takes a free hit thanks to Disguise. Other than that, as long as Trick Room doesn't go up, you should be fine.
Neutralizing Gas - Gen 8 has brought a new pain in the ass in the form of Galarian Weezing. If it rolls Gas, it cancels out the Psychic Terrain activation which also stops Psychic Seed from consuming which stops Unburden. It also shuts off Lightning Rod and Stalwart which are all pretty important. Pretty much, Weezing can shut down each of the team members in a different way and should be considered public enemy #1 if it comes out with the ability. Fortunately, all abilities that are suppressed will reactivate if it goes down so that's a plus.
Opposing terrain - Gen 8 has also brought on other Terrain setters in the facility roster! Rillaboom, Pincurchin, and the aforementioned Weezing-G can all reset Indeedee's Psychic Terrain. Fortunately, Hawlucha's Seed will activate regardless but Indeedee loses a lot of power without Terrain. Usually switching out and bringing Indeedee back later is the best option for dealing with this.
Quick Claw - A lot of the stuff carrying Quick Claw can be scary. The fossils all have Quick Claw sets with Fishious Rend and Bolt Beak that tear the team a new one. Perrserker, of all things, can also be a problem with Quick Claw+Tough Claws+Play Rough.
Heliolisk-1 - This set can be a little annoying as it carries Glare. Since Glare is a Normal-type move that can paralyze, Marowak's Lighting Rod doesn't block it. Plus, thanks to its spread (SpD/Spe), it has a chance to live Expanding Force which can make things pretty difficult. Approach with caution.
Contact abilities - Flame Body and Static can be frustrating and can both abilities can stop Hawlucha in its tracks. Marowak can be hit by Static but it's not so bad as Shadow Bone and Bonemerang both do not make contact.
Fake Out - While not a huge problem, the AI will still try to Fake Out Hawlucha if it has the chance to do so since Lucha is the only member of the team that can still be hit with priority.

And there we have it. Now for a much needed break from Tower climbing. Maybe it's time to try out Restricted Sparring.... See ya.
 
Last edited:

Anubis

HONK
is a Community Contributoris a Top Researcheris a Battle Simulator Admin Alumnusis a Community Leader Alumnusis a Smogon Discord Contributor Alumnus
Hello!

I dumped all 150 Restricted Sparring sets. You can see 'em here.
https://gist.github.com/Lusamine/ca5b7409c1d5f6a4891fa774e5ba8c96

Here's how the abilities for the 801 mons were distributed. It's worth noting that mons that have only one non-HA such as Salazzle could still roll ability 1 and ability 2, so they presumably have higher chance of rolling the non-HA.
https://gist.github.com/Lusamine/e93a15312b0d18789fbe807e0d908fcc

(If you're wondering why it's ability 1, 2, and 4, that's how the bitflags work. Ability 4 is the same as HA.)
Man some of those sets are surprisingly good.

I do wonder if the reason they actually included G-max is because those sets are going to be returning later on in a separate facility in Tundra... questionmarkquestionmarkthinkingface
 

Eisenherz

ΡπέκΡινα της ουσίας
is a Forum Moderatoris a Community Contributoris a Tiering Contributoris a Top Social Media Contributor Alumnus
Moderator
First of all, Jumpman16, I'm happy to see you back into action after all this time, and with such a nice streak! Thanks a lot for the kind words, it's exciting to see you dive into this format, I'm hoping (suspecting...) there is more to come!

Second, we now have all the sets datamined thanks to Anubis (as you can see above)! I've gone ahead and updated our spreadsheet with all the correct information, and also updated the damage calculator, so now our calcs will finally be accurate! Also importantly, we can now prepare proper EV spreads meant to take on RS, and for that purpose, I've put together a speed tier list. In addition to the 150 sets, it includes the most common and relevant speed modifications encountered while playing, I figured this will be helpful while planning:

238 – Sandslash (Sand Rush in sand)
228 – Cloyster (after a Shell Smash)
208 – Sharpedo (after a Speed Boost)

207 – Accelgor
204 – Klinklang (after a Shift Gear)
201 – Lilligant (after a Quiver Dance)
198 – Barraskewda
188 – Beartic (Swift Swim in rain)
186 – Scolipede (after a Speed Boost)
185 – Weavile
184 – Ribombee
181 – Boltund
180 – Alakazam
177 – Salazzle
174 – Cinccino, Starmie, Garbodor (after Blunder Policy), Kingler (after Agility)
173 – Swoobat
171 – Whiscash (after a Dragon Dance)
169 – Froslass, Tauros
164 – Mantine (Swift Swim in rain)
163 – Lopunny, Mienshao
161 – Emolga
159 – Dedenne
152 – Drapion, Obstagoon
149 – Zoroark
148 – Rotom
145 – Kommo-o (after a Clangoroul Soul)
144 – Comfey, Volcarona
141 – Heracross, Kingdra, Lycanroc-M (after Salac Berry)
140 – Skuntank
139 – Sharpedo
136 – Braviary, Mandibuzz, Passimian
135 – Vanilluxe
134 – Lilligant, Pikachu, Porygon-Z, Thievul
133 – Meowstic-M
129 – Pinsir, Toxicroak
125 – Butterfree, Flapple, Mr. Rime
124 – Gallade, Goodra, Lycanroc, Scolipede, Stoutland, Talonflame
123 – Seaking
120 – Galvantula
119 – Klefki, Morpeko, Sandslash
117 – Falinks (after No Retreat)
114 – Cloyster, Luxray, Whiscash
112 – Miltank, Tentacruel
109 – Pelipper
108 – Bouffalant
104 – Krookodile
103 – Clawitzer
102 – Klinklang
101 – Mamoswine
100 – Dubwool
97 – Cramorant, Golduck, Kommo-o
96 – Dragalge, Gourgeist
94 – Beartic, Lycanroc-M
93 – Gyarados, Milotic
92 – Drifblim, Gardevoir
91 – Kangaskhan, Orbeetle
90 – Magneton, Solrock
87 – Garbodor, Kingler
86 – Drednaw, Seismitoad
84 – Slurpuff, Vespiquen
82 – Bisharp, Lunatone, Mantine, Politoed, Skarmory
80 – Exploud
79 – Corviknight, Lanturn
78 – Falinks
77 – Centiskorch, Scizor
76 – Alcremie, Malamar
74 – Sandaconda
73 – Poliwrath
72 – Abomasnow, Eldegoss, Jellicent, Oranguru, Porygon2, Wailord
70 – Scrafty
69 – Sirfetch’d
68 – Trevenant
67 – Blissey, Crawdaunt, Exeggutor, Golurk
64 – Magnezone
62 – Azumarill, Perrserker, Vileplume
60 – Druddigon, Orbeetle (after Room Service)
57 – Conkeldurr, Crustle, Dusknoir, Lurantis, Marowak
55 – Lickilicky, Tangrowth
54 – Grapploct
52 – Drampa, Golisopod
51 – Dunsparce, Octillery
48 – Turtonator
47 – Quagsire, Toxapex
46 – Beheeyem, Rhyperior
42 – Amoonguss, Appletun, Coalossal, Cursola, Palossand, Runerigus, Steelix
41 – Aromatisse, Musharna
37 – Gigalith, Wishiwashi
32 – Greedent
28 – Escavalier, Torkoal
27 – Pincurchin
15 – Pyukumuku

Third, new mono Fire streak to submit! I've been having the worst luck with Psychic, encountering exactly what I need not to, exactly at the worst times... several times now, I healed post-40, only to go down a couple of battles after the heal to repeated Scizor encounters (unsurprising spoiler: Mono Psychic has limited ways of dealing with Scizor...). It became so frustrating, that I decided a break was needed, and turned to old streaks that could be improved with new knowledge. And the result...

PokΓ©mon Sword-Shield Screen Shot 2020-07-22, 4.32 PM.png


Clearly, Jumpman's streak inspired me to add Volcarona to my Fire team, which did feel like a reasonable addition, being neutral to Ground and a safe switch into any Scorching Sands. Charizard's immunity was nice, but Volcarona offers a lot more than Charizard, being able to setup and heal. At first, I also replaced Darmanitan with Turtonator, not only as a generic physical tank, but to switch into stuff like Waterfall from Barraskewda, which is problematic as a lead. However, I found Turtonator to be constantly put in bad spots after KOing the threat it was handling; Kommo-o, or Kingdra, or Dragalge would come in and threaten it heavily while I had no switch-ins. Rather than a switch-in tank, I decided to go back to an all-out sweeper and trust in the power of Shell Bell and Libero to handle bad leads. Good old Darm delivers all the power I need.

–––––––
S E T S
–––––––

@

Jolly | Libero
IVs: 31/31/31/31/31/31
EVs: 252 Atk / 4 Def / 252 Spe
Fire Punch / Low Kick / Zen Headbutt / U-turn

@

Adamant | Sheer Force
IVs: 31/31/31/31/31/31
EVs: 4 HP / 236 Atk / 4 Def / 12 SpD / 252 Spe
Fire Punch / Earthquake / Rock Slide / Superpower

@

Modest | Flame Body
IVs: 31/0/30/31/31/31
[Hyper trained to 31/0/31/31/31/31; once upon a time, it had HP Ice]
EVs: 132 HP / 204 Def / 116 SpA / 4 SpD / 52 Spe

Fiery Dance / Giga Drain / Quiver Dance / Roost

––––––––––––––––––––––
T E A M B U I L D I N G
––––––––––––––––––––––

:cinderace: With the way our "meta" has developed, looking back at my old Cinderace set, it was pretty obvious how it could be improved. First of all, Cinderace clearly ticks all the boxes of a good Shell Bell sweeper, and while a loss in power was inevitable, fewer OHKOs isn't as big of a deal when you're constantly healing. Second, what stopped it from going any further previously was a simple lack of PP, so picking moves with higher PP was a must, but this is where the puzzle began.

Given that G-Max Fireball is 160 BP regardless, Fire Punch was the obvious pick for the Fire move since Blaze Kick can miss (besides, Punch has more PP as well). But the coverage was a bit difficult to pick... the moves I deemed viable were Low Kick, Acrobatics, Iron Head, Assurance, Zen Headbutt, U-turn and Double-Edge. Low Kick was decidedly a must, which left room for 2 more... I first went with Acrobatics. You usually want a Flying move for the Speed boost, but Cinderace's case is a bitdifferent; it doesn't need the speed, but defensively, being able to turn into a Flying type is a huge asset for a Fire type, especially when your opponent is an AI... best possible Ground resist! I decided to round it out with U-turn, because Max Flutterby OHKOs Musharna, and not dealing with it setting Trick Room was important to me. It also sounded pretty helpful for getting free damage + Shell Bell recovery if I ever wanted to switch.

That set (Fire Punch / Low Kick / Acrobatics / U-turn) worked pretty nicely, but I was constantly missing KOs with Airstream and that bothered me, it ended up wasting more PP overall. It also ended up being the only neutral option against several opponents, quite a weak one... so I decided try giving up the Ground immunity and rely on the Ground resistance U-turn offers, and replaced Acrobatics with Iron Head, which was sure to give me quite an edge defensively. It worked wonders (OHKOing the Slurpuffs and Alcremies was very satisfying), but then I ran into Jellicent, and realized it became a huge problem for me... well, Volcarona could handle it, but being forced to switch out during a sweep (or waste a ton of PP) was bothersome. So I tried Zen Headbutt, which I thought seemed kind of bad... and never looked back. OHKOing Fighting types ended up being more useful than the Fairies, but most importantly, setting the Terrain was super good all-around, and Psychic proved to often be a decent type to turn into defensively.

The final moveset has a grand total of 112 PP, through which Cinderace is fully capable of burning. As a sweeper, it's 100% up there with the Moxie behemoths, but with more defensive flexibility thanks to Libero, and the speed to outpace everything barring Accelgor and Barraskewda.

:darmanitan: 
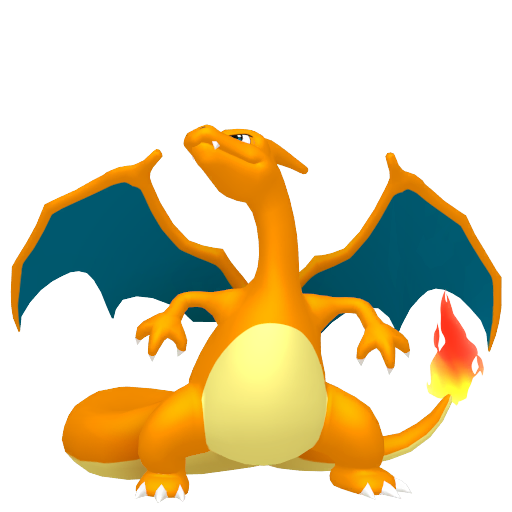
I really don't have much to add about Darmanitan that I haven't said last time. It just tears through everything that doesn't outspeed it. A limited lifespan assuredly, but with not too much bad luck, it can get 5-10 sweeps before going down. I decided to keep the Choice Band, since it allows it to get OHKOs on bulkier threats *without* Dynamax, which I find really valuable for such a glass cannon (it's possible I already Dmaxed Cinderace, or I'd rather not commit yet). If anything, I think Charcoal could be viable for it too, since it tends to spam Fire Punch / Max Flare. Earthquake sees a lot of usage too; the other moves, not nearly as much.

:volcarona: As I mentioned already, this addition was inspired by Jumpman's succesful Bug streak. I decided to go with a bulkier variant than his, simply because I used bulky Volcarona a lot in different formats last gen and really loved it, so I felt comfortable going for that. I even considered going with Bold and near max Def, but then decided this was probably overkill, and Modest grants more stat points in total, so it's also more optimal. With the addition of Roost, I felt ok with giving up Speed, which I'd gain with QD instead. The spread probably looks more intricate than it really is... I put 52 Spe to outspeed Weavile at +1 (this was before we had the exact numbers of the dump), 116 SpA to hit a reasonable jump point, 132 HP for the optimal Leftovers number, and dumped the rest in Def since I wanted that to be the main focus.

Volcarona was wonderful, and if it hadn't been killed at the very start of the 3rd leg by a Milotic crit (on the only turn a crit could KO; I was about to Roost and be safe from then on), I have no doubts it would have easily carried me past 100. It solo'd more than 10 battles in the 1st leg, and nearly as many in the 2nd. Having both QD and Roost, its offensive PP could definitely deplete quickly, which made it more imperative to set up enough to OHKO everything and save PP. This was usually not a problem with Dmax, but it's possible that foregoing Roost and relying on on Grassy Terrain + Lefties would have been enough and allowed further sweeping. Roost did make setting up feel safer/easier, so I'm a bit torn about the set I'll run in the future... there's also the fact if I remove Roost, I can't get it back now that I've transferred it to Gen 8.

If I have one complaint about Volcarona... it's the Dynamax model!! It looks SO BAD when it Dynamaxes! It takes such a big portion of the RS field that it looks awkwardly squeezed, and the worst part is the movement! Its head goes up and down in a motion that looks very robotic, it looks like a giant mechanical PokΓ©mon that loops in this unnatural motion... it's almost unsettling lol.

––––––––––––
T H E R U N
––––––––––––

I went into this and considered it to still be testing grounds; I had just added Zen Headbutt to Cinderace's set, and Darm was making a return after trying out Turtonator. I had also just changed Volcarona's spread. Early on, I definitely played it like it was a test run. Twice, I simply G-Max Fireballed Magneton hoping it wasn't Sturdy, and got lucky enough that it wasn't; I didn't really mind forfeiting and restarting at that point since it was before the 1st heal [edit: I just realized G-Max Fireball has the Mold Breaker effect to ignore Sturdy, I'm dumb!! I wish I realized it sooner lol]. More than anything, I was in the process of calculating my Shell Bell recovery on every possible occasion to figure out which sets had HP investment for our spreadsheet (little did I know, this would be moot just a few hours later lol). But then, I found myself needing to heal after battle 31, and seeing the potential of the run, I started taking it more seriously. No more staying in on Magneton (I only encountered 2 more; in one case, Darm was the sacrificial lamb, and its run was cut short in the 2nd leg, while the second one missed its Thunder Wave!!!), no more focusing on Shell Bell calcs.

Outside the Darmanitan paralysis, the 2nd leg went pretty much as good as it could have. I burned through almost all of Cinderace's PP (it may have had 4 or 5 left overall when it went down), and the game seemed to throw at me exactly what I needed to be able to balance all of its PP nicely, so the run wouldn't be cut short by missing PP on only 1 move. Volcarona put in the finest of work in that leg as well, going through all of its offensive PP barring a Giga Drain before I finally healed at 67.

PokΓ©mon Sword-Shield Screen Shot 2020-07-22, 1.32 PM.png

(The art of balancing PP usage; colorized, 2020)

However, as I mentioned earlier, leg 3 wasn't as smooth. Very early, Milotic crit Volcarona on the one turn I needed it not to (I even said out loud: "just don't crit here please" .....maybe I shouldn't have), and I knew right away that at least 10 battles had just been cut from the run. Everything went down the drain as right after, lead Barraskewda crit Waterfall my G-Maxed Cinderace, which barely lived on 11 HP. The next few battles were incredibly tense, as I had to avoid all priority and take every bit of Shell Bell I could, while leaning more on Darmanitan to take on things I couldn't OHKO. But Shell Bell did what it does best, and about 5 battles later, Cinderace was back at full. I went through quite the rollarcoaster of emotions in those battles. Things stabilized afterwards, and Cinderace slowly but surely burnt through all of its PP, until, on battle 95...

PokΓ©mon Sword-Shield Screen Shot 2020-07-22, 4.28 PM 2.png


I actually mismanaged things in those last few battles: I used Cinderace's PP so that, by the end, all I had left were 2 U-turn PP. Clearly, you don't want to Dynamax with just 2 Max Flutterbys in store, especially against Steelix. But U-turning into Darmanitan is also a sure way to sacrifice it... the question became: how do I sacrifice Cinderace now without Darmanitan going down? Thankfully, this happened with a Steelix in front, so I had some margin of maneuver thanks to Dig. This interaction still resulted in Darmanitan catching a Heavy Slam, which did way more damage than I wanted to take, and potentially stole a few games entirely from Darm. Still, lesson learned, from now on I'll make sure U-turn is not my only PP left by the end!

I was disappointed to fall just short of 100 yesterday when the streak ended, but now I'm happy that I had a good run. Given how quickly I was able to get this far, and how consistent Cinderace was, I think 100 is only a matter of time for Mono Fire, I suspect it could even get to 110+!

––––––––––––––––––––––––––––––––––––––––––––––––––––––––––––––––

For now, back to Mono Psychic, I'm excited to finally be able to optimize my EVs for RS and properly calc! I'll have to hope, regardless, that I stop running into Scizor right after my second heal......
 
Last edited:
The Tower sheet now also has the new Restricted info; to use that instead of the Tower sets, enter "Student" as the trainer name. The return of the Big-Brother-esque "This trainer is capable of using Zoroark" message!

Here's another piece of data that might be interesting to plan around. With only 149 species in the pool, each with just one set (except Lycanroc who gets two), there's a smaller sample size you have to cover for, and the distribution of their types differs from other historical samples. So, for an overview, I thought I'd look at how good each type's coverage is against the whole pool in aggregate. This does factor in items like type resist berries (only the first hit is being considered) or Cursola's Ring Target, and considers a superposition of all three possibilities: for example, Politoed has a 1/3 chance of getting Damp which has no interaction with types and makes it a simple resist to Water, 1/3 chance of Water Absorb to make it immune to water, and 1/3 chance of Drizzle which still makes it resist Water but also powers it up with rain, so in total the "Water vs. Politoed" matchup is considered to have a multiplier of 5/12. For comparison, the multipliers that I computed last gen from a weighted average of endgame opponents in Ultra Sun Battle Tree is also included, so you can see which types become more or less favorable here.

TypeRestricted Sparring multiplierBattle Tree multiplier
Rock1.18831.2315 (-0.0432)
Flying1.15001.0720 (+0.0780)
Fairy1.13171.1163 (+0.0154)
Fire1.10441.0468 (+0.0576)
Fighting1.10391.1317 (-0.0278)
Grass1.09500.9638 (+0.1312)
Electric1.08480.9927 (+0.0921)
Ice1.07111.1968 (-0.1257)
Dark1.04831.0548 (-0.0065)
Ground1.04561.0690 (-0.0234)
Bug1.00830.9846 (+0.0237)
Water0.99941.0984 (-0.0990)
Ghost0.99331.0485 (-0.0552)
Dragon0.96670.9848 (-0.0181)
Steel0.95390.9782 (-0.0243)
Psychic0.95000.9293 (+0.0207)
Poison0.91000.9241 (-0.0141)
Normal0.86330.8575 (+0.0058)
Freeze-Dry1.45441.4309 (+0.0235)
Flying Press1.14001.0986 (+0.0414)
A big boost for Grass in terms of favorable opponents, huh? Having Seismitoad, Whiscash, Quagsire, and Drednaw all crammed into a sample of just 150 sets will do that. The fact that Ice took a precipitous drop from its role as offensive juggernaut, while Freeze-Dry even managed to gain ground, points to a relatively high concentration of Water types...but Fire also managed to make gains from enough volume of other types like Ice and Steel. Remember, a 2 and a 0.5 combine to give you a better average than two 1s.

And of course, Flying benefits not just from the better matchup compared to Tree, but also the existence of Max Airstream, as evidenced by almost everything that can legally run it finding ways to squeeze in a flying move.
 
Last edited:

Eisenherz

ΡπέκΡινα της ουσίας
is a Forum Moderatoris a Community Contributoris a Tiering Contributoris a Top Social Media Contributor Alumnus
Moderator
Well, it looks like that Mono Fire run was just what I needed for my rotten luck to end with my Mono Psychic runs; first new attempt, and I got a result I'm happy with!

PokΓ©mon Sword-Shield Screen Shot 2020-07-23, 1.47 PM.png


I was aiming for 60, so I barely scraped by, but I'll gladly take it. The team had no issue getting through 20-25 battles without healing on the regular, but a couple of really nasty threats I'll detail later could cut things short at any time, and it just so happened they repeatedly stopped me right after my 2nd heal, between battles 40-45, which was really rough for my morale.

I spent a long time adjusting the team (I've been working on it for more than a week by now), making lots of set, item and EV changes, but I'm super happy with this version, I think it's truly the best Psychic team I was able to build. This was, of course, before we had the exact data dump, so a few EV adjustments could probably be made now.

–––––––
S E T S
–––––––

@

Timid | Magic Guard
IVs: 31/0/31/31/31/31
EVs: 4 HP / 252 SpA / 252 Spe
Psyshock / Dazzling Gleam / Shadow Ball / Grass Knot

@

Jolly | Justified
IVs: 31/31/31/31/31/31
EVs: 252 Atk / 4 Def / 252 Spe
Drain Punch / Zen Headbutt / Fire Punch / Knock Off

@

Bold | Regenerator
IVs: 31/31/31/HT/HT/31
EVs: 244 HP / 236 Def / 20 SpD

Scald / Toxic / Slack Off / Teleport

––––––––––––––––––––––
T E A M B U I L D I N G
––––––––––––––––––––––

:alakazam: The team was built around Alakazam; after seeing others' usage of Espeon, I thought Alakazam looked like a straight upgrade, but I wasn't instantly convinced on its viability seeing how incredibly frail it is. Any hope at a good streak with it would require a stream of OHKOs, but with 135 SpA and the free Life Orb boost applying to Max Moves, I figured it was worth a shot. On my first test, Alakazam mowed through the first 10 battles in 3 turns each, no switching, no damage taken, and that's when I decided it was absolutely worth building around.

At first, I ran Expanding Force rather than Psyshock, thinking the former could help if Dmax comes to an end and Psychic Terrain is up. But 3 of Alakazam's moves set Terrains, so they just constantly switch, and when Dynamax comes to an end, Psychic Terrain is rarely up, making even Psychic a more appealing option in the end. Psyshock comes in handy for some matchups, the most important of which might be Mantine, though Aromatisse is also worth a mention.

The other moves are pretty straightforward; I was secretly hoping I could fit Recover on there, but all 4 moves are absolutely necessary for full sweeps to happen. I originally ran Energy Ball over Grass Knot, switched when I realized the PP difference, but I think I would change it back now, if only because of Clawitzer. It's OHKOd by Energy Ball but not Grass Knot, and with Terrain Pulse, it's a huge threat when it shows up after Dmax ends.

Despite its immense offensive prowess, Alakazam is an absolute glass cannon and cannot take a physical hit, so the choice and usage of its teammates is the only reason it's usable for a long streak.

:gallade: Gallade was the most obvious addition, not only has it proven itself on others' Psychic streaks, but it's a great switch-in for Dark moves (though in the end, I rarely used it as such). I started using it with Shell Bell and the same moves doctordoak ran, since I really liked his set. My idea was for Alakazam to get as many sweeps as possible, and once it goes down, Gallade takes over as the main sweeper until a heal is needed, making the team function as "Alakazam + Slowbro" and then later "Gallade + Slowbro".

However, I found myself using Gallade more than expected to handle specific threats while Alakazam was still around, and in those occasions, it rarely got to Dynamax, which kind of altered its role. I never came close to running out of Fighting PP, so I dropped Low Kick, and added Fire Punch when Scizor revealed itself as a premium threat to the team. With no Dmax available, Gallade couldn't afford to not OHKO Scizor. I replaced Aerial Ace with Knock Off later, since Dmax speed boosts were suddenly a lot less relevant, while I needed a better answer to Ghosts and opposing Psychic. Because Gallade had a tendency to have to tank big hits without being the main sweeper, Shell Bell just wasn't doing the job for the recovery, and I had to rely on Drain Punch to go from the yellow back to full on (usually) a Normal type.

Noticing this pattern, I finally made the switch to Choice Band, allowing Drain Punch to OHKO so many more threats (I was barely missing out on a lot of them). That helped out a ton, and Gallade regularly went from low HP to near-full HP many times in a single leg. Every time something like Bouffalant, Kangaskhan, Lickilicky, Bisharp or Blissey hit the field, all I had to do was pivot into Slowbro (or hard switch into Gallade, depending on the foe) and heal myself fully. I think the reason Band worked exceptionally well on Gallade even without Dmaxing is Slowbro: often, I could just lock myself into the move that allowed an OHKO, then, if I needed to switch moves, go Slowbro, Teleport back to Gallade and score the 2nd OHKO.

:slowbro: The glue and true MVP of this team! At first, I was thinking of using Galarian Slowbro, but then I realized Teleport was a valuable tech, and that only Kantoan Slowbro had access to it. One of the biggest gripes I've had with using tanks in RS is that once they're in, you can't easily get them out, because the main sweepers can rarely afford to soak damage from whatever the AI uses to revenge KO. This creates awkward situations where you're stuck and ultimately might need to sacrifice something; this happened a lot to me with Gastrodon, Avalugg and Ferrothorn. Teleport allows the tank to soak the damage and get in a sweeper unharmed (something Blitzamirin brilliantly showcased with slow Baton Pass Shedinja), and that allows so much more flexibility. Pair that with Regenerator, and you have the most ideal pivot for RS.

After thinking of this, I immediately booted up LGPE to hunt a Slowpoke... only to realize 45mins later that LGPE PokΓ©mon couldn't get their HA. So I booted PokΓ©mon Yellow on VC, and found my "ws m" glitch setup I had put together a few years back, and which I had no recollection on how to use. Several hours of research later, I finally was able to clone a bunch of Teleport TMs, and transfer this Slowbro! It unfortunately rolled a max Atk IV, but with how defensive it was, I don't think it made much of a difference. It ate several Klefki Foul Plays during the runs and they barely did any damage lol.

The moveset is very straightforward once you take Teleport for granted. At first, I put a lot more SpD EVs on it, hoping it could take on a wider array of threats, but I lost to Golisopod and Centiskorch several times, before finally taking the time to calc whether Slowbro could actually 1v1 those "reliably" (crits do happen) with more Def. I was surprised to find out it actually could, and so I switched to this near-max Def spread. This came at the cost of not having as easy of a time dealing with Mantine, Clawitzer and Goodra, and while I previously used Slowbro to safely handle Aromatisse, it became near-impossible. Still, this was a worthwhile trade, Golisopod and Centiskorch are streak-enders, while the others can be played around differently.

–––––––––––
T H E R U N
–––––––––––

Since I had made 60 my goal, I went into every run with a 20-battle minimum before healing on every leg. While several of my past runs were able to get to 25+ before the first heal and 45+ before the 2nd, this one was incredibly tight, and I healed at 21, then again at 41; the entire time, it felt like this was going to end up being a bad run, and yet...!

While usually I tried to get about 15 sweeps with Alakazam before letting it go down, and then 5-10 with Gallade, I wasn't able to get much out of Gallade alone this time. Alakazam was alive basically the entire time until the heals and carried all 3 legs, though obviously Slowbro and Gallade both assisted. After Alakazam went down on battle 19, Gallade was in a good spot to take over for a while, but the AI decided to throw Dusknoir into Emolga at it, both of which are on the short list of things Gallade hates to face, and instantly a heal was needed. I don't remember exactly what cost Gallade the 2nd time around, but it was basically the same scenario, except this time it was Weavile and Starmie. Then early on in the 3rd leg, I switched Gallade in on a Blissey Metronome (yeah, I know this risks Fissure and such, but it's still better to have Gallade catch that than Slowbro), and Poison Gas happened, which greatly shortened its lifespan.

So long story short, this was Alakazam's run. In the mid-50s, I encountered 2 Milotic within 2 battles; I usually simply Max Overgrowth them twice and let them get a Scald on Alakazam, since it doesn't do much damage, Grassy Terrain recovers it pretty quickly, and most importantly, I want Alakazam to get burned since that protects it from Paralysis and Sleep in the future. But in this case, both times, Scald crit, which added up to a lot more damage than I would've liked to take... but somehow saved me. I thought the run was probably over when this lead showed up (Gallade was mostly down at that point):

PokΓ©mon Sword-Shield Screen Shot 2020-07-23, 1.19 PM.png

(Welcome to the Trevenant casino! Were you hoping to reach 60 today, sir?)

Trevenant is a top 3 threat for Alakazam lead, since Max Phantasm is precisely a 50% roll to OHKO because of the Assault Vest (I guess odds tilt slightly in Alakazam's favour given Poltergeist's 90% accuracy, but still, it's been the ender of many runs, and I don't ever expect to get that roll). However, here, because Alakazam had already taken damage, it happened to be in Horn Leech range, and Trevenant picked that over Poltergeist, allowing Alakazam to survive and 2HKO.

PokΓ©mon Sword-Shield Screen Shot 2020-07-23, 1.20 PM.png

(Thanks for the misplay, AI)

Shortly after, Salazzle showed up. Conscious Alakazam was going to be the one to carry the team until the end, I decided to be stingy and save a Psyshock PP by going for the 94% Max Phantasm roll. It lived, and got an Acrobatics off, leaving Alakazam in the red. For 5 battles, Alakazam kept sweeping with basically no HP left, and singlehandedly granted my wish of 60.

PokΓ©mon Sword-Shield Screen Shot 2020-07-23, 1.34 PM.png

("Better switch to Slowbro since I'm in Fake Out range!". Nope, it went straight for the High Jump Kick! Regardless, Slowbro absorbed all damage, and teleported back to Alakazam for a safe OHKO. Being at such low HP forced me to pivot a lot more! Don't be fooled by the high Dazzling Gleam PP, by the way; in several runs, it went down to 1-2 PP, it really just depends of the matchups!)

The run ended at 62 with me forgetting that Clawitzer carries Aqua Jet, but I don't think it was consequential at all; Slowbro can't reliably take on Clawitzer, especially paralyzed as it was. In any case, Psyshock PP was almost depleted, and at best a couple more battles could have been achieved.

–––––––––––––
T H R E A T S
–––––––––––––

The threats vary greatly depending on whether Alakazam or Gallade is the current lead.

To an Alakazam lead :alakazam::

:scizor: This is the #1 problem. The only hope is a Max Phantasm crit, which is basically no hope. I can't play around X-Scissor at all, and am forced to sacrifice Alakazam on the spot and revenge KO with Gallade. I usually considered that encountering Scizor after the 10th battle of a leg was "ok"; Alakazam had carried the team enough, and Gallade had a good chance at finishing the leg. However, several times, Scizor showed up RIGHT AFTER my 2nd heal, in one instance it was even the lead of the very 1st battle after the heal. I can't describe how disheartening that was. Those were all good runs that had gone post-40. In this run, I encountered Scizor on battle 19, which was all in all very lucky; this is a number where Alakazam has become pretty expandable.

:trevenant: As mentioned above, Max Phantasm has exactly a 50% chance to OHKO. The gamble is worth taking, since there's no switch-in, but it has a good shot at being a run-ender, at least for Alakazam.

:cursola: Max Phantasm is an 80% roll, which is not bad at all, but not reliable. Obviously, there isn't really a switch-in, so the gamble is worth taking... but it doesn't always go for Shadow Ball if it lives. A few times, it went for Grudge, which is the absolute worst case. It forces Alakazam out (there's no way I'd let my entire PP deplete on a move) and risks Gallade taking a ton of damage (thankfully, it has a good chance of being able to heal later on).

:golisopod: Of course, when Psychic Terrain is up, this is not an issue, but it's not up that often, and which Terrain is up is rarely fully in my control (I need to use the move that OHKOs...). A good example to highlight the Terrain issue: once, in front of a Conkeldurr lead, I decided to Max Starfall to preserve Psyshock PP, since both OHKO. Next came Golisopod, making me wish I Mindstormed instead. The next time I faced a Conkeldurr lead, I went for Max Mindstorm to protect myself for the future... and Conkeldurr turned out to be a Zoroark. You just can't win............
With the new EV spread, Slowbro can 1v1 Golisopod, but it's still very risky, because it doesn't necessarily spam Skitter Smack. When Slowbro is near full, it loves going for Close Combats (nice) and... Razor Shell. Which obviously never fails to drop defense... and then things get very shaky, a Teleport is needed, etc. There's also always a dilemma between trying to burn it with Scald, which is obviously a lot nicer but less reliable, and going for Toxic but allowing Emergency Exit to trigger and have another First Impression at its disposal later.

:centiskorch: Its insane bulk allows it to tank even a Max Mindstorm in Terrain, so a switch to Slowbro is necessary. This usually goes well, but crits can be a problem.

:malamar: & :sandaconda: Ugh Quick Claw........

To a Gallade lead :gallade::

:weavile: Alakazam outspeeds it, so it's only a problem for the Gallade lead. Crit Shadow Claws can easily end a Gallade that's not fully healthy.

:ribombee: Forces Gallade to tank a big Moonblast and find a way to heal shortly after asap.

:starmie: It had a habit of coming in last, after I set Psychic Terrain, which allowed it to do a ton of damage with Psychic.

:pyukumuku: Did you know Magic Guard blocks Innards Out damage? I sure didn't, until I went for Max Overgrowth into it, saw Innards Out activate, and do nothing. This is absolutely fantastic for Alakazam... however, Gallade has to deal with the Toxic/Counter/Innards Out "mindgames"... there's no perfect way of handling it, really.

:marowak: With no way of OHKOing it if Terrain isn't up, Slowbro is a shaky switch. It'll usually lock itself into Outrage, but 2-turn Outrage can be disastrous for Slowbro, as Throat Chop does way too much damage. It might also use Throat Chop directly if Gallade was in range. It forced me to Dynamax Slowbro a couple times.

:magneton: The usual: Sturdy + T-Wave. Not a problem for Alakazam, because it can use Max Starfall to prevent the paralysis, and then finish Magneton with Max Phantasm. Unfortunately, Gallade has no such big brain play, it can only hope for no Sturdy.

––––––––––––––––––––––––––––––––––––––––––––––––––––––––––––––––

With Psychic out of the way, Bug is next! ...except Bug already happened, I just finished my run this morning...! I thought it would take me more time, but I may have gotten very lucky for that one. Either way, I'll be reporting that streak later, and for now, SPH is actually next, and will certainly keep me away from Restricted Sparring for a week!
 
Last edited:
Hey all, coming in to report a no-dynamax streak that hit 112 on Battle Tower. I'm starting a self-challenge where I try to make teams that are all one color and I started with Purple to use Starmie. I could just do restricted sparring if I'm playing with team member limits anyways, but I like to pick my own handicaps I guess. Overall, this team felt fairly binary. I either cleaned house in like 2 turns or really struggled to pull out a W. That's largely due to the lack of good Dark resists that are also purple; dark type pokemon, particulalry in the lead slots, absolutely ruin me. I tried Drapion for awhile, and was using Purple Alcremie until I realized it wasn't coded as a purple pokemon (and yet Grimmsnarl is??? WTF, Gamefreak). As a result, I ended up settling for Grimmsnarl even though it has anti-synergy with Psychic Terrain. That's not to say that there aren't strengths here. Some notable boons include the team being blazing fast, immune to priority, and being able to buy free turns with Follow Me. However, there are also serious drawbacks. Namely A) getting rolled by teams with multiple strong Dark types B) Special Sponges like Snorlax & C) being way too reliant on Starmie to do damage. These flaws are large enough that I don't think a bigger streak is that feasible with this team as-is. I'm not super happy with the end result, but I also did multiple runs and I'm ready to try a new team now. I'm also not going to regale you with a full loss story, mostly because it's boring and super embarrassing (4-0 swept by a King's Rock Morpeko & Snorlax after Starmie's Dazzling Gleam didn't OHKO...). If anyone has critiques or suggestions on how to tweak this setup while sticking with the Purple theme, I'm all ears. Always looking to improve!

Anyways, here's the team:

1595634608625.png

Indeedee-F @ Focus Sash
Psychic Surge
Timid Nature, 252 SpA/4 SpD/252 Spe
Expanding Force
Follow Me
Protect
Helping Hand

I would've feel silly not using a Psychic spam team with purple pokemon, so of course I'm leading with Indeedee. Not a whole lot to discuss since it's pretty standard. Expanding Force is obvious STAB, and if Indeedee outspeeds the enemy pokemon then a double up from Indeedee/Starmie does more damage than a Helping Hand on Starmie + XForce. Follow Me can buy extra turns, Protect is useful for stalling if I think I'll be targeted, and Helping Hand lets me boost Starmie's good-not-great power if I need fast KOs. In hindsight, Mystical Fire over Protect may be better to help cover Steels and let Indeedee fight back a little against Dark types. One important synergy to note here is that Follow Me can completely nullify Ghost-Type attacks that Starmie often draws, thanks to Indeedee's Normal typing. It bought me some free turns in important situations, particularly against some Aegislash variants.

1595634632679.png

Starmie @ Life Orb
Analytic
Timid Nature, 252 SpA/4 SpD/252 Spe
Scald
Expanding Force
Dazzling Gleam
Thunderbolt

Starmie is the MVP when paired with Indeedee, and could often pick up double KOs against Pokemon that don't resist Psychic, especially considering the helping hand support Indeedee offers. Most of the time you're spamming Expanding Force, obviously. Scald is the secondary STAB. While it may seem strange to use it over Hydro Pump, Surf, or Muddy Water, Scald does more single-target damage than either spread move and I value the Accuracy given how much I need Starmie to hit every turn. Additionally, Scald +Helping Hand is enough to OHKO Leon's Charizard, which is the most important part of the Water STAB. Dazzling Gleam helps deal with Dark Types... kind of. It requires a Helping Hand to consistently score OHKOs even on frailer Dark Types, and that means that unless there's a double knock out Starmie is eating a hit in retaliation thanks to no Follow Me. The last slot is mostly filler, but I settled on Thunderbolt to help against a few select pokemon (e.g., Crawdaunt). Protect may have been a good alternative, but I did get enough niche use out of TBolt that I don't regret it.

1595634651520.png

Noivern & Choice Specs
Frisk
Timid Nature, 252 SpA/4 SpD/252 Spe
Draco Meteor
Dragon Pulse
Flamethrower
Air Slash

Noivern sucks. Don't use Noivern. I brought it in as a secondary offensive threat, drawn by its blazing speed as a way to consistently deal with Cinderace and other fast threats. Even though its speed is a huge boon, its offenses just... suck. Even with Specs, I was left so wanting for power that I always felt bad bringing it in unless it was just to clean up a final KO or something. I will also add that Noivern's bulk is nowhere near as poor as I thought it was; it survived some hits I thought would certainly kill, which saved my run a few times. Draco Meteor is strong, but its also inaccurate and leave Noivern in a spot where it can't really do damage after a single attack. I used Dragon Pulse more often for the 100% accuracy or to clean up weakened mons. Flamethrower is also great coverage that I clicked fairly often, while Air Slash is a secondary STAB that I rarely used due to the lower accuracy and power. One unfortunate quirk of Noivern is that it isn't protected by Psychic Terrain, meaning it got Prankster T-Waved, Faked Out, or Ice Sharded a lot.

I will say that I can see Noivern fill niches on very specific teams with certain weaknesses. I mean, it does outspeed Cinderace and Intelleon, who can otherwise cause some problems for a lot of teams. However, relying on it as a secondary "star", so to speak, was a mistake.

1595634698573.png

Grimmsnarl@Sitrus Berry
Prankster
Careful Nature, 252 HP/116 Def/132 SpD/4Spe
Reflect
Light Screen
Spirit Break
False Surrender

There's a lot to like about Grimmsnarl, most of which I didn't get to show of on this team due to its anti-synergy in many respects. Psychic Terrain blocks all of Grimmsnarl's otherwise useful priority (e.g. Fake Tears, TWave, Fake Out), but I need its resistances in order for the team to function. I went with a bulkier set to play into its role as a sponge for Dark type moves. I'm stuck with Dual Screens as support since they aren't blocked by Psychic Terrain, but they actually synergized with Noivern fairly well given its decent natural bulk. The other moves are just the standard STABs, although their secondary effects came in useful. In aprticular, I love False Surrender's accuracy... can we all agree that Bright Powder is the worst part of the Battle Tree/Tower experience?

There's a lot of threats that I won't cover in depth because most are pretty obvious. They include: Dark types, Steel Types, Grassy Surge/Electric Surge, Psychic Type Trick Roomers, TR Mimikyu, Choice Scarf Haxorus, and apparently Morpeko in particular.

I'll probably do another color team next, but I haven't decided which one (I'll take suggestions). Otherwise, I may have to look into doing some Restricted Sparring myself. As an aside, I do think it's awesome seeing the cool teams are brining out for that. Emolga?! That's awesome stuff.
 

Users Who Are Viewing This Thread (Users: 1, Guests: 1)

Top