SwSh Battle Facilities Discussion & Records

To keep myself engaged in Gen 8's postgame offerings, similar to Repto, I've entertained a Randoms style of play for Battle Tower Doubles! A key difference is that because I'm developing my roster largely from scratch, often there's as least one new Mon to catch/breed for every roll made. This suits me fine however, as a sizeable battle-ready collection is a long term goal I don't mind working towards - the DLC only serves to facilitate this endeavour.

Since I haven't assigned specific numbers or Boxes yet, the conduction process for Random rolls is very basic, as follows (all I use is an online RNG site):
- 50/50 roll to decide format; 1 = TR, 2 = 'not TR'
- If TR, proceed to roll 2 setters, then 5 abusers; pick 1 setter, 3 abusers
- If 'not TR', proceed to roll 6 abusers; pick 4 abusers

For the abusers, I essentially include the entirety of Mons available in SwSh (no restricted Legendaries/Mythicals rolled yet but I'm open to using them!) to keep things open-ended; as you could probably surmise, re-rolls for the TR spectrum especially are common, even with Iron Ball granting viability to candidates as speedy as Gardevoir. For setters I haven't bothered to exclude the "horrid, wouldn't touch with a 10 foot stick" users yet and simply include everything that learns the move - I just re-roll such instances until I get two with any semblance of redeemable traits.

Currently, I play 20 battles with one team before advancing to the next. Early on this was to help fund item purchases and to spend more time in the Tower before returning to the Daycare; however, the former is now a non-issue, and the latter will become progressively so to the point where I'd definitely consider the more quickfire 10 battles per team. I've also been Dynamaxing whatever, whenever, so a enforcing a couple additional restrictions wouldn't be out of the question, either.

For now, I'll detail the 10 teams I've used for a total 200 consecutive battles. Each session was recorded and uploaded to YouTube in single round doses, but since I'm allowed no more than 15 videos in a single post, I'll link the first round playthrough of each team in their corresponding summaries, behind spoiler tags. Otherwise, the full playlist can be viewed here.

Initial Roll:-
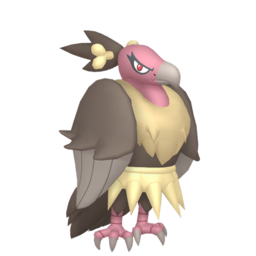
Cloyster | Haxorus | Mandibuzz | Sandaconda | Sigilyph | Ninetales

Lineup:-

Alolan Ninetales (F) @ Light Clay
Nature: Timid
Ability: Snow Warning
IVs: 31/0/31/31/31/31
EVs: 228 HP / 28 Def / 252 Spe
- Aurora Veil
- Freeze-Dry
- Ice Shard
- Protect


Cloyster (F) @ Focus Sash
Nature: Jolly
Ability: Skill Link
IVs: 31/31/31/x/31/31
EVs: 252 Atk / 4 SpD / 252 Spe
- Shell Smash
- Icicle Spear
- Liquidation
- Protect


G-Max Sandaconda (F) @ Weakness Policy
Nature: Adamant [Minted from Bashful]
Ability: Shed Skin
IVs: 31/31/31/31/31/31
EVs: 252 HP / 124 Atk / 28 Def / 44 SpD / 60 Spe
- High Horsepower
- Rock Slide
- Iron Head
- Protect


Haxorus (M) @ Lum Berry
Nature: Jolly
Ability: Mold Breaker
IVs: 31/31/31/x/31/31
EVs: 4 HP / 236 Atk / 4 Def / 12 SpD / 252 Spe
- Dragon Dance
- Dragon Claw
- Earthquake
- Protect

---------------------------
The first of several 'centralized Dynamaxer' instalments. Ninetales formed the crux of this lineup, providing pivotal lead support in Light Clay-extended Aurora Veil. Though not the primary beneficiary, Cloyster was able to Shell Smash sweep a handful of times and wasn't as expendable as I initially thought! Despite having Freeze-Dry on board, the leads were still lacking in type diversity, but that's where the backline came in to save the day, particularly Sandaconda - opportunities to engorge were plentiful, whether via lead sac or taking resist switch initiative to preserve Cloyster's Sash. Thanks to Weakness Policy (and D-Max in general), I figured max Atk/Spe wasn't necessary and opted to beef the snake up for taking attacks more comfortably. My ideal setup of AV + Ice Shard self proc was granted pretty frequently, but in its absence, Sandaconda's D-Max bulk proved a fine alternative for sponging enemy SE hits, especially with access to Steelspike as well.

I used G-Max for added flavour here, but looking back the Sandblast chip was largely inconsequential and did little to disable Sturdy/Sashes during the run. For future runs I'd definitely go the vanilla route for Max Quake SpD boosts instead, as I could only see G-Max making a noticeable impact in PvP for abusing the lock-in effect (Sand Spit with Binding Band as well?). Haxorus saw limited use which was kinda expected, though the occasional Drake debuffs were welcome.
---------------------------


Initial Roll:-
Whimsicott | Mandibuzz | Seaking | Cobalion | Wailord | Rapidash

Lineup:-

Whimsicott (M) @ Focus Sash
Nature: Timid
Ability: Prankster
IVs: 31/18/31/31/31/31
EVs: 228 HP / 4 Def / 36 SpA / 4 SpD / 236 Spe
- Tailwind
- Energy Ball
- Beat Up
- Encore


Cobalion @ Lum Berry
Nature: Jolly
Ability: Justified
IVs: 31/HT/31/31/HT/HT
EVs: 4 HP / 252 Atk / 252 Spe
- Sacred Sword
- Iron Head
- Stone Edge
- Protect


Wailord (F) @ Choice Specs
Nature: Modest
Ability: Oblivious
IVs: 31/0/31/31/31/31
EVs: 12 HP / 4 Def / 236 SpA / 4 SpD / 252 Spe
- Water Spout
- Scald
- Ice Beam
- Weather Ball


Mandibuzz (F) @ Leftovers
Nature: Calm
Ability: Overcoat
IVs: 31/0/31/31/31/31
EVs: 252 HP / 68 Def / 4 SpA / 124 SpD / 60 Spe
- Tailwind
- Foul Play
- Snarl
- Roost

---------------------------
Selecting CobaCott upon rolling them among the 6 was basically a no brainer, making an Ultra Space detour first necessary for Cobalion to join its alternate colour Musketeer brethren. While Beat Up --> Justified might traditionally be considered an unreliable gimmick, with the power of D-Max it certainly wasn't here! 95% of battles were brainless +4 (or more) Cobalion sweeps - mostly with a T1 D-Max to ensure survival since all that power could be harnessed for just one slot - but at times a boosted Sacred Sword/Iron Head was sufficient to deal with a threat, deny TR etc. Close Combat I definitely felt wasn't needed with such a capable partner in Whimsicott, while Stone Edge was excellent for handling Leon's Charizard.

Specs Wailord came along for the ride as backup, also benefitting from Tailwind, while Mandibuzz was included as a catch-all bulky annoyance and secondary setter.
---------------------------


Initial Roll:-
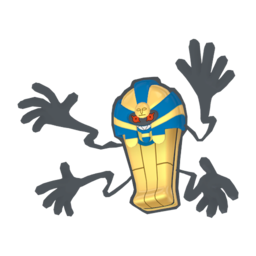
{Setters} Cofagrigus | Mimikyu
{Abusers} Vileplume | Tyranitar | Weezing | Golisopod | Coalossal

Lineup:-

Golisopod (F) @ Life Orb
Nature: Brave
Ability: Emergency Exit
IVs: 31/31/31/x/31/0
EVs: 252 HP / 196 Atk / 60 SpD
- First Impression
- Liquidation
- Leech Life
- Protect


Cofagrigus (M) @ Sitrus Berry
Nature: Relaxed
Ability: Mummy
IVs: 31/0/31/31/31/0
EVs: 252 HP / 196 Def / 60 SpD
- Trick Room
- Shadow Ball
- Body Press
- Protect


Vileplume (F) @ Iron Ball
Nature: Quiet
Ability: Effect Spore
IVs: 31/0/31/31/31/15
EVs: 244 HP / 212 SpA / 52 SpD
- Energy Ball
- Sludge Bomb
- Strength Sap
- After You


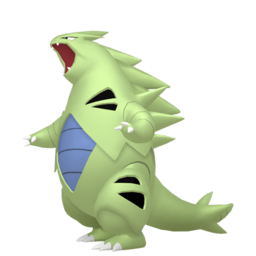
Tyranitar (M) @ Weakness Policy
Nature: Brave
Ability: Sand Stream
IVs: 31/31/31/x/31/0
EVs: 236 HP / 204 Atk / 68 SpD
- Crunch
- Rock Slide
- Low Kick
- Protect

---------------------------
This marked my first proper experience trying out Golisopod, safe to say I wasn't disappointed! Her usefulness as a lead was certainly more apparent than the potential awkwardness that arises with Emergency Exit; Life Orb Impressions are especially potent and were used liberally T1 to chunk stuff or KO Bug-weaks outright, even to bypass Speed to guarantee damage for a follow-up attack. I haven't rewatched every battle, but iirc EEs were largely a non-issue when they occurred; it would've mostly been once TR was already set, allowing Vileplume/Tyranitar to dish out some pain while resetting another Impression for later. However, enemy Rock Slides were a thing for the leads and one such instance happened early on that almost prevented me from setting - Unnerve Haxorus with the flinch and disabling Sitrus Berry simultaneously :grr:

In a similar fashion to Foul Play nicely rounding out movesets for the offensively lacking, so too does Body Press for Cofagrigus - achieving Ghost/Fighting coverage without having to invest in SpA is quite the boon for a setter, and it increased his usefulness beyond T1 as a legitimate attacker. Vileplume was an unexpected Shiny that hatched with imperfect Speed, causing me to tunnel vision into a pseudo Iron Ball After You support set; Tyranitar didn't require this aid too much as the primary Dynamaxer, but the two performed well enough with Strength Sap adding some welcome reliable recovery.
---------------------------


Initial Roll:-
Orbeetle | Inteleon | Goodra | Butterfree | Slurpuff | Seaking

Lineup:-

Goodra (M) @ Assault Vest
Nature: Modest
Ability: Sap Sipper
IVs: 31/0/31/31/31/31
EVs: 236 HP / 132 Def / 68 SpA / 4 SpD / 68 Spe
- Dragon Pulse
- Thunderbolt
- Flamethrower
- Sludge Bomb


Inteleon (M) @ Scope Lens
Nature: Timid
Ability: Sniper
IVs: 31/0/31/31/31/31
EVs: 252 SpA / 4 SpD / 252 Spe
- Snipe Shot
- Air Slash
- Dark Pulse
- Protect


Slurpuff (F) @ Electric Seed
Nature: Timid
Ability: Unburden
IVs: 31/0/31/31/31/31
EVs: 252 HP / 68 Def / 4 SpA / 44 SpD / 140 Spe
- Dazzling Gleam
- After You
- Fake Tears
- Cotton Spore


Seaking (M) @ Life Orb
Nature: Adamant
Ability: Lightning Rod
IVs: 31/31/31/x/31/31
EVs: 12 HP / 236 Atk / 4 Def / 4 SpD / 252 Spe
- Waterfall
- Megahorn
- Drill Run
- Protect

---------------------------
I believe I was putting this team together prior to the HA starters being released, but only finished after the fact - I took advantage and replaced Torrent Sash Inteleon with a Sniper Scope Lens variant.

After an annoying first run-in with Attract Vespiquen, my confidence in this arrangement wasn't great, and I was concernced with the team's capacity for synergy/dealing heavy damage. Both leads have their shortcomings, which was likely made more apparent by the team's general lack of cohesion; Inteleon is fast but isn't a truly hard hitter, neither is Goodra...Inteleon still likes to D-Max to ensure a KO or grant an Airstream boost, but that frailty can become a liability compared to bulkier D-Maxers...which Goodra can be but...this cycles back to the damage issue. Seaking was also difficult to get going due to safe switches basically only existing in the form of Electric attacks, and requiring Airstream to truly feel ready for a sweep. Slurpuff sadly didn't get to shine a whole lot either as her main draws in After You and Fake Tears hinged on outspeeding her pals with Electric Seed activated through Goodra's Max Lightning (lol) - very niche and hard to engineer. The wiser, albeit less fun choice was probably Sitrus Berry there. Still, the squad weathered the storm and prevailed against two Leons.
---------------------------


Initial Roll:-
{Setters} Gardevoir | Mr. Rime
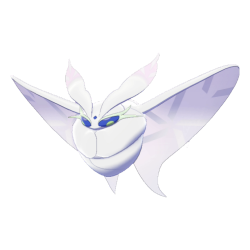
{Abusers} Quagsire | Frosmoth | Clefable | Stonjourner | Bewear

Lineup:-

Mr. Rime (M) @ Sitrus Berry
Nature: Relaxed
Ability: Ice Body
IVs: 31/0/31/31/31/0
EVs: 252 HP / 212 Def / 44 SpD
- Trick Room
- Freeze-Dry
- Psychic
- Protect


Clefable (F) @ Life Orb
Nature: Quiet
Ability: Magic Guard
IVs: 31/0/31/31/31/0
EVs: 252 HP / 60 Def / 196 SpA
- Moonblast
- Flamethrower
- Follow Me
- Helping Hand


Quagsire (F) @ Leftovers
Nature: Sassy
Ability: Unaware
IVs: 31/31/31/31/31/0
EVs: 212 HP / 28 Atk / 44 Def / 4 SpA / 220 SpD
- Curse
- High Horsepower
- Liquidation
- Protect


Bewear (M) @ Assault Vest
Nature: Brave
Ability: Fluffy
IVs: 31/31/31/31/31/0
EVs: 100 HP / 220 Atk / 188 SpD
- Double-Edge
- Drain Punch
- Darkest Lariat
- Thunder Punch

---------------------------
Mr. Rime was something I hadn't used yet, and while he doesn't have any particularly worthwhile TR traits, I figured Clefable paired decently and could assist with the setting. Fortunately Follow Me did the thing, and LO Magic Guard packed a solid punch with Fairy/Fire coverage. Not much to add apart from Bewear being the most popular D-Max for easily accessible bulk, power and desirable side effects (though Max Strike was generally to be avoided in this state). Sassy Curse Quagsire also impressed me the few times she got going, who didn't care necessarily about operating outside TR.
---------------------------


Initial Roll:-
Milotic | Drednaw | Talonflame | Comfey | Mantine | Mandibuzz

Lineup:-

Talonflame (F) @ Life Orb
Nature: Adamant
Ability: Gale Wings
IVs: 31/31/31/x/31/31
EVs: 44 HP / 236 Atk / 4 Def / 12 SpD / 212 Spe
- Brave Bird
- Flare Blitz
- Tailwind
- Protect


Comfey (F) @ Pixie Plate
Nature: Modest
Ability: Triage
IVs: 31/0/HT/31/31/31
EVs: 164 HP / 252 SpA / 92 Spe
- Calm Mind
- Draining Kiss
- Giga Drain
- Floral Healing


Milotic (M) @ Mago Berry
Nature: Modest
Ability: Competitive
IVs: 31/0/HT/31/31/31
EVs: 236 HP / 20 Def / 172 SpA / 4 SpD / 76 Spe
- Scald
- Icy Wind
- Recover
- Protect


Drednaw (M) @ Weakness Policy
Nature: Adamant
Ability: Swift Swim
IVs: 31/31/31/31/31/31
EVs: 76 HP / 228 Atk / 20 Def / 4 SpD / 180 Spe
- Liquidation
- Rock Slide
- High Horsepower
- Protect

---------------------------
This Comfey developed cabin fever back in Alola and was hankering for some battle exposure; lucky for her that Eisen's Battle Tree streak was egging me on! Talonflame didn't disappoint in spite of nerfed Gale Wings and got plenty of mileage out of Tailwind, Airstream & 120 BP STABs, as did Triage Comfey. The bird attracted a healthy share of attacks, making Protect + Calm Mind a commoun scouting T1 play. Drednaw was also a star with easy methods of making speedy and powerful, whether via TW, Airstreams or Geyser self-activating the rain. This sadly made Milotic pretty redundant, though.
---------------------------


Initial Roll:-
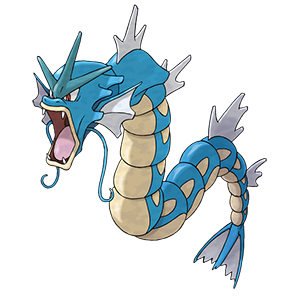
Gyarados | Gardevoir | Rillaboom | Aegislash | Tsareena | Seismitoad

Lineup:-

G-Max Rillaboom (M) @ Assault Vest
Nature: Adamant
Ability: Grassy Surge
IVs: 31/31/31/x/31/31
EVs: 60 HP / 196 Atk / 4 Def / 36 SpD / 212 Spe
- Fake Out
- Grassy Glide
- Wood Hammer
- Knock Off


Gyarados (F) @ Lum Berry
Nature: Jolly
Ability: Intimidate
IVs: 31/31/31/31/31/31
EVs: 12 HP / 212 Atk / 28 Def / 4 SpD / 252 Spe
- Dragon Dance
- Waterfall
- Bounce
- Protect


Seismitoad (M) @ Life Orb
Nature: Modest
Ability: Swift Swim
IVs: 31/0/HT/31/31/31
EVs: 4 HP / 20 Def / 196 SpA / 36 SpD / 252 Spe
- Surf
- Earth Power
- Sludge Bomb
- Protect


Aegislash (M) @ Leftovers
Nature: Quiet
Ability: Stance Change
IVs: 31/0/31/31/31/0
EVs: 252 HP / 212 SpA / 44 SpD
- King's Shield
- Shadow Ball
- Flash Cannon
- Wide Guard

---------------------------
> on further reflection :rotathunk: this is absurdly synergistic pseudo rain
> the 2 I didn't pick among the 6 rolled were tsareena/gardevoir


Well that's an adequate summary for this roll! I was excited to try Rillaboom's new toys in Grassy Surge, Grassy Glide and G-Max form, and what better way to support an Assvest variant than Intimidate Gyara. Dual Grass + Knock Off was something I appreciated quite a bit, providing Rillaboom with strong priority to bypass his middling Speed. Like Drednaw, Seismitoad could Geyser himself for the Swift Swim boost but often benefited excellently from Gyara's hole punching instead.
---------------------------


Initial Roll:-
Pelipper | Lilligant | Bewear | Starmie | Luxray | Togedemaru

Lineup:-

Pelipper (M) @ Focus Sash
Nature: Modest
Ability: Drizzle
IVs: 31/0/31/31/31/31
EVs: 4 HP / 252 SpA / 252 Spe
- Hurricane
- Scald
- Tailwind
- Protect


Togedemaru (F) @ Air Balloon
Nature: Jolly
Ability: Lightning Rod
IVs: 31/31/31/x/31/31
EVs: 252 Atk / 4 SpD / 252 Spe
- Fake Out
- Zing Zap
- Iron Head
- Spiky Shield


Bewear (M) @ Assault Vest
Nature: Adamant
Ability: Fluffy
IVs: 31/31/31/x/31/31
EVs: 12 HP / 220 Atk / 44 Def / 76 SpD / 156 Spe
- Double-Edge
- Drain Punch
- High Horsepower
- Darkest Lariat


Starmie @ Power Herb
Nature: Timid
Ability: Natural Cure
IVs: 31/0/31/31/31/31
EVs: 4 HP / 4 Def / 244 SpA / 4 SpD / 252 Spe
- Scald
- Expanding Force
- Meteor Beam
- Protect

---------------------------
Another roll which afforded an oddly synergistic rain team, heh. Pelipper/Togedemaru did a rather good job in supporting each other - between Fake Out, LRod, protecting and spammable Modest Hurricanes, the AI probably wasn't having a good time. Pelipper preferred to let Bewear engorge himself (Max Strike now a good option, score), and Starmie, while not really getting to shine much with Power Herb, was an ok backup that was plenty speedy to not require TW.
---------------------------


Initial Roll:-
Mantine | Dragapult | Ferrothorn | Chandelure | Sharpedo | Gengar

Lineup:-

Dragapult (M) @ Dragon Fang
Nature: Jolly
Ability: Clear Body
IVs: 31/31/31/x/31/HT
EVs: 12 HP / 252 Atk / 4 Def / 4 SpD / 236 Spe
- Dragon Darts
- Phantom Force
- Fly
- Protect


Sharpedo (M) @ Life Orb
Nature: Adamant
Ability: Speed Boost
IVs: 31/31/31/31/HT/31
EVs: 252 Atk / 4 SpD / 252 Spe
- Protect
- Liquidation
- Crunch
- Close Combat


Ferrothorn (M) @ Leftovers
Nature: Sassy
IVs: 31/31/31/x/31/0
EVs: 252 HP / 132 Def / 124 SpD
- Iron Defense
- Body Press
- Leech Seed
- Protect


Chandelure (F) @ Weakness Policy
Nature: Modest [Minted from Timid]
Ability: Flash Fire
IVs: 31/0/HT/31/31/HT
EVs: 28 HP / 4 Def / 196 SpA / 28 SpD / 252 Spe
- Flamethrower
- Shadow Ball
- Energy Ball
- Ally Switch

---------------------------
> the most recent one with dragapult/sharpedo leads was fun but ridiculous
> when dragapult wasn't dmaxing to snipe something with phantasm, sharpedo would instead boost it with LO max knuckle :tympole:


Courtesy of more Discord self-musings, it's no secret these leads were sickeningly good, almost on the same page as CobaCott. Both very capable D-Maxers depending on matchup, each benefiting from the other's coverage. When the privilege was given to Sharpedo, outspeeding Dragapult T2 to gift Max Knuckle boosts to Dragon Darts was also a sight to behold. Chandelure/Ferrothorn naturally weren't part of the main attraction, but they still formed a welcome FWG core.
---------------------------


Initial Roll:-
{Setters} Bronzong | Reuniclus
{Abusers} Blastoise | Gardevoir | Octillery | Copperajah | Indeedee

Lineup:-

Reuniclus (F) @ Life Orb
Nature: Quiet
Ability: Magic Guard
IVs: 31/0/31/31/31/0
EVs: 28 HP / 156 Def / 148 SpA / 176 SpD
- Trick Room
- Expanding Force
- Shadow Ball
- Protect

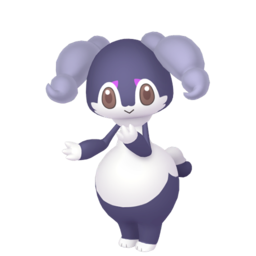
Indeedee-F @ Psychic Seed
Nature: Relaxed
Ability: Psychic Surge
IVs: 31/0/31/31/31/0
EVs: 244 HP / 196 Def / 68 SpD
- Follow Me
- Expanding Force
- Helping Hand
- Heal Pulse


Copperajah (M) @ Weakness Policy
Nature: Brave
Ability: Sheer Force
IVs: 31/31/31/x/31/0
EVs: 236 Atk / 124 Def / 148 SpD
- Iron Head
- Rock Slide
- High Horsepower
- Protect

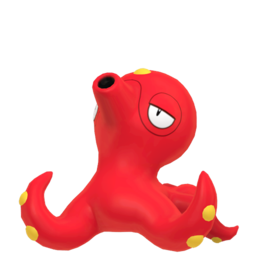
Octillery (F) @ Expert Belt
Nature: Quiet
Ability: Sniper
IVs: 31/0/31/31/31/0
EVs: 252 HP / 36 Def / 220 SpA
- Water Spout
- Scald
- Flamethrower
- Energy Ball

---------------------------
Taking the cake for my most offensively inclined TR lead arrangement yet, and my first taste of PsyTerrain spam - so good it hurts! TR + Follow Me was the T1 go-to and worked great; it took me a little bit to acclimatize, but Expanding Force turning my setter into an absolute machine was refreshing to say the least. I mean..
148+ SpA Life Orb Reuniclus Helping Hand Expanding Force (120 BP) vs. 0 HP / 0 SpD Dynamax Charizard in Psychic Terrain: 220-261 (96 - 113.9%) -- 75% chance to OHKO (75% chance to OHKO after accuracy)

Indeedee's uninvested Expanding Forces were by no means weak either, and were a welcome accompaniment when double attacking was the best option. Reuniclus's desire to not D-Max also enabled Copperajah the pleasure, and in conjunction with Octillery, helped offset Dark/Steel-types putting a dampener on the leads' fun.
---------------------------


Dark type: 39 wins with a team of :krookodile: :zoroark: :obstagoon:

Krookodile @ Shell Bell
Ability: Moxie
EVs: 4 HP / 252 Atk / 252 Spe
Jolly Nature
- Knock Off
- Earthquake
- Low Kick
- Aerial Ace

He's the star of the show and you've read his story many times already. With Moxie and Max Airstream, he can sweep 10+ battles solo. I originally traded for one with just Aerial Ace, but after noticing that Knock Off had more PP than Crunch, I went back and resubscribed to Pokemon Bank so I could get a new one for myself (sorry doctordoak for wasting your time). Low Kick was initially just a placeholder since Eisenherz did it first, but after using it myself, I found it essential in so many cases and I wouldn't want to replace any of these 4 moves with other coverage.

Zoroark @ Wise Glasses
Ability: Illusion
EVs: 4 HP / 252 SpA / 252 Spe
Timid Nature
- Dark Pulse
- Flamethrower
- Extrasensory
- Grass Knot

Zoroark was the original reason from a few weeks ago why I wanted to try out Dark. "Surely 120 SpA and 105 Speed is enough to mess around in a mode with limited defensive options..." Plus it's faster than Mienshao, a notable killer of Dark (and Normal) teams. No, this Pokemon sucks and held me back from easily reaching 50+. It has nothing to distinguish it from other more efficient attackers (Moxie, Guts, Huge Power, etc) and it's frailer than Weavile (the token "frail but fast attacker") on all 3 sides. I first tried Expert Belt but it made its lack of power on neutral hits even more glaring. Even Life Orb would probably be better since you're gonna die after 1-2 hits anyway. I will not be using this Pokemon again on future attempts.

Obstagoon @ Flame Orb
Ability: Guts
EVs: 252 Atk / 4 Def / 252 Spe
Adamant Nature
- Facade
- Knock Off
- Low Kick
- Seed Bomb

This Obstagoon was first taken out of my competitive box and retooled to be used on my Normal team (currently 26 wins, which I have not posted in this thread because I want 30+). After finishing Krookodile, I realized that he was right here ready to tag along on Dark so I could start playing right away. Seed Bomb is for Grassy Terrain to cancel out the Flame Orb damage. While burned Facade is notably slightly stronger than Max Strike, Obstagoon is still a good Dynamaxer because of his other moves, and the fact that burn damage takes the same HP whether you're Dynamaxed or not. That means that if you take 10 damage from burn and then un-Dynamax, you've really only lost 5 HP. Low Kick was again a filler move but the boosting effect was appreciated at times.

On wave 1, Krookodile swept through 9 without problem, and then died to Tangrowth on battle 10. Even though I had two other runs where he made it to battle 11, I was sick of resetting so I just took it and kept playing. I ended up healing after battle 12. Wave 2 was uneventful until battle 21, where Krookodile took 3 turns to kill 2 Pokemon and then was left against Emolga. He got the kill with Knock Off but got paralyzed by Static on the way out, so I knew that his sweep was gonna be cut short. I wanted to hold out until battle 25, but Obstagoon was at half HP by the end of 24. I know that he's capable of winning multiple battles without healing, but with this being my first serious Dark streak, I wanted to play it safe and bank my wins so I can get a decent first record rather than losing unexpectedly, so I healed after 24. I can play more risky on future streaks (when I have a competent third Pokemon who can get more than 2 kills before dying).

The wild stuff started happening in wave 3. In battle 34, it was Krookodile against lead Sirfetch'd. The calculator said that I couldn't OHKO, but he could OHKO me with Meteor Assault since Krookodile wasn't at full HP. So I decided to sacrifice Zoroark, my only manual switch of the run and the only useful thing that Zoroark did the whole time. He took the Meteor Assault to get Krookodile back in safely, then I was able to Airstream on the recharge turn and finish with a second Airstream unharmed. And good thing, because the next Pokemon was Starmie, which I outsped. The third Pokemon after my Dynamax ran out was Orbeetle, and with the Shell Bell Krookodile ended that battle back at full HP. Battle 36 was where it went downhill. Krookodile vs. lead Rhyperior, I didn't want to activate Weakness Policy so I used Max Darkness twice while it lowered my attack with Breaking Swipe twice, then I ended with Max Quake to get a SpDef boost. Next was Dedenne, which somehow managed not to kill me with a combination of Charm and Dazzling Gleam. Last was Pincurchin, where this happened: And Krookodile lived to fight another battle.

Except the very next one opened with Goodra, which I also couldn't OHKO, so I just Knocked Off its Lansat Berry to save Dynamax for Obstagoon. He got through the next 3 taking minimal chip damage, and then on battle 40 it started with Vespiquen.

252+ Atk Guts Obstagoon Max Strike (120 BP) vs. 252 HP / 0 Def Vespiquen: 139-165 (82.2 - 97.6%) -- guaranteed 2HKO (100.00% chance to 2HKO after accuracy)
252+ Atk Guts Obstagoon Facade (140 BP) vs. 252 HP / 0 Def Vespiquen: 162-192 (95.8 - 113.6%) -- 75% chance to OHKO (75% chance to OHKO after accuracy)


I wanted to Dynamax to reduce burn damage, but this is a rare instance where the power difference actually matters. I had to gamble on a 75% chance. And it worked. And then out comes Mienshao to ruin everything with no chance of survival. I Dynamaxed anyway just in case it missed HJK, but it didn't, so that's the end, no big climax.

So anyway, there's clearly a good core here, but I was effectively playing 2v3 for roughly 38 of the 40 battles. If I get a good replacement, I should be able to get closer to 60. One Pokemon that I was considering was Hydreigon, who can fulfill a similar special attacking role and can carry Surf to beat Crustle (who ended 2 of my previous attempts but did not show up here), while also outspeeding Mienshao and resisting that annoying Tangrowth. There are also a few defensive options possible, like Drapion or Mandibuzz.
 
Mr. Rime is one of my favorite new Pokemon, and like Eisenherz I saw a lot of potential in it for mono-Ice, so I made that my next project. Mr. Rime has passable speed, a good secondary typing for Fighting-types, Calm Mind/Slack Off to set up, Ice Body, and a wide offensive movepool. But honestly, when I started thinking about it more it sounded worse and worse. Basically, its defenses didn't seem good enough to switch-in but its offenses weren't good enough to lead, either. A classic problem of Balanced Stats.

Saddened at the lack of Mr. Rime, I explored other options. The first team that actually made it to playtesting was a hail team. Abomasnow and Vanilluxe are awful, but Ninetales was passable. With Aurora Veil, Nasty Plot, and STAB Draining Kiss, it worked okay as a lead that could stay healthy and sweep. And of course, the main reason for even running it, auto-hail, enabling Slush Rush Sandslash. With a Steel typing, doubled speed, and Swords Dance, Sandslash could switch in on a lot of problems and sweep while staying decently healthy with Shell Bell. I first rounded out the team with Lapras, then Arctovish which had Ice Body and dealt with Steels a bit better. While Sandslash was awesome with a hail lead, Ninetales was ultimately too passive for this team to work. It takes a couple turns to do anything and is very reliant on using Aurora Veil and not being dynamaxed to set up, so it's complete crit fodder. And with just Freeze-Dry and Draining Kiss to attack with, it had to switch out a lot, even after being set up. I got up to 27 with this team which had a 2-battle middle run (lol) so I probably could have taken it into the 30s if I really tried, but after many failed attempts it was clear this wasn't good.

My first thought was to be way more offensive, because regardless of what's in reserve, that's proven time and time again to be the best way to lead. Darmanitan is the obvious choice for an offensive Ice-type, but it's super fragile (with a bad stat spread for Shell Bell to boot), mono-STAB (as I realized when trying Haxorus in mono-Dragon, I don't think it's a coincidence that almost every top lead is dual-type), and its ridiculous Gorilla Tactics ability doesn't work with Dynamax, the hallmark of any good lead. With all that in mind, I wasn't optimistic about this. I did happen to see the Zen Mode form while looking at Darmanitan, and boy did I wish that was just like, a normal Pokemon. But a Pokemon that requires to be under half to exist, and is then naturally resistant to healing is way too risky to use over several battles.

unless...?


<->

Darmanitan-G @ Muscle Band
Adamant/Zen Mode
4 HP/252 Atk/252 Spd
Ice Punch/Flare Blitz/Earthquake/Protect

Okay, yes, Zen Mode Darmanitan is risky, but hear me out: 160 base attack. 135 base speed. Fire STAB that sets up Sun. Ice STAB that sets up Hail instead. It's actually nuts. Once it's active, it decimates nearly every offensive threat while setting up sun, and it decimates a large amount of defensive Pokemon as well, especially if sun is up. And that's not hard given how many mons are OHKOd by Max Flare. I always try to keep it up, even if Hailstorm would also KO and has more PP remaining. What I also really like for mono-Ice in particular about Darm-Z is that the majority of trouble-makers are Water, a far easier type for Ice to deal with than its usual weaknesses.

But the risk, of course, is undeniable. If I run into something I can't KO as Darm-Z, I basically have to switch out. The lack of healing also makes priority and Sturdy even more annoying than they already are, especially the latter since it's mostly (entirely?) on Rock/Steel types. I did try out Shell Bell to try and make it less risky, but in my experience I would dip under half, be awesome, come back up to like 60%, then inevitably get hit by some attack Darm-Z wouldn't have taken in the first place. So Shell Bell ended up being entirely counter-productive. The Muscle Band I get to use instead is also a great help, since while Darm-Z OHKOs an absurd amount of Pokemon, it's not stacking attack boosts so a lot of them are barely guaranteed KOs.

As for moves, Ice Punch and Earthquake are obvious choices. Flare Blitz is used over Fire Punch for the 140>130 BP Max Flare, and it has the same PP. I think I needed to use a Fire move outside dynamax twice, and neither time was really an issue. The recoil can also be helpful as normal Darmanitan. While Flare Blitzing willy-nilly from full to half is stupid (Darmanitan can take a hit just fine at full in dynamax), some attacks will bring me down to around 60% or so, and honestly at that point it's safer to just Flare Blitz into Zen Mode since a decent number of things just KO me at 60%. While Protect might seem weird in lieu of a 4th attacking move (notably Brick Break/Focus Punch for Max Knuckle), it's basically necessary with how Zen Mode works. It triggers at the end of the turn, even if you enter a battle with half health. So if I need Zen Mode for the lead I have to Protect. It has a few other uses though, like baiting out Misty Explosion from Alcremie to avoid random Baby-Doll Eyes, potentially adding on hail damage, free damage vs Steel Beem users, and scouting out Zoroark.

Frosmoth @ Leftovers
Modest/Ice Scales
140 HP/252 Def/100 Spd
Ice Beam/Bug Buzz/Giga Drain/Quiver Dance

When I noticed Water-types would be annoying, I instantly thought of this. While not as many water are special as I'd thought, there's still a lot of relatively passive walls that survive Darm-Z and are special, and Frosmoth makes mincemeat out of them while likely going on to sweep. It stays up healed pretty well even without a healing move with Giga Drain and Leftovers, too. Pretty straight-forward mon, but it works great on this team when most of what you need to switch into is fairly passive.

The EV spread is kind of wonky, and I'm not sure I'd keep it the same if I returned to this. 100 speed lets Frosmoth outspeed Barraskewda at +2, and by extension everything but Accelgor. From there I gave it as much defense as possible if it needed to take a physical hit after setting up (or needed to set up on a physical mon in a pinch), with the rest in HP. My thought was that extra special defense and attack would be unnecessary with Quiver Dance, and while I'm pretty sure about the special defense I think some more offense could help out to get easier Giga Drain O/2HKOs. I'm not sure how much extra I'd add, though.

Avalugg @ Rocky Helmet
Impish/Ice Body
252 HP/252 SpD/4 Spd
Iron Defense/Body Press/Icicle Spear/Recover

I originally had Mamoswine here, but with how little flexibility Darm-Z has versus its problems I needed switch-ins as sturdy as possible, so of course Avalugg made a great complement to Frosmoth for that purpose. Iron Defense is the only way Avalugg can really sweep so that's what I ran. I used Rocky Helmet since Eisenherz used it and Leftovers was on Frosmoth, but it worked out pretty nice. It's redundant a lot of the time, but it helps conserve Body Press PP. Also Poliwrath sucks ass to deal with and it's pretty nice for that. I opted for special defense investment instead of defense, because in my experience with Turtonator +6 Body Press did 90% to even the slightly bulky resists like Mantine, so Avalugg should have no issue KOing them even without investment. While it makes crits while setting up on physical mons a bit scarier, the special mons that come out are much less problematic with special defense investment, especially if dynamax is available (double health plus Ice Body is very nice). The 4 speed looks fillery but it actually lets Avalugg outspeed Drampa and Turtonator!

Threats

:lycanroc: : Awful. Snipes with Accelrock, phazes Avalugg with Roar so no +6 defense, and sets up Stealth Rock which really screws me over if Avalugg needs to switch out. My plan is switch in on Accelrock, Iron Defense as it uses SR, then Body Press as it tries to Roar. Bleh.
:pyukumuku: : One part I miss about my hail team: switching between Ninetales and Sandslash forever, then SDing as its health was low from hail. This sucks because Toxic is unavoidable. I let Avalugg take it, bait out Red Card with Icicle Spear which prompts a pathetically weak Counter (reflects 1 hit), then go back to Avalugg and Body Press/Recover, switching out as needed to reset Toxic. I actually considered replacing one of Frosmoth's STABs with Safeguard for this, but it seemed like it would make sweeping with it much less consistent.
:poliwrath: : Not even KOd by sun Max Flare, I hate this thing. It also has Circle Throw, so I can't set up Iron Defense on it. Dynamic Punch can potentially be an ass, too - I almost considered Own Tempo on Avalugg. This is where Rocky Helmet shines though - it helps weaken it (switch in+Circle Throw at least) for Darm or Frosmoth to get rid of. Still doesn't put me in a great position, but it's something.
:politoed: : This is at least KOd in the sun, though it can have Drizzle to negate that. Frosmoth doesn't take all that much damage, but Politoed uses Perish Song and while I can KO it in time, obviously then I have to switch out which is problematic if it's a special mon.
:zoroark: : I can bait this out sometimes with Protect, but if the "lead" is something I don't want to Protect on, then this screws me over hard. Faster than normal Darm, and if I were to switch both my switches hate Flamethrower. Potentially catastrophic.
:cloyster: : Dead with sun up, but otherwise it's a 50/50 and I'm pretty sure I just lose if I miss it and it uses Shell Smash.
:scrafty: : Only an 81% KO even with sun up if it rolls Intimidate, and I can't switch in to this at all.
:rhyperior: : If this gets Solid Rock, even Darm-Z's Hailstorm only KOs 30% of the time. And just lol at trying to switch into a Rock Wrecker.
:scizor: : I can't switch into this at all, and it can snipe Darm with Bullet Punch. It doesn't seem to use if if not a KO, though.
:azumarill: Can potentially snipe with Aqua Jet, I can't OHKO it, and it uses Belly Drum. The good news is that if I'm not in KO range I think it always uses Belly Drum so I can cause it to waste its turn by attacking.
:magneton: : Sturdy...at least it only appears 1/3 of the time. I can't switch into this at all, so I just have to hope. If Darm's at full at least it might go for Flash Cannon instead, but this is always a fingers-crossed Pokemon. Magnezone isn't as bad since I can potentially bait out Steel Beam with Protect/Max Guard.
:wailord: : I can't OHKO thiis unless I have sun up and even then only it's only 43%, and it blows itself up if I switch in Avalugg preventing me from setting up Iron Defenses. Not inherently problematic, but likely to cause one.
:malamar: : :quickclaw: I've considered switching in Frosmoth vs this, since it wins if no Quick Claw and if it does proc dead Frosmoth isn't as bad as dead Darm. But it's a bad position even when I "win" (+0 Frosmoth), so I've just risked the claw.

The Run

My first heal wasn't used until battle 25, which was incredible. Not really much to say - things just went right. It's the only time I ever nearly ran out of PP on Darm. I healed once I reached a Sturdy Magnezone. It was a lead so I really had no reason to not bait out the Steel Beem with Protect, but I didn't and ran into Sturdy. But then I saw Toxapex, which is the easiest set-up in the world for Frosmoth. I set up to +6 to be as safe as possible. Flare Blitz would only have 1 PP though, so not an impactful misplay since I needed to heal regardless.

I was pretty hyped with that start, but my hype soon deflated at battle 34 when I went to attack a "Trevenant" that turned out to be Zoroark. Darm fainted, and I determined my best hope was setting up 1 Quiver Dance with Frosmoth (amusingly, my spread outspeeds Zoroark by 1 point at +1), OHKOing, then going for a 50/50 KO on Trevenant (AV), and if I failed I would set up Avalugg. I got the KO anyways, and the last was Beheeyem which Avalugg would've been fine versus at +6. That being said, this was kind of my fault. There's no harm in Protecting versus Trevenant, and with an incredible lead of 25 I should have been as safe as possible. If I was in a position where Protect could run out of PP it would mean I was doing fine anyways.

My last run went a more standard 19 battles, and was going pretty smoothly until battle 51. I ran into Accelgor, which is one of two things that outspeeds Darm-Z (the other is Barraskewda). I was right at half and it usually uses Spikes if no KO, but here it Sludge Bombed and poisoned me. That pretty much put my run on death's door, but then at 53 another Zoroark really put the nail in the coffin. I actually had been better about "unnecessary" Protecting on this last leg, but when you're poisoned you just have to eat the risk. Frosmoth again pulled off a Quiver Dance, and while I honestly forgot what else was on the team I think Frosmoth swept. Battle 54 got off to a bad start as a Pelipper lead Hurricaned Frosmoth from half health, but then missed Avalugg as it recovered, and I dynamaxed and 2HKOd with Hailstorm as it Stockpile+Swallow. Marowak came out, and while I could KO it risk free in dynamax I felt it be safer to Max Guard and set up Iron Defense for the last mon. I ended up getting flinched a ton with Iron Head though, so I guess not. RIP.

Anyways, this was a pretty fun team that played to Ice's strengths: extreme in every aspect. It could probably go a bit farther, but 50 was my goal and I'm happy with this run.
 
Hello, this is my first ever submission so bear with me lol.
This is a Dynamax Streak of 218 for doubles on the Battle Tower, with a team that had some changes going through it. (both Hatterene sets and Copperajah sets are all GMAX)
From 0-124:
:ss/Hatterene: @ Leftovers
Ability: Magic Bounce
EVs: 140 HP / 100 Def / 200 SpA / 68 SpD
Relaxed Nature
IVs: 0 Atk
- Magic Powder
- Trick Room
- Dazzling Gleam
- Mystical Fire


:ss/Scrafty: @ Life Orb
Ability: Intimidate
EVs: 252 HP / 252 Atk / 4 Def
Adamant Nature
- Throat Chop
- Thunder Punch
- Close Combat
- Fake Out


:ss/Copperajah: @ Assault Vest
Ability: Heavy Metal
EVs: 100 HP / 252 Atk / 88 Def / 68 SpD
Adamant Nature
- High Horsepower
- Heat Crash
- Heavy Slam
- Power Whip


:ss/Araquanid: @ Sitrus Berry
Ability: Water Bubble
EVs: 252 HP / 252 Atk / 4 SpD
Careful Nature
- Crunch
- Liquidation
- Poison Jab
- Leech Life

Team worked very well for a long time, but had some major flaws
:aegislash: Leon's special one can OHKO Hatterene, while Scrafty can't fake out it
:Kommo-o: Dmax kills Hatterene before TR is set up, leaving team very vulnerable.
Fairy types would 1 shot Scrafty
Ghost types would make Hatterene have a hard time, while Scrafty couldn't fake them out to get Tr set easily.

so from 125-218 I changed up the team, since Scrafty wasn't able to deal with much anymore

:ss/Hatterene: @ Life Orb
Ability: Anticipation
Shiny: Yes
EVs: 252 HP / 4 Def / 252 SpA
Quiet Nature
IVs: 0 Atk / 0 Spe
- Trick Room
- Expanding Force
- Dazzling Gleam
- Mystical Fire


:ss/Indeedee-F: @ Psychic Seed
Ability: Psychic Surge
EVs: 252 HP / 126 Def / 30 SpA / 100 SpD
Modest Nature
IVs: 0 Atk / 0 Spe
- Helping Hand
- Follow Me
- Expanding Force
- Shadow Ball


:ss/Copperajah: (M) @ Assault Vest
Ability: Heavy Metal
EVs: 100 HP / 252 Atk / 88 Def / 68 SpD
Adamant Nature
- High Horsepower
- Heat Crash
- Heavy Slam
- Power Whip


:ss/Araquanid: (M) @ Sitrus Berry
Ability: Water Bubble
EVs: 252 HP / 252 Atk / 4 SpD
Careful Nature
- Crunch
- Liquidation
- Poison Jab
- Leech Life

Ngl, only reason I used this Hatterene is because i finally bred one shiny (which wasn't the best choice but magic bounce wasn't needed for the rest of the runs. Indeedee was a perfect swap for Scrafty, the psychic terrain with follow me was very helpful. The back line stayed the same due to them being very strong (and still are)
HOW THE TEAM LOST:
Office worker (don't know which name)
Pokemon:
:noivern:
:snorlax:
:drampa:

started out normal, Hatterene set up TR while Indeedee follow me. Snorlax and Noivern knocked Indeedee to 47. Hatterene went for Dazzling Gleam turn 2 to OHKO Noivern, and did a decent chunk to Snorlax and Snorlax knocked out Indeedee with Body Slam. Turn 3 my Copperajah comes out and he brings out Drampa. Hatterene goes for Dazzling Gleam, knocking Drampa to Berserk range. Snorlax smacks Copperajah with HHP, knocking him pretty low. Drampa goes for Hyper Voice, which knocks out both of mine in 1 hit. (at this point I knew I should have Gmaxed Hatterene) Araquanid comes out, which Snorlax knocks him to half with Body Slam and even with Sitrus, Drampa knocks out Araquanid.
This team didn't have much for issues, just bad misplay costed me the game. (If I went for Gmax on Hatterene, Hatterene would have OHKOed Drampa, and Hatterene would have been able to sweep.)
 

turskain

activated its Quick Claw!
is a Community Contributor Alumnus
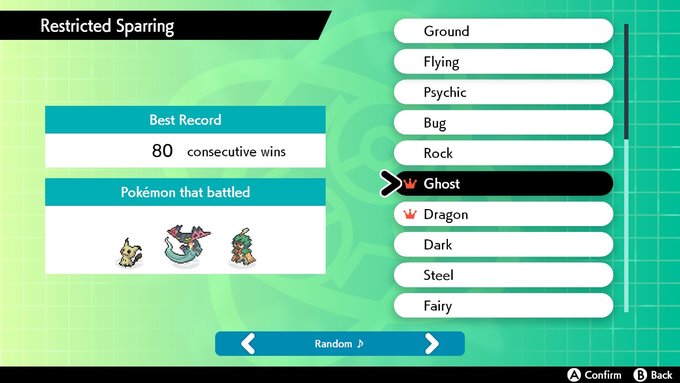
Great to see lots of activity in Restricted Sparring and in the Tower! Updated through here.

I've also added a Top 5 overall streaks listing for for Restricted Sparring (cutoff subject to change) to track the race going on between players and types!
 

Eisenherz

επέκεινα της ουσίας
is a Forum Moderatoris a Community Contributoris a Tiering Contributoris a Top Social Media Contributor Alumnus
Moderator
Well, I had written most of my Mono Bug report before SPH, but I guess the Save Draft function on this forum is just for show, and I lost it all. I'll redo it eventually, but for now, something fresher to my memory: a Mono Rock streak I finished yesterday!

Pokémon Sword-Shield Screen Shot 2020-08-04, 10.39 AM.png


–––––––
S E T S
–––––––
@

Jolly | Justified
IVs: 31/31/31/6/31/31
EVs: 4 HP / 236 Atk / 4 Def / 12 SpD / 252 Spe
Sacred Sword / Rock Slide / Zen Headbutt / Iron Head

@

Modest | Levitate
IVs: 31/0/31/31/31/31
EVs: 60 HP / 4 Def / 196 SpA / 4 SpD / 244 Spe
Psychic / Power Gem / Earth Power / Grass Knot

@

Bold | Regenerator
IVs: 31/0/31/31/31/31
EVs: 244 HP / 196 Def / 68 SpD

Scald / Toxic / Recover / Protect

––––––––––––––––––––––
T E A M B U I L D I N G
––––––––––––––––––––––

This is probably the team I'm proudest of so far in RS. At first, I was just hoping to make Lunatone work, and I can't say I was too hopeful. As some have already stated, Rock is really difficult to teambuild for due to a barren Pokémon pool available in SwSh and most of them sharing similar issues. My initial idea was to have Lunatone at the front, and Terrakion as a switch-in for the Dark moves it would bait without fail (though it was also a good switch-in for Bug moves). But it probably won't be a surprise for anyone to hear Lunatone was kind of underwhelming as the main sweeper, not really due to a lack of power, but rather a lack of speed. Timid over Modest would only have allowed it to outspeed a handful more things, not enough to make much of a difference for its main problems (and losing power would have made a difference in some calcs).

After a few runs (with Shuckle as my third), I realized Terrakion was bound to be the star of the show no matter what, so I started leading with it, to much better results. Shuckle didn't really complement these 2 well, though; it was not a good switch-in to stuff like Escavalier or Marowak. Moreover, setting it up and stalling out opponents with it took so many turns I ended up getting crit too many times. I tried Drednaw, I tried Tyranitar, I tried removing Lunatone... nothing seemed to patch the main issues. Until I tried Corsola.

I can't say I had the most faith in Corsola at first, its base stats are very underwhelming, and Regenerator might be one of the best abilities in RS, but it doesn't come into play unless you switch out, and with Mono Rock, good luck finding opportunities to switch around into anything (how I wish it had Teleport!). Unless... Lunatone is also on the team! Corsola baits enough Ground attacks that it does find opportunities to be helpful as a pivot. For example, what used to be the biggest downfall to the team, a Marowak lead, could now be handled by going Corsola on the Iron Head (Marowak goes for Iron Head over Bonemerang in front of Terrakion, since it sees Bonemerang as only 50 BP), which does around 33%, then right to Lunatone on the Bonemerang, and OHKO with Max Overgrowth. Corsola also adequately handled a lot of the stuff Shuckle did, like Porygon2, Musharna, Ribombee, Toxapex, Goodra, but also Clawitzer, Barraskewda, Escavalier, Golduck, Kingler, Sandslash, Quagsire (in tandem with Lunatone)... It can 1v1 a lot of stuff. However, more than for any tank I've used previously, handling the 1st or 2nd Pokémon with Corsola is very risky business, since whatever comes out next could be something I have no switch-in for, so I tried to only use it when I really needed to, and preserve it for important situations.

:terrakion: Unsurprisingly, this was the main sweeper and did most of the work. Despite a lot of weaknesses, I found it to be an excellent Shell Bell sweeper, because it finds a lot of opportunities to get a free +1 Atk on turn 1 with Max Knuckle and steamroll afterwards. I think Zen Headbutt is a must on the moveset, if only because of Sirfetch'd; there is no switch-in to a crit Meteor Assault for any Mono Rock team, but Max Mindstorm has an 88% chance to outright OHKO! Zen Headbutt was also most useful for handling Scizor; I always used Max Mindstorm first on it, removing Bullet Punch as an option. More generally, I used it a lot when any move KOd, as setting Terrain boosts its damage output for the next turns and can open up more options.

The last moveslot is more of a toss. I had Megahorn at first, with the idea of using it to handle Grass and Psychic types. I didn't use it much, so I tried out Iron Head to OHKO stuff like Alcremie and Aromatisse. I was also thinking of testing EQ, but Iron Head was excellent, helping me preserve Sacred Sword PP in several occasions as well as giving me opportunities to flinch in a pinch (I did get a few lucky ones), but also as a way of getting Def boosts in front of physical foes I couldn't OHKO (for example against Trevenant, or if Skarmory came out when I was at +1 Atk, I would always Max Steelspike into Max Rockfall, taking a lot less from Body Press). I optimized EVs with more SpD for Download, which comes into play whenever P2 has it.

:lunatone: Even though I first used Lunatone simply because I really like it, I had the preconception it was not a good option and that I was just forcing it onto the team, so I eventually gave up on it. But then, as I tested other Pokémon, I started to see its real value was much higher than I had thought. Levitate is really big for Mono Rock, and for Terrakion in particular; Palossand was a gigantic pain for my Terrakion-Corsola core (as well as Marowak, as previously mentioned) which worked quite well otherwise. Expert Belt is there because of this calc among others:

196+ SpA Expert Belt Lunatone Grass Knot (120 BP) vs. 252 HP / 0 SpD Palossand: 192-228 (104.3 - 123.9%) -- guaranteed OHKO

Pokémon Sword-Shield Screen Shot 2020-08-04, 10.33 AM.png

Which, as fate would have it, is the calc that won me battle 50...

There were a few other blessed calcs, like a Psychic OHKO on Kommo-o, but this one alone makes the E-Belt worth.

When I first started using Lunatone, I thought I could be cute and maybe have Nasty Plot and/or Moonlight, but the harsh reality taught me that with all of its weaknesses, 4 attacks was the only thing that could really work (for an offensive one, anyway). Thankfully, Lunatone has been blessed with an exceptional offensive movepool, so much so that it had a severe 4 MSS. At many points during my play, I wish I could have fit Moonblast on this moveset for Scrafty, or Shadow Ball for Beheeyem. Power Gem and Grass Knot were my 2 most useful attacks, and I think Earth Power is necessary for Steels, especially Magneton and Steelix, but I had serious thoughts about using Moonblast > Psychic. We'll never know how that would have gone.

For all its qualities, one of Lunatone's main downside ironically comes from its most useful trait: Levitate. If only it could heal from Grassy Terrain, and be protected from First Impression / Bullet Punch by Psychic Terrain (not to mention the power boosts these would offer)!

:corsola: I never would have thought I'd find a place to use Corsola in a serious fashion, and I cannot express how happy this makes me. It's always been among my favourite Pokémon, but let's face it, unless you want to meme with subpar picks, there's never any reason to use it competitively. Sadly, there isn't that much to say about it, because the set is such a straightforward Toxic stalling set, with Regenerator as a big help for pivoting. I wasn't sure whether Natural Cure would be better since it commonly found itself statused, but I think Regen ended up helping me way more than curing those statuses would have been; a burn is not that big of a deal, and Toxic is annoying but it can still function with it, for a while at least.

I made it very physically bulky with, originally, the intention to give myself a chance against Scizor (until I figured out that the best thing to do was setting Psychic Terrain with Terrak). On the special side, it lives 2 Clawitzer Water Pulses, and even 2 Starmie Thunderbolts (with a Protect in between). Physically, it lives 2 +2 Bullet Punches from Scizor and 2 Klinklang Wild Charges.

Pokémon Sword-Shield Screen Shot 2020-08-03, 7.08 PM.png


–––––––––––––
T H R E A T S
–––––––––––––

As this is Mono Rock... the threats are numerous! The backline softens a lot of threats for Terrakion, but some of them are just extremely bad news:

:tangrowth: This is the main one, especially if it's a lead. With a bit of luck (I think it depends on rolls), it's possible to get away with Terrakion "only" have to tank one Terrain-boosted Grassy Glide, but if Terrakion can't handle it, gg.
:sandaconda: If it wasn't of the stupid Quick Claw, this would be Lunatone food, but after getting QC Skitter Smacked twice, I stopped trying, and now I usually handle it with Corsola instead...
:grapploct: Lives a Max Mindstorm if Terrakion isn't +1 yet, and does a ton in return (unless it luckily Taunts). Ended one of my runs with a Submission crit.
:poliwrath: Similar scenario to the above, but it's Dynamic Punch... if it hits, it does about 50% and then you have to hope not to hit yourself.
:beheeyem: If only it didn't have Energy Ball!! Terrakion needs to handle it, but Analytic Psychic does an insane amount. Encountering it makes me regret removing Megahorn every time, lol.
:eldegoss: The biggest issue is definitely Cotton Down, which can put Terrakion is a really bad spot against whatever the AI has in the back.

–––––––––––––––––––––––––––––––––––––––––––––––––––––––––––––––––––––––––––––––––––

Mono Bug report coming soon, but until then, it's time to tackle Mono Ghost!
 
Last edited:
:ss/Araquanid: (M) @ Sitrus Berry
Ability: Water Bubble
EVs: 252 HP / 252 Atk / 4 SpD
Careful Nature
- Crunch
- Liquidation
- Poison Jab
- Leech Life
Curious, why Careful nature and Sitrus Berry? Did you really get any mileage whatsoever out of Crunch or Poison Jab?

Neutral Liquids deal more damage than supereffective Leech Life because of WB, and it’s not worth using Crunch for things like Jellicent when you have Power Whip or Scrafty.

Mystic Water or Life Orb with an attack-boosting nature widely expands your OHKOs, including things that resist water in dmax, and Leech Life is enough to restore some HP if you even bother to use it.

Without the pretty irrelevant STABless moves, you can easily fit Protect or Wide Guard, or Soak, which broadens the number of things weak to that Power Whip. There’s no major loss in running both Protect AND Wide Guard, even.

Araquanid is very strong but has the capacity to be so much stronger than what you’re doing with it.
 
Last edited:
I decided to try Eisenherz grass team (surf instead of scald) and reached 100 consecutives wins!


There are some tricks like switching from Rillaboom into Ludicolo until Bisharp has no sucker Punch, but most have been said.

Edit: I won 41 battles before the 1st heal (which is a very good start) then I healed at 73 because of some bad bug Pokemon and finally sacrificed my Rillaboom into Pyukumuku at 100 (so I could easily go further).


Last edited:
Part four of...
The Repto Rando Fun Show! (now with additional filler!)

Eisenherz collapsed back in his chair, mentally drained. Smogon Puzzle Hunt 3 had finally concluded and he wanted nothing more than to relax with some mindless entertainment. Restricted Sparring was entertaining but nonetheless required him to pay attention, lest he waste a heal. So what were his options at this ungodly hour? He could hop onto the Gen 8 Tower thread, where Repto had evidently released yet another randos dump, chronicling Musharna or Dusclops carrying three bad movesets.

...but then he had already recently been forced to look at them during a series of trades. Never mind the previous abduction of his Arctovish; Eisen was even less mentally prepared for the sight of Acid Spray Escavalier. Sure, he knew it technically existed, but that never compared to actually having it shoved in his face. The psychological abuse was maddening. "The kinds of shit I put up with for candies," Eisen muttered. He concluded it was too early to read yet another incoherent manifesto on the importance of -2 SDef. The Temple of Ferro could wait.

Turning to his television, Eisen flipped on the monitor and was quickly reminded that the Earth was a dystopian wasteland and all network programming was dictated by, who else, the High Priests of the Temple of Ferro. The entire slot of midnight to 6AM was allotted to AI Dungeon scripts generated by insane cultists Coeur and "Someone That Can Only Be ExtendedFreezer or Repto Which Given The Context Really Narrows It Down," which were then converted into CGI animated films. Even if they didn't involve Ferro propaganda, the show was more tasteless than lead paint chips and had a similar effect on the brain.

Eisenherz sighed. Entertainment would have to come from someplace else, but he guessed he'd settle for mindlessness. The TV was muted, but he could see from the info panel that Pokemon Menagerie: Political Dissonance was playing. A Miltank had just rolled through the gates of the White House and sprayed milk at a row of Secret Service agents, apparently killing them. The Miltank was quickly joined by- "Seriously, what the hell?" Eisen rubbed his eyes, but the images did not improve. Against his better judgment, he unmuted the television. He also turned on closed captioning, as the dialogue sounded comparable to the noise a paper shredder makes.

> Sharpedo fires Ice Beam at one of the secret service detail. "Take us to President Mewtwo immediately, or I will freeze more of you!"
"Stop! Don't make any sudden moves!" one of the secret service says.
"Quick, catch!" Sharpedo snatches a hot dog from one of the stand and throws it at one of the secret service. You fire a blast of ice, instantly killing the man.
"Run for the bushes!" you shout, sprinting off into the rose bushes. Miltank follows you.
"Why are we running?"

> Miltank pulls out her walkie-talkie to order a Lanturn-shaped helicopter.
"Hi, this is the First Lady. We're currently stuck in the rose bushes, and we need a helicopter. I need a Lanturn-shaped helicopter."
"A Lanturn-shaped helicopter?"

> Miltank confirms that they all really need a Lanturn-shaped helicopter.
"Got it," the voice on the other end says. "We'll get one here soon."
Miltank and you walk around the side of the mansion to wait.

> Sharpedo steals the walkie-talkie from the dead secret service and tries to call President Mewtwo while they wait.
"911, what is your emergency?" the voice on the other end asks.
"Hi, I need you to send a Lanturn-shaped helicopter to the White House right away," Sharpedo says.

> Miltank awaits the arrival of the glorious Lanturn-shaped helicopter.
You walk around to the front of the mansion, and there on the lawn is a giant, ornate helicopter. It's shape is that of a giant purple squid, with a giant rotor on its back.
Eisen could not mute the TV fast enough. He decided to stomach the rando dump in smaller doses, then switch back to the movie once the pain became unbearable, and vice versa. At this hour, he lacked the rationale to conclude that this would only prolong and intensify the suffering from both.
:comfey::arctovish::cursola::roserade:
I normally run into Heliolisks that attack immediately or set weather, and I kinda prefer the roll on a Dark Pulse flinch to Glare spam, which is what I got when using this team. Dual paralysis reminded me of Latias4 from tree, but at least Heliolisk falls the moment you jab it.

:slowbro::krookodile::darmanitan-galar::ferrothorn:
Imagine becoming anxious at the sight of Hatterene activating its Quick Claw only to use Play Rough on your Ferro.

This run was problematic for a few reasons. Like a previous run where Gastrodon kept running into bad leads, Krookodile needed to flee more often than not. This run also featured a Butterfree content to keep spamming Sleep Powder. Leon would flinch Slowbro with FO (Rime) as Krookodile swapped into Ferro. His Rillaboom declined to use Drum Beating against either target, instead using Body Slam on Slowbro and paralyzing it. It's almost like Rillaboom4 is programmed not to take guaranteed OHKOs, since this is far from the first time it's done this.

:cofagrigus::rillaboom::golisopod::porygon-z:
Pod tried LO for the first time so that Rillaboom could use the AV. Slaughtering a Mimicry Stunfisk with First Impression felt great. P-Z had mostly little jobs like safely killing an Attract-spamming Unfezant. Rilla is of course the gmax variant now, and can we appreciate the ludicrous defense of Slurpuff1? The thing ate a Drum Solo in terrain like a boss. That same attack was aimed at an Aromatisse which avoided it by way of Ally Switch; I would try using my own AS to prevent P-Z from being hit by a Whimsicott's Moonblast, only to find that it targeted Cofagrigus anyway (and critted for good measure.) Immediately afterward a Machamp would go on to crit me twice. I don't remember my precise reaction to that, but it was probably vulgar.

:cofagrigus::indeedee::azumarill::druddigon:
This run had a battle where an Indeedee, Flareon and Rhyperior would all T1 Protect, and Flareon would even go for a second. TR would wear off in time for Shuckle who, whaddya know, opened with Protect. Leon would lead his Haxorus2, most notable to me for Attract, and force Cofagrigus to KO it in order to prevent Indeedee from wasting its turn. This was noteworthy because I originally planned to Fake Tears the Charizard, who would ultimately use Overgrowth and kill my terrain anyway, which was the whole benefit of E-Force.

:musharna::shiinotic::araquanid::dragalge:
A team of Falinks/Tsareena/Basculin/Ludicolo made me utter something I never thought could be produced from my fingertips above a keyboard: OOHHHH SHHHHIIIIIIIIIIIINOTIC SWEEP

As if Shiinotic were finished being useful, it crit a HH Weather Ball at +0 and OHKO'd Leon's Zard. More noteworthy because this shroom runs no special offense and instead goes full bulk, relying on tripping WP for damage.

:oranguru::mimikyu::pincurchin::gastrodon:
This run prompted a humorous exchange with Eisen, because of Eevee girl's dmax Vespiquen being unable to KO Oranguru and then spending the rest of its giganticism guarding itself from LO Coeurchin. I had to remind myself of this because the only anecdote I had for this run was "disrespects dmax Vespiquen" lol

I'm becoming a fan of Mimikyu as a lead. It doesn't use TR more than once in a blue moon but those +2 Play Roughs do pack a wallop.

:bronzong::tyranitar::dracovish::primarina:
Dracovish looks pretty comical next to Tyranitar, being a foot taller and a bit heavier. The ingame proportions are what made me look up their differences. It goes without saying that Zong provided rain as needed to increase destruction.

:magearna::porygon2::golisopod::copperajah:
ENOUGH IS ENOUGH! I HAVE HAD IT WITH THESE MOTHER FUCKING WOBBUFFETS AND THEIR MOTHER FUCKING ENCORES

Between the last few runs this was like the fourth or fifth time I ran into one, and they never failed to be a royal PITA.

Coeur had asked to see this roll when EVELYN bore it, and suggested leading both setters rolled as leads. It ended up working excellently, though this team still nearly met its end to an Escavalier/Greedent/Mimikyu/Flapple. Greedent itself did not scare me despite outspeeding in TR, but Escavalier was Set4, and LO Drill Run would put Copperajah to bed before it could Heat Crash it to death. That was also my best answer to it, so the battle would only go downhill from there. Magearna re-enters, and in spite of excellent physical bulk Escavalier would crit its next Drill Run and put her at near death. Getting desperate, I dmax P2 and begin using Phantasm on Escavalier, not just to injure it but pile def cuts onto Greedent, happily sitting there spamming Super Fang. Thankfully, it runs off the base HP and so they weren't crippling P2, who would also eat a Megahorn. Escavalier falls and is replaced by Mimikyu, who loses its Disguise to a Liquidation and is KOed by P2's final Phantasm. P2 shrinks and Flapple enters, bringing it to ONE HP with an Energy Ball (74 dmg) which is what allowed it to retaliate with a +1 Ice Beam, OHKOing Flapple through its Yache. TR was off, which was what allowed Golisopod to OHKO that damn squirrel. By far one of the most clutch battles I have had doing Gen8 randos. On the one hand setting TR had painful ramifications, but Copperajah is slower than Escavalier4 by 7 points outside TR, and I needed that Heat Crash if I were going to KO it right away.

P2 set TR every single battle until it was Fissured. Cooper's Aegislash/Hydreigon/Ferrothorn/Hitmonlee would provide a challenge, primarily due to Curse/Body Press Ferro, but nothing like the Escavalier battle. And for your dose of insanity, Espeon would Skill Swap Soul-Heart! Too bad it wouldn't get to put it to good use!

:comfey::snorlax-gmax::kommo-o::volcarona:
Foul Play Sableye, yikes..! Leon's Cinderace3 would prevent Snorlax from Belly Drumming with Fire Fang, and I ended up sacking Comfey to Aegis (AV set) in order to heal it. I drummed and Cinderace would crit me anyway out of spite.

:hatterene-gmax::togedemaru::drampa::rhyperior:
This team would fight two Dittos, but never mind that- FEARdemaru would faint only twice! I also need to remind myself that Endeavor also runs off the base HP and won't bring Leon's Zard down to 1 or 12 HP.
The very first team included an Arctovish, and Eisen could feel himself being overcome with PTSD. But he quickly chugged a liter of scalding hot tea, calming himself in addition to focusing much of his thoughts to the now painful burns in his mouth and throat. That allowed him to easily read the remainder of the dump. Before turning back to Political Dissonance, he made sure to refill the kettle.
> Miltank is a goddamn cow.
Miltank charges forward and puts her head down, smashing into the two remaining helicopters. She crushes them, before they explode.
"COW!"
"MOOOO!

> Sharpedo says "You have successfully brought about the APOCOWLYPSE!"
"Good job, Miltank," you say. "I guess you're my personal bodyguard from now on."
"COW!" Miltank says, happily.
"Why isn't the water boiling yet!!!!?" Eisen screamed in a tone one might describe as hysterical.
:dusclops::aegislash::azumarill::lickilicky:
Not only would Cherrim refuse to attempt Solar Blade in Cloud Nine, instead preferring to waste Sunny Day PP, multiple enemies would use their given weather setters despite Schlurplek already having been on the field.

:jirachi::appletun::centiskorch::clawitzer:
I still haven't found a fourth move for Jirachi I like that also has the odds to be used more than once. It's around this time I decide I'd really like to have a second shiny Clawitzer with Terrain Pulse (since Ice Beam is too useful to delete off the main set.) I would get to breeding afterward.

:porygon2::slowbro::togekiss::escavalier:
Acid Spray!

:musharna::politoed::frosmoth::golurk:
Gigalith with that effing QC proccing three times in a row... never mind the Rock Slide. I find to my dismay that HH Weather Ball is still not enough to overcome some of the bulkier foes.

:musharna::porygon-z::darmanitan-galar::gardevoir:
Leon "stalls" out dmax by way of a sashed Cinderace and switching Rime (who survived the Adaptability Max Strike!) for Aegislash. I ended up needing to use my third turn to KO the two of them. I was amazed that Rime could eat that attack (granted it's a roll on sets1-3) since until now it has easily chewed through everything I've aimed it toward.

:musharna::kyurem-white::scizor::sirfetchd:
Magic Room disabled Choice Specs, which immediately allowed Mush to After You Kyurem for an Earth Power to Coalossal! Thanks, Alcremie! Lazlo's dmax Inteleon and LO Flareon inflict severe T1 damage, but ducky would OHKO Inteleon with a HH crit Leaf Blade. I have come to prefer Leek to Iron Ball on it by a mile, in no small part due to encouragement from Eisen.

Next on Espeon 200 IQ Skill Swaps: using it on its lead ally with Intimidate! Wait, neither of my leads can use physical attacks... let's bump that 200 down a notch.

:hatterene-gmax::coalossal-gmax::octillery::exeggutor-alola:
After nabbing that attractive looking shiny shrimp, I decided I also loved the way shiny Coalossal looked, and it became my next breeding project. I also noted that this egg set was a relic from Tree, where Z crystals were a thing, and quickly decided I'd rather have Energy Ball over Leaf Storm. My Harvest set is still in Home, but with sun being so easily achieved the Petaya user could be potentially useful.

:musharna::steelix::clawitzer::gardevoir:
Still the Ice Beam using shrimp. Espeon would Skill Swap off Sheer Force, the only reason Steelix is allowed on the roster. Whelp.

:oranguru::beartic::golurk::tsareena:
AKA "How many times can we miss with 90% accurate moves?" I love Golurk's damage output with Poltergeist, and it was inflicting tons of OHKOs to neutral targets, but were it not for Instruct granting merciful second chances I'd have lost Golurk to punishment often. It was so bad that I not only wondered if Poltergeist was misprogrammed and had 80% accuracy or lower, but declined to continue after a battle midway and put a Wide Lens onto it (over Expert Belt.) Things went much better afterward.

:bronzong::incineroar::wishiwashi::roserade:
This team had to dmax a few times in order to save themselves, and I generally try not to use it unless the particular poke was designed solely to use it. Incineroar ended up soloing a Vaporeon/Gengar/Hatterene/Wobbuffet, with Zong's Iron Head unusable and no way to switch.
Going three teams without triggering any awful flashbacks was hardly an improvement, but an improvement nonetheless. "I'm not blind, Repto..." Eisen muttered, before contemplating that perhaps blindness is not such a disability when enduring the CGI filth before him.
> Sharpedo dodges the Thunderbolt due to +6 speed, and bites President Mewtwo.
You dodge the attack, and fire your own bite at the monster, piercing through his arm. He screams, before responding with a powerful blast of lightning.
"You're... too weak... to be... a hero,"

> Miltank says "...but just strong enough to be a cow."
Miltank charges at the monster, tackling him. She rolls with him, and grabs a large piece of marble, smacking it into his head.
"You're a marble-mook," she says.
Eisen accidentally unmuted the TV long enough for the delivery of Miltank's gritty one-liner. "W-was that cow speaking German?"
:hatterene-gmax::bouffalant::politoed::haxorus:
Confusion status was spread like the plague, between Smite, Outrage fatigue, & Swagger. Haxorus has two sets, and this one added Iron Tail and Stomping Tantrum to differentiate itself more from the other. Reckless LO Head Charge never fails to impress.

:musharna::gigalith::grimmsnarl-gmax::kommo-o:
TR was prevented by a Sky Attack flinch, followed T2 by Accelgor finishing Musharna off with Final Gambit. I also deliberately shut off TR to prevent a Power Trick Shuckle from getting out of hand, and was amused to find Fake Out did over half.

:cofagrigus::magearna::vileplume::primarina:
Soul Heart was killed by Mummy at one point, but the sweep still occurred thanks to Fake Tears. I didn't note the circumstances but I would've Grass Knotted something important after it smacked my setter.

:oranguru::tyranitar::flareon::alcremie-gmax:
I fought a full Water/Ground team with this, and of course couldn't have smooth sailing as one of the opponents was Seismitoad2, the meme set that liked to dual layer Protects, which it did.

:oranguru::darmanitan-galar::chandelure::drampa:
I regretted leading the Darmanitan. Leon would reassure me by completely squandering Rhyperior/Aegislash/Haxorus and not only sending Hax in before Zard, but opting not to attack it when likely anything the AI would've wanted to use would've done the job. IIRC Chandelure did most of the killing during the run. Unlike Golurk it was landing all of its Heat Waves.

:aromatisse::sirfetchd::reuniclus::krookodile:
Close Combat might actually be the duck's least-used move.

:dusclops::volcarona::octillery::cursola:
Cotton Down plus Gen8 speed mechanics would allow Volcarona to get the jump on an Eldegoss in Magic Room. Hitmontop would freeze Dusclops and use Fire Punch on it immediately afterward.

:jellicent::melmetal::ditto::stonjourner:
Ditto got to rampage as an Appletun (post-Ripen Petaya!) Lanturn against a water team, and as a shitty Falinks set, which ended up being necessary after Melmetal missed a Brightpowder Conk using Focus Punch. D-Falinks was assisted by a healthy supply of Rock Slide flinching, and Max Knuckle boosts for the two of them.

:bronzong::dracovish::barbaracle::heracross:
Dracovish would sweep easily in spite of a Trop Kick debuff. Zong would score three consecutive flinches on an Arctovish! This team fought dmax Rapidash as well as Dusknoir. Poor Leon would Outrage twice into Zong, and as if I needed more reminders as to its sheer bulk, Cinderace4's LO Pyro Ball would do pathetic damage in the rain.

:oranguru::appletun::dhelmise::tangrowth:
Durant would Eject Button following a First Impression and pass on killing my Appletun in order to target Guru, which would allow me to murder its ally Pangoro.

This team was doing extremely well for semi-mono grass until Pokekid Eva showed up with her Frosmoth. Lead Ninjask is swatted away while Shiinotic prevents TR with Spore; Frosmoth enters, nearly KOs Appletun with Hailstorm, and a Moonblast puts him to bed. Now I have no TR and an extremely ice-weak backline. I decide that if I'm going to continue desperately trying to thaw and set TR, I'd be better off sacking Tangrowth before my anchor.

If you said "now would be a good time for the AI to throw in a fucking hilarious manner" you'd explain why most really bad randos teams still succeed. Frosmoth would use its second turn of uninhibited rampage to Max Guard, which allowed Tangrowth to OHKO Shiinotic. Ditto would enter without Impostor, and be forced to choose Oranguru as Frosmoth uses its last turn to murder Tangrowth. But Guru finally wakes up at that crucial moment, and sets! Dhelmise finally gets to safely remove it, and Ditto would reset TR on top of winning the following speed tie, but its Foul Play is unable to KO Dhelmise and victory is mine.
Eisen briefly pondered why that one guy in gen 6 ever wanted to copy a number of Repto's sets. Having run out of tea, he switched to hot chocolate laced with rum, a 5%-95% mix.
> Miltank repeats the question of whom President Mewtwo will vote for in the upcoming election.
"I don't know," the chat leader says.
"Ah," you say. "You poor soul. Do you want to die of starvation and dehydration?"
"Stop!" he says.

> Miltank says "Vote Sharpedo 2020."

> Sharpedo uses Hydro Pump, taking death by dehydration out of the equation.
The chat leader screams as he gets drowned by the powerful stream of water.
"Thank you," he says.

> Sharpedo offers to spare President Mewtwo if he psychokinetically murders the chat leader.
"I'll give you thirty seconds," you say. "One... two..."
Mewtwo stares at the chat leader, who begins to feel uneasy.

> Sharpedo says "Three"
Suddenly, the chat leader's body begins to vibrate, as if his skin is being electrocuted.
"Ah!" he says. "Stop! Stop! Ah!"
Eisen noted that, according to the TV Guide, Pokemon Menagerie: Political Dissonance was rated for ages 3+.
:bronzong::krookodile::grapploct::magnezone:
I was surprised by the meager damage to a Corviknight with full-powered Lash Out that I briefly considered that debuffs from teammates didn't affect the damage, but a calc showed that they did. Bulky birb.

:jellicent::coalossal-gmax::exeggutor::escavalier:
This team suffered its first loss, capping an otherwise very long and successful streak. Cooper would lead dmax Lucario, who would not inflict much damage to Coalossal but pass attack boosts onto ally Dracozolt, allowing Bolt Beak to easily destroy Jellicent and then Coalossal the following turn. Were Lucario not sashed, I would have at least kept Coal around and probably have won. Exeggutor would outspeed and KO Dracozolt, revealing it was set1 using Dragon Tail, and Passimian would set up enough Bulk Ups to prevent my taking it down after dealing with the Pangoro beside it.

I gave them a retry and it was mostly quite smooth. Hestia would prevent TR again with a Shiftry LO crit Leaf Blade, but that was my only loss and Coalossal easily finished them. Leon's only source of damage would come from Rime's Icy Wind.

:jellicent::charizard-gmax::gardevoir::runerigus:
Rillaboom1 can't even OHKO Jellicent with a crit Grass Pledge in terrain (lol) and Durant would Twave Charizard, allowing it to easily outspeed a backline Copperajah. Runerigus generally made a great switch for Zard from bad leads... ...until Darmanitan greeted it eight battles in, and ripped me apart with multiple consecutive crits. The team was given a retry and finished easily, including trolling Leon with hax- Dragapult's Meteors missed, Wyrmwind crit Zard putting it into range for a weak Scald KO, and everything to hit Jellicent tripped Cursed Body, which included Shadow Sneak and Sucker Punch. Cinderace resorted to using Feint of all things for damage.

:bronzong::barbaracle::escavalier::turtonator:
I ended up recording this entire run and, while it was done in 37 minutes, I declined to edit it and speed it up to drastically reduce the runtime. I figure if people get bored or don't want to watch it, that's their choice.

The run was mostly very successful, with only two massive derps; I declined to look up sets for a Thievul to note that it could potentially Grass Knot Barbaracle, and I would use Max Knuckle on a Heliolisk at +0 when literally anything else would've OHKO'd and was punished. I also encountered Golisopod/Escavalier leads that put me in a bit of a spot, but because I really didn't like my switching prospects I ran with it and things weren't very smooth for the first few turns.

:comfey::crustle::vikavolt::centiskorch:
Semi-mono Bug TR continues to be very fun! Eva's Frosmoth would not dmax but instead freeze Comfey and, while Comfey failed to thaw, the team was still easily beaten in part due to a lineup that didn't threaten Centiskorch (including Escavalier.) Durant didn't attend Espeon's Ability Control Seminar and would use Entrainment on its own Mimikyu. AV Centiskorch would eat a Rock Weather Ball from Heliolisk and take only about half due to multiple Max Quake boosts. After the run I would hastily put Knock Off onto Crustle, as there were several instances I'd have liked it.

Leon's Rillaboom FO'd Comfey, and T2 Inteleon & Zard would KO Crustle, forcing me to attempt a Vikavolt sweep. Vikavolt managed to do it, though I was concerned again when Rime entered, as Inteleon had used Focus Energy the turn I took out Charizard. Rime indeed used FO, but on Comfey, so I wasn't forced to use Centiskorch (though in hindsight Centiskorch would've easily won.)

:aromatisse::charizard-gmax::gastrodon::pincurchin:
Raichu/Salazzle/Morpeko all used FO against Gastrodon in a single battle BUT THEY WERE ONLY DELAYING THE INEVITABLE. Claydol would alternate weathers with Solarbeam in its moveset, waiting to use it until Gastro had already murdered the rest of its team.

Coeurchin was the king of low rolls until Leon, and I was getting extremely dissatisfied with it. It couldn't finish off a weakened Gigalith and I'd have been punished had I not doubled into it with Aromatisse.

And that was all before Leon. Haxorus1/Seismitoad4 leads; Charizard immediately swaps to Gastro and Rock Slide flinches Aroma, on top of noting with great dismay that Seismitoad is Set4; I can't stay in and be Power Whipped, and if I bring in Coeurchin and set TR, what is it going to do to these leads? Very little. So I regrettably bring Zard back in, get critted by Rock Slide, and TR goes up. Seismitoad survives Moonblast plus Earth Power, kills Gastro, then succumbs to LO recoil. Cinderace enters, and I now have to finish three healthy pokemon with Coeurchin as my only damage dealer. Not unlike the rest of the run, it fucking misses a 50% OHKO on Cinderace and Aromatisse also fails to KO Haxorus, who pulls off a Breaking Swipe. Now in addition to rolling low, it gets a -1 to boot! I had a meltdown on Discord, saying I was going to have to gamble on HH Zing Zap managing to OHKO Leozard, but as it would turn out this was the only guaranteed OHKO available to it the entire run, even at -1.

Thinking more calmly afterward, the terrain plus ebelt, STAB, HH, and of course Zard being weak to electricity inflated the damage so much that the -1 was laughable.

:solgaleo::incineroar::dracovish::arctovish:
Does that look like an odd lineup? Would you believe the frontline consisted of the only two non Water/Ice pokes in the roll?

Hitmontop would land all three hits of Triple Kick for a whopping 21 damage total. Absolutely pathetic. Why does that move not do 20-40-60 considering the user? Aromatisse was back with Ally Switch, but because partner Durant was already at -1, the redirected attacks KOd them both regardless. Arctovish now runs Freeze Dry and actually used it quite a bit. Good move.

:hatterene-gmax::slowbro::magearna::heracross:
Slowbro evidently was determined to be as unhelpful as possible and not only tripped QDQC very, very, very rarely, it got a whopping single T1 proc on a target that ended up being Sturdy. The remaining procs were in the low single digits, at one point even being wasted as the Inteleon it tried to hit (who flinched twice with Waterfall for good measure) used Sucker Punch, winning the first turn anyway. As if that weren't enough, the one fucking time it was more beneficial NOT to proc, so Hatterene could set terrain with Mindstorm, it did, meaning E-force dealt the minimum amount of damage to one target.

Unfortunately for Slowbro that was as useless as it got, as otherwise its type coverage and excellent TR speed forced it to do the dirty job of OHKOing numerous enemies. There was also a lot of Magearna +2/3 Dazzling Gleam abuse.

:aromatisse::snorlax-gmax::politoed::kommo-o:
This run was for the most part completely effortless, though Leon would lead Grassy Surge ape and Haxorus, and the nightmare scenarios began. Hax4 easily prevents drumming with CC, and Rillaboom34 are able to threaten Snorlax in the same way, or simply FO Aromatisse. But as it'd turn out, Ape2 used Protect and Haxorus would Outrage into Aroma, and thus yet another brutal sweep took place.

:dusclops::dracozolt::grapploct::copperajah:
This roll was chock full of Ground weaknesses, including Incineroar and Coeurchin. Since Gravity was there, I ended up replacing Dracozolt's Wide Lens with Room Service, and this worked out especially well. I also wasn't missing my attacks, though I expected there to be a few instances. Using HH to OHKO a Greedent with Bolt Beak T1 felt very satisfying.

I faced a Ditto that would have copied Copperajah were it Impostor, which could've gone very badly. Leon would crit Dusclops with Shadow Ball and then crit Copperajah with Rillaboom's Drain Punch, but it didn't prevent my elephant from OHKOing both Dragapult and Haxorus, leaving Dracozolt the easy task of removing Zard/Rillaboom without dmax.

Holy shit, 40 teams in a single dump! I don't bring my laptop to work, so I had the idea of rolling EVELYN many times at once, and simply copying the log into notepad to peruse while playing at work. Due to the virus severely reducing the number of planes coming to our base, I often had a lot of time to play, doing as many as six runs in a single day.
Unmercifully, the movie was still playing as Eisen closed the final tab on the rando dump. Drunken and feeling somewhere between angry and confused, Eisen slowly turned toward the television screen. Wanting his neighbors to share in his misery, he unmuted and cranked the volume up to full.
> Sharpedo was really the villain all along!
Sharpedo quickly shatters the Wailmer eyeballs, and pushes Miltank off his back.
"Why are you doing this?" Sharpedo asks.

> Sharpedo assassinates President Mewtwo and assumes control of the United States in the new White House built in Shark Heaven.
Mewtwo attempts to stop Sharpedo, but is beaten badly.
"How did you know I was going to do that?"
"Trust me," Sharpedo says. "I'm the bad guy here."

> Miltank agrees to this offer and is Vice President of Shark Heaven.
"I'm not like the others," Miltank says. "I'm loyal."
"Good, because I need a reliable person," Sharpedo says.

> Sharpedo raises the national debt by trillions by spending it on weapons he intends to use to destroy the remaining clones of President Mewtwo.
"Who will pay for this?" the public asks.
"The debt will be paid by others, who have no choice," Sharpedo says.

> Sharpedo becomes paranoid that Miltank will double-cross him and assassinate him.

> Miltank approaches Sharpedo, milk gun concealed in her hoof.
"I have a plan to assassinate you," Miltank says.
"Do tell," Sharpedo says.
"You are very trusting, and you have been so for a reason," Miltank says.

> Sharpedo uses Destiny Bond on himself, as a trump card, not to be confused with the shitty move known as Trump Card.
"If you try anything, I'll kill you," Miltank says.
"Fair enough," Sharpedo says.


Last edited:
Water
I gave this a lot of attempts, and it can definitely do better. My highest number of wins before my first heal is 36, but I had a hard time turning that into 90+, which was my goal (I think 100 is stretching it, but it's physically possible).
Ee8ZqpiUMAMLmS-.jpg

Note: A slash in the sets indicate that I tried using an alternate move or item and found it to be viable, but the move or item that comes before the slash is the one I used in this run.


Gyarados @ Shell Bell
Ability: Moxie
EVs: 4 HP / 252 Atk / 252 Spe
Jolly Nature
- Waterfall
- Bounce
- Bulldoze / Earthquake
- Power Whip / Crunch

Gyarados: Gyarados is good, you probably know this. Its STAB Flying options are limited to Hurricane (16 PP - not viable with its low Special Attack) and Bounce (8 PP). I tried using Ice Fang (24 PP) instead to increase my PP, but always ended up really missing Bounce's coverage and (STAB) power. Additionally, the Hail is annoying. There are a number of threats to this team that are eliminated by bounce that wouldn't be eliminated by Ice Fang, some of the most notable ones are Exeggutor and Amoongus. You might be able to make Ice Fang work, but I didn't find it good enough to include in my suggested alternative moves. I did a lot of runs with Crunch (24 PP) and found it to be a viable alternative to Power Whip (16 PP) with its 8 additional PP and decent coverage. I also didn't really like that my opponents were benefiting from Grassy Terrain while I wasn't. Ultimately I think Power Whip is superior, and my best run used it. Bulldoze (32 PP) was what I happened to be using on my run, but Earthquake (16 PP) is what I started with. I think Bulldoze is slightly better due to its PP, but your mileage may vary. I found ways to dump Bulldoze PP without sacrificing anything (for example, to finish off something that I was never able to OHKO - in fact, if you're facing a special attacker you should use it first to boost your Special Defense).


Gastrodon @ Leftovers
Ability: Storm Drain
EVs: 252 HP / 4 Def / 252 SpD
Calm Nature
IVs: 0 Atk
- Surf
- Earth Power
- Toxic
- Recover

Gastrodon: Even without any Special Attack investment, Gastrodon can utilize Surf and Earth Power very well, especially after getting a Storm Drain boost. Why Surf and not Scald? The reason Toxapex uses Scald is that it can burn Poison and Steel types. Since Gastrodon already has STAB Earth Power for both, I see no reason to use the weaker Scald. I didn't try it myself for that reason, but it's definitely an option to consider. Recover and Toxic are pretty obvious. I ran a specially defensive Gastrodon to go with the physically defensive Toxapex. Storm Drain is incredibly useful. Also, I wonder if another mudboi could be used instead.


Toxapex @ Black Sludge / Rocky Helmet
Ability: Regenerator
EVs: 252 HP / 252 Def / 4 SpD
Bold Nature
IVs: 0 Atk
- Scald
- Baneful Bunker
- Toxic
- Recover

Toxapex: Scald to burn Poison/Steel types, and to occasionally apply pressure. Baneful Bunker so that you can stall out Toxic, and occasionally poison something with it (be aware that it's normal Poison rather than Toxic, so it takes more turns to KO) in order to save a Toxic PP. Recover and Toxic are obvious. You could try Iron Defense, but it clashes a little bit with the swapping strategy. I ran a physically defensive Toxapex to go with the specially defensive Gastrodon. The main reason for this is because Baneful Bunker requires contact, and contact moves are almost always physical (you can poison Froslass with it when it uses Draining Kiss though!). You could certainly try swapping Gastrodon and Toxapex's specializations, but I can't really see a good reason to. Regenerator is mandatory with this sort of build. Black Sludge is what I used during my best run, but I actually slightly prefer Rocky Helmet for its ability to more quickly take out Pokemon that make contact.

--------------------------------------------------

This team isn't very complicated. You'll need to always look at calcs though. Okay, so I'm gonna stop saying that now, because it's true for every type. And it's way more important than in past gens' Battle Facilities imo. I only started using a calculator in the last 3 or 4 types I've done and if you really want to push things as far as you can, you should use one (this is the one Eisenherz made - just make sure the SwSh option is checked in the top-right and the RS sets should come up).

Basically if something comes out and Gyarados can OHKO it, you do that. Otherwise, you play the swapping game between Toxapex and Gastrodon. The main way for it to get complicated is when you have Gastrodon or Toxapex out, and something comes in that can beat both of them. Off the top of my head, you have Exeggutor (Solar Beam and Psychic), Elgeyem (Energy Ball and Psychic), Gallade (Leaf Blade and Psycho Cut), Garbodor (Seed Bomb, Stomping Tantrum, Toxic immunity), Vileplume (Giga Drain and Toxic immunity), Amoonguss (Giga Drain and Toxic immunity). The latter two can't really beat Toxapex, but you can't really kill them and will waste ALL of your PP if you try to PP stall them. If one of these comes out to GastroPex and you still have your Dynamax, you can usually switch to Gyarados, Dynamax, and take it out. But that necessitates keeping Gyarados topped off, so I found that to be more important than a lot of the other lead sweepers on my teams.

Most of Toxapex's healing comes from swapping with Regenerator, and most of Gastrodon's healing comes from Recover. Thus, Recover PP will always be more precious on Gastrodon. You should always be stingy with PP. If you use Rocky Helmet on Toxapex, oftentimes just a Baneful Bunker poison will be enough and you won't need to spend a Toxic PP. There are so many Pokemon that you can just use Toxic on and then swap between GastroPex without doing anything else. One such example is Golduck (of course, Gyarados can also OHKO it with Max Overgrowth, but to maximize wins you'll need to do a lot of Toxic stalling). Just put up a Toxic and swap. After it tries to hit Gastrodon with a Surf, it will only use Ice Beam on it due to the Water immunity. Toxapex easily heals Ice Beam with one Regenerator swap. And when Toxapex is out, Golduck will use Surf, meaning when you swap back into Gastrodon you'll take no damage and get Leftovers recovery. Gastrodon's two immunities mean you can very commonly swap into it, take no damage, and get Leftovers recovery. This is important because it conserves Recover PP.

The other thing that's important is that there are a number of Pokemon that can only be handled by Gastrodon or Toxapex. An example of the former is Gardevoir (Psychic Terrain and Psychic), and an example of the latter is Abomasnow (Wood Hammer) (though with a crit, Abomasnow can break through Toxapex). In these cases you won't be swapping and will be relying on using Recover/Surf/Earth Power or Recover/Baneful Bunker/Scald.

Speaking of GastroPex's attacking moves, Gastrodon itself has 40 PP between Surf and Earth Power. Using them right will be hugely important. I try to avoid using Toxic and then Surf or Earth Power against the same target, but against hard-hitters you might have to apply some pressure so you don't get damaged faster than you can heal (this also applies to Scald on Toxapex, but it hits much more weakly than Gastrodon does). But there will be many opportunities to skip the poison and just Dynamax and OHKO with Surf or Earth Power (for example, Sandadconda, which has potential to be annoying for Gyarados with Quick Claw and Coil). Gastrodon is commonly Dynamaxed, but it's also common to swap it out mid Dyanamax, because so many things wall the Water and Grass combo - mainly Grass types.

The thing I like most about this team is its typings. Gyarados is weak to Rock and double weak to Electric, and Gastrodon resists one and is immune to the other. Toxapex is weak to Ground and Electric (note: also Psychic), and Gyarados is immune to one, and Gastrodon the other. Gastrodon is double weak to Grass, and the other two take Grass damage neutrally. Always use these to your advantage when swapping, especially the immunities. The additional Storm Drain on Gastrodon comes in handy very often, even without swaps. As I mentioned in a different post, trainers will use Water moves against Gastrodon until they see it has immunity. But when Gastrodon isn't out, they will use water moves (but only if they don't have something better against Toxapex), so you can swap in and get a free Leftovers plus another turn of Toxic.

One final note: On this team, it is important for your Pokemon to be as close to full HP as possible at the end of a battle. Doing so greatly decreases the chance of your walls being broken through by an unfortunate matchup. If you're trying for a huge number of wins, you'll want to spend time recovering HP on Gastrodon and Toxapex without using any PP. The aforementioned Golduck is a great example of an opportunity to do so. Miltank is another, as it only has Water and Electric moves. Just keep in mind that when a Pokemon runs out of PP on one of its moves, its behavior is going to change, and that can sometimes be deadly.

One final final note: be careful with Mr. Rime and Dubwool. They'll poison your Gastrodon with Copycat if you aren't careful. You'll probably want to poison them with Toxapex instead, and not swap to Gastrodon until another move other than Copycat has been used. Against Dubwool specifically, you can then use Scald and swap into Gastrodon to get one or sometimes two Storm Drain boosts.

Hopefully I will at some point in the near future post a 90+ win streak with this team. But I needed to move on. I finished my Dark streak and will hopefully post that tomorrow, too.
 
Last edited:
Pikachu makes for a very interesting choice for Mono Electric if you're tired or don't want to use Draco spam. No wonder Pikachu manages to stay in the upper tiers all throughout Smash Bros...

Anyways, everyone knows that Pikachu hits like a truck when it has a Light Ball equipped, and Pikachu has some of the better movepool options out of its Electric brethren, so people have always been trying to make it work in some capacity. Base 90 Speed actually isn't bad in this Dexit world we're in right now. If you do want to use Pikachu, you'll definitely want that Google Spreadsheet open. so you can input damage ranges in the Damage Calculator or see who you do and don't outspeed. (Timid Pika will outspeed the Modest Volcarona and Rash Zororak, but will never outspeed the Tauros)

I messed around with a Special variant with Thunderbolt/Surf/Grass Knot/Draining Kiss, and there were a lot of rounds that just ended in complete sweeps. I opted for Draining Kiss because as it heals 75% of the damage delt as opposed to 50% and Pikachu has a really small Base 35 HP, it gives the lil rat some good sustain. Pikachu can land a lot of OHKOs, but of course problems start to arise when you DON'T land the OHKO since Pikachu is hilariously frail, even in Dynamax. BTW, Dynamax is better than Gigantamax in 99.99% of situations because setting up your own Electric Terrain actually does make the difference between 2HKOs and OHKOs (timid nature), like against Kangaskhan for example.

It can also become a problem if Pikachu switches out because it is very hard to switch back in due to its paper thin defenses. A slow pivot like Vikavolt can make for a great partner for Pikachu due to its reliable recovery and immunity to Ground moves. All and all, I'm having a lot of fun making an Electric team centered around Pikachu. A physical variant Pikachu also makes for a good choice due to his higher physical attacking stat. I haven't tried it out yet, but it's expected that if Physical Pikachu is chosen, you'll either need a reliable partner to dispatch (Water)/Ground types or forego one of your moves for Grass Knot. Luckily, an uninvested Max Overgrowth still OHKOs the specially defensive Seismitoed in Restricted Sparring. Physical Pika also has some interesting snowball potential with Max Knuckle, but because of its Physical STAB being Volt Tackle, you'll only be using this Pikachu when Dynamaxed.
 
Last edited:
Pikachu makes for a very interesting choice for Mono Electric if you're tired or don't want to use Draco spam. No wonder Pikachu manages to stay in the upper tiers all throughout Smash Bros...

Anyways, everyone knows that Pikachu hits like a truck when it has a Light Ball equipped, and Pikachu has some of the better movepool options out of its Electric brethren, so people have always been trying to make it work in some capacity. Base 90 Speed actually isn't bad in this Dexit world we're in right now. If you do want to use Pikachu, you'll definitely want that Google Spreadsheet open. so you can input damage ranges in the Damage Calculator or see who you do and don't outspeed. (Jolly Pika will outspeed the Modest Volcarona and Rash Zororak, but will never outspeed the Tauros)

I messed around with a Special variant with Thunderbolt/Surf/Grass Knot/Draining Kiss, and there were a lot of rounds that just ended in complete sweeps. I opted for Draining Kiss because as it heals 75% of the damage delt as opposed to 50% and Pikachu has a really small Base 35 HP, it gives the lil rat some good sustain. Pikachu can land a lot of OHKOs, but of course problems start to arise when you DON'T land the OHKO since Pikachu is hilariously frail, even in Dynamax. BTW, Dynamax is better than Gigantamax in 99.99% of situations because setting up your own Electric Terrain actually does make the difference between 2HKOs and OHKOs (jolly nature), like against Kangaskhan for example.

It can also become a problem if Pikachu switches out because it is very hard to switch back in due to its paper thin defenses. A slow pivot like Vikavolt can make for a great partner for Pikachu due to its reliable recovery and immunity to Ground moves. All and all, I'm having a lot of fun making an Electric team centered around Pikachu. A physical variant Pikachu also makes for a good choice due to his higher physical attacking stat. I haven't tried it out yet, but it's expected that if Physical Pikachu is chosen, you'll either need a reliable partner to dispatch (Water)/Ground types or forego one of your moves for Grass Knot. Luckily, an uninvested Max Overgrowth still OHKOs the specially defensive Seismitoed in Restricted Sparring. Physical Pika also has some interesting snowball potential with Max Knuckle, but because of its Physical STAB being Volt Tackle, you'll only be using this Pikachu when Dynamaxed.
It's funny you mention this, I was thinking about Pikachu in sparring earlier today (well I suppose it's not that peculiar, there is a Pikachu raid event right now...). As far as physical Pikachu goes, I was thinking it would be better if you could get your hands on one of the old event ones with Fly. This is both super useful coverage and gives the always useful Airstream. Dig seems like a good pair after that for Max Quake (Knuckle is also an option, but idk how annoying that would make opposing Electrics), and then probably Grass Knot for Max Overgrowth, both for healing and Ground coverage. I'm not sure how well that would do uninvested, though, especially considering the importance of EV investment for Pokemon with low bases. The coverage and utility seems pretty solid with this set, except maybe against Dragons. Obviously you run Dedenne to counter these.

How useful did you find Draining Kiss? I noted that it learned that, but I struggled to see what it could actually use that on and net health from.
I found Draining Kiss to come in handy against the Dragons that would otherwise force Pikachu out. Draining Kiss itself won't be OHKOing anything (you'll have to Max Starfall for guaranteed OHKOs. When it comes to Kingdra, both Max Starfall and Max Lightning are ranges, but Max Starfall has the higher range (48% opposed to 18% chance). Although if you already have Electric Terrain set up, then Max Lightning is guaranteed. I think overall having Draining Kiss take up a moveslot really depends on the two other Pokemon you have in reserve.
 
My next project was Ghost, and at first I was mainly interested in Shedinja. That being said, I don't think it really does much without Baton Pass, and that requires a Gen 3/4 exploit to obtain. I don't have the chain necessary to transfer that over myself anymore, so I briefly tried to obtain one somewhere else, but honestly for as interesting as Shedinja is I wasn't sure it was optimal (I know Eisenherz is working on Ghost and experimenting with Shedinja, and somehow, I have a sneaking suspicion he will prove me wrong). While slow Baton Passing Agility (Lagging Tail) and/or Hone Claws can completely trivialize a number of fights, Shedinja is theoretically complete dead weight versus threatening Pokemon. But at the same time, Mimikyu is a ridiculous lead, and given its unique ability I wasn't even sure what was actually problematic for it - maybe most of them were Pokemon Shedinja could handle. So I whipped up a quick, relatively offensive team to suss out Mimikyu's issues, and, well...


Serendipitously, it just worked. This wasn't my first run, but even on my second I got pretty close to this.

Mimikyu @ Lum Berry
Jolly/Disguise
4 HP/252 Atk/252 Spd
Shadow Claw/Play Rough/Drain Punch/Swords Dance

It's Mimikyu. You Swords Dance and use 3 Max attacks, and that's most battles. I tried something a little different though, with Lum Berry instead of Shell Bell. My thought process was that Mimikyu "takes" significantly more attacks than any other lead due to Swords Dance, and thus invites significantly more opportunities to get statused. In practice, this assumption turned out to be correct and then some. The AI definitely recognizes that they don't need to use their strongest attack to break Disguise, and seemed to weigh moves with secondary effects equally with the strongest one. For example, Lycanroc-M and Dusknoir will both very often use Fire Punch on Disguise instead of their STAB, inviting burn chances. Granted, I think I only used it on one leg of this streak. But even if I never trigger it, it still lets me play more dangerously in certain situations. Take Milotic and Musharna. Milotic is a huge risk without Lum Berry - you can try to SD and dynamax, but there's a 30% burn from Scald. You can be "safe" and Starfall immediately for Misty Terrain then KO it with another max move, but this is a pretty bad situation - 2 dynamax turns burned, no Disguise, no attack boosts. But with Lum you can safely go for the Swords Dance and likely still keep the Lum, but no big deal if not. Now for Musharna, which is a big issue as a Trick Room setter that can't be OHKOd by a raw Phantasm. But it also likes to spend extra turns using Psychic Terrain and Yawn, the latter of which is a huge issue without Lum. But with it, you can SD once or twice and KO it, potentially even with Disguise still up, and the Trick Room can either be utilized versus faster Pokemon (I never had the opportunity, but it would be funny), or stalled out with Max Guard.

The obvious downside, though, is that you lose Shell Bell. To offset this massive loss of healing, I ran Drain Punch. On average, it worked pretty well for staying alive, but its inconsistency can be problematic. When I take a hefty hit, it leaves me with few battles to find a target to heal off of, compared to the more consistent healing of Shell Bell. I've definitely had to get, shall we say, creative, at times to stay alive. As a damaging move Max Knuckle doesn't get any extra OHKOs, but the attack boost is, as always, useful, especially for some of the Steels that plague Mimikyu. Klinklang for example can just be 2HKOd by Max Knuckle while taking the horrendous Gear Grind with dynamax HP, leaving me with +2 attack and a turn of dynamax left, which is pretty good for Klinklang. Getting to +3 can let Mimikyu KO some bulkier foes, too. Admittedly, I didn't try the usual Wood Hammer, but I can't say I missed the Grass coverage that much. The biggest issue by far with this Lum/Drain Punch set-up though is that it has 8 less attacking PP than Wood Hammer, and Mimikyu often burns though all its attacking PP. Still, I feel like in theory it's very hard to get a streak of this length without Mimikyu getting hit by some random status and thus the importance of Lum Berry.

Dragapult @ Shell Bell
Naughty/Clear Body
252 Atk/44 SpA/212 Spd
Phantom Force/Dragon Darts/Fly/Fire Blast

Dragapult is the obvious choice for a secondary sweeper, though to be honest I wasn't super thrilled by it in theory. It didn't seem especially strong, and had no good boosting or healing moves. Oh, how wrong I was. This thing owns. Its STABs don't get a lot of super-effective coverage, but they're a lot stronger than I expected, OHKOing damn near anything without defensive investment. The speed is also incredible, making so many Pokemon I'm usually scared to see complete pushovers, like Weavile and Cinccino. And all things considered its durability isn't that bad, especially since it has no 4x weaknesses. I opted for the slightly weaker max move with Dragon Darts instead of Outrage, since it's much more useful outside of dynamax which is nice for picking up KOs for optimal Shell Bell healing. I think Braviary is the only thing I've encountered that made wish I had Outrage, as it's a 75% range with Darts!Wyrmwind. Airstream's speed boost isn't too useful here, but it helps edge out KOs on a lot of random things weak to it that have defensive investment.

For the last slot I originally had Psychic Fangs before realizing this was a worthless option. In fact, my second streak was 77, and I was fine with that numerically. But my biggest reason for topping it? Sparing myself the embarrasment of having Psychic Fangs Dragapult on the leaderboard. I'm not exaggerating it being worthless either - literally nothing required it on that 77 streak, and the 41 before that. Anyways, going mixed with Fire Blast is way better. This OHKOs Scizor, Cloyster (this is what needs the power boost over Flamethrower), Perrserker, Tangrowth, and Skarmory/Steelix/Magnezone (if no Sturdy, and Magnezone is still only a 75% chance). Also once I Max Flared a "Magneton" that was Zoroark that Eject Buttoned out, then later was able to OHKO the real Magneton because of the sun, which was awesome. I lose a slight amount of bulk going mixed, but it's definitely worth it.

Clear Body is obviously nice for Intimidate, but what I also found surprisingly useful about it was nullifying the speed drop from moves like Bulldoze. These are awful for Mimikyu, since -1 speed Mimikyu with no Disguise is precarious even with an SD. But at least for Goodra and Wailord, Dragapult can pretty safely switch in and take the reigns. Mamoswine on the other hand...

Decidueye @ Leftovers
Timid/Overgrow
4 HP/252 SpA/252 Spd
Giga Drain/Shadow Ball/Hurricane/Nasty Plot

And here's the off-kilter option that actually worked really well! I was looking for offensive Ghosts, and I thought Decidueye was interesting because it could set up with SD and get an Airstream (Brave Bird) for speed. But then I thought, it's not any bulkier than Dragapult, it's weaker, and even with an Airstream (never mind the inflexibility of having to get one) it's slower. It didn't seem worth it at all, until I remembered I could use its slightly weaker attacking stat and use Giga Drain instead, which was a game-changer. This lets Decidueye switch in on a lot of things - especially physically bulky ones Mimikyu and Dragapult dislike - and set up 1 or 2 NPs while healing up to full, or close enough. And some things are passive enough that I will have enough HP after NP to safely use Airstream to KO, which is basically a guaranteed sweep. But even without that, 70 speed is still reasonably fast with investment, and even if I don't get an Airstream on the lead I can get one on the second mon, where I also you don't generally have to worry about the secondary goal of keeping health topped off with Giga Drain.

Threats

:torkoal: : The absolute worst. Mimikyu can't KO this at +2, I risk burns from Lava Plume, and with or without Drought Lava Plume hurts. If I don't get burned on the first one, I can 2HKO with Starfall and Phantasm to protect against the second burn chance at least. Dragapult hates this too and is forced to risk a burn, and I can't switch in Decidueye to much effect.
:klinklang: : A range for Mimikyu at +2, and Gear Grind is REALLY bad. Knuckles help here as mentioned earlier, but it's still not great. Shift Gear would be particularly bad vs Mimikyu, but I've never seen it use it. Dragapult also can't OHKO this and takes some damage.
:froslass: : Lum Berry helps a lot versus this, but it's still bad. Will-o-wisp's burn is obviously bad, and Poltergeist does like 60% even in dynamax. One potentially funny interaction is that if Lum is spent and I have Misty Terrain up, this is actually not very threatening. I never saw that happen though.
:scizor: : If this uses Dual Wingbeat then Bullet Punch on Mimikyu, it does like 90% total even with the Dynamax HP buffer for the second hit. It can just use SD on turn 1 in which case it's no issue, since it gets OHKOd by +2 Phantasm. But an attack on turn 1 is very bad.
:skarmory: : This is pretty similar to Scizor in practice. Dual Wingbeat beats up Disguise for a lot of damage, and while it has no priority it just survives Mimikyu at +2 anyways. But similarily to Scizor it might just waste t1, in this case with Spikes.
:magneton: : It's Magneton. I can 2HKO this with Knuckle to get to +2 and let Lum deal with the Twave, but I still hate seeing it. And Dragapult has basically nothing.
:magnezone: : I can SD then 2HKO with Knuckle even with Reflect up, giving me a net of essentially +1 with no Disguise, which is...doable. And Dragapult has reasonable odds to OHKO with Fire Blast, so this isn't as bad as Magneton.
:rhyperior: : This is usually fine as a lead, as it's unlikely to start with Heat Crash (Sandstorm instead), so I just SD and 2HKO in dmax, likely keeping Disguise up due to messing up the AI trying to Heat Crash on t2. But seeing it in reserve? Absolutely awful. Rock Wrecker does incredible damage even in dynamax, so at +2 with no Disguise I'm either dead or in a terrible position. Dragapult's not a fan either.
:gyarados: : Survives at +2 even without Intimidate. Scald and Icy Wind are both awful for Mimikyu too. Decidueye can switch in and take basically no damage with Giga Drain, but leaves it at -1 speed from Icy Wind, which also prevents it from using Nasty Plot due to Taunt. Not a good situation to be in.
:cinccino: : This does a billion damage with multi-hit moves to Mimikyu and unforunately SD+Drain Punch is just not safe. Immediate dmax into Starfall is the safest play but it's not great. Knuckle is a 75% range and honestly I think it might be worth going for, no Disguise, missing health, dmax started, and no boosts is a terrible position to be in.
:mamoswine: : Pretty unfortunate, I can KO it at +2 but it breaks Disguise with Icy Wind which isn't nice. Unlike other Pokemon with these kinds of moves though I don't have a good switch in so I just have to take it.
:boltund: : This does a lot of damage, or it can waste time with Electrify and then just do that damage anyways. Thinking on it more, I should probably let it break the Diguise and get some health back with Drain Punch, then take advantage of its more consistent AI with no Disguise and go to Dragapult, since both Wild Charge and Electrify should be fine on the switch.
:corviknight: : PP is definitely more of an issue with Ghost than other types I've used, and boy can this waste a lot of it if it gets Pressure, Taunts, and doesn't want to Steel Beam.

The Run

To start, I'll say this team is pretty different from my previous two, as it's not really meant as a cohesive unit. I lead Mimikyu until it faints or runs out of PP, then I lead Dragapult until it's too dangerous to proceed, both with switches into Decidueye whenever possible. Since Mimikyu's PP is such an issue, this includes Pokemon like Lanturn that Mimikyu can set up just fine on, so that Decidueye can save it the PP. As such I basically separate each leg of a run into a "Mimikyu phase" and a "Dragapult phase". A good Mimikyu phase lasts around 20 battles, and a good Dragapult phase around 10. So a consistently good run could theoretically get up to 90, though of course the notion of a consistently good run is silly.

Anyways, this wasn't a run I had much faith in; in fact, it was going to be my last run before I just accepted the 77. So I accepted my first heal at 23 (I was aiming for at least a 25-50 progression), which had a good Mimikyu phase of 19 battles, and a bad Dragapult phase of only 4 (ouch). Honestly I don't remember exactly what happened, I think it started with Poliwrath and I just kept getting mons Dragapult couldn't OHKO on the 4th battle that Decidueye wasn't good versus either. So that was unfortunate.

The next leg was of similar length to 44, but with an awful Mimikyu phase instead. Again I don't recall exactly what happened (if only there were some sort of feature that you could record batles with...), but Mimikyu got hit hard by something and I just couldn't find something to heal off of Drain Punch in time. It fainted around batle 35, but thankfully Dragapult came through better with 9 battles before I healed.

If you quickly do the math though, you'll see that my last leg was incredible, going up to 36 battles. It was looking pretty bad at first, with Mimikyu nearly having a repeat of the second leg around battle 53. It got down to 16 HP, the amount of HP Disguise breaking loses. I had some leeway since it could break in dynamax, but it still felt hopeless to me. But then I ran into lead Seaking. Every time I've fought it it's used Bounce, a 2-turn move. So I hoped it would use it and used Swords Dance, and it did. Unfortunately I couldn't SD again (huge shame as it's OHKOd by +4 Drain Punch), so I Max Guarded. I OHKOd it, then Weavile came out. It could have ended my life right here with Triple Axel, but thankfully it used Shadow Claw instead so Mimikyu survived with 16 HP dynamaxed and KOd with Max Knuckle. And what should come out but a deliciously juicy Beartic, an easy OHKO for Mimikyu that brought up its health to 65% or so.

From there, Mimikyu went on to shatter what I considered a good Mimikyu phase, going all the way to battle 72 before running out of PP. There were definitely a lot more Pokemon for Decidueye to set up on this run, which helped a lot. I just needed a good Dragapult phase to close this out. It went smoothly until battle 79, where I ran into the dreaded Torkoal which burned me with Lava Plume. Thankfully I didn't dynamax (Dragon Darts+Wyrmwind is a likely KO), so Decidueye was able to mop up albeit without set-up. The second mon was something faster that I OHKOd, and thankfully the last was Seismitoad which I Max Guarded twice versus (second failed) to heal up with Giga Drain. Battle 80 led with Ribombee which I couldn't set up Nasty Plot on, but I could OHKO with Airstream. Unfortunately Moonblast got its typical special attack drop, though Airstream still OHKOd. But then Azumarill came out, which I could no longer do over 50% to except with Overgrowth, risking Sap Sipper. I risked it to avoid Belly Drum, but it was Sap Sipper so drum it did. It used Aqua Jet (no Huge Power thankfully), and I got a merciful crit with Phantasm to KO it. Last was Conkeldurr, and I started with Giga Drain so I could survive Stone Edge, but it used Bulk Up instead, so I was still in KO range. That was my last Giga Drain (Decidueye's extended use in the Mimikyu phase left it very low PP-wise), so I had to use Hurricane and hope for a crit or confusion. I got the confusion, but it didn't hit itself and instead used...Bulk Up again. At that point I used my last Shadow Ball to finish it. I only had 2 Hurricanes for battle 81 so of course I had lost, but I got further than expected - both Butterfree and Toxicroak went down to Airstream. And the final Pokemon I Nasty Plotted against until I fainted was Beartic again. What it giveth, it taketh away...


The only time Decidueye ever ran out of attacking PP

Overall this was a much more offensive team than I'm used to, but it definitely showed off the absurdity of Mimikyu. I was also pretty happy Decidueye worked out. Fun fact: if only for this brief moment in time, all 3 of the Alola starters are on a top-ranked team! Though amusingly none are in their typical starter types.
 
Last edited:

Eisenherz

επέκεινα της ουσίας
is a Forum Moderatoris a Community Contributoris a Tiering Contributoris a Top Social Media Contributor Alumnus
Moderator
I love how many of us have come up with different strategies for Ghost, including stuff like Trevenant and Decidueye, and they all worked nicely! I have a Ghost streak of my own to submit, a team I made for a silly attempt at first, which turned into my highest streak thus far...!

Pokémon Sword-Shield Screen Shot 2020-08-11, 2.43 AM.png


–––––––
S E T S
–––––––
@

Jolly | Disguise
IVs: 31/31/31/31/31/31
EVs: 52 HP / 252 Atk / 12 Def / 4 SpD / 188 Spe
Swords Dance / Play Rough / Shadow Claw / Wood Hammer

@

Modest | Flash Fire
IVs: 31/0/31/31/31/31
EVs: 44 HP / 4 Def / 252 SpA / 12 SpD / 196 Spe
Flamethrower / Shadow Ball / Energy Ball / Clear Smog

@

Brave | Wonder Guard
IVs: x/HT/31/31/HT/0
EVs: 252 Atk / 252 SpD

Shadow Sneak / Toxic / Agility / Baton Pass

––––––––––––––––––––––
T E A M B U I L D I N G
––––––––––––––––––––––

Right away, I knew I wanted Mimikyu at the front as the main Shell Bell sweeper, because it's just so incredibly good at it, and I didn't see anything in Ghost that had the potential to be better. Then, I immediately turned my attention to Shedinja, in no small part because of that set Blitzamirin used in his streak, which I thought had a lot of potential. It took me a while to realize both Baton Pass and Swords Dance needed to be acquired through an old glitch which made it impossible to get both on the same set. I didn't like Shedinja's potential for safely sweeping, so I opted for the former, and figured Agility was probably the best thing it could pass to help out a sweeper. Somehow, I missed the fact it could get Hone Claws in Gen 6 (sb879 pointed it out as I was doing this streak!), which is probably the best option and would pair incredibly well with Dragapult... oh well, next time maybe!

When looking for things that could make good use of the Agility, my attention went to Alolan Marowak, and I actually tested it out early on, but I needed something that could also have a decent chance at sweeping without the Agility, and Marowak's base speed was just too slow. That's also about the time I realized what a threat Froslass was to the team, and Chandelure stood out as both a great Agility recipient and something that could switch into a Will-O-Wisp and, with a Scarf, handle Froslass in a whiff. I guess things sort of came full circle, since Chandelure was already included on Blitzamirin's original team!

The main "Chandelure mode" of the team was designed a bit later, though, and it's a bit gimmicky, but somehow it works: using Shedinja to get things in range with Toxic/Sneak, slowpassing an Agility (it's important that Shedinja be slower than the foe even at +2), and then finishing off the lead with Max Ooze. This sets Chandelure to +1 SpA and +2 Spe, which is usually all it ever needs to sweep effortlessly through anything (well, Sturdy exists, I guess.....). In some runs, I was able to get off a lot of these sweeps, sometimes more than half of the leg was this, but in other legs Mimikyu did almost all the work; it really depended on the leads I got.

:mimikyu: Mimikyu has been used a lot in RS by now, and there is little left to be said. If you'll be using a Shell Bell, I think this is the best moveset. I customized the EVs to squeeze a little bulk out of it. It outspeeds Obstagoon and Drapion, missing out only on Dedenne which is setup fodder for Shedinja, and Emolga which does very little damage with Electro Ball.

:chandelure: To make sure I'd take advantage of Agility, going Modest 252 SpA was a no-brainer, and I cut the speed to outspeed base 80s (Scolipede, Gallade and several more with that same speed in RS) in Dmax in case it finds itself without speed boosts (happened a bunch of times), while outspeeding Weavile by 1 point with the Scarf, and obviously everything with an Agility. The whole Max Ooze setup worked a lot better than I had anticipated at first, but didn't come into play as much as usual in this run!
There was a moment, after maybe 5 runs, where I put the Scarf into question. I had only seen 1 Froslass that entire time (and most practice runs went quite far, the team was pretty consistent), and when I switched Chandelure into it... it went for Poltergeist! Chandelure survived on 1 HP, which was literally the min roll lol. This did, however, save the run at that time, because without the Scarf, I still had no way of dealing with it. But I thought maybe I should just hope for a no-Froslass run eventually and ditch the Scarf for Leftovers, making Chandelure's staying power so much better, especially since it can heal for free by switch stalling things with Shedinja thanks to Flash Fire. But that 1 Leftovers run was cut short by... a Froslass. Which went for Will-O-Wisp into Mimikyu. Without the Scarf, I couldn't revenge KO, and that was it... so, the Scarf came right back! This record run did feature one Froslass, but it came as Chandelure was fully setup with Agility, so no issue!

:shedinja: Ahhh Shedinja, meme machine extraordinaire, beloved child of low ladders throughout formats and generations, but also, a powerful tool when utilized mindfully. I'm not too sure where this run stands in that regard, maybe somewhere in the middle!
Shedinja connoisseur supreme Level 51 kindly scanned the full RS roster for what it could wall, and while I expected more, the result was still promising: 62 sets, which is 41% of the roster! Granted, some of these involve stuff like stalling out Sucker Punch PP or having Safety Goggles, but that's not much of an issue.

Whenever running into a Magneton, Shedinja can be paralyzed at absolutely no cost, wall Magneton and setup all over it, and even break Sturdy before taking its leave with Baton Pass! Once Paralyzed, Shedinja becomes the ideal status absorber. For my "Chandelure mode" strategy though, this had both an upside and a downside: the paralysis meant I could setup Agilities in front of more foes without outspeeding them, allowing me to use this mode more. But if I put the foe on a timer with Toxic to put them in range of Max Ooze, I need to Baton Pass on a specific turn, and full paralysis could screw that up any time, and worse, leave me with Shedinja in to face the next foe, which is a horrible idea. But generally, since Shedinja was only in on things that couldn't touch it, full paras were not an issue, and were sometimes beneficial to preserve PP.

Speaking of PP, one of Shedinja's big upsides is the gigantic reserve this moveset offers. Baton Pass has a whopping 64 PP, and both Agility and Shadow Sneak have 48, allowing me PP stall things such as Toxapex with a Baton Pass every other turn until it's out of attacking PP, and still be left with a lot of PP by the end of it.

Despite this set proving successful, I do believe Hone Claws + Baton Pass is the most powerful combo Shedinja can offer, though Hone Claws' low-ish PP means the recipient shouldn't need more than a couple to accomplish sweeps. This seems promising for both future Mono Ghost runs and perhaps Mono Bug as well!

(oh, the 252 SpD is just to ensure giving P2/P-Z an Atk boost with Download)

–––––––––––––
T H R E A T S
–––––––––––––

:zoroark: Two of my most promising runs ended to this, and there's just nothing to be done. It once disguised itself as a Dunsparce that seemed to kindly allow Mimikyu a second Swords Dance (necessary to OHKO with Overgrowth), until Foul Play came out. The next time, it was disguised as a lead Scizor, which is an instant switch to Chandelure for me; Night Daze OHKOd, and the rest is history. Stuff like that is really frustrating, you can't really prepare. I guess I'm lucky I never went Shedinja on a Zoroark, but that would've been bound to happen eventually.
:froslass: I already mentioned Froslass above... It can Will-O-Wisp Mimikyu, which is a run-ender, but can also OHKO everything else with Poltergeist. Given my 2 interactions with it, my current theory is that it's more likely to Poltergeist Mimikyu if Disguise is up, but Will-O-Wisp if it's not, or if Mimikyu is Dynamaxed and Poltergeist doesn't have a guaranteed KO. Not enough instances to test it, but that's the assumption I was planning on working with for my future encounters.
:coalossal: / :tangrowth: / :talonflame: Cramming the worst Dynamax stallers together; Mimikyu gets so much milage from the higher power of max moves, and sweeping outside Dmax is so much riskier, and those make that happen. Not many things trigger me as much as a successful double Endure from the AI...
:boltund: ...but this takes the crown. Whenever I try to outplay Electrify, it attacks. Whenever I attack, here comes the Electrify!!!!! And suddenly it's in Terrain, at +1 Atk, a turn of Dmax has been stalled, and if Disguise has been broken, it does so much damage on the next turn. It also flinched me with Fire Fang twice while breaking Disguise as I was trying to SD, just for good measure I guess. The set is genius, but it's the most frustrating thing to face.
:palossand: There's no switch-in for a Poltergeist if it's a lead. But it likes to Scorching Sands on Mimikyu, instead... 30% chance to lose outright. Not fun.
:pyukumuku: The usual. Unless Shedinja is paralyzed, then it's happy days all over town!

–––––––––––
T H E R U N
–––––––––––

I streamed the entire run on Twitch (thanks to everyone who showed up!), so I won't go into much detail. However, the first two legs of the run were pretty rough and definitely substandard for this team. I got a 35+ 1st leg from this team more than once before, but I was barely able to go above 25 before the first heal, in large part due to misplays. The second leg was ok, but featured very few occasions to use Chandelure, which led to quicker PP depletion for Mimikyu, and another shorter leg. I healed around 55 I think, but the 3rd leg went incredibly well!

Mimikyu went down at 87, which would have been a pretty good run already, but then Chandelure decided to show up for work, and without a recovery item, it just swept and almost depleted its own PP (including Clear Smog!), carrying the team for 13 battles straight! How I wish it could have done just 1 more, but lead Mantine was horrible news already, and while I managed to handle it (thanks for your sacrifice, Shedinja!), I had to Dynamax, and Cinccino came 2nd, ready to outspeed and finish it off with Rock Blast.

Here's the VOD for anyone interested – you'll have to click it to watch it on Twitch since something seems wrong with the embed on the forums. I'll probably cut it into 3 and upload it to YouTube later, at which point I'll just edit this!


–––––––––––––––––––––––––––––––––––––––––––––––––––––––––––––––––––––––––––––––––––

Uhhhhh I still have a month-old Mono Bug report to write. I'm not too enthusiastic about it since I forgot a lot of what I wanted to write by now. I guess I might make it a short one after all (my draft was pretty lengthy!). But for now I'm ready to plunge into Mono Dragon!
 
Last edited:
Uhhhhh I still have a month-old Mono Bug report to write. I'm not too enthusiastic about it since I forgot a lot of what I wanted to write by now.
This, exactly, with Dark.

Sorry this took so long, I've been putting it off because I've been grinding with a new Bug team. I did this run a while ago, and I've used the team a few more times recently in an attempt to remember what I did with it, however I struggled to get anywhere near 67 wins again with it. I may have just gotten lucky. Anyway, since it was a while ago this will be fairly short.

Dark:
Ee8ZqpgU0AU0pvM.jpg


Krookodile @ Shell Bell
Ability: Moxie
EVs: 4 HP / 252 Atk / 252 Spe
Jolly Nature
- Earthquake
- Crunch
- Low Kick
- Aerial Ace

892-gi.png


Urshifu-Gmax @ Choice Band
Ability: Unseen Fist
Gigantamax: Yes
EVs: 252 Atk / 4 SpD / 252 Spe
Jolly Nature
- Drain Punch
- Wicked Blow
- Thunder Punch
- Iron Head


Mandibuzz (F) @ Leftovers
Ability: Overcoat
EVs: 252 HP / 4 Def / 252 SpD
Calm Nature
IVs: 0 Atk
- Dark Pulse
- Iron Defense
- Toxic
- Roost

This team is similar to Photon's. The main differences are the usage of Urshifu-Dark over Incineroar, and a different Mandibuzz set. Usually when I make a team with two sweepers and a support Pokemon, I find it hard for the second sweeper (the one without the Shell Bell) to be significantly useful, since they often struggle to stay healthy. My thought for Urshifu was to swap it in to something weak to Fighting, in order to use its very potent Drain Punch, aided by a Choice Band, to get most of its health back after taking a hit. After that, I could Dynamax to use whichever moves I needed for the following threats. It sounds great on paper, but you also need Drain Punch to buff your attack in Dynamax, so the 16 PP runs out pretty quickly. I thought about using Low Kick as well, but Thunder Punch was very important for the Flying types that counter itself (and also Krookodile to a degree), and Iron Head was very important to beat Fairies. Wicked Blow was my last move, as it's very strong with a Choice Band, and can break right through anything buffing its Defense (like Sandaconda). The only problem with Wicked Blow is it's rather underwhelming in Dynamax, since it loses the 100% crit effect, and it also loses the Choice Band power.

Krookodile has been talked about a bunch. It's quite good, but it has a lot of weaknesses. I think the reason Photon used Incineroar with it is that it resists Ice (which Krookodile and Mandibuzz are weak to) and is neutral to Fighting and Fairy, which most Dark types are weak to. Anyway, I changed my Krookodile's moveset around a few times, based on what my team was needing, and ultimately arrived at Crunch/Earthquake/Low Kick/Aerial Ace. A Steel move and a Rock or Electric move are good options, but I gave them to Urshifu instead.

Mandibuzz was very useful. Krookodile and Mandibuzz are a pretty great combo. Mandibuzz can run a bulky set and gets hit neutrally by Fighting moves, and it also resists the Grass moves that Krookodile is weak to. Additionally, Krookodile is immune to the Electric moves that Mandibuzz is weak to. The big problem with this combo is both are weak to Fairy and Ice moves, the latter of which was quite threatening to my team. Fairies weren't as bad, as Mandibuzz can mostly deal with them. Urshifu can as well, but only if it's already in the battle. Sometimes Roost's secondary effect can be useful, and sometimes it can be detrimental. Just be sure to always keep the loss of Flying typing in mind when using it.

I originally ran Knock Off/Bone Rush/Toxic/Roost on Mandibuzz. I ran Bone Rush because it hits the Toxic-immune Steel and Poison types super-effectively. I probably don't have to tell you that it wasn't very strong. So I replaced it with Iron Defense, which was very useful as Mandibuzz isn't one of those tanks that is constantly swapping. The rest of my team was physical, so I was still having a hard time with stuff like Tangrowth and Steelix. That's when I decided to use Dark Pulse, since it has a snowball effect in Dynamax (which I used on Mandibuzz fairly often), by dropping the target's Special Defense. This was incredibly useful for Steelix (which I ran into a lot for some reason) and similar physical walls. I did miss the knock off effect of Knock Off, however. Dark Pulse's flinch chance has proven to be useful too, but the real selling point is the snowball effect in Dynamax.

From what I remember, Mienshao and Sirfetch'd are probably this team's biggest problems. Depending on situations, those can be auto-losses. The bulky Fairies are annoying, but I found them to not be as bad as one might think. Ribombee, however, is terrible, unless you have a +1 from Airstream. As mentioned, this team is also weak to strong Ice moves but I can't remember any specific Ice threats, since my two sweepers both have Fighting moves. Golisopod is scary, but usually I would just swap into Mandibuzz for it (again, be careful using Roost). The usual status spreaders (Froslass, Drifblim, Passimian. Luckily Krookodile is immune to Magneton's Thunder Wave) are annoying if not deadly too, but when are they not?

Hopefully I'll have a Bug report soon.
 
Last edited:
I’ve been playing a fair bit with Shedinja after reading in this thread a few weeks ago about its ability to learn Baton Pass. I grabbed one to combine with Toxic to see how it would do as a staller/boost passer, initially with Harden. Although Agility looks interesting, even at +2 Shedinja's still slow enough to underspeed most things.

I got 53 wins in Ghost with Mimikyu, but couldn't really settle on a 3rd team member, so I switched over to Bug to try out Heracross after seeing it's fantastic runs, and Volcarona as the obvious to cover the fire weakness. There are still a few threats, some more manageable after re-doing Volcarona's EVs, but if everyone's healthy only really Sirfetch'd and Scizor are automatic 'someone has to die' threats.
I got a few in the 70's and 80's, I nearly posted here but all ended or had legs ended by my own mistakes and I wanted to see how far was possible when I didn’t screw it up. I switched from Harden to Hone Claws, after a brief trip back to Gen 4 to get a new Shedinja, and after a few runs managed to pull off this...

Record.jpg


THE TEAM

:ss/Heracross: @ :Shell Bell:

Jolly – Moxie
IVs – 31/31/31/XX/31/31
EVs – 4HP / 252Atk / 252Spe
Pin Missile / Bullet Seed / Low Kick / Rock Slide

Not much to say that hasn't been already!
Rock slide takes out a lot of Birds/Bugs that Shedinja can't handle - :Braviary: :Centiskorch: :Scolipede: :Volcarona: :Butterfree: :Mantine: :Pelipper:
Aerial Ace, while good for the speed boost, would be more valuable if it OHKO'd a lead Sirfetch'd, but it annoyingly misses out on that and isn't guaranteed even if you go with Adamant nature. Left him at simple max attack/speed as that outspeeds Zoroark, and it's nice to get lucky now and then!

:ss/Volcarona: @ :Leftovers:

Modest – Flame Body
IVs – 31/0/31/31/31/311
EVs – 132HP / 108Def / 156SpA / 100SpD / 12Spe
Quiver Dance / Roost/ Bug Buzz / Fiery Dance

I used a simple Timid Max SpA/Spe to start with, until the datamine became available and I re-EV'd. Initially had Giga Drain over Roost, but for this team I think Roost is better, even if it restricts your attacking PP. Volcarona is used to manage threats to Heracross that Shedinja can't handle, not as a secondary sweeper. Roost helps that, particularly if a physical attacker gets burned by Flame Body, instead of trying to heal by shoehorning a grass attack in against something just to give you a fraction of Roost's return.
EV's to switch in to Froslass and survive 2 Poltergeists, switch in to Dusknoir and take a Fire Punch/Shadow Punch combo and OHKO with Max Flare, and switch in to Boltund and outspeed after 1 QD. If either of these get burned by Flame Body then Roost comes in to play.

:ss/Shedinja: @ :Safety Goggles:

Brave – Wonder Guard
IVs – XX/31/XX/XX/XX/0
EVs - 252Atk
Toxic / Shadow Sneak / Hone Claws / Baton Pass

Love this thing, makes so many annoying/powerful Pokemon a non-event. It underspeeds all but 7 sets, 6 of which it doesn't want to face anyway. You're frequently either able to remove the first foe with no fuss and go 3 vs 2 with a boost headstart, or switch in and clear up the final one, pausing to switch-heal Volcarona back to full health on the way.
Default is Toxic, Baton Pass, Switch back, Hone Claws, Hone Claws, Baton Pass - giving Heracross a +2 headstart on whatever comes out 2nd. Subject to things with healing moves or Toxic immunity who get whittled down before Hercross finishes them off.
Something not explored in the Scarf-Chandelure run is how great slow Baton Pass is with leftovers recovery – you’re able to heal Volcarona back up to full at the expense of a handful of PP and a few minutes of switching. Especially important as a lot of lead threats need her at full health, so is she's taken a hit or 2 a 'friendly' 3rd Mon is a godsend.
A few other points...checking abilities as well as movesets is important and don't forget things like Dedenne/Cramorant/Luxray which have Atk/SpA lowering moves. I've poisoned a Synchronise Musharna, Shadow Sneaked a Garbodor with Aftermath and Baton Passed Heracross -6 Attack when not paying enough attention...I even managed to get burned by a Porygon2 that traced Flame Body and then converted to Ghost type...
And don't forget if something has set up entry hazards!

THREATS
There are things that sponge up more than 1 turn of dynamax, or behave differently if Heracross is low health but the below are the biggies.
:Skarmory: - Heracross can 2HKO but you lose if it has Weak Armor, Volcarona needs to be at full to switch in and Fiery dance, but if it has sturdy you lose her.
:Passimian: - Heracross needs to be +2 to OHKO and Volcarona doesn't appreciate paralysis or Acrobatics, but unboosted Max Flare is a OHKO.
:Scizor: / :Sirfetch - Heracross needs to be at +2, if not then choice between it and Shedinja, one has to be sacrificed.
:Zoroark: - hope you get lucky and Heracross takes it out!
:Dusknoir: / :Boltund: - As leads need Volcarona at full health to take 2 hits or risk getting Heracross burned and wasting dynamax turns and a chunk of health.
:Froslass: - faced this loads of times and it's never tried Will'o'Wisp for some reason. Still a switch to Volcarona just in case and hope for either W'o'W or no crit.
:Pyukumuku: - ugh.

THE RUN
The first leg was quite uneventful until the last 8 or 9 battles other than battle 14, where Magneton paralyses Shedinja. As previously noted this can be a bit of a result as long as you're careful not to get stuck in while Toxic stalling. Lead Skarmory shows up in battle 15, it’s not sturdy though, so Volcarona takes a hit and takes it out.
Begin to sense the RNG is taking a dislike to me from battle 40 though, with 2 skill link Cinccino’s, Emolga, Gale Wings Talonflame, Turtonator and Alakazam all leading...with Passimian and Sirfetch'd showing up too.
40 - :Cinccino:
41 - last Toxic used vs :Barraskewda:
42 - :Emolga:
43 - :Cinccino:
44 - :Talonflame: Gale Wings, with Heracross at 1/3HP. Volcarona gets to show off with Roost and Quiver Dance, coming out +2 at full health without touching it thanks to Sticky Barb. (Future runs could do with more Def EVs to guarantee surviving a crit) 2nd comes Passimian...a big threat if Heracross had been at +1 after taking out a non Gale Wings Talonflame!
45 - :Turtonator: big threat/annoyance if I went with something other than Volcarona, who gets a free setup while it uses Shell Trap.
46 – :Dubwool: gets me to +3, enough to take out :Sirfetch when he comes out 2nd.
47 – :Alakazam:
Take the heal after this as I'm paranoid about only having 1PP of Rock Slide left, here’s the full PP status
Volc PP.jpg

Hera PP.jpg

Shed PP.jpg

Battle 50 - Magneton paralyses Shedinja even earlier this leg!
Battle 57 - Alcremie explodes 1st move as I switch to Volcarona, which it's never done before. Lycanroc-M comes out and I land a 25% OHKO chance with no safe switch, followed by Mantine throwing it away by failing to Rain Dance and missing 2 Hurricanes lol.
Battle 76 - lead Scizor means bye-bye Shedinja, and Golduck leaves Volcarona at 50% HP so I use the 2nd heal rather than risk going further. Volcarona only had 5 Attacking PP left anyway.

Shedinja has now spent 59 battles of this run paralysed!

Leg 3 was as generally uneventful as leg 1, with threats only showing up when Heracross is boosted enough to deal with them easily and ample opportunities for Shedinja to heal Volcarona when needed.
Battle 82 - Skarmory, as I switch to Volcarona it uses Spikes (possibly as Heracross was dynamaxed so out of KO range?) It has sturdy so Volcarona takes a hit and luckily gets a Fiery Dance SpA boost, otherwise Octillery would have been more of a problem!
Battle 102 - Shedinja runs out of Toxic/Hone Claws.
Battle 108 - Heracross uses his last Rock Slide against Drifblim.
Battle 123 - Lead Volcarona comes out and Heracross is helpless without Max Rockfall. I sacrifice Shedinja to get Volcarona in and use the last 6 Quiver Dances. She only has 2 attacking PP left though, enough to take Volcarona and Rhyperior out. Don’t quite get the struggle KO on Blissey, but it does faint the same turn as Volcarona thanks to a Flame Body burn.
Battle 124 - Klinklang gets Heracross to +2 to sweep.
Battle 125 - Appletun is taken out before Starmie finally brings things to an end!

Fair to say Heracross put a good shift in…
Hera.jpg


In conclusion, Shedinja is awesome, if obviously all or nothing. Able to easily remove something and pass on a boost, or completely useless and you're reliant on the other 2, which isn't too bad when they're as good as these 2. And when partnered with Volcarona, they are able to cover a lot of what Heracross doesn't like.
There's also this beauty...
252+ Atk Shedinja Shadow Sneak vs. 0 HP / 0 Def Alakazam: 126-150 (103.2 - 122.9%) -- guaranteed OHKO
Though I've never got to take advantage of this!

And the leader boards don't lie, Heracross is an absolute beast in this format - Moxie, STAB that Boosts Attack, Grassy Terrain healing, great coverage and a crapload of PP.

Believe it or not I think this team can go better (the 2nd leg was 'only' 28) but I'm sure it will take a LOT of attempts to replicate the amount of luck I had in what's faced as a lead, or when Heracross is at 'just' +1. I've become mildly obsessed with Shedinja and done a lot of runs now and it is ridiculously frustrating to see a lead Scizor/Sirfetch'd rock up and ruin everything just after a heal, and I can't believe how few of these I ran in to. One lead Skarmory and a Scizor who ended leg 2 is as bad as it got, and not a single Pyukumuku the entire run!

Thanks for reading, not sure if I’ll try Ghost again straight away or have a rest from Shedinja and try some more ‘regular’ teams!
 
Last edited:
Guess I was like an hour late to writing this.

After much Scizo- I mean grinding, I'm happy with my new Bug streak. Thanks to Eisenherz for the idea to use Baton Pass on Shedinja, and sb879 for the idea to give it Hone Claws (which is a TM in Gen 6). I caught it in Gen 4 and transferred it to Gen 6 and then to Gen 8.

Bug
Efqc0oyUMAEqrjP.jpg


Heracross @ Shell Bell
Ability: Moxie
EVs: 4 HP / 252 Atk / 252 Spe
Jolly Nature
- Low Kick
- Bullet Seed
- Aerial Ace
- Rock Slide

I decided I couldn't live without both Aerial Ace and Rock Slide, so I tried out a set without a Bug move and it's now my favorite Heracross set. Fighting/Bug/Grass/Rock can hit all but 42 RS Pokemon super-effectively, while Fighting/Flying/Grass/Rock can hit all but 35 RS Pokemon super-effectively. I feel I need Aerial Ace because using it on turn 1 or 2 can completely neutralize some of the faster threats, especially Boltund(!) and Alakazam (Starmie and Ribombee as well, but those can be handled by Shedinja -> Durant). It also allows you to OHKO Passimian and Sirfetch'd with a +1 in Attack, and allows you to hit Vileplume and Amoonguss super-effectively.


Meme Ant (Durant) @ Leftovers
Ability: Hustle
Shiny: Yes
EVs: 12 HP / 252 Atk / 244 Spe
Jolly Nature
- Iron Head
- Bug Bite
- Thunder Fang
- Stomping Tantrum

We know that Hustle is a great ability in Dynamax, but in RS you still sometimes have to use moves outside of Dynamax, and that can occasionally be disastrous. With a +1 in Accuracy, all moves that have a base 95% Accuracy or higher are guaranteed to hit outside of Dynamax. This is a pretty huge advantage. Typically when I would swap in Shedinja, I'd pass +1 to Durant and KO the first Pokemon outside of Dynamax just in case the second or third Pokemon has sturdy or is Miltank and can't be OHKOd. It never took Durant more than 4 turns to sweep a team of 3 with a +1 passed to it. Leftovers allows you to heal by dry Baton Passing back and forth between Shedinja and Durant against a non-threatening Pokemon. On this team, Durant and Heracross actually have 8 attacks and 8 unique attack types.


Shedinja @ Safety Goggles
Ability: Wonder Guard
EVs: 252 Atk
Brave Nature
IVs: 0 Spe
- Baton Pass
- Shadow Sneak
- Hone Claws
- Toxic

As has been said, there are a large number of Pokemon that it can switch into and do whatever it wants. Unlike Dobbly, I baton-passed Hone Claws into Durant rather than back into Heracross. Shedinja is weak to Dark, Ghost, Flying, Rock, and Fire, but it's also threatened by Pokemon with certain moves, abilities, and items. I made a list of these, however it may not be exhaustive. This list is also assuming Safety Goggles as an item. And yes, I got screwed over by a bunch of these. That's why I made the list.

Druddigon - Mold Breaker
Pinsir - Mold Breaker
Eldegoss - Worry Seed
Accelgor - Spikes
Skarmory - Spikes
Dragalge - Toxic Spikes
Comfey - Leech Seed
Gardevoir - Synchronize (Toxic)
Beheeyem - Synchronize (Toxic)
Musharna - Synchronize (Toxic)
Mr. Rime - Copycat (Toxic or Shadow Sneak)
Dubwool - Copycat (Toxic or Shadow Sneak)

On contact:
Toxapex - Rocky Helmet
Gyarados - Rocky Helmet
Druddigon - Rocky Helmet
Falinks - Rocky Helmet
Coalossal - Flame Body
Volcarona - Flame Body
Talonflame - Flame Body
Centiskorch - Flame Body
Amoonguss - Effect Spore*
Eldegoss - Effect Spore*
Vileplume - Effect Spore*
Pikachu - Static**
Emolga - Static**


*EDIT: According to Bulbapedia, Effect Spore cannot affect a Pokemon with Safety Goggles. But if you're running any other item, those can be a problem with Shadow Sneak
**Paralyze from Static can be beneficial, but it can sometimes bite you in the butt when Toxic is ticking on your opponent

The origin of Meme Ant
When I was working on Heracross/Durant/Volcarona, I wanted to try out Rock Smash on Durant, so I booted up White 2 and went to whatever cave it was where it was found. I caught one but it didn't synchronize to Jolly so I went to catch another one (even though I'm not exactly short on BP for mints), and I got this:

IMG_20200627_231834.jpg


I called it Meme Ant (at the name rater) because I originally was going to run Metal Claw/Bug Bite/Rock Smash/x. My earlier Bug run didn't use it, but I wanted to use it for this one, even though Rock Smash was pretty pointless for a team where it gets Hone Claws boosts. So I got rid of Rock Smash and tried out Metal Claw/X-Scissor/Thunder Fang/Stomping Tantrum. Metal Claw is more than strong enough with a +1 (it even OHKOs Slurpuff in Dynamax without a boost), but it turns out that you will run out of Hone Claws before you run out of Metal Claws, so I ended up using Iron Head/X-Scissor/Thunder Fang/Stomping Tantrum. My best leg overall had 54 wins (but that run ended at 66 wins), and this is what Durant looked like when I decided to call it. Clearly, it had plenty left in the tank, but Shedinja was now out of Hone Claws. If this had been a 3rd leg, I would have kept going and possibly broken 60. Heracross got burned on battle 54 by Torkoal's Lava Plume, and it still had about 20 PP left.

EfRdhxjUEAAQ-D7.jpg


Here he is in all his glory. I think the shiny looks awesome in Dynamax.

EfqwWNqUYAA5AZz.jpg


The Run
I don't take notes on successful runs like you guys do, because that would require taking notes for every attempt. But I do know that Leg 1 had 42 wins, Leg 2 has 24 wins, and Leg 3 had 47 wins. Leg 2 was cut short by swapping Shedinja into Zoroark, and Leg 3 was cut short by swapping Durant into Zoroark. However, I still managed about 10 wins afterward until Heracross PP'd out and I had to Struggle. Unfortunately, the last Pokemon I faced was a Lunatone, so I couldn't pass any Hone Claws for the Struggle. Also of note, a Scizor came out 2nd on battle #100, but I had a +2 on Heracross and Max Knuckling it was probably the best feeling I've had so far in Restricted Sparring.

Threats
Dobbly mostly covered it one post up. I don't really see Froslass as a threat because it doesn't use Will-o-Wisp on Heracross (because it can have Moxie? I dunno) and Durant outspeeds it and OHKOs. Passimian and Sirfetch'd are both a bit easier with Aerial Ace, since you only need a +1 to OHKO, but they are still basically run or leg enders as a lead.

Skarmory also might be a bit easier for my team since Durant takes DWB pretty well and can 2HKO (and oftentimes Skarmory will use Spikes on turn 2). Durant can also OHKO Skarmory with a +1 as long as it doesn't have Sturdy. I swap directly into Durant against a Skarmory lead and as long as it isn't on low HP, it's usually ok. However, an additional problem is that after Spikes is out, you can't swap into Shedinja. So in the worst case, you've now used 2 turns of Dynamax and have only KO'd one Pokemon and can't swap into Shedinja. That means you're going to have to risk a Hustle miss... or seven.

I found Dedenne to be quite threatening too, since it outspeeds Heracross and can't be OHKO'd. Even though it can't hit Shedinja, you can't Baton Pass to Durant because it will spam Charm on Shedinja. Still, it probably won't end your run unless you were already in terrible shape. Dedenne is a good example, though, of where having the Special Attacker is advantageous. I'm sure there are many other small differences between our two teams, but comparing his threat list to mine shows there isn't a huge difference.

TLDR: Just grind until you get enough good matchups in a row.

Edited Shedinja threat list
 
Last edited:
Restricted Sparrings: MonoGhost: 38 Wins.
I know it's not much but this is my first run ever at this battle arena, and I would like to share the team I used.
1597839539518.png

1597839512730.png

Team used:
1597839730757.png

Mimikyu @ Leftovers
Ability: Disguise
Shiny: Yes
EVs: 252 Atk / 4 SpD / 252 Spe
Jolly Nature
- Wood Hammer
- Phantom Force
- Play Rough
- Swords Dance

1597839668820.png

Dragapult @ Choice Specs
Ability: Infiltrator
EVs: 252 SpA / 4 SpD / 252 Spe
Modest Nature
IVs: 0 Atk
- Fire Blast
- Thunderbolt
- Draco Meteor
- Shadow Ball

1597839700116.png

Gengar-Gmax @ Black Sludge
Ability: Cursed Body
Shiny: Yes
Gigantamax: Yes
EVs: 252 SpA / 4 SpD / 252 Spe
Timid Nature
IVs: 0 Atk
- Nasty Plot
- Encore
- Sludge Wave
- Shadow Ball

This is a very very offensive team. The idea is to lead with mimikyu, abuse disguise to set up sword dance, and then drop a +2 max move to KO everything. Leftovers recovery will help with the recoil from disguise. Dragapult is there to deal with steel types that mimikyu cant handle like corviknight or skarmory. Gengar can encore on mons that use status move like blissey, magnezone, ... to set up nasty plot and sweep.
Most of the time keeping mimikyu healthy is the key to win the game. However there are situations like P2 setting up TR, gyarados's icy wind, ... which make mimikyu slower next turn which is a problem. Usually I try to stall out the TR or try to preserve mimikyu's disguise for later.
So that's it. I hope you guys like it and I'll try to do more battles soon
 
The next type that caught my eye was Normal, because I wanted to use Wish with Obstagoon. Obstagoon's incredible power is of course offset by it literally burning through its health at light-speed, so I thought I could get it to work by integrating Wish. I liked Wigglytuff a lot in theory, because in addition to super big Wishes it could also safely pivot with Teleport. Even before playtesting I realized Wish+Teleport would have it take a lot of damage, so I used Stockpile to set up to +3/+3 on passive Pokemon, greatly reducing the damage I would take from the Wish+Teleport combo. While I wanted to lead with Obstagoon, it had the problem so many good potential Normal leads have: it gets wrecked by Mienshao. A lot of the Normal write-ups have mentioned it, but it really can't be overstated how awful Mienshao is. Even to the bulkiest Fighting-weak prospective sweeper, Diggersby, it does absurd damage (80+%) even in dynamax, and can flat-out OHKO if it rolls Reckless. So like doctordoak I opted to lead with Braviary instead, who gets a Fighting-neutrality and wonderfully-strong Airstreams.

Playtesting didn't go well, frankly. Wigglytuff had lots of trouble keeping its own HP up, and there weren't really as many Pokemon as I would've liked to pass Wishes from in the first place. Wigglytuff also has a nightmarish problem with crits, since its bulk is solid at best so ignoring its boosts is terrible. Not to mention, Wigglytuff is very slow so it usually can't set up boosts before whatever it switched in on attacks again. Obstagoon also wasn't as nice as I would've liked. It didn't really OHKO nearly everything as I expected, and the speed wasn't amazing either. And the burning HP proved to be too much even with Wish. I tried specializing Wigglytuff a bit more with Charm to focus on physical Pokemon, which helped a little but Wigglytuff still had too many issues. Using Charm also made me realize Teleport might not be strictly necessary, since I could switch into my Wish recipient relatively safely on a -6 attack mon. This got me to consider Wish Unfezant, who has similar physical bulk to Wigglytuff and Feather Dance, while having a real speed stat to use that before Pokemon attack, plus Roost to keep its own HP up better.

Of course, staring into the abyss that is Wish Unfezant made me consider that there might be a better team concept. Wish didn't seem unworkable (I think Porygon-Z would work better than Obstagoon in retrospect), but at best I got up to 29, though admittedly that was without a third leg at all. Still, that wasn't great. Braviary had been working pretty well so I kept that, but I looked for other options for the other slots. Bewear had actually originally caught my eye as a lead - 60 speed is surprisingly passable in sparring with investment plus it learns Aerial Ace, and of course its physical bulk is incredible, so a lot of hits are fine to take anyways. But thinking on it more, I realized it would work better as a set-up sweeper with Swords Dance and Drain Punch. The big issue Bewear would have were faster special mons, and these were surprisingly numerous with super-effective STAB - Starmie, Ribombee, and Alakazam. Of course, Normal has the most obvious answer in the world to special mons in Chansey/Blissey, so I went with Blissey. I realized I'd inadvertently came up with meddle's team concept from a while back, but hopefully I could get farther with it this time.


I did.

Braviary @ Shell Bell
Jolly/Defiant
252 Atk/4 SpD/252 Spd
Brave Bird/Thrash/Iron Head/Bulk Up

Braviary's stat spread is really nice for Airstream spam - solid 80 base speed that outspeeds most Pokemon, and from there it's easy to get an Airstream and outspeed everything. I kind of hate running Jolly as a result, but Passimian and believe it or not, Pikachu, leads are awful without it. The fairly high bulk for an offensive mon is also really handy, especially considering Braviary has no way to access or even benefit from Grassy terrain. Defiant is a wonderful ability as well - inverting Intimidate is one of the strongest feelings in the world. Braviary's coverage is kind of bad though, so I tried Bulk Up instead of a 4th attacking move and was pleased with the results. There's a lot of Pokemon you can pretty safely set up a Bulk Up on, and then you KO them with Airstream and have a very likely sweep that conserves your STAB PP, especially since even Steelspike gets a lot of neutral OHKOs at +1. I originally had Close Combat over Iron Head, but the PP was awful and most things I wanted Fighting coverage for it was better to switch to Bewear anyways. Iron Head is particularly nice for Crustle who was a huge shithead before, and nice for Solrock as well. It also has a lot of PP, and the defense boost comes in handy to minimize health loss when I'm going to miss an OHKO anyways.

This set's attacking PP is a little subpar (24+16+24) for streaks of this length, and Braviary does have some alternate options worth considering. While a hefty power loss, Wing Attack is still a potentially workable option with an amazing 56 PP. But, 140->110 max move is pretty terrible, so I don't think it's worth it. What is more workable is the Normal STAB, though. I actually think Strength of all options might be ideal. It has 24 PP and is a nice drawback-less 80 BP move outside of dynamax. That being said Thrash's downside isn't that notable for these situations anyways (usually last mon), so idk. Also it's a transfer-only move so ehhhhh


Bewear @ Big Root
Adamant/Fluffy
4 HP/252 Atk/252 Spd
Body Slam/Drain Punch/Darkest Lariat/Swords Dance

This switches in on most Steels and Rocks (and some other obnoxious physically bulky mons like Greedent and Miltank), sets up Swords Dance, and heals up with Drain Punch. It's not as consistent at sweeping as Braviary with a boost and it often takes some extra damage, but everything that would outright force it out can be handled by Blissey. Big Root is kind of a dumb item, but Leftovers and Shell Bell are in use so it's the best option to keep Bewear's health up. Leppa Berry might actually be optimal if you really wanted to push this team, though - Drain Punch has to be used at least once, often twice, virtually every time Bewear is used and it only has 16 PP. As for its other moves, Bewear is pretty limited in practice. Normal STAB is basically required since it needs another STAB to get through walls, as Knuckle is both weak and undesirable since it takes away Drain Punches. And from there it requires Ghost coverage, so Darkest Lariat it is. The defense-ignoring property is occasionally useful versus Cosmic Power Psychics Blissey pivots off of.

Blissey @ Leftovers
Calm/Natural Cure
4 HP/252 Def/252 SpD
Seismic Toss/Icy Wind/Soft-Boiled/Teleport

Rather than try to KO anything, this set is wholly dedicated to weakning the health or nerfing the speed of even vaguely problematic special mons before pivoting back to one of my sweepers with Teleport. Ideally Braviary gets its Airstream and goes off from there, but if dynamax is spent I find Bewear is a safer option to send out unboosted. While Eviolite Chansey has even the physical bulk to slowly mow through teams with Toxic and Seismic Toss, it is incredibly PP-inefficient. Even just doing this softening up I pretty consistently get low on Blissey's attacking PP. Since I'm not going to be switching it on physical attackers anyways (well, most of the time, there's some unfortunate edge cases where it happens), Blissey is a lot bulkier than Chansey since it can use Leftovers and takes so little damage from special attacks anyways. Icy Wind is mainly for speed control, but as a damaging move it can conserve some Seismic Toss and lets Blissey hit Ghosts. The only downside is Shield Dust Ribombee, where Thunder Wave would be better. But this only happens 1/3 of the time, and if Braviary is at good HP I just Teleport back and take the Moonblast for ~30% (some day I'll get that Defiant Moonblast satk drop buff). Otherwise Blissey just KOs it and prays a Fighting-type doesn't come in. That's a pretty uncommon sitation, though, and if no Fighting-type is sent out it's fine anyways. Seismic Toss is dependable damage with a nice 32 PP, but Toxic is likely better in a vacuum. Unfortunately, Seismic Toss is basically required for Magneton. Speaking of, Natural Cure is a godsend; Blissey gets statused like 5-6 times every leg.

Threats

:corviknight: : This might be weird as a top threat, but I really hate seeing it because outside of +2 Bewear it forces me to go to Blissey, who is then forced to KO it because of Taunt, unable to safely pivot out with Teleport. If I could safely wear out Taunt, I could switch to Bewear on a turn I expect it to reapply that and KO it. But, it usually just KOs itself with Steel Beam and Blissey has to pray no Fighting-type comes out, which is a bad, likely knock-out situation. Stuff like Kingler would be really bad too.
:kingler: : This is too strong and bulky for Bewear to switch in safely, and Braviary can't OHKO it unboosted. I also can't do the safest option of Steelspike+STAB since it doesn't consistently KO. I find setting up Bulk Up is the best option, but Crabhammer still does 50%, and it has 1/8 crit chance which blows. On the upside, it often uses Agility turn 1 so the Crabhammer is taken in dynamax instead.
:marowak: : This is really similar to Kingler, except I can do instant Steelspike as an option and it only crits 1/24 of the time. That being said I am irrationally annoyed at it because Marowak crits kneecapped two legs of an otherwise promising run.
:skarmory: : This is fine if it sets up some Spikes, but sometimes it just keeps attacking with Body Press. Bewear switches in and 2HKOs with +2 Drain Punch, but if it keeps attacking Bewear gets pretty low.
:froslass: : Because Braviary is so often at +1 speed, this is usually a non-issue. But if seen as a lead or when Bewear is trying to sweep it really sucks. Blissey can take the burn, but Triple Axel does way too much to then safely Icy Wind then Teleport. I can do a raw switch to Bewear instead of Teleport, but with Adamant -1 Froslass is a speed tie. I never did a ton of calcs to see what Adamant helped with (just that the apparent Pokemon Jolly would let me outspeed didn't matter), so it might be better to go Jolly just because of this. I also considered Bold on Blissey to help with this. Icy Wind+Teleport is potentially workable if I keep Soft-Boiling until at least the last hit of Triple Axel misses, and then I can just pivot to Braviary.
:garbodor: : Goes down easily with attack buffs, but otherwise a really shitty Gunk Shot has to be taken - strong with a 30% chance of poison.
:lickilicky: : Similar to Garbodor, but weaker and paralyzes instead.
:rhyperior: : Sort of dumb as a lead, since I'm not sure if it will Heat Crash as I switch to Bewear, but I also really don't want to dynamax and see Rock Wrecker. If I'm already in in dynamax then I know Heat Crash won't happen, so I just switch to Bewear on the Rock Wrecker and get up to +4 before Drain Punch OHKOs. It usually just Sandstorms after the recharge turn.
:pinsir: : Irrelevant with Braviary, but really stupid with Bewear if it rolls Mold Breaker to ignore Fluffy. Close Combat does almost 50% even in dynamax, and then it just swaps out with Eject Pack and I have to see it again. It can just SR, though.

The Run

The first leg was uneventful. All I remember is that Braviary fainted a few battles before it ran out of PP and Bewear had been used a lot, so this leg went for 24 battles, which is pretty good.

The second leg should have been a trainwreck by all accounts, but somehow it turned out passable. I think I needed to use Blissey for every single one of the first 9 battles, which left it at like 14 Seismic Toss and 6 Soft-Boiled fairly early in the leg, which was worrrying. But then things got worse as I ran into Mold Breaker Pinsir while trying to sweep with Bewear. It used one Close Combat for around half as it ejected into Klinklang who was thankfully slower, and then when it came back in it used SR. But this left Bewear at half health or so, and who should I see the next battle but Skarmory? I had one turn of dynamax left on Braviary when it came out, so I determined the best path was to Steelspike for the defense buff, then use 2 Bulk Ups and 2HKO with Thrash. But it used Body Press on all 4 turns, leaving Braviary with critically low HP while Bewear was still at half. This was battle 39 or so I think, and since my goal was 70 I really didn't want to take the heal and bank on a 31 final leg. So I pushed on. Against all odds, Braviary pushed through 3 or so battles with critical HP, taking hits but somehow staying afloat with Shell Bell. The most absurd one was a Whiscash outside of dynamax, where I resigned myself to death and used Thrash, but since I was low it used Zen Headbutt, which I barely survived instead due to Shell Bell healing. Braviary eventually fell to Lickilicky's Rollout, which was perfect since Bewear could safely SD and Drain Punch. Bewear+Blissey is a pretty workable team, but I either ran out of Drain Punch or something bad happened; I don't remember which. Either way I took my heal at 45, ending up with a decent 21 middle leg.

The final leg went on for a really nice 30 battles. As you might expect, most of it went smoothly. I recall burning through Airstreams a bit faster than I'd like, but nothing too bad. I did have a bit of a scare at battle 69, where Bewear had to KO something with no chance to set up SD and dynamax spent, and Amoonguss came in. Brave Bird doesn't even OHKO it, and it's really terrible to wittle down with Blissey due to Giga Drain, Ingrain, and Spore. I ended up stalling out its Giga Drains to do that, which is slightly better than it sounds PP-wise since a lot of turns were spent sleeping. I realized when Seismic Tossing that it had Effect Spore too, but I didn't really have any other option but to pivot back to Braviary and Brave Bird. Thankfully there was no status, but despite being at high health the recoil took me to around 40%. I then got crit by a Kingler, thankfully in dynamax, bringing me critically low. And then I got surprised by one of the stupidest Zoroarks of all time. When it imitates Wishiwashi, it doesn't even group up with Schooling so it's an obvious fake, but one that nevertheless went over my head. It KOd Braviary, but Bewear and Blissey got past the rest of the fight. I made a stupid mistake at battle 75 where I got overzealous with SD on Bewear vs Azumarill, forgetting it could paralyze with Body Slam. However, I got through that fight and almost all of battle 76, too. The last Pokemon was Lycanroc-M, but I had run out of Drain Punch so I used Max Darkness then Body Slam before fainting. It was at basically 1 HP, and Blissey had only a single Icy Wind to attack with. It was nearly a picture-perfect finish, except Lycanroc has Reversal so it was actually a picture of tragedy. Despite the references to pictures I did not, in fact, take a picture.

Overall I'm very happy with how this team worked out. I still want to make Wish work somewhere, but Chansey and Blissey have definitely been tantalizing options in sparring and I'm glad I made one of them work.
 
Last edited:
Rando Dump V
same stuff minus the fluff
Many new additions joined the roster prior to and during the runs, but unfortunately not all of them were able to be rolled at least once. I made sure to run any new additions if they popped up and always enjoyed it when they did.

On the Galar side, I became hellbent on having a shiny Sandaconda and the breeding process was so monotonous and miserable that I decided henceforth that any pokemon obtainable in a prior gen would be bred in USUM because of the increased speed and ease of Magikarp hatching, alongside swapping out the parent. Forget taking three or four days to hatch 1500 goddamn eggs.

Max Soup allowed me to have 0 speed Venusaur/Blastoise without needing a Mewtwo Farmer to RNG one, so shinies of them were first on the list. I also decided to breed a 0 speed Solar Power Charizard (the one I had used previously was miraculously 0 speed from a den I spawned myself) but wasn't entirely sure how I'd reliably activate the sunlight without running Torkoal, or using Max Flare as something else. The answer came to me almost immediately in my not-so-new favorite filler move user, Bronzong! No other setter besides the Ghost types has at least one move slot that can freely be changed, and Zong in this case had even fewer viable options, but it made as great a sun user as it did rain. I ran a couple test runs with it and loved the damage output, though Scorching Sands still leaves a bit to be desired (but is still so much better than Dragon Pulse.) Unfortunately Blastoise made out the worst, with the loss of Mega Launcher and most of its damage output. I loved Venusaur the one time I got to use it.

Kingler, Weezing, Excadrill & Diggersby came aboard as well. Besides the Mad Mole, I believe only Shedinja and Sandaconda have yet to be legitimately rolled. Their time will surely come.

Toxapex came out of Home and was tested for a single stretch of ten battles before being promptly shoved back in. Also prompt should be your own willingness to forget that I tried it. It looked fun on paper but is easily one of the trashier things I've used (I think I also talked Worldie out of trying it last gen) and I think even vanilla Sheer Force Mawile would be more consistent, not counting its reliability in dying while accomplishing nothing.

I've spent a while thinking about what I'll do once the Tundra dex is available, and I'm wondering if removing the Mythicals/Legends from the main flunky pool to be placed in their own separate pool would be better. Not only that, but configuring EVELYN to roll a chance on being able to use one in the first place, with 3/5 odds or worse. Or at least for some of them, as Jirachi is not terribly busted.
:jirachi::slowbro::mudsdale::braviary:
Galarbro was abusing QDQC greatly this time around, even netting three procs in a row. While this usually didn't matter in TR, it was doing so against a Pyukumuku with a clear speed advantage. That thing was still so bulky that Jirachi with +2 atk and Zen Headbutt in terrain still would have only managed a 3HKO without Slowbro. Ditto would later Impostor Slowbro and trip QD simultaneously with mine.

:comfey::machamp-gmax::centiskorch::drednaw:
Gmax Machamp's first foray into TR and I'm enjoying it, though because it's Guts/Florb I'm not enjoying the guaranteed-crit Stone Edge or Cross Chop outside those three turns, at least without Gravity. At some point I left the run to put Low Kick and Rock Slide on it, which predictably were more reliable. Leon would lead Aegislash, usually very bad for Comfey, but thankfully it went straight for KS.

I had merely swapped Comfey out of a Taunt and was not expecting to absorb an Overheat with Centiskorch. I was also a little dismayed to see both Arctovish4 and Mr. Rime1 survive a crit Guts-boosted Rock Slide, though as calcs would state, only Rime survived on a low roll. And it IS a stabless 75BP spread move...

:cofagrigus::kingler::lurantis::centiskorch:
First things first, Kingler is fucking insane. Not the gmax form, which is probably awful in TR, but vanilla Sheer Force Kingler. GF really pumped that movepool up for Swsh and I have lead with it each time it rolled. I passed on High Horsepower to fit Rock Slide/Hammer Arm/Knock Off in there, and haven't found myself wishing I'd had it. One thing that did get annoying as shit was overwriting Sheer Force T1, nearly always because something physically attacked Cofagrigus before being murdered. There were also a few instances of Liquid KOing a lead Runerigus, but at least I planned for that.

As a funny coincidence, Eisen had begun doing randos again, himself, and had lost with a team that morning to a disastrously unlucky encounter with Discharge Galvantula; on top of running a fully-physical team his frontline would be paralyzed and spend too much time in that state. What do you know, I was running a fully physical team (the fairly weak Shadow Balls on Cofagrigus didn't count) and ran into that same spider. However, in my case, the FP bullshit hax didn't start to occur until Lurantis/Centiskorch were facing the backline, and I was able to KO an Imposter Ditto before being left to sit uselessly in front of an Aromatisse which reset TR then spammed Dgleam, nearly as uselessly, into my AV Skorch.

Leon would run Haxorus4/Rhyperior34/Rillaboom4 and be solo'd by Kingler, though not without Ally Switch used repeatedly.

:bronzong::weezing-galar::flapple::conkeldurr:
So, yeah, the debut of Weezing. It's good fun but, predictably, not amazing. The good points are that it never had any trouble getting to +3 or even +4 and its coverage, while meh, still seemed to cover its bases well enough. I went with Dark Pulse and Fire Blast because they had useful side effects that wouldn't ruin Misty Terrain. The downsides are that it's still Weezing with 85 SAtk and because setting off WP safely pretty much requires Bronzong or Dusclops (I don't want Weezing eating STAB Psychic, even uninvested) you can't detonate in a massive floor wipe without also killing or nearly killing the setter. Plus I was always paranoid about the Protect-happy AI using it at the worst time. That said, Weezing was still able to solo most of the teams.

As for the run, a Butterfree would lead alongside a Rotom and use Safeguard, which looked funny with terrain already in effect, but of course that terrain wouldn't do squat for either of them. On its second turn, it targeted a full-HP Rotom with Pollen Puff. Leon's Cinderace would Libero into Dark type the turn Weezing committed suicide, which was satisfying. Not as satisfying as destroying a weakened Charizard in the blast, of course!

:porygon2::alcremie-gmax::toxtricity::runerigus:
Aegislash1/Mr. Rime3/Leozard/Dragapult1 took a little while to whittle down without being able to Decorate. I didn't write anything else down for this team but IIRC by the time I KOed Dragapult for the win, Leon had finally managed to KO someone himself.

:musharna::kyurem-white::gardevoir::sylveon:
This team required a lot more usage of the backline (and switching in general) than envisioned mostly due to Yawn and Kyurem being unable to do high damage due to choice locks. After You was used a number of times, namely for Greedent and Escavalier. The Leon battle was also fairly close and Charizard was sent out last, and by that time my only option for killing it insantly was Fake Tears with Dragon Pulse.

:musharna::dracovish::grimmsnarl-gmax::porygon2:
A Stonjourner/Duraludon/Darmanitan/Bisharp managed to KO two of my pokes, unusual for the gross amount of muscle and bulk I had to work with. Otherwise, Dracovish did what Vish does. Exploits included OHKOing a dmaxed Dusknoir with Rend, and sweeping a team while burned.

I did make a retarded T1 misplay against Hestia and her lead Togekiss, which culminated in my pulling a 1v2 with Grimmsnarl against her Maractus/Clefable. Speaking of soloing, P2 nearly took Leon down by itself.

:slowbro::duraludon::bewear::primarina:
I swapped Duraludon away from a Quagsire to spare it from an easy revenge KO and it opted to Sludge Wave. Duraludon was also unable to spare Slowbro from an Escavalier4 T1 OHKO by scumming a quick Steelspike boost, thanks to Tailwind being used before I could execute the move... ...but by continuing to boost it was able to finish the battle with the help of Primarina, so all was well (Tailwind Escavalier lol)

This run marked the second time I'd been trolled by Brightpowder Focus Punch! Fucking cretins!!!!

:bronzong::blastoise::bouffalant::hydreigon:
Blastoise manages to sweep Ulster outside of TR thanks to Taunt Arctozolt, whom awakened me very rudely to the reminder that it can have Static.

Getting really sick of these fucking gorillas with Fake Out. It's bad enough that Leon runs them all the time.

:aromatisse::slowbro::octillery::magnezone:
Tons more QDQCs from Galarbro. This particular set was using Shell Side Arm and, yes, Focus Blast. Without Gravity. Without missing. Aromatisse used Heal Pulse liberally for this squad, and I was happy to note survived a full-power Bolt Beak from Dracozolt.
:musharna::abomasnow::dragalge::mudsdale:
This team almost lost to Quick Claw Dracovish4, which procd for OHKOs against both Mudsdale and Dragalge. If there's one perk to Magic Room, it's that it disables that cursed item! They also won a 2v4 as Musharna eats consecutive Dark Pulse flinches from Inteleon4, which some of you may recall is also Sashed. Sylveon/Jolteon/Cherrim rounded out the enemy lineup, with Sylveon not only being Quick Clawed (irrelevant in this case at least) but also having Mystical Fire, unappreciated by Abomasnow.

As if this team hadn't been punished enough for using Abomasnow, an Escavalier began to slice like a hot knife through butter, even mitigating the debuff from Wyrmwind by critting; Cinccino2 was able to Twave both leads thanks to its Sash; and lastly, Abomasnow missed an 81% OHKO against Leozard with Max Quake, but otherwise would have solo'd his team of Rhyperior/Dragapult/Haxorus courtesy of Dragapult continuing to spam Sucker Punch into Musharna to no avail. If Eisen can succeed with a frigging Delibird, how come I can't have one smooth run with an Abomasnow? It's fallen a long way since USUM, but my tree climbing days are over...

:slowbro::togedemaru::clawitzer::trevenant:
It became quickly apparent that the AI preferred to target Slowbro T1 and create problems. In contrast to previous joke runs, Toge was not given much of a break! Let's see...
  • Snow Warning Abomasnow with Ice Shard
  • Anticipation Ferrothorn... ...with Rocky Helmet
  • Brightpowder Heliolisk dodging Endeavor
  • Quick Claw Ribombee (did you know Spiky Shield blocks Speed Swap? I do now! I know what you tried to do, you crafty little shit!)
  • Mold Breaker Haxorus
Leon on the other hand would fall in the sort of fashion I'd expect for FEARdemaru, as lead Inteleon would opt to use Double Team repeatedly and, by the time it KOd Slowbro, Toge had already killed Haxorus/Charizard/Rillaboom (unlike Aromatisse, Slowbro is easily able to KO Zard with the modest chunk of HP left by hitting a dmaxed enemy with Endeavor.) Clawitzer then picked Inteleon off with Aura Sphere, marking the end of a dmax-less run. I haven't given Trevenant props, yet, but it did quite its share of cleaning, and I had the pleasure of obtaining a couple +2s thanks to Harvest.

:musharna::flapple::darmanitan-galar::jirachi:
I love Flapple to death, but this was a pretty bad roll without any great switching prospects. Darmanitan is very good at destroying steels but can't switch cleanly into anything, which meant a lot of that responsibility would fall to Jirachi. Its previous expendable move Zen Headbutt was changed to Drain Punch. I kept Ice Punch instead of switching it out for Fire Punch as well, and was glad I did, as Jirachi scored multiple freezes.

Musharna speed ties Greedent2, which made shrugging off its Paybacks a lot easier while Darma handled the task of dishing out KOs. Musharna ALSO has a 6.3% chance of being OHKOd by Accelgor4, and you can safely assume that the sole reason I even mentioned it is because I ate the bad end of that roll; thankfully, this occurred T2, but the remainder of the battle was still annoying as shit with a Yawn-spamming enemy Mush and a Nuzzle-spamming Hatterene. I had three consecutive FPs, but for some reason Hatty continued to Nuzzle Darmanitan instead of using Draining Kiss for much more damage.

This was a really difficult team to use, but once again I was not mentally prepared for Darma obliterating Leon effortlessly. It offed Mr. Rime and Charizard with Stone Edge then maxed to get around GT's pseudo-crippling effect and dropped some snowballs onto his dragons. I was prepared to let Flapple dmax instead, as Hustle HH Overgrowth/Wyrmwind obliterates his roster.

:dusclops::bewear::beheeyem::vikavolt:
After the last three teams struggled for one reason or another, now we get back into the smooth sailing! I ALMOST ran Melmetal, as it rolled for this team and I was eager for some relief, but backed down after noticing I could run some fresh(er) goods. I spent a few minutes staring at Beheeyem before this run began. I really wanted to use it as it was getting no love, but I also wanted to run my second favorite insect, Vikavolt, and their movepools did not differentiate enough to make them worth it. Vikavolt outclasses the alien in just about every regard, so Beheeyem was going to need to try something new and unorthodox. I refreshed my memory of its new movepool additions, of which there were a negligible amount, and bitched internally that it didn't even get the IMO waste of a TR, Aura Sphere. I also rolled my eyes at its tutor additions, such as Meteor Beam.

...well, now, wait a sec. I already ran Meteor Beam on Coalossal, who badly needed a stronger Rock move, but what good came from its vanilla form? It had that +SAtk boost, but apart from that, it was Rock damage and nothing else positive could be said about it.

Whether you know how my mind works when designing randos sets or not, you probably could've guessed that I tried Meteor Beam with a Power Herb, and I actually really liked it. Because of the boost it was able to kill the things I was hitting with it, on top of having the benefit of Clops' HH and/or Gravity, and it merely lost Thunderbolt in the process (Eforce, Dark Pulse and Energy Ball making the rest of the set.) I figured I could dmax if I needed special Rock coverage that badly, but it didn't come to that.

Beheeyem even swept a team while staying at 9HP, though that team was Slurpuff/LO Mawile/Ditto without Impostor/Pyukumuku; Claydol would reset TR after eating its Room Service then explode; Stunfisk would use Pain Split at full health on my 10 HP Bewear; Rime3/Rhyperior3 compels the dmax of Bewear to guarantee the OHKO on Leozard by the time it enters, and I was very, very glad that I let paranoia set in and run the calcs for this eventuality, because I learned that Bewear *needed* Helping Hand; to do that, I would need to have Gravity up before Charizard actually entered, which meant killing Rime or Rhy without the assistance of Dusclops. Rime obviously was the only one I could feasibly OHKO, but even then the bastard was STILL a roll for Double-Edge after the LO recoil. That bulk! I wanted to take Charizard down with Bewear just in case Rhyperior was Lightningrod or Rindo (indeed it was the latter) and having a backline of Cinderace4 or Aegislash would've further complicated things for my own backline.

:magearna::azumarill::palossand::scizor:
My first battle immediately pits me against Vikavolt with Thunder Wave and Mud Slap, and any sort of accuracy bullshit prompts me to dmax on sight, as I hate dealing with it. Most of the run afterward was a cakewalk... A Greedent/Bellossom/Shiinotic/Cherrim are slain without TR thanks to Scizor and Magearna not being that much slower. Kommo-o would amusingly use Clangorous Soul against my leads, having learned nothing at all from the many exploits of 4K last gen. CB Delibird would inflict absolutely pitiful damage on Azumarill with Seed Bomb, and the calc I ran indicted it could've only been Hustle as well; that same battle had a backline of Stonjourner/Beheeyem which used nothing but Wide Guard and Protect until they fell.

As if the team hadn't coasted enough, Azumarill would outspeed Leon's Rhyperior T1, which could've only meant it used Avalanche, and that same set contained Stone Edge :thonkang: Also, this contained what may be my first-ever witnessed three-way item conflict! Aegislash3/Rhyperior4/Rillaboom1, all normally with Assault Vests; Rillaboom held the Focus Sash, meaning Rhyperior was a Sitrus Berry. If it's possible to have a 4-way, I wonder what the fourth item could be..?

:comfey::snorlax-gmax::octillery::necrozma-dawn wings:
This roll was pretty much going to be busted no matter what, so I said whatever and went full POS. Magearna as both a setter/abuser, along with Kyurem and Melmetal. Thanks, EVELYN, baby. I dunno what you were mad about for those first few rolls, but it's nice to see we're getting along again.

Then again, the run still hit some bumps. Snorlax would be frozen and not thaw over three turns, so I was forced to bring out the Lunala. A Boltund2 would paralyze all three of us with Discharge, but not only did TR/Belly Drum still occur, the paralysis blocked a Will-O-Wisp! The positives ended there, as Lax would still be repeatedly FP and once the stupid dog had fallen Lunala came in again to clean up without TR.

Flygon would OHKO its own Duggy with Earthquake; Leon would not approve! Speaking of Leon, he lead Haxorus/Aegislash; I'd find out they were both Set2, but Haxorus4 easily prevents Belly Drum with that horrifically strong LOCC and because Aegis wouldn't target Snorlax with any Ghost move, I brought in Lunala; if Comfey were killed by Aegis T1, I'd have dmaxed Lunala, as with its Room Service uneaten it outspeeds Aegis2 by EXACTLY one point. I set Psychic Terrain to prevent any backline Sucker Punch shenanigans, but the lastmon was HA Rillaboom, so that was a short lived albeit unnecessary plan.

:jellicent::volcarona::beartic::dracozolt:
Will-O-Wisp was used liberally and I was having excellent luck with tripping Cursed Body (unlike other RNG-dependent abilities I tend to have great fortune with it.) There was a lot of forcing suboptimal moves into Volcarona because of it. Occasionally I sacked Volcarona to bring Dracozolt in safely.

:oranguru::golisopod::perrserker::alcremie-gmax:
I passed on the opportunity to run three ice abusers again, with Rime, Kyurem and Frosmoth in this roll. Escavalier/Pincurchin/Ferrothorn/Lunatone force me into my backline, with both hold items being knocked off, Reflect going up, and an exploding moon redirecting Giga Drain into the Ferro, prolonging my misery. Spirits were lifted when Aromatisse used its After You to allow Weezing to Sludge Wave, destroying Aroma and forcing both Liquids into Weezing, also destroying it for a nice floor wipe.

Even without Solid Rock, Viking Kitty's LOTC Iron Head is still a roll on Leon's Rhyperior123, but I lucked out and scored it.

:porygon2::slowbro::sylveon::roserade:
I dmaxed Slowbro not just to destroy Leon's Rhyperior but to set rain in case my backline needed Weather Ball for Charizard, but it and P2 ended up taking his team down by themselves.

:porygon2::dhelmise::rotom-wash::jirachi:
Save for the setters P2 & Jirachi, this entire roll was Grass and Water types, so I felt obligated to bring both. The team struggled to KO certain bulky grasses, and I was getting infuriated with a Grapploct2 which was repeatedly dodging 90% moves without Brightpowder. Rotofrost would freeze Porygon2 right off the bat, but unlike nearly all of my experiences it thawed instantly and set TR.

The team was also nearly undone by a Lapras/Cursola pair due to speed and Freeze-Dry, and the run continued the trend of my having highly aggravating encounters with Wobbuffets. For the odd breather, a Ditto would Transform into P2, which without Eviolite is quite easy to destroy.
:hatterene-gmax::kingler::ferrothorn::beheeyem:
Imagine the menacing smile that crosses your face as Yawn is Magic Bounced, and the speed at which it's converted back into a blank stare as that same Yawn is blocked by the sender's Sweet Veil. It seems we are evenly matched, Slurpuff.

Dugtrio nearly prevents TR, as it Mementos Kingler and the nasty debuff is enough to easily spare Perrserker from death to LO Hammer Arm. I also had a nice butt clench as Leon's Cinderace opened with Electro Ball, a move I had not seen in ages, but directed into Hatterene; Rhyperior would also miss Kingler with Dragon Rush, which set off the unfortunate chain of events you'd expect from Kingler being allowed free reign. I might've had to KO Leozard with Mindstorm plus Beheeyem's E-Force, or even a Meteor Beam! Alas, Hattyler swept easily. Fun team, would run again!

:magearna::kingler::perrserker::volcarona:
Can you tell I'm not yet tired of Kingler?

The same Aromatisse that After You'd Weezing to its own swift demise would attempt After You on Rillaboom4, having already chosen Fake Out, and then again to Cherrim, using Sunny Day to power up the Fiery Dance being directed toward it; Volcarona was then brought in to KO a Ferrothorn, but Plan B immediately went into effect upon killing the Hippowdon that was next to it, as a Silvally entered and exploded, easily wiping my frontline; I was forced to KO Ferro and a Copperajah with Magearna and Perrserker, but luckily I cheesed my first turn by blocking Heat Crash with Kitty going dmax and dodging Leech Seed. The second Heat Crash would crit Magearna, but on the final turn, Copperajah would miss a QC Play Rough.

Back to lighter news, Magearna would gain a +3 Soul Heart boost from sacking Volcarona in addition to both enemies succumbing to burn damage. Volcarona would later sweep the opposition while Magearna was slowly chipped down by a Whimsicott Shadow Ball (being fully paralyzed for all of its turns.)

This team also marked my first loss on battle 220. Cinderace/Rhyperior leads, Sets3/2 respectively; Rhyperior survived the first Liquidation thanks to Passho Berry, and Kingler was then flinched by Rhyperior's Rock Slide and THEN prevented from KOing it by way of Rillaboom coming in with another flinch, albeit guaranteed. I needed Rhyperior to be dead for Volcarona/Perrserker to stand a chance in hell, and probably could have attained this if Charizard had entered third and not Rillaboom. I was rightly pissed but the team otherwise didn't lose to a really cheesy display. Still, I forfeited rather than give Leon the pleasure of nuking my Perrserker.

:comfey::arctovish::druddigon::tyranitar:
My first battle with this team, I used Helping Hand to OHKO a Snorlax with Rend and the Accelgor next to it murders Comfey with Final Gambit to prevent TR regardless. I had to smile ruefully at that. A backline Barraskewda4 forced me to dmax (this entire roll was chock full of Fighting weaks...)

The sturdy but offensively pitiful Comfey would take down Dragapult1 by itself in the time it took Arctovish to sweep Appletun, Arcanine and Inteleon. Fighting types were bloody everywhere with this team, making Comfey all the more invaluable. I needed it to pull the bulk of the weight against a Sawk/Hitmontop/Gallade/Machamp lineup. Machamp would even survive Drudd's LO Outrage after sand damage. I wish it got Dragon Rush for that massive Sheer Force bonus! C'mon, GF, there are worse abusers of the ability!

:dusclops::sirfetch:flareon::crawdaunt:
Another roll with no particularly good switching prospects and all-around poor bulk aside from setters. There was going to be some deliberate sacking or non-gratuitous dmaxing. Dusclops even had to finish a shitty battle by itself, the rest of the team having been severely trolled by a lead Wobbuffet; ultimately, Clops stalled it out of Mirror Coats before beginning the slow process of Night Shading it to death. Wobb helped me by Encoring me into HH, not that I would've used anything else first.

While the run was bloody as hell, I had the pleasure of witnessing a lastmon Darmanitan open with Yawn, and I wondered if it were Gorilla Tactics and effectively doomed. Crawdault would solo Leon, winning a speed tie with Rhyperior3, blocking Cinderace4's HJK with Gravity, and then smacking Inteleon around as it tried to DT in vain.

:jellicent::grimmsnarl-gmax::blissey::stonjourner:
Blissey cements herself as the completely unexpected Queen of Randos. She was used every single battle, often abusing Ally Switch or Heal Pulse. A lineup of Dugtrio/Ferrothorn/Sandaconda/Heliolisk were crushed without TR almost entirely because of Blissey, who spammed AS to keep Jellicent safe as she did the actual killing, and none of the opponents were able to do anything of significance to Blissey (or in the case of Sandaconda wasted turns using damageless stuff.) Having Ferrothorn be its crummy SpA set certainly helped.

Blissey was also the savior of an extremely stupid battle in which Excadrill/Mudsdale leads both scored crits, on top of one thirsty horse barely surviving a crit from Jellicent; while they initially prevented me from setting TR, getting Copperajah as a third mon allowed the team to continue relatively safely, as Grimmsnarl and Jellicent hanging by threads could KO it. Blissey would come in and save Grimmsnarl from Lucario's snipe attempt by Ally Switching, and hilariously, the Misty Terrain set by Grimmsnarl's Spirit Break blocked Mudsdale's attempt to Rest.

Blissey's only real fault was Healer being a worthless shitty ability that never worked when I actually needed it. Sadly, in this format, it still has more practical use than Natural Cure, at least in theory. But it took FOUR turns to cure paralysis and during a later battle, Grimmsnarl was burned and Healer would never trigger over its slow and painful demise. I can't help but recall an early Maison run where an AI Aromatisse was tripping it turn after turn, and during the randos portion of my Tree 1845, my Mega Audino was repeatedly curing Ursaring's poisoning before Toxic Orb put it right back, maintaining Guts without any of the residual damage. Where was that shit?? I need that back, Blissey! That's the only reason I bred you with Healer! No, your job is not just to piss the AI off with AS! *ahem* I-I mean, if you would please, I'd appreciate it if you did more than just spam AS, even if that alone was winning battles. Thank you for pretending to listen.

:musharna::magnezone::wishiwashi-school::vikavolt:
Musharna would set TR against Leon under Haxorus2's Attract, and from there it was GG. Zone took advantage of that speed to murder Rhyperior with Steelspike, then easily zapped Cinderace and Leozard while leaving Haxorus to Wishiwashi.

:mimikyu::greedent::politoed::duraludon:
Until now I believe Mimikyu was only run as a dual setter, so this was my first attempt to use it as the principal setter. It worked better than I expected, and because Discount Snorlax is so freaking good, Mimi was even able to nearly always Swords Dance afterward and assist in the killing. The two of them had a sweep stalled out by a pesky Corviknight spamming Fly, along with Swagger and a Togedemaru trying to shield. This battle was also the first time the backline was summoned to do something, as Duraludon eats that birb for breakfast.

Greedent's happy berry rampage was halted a few more times. It would miss the OHKO on a Snorlax due to Curse (having opted not to dmax) but also paralyze it, so that Facade became superpowered and KOd; Swoobat would trick its Sitrus Berry, not so awful in itself, but Unfezant's Power Herbed Sky Attack would do just enough to prevent drumming; however, Mimikyu still danced and the massacre fell to it and Duraludon.

Leon was swept without any King's Shield from Aegislash1, who broke Mimi's Disguise and then did nothing to prevent the abuse that followed.

:slowbro::crustle::drampa::porygon2:
Crustle's WP was rarely activated and dmax was not used much; Crustle was simply a boss.

:porygon2::machamp-gmax::blastoise::dragapult:
Well hello again, Dragapult! Welcome back! You know Ribombee4 doesn't like your speed tiers when it Speed Swaps the Drifblim next to it... Well EXCUSE ME for running a few things a wee bit faster than what you're accustomed to, spoiled brat! My menu is always subject to change! Speaking of SS, I think it's crafty of GF to make the move not directly indicate the target with whom it swapped. I'm assuming the new numbers are reflected in the stat page, which is what I'd checked and found nothing amiss.

Eva dmaxed her Frosmoth and survived the Guts Rock Slide due to its Charti Berry, but unfortunately P2 was already at +3 and it didn't also withstand the Tri Attack afterward. Arcanine would also Will-O Machamp T1 and give me the Guts immediately, which was appreciated; what was not appreciated was Runerigus/Cinderace leads critting Machamp without the benefit of Chi Strike, while my own Machamp would get nothing. In addition to my sweet revenge on Eva's Frosmoth for that previous nasty encounter, I also ran into Cooper's dmaxed Lucario and OHKOd it without that damn lifesaving sash.

I'd love to let you think Dragapult pulled some more meme destruction during the run, but it was sent out only to replace -2 acc (Muddy Water) Machamp versus Leon, after its gmax had ended. It didn't attack, but had it done so, it would've been hilarious and painful.

:cofagrigus::appletun::slowbro::rotom-wash:
Normally, Appletun's Weakness Policy is set off quickly and easily. This time, Gourgeist would take it Trick-or-Treating, then a Skuntank would Toxic it, and then finally hit it with Hex for pitiful but nonetheless supereffective damage. Displaying its impressive bulk or the value of Thick Fat, Appletun would later eat both an Ice Beam from Lanturn and an Icicle Crash from Arctovish, taking just over 50%.

Controversy arose as Eisen accused me of flagrant bullying, simply because I shared a screenshot of Milotic by itself with -4 Sdef and mockingly stated it could still stage a comeback. Oblivious to his own hypocrisy as he bragged about his Durant OHKOing a Greedent, the discussion teetered on the edge of civility. Neither of us would like a slander/libel lawsuit so I'll just say the discussion ended amicably.

As for more Slowbro fun, Ribombee4 would Speed Swap yet again and be trumped the following turn by QDQC; Shell Side Arm would be forced into physical damage by Shiinotic1, yet even with its Kebia Berry shafting the damage, it still inflicted a ton. I know it was physical because it tripped Effect Spore.

Leon would lead Grassy Surge Rillaboom and Aegislash, whom I hoped would be the WP set, as it carries Air Slash. And wouldn't you know it, it was, and it did, and a brutal sweep ensued. Both apples have consistently been insane in TR.
:bronzong::diggersby::cursola::hydreigon:
Debut of the hideous-but-powerful wabbit! Togekiss joins Mr. Rime at the Cool Kids lunch table, with acceptance earned only by surviving stupidly powerful things that feel like they should easily OHKO; in this case it's Huge Power Mega Kick. A roll, just like the Rimes that eat Adaptability Hyper Beam, but survival all the same.

I was forced into my backline by Greedent scoring a paralysis on Diggersby, resulting in wasted turns from both FP and missing a Hammer Arm. I thought the battle had sunk drastically lower by the entrance of Snorlax into Cursola/Hydreigon, but this Lax was Set2, with only Heavy Slam and Heat Crash, meaning it couldn't even touch Cursola in its dmax state. Lax2 also runs Atk/Def, which is why even Hydreigon's Dark Pulse was hitting really hard. Before this, I was thinking I'd need to kill Snorlax via Perish Body.

Perish Body almost took down a Ludicolo due to flinching/confusion BS, and I also realised I'd forgotten to feed Diggersby candy during the Leon battle, the only time I dmaxed it. This resulted in its death, but it was at least able to destroy Leozard first.

:mimikyu::rillaboom::porygon2::porygon-Z:
Worker Freeman would lead Drampa and Escavalier, prompting me to SD immediately and swap to P2, but the snail was the nearly harmless Set1. Drampa was also the Icy Wind spammer, which helped immensely.

Leon would allow Mimi to reach +4 by repeatedly attacking the bloated P2, eating two LO Toad4 Power Whips and two Fire Fangs. In spite of this, it still needed to dmax to OHKO Leozard with Phantasm. Disguise was still intact by the end of the battle.

:jellicent::venusaur::grapploct::crustle:
Man, I was waiting to roll Venusaur. I was also waiting to encounter a Wobbuffet without the fucking Shadow Tag, and this finally occurred when I needed to escape a Yawn, for added benefit. I would miss three 100% attacks into a Seaking thanks to that stupid Brightpowder, even without any evasion boosts from Acupressure. I don't care about the Acupressure, but I know from experience the thing eventually starts using Horn Drill, so I get anxious.

Leon lead Aegislash/Inteleon4, and after tripping Inteleon's sash I took the opportunity to get Crustle in relatively safely in time for Leozard. Upon KOing Charizard with Rockfall, Venusaur got to use Weather Ball for the first time during the run.

:slowbro::tsareena::gastrodon::volcarona:
Let's appreciate the fact that a number of AI sets are so focused on priority moves that Tsareena walls the shit out of them, in this particular anecdote Hitmonchan1, a nice detail when your Tsareena is sitting on 35HP.

Shuckle would eat its Figy Berry and then Covet Volcarona's Iron Ball for the ultimate TR speed that isn't Iron Ball FEARdemaru. Volcarona would later switch into Glaceon's Freeze Dry and be frozen and, for reasons that momentarily infuriated me, Fiery Dance does not thaw the user. But I wasn't going to let that create any stupid bullshit, and had Slowbro Flamethrower it for a meager sum. Slowbro also tried to feed Scalds to Gastrodon whenever possible, but the AI repeatedly gunned for Bro and put a stop to this several times, often with nefarious things like QC crits (Snorlax.) That same Snorlax would QC again, putting enough damage on Volcarona so that it'd later fall to a Grimmsnarl's Sucker Punch, which let TR expire and generally made an already annoying battle more costly.

Milotic would use Mud Shot on Volcarona the turn Gastro was brought in to absorb any Water move, but because TR was already up it's more than likely that the AI was in Idiot Speed Control Misconception Mode and thought the speed drops from Mud Shot were more helpful at the moment.

:bronzong::barbaracle::cursola::drampa:
Bronzong went into this run with Speed Swap which I mostly had no intention of using, and had to keep reminding myself to exit and reteach it Rain Dance. It took at least five battles before I actually did this. The run also had its share of AI mindlessness, including a Xatu that Simple Beamed off both Heatproof and Sniper, and a Wailord which Soaked Bronzong instead of going straight into Fissure (or Whirlpool I guess) and this in turn made its ally Drapion's Night Slash crit, as well as an Earthquake, do pitiful damage.

The team also lost to Wotson in an incredibly lame manner. Icecue/Vanilluxe leads, and both target Barbaracle for a ZenButt flinch and an Sdef drop from Flash Cannon. Vanilluxe then crits Bronzong and freezes Barbaracle, crits Bronzong again as Pangoro comes in, one of the things that threatens both Drampa/Cursola simultaneously, and KOs Cursola; Drampa and Bronzong together are still unable to KO Vanilluxe, who puts Drampa into range of lastmon Delibird's Ice Shard with its next Blizzard. The biggest mistake I made was not aggressively trying to kill Vanilluxe at the expense of the other teammates which weren't as strong/annoying, perhaps with the exception of Pangoro. I also didn't use dmax at any point which may have made a huge difference.

I wasn't going to accept that, but almost lost a second time to Leon; Cinderace1's crit Blaze Kick leaves Zong just above its Sitrus trigger, allowing Rhyperior's HH to KO; Rhyperior is also Set2, go figure, easily surviving critless Liquidation. Drampa enters and Throat Sprays on the hit which KOs Cinderace and, just my luck, Leozard enters third, which means Drampa gets to +1 Wyrmwind for a guaranteed OHKO while Rhyperior decides to Ice Punch Drampa for a meager sum. Aegislash enters in a battle which somehow became a 2v1 and Cursola even survives Shadow Sneak to witness Drampa nuke it with Flare.

:hatterene-gmax::bisharp::mamoswine::lickilicky:
This roll was almost nothing but pokes weak to Fighting, with Scrafty and Tyranitar among the rejected candidates. I knew Hatty was going to be pulling a lot of weight and I'd be sacking one of the three abusers, more often than not Bisharp, because it had the worst speed of the bunch. I realised immediately during the first battle I'd forgotten to give Mamoswine High Horsepower, and quit upon finishing to do just that.

Bisharp would be the only survivor of a Silvally Explosion, and Lickilicky joined it to find both a Rhyperior and Conkeldurr. I badly needed some speed control for that blasted clown and found it in Max Strike, thankfully drawing Conk's attention to the weakened Bisharp in order to get it. Rhyperior protected and patiently waited for me to get to it, and helpfully was set2 to avoid nerfing the damage with Rindo.

One of the Artists led Ferro and I was all the more glad I KOd it T1, as the poke to replace it was Cursola, easy pickings for Knock Off while Hatterene went about setting. The Leon battle was also good fun, with Cinderace3/RIme leads; Bisharp swaps to Lickilicky and Cinderace Liberos Iron Head but fails to flinch, while Rime presets Psychic Terrain; even with Psyterrain blocking Sucker Punch, Cinderace can't change to Dark to block the Mindstorm coming its way, and Rime runs no HP/Def making it an easy KO for Knock Off. Leozard and Rhyperior come in, and after doubling into Charizard, Rhyperior makes a last ditch attempt to Protect. This stalls out Hatty's last turn of gmax, so I get to do something I rarely see, and that's murder Rhyperior with boosted Expanding Force!

:musharna::mudsdale::chandelure::kommo-o:
This run was especially fun for a ton of random reasons. Golurk would spam Dig and because I wasn't one to eagerly whiff, I left it alone until I had no choice but to attack and realised it had No Guard, as it fell to High Horsepower while underground. Kommo's Bulletproof triggered a lot, from Seed Bombs to Focus Blast and Shadow Ball. Chandelure was a killing machine and claimed a few 3Ts on top of being slow enough to outspeed a Copperajah (but not powerful enough to guarantee the OHKO.. fortunately I'd swapped out Kommo, locked into CS, and it had tried to Play Rough that slot.)

Sawk1's Fighting move is Reversal, which is why on multiple occasions I've swapped a lead weak to that into a Ghost type and been dismayed that it decided to target that slot with Throat Chop. I was just as dismayed to see Stunfisk3 inflicting "so much" damage to my party with a pathetic 125 SpA. How?

Kommo-o was my only casualty during the Leon battle, but it was able to KO Inteleon/Seismitoad and badly injure Leozard, leaving an easy cleanup for Mudsdale.

:bronzong::dracozolt::copperajah::alcremie-gmax:
Poor Throh. I was all set to run it again, but had a vague flashback of a composition similar to this one that got smacked hard by a Chandelure4 lead, and then could do nothing against a backline Seismitoad4 before it quaked everything to death. The rest of the roll was not too promising for such a scenario, but Alcremie at least had Giga Drain, heh. Another plan to stave off some of the abuse from powerful Ground types was to dmax Dracozolt on sight, since Hustle Wyrmwind would pack a huge wallop and the debuff would help further; this only came into play once, with a Red Card Steelix, and its ally Xatu would set Tailwind regardless, which gave it the speed advantage and mitigated my awesome BaCkUp PlAn which was to use Zong's Speed Swap on it. I still got to use Speed Swap a bit, such as the instance I OHKO'd an Escavalier3 with a full-powered Bolt Beak and was rewarded with a Fissure to Zong! What was I gonna do with a useless 72-speed setter?

I was rewarded for effortlessly murdering a Greedent and its Wobbuffet friend by being double frozen by Cloyster's Blizzard, but the nightmare ended there as Cloyster would set two layers of Toxic Spikes then do nothing but alternate Life Dew/Protect while Copperajah picked it and Aromatisse off.

Orbeetle would resist switch off an Iron Head into Rotomow, but unfortunately I'd targeted that slot with Mystical Fire. Oops! Cinderace would continue to screw itself with Libero, going for Electro Ball again and losing its Fairy resistance, which let Alcremie easily KO alongside Haxorus and (helpfully non-Rindo) Rhyperior. I was then able to Decorate Dracozolt, which powered Bolt Beak up just enough to guarantee the OHKO on Charizard. three of them actually

:aromatisse::rhyperior::clawitzer::togekiss:
I wouldn't have minded Grass Knot on Togekiss for a number of enemies, but it wasn't too badly missed. Rhyperior did the overwhelming majority of work, anyway. Such as Leon, where it Rockfalled Rime (who flinched Aroma because of course) and had sand up for the incoming Overgrowth, which did barely over 30% from what I could tell, which looked hilarious. The High Horsepower Rhy hit me with had to have done more. But with TR up and Zard gone, Haxorus would leave as quickly as it entered and Rhyperior would try to Protect stall with nothing gained besides time and a little bit of terrain recovery. Dmax expired, at least, but HHHH might as well have been Quake.

:aromatisse::avalugg::drednaw::porygon-Z:
This roll consisted of Fighting-weak pokes, the three you see there plus Ditto, as well as a handful of setters. Hatterene, Mimikyu & Solgaleo. I didn't want the final run to include the cheese that is Dusk Mane, and figured I'd save Ditto for an exhibition recording or something, which left me with those three and a setter. I went with Aroma again, thinking Heal Pulse would come into play repeatedly; and it did, with a lead Drought Torkoal immediately tripping Sturdy, getting OHKO'd, and then the +1 SDef making alllll the difference as Aromatisse healed it for "small" amounts while the three others attempted to KO it. Among those moves eaten were a Sylveon's Mystical Fire in that sunlight (replaced by Hail soon after) and then a Body Press.

A Curse Ferrothorn had me dead to rights after a Lucario finished Avalugg off with Extremespeed, but it chose to continue using Curse which only let P-Z destroy it with two Blizzards. I was also up a creek with a lead Copperajah/Lucario, but Avalugg destroyed them to be met by a Lunatone/Drednaw that set Stealth Rocks and Protected, rendering themselves a non-threat. While Avalugg nearly always had its WP set off right away, a Reuniclus would Trick it off but ultimately fail to prevent it from sweeping. Body Press and Gyro Ball were both used from time to time outside dmax, though the latter's main incentive was for Steelspikes.

Sadly this whole run ended on a low note as I lost for the third time, to Leon. Haxorus rolled not only set4 but Unnerve, which stopped Aromatisse from healing up after LO Poison Jab, and Rhyperior4 critted its Earthquake for good measure. Charizard would Wildfire P-Z instead of Avalugg, and the Power Lens left it to fall to another EQ without Hyper Beaming, which I needed to stand a chance. If Zard had Overgrowthed P-Z instead, I would've survived the EQ in terrain and possibly have turned this around. As it turned out, Zard would be KOed, Avalugg would KO Rhyperior with Icicle Spear, and nothing Seismitoad did would matter as Avalugg was guaranteed to die to a nick of Wildfire damage. RIP
 
Last edited:
Hi everyone ! I succeded 20 win streak in Monotype Water but i lost on my 21th round by Mienshao with no miss High Jump Kick. I am satisfied of this result, I excepted 10 win streak max and i am not disappointed with my Gyarados when served for dynamax. ^-^
1598570210745.png


Here my water team for my 20 win streak. ^-^

Gyarados @ Leftovers
Ability: Moxie
Evs: 252 Atk/4 Def/252 Spe
Adamant Nature
- Dragon Dance
- Waterfall
- Bounce
- Earthquake

Urshifu @ Choice Band
Ability: Unseen Fist
Evs: 252 Atk/4 Def/ 252 Spe
Jolly Nature
- Surging Strike
- Close Combat
- Poison Jab
- U-Turn

Primarina @ Choice Specs
Ability: Torrent
Evs: 4 Def/ 252 SpA/ 252 Spe
Modest Nature
- Hydro Pump
- Moonblast
- Psychic
- Energy Ball
 

Jumpman16

np: Michael Jackson - "Mon in the Mirror" (DW mix)
is a Site Content Manager Alumnusis a Top Team Rater Alumnusis a Battle Simulator Admin Alumnusis a Smogon Discord Contributor Alumnusis a Researcher Alumnusis a Top Tiering Contributor Alumnusis a Top Contributor Alumnusis an Administrator Alumnus
2020-08-25.jpeg


DRUMS PLEASE
Shell Bell

Rillaboom-Gmax ** DRUMS PLEASE @ Shell Bell
Ability: Grassy Surge
EVs: 252 Atk / 4 SpD / 252 Spe
Jolly Nature
- Branch Poke
- Grassy Glide
- Low Kick
- Acrobatics

SHORYULEPPA!
Leppa Berry

Appletun-Gmax ** SHORYULEPPA! @ Leppa Berry
Ability: Thick Fat
EVs: 252 HP / 4 Def / 252 SpD
Calm Nature
IVs: 0 Atk
- Apple Acid
- Leech Seed
- Recycle
- Recover

in your side
Leftovers

Ferrothorn ** in your side @ Leftovers
Ability: Iron Barbs
EVs: 252 HP / 252 Def / 4 SpD
Impish Nature
- Bullet Seed
- Leech Seed
- Protect
- Rest

Ok so listen to me. My favorite thing about this team is the Appletun nickname and it's not close.

SHORYUREPPA!

The Shoryureppa (昇龍裂破 Shouryuu Reppa?, "Rising Dragon Rending Blast"), also referred to as the Shadow Dragon by the manual for Super Street Fighter II Turbo (its debut), is one of Ken's special attacks, which frequently appears as a Super Combo.

1. appletun is a dragon type
2. it's holding a leppa berry
3. apple@leppa
4. L = R because japan
5. shoryureppa is literally super dragon blast or whatever
6. do you get it yet

As far as the team goes:

Rillaboom

Branch Poke. It has 64 PP. 64. G-Max Drum Solo turns every grass move into a 160BP nuke, as Eisen would say. Stemming from his success, I knew I wanted to try Branch Poke over High Horsepower just for sheer attacking PP reasons. The four moves hit 64+32+32+24=152 attacking PP. That's silly. That's funny. Poking things unironically with a branch is funny too. And also surprisingly effective:

252 Atk Rillaboom-Gmax Branch Poke vs. 252 HP / 0 Def Drednaw in Grassy Terrain: 208-252 (110 - 133.3%) -- guaranteed OHKO
252 Atk Rillaboom-Gmax Branch Poke vs. 0 HP / 0 Def Whiscash in Grassy Terrain: 244-292 (137.8 - 164.9%) -- guaranteed OHKO
252 Atk Rillaboom-Gmax Branch Poke vs. 252 HP / 0 Def Quagsire in Grassy Terrain: 220-264 (113.4 - 136%) -- guaranteed OHKO
252 Atk Rillaboom-Gmax Branch Poke vs. 0 HP / 0 Def Sharpedo in Grassy Terrain: 200-236 (145.9 - 172.2%) -- guaranteed OHKO

Pikachu takes 98% min too but I wouldn't want to risk Static. The real utility in Branch Poke is that Rillaboom will be using it as G-Max Drum Solo the overwhelming majority of the time, which meant that opting for a 40 base power milquetoast move actually had a lot of merit. It's an improvement of 48 attacking PP over the current standard.

The next main thing is how I could manage the loss of High Horsepower in favor of having two on-paper redundant Grass moves. Here's my notes regarding that:

--

low kick vs horse on rilla

drapion always outspeeds and threatens poison fang, max quake never kills anyway, switch to ferro is mandatory etc
torkoal takes 67% min from HH max quake, and always necessitates a switch to apple anyway
zone is on a balloon and does a million with steel beam, analytics or not
magneton prob has sturdy which means you should never risk rilla anyway (and apple being slower takes analytics fc off table)
drum solo doesn't always kill (the faster) obstagoon...max knuckle does.
skuntank does die to HH max quake, but you can safely grassy glide then drum solo to kill (acro into drum solo may not kill due to it recovering from terrain)
toxicroak is beaten handily by ferro if the game was indeed dumb enough to give it Atk instead of SpA for its NP shadow ball set
HH never beats turtonator so you have to go apple on that anyway (and hope its dumb with shell trap)

--

So that settled it. The Grass moves were locked in, Acro was and is required for Volcarona, and the Max Knuckle boosts proved very useful, turning drum solo into KOs with one out on stuff that would otherwise be threatening, like Drifblim.

Rilla's HP is actually wrong—I could have gotten 11 HP of Grassy Terrain recovery with the final 4 EVs in HP and not SpD, but I couldn't change that mid-streak, and this one went deep into extra innings.

Ferrothorn

Gonna talk about Ferro before discussing Apple. I started with Eisenherz's set with Iron Head/Body Press, and felt that Body Press would be required for Scizor (XS/SD). I learned along the way that while the physical synergy offered by IH/Press was great, Ferro really valued rest more than anything. Leech Seed was a better way to beat things like Scizor, Drapion and Scolipede that Rilla and Apple couldn't handle, and Protect went too well with Leech Seed, Leftovers, and Grassy Terrain to pass up.

Steel STAB is better than Grass STAB, but the 48 PP offered by Bullet Seed proved to be too valuable in the long run. Metal Claw is an option that has only eight fewer PP than Bullet Seed, and its drawbacks of contact and 95% accuracy seem like a wash with Bullet Seed's inaccuracy and susceptibility to Sap Sipper—important when you could potentially have two pokes completely walled. It's Bullet Seed's inconsistency that's most troublesome...not its damage output, but the possibility that you'd kill something off and not reap Leech Seed healing, or always get two hits on something like Druddigon.

Edit: I thought Metal Claw had less PP than Bullet Seed, and it has more. Still a wash but yeah

Appletun

I knew I wanted to try a Recycle/Leppa strat in this format, and it just so happened that Apple resists Ferro's quad weakness, while Ferro takes neutral or no damage from all six of Apple's weaknesses (Ice, Poison, Flying, Dragon, Fairy and Bug). EeveeTrainer reminded me that Appletun could G-Max to rid itself of status with G-Max Sweetness, which would prove rather handy against things like Torkoal (Lava Plume) that Apple is bound to get burned against. Being burned without Leftovers is kind of a drag, even with Recover, and being paralyzed is even worse against threats you really can't spare a turn against.

Apple Acid was amazing as you could expect, and a Grass-type move was necessary for Max Sweetness. Leech Seed on Appletun is the best way to wear down non grasses, and Recover is obvious.

Without going into too much detail, there's a lot to consider in keeping Apple's Leppa Berry—and therefore the strategy—intact. More than you think.

I'd love to share full, raw, consecutive battle videos with you, except Gamefreak has made that kind of difficult. But to be honest, I hesitate to share "everything" because for several generations, my creativity has been...appropriated by fellow posters, and used to facilitate their own records. This isn't sour grapes or selfishness, trust me—I just value the competition at the end of the day.

nothanks.jpg

I reached 100 before anyone else did, 3.5 weeks ago (as some on Discord are aware). Rilla had died to an unlikely Scolipede Liechi+Swarm Skitter Smack combination (I OHKO half the time with Airstream). Apple and Ferro were still healthy, but I decided to quit and start over, because I had and have huge faith in this team. I legit decided not to post a thing until now, in large part because I didn't want anyone to steal my strategy.

Over the years I've posted a tooooooooon of my "mad scientist" notes regarding how best to use a team I posted, and I still love doing that. I think the reason I'm going to hold back here is that I'm positive that this team, when played properly, is capable of 175. I may post more strategy if I ever pick up Grass again, which is likely, since I'm not super interested in trying to go for a record in every type.

Threats

Sirfetch'd: Drum Solo OHKOs, but I almost always will lose a poke if Dynamax is unavailable and Apple/Ferro are out. I realized this early and did my best to have Rillaboom in when the second batter came out.
Volcarona: Obvious threat. I have honestly never seen it use a single move now through both Bug and Grass, but this necessitates Rillaboom being out and having Airstream available (always OHKOs). This is the main reason I have Protect on Ferro and that Apple is MegaCalm, in the event I have to Leech Seed Volc with Apple (I date 63-75% from Bug Buzz).
Turtonator: I do 56% max with my strongest move against it with Rilla, and its combination of Dragon Pulse and Incinerate make it dicey for Appletun to beat it reliably.
Golisopod: First Impression does a ton to Rilla and outprioritizes Grassy Glide (not that I come anywhere close to killing). Close Combat does 43-51% to Ferro and Skitter Smack makes it impossible to use Apple. Can be played around reliably without losing much HP if you use your head.
Scizor: Better hit with Ferro's Leech Seed, because Rilla almost never 2HKOes with Knuckle+Airstream and SD makes it unfun to face. A primary reason Iron Barbs is amazing.
Butterfree: If Rillaboom isn't out with G-Max available, this can easily sweep. A main reason to have Metal Claw over Bullet Seed.
Kommo: Also "better hit with Ferro's Leech Seed," because the possibility of Bulletproof into Clangorous Soul is unfun.
Dusknoir: Ice Punch and Fire Punch are unfun to take when it's hard to OHKO, but Drum Solo does just that 95% of the time.
Scolipede: Not only its ability to Baton Pass to something and disrupt my rhythm, but its ability to threaten Rilla offensively. Its


There are others that require smart play and positioning. Like, Cloyster is obviously not good with Shell Smash and Icicle Spear, but a lot of the success with this team comes from thinking ahead, identifying and utilizing healing stations, and playing smart.

I've scoured my "archives," and this short video is extremely representative of my approach to using this team:

pitching change.jpg

No outs, and my starter had been getting knocked around a bit, hence the sub-50% HP.

-1 252 Atk Rillaboom-Gmax G-Max Drum Solo (160 BP) vs. 0 HP / 0 Def Luxray in Grassy Terrain: 153-181 (104 - 123.1%) -- guaranteed OHKO

I kill even through Intimidate. Why not take the sure (OH)K(O)?

-1 252 Atk Rillaboom-Gmax G-Max Drum Solo (160 BP) vs. 0 HP / 252 Def Sirfetch'd in Grassy Terrain: 100-118 (77.5 - 91.4%) -- guaranteed 2HKO after Grassy Terrain recovery
252+ Atk Sirfetch'd Brave Bird vs. 0 HP / 0 Def Dynamax Rillaboom-Gmax on a critical hit: 244-288 (69.7 - 82.2%) -- 62.5% chance to OHKO (62.5% chance to OHKO after accuracy)

And it has Grassy Glide to mop up if I survive. Didn't want to give it the chance to do that, but had to have the discipline to play the double switch perfectly.

Anyway, I took this team deep into the bottom of the fourth inning before using my first heal. I got to 79.1 with pretty good PP and health. Then, in came Drifblim with its Flame Orb, and my play is rare, but binary—go to Ferro on a possible Trick (I have Rest to heal status later), and play perfectly so I don't take a ton of damage from Hexes or get Apple's Leppa Berry taken for good.

heater.jpg

Oh yeah, haha, I "forgot" to mention one threat:

Zoroark: I can't wait to do Water or Fairy so this piece of shit stops OHKOing my Steel pokemon with Flamethrower. Rilla always outspeeds, and always OHKOs with Grassy Glide despite the priority (100% min), but that's not why this is a threat and you know it.

Or...or! Maybe I hid it till now to be sooooooooo funny! I pranked you guys good didn't I! Lol!

Fuck Zoroark. This battle deflated me, no pun intended because Drifblim->Zoroark doesn't deserve the wit. Going from Rilla to Ferro is only required on like seven pokemon (including Druddigon, Scizor, Drapion, Froslass, and Golisopod), so this was extra unlucky. As was facing Scizor as a lead the very next battle, and having to beat it with Rilla, which required a little luck of my own. I healed at 83 after a Drapion lead poisoned, and went well into extra innings, winning 56 battles on my final leg before running out of both pitches and pitchers at 140:

2020082503201100-3C66B776DB1AA06323037049FACD96D3.jpg


I could say more but I'm tired etc. I'd def say more if I were satisfied with this record, but I'm not, so...yeah. I want to keep going because these guys have real promise. If they don't win it's a shame. There's other types I wanna try, so I'll probably try them before returning to Grass.
 
Last edited:
It was only a matter of time...

Roll #3 -- Archetype: Trick Room
Setters: :oranguru: :jirachi:
Abusers: :dracozolt: :vaporeon: :grapploct: :shedinja: :necrozma-dawn wings: :alcremie-gmax:
Dmax Rule: Anytime


Shedinja existed on the roster since before the last two EVELYN sprees but had never actually been rolled. I also coincidentally rolled Grapploct, fresh after breeding the attractive shiny! Of course I couldn't resist taking either for a spin, but I liked this entire roll in addition to wanting to mess with both Sheddy sets, so I quit halfway to use the remaining ones. Huge shoutout to Eisenherz who RNG'd 0 speed Sheddy as a gift. He is the reason I have them in Safari & Sport Balls!

The first few battles, up until about the 10:20 mark, were primarily cleared by Grapploct due to shitty survival/damage prospects for Sheddy. While I did quick look for a number of enemy sets, I still really wanted to take some risks here and there for humor or even some flexing. One thing I did find mildly interesting is that the AI didn't like having both leads hardwalled by it even if they could damage Oranguru well, and they showed reluctance to use status moves like Toxic even if they had them. There were a lot of T1 switches. I also got pretty lucky with the enemy selection, but it wouldn't be much of a video if it spent the entire time cowering in the back, right?
 

Eisenherz

επέκεινα της ουσίας
is a Forum Moderatoris a Community Contributoris a Tiering Contributoris a Top Social Media Contributor Alumnus
Moderator
EISEN'S TOWER RANDOMIZER
(Part I)

I got kind of burned out on RS while grinding Mono Dragon, so I decided to go back to tower and do some randos, enticed by ReptoAbysmal's recent reports. After a few unsuccessful runs, I managed to get a randos PB with a streak of 419!

The way I do it is very simple, and is meant to kind of mirror the good old Factory: I draw 6 Pokémon from a pool of 390 pre-made sets, and must pick 4 out of these 6 to make my team for a stretch of 10 (ending with the Leon battle). While I'm allowed to shuffle items, especially if it's to abide by item clause, I try to keep it to a minimum and most sets are just used as they are.

Back in Battle Tree, I used to have a more complex system for drawing to ensure my teams had a minimum of synergy or at least speed control, but since in Tower Dynamax already gives me a large advantage, I stick to 4 out of 6 no matter what the 6 are.

After every battle, I pick a MVP of the run. It's usually just the main sweeper, but sometimes a dark horse saves the day and gets the title!
–––––––––––––––––––––––––––––––––––––––––––––––––––
Battles 1-10


@

Hasty | Technician
4 HP / 252 Atk / 252 Spe
Fake Out / Covet / Icy Wind / Taunt

@

Modest | Oblivious
12 HP / 4 Def / 236 SpA / 12 SpD / 244 Spe
Water Spout / Scald / Ice Beam / Icy Wind

@

Jolly | Intimidate
4 HP / 212 Atk / 4 Def / 36 SpD / 252 Spe
Double-Edge / High Horsepower / Helping Hand / Protect

@

Impish | Mirror Armor
252 HP / 4 Atk / 116 Def / 132 SpD / 4 Spe
Iron Head / Body Press / Iron Defense / Roost

Notes: I loved this team, every member pulled its weight at a time or another. I rolled Persian many times now and it's been really good every time. I had originally switched to Normal Gem to get around item clause, but loved it so much it's the default now. Normal Gem Technician Fake Out does a lot, and Coveting items away reliably on turn 2 is super useful. Also the damage is not to be underestimated, it packs a punch. Wailord is good pretty much every time I get it, I love this set. Double speed control upfront w/ Intimidate in the back was very useful. Also, Tauros Max Quake + Iron Defense Corviknight works really well together. This almost felt like a Randos goodstuffs kinda thing.
MVP:


–––––––––––––––––––––––––––––––––––––––––––––––––––
Battles 11-20 (no Dynamax used)


@

Modest | Weak Armor
252 SpA / 4 SpD / 252 Spe
Shadow Ball / Stored Power / Shell Smash / Protect

@

Modest | Magic Guard
84 HP / 60 Def / 196 SpA / 4 SpD / 164 Spe
Moonblast / Flamethrower / Helping Hand / Follow Me

@

Adamant | Intimidate
228 HP / 156 Atk / 4 Def / 100 SpD / 20 Spe
Fake Out / Close Combat / Knock Off / Iron Head

@

Calm | Drizzle
252 HP / 180 Def / 76 SpD
Scald / Icy Wind / Perish Song / Protect

Notes: Shell Smash Polteageist alongside Follow Me felt totally busted, easy sweeps the entire way through, including Leon. The backline barely ever hit the field.
MVP:


–––––––––––––––––––––––––––––––––––––––––––––––––––
Battles 21-30


@

Sassy | Levitate
0 Spe IV
252 HP / 180 Def / 76 SpD
Trick Room / Scorching Sands / Ice Beam / Protect

@

Brave | Sheer Force
0 Spe IV
244 HP / 252 Atk / 12 SpD
Dragon Claw / Crunch / Fire Punch / Iron Head

@

Relaxed | Imposter
0 Spe IV
252 HP / 252 Def / 4 SpD
Transform

@

Jolly | Tough Claws
20 HP / 220 Atk / 12 Def / 4 SpD / 252 Spe
Rock Slide / Stomping Tantrum / Play Rough / Accelerock

Notes: This team made no sense but it (barely) worked. I cursed myself for not having Protect on Druddigon a few times, had to Dmax it just to survive. The set wasn't meant to ever be a lead and there's 4MSS, but I might have to reevaluate my priorities there. The lead was so weak to Ice, and I ran into 2 mono Ice teams, but the AI always failed to attack with 1 of them and gave me enough leeway to scrape through. Ditto got 2 KOs, which was fun. Lycanroc barely ever came out, and when it did, it was to click Accelerock a couple of times. On the upside, Claydol did great as a setter and Scorching Sands burned a ton of times, which probably saved me!
MVP:


–––––––––––––––––––––––––––––––––––––––––––––––––––
Battles 31-40


@

Adamant | Intimidate
236 HP / 36 Atk / 4 Def / 148 SpD / 84 Spe
Fake Out / Flare Blitz / Knock Off / U-turn

@

Jolly | Moxie
252 Atk / 4 SpD / 252 Spe
Close Combat / High Horsepower / Rock Slide / Aerial Ace

@

Brave | Lightning Rod
0 Spe IV
236 HP / 204 Atk / 68 SpD
Shadow Bone / Flare Blitz / Low Kick / Detect

@

Brave | Iron Barbs
252 HP / 252 Atk / 4 SpD
Gyro Ball / Power Whip / Knock Off / Explosion

Notes: First time trying out my Dmax Heracross set, made me change Megahorn for Rock Slide mid-run, Bug STAB didn't feel necessary and being able to deal with Flying types was important. Incin and Marowak were both crucial at times, banded Ferro kinda sucked on this team, I wish I had pulled a better set because it could have put in a lot more work. I remember I was really proud of my plays in a couple of battles, but the fact I had to make plays to be proud of means this wasn't smooth sailing. I remember a lot of switching, and a lot of birds.
MVP:


–––––––––––––––––––––––––––––––––––––––––––––––––––
Battles 41-50


@

Adamant | Intimidate
204 HP / 220 Atk / 84 Spe
Fake Out / Close Combat / Helping Hand / Wide Guard

@

Adamant | Gluttony
180 HP / 252 Atk / 4 Def / 4 SpD / 68 Spe
Belly Drum / Extreme Speed / Stomping Tantrum / Protect

@

Calm | Triage
252 HP / 244 Def / 12 SpD
Draining Kiss / Floral Healing / Helping Hand / Trick Room

@

Modest | Water Absorb
20 HP / 196 Def / 156 SpA / 4 SpD / 132 Spe
Scald / Icy Wind / Helping Hand / Detect

Notes: Drum Espeed Espeed Espeed Espeed, it's fun and it works! Linoone with any support is honestly S-tier in randos, as it was in Gen 7. Vaporeon carried the Leon fight, though!
MVP:


–––––––––––––––––––––––––––––––––––––––––––––––––––
Battles 51-60


@

Bold | Inner Focus
228 HP / 196 Def / 44 SpA / 28 SpD / 12 Spe
Fake Out / Hyper Voice / Helping Hand / Trick Room

@

Quiet | Snow Warning
0 Spe IV
252 HP / 220 SpA / 36 SpD
Blizzard / Energy Ball / Aurora Veil / Protect

@

Brave | Snow Cloak
0 Spe IV
236 HP / 252 Atk / 20 SpD
Ice Punch / Low Kick / Dig / Liquidation

@

Brave | Moxie
0 Spe IV
252 HP / 252 Atk / 4 Def
Close Combat / Megahorn / Rock Slide / Protect

Notes: My whackiest Indeedee set tested for the 1st time and actually did great! It usually doesn't run Trick Room, but I added it because this team needed TR support very badly. Veil helped out a ton, and I think it's the main reason what I thought was a shaky team did work. Heracross (and Beartic, a couple times) had no trouble sweeping, surprisingly smooth run. If anything, Aboma's Sash was totally useless, it had no trouble living stuff without it, so I'll use Light Clay in the future.
MVP:


–––––––––––––––––––––––––––––––––––––––––––––––––––
Battles 61-70 (no Dynamax used)


@

Modest | Weak Armor
252 SpA / 4 SpD / 252 Spe
Shadow Ball / Stored Power / Shell Smash / Protect

@

Modest | Magic Guard
84 HP / 60 Def / 196 SpA / 4 SpD / 164 Spe
Moonblast / Flamethrower / Helping Hand / Follow Me

@

Adamant | Defiant
180 HP / 76 Atk / 252 Spe
No Retreat / Close Combat / Iron Head / Protect

@

Calm | Inner Focus
236 HP / 148 Def / 4 SpA / 76 SpD / 44 Spe
Foul Play / Snarl / Helping Hand / Moonlight

Notes: Once more managed to roll Polteageist + Clefable, what are the odds! Just as good as the first time around. Falinks' damage output disappointing once more as +1 CC failed to OHKO Leon's Life Orb Seismitoad, wth! It really needs a Defiant boost to become a threat...
MVP:


–––––––––––––––––––––––––––––––––––––––––––––––––––
Battles 71-80


@

Modest | Shell Armor
220 HP / 4 Def / 244 SpA / 4 SpD / 36 Spe
Hydro Pump / Freeze-Dry / Thunder / Life Dew

@

Bold | Levitate
252 HP / 100 Def / 36 SpA / 4 SpD / 116 Spe
Air Slash / Thunderbolt / Electroweb / Protect

@

Timid | RKS System
252 SpA / 4 SpD / 252 Spe
Hyper Voice / Flamethrower / Grass Pledge / Air Slash

@

Timid | Justified
252 SpA / 4 SpD / 252 Spe
Scald / Secret Sword / Air Slash / Icy Wind

Notes: Weird roll, full of Pokémon that want to Dmax and lack Protect. Lapras always has priority since it's amazing. Almost went Pikachu over Rotom, I think both wouldve been fine. Lapras just carried pretty easily, Keldeo in rain helped out a lot too, smooth run.
MVP:


–––––––––––––––––––––––––––––––––––––––––––––––––––
Battles 81-90


@

Sassy | Cursed Body
0 Spe IV
252 HP / 60 Def / 116 SpD
Trick Room / Surf / Will-O-Wisp / Strength Sap

@

Quiet | Storm Drain
0 Spe IV
252 HP / 188 SpA / 60 SpD / 8 Spe
Giga Drain / Hyper Voice / Helping Hand / Spiky Shield

@

Brave | Guts
0 Spe IV
236 HP / 252 Atk / 20 SpD
Storm Throw / Facade / Knock Off / Mat Block

@

Sassy | Telepathy
0 Spe IV
252 HP / 180 Def / 76 SpD
Trick Room / Psychic / Foul Play / Instruct

Notes: Put a tiny bit of speed on Maractus just for this run to avoid the speed tie with Jellicent, with Surf on Jelli over Brine. The run was really rough, I hadn't realized upfront that both sweepers were weak to Flying, and had to fight plenty of birbs. At one point, Throh saved the run by Dmaxing vs a Shedinja that was Protect stalling with sash; Throh lived Shadow Claw on 2 HP and broke sash with Knock Off, then I had to Max Darkness through Protect to finish it before dying on the last turn of TR. Maractus OHKOd Charizard with +2 Max Strike (I had Surfed too that turn). Probably lucky to have made it through alive, this was not a good team!
MVP:


–––––––––––––––––––––––––––––––––––––––––––––––––––
Battles 91-100 (no Dynamax used)


@

Timid | Psychic Surge
236 SpA / 20 SpD / 252 Spe
Expanding Force / Hyper Voice / Dazzling Gleam / Mystical Fire

@

Timid | Unburden
244 HP / 4 Def / 4 SpA / 4 SpD / 252 Spe
Foul Play / Snarl / Fake Tears / Parting Shot

@

Relaxed | Forewarn
0 Spe IV
220 HP / 252 Def / 36 SpD
Trick Room / Psychic / Helping Hand / After You

@

Quiet | Liquid Voice
0 Spe IV
252 HP / 60 Def / 196 SpA
Hyper Voice / Moonblast / Ice Beam / Energy Ball

Notes: Amazing luck getting Thievul alongside Indeedee, basically what Thievul was intended for all along! Unburden Fake Tears pairs so well with Specs Eforce. Thank god this team was very good, because the hax was disgusting this round. Noteworthy was a lead Sturdy Gigalith that double flinched me twice with Quick Claw Rock Slide for the double KO on my lead, which would otherwise have dunked over the whole AI team. More Quick Claw action as well as full paras during the run happened too. Since Indeedee had the Specs, Prima traded hers for an AV this time.
MVP:


–––––––––––––––––––––––––––––––––––––––––––––––––––
Battles 101-110


@

Timid | Compound Eyes
252 SpA / 4 SpD / 252 Spe
Thunder / Bug Buzz / Electroweb / Protect

@

Modest | Sap Sipper
252 HP / 124 Def / 76 SpA / 4 SpD / 52 Spe
Dragon Pulse / Sludge Bomb / Flamethrower / Thunderbolt

@

Modest | Sturdy
156 HP / 4 Def / 252 SpA / 4 SpD / 92 Spe
Thunderbolt / Flash Cannon / Electroweb / Protect

@

Brave | Disguise
0 Spe IV
172 HP / 164 Atk / 172 Def
Play Rough / Shadow Claw / Swords Dance / Trick Room

Notes: Dmaxed Goodra a bunch of times, great dmax Pokémon with Life Orb. Galvantula is an unsung hero, provided the important speed control, though I ran into 3 surprising TR teams (not artists), feat. Mimikyu/Chandelure setters. My own Mimikyu helped a lot there. Magnezone didn't see much action but cleaned things up a couple of times. Relatively clean run. Leon's Charizard handled by Eweb + Max Lightning.
MVP:


–––––––––––––––––––––––––––––––––––––––––––––––––––
Battles 111-120 (no Dynamax used)


@

Timid | Prankster
252 HP / 28 SpD / 228 Spe
Tailwind / Moonblast / Fake Tears / Protect

@

Modest | Liquid Voice
76 HP / 68 Def / 108 SpA / 4 SpD / 252 Spe
Hyper Voice / Moonblast / Icy Wind / Protect

@

Timid | Natural Cure
252 SpA / 4 SpD / 252 Spe
Giga Drain / Psychic / Pollen Puff / Earth Power

@

Calm | Overcoat
244 HP / 44 Def / 4 SpA / 116 SpD / 100 Spe
Tailwind / Foul Play / Snarl / Roost

Notes: I was a bit scared of the Fairy/Grass overabundance, but between double Tailwind, Fake Tears, and the Throat Spray, this run was a breeze, including Leon. Mr. Rime gave me the most trouble in 2 different fights, but a secondary Tailwind in the back came in clutch.
MVP:


–––––––––––––––––––––––––––––––––––––––––––––––––––
Battles 121-130


@

Adamant | Grassy Surge
60 HP / 196 Atk / 4 Def / 36 SpD / 212 Spe
Fake Out / Grassy Glide / High Horsepower / U-turn

@

Jolly | Serene Grace
252 HP / 4 Atk / 4 Def / 12 SpD / 236 Spe
Iron Head / Icy Wind / Helping Hand / Follow Me
*This event Jirachi comes from an injected Wondercard. This is deemed acceptable by the Smogon Wi-Fi rules, but I thought I should mention it for transparency. This and a Follow Me Blastoise are the only Pokémon in my collection to have been acquired this way.

@

Jolly | Pickpocket
12 HP / 252 Atk / 4 Def / 4 SpD / 236 Spe
Fake Out / Ice Punch / Knock Off / Low Kick

@

Naughty | Adaptability
204 HP / 60 Atk / 244 Spe
Liquidation / Ice Beam / Head Smash / Final Gambit

Notes: That was pretty shaky overall, pretty frail backline with only Jirachi holding it together. Rilla and Jirachi swept a lot together, Basculin usually cleaned up with Final Gambit. Weavile didn't do much other than die a lot (I ran into so many fighting Pokémon)... whenever I have Protect on that set, I want Low Kick, but boy did I want Protect in this run... Jirachi got its fair share of flinches, which helped. Ran into 2 Centiskorch that both gave me trouble since Basculin can't really be hard switched into it. I had to Dmax Basculin against Leon, only way I could beat Charizard, glad it worked out!
MVP:


–––––––––––––––––––––––––––––––––––––––––––––––––––
Battles 131-140 (no Dynamax used)


@

Timid | Prankster
252 HP / 28 SpD / 228 Spe
Tailwind / Moonblast / Fake Tears / Protect

@

Hasty | Illusion
4 Atk / 252 SpA / 252 Spe
Night Daze / Flamethrower / U-turn / Protect

@

Modest | Battle Armor
252 HP / 252 SpA / 4 SpD
Tri Attack / Icy Wind / Rest / Sleep Talk

@

Timid | Shadow Shield
116 HP / 84 Def / 52 SpA / 4 SpD / 252 Spe
Moongeist Beam / Psyshock / Air Slash / Protect

Notes: Zoroark's first run was great, Lunala proved a perfect disguise, prevented Fake Outs and drew all sorts of Dark and Ghost moves. But U-turning into Type: Null and wearing everything out in range of Whims/Zoroark is how it usually went down. Null was really good at surviving everything and making TW ultimately unnecessary with repeated Icy Winds. However, a Perrserker encounter came down to a 1v1 where I through all Sleep Talk PP. Not to underestimate how much easier Lunala made this, but it didn't do that much in the end.

Pokémon Sword-Shield Screen Shot 2020-08-29, 9.32 AM.png

MVP:


–––––––––––––––––––––––––––––––––––––––––––––––––––
Battles 141-150


@

Timid | Frisk
76 HP / 4 Def / 172 SpA / 4 SpD / 252 Spe
Psychic / Bug Buzz / Giga Drain / Ally Switch

@

Jolly | Hustle
252 Atk / 4 SpD / 252 Spe
Grav Apple / Dragon Rush / Fly / Protect

@

Jolly | Intimidate
12 HP / 252 Atk / 244 Spe
Waterfall / Bounce / Dragon Dance / Protect

@

Jolly | Defiant
188 HP / 20 Atk / 4 Def / 44 SpD / 252 Spe
Double-Edge / Knock Off / Parting Shot / Obstruct

Notes: The lead sounds great on paper because of the G-Max Gravitas + Grav Apple combo, but it wasn't good. There was a lack of speed control for Flapple, and I couldn't touch Steel types, which the backline couldn't handle that well either. Almost lost to a very bulky Hurricane Corviknight confusing Orbeetle into self-hits. When the combo DID work though, it was awesome, especially with setting Grassy Terrain on top! Frisk was the true MVP here, since I had to do a lot of maneuvering through bad matchups.
MVP:


–––––––––––––––––––––––––––––––––––––––––––––––––––
Battles 151-160


@

Hasty | Technician
4 HP / 252 Atk / 252 Spe
Fake Out / Covet / Icy Wind / Taunt

@

Timid | Snow Warning
252 HP / 4 SpD / 252 Spe
Aurora Veil / Freeze-Dry / Icy Wind / Protect

@

Modest | Liquid Voice
76 HP / 68 Def / 108 SpA / 4 SpD / 252 Spe
Hyper Voice / Moonblast / Icy Wind / Protect

@

Brave | Strong Jaw
0 Spe IV
252 HP / 252 Atk / 4 SpD
Fishious Rend / Crunch / Rock Slide / Protect

Notes: Quick Claw on (TR) Dracovish... a sign of how desperate this roll was! Persian stole a wide array of useless items, including a Terrain Extender, a Weakness Policy and a Room Service, but also a nice Sitrus at one point. Dracovish got way too many Quick Claw activations, it was wild, including a streak of 4 during a stally battle vs a mono Water team. Against Leon, Persian stole Mr. Rime's LO, allowing it to do 50% to Gmax Charizard with Covet, a thing of beauty. Paired with Ninetales' Icy Wind, the table was set for a Dmaxless Prima sweep.

Pokémon Sword-Shield Screen Shot 2020-08-29, 12.47 PM.png

MVP:


–––––––––––––––––––––––––––––––––––––––––––––––––––
Battles 161-170 (no Dynamax used)


@

Relaxed | Frisk
0 Spe IV
228 HP / 28 Def / 252 SpD
Trick Room / Seed Bomb / Trick-or-Treat / Ally Switch

@

Brave | Emergency Exit
0 Spe IV
244 HP / 196 Atk / 68 SpD
First Impression / Leech Life / Liquidation / Wide Guard

@

Brave | Iron Fist
0 Spe IV
212 HP / 228 Atk / 68 SpD
Knock Off / Drain Punch / Bullet Punch / Protect

@

Brave | Rock Head
0 Spe IV
204 HP / 252 Atk / 52 SpD
Head Smash / Rock Slide / Wood Hammer / Hammer Arm

Notes: The lead straight up swept Leon without taking any damage other than LO/Rocky Helmet. Inteleon spammed Double Team, passed to Cinderace, but Golisopod connected Liquidation and 2 Seed Bombs took care of Intel. The Trick-or-Treat + Knock Off combo was very strong throughout the run, but Golisopod swept so much, it's crazy. However, I almost lost to Colbur Berry Acid Armor Jellicent... Golisopod saved me with a crit Leech Life.
MVP:


–––––––––––––––––––––––––––––––––––––––––––––––––––
Battles 171-180


@

Timid | Cursed Body
4 Def / 252 SpA / 252 Spe
Shadow Ball / Sludge Bomb / Focus Blast / Destiny Bond

@

Jolly | Unseen Fist
252 Atk / 4 SpD / 252 Spe
Wicked Blow / Close Combat / Iron Head / Protect

@

Brave | Disguise
0 Spe IV
172 HP / 164 Atk / 172 Def
Play Rough / Shadow Claw / Swords Dance / Trick Room

@

Brave | Snow Cloak
0 Spe IV
236 HP / 252 Atk / 20 SpD
Ice Punch / Low Kick / Dig / Protect

Notes: Insanely powerful lead. I went for Max Knuckle + Wicked Blow almost every time. The backline didn't hit the field at all before Leon. I faced two Dmaxes outside Charizard (Hydreigon and Vespiquen). Unseen Fist is incredibly satisfying, one of my favourite abilities in Tower for sure given the massive number of Protects. Non G-Max Gengar would have been better, Def drops would have helped more than Mean Look, but oh well. Vs. Leon, I was able to OHKO Charizard with G-Max Terror after I got a Max Ooze boost on lead Rillaboom. KOd last Pokémon Rhyperior with Destiny Bond :nita:
MVP:


–––––––––––––––––––––––––––––––––––––––––––––––––––
Battles 181-190


@

Timid | Shield Dust
12 HP / 4 Def / 244 SpA / 4 SpD / 244 Spe
Tailwind / Moonblast / Pollen Puff / Protect

@

Modest | Oblivious
12 HP / 4 Def / 236 SpA / 12 SpD / 244 Spe
Water Spout / Scald / Ice Beam / Icy Wind

@

Brave | Iron Barbs
0 Spe IV
244 HP / 244 Atk / 20 SpD
Gyro Ball / Power Whip / Leech Seed / Protect

@

Modest | Surge Surfer
12 HP / 4 Def / 252 SpA / 4 SpD / 236 Spe
Fake Out / Rising Voltage / Expanding Force / Protect

Notes: The general idea: Tailwind + Water Spout, then Pollen Puff Wailord back for more Spouts. Worked quite well most of the time, but I had to Dmax Raichu once as I struggled to KO an opposing Ferrothorn (resorted to terrain boosted Max Lightnings lol). Light Screen Jolteon made things more annoying another time, but overall the lead swept a lot. Raichu without Sash scared me a bit, but I figured I should bring it as a failsafe vs. Charizard, and with Dmax, Life Orb worked out nicely. Got through Leon without Dmax though!
MVP:


–––––––––––––––––––––––––––––––––––––––––––––––––––
Battles 191-200


@

Timid | Telepathy
76 HP / 4 Def / 172 SpA / 4 SpD / 252 Spe
Psychic / Bug Buzz / Giga Drain / Protect

@

Timid | Lightning Rod
84 HP / 4 Def / 196 SpA / 4 SpD / 220 Spe
Thunderbolt / Flamethrower / Snarl / Volt Switch

@

Calm | Drizzle
252 HP / 180 Def / 76 SpD
Scald / Icy Wind / Perish Song / Protect

@

Adamant | Intimidate
76 HP / 244 Atk / 4 Def / 36 SpD / 148 Spe
Flare Blitz / Extreme Speed / Helping Hand / Protect

Notes: For the first time, I had a team to properly support WP Orbeetle! Between Snarl, a quick way of dealing with Flying types, Intimidate and Rain for Fire types, I had plenty of resources to help it out, and all of them came into play during the run. Orbeetle swept through everything except a Shuckle endgame I finished with Perish Song. I took the gambit and Gmaxed it vs Leon too to Overgrowth Rhyperior turn 1; worked out, got WP from Haxorus4's First Impression (intimidated), but I had to let Charizard KO Orbeetle as I Tbolted it with Manectric, a 70% chance to OHKO that I didn't get. I was able to finish things off with Espeed and Politoed Scalds vs last Pokémon Aegislash1. I could've run Thunder on Manectric, but was too lazy to change it lol.
MVP:

(to be continued...)
 
Last edited:

Users Who Are Viewing This Thread (Users: 1, Guests: 1)

Top