Gen III Battle Frontier Discussion and Records

I've moved on from the Factory and put in some time to actually train my own team instead of sponging from the AI, so I'm announcing:

Battle Palace Doubles Lv. 50 - 47 Streak (ended)

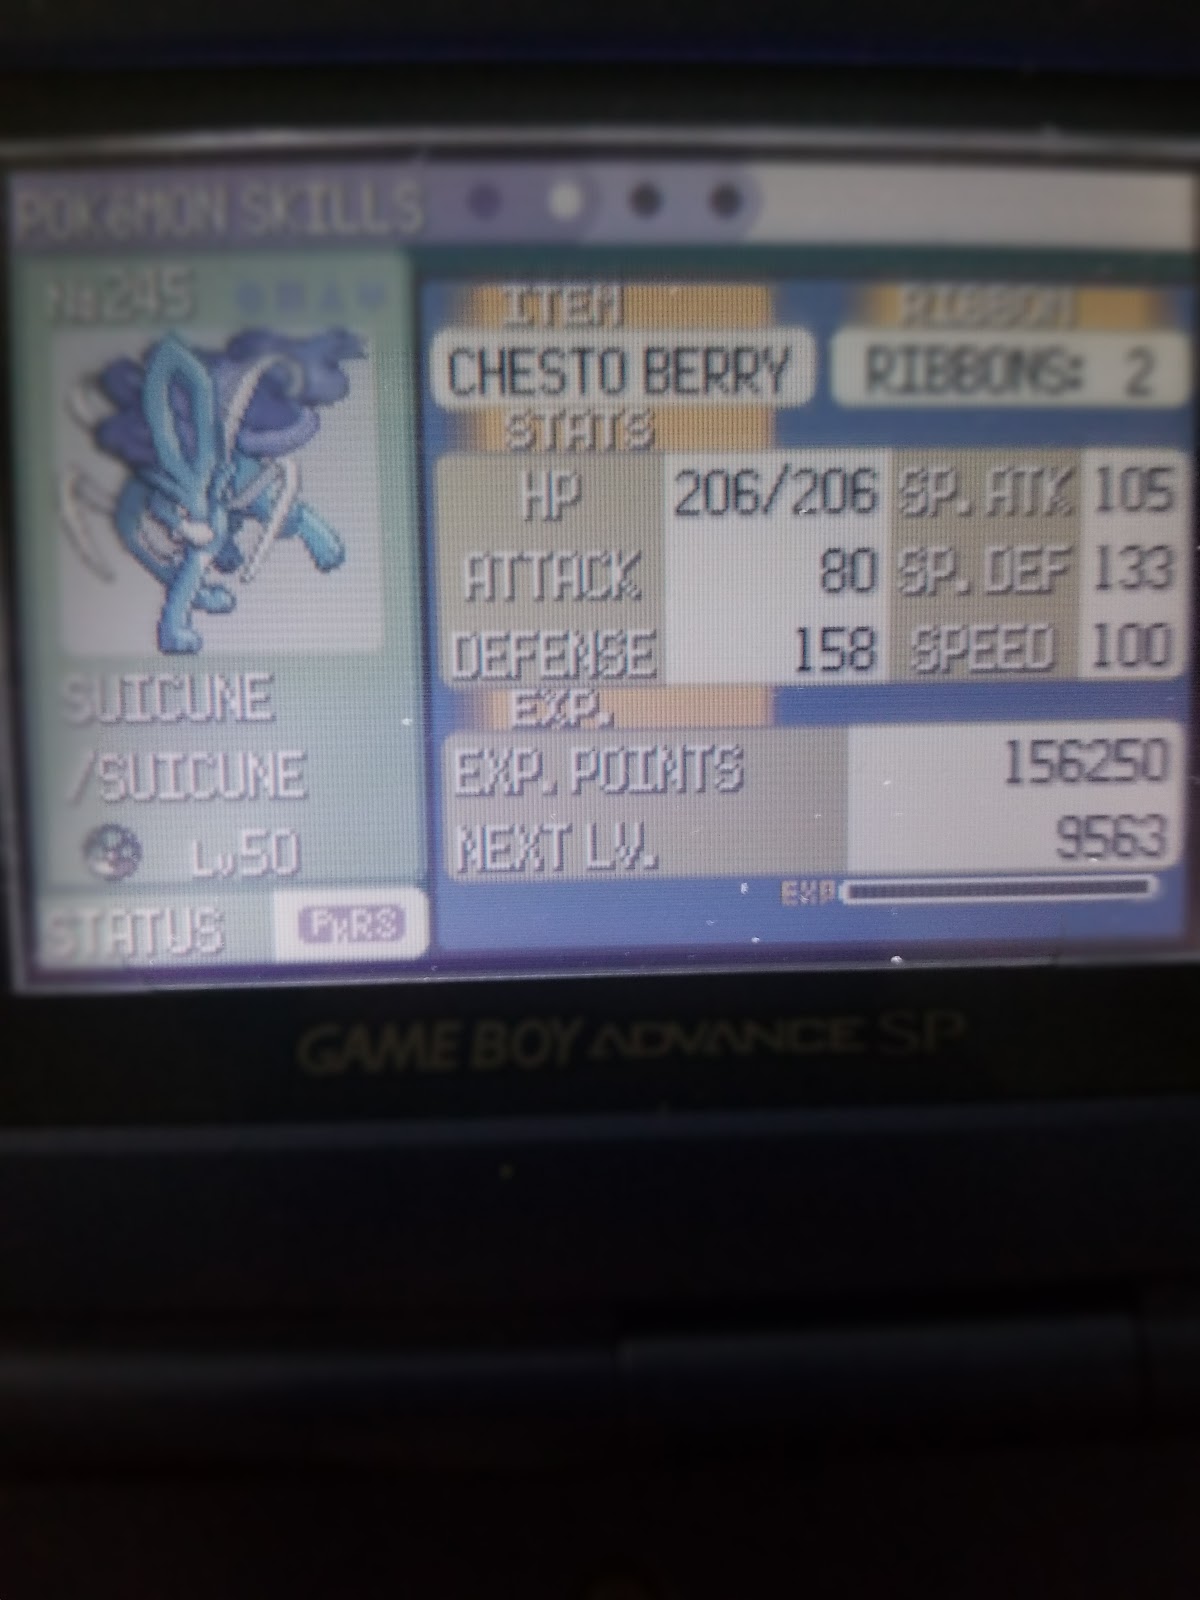
View attachment 244957View attachment 244958View attachment 244959

I was reading some comments in this thread and on Discord about Palace strategies and a couple of them caught my eye.

Firstly, Kommo-o talking about using a Bold Milotic with Toxic to try and actually get some use out of wasted turns by allowing poison to wear down foes. And secondly, Zsy6 mentioned about Curse being a Support move, and suggested Curselax or Curse Miltank as possibilities (with an Impish nature).

Looking at the table of Natures and what their move probabilities are, I figured that since Snorlax has the special bulk to tank a lot of hits and, after repeated Curses, has a lot of physical bulk, I thought the 25%/17% chances of using Curse with Impish looked a little low. Particularly, that 17% chance at <50% means there's a decent chance of Snorlax continuing to Curse when it's at low HP instead of healing itself. Ideally, if it's possibly only got one or two turns left before being KO'd, I'd rather it attacked or healed itself.

So, instead of Impish, I settled on Jolly, with probabilities of 35%/5%/60% and 35%/60%/5% (<50% HP). This means there's only a 5% chance of it using Curse on low health, and correspondingly there's a 95% chance of it either rampaging or sleeping. That chunky 60% chance of using Curse at high HP is also great, because it means Snorlax builds power and bulk quickly in early turns, and so lasts a lot longer. The downside, of course, being that Jolly is +Spe instead of +Def. I figured after a couple of Curses this might offset itself. I selected Immunity over Thick Fat because it's bulky enough on the special side already, and dodging Toxic is a nice ability to have.

Offensively, it made sense to go for Body Slam (decent power, paralysis chance, 100 accuracy) and Earthquake. I didn't want the recoil from Double-Edge; Hyper Beam's wasted turn and accuracy is an issue; and I basically just didn't really think very hard about Return. I might include Return in the future if the damage calcs look good, but the majority of the time, Snorlax is hitting after boosting its Atk anyway. Earthquake is just the go-to move in Doubles and firing it off after a few Curses is a great prospect. Plus, it gets around the issue of single-target moves being 'randomly' targeted in Palace, meaning you don't keep using it over and over against a Levitate or Flying-type foe without at least damaging its Ally.

With Snorlax banked, and its best offensive possibilities including Earthquake, I wanted to move away from Milotic for Doubles, because having to tank boosted Earthquakes from Snorlax was not a happy prospect. Indeed, I needed both potential partners to be completely immune to Earthquake, because there's no way of using Protect reliably and Snorlax could very well be at +6 Atk. I still wanted to include something bulky with access to Toxic, since this would pair well with Snorlax's propensity to keep Cursing and Resting, which wastes a lot of turns. As well as this, I wanted something with access to a healing move which isn't Rest (having both Pokemon asleep at the same time doesn't sound like fun).

So that's where I hit upon Latias: 80/90/130 HP and defences make it bulkier than Latias, a good defensive typing to take advantage of that 130 SpD stat, and access to Recover. Its Psychic typing also synergises well with Snorlax, throwing STAB Psychics at the Fighting types which make up Snorlax's main threats. And Levitate for immunity to Earthquake, of course. It can tank special hits, and even super effective hits from weakish foes.

I'm using my old Emerald cartridge and for some reason I decided to make Latias my roamer instead of Latios way back when. When I caught it, its nature was Impish, which actually is arguably slightly nicer than Bold when it comes to probabilities. It's significantly less likely to use Toxic (50%/10% for Bold; 25%/17% for Impish), but this also minimises wasted turns trying to inflict Toxic again on a Steel-, Poison-type or something that's already poisoned. Since Latias's SpA is a respectable 110, it can actually inflict some damage with increased probabilities of attacking (69%/28% for Impish; 30%/32% for Bold). And when it comes to using Recover, it's 14% less likely to use it at >50% HP (effectively wasting a turn) but only 4% less likely at <50% HP. Of course, the massive drawback is that Impish is a -SpA nature.

Offensively, I needed Psychic to try and KO Fighting-types which threaten Snorlax, as well as hitting Poison-types immune to Toxic; and I also added Surf for added pressure against Steel-types which are immune to Toxic. Plus, Surf being a spread move gets around the targeting issue in the Palace. I did consider Mist Ball, since in return for a drop in power you get a 50% chance of dropping SpA which can cripple quite a few problematic opponents. However, I considered 70 base power (only 105 with STAB...) to just be too low. Plus, it only has 8 PP and Palace battles can last much longer.

For my final team member, I wanted to utilise the other main strategy in the Palace, namely Hasty Choice Band to try and get consistent offensive pressure. I needed something immune to Earthquake, which could preferably counter Ice-types which threatened Latias, had two or three good offensive moves to take advantage of Choice Band, and was fast enough to secure revenge-kills when needed.

I settled on Aerodactyl, which, whilst far from perfect (frail, typing could be better), had a lot of good points. Hasty nature gives it the Spe to outrun everything in Palace except Jolteon-4; STAB Rock Slide spread attack; access to Earthquake; good counter to Ice-types.

Very little to it: only two moves, Choice Band, and it's my reserve team member to come in and go for KOs when Latias and Snorlax have weakened everything. Choice Band boosted Earthquake does hit Snorlax, but its physical bulk (plus possible Curses) minimise the damage. Unfortunately, neither Pressure or Rock Head are especially good abilities but Pressure's better than nothing.

Eon (Latias) (F) @ Leftovers
Ability: Levitate
Shiny: No
EVs: 252 HP / 150 SpD / 108 Spe
IVs: 30 / 18 / 0 / 18 / 8 / 5
Impish Nature
- Psychic
- Recover
- Toxic
- Surf

Professor (Snorlax) (M) @ Chesto Berry
Ability: Immunity
Shiny: No
EVs: 252 HP / 252 Def / 6 SpD
IVs: 13 / 24 / 21 / 20 / 17 / 12
Jolly Nature
- Body Slam
- Rest
- Curse
- Earthquake

Pteraplane (Aerodactyl) (M) @ Choice Band
Ability: Pressure
Shiny: No
EVs: 86 HP / 252 Atk / 172 Spe
IVs: 23 / 27 / 6 / 24 / 20 / 21
Hasty Nature
- Earthquake
- Rock Slide
- No Move
- No Move

Lead with Latias and Snorlax, and 6 times out of 7, you just need to press 'A' about twenty times and collect a win. Aerodactyl was very rarely required except as a tactical switch-in.

Latias has enough Speed EVs to get it to 131 which basically is just neatly ahead of things like other Latias, which can help with getting the jump. I only tend to switch Latias out if I'm facing a strong Ice- or Dragon-type which I know will KO Latias easily. Its special bulk makes this relatively unusual. Blizzard is less of a threat in Doubles because its power is diminished, and a lot of non-STAB Ice Beams etc. are 3HKOs and can be sponged with Recover. Additionally, since it's Palace, the AI often doesn't select the optimal moves to begin with, and often Latias is hit by Flamethrower or Hydro Pump instead of Ice Beam and Dragon Claw. Status isn't ideal, especially Toxic, but Leftovers over Lum Berry provides a lot of passive healing during the myriad of wasted turns. And even then, being burned isn't so bad; paralysis is annoying but not actually crippling; Confusion is annoying but recoil damage isn't massive. Access to Recover (and using it liberally) goes a long way to compensate for status. I usually found that Latias spends most of her time attacking with Psychic or Surf, occasionally throwing out Toxic. Under 50% HP, it's nearly always Recover.

Snorlax is a boring task of spamming Curse for as long as it wants, before eventually finding the time to attack. I only switch it out if there's a powerful Fighting-type foe which can do a lot of damage on the first turn. Focus Punch is a particular problem, because you can't rely on Latias actually attacking on the first turn for sure. After a few Curses Snorlax can tank hits so I don't tend to switch it out once it's got going. Unfortunately it can and will try to Rest when it's only lost a tiny bit of HP but this is minimal. I think in the entire run Snorlax was only KO'd once or twice, total, it just lasts forever with Rest.

Aerodactyl has the Speed EVs to touch the magic 183, then the rest is in HP and Atk since it can only at best tie Jolteon-4. There's no strategy for Aerodactyl. I only bring it in against threats which would be problematic for Latias or Snorlax. Sometimes I allow Latias to faint in order to give it a free switch-in, but with Surf's power reduced, Blizzard's power reduced, and the general unpredictability of the Palace, I don't think I ever had any problems with getting it in safely. Rock typing has general utility in just resisting a lot of the usual AI spam attacks. It's possible Aerodactyl could have some strong points as a lead Pokemon, as it's fast and consistently hits, but unfortunately both Toxic and Curse need turns to get going and allowing Aerodactyl to hang around unnecessarily long doing ineffectual damage only hinders the team.

Generally in the Palace, there's not much 'strategy' because you've got extremely limited input. In 3v3 Singles, the ability to switch gives you three potential match-ups between you and the foe; in Doubles, there are only two, and one of your Pokemon has to stay on the field no matter what. This means that there's even less input than ever. The main strategy to avoid this problem is just to make a front pair who are bulky. Unlike in Dome/Tower etc., powerful but frail Pokemon struggle because the balance of probabilities is not in their favour. The strong law of large numbers is your friend in Palace.

The good thing about Palace, as opposed to other facilities, is that the AI is extremely stupid. Although it's impossible to counter specific threats with your own team, sometimes very threatening foes can be KO'd without doing anything because the Palace probabilities ruin them. For the same reason that it's important to use different natures on your team in Palace, the AI struggles against the bad natures it gets saddled with. Movesets are also not tailored to the Palace, so sometimes you can get a foe with 4 offensive moves and only a 20% chance of attacking (e.g. Lonely nature). Jolteon-4 has a 50% chance of using Thunder Wave at low HP (even if you're already paralysed) and a 20% chance of doing nothing.

The Palace is full of problems, because it's impossible to guarantee being able to use a single move at any given time. Most of them have little or no reliable way to counter.
  • OHKO moves. I've got no answer to most OHKO users apart from just trying to KO them as fast as possible. I actually lost an early-round match on a previous streak to Pinsir-2 with Guillotine, who KO'd Snorlax on Turn 1 and Latias on Turn 2. It's luck, in the end, that means the OHKO users are unable to use their power or just miss the attacks.
  • Quick Claw. It's not a huge problem because both Latias and Snorlax are tanky, but QC Double-Edge or Earthquake on Turn 1 can weaken Snorlax quite a bit. Sometimes if EQ is a problem I switch straight to Aerodactyl for immunity.
  • Bulky (or Double Team) Pokemon immune to Toxic. Skarmory, Weezing, Venusaur, Registeel etc. can all cause problems because there's no way of wearing them down. Usually I just have to wait until I get lucky with SpD drops from Psychic or Snorlax gets 4 or 5 Curses off. Thankfully relatively few of them are seriously threatening in their own right.
  • Bulky fighting-types can be problematic as usually Latias can't OHKO. Focus Punch is also unpredictable.
  • Boosting opponents can be threatening because sometimes, infuriatingly, Latias/Snorlax just won't attack them, then get into a loop of using Recover/Rest.
  • Aerodactyl can get locked into Earthquake as the final Pokemon on the field, and be unable to hit Pokemon that are immune.
  • Teeter Dance is extremely frustrating, because it confuses everything on the field, and you can't effectively counter it by switching because you can only switch one Pokemon per turn. Aerodactyl does a lot of recoil damage to itself through confusion.
  • Targeting is a perennial problem: just because Latias uses Psychic, doesn't mean it's going to target that OHKO it could get on Gloom rather than the ineffective attack on its partner Cacturne. This is frustrating and, given the number of immunities around (Ghost-types, Steel-types, Poison-types, Flying-types, Levitate, Immunity, Water Absorb, Dark-types), it happens often.
  • Explosion users are a big issue before Snorlax can get off a few Curses, but this is down to luck as to whether they even use it, and even if they do, the ally damage can mean you're in a 1v1 situation at worst.
  • Latias's offensive stats are a bit lacking. Nearly everything is a 2HKO at best.
I have wondered about the utility of Gengar instead of Aerodactyl in the third slot to counter some of these threats, but normal Gengar strategies are too difficult to execute in the Palace. It doesn't gain much from Choice Band, and really I would just be using it for the Ghost- and Ground-type immunities without any real reason. Flygon is another possibility but it shares a crippling Ice-type weakness with Latias.

To be honest, I didn't even bother to make notes for most of the run. None of my previous battles were close.

I lost on Battle 22 of my first streak because of Pinsir-2 (previously mentioned) which hit twice in two turns with Guillotine, then finished off Aerodactyl. That kind of luck just can't be countered.

The eventual loss on Battle 48 started by facing Rest/Curse Skarmory and an Explosion Golem. Neither of these is especially threatening to Latias and Snorlax, but Explosion is a problem when Skarmory can survive it. It's possible I might have played better by switching Latias for Aerodactyl to leave Latias facing Skarmory and an unknown Ally, but Surf is my best counter to Golem and I was reluctant to give Golem more turns than it needed. Unfortunately, Golem survived Surf and promptly blew itself up, KOing Snorlax and Latias and leaving Skarmory on ~1/3 HP. Aerodactyl came in, and Golem's replacement was Flygon. Aerodactyl spent two turns doing nothing while Skarmory used unboosted Fly and Flygon used Earthquake twice, so I thought that if I could get Rock Slide, I might just grind it out. It locked itself into Earthquake instead, and the match was over.


Very happy with how this went and if I can find time, I may try to push it out longer or make some tweaks. Really enjoying Doubles and this team is, surprisingly, quite fun to play with, despite the Palace's quirks. Would love to break 50.
Had another go at the Palace with this team and did slightly better.

Battle Palace Doubles Lv. 50 - 55 Streak (ended)

Exactly the same team as before.

Facing a Heracross and Nidoking, set unknown. I was fearing a first-turn Brick Break/Double Kick type situation and switched Snorlax for Aerodactyl, since either Rock Slide or Earthquake would do some good damage. Latias hit Nidoking with Psychic for ~70% damage. Nidoking used Surf (so it's Nidoking-3) and did 30% damage to Aerodactyl. Heracross (moved after Latias so it's Heracross-1) followed it up with a Megahorn on Aerodactyl for the KO. Snorlax was back in for Turn 2. Latias used Toxic on Heracross, which possibly activated Guts, unfortunately. Nidoking was incapable of using its power. Heracross hit Snorlax with Megahorn and did about 75% damage. Snorlax Cursed. Turn 3: Latias hit Heracross with Psychic and did about 75% damage. Heracross used Megahorn on Latias for the OHKO and Nidoking landed Horn Drill on Snorlax.

A little disappointed by this because the team had overcome some much harder battles up to this point. Heracross is always a difficult Pokémon because of Megahorn/Brick Break threatening Latias and Snorlax on Turn 1, plus the risk of Guts, and up to this point my best strategy was to switch for Aerodactyl. In reality this battle might have gone better by leaving Snorlax in on Turn 1, especially since it was Nidoking-3 which is the most threatening to Aerodactyl anyway with Surf.

0- SpA Latias Psychic vs. 252 HP / 0 SpD Nidoking: 122-144 (64.8 - 76.5%) -- guaranteed 2HKO
0- SpA Latias Psychic vs. 0 HP / 0 SpD Heracross: 102-120 (65.8 - 77.4%) -- guaranteed 2HKO

Even a Bold Latias with max SpA EV investment wouldn't have got OHKOs on these two. The key to my downfall was losing Aerodactyl without it being able to attack.
Palace.jpg
 
Reporting an ongoing streak of 420 cleared rooms in the Pike.

The team I'm using is:

Tauros @ Choice Band
Jolly
38HP / 252Atk / 220Spe
- Return
- Earthquake
- Hidden Power Ghost
- Hyper Beam

Latios @ Lum Berry
Timid
16HP / 26Def / 252SpA / 220Spe
- Calm Mind
- Psychic
- Ice Beam
- Thunderbolt

Blissey @ Leftovers
Bold
252HP / 252Def / 6Spe
- Softboiled
- Aromatherapy
- Seismic Toss
- Toxic

Blissey is just the standard Pike cleric, while Tauros and Latios form a very strong Doubles duo, which is important, since if you follow the right strategy (never enter the "trainer"-rooms, and otherwise always pick the described room), being able to come out of double battles without takinfmg much damage is the most important thing. In addition, Intimidate has nice synergy with Natural Cure, in case you need to switch around to get everything cured. For example I had a battle against Lucy with my whole team asleep and could just go Tauros -> Blissey -> Tauros -> Blissey -> Armoatherapy -> Tauros and start sweeping with Earthquake without taking too much damage beforehand thanks to Intimidate.
Before my current streak, I had two attempts that ended at 109 and 146 respectively, both because I'm horribly inexperienced in doubles (never played VGC or any Smogon doubles format) and made some dumb decisions.

WhatsApp Image 2020-05-14 at 1.55.35 PM.jpeg
 
Last edited:
Reporting an ongoing battle tower streak of 210. I went up to 105 wins with Sub CM Latias, but swapped it out for Latios, which is better in that role. The set is better explained by Adeade, as this is his set.

Basically the premise is very simple, try to set up to +6 behind a substitute with either Suicune or Latios. Suicune plays a little more defensively though, as I frequently use it to switch into Fire types that have crunch and to switch into things like Aerodactyl.

In my earlier editions which unfortunately failed, I had fully specially invested Dusclops, who was on the team to stall out PP and have a good switch into Heracross. Unfortunately, it got frozen a lot from eating ice beams and the lack of hp made it 3koed by most neutral hits. Amazing heracross counter though.

I replaced it with Registeel and haven’t looked back. Gives me an amazing check to the Dragon types like Latios and Latias. Seismic Toss for consistent damage, toxic for those annoying specially defensive mons and those double teamers (looking at you Ludicolo 4!), iron defense to make it a nice mixed wall and rest with chesto berry. I found myself really needing the iron defense, as some versions of Latios and Latias carry EQ.
Sidenote: Ludicolo 4 shows up a lot around 100 ish. Super annoying to have a +6 Suicune only to encounter this thing.

Threats
Heracross- Suicune can sort of check it and Registeel can too with iron defense, but crits would put me in a lot of trouble. Hilariously, that situation actually did happen, where Heracross crit my Suicune, but iron defense Registeel knocked it out with S-toss.
Snorlax- I never like seeing this. If it’s a non-boosting set, it’s not a big threat, because Suicune can stall it out, but the belly drum and curse sets with immunity can be really scary. Quick Claw Snorlax also deserves a mention.
Gyarados 4 - It’s 3koed at the worst by unboosted Latias/Latios and I almost lost to this on battle 100. It boosted up twice on Latias, rested with the chesto berry and I was fearing the sweep at that point. Latias lived the return and weakened it enough to force another rest. Then I took advantage of the sleep turns to set up another sub/cm, before knocking it out.
Starmie 3/Gengar 5&7&8/Gardevoir 4- which have the coverage to really dent my team. I live any hit at full, but I always fear the crit.
Quick Claw users- Rhydon, Lapras, which have too many sets to worry about.
Ursaring is a big threat. Damn. That thing hits way too hard. Bright powder and Band set is dangerous.

https://pokepast.es/f4d298bdbb967f30
My streak unfortunately ended at 347 wins. Lost to Scizor Baton passing 2 SD and agility to Heracross and got totally smashed.
I think I need a phaser for those physical boosters because those are clearly a problem if they are the lead AI matchup.

https://kapwi.ng/c/aUsUOAfo
 

Attachments

Last edited:
Finally lost in my Pike streak at 559 cleared rooms. I had to sacrifice Blissey in a close Double Battle and in the next room Tauros and Latios got Poisoned. After that I faced a "stronger" trainer with Articuno, Entei and Suicune. I could beat Articuno and Entei, but Suicune was the Suicune-2 set and proceeded to toxic stall both my mons with Double Team / Protect / Dive.

Pokemon - Emerald Version (USA, Europe)_1589461353327.png

Going to try out Palace next, the ideas thrown around on the last few pages of this thread really got me hyped for it.
 
Finally lost in my Pike streak at 559 cleared rooms. I had to sacrifice Blissey in a close Double Battle and in the next room Tauros and Latios got Poisoned. After that I faced a "stronger" trainer with Articuno, Entei and Suicune. I could beat Articuno and Entei, but Suicune was the Suicune-2 set and proceeded to toxic stall both my mons with Double Team / Protect / Dive.


Going to try out Palace next, the ideas thrown around on the last few pages of this thread really got me hyped for it.
God damn you. I wasn't expecting anyone to dethrone me as Pike King (yes, that's a thing) in a hurry. Congrats though!
 
Hey all, I've been experimenting with variants of Adedede's (excellent!) team in the Dome. But before I post anything about this, I have a more general question about the Dome's mechanics. Does anyone know how CPU chooses which 2 pokemon (out of 3) to bring into battle? According to Bulbapedia,
To determine the Pokémon sent out by a CPU Trainer against the player, each of the CPU Trainer's three Pokémon is given a score. There are two scoring methods, which are chosen at random: the offensive method and defensive method. Both methods compare the type affinity of the Pokémon's damaging attacks against each of the three Pokémon on the player's team. In the offensive method, 2 points are awarded if the attack is normally effective, 4 if super effective, and 8 if 4× super effective. In the defensive method, 2 points are awarded if the attack is resisted, 4 if 4× resisted, and 8 if ineffective. 2 points are deducted if super effective, and 4 are deducted if 4× super effective ... the two highest-scoring Pokémon is chosen (if there is a tie for the second selection, the second selection of Pokémon is chosen at random).
However, I don't think this is fully correct. Instead, the CPU appears to cheat and makes its choice in response to what you picked. (The experiment below contains evidence for this.)

I entered the dome with a Suicune that knows only Surf, a Snorlax that knows only Double-Edge, and a Trapinch (lol) that knows only Earthquake. The opponent was Sailor Garett with the following team:
Golduck 3 (Hydro Pump / Cross Chop / Blizzard / Protect)
Whiscash 3 (Sleep Talk / Rest / Surf / Fissure)
Hariyama 3 (Cross Chop / Earthquake / Rock Slide / Facade)

When I chose Snorlax+Suicune (in either order), Garett's team always contained Golduck (the four combinations G+W,W+G,G+H and H+G all appeared at least once).

When I chose Suicune + Trapinch (in either order), Garett's team always contained Hariyama (again, the four possible combinations all appeared at least once). The same is true for Snorlax + Trapinch, in either order.

I don't understand Bulbapedia's description of the defensive method (it makes it sound like the method awards points for having moves which are ineffective against your team), but I believe that, according to the offensive method,
Against Suicune / Snorlax / Trapinch:
Golduck scores: 2 / 8 / 10
Whiscash scores: 2 / 4 / 6
Hariyama scores: 8 / 10 / 6
Both overall and for each pair of Suicune / Snorlax / Trapinch, Whiscash scores lowest, so presumably the offensive method always chooses G+H, and indeed this pair is always observed no matter what pair I choose.

Does anyone have more precise information on how the team selection process works?

Also, a useful dome comment: If you select 'Tourney Tree' in a match, you can see what move your opponent used to win previous fights. Very occasionally, this gives useful information as to what sets the opponent is running.
 
Got some free time now, here is my Battle Pyramid record and experience. This is the trickiest one to remember since I swapped teams depending on the floor...

Battle Pyramid: 77 floors (ongoing)
heracross-f.png

Heracross @ Choice Band
Ability: Guts
EVs: 228 Atk / 32 SpD / 248 Spe
Adamant Nature
- Megahorn
- Brick Break
- Earthquake
- Rock Slide

metagross.png

Metagross @ Shell Bell (I think?)
Ability: Clear Body
EVs: 208 HP / 212 Atk / 20 Def / 68 SpD
Impish Nature
- Meteor Mash
- Earthquake
- Sludge Bomb
- Explosion

starmie.png

Starmie @ Brightpowder (?)
Ability: Natural Cure
EVs: 4 HP / 252 SpA / 252 Spe
Timid Nature
- Surf
- Psychic
- Ice Beam
- Thunderbolt

For the 3rd floor I took advantage of the burning Pokemon so I burned my Hera on purpose with a Flame Body Macgargo, equipped a Choice Band and just let it go on any opponent I ran into. Brandon? PSSSSH! Battle was over in 3 Brick Breaks. CB Burned Guts Heracross is insane.

houndoom-f.png

Houndoom
Ability: Early Bird
EVs: 248 SpA / 8 SpD / 252 Spe
Timid Nature
- Flamethrower
- Crunch
- Bite
- Overheat

I noticed Houndoom fares well against several of the wild mons like like Ghost-types and Wobbuffet so I trained one just for the 4-9 floors while Starmie takes a seat. Double Dark STAB so I don't ran out of PP or in case of Spite/Grudge. I totally recommend this mon if you are struggling with the wild Pokemon.

rhydon-color.png

Rhydon
Ability: Rock Head
EVs: 192 HP / 236 Atk / 60 Def / 20 SpD
Adamant Nature
- Earthquake
- Rock Slide
- Megahorn
- Double-Edge

I trained this Rhydon for the battle against Gold Brandon and his Legendary Bird team, particularly Zapdos. Against him I used: Metagross, Rhydon and Starmie. The beginning was rough bc he set up Reflect and switched around a bit, an unusual npc tactic, but I managed to hold in and once Zapdos went down, Starmie took care of the rest with ease. I cleared another 7 floors afterwards, I love this facility.
20200510_200037.jpg
 
Last edited:
Hey all, I've been experimenting with variants of Adedede's (excellent!) team in the Dome. But before I post anything about this, I have a more general question about the Dome's mechanics. Does anyone know how CPU chooses which 2 pokemon (out of 3) to bring into battle? According to Bulbapedia,


However, I don't think this is fully correct. Instead, the CPU appears to cheat and makes its choice in response to what you picked. (The experiment below contains evidence for this.)

I entered the dome with a Suicune that knows only Surf, a Snorlax that knows only Double-Edge, and a Trapinch (lol) that knows only Earthquake. The opponent was Sailor Garett with the following team:
Golduck 3 (Hydro Pump / Cross Chop / Blizzard / Protect)
Whiscash 3 (Sleep Talk / Rest / Surf / Fissure)
Hariyama 3 (Cross Chop / Earthquake / Rock Slide / Facade)

When I chose Snorlax+Suicune (in either order), Garett's team always contained Golduck (the four combinations G+W,W+G,G+H and H+G all appeared at least once).

When I chose Suicune + Trapinch (in either order), Garett's team always contained Hariyama (again, the four possible combinations all appeared at least once). The same is true for Snorlax + Trapinch, in either order.

I don't understand Bulbapedia's description of the defensive method (it makes it sound like the method awards points for having moves which are ineffective against your team), but I believe that, according to the offensive method,
Against Suicune / Snorlax / Trapinch:
Golduck scores: 2 / 8 / 10
Whiscash scores: 2 / 4 / 6
Hariyama scores: 8 / 10 / 6
Both overall and for each pair of Suicune / Snorlax / Trapinch, Whiscash scores lowest, so presumably the offensive method always chooses G+H, and indeed this pair is always observed no matter what pair I choose.

Does anyone have more precise information on how the team selection process works?

Also, a useful dome comment: If you select 'Tourney Tree' in a match, you can see what move your opponent used to win previous fights. Very occasionally, this gives useful information as to what sets the opponent is running.
I don't have an emulator to play on so I can't really do any independent testing. It would be interesting if you re-tried this test again against a few different opponents, as that might add some evidence. Some basic thinking suggests that the Bulbapedia method must be flawed if the CPU always brings Golduck against one pair and always brings Hariyama against another. This would mean the CPU does its calculations against what Pokemon you actually select, rather than your whole team.
 
Hey all, I've been experimenting with variants of Adedede's (excellent!) team in the Dome. But before I post anything about this, I have a more general question about the Dome's mechanics. Does anyone know how CPU chooses which 2 pokemon (out of 3) to bring into battle? According to Bulbapedia,


However, I don't think this is fully correct. Instead, the CPU appears to cheat and makes its choice in response to what you picked. (The experiment below contains evidence for this.)

I entered the dome with a Suicune that knows only Surf, a Snorlax that knows only Double-Edge, and a Trapinch (lol) that knows only Earthquake. The opponent was Sailor Garett with the following team:
Golduck 3 (Hydro Pump / Cross Chop / Blizzard / Protect)
Whiscash 3 (Sleep Talk / Rest / Surf / Fissure)
Hariyama 3 (Cross Chop / Earthquake / Rock Slide / Facade)

When I chose Snorlax+Suicune (in either order), Garett's team always contained Golduck (the four combinations G+W,W+G,G+H and H+G all appeared at least once).

When I chose Suicune + Trapinch (in either order), Garett's team always contained Hariyama (again, the four possible combinations all appeared at least once). The same is true for Snorlax + Trapinch, in either order.

I don't understand Bulbapedia's description of the defensive method (it makes it sound like the method awards points for having moves which are ineffective against your team), but I believe that, according to the offensive method,
Against Suicune / Snorlax / Trapinch:
Golduck scores: 2 / 8 / 10
Whiscash scores: 2 / 4 / 6
Hariyama scores: 8 / 10 / 6
Both overall and for each pair of Suicune / Snorlax / Trapinch, Whiscash scores lowest, so presumably the offensive method always chooses G+H, and indeed this pair is always observed no matter what pair I choose.

Does anyone have more precise information on how the team selection process works?

Also, a useful dome comment: If you select 'Tourney Tree' in a match, you can see what move your opponent used to win previous fights. Very occasionally, this gives useful information as to what sets the opponent is running.
The AI is not cheating you. What you actually listed from Bulbapedia is how the AI determines their choices against yours. Your team is also given a score that the AI is able to read and based on that they make their choices. There are also odds in which the AI determines what Pokemon will be choosing to lead against you. There's a 60% chance that the Pokemon with the highest score will be leading and a 40% that it will not, so in the end, this is also dependant on RNG. The fact that you mentioned that all combinations appeared regardless of how much you swapped your team, doesn't proves that the AI is counter-picking.
 
Hey all! Long time lurker, first time poster. I've recently completed the Frontier on my retail cartridge with all legit Pokemon that I bred myself. Only a couple of them have "quite impressive" IVs, but they got the job done. I don't have access to a laptop, so until there is a mobile app of the Eon Timer and RNG software, I cannot RNG manipulate. That being said, I manipulate the game with the Pomeg glitch to unlock the Eon Ticket/stationary Lati@s, as well as the cloning glitch to get extra items and clones for different movesets. I first have to give thanks to Adedede for his gold symbol guide ~8ish pages back. I used his Pike, Arena and Pyramid teams with a few modifications. Once I had the right Pokemon bred, I completed every facility in a timely manner--that is, except for the Battle Factory. The Factory took me an extra 3 weeks of trying/failing and there is little advice out there for those poor souls aspiring for Factory gold. So I compiled a little extra intensive guide of everything I encountered in hopes of filling that void.


Naughtios (Latios) @ Lum Berry
Ability: Levitate
Level: 50
EVs: 4 HP / 252 SpA / 252 Spe
Timid Nature
IVs: 9 HP / 1 Atk / 25 Def / 30 SpA / 8 SpD / 25 Spe
- Calm Mind
- Thunderbolt
- Dragon Claw
- Psychic

Wusthof (Metagross) @ Choice Band
Ability: Clear Body
Level: 50
EVs: 252 Atk / 92 SpD / 164 Spe
Adamant Nature
IVs: 29 HP / 15 Atk / 25 Def / 29 SpA / 22 SpD / 16 Spe
- Earthquake
- Rock Slide
- Aerial Ace
- Explosion

Doopy Egg (Blissey) @ Leftovers
Ability: Natural Cure
Level: 50
EVs: 252 HP / 252 Def / 4 SpD
Bold Nature
IVs: 17 HP / 17 Atk / 20 Def / 29 SpA / 27 Spe
- Seismic Toss
- Soft-Boiled
- Toxic
- Heal Bell
It's no secret that Latios is the best offensive lead in the Battle Tower singles. I picked the next two teamslots based on switch-ins to the Pokemon that force him out. Blissey is usually up for switching in on Ice, Dragon or LITERALLY ANY special type attacks. Metagross is the physical counterpart, and can be seen switching in and exploding on most dangerous physical sweepers or Aerial Acing tricky evasion boosters.
-Unpoisonables. These guys are dangerous and need to be attacked ASAP to avoid them setting up.
-Counter users vs. Metagross. Regirock is the biggest offender, sometimes forcing me to trade Metagross for only 53% damage.
-Being choice locked into a bad move. There were some close calls where Metagross was my last pokemon, the opponent had two, and a tricky final pokemon could've ended me.
-OHKO moves. A difficult hurdle for all lengthy battle streaks, but I was just plain lucky.
-Critical hits on anyone. They help you, they hurt you.
-Evasion boosters who don't mind Toxic. I'm looking at you Registeel4/5.
-Better HP and SpD IVs on Latios would allow me to avoid crit Ice Beam OHKOs.
-Move 92 SpD EVs to HP or Def on Metagross. Standing up to Earthquake users is probably more relevant than the Tentacruel matchup...
-Move EVs to Speed to hit 106 or 112 Speed on Metagross. 106 outspeeds Suicune, Articuno, Kingdra, Nidoking and 112 outspeeds opposing Metagross.
-Change Heal Bell to Substitute on Blissey. This would potentially help against OHKO move users. Heal Bell was nice insurance against paralysis.
-Move EVs to Speed to hit 76 on Blissey. 76 outspeeds Machamp, physical Ursaring, physical Ampharos, Swalot and Crawdaunt
-Level up the Open Level Pike and Pyramid teams to 100. This would maximize Blissey's Seismic Toss. Seriously, it turns many 4HKO's into 3HKO's.
20200508_201852.jpg
Wow this facility is hard. Sometimes it is more luck based than Pike or Palace. Your starting lot of 6 can make or break runs.
I lost on open level battle 36, the first battle of the factory head round, because I was given a hint that warned "the next trainer is skilled with Ice type Pokemon", was given Latias, Suicune, Entei, Donphan, Houndoom or Charizard, and the opponent's lead was Lapras with Blizzard, Hydro Pump, Thunder, Rain Dance. I desperately tried to lower its SpAtk with Mist Ball twice, but no luck. Suicune frantically used Bite, but Rain Dance ensured two thunders would kill. Entei knocked out Lapras, but a Dragonite came in, outsped, and hit Surf. Absolutely no combination of the starting six could have beaten that very first trainer.
Tl;dr they can give you an unwinnable matchup. There's only so much you can do, so don't beat yourself up.
Before attempting, make sure you reset your battle tower streak by forfeiting on the first battle. I found the Factory is overall easier to beat when challenging level 50 instead of open, because you can know for certain what your oppenents run. The sets all go in order for level 50 and avoid the traditional Tower outcasts, Dragonite and Tyranitar, and also the Dog, Regi and Bird trios. Open level will use sets in order up until battle 29, where all hell breaks loose, and the 4-6 different sets are randomly chosen. Level 50 sets, on the other hand, are static (at least up until the Factory Head). When challenging level 50 in the Battle Factory, you have to look at all the Pokemon that you might encounter in that round, and view it as its own little metagame. So if they warn that the opponent is skilled with Normal types, take a peek at the most threatening potential Normal sets. You might find out the Snorlax in this round has Earthquake and Rock Slide, making Claydol worth swapping for. This all helped me figure out what Pokemon shine in lower tiers, where the formidable Pokemon might not be obvious. For example, Graveler is fantastic, not only because of its typing and stats, but because in the first round it has Protect. And since the strongest Ground move you'll run into is Dig, Graveler turned its Ground weakness into an immunity.
TEAM COMP: The team must try to always follow the format: Fast Lead, 2 Fat Pokemon in the back. The Fast Pokemon should be, for the most part, only attacking, unless a Fat Pokemon can switch in safely to wall the opponent. Envision every matchup that might cause your Lead to switch out, and build around this. An occasional exception to the "Fast Lead" team-building rule is that mid-speed Intimidate, paralysis or great coverage users can have viability in the lead position. More times than not, one of the Fat Pokemon will be a Water type. Be cautious that you can't be swept by any one move. Don't be afraid to double up on typings as long as it doesn't deplete you of resistances and coverage. You also have to play differently depending on what round it is. In the first two rounds, the AI is bad, so don't think you can safely switch in Gengar on enemy Tauros, because that Tauros might be trying to Ice Beam your Lapras. Starting round 3, the AI is smarter and doesn't dawdle looking for the super effective move. This is great because by round 4, you can play as if you are in the Battle Tower, switching in safely knowing the AI will pick the smartest move. Do realize Factory Head Nolan has wonky AI and might spam Encore though.
SPECIFIC STRATEGIES: Avoid Endure/Flail strategies (even on Kingdra), as the AI loves their confusion, speed control, status. Ninjask can be a okay in Lead slot, but it's unreliable. Espeon performs the Baton Pass lead much better. Protect-Mons are very strong in the early rounds due to them invalidating 2-turn charging moves. Health recovery is very valuable and should be prioritized, as you never know when the extra 20% will matter. Try to observe which ability you are battling, as it's a 50/50, unless you've seen that Pokemon earlier in the round, in which case its ability is locked in for the rest of the round. It is so tedious, but if you're unsure of what may happen, you absolutely have to load up a damage calculator, factoring the imperfect IVs on both sides of the field. All Water/Ground are pretty decent, so if running one, really scout which Pokemon that round have Giga Drain. A lot of Grasses/Poisons opt to go physical and drop Grass coverage. If you carry an Ice move, you can more easily KO, and then obtain, Salamence, Flygon, and Gligar. Grass moves for Swampert and Whiscash. Fighting moves for Blissey and Snorlax. After 15//22 swaps, 1//2 of the Pokemon from the next number set is pulled down for you to battle/obtain. These pokemon are nice but not worthy of swapping carelessly. I swapped pretty often up until the 5th and 6th rounds, where I hardly swapped at all from my starting picks.
So the following Pokemon I've found worthy of building a team around - so long as you're using them in an appropriate team slot.

[L]=In Lead Position (B)=In the Back Position [L/B]= Both Lead and Back

Lvl 50 Round 1- Masquerain1[L/B], Staryu1[L/B], Gligar1[L/B], Vibrava1[L/B], Graveler1, Pidgeotto1[L], Poliwrath 1[L/B], Houndour1[L/B], Magnemite1[L/B], Metang1, Dunsparce1[L/B]

Lvl 50 Round 2- Zangoose1[L], Scyther1[L], Grumpig1[L/B], Girafarig1[L], Magneton1[L/B], Lairon1, Hitmontop1, Mantine1[L/B]

Lvl 50 Round 3- Kadabra2[L], Girafarig2[L/B], Linoone2[L], Magneton2[L/B], Chansey2, Scyther2[L], Grumpig2[L/B], Haunter2[L], Politoed2, Pidgeot2[L], Stantler2[L], Wartortle2, Omastar2

Lvl50 Round 4/Open Round 1- Tauros1[L], Metagross1, Jolteon1[L], Jynx1[L], Dugtrio1[L], Claydol1, Scizor1[L/B], Steelix1, Kingdra1, Aerodactyl1[L], Salamence1[L/B], Milotic1, Blissey1, Ludicolo1[L/B], Alakazam1[L/B], Gardevoir1[L/B], Starmie[L/B], Snorlax1, Gyrados1[L/B], Swampert1, Flygon1[L/B], Espeon1[L], Skarmory1

Level50 Round 5/ Open Round 2- Taurous2[L], Aerodactyl2[L], Alakazam2[L/B], Starmie2, Salamence2[L/B], Scizor2[L/B], Gyrados2[L/B], Blissey2, Snorlax2, Metagross2, Kingdra2[L/B], Swampert2, Claydol2, Steelix2, Milotic2, Snorlax2, Dugtrio2[L], Espeon2[L], Skarmory2, Ludicolo2

Level50 Round 6/Open Round 3- Gengar3[L], Jolteon3[L], Dugtrio3[L], Gardevoir3[L/B], Salamence3[L/B], Tauros3[L], Aerodactyl3[L], Alakazam3[L], Starmie3[L/B], Gyrados3[L/B], Blissey3, Snorlax3, Metagross3[L/B], Swampert3, Claydol3, Steelix3, Milotic3, Espeon[L/B], Skarmory3
20200508_202148.jpg

I won't go too far in depth with this one, as it was the first gold I received and I was using an unrefined open level version of my team. It was actually based off of Team Azure, but changing Suicune for Zapdos, improving the Water matchup. The team faltered in the Tower against Fire types, Rock types, Bulky Ice Beamers, evasion boosting, etc. But I suspect the team preview is what carried me. I almost always picked a Latios lead and left Steelix behind if I foresaw strong Water or Fire type attacks.

Frontier.. (Latios) @ Lum Berry
Ability: Levitate
Level: 60
EVs: 4 Def / 252 SpA / 252 Spe
Hasty Nature
IVs: 6 HP / 18 Atk / 13 Def / 23 SpA / 8 SpD / 28 Spe
- Calm Mind
- Psychic
- Thunderbolt
- Dragon Claw

ThunderGun (Zapdos) @ Leftovers
Ability: Pressure
Level: 60
EVs: 84 Atk / 252 SpA / 168 Spe
Hasty Nature
IVs: 25 HP / 12 Atk / 28 Def / 30 SpA / 22 SpD / 19 Spe
- Thunderbolt
- Hidden Power [Grass]
- Substitute
- Drill Peck

Ironix (Steelix) @ Choice Band
Ability: Rock Head
Level: 60
EVs: 252 HP / 252 Atk / 4 SpD
Serious Nature
IVs: 9 HP / 30 Atk / 22 Def / 12 SpA / 19 SpD / 21 Spe
- Double-Edge
- Earthquake
- Toxic
- Explosion
20200508_202239.jpg

Frontier.. (Latios) @ Lum Berry
Ability: Levitate
Level: 60
EVs: 4 Def / 252 SpA / 252 Spe
Hasty Nature
IVs: 6 HP / 18 Atk / 13 Def / 23 SpA / 8 SpD / 28 Spe
- Surf
- Psychic
- Thunderbolt
- Dragon Claw

DavidCross (Heracross) @ Persim Berry
Ability: Guts
Level: 60
EVs: 44 HP / 252 Atk / 212 Spe
Jolly Nature
IVs: 4 HP / 13 Atk / 16 Def / 5 SpA / 14 SpD / 1 Spe
- Brick Break
- Megahorn
- Earthquake
- Rock Slide

Perpetual (Blissey) @ Leftovers
Ability: Natural Cure
Level: 60
EVs: 252 HP / 252 Def / 4 SpD
Bold Nature
IVs: 22 HP / 22 Atk / 22 Def / 4 SpA / 25 SpD / 18 Spe
- Soft-Boiled
- Ice Beam
- Seismic Toss
- Heal Bell
This was my strategy: take every passage the woman suggests, unless she says "is it... a trainer? I sense the presence of people...", in which case avoid that passage. Excellent coverage with the spread move Surf helps lead Latios in single and double battles. I have Guts Heracross with a Persim to only negate status that doesn't boost attack. I swear I never realized how godawful those IVs were until today. Heracross has perfect neutral coverage, spread moves and a Fighting resist for Blissey. Speaking of, the unrivalled team supporter herself, Blissey, is a staple for almost all serious Pike/Pyramid run. Latios is fast enough to run from every wild Pokemon encounter (except Wobuffet, which could have ended me...), but occasionally, I opted to safely switch in Blissey to Heal Bell. Only avoid doing this against Mean Look Dusclops, Explosion Electrode, and Breloom. Supposedly there's a luck factor involved, but I didn't encounter it.
20200508_202114.jpg

I didn't plan much at all for this one. Coincidentally, I picked some great Palace natures (Hasty Latios and Zapdos) and sought out a Hardy Slaking. I was originally leading Slaking with both Shadow Ball and Hyper Beam, but Hyper Beam is ideal 95% of the time. After losing a few times, I dropped Shadow Ball and swapped the Zapdos for a leftover in-game Tyranitar as my hard switch to Ghost pokemon. Tyranitar had an interesting Sassy nature, which is great for attacking at high health. Sitrus Berry would have been more effective at keeping him above 50% HP, though. Flamethrower for x4 targets, Aerial Ace for evasion boosters, and Sand Stream, the secret weapon, able to KO opponents in chip damage range without even attacking. Spencer was a nail biter with CM Latios ultimately pulling through against Suicune.

Bread (Slaking) @ Choice Band
Ability: Truant
Level: 60
EVs: 252 Atk / 4 SpD / 252 Spe
- Hyper Beam

Frontier.. (Latios) @ Lum Berry
Ability: Levitate
Level: 60
EVs: 4 Def / 252 SpA / 252 Spe
Hasty Nature
IVs: 6 HP / 0 Atk / 13 Def / 23 SpA / 8 SpD / 28 Spe
- Calm Mind
- Psychic
- Thunderbolt
- Dragon Claw

ThunderGun (Zapdos) @ Leftovers
Ability: Pressure
Level: 60
EVs: 84 Atk / 252 SpA / 172 Spe
Hasty Nature
IVs: 25 HP / 28 Def / 30 SpA / 22 SpD / 19 Spe
- Thunderbolt
- Hidden Power [Grass]
- Drill Peck
- Substitute


BRUPPER (Tyranitar) @ Leftovers
Ability: Sand Stream
Level: 60
EVs: ???
Sassy Nature
IVs: ???
- Aerial Ace
- Flamethrower
- Earthquake
- Crunch
20200508_202029.jpg

So this was inspired exactly by Adedede's gold symbol. In order to immediately explode on Greta's lead Umbreon, I swapped Metagross to the lead spot starting round 6. Latios is a better overall lead though, because Latios loses against SpD walls, which Metagross then has a favorable matchup against. Very cool tech with Fly on Latios, which counts as a successfully landed attack (for literally Flying up turn 1) and counts against the opponent if they miss their attack.

Frontier.. (Latios) @ Lum Berry
Ability: Levitate
Level: 60
EVs: 4 Def / 252 SpA / 252 Spe
Hasty Nature
IVs: 6 HP / 18 Atk / 13 Def / 23 SpA / 8 SpD / 28 Spe
- Fly
- Psychic
- Thunderbolt
- Ice Beam

Wusthof (Metagross) @ Persim Berry
Ability: Clear Body
Level: 60
EVs: 252 Atk / 92 SpD / 164 Spe
Adamant Nature
IVs: 29 HP / 15 Atk / 25 Def / 29 SpA / 22 SpD / 16 Spe
- Earthquake
- Rock Slide
- Aerial Ace
- Explosion

Nonbinary (Starmie) @ Mystic Water
Ability: Natural Cure
Level: 60
EVs: 252 SpA / 4 SpD / 252 Spe
Timid Nature
IVs: 14 HP / 4 Atk / 17 Def / 22 SpA / 28 SpD / 15 Spe
- Surf
- Ice Beam
- Psychic
- Thunderbolt
20200518_231610-1.jpg

Probably the most fun I've had in the entire Frontier was climbing these pyramids! Max out the PP for every single move on your team, as it will likely matter. I did breed a Linoone, but it wasn't until after I got the silver. The best time to bring Linoone would be round 2, when you can find Leftovers and Choice Bands. So in the end, he didn't pick up a single item and was not useful in battle, and thus was retired back to the PC.

Teleport (Alakazam) @ King's Rock
Ability: Synchronize
Level: 60
EVs: 4 Def / 252 SpA / 252 Spe
Modest Nature
IVs: 24 HP / 17 Atk / 30 Def / 20 SpA / 20 SpD / 30 Spe
- Psychic
- Thunder Punch
- Fire Punch
- Teleport

Bread (Slaking) @ Scope Lens
Ability: Truant
Level: 60
EVs: 252 Atk / 4 SpD / 252 Spe
Hardy Nature
- Hyper Beam
- Shadow Ball
- Return
- Earthquake

Perpetual (Blissey) @ Brightpowder
Ability: Natural Cure
Level: 60
EVs: 252 HP / 252 Def / 4 SpD
Bold Nature
IVs: 22 HP / 22 Atk / 22 Def / 4 SpA / 25 SpD / 18 Spe
- Soft-Boiled
- Toxic
- Seismic Toss
- Heal Bell
Shartnado (Sharpedo) @ King's Rock
Ability: Rough Skin
Level: 60
EVs: 4 Def / 252 SpA / 252 Spe
Modest Nature
- Surf
- Ice Beam
- Crunch
- Toxic

Bread (Slaking) @ Scope Lens
Ability: Truant
Level: 60
EVs: 252 Atk / 4 SpD / 252 Spe
Hardy Nature
- Hyper Beam
- Shadow Ball
- Return
- Earthquake

Perpetual (Blissey) @ Brightpowder
Ability: Natural Cure
Level: 60
EVs: 252 HP / 252 Def / 4 SpD
Bold Nature
IVs: 22 HP / 22 Atk / 22 Def / 4 SpA / 25 SpD / 18 Spe
- Soft-Boiled
- Toxic
- Seismic Toss
- Heal Bell
Teleport2 (Alakazam) @ King's Rock
Ability: Synchronize
Level: 60
EVs: 4 Def / 252 SpA / 252 Spe
Modest Nature
IVs: 24 HP / 17 Atk / 30 Def / 20 SpA / 20 SpD / 30 Spe
- Psychic
- Toxic
- Fire Punch
- Teleport

Bread (Slaking) @ Scope Lens
Ability: Truant
Level: 60
EVs: 252 Atk / 4 SpD / 252 Spe
Hardy Nature
- Hyper Beam
- Shadow Ball
- Return
- Earthquake

Perpetual (Blissey) @ Brightpowder
Ability: Natural Cure
Level: 60
EVs: 252 HP / 252 Def / 4 SpD
Bold Nature
IVs: 22 HP / 22 Atk / 22 Def / 4 SpA / 25 SpD / 18 Spe
- Soft-Boiled
- Toxic
- Seismic Toss
- Heal Bell
Alakazam is the lead and should Teleport away from every single wild encounter, unless I am certain it will OHKO. The only Pokemon that might outspeed and foil this strategy would be Crobats in Round 2 and Aerodactyls in Round 10. The team was changed in Round 6 (because Sharpedo can OHKO every potential wild encounter) and Round 10 (because Toxic spam is needed to take out Wobbuffets). Slaking should be switched to the lead position when going into trainer battles. Blissey is there to switch in effortlessly on special attackers and nurse the team with Heal Bell and Soft-Boiled. Blissey 1v1ed every single one of the Pyramid King's Round 10 team.

If you see a cluster of trainers not near the starting point, odds are they're guarding the exit.
20200508_201933.jpg

TL;DR: S-rank Pokemon get S-rank results.
 
Last edited:
Finally built a Palace team I'm satisfied with and reached 154 wins with Slaking/Suicune/Venusaur. Huge respect to everyone doing Palace on retail, as it was a big struggle even on emulator.
Because of how long the Palace battles take, I'm not able to provide video proof for my streak, but I'll try to upload a sample of 7 battles later and I encourage everyone to test the team for themselves, it's working really well and easy to pick up.


Slaking @ Choice Band
Sassy
4HP / 252Atk / 252Spe
- Double-Edge
- Shadow Ball
- Earthquake
- Hyper Beam
  • Sassy makes it behaves pretty smart when above 50% health; since I normally only leave it in against pokemon it can KO, it has 88% chance of chosing the right move.
  • It's most of the time smart enough to chose Double-Edge over Hyper Beam when not needed.
  • Originally I ran Return over Double-Edge, because you don't want recoil to drop you below 50%, but I think the Palace AI has issues with recognizing Returns Base Power, it almost always chose Hyper Beam over it, even when both would have killed.
  • The minus Speed nature from Sassy isn't optimal, but it still outspeeds most relevant things (especially most scary OHKO move users that are otherwise very threatening for this team).
  • Normally you want to do hit and run as much as possible, but if Slakings helath gets below 50% while locked into Choice Band, it's better to just leave him in and try to do as much damage as possible.

Suicune @ Chesto Berry
Modest
252HP / 240Def / 16SpA
- Calm Mind
- Rest
- Surf
- Ice Beam
I was honestly suprised how good this thing works.
  • Sometimes likes to PP stall out opponents that it could just kill, but that's ok.
  • With some luck it also wins againts super-effective moves, since it uses Calm Mind / Rest more consistently than most opponents use their attacking moves.
  • Together with Venusaur it handles almost everything that Slaking needs to switch out of.

Venusaur @ Leftovers
Jolly
252HP / 196Atk / 60Def
- Curse
- Synthesis
- Earthquake
- Sludge Bomb
  • Jolly makes it use Curse when at high HP and Synthesis at low HP, and while not being optimal statwise, it's sometimes nice to outspeed some things and get a Defense boost in before their first attack.
  • Immunity to Leech Seed and Toxic while carrying Leftovers lets it beat almost all annoying stall sets you could face sooner or later (although it might take some time).
  • Venusaur has amazing defensive Synergy with Suicune, together they check basically everything except Zapdos, strong special sweepers with good coverage (and some bad luck on my side) and OHKO moves.
  • The biggest weakness of Venusaur is that even when it's fully set up, it still gets forced out by things with strong Ice, Fire or Psychic moves, since it doesn't select it's attacking moves consistently enough to beat them.
  • Sludge Bomb + Earthquake hits everything except Skarmory.
  • The EVs could probably be optimized, the spread here is actually from an older version of the team and I didn't bother to adjust them.

The opponent led with Starmie, which is one of the few pokemon that can threaten both Suicune and Venusaur depending on the set. I decided to let Slaking take a hit and kill it with Shadow Ball, which worked, but Slaking was now at about 70%. Next he sent out Espeon, so I switched out to Suicune. Suicune beats Espeon under normal circumstances, but it was an Espeon-3 that somehow managed to flinch Suicune to death. I sent out Slaking again hoping to kill Espeon with Shadow Ball too, but the 5% chance to not use its power triggered and Espeon killed me in two hits (I could have maybe tried to preserve Slaking after the first one and sack Venusaur, but winning a game with a <50% Sassy Slaking against two remaining pokemon isn't exactly in my favor either). So I let Slaking die and hoped that Venusaur could somehow beat Espeon (which isn't impossible with some Palace hax), but it didn't really work out.

Pokemon - Emerald Version (USA, Europe)_1589893471953.png
 
Last edited:
Battle Pike: 140 floors (ongoing)
20200510_195941.jpg


Soooo fun story, I beat Silver Lucy with just my ingame team since it's so easy to reach her and her only threat is Milotic. I remember I used Flygon, Manectric and Blaziken.

Now for the rest of the run:
6775.png(ASSERTING DOMINANCE)
Regice @ Leftovers
Ability: Clear Body
EVs: 168 HP / 148 Def / 100 SpA / 92 SpD
Modest Nature
- Ice Beam
- Thunderbolt
- Rest
- Sleep Talk

5104.png
Heracross @ Choice Band
Ability: Guts
EVs: 228 Atk / 32 SpD / 248 Spe
Adamant Nature
- Megahorn
- Brick Break
- Earthquake
- Rock Slide

380-7.jpg
Latias (F) @ Lum Berry
Ability: Levitate
EVs: 104 HP / 52 Def / 100 SpA / 252 Spe
Modest Nature
- Dragon Claw
- Psychic
- Calm Mind
- Recover

I selected Regice and Latias because of their self recovery options, and Heracross because it can take advantage from some status ailments. Banded doesn't matter much, since most battles I stumbled were short Doubles or wild. Gold Lucy didn't cause too much trouble either: Regice handled her Seviper fine, then I had to switch against Steelix, but Hera took care of it with 2 Brick Breaks. Then switch again to Regice for Gyarados and Tbolt for the win.

There isn't much to say so I will add my Dome experience too. I used the same team throughout the run with little problem:

Battle Dome Singles Open Level: 12 wins (ongoing)
20200510_195951.jpg


unnamed.jpg
Ludicolo @ Shell Bell
Ability: Swift Swim
EVs: 76 HP / 244 SpA / 68 SpD / 120 Spe
Modest Nature
- Surf
- Ice Beam
- Giga Drain
- Rain Dance

376-6.jpg
Metagross @ Quick Claw
Ability: Clear Body
EVs: 208 HP / 212 Atk / 20 Def / 68 SpD
Impish Nature
- Meteor Mash
- Earthquake
- Sludge Bomb
- Explosion

unnamed.png
Starmie @ King's Rock
Ability: Natural Cure
EVs: 4 HP / 252 SpA / 252 Spe
Timid Nature
- Surf
- Psychic
- Ice Beam
- Thunderbolt

The Dome was probably my favorite facility and it truly lives up to the Tactics title. I get to see my opponents' team so I can be prepared and react accoordingly, making it more reliant on strategy than hax (most of times xd). Starmie+Metagross already form a strong core, I added Ludicolo to gain a Ground resistance as well as being incredibly fast once it sets up the rain, said rain also removes Metagross Fire weakness and powers up Starmie's Surf if Ludicolo goes down.

Said Ludicolo also fared incredibly well against Tucker, he swept him both times. Silver battle was won in 2 turns: Giga Drain Swampert and Surf Charizard. In the Gold battle Swampert went down to Giga Drain, and Metagross was defeated after 2 Surfs boosted by rain.
 
Last edited:
I've barely been on Smogon since 10(!) years ago, but I recently decided to finally try for all Gold Symbols in a physical copy of Emerald. So far I have 2 ended streaks after the Gold Symbol battles: Battle Palace 48 wins (Open Level, retail) and Battle Factory 43 wins (Level 50, retail).

Battle Palace proof:
Palace 48.JPG

Video of Gold Symbol battle vs Spenser (featuring some amazing luck)

The team:

500px-373Salamence.png
Salamence @ Lum Berry
Ability: Intimidate
EVs: 252 HP / 248 Atk / 10 Def
IVs: 31/30/30/15/29/30
Adamant Nature
- Aerial Ace
- Earthquake
- Dragon Dance
- Protect

500px-121Starmie.png
Starmie @ BrightPowder
Ability: Natural Cure
EVs: 252 SpA / 252 Spe / 6 Def
IVs: 30/16/27/31/31/31
Modest Nature
- Surf
- Double Team
- Ice Beam
- Thunderbolt

500px-376Metagross.png
Metagross @ Leftovers
Ability: Clear Body
EVs: 148 HP / 244 Atk / 16 Def / 6 SpD / 96 Spe
IVs: 31/31/30/15/29/30
Adamant Nature
- Meteor Mash
- Earthquake
- Protect
- Aerial Ace

Although the RNG definitely favoured me in that recorded Gold Symbol battle, overall it balanced out over the streak. The battle 49 loss was simply due to hax, both the usual enemy critical hits and some very bad Pokemon behaviour - that was bound to happen eventually, as I couldn't be bothered breeding new Pokemon with specific natures for the Palace. As such, I had Modest and Adamant natures, which were still quite decent:

Salamence (Adamant): 38% attack move, 31% Dragon Dance / Protect, 15.5% random move, 15.5% do nothing.
Salamence sub-50% HP: 70% attack move, 15% Dragon Dance / Protect, 7.5% random move, 7.5% do nothing.

Metagross (Adamant): 38% attack move, 31% Protect, 15.5% random move, 15.5% do nothing.
Metagross sub-50% HP: 70% attack move, 15% Protect, 7.5% random move, 7.5% do nothing.

Starmie (Modest): 35% attack move, 45% Double Team, 10% random move, 10% do nothing.
Starmie sub-50% HP: 34% attack move, 60% Double Team, 3% random move, 3% do nothing.

Since I didn't want to breed new Pokemon just for certain facilities, the only changes I made specifically for the Palace were some of the moves. Having 2 Aerial Ace users helped a lot, as Double Team spammers often get more turns to set up due to the randomness of your Pokemon's move choices. Double Team + Leftovers is especially bad to deal with, but having a bulky steel type with Leftovers helped me deal with that. In fact, just one battle before the Gold Symbol, Metagross had to stall a Leftovers Dusclops until it was Struggling. Starmie was changed to BrightPowder and Double Team, as it previously had Protect which it spammed too much due to its nature, resulting in many failed Protects. As such, I figured it was better to gain some cumulative benefits from those frequent non-attacking turns. It was also to help against Spenser's Suicune.

As for the Battle Factory:
Factory 43.JPG

The Gold Symbol battle was just a clean sweep with no RNG - I had the ideal Starmie/Flygon/Forretress team that Werster used in his speedrun; it was the first time I hit the right frame to get that team. I kept going after that win, but soon lost due to a combination of hax (my Milotic's Mirror Coat missed Brightpowder Gardevoir after its Thunderbolt) and having a bad team, as I completely missed the frames for good initial Pokemon selections.
 
And finally, the two remaining facilities:

Battle Factory Singles Open Level: 49 wins (ongoing)
20200510_195921.jpg

I spent most of my time here ever since the first time I reached the Battle Frontier, because I didn't know how to train my mons properly so I had no chance at the other facilities. Most of my playthorughs I managed to defeat Silver Noland but never got past Round 4/5, this time however I was decided to finally get his Gold Symbol, and years and years of playing and watching the same sets got me used to what expected from each Pokémon I face. In that sense, this place truly lives up to the Knowledge title...

For Silver Noland, I don't remember the battle well aside from having little difficulty to beat him. I used:
STARMIE (3), modest, lum, 261,167,206,328,206,329, surf, psychic, thunderbolt, ice beam
ELECTRODE (3), naughty, liechi, 261,218,176,259,176,316, explosion, thunderbolt, thunder wave, endure
METAGROSS (3), adamant, chesto, 343,382,296,203,216,218, meteor mash, earthquake, double team, rest

For Gold Noland I used:
SWAMPERT (2), docile, QC, 383, 256,258,206,258,156, surf, earthquake, counter, mirror coat
ELECTRODE (3), naughty, liechi, 261,218,176,259,176,316, explosion, thunderbolt, thunder wave, endure
DRAGONITE (5), modest, shell bell, 323,273,226,328,236,259, dragon claw, thunderbolt, ice beam, surf

Swampert helped inmensely in Round 6, since the AI plays more aggressively at this point I can predict the upcoming attack and counterattack accoordingly with CounterCoat. Dragonite covered most of Swampert's weaknesses and had great coverage to boot. I remember I picked Manectric first but swapped it once I saw Electrode, having an exploder can be valuable for finishing off a dangerous mon.

In the battle against Gold Noland he used: Dodrio, Cradily and Regice.
- Dodrio went down turn 1 after Countering its Drill Peck
- He sents Cradily next so I switch to DNite and he went for...Earthquake?....that's the set with no grass attack LOOOOOOOOOOOL
CRADILY (2), adamant, sitrus, 376,287,230,178,250,122, earthquake, ancientpower, swagger, psych up
So I switched back to Swampert and after exchanging EQs Cradily went down.
- Then came Regice, which took the EQ well and KOd back with Ice Beam. I knew DNite stood no chance so went for the BOOM with Electrode and won. (this was the first gold symbol I ever won so you can imagine my joy at that moment)

Battle Arena Singles Open Level: 56 wins (ongoing)
20200510_200019.jpg


0f170eb364fd4365-nsavi-s-bucket.gif
Salamence @ Lum Berry
Ability: Intimidate
EVs: 72 Atk / 248 SpA / 188 Spe
Docile Nature
- Dragon Claw
- Aerial Ace
- Fire Blast
- Brick Break
Heracross_BW.gif
Heracross @ Choice Band
Ability: Guts
EVs: 228 Atk / 32 SpD / 248 Spe
Adamant Nature
- Megahorn
- Brick Break
- Earthquake
- Rock Slide
01683afae421c5727f2d9e531525092c016db4c0_00.gif
Starmie @ King's Rock
Ability: Natural Cure
EVs: 4 HP / 252 SpA / 252 Spe
Timid Nature
- Surf
- Psychic
- Ice Beam
- Thunderbolt

This was the hardest challenge for me. The restriction of having a predetermined order with no switching made this so hard. At first I went for this team, in fact, Salamence swept Silver Greta clean, but after losing several times on my way to Gold, I decided to change up some things:

giphy.gif
Latias (F) @ Shell Bell
Ability: Levitate
EVs: 4 HP / 252 SpA / 252 Spe
Modest Nature
- Dragon Claw
- Psychic
- Thunderbolt
- Surf

I EVd my Latias for an all out attacker set. Then I lead with Starmie/Lum first, Choice Hera 2nd and Latias 3rd. Starmie was very good at the first slot, having a fantastic coverage that either KO'd the opponent before the 3rd turn or won by Skill points. Hera came next and was prepared against bulky Grass, Dark, Psychic, etc. that might beat Starmie. Latias was the backup cleaner if everything failed. I stil failed a couple times (including an infuriating "loss" against an Explosion Metagross which should have been a tie at my favor...) but then I finally reached Gold Greta, and the end of my suffering:

- Greta sends out Umbreon. That tricky mon went for the offensive just to heal up on the last turn with ChestoRest, while Starmie couldn't do much against it. Fortunately we tie: Won Mind, Tie Skill, Lost Body.
- Next is Heracross vs Gengar. Hera does her best with a crit Banded Rock Slide but even that fails to OHKO this weird bulky Gengar set. She goes for the Hypnosis and defeats me with Dream Eater whiel almost healing back to full HP.
- However, I was fine. I only needed Umbreon to go down since the rest of Greta's team is horribly weak to Psychic. Latias came next and took down Gengar and Breloom. ALL SEVEN GOLDEN SYMBOLS BABY!!!

And that's the end. I might go back and try to continue the ongoing streaks in the future, but for now my priority is the Sinnoh Frontier...
 
Last edited:
I have been playing just the palace for so many years that I have this twisted view that palace battles are the real way to play pokemon. It seems pretty premature to change my avatar to the maven given my lack of posting streaks, but I think I have become just as grumpy as the palace maven due to our mutual overexposure to the palace.


I finally finished my plan of getting 6 streaks. The open level were done with salamence/gyarados+ skarmory +lanturn over the course of 25 attempts between january and april. Prior to that I was just repeatedly trying and losing around battle 51, I did make it to battle 63 once but as I recently learned having live streaks in both lv50 and open lv means your record will get overwritten by your current and I accidently entered open level with level 50 mons losing a streak so I had to start over :( The lvl 50 streaks were done in May because I finished catching a suicune and breeding a snorlax which make for a far better team.


So for a few weeks I have been planning to spend this saturday to record the entire post 49 attempt for each. But with wtset’s ceiling shattering post I feel spending so much time to show off a 90 win streak (if I’m lucky) is meh because he has accounted for the exact thing i will die to. Swords dance users are brutal and so are mixed ohko sets. You need to be extra aggressive against them and give them fewer turns. Banded truant sassy is so gutsy, but it gives you the best odds vs those threats, like at least 85% vs the 20% it feels like my team has. Banded tauros operates on the same principle btw in lower sets where you deal more damage due to iv advantage and for sets 29-35 I really recommend tauros-salamence-suicune as tauros deals with ohko users and suicune deals with scizor type threats. I actually have a sassy slakoth ready to go that I hatched in 2017 but I didn’t think there was a way to make the last two pokemon cover enough once slaking went under. Recently I’ve been thinking about sassy plus wish, so I decided to test it and my initial findings are that latias passing wish to slaking is everything you want it to be, slaking’s bulk allows it to switch into a damaging move and wish will put it back up so it stays in attack mode. However latias itself wasn’t contributing enough as a team member so I’m hoping one of you can figure out how to make that work. If you’re willing to use new york pokemon center distribution sets (I’m not) then wish salamence could probably support slaking and use intimidate to unlock suicunes full power. Wtset, you beautiful son of a *****, finding that venusaur set is amazing. It’s such a unique typing that I’m having trouble adjusting to using it but the whole anti-toxic and curse with recover is great. wtset how many tries did it take to get to 154? What fraction of those streaks do you think got past 100?

I think next I’m going to test Slaking-salamence-struggle snorlax(higher on special defense?) because technically if slaking is the emergency button for danger and snorlax actually sets up on special attackers and slaking/salamence both have equake to tag team physical attackers it's seems like everything is covered.
https://pokepast.es/8adcbcc1e89d2c22

I’ve already praised Greentypholosion’s palace team for it’s hasty band innovation, overall aggressiveness and use of scizor. But I want to take a moment to appreciate Jellal’s palace team I love the unique offensive presence banded flygon provides, the switch to milotic for recover and the bulky presence of the team while utilizing each type of move. It represents a lot of things teams should strive for in the palace. Good palace teams are made up of pokemon that trainers will use to get 90-130 wins in the tower because you’re not looking for that perfect strategy, you’re looking for the one with decent odds.

When 2019 ended it felt like we were like 40% of the way to finding the optimal palace team, I wasn’t even sure a 100 streak was realistic, then last month it felt like we were 75% of the way with a 100 streak being something you had to get lucky for. Now it feels like we’ve seen a palace team with something like 90% of the win rate of the optimal palace team. Unless someone finds a third pokemon that completes shedninja and an aggressive water type (so you can ohko armaldo/marowak/dragons ect.) Or finds a way to use perish trapping or wish passing.

I really hope recent leaks will lead to more understanding of how palace chooses it’s trainers and pokemon. Like can you get 7 guitarists in a row? And how does it handle species and item clause because if it really is random then based on held item you might actually expect to encounter some sets of moves less. Anyways even now we should be able to guess what your expected encounter rate of swords dance users and ohko users is for open lvl and lvl 50 respectively.
Other things I’ve noticed: Saying tightening focus and then unable to use power like the nature is bad despite no interruption. Which doesn’t make sense if the move is selected how does it fail? Similar thing with future sight failing.

Shame no one has used blissey in the palace. Natural cure on top of those stats can really wall special attackers, then just back it up with pressure/intimidate to pp stall cross chop and you’ve got a lot of mixed attackers covered.

So for palace doubles I think the offensive pressure of sassy explosion is where it’s at. I last tried it in 2017 so I don’t remember the teams but one was some combination of electrode-gengar-haunter-dusclops and the other was sassy flygon sassy aerodactyl careful skarmory for the below streaks


After explosion a lot of situations turn into a 2v1 favoring you, though you need to be ready for regis and metagross ect. But just imagine using explosion to set up a hasty salac berry shell armor pokemon that won’t get crit by your explosion. Or getting a free shot at their third pokemon with your dusclops or gengar using curse or wil-o-wisp.
 
Last edited:
I have been playing just the palace for so many years that I have this twisted view that palace battles are the real way to play pokemon. It seems pretty premature to change my avatar to the maven given my lack of posting streaks, but I think I have become just as grumpy as the palace maven due to our mutual overexposure to the palace.


I finally finished my plan of getting 6 streaks the open level were done with salamence/gyarados+ skarmory +lanturn over the course of 25 attempts between january and april. Prior to that I was just repeatedly trying a losing around battle 51, I did make it to battle 63 once but as I recently learned having live streaks in both lv50 and openlv means your record will get overwritten by your current :( The lvl 50 streaks were done in May because I finished catching a suicune and breeding a snorlax which make for a far better team.


So for a few weeks I have been planning to spend this saturday to record the entire post 49 attempt for each. But with wtset’s ceiling shattering post I feel spending so much time to show off a 90 win streak if I’m lucky is meh because he has accounted for the exact thing i will die to. Swords dance users are brutal and so are mixed ohko sets. You need to be extra aggressive against them and give them fewer turns. Banded truant sassy is so gutsy, but it gives you the best odds vs those threats, like at least 85% vs the 20% it feels like my team has. Banded tauros operates on the same principle btw in lower sets where you deal more damage due to iv advantage and for sets 29-35 I really recommend tauros-salamence-suicune as tauros deals with ohko users and suicune deals with scizor type threats. I actually have a sassy slakoth ready to go that I hatched in 2017 but I didn’t think there was a way to make the last two pokemon cover enough once slaking went under. Recently I’ve been thinking about sassy plus wish, so I decided to test it and my initial findings are that latias passing wish to slaking is everything you want it to be, slaking’s bulk allows it to switch into a damaging move and wish will put it back up so it stays in attack mode. However latias itself wasn’t contributing enough as a team member so I’m hoping one of you can figure out how to make that work. If you’re willing to use new york pokemon center distribution sets (I’m not) then wish salamence could probably support slaking and use intimidate to unlock suicunes full power. Wtset, you beautiful son of a *****, finding that venusaur set is amazing. It’s such a unique typing that I’m having trouble adjusting to using it but the whole anti-toxic and curse with recover is great. wtset how many tries did it take to get to 154? What fraction of those streaks do you think got past 100?

I think next I’m going to test Slaking-salamence-struggle snorlax(higher on special defense?) because technically if slaking is the emergency button for danger and snorlax actually sets up on special attackers.
https://pokepast.es/8adcbcc1e89d2c22

I’ve already praised Greentypholosion’s palace team for it’s hasty band innovation, overall aggressiveness and use of scizor. But I want to take a moment to appreciate Jellal’s palace team I love the unique offensive presence banded flygon provides, the switch to milotic for recover and the bulky presence of the team while utilizing each type of move. It represents a lot of things teams should strive for in the palace. Good palace teams are made up of pokemon trainers will use to get 90-130 wins in the tower because you’re not looking for that perfect strategy, you’re looking for the one with decent odds.

When 2019 ended it felt like we were like 40% of the way to finding the optimal palace team, I wasn’t even sure a 100 streak was realistic, then last month it felt like we were 75% of the way with a 100 streak being something you had to get lucky for. Now it feels like we’ve seen a palace team with something like 90% of the win rate of the optimal palace team. Unless someone finds a third pokemon that completes shedninja and an aggressive water type (so you can ohko armaldo/marowak/dragons ect.) Or finds a way to use perish trapping or wish passing.

I really hope recent leaks will lead to more understanding of how palace chooses it’s trainers and pokemon. Like can you get 7 guitarists in a row? And how does it handle species and item clause because if it really is random then based on held item you might actually expect to encounter some sets of moves less. Anyways even now we should be able to guess what your expected encounter rate of swords dance users and ohko users is for open lvl and lvl 50 respectively.
Other things I’ve noticed: Saying tightening focus and then unable to use power like the nature is bad despite no interruption. Which doesn’t make sense if the move is selected how does it fail? Similar thing with future sight failing.

Shame no one has used blissey in the palace. Natural cure on top of those stats can really wall special attackers, then just back it up with pressure/intimidate to pp stall cross chop and you’ve got a lot of mixed attackers covered.

So for palace doubles I think the offensive pressure of sassy explosion is where it’s at. I last tried it in 2017 so I don’t remember the teams but one was some combination of electrode-gengar-haunter-dusclops and the other was sassy flygon sassy aerodactyl careful skarmory for the below streaks


After explosion a lot of situations turn into a 2v1 favoring you, though you need to be ready for regis and metagross ect. But just imagine using explosion to set up a hasty salac berry shell armor pokemon that won’t get crit by your explosion. Or getting a free shot at their third pokemon with your dusclops or gengar using curse or wil-o-wisp.
Thanks for the praise, the sets you posted earlier were a huge inspiration for me to get into palace (I copied your Suicune set as you might have noticed). I actually only had two other attempts reaching 100+ wins, one of which was the very first one with this team where I lost at 112 to a Hyper Beam miss. This was still the early version running Return over Double Edge on Slaking, so as soon as I found out about the Palace AI probably not properly recognizing Returns Base Power (still not 100% sure though) and switched to Double Edge, I tried to go even higher, since the team had improved now. It then took me about 30-40 attempts to get to 154 wins, one of which ended at 107 and three that got to ~80.
 
Thanks for the praise, the sets you posted earlier were a huge inspiration for me to get into palace (I copied your Suicune set as you might have noticed). I actually only had two other attempts reaching 100+ wins, one of which was the very first one with this team where I lost at 112 to a Hyper Beam miss. This was still the early version running Return over Double Edge on Slaking, so as soon as I found out about the Palace AI probably not properly recognizing Returns Base Power (still not 100% sure though) and switched to Double Edge, I tried to go even higher, since the team had improved now. It then took me about 30-40 attempts to get to 154 wins, one of which ended at 107 and three that got to ~80.
Ah okay that is plenty of tries thank you for sharing, makes me feel better about my teams. Wow if you hadn't broken 100 on your first try I wonder if you would have kept trying until you got 154. 154 is so high, from my testing I expect emulator players to start breaking 100 if they put in 50 tries with some of the more recent sets and technology. But 154 is just insane.
 
Last edited:
I got a pretty good Latios with this glitch. Bold, perfect IV's and came with max speed and SpA evs. I've been meaning to check some calcs to see if I can make better use of bold nature for a spread but then again any bulky set would be out classed by Latias. I may try catch another one for a timid or modest nature but it would take forever to soft reset for those natures.
I just completed 49 wins hoping to snatch a pokemon with a pinch berry (I got an appricot berry (SpD) with the latios so am aiming for a salac). Funny thing is I have Colosseum completed with coupons but grinding battle tower feels faster and more worthwhile considering I can get 6IV mon. The trainer I lost to had a salac Blaziken and Registeel. I caught the Registeel with the glitch but unfortunately it had a lonely nature so I reset the game.

Since this glitch takes so long to perform I've been thinking which pokemon may be the best to snatch based on how viable they are for emerald battle tower, how many different natures they could run or how useful they may be for breeding.
The Blaziken would have been cool since I get the salac berry with it and I can breed it with any other pokemon in the ground egg group which will help a lot breeding new pokemon with good IV's.
I targeted the registeel since a perfect IV spread with a good nature is hard to RNG.
Others I considered were Herracross, Hariyama, Donphan (for salac), Milotic (for galan), or other decent pokemon which can run multiple natures like Swampert, Gardevoir. I've seen some sets with leichi, SpA berry too but can't remember which mons had them.

Does anyone have any recommendations? I've breed decent IV's for my Salamence, Alakazam, Gyarados, Kingdra with my 31/x/31/x/30/30 Ditto.
 
Last edited:
It's been a while since I posted in here but today I will present a new team for the Battle Pike. Current team is at 179 rooms cleared at Lv.50 on a retail Emerald cartridge (will post a picture proof later). In case someone is wondering on the odd number for an active streak, I had to save on the 11th room before going to work. Either way, it's a pretty simply team:

:rs/latios:
Enkidu (Latios) (M) @ Lum Berry
IVs: 4 Atk
EVs: 28 HP / 12 Def / 244 SpA / 6 SpD / 220 Spe
Ability: Levitate
Level: 50
Shiny: Yes
Timid Nature
- Psychic
- Calm Mind
- Dragon Claw
- Thunderbolt

While Latios is not certainly the best Pokemon to use on the Battle Pike, I do believe it has some interesting traits despute not being immune to burn/para/freeze. It has access to Calm Mind which is the best boosting move in Generation III and its sweeping potential alone makes it worthwhile to carry on the facility. It's vulnerable to all status ailments but with Blissey supporting its team with Aromatherapy and Heracross abusing Poison and Burn with Guts, it makes it worthwhile to carry. It should be mentioned that thanks to Levitate Heracross can spam Earthquake which is an incredible move that allows the team to pick KOs specially in Double Battles in case you are assaulted by two trainers since it will finish off whatever survives Latios' attacks. The main reason why I ended up deciding on using Latios over Starmie, despite the latter's access to Natural Care, is because Latios handles Zapdos much better. It is also faster than Aerodactyl and opposing Starmie which lets me toast these threats before they harm Heracross.

I don't think the moveset needs any further explanation it's basically Team Azure's set. While Protect, Recover or even Waterfall would've been considerable options over Calm Mind, I don't think I ever felt the move was out of place. As a matter of fact, in Singles it still makes the monster Latios is very well known as in facilities like Dome and Tower which grants me extra confidence considering how broken this Pokemon is.

:rs/heracross:
Hercules (Heracross) (M) @ Choice Band
IVs: 30 Def / 13 SpA / 30 SpD
EVs: 252 Atk / 6 SpD / 252 Spe
Ability: Guts
Jolly Nature
- Megahorn
- Rock Slide
- Earthquake
- Brick Break

Heracross was supposed to be my hipster pick on this facility but I recently saw that Golden Blissey also used him on his Pike team. Neverless, Heracross is an amazing Pokemon on this facility for one main reason: Guts. Getting powered up when being status inflicted, with the extra power that a Choice Band already adds, this makes Heracross a very powerful Pokemon and when you consider the extra amount of OHKOs it gets, it definitely makes it worthwhile. Earthquake was chosen not only because of Latios' Levitate which allows it to spam the move in Doubles but it is Heracross' strongest move vs Metagross who is OHKO'd with a Guts boost on Single battles and it's overall the safest option to use against Arcanine and Ninetales. Rock Slide gets the Flying types like Moltres and Articuno. Brick Break destroys Snorlax and Umbreon while Megahorn, despite being inaccurate, completely ravages through targets such as the Lati@s. The Guts boost is so strong that at times I do not consider Aromatherapy because of how absurdly powerful Heracross becomes knowing that I just have to bring it safely to start dropping Pokemon like dead flies

I use a simple minded max Atk and Spe spread with a Jolly nature because Heracross would otherwise not be able to outspeed Pokemon like Alakazam and Articuno without a +Spe nature. Yes, the last 4 EVs are actually wasted since the IVs are originally intended for an HP Ghost spread which lacks utility on this facility but an even number in HP means that Heracross will be OHKO'd on full turns instead of having that extra 1 HP survival turn which is undesirable IMO on a Guts user.

:rs/blissey:
Garnett (Blissey) (F) @ Leftovers
IVs: 16 Atk
EVs: 172 HP / 252 Def / 84 Spe
Ability: Natural Cure
Level: 50
Bold Nature
- Toxic
- Soft-Boiled
- Seismic Toss
- Aromatherapy

The one Pokemon that makes this facility a joke. All you need is run to a Wild Area room and Aromatherapy against a Pokemon that can't threaten her like Milotic to heal your party from all the ailments those Kirlia and Dusclops can ever come up with. Aromatherapy is the most important move on this facility and the only reason why I spent 3 days trying to hit Split/Alternate frames only to settle with a not-so-horrific Atk IV from a Normal spread: It is basically Blissey wiggling the middle finger to the Dusclops and Kirlia that old fart can't control by himself. The other moves don't really require a lot of explanation since Seismic Toss is the main move to deal damage and Toxic is for poison-stalling anything that can't break through her while being her best move against the wild Dusclops in the Pike.

84 Spe EVs are needed to outspeed both Haxrein and Lapras who carries OHKO moves allowing her to poison them before they move. Max Defense to tank non-STAB physical hits and the rest goes into HP for a nice perfect Leftovers number.

  • :granbull: :ursaring: Banded Normal types are a nightmare for this team since I got no resistances or immunities to their moves. The worst part is that Granbull gets a guaranteed kill depending on what it chooses since it could pick either Shadow Ball or Mega Kick with the latter breaking Blissey's eggs into smithereens.
  • :metagross: It's a troublesome Pokemon on Singles since I got no Steel type resist on the team either. I do not want to switch Heracross or Blissey into a Meteor Mash on my face so usually Latios dies on it. Extremely bad news if it leads on a non-healing battle. On Doubles, it's not so threatening since you can double target it (although without a Guts boost, Earthquake + Thunderbolt is still a roll).
  • :aerodactyl: Thunderbolt has a small chance of OHKO so it forces out Heracross most of the time. Not a big deal but since Blissey is forced to take damage if it's Set 2, it hurts.
  • :golem: + :quagsire: or :metagross: + :gengar: Explosion with Damp / Ghost type is a pretty dangerous combination and with the lack of Protect, it can be deadly if unchecked. To make matters worse, all Golem needs is a Quick Claw activation to completely fuck you over.
Pretty sure they are out there more threats but will update this section as I find them


Important Disclaimer: The picture is not updated since I was unable to take a newer picture during my paused streak. I posted this earlier on the Discord back when I was on this track. Will update this with a newer one when I have the time.

 
Last edited:
Battle Arena finished streak: 75 wins (Open Level, retail)

Picture proof:
Arena 75.JPG

This facility was even more frustrating than the Factory, as the inability to switch or change the team order often makes hax or bad team matchups much harder to recover from. I had around 10 failed runs that mostly ended between battles 28 and 49, but a few made it to the final Gold Symbol set, only to lose to terrible luck (I think BrightPowder has caused more of my losses than any other form of hax). It was painful because I knew my team was 100% guaranteed to beat Greta if I could just reach her; Metagross’s Explosion KOs her Umbreon and Starmie sweeps the rest.

In battles 49-55 of the successful run, I faced 3 legendaries (Latias, Regirock and Suicune), several Tyranitars, and I almost lost to the very last Pokemon before Greta - it was Milotic-4 against my full-HP Starmie. Thankfully it didn’t use Mirror Coat at all… a huge relief, considering that I’ve been 'so close yet so far' in other facilities (one of my failed Factory runs ended on the Gold Symbol boss’s final Pokemon sweeping my full team).

The team:

Latios.png

Latios @ Lum Berry
Ability: Levitate
EVs: 252 SpA / 252 Spe / 6 SpD
IVs: 7/9/12/31/25/17
Calm Nature
- Psychic
- Ice Beam
- Calm Mind
- Thunderbolt

Metagross.png

Metagross @ Chesto Berry
Ability: Clear Body
EVs: 148 HP / 244 Atk / 16 Def / 6 SpD / 96 Spe
IVs: 31/31/30/15/29/30
Adamant Nature
- Return
- Earthquake
- Agility
- Explosion

Starmie.png

Starmie @ Persim Berry
Ability: Natural Cure
EVs: 252 SpA / 252 Spe / 6 Def
IVs: 30/16/27/31/31/31
Modest Nature
- Surf
- Psychic
- Ice Beam
- Thunderbolt

The items and movesets were adjusted for this facility. Lum Berry seems to be the most reliable item for a setup lead, especially since you can’t switch out. The other berries were to prevent the most debilitating status ailments, as they are especially dangerous in the Arena.

The Latios was the only one I had available; it was one I settled for over a decade ago due to its 31 SpA IV and -Atk nature. The Calm nature actually worked quite well with Calm Mind against special attacks. Ice Beam was definitely more useful than Dragon Claw would’ve been, as super-effective moves are important in the Arena, and DC only would’ve seen much use against Psychic-types.

Metagross originally had Brick Break over Return, but either way I tended to use Earthquake more often. I didn’t want to use any moves with less than 100% accuracy, so I chose Return for reliable neutral damage. Agility helped a lot, as Metagross would typically come in against something weakened by Latios, allowing it to Agility before finishing off the foe with 1 attack. Against faster foes, there was typically no downside to using Agility on the first turn. That Agility turn would also give me a chance to scout the foe's moveset when there are multiple possible sets. After finishing off a foe weakened by Latios, the speed boost then allowed for the option to safely Explode the next foe, if the foe’s matchup with Metagross and/or Starmie justified it.

Not much to say about Starmie, it’s just an effective sweeper with only the item changed for this facility.

How I lost: Latios was finished off by a Gengar as the second foe, which can't be touched by my Metagross set - however, even if it had moves such as Rock Slide, the Gengar would've had a major advantage. My Starmie then KOed Gengar, but the last Pokemon was a Leftovers Latias with Shadow Ball - it 2-hit KOed Starmie and I couldn't quite 2HKO it with Ice Beam.

I now have Gold Symbols in the Palace, Factory and Arena, not sure which one I'll do next...
 
Last edited:
It's been a while since I posted in here but today I will present a new team for the Battle Pike. Current team is at 179 rooms cleared at Lv.50 on a retail Emerald cartridge (will post a picture proof later). In case someone is wondering on the odd number for an active streak, I had to save on the 11th room before going to work. Either way, it's a pretty simply team:

:rs/latios:
Enkidu (Latios) (M) @ Lum Berry
IVs: 4 Atk
EVs: 28 HP / 12 Def / 244 SpA / 6 SpD / 220 Spe
Ability: Levitate
Level: 50
Shiny: Yes
Timid Nature
- Psychic
- Calm Mind
- Dragon Claw
- Thunderbolt

While Latios is not certainly the best Pokemon to use on the Battle Pike, I do believe it has some interesting traits despute not being immune to burn/para/freeze. It has access to Calm Mind which is the best boosting move in Generation III and its sweeping potential alone makes it worthwhile to carry on the facility. It's vulnerable to all status ailments but with Blissey supporting its team with Aromatherapy and Heracross abusing Poison and Burn with Guts, it makes it worthwhile to carry. It should be mentioned that thanks to Levitate Heracross can spam Earthquake which is an incredible move that allows the team to pick KOs specially in Double Battles in case you are assaulted by two trainers since it will finish off whatever survives Latios' attacks. The main reason why I ended up deciding on using Latios over Starmie, despite the latter's access to Natural Care, is because Latios handles Zapdos much better. It is also faster than Aerodactyl and opposing Starmie which lets me toast these threats before they harm Heracross.

I don't think the moveset needs any further explanation it's basically Team Azure's set. While Protect, Recover or even Waterfall would've been considerable options over Calm Mind, I don't think I ever felt the move was out of place. As a matter of fact, in Singles it still makes the monster Latios is very well known as in facilities like Dome and Tower which grants me extra confidence considering how broken this Pokemon is.

:rs/heracross:
Hercules (Heracross) (M) @ Choice Band
IVs: 30 Def / 13 SpA / 30 SpD
EVs: 252 Atk / 6 SpD / 252 Spe
Ability: Guts
Jolly Nature
- Megahorn
- Rock Slide
- Earthquake
- Brick Break

Heracross was supposed to be my hipster pick on this facility but I recently saw that Golden Blissey also used him on his Pike team. Neverless, Heracross is an amazing Pokemon on this facility for one main reason: Guts. Getting powered up when being status inflicted, with the extra power that a Choice Band already adds, this makes Heracross a very powerful Pokemon and when you consider the extra amount of OHKOs it gets, it definitely makes it worthwhile. Earthquake was chosen not only because of Latios' Levitate which allows it to spam the move in Doubles but it is Heracross' strongest move vs Metagross who is OHKO'd with a Guts boost on Single battles and it's overall the safest option to use against Arcanine and Ninetales. Rock Slide gets the Flying types like Moltres and Articuno. Brick Break destroys Snorlax and Umbreon while Megahorn, despite being inaccurate, completely ravages through targets such as the Lati@s. The Guts boost is so strong that at times I do not consider Aromatherapy because of how absurdly powerful Heracross becomes knowing that I just have to bring it safely to start dropping Pokemon like dead flies

I use a simple minded max Atk and Spe spread with a Jolly nature because Heracross would otherwise not be able to outspeed Pokemon like Alakazam and Articuno without a +Spe nature. Yes, the last 4 EVs are actually wasted since the IVs are originally intended for an HP Ghost spread which lacks utility on this facility but an even number in HP means that Heracross will be OHKO'd on full turns instead of having that extra 1 HP survival turn which is undesirable IMO on a Guts user.

:rs/blissey:
Garnett (Blissey) (F) @ Leftovers
IVs: 16 Atk
EVs: 172 HP / 252 Def / 84 Spe
Ability: Natural Cure
Level: 50
Bold Nature
- Toxic
- Soft-Boiled
- Seismic Toss
- Aromatherapy

The one Pokemon that makes this facility a joke. All you need is run to a Wild Area room and Aromatherapy against a Pokemon that can't threaten her like Milotic to heal your party from all the ailments those Kirlia and Dusclops can ever come up with. Aromatherapy is the most important move on this facility and the only reason why I spent 3 days trying to hit Split/Alternate frames only to settle with a not-so-horrific Atk IV from a Normal spread: It is basically Blissey wiggling the middle finger to the Dusclops and Kirlia that old fart can't control by himself. The other moves don't really require a lot of explanation since Seismic Toss is the main move to deal damage and Toxic is for poison-stalling anything that can't break through her while being her best move against the wild Dusclops in the Pike.

84 Spe EVs are needed to outspeed both Haxrein and Lapras who carries OHKO moves allowing her to poison them before they move. Max Defense to tank non-STAB physical hits and the rest goes into HP for a nice perfect Leftovers number.

  • :granbull: :ursaring: Banded Normal types are a nightmare for this team since I got no resistances or immunities to their moves. The worst part is that Granbull gets a guaranteed kill depending on what it chooses since it could pick either Shadow Ball or Mega Kick with the latter breaking Blissey's eggs into smithereens.
  • :metagross: It's a troublesome Pokemon on Singles since I got no Steel type resist on the team either. I do not want to switch Heracross or Blissey into a Meteor Mash on my face so usually Latios dies on it. Extremely bad news if it leads on a non-healing battle. On Doubles, it's not so threatening since you can double target it (although without a Guts boost, Earthquake + Thunderbolt is still a roll).
  • :aerodactyl: Thunderbolt has a small chance of OHKO so it forces out Heracross most of the time. Not a big deal but since Blissey is forced to take damage if it's Set 2, it hurts.
  • :golem: + :quagsire: or :metagross: + :gengar: Explosion with Damp / Ghost type is a pretty dangerous combination and with the lack of Protect, it can be deadly if unchecked. To make matters worse, all Golem needs is a Quick Claw activation to completely fuck you over.
Pretty sure they are out there more threats but will update this section as I find them


Important Disclaimer: The picture is not updated since I was unable to take a newer picture during my paused streak. I posted this earlier on the Discord back when I was on this track. Will update this with a newer one when I have the time.

Small update, but Pike Bugs is now sitting at 224 rooms cleared at the Lv.50 Battle Pike. Had a close call on one of the rounds where I almost got fucked by Scizor 3 on a non-healing NPC battle who survived Heracross' onslaught thanks to its Focus Band activating. This was also the Battle Pike round, but fortunately I got into a healing NPC battle where Pokefan Gavin had a team of Mr. Mime 4 / Breloom 4 / Quagsire 4 which Blissey and Latios handled pretty well and I was in good shape vs the Pike Queen battle (I even got my party poisoned which benefitted Heracross to claim the kill on Steelix and Latios had its Lum intact which made it unecessary to Aromatherapy on the middle of the battle).

Neverless here are the tiers of the rooms based on the information the maid gives which influences my decision making when choosing a room:


QuoteResult 1Result 2Tier
For some odd reason, I felt a wave
of nostalgia coming from it...
Status ailmentHeals one or two PokémonOkay to pick early rounds since the chances of finding a Wild Pokemon room are good. Usually avoided on the last rooms in the round where you face the Pike Queen as otherwise Blissey struggles using Aromatherapy on the boss fight.
Is it...A Trainer?
I sense the presence of people...
Single battleHeals all PokémonAvoid this room at all costs. Not worth having an NPC battle without healing.
It seems to have the distinct aroma
of Pokémon wafting around it...
Wild PokémonSingle battle, then heal partyBest room to pick if it's the wild Pokemon room since it heals whatever ailment your party is afflicted with.
I seem to have heard something...
It may have been whispering...
Idle NPCDouble battle2nd best room for this team. Thanks to Banded Heracross' Earthquake and Latios' high Speed, this combination can easily pick OHKOs and you can double target a specific threat to avoid mayor damage.
From every path I sense a dreadful
presence...
Battle Pike Queen LucyAs long as the team is in good shape, you will be on a great position since Latios beats both Seviper and Gyarados and Steelix only needs a bit of chip damage to get OHKO'd by Banded Brick Break.


Additional notes:
  • Single battle NPC with no healing is the absolute worst result since if you are forced to sack something, you won't be able to recover your Pokemon until you get your party healed. If your Pokemon were inflicted by status previously, find a nostalgia room since the game will no longer inflict a status ailment and instead the Gentleman will heal one or two of your Pokemon.
  • Double battles are not bad results since this team does incredibly well on them due to how strong the pairing of Heracross and Latios is. I'd recommend choosing this room early rounds and specially over the nostalgia room when you are on the Pike Queen round.
Finally updated the picture proof and you can find it attached below:

 
Last edited:
Well, unfortunately my Pike run came to an end at the 290th room. I entered a room where I had to battle an NPC battle vs Bird Keeper Dirk and his Aerodactly 2 lead which completely creamed my Latios and Blissey thanks to an omni-boost triggering from the first Ancient Power and a consecutive +1 Ancient Power crit against Blissey left me at 48 HP left only for Skarmory 1, of all sets, to finish her off.

Details of the run are as followed:

What triggered the loss, in great part, was a Double battle vs Cooltrainer Carrie and Thriathlete Finn who lead with a combination of Salamence and Lapras. This is a pretty bad matchup since the bulky Salamence sets are guaranteed to survive Dragon Claw Latios and the presence of Bright Powder in Sala 4 is always a huge concern. Then, there's also the fact that Finn can use any of the 8 existing Lapras sets which are awful. The match started with me targeting Salamence with Dragon Claw and Rock Slide subsequently. The initial plan was good since both mons were hit, however, for some fucking reason, Salamence survived with 1 HP left. This proved that the set in front was not Salamence 4 but Salamence 6 which is an even bulkier variant since it has 170 HP / 170 Def / 170 SpD.

:rs/heracross: :rs/latios: vs :rs/salamence: :rs/lapras:

244 SpA Latios Dragon Claw vs. 170 HP / 170 SpD Salamence: 137-162 (71.7 - 84.8%) -- guaranteed 2HKO

252 Atk Heracross Rock Slide vs. 170 HP / 170 Def Salamence: 42-50 (21.9 - 26.1%) -- 2.9% chance to 4HKO


It was a roll, but it lived with 1 HP. Curse the moment Game Freak decided that it was a good idea to nerf spread damage on non-ally attacking moves to a 50% (Gen IV and forward, it maintains a 75% on all spread moves).

It retaliated with Aerial Ace claiming Heracross. Without words, I only hoped for the Lapras not being set 8, to which fortunately it wasn't but neverless I had to finish the fight without Heracross. After winning this battle, I was able to get to the waiting room where the maid mentioned that the room on the center heard people whispering. At this point I was simply unable to take the risk without Heracross since Blissey and Latios were my only two Pokemon left and I was afraid of any possible Normal types to appear. I opted for another room and instead I got an NPC battle vs Bird Keeper Dirk who lead with Aerodactyl.

:rs/latios: :rs/blissey: vs :rs/aerodactyl: :rs/skarmory:

I went for Thunderbolt which did solid damage and under normal circumstances, Aerodactyl shouldn't be a threat in Singles, however, after attacking with Ancient Power and revealing to be Set 2, it gained an omni-boost. At this point, the odds were against me now. No matter what I could've done, Latios was going to die and it did. Choice Banded Aerodactyl at +1 is a nightmare. Blissey came out and I could still win this since Blissey is still able to survive the hit but to my horror, Aerodactly landed a critical hit this time which left Blissey at the brink of death. Blissey finished it off with Seismic Toss but thanks to that stupid critical hit, I only had a 48 HP Blissey left vs two Pokemon. Skarmory 1 comes out and I had no chance to survive as Steel Wing made me loss the battle and the run.

Reflecting a bit more about this, I probably should've taken the Whispering room and bet on my chances. I guess I got very spoiled by Banded Earthquakes coming from Heracross and being abused. Blissey is not to shabby in Doubles although either way, if the NPC carried Normal types like Granbull or Ursaring, I would've been in trouble. Also, my loss was 100% caused by luck since under normal circumstances Latios would've been able to take a hit from Aerodactyl without the omni-boost and 2HKO with Thunderbolt while Skarmory can't threaten Latios at all which would've made this fight a joke and grant me a full healing for my party. Unfortunately, the AI haxxed the living shit out of me on this match and there wasn't really anything else I could've done about it.

 
Reporting an ongoing streak of 100 tournaments in Dome Doubles. Heavily inspired by GOSCIZOR post, I decided to modify his team to further take advantage of the newly discovered tie and 3IV mechanics in the Dome. Since you never fight Tucker in Doubles, you can go all out with forcing a tie if your BST is high enough:

Metagross @ Choice Band
Jolly
6HP / 252Atk / 252Spe
- Explosion
- Earthquake
- Hidden Power Steel
- Shadow Ball
  • Has a decent chance to KO everything except Aggron and Ghost-types
  • Jolly is needed to outspeed scary Fire-Types with 3IVs (Arcanince, Houndoom and Rapidash)
  • Unfortunately still gets outsped by Entei, Charizard, Typhlosion and Ninetales
  • I run Shadow Ball over Aerial Ace since Gengar takes care of evasion boosters with Destiny Bond

Gengar @ White Herb
Mild
12HP / 220Atk / 50SpA / 228Spe
- Substitute
- Destiny Bond
- Explosion
- Hidden Power Grass
  • The Atk investment is so that Explosion kills even the bulkiest thing that could outspeed and KO Metagross (which is Entei).
  • Substitute and Destiny Bond make sure you can almost always force a tie if you get at least one kill, which is incredibly easy with this team.
  • While Substitute lets it tie all 1v1 situations, Explosion is strong enough to even tie most 1v2s if neeeded.
  • Hidden Power Grass kills Quagsire, which is the only Damp mon that Latios can't kill in a single hit. As an added benefit, it also kills Rhydon which can become scary with QC.


Latios @ Lum Berry
Timid
44HP / 26Def / 252SpA / 188Spe
- Psychic
- Thunderbolt
- Ice Beam
- Protect
  • In theory, there are better mons to fit the strategy of the team, like Follow Me/Fake Out/Destiny Bond/Endure Smeargle, Fake Out/Explosion/Protect/HP Grass Shiftry or even GOSCIZOR Sableye set, but they all have too low BST to guarantee winning all the ties.
  • Latios is still very nice because it KO's most Damp users, has Levitate and outspeeds everything bar Jolteon-4 (Timid is needed because otherwise Crobat 3 and 4 become scary threats.
  • Psychic kills Gengar which is the only Ghost that Metagross can't outspeed and kill with Shadow Ball (Misdreavus-4 is a tie, but it's not really a threat.
While I mostly go with Gengar + Metagross, all 3 team combinations have some use. Latios + Gengar can be immune to Fake Out with Protect and it's also a guaranteed win if Latios can kill at least 2 out of the three opposing mons in one hit. Latios + Metagross is nice if there is something that could threaten Gengar with QC.

Pokemon - Emerald Version (USA, Europe)_1590703295851.png
 
Reporting an ongoing streak of 100 tournaments in Dome Doubles. Heavily inspired by GOSCIZOR post, I decided to modify his team to further take advantage of the newly discovered tie and 3IV mechanics in the Dome. Since you never fight Tucker in Doubles, you can go all out with forcing a tie if your BST is high enough:

Metagross @ Choice Band
Jolly
6HP / 252Atk / 252Spe
- Explosion
- Earthquake
- Hidden Power Steel
- Shadow Ball
  • Has a decent chance to KO everything except Aggron and Ghost-types
  • Jolly is needed to outspeed scary Fire-Types with 3IVs (Arcanince, Houndoom and Rapidash)
  • Unfortunately still gets outsped by Entei, Charizard, Typhlosion and Ninetales
  • I run Shadow Ball over Aerial Ace since Gengar takes care of evasion boosters with Destiny Bond

Gengar @ White Herb
Mild
12HP / 220Atk / 50SpA / 228Spe
- Substitute
- Destiny Bond
- Explosion
- Hidden Power Grass
  • The Atk investment is so that Explosion kills even the bulkiest thing that could outspeed and KO Metagross (which is Entei).
  • Substitute and Destiny Bond make sure you can almost always force a tie if you get at least one kill, which is incredibly easy with this team.
  • While Substitute lets it tie all 1v1 situations, Explosion is strong enough to even tie most 1v2s if neeeded.
  • Hidden Power Grass kills Quagsire, which is the only Damp mon that Latios can't kill in a single hit. As an added benefit, it also kills Rhydon which can become scary with QC.


Latios @ Lum Berry
Timid
44HP / 26Def / 252SpA / 188Spe
- Psychic
- Thunderbolt
- Ice Beam
- Protect
  • In theory, there are better mons to fit the strategy of the team, like Follow Me/Fake Out/Destiny Bond/Endure Smeargle, Fake Out/Explosion/Protect/HP Grass Shiftry or even GOSCIZOR Sableye set, but they all have too low BST to guarantee winning all the ties.
  • Latios is still very nice because it KO's most Damp users, has Levitate and outspeeds everything bar Jolteon-4 (Timid is needed because otherwise Crobat 3 and 4 become scary threats.
  • Psychic kills Gengar which is the only Ghost that Metagross can't outspeed and kill with Shadow Ball (Misdreavus-4 is a tie, but it's not really a threat.
While I mostly go with Gengar + Metagross, all 3 team combinations have some use. Latios + Gengar can be immune to Fake Out with Protect and it's also a guaranteed win if Latios can kill at least 2 out of the three opposing mons in one hit. Latios + Metagross is nice if there is something that could threaten Gengar with QC.

If I can count right, Metagross/Gengar/Latios has a BST in aggregate of 1700. How do you deal with battles in which you don't win the tie? Is it just 'luck' that you don't need to tie them?
 

Users Who Are Viewing This Thread (Users: 1, Guests: 5)

Top