Challenge 4th Generation Battle Facilities Discussion and Records

189 in Hall Singles with Breloom

breloomstreak.jpg
JLY (Breloom) @ Focus Sash
Ability: Effect Spore
Level: 46
EVs: 252 Atk / 4 Def / 252 Spe
Jolly Nature
- Seed Bomb
- Stone Edge
- Mach Punch
- Spore

ADA (Breloom) @ Focus Sash
Ability: Poison Heal
Level: 46
EVs: 252 Atk / 4 Def / 252 Spe
Adamant Nature
- Seed Bomb
- Superpower
- Mach Punch
- Spore

8 wasted evs on jolly, 4 on adamant from not using a jump point

Order was:
Fire, Flying, Poison, Bug, Ghost, Grass, Psychic, Fighting, Dragon, Ice, Dark, Steel, Water, Electric, Ground, Normal, Rock.

I don't believe rotating natures was strictly necessary, but rotating stone edge in and out certainly mattered. Spore is a great built-in scamming tool, but even with it, it still never felt good to use Stone Edge. Effect spore on the jolly guy is not intentional, it was done to reduce time breeding and I lost to poison once with it. Jolly stone edge guy was used for fire flying poison bug ghost grass psychic and dragon, adamant superpower used for the remainder.

First rollover occurred from 2 lucky 3-turn sleeps on heracross for fighting and scizor for bug, shortly thereafter lost to a double stone edge miss against roserade on poison.
 
Last edited:
Hi everyone!
Submitting a 301 win streak in PtHGSS Double Battles with Bronzong, Swinub, Heatran and Slowbro on my retail Soul Silver version. I know it ain't much in the greater context but I'm so proud if it, breaking the 300s barrier is absolutely huge for me! Team is pretty much the same as my previous record with the exception of Heatran instead of Camerupt, so I'll mainly talk about it. Please refer to my previous post for a deeper general team analysis.

Heatran LV.50 @ Life Orb / Iron Ball
Ability: Flash Fire
EVs: 252 HP / 252 SpA / 4 Def
IVs: 30 HP, 30 Atk, 3 Spe
Quiet Nature
- Eruption
- Dragon Pulse
- Hidden Power (Grass)
- Protect

This specific Heatran is from the Pokémon Ranger Guardian Signs 2010-2011 event. And fun fact yes, it can be still legally obtained anytime without cheating or external tools. I chose him cause it's literally perfect for this purpose.
Has by default Quiet nature (+SpA, -Spe) and uniquely knows Eruption, a move that damages both opponents and already did wonders with Camerupt. It doesn't just hit like a truck, but like the entire trucking company. A full health Life Orb STAB Eruption deletes almost everything, one-shotting even most things that resist it. The other moves are complementary to it; Hidden Power Grass is to take care of Rock, Ground and Water types (the 3 IVs in speed grant the slowest possible speed with the highest base power of 70). Dragon Pulse is simply a coverage move against Dragons and other mons who resist Eruption and/or I can't really damage otherwise with Heatran (Dragonite, Salamence, Flygon, Kingdra, Latios, Latias, but also hits neutrally Gyarados). Lastly, Protect is obviously to not take damage while Trick Room is getting set and avoid ally Surf/Earthquake damage.
With that he basically acts as a superior form of Camerupt (having in fact almost the same build), possessing a wider movepool, more damage output (base 130 SpA vs 105) and much much more bulk (base 91 HP/106 Def/106 SpD vs 70/70/75 lol). This last trait alone is a game changer since the only problem I had with Camerupt was his fragility; terrible defensive stats, even with Rock Solid and full HP EV investment he couldn't ever stand a single super effective move.
Heatran is also excellent for itself great typing and ability. Steel is a great defensive type and immune to Toxin and Sandstorm, while Flash Fire makes him fantastic to switch on fire moves. A double ghost lead isn't really a big threat anymore (as it was with Camerupt) since in that case I usually switch Swinub (who can't damage ghosts) to Heatran on T1 while Bronzie sets the Trick Room. Heatran resists ghost moves, the only dangerous one can be Dusknoir 1 with TR + Iron Ball and 4 with Earthquake. In case of a double fire lead, that can rarely crit kill or double hit Bronzong, I usually double switch both mons to Heatran-Slowbro because Flash Fire immunity and water resists fire.
The only problem I have with Heatran is his speed. 77 base speed is a little bit too high for a Trick Room team, and in my first battles I was caught off guard by very slow mons attacking before him. This is the reason why I swinged back and forth with Life Orb and Iron Ball as each one has its pros and cons.Life Orb helps dishing out more damage and makes killing opponents a little bit more consistent. The con is simply that you have to take particular care and play around slower mons that can outspeed him under TR, often switching to Slowbro. Iron Ball grants a sluggish Heatran and makes him outspeed any threats that couldn't normally under Trick Room. The downside is obviously less damage output and a couple of enemies surviving Eruption from time to time. I still haven't decided for sure but ultimately I think I'd go for Iron Ball since it keeps the gameplay linear and predictable, so you don't really have to go out of your way to win a battle.

That being said, I compiled a list of overall "threats". These are a bunch of dangerous mfs I pay particular attention to and dispose as soon as possible, otherwise shit's gonna get rough

- Pesky Trick Room users (some even double dip as Iron Ball holders): Bronzong 1-2, Claydol 1, Dusknoir 1, Exeggutor 3, Hypno 1, Porygon2 2, Slowbro 4, Slowking 1.

- OHKO users (no Fissure since Bronzie has Levitate): Abomasnow 2, Articuno 4, Dewgong 3, Glalie 4, Gliscor 3, Lapras 2, Nidoking 2, Pinsir 4, Rapidash 3, Rhydon 4, Rhyperior 3, Walrein 3.I've seen OHKO moves happen very few times and hitting rarely, but it can definitely happen.

- Very slow Iron Ball users that can outspeed under TR (as already mentioned, if using Life Orb Heatran I also paid attention to most ≤50 base speed and any Iron Ball mons): Aggron, Marowak, Gastrodon, Forretress, Probopass, Snorlax, Golem, all 3 Regis, Bastiodon, Slowbro, Slowking, etc.

- All Quick Claw holders. Fuck that shit, worst idea in the franchise. An item that gives 10% chance to straight up cheat and steal a win shouldn't even exist. Same reasoning for Bright Powder/Lax Incense, I hate them with all my heart.

I haven't lost yet so the streak is still open, but honestly I don't feel like going on for now. I'm really satisfied already, perhaps I'll pick it up again for a longer record in the future.
Video code of my last battle: 83-49091-71418

And that's it, thanks for reading and merry Christmas to everyone!

d4b5b794-164f-49e3-8472-c5f820c4dba8.jpeg 4eee8926-4bce-419e-bc8c-73a6a5e9b5e0.jpeg
 
Would like to share an ongoing streak of 210 in the Pokémon Diamond Pearl Tradeback Battle Tower Singles (with PtHGSS movesets)

My team is:

Starmie @ Life Orb
Ability: Natural Cure
EVs: 252 SpA / 4 SpD / 252 Spe
Timid Nature
IVs: 27/x/21/31/31/31
- Surf
- Psychic
- Thunderbolt
- Ice Beam

Garchomp @ Focus Sash
Ability: Sand Veil
EVs: 252 Atk / 4 Def / 252 Spe
Jolly Nature
IVs: 31/31/25/x/30/31
- Swords Dance
- Outrage
- Earthquake
- Fire Fang

Scizor @ Lum Berry
Ability: Technician
EVs: 248 HP / 252 Atk / 8 SpD
IVs: 29/31/31/x/31/9 (lmfao)
^ If I had 31 speed IVs, I would've used this EV spread instead: 84/252/4/0/4/164, which allows Scizor to outspeed all base 85 Pokemon with zero speed IVs like Gardevoir, as well as Pokemon like Heatran among others in the Tower. But I really can't be bothered to breed and EV train/train up another Scizor up (it took me weeks of breeding before I was even able to get a Scizor with as good IVs as the one I have right now) so this is the best that I can do.
Adamant Nature
- Swords Dance
- Bullet Punch
- Bug Bite
- Superpower

Proof of team:
Proof of 100+ win streak (this was Battle 105 and this was by far the closest battle I ever faced during my ongoing streak):
Proof of 189 win streak (Battle #189):
Proof of 196 win streak (Battle #196):
Proof of 200+ win streak (Battle #203):
And finally, proof of 210 win streak (Battle #210):

Since shorts can only be up to 1 minute long, I decided to only record the 7th and final battle at the end of each set (and only the ending of it too) in order to fit it all in 1 minute. As such, please read the descriptions that I provided in all of these shorts as they pretty much cover everything that happened in the battle before what was shown in the shorts (i.e. all of the turns that happened before what was shown in the shorts from beginning to end).

As you can see, this team is 100% legit, meaning all of these mons are 100% legit bred and EV trained with legal movesets and stats.

Such an original, classic, and generic team right? All of these mons complement each other so well and deal massive damage to all opponents in the Tower with the perfect balance of Special and Physical Attacks.

The idea behind this team is pretty simple and straightforward. Basically try to take out everything I can with Starmie, gladly switching to Garchomp for Electric type Pokemon, and Scizor for Ghost/Dark/Bug/Grass/Psychic type Pokemon. If Starmie kills the first Pokemon (or if Garchomp/Scizor kills the first Pokemon while the other two mons on my team are still alive), it is pretty much over as the sheer power behind this team is too much for any trainer in the Battle Tower to handle in a 3-2 situation: no matter what Pokemon they have left. I've been lucky enough to not face too many PI trainers (i.e. trainers who only use Pokemon with OHKO moves) after Battle 105: instead, I've mainly faced Idols, Battle Girls, Black Belts, Campers, Cyclists, Ace Trainers, Collectors, Dragon Tamers, Guitarists, Hikers, Joggers, PKMN Breeders, Ruin Maniacs, Roughnecks, PKMN Rangers, and Psychic type trainers during my current win streak post Battle 105. Why do I say this? Because the only real threats that my team faces in the DP Battle Tower are either bulky Water type Pokemon that are very hard to put damage on (i.e. Milotic, Lapras, Swampert, Gastrodon, Slowbro, Politoed, or to a lesser extent Vaporeon and Walrein) or Quick Claw OHKO Pokemon like Donphan, Wailord, and Gliscor. EDIT: Forgot about Weezing. Weezing is also a threat since it has Papaya Berry which allows it to survive a SE hit from Starmie and it has Flamethrower for Scizor and has really high Physical Defense. Aside from that, my team can usually handle any other type of Pokemon that the opponent throws at me. I've been lucky enough during my streak to not have been hit by a Quick Claw OHKO move (especially on the 1st turn of the battle) or face many Fisherman/Sailor trainers (since sometimes Starmie can't even 2HKO the bulkiest Water type Pokemons in the game with either Thunderbolt or Surf, and neither Garchomp or Scizor resist Water meaning they can't be switched into safely when facing a Water type Pokemon) because otherwise my streak would've probably ended a lot sooner. Other than that though, I wouldn't call myself lucky at all during my streak because for the most part, I've always made the right plays and the right moves in each battle in each set and usually when you play flawlessly (or near flawlessly) with the Pokemon that you have on your team, the game will not usually screw you over due to hax. Even when you do get screwed over by hax, there's usually something that you could've done on one of the turns during the battle to prevent the hax from happening and guarantee that you win the battle no matter what. Always play it safe in the Battle Tower and go for the highest win probability percentage move that would ensure that you'd win in all cases (meaning you have to take into account every opponent Pokemon's set that you can face when going up against a said trainer and all the possibilities that could happen). Ex. let's say you're facing a Torterra or a Leafeon with Starmie. While Starmie always outspeeds both and easily OHKOs both mons with Ice Beam, 1 of the 4 Torterras/Leafeons in the BT has Quick Claw and if it activates, it will always OHKO Starmie with a powerful Grass type move before Starmie even gets a chance to attack it. Then you'd be screwed. In cases like this, the best thing to do is to actually switch into Scizor (since Scizor walls both of these two mons) and then safely kill it with Bug Bite + Bullet Punch (Bullet Punch might be the best attacking move in the Battle Tower bar none) ensuring that both Scizor and Starmie are alive in this scenario. It's rarely as cut and dry as this, but more often than not, the game will let you win (at least up to 100+ wins) as long as you make all the right and safe moves/choices in every battle.

I actually have a couple of other videos and shorts on my Youtube channel of my various other achievements in the Gen 4 Battle Frontier in Pokemon Platinum and SoulSilver, namely the Battle Tower and Factory in SoulSilver (seriously, it took me almost 8 months to finally get the Gold Print in the Battle Factory in SoulSilver and when I finally did, I cried tears of joy) as well as all of my achievements in the Pokemon Diamond Battle Tower right now (such as beating Palmer and obtaining the Gold Trophy), but that's a discussion post for another day and I'm only going posting this to share my achievement in the Diamond Pearl Tradeback Battle Tower Singles for now.

I'm honestly surprised that very few people on Smogon have ever used this team (movesets, natures, and EV spreads might differ to a degree but the mons should still be the same) before in the Gen 4 Battle Tower, and I'm even more surprised that very few people have ever achieved a high streak in the Battle Tower with this team, especially in Diamond Pearl, because imo the Diamond Pearl Battle Tower is much easier than the Battle Tower in Platinum and HeartGold SoulSilver because in Pokemon Diamond Pearl, almost none of the opponent's mons have access to the elemental punches or fangs (i.e. Fire Punch, Thunder Punch, Ice Punch), let alone all 3, in their movesets (or any move tutor moves for that matter) making sweeping much easier in the Diamond Pearl Battle Tower than in the Platinum/HGSS Battle Tower for any team (Trick or non Trick).

My team certainly isn't flawless (it will lose to hax eventually and it's probably not as good as a lot of the Trick lead Teams on this site that were used to get insanely high streaks (i.e. 1000+ or 500+ or maybe even 200+)), but it's a very very safe and reliable team to use if you want to achieve a 100+ win streak in the Battle Tower in Gen 4. (and it's a lot more fun and faster to go with a hyper offensive team in the Tower than to go with a Trick team imo since battles take so long to finish when using a Trick team). If there's anything you learn from my post, it's that it's still possible to achieve a high win streak in the Battle Tower even if you're not using a Trick team and are only using a hyper offensive team. You just have to play very carefully and safely each turn, each battle, each set, but as long as you use the team I used, you can easily get over 100 or even 200 wins in the Tower without needing any luck.

But yeah. This is actually my first time ever posting on Smogon (even though I've frequently lurked through all of these forums and discussion boards in the past for over a decade lol). Don't worry though: I plan on posting more often on Smogon in the future, especially in the 4th gen battle facilities and discussion boards, as I have a lot I want to share and a lot I want to get off my chest. If you have any questions about my Battle Tower streak or about my team or what were the biggest challenges I faced during my ongoing streak, etc. please do not hesitate to reach out to me. I'd be very happy to answer any questions you have for me.

EDIT: I will be going on vacation on the 21st of December and won’t be back until a week later so I will not be playing the Battle Tower during that time. I will continue my streak when I get back and let others know when I eventually/inevitably lose when that day comes…

Thanks!!!
 

Attachments

  • battletower168.JPG
    battletower168.JPG
    2.5 MB · Views: 59
  • battletower175.JPG
    battletower175.JPG
    2.5 MB · Views: 48
  • battletower182.jpg
    battletower182.jpg
    2.2 MB · Views: 41
  • battletower189.jpg
    battletower189.jpg
    2.6 MB · Views: 38
  • battletower196.jpg
    battletower196.jpg
    2.5 MB · Views: 50
  • battletower203.jpg
    battletower203.jpg
    2.3 MB · Views: 45
  • battletower210.jpg
    battletower210.jpg
    2.4 MB · Views: 39
Last edited:
Hi everyone!
Submitting a 301 win streak in PtHGSS Double Battles with Bronzong, Swinub, Heatran and Slowbro on my retail Soul Silver version.

That being said, I compiled a list of overall "threats". These are a bunch of dangerous mfs I pay particular attention to and dispose as soon as possible, otherwise shit's gonna get rough
I should underline that this isnt any kind of direct accusation and its more just feedback but because 300+ is a lot (and because I think people may copy this or something very similar to this) I'm going to be more direct.

Early smaller thoughts:
  • Occa bronzong should actually survive a lot of STAB Flare Blitz crits. It would take ~165 atk to start to consistently get that OHKO and a lot of fire types (charizard, infernape, magmortar, arcanine2) fall short. The problem is generally going to be STAB Fire Blast and Overheat Crits and these dont fall under the umbrella of "very bad" scenarios as you can simply put slowbro in and cycle swinub out to heatran for TR on turn 2. It's not a genuine threat in terms of how often it will happen.
  • Your 252/128/128 bronzong is wasting 8 EVs as its the same as 252/124/124. Putting 4 of them in atk would jump you from 119 to 121 which is kind of meaningful as a slight power bump. I dont think download is relevant at all so i wouldnt worry about balancing the average def/spdef with swinub when you re-EV train.
  • The HP Grass Camerupt is also wasting 8 EVs between HP and attack. I know you are using Heatran now but just mentioning in case you go back.
  • Is there any reason why Swinub is Oblivious and not snow cloak? There's about a 1.3% chance of seeing abomasnow in the lead slot and snow cloak seems somewhat useful in those games at least. Attract + no "kill" attack is very rare and pretty much exclusively on Scientists/Waiters and even then they're unlikely to try and use attract because only do they need "50%" to hit the correct gender but the AI needs to guess that swinub isnt oblivious and then attract has to win the AI move tie.
  • QC is 20%. Idk if that'll ever affect any decision making but just wanted to make you aware as it is a huge threat
  • The enemy cannot reverse TR unless both of its pokemon are faster (in terms of raw speed) than yours. I'm not sure how much I recommend going for an adjusted speed value between 45-50 (to prevent e.g. slowbro and slowking from ever reversing TR while that pokemon is on the field) because the cost of being "slower" than some of these enemies is obviously also high. Just thought I'd mention it as the exact doubles AI doesn't get discussed a lot here.
  • Something that isnt mentioned as much as it should be: the "spread" damage nerf on moves like Eruption does not apply on the 2nd hit if the first hit killed the other pokemon. In general, a spread move (like eruption) always "hits" the faster pokemon (slower pokemon under trick room) first. So usually this increase in power can be predicted. Unfortunately, QC mons have a 20% chance to also mess this up. But it does mean you can fully plan for a turn and I recommend being aware of this if you are already using calcs/ playing "slower".
  • A pokemon with a priority move (all of them can hit swinub) will always reveal it on turn 1 and in general will always use its priority move on swinub while swinub is on the field. This makes planning for turn 2 slightly easier (i heavily favor switching in these scenarios if its possible and bronzong isnt under pressure itself).

The biggest problem I see in this team is the lack of lum berry though. This should be #1 in your threats section and above everything else, I'm guessing maybe you just forgot to include it in the threat list.
Blizzard is an outright common attack (even double blizzard is not that rare given the ice trainer %) and there are a pretty wide list of very annoying no-attack enemies that will happily sleep or confuse bronzong on turn 1 (Jynx2, Lapras2, Dusknoir2, Exeggutor2, Mime2, Milotic2, etc). A lot of fire moves (bronzong will draw these because the AI does not see occa berry when it checks to see if moves can kill) carry a burn chance and a burned Bronzong is not useless but is severely crippled.

You don't lose if Bronzong gets frozen, slept or confused on turn 1 but (for the benefit of everyone who hasnt played TR in doubles); you are in very serious trouble. Swinub will not be able to safely protect on turn 2 and will be vulnerable to the same hax-based moves. Without TR up you will be desperate to get another attempt at it but getting Slowbro onto the field can be very awkward and I would be pessimistic about winning from this scenario if swinub faints before an endeavor goes off. There's a high risk that the enemy simply ignores a frozen/sleeping bronzong and kills swinub first and then slowbro/heatran become the next target.

Another Bronzong question mark I have is the presence of running EQ on it at all tbh. This makes a lot of sense with Togekiss. Without a ground-immune level 1 i think a lot of the sense is lost. You are very rarely able to find time to safely protect alongside EQ because of how often protect is needed for TR (basically always). Bronzong is an OK pokemon but without atk investment, spread dmg EQ is killing basically nothing (as an example; heatran never faints to it without a crit. you dont even 2hko Aggron). It may make a bit more sense if you had a pokemon in the back you would happily EQ alongside, but heatran very obviously must protect (after which idk what happens, you switch heatran or you are forced to gyro ball next turn i guess - but wasting TR turns is always bad. at least heatran can sit there for explosion). Slowbro doesnt take much true, but its chip and its not like the enemies take that much anyway. Bronzong is not short of non-EQ moves to run here so its not as if this is forced at all.

Dropping Occa does cause a very very difficult set of decisions anytime a Fire Blast/ Overheat potential user shows up alongside "anything else" (example of something horrific; Eve leading Machamp/Moltres). Under such scenarios I could see the optimal decision being to just naked endeavor while slowbro is brought in on Bronzong's spot. The chance of EQ hitting Heatran (double switch) seems untenable, and while that play risks heat wave denying the endeavor, at least you'd be in a winning position. There's also a host of complicating factors that ruin such plans even more like a fake out or uturn from moltres/infernape as well as any possible threats coming from the other pokemon. Moltres is "quite common" given how many trainer classes can use it and its also quite a big issue for this team given that bronzong and heatran have a terrible matchup into it and slowbro is hampered by doubles-surf.


I also have a huge question mark over running surf at all tbh. Your original post mentions "Surf is nice in doubles" but I would really question that based on my experiences. Surf borderline forces protect, the list of targets you want to surf has an unfortunate overlap (fire types) with a list of targets unlikely to target heatran. The spread nerf is better than it was in gen3 yes, but Slowbro is going to struggle to pick up a lot of KOs here. You do get most 2hkos when surf can do super effective damage, but taking an extra turn in TR to not do "as much damage as typical" is rough because TR running out later into the game can be game ending. It's also rough alongside Swinub. You can surf your own Bronzong and its ok but a crit surf will do around 50% to bronzong i imagine which is enough to potentially lose the game.

I also think it must be somewhat common to: [have a start to the game that is ok but not perfect, resulting in explosion + protect and having slowbro/heatran in] but basically be in a situation where protect would be 50% on heatran and have surf be almost-blocked.

Talking about things in a nonspecific way can be confusing though, so lets instead pretend its slowbro-heatran in a 2v2 under TR and protect wasnt used last turn (aka a scenario that you would be happy to have most of the time) against a fire or ground type that you want to surf + another pokemon that doesnt suck. Moltres/Medicham is the example i want to use but perhaps its unfair to pick a pokemon that can sometimes run out a protect to deny eruption/psychic as i'm assuming thats a very common play pattern. So perhaps instead Charizard/Blastoise (Yes, Charizard doesnt faint to modest surf). The temptation to surf + eruption is high and in this exact scenario is perhaps correct but even though Blastoise is really "not that bad" for this team to handle, its clear that the uncertainty regarding double team, mirror coat, etc is enough to cause hestitation. Charizard/Blastoise is not the most offensive combination either but you definitely have to kill at least 1 of them before TR ends. I've left out how many turns of TR would be left. Obviously most common is 2 or 3. The situation doesnt seem that bad but I want to underline the fact that if surf misses e.g. Charizard4 and you do surf + protect, then suddenly you are close to lost. This again does bring in another layer of bad luck but 300+ wins (idk what your exact goal is) is obviously a lot and this stuff will happen.

If I was going to be more critical of surf I'd want to bring up "worse" scenarios, like how a lot of water absorb pokemon welcome the healing in lategame 2v2s. Unfortunately basically every single Water Absorb enemy somewhat doesnt care about HP Grass except perhaps poliwrath, but then poliwrath (like a lot of the others) does have a rindo set.

Regardless I am sure it is clear that the idea that Surf + Eruption is a blocked move combination is an issue and (more broadly) I would say surf is often kind of blocked anyway.

If slowbro had a small movepool i would probably end it there but given Grass Knot, flamethrower (I know heatran is on the team but its doubles; heatran isnt always alive and spread eruption sometimes needs some help), shadow ball, slack off, light screen, etc etc are all available its not as if the options stop there. in fact I would say HP water or brine both seem like very reasonable alternatives to Surf that dont ever have the teammate-target downside at the cost of not hitting 2 enemies which you'd both want to surf.


The entire surf discussion bleeds into my other main guess at what this team probably really struggles with: which would be water trainers. Quick list of why I think these seem exceptionally dangerous:
  • Damp leads are a massive headache. You may be thinking "I can just TR + Protect and then Endeavor + gyro" but:
    • There can easily be 2 leads with damp or a lead with damp alongside something that interferes with TR.
    • Politoed1 + Poliwrath2 has a 19% chance to dodge this KO.
    • Politoed2 is going to dive on turn 1 about 50% of the time. Quagsire2 is always going to Dive
      • Not being able to endeavor/gyro on turn 2 is a problem because of what turn 3 will look like (explosion once again blocked, but 3 turns left on TR is now 2)
    • Poliwrath3 is a blizzard/ lum threat as well
    • Quag3 is QC as well
  • Because of how common water absorb is, spread damage is often leaking onto Bronzong. This sounds ok until you realise how much 2-3 surfs actually do.
  • The gyro damage is often shit against many water types as speed EVs are rare there. You are reliant on swinub for damage.
  • Gyarados (intimidate) basically shuts down the explosion line in a slightly different way. You can TR/Protect > Endeavor (the more important target or ideally the slower target for spread removal) / Explode but often the 2nd opponent lives to kill swinub there and its a 2v3 with 3 turns of TR left.
  • A lot of Waters just straight-up live explosion even without intimidate/damp in play. Idk what you are meant to do here. I guess once again its Tr/Protect and then Explode/endeavor. This is also often going to be a 2v3 with 3 turns of TR left.
  • A lot of those turn 2 endeavors get blocked by aqua jet and quick attack and vacuum wave which are "annoyingly common" as potential threats based on what you see on turn 1
  • As you mention, Slowbro/slowking are straight up common in the backline to reverse TR
  • The most important problem though: your own Slowbro/ Heatran combination is just going to suck in endgame:
    • There's no where near enough pressure to safely out muscle the opponents before TR ends. Again HP Grass is a kind of meh attack, a lot of waters are going to threaten KOs on Heatran in these 2v2 scenarios. Psychic is "ok" in the sense that the opponent probably also has an attack this powerful
    • As a direct example of this, think about just how many opponents can live Psychic + HP Grass (rindo is annoyingly common and you often do not know the enemy sets)
    • Any kind of complicating factor (a CM, a double team, a protect, an endure, etc) is probably shifting the balance from "somewhat even" to "lost"
    • I dont see how heatran/slowbro are surviving any kind of bad luck here that often (brightpowder, QC, a crit)
    • If heatran/slowbro dont close the game (or effectively close it) fast enough then I think TR going down is probably just a straight up loss. This opens the door to "everything else" that could stall a game like a double team, dive, protect, whatever
The water trainer matchup seems to largely go: hope that TR goes up, hope that swinub can do endeavor with explode and survive, creating your own 3v2, then win either via endeavor or protect on turn 3. You can win without swinub doing more but these matches should have been incredibly scary. I struggle to believe this wasnt a problem in the hundreds of games you played (Camerupt has almost exactly the same issues as heatran).

The water weakness is so bad (for how common it is) i'm actually surprised you dont mention it. Im guessing you forgot. I'm also wondering if I'm missing something tactically. I considered the opening TR + slowbro switch against a water trainer but the more I think about it the more I hate it.

I think 300 is actually impressive given the problems above. Going to tag Jheisinho to see if he has anything to add since hes surely the active user with the most TR games in gen4.
 
I did a pretty underwhelming streak of 51 in 1v3 multis. More on that later, but what I really wanted to write down is that gen 4 in-game multi partners are subject to “species/item clause” constraints wrt your team. This implications for scouting partner sets, e.g. if you’re holding Lum and Mira reveals Psychic Latias, then it’s guaranteed to be tias3.

This also at least partially explains QuentinQuonce’s observation that “it seems that they only reroll if you bring a different team”: the partners reroll if they roll something that conflicts with your team. This has knock-on effects for every partner that rolls after the one that conflicted; it’s my impression that the partners roll in a fixed order (and it’s probably Cheryl-Mira-Riley-Marley-Buck), which could probably be confirmed with some tedious experimentation (maybe less tedious with save states and if you actually understand how tower trainer RNG works but I haven’t gotten around to it yet) that I didn’t do. This much has been vaguely known I want to say in ribboncord for at least most of this year except that the first mention I could find of it is Valentino mentioning it in May … citing me lol, so before then but I got nothing.

Also, you can reroll partners by entering any other tower format. You can just immediately run if you don’t care about resetting that streak. This one has definitely been known for 3+ years but apparently not here. Text chat is just kind of an awful format for tracking things we know, so yeah, better to have it in the thread.

The actual streak—I slapped together some gyarachomp and called it a day:

Gyarados @ Focus Sash
EVs: 4 HP / 252 Atk / 12 Def / 4 SpD / 236 Spe
Adamant Nature
- Waterfall
- Earthquake
- Protect
- Dragon Dance

“sorry, it’s not Gliscor” (Garchomp) @ Lum Berry / Coba Berry†
EVs: 252 Atk / 6 SpD / 252 Spe
Jolly Nature
- Dragon Claw
- Earthquake
- Protect
- Swords Dance

The actual Gyarados I was using had -1 hp/def -6 atk points just because I’m dumb and pkhexed it wrong. I was steaming the whole steak because I wanted footage of what a slightly higher level of judgment than “click moves lol, lmao” looked like except I fucked it up in OBS so while the footage contains … nearly all the relevant information, actually, it’s ridiculously painful to watch.

Quick rundown of partner choices:

  • 1-7: Mira, Psychic Latias4 (set 1 excluded due to Lum) + Leaf Storm Roserade34 (idr tbh, I wasn’t taking the first set seriously)
  • 8-14: Mira, Hyper Beam Togekiss4 + Surf Empo3 (still wasn’t taking it seriously ngl)
  • 15-21: Riley, Facade Ursaring3 (rolled QF) + Fire Punch Tyranitar2
  • 22-28: Mira, Mist Ball Latias4 + Shadow Ball Gengar1 (this was a bad choice, I had a brainfart and thought it was gar4 instead of definitely not gar4, but I don’t hate this one as much in the back as I could)
  • 29-35: Mira, Flamethrower Heatran3 + Tri Attack Porygon-Z4; I didn’t actually have an Expert Belt lying around so this was actually kind of a gamble but Heatran3 is honestly a pretty nice set to work with. Yes, even with the weakness to your own EQ.
  • 36-42: Mira, Psychic Latios3 + Shadow Ball Gengar2 (lol)
  • 43-49: Mira, Flamethrower Heatran3 + Overheat Moltres4. So here’s the †funny Coba Berry story: my first Mira roll here was Sludge Bomb Roserade1 + Flamethrower Moltres1, so I went to get a Coba to see what we’d get if we item-rerolled the Roserade, but it was Ice Beam Glaceon. After tossing a doubles streak, Mira’s next roll was Signal Beam Yanmega1, with tran3 in the back… since I’d just gotten the Coba and I liked tran3 last time, I checked this one too and this is actually a pretty nice lineup except it basically meant chomp didn’t get to hold an item for the set. But like, 1v3 multis is fundamentally inconsistent enough as is so like lol w/e sure we take those.
  • 50-52: Riley Psycho Cut Gallade3 (either 3 or 4 felt runnable… probably wasn’t actually a good idea though) + Draco Salamence3. I really should’ve rerolled this one tbh, I kind of forgot how much of a difficulty spike the introduction of all sets trainers at 49+ is. It did complete the ribbon run, at least.

Gyarachomp is a fun comp, Intim is still very good and there is surprisingly good defensive synergy with chomp switching in on elec and rock attacked aimed into the slot (this is actually where the idea came from), although I’m not sure I really trust it in 50+. Sometimes if your partner is good, you can win battles by clicking Protect and switching, which is definitely my kind of battle. Gyara’s movepool is really disappointing, its bulk … somehow was not. 7/10 would play again for ribbons though. 1v3 multis is pretty undercooked.

And while I’m here I guess I might as well mention that I took Not a Bot’s gargarzor comp to 109 since I also have that documented on stream, which also is pretty underwhelming (and honestly an underperformance for the team) but I think it’s neat to mention because it’s a kind of poorly-represented team archetype (ok it’s basically a starmie team but still) and the previous examples are mostly dead links. Mostly my impression is that I had to click a lot of unhappy buttons and wasn’t happy about it though…
Interesting bit the confirmation about the species/item clause.

I want to add to the rerrolling partners by entering another tower format and running from it when you don't care about that second streak (as your focus is the multi with NPCs one).
I would argue that an old reliable Soft Reset after accepting to enter that other streak felt faster for me and was my preferred method to reset partners when I got the 86 wins streak in PTHGSS (current WR).

At first I let that other battle begin just to shiny check the opposing mons LoL, but after a while felt like so much time was going to be lost doing that shit multiple times in each future attempt, instead of being spent in the battles I really cared about so I started to SR inmediatly after the game was saved by the attendant in order to skip the long secuence of her taking you to the battle room and waiting for the fight to start just so you could run from it later.

Although keep in mind that I have no idea if doing that affects the RNG in a different way and with that the teams offered by the NPCs.
 
I was grinding out attempts with the above team to assess its 1-49 reliability (actually pretty okay, if you're paying attention and not Just Clicking Buttons... but I was tbh) and just?? got???? a run that made it to 75 wins?????? The stream is actually watchable this time, I wasn't playing particularly well, it's still probably an overperformance with the team but the run is quick enough that I'm pretty sure now that the multis records are just deeply undercooked and it's not ... as hard as it looks (still definitely the hardest format to streak tho ofc)
 
Jumping on the Tower Multis Train and submitting an emulator winstreak of 102 with

Latios @ Choice Specs
EVs: 4 HP / 252 SpA / 252 Spe
Timid
- Psychic
- Dragon Pulse
- Thunderbolt
- Draco Meteor

Heatran @ Leftovers
EVs: 124 HP / 4 Def / 228 SpA / 4 SpD / 148 Spe
Modest
- Substitute
- Flamethrower
- Earth Power
- Protect

Full streak:

1734928463887.png


just 2 sets i had lying around from a different team.

Latios and Heatran have near-perfect switch synergy which helps when the ""partner"" is completely unreliable for defensive assists.

Latios is incredibly broken in ways that people who have used it in PvP will be too familiar with. Too fast, dies to too few moves, picks up too many KOs at "+1", and invalidates a lot of bad matchups with Draco. Draco definitely seemed worth it given that in all "bad-ish" matchups the option to switch is there, the option to go for a safe but weaker move is there and the option to click Draco and get "so far ahead that its probably over" is there.
Heatran is perhaps even more broken but only because the gen 4 doubles AI is exceptionally dumb with its behavior regarding EQ and surf among a few other moves. This creates strange matchups where Heatran should lose with smart play from the opponent but instead becomes incredibly likely to win as surf/EQ are often "blocked" moves. Heatran's main problem is that flash fire makes the partner stupid (it will almost always activate flash fire where possible which is kind of "wasting the turn", making a lot of pokemon with fire moves a lot worse)

I think if I was going to play more I'd probably adjust the Heatran set to be a bit more offensive. But then it would probably be best to actually build a specific duo anyway.


I would treat the NPC selects similar to a factory doubles situation where a very heavy emphasis should go on speed above everything else. Unlike factory doubles though, an extra emphasis should go on "pokemon that cant throw" (aka pokemon that dont have status moves that the ai misuses. aka most status moves)

Similarly to factory doubles, the concern over specializing or having bad type synergy or having no physical/special coverage in the 4 is much, much less relevant than actually having strong sets that move quickly. Latios/Alakazam/Moltres/Heatran was arguably the strongest team in the streak despite relatively low type diversity.

Knowledge of what the AI partner is likely to do helps a lot too

Perhaps this advice is too obvious; but its very difficult to lose a "2v1" field advantage. The emphasis should strongly be on KOing 2 pokemon on either side early. It's not too hard to help encourage this behavior in the AI partner. Likewise "everything possible" should be done to avoid the opponents doing the same to you. It's why protect on at least 1 pokemon is almost necessary, and its why having a lot of weaknesses between the team can actually benefit in terms of splitting the enemies attention. It also makes much more aggressive plays "more correct" to go for in comparison to "solo doubles" where you would want to slow play things out more.

Likewise the almost enforced 2+2 v 2+2 means that the partner's 2nd pokemon is almost exclusively playing the endgame. this makes instant power or "one move wonders" a lot more tolerable. Slaking, Overheat sets (even those without white herb), etc are all a lot better than they would be in regular 4v4.

Anyway Multis w/ AI is weird. Feels like its halfway between tower and factory. At least 0-42 is borderline unlosable in a similar way to tower instead of being the horror show that 0-42 in factory is. Wouldn't surprise me if the record could go beyond 150 if [a better doubles player than me] took it somewhat seriously.
 
I should underline that this isnt any kind of direct accusation and its more just feedback but because 300+ is a lot (and because I think people may copy this or something very similar to this) I'm going to be more direct. [...]

Wow, thanks a lot for the long reply Magpie! I really didn't expect it and got many interesting insights. I'll try to make this post relatively short and as cohesive as possible, just a small preamble first.

I'm not a hardcore pokemon scientist so most of my opinions are based on personal impression and experience. My battles are assisted by Jumpman's Battle Frontier pokemon list, Bulbapedia, Smogon, a pokedex app and my memory. I don't have a pc to run programs/make calcuations off and just open Showdown's damage calculator on my phone sometimes when I feel it's crucial. In fact in my previous posts I use words such as "from my experience", "for what I was able to see", etc. You know tons of shit cause you analyzed the game's data, I know a bunch of shit cause "I saw it behave like this many times".
I want to make it clear that this is NOT an excuse, but rather an apology in advance for my coarse inaccuracies and errors (especially related to enemy AI and behavior) that perhaps look trivial to you but are not for me. I'll be happy to receive tips and suggestions to further improve my Frontier battle skills so feel free to correct me again about anything, especially enemy AI which I know little about.
  • [about Bronzong] Something that doesn't crit-OHKO but leaves Bronzong on red healthbar is still bad. Enemies could see the potential kill and focus on him instead of Swinub as they'd do normally, making Bronzong survive one turn less than usual, so I try to prevent it. Things that have CRIT-OHKO'd my Bronzong might have been in a specific range or who knows, maybe some buffs I forgot about. It's not a serious threat (I built my Bronzong specifically for that lol), BUT it can definitely happen and, in my opinion, anything that may prevent you from setting Trick Room turn 1 is worth considering. You see, I love this set so much because it's purely bulky but doesn't really behave like one. He doesn't have to deal damage but still does damage. His main job is just tanking a hit while setting the Trick Room up, that's my focus and anything after that is secondary. This is why differently from many sets that I saw here he's full tank with no EV investment in Atk. I genuinely think he doesn't need them, or maybe a few at best. STAB max BP Gyro Ball hurts a lot, pre-nerf Explosion hurts a lot. In short words: he's not meant to deal damage, I don't care if he doesn't, but he still does it.

  • [about EV spreads] Yeah you're absolutely right, I'm pretty dumb with EV spreads. I usually go for 252/252/4 and call it a day since 2012, I mess up too easily with other spreads. Literally noticed it yesterday when building a team for Multi battle tower, I gotta re-EV train a couple of mons again.

  • [about Swinub] I didn't know that thing about Scientists/Waiters and just thought the ability was irrelevant given the abysmal chances. Now that you make me really think about it, Abomasnow appears and Snow Cloak it's slightly better.

  • [about QC] Lapsus, got confused with Bright Powder and Lax Incense being 10%

  • [about enemy TR] Yeah I thought about it and came to the same conclusion, not worth adjusting speed range for what could happen. With the exception of Bronzong, only one of the four possible enemy sets can have TR. I know little of enemy AI so my impression is VERY approximate, but opponents using/reversing Trick Room is a thing I saw happen rarely.

  • [about status and Lum Berry] I didn't mention this in my "threat list" cause I took it for granted tbh. Basically any team that hasn't status protection is on great risk, and I'm fully aware of it (in my very first post here I said "Lum Berry is huge cause para, sleep, freeze and confusion are extremely common and mean certain death in later rounds") and of course I still mean it. The problem is I couldn't really find space for it, every item is fundamental and must stay there. The only one I could slap the Lum on is Slowbro instead of Citrus. That would protect him from a status but Citrus really helps everytime cause Slowbro is a frequent switch-in when Bronzie gets a status or sees a strong double fire type lead.
    I could rework Bronzong with Lum Berry and Fireproof, but that basically shuts a danger to open another. One status protection, but enables ground threats like the OHKO Fissure and the omnipresent EQ, and Fireproof = no super effective, while Levitate = immunity. Huge difference here to me. Also the resistance is something I really care about only on turn 1; Occa Berry is a one-time Fireproof to secure TR and that's enough, I don't need it every single turn.
    If I gotta pick my poison, I choose to pick Occa and Levitate.

  • [about burn] Small correction about burning tho. "A burned Bronzong is not useless but is severely crippled". Not the case in my opinion. Yes Bronzong would be crippled by the Attack debuff, but it's almost always irrelevant cause Endeavor exists. As already mentioned, you don't need damage to kill an opponent when it has 1 HP. Skarmory, Magnezone, Steelix and Quagsire are some of the only ones I can't usually kill with Gyro Ball at 12 HP (that is, after the case of a full-health Endeavor), while everything else falls.

  • [about EQ] Earthquake is often considered one of the best moves ever created and being a 100% accuracy that hits both opponents helps a lot in this sense. Deals with types obnoxious to Bronzong thanks to its great coverage, has very high BP and even without Attack EVs it deals solid damage, often granting a 3v1 instead of a 3v2 ending. It doesn't synergize with Heatran and forces me to Protect him wasting TR turns, I do agree on that. But that's the only downside from my point of view and works like a charm otherwise, not the trash you described at all. I seriously thought about swapping it with Rock Slide tho but it has lower BP, different coverage and that 5% chance of missing is painfully real, I've seen it happen a lot. The flinch chance would be nice tho. What other moves would you suggest me?

  • [about Surf] Pretty much a similar reasoning as with Earthquake. High BP, precise, STAB, good coverage, solid damage but anti-synergic with Heatran, etc. I chose it cause I wanted a solid water STAB and the alternatives seem pretty mid. Brine isn't consistent since it does piss damage and kills nothing unless the oppo is already at half health and HP-water on a water mon is hilarious, I'd almost play Water Pulse at that point. He can't learn Hydro Pump in gen 4 but maybe I would have picked it even if unreliable. Slowbro is a backup TR that just works and Surf has worked good till now. Now I'm thinking about Grass Knot instead of Surf: not having a water STAB feels strange but it deals with Ground, Rock and most importantly those fucking water types. What do you think? Any help is appreciated.

  • [about water types] Speaking of water types, yeah that has to be the biggest oversight in my report, Jesus I don't even know how could I completely forget about them. They are a very dangerous but, believe it or not, in reality not as much as expected.
    There are things that you listed that aren't really a problem to anyone. For example, I wouldn't throw Surf against a damaged potential Water Absorb mon unless I was forced to. Damaging an ally while risking to heal the enemy, just to deal some damage to its partner? I'm stupid but not that stupid. Or why tf would I risk trying Explosion against a potential Damp mon? I must be desperate. You said it yourself, I rely on Endeavor + Gyro Ball. Let's say it happens the uncommon case where Swinub gets somehow killed on turn 2, and the rare case of me using Explosion, and also the extremely specific case I couldn't Explode if I wanted because of Damp. Then I'd blame the whole complex bullshit that lead to that situation (miss, flinch, QC, secondary status etc.), and not Damp itself. Gyarados' Intimidate lowers Bronzong's attack and GB damage is shit against waters, but again, who cares when they have 1 HP, or 12 at best? Water types are instead more threatening as backsides to me, not as leads. I want to stress that many common water types are actually pretty easy to deal with by Bronzong and Swinub, while tougher to face by Heatran and Slowbro. Seeing a single water type is not a problem, seeing a water team is a huge problem.
    I'm not saying water types are ALWAYS easy to handle, pretty much the opposite; in fact water trainers ARE much of a hustle and a very dangerous threat. Almost everything you said is right and perfectly accurate, I'm just saying that it's less hardcore catastrophic as you picture. The ritual of Protect + TR, Endeavor + GB that ends in the usual 3v2 or 3v1 is reliable and surprisingly common even against water teams.

One last thing.
Your sentence "I think 300 is actually impressive given the problems above" almost reads as "This team isn't good enough and you got there with luck or, much worse, by cheating". I don't know for sure whether this is a subtle accusation or not, but I could understand it. Being suspicious is legit, especially with long streaks, moreover in this case where I recognize my report was relatively meager and less detailed than my previous ones. Anyhow I know it's true, it's a great result and tbh that's enough for me; I'm not seeking attention or validation from anyone. If you believe me, fine; if you don't, it's fine too. And in the case I've been very lucky, lol I'm happy for it.
I only hope my report is more accurate now and my team is (or soon will be) better than you think!

Thanks so much for all the helpful advice Magpie, merry Christmas and have a good one! :totodiLUL:
 
Last edited:
Oh, and thanks again for those tips you gave me in pm about the Battle Factory. I still fucking suck unfortunately, can't even reach 40 in a row (I mean, ofc I don't really suck that much, your guide and tips massively helped me but the artificial bad luck and enemy hax is just atrocious).
Now it's been a week I'm enjoying Tower multi battles with in-game partner, it's a breath of fresh air after all the intense Tower/Factory I always do. It seems pretty easy and chill for now, I think I'll try to get a nice score on that too. Didn't know there was an hype train in the forum about multis, sweet coincidence and really glad for it cause I (like many others) didn't really care and neglected them for years till now. Multi battle with in-game trainer are cool and deserve some love!
 
I'm not saying you are wrong about lum vs occa. It's just my experience that the list of pokemon that can status bronzong is longer and more annoying to deal with than the list of pokemon that can OHKO it.
The other problem I have (with no lum) is that if something "goes wrong"; i would rather bronzong be dead. I would rather have bronzong faint than have bronzong stuck on the field frozen or asleep. This is just the nature of doubles.

It's not that you're wrong its just that every earlier record went lum (idk exactly how much testing and teambuilding was involved in each) so the decision to go occa is significant because its probably the most meaningful difference to this vs other TR records.

Surf is very weak with the doubles spread-nerf though. its about as strong as HP water is. HP water sounds like a joke but its not, because I think in most situations where you want to surf you would trade not having to use protect for the accidental surf damage on the other target. You can run Surf if you like but it sticks out to me as an odd choice. The part that bothers me most is (like i said earlier) the fact that surf + protect uses up an entire turn of TR, which is an expensive cost.

Bronzong's other attacks do not have a great solution. My expectation is that you just simply rip attacks and kill swinub a lot in games (either with EQ or explosion). There is gravity and zen headbutt and so on. I would not call any of these amazing moves.
It's more a comment on the idea of running swinub at all. Swinub is an interesting choice but obviously a flier allows for "free" EQs and a ghost would allow for "free" explosions. In terms of not-flying, not-ghost partners, smeargle stands out as being very high utility. It's fine to just want to use swinub as something for fun but i think it means bronzong has problems to solve or experiments to run on exactly how to best support it.
One thing swinub does do (I dont expect you to know this given you've only played with it); the weakness to specifically grass and water is actually very helpful. There are a few sets with only 1 very weak attack (often something like giga drain/ whirlpool) and these pokemon are notorious for ignoring something like Togekiss. So swinub gets to pull more moves here without relying on e.g. follow me

I'm not going to reply to more because I dont have anywhere near your gamecount and I can't watch any footage of someone else doing it to know how right/wrong i am about certain things. This is (imo) a much bigger deal in doubles than singles because things are just more chaotic and because the doubles AI is weirder. But i think you seemed to answer well, it makes me more confident in believing the run when points are addressed (like you have done) instead of ignored or dismissed.
One last thing.
Your sentence "I think 300 is actually impressive given the problems above" almost reads as "This team isn't good enough and you got there with luck or, much worse, by cheating". I don't know for sure whether this is a subtle accusation or not, but I could understand it. Being suspicious is legit, especially with long streaks, moreover in this case where I recognize my report was relatively meager and less detailed than my previous ones. Anyhow I know it's true, it's a great result and tbh that's enough for me; I'm not seeking attention or validation from anyone. If you believe me, fine; if you don't, it's fine too. And in the case I've been very lucky, lol I'm happy for it.
I only hope my report is more accurate now and my team is (or soon will be) better than you think!
I will repeat what I said before; I don't doubt that this team can do 300. The idea of this team getting 300 is fine with me. I've played TR + Level 1 on and off stream a lot; it does win a lot of games "automatically" (broadly speaking if both opponents target Lvl1 on turn 1, imo its like a 99% win already at minimum).
I just think that you undersell how easy it is to lose even with level 1 bait though. You didnt do this in a "bad way", its just that a lot of write ups leave out things which may seem obvious or leave out some clear threats and I wish they didnt because 1) its the stuff that someone else copying the team most needs to know and 2) its important evidence to show that the team was played. I think there is this broader idea or pattern where people leave out problems with their team because they think it makes the streak look better to not mention them or because they are proud of the team and want to say it is perfect; but IMO it does the opposite (this isnt really aimed at you i think almost every single record does this). And I "know" that in their heart of hearts, everyone who has played so many games is very aware of moments like "oh if this crits/ freezes/ misses then i lose" and therefore know how close things can be to falling apart.

This is indeed both a compliment for someone playing legit and a callout for someone cheating. Unfortunately a very strong record overlaps slightly with what people would loosely expect cheating to look like which is why proof, writeups, and whatever else is important.
I also think it does add context for me to take a record (any record) and say how much I think it probably underperformed/ met expectations/ overperformed.
 
Submitting an ongoing run of 371 in Castle Doubles on Emulator

Azelf
Ability: Levitate
EVs: 4 HP / 252 Atk / 252 Spe
Jolly Nature
- Explosion
- Protect
- U-turn
- Fling

Gengar
Ability: Levitate
EVs: 12 HP / 204 Atk / 4 Def / 36 SpA / 252 Spe
Naive Nature
- Destiny Bond
- Shadow Ball
- Explosion
- Protect

Zapdos
Ability: Pressure
EVs: 220 HP / 28 Def / 4 SpA / 4 SpD / 252 Spe
Timid Nature
- Protect
- Substitute
- Roost
- Thunderbolt

(for almost the entire playtime, Zapdos has leftovers)

You can watch the entire commentated streak on the playlist here: https://www.youtube.com/playlist?list=PL07Pg6iILwrJ9QXpERk1y3ADY_nShmWCX

I built this team 5 months ago (it was slightly different back then - more on that later) and while it was extremely promising in theory I had several runs cut short by 1% wide lens explosion misses, triple QC activations and a split min roll, as well as a few just plain errors that were subsequently punished by bad luck. Despite the losses being objectively bad luck I did lose some confidence in the "team" (keyword there because the squishy human playing is a part of that team) but 0-371 has been extremely smooth.

The idea of this team is really simple; abuse Azelf's incredibly broken explosion (the speed and power is unreal). Azelf is maybe the most underplayed pokemon this generation and I'm glad that its being recognised finally and not just by me. The backup strategy is the most broken 1v1 concept available to the player (pressure subtect stalling). I will also say that Fling is easily the most broken single move in the Castle. For those unaware: fling is a 90bp dark physical move + fake out + guaranteed burn/para/psn

Because its almost essential in how the team is played and because there is a lot of misinformation about this, i will repeat what i said in my factory doubles posts; the spread damage in gen4 is calculated dynamically. This means if I have a spread move (explosion, EQ, surf, etc) and there are 2 opponents getting hit by it (lets say, dugtrio and aggron) - dugtrio will get hit first by the spread move (75% power) and then if dugtrio faints, aggron will get hit by the full unnerfed version of that move.
A very important exception to this is: 1) under TR, all speeds are reversed including order of attacks and 2) Quick Claw has a 20% chance to make the user fast in any scenario, including spread attacks. So if that aggron had Quick Claw, there's a 20% chance that it gets hit before Dugtrio.

The most common game is this:
1. Azelf explodes and kills the 2 opening enemies
2. Gengar Destiny Bonds the final pokemon as Zapdos protects

This most common win is really *extremely* common and nets 34-36 battle points with 3 x 55 - something that also happens a lot because destiny bond doesnt care about how hard you can hit, and azelf overkills most of the frontier even with spread damage explosion.

However this "alone" does not generate enough CP to offset the number of skips this team needs to do. Therefore, every move which isnt protect-explosion-destiny bond are pretty much only there to assist in winning as many non-standard games as possible.

It's probably best to just describe scenarios / opposing teams that can beat the above, and how this team aims to 100% safely avoid them.

There could be various reasons for why this is. Perhaps one of them is unkillable with explosion. Perhaps its a focus band opponent. Perhaps they have lax incense/ bright powder. Perhaps they are a ghost which does not faint to shadow ball even at +1 special attack.

Zapdos is the clutch master here. Pressure + Substitute/Protect means Zapdos can 1v1 "almost anything" so long as Zapdos is faster than it. You simply strip the opponent of all their PP, let them struggle and win.

Zapdos does need leftovers for this "usually" but the power of Zapdos is in its ability to safely dominate 1v1s even if the opponent is going to use Focus Band/ Brightpowder/ Double team or even if the opponent is going to use Calm Mind/ Curse/ Swords Dance/ etc.

If the opponent is faster then you can consider dropping to Level 45, although since level drop is expensive then perhaps one of the below points is more optimal.

Try to win "like this" before the rest of the points below.

- use shadow ball on the pokemon that survives
- if azelf is at 1hp due to fainting in the previous fight, give it liechi
- azelf can also be given life orb (this usually pays for itself) or even choice band

If none of the above win the match, then see one of the bullet points below

- Salac berry is the cheapest solution usually
- If the faster opponent cannot OHKO a 100% HP azelf, then just heal azelf and leave gengar at 1hp. it will then just target gengar.
- In other situations (if another issue exists) it may be necessary to drop the level of the opponent
- In rare scenarios, choice scarf may be required

If the pokemon with brightpowder is the fastest enemy:
- Heal Azelf but not Gengar. Use Protect (Azelf) and Destiny bond (gengar). Make sure that opponent only sees a "kill" on gengar. The faster opponent with brightpowder will then kill itself on destiny bond, allowing Azelf to explode safely on turn 2 with Protect on Zapdos.

If the pokemon with brightpowder is the slower enemy:
- Heal Azelf but not Gengar. Give Azelf a King's Rock. Use Fling on the faster opponent to flinch them, and destiny bond with gengar. The slower pokemon will safely kill itself on destiny bond.

Also possible but not recommended:
- Wide Lens on Azelf can make explosion 99% accurate

The best way to play these is probably just: Protect (Azelf) and Destiny bond. Let one of them die to destiny bond. Then Azelf explodes on the final opponent, and Zapdos handles the final 1v1 if Azelf's explosion missed the remaining "accuracy hax" item opponent.

If this quick claw opponent cannot kill both gengar and Azelf:
- heal the one it cant kill and explode with that. Gengar often needs more help (Band or life orb etc).

If the quick claw opponent kills both gengar and Azelf:
- Make sure that the kill move on both isn't coming with secondary effects (e.g. flinch, burn, paralysis)
- (if you need both alive and both must take an action) There is the option to heal both Gengar and Azelf to full (20 points) and focus sash both of them (20 points). Azelf/Gengar can then safely explode. This is usually better than skip (50 points) but be careful if there are more complications.
- (if you dont need both alive or 1 of them can just protect @ 1hp) - just 1 heal and 1 sash is enough then

Remember to check the above at level 45 and 55 as well.

The solution to this is usually to just explode with gengar instead.

If that doesnt work and more compound ideas like kings rock fling on turn 2 after protect to guarantee zapdos gets a sub/ attack off fail - then its probably just a skip.

Use explosion on turn 1 alongside Destiny bond. The fact Gengar is already destiny-bonded before turn 2 means if QC does activate on turn 2, its still a win. Gengar destiny bonds again on turn 2 incase QC doesnt activate.

Alternatively if the pokemon is going to faint to 2x thunderbolt and/or cannot threaten Zapdos:
- Just protect with Gengar on turn 2 and tbolt the QC mon twice with zapdos.

Special case of "survives explosion"

Shadow ball and fling exist for this reason mainly. Fling a Grip Claw or shadow ball. Shadow ball can be boosted by petaya and this kills "most ghosts".

If both leads are ghost: both fling and shadow ball may be necessary. Just be careful of these because a generically strong ghost probably threatens KOs on both Gengar and Azelf with their STAB.

White herb works well here. Liechi can also work but you have to be <25% of course.

This is -generically- the "worst" matchup for the team.

Examine if Destiny bond fixes the problem. If the damp opponent is faster than its ally, you can just protect + Destiny bond.

If the damp opponent is slower, then azelf will need to fling king's rock and be healed as Gengar Destiny Bonds.

This is usually some shit like Aggron.

The best direct answer is the following:
- heal azelf
- give azelf a flame orb
- fling the flame orb on turn 1 and protect with gengar on turn 1

This usually cripples the opponent so badly that even if it turns into a 2v1 against Zapdos, it's over after a protect or 2

This is also the reason for flamethrower on Azelf, it just generically hits this stuff the hardest. If it doesnt work (even with life orb or petaya) then dont worry, just skip.

Extreme care needs to be taken here, it's probably the most likely cause of a loss.

A lot of pokemon that wont buy the bait and attack a 1hp pokemon are slow and terrible and lose easily to Zapdos/ just die to explosion anyway. But there are a few that aren't mainly:
Jynx2
Lapras2
Dusknoir2
(etc)

There is no guide except to make very sure that your planned strategy actually works. If Azelf could be vulnerable to confuse ray or sing, then lum berry it. If there is no way to guarantee safety and you cant double explode on turn 1 (against e.g. Lapras2) - then just skip.

There are a longer list of plans including how and when to actually switch out on the first turn, but these are so rare and so individual to the situation that i dont think its that helpful to outline them.

Generically there are some other tips, like the fact that if Azelf kills something at level 50, its probably worth using Liechi (-5) and level up (-1) for the payout (+7) and killing them at 55 instead. Depending on how far into the run this is, it may be the case that these small optimisations are no longer worth.

The hardest match is _usually_ match 1 of a set, since pinch berries are unavailable


This team is perfect on paper. There is nothing stopping 9999 wins because its easy to only ever play guaranteed win games, there is no need to even engage with wide lens or having 3+ hits onto focus band, etc. Depending on how good the player is at optimising wins and finding safe ways through tricky combinations of opponents - you get a bigger and bigger margin for being able to skip games you dont really have to skip.
It's also "hard" to play. IMO this is as hard as pokemon gets outside of the factory. You never have an excuse for losing with this team once you get past ~500 castle points.

Things to watch out for in particular (i.e. remember that for 95%+ of playtime you are using 2 leads with 1HP on purpose lol):
- If Destiny Bond is happening, be really sure that misses arent an issue. Destiny bonding at the end against a move that can miss is usually fine since there is no pressure on Gengar/Zapdos in a 2v1. But a turn 1 or 2 Dbond which must go off ? Make sure the pokemon that will try to target gengar isnt going to use a move like hydro pump or stone edge (and if they are, strongly examine healing gengar and destiny bonding at 100% to force a move like psychic or night slash, etc)
- Priority moves and spread damage moves
- Sandstorm and Hail if gengar/azelf needs to survive into turn 2
- Opponents (or allies...) with pressure pushing Explosion to 0pp before the end of the set
- pressure subtect is not bulletproof. Perish song, taunt, encore, disable, priority moves, dragon dance, etc can be problems
- Any move that can "beat" a kill move in terms of the enemy AI priority. Having trick room used on you, having the opponent set weather or skill swap or flash fire their ally - you dont want to be surprised by any of these mid-match
- compound things that may seem unlikely (assuming you want a long streak). e.g. Aggron2 cant OHKO azelf. but it can QC ice punch freeze it. I also wouldnt mess around with giving free turns to double teamers on turn1 (set 2 opponents are surprisingly threatening)


Actual alternatives:
- I used to run Aero instead of Zapdos. The change is mostly a nod to the fact that, while speed is good, the most important thing is that the 3rd enemy doesnt see a KO on the pressure subtect staller. This happens less often with Zapdos. There are a few other bonuses too like how tbolt can close games faster/easier (its particularly nice that it hits some damp opponents hard) and how Zapdos is genderless. Mostly; the extra speed didnt mean much when opponents can just be dropped to level 45 anyway.
- Taunt, Grudge, Substitute, U-Turn, Defog, Curse (Ghost), Sunny Day, Pain Split, Fire Punch (and ice/thunder), Toxic, Perish Song, Energy Ball, Knock Off, Natural Gift, Torment, twave have all been considered (some run in testing) but dropped for simply not being used often enough. This is mainly a nod to how incredibly dominant explosion-destiny bond is


There's a lot of room to make variants of azelf-ghost-X work. I will repeat what I said to turskain a number of weeks ago which is that I kind of "dont think it matters" - in the sense that all sensible versions of these teams probably should go infinite. Perhaps some of them have a skip % that is too low to always avoid potential (very unlikely) losses to focus band, quick claw, Brightpowder, etc. But in practical terms its likely that the player just makes an error or runs low on points due to continuously poor optimisation rather than a team concept like this actually being at fault.

In fact Azelf its can probably be replaced. e.g. meta hits 201 speed with scarf/salac but comes with the upside of how few opponents would ever target a 100% meta. But really "anything" can can go above like ~178 effective speed and explode hard enough probably works, its just that it will increasingly lose points margin and increasingly demand perfection.

In terms of "X", I've written a lot here about how ridiculously strong and reliable Zapdos is in 1v1s almost no matter what its facing. That said; I wont lie. Zapdos does nothing in like 95% of battles apart from click protect. Zapdos could be replaced by almost anything that doesnt draw in attacks from opponents (while gengar is trying to dbond) and I'm not sure much would change apart from (again) points management being harder and (depending on the replacement) sometimes having to play games that are only 99% win.

The one thing I would underline is taking care with certain strategies that run into the more random aspects of the gen4 Doubles AI. You may notice that all 3 of these pokemon float. There is a reason for that. Similarly none of these pokemon have a 4x weakness. That's also intentional (although it can be accounted for). The biggest improvement for variants of the above is probably not in direct % skip gain/loss but instead in avoiding certain aspects of the enemy AI - since this is something I suspect a typical player is much more likely to forget/overlook/be surprised by.
 
Welp. My streak in the Pokémon Diamond Pearl Battle Tower (with PtHGSS movesets) ended at 229 today. I got swept by a freaking Zapdos. What makes this loss even worse is that I killed the opponent's first Pokémon Latias with Scizor (on Turn 1, the opponent sent out a Latias and my lead Pokemon was Starmie so I switched to Scizor and it ended up using Calm Mind meaning it was either Latias 2 or Latias 4. I thought it would attack me with Draco Meteor next, but it actually ended up using Calm Mind on the next turn again (instead of attacking me) meaning it was Latias 2. I decided to play it safe and use Bug Bite on it on the next turn which takes it all the way down to a low red health (I ended up taking its Lum Berry but it didn't matter at all in regards to the battle). I then used Bullet Punch on the next turn before it could even attack me and I ended up taking out the Latias with my Scizor and the rest of my team at full health. In my previous post, I said that my team is almost unbeatable in a 3-2 situation because of how amazing of a synergy Starmie, Scizor, and Garchomp have together. Well here the opponent sent out Zapdos next. I really thought it was going to use an Electric type attack on Scizor since none of Scizor's attacks can do anything against Zapdos (Zapdos is one of, if not, the best Scizor counters in the entire game) and Electric moves do neutral damage on Scizor so I thought it'd be an easy and safe switch into Garchomp right? Well the Zapdos actually didn't use an Electric type move on Garchomp. It used Double Team. This is where I lost the game. I panicked, realizing that this is Double Team Zapdos, and my first instinct was to try to kill it as fast as I can by spamming Outrage on it. (Outrage always 2HKOs it or so I thought...). Well Outrage missed on the next turn and then it used Double Team AGAIN. I knew I was in trouble so I just kept clicking Outrage on it, hoping that it would hit twice to knock it out. I ended up hitting it with Outrage twice, but after the first Outrage hit, it used Roost on me, meaning it was able to stall me and barely survive another hit (as you can see in its health bar in the short I've attached below of my battle). It then started attacking me with Pluck (Pluck only does like 40ish damage on a 183HP Chomp, but I think one of the Plucks, it actually got a critical hit on Chomp... more hax...) and I think it managed to sneak in one more Double Team in between. Long story short, all I needed to do was to hit it once with Outrage while it was on red/low health, and I would've knocked it out and essentially won the battle, but I ended up missing with Outrage twice (Garchomp fainted), Ice Beam once (I sent out Starmie next, I just needed to hit it once with Ice Beam and it would've knocked it out and essentially won me the battle: it missed and then it used Discharge on Starmie which easily OHKO'd it), and then 3 more times with Bullet Punch with Scizor (as you can see in the short I uploaded below) essentially costing me the battle. I didn't even get a chance to see what the next Pokémon the opponent sent out next.

In hindsight though, I should've used Swords Dance on Garchomp on the very first turn against Zapdos once I switched from Scizor to Chomp. At +2, Outrage easily would've knocked out Zapdos and I would've still had my Garchomp (as well as my Scizor and Starmie) alive at full health once the opponent sends out his last Pokemon. I still would've had to hit through +2 evasion (plus BrightPowder since the opponent's Zapdos held item was a BrightPowder (I know what a demon right?)) but as long as the game lets me hit it once, I not only knock out the Zapdos, but also easily knock out (or at the very least deal significant damage to) the next Pokemon that the opponent sends out to the point where Starmie and Scizor can easily revenge kill it. Oh well. I panicked, played too hastily, and it cost me the battle and my streak in the Tower.

Unfortunately, I do not have a capture card with me and I did not play on an emulator/computer so I only recorded the ending of the battle instead of all of it (once I knew I was gonna lose) so this is the best proof of my loss that I can show all of you.

Proof of Battle Tower loss at Battle 230:

The opponent's list of possible Pokemons who I lost to (I only got to see Latias 2 and Zapdos 1: I didn't even get to see who the opponent's last Pokemon was): http://www.psypokes.com/dp/battletower_teams.php?id=250#google_vignette

But yeah, I'm kinda glad that this streak is over. I did not expect to make it this far (especially with a non-Trick team) and playing it everyday (especially while having to work full time during the day before playing it) at night is extremely exhausting and mentally taxing for me. I started playing this on the 30th of November (my birthday funny enough) and I ended it on the 30th of December so this challenge/journey took me exactly one month to complete. I can now move on to other challenges in the Gen 4 Pokémon games and more important things in my life. I just hope that one day the mods will notice my post and add my name and my team/win streak to the leaderboard. Thank you all so much!
 

Attachments

  • battletower229winstreakproof.jpg
    battletower229winstreakproof.jpg
    2.1 MB · Views: 47
Last edited:
It's not that you're wrong its just that every earlier record went lum (idk exactly how much testing and teambuilding was involved in each) so the decision to go occa is significant because its probably the most meaningful difference to this vs other TR records.
Ah yes I see, that's surely where I diverge the most as I didn't really look deep at other teams when I started with doubles. I just studied the "ideal strategy" of Bronzong + LV1 bait and focused on that route, slowly building the team that suited best for me in a full heuristic process. For example, before Swinub (back when my team wasn’t even Bronzong/Camerupt/Octillery yet) I did in fact try a couple other baits for a good chunk of time; Duskull, Rattata, Starly, Smeargle, Ghastly and LV2 Togekiss worked really good and each got its own nice perks, but for me the goofy brown pig is what worked best out of them all. I’ll seize the opportunity to better talk about Swinub, perhaps making an addendum to my original post for clarity, because apparently some stuff I consider obvious actually isn’t.

I never found LV2 Togekiss lead much appealing and, in my opinion, EQ immunity is the only real trait it has more than Swinub. Togekiss has many interesting moves (Reflect, Light Screen, T-Wave, Trick, Encore, Safeguard, Heal Bell, Lucky Chant, Tailwind…), but very few that I truly judge relevant in the context of TR doubles. As "relevant move", I mean a move that you can use even if you go out of the Protect/TR/Endeavor golden standard and/or can often change the outcome of a battle. In my opinion Foresight and Follow Me can be relevant moves, the others listed above aren't. Foresight can be fantastic to land Explosion on Dusknoir and against Double Team spammers but other than this being fairly rare to happen, Swinub has Odor Sleuth anyways. Follow Me is useful to redirect moves but it pretty much guarantees Togekiss to be dead on turn 1 (kinda defeating the very purpose of the Endeavor exploit) and for all the time I played Swinub I never felt needing it (ty for making me aware part of it comes from the wacky AI shenanigan you mentioned about him attracting more moves because of its typing). There’s also Extreme Speed, a solid +2 priority that can steal kills sometimes, but again it doesn’t happen so commonly to be considered truly relevant; just like Swinub's Ice Shard of course, which anyway does the same as +1 and also hits ghost types.

Speaking of ghost types; believe me or not but Ghastly with Protect, Pain Split, Sucker Punch and Destiny Bond has worked even better than Togekiss for me, and I mean a lot. With Destiny cheese and EQ/Explosion immunity was really chill to play. Same with Duskull, I also tried it a little bit and found them pretty much on the same level, with Leer occasionally being super nice to make Bronzong dish out more damage. Unfortunately Pain Split only halvens the oppo’s HP instead of reducing it to a sneeze, taking out most of Bronzong’s KO potential.

Smeargle is actually interesting tho and was extremely useful because of his universal movepool and I seriously considered playing him instead of Swinub. Spore, Foresight /Odor Sleuth/ Miracle Eye, Fake Out and Bullet Punch/Ice Shard are all fantastic moves and make Smeargle the best bait leader along with Swinub for me. He’s the only one that really is better than Swinub in terms of utility, and just because of how damn broken Spore is in gen 4. Now THAT is a super relevant move that can actually change the outcome of a battle and turn off entire threats. So why didn’t I pick Smeargle? Because Swinub is more durable and consistent.

The reason why I chose the pig over other baits is its typing. Ice-Ground means it can’t be damaged by weather (Hail/Sandstorm and the more common and annoying Snow Warning/Sand Stream) so its Focus Sash is always on. This simplifies a lot of matchups and makes a huge difference for me. I find really strange you didn't mention it even once, glad to know I’m not the only one who misses obvious stuff out of distraction! /s
If you run a bait vulnerable to weather (let’s take Togekiss as example since it’s the most popular) and your opponent leads Tyranitar, Hippowdon or Abomasnow (and by experience I can tell they are very common) you're in a tricky spot cause without Sash your bait is basically on a constant deadline. If you switch bait on turn 1, the switch-in will probably take both opponent moves, maybe get serious damage (>Eruption), status and even not survive. It would be a forced switch, you make the battle longer and lose turns for TR. Your best bet is to Protect on turn 1 as usual, so that TR most probably is set and half the job is done as always with the exception of Focus Sash being offline. Then on turn 2 if you leave it on field the bait will die after taking out a single oppo, while usually it lasts more and takes out *at least* two. If you switch turn 2, when your bait enters the field again it would be on the same exact 1-turn deadline. Also since weather damage takes out your Sash turn 1 even if you Protect your bait wouldn’t be safe from a single priority move.
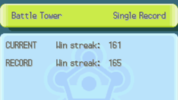
It’s not the worst situation imaginable of course, but it’s very annoying and can lead to many further complications (my previous streak of 281 ended similarly, imagine the absolute terror in my eyes when Swinub got QC-hax killed on turn 2 and I saw the oppo have two bulky water types and a Bronzong I couldn’t damage). In some rare cases you’re almost, almost playing a 3v4 from the start.
Cleffa with Magic Guard acts even better than Swinub in theory cause other than ignoring weather it’s immune to poison and burn damage too (taking a little more hax out of the equation) but other than the sweet Aromatherapy it has a much less interesting movepool. For example Wish can be really good in singles but too slow to be effective in doubles, and Cleffa has no access to priorities.
I think this is a bit different playstyle than, for example, Togekiss that you expect to die very soon with Follow Me to grant the TR success or sooner because of weather damage. With Swinub I trade utility for durability, favoring my bait’s longevity in order to maximizes its efficiency. This allows to take out as many opponents as possible: my most common outcome if there are no dangerous threats or crazy hax is simply winning after reducing the battle to a 3v1.

So basically Swinub allows me to completely forget about weather and avoid going out of my way, keeping the gameplay simple and straightforward and having less stuff to worry about. I can’t stress enough how much important this is. I do my best to keep the gameplay as simple as possible cause all these battles take a huge amount of time and mental effort. Technically sometimes you ARE allowed to make mistakes (and obv I did) but actually not at all cause you never know which mistake can be your last. There aren’t many battles where you don’t get potential threats or hax from the start and can go full autopilot for the entire fight, so it’s really difficult (at least for me) to keep the focus and not mess up for so long. In fact I only play when I’ve got time, I’m fully focused and not too much in a single session otherwise I get too easily distracted. Just like Ockham's razor the more streamlined a battle is, the less bullshit happens, the easier is to read the situation and, of course, win.

The second reason why I chose Swinub is consistency.
We know all lead baits have several traits in common: they’re as weak as possible (level 1-2), hold a Focus Sash and know Protect and Endeavor/Pain Split. Therefore, the key differences between them are their "innate features" like typing, moves and abilities that give them unique plays and/or better synergy with Bronzong. There’s a catch tho: in the grand scheme of things, most of these quirks don’t matter. You said it yourself: if both oppos on turn 1 target the bait and TR gets in, ">99%" of battles are already won and this is with a solid team and ANY bait leader. We care about the bait’s innate features to better handle that bad "<1%". But if you think about it, by no surprise harmful weather is WAY MORE COMMON than any other "1%" specific threat.
Yes, it’s cool to drop a free Explosion or EQ if the bait is immune to it, but how many times does it decide if it’s a win or a loss? After all, your LV1 bait has Protect to survive and if you can’t use it that turn your bait would die anyway.
A priority is always nice to have, but how many times is it really used to kill an oppo in a TR double battle and decide an outcome? How many times do you actually need to use Future Sight/Odor Sleuth to win? These ones aren’t rhetorical questions, I counted them. In more than 800 TR battles I used Ice Shard to kill an opponent a grand total of seven times and Odor Sleuth to hit evasion spammers/ghosts with Explosion three times (I don’t remember if any of those were absolutely crucial for the win but still). Instead, I’d be really surprised to go a full round without seeing Rockzilla, the hippopotamus and the christmas tree at least once or twice.

Then my question is: do I prepare better for a threat that appears perhaps once every one hundred battles, or turn off a threat that appears every few battles? The answer should be obvious. I don’t give a shit if my Togekiss saves Bronzong’s metal ass with Follow Me once in a blue moon, if that means becoming heavy as a brick whenever you see Abe, Tyr or Hippo. To put it simple, Swinub makes the team less ready to fight the “1% threat”, but much more ready for the “10% threat”(((ofc random numbers just to make the point))). Took Togekiss as example but the reasoning still applies to basically all other baits, the only other one I’d play instead is Smeargle and again just for the movepoool cause Spore is doing the heavy lifting here.

Given these considerations, now it should be much clearer that I didn't pick Swinub just for fun at all. I don't know if my reasoning is right, wrong or whatever, but looks like it works.

I repeat once again that all this stuff is a mix of objective facts and personal perception. As I said these are thoughts that I matured with internet knowledge, time and experiences and made me build my team as it is for now. Now that you make me notice you’re right, I DID undersell how easy is to lose even with a lead bait when stuff goes wrong (status, crits, double team, bad matchup, OHKO etc.). Ofc I didn't on purpose, tbh I didn't even think it was that relevant to mention since, just like the status danger thing, I took it for granted. Battle Tower and TR strategy has been known (even if in different shapes) for like what, 15 years? I expected everyone interested to already know it thoroughly, probably even better than me especially in this dedicated forum, but you’re right I should have made it clear from the start.
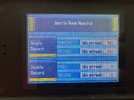
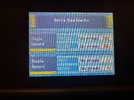
Btw I finished a new multi battle streak taking many notes, writing down all teams used and saved a couple battle videos. Next time I’ll try to not neglect any details and make my report complete right away!
Happy new year, lads :totodiLUL:
 
Ongoing streak of 2630 in Hall Multi with Heatran (on emulator):

Proof: playlist
I’ve been streaming my gameplay in the facilities discord for the entire streak thus far, and I intend to keep doing so every day until the streak ends. I’ll keep this playlist updated so you guys can keep up to date on my current progress
+the type menu gets reset after every round. This means you only have to face ten of the seventeen available types
-opponents start at rank 10
-opponents use equal level pokemon to your highest level mon (level 100 instead of the usual level 96 in my case), though they are still 26iv
-there is no ‘rest’ function
-animations are forced on

Only having to face ten of the seventeen types is (evidently) a massive advantage over regular doubles, since you get to avoid almost all of the major problems your team would otherwise have to face. This vastly outweighs the downside of having higher-leveled opponents.
The ten types I chose to face are as follows:
Dragon, bug, grass, fire, ghost, normal, ice, electric, steel, poison (in that order)

As such, I never have to face the following types:
Ground, water, fighting, dark, psychic, rock, flying

I’ve experimented with a couple different type orderings, but I ultimately settled into the one listed above a few hundred battles into the streak. This ordering delays the more threatening types as long as possible with one exception: I do steel after electric to decrease the odds of encountering Electrode. Encountering Magneton in Steel significantly increases the chance of later seeing Electrode in Electric (see Magpie’s Battle Hall video for a more detailed explanation on why this is the case). Doing steel after electric circumvents this issue.
Hacked in with pkhex as per usual

“eruptran”
Heatran @ Choice Scarf
Ability: Flash Fire
EVs: 144 Atk / 12 Def / 204 SpA / 148 Spe
Quiet Nature
- Eruption
- Explosion
- Earth Power
- Lava Plume

“leertran”
Heatran @ Choice Scarf
Ability: Flash Fire
EVs: 64 HP / 252 SpA / 192 Spe
Modest Nature
IVs: 12 Atk
- Leer
- Explosion
- Earth Power
- Lava Plume

Set details:
Eruptran:
144 attack EVs is necessary to OHKO snorlax with Explosion after Leer. 148 speed EVs outspeeds Manectric. 12 defense EVs makes it so that you survive Explosion from the other Heatran+Waterfall/Dive from Tentacruel (assuming no crits). The remaining EVs are dumped into special attack. Quiet nature is required in order to run Eruption.

Leertran:
Max special attack. 192 speed EVs outspeeds Raikou. The remaining EVs are dumped into HP. 12 attack IVs is the lowest value that will still OHKO Tentacruel with Explosion. You could, in theory, run a Timid nature instead of Modest in order to outspeed Electrode and Crobat, but I don’t think it’s worth the cut in power (in fact, I think it creates more problems than it solves).
Tentacruel:
With my current knowledge, I consider this to be the most likely way for the run to end. I believe the optimal strategy vs. Tentacruel is to use Earth Power with eruptran and Explosion with leertran (I built the Heatran sets with this in mind). If Explosion hits both, it’s a win. If it misses both, it is (almost certainly) a loss. If Explosion hits one Tenta but not the other, you still win if you land two Earth Powers with eruptran (Earth Power is a guaranteed 2HKO). This strategy gives a ~94% win chance, or roughly 1 in 16 to lose.

The alternative would be to use Earth Power+Earth Power. I haven’t actually sat down and done probability calculations for this line, but my intuition is that it is worse by virtue of needing to successfully hit more attacks into a Brightpowder opponent (4 EPs vs either 2 Explosion hits or 1 Explosion hit+2EPs)

Togekiss:
I currently consider Togekiss the 2nd worst threat to this team’s success. I’ve had a couple very close calls with it, though it appears much less frequently than Tentacruel. In my experience, it seems to always use Thunder Wave turn one. Couple that with the fact that I’m not even guaranteed to kill it with Eruption+Lava Plume (assuming I don’t miss) and things can start to get out of control very quickly.

Piloswine:
Has brightpowder and OHKOs with Dig. Missing both opponents with Lava Plume is an auto-loss. Luckily though, you can afford to miss one opponent on turn 1 and still have good odds to win.

Electrode:
The one relevant thing that outspeeds me. Double-target tbolt with at least one crit can kill either Heatran in a single turn before I get the chance to even attack, not to mention the issue of paralysis chance. The main saving grace is that this thing is super rare in Hall, though I have had to face it multiple times already this streak.

Raikou:
Outspeeds eruptran and can OHKO either heatran with a crit Thunder. However, I think the bigger issue vs Raikou is having both Heatrans get paralyzed by Thunder. In my experience, though, Raikou will usually use Reflect on turn 1, which makes it feel like less of an issue.

Outside of these there are several other matchups that I think are technically loseable but I think would require much worse odds to lose than the ones listed above, in no particular order:
-Crobat
-Froslass
-Jumpluff
-Jynx
-Magmortar
-Porygon2
-Ursaring
-Tangrowth
-Torterra
-Dusknoir
-Probopass
-Vespiquen
-Bastiodon
-Dusclops
-Probably more that I haven’t properly considered

Basically anything with Focus Band, Brightpowder/Lax Incense, or QC+status chance is technically loseable, but the odds of losing to one of these mons seems incredibly low compared to the likes of say, Tentacruel or Togekiss.

In reality, the biggest threat to the streak is my own attention span. Prior to this streak, I had a few failed attempts with Heatran that lost to obscene misplays that were completely avoidable if I had just stopped to think for a second. This issue gets exacerbated by the fact that animations are forced on and I have to do significantly more menuing to control both games at once. Hall Multi (at least when played alone) is arguably more a test of endurance than skill. I could not fathom playing this game mode on retail at default speed.
I’m a little surprised this streak has made it this far. It feels like I’ve faced enough Tentacruels that I should’ve lost to one of them by now, which makes it feel like this streak is probably an over-performance. In any case, I feel like this streak almost certainly isn’t going to go the distance to 9999.

I get that this is a very long streak. If you feel like I’ve failed to cover any important details, feel free to ask me questions, and I’ll do my best to answer. Expect an update soonish for when this streak ultimately dies.
 
Link Castle goes infinite absurdly easily and the challenge is overwhelmingly staying focused enough to not throw while you’re sitting on more skips than battles you actually played. This is a streak of 109 (1-105, 106-110) with Drifbim/Garchomp//Azelf/Gengar:

Drifblim
Ability: Unburden
EVs: 30 HP / 252 Atk / 92 Def / 52 SpD / 84 Spe
Adamant Nature
- Defog
- Explosion
- Protect
- Destiny Bond

111 speed is a bit more than needed for Aero12/Crobat1/Jolt13 to outrun uninvested L50 base 90s and L55 base 80s before Unburden so that it's a bit easier to find a playable battle at full hp; the bulk EVs are nonsense. Defog on a second boomer faster than Azelf is a surprisingly real move, and despite the utter lack of good moves, the darn thing still manages to have 4mss and wishes it could run Knock Off or something to break sash and Focus Band. It doesn’t really matter that much, though, when you generate genuinely more skips than battles you play.

Garchomp
EVs: 252 Atk / 4 Def / 252 Spe
Jolly Nature
- Earthquake
- Swords Dance
- Outrage
- Protect

Stupid. This is a Generically Strong Thing with okaaaaayish matchups on some things that don’t die to Explosion, it’s honestly kind of bad and there’s a lot of room for improvemetn, it just kind of washes out when you can skip anything remotely fishy.

Azelf
EVs: 254 Atk / 4 SpA / 252 Spe
Hasty Nature
IVs: 30 Def
- Fling
- Explosion
- Flamethrower
- Protect

You know what this does. Petaya Flamethrower occasionally gets to nail a Steelix or Skarmory or something but otherwise it realistically doesn’t even get much play breaking sashes. It wouldn’t even matter that much if you just had to skip every Skarmory (and even without Flamethrower you wouldn’t necessarily).

Gengar
EVs: 252 Atk / 6 Def / 252 Spe
Jolly Nature
- Fling
- Explosion
- Protect
- Destiny Bond

Can you tell I’m just mashing together “known busted mechanics” slop go brrrrrr? This slot, like Garchomp, I think can be improved a lot to round out “weird matchups”—“anything” with Protect (and no Pressure?) that generically better rounds out matchups against things that don’t die to Explosion would probably do more, since Gengar really doesn’t actually get to do much. Destiny Bond is a neat generically strong trick but staying in the back it frequently doesn’t get to 1 hp (and it’s almost desirable for it not to) and clicking double dbond actually has a lot of failure modes e.g. you just get hit with a spread move.

Loss was to basically not playing with sufficient attention when coming back for session 2, should’ve clicked flame and then should’ve clicked dbond+EQ instead of boom. This is a severe underperformance, dying with like a hundred skips banked, that I’m only bothering to post now because I had this time blocked out to play the steak and now it’s dead!!!! and I probably won’t be getting back into things for a couple of weeks.This format actually takes extremely high attention to play, it’s very finicky and easily won or lost at prep; I have never once lost a Castle streak to non-misplays, it’s basically all been playing games I shouldn’t have or just wrong… actually looking at this one, maybe with a side of not understanding how the spread penalty works.

So the thing about Castle multis is that each player get awarded “full” CP, everything including skips costs the same, only one player ever needs to rank up items (and healing, but double boom means you basically never need PP heals anyway), and due to CP calculation minutia that barely matters you actually earn like 7-ish more CP per player per battle played than playing this genre of team in doubles (basically, each trainer gets the CP assessed individually, so each death still only costs 5-7 CP on one side; it’s also just way harder to use up >5 PP). Occasionally this tilts a decision to make buying an item so that you can uplevel something worth it here where it wouldn’t be in doubles but except that CP micromanagement is a joke when the most common battle generates something like a 69 CP profit. It seems extremely easy to build a team that goes infinite in expectation in this format, even moreso than in the other Castle formats, just playing “a doubles team” against level 50s to generate ~30/battle is basically enough to heal every round; scouting to selectively uplevel 1-2 where safe probably puts you ahead, but even without that the +2k or so you get ahead in the baby rounds should be enough to carry you to something like 4 digits with dumb goodstuffs.

I wasn’t particularly impressed with Drifblim at first when I tried it in doubles, but in multis where CP is way more free I think being very fast and a ghost with a decent bit stronger boom than Gengar at the same time brings a fair bit to the table since multis is more dependent on getting your clean Explosion double KOs. But its “no pinch berries in battle 1” problem is really big since it “nearly always” wants a turn 1 item proc just for the speed so sometimes you’re left wishing that Tauros rolled intim instead or some nonsense.

(White Herb restores you to +0 in a double intim sendout scenario, which is cool and came up once, I guess.)

Realistically, though, I suspect that the strat if your goal is winstreak (you know, if there were actually a competition) and not racing to 10k CP or something, it’d actually be way easier to play a dumb team that wins 99% of battles even if you accidentally click Battle than it is to play a finicky team that clearly goes infinite as you skip half your battles but dies if you forget one thing.

Oh, and one last aside—the BP gain is also actually kind of bonkers compared to single-player formats, although I think Hall multis has it beat.
 
I got a 165 battle win streak with this team. currently doing another run and have gotten to 161 win so far. Here is the team.
Screenshot from 2025-01-17 21-02-44.png


Tyranitar (Choice Band)
Nature: Adamant
Ability: Sand Stream
252 HP/ 252 Attack/ 4 Def
- Crunch
- Stone edge
- Earthquake
- Ice Punch
Tyranitar can solo half the battle tower. I have invested more in bulk since it didn't outspeed much with speed investment, and with bulk it could live some focus blasts. There isn't really much more to say about it. I just click stone edge 3 times and win(Provided it hits, which for me luckily has mostly).

Garchomp (Yache Berry)
Nature: Jolly
Ability: Sand Veil
252 Attack/4 SpDef / 252 Speed
-Outrage
-Swords Dance
-Substitute
-Earthquake

The best pokemon in gen 4 by far. Swords dance + Outrage sweeps most teams and substitute can fish for sand veil misses. Yache berry is what I have found to be the best item since a lot of random pokemon have ice coverage. Substitute also helps with the Ohko move spamming trainers since you can substitute as they are unlikely to hit multiple ohko moves in a row.

Scizor (Life Orb)
Nature: Adamant
Ability: Techinician
252 Hp/ 108 Attack/ 144 SpDef
-Bullet punch
-Superpower
-X Scissor
- Swords Dance
Counter to Ice types to help Garchomp. The EV Spread allows it to be 3 Hit KoD by Surf from Milotic which I found a lot of in the battle tower. Too much attack investment isn't needed since it's typing allows it to set up quite easily.

Weaknesses of the team:
Every pokemon here has a 4 times weakness and the only weakness that's not covered by another teammate is tyranitar's fighting weakness. Also every teammate is a physical attacker. Alternatively, tyranitar could be swpped out for gengar or alakazam for a special attacker.
 

Attachments

  • 1737128290072.png
    1737128290072.png
    29 KB · Views: 24
Reporting an unfinished streak of 308 wins in PtHGSS (technically SS) Tower Multis w/ Jheisinho . Although this streak has not lost, it's not likely either of us will be returning to it anytime soon. Jheisin has said he mostly just wanted to hit 300 wins and be done with it, and I'm not particularly interested in streaming it by myself since I think that takes a little bit of the fun out of it. If someone does challenge this record, though, I'll probably continue and see how far I can get.

The streak was entirely recorded & streamed on Twitch. The video uploads, sans audio, can be found in a playlist on my YouTube channel.

The team is identical to the one used by Jheisin in his 1001-win streak (the final version), posted below:

Jheisin's side:

Bronzong @ Lum Berry
Ability: Heatproof
EVs: 252 HP / 252 Atk / 6 SpD
Brave Nature
- Iron Head
- Explosion
- Earthquake
- Trick Room

Slowbro (F) @ Life Orb
Ability: Own Tempo
EVs: 252 HP / 252 SpA / 6 SpD
Quiet Nature
IVs: 0 Atk / 0 Spe
- Psychic
- Grass Knot
- Flamethrower
- Trick Room

My side:

Togekiss (F) @ Focus Sash
Ability: Serene Grace
Level: 2
Careful Nature
IVs: 0 HP
- Encore
- Protect
- Follow Me
- Endeavor

Machamp (M) @ Iron Ball
Ability: No Guard
EVs: 252 HP / 252 Atk / 6 SpD
Brave Nature
IVs: 0 Spe
- Protect
- Fling
- Dynamic Punch
- Stone Edge

I probably don't need to write a lot about the team itself. The Trick Room w/ level-1 bait strategy is well known by this point (one of the earliest archetypes developed for Frontier doubles) and this particular team has already been discussed by Jheisin in his post, so I'm not adding anything new to the discussion. What I do want to talk about instead is the aspects of play that were different from standard Doubles because of the restrictions of Multis.

In Multis, each Trainer uses two of the four Pokémon, and when one Pokémon faints, only the second Pokémon that the Trainer has can be sent out. This means that one player has no access to the other two Pokémon and can never send them out, even if it would be beneficial to do so. I'm sure you all know this, but if you haven't played Multis, you may not have thought about what that means in terms of team construction for each Trainer.
Obviously, Bronzong and Togekiss need to be the first two Pokémon sent out. The question for this particular team then becomes which of Slowbro and Machamp get added as the backup for each Trainer.

Jheisin's idea was to have Machamp be the backup for Togekiss and Slowbro be the backup for Bronzong. Without changing any movesets or other aspects of team construction, there's two moves that make this a pretty obvious decision: Machamp's Protect, which allows it to deal with Bronzong's EQ and Explosion, and Slowbro's Trick Room, which makes it usually a desirable switch-in for a fainted Bronzong to reset Trick Room if need be.

That's not to say you couldn't use the other combination, though it would probably require a tweak - maybe you could put Protect over Flamethrower on Slowbro and Fire Punch over Protect on Machamp, but I think this would probably lead to worse results since Slowbro having a Special Fire Move is nice for some Steel-types that Machamp can only have neutral damage on (Skarmory, Forretress, Scizor), and the possibility of needing to switch or sac Togekiss to get Slowbro in for Trick Room seems... subpar. But I guess you could do it.

In practice, I didn't personally see scenarios where I would have preferred Slowbro to come in over Machamp when Togekiss dies (Bronzong so rarely died from something that wasn't Explosion that it isn't even really worth talking about the other circumstance, where Machamp comes in after Bronzong). In fact, there were a few times where Togekiss was deliberately swapped for Machamp so that Machamp could either hit a Ghost-type or something with evasion buffs/Lax Incense/Brightpowder, and it seemed like the logical choice in a lot of those scenarios - Slowbro doesn't have a super-effective attack against Ghosts, for instance, whereas Machamp has Fling as well as a very powerful physical Stone Edge.

The 'standard' sequence of events is usually something like this:
Turn 1 - Protect/Trick Room
Turn 2 - Endeavor/attack, Togekiss gets hit down to Sash
Turn 3 - Endeavor/attack the Pokémon on the same side of the field as the Pokémon that just fainted, Togekiss gets killed, bring in Machamp
Turn 4+ - now the battle is Bronzong + Machamp against a single mon, and once it's dead, another single mon

Choosing to focus Togekiss' attacks on one side of the field to force a 2v1 seems to make the battles easier than I would think they would be in Doubles, though of course I have no experience in Doubles. Machamp + Bronzong is usually sufficient to take out the third and fourth Pokémon, and in instances where it isn't, either Protect + single-target-Explosion or a switch to Slowbro is often more than sufficient. Having an opponent that really can't threaten both Machamp and Bronzong/Slowbro at the same time is pretty powerful.

It's not always possible, of course. If on Turn 2, the Pokémon that replaces the lost Pokémon is a Ghost-type, Togekiss obviously can't hit it. Apart from that, there are some other occasional edge cases - the Pokémon that comes out has Lax/Brightpowder, for instance, or just does not pose a threat compared to the other Pokémon on the field. In any of those cases, this acts more like a traditional Doubles match, but obviously this team has an excellent matchup in normal Doubles too - as Jheisin's 1001 streak proves.

Instead of fighting one enemy trainer that sends out four Pokémon in their roster, you fight two trainers that each send out two Pokémon in their roster, and their second Pokémon can only be sent in after their first one faints. The distinction may seem academic, but in reality, this means you're a lot less likely to see certain threatening combinations on the field at the same time. For example:
  • PIs: it's less likely that both Pokémon on the field are going to be the hax-based sets that PIs run
  • Psychics: it's less likely that both Pokémon on the field have Trick Room or are built to benefit from it, making it easier to manage enemy Trick Room threats

There are likely other less-likely-combinations that are meaningful too, but these are the first ones I thought of. For instance, let's compare the reality of a match against a PI in normal Doubles with the reality of a PI + random Trainer match in Multis:

In Doubles, there's the possibility that you might face two OHKO users at the same time. This represents two chances to hit a 30% that might target Bronzong (since they can target Bronzong instead of Togekiss with OHKO moves). Even if Bronzong gets off Trick Room successfully, on the next turn, Togekiss + Bronzong is really only capable of taking out a single foe, leaving the second Pokémon capable of targeting Bronzong again with an OHKO move (Togekiss would get hit down to Sash, the same as any other attack).

In Multis, while it's not impossible for the second Trainer to use a Pokémon that a PI also could have used, it's much less likely. In this scenario, only one of the opposing Pokémon is likely to have an OHKO move. While it still represents a 30% chance to prevent Trick Room on turn 1, double-targeting it on turn 2 means it's off the field, and the other active Pokémon is probably doing what happens normally (hitting Togekiss down to Sash and never threatening Bronzong). Of course, the OHKO user becomes more annoying to handle if it also has Quick Claw or Brightpowder, but it's at least easier to play around only one of those Pokémon existing on the field than two.

Prior to the 308 win streak, we had exactly two losses. The first loss, at battle 28, occurred as a result of a couple unlucky crits on the rain team we were using to quickly beat the early rounds; it's not really worth detailing because it didn't even use the correct team.

The second loss, however, did occur with this team at battle 39. Jheisin had not started scouting enemy sets -- and had lost some familiarity with them after spending time on his Subway streak -- and it's been so long since I played Frontier that I don't know any sets by heart. The loss isn't recorded on the playlist, but we did save the Battle Video and showed it off (2:40:00 if the time tracking doesn't work right). Here's what happened:

Opponents: PI Sergei, Guitarist Chase
Chase sends out Skuntank-3
Sergei sends out Mamoswine-3

Mamoswine-3 is EQ, Superpower, Fissure, Hail w/ Lax Incense. OHKO moves are already a sizable threat to this team, since they might choose to hit Bronzong first turn and deny Trick Room. Even if that's not the case, Quick Claw, Lax Incense, and Brightpowder are all common items and can be a pain. However, at this point, neither of us were really paying attention to the trainer or any sets. I think Jheisin may have commented that Mamoswine had the possibility of being annoying when we started, but we didn't really pay a whole lot of attention here.
This particular Mamoswine can also be annoying because it's a bit unpredictable. Earthquake and Fissure will be able to hit Bronzong since it has Heatproof and not Levitate, but that requires the AI to 'guess' that Bronzong has Heatproof, and we have no way of knowing how it's going to guess. If it chooses not to EQ or Fissure, it still isn't guaranteed whether it uses Hail or Superpower (afaik - Magpie might have more AI knowledge to correct me here).

Turn 1:
Togekiss Protect
Skuntank uses Flamethrower on Togekiss, Protected
Mamoswine uses Hail
Bronzong Trick Room
Hail damage breaks Togekiss' sash and injures Bronzong and Skuntank

Like I said before, we weren't scouting, so we didn't know immediately which Mamoswine set it was (at least I didn't and based on what I remember of Jheisin's responses, he didn't either). Mamo-1 also has Hail.

Usually, when we determine that there's a chance that one of the two Pokémon on the field has Lax/Brightpowder or evasion moves/abilities (like Snow Cloak), we leave it alone and choose to get rid of the thing that we know will die to Endeavor + Attack. Part of the reasoning here is that Togekiss almost always dies before Bronzong, which means Machamp can come in and hit evasive Pokémon with No Guard attacks easily enough. Mamoswine in particular is weak to Dynamicpunch of course. After this loss we revised that slightly so that some particular threats might be better served by attacking them directly or switching to Machamp turn 2, but according to the playbook we were using at the time of this match, the play was to kill Skuntank.

Turn 2:
Togekiss Endeavor on Skuntank
Bronzong EQ, hits both opponents and takes out Skuntank
Mamoswine Superpower on Bronzong
Hail damage
Chase sends in Mr. Mime

Some Pokémon can sometimes choose to target Bronzong over Togekiss, it's not altogether too likely, but it can happen. I can't speak for why it chose to attack Bronzong here, but this is actually not a great situation to be in: Bronzong is around half HP so it's not unlikely that Mamo could try to (and maybe succeed at) killing it next turn instead of killing Sash-broken Togekiss. If Mamoswine had killed Togekiss this turn, we may have been in a better position because Machamp can get in for free and Machamp definitely takes out Mamo now with Dynamicpunch through all of the evasion.

Turn 3:
Togekiss Endeavor on Mr. Mime
Bronzong EQ, hits both opponents and takes out Mr. Mime
Mamoswine EQ, kills Bronzong
Hail damage
Jheisin sends in Slowbro

Unfortunate to lose Bronzong (on our successful streak I don't know if we ever lost Bronzong to anything except Explosion) but whatever, we have the match down to a 3v2 with only one side remaining (meaning it's a 3v1). That should be fine, right?

Turn 4:
Togekiss Endeavor on Mamo
Slowbro Grass Knot Mamo, MISS
Mamo Fissure Slowbro, HIT
Hail damage

Oh. Well. That's unfortunate because Togekiss literally cannot kill this thing on its own. Machamp definitely will though, right?

Turn 5:
Switch Togekiss for Machamp
Mamoswine Superpower Machamp
Hail stops
Trick Room reverses

That's ok, even though trick room ran out I can still just hit things here right?

Turn 6:
Mamoswine Hail
Machamp Dynamicpunch, kill Mamo
Hail damage
Sergei sends in Hippowdon
Sandstorm begins

Well, I can hit things, but they can hit me too, and we all know PIs like to use OHKO moves. Hippowdon knows Fissure and it will hit, guaranteed. Even if I protect or switch to Togekiss, there isn't any way to avoid losing to this thing, simple as.

Turn 7:
Hippowdon Fissure, kill Machamp
Send in Togekiss

Turn 8:
Hippowdon Fire Fang, kill Togekiss

Yeah, that was the result of both bad luck (Grass Knot missing Mamo, Mamo hitting w/ Fissure) and misplays (should have gotten Machamp into the battle earlier specifically to fight Mamo). There are a handful of options here, but I think we decided the best play probably would have been to switch Togekiss for Machamp on turn 2, after getting Trick Room up. There's no chance that Mamoswine is using Fissure on Togekiss and I don't think EQ or Superpower + FT/DP/SB from Skuntank is killing Machamp (though it might suck if Machamp gets burned). After that Machamp outspeeds them both, can take down Mamo, and then even if Machamp dies to Skuntank or Mr. Mime or Hippo, we still have Togekiss in back to hit Endeavors on things.

It's also worth noting this loss might not have happened in Doubles, either. After Bronzong died, in Doubles, Machamp could have come in instead of Bronzong and gotten a similar result (as well as Endeavors to hit other Pokémon with).

Oh well - live and learn. I don't remember exactly when we began scouting sets after that, but whatever the case we got to 49 no problem and everything was definitely scouted after that, and we got lucky enough not to lose before getting to the end.

Thanks for reading!
 
Expect an update soonish for when this streak ultimately dies.
Lost at 3558. full streak, losing session

Here's the team again, for posterity's sake:
Heatran @ Choice Scarf
Ability: Flash Fire
EVs: 144 Atk / 12 Def / 204 SpA / 148 Spe
Quiet Nature
- Eruption
- Explosion
- Earth Power
- Lava Plume

Heatran @ Choice Scarf
Ability: Flash Fire
EVs: 64 HP / 252 SpA / 192 Spe
Modest Nature
IVs: 12 Atk
- Leer
- Explosion
- Earth Power
- Lava Plume
I also changed the type order slightly since my last post; this is the order I've been using for the past few hundred battles:
dragon, bug, grass, fire, ghost, ice, electric, steel, normal, poison
The only difference is that I started doing normal later.
Porygon2. This thing is more threatening than I gave it credit for in my previous post. You can't use Lava Plume since one of them is guaranteed to trace flash fire, and you can't safely explode because it has quick claw.

Turn 0: The left Porygon2 gets a Special Attack boost from download
Turn 1: I EP+EP the download P2 (it lives), both P2s target leertran with tri-attack, the first one freezes
Turn 2: The download P2 QC crits eruptran with tri-attack, leertran is frozen, eruptran KOs the download P2 with EP. The trace P2 paralyzes eruptran with tri-attack
Turn 3: P2 KOs eruptran with tri-attack, leertran is frozen
Turn 4: leertran thaws and uses EP. P2 uses tri-attack
Turn 5: P2 QC paralyzes with tri-attack, leertran gets fully paralyzed
Turn 6: P2 KOs leertran with tri-attack

Somewhat unlucky sequence of events, but so it goes. You're bound to get some bad luck after a few thousand battles. It's possible explosion is better, but I think earth power is probably the correct play vs. P2. I haven't thought about it enough to say for sure.
In hindsight, the EV spreads could probably be optimized a bit further to make this matchup less bad. It's definitely worth moving at least 4 EVs from HP to SpDef on Leertran to guarantee that P2 won't get the SpA boost from download if it's in front of it. I'm a little more wary of messing with the EVs on Eruptran, though.
I would encourage others to give Hall Multis a try. It plays really slow, but the differences make it so that many mons can probably make much deeper streaks than in doubles.
 
I'm currently challenging myself to get a 130+ streak with one pokemon for every letter of the alphabet in Battle Hall Singles (to fill out the records menu in Soul Silver). I got a few 170+ records to share. All of them are done on retail with RNG manipped mons.

Bronzong 185, using one with levitate & one with heatproof. Video of battle 169 & 170. The levitate one has more SpD EVs, and the heatproof one has more Def EVs, both also have max HP EVs, though I didn't save the exact spreads anywhere.

Bronzong @ Variable item (usually lum berry or or choice band/specs depending on which type I'm facing)
Ability: Heatproof
Sassy nature
0 Speed IV
-Gyro Ball
-Grass Knot
-Psychic
-Earthquake

Bronzong @ Variable item (usually lum berry or power herb)
Ability: Levitate
Quiet nature
-HP Fire
-Earthquake
-Solar Beam
-Payback

Dragonite 171, lucky enough to get this on my first try. Ended up losing to Yanmega since I didn't realize it had defense EVs.

Dragonite @ Choice Band or Focus Sash
Adamant nature
-Outrage
-Earthquake
-Fire Punch
-Brick Break (I don't think I ever used this lol)

Espeon 183, surprised how far this one went.

Espeon @ Choice Specs or Focus Sash
Modest nature
-Psychic
-Shadow Ball
-HP Fire
-Grass Knot

Garchomp 184, just another in the sea of garchomp records.

Garchomp @ Choice Band or Focus Sash
Adamant nature
-Outrage
-Earthquake
-Swords Dance (only used it for wobbuffet)
-Flamethrower

I also have a 36 streak in Factory Singles Lv50. Before I started going for this Hall challenge I was inspired by werster to grind the factory, which is how I got enough BP for all the moves and items I needed. Unfortunately it was too long ago for me to recall any details, but I'll get around to beating it eventually.

Hopefully I'll have more to share soon, just finished a 156 streak with Octillery and am starting Porygon-Z. Once I'm done with my alphabet challenge I'll try to get some weaker mons to 170 on emulator.
Edit: made links work
 
Last edited:
Arcade Multi - 163 on emulator
proof: 1-56, 57-84, 85-147, 148-164

Quick post about a fun gimmick team that uses a multi-exclusive strategy. Here’s the team(s):
Team 1:
Azelf
Ability: Levitate
Level: 50
EVs: 252 Atk / 4 SpA / 252 Spe
Naive Nature
IVs: 30 HP
- Explosion
- Protect
- Energy Ball
- Flamethrower

Metagross
Ability: Clear Body
Level: 50
EVs: 124 HP / 252 Atk / 4 Def / 4 SpD / 124 Spe
Adamant Nature
- Explosion
- Iron Head
- Thunder Punch
- Protect

Team 2:
Weavile
Ability: Pressure
Level: 50
EVs: 252 Atk / 4 SpD / 252 Spe
Jolly Nature
- Assist
- Night Slash
- Low Kick
- Protect

Gengar
Ability: Levitate
Level: 50
EVs: 252 Atk / 252 Spe
Hasty Nature
IVs: 0 HP / 0 Def / 0 SpD
- Explosion
- Destiny Bond
- Protect
- Thief
This team leverages the fact that Assist can’t call moves from the other trainer’s pokemon in a multi battle. This makes it much easier to abuse Assist by building a set that is guaranteed to call one specific move. For this team, I have a Gengar whose only Assist-able move is Explosion, and a Weavile who makes use of Explosion via Assist. I like Weavile as an Explosion-user because it is very fast and is capable of dealing with many ghost types thanks to its dark STAB.
I decided to throw two other explosion users on the team mainly just because I thought it was funny.

I’ll probably return to Arcade Multis at some point with a real team, but I’m happy enough with this streak for the time being.
 
Signing it at 61 wins for the Battle Factory in Pokemon HeartGold SoulSilver Level 50 Singles on a DS cartridge. Lost/got swept on Battle 62 by Skarmory 2.

Staraptor 1, Machamp 1

I think Thorton had Leafeon 1, Muk 1, and Claydol 1 on his team for Battle 21 but I don't remember exactly...

Miltank 1, Venusaur 2

Garchomp 2, Kangaskhan 3, Togekiss 3 (with Hustle), Shuckle 3, Ninetales 3, Drapion 2

I draft Togekiss 3 (lead), Garchomp 2, Kangaskhan 3

Battle 29: Electrode 1, Lapras 1, Cradily 1
Battle 30 (Fighting type): Breloom 1, Probopass 1, Poliwrath 1
Battle 31 (Poison type): Lanturn 2, Muk 2, Weezing 2
Battle 32: (Water type): Kingdra 1, Feraligatr 1, Tentacruel 1 (replaced Kangaskhan 3 with Muk 2)
Battle 33: Probopass 2, Hypno 2, Meganium 2 (replaced Togekiss 3 with Kingdra 1)
Battle 34 (Fighting type): Machamp 2, Heracross 2, Torterra 2
Battle 35: Infernape 3, Raichu 3, Cradily 3 (replaced Muk 2 with Heracross 2)

Arcanine 3 (with Intimidate), Lanturn 3 (with Volt Absorb), Jynx 4, Ampharos 4, Pinsir 4, Nidoking 4 (with Rivalry)

I draft Jynx 4 (lead), Pinsir 4, Nidoking 4

Battle 36 (Ground type): Torterra 2, Machamp 2, Swampert 2
Battle 37: Aerodactyl 2, Leafeon 2, Gastrodon 2 (replaced Nidoking 4 with Swampert 2)
Battle 38 (Ground type): Tangrowth 3, Donphan 3, Nidoqueen 3
Battle 39: Toxicroak 2, Froslass 2, Flygon 2
Battle 40 (Psychic type): Bronzong 3, Medicham 3, Muk 3
Battle 41: Abomasnow 2, Hariyama 2, Alakazam 2
Battle 42: Raichu 4, Cradily 4, Heracross 4

Magmortar 2, Typhlosion 4, Mismagius 4, Empoleon 4, Cradily 4, Dusknoir 4

I draft Mismagius 4 (lead), Empoleon 4, Cradily 4

Battle 43: Hypno 4, Garchomp 4, Probopass 4
Battle 44 (Poison type): Victreebel 4, Venusaur 4, Lickilicky 4 (replaced Cradily 4 with Garchomp 4)
Battle 45 (Fighting type): Rampardos 3, Breloom 3, Poliwrath 3
Battle 46: Politoed 3, Typhlosion 3, Cradily 3
Battle 47: Floatzel 4, Shiftry 4, Arcanine 4 (without Intimidate)
Battle 48: Walrein 3, Roserade 3, Electrode 3
Battle 49 (Thorton Gold Print Battle): Tauros 4, Suicune 2, Electivire 4

Here's the video of the Gold Print battle win vs Thorton on Battle 49:

After beating Thorton on Battle 49 and obtaining the Gold Print, I took a break from the Factory for almost 8 and a half months before I picked it up again last week in order to finish my streak. Since I didn't record any of my battles from Battles 1-49 besides the Thorton Gold Print Battle, I decided to record all of my battles for Round 8 and beyond until I lost (I don't have a capture card with me unfortunately and I'm not playing on an emulator or computer so I had to use my phone to record all of my battles lmao. This was the best that I can do for the time being as I really can't be bothered to re-upload and re-edit all of these videos again...). Here's the playlist I created of each individual battle I faced from Battle 50 to Battle 62 when I lost:

https://www.youtube.com/playlist?list=PLx6a8ZnZU6GAh2vhLcwLf_D71BuipjZgo

And here's the loss on Battle 62:

Glen wasn't kidding when he said that Skarmory 2 is the best pokemon in the factory, bar none. If you don't have a Fire or Electric type move or Pokemon on your team (especially a special attacking one), you will lose and get stalled out by Skarmory 2. My team had absolutely no answers for Skarmory 2. To show you how unfairly durable it is, take a look at these damage calcs from the 3 mons I had on my team during Round 9.

252 SpA Tentacruel Hydro Pump vs. 168 HP / 168+ SpD Skarmory: 75-88 (46.5 - 54.6%) -- 7.8% chance to 2HKO after Leftovers recovery
252 SpA Tentacruel Ice Beam vs. 168 HP / 168+ SpD Skarmory: 38-46 (23.6 - 28.5%) -- possible 5HKO after Leftovers recovery
252+ Atk Gliscor Stone Edge vs. 168 HP / 168 Def Skarmory: 34-40 (21.1 - 24.8%) -- possible 6HKO after Leftovers recovery
252 Atk Weavile Ice Punch vs. 168 HP / 168 Def Skarmory: 42-48 (26 - 29.8%) -- 0.4% chance to 4HKO after Leftovers recovery

Even at max attack and with STAB, Gliscor and Weavile get completely walled by Skarmory 2 and don't even come close to killing it - even on a crit. I really thought that with Skarmory's relatively low Special Defense stat (compared to its Physical Defense stat) that Ice Beam would do a decent amount of damage to it but no, even that is a freaking 5HKO at best. Only Hydro Pump does remotely close to half to it (and even then it has Leftovers so after Leftovers and Fly (it also restores health from Leftovers when it's up in the air too) it doesn't get 2HKO'd by Hydro Pump. So my only hope of beating it was to rely on an already inaccurate Hydro Pump and pray that I keep hitting it - even through evasion - before it runs out of PP. Long story short... I came up well short of doing that. I missed my first two Hydro Pumps on it while it continued to use Double Team before I was finally able to hit it once with Hydro Pump, which barely did over half to it. By then it was at +3 evasion and I only had 2 PP left on Hydro Pump. I was expecting it to keep using Double Team on me until it got up to +6 evasion, but that's when it ended up using Fly on me. This is where I lost the battle. I should've just stayed in with Tentacruel, used any move on it while it was Flying on Turn 1, and then used Hydro Pump once it's done attacking me with Fly. Instead I panicked and ended up switching to Gliscor, hoping that I can stall it out (since Fly barely does over 20% to Gliscor), and then switch back to Tentacruel, expecting it to use Toxic on me. Little did I know that it actually used Roost to restore all of its health back to 100% while I switched back to Tentacruel. I knew then that I lost unless I managed to not only hit it with Hydro Pump, but also land a crit on it. I was able to hit it once more with Hydro Pump (which unfortunately did not get a crit on it) before missing with Hydro Pump again later in the battle and running out of Hydro Pump PPs. After that, the only faint hope that I had left was getting an Ice Beam freeze on it and continuously hitting it with Ice Beam through evasion while it stays frozen. I really thought that with Gliscor on my team that I can stall it out and eventually get it to run out of moves to use, but sadly it has Roost and Fly has 15 PP (Hydro Pump and Ice Beam combined have 15 PP and only Hydro Pump does any damage on it at all) so not only was I not able to stall it out, it ended up stalling me out. In hindsight, the only way I could've possibly won this battle was to hit it twice (and both times) with Hydro Pump with Tentacruel once it was at >50% health through +3 evasion and get a high roll on both Hydro Pumps or get a crit on one of them. The latter is why I switched back and forth between Tentacruel and Gliscor because I knew that I needed a crit on it anyway (whether at 50% health or full health) in order to knock out the Skarmory so I decided to preserve Tentacruel rather than having it take massive damage from Fly (since Tentacruel is the only mon on my team that even has a shot at knocking out Skarmory).

From the previous battle (Battle 61), the opponent's mons were Ambipom 2, Drifblim 4, and Toxicroak 1. None of these mons can do anything to Skarmory either and trading for one of these mons would've just made my team a lot worse anyway so I was pretty much screwed here no matter what I do. Skarmory’s just a bad matchup for my team and I’ve never been great at dealing with Double Team in the Frontier (I also lost my streak in the Diamond Battle Tower to a Double Teaming Zapdos).

From the earlier battles this round, the only battle where I could've swapped out one of the mons on my team for one of the opponent's mons was Battle 57 (Battle 1 of Round 9) where the opponent had a Moltres which used Flamethrower on me (meaning it was Moltres 1). I went back and forth on this for awhile and strongly considered swapping out Weavile 4 for Moltres 1, but I ultimately decided against it because 1) Moltres is slower and gets outsped by several key mons that Weavile naturally outspeeds 2) I'd lose an immunity to Psychic and gain a double weakness to Electric on my team (I didn't want to swap out either Tentacruel or Gliscor since they have great synergy with one another) and 3) If Gliscor gets knocked out, I'd get swept by any fast Electric type mon like Jolteon or Raikou or Zapdos or Electrode and in general fast Psychic type mons like Alakazam, Espeon, and Latios/Latias (as well as Water/Psychic type mons like Slowbro, Slowking, and also mons like Aerodactyl, Blissey, and Cresselia) would pose a huge threat to my team had I swapped out Weavile for Moltres. Plus, I felt like in general Weavile, Tentacruel, and Tentacruel was a pretty strong team with great synergy, and I was rolling with this team up until Battle 62 so I had no reason to believe that I'd ever lose at any point during this round with this team... Idk, it was a really tough call. I also made the mistake of leading off with Weavile for Round 9 instead of Tentacruel. The reason why I led with Weavile instead of Tentacruel for Round 9 is because it's faster and because the AI for Battle 57 (the first battle of Round 9) was a Flying type specialist so I wanted to send out a mon that was super effective against Flying. In retrospect though, it's actually better to lead with Tentacruel because it still has Ice Beam to cover Flying types, it’s still pretty fast, and it matches up better against more mons in the Factory than Weavile since it has better typing and it can safely switch into Weavile for Psychic type attacks and Gliscor for Electric and Ground type attacks. And in battle 62, had I had Tentacruel as my lead instead of Weavile, I would've been able to just kept spamming Hydro Pumps at Skarmory instead of having to waste a turn switching from Weavile to Tentacruel and letting it get an evasion boost on me first.

And after looking at the Battle Video for Battle 62, I don't feel so bad about my loss anymore because it turns out that the remaining two mons the opponent had (I didn't even get a chance to face them and see what set they were) were Feraligatr and Claydol and both pose awful matchups to all of the mons on my team even at full health. So even if I had somehow made it past Skarmory with Tentacruel, I would've had a very hard time beating both Feraligatr and Claydol especially since I would've had zero Hydro Pump PPs left by the time the opponent sent out Claydol next.

But yeah, overall I'm still very happy about my streak and I'm glad that this is finally over. I first started playing the Factory on August 31, 2023 and I obtained the Silver Print within the first couple of hours of playing it. The Gold Print though? It would take me another 400 hours and 8 months until May 1, 2024 before I finally was able to obtain the Gold Print in the Battle Factory. All of the other facilities in the Frontier took me 1 or 2 days/attempts max to get the Gold Print (as well as the 100 win streak in the Battle Tower), but I swear I've lost at least 1000 times in the Factory before I finally was able to obtain the Gold Print in it. I usually lost in Rounds 5-7 or the Thorton Silver Print battle or sometimes even earlier than that. Most of it was due to bad luck, hax, or bad elevations, but some were also due to misplays/miscalcs on my part, lack of focus and patience (due to having to juggle with work and other activities each week in addition to this), and also fatigue from spending so many hours playing it. I faced off against Thorton on the Gold Print battle once before my winning attempt on the 300th hour of playing the Factory and found out he was an Electric type Specialist (I had Alakazam 4, Dragonite 4, and Magnezone 4) and he led off with Tyranitar 4 and had Electivire 4 and Raikou on his team. After knocking out his Tyranitar with Dragonite (and having to sacrifice Alakazam by using Energy Ball on it and then bringing in Dragonite next to revenge kill) it, I thought I had the battle in the bag until the next Pokemon he sent out was Electivire, which not only outspeeds Dragonite, but OHKOs it with Ice Punch and OHKOs Magnezone with Earthquake. After that loss, I couldn't reach him again for another 100 hours. When I faced him again the second time, I was shitting all over my pants during the entire battle. I almost lost it when his Suicune won the speed tie against my Garchomp and hit it with Ice Fang. After barely living the Ice Fang attack with Garchomp and knocking out Suicune with Earthquake, I needed a mon that I can outspeed and OHKO in one shot with Garchomp or else I would've lost again on Battle 49 and my streak would've been over. Fortunately, Thorton's last Pokemon was Electivire 4 and I made the correct decision to use Outrage on it instead of Earthquake (Earthquake doesn't OHKO it since it has Shuca Berry while Outrage always OHKOs it from full health). How fitting and sweet was it to finally obtain the Gold Print by defeating the one Pokemon that essentially ended and cost me my best streak in the Factory before this winning attempt right? After obtaining the Gold Print in the Battle Factory, I was so overwhelmed with joy that I legit never wanted to play the Factory ever again. As I alluded to earlier, I took an 8 and a half month hiatus from it before I finally found the courage and passion in me to return to it again and finish my streak once and for all.

Now that I'm done with the Battle Factory, I honestly don't know what I'm gonna do next in my life. As mentioned earlier, I already obtained all of the Gold Prints in SoulSilver and I already got the 100+ win streak in the Battle Tower in both Diamond and SoulSilver. I might consider resuming my streak in the Battle Hall with Garchomp to see what my final streak is there, but there are already a million people on this forum who have used Garchomp for their Battle Hall streaks so I don't want to just come across as a copycat at that. And I'm not a big fan of the Arcade or Castle (especially the Castle) so yeah. Who knows what I'll do in the future in Gen 4 or Pokemon for that matter? No matter what though, I'll always be a fan of Pokemon (especially Gen 4) and if God willing, I will be back!
 

Attachments

  • pokemonheartgoldsoulsilverbattlefactoryround5opponentpokemoneachbattle.JPG
    pokemonheartgoldsoulsilverbattlefactoryround5opponentpokemoneachbattle.JPG
    1.2 MB · Views: 50
  • pokemonheartgoldsoulsilverbattlefactoryround6opponentpokemoneachbattle.JPG
    pokemonheartgoldsoulsilverbattlefactoryround6opponentpokemoneachbattle.JPG
    1.5 MB · Views: 45
  • pokemonheartgoldsoulsilverbattlefactoryround7opponentpokemoneachbattle.JPG
    pokemonheartgoldsoulsilverbattlefactoryround7opponentpokemoneachbattle.JPG
    1.4 MB · Views: 42
  • pokemonheartgoldsoulsilverbattlefactorybattle49thortongoldprintbattlepokemonused.JPG
    pokemonheartgoldsoulsilverbattlefactorybattle49thortongoldprintbattlepokemonused.JPG
    745.8 KB · Views: 42
  • battlefactorywinningattemptbattles28to49pokemonusedduringeachroundlog.jpg
    battlefactorywinningattemptbattles28to49pokemonusedduringeachroundlog.jpg
    589.4 KB · Views: 43
  • battlefactory49winstreakproofmay12024.JPG
    battlefactory49winstreakproofmay12024.JPG
    2.4 MB · Views: 39
  • amountofhourspentonbattlefactorybeforeifinallygotthegoldprint.JPG
    amountofhourspentonbattlefactorybeforeifinallygotthegoldprint.JPG
    1.3 MB · Views: 39
  • pokemonheartgoldsoulsilverallgoldprintsproof.jpg
    pokemonheartgoldsoulsilverallgoldprintsproof.jpg
    1.9 MB · Views: 37
  • battlefactory61winstreakproof.jpg
    battlefactory61winstreakproof.jpg
    1.6 MB · Views: 43
  • battlefactorybattle62battlevideo.jpg
    battlefactorybattle62battlevideo.jpg
    129.5 KB · Views: 44
Last edited:
Single Segment Emulator Battle Arcade Run

1-105 - 1:51:10
106-203 - 2:20:25
204-276 - 1:41:25

Battle Arcade Battles 1-276

Right before this I set a streak of 301 offline on emulator done in segments, I recorded my play times but did not record the play itself.

1/27 - 1-105 - 1:57:27
1/28 - 106-203 - 2:21:24
1/29 - 204-301 - 2:24:46

total - 6:43:37

I've been practicing for a few hours each day the past week but I almost never start from battle 1, that run that got to 301 with its times listed above was my 3rd attempt starting from battle 1. I didn't continue that streak from 301 even though it was still active and just started over with the intent of this time beating my record or getting close in 1 sitting.

This recorded run was my 4th attempt starting from battle 1, and I think my longest period ever of continuous play doing the Arcade though I did play it a bunch in college. I can tell I'm getting a bit better because this run was faster than those segments and I was on pace to beat my previous run by about 20 minutes, and my first 105 battles totally crushes my old videos time of like 2:40.

I was hoping to pass 300 in 1 go, but I don't consider emulator streaks to be at all legitimate compared to retail, this is really more a demonstration of level of play, this takes way too long and I can't keep doing this lol. I don't know how much faster it would be if I removed the emulator's throttle on speed up, but that would still be a huge time sink.

I was definitely playing bad after getting to the mid 200s but that's what happens when you go for so long.

Died to the enemy hitting through paralyzed -6 accuracy to kill Garchomp. I also just completely did not need to throw Articuno away like that but I was worried about Cresselia getting frozen if I sat against it too long. I think I also pulled off the pp stall against that Regice earlier in the run so I thought it was gonna work again. I subbed that low because I thought it might pick Ice Beam when I got low and I wanted it to be hitting sub as much as possible when it was tbolting and I forgot it had focus blast. I don't know why it picked focus blast every time when Articuno was at low hp, I thought it randomly picked any attack that kills, maybe I was just really unlucky. In retrospect from the beginning I should've switched around to get Garchomp in on Regice's tbolt, get an outrage off, finish it off with a few psychics, then Cresselia/Articuno easily beat Latias/Suicune.

If I run Substitute on Garchomp I don't think I have an answer to Scizor lead Swords Dancing and killing my entire team. Some other specific pokemon I want it for but can't remember right now.

Fire Fang is also useful for killing some things Earthquake can't hit without locking into Outrage. No doubt Substitute makes some tough matchups trivial though like Tyranitar, and I'm sure its possible to get a much higher streak than my record with the same team with Substitute over Fire Fang.
 
Last edited:
Back
Top