I've done this for ribbon masters before, and I believe they came from the DP pool IIRC.
Ah fab, thanks. Seems like that would be a lot easier since DP's sets are inferior and have randomised natures.

I've done this for ribbon masters before, and I believe they came from the DP pool IIRC.
 @ Choice Scarf (Intimidate)
 @ Choice Scarf (No Guard)
 @ Life Orb (Intimidate)
 @ Expert Belt (Snow Cloak)
 @ Expert Belt (Pressure)
 @ White Herb (Levitate)
First try said:Ah, I think the teams only reroll if you change your team as well. In the round I just started, Riley had Rampardos3/4 and Slaking1 and Mira had Latias2 and Exeggutor1, so I bailed. I left and came back with a different lead and their teams had changed. Nice!
Second try said:Got another shitty draft: Magmortar1 and Gardevoir (set indeterminate, but Gardevoir makes for an unreliable partner anyway) from Mira and Rampardos2 and Entei4 from Riley. Exited and re-entered three times with the same team to no change; only got a new draft when I came back with a different squad. Yep, looks like teams reroll with yours.
Third try said:Got another crap draft; left and returned with a different lead Pokemon, to no change whatsoever. Changed to a (third) new lead and still no change. This is weird. Entered with a deliberately crappy underlevelled team and drafts were completely different. Decided to come back with the first team I entered with and drafts appeared to have returned to the ones I was offered at the start.
 @ White Herb (Natural Cure)
| @ Choice Scarf (Intimidate) Brave Bird Giga Impact Close Combat U-Turn 4 HP, 252 Attack, 76 Def, 4 Sp.Def, 172 Speed (Adamant) | @ White Herb (Natural Cure) Leaf Storm Sludge Bomb Shadow Ball Extrasensory 4 HP, 252 Sp.Atk/Speed (Timid) |
| @ Life Orb (Intimidate) Double-Edge Earthquake Rock Slide Zen Headbutt 4 HP, 252 Attack/Speed (Jolly) | @ Choice Scarf (No Guard) Dynamicpunch Stone Edge Earthquake Ice Punch 12 HP, 252 Attack, 244 Speed (Adamant) |
Factory Multis seem really interesting, I've been thinking about buying a SS or Platinum copy to give this a shot some time in the future so I really appreciate this detailed writeup, cool stuff!
Also I can't quite understand if you know this from your post, but you can always tell what Pokemon Sets you're fighting (up to R7 in LV50 and up to R4 in Open Level) by the opponent Trainer Class and Name. I'm mentioning this because you write you faced someone with Togekiss3 and Raichu4, which should be impossible because Set4 Pokemon can only show up as opponents on R7 or R6 Battle7, and also all their Pokemon should be from the same Set. It looks like there may be different rules for Multis, because getting Tyranitar1 in R6 should be impossible as well. I'm also interested to know if you were always fighting Trainers with same Set Pokemon (as in both opponent Trainers in a Round4 Battle for example used only Set4 Pokemon or only Set3 Pokemon or if one of them could use Set3 Pokemon and the other Set4 Pokemon)
Edit: Unless what you've posted as your R6 Draft is your R7 draft and it's a simple case of a typo, just noticed you got 43 :)
About the Shiny Blastoise, did you use the Rest Function (as in take a break and close the game) before getting it? Because I've read that's (apparently) the only way a Shiny can show up in Gen4 Factory, and that it also stops being Shiny after 1 Battle.
So wait, can two players with unequal streaks play multis together? It's not clear from your wording whether this means that they can connect, and the game added the "only one person trades" stipulation as a balancing feature for this specific scenario to prevent cheese, or if they can't join together at all and both have to start a fresh streak if they connect.The effect of this is that it takes longer to max out your swaps if both partners are swapping with a more or less even frequency, and thus it will take much longer for you both to access elevations. Presumably, this is done to counteract non-joined-up streaks (i.e. to prevent you partnering with a partner with a streak of 42 and accessing the top sets right away)
So wait, can two players with unequal streaks play multis together? It's not clear from your wording whether this means that they can connect, and the game added the "only one person trades" stipulation as a balancing feature for this specific scenario to prevent cheese, or if they can't join together at all and both have to start a fresh streak if they connect.
If two games with different streaks are allowed to connect, how does the game determine which opponents you fight? Is there some crazy world where two games both build up smaller streaks by playing multi with a separate 3rd game, and then they connect with each other mid-streak in order to both have higher tier sets than they'd have if they played together from the start? This sounds so convoluted that it probably doesn't even work this way, but I do have to ask because I've never read anything about multi battle mechanics before.
Platinum Multi w/ In-Game Trainer Record = 56 (ongoing)
Team:
Staraptor @ Choice Band
252 Attack / 252 Speed
- Brave Bird
- Return
- Close Combat
- U-turn
Porygon-Z @ Life Orb
252 Sp.Attack / 252 Speed
- Tri Attack
- Dark Pulse
- Hyper Beam
- Nasty Plot
Me: Staraptor @ Porygon-Z + Marley: Arcanine & Dugtrio Vs Exeggutor, Donphan & Flygon, Tyranitar
- Team inspired by QuentinQuonce and his Staraptor and Tauros combo (I just didn't have a Tauros ready to go)
- I didn't start this streak with this team, but eventually switched to it. Was just mucking around with different teams, but eventually I surpassed my PB of 47 using this current team. Used them consistently from around 21 wins.
- I usually partnered with Riley or Mia, but would sometimes use Marley if they didn't have solid options. Although I found Marley lacklustre in the damage department.
- Had a close call in battle 33:
Her Dugtrio's moveset was EQ, Rock Slide, Astonish and Sand Tomb. She loved to click Astonish for some reason against the Tyranitar. She also had a habit of doing this against a Steelix we fought in the same streak.
Had Riley with his Focus Punch Breloom do some derpy stuff that almost costed the streak. On a turn where my Staraptor was going to be targeted by the AI (super low HP), Breloom goes for the focus punch. He goes FP, Staraptor dies to enemy Poke, the other enemy Poke misses the Breloom and then he lands the FP.
Not sure how far I can take this streak. I had this bad habit of constantly losing at 47, lost on 47 about 5-6 times. A few of those in a row.
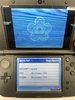
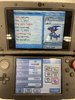
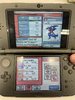
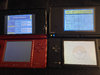
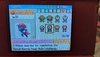
Will post photo proof later of the streak.


Lower levels are better for the early rounds, higher levels are better for the late rounds and post-170. If you're playing hall with something horrible, 30 or 31 is definitely the way to go, often I might use both a level 30 and 100 mon for something with very borderline 170 potential (wormadam).Hi, everyone. Created an account just to follow this thread.
Planning on doing something similar to what atsync and average fella are doing: getting a total record of 10,000 wins with a bunch of different Pokemon in the Battle Hall.
My question, before I start, is: what's the best level(s) to challenge the Hall at, if any? Is there one level that's always the best, and if not, what's an easy way to calculate it?


After posting about my Factory Doubles escapades and learning from Anna says hi that I'm apparently the first person to beat all four Battle Factory formats (that is to say, Singles Level 50 Singles Open Level Doubles Level 50 Doubles Open Level) I was thinking about taking this meme achievement one step further and going for Gold Print on the Multi formats of the Factory. While it was something that I had in the back of my mind, I was hesitant to actually go ahead and buy another Gen IV game because I wasn't sure if it was even worth going for it, considering it's just Doubles but with 4 Pokemon instead of 3. What convinced me that it was different enough that I'd want to go for it was QuentinQuonce's post into Factory Multis, which is definitely worth a read if you want to know more details about how Factory Multis work. As you can tell, I've decided to take on this "challenge" of winning a sextuple of Battle factory Gold Prints and I'm now at 5/6 with my latest streak of 49 wins in Battle Factory Multis LV50
I kept logs of all the battles from Round6 and Round7 on Discord, so I'll just transcribe what I wrote here
Heart Gold Draft: Aerodactyl3/Abomasnow3/Quagsire4(Water Absorb)/Nidoking3(Poison Point)/Drifblim3/Lickilicky3
Platinum Draft: Porygon-Z3(Adaptability)/Kangaskhan3/Mr.Mime3/Politoed4(Damp)/Sceptile3/Umbreon4
6-1
I picked Aerodactyl/Quagisre Sceptile/Politoed vs Ground Specialist who led Set2 Gliscor Rhydon
Turn1 Rock Slide broke Sash and Leaf Blade killed Rhydon, Gliscor didn't flinch and used Fire Fang on Sceptile for a bit over half
Turn2 Hypno2 came out and I decided to not risk Rock Slide miss and killed Hypno with Crunch Leaf Blade, then Sceptile died to another Fire Fang
Turn3 Rock Slide missed Gliscor, it used Thunder Fang on Wacan Berry Politoed which paralyzed it but it got through and killed with Ice Beam
Turn4 absol2 came out, Rock Slide didn't flinch, it used Thunder Wave on Aerodactyl and Politoed killed it with Ice Beam
6-2
Ghost Specialist, vs Set2 Lanturn Mr.Mime
Turn1 doubled up on Mr.Mime, it wasn't Filter so it died to Crunch, Leaf Blade missed the range on Lanturn and it paralyzed Aerodactyl
Turn2 Froslass2 came out, doubled up on it, Night Slash didn't crit, it killed Sceptile with Ice Punch and Lanturn wasted its turn by using Thunder Wave aimed at Grovyle but it went into Aerodactyl after Sceptile died, and Froslass fell to Crunch.
Turn3 Lanturn died to Politoed's Psychic
Turn4 Gengar2 came out, missed Hypnosis and died to Psychic
6-3
Swaped Sceptile for Gengar, vs Set3 Torterra Skarmory
Turn1 switched Politoed in for Gengar and got a double Rock Slide flinch
Turn2 I got a double Rock Slide miss, killed Torterra with Ice Beam and Skarmory Night Slash crit Aerodactyl for a bit over half
Turn3 Porygon-Z3 came out and got a Download Attack boost, used Rock Slide with Aerodactyl and died to Charge Beam +1 Special Attack, Hydro Pump missed Porygon-Z and Skarmory flinched
Turn4 Ice Beam left Quagsire on red health, Porygon-Z died to hydro pump, Slash from Skarmory on Politoed, Waterfall on Skarmory
Turn5 Ice Beam killed Skarmory
Turn6 Armaldo3 came out, died to Ice Beam Waterfall after missing Stone Edge
6-4
VS Set2 Weavile Magmortar
Turn1 switched Politoed into Night Slash, Rock Slide missed Weavile but killed Magmortar
Turn2 Crobat2 came out, Night Slash left Politoed on red health, Rock Slide got the double kill
Turn3 Raichu2 came out and Earthquake cleared the field
6-5
Ground Specialist, vs Set2 Garchomp Rhyperior
Turn1 Earthquake Shadow Ball killed Rhyperior, Earthquake crit Garchomp for half, Draco Meteor killed Gengar
Turn2 Whiscash2 came out, Giga Impact killed Garchomp, Hydro Pump on Whiscash for half, and it killed Aerodactyl with Aqua Tail
Turn3 Blastoise2 came out, it used Double Team, Hydro Pump killed Whiscash
Final Turns where me trying to hit a sleeping Aqua RIng Blastoise through Double Team, I eventually won thanks to a Stone Edge crit
6-6
Swapped Politoed for Garchomp, vs Set3 Drifblim Miltank
Turn1 Rock Slide Shadow Ball killed Drifblim, Miltank didn't flinch and used Thunder Punch on Aerodactyl
Turn2 Dugtrio3 came out, I switched Garchomp in but it aimed its Night Slash on Aerodactyl, it must have been a range but Aerodactyl tanked and killed it with Giga Impact before going down to Miltank's Ice Punch
Turn3 Draco Meteor killed Miltank
Turn4 Slowbro3 came out, tanked both Earth Power and Earthquake, Psychic didn't kill Quagsire
Turn5 Garchomp finished it with Earth Power
6-7
Rock Specialist, vs Set4 Shuckle Flygon
Turn1 Crunch Shadow Ball killed Flygon, Shuckle used Double Team
Turn2 Rampardos4 came out, switched Garchomp in, Earthquake got a good crit on Rampardos and Shuckle set up Sandstorm
Turn3 Rock Slide hit Shuckle for half, switched Gengar back in while Shuckle used Double Team
Turn4 Rock Slide killed and Gengar set up Substitute
Turn5 Lapras4 came out and died to Rock Slide Shadow Ball
Heart Gold Draft: Milotic4/Steelix4/Gardevoir3/Regigigas2/Forretress4/Togekiss4(Serene Grace)
Platinum Draft: Raikou2/Victreebel3/Mr.Mime4/Whiscash4/Lucario4/Bronzong4(Levitate)
7-1
I picked Milotic/Steelix Lucario/Bronzong vs Set3 Weavile Lopunny
Turn1 switched Bronzong in, Night Slash did less than half on Milotic, Focus Blast went into Bronzong, Ice Beam into Lopunny
Turn2 Night Slash on Bronzong Focus Blast on Milotic, Dragon Pulse broke Weavile's Sash and Lopunny died to Iron Head
Turn3 Scizor3 came out, I switched Steelix in, they doubled up with Night Slash X-Scissor and killed Bronzong
Turn4 Scizor used Quick Attack on Lucario, I used Psychic on Scizor (to not put it into Endure range) and Gyro Ball killed Weavile which was using counter since it was going last
Turn5 Flygon3 came out, I tried to end it with Explosion, didn't get the Quick Claw and Flygon targeted Steelix with Earth Power, thankfully Lucario got the Aura Sphere kill on Scizor to give me a fighting chance
Turn6 needed Flygon to choose Lucario as kill target, it did, and died to Milotic's Ice Beam
7-2
Normal Specialist, vs Set4 Tyranitar Tauros(Anger Point)
Turn1 is interesting in regards to Smart AI Spread Move usage, I banked on Tauros clicking Earthquake vs kill target Lucario and switched Bronzong in, it didn't do that and used return on Milotic, I used Surf and Tyranitar chose to use Earthquake vs kill target Lucario, Milotic died but so did Tauros thanks to Surf + Earthquake + Sandstorm damage
Turn2 Shuckle4 came out, I double targeted Tyranitar with Iron Head and Earthquake, killed it while it used Dragon Dance, Shuckle set up Sub, it could do nothing to any of my remaining 3 Pokemon
Turn3 Kangaskhan4 came out, I double targeted with Iron Head Earthquake and it Crunched Bronzong while Shuckle used Double Team
Turn4 another Crunch on Bronzong then it died to another Iron Head Earthquakem Shuckle Double Team
Final Turns where me trying to kill Shuckle through Substitute Double Team
7-3
Swap Milotic for Tauros, vs Set3 Lopunny Jolteon
Turn1 switched Bronzong into Thunder paralysis for half, Lopunny died to Return
Turn2 Houndoom3 came out, Thunder missed, Return killed Jolteon, Flamethrower killed Bronzong
Turn3 Poliwrath3 came out, Return killed Houndoom, Psychic on Poliwrath doesn't kill, Focus Blast kills Tauros
Turn4 Lucario finishes Poliwrath off
7-4
Water Specialist, swapped Steelix for Jolteon, vs Set3 Lapras Glaceon
Turn1 doubled up on Glaceon for the kill while Lapras used Dragon Dance
Turn2 Infernape3 came out, Tauros killled it with Return, Aura Sphere didn't kill Lapras, Waterfall didn't kill Lucario
Turn3 switched Tauros out to unlock Choice Band for last Pokemon, Aura Sphere killed Lapras
Turn4 Wailord3 came out and died to Thunder
7-5
Swapped Jolteon for Infernape, vs Set3 Sceptile Gyarados
Turn1 Leaf Blade on Tauros for less than half, Stone Edge Psychic kills Gyarados
Turn2 Flygon3 came out, I double switched, Leaf Blade missed Infernape and it tanked a Draco Meteor
Turn3 Infernape down to Aerial Ace, Flygon used Earth Powers into Bronzong Levitate, Iron Head on Flygon for half
Turn4 Tauros died to crit Leaf Blade, Draco Meteor crit Bronzong for half and Flygon died to another Iron Head
Turn5-6 I saw that 78 health zong wouldn't die to 2 X-Scissors without a crit, tried to preserve Quick Claw Explosion but I got crit turn2, it probably didn't matter because I put him into Overgrow anyways
Turn7 Lucario took a Leaf Blade for Half and killed Sceptile
Turn8 Hypno3 came out and I needed to crit for the win, and I did crit for the win!
7-6
Poison Specialist, swapped Infernape for Gyarados, vs Set3 Weezing Rampardos
Turn1 used Return on Weezing Aura Sphere killed Rampardos, Sludge Bomb on Tauros for half
Turn2 Rhyperior3 came out, I killed weezing with another return and brought Counter using Rhyperior down to Sash
Turn3 Venusaur3 came out, Return didn't get the range, Rhyperior died to Aura Sphere and Tauros died to Seed Bomb
Turn4 Venusaur died to Lucario
7-7
Bug Specialist, vs Forretress Armaldo
Turn1 I ruled out Forretress4 Armaldo3,4 with Item Clause and decided to double Switch because Armaldo1 would use Earthquake for Lucario kill but Armaldo2 could potentially Swagger on Persim Berry Gyarados and Forretress was pretty much a complete non-factor, turned out I was fighting Armaldo2 Forretress1, Swagger went into Bronzong and Foretress used Bug Bite to steal my precious Persim Berry and foil my plans
Turn2 switched Lucario back in, Waterfall didn't kill Armaldo, it used Swagger on Gyarados, Bug Bite went on Lucario
Turn3 switched Tauros back in, killed Armaldo with Aura sphere and Forretress used Counter
Turn4 Abomasnow? came out and died to Return Aura Sphere, Counter into nothing
Turn5 Return Aura Sphere kill Forretress
Turn6 Dusknoir comes out, switch Tauros out, Shadow Ball doesn't kill, Brick Break into Lucario
Turn7 another Shadow Ball wins me the Gold Print!
Heart Gold Draft: Entei4/Houndoom1/Altaria3/Mamoswine1/Hypno3/Gallade1
Platinum Draft: Poyrgon2(2)/Arcanine2(Flash Fire)/Victreebel3/Ursaring2/Shuckle3/Typhlosion3
8-1
VS Water Specialist, I picked Hypno/Mamoswine Arcanine2/Poyrgon2, my logic was Hypno3 can slowly whittle things down while Arcanine buys a Turn with Endure and then potentially kills something with Reversal, probably should have compromised and not picked Arcanine or Mamoswine, but my drafts were not great. At the very least I should have switched Arcanine back into Porygon2 to eat the Fire Blast, but I'm not too disappointed, that was a pretty fast clear and didn't take many attempts
Now there's only one Gold Print left, but I'm probably going back to Battle Hall again, not quite sure right now. I'd also like to say something that I've expressed on the Discord Server as well, that I think this is easier than Doubles if not necessarily because it's 4v4, definitely because of 12 Pokemon Drafts and also I've noticed that I tend to get hints from the assistant far more often which can sometimes make my life easier. Closing by saying that Battle Factory is awesome, I'm glad I decided to play Doubles and now Multis and enjoy all the different formats this game has to offer, even if sometimes it makes me want to break my DS (looking at you Open Doubles, hopefully Open Multis won't be quite as impossible)
View attachment 583471View attachment 583472
I've only got Platinum and SoulSilver, so I was never able to test that as both games began and ended their streaks at the same time (I do actually have HG, come to think of it, but it's a Japanese copy and the current file is only 2 badges in, iirc).
Technically speaking you could do what you suggested and have both games separately partner with a third to max out their swaps before joining up; that might actually be a legitimately interesting strategy if anyone's inclined to try it. I can't imagine the game would prevent you from joining someone with a different streak length but it's an interesting question. I have actually done this in the Emerald Battle Tower's link multi mode, and it takes the player with the longer streak into account when selecting opponents (which prevents you from artificially getting a long streak by only fighting weak opponents, as otherwise you could partner with different trainers over and over and just fight the first-round sets repeatedly). You never see a weak opponent partnered with a strong one; it doesn't divide opponents to mirror the players having unequal streaks. But I can't imagine the same is true here, otherwise the player with a 0 streak could immediately start trading for top-tier sets right from the start.
Records on emulators are eligible as well as any Pokemon obtained from an emulator. Records on retail and emulator will be marked differently so that other interested parties wanting to replicate a leaderboard team can recognize the differences at which each team can be played. Due to how easy it is to cheat streaks on emulator, having concrete proof such as recorded videos or detailed write-ups is heavily encouraged. I reserve myself the right to ask for any additional recorded footage if I do not trust your streak enough in order to add it as leaderboard material.
Streaks must be done on legitimate copies of the game. Emulator streaks must be done on unedited ROMs without any patches. Bootlegs, ROM-hacks or fan-translations will not be allowed.