Project Old Gen Hackmons Megathread

Sup, I collected all the replays of ORAS PH games that were played in PHPL and assembled them into generating usage stats for them. Here are the PHPL usage stats for ORAS PH during PHPL. Take these as you may.

Code:
+ ---- + ------------------ + ---- + ------- + ------- +
| Rank | Pokemon            | Use  | Usage % |  Win %  |
+ ---- + ------------------ + ---- + ------- + ------- +
| 1    | Rayquaza-Mega      |   78 |  60.94% |  48.72% |
| 2    | Groudon-Primal     |   61 |  47.66% |  47.54% |
| 3    | Giratina           |   58 |  45.31% |  46.55% |
| 4    | Mewtwo-Mega-X      |   47 |  36.72% |  55.32% |
| 5    | Gyarados-Mega      |   46 |  35.94% |  60.87% |
| 6    | Xerneas            |   34 |  26.56% |  41.18% |
| 7    | Diancie-Mega       |   31 |  24.22% |  22.58% |
| 8    | Audino-Mega        |   30 |  23.44% |  63.33% |
| 9    | Gengar-Mega        |   28 |  21.88% |  39.29% |
| 10   | Kyogre-Primal      |   25 |  19.53% |  36.00% |
| 11   | Slaking            |   21 |  16.41% |  38.10% |
| 12   | Chansey            |   21 |  16.41% |  47.62% |
| 13   | Aegislash          |   19 |  14.84% |  63.16% |
| 14   | Arceus             |   19 |  14.84% |  68.42% |
| 15   | Swampert-Mega      |   18 |  14.06% |  50.00% |
| 16   | Manectric-Mega     |   16 |  12.50% |  68.75% |
| 17   | Blissey            |   15 |  11.72% |  46.67% |
| 18   | Latios-Mega        |   12 |   9.38% |  58.33% |
| 19   | Yveltal            |   11 |   8.59% |  45.45% |
| 20   | Ferrothorn         |   10 |   7.81% |  40.00% |
| 21   | Thundurus          |    9 |   7.03% |  55.56% |
| 22   | Metagross-Mega     |    8 |   6.25% |  62.50% |
| 23   | Registeel          |    8 |   6.25% |  62.50% |
| 24   | Mewtwo-Mega-Y      |    8 |   6.25% |  37.50% |
| 25   | Beedrill-Mega      |    7 |   5.47% |  57.14% |
| 26   | Probopass          |    7 |   5.47% |  14.29% |
| 27   | Dialga             |    6 |   4.69% |  33.33% |
| 28   | Deoxys-Speed       |    6 |   4.69% |  33.33% |
| 29   | Escavalier         |    5 |   3.91% |  40.00% |
| 30   | Sableye-Mega       |    5 |   3.91% |  40.00% |
| 31   | Regigigas          |    4 |   3.13% |  75.00% |
| 32   | Meloetta           |    4 |   3.13% | 100.00% |
| 33   | Tyranitar-Mega     |    4 |   3.13% | 100.00% |
| 34   | Ludicolo           |    3 |   2.34% |  33.33% |
| 35   | Gyarados           |    3 |   2.34% |  66.67% |
| 36   | Zapdos             |    3 |   2.34% |  33.33% |
| 37   | Ho-Oh              |    3 |   2.34% |  66.67% |
| 38   | Scizor-Mega        |    3 |   2.34% |  66.67% |
| 39   | Thundurus-Therian  |    3 |   2.34% |   0.00% |
| 40   | Deoxys-Attack      |    2 |   1.56% | 100.00% |
| 41   | Cresselia          |    2 |   1.56% |  50.00% |
| 42   | Skuntank           |    2 |   1.56% | 100.00% |
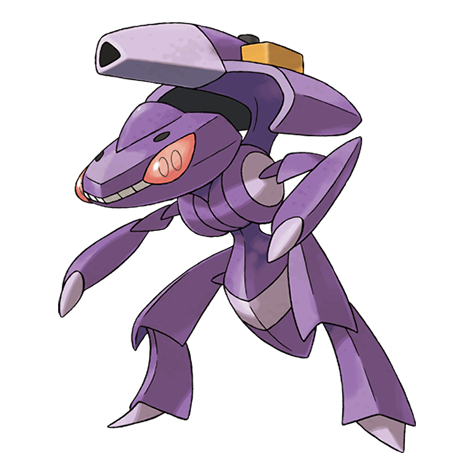
| 43   | Genesect           |    2 |   1.56% | 100.00% |
| 44   | Durant             |    2 |   1.56% |   0.00% |
| 45   | Pidgeot-Mega       |    1 |   0.78% |   0.00% |
| 46   | Pikachu            |    1 |   0.78% | 100.00% |
| 47   | Shaymin-Sky        |    1 |   0.78% | 100.00% |
| 48   | Pidgeot            |    1 |   0.78% |   0.00% |
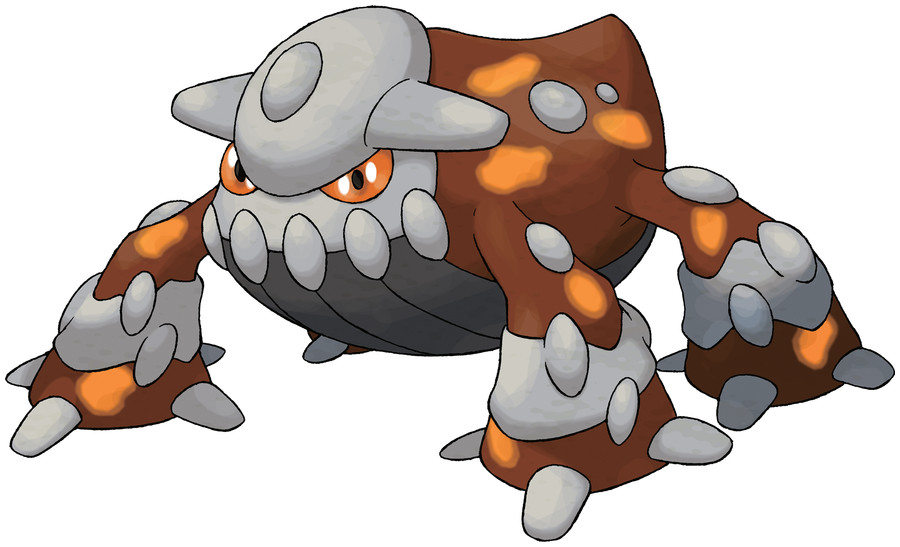
| 49   | Heatran            |    1 |   0.78% |   0.00% |
| 50   | Spiritomb          |    1 |   0.78% | 100.00% |
| 51   | Hoopa-Unbound      |    1 |   0.78% |   0.00% |
| 52   | Aerodactyl-Mega    |    1 |   0.78% |   0.00% |
| 53   | Kyurem-Black       |    1 |   0.78% |   0.00% |
| 54   | Lugia              |    1 |   0.78% |   0.00% |
| 55   | Palkia             |    1 |   0.78% | 100.00% |
| 56   | Giratina-Origin    |    1 |   0.78% |   0.00% |
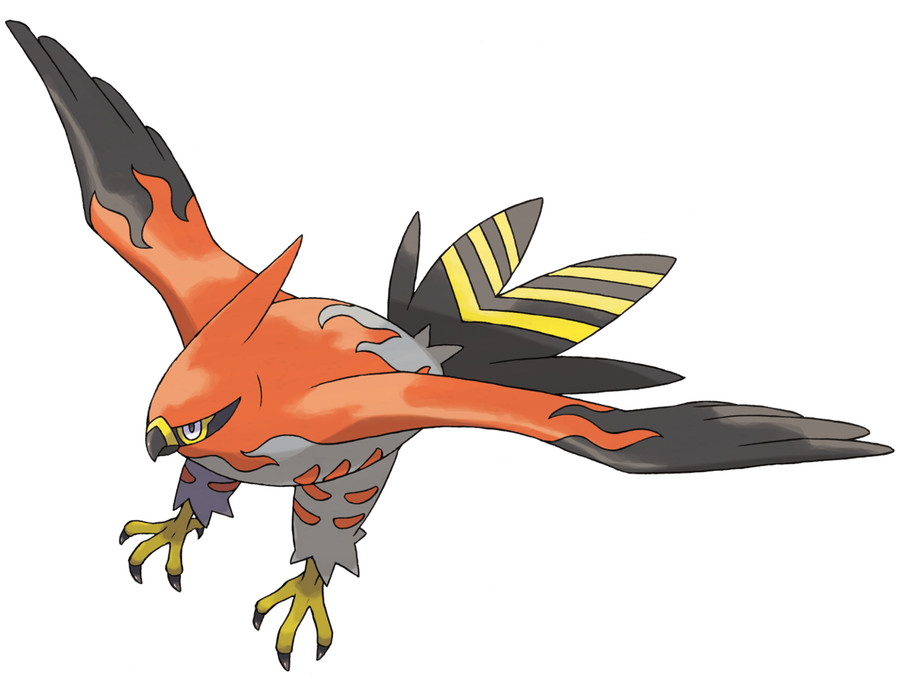
| 57   | Talonflame         |    1 |   0.78% |   0.00% |
| 58   | Steelix-Mega       |    1 |   0.78% |   0.00% |
| 59   | Electrode          |    1 |   0.78% |   0.00% |
| 60   | Drapion            |    1 |   0.78% | 100.00% |

You can check out the HPL Usage Stats thread to see how they compare to the usage stats during our first Hackmons Premier League, a separate tournament that happened from late August to early October of last year.

Here are all the PHPL replays as well that I used to generate this: https://pastebin.com/FJNYB6n0 feel free to tell me if I got something wrong.
 
:ho-oh: GSC PH Resources Hub:lugia:
:suicune:
this meta is still pretty preliminary, so resources may change or become outdated unexpectedly

Viability Rankings
pokemon are ordered by strength throughout the S rank, and are ordered alphabetically in other ranks. the links contain sample sets and short descriptions, though there's lots of set diversity in GSC. some samples even use sets not shown in these links

1744931667138.png

S Rank
S

:mewtwo: Mewtwo
:lugia: Lugia
:aerodactyl: Aerodactyl


S-
:snorlax: Snorlax
:electrode: Electrode


A Rank
A+

:skarmory: Skarmory
:steelix: Steelix
:tyranitar: Tyranitar


A
:ho-oh: Ho-Oh
:jolteon: Jolteon
:misdreavus: Misdreavus
:raikou: Raikou

:rhydon: Rhydon

B Rank
B+

:celebi: Celebi
:gengar: Gengar
:marowak: Marowak
:quagsire: Quagsire


B
:magneton: Magneton
:poliwrath: Poliwrath
:scizor: Scizor

C Rank
:blissey: Blissey
:houndoom: Houndoom
:machamp: Machamp
:slowbro: Slowbro
:zapdos: Zapdos


Sample Teams
i'm very open to sample submissions, anything that can hold vs common threats will do

Triple Explosion Offense by AV Cosmoem
:electrode::mewtwo::mewtwo::mewtwo::aerodactyl::steelix:

Belly Drum Aerodactyl Offense by AV Cosmoem
:electrode::lugia::aerodactyl::mewtwo::mewtwo::snorlax:


Poliwrath Balance by AV Cosmoem
:electrode::aerodactyl::mewtwo::snorlax::lugia::poliwrath:

Misdreavus Stall by AV Cosmoem
:rhydon::lugia::lugia::snorlax::skarmory::misdreavus:
 
Last edited:
:xy/groudon-primal::xy/groudon-primal::xy/slowbro-mega::xy/steelix-mega::xy/drapion::xy/blissey:
(click on sprite for link)
ORAS Assist team. I optimized to the best of my ability, but Assist is complete garbage so decent players/teams will usually win with little to be done by the Assist user. DO NOT USE IN SERIOUS GAMES

Potentially relevant moves bolded. I'm being liberal with what I consider relevant

Assist
Belch
Bestow
Bounce
Chatter
Circle Throw
Copycat
Counter

Covet
Destiny Bond
Detect
Dig
Dive
Dragon Tail
Endure
Feint

Fly
Focus Punch
Follow Me
Helping Hand
Hold Hands
King's Shield
Mat Block
Me First
Metronome
Mimic
Mirror Coat
Mirror Move
Nature Power

Phantom Force
Protect
Rage Powder
Roar
Shadow Force
Sketch
Sky Drop
Sleep Talk
Snatch
Spiky Shield
Struggle
Switcheroo
Thief
Transform
Trick
Whirlwind
____________________________________________________________

:groudon-primal:
Assist is blessed with two very strong priority options (the other one being Gale Wings Chatter). You OHKO basically every boosted Shell Smash Mold Breaker user and only barely miss out on Quiver Dance/Gale Wings Mega Rayquaza and MMX. You also deal ~75 to Mega Gyarados and ~45 to Giratina. In short, your only shortcoming is being itemlocked (i.e. if you Assist into opposing Wonder Guard you're forced into switch). Sleep Talk + Destiny Bond means you can pseudo sleep absorb vs. setup Mold Breaker, though it largely relies on surprise factor. I've never clicked Copycat but it has theoretical uses, for example if the opponent sets hazards or recovers when Groudon's chipped.

:groudon-primal:
2HKOes everything except Giratina and cteam resists. Assist's self-Improofing properties are the most useful on this mon (since Imposter can only really Dragon Tail or get lucky with Assist). Banded Dragon Tail is legit and I've experimented with it even outside of Assist. Feint helps with random Focus Sash or random mons at 10% health or something – surprisingly, it's not useless and I've actually clicked it a few times. You can also Trick Giratina or an annoying WG if directly breaking through is infeasible.

:slowbro-mega:
Could be Ludicolo but running 2 Flying-immune WGs is much safer vs. Gale Wings Rayquaza and Slowbro takes about as little from Primal Groudon's attacks (and much less from U-turn) anyway. Focus Punch hits weakened Gyarados and some misc. mons like Registeel/WG Ferrothorn. Whirlwind is nice for SubPass WGs and hazard chip if you can manage getting them up. Chatter and Copycat are filler; you could probably replace the latter with King's Shield.

:steelix-mega:
Solid short-term check to Mega Rayquaza and hits hard enough with Assist to annoy Primal Groudon and 3HKO MMX. King's Shield + Counter helps with opposing Shadow Tag Groudon/MMX (though Trick from the former kinda screws you over). King's Shield is also just generally nice for scouting misc. things, mindgames vs. opposing HP Gyarados, and Leftovers recovery. Whirlwind helps against SubPass and to accrue hazard chip if you've managed to set any. DO NOT LET THIS DIE IF THEY HAVE INTACT HAZARD SETTERS

:drapion:
Means Gastro + Fissure No Guard 6-0s but it's worth it imo. Trick + Black Sludge lets you win the long game vs. otherwise unbreakable support WGs. Transform allows you to indirectly access recovery, and act as a pseudo-Imposter if you don't want to switch to Imposter for whatever reason (for example, if you want to account for opposing switches). Whirlwind for similar reasons to the above two, and Chatter for opposing Taunt and being overall spammable. You could run Assist to damage opposing Imposter but I find Chatter to be more useful overall. Could maybe be Beedrill but Drapion actually lives STAG Groudon's Thousand Arrows from full and you have an easier time vs. Gale Wings.

:blissey:
Imposter bullies both offensive and defensive mons alike, and greatly expands the progress-making options available to you. Thousand Arrows is on Blissey so everything else can make use of Assist's Improofing properties, while Whirlwind/Transform are generally the most useful non-callable moves when you're not Transformed. Copycat can also theoretically do stuff but you could run Trick instead to have 2 Trick absorbers, as opposed to just Drapion. Leftovers Imposter offers recovery in 1v1s against offensive mons (Mega Gyarados in particular), and is also hugely underrated in general.

____________________________________________________________

Not bothering to explain what wins vs. Assist since almost any coherent team should if played properly.

 
Talonflame Offense (formerly Thundurus Offense): Sample Submission & The improvement of the team
NOTE: I changed Thundy to No Guard in some games to throw opponents off, but I will not include those games.
I only saved some games that I played, but I recorded the statistics of the games even without the replays.
My losses also mainly came from Aerobee :(


Sample Submission Team: https://pokepast.es/5015ca9c8baa7c79

Draft 1: https://pokepast.es/cf27f037c32a4220
This was the first draft of the team. And also my week 1 and 2 PHPL team.
This team has loads of problems:
1. Lack of hazards makes the team unable to progress at all when faced against a WG like MSwampert when MRay faints due to an error play.
2. Weak to Shed Shell/Bulky No Guards.
3. Absolutely awful MU against WG Genesect with the coverage build.
4. No hazard control once they take out Registeel.
5. Lack of pivot on Registeel sucks.


Although I missed 7 DVoids in week 1, the team worked out pretty well in week 2, so I decided to bring it again some time in the future. However, it was clear that I needed some changes.
Games: W1 Excaliju, W2 Iguana
Run: 7 wins; 4 losses

Draft 2: https://pokepast.es/5cc9138289ba345a
It was until week 6 that my opponent this time would have teams that can't hit Thundy + MAud core at all, and MGyarados also bring enough strength to 4-0 five of their six most used teams. This adjusted team has a slightly better MU against MMX and Mray. I also noticed KShield Registeel was mostly abundant, which is where I solved the problem "lack of pivot" on a Magic Bounce user.
Weaknesses of this team include:
1. Weak against Impostor who copies MRay because this team has Earth Power MRay which hits Probopass, a mon which was used by my opponent in the previous weeks; it then also hits my "soft improof" Registeel. But since they had not brought Impostor once, I decided it would be fine to bring EPower Mray.
2. WG Coverage Xerneas 6-0s this team.
3. Lack of hazards makes the team unable to progress at all when faced against a WG like MSwampert when MRay faints due to an error play.
4. Weak to Shed Shell/Bulky No Guards.

Games: W6 Cazenovia
Run: 1 win; 1 loss

Draft 3: https://pokepast.es/8b28961863580ebe
This is when the team started having improvements. Gear Grind on Registeel assists the WG Xerneas MU so I dont get 6-0ed by it once it sets up Shell Smash.
Problems with the team include:
1. Lack of hazards makes the team unable to progress at all when faced against a WG like MSwampert when MRay faints due to an error play.
2. Weak to Shed Shell/Bulky No Guards.

Games: VS Eyeos
Run: 4 wins; 1 loss

Final Draft/Team: https://pokepast.es/5015ca9c8baa7c79
Last and final team. Thundurus to Talonflame due to Talon being faster and also not being weak to No Guard, in exchange for being weak to Rocks. Aegislash over Registeel to support the SubPass due to my team being in need of SubPass to MRay.
Difficulty of this team:
1. Hard to play around Smash MRay and always have to keep Sub up when playing against Impostor Chansey
2. Need to align MB Aegislash when they set up Rocks.

Games: VS Ransei (not exactly the same team but Registeel did nothing anyways), VS Archey, VS Goat Iguana
Run: 56 wins; 4 losses; 1 tie

Thanks to:
Iguana, Ballfire, Archey and Toast for helping me test after PHPL.
Homeless Audino for helping me test this team and other troll teams.
Ransei, Sheep for helping me test during PHPL.
Fish Gaming, Hallward for being my PHPL managers (the best managers I could ever ask for).
lag=bad for always suggesting ideas for this and other teams during PHPL, and suggesting Thundurus when I wanted to use a SubPass WG that is not Deer (Thundy helped the team have excellent synergy, so ty). Thanks for also helping me double-check EVS!!
Aerobee for suggesting changes to my final draft: Rocks MGyara, SubPass Aegi.
And all my PHPL opponents that allowed me to learn how to play this meta better: Iguana, Excaliju, Caze, Glory, Max

I'm done yapping.
Have a good day everyone.
 
Last edited:
Apologies for this taking so long. Since Ransei has already done the replay stats for ORAS and USUM, I took care of the overall replay stats for DPP and SWSH from PHPL.

:arceus: DPP Pure Hackmons :arceus:
Moves and Teammates
Code:
+ ---- + ------------------ + ---- + ------- + ------- +
| Rank | Pokemon            | Use  | Usage % |  Win %  |
+ ---- + ------------------ + ---- + ------- + ------- +
| 1    | Arceus             |   27 |  54.00% |  48.15% |
| 2    | Deoxys-Speed       |   20 |  40.00% |  45.00% |
| 2    | Giratina-Origin    |   20 |  40.00% |  45.00% |
| 4    | Regigigas          |   13 |  26.00% |  61.54% |
| 5    | Gyarados           |   11 |  22.00% |  27.27% |
| 6    | Dialga             |   10 |  20.00% |  60.00% |
| 6    | Deoxys-Attack      |   10 |  20.00% |  50.00% |
| 6    | Latios             |   10 |  20.00% |  50.00% |
| 6    | Aerodactyl         |   10 |  20.00% |  40.00% |
| 10   | Tentacruel         |    9 |  18.00% |  55.56% |
| 10   | Spiritomb          |    9 |  18.00% |  55.56% |
| 12   | Swampert           |    7 |  14.00% |  42.86% |
| 12   | Slaking            |    7 |  14.00% |  28.57% |
| 14   | Palkia             |    6 |  12.00% |  16.67% |
| 15   | Ho-Oh              |    5 |  10.00% |  80.00% |
| 15   | Darkrai            |    5 |  10.00% |  60.00% |
| 17   | Rayquaza           |    4 |   8.00% | 100.00% |
| 17   | Suicune            |    4 |   8.00% |  75.00% |
| 17   | Jirachi            |    4 |   8.00% |  50.00% |
| 17   | Skarmory           |    4 |   8.00% |  50.00% |
| 17   | Latias             |    4 |   8.00% |  50.00% |
| 17   | Giratina           |    4 |   8.00% |  25.00% |
| 17   | Weavile            |    4 |   8.00% |  25.00% |
| 17   | Kyogre             |    4 |   8.00% |   0.00% |
| 25   | Lugia              |    3 |   6.00% | 100.00% |
| 25   | Hariyama           |    3 |   6.00% |  66.67% |
| 27   | Groudon            |    2 |   4.00% | 100.00% |
| 27   | Probopass          |    2 |   4.00% | 100.00% |
| 27   | Arceus-Fire        |    2 |   4.00% |  50.00% |
| 27   | Mewtwo             |    2 |   4.00% |  50.00% |
| 27   | Regice             |    2 |   4.00% |  50.00% |
| 27   | Blissey            |    2 |   4.00% |   0.00% |
| 27   | Infernape          |    2 |   4.00% |   0.00% |
| 34   | Manaphy            |    1 |   2.00% | 100.00% |
| 34   | Regirock           |    1 |   2.00% | 100.00% |
| 34   | Empoleon           |    1 |   2.00% | 100.00% |
| 34   | Shuckle            |    1 |   2.00% | 100.00% |
| 34   | Umbreon            |    1 |   2.00% | 100.00% |
| 34   | Blaziken           |    1 |   2.00% | 100.00% |
| 34   | Raikou             |    1 |   2.00% | 100.00% |
| 34   | Electrode          |    1 |   2.00% |   0.00% |
| 34   | Drapion            |    1 |   2.00% |   0.00% |
| 34   | Gengar             |    1 |   2.00% |   0.00% |
| 34   | Registeel          |    1 |   2.00% |   0.00% |
| 34   | Dustox             |    1 |   2.00% |   0.00% |
| 34   | Arceus-Ghost       |    1 |   2.00% |   0.00% |
| 34   | Tyranitar          |    1 |   2.00% |   0.00% |
  • Missing 2 Pokemon from HIGHLORD.
  • Missing 3 Pokemon from TUGGIN.
  • Missing 4 Pokemon from HIGHLORD.
  • Missing 4 Pokemon from TUGGIN.
  • Missing 2 Pokemon from GHASTLYPIXIE.
  • Missing 1 Pokemon from HIGHLORD.
  • Missing 2 Pokemon from BLAHPY.
  • Missing 1 Pokemon from TUGGIN.
  • Missing 4 Pokemon from BLAHPY.
  • Missing 2 Pokemon from HIGHLORD.
  • Missing 1 Pokemon from BLAHPY.
  • Missing 3 Pokemon from HIGHLORD.
  • Missing 2 Pokemon from GHASTLYPIXIE.
  • Missing 2 Pokemon from GHASTLYPIXIE.
  • Missing 2 Pokemon from TUGGIN.
  • Missing 2 Pokemon from HIGHLORD.
  • Missing 1 Pokemon from TUGGIN.
  • Missing 2 Pokemon from GHASTLYPIXIE.
  • Missing 1 Pokemon from BIG TONY 2014.
  • Missing 1 Pokemon from GHASTLYPIXIE.
  • Missing 1 Pokemon from HIGHLORD.
  • Missing 1 Pokemon from HIGHLORD.
  • Missing 1 Pokemon from BLAHPY.
  • Missing 1 Pokemon from TUGGIN.
  • Missing 3 Pokemon from NTOTHEN.
  • Missing 2 Pokemon from BLAHPY.
  • Missing 1 Pokemon from HIGHLORD.
  • Missing 1 Pokemon from BLAHPY.
  • Missing 2 Pokemon from HIGHLORD.
https://pokepast.es/3a0c8dbb7b98fdcb


:eternatus-eternamax: SWSH Pure Hackmons :eternatus-eternamax:
Moves and Teammates
Code:
+ ---- + ------------------ + ---- + ------- + ------- +
| Rank | Pokemon            | Use  | Usage % |  Win %  |
+ ---- + ------------------ + ---- + ------- + ------- +
| 1    | Eternatus-Eternamax |   32 | 200.00% |  50.00% |
| 2    | Zacian-Crowned     |   18 | 112.50% |  50.00% |
| 3    | Regieleki          |    9 |  56.25% |  44.44% |
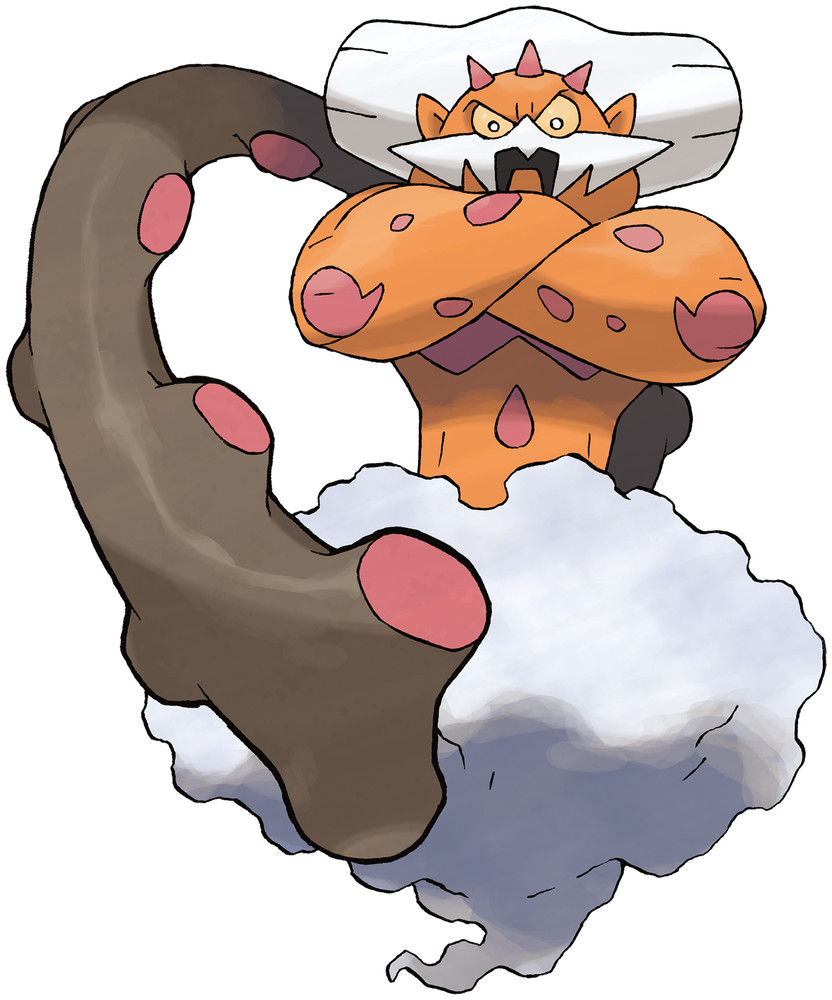
| 4    | Landorus-Therian   |    7 |  43.75% |  57.14% |
| 4    | Cramorant-Gorging  |    7 |  43.75% |  57.14% |
| 6    | Spiritomb          |    6 |  37.50% |  33.33% |
| 7    | Giratina           |    5 |  31.25% |  40.00% |
| 8    | Calyrex-Shadow     |    3 |  18.75% |  66.67% |
| 8    | Yveltal            |    3 |  18.75% |  33.33% |
| 10   | Regigigas          |    2 |  12.50% | 100.00% |
| 10   | Obstagoon          |    2 |  12.50% |   0.00% |
| 12   | Indeedee           |    1 |   6.25% | 100.00% |
| 12   | Drifblim           |    1 |   6.25% | 100.00% |
 
Heya! SpamtonZZZSpamton here, here to end a battle that has continued to rage for quite a long time now. In both Generation 6 and 7, the role of "best STag Mon" has been generally debated between two mons, Primal Groudon, and Mega Rayquaza. Now, I don't know enough about the Gen 6 meta to comment on the best STag Mon for that generation, but I do have enough information to give a definitive conclusion to this debate.
Very interesting beginning from the USUM post. I would argue ORAS staggers then; the debate of best Stag user would be between 4 types of Mons. Scarf Pdon, Slaking, Lugia/Arceus/Psong MMX (on the correct team comp), and Scarf MMX.

I'm just going to save time for anyone who is too lazy to read the whole thing. Stag Slak is, in my opinion, the best Stag user.

Advantages of Stag Slaking

  • Low Kick OHKOs MGyarados; it beats, in my opinion, the best HP user in the meta.
  • Encore can be used on SubPass mons like Xerneas to give your setup mons like Pdon a free setup.
  • Fake Out + Ice Shard with Life Orb OHKOs MRay no matter what happens.
  • Fake Out + Extreme Speed with Silk Scarf can also beat No Guard Deoxys, non-bulk MMX, and also bulk MMX with chip.
  • Spikes/Rocks give your team hazards to threaten their sweepers and WG users.
  • Fake Speed also beats Smash MRay without a Substitute up.
Advantages of PSong + Encore Lugia/Arceus/Psong MMX
  • Encore + Goggles can be paired together on Lugia and Arceus, so if the opp has Spore, you hard one of these mons, and it's ggs for the Spore Mon if they do NOT have Shed Shell. This strat can also be used on non-Shed WGs, especially SubPass Xerneas.
  • The biggest problem is, in order for this strat to work, your Mold user is usually something defensive like Knock Arc/Yveltal to knock the opponent's Shed Shell, and basically your whole team will then need to rely on Stag to win.
  • Stag Low Kick MMX threatens MGyara and also a few other WG Normals, while this set can also be paired with Goggles + Encore to do the same job as Lugia and Arc.
  • Not really that consistent of a strategy, as it limits your building choices.
Advantages of using Scarf Stag Pdon (the better Stag Pdon set)
  • Trick beats WGs that even dare to click Defog/Arom in front of it.
  • VCreate OHKOs Non-Bulky MMX, and KOes Bulk MMX after small chip
  • You can randomly hard swap into some things and can switch out of Pursuit after KOing sometimes, which is huge for a Stag Mon.
  • Spikes allow your team to threaten their sweepers and WGs.
  • TArrows also beats the rare SubPass MManec, and it is also the only Stag user to force Bounce Aegislash for an OHKO.
  • It can also run PSong with Encore to throw people off guard, although this isn't recommended.
Advantages of using Scarf Stag MMX (the better Stag MMX set)
  • Ice Punch always OHKOs MRay. Non-Shed Shell MRay can't stay in against this set, guaranteed, unless they click Smash. One QD might not be enough, as you bear the risk of needing to risk losing your Mold user to a 252 Speed MMX.
  • Surf always OHKOs Pdon without -SpA nature without needing a single spA investment.
  • DAscent deals with offensive MMX sets.
  • Similar to Low Kick Slak, Close Combat always OHKOs MGyarados. With Defense/HP investment, you always tank a Sucker Punch, allowing MMX to revenge kill against the fish.
Honorable Mentions: Regigigas, I counted it as the same mon as Slaking, as they offer basically the same thing.

RANKINGS IN MY OPINION:
1. Slaking, Regigigas
2. Scarf Pdon
3. Scarf MMX
4. The PTrappers
Just because it is ranked 3/4, it doesn't mean it's bad. After all, I chose the best 4 I could think of.


Credits: Thanks Aerobee for helping.
.
 
Last edited:
new ADV samples are here!!!

:ninjask::slaking::slaking::slaking::groudon::latios: - standard sun latios
style: hyper offense
description: this is a very standard hyper offense team. the gameplan is simple: pass speed and potentially substitute to one of your slakings, click belly drum, and sweep. with 3 slakings, you can use them to break both early and late game. a full hp groudon can survive any hit from slaking at +6 and KO back with superpower. latios rounds out the team as a kyogre switch-in with a sacred fire that disables (deals 50%+ to) slaking.

:slaking::ninjask::slaking::slaking::kyogre::gengar: - water spout gengar
style: hyper offense
description: this team utilizes lead band slaking to serve as pressure against opposing lead ninjask as well as a revenge killer later on. ninjask is placed in the back to pass speed and substitute later on. it can also use its fast spore to check pokemon without an active lum berry. kyogre checks pokemon who give belly drum slaking a hard time like groudon, impish slaking, and gengar. its unboosted surf disables slaking as well, making it great against other hyper offense. imprison gengar is one of the best slaking answers in the tier. most slaking can't touch it, and water spout disables slaking as long as gengar is at full hp.

:mewtwo::slaking::slaking::kyogre::deoxys::skarmory: - skarm + double psychic
style: offense
description: this team's gameplan is to prevent spikes with lead taunt mewtwo, then set up its own spikes with skarmory. then force switches with whirlwind or strong attacks. deoxys normal is chosen over deoxys attack because normal form can survive some crucial hits like choice band jolly slaking extreme speed and modest latios dragon claw, which are important for this team.

:aerodactyl::slaking::slaking::tyranitar::groudon::latios: - sand boom spam
style: balance
description: this team utilizes spikes and sand to disable slakings quickly while keeping momentum. spikes-immune pokemon get targeted by explosion and the many ghost moves. choice band slaking can clean after spikes, sand, and explosion has weakened the enemy.

in case it wasn't clear, all current samples will be removed and replaced with these

--------------------------

the VR is also updated! mostly, pokemon were shuffled within ranks, but some pokemon moved ranks:
:wobbuffet: B -> C
:banette: B -> C
:starmie: UR -> D
 
:slaking: how to beat slaking :slaking:

whenever adv gets any traction it always gets shut down with the usual claim of "just run 6 slak" or "slak ohkoes everything at +6 it's unplayable zomg where's my stall!?!!" there are a lot of ways to beat slak, pre- and post-setup. i decided to make a comprehensive list of all slak answers in order to dispel misinformation. also, there's increasing interest in adv recently, so i'd like to make this kind of a guide as well for new players

so what are we dealing with here? there are 2 main slak sets. both are very good and you need to be ready for both of them. of course there are other slak sets you can use, but there is a huge gap between these 2 sets and other sets, to the point where you're really only gonna see these

:rs/slaking:
Slaking @ Lum Berry
Ability: No Ability
EVs: 248 HP / 252 Atk / 252 Def / 252 SpD / 252 Spe
Jolly / Adamant / Impish Nature
- Belly Drum
- Extreme Speed
- Superpower
- Spore / Shadow Ball / Hidden Power [Ghost] / Recover

everyone knows bd slak. but few know exactly what the pieces here are doing. the lack of understanding regarding bd slak is usually why people get swept, because they aren't able to identify their counterplay options or because their team has a lack of options. so ultimately, bd slak needs to be broken down to its purest form
  • belly drum: you may wonder why slak runs bd and not another boosting move like dd or sd. after all, shouldn't you want to preserve your HP? there are a few simple reasons for that. first off, there is no general post-setup speed control like impostor, prankster, or sash. once slak clicks bd, it almost always forces a sack. +6 is a very important range for it, as that's the range where espeed has a 75% chance to ohko other slak. in addition, most of the options that can beat bd will also beat sd or dd, making their use redundant. finally, bd's loss of HP isn't a big deal – slak is very tanky because all fighting moves are physical in adv, and most teams have multiple slak, meaning it's expendable
  • extreme speed: espeed is a swiss army knife. you can use it to sweep, of course, but that probably won't be your primary use of it. instead, it can be used to revenge kill, chip, and clean up endgames. it's also one of your best tools against post-setup slak, not because it's the most effective option, but because it's very easy to add slak to your team. slak's espeed is also one of your best options to combat speed pass, because it's one of the only pokemon that can punish protect > bp line from jask and it can also revenge kill speed boosted pokemon
  • superpower: this move's main use comes at +0 because it has a 75% chance to disable slak (term for dealing 50% or more to slak, because it disables bd for the game). it also ohkoes every non-resist in the game at +6, except for don. despite this fact, you really want to avoid using superpower unless necessary, since going to +5 atk allows some bulkier pokemon to survive espeed (notably slak) and going to -1 def makes opposing espeed do way more damage to you
  • spore: slak is a great spore user because it can turn mons into setup fodder without needing outside support. generally you should spam this earlygame to delete lums, giving you bd chances down the road. spore slak is the biggest reason that mons run lum, even if they have talk, because the free turn against slak can be used to disable it or set up. this is why it's better to use spore earlygame, so you can use other spore sweepers later on to set up on pokemon whose lum has been eaten already
  • shadow ball: this move's main purpose is to prevent gar from switching in, but it has use outside of that. it picks up an important 2hko on latios at +0 and also improves the lugia matchup. the main reason sball isn't the primary option in this slot is that gar can beat sball variants anyway, so the only relevant pokemon this move beats post-setup is banette. its utility pre-setup is usually what lands it the slot
  • hidden power ghost: this move is able to beat imprison sball gar, one of the biggest problems for slak. so why not run this all the time? the power drop seems miniscule, but it means latios only has a 35.5% chance to be 2hkoed and lugia is 5hkoed, making the matchup against those two a lot worse. it also does nothing to help with any other variant of gar, and gar can always run hp ghost imprison if it wants, so hp ghost slak isn't even a reliable imprison gar answer
  • recover: not a common slot by any means; even i barely run this. nonetheless, it's a powerful option on hyper offense to combat sand and spikes chip, and it also lets slak try again if it gets disabled. most importantly, since no espeed in the game ohkoes slak at +0, it can recover on opposing espeed and deny that as an answer. the reason it's barely run is because not having spore or ghost coverage makes slak's pre-setup utility really lacking. this is why you can only really run it on hyper offense, because you want other slak with pre-setup utility
  • lum berry: why run this item over lefties? if slak's HP gets cut into by bd so much, shouldn't lefties be better to heal the damage off? lefties slak certainly isn't unviable, since it can deal with spikes much better and is harder to disable. however, i didn't list it because without lum, slak is terrible against opposing spore and will find much less opportunity to set up. it also doesn't help much with post-bd in the majority of situations, since post-bd slak answers are about constantly dealing damage to slak. lefties is too slow to heal it off fast enough. lefties talk slak is a really bad idea because you lose the priority from espeed when asleep, making you much less threatening
  • 248 HP: i add 248 HP to everything to minimize chip, but it's especially important on slak to bd twice and be left at 1 HP
  • jolly: jolly is the best slak nature because it outspeeds other slak, letting you not only spore them first but also ohko them with +6 espeed before they can act. it also ensures that slak will outspeed timid kyogre, making its matchup against kyogre a lot better than other natures. jolly is a surefire way that you will have at least some post-bd slak counterplay, making it the easiest nature to add
  • adamant: adamant hits some very important ranges, such as guaranteeing an ohko on slak and having a 68.8% chance to ohko don, both with espeed. this improves your matchup against counterplay based on tanking hits. however, being outsped by jolly slak and timid kyogre is really bad and makes ada slak an inconsistent sweeper. it also means that ada slak can never revenge kill post-setup jolly slak, making it a difficult add, but worthwhile with proper support
  • impish: an often overlooked nature on slak, impish is a surprisingly strong choice. it turns +6 slak espeed from a 75% chance to ohko to a 25% chance, letting it reliably survive and ko back with superpower. it also guarantees slak will not be disabled by don superpower and it also only has a 25% chance to be disabled by opposing slak superpower. this nature combines counterplay against opposing slak and don with answering post-setup slak. however, like adamant, it still retains its speed tier issues, and it also does poorly into opposing adamant slak. the natures are somewhat like a triangle where jolly > ada > impish > jolly
this is about everything you need to know about bd slak. it generally has ways to work around its counterplay, but it can only choose one or two options to answer at a time, and will lose to the rest. this means you must pack a variety of slak answers, ensuring you have ways to beat each variant. luckily, many of the forms of counterplay can answer multiple slak variants at a time, making this not too difficult in practice

:rs/slaking:
Slaking @ Choice Band
Ability: No Ability
EVs: 248 HP / 252 Atk / 252 Def / 252 SpD / 252 Spe
Jolly / Adamant / Impish Nature
- Extreme Speed
- Superpower
- Shadow Ball
- Explosion

band slak is arguably just as good as bd slak. one of the huge benefits of band slak is that it can ignore all counterplay based around disabling it – without bd, there's nothing to disable. instead, band slak acts as a catalyst for consistency, as its espeed is one of the best tools to stop sweeps in the game. it's really difficult to prep for this mon, since the stuff it loses to will usually lose to bd. often your gameplan against band slak is to spore it or boom on it. some moves also require further explanation
  • shadow ball: unlike on bd, hidden power ghost is a huge downgrade compared to sball, which is why it's not listed. jolly slak is unable to 2hko lugia and only has a 37.5% chance to ohko gar, and ada slak fails to ohko banette and still only has a 17.6% chance to 2hko lugia. it also just isn't a good imprison gar answer in general because it has no spore counterplay.
  • explosion: do not use trick in this slot. you are never going to click trick when you can ko everything, and boom ohkoes literally every non-ghost in the game. also the majority of slak counterplay still works even after trick
that's about everything you need to know about slak. with this information, we now have a reference for counterplay. so what can we do?

:gengar: gengar :gengar:

:rs/gengar:
Gengar @ Leftovers / Lum Berry
Ability: Levitate
EVs: 248 HP / 252 Atk / 252 Def / 252 SpA / 252 SpD / 252 Spe
Hasty Nature
- Imprison / Encore
- Water Spout / Eruption
- Shadow Ball / Hidden Power [Ghost] / ...
- Spore

gar is basically the best slak answer you could ask for. slak has no way to stop a healthy gar from ending its sweep. keeping gar unrevealed and baiting slak into an early bd is one of the best ways to deal with it. the most important way to use gar is to play safe. i see lots of people take needless risks with gar, like switching it directly into slak or clicking imprison on a post-setup slak whose 4th move is unrevealed. gar should never switch into anything, ever. it is vitally important to keep it at max HP so that rain water spout / sun eruption can disable slak. note that anything that disables slak will also ko it post-setup. this means when you are facing a post-setup slak as gar, your priority is to ko it with water spout or eruption. only click imprison or encore if there's no weather up or gar isn't at max hp. also, make sure not to run two elements with different colors on the same set

:slaking: extreme speed :slaking:

opposing extreme speed, either from other slak or from faster pokemon, are able to chip slak down post-setup and eventually revenge kill it. this strategy will usually take several pokemon, as no espeed in the game can ko slak post-setup. however, this is one of the most consistent methods to prevent slak sweeps, as there's nothing slak can do to stop it. note that this strategy won't work if slak has any speed boosts and recover slak is able to outplay opposing espeed as well. in the case of the latter, if recover has been revealed, you can punish it with superpower if you're willing to hard call it

:kyogre: kyogre :kyogre:

:rs/kyogre:
Kyogre @ Lum Berry
Ability: Drizzle
EVs: 248 HP / 252 Def / 252 SpA / 252 SpD / 252 Spe
Timid Nature
IVs: 0 Atk
- Tail Glow
- Surf
- Ice Beam / Thunder
- Spore / Thunder / Sleep Talk

kyogre is one of the only pokemon that can disable slak at +0 with surf. this lets it trade with slak freely, completely controlling the pace of the game against hyper offense teams which tend to load up on slaks. it's also very difficult to tank across the board, which often forces opponents to sacrifice their slak in order to get damage on kyogre. just don't get too careless against slak, as band slak can lure kyogre in and boom on it, which is usually a bad trade for the kyogre

:tyranitar: passive chip :tyranitar:

passive chip – typically in the form of sand and spikes – is one of the most effective ways to pressure slak, although it's a bit exclusive sometimes. sand and spikes massively debilitate both pre-setup slak (wants to have high hp to use its neutral bulk and still threaten bd) and post-setup slak (sweep is put on a timer). it's worth noting that running sand means using ttar, who is able to force lots of extra chip on post-setup slak with protect and espeed. although it's slower than slak, slak is unable to ko it with espeed, meaning ttar will always be able to get an espeed off

:latios: sun latios :latios:

:rs/latios:
Latios (M) @ Soul Dew
Ability: Levitate
EVs: 248 HP / 252 Def / 252 SpA / 252 SpD / 252 Spe
Timid Nature
IVs: 0 Atk
- Tail Glow
- Dragon Claw
- Sacred Fire
- Sleep Talk

lati sfire in sun is another move that disables slak at +0. in addition, sfire's 50% chance to burn makes it extremely risky to send slak without a lum in front of it, even if sun isn't up. the best answer to sun, kyogre, is naturally countered by lati. this means that, similar to kyogre, sun lati is incredible against hyper offense. the main problem with lati as a slak answer is that sball + espeed does huge damage to it, meaning it can't trade as freely as kyogre. if it can find an opportunity to tg it's much better vs slak since it can ohko with +2 sfire. note that lati is able to perform a similar strat in rain with surf, but it's noticeably worse than sun

:electrode: explosion :electrode:

most pokemon can't disable slak with superpower, but almost every pokemon can disable it with boom. even blissey can disable slak with boom after a round of spikes. it's recommended to put boom on any pokemon that invites slak in without being able to punish it. the trade will always be worth it, as you're often sacrificing a pokemon who is less of a threat to their team than slak is to your team

:aerodactyl: aerodactyl :aerodactyl:

:rs/aerodactyl:
Aerodactyl @ Lum Berry
Ability: Pressure
EVs: 248 HP / 252 Atk / 252 Def / 252 SpD / 252 Spe
Impish Nature
- Rock Blast
- Spikes
- Spore
- Haze / Explosion

one of the biggest reasons to run lead aero is the fact that it can survive post-setup slak espeed and click haze or boom, ending its sweep. it is able to outspeed most of the meta even without a speed boosting nature, allowing it to run impish to make sure ada slak only has a 12.5% chance to ohko aero with espeed. with its immunity to sand and spikes, it's incredibly good at dodging chip. this makes aero a surprisingly consistent backbone against post-setup slak

:groudon: groudon :groudon:

:rs/groudon:

Groudon @ Lum Berry
Ability: Drought
EVs: 248 HP / 252 Atk / 252 Def / 252 SpD / 252 Spe
Impish Nature
- Dragon Dance
- Superpower
- Shadow Ball
- Explosion

there's a lot of different ways to run don, but dd is the most common because its speed is actually kinda bad in this meta. the main draw of don is that you can survive +6 slak espeed and superpower, which no other mon in the game can do. unfortunately this mon requires support and luck to work. don only reliably works against jolly slak, as it has a 62.5% chance to be ohkoed by boosted ada slak espeed and its superpower will never disable impish slak. don has to set spikes or have sand up, as otherwise its superpower only has a 48.4% chance to disable slak, forcing it to explode. it also must keep spikes off its side, as even one round of spikes gives jolly slak a 87.5% chance to ohko don. because of this, don's primary purpose is not to beat post-setup slak, but instead to set sun and use its high neutral bulk to set up and break early. however, it does have the option to be a slak check when necessary

:banette: banette :banette:

:rs/banette:
Banette @ Spell Tag / ...
Ability: Insomnia
EVs: 248 HP / 252 Atk / 252 Def / 252 SpD / 252 Spe
Jolly / Adamant Nature
- Shadow Ball
- Explosion
- Dragon Dance / Imprison
- Baton Pass

bane is a weird mon because it has bad stats, so it has to run odd sets like this to do something. its usage comes down to its very lucky traits: the combination of a ghost type and insomnia, which let it hard wall some of the common slak sets. this gives you free opportunities to dd, but you can also sub or even heal bell. the set listed here is not the only set you should use, it's just the one i like the most. the green elements should only be ran in the lead and the red elements should only be ran in the back


:incineroar: intimidate :incineroar:

your pickings for intim are pretty slim (the best one is tauros...) but it can be used to lower slak's attack on a sack. as mentioned earlier, slak uses bd because it misses some crucial kills when it's not fully boosted. intim causes it to miss some crucial kos, most notably failing to ohko other slak with espeed at +5. if you use intim, then check to make sure that the pokemon on your team who you want to follow up the intim user with can actually survive a hit at +5

:omastar: omastar :omastar:

:rs/omastar:
Omastar @ Mystic Water
Ability: Swift Swim
EVs: 248 HP / 252 Def / 252 SpA / 252 SpD / 252 Spe
Modest Nature
IVs: 0 Atk
- Tail Glow
- Surf
- Spore / Thunder
- Sleep Talk / Substitute

oma is one of the most effective post-setup slak answers, as it's able to survive even an ada slak espeed with ease and ko back with surf. its surf also disables slak at +0 thanks to modest and mystic water, making it a threat vs slak at all points in the game. however, because it cannot run lum, it's risky to switch it in on slak. it also only really fits on offense with kyogre, as it needs rain support and also lots of spore users to create setup opportunities for it. this makes it a pretty exclusive pokemon, despite its effectiveness

:lugia: lugia :lugia:

:rs/lugia:
Lugia @ Leftovers
Ability: Pressure
EVs: 248 HP / 252 Atk / 252 Def / 252 SpA / 252 SpD / 252 Spe
Jolly / Timid Nature
IVs: 0 Atk
- Dragon Dance / Psychic
- Drill Peck / Sacred Fire / Toxic
- Recover
- Taunt

lugia is useless against post-setup slak, but it's very effective against pre-setup slak. this is because it carries a fast taunt and the bulk to stomach any of slak's unboosted moves, including sball. with pressure and recover's massive 32 pp, lugia can easily stall slak. it can also pressure slak not to switch out with either setup or status. lugia's main issue is having no post-setup utility and also being difficult to fit on teams, since it's a pretty abstract answer to the stuff it's answering. again, make sure not to use differently colored elements on the same set

:skarmory: skarmory :skarmory:

:rs/skarmory:
Skarmory @ Lum Berry
Ability: Sturdy
EVs: 248 HP / 252 Def / 252 SpD / 252 Spe
Bold Nature
IVs: 0 Atk
- Spikes
- Recover
- Whirlwind
- Sleep Talk

skarm is another mon that is mainly used to answer pre-setup slak. in this case, skarm specifically wants to answer band users, including band slak. it's one of the best switchins to band slak in the whole game, tanking everything easily except for boom, which is a bad trade for the slak. skarm is one of the best spike setters as well, because band slak will be forced to switch out and lose momentum. despite being ohkoed by superpower at +6, skarm has some utility against post-setup slak, as it forces slak to lower its atk/def and become much easier to answer. similar to aero, its immunity to spikes and sand makes it amazing at dodging chip. its only issue is that it invites lots of threatening pokemon in for free, like kyogre and lati

:slaking: conclusion :slaking:

there's tons of counterplay to slak out there, way more than meets the eye. there's so many ways to approach a seemingly impossible task, which makes teambuilding in adv really comfortable once you get the hang of it. i hope you learned something new from this post :altaria-mega:
 
Last edited:
Personal ORAS PH VR, please don't cancel me. They are just my opinion. :psycry:

S Rank
S
:giratina:

Giratina ......................... Prankster (S), Magic Bounce (A), Poison Heal (B+)

:rayquaza-mega:
Rayquaza-Mega ........... Mold Breaker (S), Gale Wings (A+), Aerilate (C), Shadow Tag (C-)

:gyarados-mega:

Gyarados-Mega ............ Huge Power (S), Poison Heal (B)

:mewtwo-mega-x:

Mewtwo-Mega-X .......... Huge Power (S), Shadow Tag (A), Wonder Guard (A-), Mold Breaker (B), No Guard (C), Poison Heal (C-)

S-
:groudon-primal:

Groudon-Primal ............ Shell Smash Mold Breaker (S-), Choice Band Mold Breaker (A), Shadow Tag (A), Wonder Guard (B), Huge Power (C)

A Rank

A+
:chansey:

Chansey ........................ Imposter (A+)

:kyogre-primal:

Kyogre-Primal ................ Wonder Guard (A+), Magic Bounce (C-)

:xerneas:

Xerneas .......................... Wonder Guard (A+), Mold Breaker (B), Poison Heal (C-), Pixilate (C-), Magic Bounce (C-), Huge Power (C-)

A
:audino-mega:

Audino-Mega ................ Wonder Guard (A)

:slaking:

Slaking .......................... Shadow Tag (A), Wonder Guard (A-), Huge Power (B+)

:regigigas:

Regigigas ....................... Shadow Tag (A), Huge Power (B+), Poison Heal (C-)

:diancie-mega:

Diancie-Mega ................ Pixilate (A), Mold Breaker (A-), Huge Power (B-)

:ferrothorn:

Ferrothorn ..................... Wonder Guard (A), Magic Bounce (C-)

:arceus:

Arceus ........................... Wonder Guard (A), Shadow Tag (B), Mold Breaker (B)

:aegislash:

Aegislash ....................... Magic Bounce (A)

:beedrill-mega:

Beedrill-Mega ................ Wonder Guard (A), No Guard (C-)

A-

:sableye-mega:

Sableye-Mega .............. Wonder Guard (A-)

:blissey:

Blissey .......................... Imposter (A-), Wonder Guard (B+)

:deoxys-speed:

Deoxys-Speed .............. Wonder Guard (A-), No Guard (B)


Reminder that Pokemon after this point are ranked alphabetically

B Rank

B+
:escavalier:
Escavalier ..................... Wonder Guard (B+)

:gengar-mega:

Gengar-Mega ............... Wonder Guard (B+), No Guard (B-), Mold Breaker (B-)

:ludicolo:

Ludicolo ........................ Wonder Guard (B+)

:metagross-mega:

Metagross-Mega ............ Prankster (B+)

:scizor-mega:

Scizor-Mega ................. Wonder Guard (B+)

:swampert-mega:

Swampert-Mega ........... Wonder Guard (B+)


B

:dialga:

Dialga ............................ Mold Breaker (B), Magic Bounce (C+)

:latios-mega:

Latios-Mega ................... Protean (B), Mold Breaker (B-)

:registeel:

Registeel ....................... Magic Bounce (B), Prankster (C)

:yveltal:

Yveltal ............................ Poison Heal (B), Magic Bounce (B-), Magic Guard (C+), Huge Power (C)


B-

:deoxys-attack:

Deoxys-Attack .............. Wonder Guard (B-), Huge Power (C-), No Guard (C-)

:gyarados:

Gyarados ....................... Wonder Guard (B-), Magic Bounce (C+), No Guard (C-)

heatran.jpg

Heatran ............................... Magic Bounce (B-)

:lugia:

Lugia ................................ Shadow Tag (B-), No Guard (C-)

:manectric-mega:

Manectric-Mega ............ Wonder Guard (B-)
:garchomp-mega:

Meloetta ........................... Baton Pass Wonder Guard (B-)

:mewtwo-mega-y:

Mewtwo-Mega-Y ............ No Guard (B-), Protean (C+), Shadow Tag (C), Wonder Guard (C), Mold Breaker (C), Huge Power (C-)

talonflame.jpg

Talonflame ..................... Wonder Guard (B-)

:thundurus:

Thundurus ..................... Wonder Guard (B-)

:tyranitar-mega:

Tyranitar-Mega ............... Poison Heal (B-), Huge Power (B-), Mold Breaker (B-)

C Rank
C+
:aegislash:

Aerodactyl-Mega ............. No Guard (C+), Shadow Tag (C-)

649.png

Genesect ............................ Wonder Guard (C+)

landorus-incarnate.jpg

Landorus- Incarnate ................... Wonder Guard (C+)

:lucario-mega:

Lucario-Mega................... Wonder Guard (C+)

:rotom-fan:

Rotom-Fan ...................... Wonder Guard (C+)

:arceus:

Skuntank ......................... Wonder Guard (C+)


C
:abomasnow-mega:

Abomasnow-Mega .......... Refrigerate (C)

:cresselia:

Cresselia .......................... Wonder Guard (C)

:zekrom:

Zekrom ............................ Mold Breaker (C)

:gardevoir-mega:

Gardevoir-Mega .............. Wonder Guard (C)

:kyurem-black:

Kyurem-Black................... Refrigerate (C)

:landorus-therian:

Probopass ....................... Magic Bounce (C)

:garchomp-mega:

Umbreon .......................... Poison Heal (C), Wonder Guard (C-)

:rotom-fan:

Zapdos ............................ Wonder Guard (C), Poison Heal (C-)

C-
:garchomp-mega:

Garchomp-Mega ............. Mold Breaker (C-)

:garchomp-mega:

Giratina-Origin ................. Mold Breaker (C-)

:ho-oh:

Ho-Oh .............................. Magic Guard (C-), Wonder Guard (C-)
 
Last edited:
I’m not sure who is in charge of sample teams for BDSP Pure Hackmons, so I’m just going to leave this here for now. I’m pretty happy with how this Balance team has turned out. Yes, I said Balance, and yes, this is for BDSP Pure Hackmons. I’ve been trying to prove that BDSP Pure Hackmons is a far better meta than PHPL has shown it to be, and I hope this team will help me with that goal. Onto the team…


:arceus-fairy:
Magic Bounce Arceus-Fairy is your dedicated ComaPhaze check, blocking Whirlwind / Roar attempts as well as Dragon Tail. It also doubles as a special setup sweeper. Pixie Plate will block TrickScarf attempts, and Moonblast is chosen over Judgment because you trade like 7.2 power (after Pixie Plate) for a 30% chance to drop SpA by one, which can be huge.

:arceus-flying:
This is your ComaPhazer. As a Flying-type, Arceus-Flying will get STAB on Chatter and will be immune to Sticky Web trying to slow it down. I don’t think much needs to be said here.

:arceus-steel:
Circle Throw Arceus-Steel handles most special sweepers, and physical sweepers are not common enough right now to require a dedicated answer. You really cannot afford to have a Scarf tricked onto this, so Iron Plate is given to block TrickScarf as well as to boost Iron Head.

:arceus-water:
Arceus-Water functions as both a lead and a burn spreader (in case there are any physical threats). Splash Plate is here to boost the power of Scald and to block TrickScarf attempts.

:mewtwo:
This is the team’s main sweeper, so you will need to be careful with how you use Mewtwo. Life Orb Stored Power after a Shell Smash is a guaranteed OHKO on Arceus, and Moonblast can take care of Arceus-Dark, Spiritomb, and more gimmicky Mewtwo checks such as Latias. A lot of people seem to not be running Comatose as much nowadays, so Spore is an excellent tool for getting your sweep ready.

:spiritomb:
The second Wonder Guard, and the dedicated hazard remover. There is only really one GOOD Ghost-type, that being Arceus-Ghost, so Rapid Spin + Foul Play will cover it. Also, if Mewtwo is threatening a sweep, Sucker Punch may be able to stop it. Dread Plate is here to block TrickScarf Arceus forms as well as boost Foul Play + Sucker Punch damage.

I don’t have many replays, but I did try to get at least a couple. This team has changed a lot and games are VERY hard to come by, so this is pretty much all I have.

Arceus-Fairy sweep
https://replay.pokemonshowdown.com/gen8bdspou-2387357279

Electra loses to her own team (I passed Archeyyy this team)
https://replay.pokemonshowdown.com/gen8bdspou-2387362484

Old version of this team with Swellow, but it probably does the best job demonstrating how this team functions
https://replay.pokemonshowdown.com/gen8bdspou-2380731000

Guide for how to teambuild defensively in BDSP Pure Hackmons coming soon.
 

Arceus
BDSP Pure Hackmons Teambuilding Guide
Mewtwo


I have been obsessed with BDSP Pure Hackmons recently, and I’m hoping that if I provide resources for this meta, then I can convince people to give it a second chance after what happened in PHPL. I find this meta to certainly have its problems, but with the right strategies in the teambuilder the metagame becomes quite a bit less focused around spamming Taunt and Quiver Dance until you can sweep. This guide will focus mainly on more defensive teambuilding, although options will be given for more offensive teams. Hyper Offense is still great in this meta, but with this guide I’m hoping I can show that defensive teams can most certainly work in this meta.

YOUR TEAM WILL NEED​

  • General answer(s) for non-Mewtwo special sweepers
  • Mewtwo answer(s)
  • ComaPhaze answer
  • Hazard remover
  • ComaPhazer
  • At least one sweeper of your own
Note: Two Wonder Guards are also nice to have versus No Guard, but if you are fine with gambling or if you have Arceus-Ice, you’ll probably be fine.

General Special Wall(s)​

First off, you will want at least one general answer for special attackers. From my experience, you have two main choices- Arceus-Steel for most teams, and Blissey if you like taking things more slowly. There are other options, of course, and I will go over some of them in this section.

Arceus-Steel

Arceus-Steel @ Iron Plate
Ability: Comatose
EVs: 252 HP / 252 Atk / 252 Def / 252 SpD / 252 Spe
Jolly Nature
IVs: 30 HP
- Iron Head / Rapid Spin
- Circle Throw / Dragon Tail / Clear Smog
- Nuzzle / Foul Play
- Strength Sap

Arceus-Steel is generally going to be your best option for anything that doesn't have specific coverage for it, and can even take on mons that DO have specific coverage for it. Just look at these calcs-

:arceus-electric: +5 252 SpA Zap Plate Arceus-Electric Discharge vs. 252 HP 30 IVs / 252 SpD Arceus-Steel: 361-426 (81.4 - 96.1%) -- guaranteed 2HKO
:arceus-fairy: +6 252 SpA Pixie Plate Arceus-Fairy Moonblast vs. 252 HP 30 IVs / 252 SpD Arceus-Steel on a critical hit: 367-432 (82.8 - 97.5%) -- guaranteed 2HKO
:arceus-fire: +1 252 SpA Arceus-Fire Fire Blast vs. 252 HP 30 IVs / 252 SpD Arceus-Steel: 356-420 (80.3 - 94.8%) -- guaranteed 2HKO
:arceus-flying:+6 252 SpA Sky Plate Arceus-Flying Aeroblast vs. 252 HP 30 IVs / 252 SpD Arceus-Steel on a critical hit: 386-455 (87.1 - 102.7%) -- 18.8% chance to OHKO
:arceus-grass: +6 252 SpA Meadow Plate Arceus-Grass Grass Knot (120 BP) vs. 252 HP 30 IVs / 252 SpD Arceus-Steel: 309-363 (69.7 - 81.9%) -- guaranteed 2HKO
:arceus-ground: +2 252 SpA Arceus-Ground Earth Power vs. 252 HP 30 IVs / 252 SpD Arceus-Steel: 390-458 (88 - 103.3%) -- 25% chance to OHKO
:arceus-ice: +6 252 SpA Icicle Plate Arceus-Ice Ice Beam vs. 252 HP 30 IVs / 252 SpD Arceus-Steel on a critical hit: 348-409 (78.5 - 92.3%) -- guaranteed 2HKO
:arceus-water: +3 252 SpA Splash Plate Arceus-Water Origin Pulse vs. 252 HP 30 IVs / 252 SpD Arceus-Steel: 355-418 (80.1 - 94.3%) -- guaranteed 2HKO

And for some more obscure mons-
:dialga: +4 252+ SpA Draco Plate Dialga Spacial Rend vs. 252 HP 30 IVs / 252 SpD Arceus-Steel on a critical hit: 374-441 (84.4 - 99.5%) -- guaranteed 2HKO
:kyogre: +1 252+ SpA Kyogre Origin Pulse vs. 252 HP 30 IVs / 252 SpD Arceus-Steel in Rain: 345-406 (77.8 - 91.6%) -- guaranteed 2HKO
:palkia: +4 252+ SpA Lustrous Orb Palkia Spacial Rend vs. 252 HP 30 IVs / 252 SpD Arceus-Steel on a critical hit: 374-441 (84.4 - 99.5%) -- guaranteed 2HKO

However, with Arceus-Steel being one of the better special walls right now, I would not be surprised if people start preparing more for it- Arceus-Grass may start dropping Taunt for Flamethrower / Fire Blast, Arceus-Fairy may drop Strength Sap for Earth Power / Judgment-Ground, and so forth. You will probably want backup for Arceus-Steel, and you have a few options for this:
:blissey: Blissey is a second option, being able to take on almost anything Arceus-Steel cannot (save for really strong Fighting coverage).
:ho-oh: Ho-Oh may be an option if you have good hazard removal, being able to take on Fire / Grass, special Ghost / special Fighting, and Fairy / Ground coverage.

Or you could be a little silly and try something new, such as:
:crobat: Crobat (takes on Fairy / Ground and Grass coverage)
:latias: Latias (takes on Fire / Grass coverage and can form your Mewtwo check alongside Foul Play Arceus-Steel).

If your team really struggles against certain Arceus forms (in particular Arceus-Fairy, Arceus-Fire, Arceus-Grass, Arceus-Ice, sweeper Arceus-Steel, and so forth), you could swap out Arceus-Steel with:


Heatran

Heatran @ Flame Plate / Iron Plate / Dread Plate / Mental Herb
Ability: Comatose
EVs: 252 HP / 252 Atk / 252 Def / 252 SpA / 252 SpD / 252 Spe
Jolly / Timid Nature
IVs: 30 HP
- Lava Plume / Iron Head / Rapid Spin
- Circle Throw / Dragon Tail / Clear Smog
- Nuzzle / Foul Play / Lava Plume
- Strength Sap

Heatran serves essentially the same role as Arceus-Steel. The only difference between the two is that Heatran does better versus STAB-only Arceus-Fairy, Arceus-Fire, Arceus-Grass, Arceus-Ice, and sweeper Arceus-Steel, while Arceus-Steel does better versus Arceus-Water, Ground coverage, and has a bit more bulk than Heatran.


Blissey

Blissey @ Toxic Plate / Mental Herb / Dread Plate
Ability: Comatose
EVs: 252 HP / 252 Def / 252 SpA / 252 SpD / 252 Spe
Calm Nature
IVs: 0 Atk
- Foul Play / Final Gambit
- Clear Smog / Circle Throw
- Nuzzle
- Strength Sap / Soft-Boiled / Final Gambit

Blissey can also be your main special wall, and can double as your general Mewtwo check. I don't think I really need to prove how bulky Blissey is to you all, but having a backup special wall in case Blissey somehow goes down may be nice, especially if you are running stall.

Other options​


Chansey

Chansey @ Eviolite
Ability: Comatose / Wonder Guard
EVs: 252 HP / 252 Def / 252 SpA / 252 SpD / 252 Spe
Calm Nature
IVs: 0 Atk
- Foul Play / Final Gambit / Magic Coat
- Clear Smog / Circle Throw
- Nuzzle / Magic Coat
- Strength Sap / Soft-Boiled / Final Gambit
Chansey is going to work almost exactly the same as Blissey, except now you are terrified of TrickScarf and can't run Mental Herb. I don't really think much else needs to be said here.

Giratina

Giratina @ Griseous Orb
Ability: Comatose / Neutralizing Gas
EVs: 252 HP / 252 Def / 252 SpA / 252 SpD / 252 Spe
Calm Nature
IVs: 0 Atk
- Hex / Foul Play / Mirror Coat / Counter
- Dragon Tail / Clear Smog
- Nuzzle
- Strength Sap
Giratina is back, and is able to take on mons such as Arceus-Electric, Arceus-Fire, Arceus-Grass, Arceus-Poison, Arceus-Water, and so forth. You WILL need a backup for Giratina, however- Giratina will not be able to check Arceus-Dark, Arceus-Fairy, special Arceus-Ghost, Arceus-Ice, and so forth. Blissey or potentially Ho-Oh would work well as backups.
Ho-Oh

Ho-Oh @ Flame Plate / Leftovers
Ability: Comatose / Magic Guard
EVs: 252 HP / 252 Def / 252 SpA / 252 SpD / 252 Spe
Calm Nature
IVs: 0 Atk
- Nuzzle / Lava Plume / Rapid Spin
- Circle Throw / Dragon Tail / Clear Smog
- Lava Plume / Foul Play / Chatter
- Strength Sap
Ho-Oh is also an option, but you will have to keep hazards away like the plague. Ho-Oh would honestly be a great option if we still had Heavy-Duty Boots, but for some reason they were cut even though Sword / Shield has JUST introduced them.

Mewtwo Answer(s)​

Every team (and I mean EVERY team) needs to be able to answer Mewtwo, preferably after it has clicked Shell Smash. You could go for an overall check, such as Blissey, but most teams will need two checks. You will need to be able to answer most if not all of the following moves-
  • Aura Sphere
  • Dark Pulse (rare)
  • Fire Blast (not super common)
  • Focus Blast (rare)
  • Moonblast
  • Stored Power (140 base power)
  • Psystrike (rare)
You can pretty much always assume Mewtwo will run two attacking moves, and that one will most likely be Stored Power / occasionally Psystrike. If you need ideas for Mewtwo-check cores, I will provide some below:

:arceus-psychic: Arceus-Psychic + Arceus-Steel :arceus-steel:
:arceus-psychic: Arceus-Psychic + Spiritomb :spiritomb:
:arceus-psychic: Arceus-Psychic + Tyranitar :tyranitar:
:arceus-steel: Arceus-Steel + Giratina :giratina:
:arceus-steel: Arceus-Steel + Latias :latias:
:arceus-steel: Arceus-Steel + Spiritomb :spiritomb:
:blissey: Blissey + Spiritomb :spiritomb:

ComaPhaze Answer​

Just like in Sword / Shield, ComaPhaze is here and can be very dominant in the right scenario. Most of the time, your team will need a mon with Magic Bounce in order to answer this, and there is a "best" option for most teams-

Arceus-Fairy

Arceus-Fairy @ Pixie Plate / Earth Plate
Ability: Magic Bounce
EVs: 252 HP / 252 Def / 252 SpA / 252 SpD / 252 Spe
Timid Nature
IVs: 30 HP / 0 Atk
- Moonblast
- Taunt / Earth Power / Judgment-Ground
- Strength Sap
- Quiver Dance

You already bounce back Whirlwind / Roar with Magic Bounce, but what about Circle Throw / Dragon Tail? Arceus-Fairy not only blocks Dragon Tail, but resists Circle Throw, and is not weak to Chatter (the most common filler move on ComaPhazers). If you are especially concerned about Circle Throw, you could instead run Arceus-Ghost and adjust the coverage for it, but generally Arceus-Fairy is going to be your best option. This set in particular can double as your win condition / special setup sweeper.

Spiritomb

Spiritomb @ Dread Plate
Ability: Magic Bounce
EVs: 252 HP / 252 Atk / 252 Def / 252 SpD / 176 Spe
Careful Nature
IVs: 30 HP
- Foul Play
- Rapid Spin
- Sucker Punch / Magic Coat / Nuzzle
- Strength Sap

Spiritomb is another option I have tried recently. It's niche is being able to role-compress like nothing else, serving as not just your Magic Bouncer, but also a partial Mewtwo answer and your hazard remover. 176 Speed EVs will cause it to outspeed Arceus when Spiritomb is at +3. Will this ever be important? Probably not, but you might as well- games can be won via tiny optimizations like these.

Hazard Remover​

The first thing you need to note about hazard removal in BDSP Pure Hackmons is that Defog is NOT a reliable option, so you almost always will need to run Rapid Spin. Wonder Guard is uncommon in BDSP Pure Hackmons, and there are only two or three relevant Ghost-types (Arceus-Ghost and Spiritomb, plus maybe Giratina). However, you can run Foul Play in order to check physical attackers (such as Arceus-Ghost and Regigigas), and so you can hit those annoying Ghost-types trying to block your Rapid Spin.


Spiritomb

Spiritomb @ Dread Plate
Ability: Wonder Guard / Magic Bounce
EVs: 252 HP / 252 Atk / 252 Def / 252 SpD / 176 Spe
Careful Nature
IVs: 30 HP
- Foul Play / Knock Off
- Rapid Spin
- Sucker Punch / Gastro Acid / Toxic Spikes
- Strength Sap

This is what I usually run for hazard removal. Foul Play will OHKO Mewtwo if it tries to Shell Smash on you, and with Wonder Guard you can block annoying Chatter attempts from ComaPhazers. Knock Off is another option, if you want to remove Mewtwo's Life Orb or anything's Lum Berry. I honestly don't know why Spiritomb is not ranked- I would honestly rank this thing in A- if it was up to me.


Other Options​

:arceus-dark: Arceus-Dark is another option on certain teams, although I have personally never used it before.
:arceus-steel: Arceus-Steel can also serve as your general special wall and as part of a Mewtwo-check core.
:drapion: Drapion is generally just going to be a worse Skuntank. It IS an option, I suppose, but why use it?
:skuntank: Skuntank might be able to do something, also being able to kind of take on Moonblast / Aura Sphere / Fire Blast from Mewtwo (takes 98.5% max from +2 Fire Blast), and can run Black Sludge, but in my opinion Black Sludge is VERY risky to run when trying to punish TrickScarf. I'm mostly speculating here, but maybe someone could do something with Skuntank.
:tyranitar: Tyranitar is going to be generally worse than Spiritomb, but is definitely an option if your team can make good use of it, being able to take on Stored Power or Psystrike / Fire Blast Mewtwo.

ComaPhazer​

ComaPhaze is rather underutilized in the current BDSP Pure Hackmons metagame. The sets will for the most part be the same- Sleep Talk, Whirlwind, and either Chatter / Solar Beam or Focus Punch / Shadow Force. Other options for moves include Copycat, Mirror Move, Dig, Fly, Dive, and so forth. You could run Circle Throw / Dragon Tail, but you will need to gamble when it comes to most Wonder Guards or a Fairy-type / Ghost-type. I'll provide some example sets below.


Arceus-Fighting

Arceus-Fighting @ Choice Scarf
Ability: Comatose
EVs: 252 HP / 252 Atk / 252 Def / 252 SpD / 252 Spe
Jolly Nature
IVs: 30 HP
- Focus Punch
- Shadow Force
- Sleep Talk
- Whirlwind

Gets STAB on Focus Punch, in case there is an annoying Arceus-Steel or Blissey you want to remove. Will have a hard time versus Arceus-Fairy and Arceus-Flying, however.

Arceus-Flying

Arceus-Flying @ Choice Scarf
Ability: Comatose
EVs: 252 HP / 252 Def / 252 SpA / 252 SpD / 252 Spe
Timid Nature
IVs: 30 HP / 0 Atk
- Chatter
- Solar Beam
- Sleep Talk
- Whirlwind

Arceus-Flying gets STAB on Chatter and won't have its speed dropped by Sticky Web. Trying to phaze out Arceus-Electric will be risky, however.

Other Options​

:arceus-ghost: Arceus-Ghost gets STAB on Shadow Force. Maybe someone could do something with that.
:arceus-rock: Arceus-Rock is an older pick, and is common on the sample teams.
:arceus-steel: Arceus-Steel (in my opinion) is kind of wasted if given a ComaPhaze set, but it is an option.
:deoxys-speed: Deoxys-Speed holding a Choice Scarf will outspeed even +2 Arceus, and it resists Stored Power or Psystrike / Aura Sphere or Focus Blast from Mewtwo.
:latias: Latias can be a part of a Mewtwo-check core, taking on Stored Power or Psystrike / Aura Sphere or Fire Blast.

Sweeper​

This is what BDSP Pure Hackmons is well-known for. There are two main kinds of sweepers: Special Quiver Dancers, and Shell Smashers (which can be Physical, Mixed, or Special).

Any Arceus form

Literally any Arceus form (Arceus) @ STAB Plate
Ability: Neutralizing Gas
EVs: 252 HP / 252 Def / 252 SpA / 252 SpD / 252 Spe
Timid Nature
IVs: 30 HP
- Judgment / non-Judgment STAB special move
- Taunt / Coverage / Spore
- Strength Sap / Coverage
- Quiver Dance

You will need to fill in some parts to make this set legal, but this is otherwise the most standard and important set in the metagame.


Arceus-Ghost

Arceus-Ghost @ Spooky Plate / Lum Berry
Ability: Neutralizing Gas
EVs: 252 HP / 252 Atk / 252 Def / 252 SpD / 252 Spe
Jolly Nature
IVs: 30 HP
- Shadow Force
- Low Kick
- Shell Smash
- Spore / Taunt / Strength Sap

Arceus-Ghost runs Shadow Force due to how few Normal-types there are in the game, and even if you hard-switch in a Normal-type after Arceus-Ghost uses Shadow Force, they will just Low Kick you next turn. One hilarious thing about this set is its hard counters- Swellow, Staraptor, and even Jigglypuff can almost completely stop this thing, with Swellow taking 97.2% maximum from a +6 Low Kick on a critical hit, and being able to phaze it out with Dragon Tail. I have personally run Swellow and Staraptor on a couple of my teams, and they do their job well.

Mewtwo

Mewtwo @ Life Orb / Lum Berry
Ability: Neutralizing Gas
EVs: 252 HP / 252 Def / 252 SpA / 252 SpD / 252 Spe
Timid Nature
IVs: 30 HP / 0 Atk
- Stored Power / Psystrike
- Fire Blast / Moonblast / Aura Sphere / Focus Blast
- Shell Smash
- Spore / Taunt

Mewtwo is the biggest threat in the entire BDSP Pure Hackmons metagame, being able to OHKO most Arceus forms after a Shell Smash with a Life Orb-boosted Stored Power.

Regigigas

Regigigas @ Life Orb / Lum Berry
Ability: Neutralizing Gas
EVs: 252 HP / 252 Atk / 252 Def / 252 SpD / 252 Spe
Adamant Nature
IVs: 30 HP
- Extreme Speed
- Precipice Blades
- Shell Smash
- Spore / Taunt

Regigigas is better than Slaking for once, since special attackers are so common. However, a +2 Extreme Speed is only dealing 62.1% maximum to an Arceus form, and they will just click Strength Sap on you. Getting a Shell Smash off will also be hard, since Arceus will always outspeed you, and many Arceus sets carry Taunt. Maybe someone better than I am could make Regigigas work.

Other Options / Gimmicks​

TrickScarf used to be very important, but in my opinion it has fell off. Most mons that are scared of TrickScarf can easily just run a Plate to block it from any Arceus form.
Options:
:arceus-ghost: Arceus-Ghost uses TrickScarf on one of the sample teams.
:arceus-ice: Arceus-Ice with No Guard can probably run TrickScarf.
:deoxys-speed: Deoxys-Speed holding a Choice Scarf will outspeed +2 Arceus. Someone can probably do something with that.
:mewtwo: Mewtwo could maybe serve as a TrickScarf mon that answers TrickScarf, since it naturally outspeeds Arceus.

No Guard is here, and can be run to get a surprise KO on non-Neutralizing Gas mons. Gastro Acid is now used to eliminate Neutralizing Gas, rather than Wonder Guard.
Options:
:arceus-grass: Arceus-Grass sacrifices some Sheer Cold accuracy for a Spore immunity.
:arceus-ice: Arceus-Ice gets a 30% accurate Sheer Cold under Neutralizing Gas, and is immune to Sheer Cold itself.
:deoxys-speed: Deoxys-Speed is VERY gimmicky, but it could maybe work if used well and on the right team. I'm thinking it could be a suicide hazard-setting lead that severely punishes any attempts to bounce back hazards through sending out a Magic Bounce mon.
:mewtwo: Mewtwo hasn't been used as a No Guard in a while, but it probably still works.

Shadow Tag can try to take advantage of non-Neutralizing Gas mons, but I have personally never seen it, so I don't know what to recommend for it.
Options:
:arceus: An Arceus form can probably run Shadow Tag.

Swellow tries to hard-check Arceus-Ghost, taking advantage of it running Low Kick and Shadow Force. It also naturally outspeeds Arceus, with a base Speed stat of 130 (compared to 120, which Arceus has).
Other options:
:jigglypuff:
Jigglypuff is only really going to be used on a meme team. It could be VERY funny, however.
:staraptor:
Staraptor is Swellow but slightly worse.
:swellow: Swelllow is Swellow.

Weather can be run, since Drizzle / Drought / Sand Stream / Snow Warning activate if a mon with Neutralizing Gas switches out.
Options for Rain (I have never seen anyone run Sun before, but it could probably work):
:arceus-water: Arceus-Water hits a bit less hard and takes special hits a very slight bit less well than Kyogre.
:kyogre: Kyogre is less physically bulky and much slower than Arceus-Water, but hits harder.
:palkia: Palkia is a Dragon-type and is faster than Kyogre, but is still slower than Arceus.

Wonder Guard exists, and is nice to have against a No Guard or an annoying Comatose mon spamming Chatter.
Options:
:arceus-electric: Arceus-Electric tends to run a sweeping set, with Gastro Acid / Discharge / Quiver Dance / Strength Sap or Taunt.
:arceus-steel: Arceus-Steel does Arceus-Steel things, just with Wonder Guard instead of Comatose.
:spiritomb: Spiritomb is only weak to Fairy and can help against certain Mewtwo sets.

Closing thoughts​

For now, BDSP Pure Hackmons seems to have quite a bit more potential than many give it credit for. In my honest opinion, PHPL gave it a bad showing, with Iguana's post here on the forums against it and Hendrit winning her match with Fullpass. With this post and any others I make, I'm hoping to show that BDSP Pure Hackmons is worth another try.
-electra​
 
Last edited:
since the tour died here's the teams i used/passed in ust 2, not posting unused teams because they're probably bad

:diancie-mega::giratina::rayquaza-mega::arceus-ice::scizor-mega::aegislash: - Game 1, Game 2

basic ass mold diancie balance, mold diancie was an idea i wanted to try for a while now and i think i pulled it off decently here, unfortunately cheese lost ray to toxic damage and diancie to stag g1 and lost tina to a mgyara 50/50 g2

:groudon-primal::gyarados-mega::arceus-ghost::swampert-mega::giratina::slaking: - Game

another balance, not much to say tbh aside from fusion bolt mgyara being a funny set, got cteamed by mmx spam unfortunately

:electrode::mewtwo::mewtwo::mewtwo::aerodactyl::steelix: - Game

slightly modified sample not much to say threw super hard in game though

:kyogre::gengar::slaking::slaking::slaking::skarmory: - Game 1, Game 2

basic offense team, ogre lead beats jask with thunder and everything else with surf, played this set off of pretty much 0 sleep which is why i clicked thunder t1 vs aero but i still won somehow, adv is the best ph gen btw and it's not even close

:deoxys::slaking::slaking::groudon::latios::gengar: - Game

don't use this it sucks

:diancie-mega::talonflame::ferrothorn::gyarados-mega::giratina::chansey: - Game

another basic balance not much to say other than talonflame's here to cteam mmx spam in case koen brought that again, unfortunately guysmash loaded into opposing ferrothorn which is a really bad mu so he couldn't really make progress

:xerneas::rayquaza-mega::rayquaza-mega::scizor-mega::aegislash::chansey: - Game

more balance woohoo!!! xern evs are for mmx gear grind iirc but i'm not sure, koen brought max speed gyara so guysmash lost this game since metagross could just subpass for free (ik guysmash used this again but i can't be bothered to write about that game tbh)

:deoxys-speed::arceus::arceus::giratina::palkia::latios: - Game

team name and nicknames are only because i wanted to submit this to samples, didn't end up doing it because i don't wanna get more replays, copied the structure from highlord, lefties on deo is prob better but i was afraid of losing to trick stuff so i ran mail, ended up playing bad because of multiple deo-speeds tripping me up and making me paranoid of taunt, could've played better but oh well

:deoxys-speed::landorus-therian::giratina::sableye-mega::regigigas::palkia: - Game

overall solid team not much to say, misplayed in game by sacking regigigas but the mu wasn't great anyways

btw don't ask me what ust is i don't really know koen just invited me ngl
 

arceus.gif
Personal BDSP Pure Hackmons Viability Rankings
mewtwo.gif

Yay, two BDSP Pure Hackmons posts in one day!
Main abilities are in Bold, while niche / uncommon abilities are in Italics. Everything is subject to change, and all placements are based on my perception of how well the Pokemon does or would do in the current metagame. The tier named "Banished" is specifically for Pokemon that are currently on the official BDSP Pure Hackmons Viability Rankings, and I am suggesting that they should be removed. Please note that I am strongly biased towards more defensive Pokemon and teamstyles. If you are interested in learning BDSP Pure Hackmons, I would recommend that you do your own research and make your own conclusions about the metagame.

My viability rankings​

S Rank​

S
:arceus-fairy: Arceus-Fairy (Magic Bounce, Neutralizing Gas)
:arceus-steel: Arceus-Steel (Comatose, Neutralizing Gas, Wonder Guard)
:mewtwo: Mewtwo (Neutralizing Gas, No Guard, Wonder Guard)

A Rank​

A+
:arceus-dark: Arceus-Dark (Neutralizing Gas, Comatose)
:arceus-electric: Arceus-Electric (Neutralizing Gas, Wonder Guard)
:arceus-flying: Arceus-Flying (Comatose, Neutralizing Gas)
:arceus-ice: Arceus-Ice (Neutralizing Gas, No Guard)

A
:arceus-fire: Arceus-Fire (Neutralizing Gas, Drought)
:arceus-ghost: Arceus-Ghost (Neutralizing Gas, Comatose, Wonder Guard)
:arceus-ground: Arceus-Ground (Neutralizing Gas)
:spiritomb: Spiritomb (Magic Bounce, Wonder Guard)

A-
:arceus: Arceus (Neutralizing Gas)
:arceus-fighting: Arceus-Fighting (Neutralizing Gas, Comatose)
:arceus-grass: Arceus-Grass (Neutralizing Gas, No Guard)
:heatran: Heatran (Comatose)

B Rank​

B+
:arceus-poison: Arceus-Poison (Neutralizing Gas)
:arceus-water: Arceus-Water (Neutralizing Gas, Drizzle, Wonder Guard)
:jirachi: Jirachi (Comatose, Neutralizing Gas)

B
:arceus-psychic: Arceus-Psychic (Comatose, Neutralizing Gas, Wonder Guard)
:blissey: Blissey (Comatose, Innards Out, Neutralizing Gas, Wonder Guard)
:giratina: Giratina (Comatose, Neutralizing Gas, Innards Out)
:lugia: Lugia (Comatose, Neutralizing Gas)

B-
:arceus-dragon: Arceus-Dragon (Neutralizing Gas)
:arceus-rock: Arceus-Rock (Comatose, Neutralizing Gas)
:ho-oh: Ho-Oh (Comatose, Magic Guard)
:regigigas: Regigigas (Neutralizing Gas)

C Rank​

C+
:deoxys-speed: Deoxys-Speed (Neutralizing Gas, No Guard)
:kyogre: Kyogre (Drizzle, Neutralizing Gas, Wonder Guard)
:palkia: Palkia (Neutralizing Gas, Drizzle, Wonder Guard)

C
:chansey: Chansey (Comatose, Innards Out, Neutralizing Gas, Wonder Guard)
:deoxys-attack: Deoxys-Attack (Neutralizing Gas)
:dialga: Dialga (Neutralizing Gas)
:groudon: Groudon (Neutralizing Gas)
:shaymin-sky: Shaymin-Sky (Neutralizing Gas)
:tyranitar: Tyranitar (Neutralizing Gas, Wonder Guard)

C-
:arceus-bug: Arceus-Bug (Neutralizing Gas)
:slaking: Slaking (Neutralizing Gas)

D Rank​

D
:gliscor: Gliscor (Comatose, Neutralizing Gas)
:staraptor: Staraptor (Comatose)
:swellow: Swellow (Comatose)

BANISHED​

:aerodactyl: Aerodactyl
:articuno: Articuno

Changes from the official viability rankings​

Rises​

:arceus-dark: Arceus-Dark: A to A+
:arceus-fairy: Arceus-Fairy: A to S
:arceus-fighting: Arceus-Fighting: B to A-
:arceus-fire: Arceus-Fire: A- to A
:arceus-ground: Arceus-Ground: A- to A
:arceus-ice: Arceus-Ice: A- to A+
:arceus-psychic: Arceus-Psychic:
:arceus-steel: Arceus-Steel: A+ to S
:arceus-water: Arceus-Water: B- to B
:blissey: Blissey: C- to B
:deoxys-speed: Deoxys-Speed: D to C+
:dialga: Dialga: D to C
:giratina: Giratina: C+ to B
:groudon: Groudon: C- to C
:heatran: Heatran: C+ to A-
:ho-oh: Ho-Oh: C- to B-
:jirachi: Jirachi: B to B+
:kyogre: Kyogre: C- to C+
:lugia: Lugia: B- to B
:palkia: Palkia: D to C+

Newly Ranked​

:chansey: Chansey: Starting in C
:spiritomb: Spiritomb: Starting in A
:staraptor: Staraptor: Starting in D
:swellow: Swellow: Starting in D
:tyranitar: Tyranitar: Starting in C

Drops​

:arceus-bug: Arceus-Bug: C to C-
:arceus-dragon: Arceus-Dragon: C+ to C-
:arceus-flying: Arceus-Flying: S to A+
:arceus-ghost: Arceus-Ghost: S to A
:arceus-grass: Arceus-Grass: A+ to A-
:arceus-poison: Arceus-Poison: A to B+
:arceus-rock: Arceus-Rock: B+ to B-
:regigigas: Regigigas: A- to B-
:slaking: Slaking: C+ to C-

Unranked​

:aerodactyl: Aerodactyl: Originally in D
:articuno: Articuno: Originally in D

Unchanged​

:arceus: Arceus: Still in A-
:arceus-electric: Arceus-Electric: Still in A+
:deoxys-attack: Deoxys-Attack: Still in C
:gliscor: Gliscor: Still in D
:mewtwo: Mewtwo: Still in S
:shaymin-sky: Shaymin-Sky: Still in C

Current viability rankings​


S Rank
S

493.png
Arceus-Flying
493.png
Arceus-Ghost
150.png
Mewtwo

A Rank
A+
493.png
Arceus-Electric
493.png
Arceus-Grass
493.png
Arceus-Steel

A
493.png
Arceus-Dark
493.png
Arceus-Fairy
493.png
Arceus-Poison

A-
493.png
Arceus
493.png
Arceus-Fire
493.png
Arceus-Ground
493.png
Arceus-Ice
486.png
Regigigas

B Rank
B+
493.png
Arceus-Dragon
493.png
Arceus-Rock

B
493.png
Arceus-Fighting
493.png
Arceus-Water
385.png
Jirachi

B-
249.png
Lugia
289.png
Slaking

C Rank
C+
493.png
Arceus-Psychic
487.png
Giratina
485.png
Heatran
C
493.png
Arceus-Bug
386-a.png
Deoxys-Attack
492-s.png
Shaymin-Sky

C-
242.png
Blissey
383.png
Groudon
250.png
Ho-Oh
382.png
Kyogre
D Rank
D
142.png
Aerodactyl
144.png
Articuno
386-s.png
Deoxys-Speed
483.png
Dialga
472.png
Gliscor
484.png
Palkia
 
since the tour died here's the teams i used/passed in ust 2, not posting unused teams because they're probably bad

:diancie-mega::giratina::rayquaza-mega::arceus-ice::scizor-mega::aegislash: - Game 1, Game 2

basic ass mold diancie balance, mold diancie was an idea i wanted to try for a while now and i think i pulled it off decently here, unfortunately cheese lost ray to toxic damage and diancie to stag g1 and lost tina to a mgyara 50/50 g2

:groudon-primal::gyarados-mega::arceus-ghost::swampert-mega::giratina::slaking: - Game

another balance, not much to say tbh aside from fusion bolt mgyara being a funny set, got cteamed by mmx spam unfortunately

:electrode::mewtwo::mewtwo::mewtwo::aerodactyl::steelix: - Game

slightly modified sample not much to say threw super hard in game though

:kyogre::gengar::slaking::slaking::slaking::skarmory: - Game 1, Game 2

basic offense team, ogre lead beats jask with thunder and everything else with surf, played this set off of pretty much 0 sleep which is why i clicked thunder t1 vs aero but i still won somehow, adv is the best ph gen btw and it's not even close

:deoxys::slaking::slaking::groudon::latios::gengar: - Game

don't use this it sucks

:diancie-mega::talonflame::ferrothorn::gyarados-mega::giratina::chansey: - Game

another basic balance not much to say other than talonflame's here to cteam mmx spam in case koen brought that again, unfortunately guysmash loaded into opposing ferrothorn which is a really bad mu so he couldn't really make progress

:xerneas::rayquaza-mega::rayquaza-mega::scizor-mega::aegislash::chansey: - Game

more balance woohoo!!! xern evs are for mmx gear grind iirc but i'm not sure, koen brought max speed gyara so guysmash lost this game since metagross could just subpass for free (ik guysmash used this again but i can't be bothered to write about that game tbh)

:deoxys-speed::arceus::arceus::giratina::palkia::latios: - Game

team name and nicknames are only because i wanted to submit this to samples, didn't end up doing it because i don't wanna get more replays, copied the structure from highlord, lefties on deo is prob better but i was afraid of losing to trick stuff so i ran mail, ended up playing bad because of multiple deo-speeds tripping me up and making me paranoid of taunt, could've played better but oh well

:deoxys-speed::landorus-therian::giratina::sableye-mega::regigigas::palkia: - Game

overall solid team not much to say, misplayed in game by sacking regigigas but the mu wasn't great anyways

btw don't ask me what ust is i don't really know koen just invited me ngl
Here's some weird teams that I used.
I don't understand 2 of my teams but whatever. (You can probably see it)
Stole 1 team from Glory in PHPL (stall) and 1 in HPL (HO)

Team Dump

For games, just check Toast's replays. (And no, I'm not the one setting Mod Chat in games)
Also, Meloetta is underrated as a SubPass user. It's faster than the fastest Gyara (244) with 176 Speed and people generally don't run tools like BUp on offensive threats like MMX.

Meloetta appreciation post in ORAS PH disguised as a Team Dump.
 
Last edited:
I got bored.
PlateQuaza
:Rayquaza-Mega: :Groudon-Primal: :Arceus: :Manectric-Mega: :Gyarados-Mega: :Probopass:

Polished this a bit after 4 battles.

This team uses DAscent Ray due to being able to deal with Special Bulk Wonder Guards, while running Judgment Ground to beat Registeel (and improof).

PDon is self-proofed due to me being unable to find a real Improof for it. Not ideal however. UTurn can be switched out for TArrows if played carefully.

Arceus is trained on both Def and SpD. Copied one of Lag=bad's PHPL team's Arceus.

Manectric is your standard SubPass user. Steam Eruption checks all Pdon under a Sub. Spore as a support move, while maxing out it's Speed completely, and giving it Max HP so it's not a glass cannon.

Gyarados has to fit Rocks due to my whole team not being able to fit a single hazard. Shed Shell so I don't lose it to Slaking, which is scary for this team to only have one real revenge sweeper or Don check.

My whole team is built around Probopass. STAG to beat Impostor on Ray. Frost Breath picks up a guaranteed 4hko on a Impostor Ray. It has both Defense (to beat my own Ray even when they do crit) and SpD to beat Non-Shed Shell MRay that don't run coverage or GWings MRay that doesn't run the niche Baton Pass.


Notable things
Replay 1
Replay 2


Calcs:
Red= Opponent's Impostor copying my MRay
Green= My MRay/Probopass against opponent
Blue= GWings MRay/Opponent's Mold MRay

+2 100+ SpA Earth Plate Rayquaza-Mega Judgment vs. 252 HP / 252+ SpD Registeel: 364-430 (100 - 118.1%) -- guaranteed OHKO

0 SpA Probopass Frost Breath vs. 252 HP / 0 SpD Rayquaza-Mega (Blissey's HP) on a critical hit: 204-244 (28.5 - 34.1%) -- 1.4% chance to 3HKO

0 SpA Probopass Frost Breath vs. 92 HP / 0 SpD Rayquaza-Mega on a critical hit: 204-244 (54.5 - 65.2%) -- guaranteed 2HKO


+2 184 Atk Rayquaza-Mega Dragon Ascent vs. 248 HP / 112+ Def Probopass: 73-86 (22.6 - 26.6%) -- 29.2% chance to 4HKO

+2 100+ SpA Rayquaza-Mega Judgment (Normal) vs. 248 HP / 148 SpD Probopass: 44-52 (13.6 - 16%) -- possible 7HKO


252+ SpA Sharp Beak Rayquaza-Mega Chatter vs. 248 HP / 148 SpD Probopass: 28-33 (8.6 - 10.2%) -- possibly the worst move ever

252+ SpA Sharp Beak Rayquaza-Mega Chatter vs. 248 HP / 148 SpD Probopass: 28-33 (8.6 - 10.2%) -- possibly the worst move ever

252+ SpA Choice Specs Rayquaza-Mega Oblivion Wing vs. 248 HP / 148 SpD Probopass: 43-51 (13.3 - 15.7%) -- possible 7HKO

252+ SpA Choice Specs Rayquaza-Mega Chatter vs. 248 HP / 148 SpD Probopass: 35-42 (10.8 - 13%) -- possible 8HKO

I hope you don't see this
https://pokepast.es/f35c44abaab2309f

I'm sorry I suck at teambuilding :psycry:
And even worse at clicking buttons :psycry::psycry:

Anyways, thanks for reading.
 
Last edited:
Reasons why I think :Meloetta::Meloetta: :Meloetta: :Meloetta: :Meloetta: :Meloetta: isn't dumb stupid nor ugly

Part 1: Stats
Part 2: Why it is actually good and why it worked out in HPL and PHPL

1. Stats

HPL: We saw only 1 usage of it, having only Lag≠bad trusting on it
Game(s): Lag=bad


PHPL: We saw only 4 usage of it, having Iguana and Excaliju trusting on it
Game(s): Iguana Excaliju Iguana Excaliju


WR: 100%

Purpose:
Support WG (Usage: 1)
SubPass WG (Usage: 3)


2. Why it actually worked

I'm mainly going to talk about its SubPass set due to that set being fit for its Stats and Weakness.

Standard Set used:
Meloetta @ Leftovers
Ability: Wonder Guard
EVs: 252 HP / 4 SpD / 252 Spe
Timid Nature
IVs: 0 Atk
- Substitute
- Baton Pass
- Dark Void / Magic Coat
- Shell Smash / Stealth Rock / Chatter / Recover

Firstly, it is weak to Dark, meaning it just dies to Pursuit :Gyarados-Mega: , right? Right?.....
No.
:Gyarados-Mega: Speed: 81
:Meloetta: Speed: 90
:Meloetta: is not only faster, :Gyarados-Mega: can't afford to run Max Speed, so, strictly, :Meloetta: can be anything around 176 to 252+ Speed.

Secondly, :Meloetta: looks cool, wait no, sorry, I mean:Meloetta: 's ability to be a Normal type that's not weak to Fighting, and a Psychic type that's not weak to Ghost is great, although its weakness to HP Beat Up from :Mewtwo-Mega-x: is still scary, but its ability to avoid Mach/ SSneak / Pjab/ GGrind/ Petal/ Bolt/ Fire/ Ice/ Diamond Storm will always be crucial as it shares the Dark weakness with only SubPass :Gengar-Mega: which is just worse than SubPass :Xerneas: in team structures that lack :Audino-Mega: anyways.

Lastly, team structures surrounding it. :Meloetta: is weak to UTurn and Taunt, which is exactly what :Beedrill-Mega: does. Players like Iguana and Excaliju used Mold :Rayquaza-Mega: on teams that pressures it significantly while having a Mon that can consistently SubPass into it.

In summary, :Meloetta: is decent due to it's very strong typing and its decent speed tier.

Something similar to what Iguana brought:
Iguana PHPL Paste
 
Last edited:
:slaking: (Unofficial) ADV SETPEDIA!!! :kyogre:
Lots of thanks to AV Cosmoem for helping me make this

Disclaimer: These sets aren't word of god or anything, this is Pure Hackmons! Anything can use any move, these are just sample sets. If you think that a relevant set is missing or that I've made a mistake, please feel free to DM me either on Discord or Smogon.​


S Rank
1. :slaking: Slaking

A Rank
2. :kyogre: Kyogre
3. :gengar: Gengar
4. :ninjask: Ninjask
5. :latios: Latios
6. :aerodactyl: Aerodactyl
7. :groudon: Groudon

B Rank
8. :dugtrio: Dugtrio
9. :deoxys-attack: Deoxys-Attack
10. :deoxys: Deoxys
11. :tyranitar: Tyranitar

C Rank
12. :mewtwo: Mewtwo
13. :skarmory: Skarmory
14. :banette: Banette
15. :wobbuffet: Wobbuffet
16. :lugia: Lugia
17. :blissey: Blissey

D Rank
18. :tauros: Tauros
19. :machamp: Machamp
20. :breloom: Breloom
21. :metagross: Metagross
22. :chansey: Chansey
23. :omastar: Omastar
24. :gyarados: Gyarados
25. :starmie: Starmie

14/07/2025
-
Removed and tweaked outdated sets that were in the initial draft
- Changed some descriptions to make them clearer
- Added Choice Band Aerodactyl
 
Last edited:

Arceus
BDSP Pure Hackmons Resource Hub
Mewtwo

Council

:deoxys: Electra102
:arceus-bug: Archey

Viability Rankings + Setpedia​

S Tier
1. :arceus-fairy: Arceus-Fairy
2. :arceus-steel: Arceus-Steel
3. :mewtwo: Mewtwo
A Tier

A+
4. :arceus-dark: Arceus-Dark
5. :arceus-electric: Arceus-Electric
6. :arceus-flying: Arceus-Flying
7. :arceus-ground: Arceus-Ground
8. :blissey: Blissey
9. :spiritomb: Spiritomb

A
10. :arceus-fire: Arceus-Fire
11. :arceus-ice: Arceus-Ice
12. :deoxys: Deoxys
13. :heatran: Heatran

A-
14. :arceus-fighting: Arceus-Fighting
15. :arceus-ghost: Arceus-Ghost
16. :arceus-grass: Arceus-Grass
17. :arceus-psychic: Arceus-Psychic
18. :giratina: Giratina

B Tier

B+
19. :chansey: Chansey
20. :ho-oh: Ho-Oh
21. :jirachi: Jirachi
22. :lugia: Lugia

B
23. :arceus: Arceus
24. :arceus-poison: Arceus-Poison
25. :arceus-water: Arceus-Water
26. :deoxys-attack: Deoxys-Attack
27. :deoxys-speed: Deoxys-Speed

B-
28. :arceus-dragon: Arceus-Dragon
29. :arceus-rock: Arceus-Rock
30. :groudon: Groudon
31. :regigigas: Regigigas

C Tier

C+
32. :cresselia: Cresselia
33. :kyogre: Kyogre
34. :palkia: Palkia
35. :tyranitar: Tyranitar

C
36. :arceus-bug: Arceus-Bug
37. :dialga: Dialga
38. :shaymin-sky: Shaymin-Sky
39. :slaking: Slaking

C-
40. :celebi: Celebi
41. :crobat: Crobat
42. :latias: Latias
43. :swellow: Swellow

D Tier
44. :aerodactyl: Aerodactyl
45. :articuno: Articuno
46. :darkrai: Darkrai
47. :gliscor: Gliscor
48. :latios: Latios
49. :skuntank: Skuntank
50. :staraptor: Staraptor


Sample Teams​

\\\\\\:arceus-fairy: :arceus-flying: :arceus-steel: :arceus-water: :mewtwo: :spiritomb:


Other Resources​

 
Last edited:
Back
Top