
Dorron said:Bc at this point stench is better than sereneOk, we have King's Rock Beat Up Weavile. We also have Serene Grace Togekiss. But what about Serene Grace King's Rock Beat Up Weavile?
Weavile @ King's Rock
Ability: Serene Grace
EVs: 252 Atk / 4 SpD / 252 Spe
Jolly Nature
- Swords Dance
- Beat Up
- Triple Axel
- Ice Shard
King's Rock is affected by Serene Grace (I have been told so in Help room), so you basically have 20% chance to flinch 5/6 times. It is true that it is pretty weak, but if walls are weakened and you still have most of your team alive, it can easily sweep. Also Triple Axel can flinch too with 20% three times and ignores team's status.
The set can be a gimmick but it can become very threatening when used well

-
Follow our Instagram!
-
Curious about what we're currently doing about bots? Check out the latest updates from staff in this thread.
-
Welcome to Smogon! Take a moment to read the Introduction to Smogon for a run-down on everything Smogon, and make sure you take some time to read the global rules.
You are using an out of date browser. It may not display this or other websites correctly.
You should upgrade or use an alternative browser.
You should upgrade or use an alternative browser.
AAA Almost Any Ability
- Thread starter UT
- Start date


Overwatched72 said:Stench and King's Rock do not stack unfortunately.Bc at this point stench is better than serene
Anyways so this isn't a one liner, here's a funny Weavile check that I theorymonned the other day
:ss/silvally-steel:
Silvally @ Steel Memory
Ability: Regenerator
EVs: 252 HP / 252 Def / 4 SpD
Relaxed Nature
IVs: 0 Spe
- Multi-Attack
- U-turn
- Thunderbolt
- Defog
With Noivern gone Silvally are a lot easier to explore, though I don't have *huge* hopes for them in the meta. The niche for this is being Trick immune and taking less damage from Knock Off, which in turn allows you to switch into Weavile somewhat reliably. Steel-type Silvally is a pretty consistent check due to being SR resistant and being able to OHKO with Multi Attack, though it fears the rare Low Kick. though I did have an idea for Water Silvally, though that faces a lot of competition from Tapu Fini and Blastoise.
Calcs:
252 Atk Choice Band Adaptability Weavile Knock Off vs. 252 HP / 252+ Def Silvally-Steel: 150-178 (38 - 45.1%) -- guaranteed 3HKO
+2 252 Atk Life Orb Weavile Knock Off vs. 252 HP / 252+ Def Silvally-Steel: 195-230 (49.4 - 58.3%) -- 98.4% chance to 2HKO
0 Atk Silvally-Steel Multi-Attack vs. 0 HP / 0 Def Weavile: 354-416 (125.9 - 148%) -- guaranteed OHKO
In no way am I endorsing this as a good set, but it was a funny idea that popped in my head that I thought I'd post about to give this some fluff (also it's probably just worse than regen coba lol but Defog ig). I would love to see people explore Silvally sets more now that Noivern is gone though, I'm excited to see what people come up with!

If your brain is tired of thinking just remember these guys exist
Landorus-Therian (M) @ Choice Scarf
Ability: Aerilate
EVs: 252 Atk / 252 Spe
Jolly Nature
- Explosion
Flying Type Explosionnnn, explodes the shit out of your opponents
Regieleki @ Choice Band
Ability: Galvanize
EVs: 252 Atk / 252 Spe
Adamant Nature
- Explosion
Electric Explosion anything that isn't Grass, Dragon, Ground just gets erased in showdown.
Snorlax @ Choice Band
Ability: Adaptability
EVs: 252 HP / 252 Atk
Adamant Nature
- Self-Destruct
400 based power move, just press F then BOOM
Hatterene (F) @ Choice Specs
Ability: Misty Surge
EVs: 252 HP / 252 SpA
Modest Nature
IVs: 0 Atk
- Misty Explosion
Pure Suicidal Fun
Cloyster @ Focus Sash
Ability: Refrigerate
EVs: 252 Atk / 252 Spe
Adamant Nature
- Shell Smash
- Explosion
Shellsmash, then explode
Gardevoir @ Choice Scarf
Ability: Adaptability
EVs: 252 SpA / 252 Spe
Timid Nature
IVs: 0 Atk
- Misty Explosion
After that hatterene sets up misty terrain, it's just a freaking nightmare.
No strat needed, just pure Fun

Landorus-Therian (M) @ Choice Scarf
Ability: Aerilate
EVs: 252 Atk / 252 Spe
Jolly Nature
- Explosion
Flying Type Explosionnnn, explodes the shit out of your opponents
Regieleki @ Choice Band
Ability: Galvanize
EVs: 252 Atk / 252 Spe
Adamant Nature
- Explosion
Electric Explosion anything that isn't Grass, Dragon, Ground just gets erased in showdown.
Snorlax @ Choice Band
Ability: Adaptability
EVs: 252 HP / 252 Atk
Adamant Nature
- Self-Destruct
400 based power move, just press F then BOOM
Hatterene (F) @ Choice Specs
Ability: Misty Surge
EVs: 252 HP / 252 SpA
Modest Nature
IVs: 0 Atk
- Misty Explosion
Pure Suicidal Fun
Cloyster @ Focus Sash
Ability: Refrigerate
EVs: 252 Atk / 252 Spe
Adamant Nature
- Shell Smash
- Explosion
Shellsmash, then explode
Gardevoir @ Choice Scarf
Ability: Adaptability
EVs: 252 SpA / 252 Spe
Timid Nature
IVs: 0 Atk
- Misty Explosion
After that hatterene sets up misty terrain, it's just a freaking nightmare.
No strat needed, just pure Fun
Last edited:

Hello! This is my first post of the forum, so I wanted to share some sets that I personally love using.
Genesect @ Choice Scarf
Ability: Tough Claws
EVs: 252 Atk / 252 Spe / 4 Def
Adamant Nature
- Iron Head
- U-turn
- Blaze Kick
- Leech Life
I see a lot of sets that portray Genesect as a set-up sweeper, but I also really enjoy this one. 90% of the time you'll be clicking U-Turn or Iron Head, but with Tough Claws and Genesects' solid attack stat, you'll still be doing good damage to most things. Also it's a reasonable answer to most of the strong ice types like Weavile and Mamoswine, as it will always out speed and shrugs off priority moves like Ice Shard, not that they'd stay in since an Iron Head is a guaranteed OHKO on both mons.
Togekiss @ Life Orb
Ability: Triage
EVs: 236 HP / 252 SpA / 20 Spe
Modest Nature
IVs: 0 Atk
- Nasty Plot
- Draining Kiss
- Psyshock
- Aura Sphere
This mon is a very good late game cleaner, and it's versatile move set makes it much harder to wall than other triage users. I prefer using these moves because they counter specially defensive walls and steel types, and a +2 Life Orb Draining Kiss hits non-resists very hard. I like life orb for the extra damage, and you can heal it back with draining kiss, but leftovers could work. Also I didn't see a need to invest too much into speed with triage, so I put it in HP which usually guarantees you can get one nasty plot off.
Genesect @ Choice Scarf
Ability: Tough Claws
EVs: 252 Atk / 252 Spe / 4 Def
Adamant Nature
- Iron Head
- U-turn
- Blaze Kick
- Leech Life
I see a lot of sets that portray Genesect as a set-up sweeper, but I also really enjoy this one. 90% of the time you'll be clicking U-Turn or Iron Head, but with Tough Claws and Genesects' solid attack stat, you'll still be doing good damage to most things. Also it's a reasonable answer to most of the strong ice types like Weavile and Mamoswine, as it will always out speed and shrugs off priority moves like Ice Shard, not that they'd stay in since an Iron Head is a guaranteed OHKO on both mons.
Togekiss @ Life Orb
Ability: Triage
EVs: 236 HP / 252 SpA / 20 Spe
Modest Nature
IVs: 0 Atk
- Nasty Plot
- Draining Kiss
- Psyshock
- Aura Sphere
This mon is a very good late game cleaner, and it's versatile move set makes it much harder to wall than other triage users. I prefer using these moves because they counter specially defensive walls and steel types, and a +2 Life Orb Draining Kiss hits non-resists very hard. I like life orb for the extra damage, and you can heal it back with draining kiss, but leftovers could work. Also I didn't see a need to invest too much into speed with triage, so I put it in HP which usually guarantees you can get one nasty plot off.
Last edited:



I have found this meta to be fun, fast-paced, and focused on building momentum for your
These mons generate an insane amount of momentum together. Surround them with three strong sweeper/wallbreakers who enjoy switching in for free, and you've got a
Chansey Set
Chansey (F) @ Eviolite
Ability: Regenerator
EVs: 248 HP / 252 Def / 8 SpD
Bold Nature
IVs: 0 Atk
- Teleport
- Soft-Boiled
- Thunder Wave / Toxic / Heal Bell / Stealth Rock
- Seismic Toss
Ability: Regenerator
EVs: 248 HP / 252 Def / 8 SpD
Bold Nature
IVs: 0 Atk
- Teleport
- Soft-Boiled
- Thunder Wave / Toxic / Heal Bell / Stealth Rock
- Seismic Toss
Soft-Boiled and Seismic Toss are pretty standard moves so you can recover against more potent attacks and deal some damage back. You have a lot of choices with the last move slot including status, status healing, and secondary hazard setting, but usually it's best to just Teleport away. Sadly Wish+Teleport is an illegal combination.
I have changed my mind, I would now recommend Blissey over Chansey. Knock Off is too common right now. Also Heavy-Duty Boots takes more pressure off of Corv to defog, helping its longevity as well by giving it more turns to Roost.
Corviknight Set
Corviknight @ Rocky Helmet / Leftovers
Ability: Intimidate / Dauntless Shield
EVs: 248 HP / 252 Def / 8 SpD
Relaxed Nature
IVs: 0 Spe
- U-turn
- Brave Bird / Body Press
- Roost
- Defog
Ability: Intimidate / Dauntless Shield
EVs: 248 HP / 252 Def / 8 SpD
Relaxed Nature
IVs: 0 Spe
- U-turn
- Brave Bird / Body Press
- Roost
- Defog
-1 252+ Atk Choice Band Barraskewda Liquidation vs. 248 HP / 252+ Def Corviknight in Rain: 153-181 (38.3 - 45.3%) -- guaranteed 3HKO
Intimidate is probably the better ability here, since Corv will normally be switching out immediately, and it allows it to hand off a weakened attacker to Swampert if Corv can't fully check it. However, Dauntless Shield+Body Press gives Corv a surprising amount of offensive presence and should not be discounted. Rocky Helmet is great for punishing physical attackers, but Leftovers can get a small bit of extra recovery (usually not much, but every little bit helps). The zero speed IVs are important for having as slow a U-turn as possible.
Since Corv is the only pivot without Regenerator, and is responsible for Defogging hazards if they are up, it is the easiest one to wear down, so spam Roost liberally. Remember you have a secondary physical pivot if you need to recover and then hard switch. Even without Regenerator, it is an amazing pivot that is hard to wear down.
Swampert Set
Swampert @ Rocky Helmet
Ability: Regenerator
EVs: 248 HP / 8 Atk / 252 Def
Relaxed Nature
IVs: 0 Spe
- Flip Turn
- Stealth Rock
- Earthquake
- Toxic
Ability: Regenerator
EVs: 248 HP / 8 Atk / 252 Def
Relaxed Nature
IVs: 0 Spe
- Flip Turn
- Stealth Rock
- Earthquake
- Toxic
The set is pretty straight-forward. Flip turn as much as possible to take advantage of Regenerator and build momentum, Stealth Rock if you have a free turn and the other team is weak to it, Earthquake as secondary STAB and Toxic to hurt walls. It is not nearly as physically bulky as Corv, so don't expect it to be, but it can take a hit and switch out.
This core will only ever be as good as the attackers around it. If you don't have dangerous and powerful attackers to take advantage of all the free turns, this team will eventually fold to repeated powerful attacks. They aren't walls, they are pivots, so make sure you have something worth pivoting to and can punish the opponent right away.
The biggest weakness this core has is set-up sweepers that can boost speed. Genesect and Volcarona are the best examples; if they get up a Shift Gear/Quiver Dance they can outspeed your attackers and muscle through your pivots. However, if you're able to keep momentum up, it should be very hard for them to set up. Ideally your attackers will deter set up if they are out, and if they try to switch-in on a pivot you will hopefully be pivoting out, but a well-timed double switch or catching Corv on a Roost can spell trouble. Repeated strong neutral attacks will also eventually wear down this core, but hopefully before that happens your attackers will have already done the same to the other side.
Weavile is also a big threat to this core. It can wear down both the physical pivots, but it will take 2-3 switch ins each to finally knock them out, so make sure at least one of your attackers beats Weavile one-on-one to punish them for bringing Weavile in.
Replays of the team in action
Replays!
Vs #3 on the Ladder Corv and Chansey really shine here and repeatedly get Talonflame in advantageous situations
Vs #2 on the Ladder Everyone does their part to get Choice Band Zygarde in to break down Chansey before Blacephalon sweeps. Also good example of giving Genesect no chance to breathe
Finals of a AAA tournament Good example of getting Talonflame and Tapu Bulu in to wear down the other team (Corv gets trapped by Magnet Pull, which shouldn't be a problem much longer)
Vs #2 on the Ladder Everyone does their part to get Choice Band Zygarde in to break down Chansey before Blacephalon sweeps. Also good example of giving Genesect no chance to breathe
Finals of a AAA tournament Good example of getting Talonflame and Tapu Bulu in to wear down the other team (Corv gets trapped by Magnet Pull, which shouldn't be a problem much longer)
Anyway, that's the core and hopefully it gives you a good idea of what they can do. It's a fun core to play with, still gives you a ton of options to build around with, and is pretty good! Let me know if you have any questions about it, or suggestions for improvement!
Last edited:

Can we please take look at, suspect test, or complex ban (triage + affected damaging moves) triage?
If it was +1 priority it might be ok, but +3 is another story.
If it was +1 priority it might be ok, but +3 is another story.
Last edited:
Poké Legend said:Triage is, to me at least, very fine. (Curious to hear about other high ladder/top ladder, but I doubt it will differ much)Can we please take look at, suspect test, or complex ban (triage + affected damaging moves) triage?
If it was +1 priority it might be ok, but +3 is another story.
Kommo-o belly drain punch can sweep tromendously easily against bad offenses and weak bulky team (stall runs either unaware or prankster pex). But otherwise, triage is rare. Buzzwole was banned a long time ago. Leech life golisopod was a thing before DLC #2 but I didn't see it since. Tapu bulu horn leech is walled by itself, corvi, gengar if you have balls and many others. Gengar giga drain is appearently good but i never saw it once. Alakazam, Azelf and latios with psychic surge are all really good offensive counters, prankster toxapex shrugs leech life and drain punch all day long and hazes any set up in a pinch.
Also, nobody uses triage defensively because prankster is just better utility-wise.
TL;DR: triage is fine. It's usage is limited to at the very best a dozen pokemons and all triage moves are resisted by the poison type (except owing, which doesn't exist in AAA). Many counter-plays exist as mentionned before so I find a suspect test of triage mildly unlikely at best.
-Overwatched72, aka emile red
Last edited:


:ss/gengar:
After more surveillance of the post-Noivern/post-Magpull metagame, the council decided to conduct a quickban vote on Gengar.
With a unanimous ban vote from the council, Gengar will no longer be allowed in AAA! Tagging Kris to implement this.
This will likely be the last tiering action before OMPL starts, but the council will continue to watch other threats that have been brought up in this thread such as Weavile, Genesect, and Blacephalon for any further developments.
After more surveillance of the post-Noivern/post-Magpull metagame, the council decided to conduct a quickban vote on Gengar.
Results
Jrdn | shiloh | The Number Man | Thinkerino | xavgb (stresh) | |
Gengar | Ban | Ban | Ban | Ban | Ban |
Reasoning
Gengar has cemented itself as a constant threat in the SwSh AAA metagame thanks to the addition of Nasty Plot to its toolkit at the beginning of Gen 8, as well as the addition/return of Zap Cannon to its movepool in the Home metagame. This allows Gengar to run several dangerous sets in the current metagame, the most notable ones being No Guard, Sheer Force, and Triage.
No Guard has garnered a lot of attention recently, utilising an incredibly powerful combination of Hex, Zap Cannon, and Hypnosis to break through many special walls after a Nasty Plot. In addition to its wallbreaking ability, it can also prove to be a nuisance by using Focus Sash to stop offensive checks such as Scarf Garchomp from taking it out, further adding to the difficulty of taking out Gengar in actual game scenarios. A smaller, but still relevant point of interest with this set is the luck aspect that comes with using Zap Cannon and Hypnosis -- sometimes games will be decided based on the number of sleep turns that Hypnosis gets or a lucky full para, which supports the idea that Gengar could be deemed uncompetitive as well as broken.
Sheer Force was generally the most popular Gengar set for most of the generation, though it saw less usage in recent months due to the surge of other sets. This set takes advantage of Gengar's expansive range of coverage options, turning it into an incredibly powerful pure wallbreaker which has very few answers in the metagame, some of which can also be beaten by one of its coverage options, whether that's Sludge Wave, Thunderbolt, Psychic, Focus Blast, or even Energy Ball. The recent ban of Noivern also led to a decrease in popularity of one of Sheer Force Gengar's more reliable temporary switchins in Regenvest Silvally-Electric.
Triage Gengar may seem like a weird choice of set to mention, as the only priority move Gengar uses on its set is Giga Drain. However, the threat of priority on a Gengar adds even more layers to its game. With enough speed to outspeed the likes of Blacephalon and Genesect that would normally check special Triage attackers, and enough power to take out most of the faster revenge killers after a bit of chip, Triage Gengar can become an absolute nightmare to check for some teams. Not only is Triage Gengar already a super scary standalone threat, it can also take advantage of the opponent not being sure which Gengar to respond to when it first switches in. A common situation with Triage Gengar sees the opponent switch into a specially defensive pivot like Elecvally or Blissey, hoping to eat a hit from one of the other sets and pivot out, only for Gengar to get 2 Nasty Plots off in that time and proceed to threaten offensive checks with a +4 Giga Drain instead of a +2 Giga Drain. This is a situation that led some people to make a rather hefty investment of 172 Special Defense EVs on their Scarf Regen Garchomps in order to ensure that they can live +4 Giga Drain.
Gengar's sets are all very good and borderline broken in their own right, but if you combine the threat of its three main sets, then it becomes clear that Gengar is not a healthy presence in AAA right now.
No Guard has garnered a lot of attention recently, utilising an incredibly powerful combination of Hex, Zap Cannon, and Hypnosis to break through many special walls after a Nasty Plot. In addition to its wallbreaking ability, it can also prove to be a nuisance by using Focus Sash to stop offensive checks such as Scarf Garchomp from taking it out, further adding to the difficulty of taking out Gengar in actual game scenarios. A smaller, but still relevant point of interest with this set is the luck aspect that comes with using Zap Cannon and Hypnosis -- sometimes games will be decided based on the number of sleep turns that Hypnosis gets or a lucky full para, which supports the idea that Gengar could be deemed uncompetitive as well as broken.
Sheer Force was generally the most popular Gengar set for most of the generation, though it saw less usage in recent months due to the surge of other sets. This set takes advantage of Gengar's expansive range of coverage options, turning it into an incredibly powerful pure wallbreaker which has very few answers in the metagame, some of which can also be beaten by one of its coverage options, whether that's Sludge Wave, Thunderbolt, Psychic, Focus Blast, or even Energy Ball. The recent ban of Noivern also led to a decrease in popularity of one of Sheer Force Gengar's more reliable temporary switchins in Regenvest Silvally-Electric.
Triage Gengar may seem like a weird choice of set to mention, as the only priority move Gengar uses on its set is Giga Drain. However, the threat of priority on a Gengar adds even more layers to its game. With enough speed to outspeed the likes of Blacephalon and Genesect that would normally check special Triage attackers, and enough power to take out most of the faster revenge killers after a bit of chip, Triage Gengar can become an absolute nightmare to check for some teams. Not only is Triage Gengar already a super scary standalone threat, it can also take advantage of the opponent not being sure which Gengar to respond to when it first switches in. A common situation with Triage Gengar sees the opponent switch into a specially defensive pivot like Elecvally or Blissey, hoping to eat a hit from one of the other sets and pivot out, only for Gengar to get 2 Nasty Plots off in that time and proceed to threaten offensive checks with a +4 Giga Drain instead of a +2 Giga Drain. This is a situation that led some people to make a rather hefty investment of 172 Special Defense EVs on their Scarf Regen Garchomps in order to ensure that they can live +4 Giga Drain.
Gengar's sets are all very good and borderline broken in their own right, but if you combine the threat of its three main sets, then it becomes clear that Gengar is not a healthy presence in AAA right now.
This will likely be the last tiering action before OMPL starts, but the council will continue to watch other threats that have been brought up in this thread such as Weavile, Genesect, and Blacephalon for any further developments.
Need some sets?
Regieleki @ Focus Sash
Ability: Unburden
EVs: 252 SpA / 252 Spe
Naive Nature
- Explosion
- Extreme Speed
- Electro Ball
The shit is Faster than the speed of light
Steelix @ Leftovers
Ability: Dauntless Shield
EVs: 252 HP / 252 Def
Relaxed Nature
- Body Press
- Curse
- Earthquake
You lucky fur coat and fluffy is banned
Shuckle @ Leftovers
Ability: Perish Body
EVs: 252 HP / 252 Def
Impish Nature
IVs: 0 Atk
- Infestation
- Toxic
- Protect
- Substitute
Trap and erase
Regieleki @ Focus Sash
Ability: Unburden
EVs: 252 SpA / 252 Spe
Naive Nature
- Explosion
- Extreme Speed
- Electro Ball
The shit is Faster than the speed of light
Steelix @ Leftovers
Ability: Dauntless Shield
EVs: 252 HP / 252 Def
Relaxed Nature
- Body Press
- Curse
- Earthquake
You lucky fur coat and fluffy is banned
Shuckle @ Leftovers
Ability: Perish Body
EVs: 252 HP / 252 Def
Impish Nature
IVs: 0 Atk
- Infestation
- Toxic
- Protect
- Substitute
Trap and erase
Lilith222 said:Need some sets?
Regieleki @ Focus Sash
Ability: Unburden
EVs: 252 SpA / 252 Spe
Naive Nature
- Explosion
- Extreme Speed
- Electro Ball
The shit is Faster than the speed of light
Steelix @ Leftovers
Ability: Dauntless Shield
EVs: 252 HP / 252 Def
Relaxed Nature
- Body Press
- Curse
- Earthquake
You lucky fur coat and fluffy is banned
Shuckle @ Leftovers
Ability: Perish Body
EVs: 252 HP / 252 Def
Impish Nature
IVs: 0 Atk
- Infestation
- Toxic
- Protect
- Substitute
Trap and erase
This is just my personnal opinion and analysis, so it may not reflect the reality 100%, but I'm confident enough to think it's pretty close to it.
Electroball is a bad gimmick and regieleki being already the fastest pokemon in the game (and there is no scarf user to my knowledge that outspeeds it), running unburden is practically useless. Being fast is cool but there is nothing that unburden regie outspeeds that regular regie doesn't. Even vanilla regie does more damage with transistor thunderbolt than unburden electroball on a relatively fast pokemon (I took mew for the calc), so if you want regieleki sets that already proved their effectiveness, refrigerate espeed is pretty nice and sturdy light clay suicide lead with screen and explosion is awesome on hyper offense.
For steelix, it's just never going to be effective. A defensive pokemon without recovery and as passive as steelix is bad in a meta such as AAA. Better dauntless shield/intimidate user exist like hippowdon and corviknight/skarmory. Also, no decent player will ever let you set up with curse. Any pokemon with a good enough special attack that isn't resisted will probably 2hko and you will never outspeed it (for the record, weavile's special bulk is higher than steelix's. If you really want a DS body press user, kommo-o hits harder than steelix (because of stab) and skarmory is just better.
For shuckle, other trapers exist and are much better and a lot more reliable, namely heatran and mew. And shuckle is super passive (and cannot do anything to magic guard bc it rely solely and only on passive damage, which heatran and mew don't, they are still able to do significant damage to mg users). Perish body relying on the opponent to make contact is the main cause of its unreliability.
-Overwatched72, aka emile red
P.S: I might do an entire post on imprisonform mew later today. Main reasons being that it's rather underestimated and, since I played it way too much in 2020, I got a lot to say about it.
Last edited:
Mew Imprisonform
If you were active on AAA mid-high ladder during the last third of 2020, it's very likely that you stumbled upon a guy (me, lol) running fat and semi-stall with a shiny mew with a set that many called gimmicky. The almost-famous imprisonform mew. I want to explain how it is more reliable than the gimmick label attached to it would suggest and how it is a very good filler for most balanced or bulky teams.
First, it's important to explain how does the set work. The imprisonform set it made from 3 attacks: imprison, transform and block/infestation. The functionning is rather simple: imprison prevents the opponent from using a move in your moveset, transform well... Transforms you in the opponent, copying its stats, type and moveset. Since you now have the same moveset as the opponent and imprison is active, the opponent has no move to choose from and is forced to go for struggle or switch, the latter being preventable by trapping it with block or infestation. Once all those condition are met, you got ~3 free turns to do whatever you want while the opponent dies slowly.
Second, the advantages of the set. The set shines by being a terrifying stallbreaker, able to snipe down one (or often 2 or 3) stally mons in the opponent's team. It also works against bulky utility pokemons like heatran or K-zapdos or on faster not-so-hard hitting mons depending on if you use magic bounce or prankster. Also, transform allows mew to beat everything in a PP stall scenario (16×4×5=320PP just with transform). The magic bounce set (that is imo the best) also brings utility by detering the opponent from spamming status moves and bouncing back hazards or status is always nice. It also prevents taunt, which would otherwise completely shutdown the strategy. Speaking of strategy.
Third, how to properly use the set. I used imprisonform mew so much and with so many variants that I could almost do a tier list of the best set. The 3 constants in the set are the leftovers for longevity (no leftovers is like a chansey without evio), transform and imprison. The trapping move can either be block or infestation. Personally, I prefer infest because it bypasses magic bounce, add residual damage and has more PP but both are usable. The ability, as said before, can either be prankster or magic bounce. Prankster is more effective against slow set up sweepers and more offensive mons while magic bounce is better against more defensive stuff. Know that both are usable but prankster gets hard-countered by dark types. The most important variable in that set is the 4th move slot. With mew's enormous movepool, there are many options to choose from. Remember that once imprison is active, the opponent cannot select the move you got in your 4th moveslot, so it's better to choose wisely according to what you think can handicap the most the opponent. I used to run knock off to avoid getting destroyed by it (because your lefties are your life), but other interesting choices can be, but are not limited to U-turn volt switch, flip turn, roost, defog, trick. Pivots move allows you to prevent the opponent from pivoting while letting you do it freely. Roost prevents certain pokemons from healing themselves and makes it less bad if you lose your item. Defog prevents the opponent from removing hazards with it, which can be very powerful at times. Trick prevents the opponent from playing tricks on you. For the ev spread, 252 hp, 252+ in either def or spedef, 4 in the other def, and it's up to you whether or not you want to run minimum speed to outslow faster pivots.
Cyan cat (Mew) @ Leftovers
Ability: Magic Bounce
Shiny: Yes
EVs: 252 HP / 4 Def / 252 SpD
Careful Nature
- Imprison
- Infestation
- Transform
- Knock Off
Fourth, the weaknesses of the set. The elephant in the room: ghost, dark (especially knock, I can't put enough emphasis on this), bug and wallbreakers will destroy you. Mew's bulk is great but it is not to be overestimated. Using this set at it's full potential requires very good game sense and prediction (do you imprison or infest first mainly but there is a lot more depth to it). If one is to use this set going brain dead, it's gonna be very disapointing. Also, the main counterplay is to pivot constantly in front of mew and since it is weak to u-turn, it can wear it down fairly quickly. Baiting in and out can also weaken it enough with hazards to make it unusable. Also, in 90% of cases, mew is useless against hyper offense if you don't lead with it and copy the opponent lead.
Conclusion : this set is one of the most fun I ever played and, unlike pure fun sets like F.E.A.R, imprisonform is viable (I reached #4 of the ladder in early december running multiple teams that all had in common an imprisonform shiny mew named Cyan cat so it cannot be bad). I am not saying it isn't gimmicky, because it is, I am just saying this is probably one of the best gimmick in the meta.
-Overwatched72, aka emile red
If you were active on AAA mid-high ladder during the last third of 2020, it's very likely that you stumbled upon a guy (me, lol) running fat and semi-stall with a shiny mew with a set that many called gimmicky. The almost-famous imprisonform mew. I want to explain how it is more reliable than the gimmick label attached to it would suggest and how it is a very good filler for most balanced or bulky teams.
First, it's important to explain how does the set work. The imprisonform set it made from 3 attacks: imprison, transform and block/infestation. The functionning is rather simple: imprison prevents the opponent from using a move in your moveset, transform well... Transforms you in the opponent, copying its stats, type and moveset. Since you now have the same moveset as the opponent and imprison is active, the opponent has no move to choose from and is forced to go for struggle or switch, the latter being preventable by trapping it with block or infestation. Once all those condition are met, you got ~3 free turns to do whatever you want while the opponent dies slowly.
Second, the advantages of the set. The set shines by being a terrifying stallbreaker, able to snipe down one (or often 2 or 3) stally mons in the opponent's team. It also works against bulky utility pokemons like heatran or K-zapdos or on faster not-so-hard hitting mons depending on if you use magic bounce or prankster. Also, transform allows mew to beat everything in a PP stall scenario (16×4×5=320PP just with transform). The magic bounce set (that is imo the best) also brings utility by detering the opponent from spamming status moves and bouncing back hazards or status is always nice. It also prevents taunt, which would otherwise completely shutdown the strategy. Speaking of strategy.
Third, how to properly use the set. I used imprisonform mew so much and with so many variants that I could almost do a tier list of the best set. The 3 constants in the set are the leftovers for longevity (no leftovers is like a chansey without evio), transform and imprison. The trapping move can either be block or infestation. Personally, I prefer infest because it bypasses magic bounce, add residual damage and has more PP but both are usable. The ability, as said before, can either be prankster or magic bounce. Prankster is more effective against slow set up sweepers and more offensive mons while magic bounce is better against more defensive stuff. Know that both are usable but prankster gets hard-countered by dark types. The most important variable in that set is the 4th move slot. With mew's enormous movepool, there are many options to choose from. Remember that once imprison is active, the opponent cannot select the move you got in your 4th moveslot, so it's better to choose wisely according to what you think can handicap the most the opponent. I used to run knock off to avoid getting destroyed by it (because your lefties are your life), but other interesting choices can be, but are not limited to U-turn volt switch, flip turn, roost, defog, trick. Pivots move allows you to prevent the opponent from pivoting while letting you do it freely. Roost prevents certain pokemons from healing themselves and makes it less bad if you lose your item. Defog prevents the opponent from removing hazards with it, which can be very powerful at times. Trick prevents the opponent from playing tricks on you. For the ev spread, 252 hp, 252+ in either def or spedef, 4 in the other def, and it's up to you whether or not you want to run minimum speed to outslow faster pivots.
Cyan cat (Mew) @ Leftovers
Ability: Magic Bounce
Shiny: Yes
EVs: 252 HP / 4 Def / 252 SpD
Careful Nature
- Imprison
- Infestation
- Transform
- Knock Off
Fourth, the weaknesses of the set. The elephant in the room: ghost, dark (especially knock, I can't put enough emphasis on this), bug and wallbreakers will destroy you. Mew's bulk is great but it is not to be overestimated. Using this set at it's full potential requires very good game sense and prediction (do you imprison or infest first mainly but there is a lot more depth to it). If one is to use this set going brain dead, it's gonna be very disapointing. Also, the main counterplay is to pivot constantly in front of mew and since it is weak to u-turn, it can wear it down fairly quickly. Baiting in and out can also weaken it enough with hazards to make it unusable. Also, in 90% of cases, mew is useless against hyper offense if you don't lead with it and copy the opponent lead.
Conclusion : this set is one of the most fun I ever played and, unlike pure fun sets like F.E.A.R, imprisonform is viable (I reached #4 of the ladder in early december running multiple teams that all had in common an imprisonform shiny mew named Cyan cat so it cannot be bad). I am not saying it isn't gimmicky, because it is, I am just saying this is probably one of the best gimmick in the meta.
-Overwatched72, aka emile red
Last edited:


Following recent discussion in the Council discord, we figured it's worth opening a conversation on this here:
What does everyone think about native/restricted abilities in AAA? For clarification, this refers to how previous generations of Almost Any Ability allow Pokemon to use abilities they get naturally in standard formats. For example, this would mean that even though Huge Power is banned, the Azumarill line would still be allowed to use it. This has actually gotten a little bit of policy discussion in the old gen AAA hub here and in general when discussing complex bans in OMS here.
As always, all thoughts and perspectives are very much welcome :]
Note: This does not guarantee that AAA will see a reversion back to allowing restricted abilities, neither does it mean the current version of the metagame where there are no restrictions will remain. It's simply a forum to gather the community's thoughts on something that has a significant effect on how the format functions.
What does everyone think about native/restricted abilities in AAA? For clarification, this refers to how previous generations of Almost Any Ability allow Pokemon to use abilities they get naturally in standard formats. For example, this would mean that even though Huge Power is banned, the Azumarill line would still be allowed to use it. This has actually gotten a little bit of policy discussion in the old gen AAA hub here and in general when discussing complex bans in OMS here.
As always, all thoughts and perspectives are very much welcome :]
Note: This does not guarantee that AAA will see a reversion back to allowing restricted abilities, neither does it mean the current version of the metagame where there are no restrictions will remain. It's simply a forum to gather the community's thoughts on something that has a significant effect on how the format functions.
Think said:I think that restricted native ability would do much good to the tier. I don't really see any reason to ban them (instead of restrict) beyond the "complex" ban argument, which is imo flawed since this is a restriction, not a ban (so it cant be a complex ban if it's not a ban) and other OMs like stabmons do have restriction. I think the very first pokemon that would benefit from it would be ditto, but others like blaziken, azumaril and magnezone* would also enjoy it.Following recent discussion in the Council discord, we figured it's worth opening a conversation on this here:
What does everyone think about native/restricted abilities in AAA? For clarification, this refers to how previous generations of Almost Any Ability allow Pokemon to use abilities they get naturally in standard formats. For example, this would mean that even though Huge Power is banned, the Azumarill line would still be allowed to use it. This has actually gotten a little bit of policy discussion in the old gen AAA hub here and in general when discussing complex bans in OMS here.
As always, all thoughts and perspectives are very much welcome :]
Note: This does not guarantee that AAA will see a reversion back to allowing restricted abilities, neither does it mean the current version of the metagame where there are no restrictions will remain. It's simply a forum to gather the community's thoughts on something that has a significant effect on how the format functions.
*I do not mind about magnezone having magpul despite all my talks about how magpul is uncompetitive. If you see a magnezone in the opponent's team, you know it prob runs magpul so you can play accordingly, which you couldn't do nearly as well before its ban.
It's my third post in 2 days so I'm sorry if it's a bit much ^^"
Last edited:

I wanted to make a team using some of my fave pokemon (some are more or leas meme mons)
so here it is also happy pride month

Golisopod @ Choice Band
Ability: Triage
Shiny: Yes
EVs: 248 HP / 252 Atk / 4 SpD / 4 Spe
Careful Nature
- Leech Life
- Liquidation
- Sucker Punch
- Aqua Jet

Archeops @ Liechi Berry
Ability: Unburden
EVs: 252 Atk / 4 SpD / 252 Spe
Jolly Nature
- Acrobatics
- Earthquake
- Endure
- Rock Slide

Toxtricity @ Throat Spray
Ability: Adaptability
Shiny: Yes
EVs: 4 Def / 252 SpA / 252 Spe
Timid Nature
IVs: 0 Atk
- Shift Gear
- Overdrive
- Boomburst
- Sludge Bomb

Decidueye @ Choice Scarf
Ability: Moxie
Shiny: Yes
EVs: 252 Atk / 4 SpD / 252 Spe
Hasty Nature
- Spirit Shackle
- Poltergeist
- Leaf Blade
- U-turn

Galvantula @ Life Orb
Ability: Swift Swim
Shiny: Yes
EVs: 4 Def / 252 SpA / 252 Spe
Modest Nature
IVs: 0 Atk
- Sticky Web
- Thunderbolt
- Energy Ball
- Bug Buzz

Inteleon @ Life Orb
Ability: As One (Spectrier)
Shiny: Yes
EVs: 4 Def / 252 SpA / 252 Spe
Timid Nature
IVs: 0 Atk
- Surf
- Ice Beam
- Dark Pulse
- Air Slash
now you might notice I have a LOT of counters to the clown and Archeops counters that's because they are incredibly comen and if you dont have a counter you lose its just that simple any ways on to the roles. Golisopod is our late game sweeper/weavile eater, and blissy remover so our special attackers can do WORK and then onto Archeops its job is to endure (if there's no priority) and then acrobatics and stuff to ether win or punch massive holes in the opposing team. now Toxtricity is there for massive hits on anything but steels. Decidueye is for picking up KOs and then maybe sweeping if they don't have a normal type. and then we have a web setter and a rain check cuz is fast and the other abusers generally don't out speed it. then theres yet another hard hitter that can easily snow ball if there water resist comes in to late and that's it all feed back is welcome (just know there are other Pokemon that probably do the exact same things better)
so here it is also happy pride month
team
Golisopod @ Choice Band
Ability: Triage
Shiny: Yes
EVs: 248 HP / 252 Atk / 4 SpD / 4 Spe
Careful Nature
- Leech Life
- Liquidation
- Sucker Punch
- Aqua Jet
Archeops @ Liechi Berry
Ability: Unburden
EVs: 252 Atk / 4 SpD / 252 Spe
Jolly Nature
- Acrobatics
- Earthquake
- Endure
- Rock Slide
Toxtricity @ Throat Spray
Ability: Adaptability
Shiny: Yes
EVs: 4 Def / 252 SpA / 252 Spe
Timid Nature
IVs: 0 Atk
- Shift Gear
- Overdrive
- Boomburst
- Sludge Bomb
Decidueye @ Choice Scarf
Ability: Moxie
Shiny: Yes
EVs: 252 Atk / 4 SpD / 252 Spe
Hasty Nature
- Spirit Shackle
- Poltergeist
- Leaf Blade
- U-turn
Galvantula @ Life Orb
Ability: Swift Swim
Shiny: Yes
EVs: 4 Def / 252 SpA / 252 Spe
Modest Nature
IVs: 0 Atk
- Sticky Web
- Thunderbolt
- Energy Ball
- Bug Buzz
Inteleon @ Life Orb
Ability: As One (Spectrier)
Shiny: Yes
EVs: 4 Def / 252 SpA / 252 Spe
Timid Nature
IVs: 0 Atk
- Surf
- Ice Beam
- Dark Pulse
- Air Slash
now you might notice I have a LOT of counters to the clown and Archeops counters that's because they are incredibly comen and if you dont have a counter you lose its just that simple any ways on to the roles. Golisopod is our late game sweeper/weavile eater, and blissy remover so our special attackers can do WORK and then onto Archeops its job is to endure (if there's no priority) and then acrobatics and stuff to ether win or punch massive holes in the opposing team. now Toxtricity is there for massive hits on anything but steels. Decidueye is for picking up KOs and then maybe sweeping if they don't have a normal type. and then we have a web setter and a rain check cuz is fast and the other abusers generally don't out speed it. then theres yet another hard hitter that can easily snow ball if there water resist comes in to late and that's it all feed back is welcome (just know there are other Pokemon that probably do the exact same things better)
Last edited:

Think said:I'd love to see this happen. but some things would have to be looked at, such as cinderace, dugtrio, gdarm, gothitelle, and gweezing.Following recent discussion in the Council discord, we figured it's worth opening a conversation on this here:
What does everyone think about native/restricted abilities in AAA? For clarification, this refers to how previous generations of Almost Any Ability allow Pokemon to use abilities they get naturally in standard formats. For example, this would mean that even though Huge Power is banned, the Azumarill line would still be allowed to use it. This has actually gotten a little bit of policy discussion in the old gen AAA hub here and in general when discussing complex bans in OMS here.
As always, all thoughts and perspectives are very much welcome :]
Note: This does not guarantee that AAA will see a reversion back to allowing restricted abilities, neither does it mean the current version of the metagame where there are no restrictions will remain. It's simply a forum to gather the community's thoughts on something that has a significant effect on how the format functions.
ItsChew. said:It wouldn't apply to ALL native abilities. Shadow tag and arena trap are uncompetitive and are, to my knowledge, banned in all single formats except PH and AG. All the ubers with broken abilities (DarmG and cinder) would of course stay banned. for Gweezing, i kinda doubt it would even see that much use. Gweezing is a pretty bad mon for AAA standards.I'd love to see this happen. but some things would have to be looked at, such as cinderace, dugtrio, gdarm, gothitelle, and gweezing.

Think said:Yesterday in the OM Room on PS!, we held our first ever Community Create A Team for AAA!
Thanks to everyone that contributed to discussion :]
Here's the team (Technician Beat Up Weavile): https://pokepast.es/4de29f474e62e93a
I decided to pick up this team for learning the meta because it seemed like the one that fitted me the best, with heavy use of pivoting and big dumb breakers, but with one slight difference:
Silvally-Dragon @ Assault Vest
Ability: Regenerator
EVs: 252 HP / 4 Def / 252 SpD
Sassy Nature
IVs: 0 Spe
- U-turn
- Draco Meteor
- Rock Slide
- Poison Fang
Dragon Vally! The original team had rock vally because Noivern was a big bully, and because of that it had a few other problem matchups such as solar beam heatran and barraskewda. With a dragon typing, it can reliably stop all fire types, electric types, Barra, and even most Koko vairants. It still needs rock slide to actually threaten Volcarona and it is nevertheless a somewhat flimsy Barra check, especially when it takes 60 from CC and tends to have to check a lot of things, but its still better than nothing and keeps barra from just 6-0ing you for free. It is notable though that the Fairy weakness of this mon is a huge disadvantage as breaker sets of Lele (Sheer Force, Tinted Lens) can just go through the team like butter. Dragon mons can also be a headache but at least Koko can help in that regard.
Pokepast for the modified version: https://pokepast.es/2327f3213f5525b2
And as it turns out, stacking two of the biggest brokens in the meta (Blace and Weavile) is a recipe for success:

And lets talk about those two
:weavile: Some teams just get 6-0'd by Beat Up Weavile. And who can blame them? Beat Up is a hard to build for strat, as it stops you from using mons such as the blobs and most special attackers because otherwise you dont hit the power benchmarks you need, and in game it can be hard to keep full power with Scald burns and Toxic Spikes in play. This still doesnt make it impossible to use and deal 60 to pex with impunity. Even without this somewhat niche set Weavile still requieres a lot of team support to "check" Weavile, and i say "check" because weavile can do things such as having rocks up and running Beat Up or poison jab for fini to beat this counterplay.
:blacephalon: this thing is almost always a knock or a good roll/modest nature away from just 2hkoing entire teams. with the mglo set. being fire works in its favor this time giving him resistances to bug and grass making its frailty a bit harder to exploit with priority and it has some moveset variety with things such as psyshock and sub to bully things even furder. This thing can make sure that the blobs, their most common "check", walk away with enough damage to 2hko them the next time they switch in, regen or not, because magic guard makes them just sitting ducks vs blace, while it spams knock or whatever with impunity.
waiting for the bans
Last edited:

Think said:Following recent discussion in the Council discord, we figured it's worth opening a conversation on this here:
What does everyone think about native/restricted abilities in AAA? For clarification, this refers to how previous generations of Almost Any Ability allow Pokemon to use abilities they get naturally in standard formats. For example, this would mean that even though Huge Power is banned, the Azumarill line would still be allowed to use it. This has actually gotten a little bit of policy discussion in the old gen AAA hub here and in general when discussing complex bans in OMS here.
As always, all thoughts and perspectives are very much welcome :]
Note: This does not guarantee that AAA will see a reversion back to allowing restricted abilities, neither does it mean the current version of the metagame where there are no restrictions will remain. It's simply a forum to gather the community's thoughts on something that has a significant effect on how the format functions.
I'm honestly not a fan of AAA restricted abilities. My opinion boils down to three main points:
1. Philosophy: AAA and most Other Metagames should be treated like actual games. I agree with posts like this one linked in the AAA hub, or what Think said in the AAA old gens hub. From this perspective, all abilities are native abilities in AAA, and all ability bans apply consistently to every Pokemon. I'll touch a bit more on this later.
2. Gameplay: Looking at the list of banned abilities, not very many of these would be useful or welcomed in a hypothetical AAA Restricted Abilities format. Aside from the abilities that are either exclusive to banned mons or abilities that would be banned outright, I can only foresee Gorilla Tactics, Imposter, Libero, and maybe Magnet Pull seeing any usage, and honestly Gorilla Tactics would probably end up banned for the same reasons Darm-G was banned in OU. I bring this up because I don't think restricted abilities would bring many meaningful changes to the format, while also feeding into the complication associated with complex bans.
3. Complex Bans: This is the area I feel most qualified to give input on (thanks PokeAAAbilities), and I think I can speak for most other tier leaders when I say complex bans should be avoided unless absolutely necessary. Unlike other formats like STABmons and Mix and Mega, restrictions in AAA are complex and harder to implement.
Restricting a move in STAB simply prevents it from being given out via STABmons Move Legality. When I explain STAB to people who haven't heard of it before, I ask them to imagine a move tutor in-game who teaches any move of your type. Restricting moves is like preventing Pokemon from learning certain moves from that move tutor. This works because here is a clear distinction between native moves and moves gained via STABmons move legality. This does not work very well in AAA because of the aforementioned lack of native abilities, and from this perspective, a restriction on an ability is just an arbitrary exception to the ban, or in other words, a very complex ban with the sole purpose of allowing some mons to use abilities banned on every other mon.
I'd still love AAA just the same with restricted abilities, but I really don't think it would be a positive change to the format. As it is right now, AAA is in a pretty solid position, and
Just making a pivot team with all 6 of them being pivot mons im pretty dumb so if you got some suggestion for this team to be better it would be nice
Genesect @ Choice Scarf
Ability: Adaptability
EVs: 252 Atk / 252 Spe
Naive Nature
- U-turn
- Ice Beam
- Iron Head
- Blaze Kick
Uturn goes Brrrrrrr...rrrr..rrrrr
Barraskewda @ Choice Band
Ability: Primordial Sea
EVs: 252 Atk / 252 Spe
Jolly Nature
- Flip Turn
- Close Combat
- Aqua Jet
- Drill run
Typical primordial shit that gives you pain in the ass
Incineroar @ Heavy-Duty Boots/Leftovers
Ability: Prankster/Regenerator
EVs: 252 HP / 252 Atk
Adamant Nature
- Parting Shot
- Fire punch
- Knock Off
- Taunt/Will o wisp
Prankster + Parting shit is just fun
Heliolisk @ Life Orb/ Silk scarf
Ability: Normalize
EVs: 252 SpA / 252 Spe
Timid Nature
IVs: 0 Atk
- Volt Switch
- Thunderbolt
- Toxic
- Glare
Normal type volt switch, makes most of your opponents utterly confused on how the hell you can do a volt switch on a ground type.
Mew @ Leftovers
Ability: Magic Bounce/Magic Guard
EVs: 252 HP / 4 Atk / 252 SpD
Careful/Jolly Nature
- Defog/Stealth rock
- Roost
- Psychic Fangs
- U-turn
Utility Mewturn bitch
Landorus-Therian (M) @ Leftovers
Ability: Regenerator
EVs: 252 HP / 252 Def
Impish Nature
- U-turn
- Earthquake
- Toxic
- Stealth Rock/Defog
A Pivot team isn't a pivot team without my best boi.
Welp that's it

Genesect @ Choice Scarf
Ability: Adaptability
EVs: 252 Atk / 252 Spe
Naive Nature
- U-turn
- Ice Beam
- Iron Head
- Blaze Kick
Uturn goes Brrrrrrr...rrrr..rrrrr
Barraskewda @ Choice Band
Ability: Primordial Sea
EVs: 252 Atk / 252 Spe
Jolly Nature
- Flip Turn
- Close Combat
- Aqua Jet
- Drill run
Typical primordial shit that gives you pain in the ass
Incineroar @ Heavy-Duty Boots/Leftovers
Ability: Prankster/Regenerator
EVs: 252 HP / 252 Atk
Adamant Nature
- Parting Shot
- Fire punch
- Knock Off
- Taunt/Will o wisp
Prankster + Parting shit is just fun
Heliolisk @ Life Orb/ Silk scarf
Ability: Normalize
EVs: 252 SpA / 252 Spe
Timid Nature
IVs: 0 Atk
- Volt Switch
- Thunderbolt
- Toxic
- Glare
Normal type volt switch, makes most of your opponents utterly confused on how the hell you can do a volt switch on a ground type.
Mew @ Leftovers
Ability: Magic Bounce/Magic Guard
EVs: 252 HP / 4 Atk / 252 SpD
Careful/Jolly Nature
- Defog/Stealth rock
- Roost
- Psychic Fangs
- U-turn
Utility Mewturn bitch
Landorus-Therian (M) @ Leftovers
Ability: Regenerator
EVs: 252 HP / 252 Def
Impish Nature
- U-turn
- Earthquake
- Toxic
- Stealth Rock/Defog
A Pivot team isn't a pivot team without my best boi.
Welp that's it
I want to talk about another team archetype I have been having fun with (especially since the Gengar ban): Trick Room.
Disclosure first: Trick Room is never going to be the most consistent strategy. At the end of the day, you're relying on a field condition that lasts four turns and have no way to extend it or auto-set it. If you pivot to wallbreakers, you really only have three turns to do damage. There will be several times per match that Trick Room ends, and a skilled opponent can take advantage of that.
However, Trick Room gets some notable buffs in AAA that I think make it viable (both in improved setters and higher-damage abusers), and it catches a lot of teams flat-footed. Common walls like Corv, pink blobs, Swampert, Toxapex, and Tapu Fini all struggle against the insane damage output of these wallbreakers, and offensive teams have no hope of switching in safely. I have been able to successfully ladder back into the 1500s with a Trick Room team, and I would love to get feedback from others on how it could be improved/have more discussion about lesser-used strategies that are still viable.
I think there are three parts to a successful Trick Room team: the setters, the abusers, and the cleaner. The team composition I have been enjoying success with recently is two setters, three wallbreakers, and one cleaner.
The Setters
As my previous post suggested, I love slow pivoting in AAA. Most of the Trick Room wallbreakers are frail or have common weaknesses (or both), so getting them in safely is helpful. In order to still be slow once Trick Room is up, that pretty much limits us to mons that learn Trick Room and Teleport. Thankfully, there are several good ones:


All four of these mons are bulky, learn Trick Room and Teleport, and have access to reliable recovery. This makes them excellent candidates to set Trick Room and Teleport to a wallbreaker safely. Whichever ones you choose their move sets will be similar: Trick Room, Teleport, Recovery, and token attack. You do have flexibility in item choice as well (except for Porygon2 who needs Eviolite): Leftovers for Recovery, Mental Herb to shake off Taunt, Focus Sash to take one hit and set up, etc. The team I run uses Slowbro and Porygon2, but there is a good argument for all of them
The two most consistent abilities I have found for the Trick Room setters are Regenerator and Magic Bounce. Regenerator obviously helps keep your setters alive to get Trick Room up multiple times each, while Magic Bounce prevents you from being Taunted (which otherwise ruins any of these mons). Other standard defensive abilities like Intimidate or Magic Guard or even Sturdy can be used, but I have found those two to be the most reliably useful.
The Wallbreakers

Please enjoy the raw damage output that is Tinted Lens, Choice Band Gyro Ball from Stakataka against some of the best physical walls in the game right now:
Tinted Lens allows it to blast through steel resists like Corv and Swampert that normally could handle it comfortably (it should be noted that Intimidate Corv manages to avoid the 2HKO). The rest of Stakatak's moveset can be tailored around what you are weakest to: Earthquake helps with Tox, Superpower helps with Ferro, Heat Crash beats even Intimidate Corv, etc. But the bread and butter of this mon is Tinted Lens Gyro Ball.
It may be tempting to put Steelworker as the ability instead, but Stakataka already has enough power to destroy non-resists and appreciates the extra damage against resists. Trick Room turns are precious, and having Stakataka locked into a not-very-effective coverage move because you mispredicted the switch is devastating.

Ghost+Fire has amazing coverage, and with Poltergiest and Flare Blitz both being 110+ BP coming off of 568 Attack with STAB and Adaptability, it hits things hard. It lacks the raw power of Stakataka, but comes close and offers the flexibility of not being choice locked. Marowak also resists most of the common priority types, which can help against Triage.
Both of Marowak's main STAB moves have drawbacks (90% accuracy+needing item or recoil), so running Shadow Bone or Fire Punch in the other move slots can provide safer alternatives when you don't need all that power. Earthquake can nail Pex as well, Low Kick can hit...something? Maybe? Really Flare Blitz+Poltergiest will carry the bulk of the work.
If you find yourself relying on Flare Blitz, you will eventually kill yourself to recoil. But the raw damage is worth it, and if you die to recoil, you've probably killed or irreversibly crippled 2-3 mons on the other side.

Slowking-G under Trick Room becomes Sheer Force Gengar (but with a better speed tier). Psychic+Sludge Wave has pretty good coverage and tremendous power, most importantly destroying Toxapex. Nasty Plot+Focus Blast also allows you to break through non-Unaware pink blobs and Corv, who otherwise would be problematic for this set.
The Cleaner

A common occurrence is after you've set Trick Room 2-3 times, crippled or eliminated their best walls, and burned through your wallbreakers, you find yourself with a weakened opponent's team and Trick Room down. This is where a cleaner is handy, and Tapu Bulu makes a fantastic cleaner. Once Tapu's hard counters (especially Corv) are defeated, it can often easily mop up what's left between it's high attack and +3 priority Horn Leech. You may also need to bring out Bulu early if your opponent catches you with Trick Room down since everything else on the team is slow as dirt.
Threats to Trick Room
Trick Room only lasting four turns--no matter what, you're going to have several times per game where Trick Room ends. Good opponents will be looking to take advantage of those turns to set up/bring in their own wall breakers/etc. These will be the most dangerous turns of the match, and positioning yourself to deny their set-up sweepers or hit their wallbreakers will be critical.
Dark types--especially Weavile and Bisharp. All of the common setters are Psychic type or rely on Eviolite and are crippled by Knock Off. They tend to be found on more offensive teams, so maximizing the damage your wallbreakers do while Trick Room is up is vital because you won't be able to set it as much.
Taunt--unless your Trick Room setter is Magic Bounce (or holding a Mental Herb once), Taunt completely shuts down the setters.
Very slow opposing walls--they take less damage from Gyro Ball and in some cases (Ferro and Slowbro/king) can also under-speed Marowak and Knock Off/Scald before it KOs them. These add another level of mind games to the matchup, but can all still be beaten with the right moves.
Powerful wallbreakers--they will likely have several times per match they can get in for free when Trick Room ends. This can create some difficult 50-50s that favor the opponent: switching your own wallbreaker out a turn early so its in when Trick Room ends vs nabbing one more KO? Attacking with your wallbreaker after Trick Room ends to deny set up vs switching and trying to get it up again?
Substitute Blacephalon--this thing has almost made me give up Trick Room lol. Trick Room does NOT have any good answers to this thing. Still a big threat, but Bonemerang lets you get past sub Blace 90% of the time.
Priority--obviously priority attacks bypass Trick Room, but I have yet to be overwhelmed by priority attackers. Maro resists all of the Triage types, and Staka has more than enough physical bulk to handle Sucker Punch or Galvanize Extreme Speed. You also have your own priority in Tapu, but well played priority mons can still bypass the speed disadvantage.
Here is a pastebin of the team I have been using most recently. I would love feedback on how it can be improved, strategies to defeat Trick Room in general, or other strategies that are less common but you have found viable!
Disclosure first: Trick Room is never going to be the most consistent strategy. At the end of the day, you're relying on a field condition that lasts four turns and have no way to extend it or auto-set it. If you pivot to wallbreakers, you really only have three turns to do damage. There will be several times per match that Trick Room ends, and a skilled opponent can take advantage of that.
However, Trick Room gets some notable buffs in AAA that I think make it viable (both in improved setters and higher-damage abusers), and it catches a lot of teams flat-footed. Common walls like Corv, pink blobs, Swampert, Toxapex, and Tapu Fini all struggle against the insane damage output of these wallbreakers, and offensive teams have no hope of switching in safely. I have been able to successfully ladder back into the 1500s with a Trick Room team, and I would love to get feedback from others on how it could be improved/have more discussion about lesser-used strategies that are still viable.
I think there are three parts to a successful Trick Room team: the setters, the abusers, and the cleaner. The team composition I have been enjoying success with recently is two setters, three wallbreakers, and one cleaner.
The Setters
As my previous post suggested, I love slow pivoting in AAA. Most of the Trick Room wallbreakers are frail or have common weaknesses (or both), so getting them in safely is helpful. In order to still be slow once Trick Room is up, that pretty much limits us to mons that learn Trick Room and Teleport. Thankfully, there are several good ones:
All four of these mons are bulky, learn Trick Room and Teleport, and have access to reliable recovery. This makes them excellent candidates to set Trick Room and Teleport to a wallbreaker safely. Whichever ones you choose their move sets will be similar: Trick Room, Teleport, Recovery, and token attack. You do have flexibility in item choice as well (except for Porygon2 who needs Eviolite): Leftovers for Recovery, Mental Herb to shake off Taunt, Focus Sash to take one hit and set up, etc. The team I run uses Slowbro and Porygon2, but there is a good argument for all of them
The two most consistent abilities I have found for the Trick Room setters are Regenerator and Magic Bounce. Regenerator obviously helps keep your setters alive to get Trick Room up multiple times each, while Magic Bounce prevents you from being Taunted (which otherwise ruins any of these mons). Other standard defensive abilities like Intimidate or Magic Guard or even Sturdy can be used, but I have found those two to be the most reliably useful.
The Wallbreakers
Please enjoy the raw damage output that is Tinted Lens, Choice Band Gyro Ball from Stakataka against some of the best physical walls in the game right now:
Stakataka Calc
252+ Atk Choice Band Tinted Lens Stakataka Gyro Ball (141 BP) vs. 252 HP / 252+ Def Corviknight: 264-312 (66 - 78%) -- guaranteed 2HKO
252+ Atk Choice Band Tinted Lens Stakataka Gyro Ball (129 BP) vs. 252 HP / 4 Def Swampert: 380-448 (94 - 110.8%) -- 62.5% chance to OHKO
252+ Atk Choice Band Stakataka Gyro Ball (150 BP) vs. 252 HP / 252+ Def Tapu Fini: 265-313 (77 - 90.9%) -- guaranteed 2HKO
252+ Atk Choice Band Tinted Lens Stakataka Gyro Ball (98 BP) vs. 252 HP / 252+ Def Toxapex: 142-168 (46.7 - 55.2%) -- 67.6% chance to 2HKO (Earthquake is a guaranteed 2HKO)
252+ Atk Choice Band Tinted Lens Stakataka Gyro Ball (150 BP) vs. 252 HP / 252+ Def Cobalion: 246-288 (63.7 - 74.6%) -- guaranteed 2HKO
252+ Atk Choice Band Stakataka Gyro Ball (150 BP) vs. 252 HP / 4 Def Garchomp: 423-498 (100.7 - 118.5%) -- guaranteed OHKO
252+ Atk Choice Band Tinted Lens Stakataka Gyro Ball (129 BP) vs. 252 HP / 4 Def Swampert: 380-448 (94 - 110.8%) -- 62.5% chance to OHKO
252+ Atk Choice Band Stakataka Gyro Ball (150 BP) vs. 252 HP / 252+ Def Tapu Fini: 265-313 (77 - 90.9%) -- guaranteed 2HKO
252+ Atk Choice Band Tinted Lens Stakataka Gyro Ball (98 BP) vs. 252 HP / 252+ Def Toxapex: 142-168 (46.7 - 55.2%) -- 67.6% chance to 2HKO (Earthquake is a guaranteed 2HKO)
252+ Atk Choice Band Tinted Lens Stakataka Gyro Ball (150 BP) vs. 252 HP / 252+ Def Cobalion: 246-288 (63.7 - 74.6%) -- guaranteed 2HKO
252+ Atk Choice Band Stakataka Gyro Ball (150 BP) vs. 252 HP / 4 Def Garchomp: 423-498 (100.7 - 118.5%) -- guaranteed OHKO
Tinted Lens allows it to blast through steel resists like Corv and Swampert that normally could handle it comfortably (it should be noted that Intimidate Corv manages to avoid the 2HKO). The rest of Stakatak's moveset can be tailored around what you are weakest to: Earthquake helps with Tox, Superpower helps with Ferro, Heat Crash beats even Intimidate Corv, etc. But the bread and butter of this mon is Tinted Lens Gyro Ball.
It may be tempting to put Steelworker as the ability instead, but Stakataka already has enough power to destroy non-resists and appreciates the extra damage against resists. Trick Room turns are precious, and having Stakataka locked into a not-very-effective coverage move because you mispredicted the switch is devastating.
Ghost+Fire has amazing coverage, and with Poltergiest and Flare Blitz both being 110+ BP coming off of 568 Attack with STAB and Adaptability, it hits things hard. It lacks the raw power of Stakataka, but comes close and offers the flexibility of not being choice locked. Marowak also resists most of the common priority types, which can help against Triage.
Both of Marowak's main STAB moves have drawbacks (90% accuracy+needing item or recoil), so running Shadow Bone or Fire Punch in the other move slots can provide safer alternatives when you don't need all that power. Earthquake can nail Pex as well, Low Kick can hit...something? Maybe? Really Flare Blitz+Poltergiest will carry the bulk of the work.
If you find yourself relying on Flare Blitz, you will eventually kill yourself to recoil. But the raw damage is worth it, and if you die to recoil, you've probably killed or irreversibly crippled 2-3 mons on the other side.
Maro Calc
252+ Atk Thick Club Adaptability Marowak-Alola Poltergeist (110 BP) vs. 252 HP / 248+ Def Hippowdon: 246-290 (58.5 - 69%) -- guaranteed 2HKO
252+ Atk Thick Club Adaptability Marowak-Alola Poltergeist (110 BP) vs. 252 HP / 252+ Def Swampert: 294-346 (72.7 - 85.6%) -- guaranteed 2HKO
252+ Atk Thick Club Adaptability Marowak-Alola Poltergeist (110 BP) vs. 252 HP / 252+ Def Tapu Fini: 248-294 (72 - 85.4%) -- guaranteed 2HKO
252+ Atk Thick Club Adaptability Marowak-Alola Flare Blitz vs. 248 HP / 252+ Def Eviolite Chansey: 548-646 (77.9 - 91.8%) -- guaranteed 2HKO
252+ Atk Thick Club Marowak-Alola Earthquake vs. 252 HP / 252+ Def Toxapex: 184-218 (60.5 - 71.7%) -- guaranteed 2HKO (Poltergeist is actually slightly stronger, but the 90% accuracy bites if they're Recover-stalling you)
252+ Atk Thick Club Adaptability Marowak-Alola Poltergeist (110 BP) vs. 252 HP / 252+ Def Swampert: 294-346 (72.7 - 85.6%) -- guaranteed 2HKO
252+ Atk Thick Club Adaptability Marowak-Alola Poltergeist (110 BP) vs. 252 HP / 252+ Def Tapu Fini: 248-294 (72 - 85.4%) -- guaranteed 2HKO
252+ Atk Thick Club Adaptability Marowak-Alola Flare Blitz vs. 248 HP / 252+ Def Eviolite Chansey: 548-646 (77.9 - 91.8%) -- guaranteed 2HKO
252+ Atk Thick Club Marowak-Alola Earthquake vs. 252 HP / 252+ Def Toxapex: 184-218 (60.5 - 71.7%) -- guaranteed 2HKO (Poltergeist is actually slightly stronger, but the 90% accuracy bites if they're Recover-stalling you)
Slowking-G under Trick Room becomes Sheer Force Gengar (but with a better speed tier). Psychic+Sludge Wave has pretty good coverage and tremendous power, most importantly destroying Toxapex. Nasty Plot+Focus Blast also allows you to break through non-Unaware pink blobs and Corv, who otherwise would be problematic for this set.
Slowking Calc
+2 252+ SpA Life Orb Sheer Force Slowking-Galar Focus Blast vs. 248 HP / 8 SpD Eviolite Chansey: 546-645 (77.6 - 91.7%) -- guaranteed 2HKO (both Psychic and Sludge Wave have a chance to 2HKO)
+2 252+ SpA Life Orb Sheer Force Slowking-Galar Focus Blast vs. 252 HP / 0+ SpD Corviknight: 448-529 (112 - 132.2%) -- guaranteed OHKO
252+ SpA Life Orb Sheer Force Slowking-Galar Sludge Wave vs. 252 HP / 0 SpD Tapu Fini: 413-486 (120 - 141.2%) -- guaranteed OHKO
+2 252+ SpA Life Orb Sheer Force Slowking-Galar Focus Blast vs. 252 HP / 0+ SpD Corviknight: 448-529 (112 - 132.2%) -- guaranteed OHKO
252+ SpA Life Orb Sheer Force Slowking-Galar Sludge Wave vs. 252 HP / 0 SpD Tapu Fini: 413-486 (120 - 141.2%) -- guaranteed OHKO
The Cleaner
A common occurrence is after you've set Trick Room 2-3 times, crippled or eliminated their best walls, and burned through your wallbreakers, you find yourself with a weakened opponent's team and Trick Room down. This is where a cleaner is handy, and Tapu Bulu makes a fantastic cleaner. Once Tapu's hard counters (especially Corv) are defeated, it can often easily mop up what's left between it's high attack and +3 priority Horn Leech. You may also need to bring out Bulu early if your opponent catches you with Trick Room down since everything else on the team is slow as dirt.
Here are some replays of the team in action
https://replay.pokemonshowdown.com/gen8almostanyability-1358577525-bme8g1bimub65z62ymnc9vmqybw57r8pw An early version of this team that shows Staka breaking the physical walls and Maro cleaning up
https://replay.pokemonshowdown.com/gen8almostanyability-1358594132 Maro picking its way through the entire opposing team
https://replay.pokemonshowdown.com/gen8almostanyability-1358800848-w7pps70n51hxqs868eykuviso2vhhl1pw Staka putting on a one-man show tearing through an offensive team
https://replay.pokemonshowdown.com/gen8almostanyability-1359210937-1e5rq1u4i3i1tg0cso3hqkwghydctw9pw The team even has power to break through stallier teams
https://replay.pokemonshowdown.com/gen8almostanyability-1359204228 Staka making sure Bulu's checks are out of the way before it finishes up
https://replay.pokemonshowdown.com/gen8almostanyability-1358594132 Maro picking its way through the entire opposing team
https://replay.pokemonshowdown.com/gen8almostanyability-1358800848-w7pps70n51hxqs868eykuviso2vhhl1pw Staka putting on a one-man show tearing through an offensive team
https://replay.pokemonshowdown.com/gen8almostanyability-1359210937-1e5rq1u4i3i1tg0cso3hqkwghydctw9pw The team even has power to break through stallier teams
https://replay.pokemonshowdown.com/gen8almostanyability-1359204228 Staka making sure Bulu's checks are out of the way before it finishes up
Threats to Trick Room
Trick Room only lasting four turns--no matter what, you're going to have several times per game where Trick Room ends. Good opponents will be looking to take advantage of those turns to set up/bring in their own wall breakers/etc. These will be the most dangerous turns of the match, and positioning yourself to deny their set-up sweepers or hit their wallbreakers will be critical.
Dark types--especially Weavile and Bisharp. All of the common setters are Psychic type or rely on Eviolite and are crippled by Knock Off. They tend to be found on more offensive teams, so maximizing the damage your wallbreakers do while Trick Room is up is vital because you won't be able to set it as much.
Taunt--unless your Trick Room setter is Magic Bounce (or holding a Mental Herb once), Taunt completely shuts down the setters.
Very slow opposing walls--they take less damage from Gyro Ball and in some cases (Ferro and Slowbro/king) can also under-speed Marowak and Knock Off/Scald before it KOs them. These add another level of mind games to the matchup, but can all still be beaten with the right moves.
Powerful wallbreakers--they will likely have several times per match they can get in for free when Trick Room ends. This can create some difficult 50-50s that favor the opponent: switching your own wallbreaker out a turn early so its in when Trick Room ends vs nabbing one more KO? Attacking with your wallbreaker after Trick Room ends to deny set up vs switching and trying to get it up again?
Substitute Blacephalon--
Priority--obviously priority attacks bypass Trick Room, but I have yet to be overwhelmed by priority attackers. Maro resists all of the Triage types, and Staka has more than enough physical bulk to handle Sucker Punch or Galvanize Extreme Speed. You also have your own priority in Tapu, but well played priority mons can still bypass the speed disadvantage.
Here is a pastebin of the team I have been using most recently. I would love feedback on how it can be improved, strategies to defeat Trick Room in general, or other strategies that are less common but you have found viable!
Last edited:
:ss/Archeops:
After observing the post-Gengar metagame (and largely the OMPL meta), the council decided to conduct a quickban vote on Archeops.
With a unanimous ban vote from the council, Archeops is now banned from AAA! Tagging Kris to implement this.
The council is currently also discussing the possibility of suspect testing other prominent threats in the metagame such as Weavile, and will continue to observe the meta to determine if further tiering action is necessary.
After observing the post-Gengar metagame (and largely the OMPL meta), the council decided to conduct a quickban vote on Archeops.
Results
Jrdn | shiloh | The Number Man | Think | xavgb (stresh) | |
Archeops | Ban | Ban | Ban | Ban | Ban |
Reasoning
Archeops has always been known for championing the combination of its sky-high base 140 Attack stat with Magic Guard and Head Smash. With Magic Guard, Archeops removes the recoil drawback of the attack and simultaneously negates any weakness it would've had to hazards, Life Orb, and contact chip damage all in one go. With the freedom to run coverage moves like Knock Off, U-turn, Heat Wave, and Earthquake, there aren't many teams that Archeops fails to make progress against. Armed with a Life Orb, Choice Band, or even a Choice Scarf, Archeops has cemented itself as a powerful breaker with the ability to monopolize momentum, and the lack of clear answers to it more than justifies sending it back to the banlist
Despite the fact that it more or less only runs a single ability, prepping for Archeops is no easy task. Choice Banded sets have the means to 2HKO opposing Pokemon with Head Smash even on a resisted hit, and Heat Wave on Life Orb sets make it so even would-be Steel-type switchins don't have many options versus Archeops. Alternatively, Archeops can even serve as a speed control option with a Choice Scarf, and its 110 base speed at +1 makes it easily U-turn versus the vast majority of Pokemon in the tier, really only fearing priority users and other scarfed variants.
Despite the fact that it more or less only runs a single ability, prepping for Archeops is no easy task. Choice Banded sets have the means to 2HKO opposing Pokemon with Head Smash even on a resisted hit, and Heat Wave on Life Orb sets make it so even would-be Steel-type switchins don't have many options versus Archeops. Alternatively, Archeops can even serve as a speed control option with a Choice Scarf, and its 110 base speed at +1 makes it easily U-turn versus the vast majority of Pokemon in the tier, really only fearing priority users and other scarfed variants.
The council is currently also discussing the possibility of suspect testing other prominent threats in the metagame such as Weavile, and will continue to observe the meta to determine if further tiering action is necessary.

Think said:Second Coming (Archen) @ Choice Scarf:ss/Archeops:
After observing the post-Gengar metagame (and largely the OMPL meta), the council decided to conduct a quickban vote on Archeops.
With a unanimous ban vote from the council, Archeops is now banned from AAA! Tagging Kris to implement this.Results
Reasoning
Archeops has always been known for championing the combination of its sky-high base 140 Attack stat with Magic Guard and Head Smash. With Magic Guard, Archeops removes the recoil drawback of the attack and simultaneously negates any weakness it would've had to hazards, Life Orb, and contact chip damage all in one go. With the freedom to run coverage moves like Knock Off, U-turn, Heat Wave, and Earthquake, there aren't many teams that Archeops fails to make progress against. Armed with a Life Orb, Choice Band, or even a Choice Scarf, Archeops has cemented itself as a powerful breaker with the ability to monopolize momentum, and the lack of clear answers to it more than justifies sending it back to the banlist
Despite the fact that it more or less only runs a single ability, prepping for Archeops is no easy task. Choice Banded sets have the means to 2HKO opposing Pokemon with Head Smash even on a resisted hit, and Heat Wave on Life Orb sets make it so even would-be Steel-type switchins don't have many options versus Archeops. Alternatively, Archeops can even serve as a speed control option with a Choice Scarf, and its 110 base speed at +1 makes it easily U-turn versus the vast majority of Pokemon in the tier, really only fearing priority users and other scarfed variants.
The council is currently also discussing the possibility of suspect testing other prominent threats in the metagame such as Weavile, and will continue to observe the meta to determine if further tiering action is necessary.
Ability: Magic Guard
EVs: 252 Atk / 4 SpD / 252 Spe
Jolly Nature
- Head Smash
- Dual Wingbeat
- U-turn
- Knock Off
prepare
Think said::ss/Archeops:
After observing the post-Gengar metagame (and largely the OMPL meta), the council decided to conduct a quickban vote on Archeops.
With a unanimous ban vote from the council, Archeops is now banned from AAA! Tagging Kris to implement this.Results
Reasoning
Archeops has always been known for championing the combination of its sky-high base 140 Attack stat with Magic Guard and Head Smash. With Magic Guard, Archeops removes the recoil drawback of the attack and simultaneously negates any weakness it would've had to hazards, Life Orb, and contact chip damage all in one go. With the freedom to run coverage moves like Knock Off, U-turn, Heat Wave, and Earthquake, there aren't many teams that Archeops fails to make progress against. Armed with a Life Orb, Choice Band, or even a Choice Scarf, Archeops has cemented itself as a powerful breaker with the ability to monopolize momentum, and the lack of clear answers to it more than justifies sending it back to the banlist
Despite the fact that it more or less only runs a single ability, prepping for Archeops is no easy task. Choice Banded sets have the means to 2HKO opposing Pokemon with Head Smash even on a resisted hit, and Heat Wave on Life Orb sets make it so even would-be Steel-type switchins don't have many options versus Archeops. Alternatively, Archeops can even serve as a speed control option with a Choice Scarf, and its 110 base speed at +1 makes it easily U-turn versus the vast majority of Pokemon in the tier, really only fearing priority users and other scarfed variants.
The council is currently also discussing the possibility of suspect testing other prominent threats in the metagame such as Weavile, and will continue to observe the meta to determine if further tiering action is necessary.
*This post is gonna be short*
This is just my opinion, and it comes from someone that has been quite inactive these days on PS as a whole but... From what i read, there have been many quick ban lately. Not complaining about any of them, but if i remember well, the last suspect test was months ago and was noivern's. Since then, multiple pokemons were ban as a sort of chain reaction. Idk, it's just an interesting observation. That's it for me. Peace out

Overwatched72 said:*This post is gonna be short*
This is just my opinion, and it comes from someone that has been quite inactive these days on PS as a whole but... From what i read, there have been many quick ban lately. Not complaining about any of them, but if i remember well, the last suspect test was months ago and was noivern's. Since then, multiple pokemons were ban as a sort of chain reaction. Idk, it's just an interesting observation. That's it for me. Peace out ✌
The Noivern suspect was last month, not months ago. Additionally, I wouldn't call the bans of Magnet Pull, Gengar, and Archeops a chain reaction to the Noivern ban. After all, each of those elements were unhealthy to the metagame in their own way and were strong even when Noivern was allowed.
Last edited:
So how is the meta going to shift with Archeops banned?
Who gets better

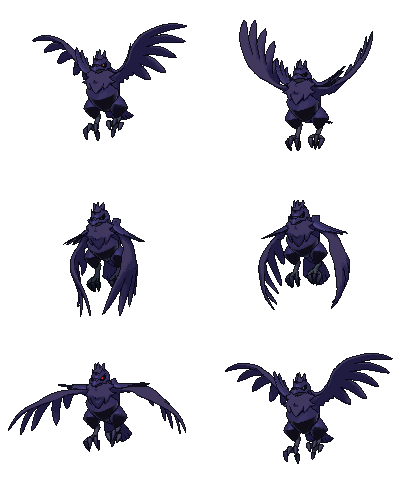

Physically defensive mons that don't resist rock
Archeops's sheer power allowed it to break through almost anything that did not resist rock, no matter how physically bulky (Corviknight with Intimidate or Delta Stream could avoid the 2HKO from Head Smash, but was still 2HKOed by Heat Wave). With Archeops gone, the only particularly relevant rock type attacker is Terrakion, who is much less common and has much less power. I predict all of the above mons will see a healthy rise in usage.


Attackers with sub-110 base speed
Archeops's 110 base speed was very valuable and outpaced a lot of dangerous threats. With it gone, I would expect to see a rise in the not-quite-so-fast attackers as they have one less revenge killer. It was also one of the better Choice Scarf users, making Volcarona in particular more dangerous.
Who gets worse



Weavile (and other fast friends)
I think the ban actually has the potential to make Weavile more manageable. Weavile can struggle to break through Pex, Corv, and Fini, all of whom I think will rise in usage with Archeops gone. Weavile also really appreciated having Archeops on its own team to help break through defensive walls; Corv can't check Weavile if it was cripple trying to slow down Archeops. Weavile is still powerful, and very little can switch into Technician Beat-up, but I think it overall will be easier to build for Weavile without having to build for Archeops as well.
Several of the other fast attackers like Talonflame and Barraskewda also struggle with the bulky waters and other physically defensive mons that will be more free post ban. Their speed tier is also less valuable now that there is one less fast mon they outpace.
Overall thoughts
I think that Archeops's ban opens up a much wider range of bulky and defensive options and puts much less pressure on team building. Defensive cores will have a wider range of options to choose from and I think bulkier teams in general will be more viable. I do worry that Blace and Gene might be better, but I am hoping the wider range of defensive options can hold them in check and think this move helps keep Weavile in check. I think this is a healthy move for the metagame, and am excited to see how it shakes out. AAA will still be fast-paced and hard-hitting, but with the hardest-hitter out, I am hopeful other play styles can see more viability.
Who gets better
Physically defensive mons that don't resist rock
Archeops's sheer power allowed it to break through almost anything that did not resist rock, no matter how physically bulky (Corviknight with Intimidate or Delta Stream could avoid the 2HKO from Head Smash, but was still 2HKOed by Heat Wave). With Archeops gone, the only particularly relevant rock type attacker is Terrakion, who is much less common and has much less power. I predict all of the above mons will see a healthy rise in usage.
Attackers with sub-110 base speed
Archeops's 110 base speed was very valuable and outpaced a lot of dangerous threats. With it gone, I would expect to see a rise in the not-quite-so-fast attackers as they have one less revenge killer. It was also one of the better Choice Scarf users, making Volcarona in particular more dangerous.
Terrakion as a replacement
While I do think Terrakion will benefit from Archeops being banned, I want to highlight that it is not a one-to-one replacement. For starters, it needs to run Adaptability + Choice Band to reach the same level of power as Archeops:
252 Atk Choice Band Adaptability Terrakion Stone Edge vs. 252 HP / 252+ Def Corviknight: 226-268 (56.5 - 67%) -- guaranteed 2HKO
252 Atk Life Orb Archeops Head Smash vs. 252 HP / 252+ Def Corviknight: 234-277 (58.5 - 69.2%) -- guaranteed 2HKO
Being Choice-locked obviously has disadvantages, especially compared to Archeops who can U-Turn out of unfavorable matchups. Having to forgo Magic Guard also leaves it vulnerable to entry hazards.
It's not all bad news for Terrakion; it has functionally the same speed tier as Archeops (only losing out to Latios and tying the other Justice Swordsmen) and a useable secondary STAB move. It can also forgo the immediate power and run a Swords Dance set, or get really creative and run other abilities like Dazzling.
Terrakion is a good mon that should see more usage post-ban, but as another rock-type wall-breaker, it is a significant downgrade from Archeops.
252 Atk Choice Band Adaptability Terrakion Stone Edge vs. 252 HP / 252+ Def Corviknight: 226-268 (56.5 - 67%) -- guaranteed 2HKO
252 Atk Life Orb Archeops Head Smash vs. 252 HP / 252+ Def Corviknight: 234-277 (58.5 - 69.2%) -- guaranteed 2HKO
Being Choice-locked obviously has disadvantages, especially compared to Archeops who can U-Turn out of unfavorable matchups. Having to forgo Magic Guard also leaves it vulnerable to entry hazards.
It's not all bad news for Terrakion; it has functionally the same speed tier as Archeops (only losing out to Latios and tying the other Justice Swordsmen) and a useable secondary STAB move. It can also forgo the immediate power and run a Swords Dance set, or get really creative and run other abilities like Dazzling.
Terrakion is a good mon that should see more usage post-ban, but as another rock-type wall-breaker, it is a significant downgrade from Archeops.
Who gets worse
Weavile (and other fast friends)
I think the ban actually has the potential to make Weavile more manageable. Weavile can struggle to break through Pex, Corv, and Fini, all of whom I think will rise in usage with Archeops gone. Weavile also really appreciated having Archeops on its own team to help break through defensive walls; Corv can't check Weavile if it was cripple trying to slow down Archeops. Weavile is still powerful, and very little can switch into Technician Beat-up, but I think it overall will be easier to build for Weavile without having to build for Archeops as well.
Several of the other fast attackers like Talonflame and Barraskewda also struggle with the bulky waters and other physically defensive mons that will be more free post ban. Their speed tier is also less valuable now that there is one less fast mon they outpace.
Overall thoughts
I think that Archeops's ban opens up a much wider range of bulky and defensive options and puts much less pressure on team building. Defensive cores will have a wider range of options to choose from and I think bulkier teams in general will be more viable. I do worry that Blace and Gene might be better, but I am hoping the wider range of defensive options can hold them in check and think this move helps keep Weavile in check. I think this is a healthy move for the metagame, and am excited to see how it shakes out. AAA will still be fast-paced and hard-hitting, but with the hardest-hitter out, I am hopeful other play styles can see more viability.
Last edited: