


Introduction:
I think this is one of the best teams I've ever built. This is probably going to be my last RMT for a while, so it'll likely be a very long one. Even though there wasn't a suspect test going on, my goal was to have a high enough GXE with a sufficient number of games played to qualify for voting requirements if there was a suspect test, and I'm happy that I achieved that. Unfortunately, as I've gotten better as a player, actually playing has become less fun, so I didn't want to ladder more than I did. I love building and just thinking about the game, but for some reason, I've built up this weird anxiety regarding playing on my alts that are fairly high on the ladder or have a good GXE. Since playing was becoming too stressful for me, I decided not to keep grinding out games to try to get as high of an Elo as I could have just to say "Peaked at _________" in the title. I feel like GXE can be a better indicator of player/team quality at times anyway because you can grind to increase Elo, but it's harder for GXE. I don't mean any hate against people that make "Peaked at _________" posts though. Obviously those posts are fine and it's good that people are proud of how high they can get their Elo. Personally, I just wanted to stop playing even though I'm confident that I could have ended up with a higher Elo.
Anyway, now that all of that personal rambling is out of the way, I'll talk a little bit about the team composition before getting into each Pokemon specifically. I built this team after the Landorus-I ban but before Zygarde and Kyurem-Black were banned. I would have posted this team earlier but I was waiting for the two weeks since I posted my previous RMT to pass. However, I think that the banning of Zygarde and Kyurem-Black doesn't really hurt its viability (and could even help in regards to Kyurem-Black, since a Dragon Dance set with Dual Wingbeat potentially 6-0ed my team) and I believe that this team is still solid for the current metagame. Here was my building thought process:
I wanted to build around Moltres because I think it's an awesome Pokemon (I'm older and love pretty much all Gen 1 Pokemon) and I was intrigued by its defensive Defogging capabilities with Flame Body and most importantly, the introduction of Heavy-Duty Boots. I've also always liked using Pokemon defensively that don't immediately scream "defensive" the way that walls like Blissey and Toxapex do.
I saw that some very good players were pairing Moltres with Buzzwole (like Ktütverde did here in the final game of a Smogon Tour night that they won) and I thought that the combination made sense. I'll talk about this more when I get to Buzzwole individually, but it's an excellent check to some otherwise extremely threatening offensive Pokemon like Urshifu and before it was banned, Zygarde. Buzzwole is also probably my favorite Ultra Beast, so I was happy to use it.
I felt like Blissey (or Chansey but I prefer Blissey for the Boots right now) was necessary to provide a specially defensive wall. I also like the utility that Blissey can provide, especially with Teleport.
I don't personally think that Regieleki is very good, but it was more common at the time that I built this and I felt like an Electric immunity was necessary, so I went with Hippowdon as my Stealth Rock user. Even though Regieleki has started to fall off, it's still obviously very nice to have a Ground type to to prevent things like Zapdos, Tapu Koko, or opposing Magearna from Volt Switching all over the place. I also like how specially defensive Hippo can provide some help with some key threats that Blissey can't really handle, like Roost Volcarona and Sub + Nasty Plot Spectrier (and other Ghosts with sub), although Hippo can't really stand up well to Spectrier if it's already at +2. Wisp + Hex sets from Ghosts are also annoying for Hippo to deal with.
I wanted to use Magearna as one of my offensive breakers since it's fallen back down from Ubers. I remember that the Specs set was considered the most consistent before it was initially banned, but I had been seeing more setup and Assault Vest variants recently, so I wanted to give Specs a try again.
I initially was going to go with Pheromosa as my physical breaker, but I didn't like how much it was walled by Toxapex. I decided to go with Cinderace because it used to be a very solid partner with Magearna as a Volt-Turn core before they were both banned and Libero is a fun ability. Toxapex can still be very annoying to break, as I'll talk about later, but Zen Headbutt with Libero gives Cinderace a much better chance than Pheromosa, even if it has Drill Run.
The Team:

Cinderace (M) @ Heavy-Duty Boots
Ability: Libero
EVs: 252 Atk / 4 Def / 252 Spe
Jolly Nature
- Pyro Ball
- High Jump Kick
- U-turn
- Zen Headbutt
Cinderace is my physical breaker. It was a little overshadowed with all of the other new additions from the Crown Tundra DLC, but it's still very good. Heavy-Duty Boots allows Cinderace to repeatedly come in virtually for free, and Libero combined with Cinderace's coverage lets it threaten out a wide range of Pokemon. Although the meta has gotten faster and I think that Cinderace is likely best off running Jolly now to out-speed things like Blacephalon and Kartana, Cinderace is still faster than the majority of the metagame at 370 Speed. Pyro Ball is pretty mandatory on Cinderace to hit defensive Pokemon like Ferrothorn, Buzzwole, Corviknight, Skarmory, Celesteela, Tangrowth, defensive Magearna, and Amoonguss. High Jump Kick is really important to prevent being walled by Heatran, but in general, it's a hard-hitting move with good coverage that helps with revenge killing certain Pokemon, like Urshifu-Single-Strike. U-turn is very nice to gain momentum, especially with how Choice Specs Magearna threatens mostly everything that wants to switch into Cinderace. I went with Zen Headbutt last because it gives me some way of breaking through Toxapex. I'll talk about Pex more in the "Threats" section, but without fishing for flinches with Zen Headbutt, I don't really have a way to break a Toxapex spamming Recover. Zen Headbutt does hit some other Pokemon nicely as well though, such as Kommo-o, Hawlucha, Nidoking, and Urshifu-Rapid-Strike. Gunk Shot and Sucker Punch would be nice on Cinderace, but I think I like the coverage and flinch chance of Zen Headbutt more. Essentially, I feel like it boils down to without Zen Headbutt on Cinderace, I have too hard of a time breaking through Pex. Having to deal with the inaccuracy of Pyro Ball, HJK, and Zen Headbutt is annoying though, especially with how Cinderace is fairly frail and won't be taking hits well if it misses. Obviously, missing HJK can be disastrous for Cinderace as well.
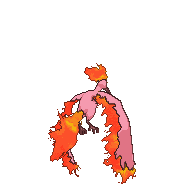
Moltres @ Heavy-Duty Boots
Ability: Flame Body
Shiny: Yes
EVs: 248 HP / 232 Def / 28 Spe
Bold Nature
IVs: 0 Atk
- Flamethrower
- Scorching Sands
- Defog
- Roost
I already talked about the Moltres and Buzzwole spreads I use in my Good Cores post here (which is also where I first posted this team), but I'll reiterate and expand on it a little more. musiquepkmn also talks about the Moltres and Buzzwole defensive core in their post directly above mine. Essentially, Heavy-Duty Boots and Flame Body makes Moltres a very good defensive option and Defogger. While there is some overlap regarding what Moltres and Buzzwole check, like Kartana and non-Quiver Dance Pheromosa, Moltres is able to check things like Cinderace, Blaziken that don't have Thunder Punch or Stone Edge, Hawlucha, Choice Banded Melmetal, and Acrobatics Rillaboom (although you need to be very careful of Knock Off) that Buzzwole can't handle. In general though, you do need to be very wary of Moltres getting its Boots Knocked Off, since having your only form of hazards removal being 4X weak to Rocks is clearly far from ideal. Flame Body is excellent on Moltres because it can inflict burns on and punish U-turn users like Pheromosa and Cinderace. Moltres does a particularly good job of punishing U-turns due to its 4X Bug resistance. Flame Body is also great to potentially punish multi-hitting moves like Melmetal's Double Iron Bash and Urshifu-Rapid-Strike's Surging Strikes, although you'll need to sacrifice Moltres in the process trying to get the burn. Lastly, Moltres provides me with a Ground immunity, which is nice against something like Excadrill if my Buzzwole is weakened, but you do need to be careful of Rock Slide.
Moltres's moveset is pretty straightforward - Flamethrower is a great STAB option and hits things like Ferrothorn, Buzzwole, and Melmetal. I could also see Mystical Fire potentially being better than Flamethrower because the Special Attack drop makes it harder for some things to switch into Moltres and it also would help against some setup sweepers like Volcarona or some Magearna variants, but I'm not sure if you'd miss the additional Flamethrower damage much, and Blissey usually switches into most special attackers fine without the Special Attack drop anyway. Scorching Sands is mainly for Heatran but its 30% burn rate is also nice. Moltres is my only form of hazard removal with Defog and Roost is necessary for longevity. Roost removing Moltres's Flying type also allows it to wall Choice Banded Melmetal even if it clicks Thunder Punch (and Moltres was healthy enough to live the initial Thunder Punch/doesn't get paralyzed). Walling Melmetal is nice because Melmetal is very susceptible to Flame Body burns. As for the EV spread, I'll quote what I said in my Good Cores post, "Moltres hits 223 with the 28 EVs. You want to at least be over 219 to creep neutral-natured Aegislash and Magnezone. There is a speed-creep war going on around this threshold between Heatrans, and since the relatively rare 252 neutral-natured Tyranitar tops out at 221, some Heatrans go to 222. I like to hit 223 with Moltres to try to creep the majority of Heatrans in this area because being faster than Heatran is very important for Moltres." The reason why it's very important for Moltres to be faster than most Heatrans is because you don't want to get Taunted before you can Defog or Roost, especially if you're trapped by Magma Storm. Scorching Sands does a lot to Heatran (usually somewhere around 48.7 - 58%), but Moltres can easily lose to Heatran if it gets trapped by Magma Storm and Taunted before it can Roost, or if the Heatran is just able to attack first. I could also see using 56 Speed EVs on Moltres to hit 230 Speed and outrun Modest Magearna, but I'm not sure if you would miss the additional bulk. Finally, I'll quote myself again to explain the 248 HP EVs, "I think it's pretty much always best to use 248 HP on Moltres so that you minimize the passive damage by not having an HP divisible by 4, 6, 8, 16, etc. You can read more about that here if you don't understand what I mean."

Buzzwole @ Leftovers
Ability: Beast Boost
EVs: 248 HP / 192 Def / 68 Spe
Impish Nature
- Drain Punch
- Ice Punch
- Bulk Up
- Roost
Part of the reason why Buzzwole became popular was because it was such a good answer to Zygarde, but even though Zygarde has been banned, I still think that Buzzwole is a terrific defensive Pokemon. Buzzwole's most important role right now is being a check to Urshifu-Single-Strike, since Urshifu can destroy teams that don't have a dedicated answer, but Buzzwole is also an excellent answer right now to other very good breakers like Rillaboom (provided it doesn't have Acrobatics, but that's really telegraphed by it having a Grassy Seed), Crawdaunt, Swords Dance Garchomp, Excadrill (even with Rock Slide), non-Fly Landorus-Therian, Urshifu-Rapid-Strike not in rain, and even Choice Band Barraskewda in the rain (assuming you don't get haxed by Waterfall or Liquidation). Having a check to all of those threats is important because Moltres can struggle with all of them (except Rillaboom, but like I said earlier, you need to be careful switching Moltres into a potential Knock Off from Rillaboom).
I'll quote myself again from a different thread to explain the EV spread I use, "Buzzwole hits 211 with the 68 speed EVs. Adamant Crawdaunt hits 209 so I like to have my Buzzwole faster than that. I just go to 211 to try to creep something like a Mandibuzz that might also sit at 210." As for the move selection, Drain Punch not only hits hard some key Pokemon that Buzzwole checks, like Urshifu-S, Excadrill, and Crawdaunt, it also provides some nice recovery. Ice Punch provides good coverage and hits other Pokemon that Buzzwole can check like Rillaboom, Garchomp, and Landorus-T. Bulk Up is nice because it allows Buzzwole to boost up alongside and wall certain threats, like Bulk Up Zeraora (although I don't think this is very common) and Swords Dance Kartana. Bulk Up can also make Buzzwole a potential late-game sweeper. Bulk Up used to be necessary to wall Coil Zygarde, so with Zygarde gone, I could see other coverage moves potentially having merit over Bulk Up. Finally, Roost is critical to keep Buzzwole healthy and allow it to wall. Leftovers is also the item of choice just to provide more longevity through passive recovery.
Hippowdon (F) @ Leftovers
Ability: Sand Stream
EVs: 248 HP / 8 Atk / 252 SpD
Careful Nature
- Earthquake
- Stealth Rock
- Slack Off
- Toxic
I went with specially defensive Hippowdon because I wanted a defensive check to things like Regieleki and Roost/Safeguard Volcarona that would otherwise be very threatening. I think that specially defensive Hippo fits my team much better than physically defensive in regards to what I want it to check. Hippowdon providing an Electric immunity is also nice to stop things like Zapdos, Magearna, and Tapu Koko from Volt Switching. Hippowdon isn't as common as it once was, but I think that it's still a pretty reliable Stealth Rocker. Some Defoggers like Zapdos, Moltres, and the less common but still relatively viable, Flygon, can't really touch Hippowdon and Hippowdon can Toxic them if they try to Defog. Sand Stream is another bonus for using Hippowdon because it can help out against opposing rain and sun teams. Specially defensive Hippowdon is a very good answer to Heatran because Magma Storm + Taunt variants can trap and knockout Blissey, while Hippo doesn't really fear Magma Storm and threatens to OHKO Heatran with Earthquake. Specially defensive Hippowdon should be able to handle Calm Mind + Draining Kiss Magearna that don’t have Ice Beam, as long as the Magearna hasn’t already gotten off too many Calm Minds, while Blissey can’t really do anything against it. Specially defensive Hippowdon also should be able to wall mixed Dracozolt, which otherwise can be a threat. Lastly, Hippowdon can check Ghost types with Substitute, like Spectrier, Dragapult, and the occasional Gengar, that my Blissey can't touch and can't Teleport into something immediately threatening if the Ghost is behind a Sub. With that said, Substitute + Will-O-Wisp + Hex variants of these Ghosts can be a problem for Hippowdon, and Hippowdon shouldn't really be switching into a Spectrier that's already at +2. In general though, as great of a special wall as Blissey is, I like having something alongside it, like specially defensive Hippowdon in this case, because Blissey feels to me to be too exploitable at times to rely on as your only specially defensive option. Hippowdon's naturally high Attack stat and STAB Earthquake lets it do a surprising amount of damage at times. Slack Off is also necessary to give Hippowdon lasting longevity and Leftovers is always nice for additional passive recovery. I go with 248 HP EVs again to minimize some passive damage and I put the remaining 8 EVs into Attack to improve Hippowdon's chances at 2HKOing Volcarona.
Blissey @ Heavy-Duty Boots
Ability: Natural Cure
Shiny: Yes
EVs: 252 HP / 252 Def / 4 SpD
Bold Nature
IVs: 0 Atk
- Seismic Toss
- Soft-Boiled
- Teleport
- Aromatherapy
Blissey/Chansey is clearly the preeminent special wall in the metagame. I went with Blissey over Chansey because having Heavy-Duty Boots makes it much easier to repeatedly bring Blissey in and I don't feel overly confident in my hazard control with Moltres as my only form of hazard removal. That being said, I do understand that Chansey's additional bulk (so long as it doesn't get its Eviolite Knocked Off) warrants considering Chansey in the current meta. Blissey is essentially a catch-all check to most special attackers, provided that they either aren't a Ghost Type that can hide behind a Substitute while you Teleport (like Spectrier, Dragapult, and the relatively rare Gengar), have a strong Psyshock (like Tapu Lele or Alakazam), or have a very strong Focus Blast (like Choice Specs Magearna or again, Nasty Plot Alakazam). I know that some people have started using Shadow Ball on Blissey to mitigate that inability to hit Ghosts, and I can see that being of value, but Blissey still won't be able to really touch the Ghosts if they have Substitute + Disable. I think that the consistent damage from Seismic Toss is generally better than Shadow Ball, but as I said, I could see Shadow Ball being better. I think I would need to lab it out more but I also think that Blissey might be able to PP stall out these Ghosts, even if Blissey can't really do much to them. Blissey does have a bit of 4MSS but Soft-Boiled at least is pretty mandatory. I really like Teleport because it can help gain momentum by bringing in my breakers like Cinderace and Magearna, but it's also very convenient on Blissey in conjunction with Natural Cure, since it lets Blissey sponge status and then cure it immediately. I also am personally a fan of Aromatherapy because Cinderace is at risk of getting burned or paralyzed by Flame Body Moltres and Static Zapdos, respectively. Since Cinderace in particular bares a lot of the offensive responsibility on this team, I think it's very important to keep it status-free. Aromatherapy is also obviously nice at removing status, mainly toxic and burns, that may have been inflicted on my other defensive options in Moltres, Buzzwole, and Hippowdon. It would be nice to fit a Toxic or Thunder Wave on Blissey but I prefer the ability to keep my own team healthier, especially since I don't want to impair Moltres's ability to spread burns on key opposing Pokemon. However, I could see Thunder Wave in particular being nice over Aromatherapy to help PP stall out Ghosts like Spectrier, but like I said, I would need to lab that situation out more.

Magearna @ Choice Specs
Ability: Soul-Heart
EVs: 252 SpA / 4 SpD / 252 Spe
Modest Nature
IVs: 0 Atk
- Fleur Cannon
- Volt Switch
- Ice Beam
- Aura Sphere
Choice Specs Magearna is my special breaker. I hope Magearna doesn't end up getting banned again, but I could see it happening, especially with how the annoying setup sets (Calm Mind and/or Shift Gear with Stored Power, often Draining Kiss, and Focus Blast/Aura Sphere) are becoming more common. It's kind of odd to me that the Specs set has become a little less common (15.560% of Magearna had Choice Specs most recently at 1695 and 16.186% at 1825), because I thought that it was widely regarded as Magearna's best set before it was previously banned. Maybe shifts in the meta make Specs less splashable right now, but I still think it's very good, especially when paired with an offensive U-turner like Cinderace. Modest, Specs Fleur Cannon hits extremely hard and has very few switch-ins in the tier. Because of this, it's often easy to read that your opponent is going to switch to whatever Fairy resist they have (Heatran, Corviknight, Ferrothorn, Toxapex, etc.) and you can just click Volt Switch instead to bring out Cinderace. Cinderace synergizes so well with Magearna because it can pick off the common Magearna switch-ins after you Volt Switched on them. Ice Beam gives you coverage against Ground types that may try to block a Volt Switch and Aura Sphere hits Steel Types when you don't want to try to Volt Switch out of them. I could see Focus Blast being better than Aura Sphere but Aura Sphere still 2HKOs most specially defensive Heatrans and all Ferrothorns. Also, I try to avoid having to deal with Focus Blast's accuracy whenever I can. I know that Trick is also commonly used on Choice Specs Magearna to cripple switch-ins like Blissey/Chansey or Heatran, and this is just a personal preference, but I tend to not like using Trick on my breakers. I like keeping the added power of Specs and if I predict a switch to some wall I would want to Trick, I feel like I can just Volt Switch into Cinderace and threaten that wall directly. Tricking Specs onto Heatran can also be scary at times. That being said, I could see Trick being better than Ice Beam so that you could Trick your Choice Specs onto slower setup sweepers like Calm Mind Clefable or Calm Mind Tapu Fini that you outrun, but again, giving them Specs can be scary, especially if they've gotten off a Calm Mind or two. Really, I just find myself clicking either Fleur Cannon or Volt Switch with Magearna that majority of the time. As for the EV spread, there isn't really much important that Magearna would be faster with if you elect to go Timid that you're missing out on with Modest, so I think that the additional power of Modest is definitely better. Finally, Magearna's good natural bulk and excellent defensive typing, providing immunities to both Poison and Dragon, as well as resists to Psychic and Dark, can come in handy in a pinch.
Threats:
Replays:
Replay 1 - vs. Trick Room
I think that this team is bulky enough to have a decent matchup with Trick Room. My opponent makes an odd play by going for a Swords Dance on turn 8, but I don't think it would have mattered much since I would have been able to revenge kill their Alolan Marowak after Moltres went down anyway. This matchup was also made easier by their Melmetal not being Banded, but I think that Buzzwole should be able to handle and stall out Trick Room turns from even Banded Melmetal, although you have to avoid getting flinched and can't switch into a Banded Double Iron Bash when Trick Room is up. Between the combination of Buzzwole, Blissey, and Hippowdon, I was able to withstand the Trick Room offense and wear my opponent's team down to win in a more elongated endgame.
Replay 2 - vs. Hyper Offense 1
The combination of Blissey and Buzzwole comes up big again here. Blissey completely walls the opposing Nidoking, which is something that I don't really think that anything else in the tier can achieve (except for Chansey but that doesn't really count). Buzzwole totally blanks Urshifu, which obviously very little can do either. I'm not sure what sets their Spectrier and Magearna were but I don't think that it should have really ended up mattering from the position I was in.
Replay 3 - vs. Bulky Offense
I think that this game shows all of the members of the team pretty well. Immediately, the Volt-Turn combination of Cinderace and Magearna gets rid of Slowking. My Blissey can't touch their Spectrier behind the Sub but my specially defensive Hippowdon ends up checking it over the course of the game. Blissey is able to Teleport out several times against things like Zapdos to gain momentum back for me. I get a little lucky with the Flamethrower burn on Zapdos, but later I get frozen by an Ice Beam and paralyzed by Thunder Punch. Having my Moltres get paralyzed by Melmetal's Thunder Punch was particularly unfortunate because otherwise I would have been able to wall it with Roost and repeatedly threaten Flame Body burns. Burning my opponent's Zapdos may actually not have ended up being a good thing for me because it prevented my Hippowdon from Toxicing it. The Special Defense investment in my Hippo does show its value repeatedly throughout this game, as it allows me to heal up from low health against their Heatran and withstand the Hurricanes from Zapdos. Aromatherapy on Blissey works well because it removes the burn on Hippowdon, which later starting on turn 28, allows my Hippowdon to use Earthquake while the Zapdos Roosts and chip it down to very low health. I may have made mistakes by staying in with my paralyzed Moltres on turns 35 and 36 against their Heatran. I probably should have gone to Blissey to try to get off an Aromatherapy since I knew they didn't have Magma Storm and it didn't seem like they had Taunt. Getting rid of the status on both Moltres and Buzzwole would have been good because I could have likely healed them up through Roost later. I don't know why my opponent went for Toxic on turn 36 unless they were trying to catch my Hippowdon or something. The endgame gets a little weird but after my Hippowdon does an excellent job of surviving and finishing off their Spectrier on turns 43-45, I knew that I could win with Cinderace if I just hit my High Jump Kicks, which I fortunately did. Without Life Orb, there was only a 6.3% chance that the final CC from Pheromosa would have OHKOed my Cinderace. Even if it did, my Hippowdon should have been able to finish it off, barring another Ice Beam freeze.
Replay 4 - vs. Hyper Offense 2
My opponent's team had Zygarde and Kyurem-Black on it, both of which have since been banned, but you can still see how my team handled them and performs against this Screens offense. Hippowdon forces Regieleki to just Explode after getting their screens up, which allows me to freely get up Rocks. Buzzwole really shines this game as it completely shuts down their Urshifu, Kyurem-Black (that thankfully didn't have Dual Wingbeat), and Zygarde. Blissey walls and beats down their Shift Gear + Calm Mind Magearna, which also thankfully didn't have Draining Kiss. In general, you can see that the defensive backbone of my team was sturdy enough to wall and wear down the opposing HO team, instead of trying to break through their Screens.
Replay 5 - vs. Rain
Blissey is big in this game again as it walls and eventually beats down the opposing Shift Gear + Calm Mind Magearna (which also thankfully didn't have Draining Kiss). I get put in a bad spot on turn 17 when their Urshifu-Rapid-Strike comes in with the rain up. As I said in my "Threats" section, I really don't have good switches into it, so I sac Moltres and get the fortunate Flame Body burn. There's a 51% chance that Urshifu-RS will get burned by Flame Body after 2 Surging Strikes hits, so it's not like I got incredibly lucky there. Still though, if I didn't get the burn, I wouldn't have been able to answer Urshifu-RS defensively at all over the course of the game. However, after their Urshifu-RS is burned, my Buzzwole ends up handling it well. Hippowdon does a good job of spreading Toxic onto their Buzzwole and Pelipper. I know it was kind of risky staying in with my Hippowdon against their Pelipper on turn 28, especially with the rain up, but I knew that I should be able to take the Scald relatively comfortably and I wanted to get the Toxic off to start wearing down the Pelipper. I made a mistake on turn 31 staying in with my Hippowdon against their Zeraora. I thought they were specially offensive anyway so I should have just gone to Blissey or Buzzwole to scout for Grass Knot. I think I was concerned about them Volt Switching or something but it was very unlikely that they would make that play while staring down a Hippowdon. Their Urshifu-RS being burned also comes into play on turn 34 because it allows my Blissey to live a rain-boosted Surging Strikes and Teleport out into Cinderace. Magearna forces a kill on turn 38 with Fleur Cannon and on turn 40, you can see my Blissey come in safely against their Magearna, even at only 22%, since Blissey only takes 7% from a Stored Power after a Shift Gear. This allows me to heal all the way back up from 15% and use Seismic Toss to beat the Magearna, which is something that I couldn't do if I used Shadow Ball on Blissey for Spectrier. My opponent forfeits after that and I think that I had the rest of his team walled.
Conclusion:
I know that this was an extremely long writeup, but as I said in the introduction, this will likely be my last post like this in a while, so I wanted to be thorough. I like this team a lot and I've found it to be a solid balance team in the current meta. It has a strong defensive backbone in Moltres, Buzzwole, Blissey, and specially defensive Hippowdon, which can stand up to most of the offensive threats in the tier. Cinderace and Choice Specs Magearna are two solid breakers that cover each other's switch-ins well and form an effective Volt-Turn core. You have to be a little careful with how you bring Cinderace and Magearna in since they shoulder the majority of this team's offensive potential, but Aromatherapy from Blissey can help get rid of status. A lot of the other SS balance teams I've built have tended to have 4 defensive Pokemon and 2 breakers (one physical and one special), so I guess this is just a style I'm comfortable with.
One weakness of this team is that it isn't particularly fast and doesn't have any form of priority or speed control. I've found that the defensive backbone is strong enough to allow me to play around threats defensively and I haven't really felt like I needed a Choice Scarfer or anything, but I could see potentially using something like Scarf Landorus-T over Hippowdon and putting Rocks on Blissey. I also think that Shadow Ball over Seismic Toss may be better on Blissey because of how dumb Spectrier can be. I might just be being stubborn by sticking with Seismic Toss but I don't like running an almost entirely inferior move just for Spectrier. Once again, I talk more about why I think that running Shadow Ball over Seismic Toss overall makes Blissey worse and less consistent/useful in my comment below. The other potential alterations I could see are using Gunk Shot or Sucker Punch over Zen Headbutt on Cinderace if you feel like you have a good enough way to deal with Toxapex, possibly going with Focus Blast over Aura Sphere on Magearna if you don't mind the accuracy, maybe Trick over Ice Beam on Magearna, and potentially Mystical Fire over Flamethrower on Moltres. So yeah, if you end up using this team, always feel free to fool around with tweaking things and see if you end up liking something else better. I end all of my RMTs like this, but seriously, thank you very much to anyone who takes the time to read or look this over, and have a great day!
PokePaste
Cinderace (M) @ Heavy-Duty Boots
Ability: Libero
EVs: 252 Atk / 4 Def / 252 Spe
Jolly Nature
- Pyro Ball
- High Jump Kick
- U-turn
- Zen Headbutt
Moltres @ Heavy-Duty Boots
Ability: Flame Body
Shiny: Yes
EVs: 248 HP / 232 Def / 28 Spe
Bold Nature
IVs: 0 Atk
- Flamethrower
- Scorching Sands
- Defog
- Roost
Buzzwole @ Leftovers
Ability: Beast Boost
EVs: 248 HP / 192 Def / 68 Spe
Impish Nature
- Drain Punch
- Ice Punch
- Bulk Up
- Roost
Hippowdon (F) @ Leftovers
Ability: Sand Stream
EVs: 248 HP / 8 Atk / 252 SpD
Careful Nature
- Earthquake
- Stealth Rock
- Slack Off
- Toxic
Blissey @ Heavy-Duty Boots
Ability: Natural Cure
Shiny: Yes
EVs: 252 HP / 252 Def / 4 SpD
Bold Nature
IVs: 0 Atk
- Seismic Toss
- Soft-Boiled
- Teleport
- Aromatherapy
Magearna @ Choice Specs
Ability: Soul-Heart
EVs: 252 SpA / 4 SpD / 252 Spe
Modest Nature
IVs: 0 Atk
- Fleur Cannon
- Volt Switch
- Ice Beam
- Aura Sphere


Last edited:


