Oh, and the one thing I really want to say about the Palace: It's more important to choose a nature that works well with your moveset and strategy than it is to choose one that increases the correct stats. Your stats mean nothing if your pokemon uses the wrong moves or doesn't move at all. Adamant, Modest, and Timid are generally bad natures in the Palace.

-
Check out the relaunch of our general collection, with classic designs and new ones by our very own Pissog!
-
Welcome to Smogon! Take a moment to read the Introduction to Smogon for a run-down on everything Smogon, and make sure you take some time to read the global rules.
You are using an out of date browser. It may not display this or other websites correctly.
You should upgrade or use an alternative browser.
You should upgrade or use an alternative browser.
Gen III Battle Frontier Discussion and Records
- Thread starter Valentino23
- Start date
I'm glad to see someone else trying to up their Palace streak. I may be crazy, but it's definitely my favorite facility. I like the added element of choosing a nature that works well with the pokemon's goals, and I'm not the best at strategy, so I like that that's out of my hands. Currently working on a team to take back the record... Is there a pokemon generating program people use to test sets out? Hard to RNG an entire team just to have it not work out.
Don't ask for hacking advice. Goes against what this forum is meant for.
Some ideas in no particular order:
- Recover (and its clones) is way better than Rest in the Palace because it doesn't matter too much if your pokemon uses it when at nearly full health. It's best to use a chesto berry with Rest for insurance.
- Curse is considered a support move, and I have yet to see someone take good advantage of this fact. Impish Curse Snorlax or Impish Curse Miltank could be amazing in the palace because you can count on them to heal themselves when their HP gets low. All other boosting moves are defense moves, so if you have Rest and Calm Mind, they may use the wrong one at the wrong time. Curse Miltank also gets Milk Drink.
- Hardy is a great nature for a pokemon with 3 attacking moves and 1 support move. Not sure who could pull it off best. Gengar, Starmie, or maybe Breloom could make use of it with their support move options.
- I generally think choice band is a bad idea in the Palace, because your pokemon can still waste turns, and it's better to spend those turns capitalizing on the opponent's wasted turns. That said, I think there's some potential for Choice Band Explosion as a way to eliminate threats. Brave Choice Band Steelix with Earthquake, Explosion and Toxic could be interesting, or maybe just Metagross with EQ and Explosion. With Choice Band you really want a higher chance of the pokemon making a smart decision at high health, so they get locked into the best possible move.
- I have a lot of Palace notes on my computer at home that I'd like to compile into a more comprehensive guide at some point.
I agree on Recover being much better than what Rest will ever be. Even with a Chesto Berry, a Modest nature, as an example still has a chance to insist with Rest and being crippled for two turns is incredibly frustrating. At least with Recover, the HP restoration is immediate and doesn't leaves you immobilized for two turns.
Impish and Curse does sounds interesting and worth exploring for the future that being said. I guess Hardy is simply too unapealing since it doesn't boost any particular stat.
Regarding the Choice Band, I haven't had any significant setbacks so far. The point is to restrict your Pokemon once it picks a move so it's "dumb" decision still remains as the move it is currently locked into and I never considered myself a big fan of using Explosion because there is still a chance where it will use it at the most inconvenient time. There's a reason why Werster removed the move on his Metagross on his speedrun strat. Either way, in case you can still provide more info on the Palace I'll be gladly looking forward it!
I'm glad to see someone else trying to up their Palace streak. I may be crazy, but it's definitely my favorite facility. I like the added element of choosing a nature that works well with the pokemon's goals, and I'm not the best at strategy, so I like that that's out of my hands. Currently working on a team to take back the record... Is there a pokemon generating program people use to test sets out? Hard to RNG an entire team just to have it not work out.
Some ideas in no particular order:
- Recover (and its clones) is way better than Rest in the Palace because it doesn't matter too much if your pokemon uses it when at nearly full health. It's best to use a chesto berry with Rest for insurance.
- Curse is considered a support move, and I have yet to see someone take good advantage of this fact. Impish Curse Snorlax or Impish Curse Miltank could be amazing in the palace because you can count on them to heal themselves when their HP gets low. All other boosting moves are defense moves, so if you have Rest and Calm Mind, they may use the wrong one at the wrong time. Curse Miltank also gets Milk Drink.
- Hardy is a great nature for a pokemon with 3 attacking moves and 1 support move. Not sure who could pull it off best. Gengar, Starmie, or maybe Breloom could make use of it with their support move options.
- I generally think choice band is a bad idea in the Palace, because your pokemon can still waste turns, and it's better to spend those turns capitalizing on the opponent's wasted turns. That said, I think there's some potential for Choice Band Explosion as a way to eliminate threats. Brave Choice Band Steelix with Earthquake, Explosion and Toxic could be interesting, or maybe just Metagross with EQ and Explosion. With Choice Band you really want a higher chance of the pokemon making a smart decision at high health, so they get locked into the best possible move.
- I have a lot of Palace notes on my computer at home that I'd like to compile into a more comprehensive guide at some point.
Hardy Starmie, Gengar and Breloom sounds terrible. All three of them need their speed to function. Running Hasty is still the best nature for all three. If you want an ideal CB user in the Palace, use CB Hasty Slaking or Tauros with just Double-edge or Return. It's a lot easier to be locked into stab normal moves, because there aren't many ghosts in the game and rock and steels are easily checked with a solid ground or water type.
Edit: Kommo-o said it above. Restrict the move choices for CB users so the dumb AI has less options to choose from. You don't want to choose EQ against a levitate pokemon or flying type for example. The explosion thing doesn't work as well as you might want. I had a Hasty Gengar with Explosion and this thing would rather boom on Rhydon than use Ice punch. Not a fan.
So I actually have a lot to share about the palace, and I was gonna wait until I finish breeding and soft-resetting for my team the hard way which I should finish in 4 months or so. But since there is a lot of discussion about palace I figured I'd jump in with some stuff I've figured out.
Okay so the narration is bad but the info is good:
Tauros (M) @ Choice Band
EVs: 4 HP / 252 Atk / 252 Spe
Ability: Intimidate
Level: 50
Sassy Nature
- Double-Edge
- Earthquake
Salamence (M) @ Lum Berry
EVs: 8 HP / 244 Atk / 72 SpD / 184 Spe
Ability: Intimidate
Level: 50
Hasty Nature
- Aerial Ace
- Earthquake
- Brick Break
- Dragon Dance
Starmie @ Leftovers
EVs: 4 HP / 252 SpA / 252 Spe
Ability: Natural Cure
Level: 50
Sassy Nature
- Thunderbolt
- Surf
- Psychic
- Ice Beam
WuLeng (Gyarados) (M) @ Lum Berry
EVs: 252 HP / 164 SpD / 92 Spe
Ability: Intimidate
Level: 50
Gentle Nature
- Return
- Earthquake
- Rest
- Dragon Dance
Red Keep (Skarmory) (M) @ Leftovers
IVs: 0 SpA
EVs: 252 HP / 56 Def / 196 SpD / 4 Spe
Ability: Sturdy
Level: 50
Bold Nature
- Curse
- Roar
- Protect
- Fly
Ground (Lanturn) (M) @ Chesto Berry
IVs: 0 SpA
EVs: 252 HP / 56 Def / 196 SpD / 4 Spe
Ability: Volt Absorb
Level: 50
Bold Nature
- Rest
- Toxic
- Protect
- Amnesia
Basically some frontier challenges will always beat the player eventually no matter what you do outside of RNG manip, palace is just that to the extreme. Which means being able to quickly try again is important. Use Sassy pokemon for the first 21 or 35 battles! Also you should be able to optimize for battles 36-49 vs how tough 50+ is
For choice band I highly suspect that the random 50% move is forced into choiceband
When choosing between two correct moves your pokemon will use the ai logic, meaning it will curse exactly 6 times then roar and if it has a lot of health it will dragon dance instead of rest.
Let me introduce you to the only move that your pokemon is garunteed to pick: struggle
+6 everything snorlax is the best struggler for having high HP and atk while being immune to toxic. 2 shots most threats which really keeps away the shenanigans.
Salamence (M) @ Choice Band
EVs: 8 HP / 244 Atk / 72 SpD / 184 Spe
Ability: Intimidate
Level: 50
Hasty Nature
- Aerial Ace
- Earthquake
- Rock Slide
- Blizzard
DIESAL (Snorlax) (M) @ Leftovers
IVs: 0 SpA
EVs: 252 HP / 252 Def / 4 SpD
Ability: Immunity
Level: 50
Bashful Nature
- Rest
- Amnesia
- Curse
- Double Team
Shedinja @ Persim Berry
EVs: 252 Atk / 252 Spe
Ability: Wonder Guard
Hasty Nature
- Aerial Ace
- Shadow Ball
- Swords Dance
Snorlax plows through 95% of pokemon by itself, it's such an auto win button especially with intimidate support. Aerial ace dragon dancers are threats (which makes registeel a consideration for this role, resisting flying and immune to poison still) . You also have to avoid getting burnt by flamethrower after running out of rest pp. But this team is only good for streaks up to around 70 (even without the problem this team has with maven you run into a problem often under 20 battles). ( I love shedninja for beating water trainers with ohko moves) I tried 30+ partners like latis with roar or charm or special attacks trying to help against swords dancers but nothing made this team as good as just having multiple attackers so they can each do 60% of the damage to a threat and just set up and sweep the rest.
So what actually is good? Attacking is good, but you need some serious bulk in order to have the luxury of not attacking every turn. Turns out cody the machine had all the right pokemon but was using very suboptimal natures.
Salamence (M) @ Lum Berry
EVs: 8 HP / 244 Atk / 72 SpD / 184 Spe
Ability: Intimidate
Level: 50
Hasty Nature
- Aerial Ace
- Earthquake
- Rock Slide
- Dragon Dance
notDIESAL (Snorlax) (M) @ Leftovers
IVs: 0 SpA
EVs: 4 HP / 252 Def / 252 SpD
Ability: Immunity
Level: 50
Hardy Nature
- Shadow Ball
- Return
- Curse
- Earthquake
Suicune @ Chesto Berry
IVs: 0 Atk
EVs: 252 HP / 240 Def / 16 SpA
Ability: Pressure
Level: 50
Modest Nature
- Surf
- Rest
- Ice Beam
- Calm Mind
You can't make me give up intimidate support in the palace.
In testing this team gets up to battle 80 in a few tries, so i expect to be posting some good streaks in 2021. Also great job greentyphlosion that palace team is really strong, I tried it out (switching dragonite for salamence, intimidate FTW). I really only suspect this team to be about the same tier as dragon-cune-scizor.
Last edited:
Reporting an on-going 42 win streak at the Battle Palace on retail cartridge. So decided that since I got completely burned out from playing Sword/Shield and after losing my record at the Tower, I would be going on and play some of the other facilities while doing some exploration with Pokemon that I usually don't use outside Tower. I decided to go ahead and make a run of my money for what I do consider the 2nd worst facility in the whole game: The Battle Palace.

Yes that place where you actually fear Volbeat 2 and becomes a much more relevant threat than Armaldo 3 on this facility simply because the AI will make the moves for your Pokemon and most of the times... they will psychologically abuse you. After having my stress levels over the chat due to how Suicune betrayed me on this facility, I decided to replace Suicune with Milotic and so far, I have been satisified with the results. I feel very proud of this team and I can say that as long as your Pokemons make the right decision, they will carry you on this facility:
TheLetterA (Flygon) (F) @ Choice Band
IVs: 30 Atk / 30 Def / 30 SpD
EVs: 4 HP / 248 Atk / 6 SpA / 252 Spe
Ability: Levitate
Level: 50
Shiny: Yes
Hasty Nature
- Rock Slide
- Earthquake
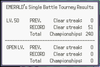
Hasty move preference percentage:
79% (Choice Band) - 21% Incapable 94% (Choice Band) - 6% Incapable Earthquake, Rock Slide - - Earthquake, Rock Slide - -

Nothing else needs to be said or explained about this Flygon set. Hasty nature is simply the best nature to use on this facility and it only requires two moves to work properly. Because Choice Band restricts the move choice, the actual attacking odds for Flygon are 79% since that 21% where it would've attacked dumbly is restricted by it. Once it is below 50% HP, it becomes a whooping 94% with only a 6% where it becomes incapable of using its own power.
Coverage wise, Earthquake and Rock Slide are the only moves that Flygon needs because its physical movepool is pretty barren and locking into anything else is begging for defeat. Flygon is used on the lead position since once it makes its move, you'll know what move it will be using for the rest of the match and swap accordingly if the enemy resists it or is immune to it.
Venus (Milotic) (F) @ Leftovers
IVs: 0 Atk
EVs: 244 HP / 254 Def / 4 SpA / 4 SpD / 4 Spe
Ability: Marvel Scale
Level: 50
Bold Nature
- Surf
- Toxic
- Recover
- Icy Wind
Bold move preference percentage:
30% 20% 50% 32% 58% 10% Surf, Icy Wind Recover Toxic Surf, Icy Wind Recover Toxic
After being psychologically abused and scarred for life by Suicune who simply refused to take down a Marowak 2 on one of my battles at Palace where it decided to boost CM in front of it, without ever fucking attacking once, until Marowak killed it... I decided that I needed a new team member. Milotic kills it on this facility due to its access of instant recovery and at below health, it will prioritize restoring its lost HP which makes it a great mon to rely into as the defensive backbone of this team. 50% chance of poisoning everything on sight is great because this makes Milotic a reliable Toxic staller that is able to defeat the Water types that Flygon struggles against. Also, its attacking odds are decent enough to take advantage of Surf. Icy Wind is there because it allows Milotic to put control on Salamence 4 and it was very useful vs Spencer's Hasty Suicune to which Milotic reduced its Speed and taking out of the window the possibility of getting flinched by boosted Bites.
Because Milotic has moves that fit into all three categories, it will always be guaranteed to make a move which is pretty great, although it won't always pick the correct one. However, on this hot pile of garbage facility, I'll take anything else other than "being incapable of using its own power."
Asura (Scizor) (M) @ Lum Berry
IVs: 29 HP / 30 Def / 18 SpA / 30 SpD / 30 Spe
EVs: 252 HP / 108 Atk / 4 Def / 10 SpD / 136 Spe
Ability: Swarm
Level: 50
Adamant Nature
- Aerial Ace
- Silver Wind
- Morning Sun
- Swords Dance
Adamant move preference percentage:
38% 31% 31% 32% 58% 10% Aerial Ace, Silver Wind Morning Sun Leer Aerial Ace, Silver Wind Morning Sun Leer
This is a real Scizor with cojones, none of that Bullet Punch and Mega Scizor bs. But seriously, this is the facility where I less enjoyed using it. Being honest, I only took a page from greentyphlosion's team and the only reason why he's here is because its resistances complements Milotic and Flygon perfectly. When Scizors picks its moves correctly, this is an amazing Pokemon to use since boosted Silver Winds hurt a lot and getting the omni-boost is always nice. Morning Sun grants recovery and with Adamant's preference of using it at low health, it knows at times when to use it. The main attacks are there for good reasons: Aerial Ace is there to punish Double Team spammers and preventing them from getting away with Palace shenanigans. It also destroys Breloom and Heracross which are troublesome for Flygon and Milotic. Silver Wind is the main STAB and what Scizor will use to destroy the Grass types both Flygon and Milotic struggle against.
One of the most important changes I made recently is replacing Swords Dance with Leer. Yes, that useless move you used early-game to get rid of Blue's Squirtle and Poochyenas on almost every route. With Leer, which is considered a support move on the Palace categories, Scizor is now guaranteed to always make a move which is much better than not having a chance at all. With Leer, Scizor is able to reduce the opponent's Defense which not only allows it to hit harder but in case it is being too dumb with the Leer drops, I can swap into Flygon who benefits massively from these drops and grab the kill. Overall, the addition of Leer has massively bolstered the team
I might consider replacing Swords Dance because in the end, Scizor doesn't really gets a lot of good support moves and the incorrect use of Swords Dance has lead to too many close battles. At least Morning Sun will recover the lost HP below the healthy percentage. Open to any suggestion on Scizor's last move.
TL:DR: Don't do this facility and ever come back to it. If you're aiming for a serious streak (just like I am), think again. This place will make any grown man cry rivers of tears and suffering. It's not fun watching your Pokemon use Swords Dance until they die. It's not fun. It will make you angry and have PTSD episodes. Easily the 2nd worst facility on this game behind the Factory.
New update on my Palace streak. It has gone up to 70 wins on cartridge now and below you can find my proof attached. In other news, no man deserves to suffer through what I had gone through this run the whole time. This facility has psychologically abused me and I'll forever have dreams of Dewgong 3 landing those OHKO moves while having me at the edge of my seat because a Silver Wind is unable to OHKO HAXGONG at -6:
108+ Atk Scizor Silver Wind vs. -6 255 HP / 255+ Def Dewgong: 170-201 (86.2 - 102%) -- 12.5% chance to OHKO
Yeah, incredibly cursed calc, but other than that, the reason why this team is very consistent in Palace comes with a small but significant change I made on Scizor with replacing Swords Dance with Leer. I'm not kidding. The very same move you use early game to get rid of Poochyenas and Rattatas in your initial routes. Because Leer is considered a Support move, Scizor will finally stop being "incapable of using its power" and will always have a guaranteed chance of moving, which after all what I have gone so far, I'll take any day over not being able to move at all. Leer also makes it very easy to handle Spencer's Gold Slaking and other similar threats like Lapras, Umbreon and Snorlax since the Leer drops also benefit Flygon on whatever it has its defense dropped thanks to the instant power of the Choice Band.

PS: WHY I AM EVEN DOING THIS TO MYSELF!?!?!?!?!?!?!?!?!?!?
Last edited:


Been a little while since I've contributed any streaks here but I figured I'd share the rest of my streaks just for completeness. Nothing too impressive here - most of my streaks were basically me just going for the symbol or farming BP rather than trying to get the longest streak I could. Maybe one day when I'm not invested with other stuff I'll try to grind out some bigger numbers but for now enjoy.
All streaks are on cart.
Battle Tower (Singles, level 50): 79 wins

For the first 70 battles I used my Jolteon/Registeel/Salamence team which I posted in one of the previous threads:
For the rest of the streak I replaced Jolteon with Misdreavus, which seems like a strange choice but its particular array of immunities, when paired with a Steel-type, help with the Rhydon problem that my previous team had. Misdreavus's stats aren't really good enough though so this experiment didn't last very long. I think I lost to some Water trainer that crit through my last Pokemon Registeel's boosts, a scenario which is not as likely to happen with Jolteon on the team for obvious reasons.

Misdreavus @ no item
Bold
Levitate
IVs: 31/4/31/31/31/31
EVs: 244/0/252/4/4/4
Thunder Wave
Growl
Taunt
Thief
This was basically to deal with Rhydon more easily. Earthquake and Horn Drill immunity + tendency to encourage Rhydon to use Rock attacks allows for much safer PP stalling through switching between Misdreavus and Registeel. However, outside of that Misdreavus was inferior to Jolteon at crippling (worse stats and move pool) and my team became more vulnerable to Electric- and Water-types. I ended up losing in the 80s. This was mostly my fault since I got lazy and didn't PP stall something I ought to have, and then I had just Salamence left against a Water team which is a recipe for disaster.
I perhaps may have been better off just using a more offensive lead set rather than a crippling one, or possibly even used Gengar instead since it has the same immunities. Or maybe Grudge Misdreavus has merit since it could remove PP of a threatening move to allow for easier set-ups. I probably won't attempt this again though.
If I were to try this again, I'd be inclined to run Hidden Power Grass on Jolteon, probably over Sand-Attack, just so that I have a method for deleting Rhydon ASAP. This sadly doesn't help with the whole Quick Claw problem but it's better than not having anything at all. I also thought about trying Light Ball Pikachu in the lead, for no reason other than potentially gaining the right to brag about pulling off a streak with Pikachu (obviously Pikachu's worse bulk and Speed compared to Jolteon does it no favours).
Battle Palace (Singles, level 50): 42 wins (ongoing)

I got the symbol on my first attempt with the Metagross/Starmie/Salamence team I posted in the previous thread:
Since playing in Palace doesn't really require a lot a mental effort (the Pokemon pick the moves themselves after all), I could probably see myself continuing this at some point with some tweaks (Hidden Power on Metagross is a BIG no-no since the AI sucks at using it) but I would need to re-breed some Pokemon and I don't feel like doing that right now.
Battle Pyramid (level 50): 147 floors cleared (ongoing)

The 147 floors represent the 20 unique rounds plus 1 extra. I didn't really have a set team for the facility. I basically just swapped things in and out based on the wild Pokemon of the round - overkill since there's no need to pack a Limber Hitmonlee for round 1 when Slaking or whatever can just steamroll everything regardless, but it made this facility a lot more fun.
My teams for rounds 1-10:
1) Hitmonlee/Flygon/Linoone
2) Alakazam/Vileplume/Linoone
3) Houndoom/Slowbro/Snorlax
4) Houndoom/Slowbro/Flygon
5) Gengar/Snorlax/Flygon
6) Sceptile/Lanturn/Charizard
7) Medicham/Lapras/Metagross
8) Gengar/Steelix/Milotic
9) Houndoom/Lanturn/Flygon
10) Heracross/Swampert/Aerodactyl
From this point on I might have trouble remembering all of my teams since I didn't document them thoroughly in one spot, so bare with me!!!!!

Crobat
Adamant
Inner Focus
IVs: 31/31/31/14/30/31
EVs: 12/252/0/0/0/244
Sludge Bomb
Wing Attack
Shadow Ball
Hidden Power [Ground]

Steelix
Adamant
Sturdy
IVs: 31/31/31/27/30/31
EVs: 76/252/4/0/176/0
Earthquake
Rock Slide
Hidden Power [Steel]
Rest

Grumpig
Timid
Thick Fat
IVs: 31/4/31/31/31/31
EVs: 0/0/4/252/0/252
Psychic
Fire Punch
ThunderPunch
Rest
This round focuses on Fighting-types and pretty much any decently strong Flying- or Psychic-type is good here. I went with Adamant Crobat because it also had Shadow Ball (for Medicham) and STAB Sludge Bomb (for Breloom) in addition to Wing Attack, providing plenty of PP to deal with everything. In the case of Breloom, having a non-contact move to deal with it whilst avoiding Effect Spore was nice too. I chose Wing Attack over Aerial Ace also because of its much higher PP. With a Choice Band equipped (and I have 3 of them in my Pyramid Bag at this point), Crobat trivialised this round.
I chose Steelix as a back-up for its type syngergy with Crobat. I liked the idea of a Psychic-type as a third team mate and went with Grumpig specifically because of Thick Fat providing Fire and Ice resistances to cover Crobat and Steelix. Unfortunately, I never actually got the opportunity to send Grumpig into battle since I never needed to, and Steelix was used just once.
This round was fairly uneventful. I only encountered 3 trainers. The first had an unknown set of Starmie which was OHKOed by Shadow Ball (only one of the 8 possible Starmie sets can survive it). The second had Salamence2, which was walled by Steelix and was even courteous enough to give Steelix a free Swagger boost (I gave Steelix Lum Berry to utilise Rest more easily). The third was Whiscash3 with Surf and Fissure which I just swatted at with Wing Attack until it died - this was the only time I needed to use a Hyper Potion. I also found 2 Sacred Ashes, making 4 total, and with the many Hyper Potions and Ethers I have I'm currently in a pretty good position. I only have 2 Revives though so hopefully I can get more of those later on.
Team 12 (Round 12: Weather abusers)

Aerodactyl
Adamant
Rock Head
IVs: 31/31/30/15/30/30
EVs: 0/252/8/0/0/248
Hidden Power [Rock]
Earthquake
Wing Attack
Fire Blast
Quagsire

Adamant
Water Absorb
IVs: don't remember
EVs: don't remember
Earthquake
AncientPower
Hidden Power [Bug]
Rest

Metagross
Adamant
Clear Body
IVs: 31/31/31/31/30/31
EVs: 4/252/0/0/0/252
Hidden Power [Steel]
Earthquake
Rock Slide
Rest
Choice Band Aerodactyl is a surprisingly good lead in this round. Quagsire seems like a strange choice but its Ground-typing combined with Water Absorb lets it wall the wild Quagsire and Gyarados in this round completely.
Team 13 (Round 13: Bug-types)

Gengar
Timid
Levitate
IVs: 31/19/31/21/31/31
EVs: 28/0/4/252/4/220
Psychic
Fire Punch
Thunderbolt
Rest

Houndoom
Timid
Flash Fire
IVs: 31/10/30/30/31/31
EVs: 4/0/0/248/4/252
Flamethrower
Crunch
Hidden Power [Water]
Taunt
Quagsire
Adamant
Water Absorb
IVs: don't remember
EVs: don't remember
Earthquake
AncientPower
Hidden Power [Bug]
Rest
I brought back my round 8 Gengar here because there are a handful of Exploders here that it is able to block and it also has its useful Psychic/Fire coverage to hit everything super-effectively except Armaldo, whose Water Pulse/Rock Slide coverage is completely blocked by Water Absorb Quagsire. Houndoom covers their weaknesses well. Don't remember much about this round aside from vowing never to use offensive Gengar sets ever again if I can avoid it. They disappoint time and time again.
Team 14 (Round 14: Dark-types)
Scizor

Adamant
Swarm
IVs: 31/30/30/15/30/31
EVs: 252/252/0/0/0/4
Hidden Power [Bug]
Steel Wing
Swords Dance
Rest
Houndoom
Timid
Flash Fire
IVs: 31/10/30/30/31/31
EVs: 4/0/0/248/4/252
Flamethrower
Crunch
Hidden Power [Water]
Taunt

Milotic
Modest
Marval Scale
IVs: 31/10/31/30/31/31
EVs: 180/0/76/248/4/0
Surf
Ice Beam
Hidden Power [Grass]
Rest
Hurr Durr Bug beats Dark. Also Scizor is cool. Didn't work so well in the lead spot though since it's just too slow, so much so that I ended up swapping Houndoom into the lead position on the second floor! Houndoom and Milotic cover Scizor's Fire weakness. This team actually isn't great but according to my notes I only encountered 2 trainers through the whole round and my item usage was low.
Team 15 (Round 15: Water-types)
I used Jolteon/Scizor/Milotic here, and I managed to find my team from over a year ago after a search through discord logs!
https://pokepast.es/62db2d439eb037b9
Water is tricky to build a singular lead set for to counter everything but Modest Jolteon with STAB and Hidden Power Grass is a good choice. Scizor helps with stuff like Ludicolo. I like Scizor better here than Metagross and other Steel-types since it lacks a Ground weakness and has a Bug STAB for Grass types. Milotic covers Fire for Scizor. The team also does acceptably against Brandon's birds although maybe I could have used Swampert over Milotic for Zapdos.
Team 16 (Round 16: Ghost-types)
Houndoom
Timid
Flash Fire
IVs: 31/10/30/30/31/31
EVs: 4/0/0/248/4/252
Flamethrower
Crunch
Hidden Power [Water]
Taunt

Slowbro
Modest
Own Tempo
IVs: 31/4/31/31/31/31
EVs: 204/0/0/252/52/0
Surf
Psychic
Ice Beam
Rest

Flygon
Jolly
Levitate
IVs: 31/31/31/21/31/31
EVs: 20/252/4/0/4/228
Earthquake
Rock Slide
Fly
Quick Attack
I got a bit lazy here and brought back the same team I used for the PP stall in Round 4 since there's a bit of overlap between the Pokemon seen in those rounds and Houndoom is well equipped to handle many of them.
Team 17 (Round 17: Steel-types)
Houndoom
Timid
Flash Fire
IVs: 31/10/30/30/31/31
EVs: 4/0/0/248/4/252
Flamethrower
Crunch
Hidden Power [Water]
Taunt

Gyarados
Adamant
Intimidate
IVs: 30/30/30/22/30/31
EVs: 0/248/8/0/0/252
Hidden Power [Flying]
Earthquake
Protect
Dragon Dance
Flygon
Jolly
Levitate
IVs: 31/31/31/21/31/31
EVs: 20/252/4/0/4/228
Earthquake
Rock Slide
Fly
Quick Attack
I ran a very similar team to the one from the previous round. Houndoom proves its Pyramid prowess once again, and between Houndoom and Flygon's STABs I was well-equipped to deal with the wild Pokemon here. I decide to change Slowbro for Gyarados because I felt like they would pair better in doubles. I used this strategy in the Battle Pike and used the same Gyarados here without changing the move set.
Team 18 (Round 18: Dragon-types and Dragon-like Pokemon)

Starmie
Hasty
Natural Cure
IVs: 31/4/31/31/31/31
EVs: 4/252/0/0/0/252
Surf
Ice Beam
Thunderbolt
Protect

Blissey
Bold
Natural Cure
IVs: 31/4/31/31/31/31
EVs: 252/0/252/0/0/4
Seismic Toss
Flamethrower
Aromatherapy
Softboiled
Flygon
Jolly
Levitate
IVs: 31/31/31/21/31/31
EVs: 20/252/4/0/4/228
Earthquake
Rock Slide
Fly
Quick Attack
Starmie is a suitable lead here because of its Speed and BoltBeam coverage. I resented using Blissey in the Pyramid since it's frankly broken in this facility, but I couldn't rely on Starmie to take down Kingdra quickly, and Blissey is basically the best non-Water-type switch-in for it (and probably the best one even with Water-types included). Flygon covers Electrics.
Team 19 (Round 19: Pokemon that evolve with Fire/Thunder/Water stone)
This is the only round where I haven't been able to find the full team I used, but according to discord logs I definitely used Flygon as the lead and Blissey as the back-up. My third was probably a Steel. Flygon is a good choice because a lot of the wild Pokemon are Fire- and Electric-types that can't handle STAB Choice Band Earthquake well at all. The Water-types are all special attackers so I just kept using Blissey for those (note that while I could have used a Water-type of my own, one of the wild Pokemon in this round happens to be a SPIT Starmie and a Water-type can't check that).
Team 20 (Round 20: Normal-types)

Heracross
Jolly
Guts
IVs: 31/31/31/21/31/31
EVs: 0/252/4/0/0/252
Brick Break
Megahorn
Earthquake
Rock Slide

Swampert
Brave
Torrent
IVs: 31/31/31/31/31/31
EVs: 252/252/0/0/4/0
Earthquake
Surf
Ice Beam
Rest
Aerodactyl
Jolly
Rock Head
IVs: 31/31/30/15/30/30
EVs: 100/252/16/0/0/136
Hidden Power [Rock]
Earthquake
Aerial Ace
Double-Edge
This is the exact same team that I used on Round 10. The reasoning behind it is basically the same: lead Heracross is a good answer for the Normal-type wild Pokemon, and Aerodactyl and Swampert counter Brandon2 reasonably well. This round is way harder than Round 10 though, especially when the wild Slaking start coming out to play. They are very hard to OHKO reliably and will have the opportunity to get a big hit in on your Pokemon. A good way around this would obviously be to run Protect on your Pokemon. In fact, if you have Protect, you could just use that on Slaking's attacking turns and then try to flee on loafing turns, but you would have to be careful with Protect's PP.
I don't remember my round 21 team either aside from using Flygon as the lead. My approximate current item stocks are:
Some stuff I noticed when playing:

Got the symbol after a number of attempts using Swampert/Alakazam/Salamence:
I hate the Arena, even more so than the Palace - I can understand that lack of switching given the rule set, but the rule that makes it so you're forced to send out you Pokemon in the exact sequence that they are entered in the facility is stupid and adds another layer of match-up luck that wasn't needed. Still, I could also see myself continuing this to a loss just because the battles are short. At least it has that going for it.
Battle Pike (singles, level 50): 181 rooms cleared

Got this streak using a team of Flygon/Gyarados/Blissey:
I don't remember what I lost to, only that I was using this to get more BP but ending up losing. This team works ok, but looking back on it I think the main issue with it is that it has a few good ideas that clash and don't work as well together as I wish they did. The pairing of Flygon and Gyarados for the double battles is great, and using a cleric Blissey in the Pike is also a good idea, but having Blissey on the same team as Flygon and Gyarados in doubles is tricky to work around because it becomes very difficult to use Earthquake when the risk of KOing Blissey with it is very real. There isn't a good solution to this problem unfortunately. There are only 5 Pokemon that can learn SoftBoiled or Milk Drink in gen 3, and of those, Togetic is the only one that is immune to Earthquake. As cool as it would be to find a niche for Togetic in this facility, the terrible HP and lack of Natural Cure and Heal Bell/Aromatherapy makes it non-viable for this role in my opinion, and if I'm going to pick a ground immune Pokemon to replace Blissey with I'd rather just use a more standard offensive Pokemon rather than a bad cleric.
All streaks are on cart.
Battle Tower (Singles, level 50): 79 wins
For the first 70 battles I used my Jolteon/Registeel/Salamence team which I posted in one of the previous threads:
I decided to try out a crippler team for the Battle Tower. While options for these kinds of teams are more limited than in later generations, the strategy still works very well and is often safer than a basic goodstuffs team, although you also sacrifice speed.
Team:

Jolteon @

Timid
Volt Absorb
IVs: 31/4/31/31/31/31
EVs: 132/0/60/252/4/60
Thunderbolt
Thunder Wave
Charm
Sand-Attack
Initially, I thought about using a Trick lead with Choice Band (probably Alakazam since it’s the fastest Trick user in 3rd gen), but I then changed track and focused on stat lowering. Jolteon seems like an odd choice for this role but I found it to work pretty well because of its Speed and access to useful options like Thunder Wave and Charm. Volt Absorb is also nice to protect against Electric moves since my team is otherwise a bit vulnerable to those.
Timid with 60 Speed EVs puts me at 173 Speed, enough to outspeed all base 120 Pokemon that appear as opponents in the Frontier, with Arena Trap Dugtrio being the most important one of this group (none of them run Speed-boosting natures). The Frontier is notoriously slow compared to later gen facilities: the only sets that outspeed this Jolteon under regular conditions are Ninjask (both sets), Crobat (sets 3 and 4) and opposing Jolteon (sets 1 and 4). I also maxed out Sp. Atk to pump up Thunderbolt and then invested the remaining EVs into bulk. If preferred, a Modest Jolteon can achieve the same Speed with 180 Speed EVs and benefits from more power, but this sacrifices some bulk.

Registeel @

Sassy
Clear Body
IVs: 23/23/31/3/30/31
EVs: 252/0/176/0/80/0
Hidden Power [Steel]
Curse
Amnesia
Substitute
This Registeel was RNGed in Sapphire rather than Emerald. It’s not completely flawless. The ideal spread for a set like this would be Careful with 31/31/31/x/30/31, but such a spread doesn’t exist on a frame that could reasonably be reached and so I had to settle for something else. Specifically, I wanted something with a usable nature (I’d be fine with Impish/Relaxed/Careful/Sassy, Adamant/Brave would also be acceptable), Hidden Power [Steel] with high power (preferably 60 as an absolute minimum) and just highish values in the IVs themselves. I managed to find the Sassy, 23/23/31/3/30/31 spread on frame 122232 (requires about 34 minutes of wait time, kind of long but not out of reach) which grants a max power Hidden Power [Steel] and meets my nature requirements too.
This set functions similarly to the equivalent Iron Head-using set seen in gen 4. High bulk combined with its resistances and support from Jolteon allow it to set up easily on lots of stuff, and once it has set up Amnesia and Curse it is very difficult to lose. Substitute is nice to have to protect against hax; obviously OHKO moves and badly timed crits can ruin this set. It’s important to note that getting Substitute on Pokemon is a bit of a pain because it’s a one-time move tutor move. I use it on a lot of my Pokemon and am able to because the move tutor also exists in FRLG, but this required having to play through FRLG multiple times which requires a lot of spare time (the fact that FRLG adamantly refuse to let you trade in non-Kanto dex mons until you unlock the National dex just adds to the pain). If Substitute is too much of an inconvenience to obtain, Rest is probably an acceptable replacement.

Salamence @

Jolly
Intimidate
IVs: 31/31/31/21/31/31
EVs: 4/252/0/0/0/252
Earthquake
Aerial Ace
Dragon Dance
Substitute
Salamence is not quite as good in 3rd gen facilities because its offensive move pool is not as luxurious as it is in later gens, and so it tends to require more boosts to reliably sweep. Regardless, I find it to be a good choice for this team because of its good type synergy with Registeel and its ability to passively cripple opponents with Intimidate. Not much else to say about it really.
Overall this team was effective in getting me to 70 wins (Anabel’s Gold battle was fairly easy too since Volt Absorb Jolteon completely walls her lead Raikou). However, it does have a significant flaw in that it is highly vulnerable to Rhydon:
RHYDON (1), adamant, QC, 393,371,276,113,168,116, earthquake, rock tomb, scary face, brick break
RHYDON (2), adamant, QC, 351,394,276,113,189,116, earthquake, horn drill, rock slide, brick break
RHYDON (3), adamant, QC, 414,394,276,113,126,116, earthquake, megahorn, crush claw, horn drill
RHYDON (4), adamant, QC, 414,394,276,113,126,116, earthquake, megahorn, rock slide, horn drill
All Quick Claw, and all threatening. The worst of all are sets 2 and 4: on top of QuakeSlide coverage, they also have Horn Drill which make attempts to PP stall it through switches very unsafe. Unfortunately, there’s not much this team can do to stop this other than pray. Set 3 also threatens with Quick Claw Horn Drill but lacks Rock-type coverage and becomes a bit more managable if Salamence manages to get a sub up against it.
I stopped playing after getting the gold symbol, but I’m interested in continuing this streak some time to see how far I can go. I’d probably need to replace Jolteon with something else though – I’ve thought about Misdreavus just because it would resolve the Rhydon problem and it has a few crippler friendly moves, although its move pool and stats aren’t as good.
Team:
Jolteon @
Timid
Volt Absorb
IVs: 31/4/31/31/31/31
EVs: 132/0/60/252/4/60
Thunderbolt
Thunder Wave
Charm
Sand-Attack
Initially, I thought about using a Trick lead with Choice Band (probably Alakazam since it’s the fastest Trick user in 3rd gen), but I then changed track and focused on stat lowering. Jolteon seems like an odd choice for this role but I found it to work pretty well because of its Speed and access to useful options like Thunder Wave and Charm. Volt Absorb is also nice to protect against Electric moves since my team is otherwise a bit vulnerable to those.
Timid with 60 Speed EVs puts me at 173 Speed, enough to outspeed all base 120 Pokemon that appear as opponents in the Frontier, with Arena Trap Dugtrio being the most important one of this group (none of them run Speed-boosting natures). The Frontier is notoriously slow compared to later gen facilities: the only sets that outspeed this Jolteon under regular conditions are Ninjask (both sets), Crobat (sets 3 and 4) and opposing Jolteon (sets 1 and 4). I also maxed out Sp. Atk to pump up Thunderbolt and then invested the remaining EVs into bulk. If preferred, a Modest Jolteon can achieve the same Speed with 180 Speed EVs and benefits from more power, but this sacrifices some bulk.
Registeel @
Sassy
Clear Body
IVs: 23/23/31/3/30/31
EVs: 252/0/176/0/80/0
Hidden Power [Steel]
Curse
Amnesia
Substitute
This Registeel was RNGed in Sapphire rather than Emerald. It’s not completely flawless. The ideal spread for a set like this would be Careful with 31/31/31/x/30/31, but such a spread doesn’t exist on a frame that could reasonably be reached and so I had to settle for something else. Specifically, I wanted something with a usable nature (I’d be fine with Impish/Relaxed/Careful/Sassy, Adamant/Brave would also be acceptable), Hidden Power [Steel] with high power (preferably 60 as an absolute minimum) and just highish values in the IVs themselves. I managed to find the Sassy, 23/23/31/3/30/31 spread on frame 122232 (requires about 34 minutes of wait time, kind of long but not out of reach) which grants a max power Hidden Power [Steel] and meets my nature requirements too.
This set functions similarly to the equivalent Iron Head-using set seen in gen 4. High bulk combined with its resistances and support from Jolteon allow it to set up easily on lots of stuff, and once it has set up Amnesia and Curse it is very difficult to lose. Substitute is nice to have to protect against hax; obviously OHKO moves and badly timed crits can ruin this set. It’s important to note that getting Substitute on Pokemon is a bit of a pain because it’s a one-time move tutor move. I use it on a lot of my Pokemon and am able to because the move tutor also exists in FRLG, but this required having to play through FRLG multiple times which requires a lot of spare time (the fact that FRLG adamantly refuse to let you trade in non-Kanto dex mons until you unlock the National dex just adds to the pain). If Substitute is too much of an inconvenience to obtain, Rest is probably an acceptable replacement.
Salamence @
Jolly
Intimidate
IVs: 31/31/31/21/31/31
EVs: 4/252/0/0/0/252
Earthquake
Aerial Ace
Dragon Dance
Substitute
Salamence is not quite as good in 3rd gen facilities because its offensive move pool is not as luxurious as it is in later gens, and so it tends to require more boosts to reliably sweep. Regardless, I find it to be a good choice for this team because of its good type synergy with Registeel and its ability to passively cripple opponents with Intimidate. Not much else to say about it really.
Overall this team was effective in getting me to 70 wins (Anabel’s Gold battle was fairly easy too since Volt Absorb Jolteon completely walls her lead Raikou). However, it does have a significant flaw in that it is highly vulnerable to Rhydon:
RHYDON (1), adamant, QC, 393,371,276,113,168,116, earthquake, rock tomb, scary face, brick break
RHYDON (2), adamant, QC, 351,394,276,113,189,116, earthquake, horn drill, rock slide, brick break
RHYDON (3), adamant, QC, 414,394,276,113,126,116, earthquake, megahorn, crush claw, horn drill
RHYDON (4), adamant, QC, 414,394,276,113,126,116, earthquake, megahorn, rock slide, horn drill
All Quick Claw, and all threatening. The worst of all are sets 2 and 4: on top of QuakeSlide coverage, they also have Horn Drill which make attempts to PP stall it through switches very unsafe. Unfortunately, there’s not much this team can do to stop this other than pray. Set 3 also threatens with Quick Claw Horn Drill but lacks Rock-type coverage and becomes a bit more managable if Salamence manages to get a sub up against it.
I stopped playing after getting the gold symbol, but I’m interested in continuing this streak some time to see how far I can go. I’d probably need to replace Jolteon with something else though – I’ve thought about Misdreavus just because it would resolve the Rhydon problem and it has a few crippler friendly moves, although its move pool and stats aren’t as good.
For the rest of the streak I replaced Jolteon with Misdreavus, which seems like a strange choice but its particular array of immunities, when paired with a Steel-type, help with the Rhydon problem that my previous team had. Misdreavus's stats aren't really good enough though so this experiment didn't last very long. I think I lost to some Water trainer that crit through my last Pokemon Registeel's boosts, a scenario which is not as likely to happen with Jolteon on the team for obvious reasons.
Misdreavus @ no item
Bold
Levitate
IVs: 31/4/31/31/31/31
EVs: 244/0/252/4/4/4
Thunder Wave
Growl
Taunt
Thief
This was basically to deal with Rhydon more easily. Earthquake and Horn Drill immunity + tendency to encourage Rhydon to use Rock attacks allows for much safer PP stalling through switching between Misdreavus and Registeel. However, outside of that Misdreavus was inferior to Jolteon at crippling (worse stats and move pool) and my team became more vulnerable to Electric- and Water-types. I ended up losing in the 80s. This was mostly my fault since I got lazy and didn't PP stall something I ought to have, and then I had just Salamence left against a Water team which is a recipe for disaster.
I perhaps may have been better off just using a more offensive lead set rather than a crippling one, or possibly even used Gengar instead since it has the same immunities. Or maybe Grudge Misdreavus has merit since it could remove PP of a threatening move to allow for easier set-ups. I probably won't attempt this again though.
If I were to try this again, I'd be inclined to run Hidden Power Grass on Jolteon, probably over Sand-Attack, just so that I have a method for deleting Rhydon ASAP. This sadly doesn't help with the whole Quick Claw problem but it's better than not having anything at all. I also thought about trying Light Ball Pikachu in the lead, for no reason other than potentially gaining the right to brag about pulling off a streak with Pikachu (obviously Pikachu's worse bulk and Speed compared to Jolteon does it no favours).
Battle Palace (Singles, level 50): 42 wins (ongoing)
I got the symbol on my first attempt with the Metagross/Starmie/Salamence team I posted in the previous thread:
This place is annoying but I was actually very fortunate and managed to get this symbol on my first try with this team.
My team utilises the “Hasty with 3 attacks + Protect” strategy. To understand how it works, consider Hasty’s properties:
Behaviour (HP > 50%): 58% Attack, 37% Defence, 5% Support
Behaviour (HP < 50%): 88% Attack, 6% Defence, 6% Support
Hasty Pokemon generally prefer to attack directly which is what you want in the Palace (note: Pokemon tend to be reasonably sensible when selecting their attacking move most of the time, so a standard SPIT Starmie will know to use Thunderbolt against a Gyarados, for example). The key thing though is that when Hasty Pokemon choose not to attack, they’ll almost always be using a defensive move. By running 3 attacks with Protect as the defensive move, Hasty Pokemon will generally stick to using one of the 3 attacks, and when they don’t, they’ll almost always use Protect to block the opponents attack and avoid damage. This is especially effective when the Pokemon falls below 50% HP, since Hasty Pokemon heavily favour offensive moves at that point. Spenser uses a variation of this strategy on his Arcanine and Suicune - both run Hasty and Arcanine even has Protect (and Roar), although his Suicune uses Calm Mind instead.
This strategy isn’t perfect (not that there’s such a thing in the Palace). There will be times where you get unlucky and have the Pokemon attempt a Support move, which results in a missed turn with 3 attacks + Protect as a move set. There will also be times where Pokemon will attempt to use Protect multiple times in a row – this nearly cost me the battle for the gold symbol against Spenser when my Starmie tried 3 Protects in a row against his Bite-spamming Suicune, but luckily all of them worked!
Team:

Metagross @

Hasty
Clear Body
IVs: 31/31/31/27/30/31
EVs: 4/252/0/0/0/252
Hidden Power [Steel]
Earthquake
Rock Slide
Protect
Starmie @

Hasty
Natural Cure
IVs: 31/4/31/31/31/31
EVs: 4/252/0/0/0/252
Surf
Ice Beam
Thunderbolt
Protect

Salamence @

Hasty
Intimidate
IVs: 31/31/31/31/31/31
EVs: 0/4/0/252/0/252
Dragon Claw
Aerial Ace
Flamethrower
Protect
This is a fairly basic Steel/Water/Dragon set up that offers good power and type synergy. I chose Hidden Power over Meteor Mash for the accuracy, but I found that Metagross almost never used Hidden Power even in situations where it would be the most effective move. This is probably because it recognises it as a Normal-type move rather than a Steel-type one, and so I would not recommend using Hidden Power in the Palace in most cases. It didn't end up mattering too much since QuakeSlide was good enough even without STAB (if anything, not using Meteor Mash avoided unfortunate misses). Also, having Metagross in the lead seemed like a decent idea due to its excellent defensive typing, but keep in mind that Spenser uses a lead Arcanine for his second battle and this puts the team on the back foot at the start of the battle (obviously I switched to Salamence immediately). If I did this again I'd probably use Salamence in the lead position instead.
My team utilises the “Hasty with 3 attacks + Protect” strategy. To understand how it works, consider Hasty’s properties:
Behaviour (HP > 50%): 58% Attack, 37% Defence, 5% Support
Behaviour (HP < 50%): 88% Attack, 6% Defence, 6% Support
Hasty Pokemon generally prefer to attack directly which is what you want in the Palace (note: Pokemon tend to be reasonably sensible when selecting their attacking move most of the time, so a standard SPIT Starmie will know to use Thunderbolt against a Gyarados, for example). The key thing though is that when Hasty Pokemon choose not to attack, they’ll almost always be using a defensive move. By running 3 attacks with Protect as the defensive move, Hasty Pokemon will generally stick to using one of the 3 attacks, and when they don’t, they’ll almost always use Protect to block the opponents attack and avoid damage. This is especially effective when the Pokemon falls below 50% HP, since Hasty Pokemon heavily favour offensive moves at that point. Spenser uses a variation of this strategy on his Arcanine and Suicune - both run Hasty and Arcanine even has Protect (and Roar), although his Suicune uses Calm Mind instead.
This strategy isn’t perfect (not that there’s such a thing in the Palace). There will be times where you get unlucky and have the Pokemon attempt a Support move, which results in a missed turn with 3 attacks + Protect as a move set. There will also be times where Pokemon will attempt to use Protect multiple times in a row – this nearly cost me the battle for the gold symbol against Spenser when my Starmie tried 3 Protects in a row against his Bite-spamming Suicune, but luckily all of them worked!
Team:
Metagross @
Hasty
Clear Body
IVs: 31/31/31/27/30/31
EVs: 4/252/0/0/0/252
Hidden Power [Steel]
Earthquake
Rock Slide
Protect
Starmie @
Hasty
Natural Cure
IVs: 31/4/31/31/31/31
EVs: 4/252/0/0/0/252
Surf
Ice Beam
Thunderbolt
Protect
Salamence @
Hasty
Intimidate
IVs: 31/31/31/31/31/31
EVs: 0/4/0/252/0/252
Dragon Claw
Aerial Ace
Flamethrower
Protect
This is a fairly basic Steel/Water/Dragon set up that offers good power and type synergy. I chose Hidden Power over Meteor Mash for the accuracy, but I found that Metagross almost never used Hidden Power even in situations where it would be the most effective move. This is probably because it recognises it as a Normal-type move rather than a Steel-type one, and so I would not recommend using Hidden Power in the Palace in most cases. It didn't end up mattering too much since QuakeSlide was good enough even without STAB (if anything, not using Meteor Mash avoided unfortunate misses). Also, having Metagross in the lead seemed like a decent idea due to its excellent defensive typing, but keep in mind that Spenser uses a lead Arcanine for his second battle and this puts the team on the back foot at the start of the battle (obviously I switched to Salamence immediately). If I did this again I'd probably use Salamence in the lead position instead.
Since playing in Palace doesn't really require a lot a mental effort (the Pokemon pick the moves themselves after all), I could probably see myself continuing this at some point with some tweaks (Hidden Power on Metagross is a BIG no-no since the AI sucks at using it) but I would need to re-breed some Pokemon and I don't feel like doing that right now.
Battle Pyramid (level 50): 147 floors cleared (ongoing)
The 147 floors represent the 20 unique rounds plus 1 extra. I didn't really have a set team for the facility. I basically just swapped things in and out based on the wild Pokemon of the round - overkill since there's no need to pack a Limber Hitmonlee for round 1 when Slaking or whatever can just steamroll everything regardless, but it made this facility a lot more fun.
My teams for rounds 1-10:
1) Hitmonlee/Flygon/Linoone
2) Alakazam/Vileplume/Linoone
3) Houndoom/Slowbro/Snorlax
4) Houndoom/Slowbro/Flygon
5) Gengar/Snorlax/Flygon
6) Sceptile/Lanturn/Charizard
7) Medicham/Lapras/Metagross
8) Gengar/Steelix/Milotic
9) Houndoom/Lanturn/Flygon
10) Heracross/Swampert/Aerodactyl
Team 1 (Round 1: paralysis)

Hitmonlee
Jolly
Limber
IVs: 30/30/30/20/30/31
EVs: 0/248/8/0/0/252
Brick Break
Earthquake
Rock Slide
Hidden Power [Flying]

Flygon
Jolly
Levitate
IVs: 31/31/31/21/31/31
EVs: 20/252/4/0/4/228
Earthquake
Rock Slide
Fly
Quick Attack

Linoone
Jolly
Pickup
IVs: 31/31/31/14/30/31
EVs: 4/252/0/0/0/252
Return
Shadow Ball
Hidden Power [Ground]
Surf
Limber protects Hitmonlee from paralysis and it has no issue KOing wild Pokemon with its high power and coverage. Flygon was just thrown on here but is at least immune to Electric (i.e. also guards against some paralysis) and is a good Pokemon in general. Linoone exists solely for Pickup. I managed to get a Sacred Ash and some other healing items during the first round with Pickup so it was worth it, and in any case the general weakness of the opponents during the early rounds makes Linoone tolerable to use in battle anyway.
Team 2 (Round 2: poison)

Alakazam
Timid
Synchronize
IVs: 31/4/31/31/31/31
EVs: 4/0/36/252/4/212
Psychic
Fire Punch
Thunderpunch
Ice Punch

Vileplume
Sassy
Chlorophyll
IVs: 31/31/31/31/31/31
EVs: 252/0/180/0/76/0
Sludge Bomb
Giga Drain
Aromatherapy
Moonlight

Linoone
Jolly
Pickup
IVs: 31/31/31/14/30/31
EVs: 4/252/0/0/0/252
Return
Shadow Ball
Hidden Power [Ground]
Surf
I already had an Alakazam ready from another facility and decided to use it here since it makes short work of almost all of the wild Pokemon of this round. Ludicolo is the only one which could survive against it, and so I decided to use Vileplume to deal with it (immune to Poison and resists Dive). I also considered Venusaur since it has better stats but Vileplume has Aromatherapy and Venusaur doesn’t. Ultimately, I never used Aromatherapy though so Venusaur probably would have been better, but never mind. Linoone makes its second and final appearance for its Pickup shenanigans. Linoone managed to grab a Choice Band which was put to good use in later rounds.
Team 3 (Round 3: burn)

Houndoom
Timid
Flash Fire
IVs: 31/10/30/30/31/31
EVs: 4/0/0/248/4/252
Flamethrower
Crunch
Hidden Power [Water]
Taunt

Slowbro
Modest
Own Tempo
IVs: 31/4/31/31/31/31
EVs: 204/0/0/252/52/0
Surf
Psychic
Ice Beam
Rest

Snorlax
Adamant
Thick Fat
IVs: 31/31/31/21/31/31
EVs: 4/252/252/0/0/0
Body Slam
Earthquake
Curse
Rest
Houndoom is an excellent lead for this round and it would go on to make appearances in other rounds too. Its combination of Flash Fire and its unique STAB combination allow it to beat most of the wild Pokemon easily. In fact, against Vulpix and Weezing, you can just spam the run option because they only have Fire moves and there is no consequence of failing to escape against those two. I chose Slowbro as a back-up because I was wary of the wild Fire Punch/Hi Jump Kick Medicham surviving Flamethrower and KOing Houndoom, and in any case Slowbro happens to synergise well with Houndoom. I wasn’t sure what to use as the third so I just went with Snorlax. The double fighting weakness seemed risky but it ended up working fine.
Against Brandon’s Regis team, I swapped Houndoom out of the lead position for Slowbro. I ended up trading Slowbro with Regirock when it Exploded at the last moment. Houndoom died to Registeel because Earthquake KOed it faster than Flamethrower could manage, but from there Snorlax was able to Curse up and sweep the remains of his team.
Team 4 (Round 4: PP draining moves + Pressure)
Houndoom
Timid
Flash Fire
IVs: 31/10/30/30/31/31
EVs: 4/0/0/248/4/252
Flamethrower
Crunch
Hidden Power [Water]
Taunt
Slowbro
Modest
Own Tempo
IVs: 31/4/31/31/31/31
EVs: 204/0/0/252/52/0
Surf
Psychic
Ice Beam
Rest
Flygon
Jolly
Levitate
IVs: 31/31/31/21/31/31
EVs: 20/252/4/0/4/228
Earthquake
Rock Slide
Fly
Quick Attack
This team is 2/3 identical to the last one. It turns out Houndoom works well in this round too. The wild Pokemon are predominantly Ghost-types, with Absol, Dunsparce and Ninetales thrown in for good measure, and Houndoom matches up well against many of them. Taunt is pretty good here since many of the Pokemon here rely on passive moves to lower your PP. I also made sure to max out Houndoom’s PP which made this round much less stressful. Slowbro is still here for its type synergy. I decided to remove Snorlax since I didn’t feel the need to hold on to it with Brandon’s first battle behind me. I don’t exactly remember why I chose Flygon. I suppose it was just out of convenience, but it does offer some synergy with the other two and at this point I had the Choice Band that Linoone got for me earlier so it ended up working out.
Team 5 (Round 5: Levitate)

Gengar
Timid
Levitate
IVs: 31/19/31/21/31/31
EVs: 28/0/4/252/4/220
Hidden Power [Dark]
Psychic
Ice Punch
Thunderbolt

Snorlax
Adamant
Thick Fat
IVs: 31/31/31/21/31/31
EVs: 4/252/252/0/0/0
Body Slam
Earthquake
Curse
Rest

Flygon
Jolly
Levitate
IVs: 31/31/31/21/31/31
EVs: 20/252/4/0/4/228
Earthquake
Rock Slide
Fly
Quick Attack
Using Gengar was my attempt to counter the wild Pokemon as best as I could. Its power is a bit subpar at times but its coverage is very good and its immunity to things like Weezing’s Selfdestruct and Flygon’s Earthquake is very handy. Hidden Power Dark is an odd choice but it covers the Ghosts. I could have used Shadow Ball but that would mean having to run Hasty/Naïve and moving EVs from bulk to Attack, and even then it’s still rather weak. I just threw Snorlax and Flygon in as back-ups again.
Team 6 (Round 6: trapping abilities)

Sceptile
Timid
Overgrow
IVs: 31/10/30/31/31/31
EVs: 44/0/0/252/0/212
Leaf Blade
Crunch
Hidden Power [Ice]
Roar

Lanturn
Modest
Volt Absorb
IVs: 31/4/31/31/31/31
EVs: 4/0/196/252/52/4
Surf
Thunderbolt
Ice Beam
Rest

Charizard
Hasty
Blaze
IVs: 31/31/30/30/31/31
EVs: 0/4/0/252/0/252
Flamethrower
Hidden Power [Ice]
Earthquake
Toxic
Sceptile can easily out-speed and OHKO the various Ground-type trappers. Roar is used here to cover Wynaut and Wobbuffet. Back-ups were selected based on type synergy. Starmie is often the go-to choice for the role of a team’s Water-type, but I had Lanturn from another facility and I prefer it here since it synergises with Sceptile much better. The addition of Charizard turns this into a Grass/Water/Fire core. I considered Blaziken for the Fire role since its much stronger and more offensively versatile, but I prefer Charizard’s Speed and superior defensive typing (I didn’t like the idea of doubling up on Ground weaknesses).
Charizard is running Toxic. It seems like an odd choice, but after building this team I realised that I was at risk of being screwed over by Blissey, and Toxic is helpful for this reason alone. The decision paid off, because it just so happens that I did encounter a trainer with Blissey during this round!
Team 7 (Round 7: Ice-types)

Medicham
Hasty
Pure Power
IVs: 31/31/30/31/30/30
EVs: 4/252/0/4/0/248
Brick Break
Shadow Ball
Hidden Power [Rock]
Psychic

Lapras
Modest
Water Absorb
IVs: 31/4/31/31/31/31
EVs: 156/0/100/252/0/0
Surf
Ice Beam
Thunderbolt
Rest
Metagross
Adamant
Clear Body
IVs: 31/31/31/31/30/31
EVs: 4/252/0/0/0/252
Hidden Power [Steel]
Earthquake
Rock Slide
Rest
Probably the silliest team I used through-out my Pyramid campaign, and definitely the least optimal. The round is probably the most difficult of the 10 rounds required to get the gold symbol. Medicham, with a Choice Band, works well as an Ice-type slayer, although as a general purpose Pokemon for trainer battles its middling Speed and defences hurt it a bit. Lapras might seem odd as a back-up since it doesn’t synergise with Medicham particularly well defensively (although Medicham covers its Rock and Fighting weaknesses), but I do like its immunity to freeze, Water Absorb, and its resistance to Ice moves. There are a couple of wild Pokemon in this round that Lapras can easily switch-in on and safely deal with, especially Cloyster, and at the very least this allowed me to preserve Medicham’s PP. I didn’t find Lapras to be too bad against trainers either. It has good coverage and can tank things well too. Metagross takes the last spot and covers Flying and Rock for the team, while also being adequate against Ice-types. The move set is identical to the one I used in the palace but this is a different Metagross with Adamant over Hasty, which was no longer needed.
Team 8 (Round 8: Selfdestruct/Explosion/Destiny Bond)
Gengar
Timid
Levitate
IVs: 31/19/31/21/31/31
EVs: 28/0/4/252/4/220
Psychic
Fire Punch
Thunderbolt
Rest

Steelix
Adamant
Sturdy
IVs: 31/31/31/27/30/31
EVs: 76/252/4/0/176/0
Earthquake
Rock Slide
Hidden Power [Steel]
Rest
Milotic
Modest
Marval Scale
IVs: 31/10/31/30/31/31
EVs: 180/0/76/248/4/0
Surf
Ice Beam
Hidden Power [Grass]
Rest
Gengar makes another appearance here, albeit with a tweaked move set. Its immunity to Selfdestruct and Explosion is what makes it so useful as a lead in this round. The move set is designed to beat as many of the wild Pokemon as possible. Psychic covers Weezing and opposing Gengar, and Fire Punch is great for Pineco, Forretress and Shiftry. Levitate combined with Ghost-typing completely walls Golem, which leaves Solrock and Electrode. Electrode is completely screwed by Steelix, hence its inclusion here. Funnily enough, Solrock is the most annoying Pokemon because of potential high-damage Psywaves and ability to survive hits from Gengar (HP Dark doesn't always KO against higher-leveled ones which is why I dumped it from this move set), and usually I just had to wail away at it until it died. I figured that at this point in the streak I could afford to go in without a particular plan for Solrock since I had plenty of healing items anyway. Steelix, in addition to blocking Electrode, happens to synergise with Gengar nicely in general, and Milotic completes a solid defensive core.
Team 9 (Round 9: Psychic-types)

Houndoom
Timid
Flash Fire
IVs: 31/10/30/30/31/31
EVs: 4/0/0/248/4/252
Flamethrower
Crunch
Hidden Power [Water]
Taunt

Lanturn
Modest
Volt Absorb
IVs: 31/4/31/31/31/31
EVs: 4/0/196/252/52/4
Surf
Thunderbolt
Ice Beam
Rest

Flygon
Jolly
Levitate
IVs: 31/31/31/21/31/31
EVs: 20/252/4/0/4/228
Earthquake
Rock Slide
Fly
Quick Attack
Houndoom makes a comeback here in the lead position. It should be pretty obvious why it works well for this round – I particularly like the combination of Psychic immunity and Taunt since it nullifies Wobbuffet. Lanturn is a pretty helpful back-up for this round since it’s slightly safer against Slowking (who can tank Crunch and can respond with STAB Surf) and also Starmie. Otherwise Fire/Dark covers things well. Flygon comes in as the third to complete a solid core.
Team 10 (Round 10: Rock-types)
Heracross
Jolly
Guts
IVs: 31/31/31/21/31/31
EVs: 0/252/4/0/0/252
Brick Break
Megahorn
Earthquake
Rock Slide
Swampert
Brave
Torrent
IVs: 31/31/31/31/31/31
EVs: 252/252/0/0/4/0
Earthquake
Surf
Ice Beam
Rest
Aerodactyl
Jolly
Rock Head
IVs: 31/31/30/15/30/30
EVs: 100/252/16/0/0/136
Hidden Power [Rock]
Earthquake
Aerial Ace
Double-Edge
Pretty straight forward. The only complication with building a team for this round is trying to make sure your team is able to handle Brandon’s birds whilst also ensuring it can deal with the Rock-types that appear in this round. This is not particularly difficult though. Between Brick Break, Earthquake and Surf, this team worked just fine. The team also synergises reasonably well too so it can handle random trainers.
Once I reached Brandon, I swapped Choice Band Aerodactyl into the lead position and attempted a sweep. Articuno went down, but unfortunately Hidden Power fell just short of a KO on Zapdos and Aerodactyl ended up KOed itself. I suspect Rock Slide might have ensured a KO, but no matter. Swampert was able to clean up from there anyway.
Hitmonlee
Jolly
Limber
IVs: 30/30/30/20/30/31
EVs: 0/248/8/0/0/252
Brick Break
Earthquake
Rock Slide
Hidden Power [Flying]
Flygon
Jolly
Levitate
IVs: 31/31/31/21/31/31
EVs: 20/252/4/0/4/228
Earthquake
Rock Slide
Fly
Quick Attack
Linoone
Jolly
Pickup
IVs: 31/31/31/14/30/31
EVs: 4/252/0/0/0/252
Return
Shadow Ball
Hidden Power [Ground]
Surf
Limber protects Hitmonlee from paralysis and it has no issue KOing wild Pokemon with its high power and coverage. Flygon was just thrown on here but is at least immune to Electric (i.e. also guards against some paralysis) and is a good Pokemon in general. Linoone exists solely for Pickup. I managed to get a Sacred Ash and some other healing items during the first round with Pickup so it was worth it, and in any case the general weakness of the opponents during the early rounds makes Linoone tolerable to use in battle anyway.
Team 2 (Round 2: poison)
Alakazam
Timid
Synchronize
IVs: 31/4/31/31/31/31
EVs: 4/0/36/252/4/212
Psychic
Fire Punch
Thunderpunch
Ice Punch
Vileplume
Sassy
Chlorophyll
IVs: 31/31/31/31/31/31
EVs: 252/0/180/0/76/0
Sludge Bomb
Giga Drain
Aromatherapy
Moonlight
Linoone
Jolly
Pickup
IVs: 31/31/31/14/30/31
EVs: 4/252/0/0/0/252
Return
Shadow Ball
Hidden Power [Ground]
Surf
I already had an Alakazam ready from another facility and decided to use it here since it makes short work of almost all of the wild Pokemon of this round. Ludicolo is the only one which could survive against it, and so I decided to use Vileplume to deal with it (immune to Poison and resists Dive). I also considered Venusaur since it has better stats but Vileplume has Aromatherapy and Venusaur doesn’t. Ultimately, I never used Aromatherapy though so Venusaur probably would have been better, but never mind. Linoone makes its second and final appearance for its Pickup shenanigans. Linoone managed to grab a Choice Band which was put to good use in later rounds.
Team 3 (Round 3: burn)
Houndoom
Timid
Flash Fire
IVs: 31/10/30/30/31/31
EVs: 4/0/0/248/4/252
Flamethrower
Crunch
Hidden Power [Water]
Taunt
Slowbro
Modest
Own Tempo
IVs: 31/4/31/31/31/31
EVs: 204/0/0/252/52/0
Surf
Psychic
Ice Beam
Rest
Snorlax
Adamant
Thick Fat
IVs: 31/31/31/21/31/31
EVs: 4/252/252/0/0/0
Body Slam
Earthquake
Curse
Rest
Houndoom is an excellent lead for this round and it would go on to make appearances in other rounds too. Its combination of Flash Fire and its unique STAB combination allow it to beat most of the wild Pokemon easily. In fact, against Vulpix and Weezing, you can just spam the run option because they only have Fire moves and there is no consequence of failing to escape against those two. I chose Slowbro as a back-up because I was wary of the wild Fire Punch/Hi Jump Kick Medicham surviving Flamethrower and KOing Houndoom, and in any case Slowbro happens to synergise well with Houndoom. I wasn’t sure what to use as the third so I just went with Snorlax. The double fighting weakness seemed risky but it ended up working fine.
Against Brandon’s Regis team, I swapped Houndoom out of the lead position for Slowbro. I ended up trading Slowbro with Regirock when it Exploded at the last moment. Houndoom died to Registeel because Earthquake KOed it faster than Flamethrower could manage, but from there Snorlax was able to Curse up and sweep the remains of his team.
Team 4 (Round 4: PP draining moves + Pressure)
Houndoom
Timid
Flash Fire
IVs: 31/10/30/30/31/31
EVs: 4/0/0/248/4/252
Flamethrower
Crunch
Hidden Power [Water]
Taunt
Slowbro
Modest
Own Tempo
IVs: 31/4/31/31/31/31
EVs: 204/0/0/252/52/0
Surf
Psychic
Ice Beam
Rest
Flygon
Jolly
Levitate
IVs: 31/31/31/21/31/31
EVs: 20/252/4/0/4/228
Earthquake
Rock Slide
Fly
Quick Attack
This team is 2/3 identical to the last one. It turns out Houndoom works well in this round too. The wild Pokemon are predominantly Ghost-types, with Absol, Dunsparce and Ninetales thrown in for good measure, and Houndoom matches up well against many of them. Taunt is pretty good here since many of the Pokemon here rely on passive moves to lower your PP. I also made sure to max out Houndoom’s PP which made this round much less stressful. Slowbro is still here for its type synergy. I decided to remove Snorlax since I didn’t feel the need to hold on to it with Brandon’s first battle behind me. I don’t exactly remember why I chose Flygon. I suppose it was just out of convenience, but it does offer some synergy with the other two and at this point I had the Choice Band that Linoone got for me earlier so it ended up working out.
Team 5 (Round 5: Levitate)
Gengar
Timid
Levitate
IVs: 31/19/31/21/31/31
EVs: 28/0/4/252/4/220
Hidden Power [Dark]
Psychic
Ice Punch
Thunderbolt
Snorlax
Adamant
Thick Fat
IVs: 31/31/31/21/31/31
EVs: 4/252/252/0/0/0
Body Slam
Earthquake
Curse
Rest
Flygon
Jolly
Levitate
IVs: 31/31/31/21/31/31
EVs: 20/252/4/0/4/228
Earthquake
Rock Slide
Fly
Quick Attack
Using Gengar was my attempt to counter the wild Pokemon as best as I could. Its power is a bit subpar at times but its coverage is very good and its immunity to things like Weezing’s Selfdestruct and Flygon’s Earthquake is very handy. Hidden Power Dark is an odd choice but it covers the Ghosts. I could have used Shadow Ball but that would mean having to run Hasty/Naïve and moving EVs from bulk to Attack, and even then it’s still rather weak. I just threw Snorlax and Flygon in as back-ups again.
Team 6 (Round 6: trapping abilities)
Sceptile
Timid
Overgrow
IVs: 31/10/30/31/31/31
EVs: 44/0/0/252/0/212
Leaf Blade
Crunch
Hidden Power [Ice]
Roar
Lanturn
Modest
Volt Absorb
IVs: 31/4/31/31/31/31
EVs: 4/0/196/252/52/4
Surf
Thunderbolt
Ice Beam
Rest
Charizard
Hasty
Blaze
IVs: 31/31/30/30/31/31
EVs: 0/4/0/252/0/252
Flamethrower
Hidden Power [Ice]
Earthquake
Toxic
Sceptile can easily out-speed and OHKO the various Ground-type trappers. Roar is used here to cover Wynaut and Wobbuffet. Back-ups were selected based on type synergy. Starmie is often the go-to choice for the role of a team’s Water-type, but I had Lanturn from another facility and I prefer it here since it synergises with Sceptile much better. The addition of Charizard turns this into a Grass/Water/Fire core. I considered Blaziken for the Fire role since its much stronger and more offensively versatile, but I prefer Charizard’s Speed and superior defensive typing (I didn’t like the idea of doubling up on Ground weaknesses).
Charizard is running Toxic. It seems like an odd choice, but after building this team I realised that I was at risk of being screwed over by Blissey, and Toxic is helpful for this reason alone. The decision paid off, because it just so happens that I did encounter a trainer with Blissey during this round!
Team 7 (Round 7: Ice-types)
Medicham
Hasty
Pure Power
IVs: 31/31/30/31/30/30
EVs: 4/252/0/4/0/248
Brick Break
Shadow Ball
Hidden Power [Rock]
Psychic
Lapras
Modest
Water Absorb
IVs: 31/4/31/31/31/31
EVs: 156/0/100/252/0/0
Surf
Ice Beam
Thunderbolt
Rest
Metagross
Adamant
Clear Body
IVs: 31/31/31/31/30/31
EVs: 4/252/0/0/0/252
Hidden Power [Steel]
Earthquake
Rock Slide
Rest
Probably the silliest team I used through-out my Pyramid campaign, and definitely the least optimal. The round is probably the most difficult of the 10 rounds required to get the gold symbol. Medicham, with a Choice Band, works well as an Ice-type slayer, although as a general purpose Pokemon for trainer battles its middling Speed and defences hurt it a bit. Lapras might seem odd as a back-up since it doesn’t synergise with Medicham particularly well defensively (although Medicham covers its Rock and Fighting weaknesses), but I do like its immunity to freeze, Water Absorb, and its resistance to Ice moves. There are a couple of wild Pokemon in this round that Lapras can easily switch-in on and safely deal with, especially Cloyster, and at the very least this allowed me to preserve Medicham’s PP. I didn’t find Lapras to be too bad against trainers either. It has good coverage and can tank things well too. Metagross takes the last spot and covers Flying and Rock for the team, while also being adequate against Ice-types. The move set is identical to the one I used in the palace but this is a different Metagross with Adamant over Hasty, which was no longer needed.
Team 8 (Round 8: Selfdestruct/Explosion/Destiny Bond)
Gengar
Timid
Levitate
IVs: 31/19/31/21/31/31
EVs: 28/0/4/252/4/220
Psychic
Fire Punch
Thunderbolt
Rest
Steelix
Adamant
Sturdy
IVs: 31/31/31/27/30/31
EVs: 76/252/4/0/176/0
Earthquake
Rock Slide
Hidden Power [Steel]
Rest
Milotic
Modest
Marval Scale
IVs: 31/10/31/30/31/31
EVs: 180/0/76/248/4/0
Surf
Ice Beam
Hidden Power [Grass]
Rest
Gengar makes another appearance here, albeit with a tweaked move set. Its immunity to Selfdestruct and Explosion is what makes it so useful as a lead in this round. The move set is designed to beat as many of the wild Pokemon as possible. Psychic covers Weezing and opposing Gengar, and Fire Punch is great for Pineco, Forretress and Shiftry. Levitate combined with Ghost-typing completely walls Golem, which leaves Solrock and Electrode. Electrode is completely screwed by Steelix, hence its inclusion here. Funnily enough, Solrock is the most annoying Pokemon because of potential high-damage Psywaves and ability to survive hits from Gengar (HP Dark doesn't always KO against higher-leveled ones which is why I dumped it from this move set), and usually I just had to wail away at it until it died. I figured that at this point in the streak I could afford to go in without a particular plan for Solrock since I had plenty of healing items anyway. Steelix, in addition to blocking Electrode, happens to synergise with Gengar nicely in general, and Milotic completes a solid defensive core.
Team 9 (Round 9: Psychic-types)
Houndoom
Timid
Flash Fire
IVs: 31/10/30/30/31/31
EVs: 4/0/0/248/4/252
Flamethrower
Crunch
Hidden Power [Water]
Taunt
Lanturn
Modest
Volt Absorb
IVs: 31/4/31/31/31/31
EVs: 4/0/196/252/52/4
Surf
Thunderbolt
Ice Beam
Rest
Flygon
Jolly
Levitate
IVs: 31/31/31/21/31/31
EVs: 20/252/4/0/4/228
Earthquake
Rock Slide
Fly
Quick Attack
Houndoom makes a comeback here in the lead position. It should be pretty obvious why it works well for this round – I particularly like the combination of Psychic immunity and Taunt since it nullifies Wobbuffet. Lanturn is a pretty helpful back-up for this round since it’s slightly safer against Slowking (who can tank Crunch and can respond with STAB Surf) and also Starmie. Otherwise Fire/Dark covers things well. Flygon comes in as the third to complete a solid core.
Team 10 (Round 10: Rock-types)
Heracross
Jolly
Guts
IVs: 31/31/31/21/31/31
EVs: 0/252/4/0/0/252
Brick Break
Megahorn
Earthquake
Rock Slide
Swampert
Brave
Torrent
IVs: 31/31/31/31/31/31
EVs: 252/252/0/0/4/0
Earthquake
Surf
Ice Beam
Rest
Aerodactyl
Jolly
Rock Head
IVs: 31/31/30/15/30/30
EVs: 100/252/16/0/0/136
Hidden Power [Rock]
Earthquake
Aerial Ace
Double-Edge
Pretty straight forward. The only complication with building a team for this round is trying to make sure your team is able to handle Brandon’s birds whilst also ensuring it can deal with the Rock-types that appear in this round. This is not particularly difficult though. Between Brick Break, Earthquake and Surf, this team worked just fine. The team also synergises reasonably well too so it can handle random trainers.
Once I reached Brandon, I swapped Choice Band Aerodactyl into the lead position and attempted a sweep. Articuno went down, but unfortunately Hidden Power fell just short of a KO on Zapdos and Aerodactyl ended up KOed itself. I suspect Rock Slide might have ensured a KO, but no matter. Swampert was able to clean up from there anyway.
From this point on I might have trouble remembering all of my teams since I didn't document them thoroughly in one spot, so bare with me!!!!!
Crobat
Adamant
Inner Focus
IVs: 31/31/31/14/30/31
EVs: 12/252/0/0/0/244
Sludge Bomb
Wing Attack
Shadow Ball
Hidden Power [Ground]
Steelix
Adamant
Sturdy
IVs: 31/31/31/27/30/31
EVs: 76/252/4/0/176/0
Earthquake
Rock Slide
Hidden Power [Steel]
Rest
Grumpig
Timid
Thick Fat
IVs: 31/4/31/31/31/31
EVs: 0/0/4/252/0/252
Psychic
Fire Punch
ThunderPunch
Rest
This round focuses on Fighting-types and pretty much any decently strong Flying- or Psychic-type is good here. I went with Adamant Crobat because it also had Shadow Ball (for Medicham) and STAB Sludge Bomb (for Breloom) in addition to Wing Attack, providing plenty of PP to deal with everything. In the case of Breloom, having a non-contact move to deal with it whilst avoiding Effect Spore was nice too. I chose Wing Attack over Aerial Ace also because of its much higher PP. With a Choice Band equipped (and I have 3 of them in my Pyramid Bag at this point), Crobat trivialised this round.
I chose Steelix as a back-up for its type syngergy with Crobat. I liked the idea of a Psychic-type as a third team mate and went with Grumpig specifically because of Thick Fat providing Fire and Ice resistances to cover Crobat and Steelix. Unfortunately, I never actually got the opportunity to send Grumpig into battle since I never needed to, and Steelix was used just once.
This round was fairly uneventful. I only encountered 3 trainers. The first had an unknown set of Starmie which was OHKOed by Shadow Ball (only one of the 8 possible Starmie sets can survive it). The second had Salamence2, which was walled by Steelix and was even courteous enough to give Steelix a free Swagger boost (I gave Steelix Lum Berry to utilise Rest more easily). The third was Whiscash3 with Surf and Fissure which I just swatted at with Wing Attack until it died - this was the only time I needed to use a Hyper Potion. I also found 2 Sacred Ashes, making 4 total, and with the many Hyper Potions and Ethers I have I'm currently in a pretty good position. I only have 2 Revives though so hopefully I can get more of those later on.
Team 12 (Round 12: Weather abusers)
Aerodactyl
Adamant
Rock Head
IVs: 31/31/30/15/30/30
EVs: 0/252/8/0/0/248
Hidden Power [Rock]
Earthquake
Wing Attack
Fire Blast
Quagsire
Adamant
Water Absorb
IVs: don't remember
EVs: don't remember
Earthquake
AncientPower
Hidden Power [Bug]
Rest
Metagross
Adamant
Clear Body
IVs: 31/31/31/31/30/31
EVs: 4/252/0/0/0/252
Hidden Power [Steel]
Earthquake
Rock Slide
Rest
Choice Band Aerodactyl is a surprisingly good lead in this round. Quagsire seems like a strange choice but its Ground-typing combined with Water Absorb lets it wall the wild Quagsire and Gyarados in this round completely.
Team 13 (Round 13: Bug-types)
Gengar
Timid
Levitate
IVs: 31/19/31/21/31/31
EVs: 28/0/4/252/4/220
Psychic
Fire Punch
Thunderbolt
Rest
Houndoom
Timid
Flash Fire
IVs: 31/10/30/30/31/31
EVs: 4/0/0/248/4/252
Flamethrower
Crunch
Hidden Power [Water]
Taunt
Quagsire
Adamant
Water Absorb
IVs: don't remember
EVs: don't remember
Earthquake
AncientPower
Hidden Power [Bug]
Rest
I brought back my round 8 Gengar here because there are a handful of Exploders here that it is able to block and it also has its useful Psychic/Fire coverage to hit everything super-effectively except Armaldo, whose Water Pulse/Rock Slide coverage is completely blocked by Water Absorb Quagsire. Houndoom covers their weaknesses well. Don't remember much about this round aside from vowing never to use offensive Gengar sets ever again if I can avoid it. They disappoint time and time again.
Team 14 (Round 14: Dark-types)
Scizor
Adamant
Swarm
IVs: 31/30/30/15/30/31
EVs: 252/252/0/0/0/4
Hidden Power [Bug]
Steel Wing
Swords Dance
Rest
Houndoom
Timid
Flash Fire
IVs: 31/10/30/30/31/31
EVs: 4/0/0/248/4/252
Flamethrower
Crunch
Hidden Power [Water]
Taunt
Milotic
Modest
Marval Scale
IVs: 31/10/31/30/31/31
EVs: 180/0/76/248/4/0
Surf
Ice Beam
Hidden Power [Grass]
Rest
Hurr Durr Bug beats Dark. Also Scizor is cool. Didn't work so well in the lead spot though since it's just too slow, so much so that I ended up swapping Houndoom into the lead position on the second floor! Houndoom and Milotic cover Scizor's Fire weakness. This team actually isn't great but according to my notes I only encountered 2 trainers through the whole round and my item usage was low.
Team 15 (Round 15: Water-types)
I used Jolteon/Scizor/Milotic here, and I managed to find my team from over a year ago after a search through discord logs!
https://pokepast.es/62db2d439eb037b9
Water is tricky to build a singular lead set for to counter everything but Modest Jolteon with STAB and Hidden Power Grass is a good choice. Scizor helps with stuff like Ludicolo. I like Scizor better here than Metagross and other Steel-types since it lacks a Ground weakness and has a Bug STAB for Grass types. Milotic covers Fire for Scizor. The team also does acceptably against Brandon's birds although maybe I could have used Swampert over Milotic for Zapdos.
Team 16 (Round 16: Ghost-types)
Houndoom
Timid
Flash Fire
IVs: 31/10/30/30/31/31
EVs: 4/0/0/248/4/252
Flamethrower
Crunch
Hidden Power [Water]
Taunt
Slowbro
Modest
Own Tempo
IVs: 31/4/31/31/31/31
EVs: 204/0/0/252/52/0
Surf
Psychic
Ice Beam
Rest
Flygon
Jolly
Levitate
IVs: 31/31/31/21/31/31
EVs: 20/252/4/0/4/228
Earthquake
Rock Slide
Fly
Quick Attack
I got a bit lazy here and brought back the same team I used for the PP stall in Round 4 since there's a bit of overlap between the Pokemon seen in those rounds and Houndoom is well equipped to handle many of them.
Team 17 (Round 17: Steel-types)
Houndoom
Timid
Flash Fire
IVs: 31/10/30/30/31/31
EVs: 4/0/0/248/4/252
Flamethrower
Crunch
Hidden Power [Water]
Taunt
Gyarados
Adamant
Intimidate
IVs: 30/30/30/22/30/31
EVs: 0/248/8/0/0/252
Hidden Power [Flying]
Earthquake
Protect
Dragon Dance
Flygon
Jolly
Levitate
IVs: 31/31/31/21/31/31
EVs: 20/252/4/0/4/228
Earthquake
Rock Slide
Fly
Quick Attack
I ran a very similar team to the one from the previous round. Houndoom proves its Pyramid prowess once again, and between Houndoom and Flygon's STABs I was well-equipped to deal with the wild Pokemon here. I decide to change Slowbro for Gyarados because I felt like they would pair better in doubles. I used this strategy in the Battle Pike and used the same Gyarados here without changing the move set.
Team 18 (Round 18: Dragon-types and Dragon-like Pokemon)
Starmie
Hasty
Natural Cure
IVs: 31/4/31/31/31/31
EVs: 4/252/0/0/0/252
Surf
Ice Beam
Thunderbolt
Protect
Blissey
Bold
Natural Cure
IVs: 31/4/31/31/31/31
EVs: 252/0/252/0/0/4
Seismic Toss
Flamethrower
Aromatherapy
Softboiled
Flygon
Jolly
Levitate
IVs: 31/31/31/21/31/31
EVs: 20/252/4/0/4/228
Earthquake
Rock Slide
Fly
Quick Attack
Starmie is a suitable lead here because of its Speed and BoltBeam coverage. I resented using Blissey in the Pyramid since it's frankly broken in this facility, but I couldn't rely on Starmie to take down Kingdra quickly, and Blissey is basically the best non-Water-type switch-in for it (and probably the best one even with Water-types included). Flygon covers Electrics.
Team 19 (Round 19: Pokemon that evolve with Fire/Thunder/Water stone)
This is the only round where I haven't been able to find the full team I used, but according to discord logs I definitely used Flygon as the lead and Blissey as the back-up. My third was probably a Steel. Flygon is a good choice because a lot of the wild Pokemon are Fire- and Electric-types that can't handle STAB Choice Band Earthquake well at all. The Water-types are all special attackers so I just kept using Blissey for those (note that while I could have used a Water-type of my own, one of the wild Pokemon in this round happens to be a SPIT Starmie and a Water-type can't check that).
Team 20 (Round 20: Normal-types)
Heracross
Jolly
Guts
IVs: 31/31/31/21/31/31
EVs: 0/252/4/0/0/252
Brick Break
Megahorn
Earthquake
Rock Slide
Swampert
Brave
Torrent
IVs: 31/31/31/31/31/31
EVs: 252/252/0/0/4/0
Earthquake
Surf
Ice Beam
Rest
Aerodactyl
Jolly
Rock Head
IVs: 31/31/30/15/30/30
EVs: 100/252/16/0/0/136
Hidden Power [Rock]
Earthquake
Aerial Ace
Double-Edge
This is the exact same team that I used on Round 10. The reasoning behind it is basically the same: lead Heracross is a good answer for the Normal-type wild Pokemon, and Aerodactyl and Swampert counter Brandon2 reasonably well. This round is way harder than Round 10 though, especially when the wild Slaking start coming out to play. They are very hard to OHKO reliably and will have the opportunity to get a big hit in on your Pokemon. A good way around this would obviously be to run Protect on your Pokemon. In fact, if you have Protect, you could just use that on Slaking's attacking turns and then try to flee on loafing turns, but you would have to be careful with Protect's PP.
I don't remember my round 21 team either aside from using Flygon as the lead. My approximate current item stocks are:
- 16 x hyper potions
- 13 x ethers
- 16 x lum berries
- 5 x sacred ashes
- 4 x full restores
- 3 x choice bands
- 3 x revives
- 1 x max elixir
- 1 x leppa berry
- 1 x max revive
Some stuff I noticed when playing:
- This would have been mentioned here already, but once you get past round 20, the wild encounters loop back to round 1, even retaining the same levels. This means you go from facing level 55 Slaking in round 20 to steam-rolling past sub-level 40 Plusle and Minun in round 21. The trainer battles do NOT loop back like this though, so you'll still see high tier and legendary Pokemon most of the time with the occasional mid tier thrown in.
- In the Pyramid, double battles are presented a multi battles with 2 separate trainers, but this is a ruse. This is because both Pokemon that are sent out for these battles are always pooled from one trainer rather than one set being taken from both trainers. I'm fairly certain that the trainer pool used is based off the first trainer that approaches you, and who is positioned on the very right side of the screen, but this may need testing. For example, if you enter a battle with Pokemon Ranger (F) Dorine as the first trainer (right side) and Battle Girl Kay as the second one (left side), both Pokemon that are sent out will be taken from Dorine's pool. This makes these battles nothing more that regular double battles with the first trainer rather than true multi battles. Be aware of this when determining sets.
Got the symbol after a number of attempts using Swampert/Alakazam/Salamence:
Team:

Swampert @

Brave
Torrent
IVs: 31/31/31/31/31/31
EVs: 124/252/4/0/4/124
Earthquake
Surf
Ice Beam
Substitute
Swampert worked ok as a lead here. Great coverage and defensive typing allow it to beat lots of things one-on-one and gain an advantage. I generally found it could take down at least 1.5 Pokemon on its own reliably, and sometimes it would sweep entire teams.
Probably the thing that might need explaining here is the EV/nature combination. I wanted to boost attack, but I didn’t want to cut into special attack or defences, which made Brave the nature of choice. But at the same time, I still wanted to invest in some speed to ensure I could get the jump on Greta’s Umbreon in the gold symbol battle, lest I end up confused before throwing a sub up. With a Brave nature, 124 Speed EVs puts me at 86 Speed, enough to beat Umbreon. The remaining EVs are used to max out Attack and buff defences. I’m uncertain if this is the absolute best nature/EV combination to achieve what I want, but in the end it worked so I’m not losing sleep over it.

Alakazam @

Timid
Synchronize
IVs: 31/4/31/31/31/31
EVs: 4/0/36/252/4/212
Psychic
Fire Punch
Thunderpunch
Ice Punch
This worked decently as a back-up to Swampert because it generally ends up coming in against a Pokemon that has already been weakened slightly, which Alakazam can then finish off with its excellent Speed and power. The set is straight-forward: Psychic for STAB and elemental punches to maximise coverage.
Timid with 212 Speed EVs gets Alakazam to 183 Speed, enough to out-speed every single Pokemon in the Frontier except Jolteon4 (200 Speed). The rest go into power and bulk. The 36 Def EVs may seem meaningless for such a frail Pokemon, but there were a number of occasions where Alakazam managed to survive a hit where it wouldn’t have otherwise, including one battle where Exploud’s Shadow Ball left Alakazam with just 1 HP.

Salamence @

Hasty
Intimidate
IVs: 31/31/31/21/31/31
EVs: 0/252/0/4/0/252
Earthquake
Aerial Ace
Brick Break
Fire Blast
Salamence is here again just because I can, although this one is an all-out attacker rather than a set up sweeper. Usually it’s good enough on its own to finish the battle off assuming I have the lead already.
EDIT: Note that this team isn't particularly optimal for the silver symbol battle and may require tweaking if it is used for that purpose.
One Pokemon that gave this team problems was Sceptile. It KOes Swampert, and while Alakazam has the speed advantage and can take a Leaf Blade, Alakazam isn’t quite strong enough to OHKO Sceptile and that leaves it vulnerable to a crit KO. From there, Sceptile can get a hit in on Salamence (which could be a super-effective Dragon Claw) before I can finish it off. Even if Salamence survives, I’m in a bad position if Sceptile has dangerous back-ups. Strangely enough, I also has a bad experience with Pinsir2 of all things: it endured a hit from Alakazam and then swept the rest of my team with Flail (I think it got a Swords Dance at some point too).
Swampert @
Brave
Torrent
IVs: 31/31/31/31/31/31
EVs: 124/252/4/0/4/124
Earthquake
Surf
Ice Beam
Substitute
Swampert worked ok as a lead here. Great coverage and defensive typing allow it to beat lots of things one-on-one and gain an advantage. I generally found it could take down at least 1.5 Pokemon on its own reliably, and sometimes it would sweep entire teams.
Probably the thing that might need explaining here is the EV/nature combination. I wanted to boost attack, but I didn’t want to cut into special attack or defences, which made Brave the nature of choice. But at the same time, I still wanted to invest in some speed to ensure I could get the jump on Greta’s Umbreon in the gold symbol battle, lest I end up confused before throwing a sub up. With a Brave nature, 124 Speed EVs puts me at 86 Speed, enough to beat Umbreon. The remaining EVs are used to max out Attack and buff defences. I’m uncertain if this is the absolute best nature/EV combination to achieve what I want, but in the end it worked so I’m not losing sleep over it.
Alakazam @
Timid
Synchronize
IVs: 31/4/31/31/31/31
EVs: 4/0/36/252/4/212
Psychic
Fire Punch
Thunderpunch
Ice Punch
This worked decently as a back-up to Swampert because it generally ends up coming in against a Pokemon that has already been weakened slightly, which Alakazam can then finish off with its excellent Speed and power. The set is straight-forward: Psychic for STAB and elemental punches to maximise coverage.
Timid with 212 Speed EVs gets Alakazam to 183 Speed, enough to out-speed every single Pokemon in the Frontier except Jolteon4 (200 Speed). The rest go into power and bulk. The 36 Def EVs may seem meaningless for such a frail Pokemon, but there were a number of occasions where Alakazam managed to survive a hit where it wouldn’t have otherwise, including one battle where Exploud’s Shadow Ball left Alakazam with just 1 HP.
Salamence @
Hasty
Intimidate
IVs: 31/31/31/21/31/31
EVs: 0/252/0/4/0/252
Earthquake
Aerial Ace
Brick Break
Fire Blast
Salamence is here again just because I can, although this one is an all-out attacker rather than a set up sweeper. Usually it’s good enough on its own to finish the battle off assuming I have the lead already.
EDIT: Note that this team isn't particularly optimal for the silver symbol battle and may require tweaking if it is used for that purpose.
The battle for the gold symbol was easy. Swampert used its faster Substitute to shut down Umbreon and from there I was in an unloseable position.WalkAway said:
For the Battle Arena team you suggested, it worked great but for the Silver Run I would suggest to anyone trying to run this team to switch the order and maybe an item too. In my Silver battle, Greta sends out Heracross first. Two Megahorns destroyed Swampert and it resists Earthquake and Surf did pretty much no damage. Alakazam outsped and OHKOed Heracross but is walled pretty hard by Umbreon. I got in two Thunderpunches for little damage especially with Leftovers. Salamence was able to take town Umbreon with Brick Break but was confused in the process. It hit itself in confusion twice in a row and died to two Shadow Balls from Shedninja before I could get off an Aerial Ace.
My suggestion is to lead with Zam and OHKO Heracross. Zam will die to Umbreon. Swampert can Substitute and Earthquake spam and potentially win by referee decision. Maybe a different Pokemon would be better here for the Silver Battle though. Salemence can clean up Umbreon with Brick Break if it is left. Then, use Aerial Ace on Shedninja to win. I would also suggest a Persim Berry for Salamence in this battle to heal a potential Umbreon Confuse Ray. Umbreon has Body Slam though too so maybe for the Silver run use a Lum on Mence to heal a potential confusion or Body Slam paralyze and give Zam something else since it will be leading for that run.
One Pokemon that gave this team problems was Sceptile. It KOes Swampert, and while Alakazam has the speed advantage and can take a Leaf Blade, Alakazam isn’t quite strong enough to OHKO Sceptile and that leaves it vulnerable to a crit KO. From there, Sceptile can get a hit in on Salamence (which could be a super-effective Dragon Claw) before I can finish it off. Even if Salamence survives, I’m in a bad position if Sceptile has dangerous back-ups. Strangely enough, I also has a bad experience with Pinsir2 of all things: it endured a hit from Alakazam and then swept the rest of my team with Flail (I think it got a Swords Dance at some point too).
I hate the Arena, even more so than the Palace - I can understand that lack of switching given the rule set, but the rule that makes it so you're forced to send out you Pokemon in the exact sequence that they are entered in the facility is stupid and adds another layer of match-up luck that wasn't needed. Still, I could also see myself continuing this to a loss just because the battles are short. At least it has that going for it.
Battle Pike (singles, level 50): 181 rooms cleared
Got this streak using a team of Flygon/Gyarados/Blissey:
Team:

Flygon @

Jolly
Levitate
IVs: 31/31/31/21/31/31
EVs: 20/252/4/0/4/228
Earthquake
Rock Slide
Fly
Quick Attack
Flygon appears again. Banded Earthquakes are just so good, and the addition of double battles makes Earthquake all the more valuable.
Gyarados @

Adamant
Intimidate
IVs: 30/30/30/22/30/31
EVs: 0/248/8/0/0/252
Hidden Power [Flying]
Earthquake
Protect
Dragon Dance
For this slot, I wanted something strong that would also pair up well with Flygon in doubles. Gyarados works well here because it’s immune to Ground, and so Flygon can spam Earthquake safely. Intimidate is another asset in doubles. Gyarados itself is otherwise a competent Pokemon than can perform well in singles too as a Dragon Dancer where needed. I like Protect on this set mostly for doubles – Gyarados is highly vulnerable to Electric moves and it works well as a lure option.
Blissey @

Bold
Natural Cure
IVs: 31/4/31/31/31/31
EVs: 252/0/252/0/0/4
Seismic Toss
Flamethrower
Aromatherapy
Softboiled
Clerics are invaluable in any facility without guaranteed healing, and this is especially true for the Pike (the Pyramid at least gives you healing items).
Blissey is hands down the best cleric. Nothing comes close to pulling off what Blissey can do. With Softboiled and its enormous HP, Blissey easily recovers the HP of its team mates without having to sacrifice too much of its own total HP (one Softboiled is often enough to heal something else completely), and with Aromatherapy/Heal Bell removing status, Blissey is essentially a Pokemon Centre in your pocket, bar the PP recovery.
I think the key thing to Blissey’s success as a cleric in the Frontier is Natural Cure; without it, I don’t think it would be as effective. Natural Cure basically allows Blissey to not care about the status inflicted by the various wild Pokemon in the Pike, and that allows Blissey to use these encounters as an opportunity to remove status from its team with little consequence. Even if Blissey gets statused after using Aromatherapy, simply fleeing eliminates the status and so it doesn’t have to worry about wasting more Aromatherapy PP and/or hoping the wild Pokemon uses something else before it escapes. This is one of the main things that distinguishes Blissey from Miltank, the only other Pokemon (excluding Smeargle) with access to both Softboiled/Milk Drink and Heal Beal/Aromatherapy (I mention Miltank because, unlike Blissey, it is readily available in Emerald and is the main alternative for those who can’t trade for Chansey/Blissey).
Blissey is not as great for actual battles. I think its use as a Cleric more than makes up for this though. At the very least, it still has its insane special bulk to wall lots of things. The other moves outside of Softboiled/Aromatherapy can be changed as desired: BoltBeam is reasonable, or perhaps Toxic/Protect could work.
As far as strategy in the Pike is concerned, I always ask the attendant for a hint when selecting rooms. There’s no reason not to unless you’re trying a speed run it or something. Generally, I aim to avoid battles if possible. My strategy for dealing with each statement is as follows:
“It seems to have the distinct aroma of Pokemon wafting around it…”
I usually go for these rooms. In most cases this will be a wild Pokemon room which is pretty much a free room if you have a remotely fast lead to flee the battles (Wobbuffet prevents this but doesn’t start to appear until well after you have done enough battles to receive the gold symbol; if you get far enough in just shove Roar/Whirlwind or some other passive move on the lead). It’s also a great opportunity to remove status from the team if required.
Occasionally you’ll end up in a single battle with a “tough” trainer when entering these rooms. I usually don’t mind this as long as I’m reasonably healthy though. “Tough” is mostly meaningless since battle outcomes depend more on match-ups – a team of 3 slow Ground-weak Pokemon is hardly a “tough” opponent for this team, for example. You also get healed after the battle anyway, so the battle is of little consequence in the long run, as long as you win.
“I seem to have heard something… It may have been whispering…”
I also find these rooms safe to go into most of the time. The outcomes are either an idle NPC room with no battle, or a double battle. Double battles are usually fine with a healthy team since it’s a 3-on-2 situation.
“Is it… A Trainer? I sense the presence of people…”
I usually avoid these rooms. Most of the time you’ll end up in a single 3-on-3 battle with no healing after it, and the more you avoid these, the better off you’ll be.
These rooms have a small chance of containing a nurse that heals all of your Pokemon, which sounds great in theory. The problem with this, though, is that the only time where you’d likely need this is if you team is already badly weakened and attempting to enter this room with a weakened team when you are more likely to encounter a trainer sounds like a bad idea to me.
“For some reason, I felt a wave of nostalgia coming from it…”
This room will either result in status being inflicted on your team, or 1-2 team members being healed (usually the former). The interesting thing about this room is that it’s the only one which is guaranteed not to contain a trainer, which in turn guarantees the extension of your streak by at least 2 rooms.
As good as this sounds, I avoid this room in most cases. Status is a killer in the Pike, and while having a cleric can negate this to an extent, you still need to enter a battle to use Aromatherapy/Heal Bell, and the last thing you’d want is to have your entire team frozen and then be challenged to a trainer battle immediately afterwards.
There are a couple of situations where I would enter these rooms. Firstly, if this is the last room of a particular run through the Pike, there is little reason not to enter it. Since there is no battle in this room, you are guaranteed to make it through, and any status inflicted on your team is basically irrelevant since the challenge is finished immediately after.
The other situation where I might enter this room would be if my team is already statused. I’m fairly certain that you can’t encounter a status room if your entire team is already statused, which means that entering this room guarantees a heal and safe passage to the next room. There may also be merit to this strategy if 1-2 Pokemon are statused: at that point, you’re in a bad situation anyway so might as well try for a heal. If it doesn’t pay-off and the remains of your team get status too…well that sucks, but at least you avoided a battle.
Flygon @
Jolly
Levitate
IVs: 31/31/31/21/31/31
EVs: 20/252/4/0/4/228
Earthquake
Rock Slide
Fly
Quick Attack
Flygon appears again. Banded Earthquakes are just so good, and the addition of double battles makes Earthquake all the more valuable.
Gyarados @
Adamant
Intimidate
IVs: 30/30/30/22/30/31
EVs: 0/248/8/0/0/252
Hidden Power [Flying]
Earthquake
Protect
Dragon Dance
For this slot, I wanted something strong that would also pair up well with Flygon in doubles. Gyarados works well here because it’s immune to Ground, and so Flygon can spam Earthquake safely. Intimidate is another asset in doubles. Gyarados itself is otherwise a competent Pokemon than can perform well in singles too as a Dragon Dancer where needed. I like Protect on this set mostly for doubles – Gyarados is highly vulnerable to Electric moves and it works well as a lure option.
Blissey @
Bold
Natural Cure
IVs: 31/4/31/31/31/31
EVs: 252/0/252/0/0/4
Seismic Toss
Flamethrower
Aromatherapy
Softboiled
Clerics are invaluable in any facility without guaranteed healing, and this is especially true for the Pike (the Pyramid at least gives you healing items).
Blissey is hands down the best cleric. Nothing comes close to pulling off what Blissey can do. With Softboiled and its enormous HP, Blissey easily recovers the HP of its team mates without having to sacrifice too much of its own total HP (one Softboiled is often enough to heal something else completely), and with Aromatherapy/Heal Bell removing status, Blissey is essentially a Pokemon Centre in your pocket, bar the PP recovery.
I think the key thing to Blissey’s success as a cleric in the Frontier is Natural Cure; without it, I don’t think it would be as effective. Natural Cure basically allows Blissey to not care about the status inflicted by the various wild Pokemon in the Pike, and that allows Blissey to use these encounters as an opportunity to remove status from its team with little consequence. Even if Blissey gets statused after using Aromatherapy, simply fleeing eliminates the status and so it doesn’t have to worry about wasting more Aromatherapy PP and/or hoping the wild Pokemon uses something else before it escapes. This is one of the main things that distinguishes Blissey from Miltank, the only other Pokemon (excluding Smeargle) with access to both Softboiled/Milk Drink and Heal Beal/Aromatherapy (I mention Miltank because, unlike Blissey, it is readily available in Emerald and is the main alternative for those who can’t trade for Chansey/Blissey).
Blissey is not as great for actual battles. I think its use as a Cleric more than makes up for this though. At the very least, it still has its insane special bulk to wall lots of things. The other moves outside of Softboiled/Aromatherapy can be changed as desired: BoltBeam is reasonable, or perhaps Toxic/Protect could work.
As far as strategy in the Pike is concerned, I always ask the attendant for a hint when selecting rooms. There’s no reason not to unless you’re trying a speed run it or something. Generally, I aim to avoid battles if possible. My strategy for dealing with each statement is as follows:
“It seems to have the distinct aroma of Pokemon wafting around it…”
I usually go for these rooms. In most cases this will be a wild Pokemon room which is pretty much a free room if you have a remotely fast lead to flee the battles (Wobbuffet prevents this but doesn’t start to appear until well after you have done enough battles to receive the gold symbol; if you get far enough in just shove Roar/Whirlwind or some other passive move on the lead). It’s also a great opportunity to remove status from the team if required.
Occasionally you’ll end up in a single battle with a “tough” trainer when entering these rooms. I usually don’t mind this as long as I’m reasonably healthy though. “Tough” is mostly meaningless since battle outcomes depend more on match-ups – a team of 3 slow Ground-weak Pokemon is hardly a “tough” opponent for this team, for example. You also get healed after the battle anyway, so the battle is of little consequence in the long run, as long as you win.
“I seem to have heard something… It may have been whispering…”
I also find these rooms safe to go into most of the time. The outcomes are either an idle NPC room with no battle, or a double battle. Double battles are usually fine with a healthy team since it’s a 3-on-2 situation.
“Is it… A Trainer? I sense the presence of people…”
I usually avoid these rooms. Most of the time you’ll end up in a single 3-on-3 battle with no healing after it, and the more you avoid these, the better off you’ll be.
These rooms have a small chance of containing a nurse that heals all of your Pokemon, which sounds great in theory. The problem with this, though, is that the only time where you’d likely need this is if you team is already badly weakened and attempting to enter this room with a weakened team when you are more likely to encounter a trainer sounds like a bad idea to me.
“For some reason, I felt a wave of nostalgia coming from it…”
This room will either result in status being inflicted on your team, or 1-2 team members being healed (usually the former). The interesting thing about this room is that it’s the only one which is guaranteed not to contain a trainer, which in turn guarantees the extension of your streak by at least 2 rooms.
As good as this sounds, I avoid this room in most cases. Status is a killer in the Pike, and while having a cleric can negate this to an extent, you still need to enter a battle to use Aromatherapy/Heal Bell, and the last thing you’d want is to have your entire team frozen and then be challenged to a trainer battle immediately afterwards.
There are a couple of situations where I would enter these rooms. Firstly, if this is the last room of a particular run through the Pike, there is little reason not to enter it. Since there is no battle in this room, you are guaranteed to make it through, and any status inflicted on your team is basically irrelevant since the challenge is finished immediately after.
The other situation where I might enter this room would be if my team is already statused. I’m fairly certain that you can’t encounter a status room if your entire team is already statused, which means that entering this room guarantees a heal and safe passage to the next room. There may also be merit to this strategy if 1-2 Pokemon are statused: at that point, you’re in a bad situation anyway so might as well try for a heal. If it doesn’t pay-off and the remains of your team get status too…well that sucks, but at least you avoided a battle.
I don't remember what I lost to, only that I was using this to get more BP but ending up losing. This team works ok, but looking back on it I think the main issue with it is that it has a few good ideas that clash and don't work as well together as I wish they did. The pairing of Flygon and Gyarados for the double battles is great, and using a cleric Blissey in the Pike is also a good idea, but having Blissey on the same team as Flygon and Gyarados in doubles is tricky to work around because it becomes very difficult to use Earthquake when the risk of KOing Blissey with it is very real. There isn't a good solution to this problem unfortunately. There are only 5 Pokemon that can learn SoftBoiled or Milk Drink in gen 3, and of those, Togetic is the only one that is immune to Earthquake. As cool as it would be to find a niche for Togetic in this facility, the terrible HP and lack of Natural Cure and Heal Bell/Aromatherapy makes it non-viable for this role in my opinion, and if I'm going to pick a ground immune Pokemon to replace Blissey with I'd rather just use a more standard offensive Pokemon rather than a bad cleric.
Last edited:


I'm glad to see someone else trying to up their Palace streak. I may be crazy, but it's definitely my favorite facility. I like the added element of choosing a nature that works well with the pokemon's goals, and I'm not the best at strategy, so I like that that's out of my hands. Currently working on a team to take back the record... Is there a pokemon generating program people use to test sets out? Hard to RNG an entire team just to have it not work out.
Yeah this is a pain in the butt at first (I won't ever shut up about this, but I once played through a fresh Emerald just to obtain a gentle Latias that ended up winning me my Palace gold). With experience you'll get to the point where your RNGed mons will be optimized to perform to the best of their/your ability and you can chill on the RNG/raising and focus on battling. It's similar to how when your first get to the BF, you likely have sub-50 Pokemon with imperfect EVs/IVs and bad natures just so you can get a Choice Band and 1 BP vitamins. An initial barrier, but one you'll break through eventually.
As far as a program, they exist, but we're not really supposed to say the name here so you'll have to use the google machine. Wishing you the best in your runs!
My first attempt at the Palace was a Gyarados, Latias, Steelix set that got totally owned by Spenser Gold. Put a lot of time into creating that team. I still think all three of the pokemon have potential, but Gyarados really suffers from not being able to use Hidden Power, and Steelix is just too weak... Latias with Charm could be really interesting because Support moves you can use repeatedly are in theory better in the Palace. Once you use Thunder wave or Toxic once on an opponent, any additional uses of it are basically wasted turns, while you at least get some benefit from Charm the first 3 times you use it, though it's useless on special attackers. Thank you for your kind words!
So, my Palace streak has officially ended on 77 wins in retail cartridge. Losing battle was vs Hiker Corey who lead with a team of Aerodactyl 2, Marowak 2 and Haxdon (Either set 1 or 2).
vs


Hope you enjoyed this read and whenever it is possible for you to update Golden Blissey, it will be greatly appreciated!
So basically Corey opened with Aerodactyl while I opened with Flygon. Taking into account that Corey is one of the few trainers in Emerald who can have any set 1-4 of the Pokemon on its movepool I can't risk a Scizor or Milotic switch-in due to the fact that Dragonbreath can annoy Milotic with paralysis if it was set 1 while set 3/4 both have Fire Blast for Scizor. I felt that the safest play was staying and hope for Flygon to choose Rock Slide since later I could switch out and finish it off depending on the set. While Rock Slide doesn't OHKOs the first two sets, it does KO set 3 and set 4. Unfortunately, the Aerodactyl was faster and it opened with Aerial Ace revealing to be the Banded set Aerodactyl 2. Normally Flygon doesn't comes close to OHKO but safe to say that AA dropped Flygon to 64 HP (41%) and Flygon's %C levels were high enough for it to retaliate with a critical hit Rock Slide that OHKO'd Aerodactyl.
At this point odds were pretty good since Flygon at below %50 health now has a 94% chance to always attack EXCEPT for the fact that the next Pokemon was Marowak.
248 Atk Choice Band Flygon Earthquake vs. 0 HP / 0 Def Marowak: 99-117 (73.3 - 86.6%) -- guaranteed 2HKO
Banded Earthquake will never kill and I can't really throw Milotic due to Bold's preference of spamming Recover and Toxic so my next move was to switch into Scizor hoping that it can pick Leer since at worst case scenario in which Marowak sets up Swords Dance, I can revenge kill with Flygon thanks to the Defense drop. Effectively, Marowak does use Swords Dance and Scizor... ends up using Morning Sun instead lol. You know what happens next, right? Yes, Marowak crushes Scizor's skull with its Thick Club boosted Earthquake and sends its soul to heaven. Odds are now pretty bad at this point since Flygon is only at a glitter of dying vs a Marowak at x2 and I had Milotic who almost always chose Toxic or Recover in good health.
My next move was to send Milotic on the hopes that it would choose that 30% chance of using Surf but nope... Milotic just like Suicune did on that battle, chose Toxic. On the other hand, Marowak decided to Icy Wind instead which revealed it to be Set 2. Maybe, just maybe and just maybe, if the AI could fuck this up, I still had a chance and hoped that Milotic could actually picked Surf. To sum up what happened next turn, I will post instead a small conversation I had with ReptoAbysmal on the Discord describing the PTSD moment I developed with Marowak 2 when I started with Suicune on the team:

Milotic only ends up achieving a Toxic to which Marowak sets up another Swords Dance and at this point, things are pretty moot. This was the one chance I had to eliminate this threat but no. In the end, Marowak finally decides to send Milotic back to the Egg it came from with only a small boot damage from Toxic. Things are pretty moot because Corey still has an unknown remaining Pokemon left and I only have a CB Flygon at 41% HP. Flygon decides to Earthquake and Marowak instead commits seppuku by Swords Dancing again and to my surprise the chip Toxic damage at the end of the turn ends up eliminating it.
At this point, I still had my chance and finally, Corey sends out a familiar face: HAXDON. During my Tower streak, I have killed 47 Rhydons in cold blood whether it was on the lead position or end game. I still had my chance since Rhydon is vulnerable to Earthquake:
248 Atk Choice Band Flygon Earthquake vs. 170 HP / 0 Def Rhydon: 185-218 (92 - 108.4%) -- 50% chance to OHKO
248 Atk Choice Band Flygon Earthquake vs. 0 HP / 0 Def Rhydon: 185-218 (102.7 - 121.1%) -- guaranteed OHKO
In order, the calculations were in my favor if it was Set 1 and Set 2 still has a chance of being destroyed. I could still do this, all I needed was for Quick Claw not to activate and had some Palace RNG in my favor. Unfortunately, my %C levels dropped and it got a Quick Claw activation to which the fucker ended up disrespecting me by just finishing me with Brick Break. Guess that it felt pity for my Flygon and didn't even bothered on choosing the feared OHKO move.
At this point odds were pretty good since Flygon at below %50 health now has a 94% chance to always attack EXCEPT for the fact that the next Pokemon was Marowak.
248 Atk Choice Band Flygon Earthquake vs. 0 HP / 0 Def Marowak: 99-117 (73.3 - 86.6%) -- guaranteed 2HKO
Banded Earthquake will never kill and I can't really throw Milotic due to Bold's preference of spamming Recover and Toxic so my next move was to switch into Scizor hoping that it can pick Leer since at worst case scenario in which Marowak sets up Swords Dance, I can revenge kill with Flygon thanks to the Defense drop. Effectively, Marowak does use Swords Dance and Scizor... ends up using Morning Sun instead lol. You know what happens next, right? Yes, Marowak crushes Scizor's skull with its Thick Club boosted Earthquake and sends its soul to heaven. Odds are now pretty bad at this point since Flygon is only at a glitter of dying vs a Marowak at x2 and I had Milotic who almost always chose Toxic or Recover in good health.
My next move was to send Milotic on the hopes that it would choose that 30% chance of using Surf but nope... Milotic just like Suicune did on that battle, chose Toxic. On the other hand, Marowak decided to Icy Wind instead which revealed it to be Set 2. Maybe, just maybe and just maybe, if the AI could fuck this up, I still had a chance and hoped that Milotic could actually picked Surf. To sum up what happened next turn, I will post instead a small conversation I had with ReptoAbysmal on the Discord describing the PTSD moment I developed with Marowak 2 when I started with Suicune on the team:
Milotic only ends up achieving a Toxic to which Marowak sets up another Swords Dance and at this point, things are pretty moot. This was the one chance I had to eliminate this threat but no. In the end, Marowak finally decides to send Milotic back to the Egg it came from with only a small boot damage from Toxic. Things are pretty moot because Corey still has an unknown remaining Pokemon left and I only have a CB Flygon at 41% HP. Flygon decides to Earthquake and Marowak instead commits seppuku by Swords Dancing again and to my surprise the chip Toxic damage at the end of the turn ends up eliminating it.
At this point, I still had my chance and finally, Corey sends out a familiar face: HAXDON. During my Tower streak, I have killed 47 Rhydons in cold blood whether it was on the lead position or end game. I still had my chance since Rhydon is vulnerable to Earthquake:
248 Atk Choice Band Flygon Earthquake vs. 170 HP / 0 Def Rhydon: 185-218 (92 - 108.4%) -- 50% chance to OHKO
248 Atk Choice Band Flygon Earthquake vs. 0 HP / 0 Def Rhydon: 185-218 (102.7 - 121.1%) -- guaranteed OHKO
In order, the calculations were in my favor if it was Set 1 and Set 2 still has a chance of being destroyed. I could still do this, all I needed was for Quick Claw not to activate and had some Palace RNG in my favor. Unfortunately, my %C levels dropped and it got a Quick Claw activation to which the fucker ended up disrespecting me by just finishing me with Brick Break. Guess that it felt pity for my Flygon and didn't even bothered on choosing the feared OHKO move.
Even though Palace ended up constantly frustrating me and made me lose my shit plenty of times, I feel proud of my streak. 77 wins with Flygon is something and when you consider that I ended up using Leer Scizor just for this facility, I feel that this team overachieved any expectation. It's a shame that I ended up being 3 wins away from greentyphlosion's record who honestly deserves massive respect for getting to 80 wins with Modest Suicune. In the end, I am satisfied with the result and I am relieved that I won't be doing anytime this facility again. I'll probably do other facilities with Dome, Arena and Pyramid being in mind for the next ones.
This is the infamous battle vs Dewgong 3 where I legitimately almost lost my shot and ended up yelling insults to the TV screen in 4 different languages. Fair warning, there's a lot of cussing on the video even though I only commented on a replay, but yeah, it was that bad.
Hope you enjoyed this read and whenever it is possible for you to update Golden Blissey, it will be greatly appreciated!
Last edited:
I was super annoyed at my last loss at the Palace and was never planning on coming back, but I felt inspired to do another run. My run ended at 61 wins.
Zam is my lead, has Psychic and Fire punch with a Hasty nature with a lum berry. The evs allow you to outspeed everything besides Jolteon 4, with the
remaining in special defense. It's super frail, so leading with it was the only option. Checks the fighting types and main ghost type in Gengar, which Tauros can't hit. It is noticeably more frail with a hasty nature, even more so because my ivs suck, having just taken the first hasty one with flawless special attack and speed.
Tauros is CB with Return with a Hasty nature. Speed evs allow you to outspeed everything besides Jolteon, Crobat and Ninjask, with the rest in attack and hp. I debated between Double-edge and Return and decided that Return would be the safer move for Hasty nature. Intimidate support was nice and I even used the ghost immunity for fat ghosts like dusclops.
*Considering how Tauros was Hasty nature AND STILL didn't move 20% of the time, Slaking would be absolutely horrible in this format. I take back what I said earlier about it potentially being good.
I had Milotic on the team the last time I did this run and figured it would be a nice glue piece. Simple bold/max hp/max def ev spread. Super annoying to see it use toxic on steel types repeatedly, but otherwise pulled it's weight.
Team is in the pokepaste. I'll upload the video of my loss. In normal situations I would win this, but my mons refused to move, so I can't be salty.
https://pokepast.es/36020903d4ecae80
https://kapwi.ng/c/BhQsISDw
Attachments
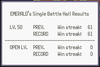
Last edited:


Just run 18 streaks in Battle Dome but lost to a critical hit once again so I am back to the beginning. Love the reads, guys.
After I get my Gold symbol in Battle Palace (not like that will be easy), I will return to Battle Dome where I am running MysticStarmie, SilkSlaking and Lum Berry Latias. They have been strong up until a Walrein got a lucky Ice Beam crit and Latias fainted before firing off the last Thunderbolt I needed to hit. At least I know I can comfortably reach 20-30 sets in Battle Dome with this team. DDMence over Slaking is my backup plan, with Leftovers, but I love how Slaking theoretically OHKOs such a large portion of the Pokemon in the game. It is a toss up between: sweep with dominence and confidence barring absurd luck or OHKO the first Pokemon and hope the second Pokemon is not going to set up on you.
Salamence + Slaking I have considered but without Earthquake TM, I need Starmie and Latias to cover Rock/Steel-types more convincingly. I also realized Starmie and Latias both wield a strong Psychic STAB and arguably two of the best secondary typings in Dragon and Water, which is why the third member of my team always performs well. Slaking being Normal-type gives it that obvious advantage having only one weakness which is resisted by both my other two members, so it's a top contender to get me closer to 50 sets.
I will post a picture when I reach over 20 sets, nearing to submenceisop's 30 win streak.

Even though Palace ended up constantly frustrating me and made me lose my shit plenty of times, I feel proud of my streak. 77 wins with Flygon is something and when you consider that I ended up using Leer Scizor just for this facility, I feel that this team overachieved any expectation. It's a shame that I ended up being 3 wins away from greentyphlosion's record who honestly deserves massive respect for getting to 80 wins with Modest Suicune. In the end, I am satisfied with the result and I am relieved that I won't be doing anytime this facility again. I'll probably do other facilities with Dome, Arena and Pyramid being in mind for the next ones.
This is the infamous battle vs Dewgong 3 where I legitimately almost lost my shot and ended up yelling insults to the TV screen in 4 different languages. Fair warning, there's a lot of cussing on the video even though I only commented on a replay, but yeah, it was that bad.
Hope you enjoyed this read and whenever it is possible for you to update Golden Blissey, it will be greatly appreciated!
Congrats man! 90% gutted for you, 10% pleased to still be in the lead (if only because I don't ever want to go back there). It took many, many attempts but it mainly comes back to what was said in the ranking - Suicune definitely tops Milotic. When you've got Suicune parked in front of something that can't KO it it's just a matter of clicking A over and over and waiting for the move you want to be chosen. But Scizor definitely also pulled its weight, I was really impressed with it.
Guys I'm at a crossroads and need some help. I'm taking a foray into Battle Tower Singles, It's been a long team. Just made it past Round 8 but I have come very close to dying several times (as in low rolls leaving me with 1 HP on my last Pokemon, Brightpowder misses, near-encounters with QC, etc.). I'm not expecting to get to thousands-long streaks like all you crazies (yet) but I do like the BP output as well as ribbons.
Ninjask (F) @ Liechi Berry


IVs: 0 Atk
EVs: 36 HP / 252 Def / 58 SpD / 164 Spe
Ability: Speed Boost
Level: 50
Shiny: Yes
Bold Nature
- Substitute
- Double Team
- Swords Dance
- Baton Pass
Speed EVs bring it up to 201 to outspeed Jolteon 4 and immediately get a Speed boost. The HP EVs let me get to +4 Speed and get the Liechi boost if I have no time to Swords Dance. Not exactly sure why I went max Def and Bold, it's been a minute since I bred this thing. So far this set has served me well, however, Evasion is the least reliable strategy for me right now unless I get past +3. Usually there's just no time for it. I'm thinking of going with Protect over Double Team just in case my sweeper dies in a freak accident, so I can get one last Speed boost to pass it onto my backup.
Medicham (M) @ Leftovers


EVs: 6 HP / 252 Atk / 252 Spe
Ability: Pure Power
Level: 50
Shiny: Yes
Adamant Nature
- Fake Out
- Brick Break
- Shadow Ball
- Substitute
I adore this thing's coverage. Fake Out helps me get certain things into KO, and grants me some Leftovers recovery if I come in without a Substitute. Its Speed is a little overkill as this was bred as more of a general purpose Pokemon and not necessarily as a Baton Pass recipient. Perhaps I can take enough Speed out to still get the jump on Jolteon 4 with +2, and invest the rest in HP to help against stuff like QC Slowking.
Regirock @ Lum Berry


EVs: 252 Atk / 6 Def / 252 Spe
Ability: Clear Body
Level: 50
Adamant Nature
- Rock Slide
- Earthquake
- Explosion
- Superpower
The hax is starting to get to me, and Rock Slide is the weakest link, and isn't as beneficial here as in Dome Doubles where I usually use it. Luckily, I recently caught an Adamant HP Rock Regirock which gets up to 101 Speed (30 Spe IV) -- letting it outspeed, you guessed it, Jolteon 4 after +2. I'm thinking of removing some Speed and focusing on what I can outspeed at +1 instead of +2, then putting the rest into SpDef to take neutral hits better.
Ninjask (F) @ Liechi Berry
IVs: 0 Atk
EVs: 36 HP / 252 Def / 58 SpD / 164 Spe
Ability: Speed Boost
Level: 50
Shiny: Yes
Bold Nature
- Substitute
- Double Team
- Swords Dance
- Baton Pass
Speed EVs bring it up to 201 to outspeed Jolteon 4 and immediately get a Speed boost. The HP EVs let me get to +4 Speed and get the Liechi boost if I have no time to Swords Dance. Not exactly sure why I went max Def and Bold, it's been a minute since I bred this thing. So far this set has served me well, however, Evasion is the least reliable strategy for me right now unless I get past +3. Usually there's just no time for it. I'm thinking of going with Protect over Double Team just in case my sweeper dies in a freak accident, so I can get one last Speed boost to pass it onto my backup.
Medicham (M) @ Leftovers
EVs: 6 HP / 252 Atk / 252 Spe
Ability: Pure Power
Level: 50
Shiny: Yes
Adamant Nature
- Fake Out
- Brick Break
- Shadow Ball
- Substitute
I adore this thing's coverage. Fake Out helps me get certain things into KO, and grants me some Leftovers recovery if I come in without a Substitute. Its Speed is a little overkill as this was bred as more of a general purpose Pokemon and not necessarily as a Baton Pass recipient. Perhaps I can take enough Speed out to still get the jump on Jolteon 4 with +2, and invest the rest in HP to help against stuff like QC Slowking.
Regirock @ Lum Berry
EVs: 252 Atk / 6 Def / 252 Spe
Ability: Clear Body
Level: 50
Adamant Nature
- Rock Slide
- Earthquake
- Explosion
- Superpower
The hax is starting to get to me, and Rock Slide is the weakest link, and isn't as beneficial here as in Dome Doubles where I usually use it. Luckily, I recently caught an Adamant HP Rock Regirock which gets up to 101 Speed (30 Spe IV) -- letting it outspeed, you guessed it, Jolteon 4 after +2. I'm thinking of removing some Speed and focusing on what I can outspeed at +1 instead of +2, then putting the rest into SpDef to take neutral hits better.
Reporting an ongoing battle tower streak of 210. I went up to 105 wins with Sub CM Latias, but swapped it out for Latios, which is better in that role. The set is better explained by Adeade, as this is his set.
Basically the premise is very simple, try to set up to +6 behind a substitute with either Suicune or Latios. Suicune plays a little more defensively though, as I frequently use it to switch into Fire types that have crunch and to switch into things like Aerodactyl.
In my earlier editions which unfortunately failed, I had fully specially invested Dusclops, who was on the team to stall out PP and have a good switch into Heracross. Unfortunately, it got frozen a lot from eating ice beams and the lack of hp made it 3koed by most neutral hits. Amazing heracross counter though.
I replaced it with Registeel and haven’t looked back. Gives me an amazing check to the Dragon types like Latios and Latias. Seismic Toss for consistent damage, toxic for those annoying specially defensive mons and those double teamers (looking at you Ludicolo 4!), iron defense to make it a nice mixed wall and rest with chesto berry. I found myself really needing the iron defense, as some versions of Latios and Latias carry EQ.
Sidenote: Ludicolo 4 shows up a lot around 100 ish. Super annoying to have a +6 Suicune only to encounter this thing.
Threats
Heracross- Suicune can sort of check it and Registeel can too with iron defense, but crits would put me in a lot of trouble. Hilariously, that situation actually did happen, where Heracross crit my Suicune, but iron defense Registeel knocked it out with S-toss.
Snorlax- I never like seeing this. If it’s a non-boosting set, it’s not a big threat, because Suicune can stall it out, but the belly drum and curse sets with immunity can be really scary. Quick Claw Snorlax also deserves a mention.
Gyarados 4 - It’s 3koed at the worst by unboosted Latias/Latios and I almost lost to this on battle 100. It boosted up twice on Latias, rested with the chesto berry and I was fearing the sweep at that point. Latias lived the return and weakened it enough to force another rest. Then I took advantage of the sleep turns to set up another sub/cm, before knocking it out.
Starmie 3/Gengar 5&7&8/Gardevoir 4- which have the coverage to really dent my team. I live any hit at full, but I always fear the crit.
Quick Claw users- Rhydon, Lapras, which have too many sets to worry about.
Ursaring is a big threat. Damn. That thing hits way too hard. Bright powder and Band set is dangerous.
https://pokepast.es/f4d298bdbb967f30
Attachments
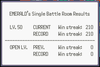
Last edited:
Guys I'm at a crossroads and need some help. I'm taking a foray into Battle Tower Singles, It's been a long team. Just made it past Round 8 but I have come very close to dying several times (as in low rolls leaving me with 1 HP on my last Pokemon, Brightpowder misses, near-encounters with QC, etc.). I'm not expecting to get to thousands-long streaks like all you crazies (yet) but I do like the BP output as well as ribbons.
Ninjask (F) @ Liechi Berry
IVs: 0 Atk
EVs: 36 HP / 252 Def / 58 SpD / 164 Spe
Ability: Speed Boost
Level: 50
Shiny: Yes
Bold Nature
- Substitute
- Double Team
- Swords Dance
- Baton Pass
Speed EVs bring it up to 201 to outspeed Jolteon 4 and immediately get a Speed boost. The HP EVs let me get to +4 Speed and get the Liechi boost if I have no time to Swords Dance. Not exactly sure why I went max Def and Bold, it's been a minute since I bred this thing. So far this set has served me well, however, Evasion is the least reliable strategy for me right now unless I get past +3. Usually there's just no time for it. I'm thinking of going with Protect over Double Team just in case my sweeper dies in a freak accident, so I can get one last Speed boost to pass it onto my backup.
Medicham (M) @ Leftovers
EVs: 6 HP / 252 Atk / 252 Spe
Ability: Pure Power
Level: 50
Shiny: Yes
Adamant Nature
- Fake Out
- Brick Break
- Shadow Ball
- Substitute
I adore this thing's coverage. Fake Out helps me get certain things into KO, and grants me some Leftovers recovery if I come in without a Substitute. Its Speed is a little overkill as this was bred as more of a general purpose Pokemon and not necessarily as a Baton Pass recipient. Perhaps I can take enough Speed out to still get the jump on Jolteon 4 with +2, and invest the rest in HP to help against stuff like QC Slowking.
Regirock @ Lum Berry
EVs: 252 Atk / 6 Def / 252 Spe
Ability: Clear Body
Level: 50
Adamant Nature
- Rock Slide
- Earthquake
- Explosion
- Superpower
The hax is starting to get to me, and Rock Slide is the weakest link, and isn't as beneficial here as in Dome Doubles where I usually use it. Luckily, I recently caught an Adamant HP Rock Regirock which gets up to 101 Speed (30 Spe IV) -- letting it outspeed, you guessed it, Jolteon 4 after +2. I'm thinking of removing some Speed and focusing on what I can outspeed at +1 instead of +2, then putting the rest into SpDef to take neutral hits better.
Definitely run Protect over DT, hax will get you in the end and 2 of your squad fear Aerial Ace anyway.
I would also rethink Regirock's moveset. Brick Break and Focus Punch both have their drawbacks but IMO they're much better choices than Superpower, especially since you should be aiming to bring Regirock in with a Sub up. Explosion is fine (as long as it's not your last team member standing, obviously) but Iron Defense/Curse is also an option since you don't have a lot of defensive utility and a QC sweeper that gets lucky could potentially get the jump on you (and in that instance it won't matter how speedy you are). Or Toxic if you come up against something you can't immediately beat down through brute force.
Hello everyone!
Today I'm here to report the result of my recent Dome's infatuation: an ongoing retail streak of 103 wins in Battle Dome Singles lv.50!
I'm glad to introduce you to my team:


Ok, jokes apart, there are some real effort and work behind my squad.
I've used the same members first brought by Valentino23 (shout-out, my man), but I'm using different set/spread/moveset on every member and my overall gameplan and approach to matches is different too, as I will better explain later.

King Tulip (Slaking) (M) @ Choice Band
Ability: Truant
Level: 50
Shiny: Yes
EVs: 252 Atk / 60 SpD / 196 Spe
Jolly Nature
- Shadow Ball
- Double-Edge
- Earthquake
- Hyper Beam

Mercury (Gengar) (M) @ Lum Berry
Ability: Levitate
Level: 50
Shiny: Yes
EVs: 12 HP / 4 Def / 252 SpA / 12 SpD / 228 Spe
Modest Nature
IVs: 0 Atk
- Destiny Bond
- Substitute
- Thunderbolt
- Ice Punch

Antarctica (Suicune) @ Leftovers
Ability: Pressure
Level: 50
Shiny: Yes
EVs: 140 HP / 124 Def / 244 Spe
Timid Nature
IVs: 6 Atk
- Substitute
- Protect
- Surf
- Calm Mind

This will be an unpopular opinion: the main reason why I picked Slaking is because of its 670 BST that always allows me to be the top trainer on the board, ensuring the godsend win in tie matches.
This Pokémon is a beast for real, don't get me wrong, but I think that until streaks will just rely on it, hax will always win in a brutal format like Singles 2v2.
Without hax, of course, Slaking can win alone vs. almost every Pokémon, and with opponents' reduced EVs it doesn't just gain extra power on the offensive side, but it can also afford to run a Jolly Nature with 196+ Spe EVs to reach the needed 159 speedtier (the old 173 one), basically outspeeding 120 BST Spe and everything slower, something that in other Facilities it cannot do. Then it must have of course max Attack investment (252 Atk EVs), while 60 SpD EVs are really blessed vs. Dome's weaker Special attacks and its HP Stat is naturally so high that it would be sub-optimized to further invest there.
Choice Band is absolutely mandatory and the moveset is pretty straightforward: Double-Edge is the main attacking move, with an insane 180 Power (factoring STAB) that can achieve an amazing list of OHKOs vs. 3 HP / 3 Def IVs Dome's foes even with a Neutral Atk Nature. Shadow Ball and Earthquake are the preferred moves for coverage, since Brick Break is really needed just vs. Tyranitar in Open Level in my opinion.
In the last slot I've opted for Hyper Beam because it's the only move that can ensure an OHKO on notorious Lapras 7/8, while sadly Double-Edge needs a roll to OHKO.

Gengar is the most versatile Pokémon in this facility, and I can't really imagine why a team should not bring it in the selected trio.
I've recently abandoned my dear Perish Song Gar in favour of a more offensive set, that has the same moveset of Ezio 's one.
I made this change after discovering opponents' reduced IVs, that boosts a lot Gengar's offensive presence and basically it's the only reason that can justify an offensive set, totally sub-par in other facilities.
Thunderbolt and Ice Punch create the notorious BoltBeam combo, while Destiny Bond is the best move available in Dome considering tie mechanic that will always make you win if you are on the top of the leaderboard.
I've selected Substitute as the last move since it is really helpful vs. Status users, giving me momentum even on switch-ins thanks to my Lum Berry, and I can also spam Subs to lower my health and ensure the double kill with Destiny Bond.
I run Modest Nature with 228 Spe EVs since a +Spe one is not required for Gengar to reach the "new" blessed speedtier, that due to 3 IVs foe is now set at 159 (173 before). I then used 252+ SpA EVs since it allows me to achieve the most on the offensive side (especially the ensured 2HKO on Armaldo and the greatest chance available to score a 2HKO on Lapras 7/8).
Then I've put 12 HP EVs to create 4 perfect Substitutes remaining at 1 HP, 12 SpD EVs to make a defensive jump on Special side and 4 Def EVs not to waste them.

Here we are with the true star of the team.
At the beginning I thought this would've been a filler spot, a Pokémon just brought vs. Tucker and maybe vs. some Rock trainers.
I was totally wrong: this Suicune is a true monster. Thanks to Timid Nature and 244+ Spe EVs she can outspeed 110 BST Spe and everything slower. If you have followed my recent Moltres adventures, you already know that if a Leftovers Pressure staller - with Protect and Substitute - outspeeds a foe, it can drain 32 PPs from that enemy just switching between these 2 moves, even admitting that a foe has 32 PPs from moves able to break Subs (and there's no Pokémon that can achieve such feat vs. Cune). Then I've put 140 HP EVs to reach the highest Leftovers number available, 193, and the rest in Def (124 Def EVs).
This set can capitalize on free turns behind a Substitute - or on Struggling foe - in a way that Moltres can just dream: thanks to Calm Mind I can set-up at +6 SpA / +6 SpD behind a Sub, with Surf of course as the only attacking move. Even if an enemy has Water Absorb, it's not an issue since I've just to stall it and then switch into my 2nd Pokémon vs. a Struggling foe to ensure the win - and Gengar can also set a Substitute on an out-of-PPs Water Absorb Pokémon-.
Suicune has lately become my first lead pick in more than 70% of matches (!), and more than 65% of them are won by her alone (!!!). She can set-up without any kind of support on every Dome slower foe without Quick Claw, it's nothing but amazing and I'm truly convinced she is the key of my team success.
There are no words to explain the buff that she has received with IVs glitch, but I want to report a consideration; in Dome Suicune can achieve calcs that would require these Base Stats vs. 31 IVs foes:
100 HP / 91 Atk / 129 Def / 118 SpA / 129 SpD / 98 Spe
Of course, every 31 IVs Pokémon you'll bring to the Dome will get this kind of buffs, but just imagine how OP and broken these stats are on a Sub/Tect Pressure staller with Calm Mind and a strong defensive Type like Water is.
The gameplan is simple: if you don't see a Lax or a faster foe in team preview, BRING CUNE!

I hope to keep my streak alive through Dome's insane ammount of hax, where a bad turn can spell the word "end" for a run in every moment.
I also want to thank a lot Valentino23 , because this team's born thanks to the brainstorming we've had, and Ezio with all of the guys on Discord server!
Today I'm here to report the result of my recent Dome's infatuation: an ongoing retail streak of 103 wins in Battle Dome Singles lv.50!
I'm glad to introduce you to my team:
Ok, jokes apart, there are some real effort and work behind my squad.
I've used the same members first brought by Valentino23 (shout-out, my man), but I'm using different set/spread/moveset on every member and my overall gameplan and approach to matches is different too, as I will better explain later.
- : Slaking+Gengar is considered a must in Dome, period. This core is the perfect combination of sheer power, Types-synergies and overall coverage. They are also perfectly tailored for the fast-paced 2v2 Singles matches and for the required offensive answer to Dome threats. I've also explained in a previous post why they are really able to shine thanks to "IVs glitch" and tie mechanic. In a potential Dome power ranking, these two beasts should both be S (and Gengar is arguably S+);
- : 3rd team member should cover few things for the fantastic duo. In particular, it's really appreciated something that can check Jolteon 4 and mostly Quick Claw Rock Types and Hax Water Types (Emerald Frontier is full of them). Don't get me wrong, Gar+King can easily beat the aformentioned threats, but a way to avoid hax from them should always be the preferred third pick. I've tried this team with Perish Song Gengar and I lost after 51 tournaments because, even if Blissey is a monster alone, I still had to rely too much on Slaking lead in almost every match and in a 2v2 format it's really tough, if not impossible, to overcome a turn 1 hax (or a Protect, or a Fake Out, or an Hyper Beam miss) on a Truant lead;
- : I've then tried Swampert as the 3rd member, to keep a strong answer vs. Jolteon 4 while also having better check to Quick Claw Rock Types, that are really threatening since Slaking can't OHKO most of them even factoring IVs glitch, and a QC activation before Gengar Destiny Bond may be game ending. Sadly, Swampert is not a good Pokémon in Frontier, and an early loss confirmed it;
- : After the previous loss, something really game-changing happened. On Discord server, Valentino pointed out that Dome enemies had reduced IVs even in later rounds, and after a few tests it was confirmed. Some people told me it was well-known, but I honestly didn't know it and no player (recent or in the past) has ever considered this before in teambuilding processes. In particular, 3 IVs foes make offensive Gengar a viable set, if not the best one. Moreover, reduced Spe IVs immediately made me notice that Jolly Slaking can then outspeed 120 Base Speed enemies, while now Timid Suicune has the potential to be a complete monster. I have never used Suicune in Tower because of her middling speedtier, that basically leaves her open to too many threats and I think that her role can be better covered respectively by Blissey (if you aim for a Special sponge), by Latios (if you aim for a set-up sweeper), or by Moltres (if you aim for a "fast" Pressure staller). That's true, but now in Dome a Timid Suicune can outspeed 110 Base Spe foes (!!!), making her the perfect stalling machine and wincon. So I gave her a shot, still convinced that at the end of the day I would've ended up with a King+Gar selection in almost every match, but the results have really passed my wildest expectations.
King Tulip (Slaking) (M) @ Choice Band
Ability: Truant
Level: 50
Shiny: Yes
EVs: 252 Atk / 60 SpD / 196 Spe
Jolly Nature
- Shadow Ball
- Double-Edge
- Earthquake
- Hyper Beam
Mercury (Gengar) (M) @ Lum Berry
Ability: Levitate
Level: 50
Shiny: Yes
EVs: 12 HP / 4 Def / 252 SpA / 12 SpD / 228 Spe
Modest Nature
IVs: 0 Atk
- Destiny Bond
- Substitute
- Thunderbolt
- Ice Punch
Antarctica (Suicune) @ Leftovers
Ability: Pressure
Level: 50
Shiny: Yes
EVs: 140 HP / 124 Def / 244 Spe
Timid Nature
IVs: 6 Atk
- Substitute
- Protect
- Surf
- Calm Mind
This will be an unpopular opinion: the main reason why I picked Slaking is because of its 670 BST that always allows me to be the top trainer on the board, ensuring the godsend win in tie matches.
This Pokémon is a beast for real, don't get me wrong, but I think that until streaks will just rely on it, hax will always win in a brutal format like Singles 2v2.
Without hax, of course, Slaking can win alone vs. almost every Pokémon, and with opponents' reduced EVs it doesn't just gain extra power on the offensive side, but it can also afford to run a Jolly Nature with 196+ Spe EVs to reach the needed 159 speedtier (the old 173 one), basically outspeeding 120 BST Spe and everything slower, something that in other Facilities it cannot do. Then it must have of course max Attack investment (252 Atk EVs), while 60 SpD EVs are really blessed vs. Dome's weaker Special attacks and its HP Stat is naturally so high that it would be sub-optimized to further invest there.
Choice Band is absolutely mandatory and the moveset is pretty straightforward: Double-Edge is the main attacking move, with an insane 180 Power (factoring STAB) that can achieve an amazing list of OHKOs vs. 3 HP / 3 Def IVs Dome's foes even with a Neutral Atk Nature. Shadow Ball and Earthquake are the preferred moves for coverage, since Brick Break is really needed just vs. Tyranitar in Open Level in my opinion.
In the last slot I've opted for Hyper Beam because it's the only move that can ensure an OHKO on notorious Lapras 7/8, while sadly Double-Edge needs a roll to OHKO.
Gengar is the most versatile Pokémon in this facility, and I can't really imagine why a team should not bring it in the selected trio.
I've recently abandoned my dear Perish Song Gar in favour of a more offensive set, that has the same moveset of Ezio 's one.
I made this change after discovering opponents' reduced IVs, that boosts a lot Gengar's offensive presence and basically it's the only reason that can justify an offensive set, totally sub-par in other facilities.
Thunderbolt and Ice Punch create the notorious BoltBeam combo, while Destiny Bond is the best move available in Dome considering tie mechanic that will always make you win if you are on the top of the leaderboard.
I've selected Substitute as the last move since it is really helpful vs. Status users, giving me momentum even on switch-ins thanks to my Lum Berry, and I can also spam Subs to lower my health and ensure the double kill with Destiny Bond.
I run Modest Nature with 228 Spe EVs since a +Spe one is not required for Gengar to reach the "new" blessed speedtier, that due to 3 IVs foe is now set at 159 (173 before). I then used 252+ SpA EVs since it allows me to achieve the most on the offensive side (especially the ensured 2HKO on Armaldo and the greatest chance available to score a 2HKO on Lapras 7/8).
Then I've put 12 HP EVs to create 4 perfect Substitutes remaining at 1 HP, 12 SpD EVs to make a defensive jump on Special side and 4 Def EVs not to waste them.
Here we are with the true star of the team.
At the beginning I thought this would've been a filler spot, a Pokémon just brought vs. Tucker and maybe vs. some Rock trainers.
I was totally wrong: this Suicune is a true monster. Thanks to Timid Nature and 244+ Spe EVs she can outspeed 110 BST Spe and everything slower. If you have followed my recent Moltres adventures, you already know that if a Leftovers Pressure staller - with Protect and Substitute - outspeeds a foe, it can drain 32 PPs from that enemy just switching between these 2 moves, even admitting that a foe has 32 PPs from moves able to break Subs (and there's no Pokémon that can achieve such feat vs. Cune). Then I've put 140 HP EVs to reach the highest Leftovers number available, 193, and the rest in Def (124 Def EVs).
This set can capitalize on free turns behind a Substitute - or on Struggling foe - in a way that Moltres can just dream: thanks to Calm Mind I can set-up at +6 SpA / +6 SpD behind a Sub, with Surf of course as the only attacking move. Even if an enemy has Water Absorb, it's not an issue since I've just to stall it and then switch into my 2nd Pokémon vs. a Struggling foe to ensure the win - and Gengar can also set a Substitute on an out-of-PPs Water Absorb Pokémon-.
Suicune has lately become my first lead pick in more than 70% of matches (!), and more than 65% of them are won by her alone (!!!). She can set-up without any kind of support on every Dome slower foe without Quick Claw, it's nothing but amazing and I'm truly convinced she is the key of my team success.
There are no words to explain the buff that she has received with IVs glitch, but I want to report a consideration; in Dome Suicune can achieve calcs that would require these Base Stats vs. 31 IVs foes:
100 HP / 91 Atk / 129 Def / 118 SpA / 129 SpD / 98 Spe
Of course, every 31 IVs Pokémon you'll bring to the Dome will get this kind of buffs, but just imagine how OP and broken these stats are on a Sub/Tect Pressure staller with Calm Mind and a strong defensive Type like Water is.
The gameplan is simple: if you don't see a Lax or a faster foe in team preview, BRING CUNE!
I will add soon in this section pics of every round from tournament 79, also reporting my picks and a few considerations about it
I hope to keep my streak alive through Dome's insane ammount of hax, where a bad turn can spell the word "end" for a run in every moment.
I also want to thank a lot Valentino23 , because this team's born thanks to the brainstorming we've had, and Ezio with all of the guys on Discord server!
Last edited:
Hello everyone, I already obtained the gold symbols years ago so I'd like to share my experience, starting with the Battle Tower. I don't remember my team's IV distribution well, I don't know RNG manipulation so I made sure everyone had 20-ish ivs in all stats. And since there's no way to check evs, the distribution is kinda iffy (just look at Metagross...). And at the time I liked relying on hax-items which helped in some ocassions but I don't recommend it now unless you are hard pressed by the item clause.
Battle Tower (Singles, Open Level): 98 wins (sorry for the image quality, my GBA is very old...)
Heracross @ Lum Berry
Ability: Guts
EVs: 228 Atk / 32 SpD / 248 Spe
Adamant Nature
- Megahorn
- Brick Break
- Earthquake
- Rock Slide
Metagross @ Quick Claw
Ability: Clear Body
EVs: 208 HP / 212 Atk / 20 Def / 68 SpD
Impish Nature
- Meteor Mash
- Earthquake
- Sludge Bomb
- Explosion
Starmie @ King's Rock
Ability: Natural Cure
EVs: 4 HP / 252 SpA / 252 Spe
Timid Nature
- Surf
- Psychic
- Ice Beam
- Thunderbolt
Basically, my strategy was to lead with Heracross and go all out offensive, her weaknesses being covered by Metagross and Starmie. No set up sweepers or anything fancy, just a lot of physical and special coverage and a exploding Metagross if things started to go wrong.
Against Gold Anabel, my Heracross took a +1 Tbolt and 2HKO Raikou with EQ and Brick Break (in case she went for Reflect, which is why I didn't want Choice Heracross here). Then to my surprise my Heracross outsped and hit her Brightpowder Latios, now I know that those Frontier Lati twins have no speed investment lol. Hera went down to Snorlax after dealing a chunk with Brick Break, so Metagross went BOOM and finished the job.
I came back after I completed the Frontier to see how far I could go before losing to a Salac Gardevoir (no I'm defenitely not salty about being so close to the 3-digit mark, definitely not me sir).
Attachments
Last edited:
I've moved on from the Factory and put in some time to actually train my own team instead of sponging from the AI, so I'm announcing:
Battle Palace Doubles Lv. 50 - 47 Streak (ended)


Very happy with how this went and if I can find time, I may try to push it out longer or make some tweaks. Really enjoying Doubles and this team is, surprisingly, quite fun to play with, despite the Palace's quirks. Would love to break 50.
Battle Palace Doubles Lv. 50 - 47 Streak (ended)
I was reading some comments in this thread and on Discord about Palace strategies and a couple of them caught my eye.
Firstly, Kommo-o talking about using a Bold Milotic with Toxic to try and actually get some use out of wasted turns by allowing poison to wear down foes. And secondly, Zsy6 mentioned about Curse being a Support move, and suggested Curselax or Curse Miltank as possibilities (with an Impish nature).
Looking at the table of Natures and what their move probabilities are, I figured that since Snorlax has the special bulk to tank a lot of hits and, after repeated Curses, has a lot of physical bulk, I thought the 25%/17% chances of using Curse with Impish looked a little low. Particularly, that 17% chance at <50% means there's a decent chance of Snorlax continuing to Curse when it's at low HP instead of healing itself. Ideally, if it's possibly only got one or two turns left before being KO'd, I'd rather it attacked or healed itself.
So, instead of Impish, I settled on Jolly, with probabilities of 35%/5%/60% and 35%/60%/5% (<50% HP). This means there's only a 5% chance of it using Curse on low health, and correspondingly there's a 95% chance of it either rampaging or sleeping. That chunky 60% chance of using Curse at high HP is also great, because it means Snorlax builds power and bulk quickly in early turns, and so lasts a lot longer. The downside, of course, being that Jolly is +Spe instead of +Def. I figured after a couple of Curses this might offset itself. I selected Immunity over Thick Fat because it's bulky enough on the special side already, and dodging Toxic is a nice ability to have.
Offensively, it made sense to go for Body Slam (decent power, paralysis chance, 100 accuracy) and Earthquake. I didn't want the recoil from Double-Edge; Hyper Beam's wasted turn and accuracy is an issue; and I basically just didn't really think very hard about Return. I might include Return in the future if the damage calcs look good, but the majority of the time, Snorlax is hitting after boosting its Atk anyway. Earthquake is just the go-to move in Doubles and firing it off after a few Curses is a great prospect. Plus, it gets around the issue of single-target moves being 'randomly' targeted in Palace, meaning you don't keep using it over and over against a Levitate or Flying-type foe without at least damaging its Ally.
With Snorlax banked, and its best offensive possibilities including Earthquake, I wanted to move away from Milotic for Doubles, because having to tank boosted Earthquakes from Snorlax was not a happy prospect. Indeed, I needed both potential partners to be completely immune to Earthquake, because there's no way of using Protect reliably and Snorlax could very well be at +6 Atk. I still wanted to include something bulky with access to Toxic, since this would pair well with Snorlax's propensity to keep Cursing and Resting, which wastes a lot of turns. As well as this, I wanted something with access to a healing move which isn't Rest (having both Pokemon asleep at the same time doesn't sound like fun).
So that's where I hit upon Latias: 80/90/130 HP and defences make it bulkier than Latias, a good defensive typing to take advantage of that 130 SpD stat, and access to Recover. Its Psychic typing also synergises well with Snorlax, throwing STAB Psychics at the Fighting types which make up Snorlax's main threats. And Levitate for immunity to Earthquake, of course. It can tank special hits, and even super effective hits from weakish foes.
I'm using my old Emerald cartridge and for some reason I decided to make Latias my roamer instead of Latios way back when. When I caught it, its nature was Impish, which actually is arguably slightly nicer than Bold when it comes to probabilities. It's significantly less likely to use Toxic (50%/10% for Bold; 25%/17% for Impish), but this also minimises wasted turns trying to inflict Toxic again on a Steel-, Poison-type or something that's already poisoned. Since Latias's SpA is a respectable 110, it can actually inflict some damage with increased probabilities of attacking (69%/28% for Impish; 30%/32% for Bold). And when it comes to using Recover, it's 14% less likely to use it at >50% HP (effectively wasting a turn) but only 4% less likely at <50% HP. Of course, the massive drawback is that Impish is a -SpA nature.
Offensively, I needed Psychic to try and KO Fighting-types which threaten Snorlax, as well as hitting Poison-types immune to Toxic; and I also added Surf for added pressure against Steel-types which are immune to Toxic. Plus, Surf being a spread move gets around the targeting issue in the Palace. I did consider Mist Ball, since in return for a drop in power you get a 50% chance of dropping SpA which can cripple quite a few problematic opponents. However, I considered 70 base power (only 105 with STAB...) to just be too low. Plus, it only has 8 PP and Palace battles can last much longer.
For my final team member, I wanted to utilise the other main strategy in the Palace, namely Hasty Choice Band to try and get consistent offensive pressure. I needed something immune to Earthquake, which could preferably counter Ice-types which threatened Latias, had two or three good offensive moves to take advantage of Choice Band, and was fast enough to secure revenge-kills when needed.
I settled on Aerodactyl, which, whilst far from perfect (frail, typing could be better), had a lot of good points. Hasty nature gives it the Spe to outrun everything in Palace except Jolteon-4; STAB Rock Slide spread attack; access to Earthquake; good counter to Ice-types.
Very little to it: only two moves, Choice Band, and it's my reserve team member to come in and go for KOs when Latias and Snorlax have weakened everything. Choice Band boosted Earthquake does hit Snorlax, but its physical bulk (plus possible Curses) minimise the damage. Unfortunately, neither Pressure or Rock Head are especially good abilities but Pressure's better than nothing.
Eon (Latias) (F) @ Leftovers
Ability: Levitate
Shiny: No
EVs: 252 HP / 150 SpD / 108 Spe
IVs: 30 / 18 / 0 / 18 / 8 / 5
Impish Nature
- Psychic
- Recover
- Toxic
- Surf
Professor (Snorlax) (M) @ Chesto Berry
Ability: Immunity
Shiny: No
EVs: 252 HP / 252 Def / 6 SpD
IVs: 13 / 24 / 21 / 20 / 17 / 12
Jolly Nature
- Body Slam
- Rest
- Curse
- Earthquake
Pteraplane (Aerodactyl) (M) @ Choice Band
Ability: Pressure
Shiny: No
EVs: 86 HP / 252 Atk / 172 Spe
IVs: 23 / 27 / 6 / 24 / 20 / 21
Hasty Nature
- Earthquake
- Rock Slide
- No Move
- No Move
Lead with Latias and Snorlax, and 6 times out of 7, you just need to press 'A' about twenty times and collect a win. Aerodactyl was very rarely required except as a tactical switch-in.
Latias has enough Speed EVs to get it to 131 which basically is just neatly ahead of things like other Latias, which can help with getting the jump. I only tend to switch Latias out if I'm facing a strong Ice- or Dragon-type which I know will KO Latias easily. Its special bulk makes this relatively unusual. Blizzard is less of a threat in Doubles because its power is diminished, and a lot of non-STAB Ice Beams etc. are 3HKOs and can be sponged with Recover. Additionally, since it's Palace, the AI often doesn't select the optimal moves to begin with, and often Latias is hit by Flamethrower or Hydro Pump instead of Ice Beam and Dragon Claw. Status isn't ideal, especially Toxic, but Leftovers over Lum Berry provides a lot of passive healing during the myriad of wasted turns. And even then, being burned isn't so bad; paralysis is annoying but not actually crippling; Confusion is annoying but recoil damage isn't massive. Access to Recover (and using it liberally) goes a long way to compensate for status. I usually found that Latias spends most of her time attacking with Psychic or Surf, occasionally throwing out Toxic. Under 50% HP, it's nearly always Recover.
Snorlax is a boring task of spamming Curse for as long as it wants, before eventually finding the time to attack. I only switch it out if there's a powerful Fighting-type foe which can do a lot of damage on the first turn. Focus Punch is a particular problem, because you can't rely on Latias actually attacking on the first turn for sure. After a few Curses Snorlax can tank hits so I don't tend to switch it out once it's got going. Unfortunately it can and will try to Rest when it's only lost a tiny bit of HP but this is minimal. I think in the entire run Snorlax was only KO'd once or twice, total, it just lasts forever with Rest.
Aerodactyl has the Speed EVs to touch the magic 183, then the rest is in HP and Atk since it can only at best tie Jolteon-4. There's no strategy for Aerodactyl. I only bring it in against threats which would be problematic for Latias or Snorlax. Sometimes I allow Latias to faint in order to give it a free switch-in, but with Surf's power reduced, Blizzard's power reduced, and the general unpredictability of the Palace, I don't think I ever had any problems with getting it in safely. Rock typing has general utility in just resisting a lot of the usual AI spam attacks. It's possible Aerodactyl could have some strong points as a lead Pokemon, as it's fast and consistently hits, but unfortunately both Toxic and Curse need turns to get going and allowing Aerodactyl to hang around unnecessarily long doing ineffectual damage only hinders the team.
Generally in the Palace, there's not much 'strategy' because you've got extremely limited input. In 3v3 Singles, the ability to switch gives you three potential match-ups between you and the foe; in Doubles, there are only two, and one of your Pokemon has to stay on the field no matter what. This means that there's even less input than ever. The main strategy to avoid this problem is just to make a front pair who are bulky. Unlike in Dome/Tower etc., powerful but frail Pokemon struggle because the balance of probabilities is not in their favour. The strong law of large numbers is your friend in Palace.
The good thing about Palace, as opposed to other facilities, is that the AI is extremely stupid. Although it's impossible to counter specific threats with your own team, sometimes very threatening foes can be KO'd without doing anything because the Palace probabilities ruin them. For the same reason that it's important to use different natures on your team in Palace, the AI struggles against the bad natures it gets saddled with. Movesets are also not tailored to the Palace, so sometimes you can get a foe with 4 offensive moves and only a 20% chance of attacking (e.g. Lonely nature). Jolteon-4 has a 50% chance of using Thunder Wave at low HP (even if you're already paralysed) and a 20% chance of doing nothing.
The Palace is full of problems, because it's impossible to guarantee being able to use a single move at any given time. Most of them have little or no reliable way to counter.
- OHKO moves. I've got no answer to most OHKO users apart from just trying to KO them as fast as possible. I actually lost an early-round match on a previous streak to Pinsir-2 with Guillotine, who KO'd Snorlax on Turn 1 and Latias on Turn 2. It's luck, in the end, that means the OHKO users are unable to use their power or just miss the attacks.
- Quick Claw. It's not a huge problem because both Latias and Snorlax are tanky, but QC Double-Edge or Earthquake on Turn 1 can weaken Snorlax quite a bit. Sometimes if EQ is a problem I switch straight to Aerodactyl for immunity.
- Bulky (or Double Team) Pokemon immune to Toxic. Skarmory, Weezing, Venusaur, Registeel etc. can all cause problems because there's no way of wearing them down. Usually I just have to wait until I get lucky with SpD drops from Psychic or Snorlax gets 4 or 5 Curses off. Thankfully relatively few of them are seriously threatening in their own right.
- Bulky fighting-types can be problematic as usually Latias can't OHKO. Focus Punch is also unpredictable.
- Boosting opponents can be threatening because sometimes, infuriatingly, Latias/Snorlax just won't attack them, then get into a loop of using Recover/Rest.
- Aerodactyl can get locked into Earthquake as the final Pokemon on the field, and be unable to hit Pokemon that are immune.
- Teeter Dance is extremely frustrating, because it confuses everything on the field, and you can't effectively counter it by switching because you can only switch one Pokemon per turn. Aerodactyl does a lot of recoil damage to itself through confusion.
- Targeting is a perennial problem: just because Latias uses Psychic, doesn't mean it's going to target that OHKO it could get on Gloom rather than the ineffective attack on its partner Cacturne. This is frustrating and, given the number of immunities around (Ghost-types, Steel-types, Poison-types, Flying-types, Levitate, Immunity, Water Absorb, Dark-types), it happens often.
- Explosion users are a big issue before Snorlax can get off a few Curses, but this is down to luck as to whether they even use it, and even if they do, the ally damage can mean you're in a 1v1 situation at worst.
- Latias's offensive stats are a bit lacking. Nearly everything is a 2HKO at best.
To be honest, I didn't even bother to make notes for most of the run. None of my previous battles were close.
I lost on Battle 22 of my first streak because of Pinsir-2 (previously mentioned) which hit twice in two turns with Guillotine, then finished off Aerodactyl. That kind of luck just can't be countered.
The eventual loss on Battle 48 started by facing Rest/Curse Skarmory and an Explosion Golem. Neither of these is especially threatening to Latias and Snorlax, but Explosion is a problem when Skarmory can survive it. It's possible I might have played better by switching Latias for Aerodactyl to leave Latias facing Skarmory and an unknown Ally, but Surf is my best counter to Golem and I was reluctant to give Golem more turns than it needed. Unfortunately, Golem survived Surf and promptly blew itself up, KOing Snorlax and Latias and leaving Skarmory on ~1/3 HP. Aerodactyl came in, and Golem's replacement was Flygon. Aerodactyl spent two turns doing nothing while Skarmory used unboosted Fly and Flygon used Earthquake twice, so I thought that if I could get Rock Slide, I might just grind it out. It locked itself into Earthquake instead, and the match was over.
Very happy with how this went and if I can find time, I may try to push it out longer or make some tweaks. Really enjoying Doubles and this team is, surprisingly, quite fun to play with, despite the Palace's quirks. Would love to break 50.
Great job! Finally someone on the charts for Battle Palace doubles! Jolly is definitely an interesting nature for Snorlax, I just couldn't bring myself to suggest it because a +Speed curselax sounds so absurd! But I guess it goes to show that the attack/defense/support ratios really are the most important thing in the Palace.I've moved on from the Factory and put in some time to actually train my own team instead of sponging from the AI, so I'm announcing:
Battle Palace Doubles Lv. 50 - 47 Streak (ended)
View attachment 244957View attachment 244958View attachment 244959
I was reading some comments in this thread and on Discord about Palace strategies and a couple of them caught my eye.
Firstly, Kommo-o talking about using a Bold Milotic with Toxic to try and actually get some use out of wasted turns by allowing poison to wear down foes. And secondly, Zsy6 mentioned about Curse being a Support move, and suggested Curselax or Curse Miltank as possibilities (with an Impish nature).
Looking at the table of Natures and what their move probabilities are, I figured that since Snorlax has the special bulk to tank a lot of hits and, after repeated Curses, has a lot of physical bulk, I thought the 25%/17% chances of using Curse with Impish looked a little low. Particularly, that 17% chance at <50% means there's a decent chance of Snorlax continuing to Curse when it's at low HP instead of healing itself. Ideally, if it's possibly only got one or two turns left before being KO'd, I'd rather it attacked or healed itself.
So, instead of Impish, I settled on Jolly, with probabilities of 35%/5%/60% and 35%/60%/5% (<50% HP). This means there's only a 5% chance of it using Curse on low health, and correspondingly there's a 95% chance of it either rampaging or sleeping. That chunky 60% chance of using Curse at high HP is also great, because it means Snorlax builds power and bulk quickly in early turns, and so lasts a lot longer. The downside, of course, being that Jolly is +Spe instead of +Def. I figured after a couple of Curses this might offset itself. I selected Immunity over Thick Fat because it's bulky enough on the special side already, and dodging Toxic is a nice ability to have.
Offensively, it made sense to go for Body Slam (decent power, paralysis chance, 100 accuracy) and Earthquake. I didn't want the recoil from Double-Edge; Hyper Beam's wasted turn and accuracy is an issue; and I basically just didn't really think very hard about Return. I might include Return in the future if the damage calcs look good, but the majority of the time, Snorlax is hitting after boosting its Atk anyway. Earthquake is just the go-to move in Doubles and firing it off after a few Curses is a great prospect. Plus, it gets around the issue of single-target moves being 'randomly' targeted in Palace, meaning you don't keep using it over and over against a Levitate or Flying-type foe without at least damaging its Ally.
With Snorlax banked, and its best offensive possibilities including Earthquake, I wanted to move away from Milotic for Doubles, because having to tank boosted Earthquakes from Snorlax was not a happy prospect. Indeed, I needed both potential partners to be completely immune to Earthquake, because there's no way of using Protect reliably and Snorlax could very well be at +6 Atk. I still wanted to include something bulky with access to Toxic, since this would pair well with Snorlax's propensity to keep Cursing and Resting, which wastes a lot of turns. As well as this, I wanted something with access to a healing move which isn't Rest (having both Pokemon asleep at the same time doesn't sound like fun).
So that's where I hit upon Latias: 80/90/130 HP and defences make it bulkier than Latias, a good defensive typing to take advantage of that 130 SpD stat, and access to Recover. Its Psychic typing also synergises well with Snorlax, throwing STAB Psychics at the Fighting types which make up Snorlax's main threats. And Levitate for immunity to Earthquake, of course. It can tank special hits, and even super effective hits from weakish foes.
I'm using my old Emerald cartridge and for some reason I decided to make Latias my roamer instead of Latios way back when. When I caught it, its nature was Impish, which actually is arguably slightly nicer than Bold when it comes to probabilities. It's significantly less likely to use Toxic (50%/10% for Bold; 25%/17% for Impish), but this also minimises wasted turns trying to inflict Toxic again on a Steel-, Poison-type or something that's already poisoned. Since Latias's SpA is a respectable 110, it can actually inflict some damage with increased probabilities of attacking (69%/28% for Impish; 30%/32% for Bold). And when it comes to using Recover, it's 14% less likely to use it at >50% HP (effectively wasting a turn) but only 4% less likely at <50% HP. Of course, the massive drawback is that Impish is a -SpA nature.
Offensively, I needed Psychic to try and KO Fighting-types which threaten Snorlax, as well as hitting Poison-types immune to Toxic; and I also added Surf for added pressure against Steel-types which are immune to Toxic. Plus, Surf being a spread move gets around the targeting issue in the Palace. I did consider Mist Ball, since in return for a drop in power you get a 50% chance of dropping SpA which can cripple quite a few problematic opponents. However, I considered 70 base power (only 105 with STAB...) to just be too low. Plus, it only has 8 PP and Palace battles can last much longer.
For my final team member, I wanted to utilise the other main strategy in the Palace, namely Hasty Choice Band to try and get consistent offensive pressure. I needed something immune to Earthquake, which could preferably counter Ice-types which threatened Latias, had two or three good offensive moves to take advantage of Choice Band, and was fast enough to secure revenge-kills when needed.
I settled on Aerodactyl, which, whilst far from perfect (frail, typing could be better), had a lot of good points. Hasty nature gives it the Spe to outrun everything in Palace except Jolteon-4; STAB Rock Slide spread attack; access to Earthquake; good counter to Ice-types.
Very little to it: only two moves, Choice Band, and it's my reserve team member to come in and go for KOs when Latias and Snorlax have weakened everything. Choice Band boosted Earthquake does hit Snorlax, but its physical bulk (plus possible Curses) minimise the damage. Unfortunately, neither Pressure or Rock Head are especially good abilities but Pressure's better than nothing.
Eon (Latias) (F) @ Leftovers
Ability: Levitate
Shiny: No
EVs: 252 HP / 150 SpD / 108 Spe
IVs: 30 / 18 / 0 / 18 / 8 / 5
Impish Nature
- Psychic
- Recover
- Toxic
- Surf
Professor (Snorlax) (M) @ Chesto Berry
Ability: Immunity
Shiny: No
EVs: 252 HP / 252 Def / 6 SpD
IVs: 13 / 24 / 21 / 20 / 17 / 12
Jolly Nature
- Body Slam
- Rest
- Curse
- Earthquake
Pteraplane (Aerodactyl) (M) @ Choice Band
Ability: Pressure
Shiny: No
EVs: 86 HP / 252 Atk / 172 Spe
IVs: 23 / 27 / 6 / 24 / 20 / 21
Hasty Nature
- Earthquake
- Rock Slide
- No Move
- No Move
Lead with Latias and Snorlax, and 6 times out of 7, you just need to press 'A' about twenty times and collect a win. Aerodactyl was very rarely required except as a tactical switch-in.
Latias has enough Speed EVs to get it to 131 which basically is just neatly ahead of things like other Latias, which can help with getting the jump. I only tend to switch Latias out if I'm facing a strong Ice- or Dragon-type which I know will KO Latias easily. Its special bulk makes this relatively unusual. Blizzard is less of a threat in Doubles because its power is diminished, and a lot of non-STAB Ice Beams etc. are 3HKOs and can be sponged with Recover. Additionally, since it's Palace, the AI often doesn't select the optimal moves to begin with, and often Latias is hit by Flamethrower or Hydro Pump instead of Ice Beam and Dragon Claw. Status isn't ideal, especially Toxic, but Leftovers over Lum Berry provides a lot of passive healing during the myriad of wasted turns. And even then, being burned isn't so bad; paralysis is annoying but not actually crippling; Confusion is annoying but recoil damage isn't massive. Access to Recover (and using it liberally) goes a long way to compensate for status. I usually found that Latias spends most of her time attacking with Psychic or Surf, occasionally throwing out Toxic. Under 50% HP, it's nearly always Recover.
Snorlax is a boring task of spamming Curse for as long as it wants, before eventually finding the time to attack. I only switch it out if there's a powerful Fighting-type foe which can do a lot of damage on the first turn. Focus Punch is a particular problem, because you can't rely on Latias actually attacking on the first turn for sure. After a few Curses Snorlax can tank hits so I don't tend to switch it out once it's got going. Unfortunately it can and will try to Rest when it's only lost a tiny bit of HP but this is minimal. I think in the entire run Snorlax was only KO'd once or twice, total, it just lasts forever with Rest.
Aerodactyl has the Speed EVs to touch the magic 183, then the rest is in HP and Atk since it can only at best tie Jolteon-4. There's no strategy for Aerodactyl. I only bring it in against threats which would be problematic for Latias or Snorlax. Sometimes I allow Latias to faint in order to give it a free switch-in, but with Surf's power reduced, Blizzard's power reduced, and the general unpredictability of the Palace, I don't think I ever had any problems with getting it in safely. Rock typing has general utility in just resisting a lot of the usual AI spam attacks. It's possible Aerodactyl could have some strong points as a lead Pokemon, as it's fast and consistently hits, but unfortunately both Toxic and Curse need turns to get going and allowing Aerodactyl to hang around unnecessarily long doing ineffectual damage only hinders the team.
Generally in the Palace, there's not much 'strategy' because you've got extremely limited input. In 3v3 Singles, the ability to switch gives you three potential match-ups between you and the foe; in Doubles, there are only two, and one of your Pokemon has to stay on the field no matter what. This means that there's even less input than ever. The main strategy to avoid this problem is just to make a front pair who are bulky. Unlike in Dome/Tower etc., powerful but frail Pokemon struggle because the balance of probabilities is not in their favour. The strong law of large numbers is your friend in Palace.
The good thing about Palace, as opposed to other facilities, is that the AI is extremely stupid. Although it's impossible to counter specific threats with your own team, sometimes very threatening foes can be KO'd without doing anything because the Palace probabilities ruin them. For the same reason that it's important to use different natures on your team in Palace, the AI struggles against the bad natures it gets saddled with. Movesets are also not tailored to the Palace, so sometimes you can get a foe with 4 offensive moves and only a 20% chance of attacking (e.g. Lonely nature). Jolteon-4 has a 50% chance of using Thunder Wave at low HP (even if you're already paralysed) and a 20% chance of doing nothing.
The Palace is full of problems, because it's impossible to guarantee being able to use a single move at any given time. Most of them have little or no reliable way to counter.
I have wondered about the utility of Gengar instead of Aerodactyl in the third slot to counter some of these threats, but normal Gengar strategies are too difficult to execute in the Palace. It doesn't gain much from Choice Band, and really I would just be using it for the Ghost- and Ground-type immunities without any real reason. Flygon is another possibility but it shares a crippling Ice-type weakness with Latias.
- OHKO moves. I've got no answer to most OHKO users apart from just trying to KO them as fast as possible. I actually lost an early-round match on a previous streak to Pinsir-2 with Guillotine, who KO'd Snorlax on Turn 1 and Latias on Turn 2. It's luck, in the end, that means the OHKO users are unable to use their power or just miss the attacks.
- Quick Claw. It's not a huge problem because both Latias and Snorlax are tanky, but QC Double-Edge or Earthquake on Turn 1 can weaken Snorlax quite a bit. Sometimes if EQ is a problem I switch straight to Aerodactyl for immunity.
- Bulky (or Double Team) Pokemon immune to Toxic. Skarmory, Weezing, Venusaur, Registeel etc. can all cause problems because there's no way of wearing them down. Usually I just have to wait until I get lucky with SpD drops from Psychic or Snorlax gets 4 or 5 Curses off. Thankfully relatively few of them are seriously threatening in their own right.
- Bulky fighting-types can be problematic as usually Latias can't OHKO. Focus Punch is also unpredictable.
- Boosting opponents can be threatening because sometimes, infuriatingly, Latias/Snorlax just won't attack them, then get into a loop of using Recover/Rest.
- Aerodactyl can get locked into Earthquake as the final Pokemon on the field, and be unable to hit Pokemon that are immune.
- Teeter Dance is extremely frustrating, because it confuses everything on the field, and you can't effectively counter it by switching because you can only switch one Pokemon per turn. Aerodactyl does a lot of recoil damage to itself through confusion.
- Targeting is a perennial problem: just because Latias uses Psychic, doesn't mean it's going to target that OHKO it could get on Gloom rather than the ineffective attack on its partner Cacturne. This is frustrating and, given the number of immunities around (Ghost-types, Steel-types, Poison-types, Flying-types, Levitate, Immunity, Water Absorb, Dark-types), it happens often.
- Explosion users are a big issue before Snorlax can get off a few Curses, but this is down to luck as to whether they even use it, and even if they do, the ally damage can mean you're in a 1v1 situation at worst.
- Latias's offensive stats are a bit lacking. Nearly everything is a 2HKO at best.
To be honest, I didn't even bother to make notes for most of the run. None of my previous battles were close.
I lost on Battle 22 of my first streak because of Pinsir-2 (previously mentioned) which hit twice in two turns with Guillotine, then finished off Aerodactyl. That kind of luck just can't be countered.
The eventual loss on Battle 48 started by facing Rest/Curse Skarmory and an Explosion Golem. Neither of these is especially threatening to Latias and Snorlax, but Explosion is a problem when Skarmory can survive it. It's possible I might have played better by switching Latias for Aerodactyl to leave Latias facing Skarmory and an unknown Ally, but Surf is my best counter to Golem and I was reluctant to give Golem more turns than it needed. Unfortunately, Golem survived Surf and promptly blew itself up, KOing Snorlax and Latias and leaving Skarmory on ~1/3 HP. Aerodactyl came in, and Golem's replacement was Flygon. Aerodactyl spent two turns doing nothing while Skarmory used unboosted Fly and Flygon used Earthquake twice, so I thought that if I could get Rock Slide, I might just grind it out. It locked itself into Earthquake instead, and the match was over.
Very happy with how this went and if I can find time, I may try to push it out longer or make some tweaks. Really enjoying Doubles and this team is, surprisingly, quite fun to play with, despite the Palace's quirks. Would love to break 50.
While the Palace isn't one of the most fun facilities to go through, it seems to be one of the most interesting facilties to discuss about. I learned about the nature rates in Bulbapedia so I selected my best possible choices:
Battle Palace (Singles, Open Level): 42 wins (ongoing)

Starmie @King's Rock Sitrus Berry
Ability: Natural Cure
EVs: 4 HP / 252 SpA / 252 Spe
Timid Nature
- Surf
- Ice Beam
- Thunderbolt
-Psychic Confuse Ray
Timid has a battle style of 62-10-28, however her atk% goes down a lot below half HP so I equipped a Sitrus Berry as a countermeasure. I needed to swap a move to make use of its support%, and Water+BoltBeam is too good to pass up so bye Psychic. I was considering T Wave at first but then I saw Confuse Ray in the move reminder list and I preferred the 50% chance of confusion over 25% of paralysis. Overall, Starmie still remained as an effective offensive lead, even with 1 STAB move missing.

Ampharos @ Leftovers
Ability: Static
EVs: 124 HP / 120 Atk / 228 SpA / 36 SpD
Quiet Nature
- Thunderbolt
- Fire Punch
-Focus Punch Light Screen
- Thunder Wave
I trained this Pokemon as a check to bulky Water-types, Electric resist and to spread paralysis but didn't get to use it as much as I hoped. I checked that Quiet nature provided a decent battle style of 56-22-22 so it's now her time to shine. All of Ampharos moves cover attack, defense and support so no matter what, Ampharos will never be incapable of using her power.

Salamence @ Lum Berry
Ability: Intimidate
EVs: 72 Atk / 248 SpA / 188 Spe
Docile Nature
- Dragon Claw
- Aerial Ace
-Fire Blast Flamethrower
-Brick Break Protect
Another Pokemon that I didn't get to use as much as I hoped, but his Docile nature (56-22-22) was what I needed here and none of my mons had the coveted Hasty or Sassy natures. His typing synergized well with Starmie and Ampharos' weaknesses, and Intimidate helped too. Swapped Fire Blast for Flamethrower because this place has lots of hax already so I didn't feel like pushing it. Protect over Brick Break to make use of the defense%, despite leaving me with 22% chance to do nothing.

During the 42 battles Pokémon got the "incapable" turn pretty few times, in fact, I remember my opponents usually got it more frequently lol.
Silver Spenser went down pretty easy, with Starmie and Salamence taking care easy of his mons. It's on Gold that things started to get tense:
- Right in turn 1 HIS FREAKING ARCANINE GOT A CRIT E-SPEED!!! Thankfully Starmie hit with Surf and it was down.
- Enter Slaking. I got another Surf that did around half and Slaking Yawned. I switched to Mence. He went for Shadow Ball and I got the "incapable" turn. Mence beat it with Dragon Claw and Aerial Ace but got yawned (not like it matters bc Lum Berry).
- Enter Suicune. Mence went for 2 Aerial Aces but it didn't do much, while Suicune set up a Calm Mind and KOd with Blizzard. I sent out Ampharos, the true MVP of this fight, capable of taking 2 +1 Surfs and giving us the win with 2 TBolts. This whole battle was so unnerving.
Battle Palace (Singles, Open Level): 42 wins (ongoing)
Starmie @
Ability: Natural Cure
EVs: 4 HP / 252 SpA / 252 Spe
Timid Nature
- Surf
- Ice Beam
- Thunderbolt
-
Timid has a battle style of 62-10-28, however her atk% goes down a lot below half HP so I equipped a Sitrus Berry as a countermeasure. I needed to swap a move to make use of its support%, and Water+BoltBeam is too good to pass up so bye Psychic. I was considering T Wave at first but then I saw Confuse Ray in the move reminder list and I preferred the 50% chance of confusion over 25% of paralysis. Overall, Starmie still remained as an effective offensive lead, even with 1 STAB move missing.
Ampharos @ Leftovers
Ability: Static
EVs: 124 HP / 120 Atk / 228 SpA / 36 SpD
Quiet Nature
- Thunderbolt
- Fire Punch
-
- Thunder Wave
I trained this Pokemon as a check to bulky Water-types, Electric resist and to spread paralysis but didn't get to use it as much as I hoped. I checked that Quiet nature provided a decent battle style of 56-22-22 so it's now her time to shine. All of Ampharos moves cover attack, defense and support so no matter what, Ampharos will never be incapable of using her power.
Salamence @ Lum Berry
Ability: Intimidate
EVs: 72 Atk / 248 SpA / 188 Spe
Docile Nature
- Dragon Claw
- Aerial Ace
-
-
Another Pokemon that I didn't get to use as much as I hoped, but his Docile nature (56-22-22) was what I needed here and none of my mons had the coveted Hasty or Sassy natures. His typing synergized well with Starmie and Ampharos' weaknesses, and Intimidate helped too. Swapped Fire Blast for Flamethrower because this place has lots of hax already so I didn't feel like pushing it. Protect over Brick Break to make use of the defense%, despite leaving me with 22% chance to do nothing.
During the 42 battles Pokémon got the "incapable" turn pretty few times, in fact, I remember my opponents usually got it more frequently lol.
Silver Spenser went down pretty easy, with Starmie and Salamence taking care easy of his mons. It's on Gold that things started to get tense:
- Right in turn 1 HIS FREAKING ARCANINE GOT A CRIT E-SPEED!!! Thankfully Starmie hit with Surf and it was down.
- Enter Slaking. I got another Surf that did around half and Slaking Yawned. I switched to Mence. He went for Shadow Ball and I got the "incapable" turn. Mence beat it with Dragon Claw and Aerial Ace but got yawned (not like it matters bc Lum Berry).
- Enter Suicune. Mence went for 2 Aerial Aces but it didn't do much, while Suicune set up a Calm Mind and KOd with Blizzard. I sent out Ampharos, the true MVP of this fight, capable of taking 2 +1 Surfs and giving us the win with 2 TBolts. This whole battle was so unnerving.
Jishin here. 42 wins on Palace first try, didn't really have any trouble aside from Milotic misbehaving against Spenser's Suicune. It's a very easy to use team TBH and I mostly mashed A while reading Umineko.

Latios @ Lum Berry
Hasty
255 SpA/255 Speed (the IVs were not perfect so I went "Screw it" TBH)
-Calm Mind
-Dragon Claw
-Psychic
-Thunderbolt
The MVP honestly, just press A to win the vast majority of your matches. My IVs weren't perfect, with SpA being the lowest at 24. Still worked very well. Against certain threats you switch out if you don't have any CMs. Others you just always switch out. Probably the best Palace Pokemon because it usually just actually behaves. But it does need to be Hasty because the most important thing in the Palace is matching the nature to your moveset and Hasty just works almost perfectly.

Kangaskhan @ Choice Band
Hasty
252 Attack/252 Speed/6 HP
-Return
-EQ
-Shadow Ball
-Brick Break (I forgot to drop this one, it's better not to have this move IMO)
It takes care of certain things I don't want to leave Latios in on pre-CMs. So I just bring out Kangaskhan and hope for the best haha. Because one of those things is certain ghost types, I chose Kangaskhan over Tauros because Shadow Ball, and being kinda bulky is very nice in the Palace when Kangaskhan often won't cooperate until below half HP.

Milotic @ Leftovers
Bold
252 HP/252 Def/6 Speed
-Surf
-Ice Beam/Icy Wind
-Toxic
-Recover
I was too lazy to get the Suicune I wanted and I already had this lying around so I ripped off Kommo-o. :3 Not much else to say about it I guess. It complements the other two well and takes care of certain Pokemon Latios doesn't like when it doesn't have any Calm Minds up, and also is a really nice thing to switch into when Kangaskhan locks into a questionable move. Not original at all but it works.
----
So yeah there it is, I wouldn't say it's the best Palace team hands-down. However, most of the matches will be really fast and I found it to be pretty reliable, and I think it is a good choice if you just want to get the gold symbol pretty easily. But honestly there is lots of room to mess around with this basic team structure: Hasty Latios/Choice Band/Staller or bulky water.
I'll probably replace Kangaskhan and maybe even Milotic for my 100 streak attempt though. This was just a test run to see how far I could get with this and well... Good enough for now lol
Latios @ Lum Berry
Hasty
255 SpA/255 Speed (the IVs were not perfect so I went "Screw it" TBH)
-Calm Mind
-Dragon Claw
-Psychic
-Thunderbolt
The MVP honestly, just press A to win the vast majority of your matches. My IVs weren't perfect, with SpA being the lowest at 24. Still worked very well. Against certain threats you switch out if you don't have any CMs. Others you just always switch out. Probably the best Palace Pokemon because it usually just actually behaves. But it does need to be Hasty because the most important thing in the Palace is matching the nature to your moveset and Hasty just works almost perfectly.
Kangaskhan @ Choice Band
Hasty
252 Attack/252 Speed/6 HP
-Return
-EQ
-Shadow Ball
-Brick Break (I forgot to drop this one, it's better not to have this move IMO)
It takes care of certain things I don't want to leave Latios in on pre-CMs. So I just bring out Kangaskhan and hope for the best haha. Because one of those things is certain ghost types, I chose Kangaskhan over Tauros because Shadow Ball, and being kinda bulky is very nice in the Palace when Kangaskhan often won't cooperate until below half HP.
Milotic @ Leftovers
Bold
252 HP/252 Def/6 Speed
-Surf
-Ice Beam/Icy Wind
-Toxic
-Recover
I was too lazy to get the Suicune I wanted and I already had this lying around so I ripped off Kommo-o. :3 Not much else to say about it I guess. It complements the other two well and takes care of certain Pokemon Latios doesn't like when it doesn't have any Calm Minds up, and also is a really nice thing to switch into when Kangaskhan locks into a questionable move. Not original at all but it works.
----
So yeah there it is, I wouldn't say it's the best Palace team hands-down. However, most of the matches will be really fast and I found it to be pretty reliable, and I think it is a good choice if you just want to get the gold symbol pretty easily. But honestly there is lots of room to mess around with this basic team structure: Hasty Latios/Choice Band/Staller or bulky water.
I'll probably replace Kangaskhan and maybe even Milotic for my 100 streak attempt though. This was just a test run to see how far I could get with this and well... Good enough for now lol
Last edited:
Hi everyone, after being more or less satisfied with my Tower streak, I tried my hands at the Arena. After about a week of trial and error testing, I got to a streak of 143 wins with the following team:

Regice @ Brightpowder
Modest
EVs: 248HP / 252SpA / 8Spe
IVs: 30Def / 30SpA / 30Spe
- Ice Beam
- Thunderbolt
- Hidden Power Fire
- Explosion

Gyarados @ Sharp Beak
Adamant
EVs: 252Atk / 4SpD / 252Spe
IVs: 30HP / 30Atk / 30Def / 6SpA / 30SpD
- Dragon Dance
- Earthquake
- Hidden Power Flying
- Taunt

Latios @ Lum Berry
Timid
EVs: 12HP, 26Def, 252SpA, 220Spe
- Calm Mind
- Psychic
- Dragon Claw
- Thunderbolt
_1589328704827.png")
To be honest, I don't think I've found the optimal Arena team. For example Luke Warm's (in my opinion) very underappreciated Lati Sandwich team comes much closer to that benchmark, since it was able to reach 100+ wins multiple times, while mine only got over 100 once while trying much more than 10 times (my second best attempt ended at 82).
Regice @ Brightpowder
Modest
EVs: 248HP / 252SpA / 8Spe
IVs: 30Def / 30SpA / 30Spe
- Ice Beam
- Thunderbolt
- Hidden Power Fire
- Explosion
- This thing wins 1v1s against a big chunk of all leads, because of the fact that it at least 3hkos basically everything except Blissey, Snorlax and some other very bulky mons.
- The only thing it consistently loses to (without major hax) are Fighting-Types, Fire-Types and the aforementioned Blissey and Snorlax, all of which the next pokemon can set up on.
- Brightpowder is probably at its strongest in the Arena, since a single miss can make all the difference in the judging.
- I run Modest because the Explosion Damage doesn't really matter in most cases, it's more important to get Regice out and not letting the opponent set up (especially important against Snorlax)
- 8 Speed IVs lets it outrun the 70 speed tier, which houses quite a number of pokemon
Gyarados @ Sharp Beak
Adamant
EVs: 252Atk / 4SpD / 252Spe
IVs: 30HP / 30Atk / 30Def / 6SpA / 30SpD
- Dragon Dance
- Earthquake
- Hidden Power Flying
- Taunt
- Sets up on everything Regice loses to, which is probably the biggest strength of this team.
- Taunt can be nice for judgment points, but I mostly use it to stop Blissey from using Softboiled.
- Not many things can beat this after a Dragon Dance, but be careful of Counter users.
- I'm actually not too sure about Sharp Beak as an item, but Lum Berry is already reserved for the last mon, and everything else seems sub-par.
Latios @ Lum Berry
Timid
EVs: 12HP, 26Def, 252SpA, 220Spe
- Calm Mind
- Psychic
- Dragon Claw
- Thunderbolt
- Has good synergy with Gyarados, since it can set-up on most Electric-types.
- Mostly used as a revenge killer, but Calm Mind and decent defensive stats also allow it to clutch it out against 2-3 mons if needed.
- Ice Beam over Dragon Claw might be something worth testing out.
Since the Arena is so fast-paced, I was actually able to record the whole streak from the Gold Symbol mark (56 wins) to the end (143 wins).
My loss was to Belly Drum Snorlax setting up on a sleeping Regice (and Regice not waking up and Exploding), which then proceeded to sweep me (all on video).
My loss was to Belly Drum Snorlax setting up on a sleeping Regice (and Regice not waking up and Exploding), which then proceeded to sweep me (all on video).
To be honest, I don't think I've found the optimal Arena team. For example Luke Warm's (in my opinion) very underappreciated Lati Sandwich team comes much closer to that benchmark, since it was able to reach 100+ wins multiple times, while mine only got over 100 once while trying much more than 10 times (my second best attempt ended at 82).
Last edited:
Thank you!Great job! Finally someone on the charts for Battle Palace doubles! Jolly is definitely an interesting nature for Snorlax, I just couldn't bring myself to suggest it because a +Speed curselax sounds so absurd! But I guess it goes to show that the attack/defense/support ratios really are the most important thing in the Palace.
The only thing I found frustrating from a nature perspective is the -SpA on Latias, which really leaves it underpowered. Thankfully this is less of an issue in the Palace than elsewhere because you usually get quite a few turns to hit with, and the AI doesn't reliably recover its HP. I didn't miss the reduced defences on Snorlax or Latias because they're bulky enough as it is, and the Doubles format encourages the AI to spread damage around.

Hi everyone, after being more or less satisfied with my Tower streak, I tried my hands at the Arena. After about a week of trial and error testing, I got to a streak of 143 wins with the following team:
To be honest, I don't think I've found the optimal Arena team. For example Luke Warm's (in my opinion) very underappreciated Lati Sandwich team comes much closer to that benchmark, since it was able to reach 100+ wins multiple times, while mine only got over 100 once while trying much more than 10 times (my second best attempt ended at 82).
This looks like a good team! Explosion seems like a great move in the arena (not on the last pokemon of course!) for exactly the purpose of getting a bad matchup out the way. Regarding the Lati Sandwich team, I now believe that the particular run of 10 tests I did was unusually lucky, and the true performance of the Lati Sandwich team is less good than the stats in my original post might suggest.
[Edit: Taunt on Gyarados also presumably allows you to consistently beat things like double team Blissey / Snorlax, who can "sweep" through a whole team via referee decision with a bit of hax.]
I don't think it's possible for any team to consistently win in the arena (though I would love to be proved wrong!) - "clever" sets such as spore smeargle seem to be less good than just outright attacking, since if strats like fakeout+protect fail to work, you haven't dented the opposing pokemon at all, whereas if you fire off a powerful move and fail to KO, at least the next pokemon can probably win.
Perhaps the optimal arena team involves two pokemon with explosion in the lead spots? I tried Metagross+Latios+Snorlax which seems to work well, but 2 slow members mean the team is vulnerable to confuse ray and the like. So I'm still not really sure what the optimal team is.
Took a break from the Tower to try the Dome again. Got 51 with Slaking, Latios and Suicune. Very straight forward team, mostly button mashing.
Latios handles the fighting types and sits at a good speed tier, Jolly Slaking with CB destroys the psychic types, ghost types and everything else. Suicune checks the rock and steel types. I lost to freaking Endure Reversal Miltank. Flashback to GSC when that cow caused me so much trouble.
https://pokepast.es/f15c0d26d89c1d26
Alright, it's back to the Tower for me. Congrats wtset! I toyed with the idea of Explosion Regice but chickened out. Glad to see it worked out so well.