If I can count right, Metagross/Gengar/Latios has a BST in aggregate of 1700. How do you deal with battles in which you don't win the tie? Is it just 'luck' that you don't need to tie them?
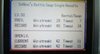
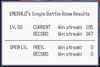
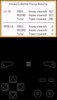
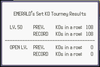
I'm pretty sure the formula on Bulbapedia on how the seeds get determined is wrong. You can see for example in the following screenshots that Nelson should have clearly outperformed my team BST wise (even factoring in the typing bonus explained on Bulbapedia) but I still have the first seed. In fact, in >300 tournaments I played with Metagross/Gengar/Latios, I always got the first seed. The BST total certainly plays some role, since this wasn't true with other team compositions I tried, like Metagross/Gengar/Smeargle for example, but there is definitely something missing in the Bulbapedia formula. I've come up with some possible explanations, but since I have no idea on how to read Emeralds source code I don't which one is true (or if it's something completely different):
- You might get some bonus for having won the previous tournament (it definitely has some effect on the announcer at least).
- The typing bonus is higher than what is listed on Bulbapedia (still seems highly unlikely that my team never got outperformed in 300+ tournaments).
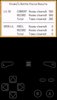
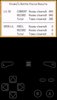
- The Top 2 competitors in the tournament actually get the same seed for tiebreakers, but the player (if he's in the top 2) gets placed on the top left and the CPU on the bottom right of the tournament tree. If it then comes to a tie between these two competitors, the order of winning is Tucker > Player > CPU. This would also explain Tucker being on the bottom right (which according to Bulbapedia is the second seed) but still winning all ties. It would also explain why I never got the bottom right spot (even with weaker teams). This would still imply that my team was never outside the Top 2 BST wise in 300+ tournaments, which I doubt (but I haven't always checked the tournament trees). It might also be that the same logic applies not only to the Top 2, but even the Top 4, but I think I remember having the bottom left spot once, which would contradict this (not 100% sure though).
- There is some other hidden factor in the calculation of the seeds that I'm not thinking about.


 Extremely annoying on the wrong pick up since Thunder Wave will pretty much cripple Slaking and crits against Suicune hurt a lot.
 While the whole team has a way to OHKO it with the appropriate coverage move, a QC activation is extremely dangerous.
 The sight of this Pokemon forces Suicune to be picked as otherwise without Substitute's protection and Pressure stalling, Sheer Cold will easily go rampant.

 Evasion is bad for Slaking's health and these two are troublesome for Latias / Suicune to set up against. Garde 2 / Ludicolo 4 are complete AIDS
 While Latias has enough SpA to even OHKO Set 2, a Bright Powder miss or a Focus Band activation will easily mean doom for the team.
 Fake Out messes up Slaking very badly, access to Grass STAB to damage Suicune, and Explosion potentially OHKOing anything on my team is a huge red flag. Shiftry 2 and Shiftry 4 are the most dangerous since Set 2 is an evasion Leech Seed spammer while the latter has Fake Out / Giga Drain / Explosion.


 )
)