Welcome to Smogon! Take a moment to read the Introduction to Smogon for a run-down on everything Smogon, and make sure you take some time to read the global rules.
Flygon @ Choice Band
Naughty; max atk and speed
152/148/100/105/88/142
-EQ
-Rock slide
-Flame thrower
-Facade (looking to replace this move)
Caught at lv21 with an Ultra ball
Skarmary; Sturdy @ Leftovers
Hardy; specially defensive with atk and speed too
145/99/169/55/98/103
-Aerial ace
-Protect
-Torment
-Toxic
Caught at lv16 with a Great ball
Lanturn; Volt Absorb @ Chesto Berry
Calm; specially defensive with some speed
195/60/74/85/130/92
-Surf
-Thunderbolt
-Rest
-Thunderwave (considering replacing this move with ice beam, protect- for torment scouting, or confuse ray
These were all pokemon I caught on my initial play through, without RNG manipulation. The idea is Lanturn covers boltbeam while Flygon and Skarmary cover EQ-slide. Dragon-Water-Steel core with two ground immunities, two electric imunities, two fire resists, one 4x grass resist, one ice resist, which should make switching easy. Choice stab EQ hurts, flame thrower has 100% accuracy which is better than missing fire blast twice, facade was a 100% accurate filler that hopefully helps with burns and poison. Skarmary is arguably the best sturdy user and with great defensive typing, a move that cuts through DT, and toxic + torment + protect, it can stall mons on its own or add prior damage for Flygon. Lanturn is great. Rest so it can be a status absorber and keeps high hp for multiple water types.
I post this team early asking for brainstorming and hope to share a potentially good trio with anyone else who may be able to adapt it for their own streak.
I really like your approach; it's a neat idea to use Torment and good type synergies to abuse the dumb AI. However, since Skarmory cannot learn Torment except by using the TM, the team doesn't conform to the rules of the challenge. The only Pokemon that learns Torment by level-up in Gen 3 is Nuzleaf and if I checked correctly, there is no path to pass the move from Nuzleaf to Skarmory by chain breeding.
I hope this doesn't discourage you too much, I'm sure there's some way you can still make this work :)
Return/Frustration probably shouldn't be classified as repeatable these days, as the only way to repeat them is if you have a working battery to power the clock long enough to witness the passage of 7 days, and most batteries in GBA games ran out of juice years ago. You can still salvage them by replacing the battery, but that's probably beyond the skillset of the casual user. Likewise for planting berries, but at least you can pick up all the berry trees that are planted around the region once each, and item clause means that even if a tree yields only one berry, you don't have to worry about getting another for any of your Frontier teams.
Update: I reached 378 wins with Salamence! I also provided an "overly detailed list of potential threats".
It can be simplified to QC users, explosion leads, METAGROSS 4-8, missing icy wind, or getting crit by QC physicals. Baton pass into a dangerous threat is also something to be wary about.
This list of things are all the things that "could" potentially screw me over. It looks worse than it is, but with the BF, you can never be too prepared.
List of faster/QC OHKO users. Big problem if you don't get the thief off.
- Whiscash 4, - QC Rhydon (Rhydon 1, 3, 2, 4 – easiest to hardest to deal with)
- Arena Trap Dugtrio 3 and 4
- Wailord 4
-Donphan 3
- Walrein 3
-Lapras 8
-Seaking 2
-Nidoking 1
Explosion Leads (Most dangerous listed)- Other ones are also dangerous, but Zapdos can tank their stab move with memento.
-Golem 3, Golem 4
-Steelix 3
-Muk 4- Especially Stickyhold Muk.
-Regirock 1, 2 & 6
-Regice 3
-Forretress 4
Icy wind targets (5-15% chance to miss!)
-All Starmie.... most dangerous is Starmie 3
-Raikou
-Gengar 4, 5, 6, 7 & 8. Especially Gengar 5 and 6 - Has shadow Ball and strong special moves. Missing Icy wind is terrible here.
-Jolteon 4. You trace Volt-Absorb. If you miss icy wind or get flinched... DON'T SACK Gardevoir. Try to bait out the thunderbolt to heal and try again.
QC crit from Physicals
- Ursaring 2
-Granbull 3
-Aggron 4 -Snorlax 4- No safe moves, struggles become too strong- have to dodge while setting up.
Roar Users (Remember NOT to boost up to +3 evasion until other moves are safely stalled out!) Not really a threat, just something to be mindful of.
-Articuno 1
-Zapdos 1
-Suicune 3
-Raikou 3 and 5
Pressure Double Team Users
-Zapdos 2 with Bright powder and Double team.
- Articuno 2 with leftovers AND DOUBLE TEAM.
-Moltres 2 and 3
- Suicune 2 and 3
- Entei/Raikou. Not as much of a threat. Should have plenty of spare EQ PP.
Be conservative with your PP! /SPOILER]
I didn't steal Curse Umbreon's leftovers and ran out of HP Flying PP against Umbreon/Articuno/Zapdos. Still pulled it out.. but I definitely escaped a narrow loss there. The replay is almost 12 minutes long.... I'll spare you all the replay. Zapdos had to struggle ko the other zapdos.
Aerial Ace is worth an argument to prevent these "infinite battles" and also helps not missing against double team and brightpowder... which is something at least.
Unfortunately, the power really sucks.
+6 252+ Atk Salamence Aerial Ace vs. 170 HP / 0 Def Aerodactyl: 163-192 (92.6 - 109%) -- 56.3% chance to OHKO
+6 252+ Atk Sharp Beak Salamence Aerial Ace vs. 170 HP / 0 Def Aerodactyl: 178-210 (101.1 - 119.3%) -- guaranteed OHKO
+6 252+ Atk Sharp Beak Salamence Aerial Ace vs. 0 HP / 0 Def Zapdos: 145-171 (87.8 - 103.6%) -- 25% chance to OHKO
Update: My Salamence team has ended at 723 Tower wins. Lost to Snorlax 4. I stole the QC, but Zapdos couldn't dodge enough hits (even with +2 or +3). Salamence couldn't set up and then I lost. No shame in this loss. It's just an incredibly difficult threat to deal with.
I actually tried out Aerial Ace with Sharp Beak and it was very comforting. No roar on this team means that I won't have the annoyance with double team and bright powder AND no worries about double team pressure users stalling me out.
Introducing an OPEN LEVEL Level 97 Skarmory, Raikou & Tyranitar Tower team that Actaeon and I have been working on. Reached 196 wins.
Skarmory (M)
Ability: Sturdy
EVs: 252 HP / 76 Def / 176 SpD / 4 Spe
Bold Nature (+Def, -Atk)
- Thief
- Sand-Attack
- Whirlwind
- Sunny Day / Rest
Lvl 97 252 SpA Metagross Thunder Punch vs. Lvl 97 252 HP / 176 SpD Skarmory on a critical hit: 272-320 (83.9 - 98.7%) -- guaranteed 2HKO
Full HP
Live crit Metagross Thunder Punch / Whiscash 4 critical hit Surf
Rest in physical defense
Cheap out speed its own tier with spare EVs
Sunny day to change the weather (for roar users who bring in Tyranitar too early
Raikou @ Leftovers
Ability: Pressure
EVs: 240 HP / 92 SpD / 176 Spe
Timid Nature (+Spe, -Atk)
- Protect
- Substitute
- Rest
- Flash
Highest Leftovers HP
outspeed the sceptile/duggy tier
Rest into SpD
Accuracy debuff for Tyranitar
Lvl 97 252+ SpA Starmie Ice Beam vs. Lvl 97 240 HP / 92 SpD Raikou: 83-98 (22.4 - 26.5%)
Tyranitar (F) @ Iapapa Berry
Ability: Sand Stream
EVs: 220 HP / 252 Atk / 36 Def
Adamant Nature (+Atk, -SpA)
IVs: 30 Def / 30 SpD / 30 Spe
- Dragon Dance
- Substitute
- Hidden Power [Rock]
- Earthquake
Maximum Atk
Lots of HP (1 mod 8)
Rest in physical defense
Iapapa berry to tank more struggles/ create an extra substitute
Level 97 has a marginal difference for defensive calculations for open level, level 60 has the best damage calcs. Running this team at level 100 is also viable.
Skarmory's Role
Use Thief for potential QC users.
Whirl wind Metagross, dragon dance users.
Spam sand attack as a filler move
Sunny day if Tyranitar is roared in prematurely
Raikou
Completely outstall the AI's moves and spam flash to -6 accuracy on the AI
Tyranitar
Set up 6 dragon dances on -6 accuracy struggles
Time to Sweep
Threats and Issues
Metagross
Claydol
Mixed QC users with EQ
Skarmory's lack of longevity
Brightpowder and QC combinations.
Opposing Tyranitar.
This is one of the better Tyranitar teams... but it's still somewhat shaky to be honest. Skarmory cannot afford to run rest because of sandstorm from opposing Tyranitar and your own Tyranitar getting roared into battle. If a roar user is out when sand is up.... Tyranitar cannot set up on it due to sandstorm damage. Thus, Skarmory runs sunny day instead of rest. Skarmory can get worn down without recovery ... which is a potential problem against teams with multiple physical threats.
In addition, Tyranitar doesn't have evasion baton passed to it like my Salamence team. Thus, Tyranitar does have some issues against the Brightpowder +QC combination from AI opponents (in slot 2 and 3).
In the footage... this team also does struggle a bit with Mixed QC users with EQ. I actually misplayed a bit against QC gyarados (had Raikou rest too late).
Disclaimer: The following is not my submission for Challenge #4 (as should be obvious from the movesets), but another team I've been working on the past few days.
Introduction
When Adedede mentioned my Assist team in his last post, I got the urge to take it out of the box and play some rounds in Tower for nostalgia. While doing that, I couldn't get rid of the feeling that there are still some things that haven't been tried with Assist.
I did some brainstorming but there was always something that didn't quite work out; a common mistake when trying to build an Assist team is that you have an idea that seems to function, but then you realize you have a move on some Pokemon that can get copied by Assist instead of the move(s) you want to copy, and it messes everything up.
After some more theorymoning, I decided that I finally had a workable idea:
The concept was that instead of copying Spore, I can use Assist to copy different stat boosting moves and turn Assist into a Gen 3 Acupressure, a move that has seen a lot of success in Gen 4.
I realized that only two moves are needed to get something akin to Acupressure: Cosmic Power and Dragon Dance. The first problem was that all Assist mons are weak and need some crippling support to set up for a sweep. But almost all crippling moves can get copied by Assist which leads to a less consistent pseudo Acupressure, Trick and Thief being the only notable exceptions. Trick can be used to cripple speed with a Macho Brace and get rid of hax items, which makes Thief kind of redundant if we can manage to fit a Trick mon onto our team. But I realized pretty fast that Trick alone is by far not enough to set any Assist mon up for Acupressure boosting. My solution was to include some more crippling moves, while trying to keep them to a minimum to still get a boosting move with Assist reasonably often.
The above considerations led to this initial draft of the team:
Smeargle provides access to Cosmic Power and Dragon Dance while simultaneously having access to one of the most useful moves not callable by Assist with Destiny Bond. Grumpig is the bulkiest Trick user. For further crippling I ran Flash on Grumpig as well as Smeargle (having the same crippling move on both increases Assist odds). As the Assist user with the most solid base stats, Hypno tried to setup on the reduced Accuracy with Assist and Substitute while having perfect coverage with Brick Break and Shadow Ball.
This worked sometimes, but had a lot of glaring issues. Hypno needed a lot of Flashes to be able to setup which Smeargle and Grumpig couldn't always provide. Also accuracy ignoring moves where a huge problem if Assist didn't call the right boosts at the right time.
I decided to change Hypnos moveset to Protect, Sub, Assist and HP Steel to have an easier time setting up against not totally crippled opponents while sacrificing some power and coverage. The second change was to swap Grumpig out for Linoone which shares less weaknessses with Hypno and has a second very good crippling move in Charm.
Hypno setting up worked a lot more often with this team but I ran into a new issue: Mono attacking HP Steel Hypno is just not strong enough to consistently sweep (even at +6, which isn't exactly guaranteed when using Assist to call your boosting moves). Sadly, Hypno doesn't have a stronger move with no immunities and Protect + Substitute is definitely needed to be able to set up. I started looking at the list of Pokemon that learn Assist again, looking for something with a stronger mono attacking option.
After looking up all their learnsets, I realized there is only one single move in the combined moveset of all Assist mons that works on a mono-attacking set: Rollout. There are actually three different fully evolved Pokemon that can learn Assist and Rollout: Delcatty, Spinda and Furret (although I think it is an event move for Delcatty). Out of these, Furret has the highest attack stat (actually the highest out of all Assist mons) and the best stats overall. I swapped Hypno for Furret to obtain my current team composition:
Linoone is fast enough to outspeed everything without any speed investment after tricking a Macho Brace.
Always try to stall as many PP as possible with Protect.
Fighting Pokemon are very scary to this team, so Def is prioritized over SpD
With this spread, Linoone becomes quite bulky and it happens more often than you think that Linoone just PP stalls all the attacks of the opponent before fainting.
It shares a typing with the Pokemon before and after it; I considered to switch back to Grumpig but Charm is just too important to pass up.
With Cosmic Power, Dragon Dance, Sand-Attack and Charm as eligible moves for Assist, there's a fifty-fifty chance between boosting and crippling.
Assist always picks the wrong move in clutch situatios.
Two Dragon Dances are enough to outspeed everything, the chance of being at +2 or more Speed after using all 32 PP of Assist is >99%.
Doesn't need a lot of beforehand crippling to be able to set up; it can extend the crippling itself with Assist or use Sub+Protect to PP stall.
Rollout is a crazy strong and PP-preserving sweeping move; there was even a game where I swept at +1 with Rollout alone. The only downside is the 90% accuracy.
The downside of having to use Leftovers over Lum Berry is that there is no protection against contact status abilities, but most of the time Furret has acquired enough boosts to just power through it.
Protect PP usually dwindles faster than excepted; only use Protect when there is some HP to gain with Leftovers.
I hope you like the team, I had a lot of fun building it! While certainly not made for large streaks, it usually reaches Gold and can even break the 100s with a bit of luck. I would say it performs on a similar level as my first Assist team, but with a very different playstyle. Actaeon: I don't know how consistent your current Mono Normal team is but if you're looking for something different to try, I recommend you to try this team. I didn't plan to build a monotype team from the beggining, these three unlikely low BST Normal mons just somehow happened to be the best for the job :) In general, I find that the restrictions of Monotype Normal seem to bring out a lot of interesting ideas: your Struggle Porygon2 is still one of my all-time favorite sets. Kommo-o: Is it possible for Actaeon's big monotype post to get linked somewhere in the OP? I feel like it's more deserving and interesting to new visitors than half the stuff that is already there (and I had a lot of trouble finding it the last time I looked for it haha). Another post I could see doing really well in the OP is the tier list. The tier list is already there, nevermind that. But I still demand that it includes Furret, I even had a team concept that used Furret in a Battle Dome Doubles team once.
This is the best post I've read in a very long time. It's very challenging to maintain creativity in ADV Frontier; nearly everything has been done and even with restriction (e.g. the Mono Teams) we're running out of unique strategies. Yet you did it again; this looks extremely nice. Main concern is (double) Clear Body I can imagine, and strong special attackers + the inevitable critical hits early in the setup. My current Mono Normal is certainly dependable enough and the 17*7 attempt rarely fails on it (the Linoone/Porygon2/Vigoroth Trick team). But I will most surely test this! Again, congratulations on this magnificent idea.
This is the best post I've read in a very long time. It's very challenging to maintain creativity in ADV Frontier; nearly everything has been done and even with restriction (e.g. the Mono Teams) we're running out of unique strategies. Yet you did it again; this looks extremely nice. Main concern is (double) Clear Body I can imagine, and strong special attackers + the inevitable critical hits early in the setup. My current Mono Normal is certainly dependable enough and the 17*7 attempt rarely fails on it (the Linoone/Porygon2/Vigoroth Trick team). But I will most surely test this! Again, congratulations on this magnificent idea.
Thanks a lot! You're pretty much spot on about the threats; two Clear Body mons in the first two slots are very difficult to handle indeed and you kind of have to hope that one of them is a set that can be PP stalled reasonably fast (Mono Attacking Registeel for example). Everything that only needs some unlucky stuff like crits or QC happening to kill Smeargle and Linoone before they can get of more than two crippling moves (combined) is also very threatening, although it has to be said that Furret can clutch out more games on its own than one would assume; something that has saved me a lot of times is the tendency of the AI to go for speed reducing moves when they're slower (which they almost always are thanks to Macho Brace) and don't have a move that kills (which is usually true as well since Furret is surprisingly bulky with this spread).
A third, maybe a bit more surprising problem are Pressure users; when Assist calls Sand-Attack or Charm against a Pressure user it loses 2 PP (compared to only 1 if it calls Dragon Dance or Cosmic Power) which sometimes leads to the Assist PP depleting too fast for Furret to get enough boosts, but this is a rather rare occurence because usually Rollout is strong enough to still sweep.
I hope you like the team, I had a lot of fun building it! While certainly not made for large streaks, it usually reaches Gold and can even break the 100s with a bit of luck. I would say it performs on a similar level as my first Assist team, but with a very different playstyle. Actaeon: I don't know how consistent your current Mono Normal team is but if you're looking for something different to try, I recommend you to try this team. I didn't plan to build a monotype team from the beggining, these three unlikely low BST Normal mons just somehow happened to be the best for the job :) In general, I find that the restrictions of Monotype Normal seem to bring out a lot of interesting ideas: your Struggle Porygon2 is still one of my all-time favorite sets. Kommo-o: Is it possible for Actaeon's big monotype post to get linked somewhere in the OP? I feel like it's more deserving and interesting to new visitors than half the stuff that is already there (and I had a lot of trouble finding it the last time I looked for it haha). Another post I could see doing really well in the OP is the tier list. The tier list is already there, nevermind that. But I still demand that it includes Furret, I even had a team concept that used Furret in a Battle Dome Doubles team once.
Hi, just typing a quick response since I'm at work. I definitely planned to add Actaeon's mono-type runs on the OP since it's valuable theorymonning regardless of how he obtains his Pokemons. I just haven't been able to get the time to check the IV spreads of his party members to make sure they are Colo/XD/GBA legal (which is something I want to make sure since otherwise it wouldn't make sense to suggest a spread that would otherwise be impossible to obtain without hacking). Once I get the time to check, I'll be able to add it. Actaeon had asked me for help before on checking the legality spreads, so I think it shouldn't take too long to update.
Regarding Furret, just type a suggestion in here and I'll add it to the tierlist. I planned to revise it since Pokemon like Zapdos became even more potent on Singles streaks and there's a lot of unexplored options in Doubles. Feel free to add any suggestions in here and I'll try my best to update the tierlist accordingly.
It is also due time to update the OP's links since I know there are some outdated resources inside it but I didn't had enough time to sit down and work on it. Please let me know if there's something you think it's worth to add to the OP in addition to Actaeon's mono-type runs and the tierlist as well wtset!
Honestly all of Actaeon's teams, but especially the stuff that is probably the best we've got for its respective facility
Challenges like my challenge series or the Manga / Pokemon Adventures challenge from green_typhlosion
The Bank of Hoenn
Mechanics stuff like Adedede's post regarding the Dome IV glitch, the explanation how the floor layout in Pyramid is generated or the post from dgice about the probabilities how often different trainer tiers appear
Tools like Actaeon's DomeAssistant or FrontierAssistant, my move combinations finder, the stuff Huff_J7 made, maybe even some general RNG resources / guides
Regarding the tierlist: Before I can start recommending tierings for specific Pokemon, a thing I would like to have are clear definitions on what the different tiers mean. For example the S+ Tier definition could be "Very good in every facility and excellent in at least one", while the description "Pokemon that is only good for a gimmick team in a specific facility" (that's where Furret belongs) would probably be somwhere in the definition of C Tier. This also makes it easier for new visitors to understand what's going on.
If someone reading this thread is good at video editing, a video that I could imagine getting a lot of attention on YT would be something like: "The History of Pokemon Emerald Battle Tower/Frontier World Records", like the stuff Summoning Salt does for speedrun records which has millions of clicks on every video. You can tell the history from Team Azure or maybe even Jumpmans early teams all the way to stuff like Irridescence. Plus, it would be an amazing way to spread the joy of Gen 3 frontier to more people. If it catches on, you could then easily make it into a series by doing the same video for other Pokemon generations.
Honestly all of Actaeon's teams, but especially the stuff that is probably the best we've got for its respective facility
Challenges like my challenge series or the Manga / Pokemon Adventures challenge from green_typhlosion
The Bank of Hoenn
Mechanics stuff like Adedede's post regarding the Dome IV glitch, the explanation how the floor layout in Pyramid is generated or the post from dgice about the probabilities how often different trainer tiers appear
Tools like Actaeon's DomeAssistant or FrontierAssistant, my move combinations finder, the stuff Huff_J7 made, maybe even some general RNG resources / guides
Regarding the tierlist: Before I can start recommending tierings for specific Pokemon, a thing I would like to have are clear definitions on what the different tiers mean. For example the S+ Tier definition could be "Very good in every facility and excellent in at least one", while the description "Pokemon that is only good for a gimmick team in a specific facility" (that's where Furret belongs) would probably be somwhere in the definition of C Tier. This also makes it easier for new visitors to understand what's going on.
I updated the OP and I added more resources to the thread. In case that the links are not working properly, please let me know so that I can correct. I took some of your suggestions while adding some resources that I felt that should be added to the OP. I'm sure there are more interesting posts they could be, but I'm adding the ones I believe are the most useful ones.
Golden Blissey's Pyramid floor layout: He pretty much left a good explanation of how the floors are layed-out on the Battle Pyramid
Eisenherz's translation of mystic251's post: This post has a pretty big historical value on Gen 3 Frontier's history. For a long time ago, many people thought that his initial research was accurate and there was a "%C factor". However, thanks to Eisen who translated pretty much his blog entries on this post, we were able to finally debunk what he published many years ago.
Frontier Assistant and Dome Assistant were added to the resource list as well. There are two useful programs that Actaeon built and created and they deserve to be on the resource list as well.
dgice's threat summary: He did a really good summary of the main Gen 3 Frontier threats and I felt it was necessary to be there.
I added the Bank of Hoenn's Discord invite on the OP.
I've also added Actaeon's mono-type main post to the OP on Team Threads as well as a summary of some of his teams I was able to find. I did not added the rest since they were initially presented as individual records but I think we cover his best teams on the forum. I also added green_typhlosion's Emerald challenge on the Team Thread gallery as well. I'm probably forgetting a couple of things but please let me know if you think there is something else we can add. I'm always open for suggestions.
f someone reading this thread is good at video editing, a video that I could imagine getting a lot of attention on YT would be something like: "The History of Pokemon Emerald Battle Tower/Frontier World Records", like the stuff Summoning Salt does for speedrun records which has millions of clicks on every video. You can tell the history from Team Azure or maybe even Jumpmans early teams all the way to stuff like Irridescence. Plus, it would be an amazing way to spread the joy of Gen 3 frontier to more people. If it catches on, you could then easily make it into a series by doing the same video for other Pokemon generations.
I'm writing a book about Tower that plans to include all archetypes, example (record) teams, et cetera. This might be a good backbone if we decide to make a video. PM me if you want extra info. The project hasn't advanced far yet, but I'm working on it occasionally.
Today, I finally have the chance to share an amazing project that has been taking place at the Discord for a while. I haven't had the time to share this earlier due to time constraints and as I am writing this message right now, I'm under the side-effects of the COVID vaccine I took. Neverless, I can't let this be unknown to the rest when everyone involved had a good time with it and this really changed the way in which I saw the Battle Factory as a whole.
The way in which it works is extremely simple and it was facilitated thanks to the Battle Tower Discord's channels. I basically live-streamed Factory for the viewers and whoever wanted to participate, would have to nominate and decide, by majority vote, which Pokemon are picked on every initial draft and after every battle, whether we keep the same team members or which Pokemon gets swapped. If we had a tie with an even amount of viewers, then I, as the player, would decide the tie-breaker but only between the options nominated. To sum it up, my viewers had control on which was the team they wanted me to use throughout the rounds and which Pokemon were replaced or kept. I battled under my own criteria but I relinquished control every team-building decision to the viewers.
Thanks to Actaeon he recorded our most recent Community Factory run and you can see in this video how it works or at least have an idea on how it played. Sadly, he was unable to record the audio which actually had me explaining most of my playing decisions. However, you can still see the chat portion where you can pretty much check on how it worked.
As some closing thoughts, I think that streaming Factory and doing it with friends has been something that completely changed my perception on Factory. I used to despise it before, but now I find myself enjoying and I'm not even bothered sometimes by the insane amount of hax. Probably the best part is that everyone who participated also had their fair share of fun and it's a really fun activity. I hope that this inspires more similar activities because we all had our share of fun in the Discord. If you wanna catch up on one, join us on the Discord server!!
Hi everyone,
People in discord pointed me here. I recently found myself playing Ruby's Battle Tower and was surprised on how little info is on the mechanics on the tower (anything except Pokemon list was super hard to find). But I did some digging and compiled the Trainer list for both level 50 and 100. I did some tests and compared with some available videos on YouTube and found no errors so far. I know that it's much easier than Emerald but maybe someone (chasing Gold Shield perhaps) will be interested.
Let me know if I posted in the wrong place, never used these forums before.
Low palace Mega post
Fair warning: this was a 15 page document in word ahahahaha
So originally this was a study of the low palace in order to yield fast but reliable early round teams because in a facility with such high variance, the palace record holder will likely be whoever makes the most attempts (with a decent team). But as I studied rounds 5 and 6 my intentions shifted towards “solving” these rounds with the best risk reduction I could come up with instead of the fastest because it felt possible (regrettably it appears even the lower palace is difficult to claim you have a 99% win rate in all matchups). Rationally finding the best team would mean timing how long it takes each team to beat battle palace gold at many times to accurately account for variance (I’m thinking like 20). However human psychology plays a part too. If I lose I am less motivated to try again, less likely keep playing and maintain my excitement for the game so I would actually probably want to weight not failing to beat 42 much higher. I considered someday funding a cash prize competition to find the most accurate fast team. I’m still not sure what the format would be but I think it would be on emulator to speed it up as the more times we beat 0-42 the more confidence we can have in the best team.
I chose 42 because the 7th round contains not just further elevated sets but the 49th battle which includes every possible high tier trainer. Spenser actually blocks an elevated set so you just need a plan for his suicune (it doesn’t have recovery so you just need to survive the attacks and deal consistent damage like amnesia return snorlax)
For the first 21 battles the opponents have such low base stats that in order to save time you definitely want a sassy natured pokemon. Battles 15-20 can have a few pokemon that are harder to one shot but the threat level is still laughably low. The only real battle is the palace maven spencer silver fight between the confusion hax and the ohko. What I have found is that magneton actually covers his crobat and lapras quite well resisting flying, poision, ice, and horndrill and having a strong thunderbolt. With the existence of magneton there really isn’t an excuse to lose at battle 21 anymore.
Starmie @ Leftovers
EVs: 4 HP / 252 SpA / 252 Spe
Ability: Natural Cure
Level: 50
Sassy Nature
- Thunderbolt
- Surf
- Psychic
- Ice Beam
Salamence (F) @ Lum Berry
EVs: 4 HP / 252 Atk / 252 Spe
Ability: Intimidate
Level: 50
Hasty Nature
- Aerial Ace
- Earthquake
- Brick Break
- Substitute
Magneton @ Persim Berry
EVs: 252 HP / 252 SpD / 4 Spe
Ability: Sturdy
Level: 50
Calm Nature
- Thunderbolt
- Rest
- Substitute
- Metal Sound
Okay, not really much thought went into the ev’s and a sassy banded pokemon may work on this team too. But I like leading with a 4 attack starmie for the most coverage and not getting locked into a move. Starmie with leftovers sometimes actually keeps it above 50% and natural cure is so nice. Hasty sub mence is a little overkill on the safety side but subbing yourself into attacking is nice and subs as I discuss later are very good. Magneton while meant for Spenser holds its own in other battles I will have a section on my new appreciation for Calm which sticks to the good attack and defense moves only instead of support. Magneton is specially defensive for lapras. Metal sound is really superfluous. Shoutout to iSoNkei for putting magneton in my head a little before I tried it here.
Threats :
Okay so similar what I did with the post battle 49 threats, I’ve kept the same groupings and listed the pokemon that stand out to me
The pokemon available in 29-34 are different than the ones in 36-41; but the sets for battle 35 specifically are an elevated set meaning all the pokemon in 36-41 are available in battle 35. So the top sets are the probabilities for round 5 and bottom are round 6. So you’ll notice I’m ignoring round 4 but it's quite easy and I’m not sure yet whether it’s better to group it with the first three rounds or with rounds 5 and 6. I think the odds here are the rate of encounter for the set of six/seven battles (originally odds of seeing it atleast once but then added the probability of encountering twice and three times to it) and they haven’t been converted so .040 is 4% and .157 is a 15.7% chance for the seeing that pokemon that round. (odds courtesy of Actaeon 's program)
Swords Dance
Armaldo 3
Adamant
Quick Claw
Earthquake
Rock Slide
Brick Break
Swords Dance
0.040178
Marowak 3
Adamant
Thick Club
Earthquake
Rock Slide
Swords Dance
Brick Break
0.046044
Marowak 2
Adamant
Thick Club
Earthquake
Rock Slide
Swords Dance
Icy Wind
0.063656
Ninjask 1
Mild
Petaya Berry
Baton Pass
Swords Dance
Endure
Dig
0.087622
Scyther 2
Adamant
BrightPowder
Silver Wind
Aerial Ace
Swords Dance
Double Team
0.157844
Ninjask 2
Quirky
Focus Band
Slash
Shadow Ball
Swords Dance
Baton Pass
0.143267
Scizor 2
Adamant
Quick Claw
Silver Wind
Steel Wing
Swords Dance
Light Screen
0.139311
Scizor 2
Adamant
Quick Claw
Silver Wind
Steel Wing
Swords Dance
Light Screen
0.16181
Marowak 3
Adamant
Thick Club
Earthquake
Rock Slide
Swords Dance
Brick Break
0.12824
Scyther 2
Adamant
BrightPowder
Silver Wind
Aerial Ace
Swords Dance
Double Team
0.11217
Armaldo 3
Adamant
Quick Claw
Earthquake
Rock Slide
Brick Break
Swords Dance
0.11181
Ninjask 2
Quirky
Focus Band
Slash
Shadow Ball
Swords Dance
Baton Pass
0.10594
Marowak 2
Adamant
Thick Club
Earthquake
Rock Slide
Swords Dance
Icy Wind
0.06357
For round 5 ninjask and scyther while popular aren’t that scary. Marowak and armaldo are the classic ones beaten by surf. Scizor stands out as more dangerous than normal pokemon and is common in both 5th and 6th rounds only held back by the weak base stats of it’s moves. Scyther, ninjask and scizor are mostly walled by a good skarmory set. Scyther tends to go for double team (probably depends on your physical defense stat)
Snorlax
Snorlax 1
Adamant
Leftovers
Facade
Shadow Ball
Attract
Double Team
0.139289
Snorlax 2
Adamant
Chesto Berry
Earthquake
Rock Slide
Curse
Rest
0.100644
Snorlax 3
Adamant
Quick Claw
Mega Kick
Shadow Ball
Swagger
Psych Up
0.018967
Snorlax 2
Adamant
Chesto Berry
Earthquake
Rock Slide
Curse
Rest
0.11647
Snorlax 3
Adamant
Quick Claw
Mega Kick
Shadow Ball
Swagger
Psych Up
0.05361
With the lower stats it’s even easier to knock snorlax below half so it stops boosting (they’re all adamant), with the curse set being the only dangerous one. I think since it has only eq and rock slide it's actually beatable with the right set like a claydol or a bulk up hitmontop. But I usually don't bring a specific set for it and just hope I get some attacks in.
Dragon Dance
Gyarados 1
Careful
Lum Berry
Return
Bite
Thunder Wave
Dragon Dance
0.1242
Charizard 2
Adamant
BrightPowder
Earthquake
Aerial Ace
Dragon Dance
SmokeScreen
0.065689
Kingdra 3
Adamant
Salac Berry
Flail
Hydro Pump
Dragon Dance
Endure
0.022111
Altaria 3
Adamant
Lum Berry
Sing
Dragon Dance
Earthquake
Aerial Ace
0.005856
Yeah these really aren’t that much of a problem. Specially defensive Dusclops notably beats kingdra and gyardos. Altaria and Charizard have a tough time against skarmory, but these sets are practically non existent besides gyarados
Calm Mind
Espeon 2
Docile
Chesto Berry
Psychic
Shadow Ball
Calm Mind
Rest
0.0896
Gardevoir 2
Modest
Chesto Berry
Psychic
Calm Mind
Double Team
Rest
0.087756
Alakazam 2
Modest
Lum Berry
Psychic
Calm Mind
Thunder Wave
Recover
0.082778
Slowbro 2
Modest
Leftovers
Surf
Ice Beam
Calm Mind
Yawn
0.0768
Espeon 1
Modest
Lum Berry
Psychic
Charm
Calm Mind
Baton Pass
0.034044
Medicham 1
Docile
Focus Band
Psychic
Hi Jump Kick
Calm Mind
Baton Pass
0.028244
Blissey 3
Bold
Focus Band
Fire Blast
Blizzard
Calm Mind
Softboiled
0.023489
Espeon 2
Docile
Chesto Berry
Psychic
Shadow Ball
Calm Mind
Rest
0.09019
Slowbro 2
Modest
Leftovers
Surf
Ice Beam
Calm Mind
Yawn
0.08865
Gardevoir 2
Modest
Chesto Berry
Psychic
Calm Mind
Double Team
Rest
0.08631
Alakazam 2
Modest
Lum Berry
Psychic
Calm Mind
Thunder Wave
Recover
0.08251
Blissey 3
Bold
Focus Band
Fire Blast
Blizzard
Calm Mind
Softboiled
0.06862
Shedinja covers some of these but calm nature calm mind blissey laughs at all of these. You can just attack most of these except for slowbro.
OHKO
Pinsir 2
Jolly
Salac Berry
Guillotine
Swords Dance
Flail
Endure
0.185778
Nidoking 1
Adamant
Quick Claw
Horn Drill
Double Kick
Body Slam
Counter
0.132533
Rhydon 2
Adamant
Quick Claw
Earthquake
Horn Drill
Rock Slide
Brick Break
0.059211
Nidoking 3
Modest
Leppa Berry
Horn Drill
Fire Blast
Blizzard
Surf
0.0471
Whiscash 3
Hardy
Chesto Berry
Sleep Talk
Rest
Surf
Fissure
0.053589
Dugtrio 3
Adamant
King's Rock
Earthquake
Double-Edge
Sludge Bomb
Fissure
0.040678
Pinsir 2
Jolly
Salac Berry
Guillotine
Swords Dance
Flail
Endure
0.13315
Kingler 2
Adamant
Salac Berry
Guillotine
Rock Tomb
Flail
Endure
0.07379
Crawdaunt 2
Adamant
Quick Claw
Guillotine
Frustration
AncientPower
Aerial Ace
0.06286
Nidoking 3
Modest
Leppa Berry
Horn Drill
Fire Blast
Blizzard
Surf
0.12611
Rhydon 3
Adamant
Quick Claw
Megahorn
Crush Claw
Earthquake
Horn Drill
0.07452
Seaking 2
Impish
Quick Claw
Horn Drill
Megahorn
Sleep Talk
Rest
0.06361
Dewgong 3
Bold
Chesto Berry
Horn Drill
Sheer Cold
Sleep Talk
Rest
0.06172
Rhydon 2
Adamant
Quick Claw
Earthquake
Horn Drill
Rock Slide
Brick Break
0.05925
Whiscash 3
Hardy
Chesto Berry
Sleep Talk
Rest
Surf
Fissure
0.14874
Dugtrio 3
Adamant
King's Rock
Earthquake
Double-Edge
Sludge Bomb
Fissure
0.11298
Wailord 3
Modest
Chesto Berry
Hydro Pump
Fissure
Double Team
Rest
0.10431
Donphan 3
Adamant
Quick Claw
Fissure
Earthquake
Rock Slide
Secret Power
0.06716
Walrein 3
Hardy
Quick Claw
Sheer Cold
Fissure
Surf
Attract
0.03341
So pinsir is the most common of every threat in the set 5 and very common in set 6. The fissure users are more common in set 6. Substitute is a big deal against these pokemon. Pinsir is notably walled by ghosts like dusclops and shedinja. A special duslcops might have some overlap against mixed attackers with fighting moves. Whiscash 3 is interestingly beat by salamence and Walrein 3 doesn't really exist making physically defensive sturdy users actually very good in these lower rounds.
Clear Body
Metagross 2
Adamant
Lum Berry
Earthquake
Meteor Mash
Psych Up
Swagger
0.065144
Metagross 1
Adamant
Leftovers
Meteor Mash
Aerial Ace
Facade
Light Screen
0.034756
Metagross 3
Adamant
Chesto Berry
Earthquake
Meteor Mash
Double Team
Rest
0.017822
Metagross 2
Adamant
Lum Berry
Earthquake
Meteor Mash
Psych Up
Swagger
0.06486
Metagross 3
Adamant
Chesto Berry
Earthquake
Meteor Mash
Double Team
Rest
0.0506
Meteor mash and earthquake being the only moves from the round 6 clear bodies is interesting. Suicune is great because it discourages the use of meteor mash so that metagross doesn’t get lucky boosts. Also reflect is key for clear body psychup metagross.
Mixed attackers
Swampert 2
Docile
Quick Claw
Surf
Earthquake
Counter
Mirror Coat
0.1006
Ampharos 2
Hardy
BrightPowder
ThunderPunch
Fire Punch
Focus Punch
Thunder Wave
0.077811
Swampert 3
Brave
Shell Bell
Surf
Earthquake
Ice Beam
Counter
0.034522
Electabuzz 2
Quirky
Leftovers
Thunder
Rain Dance
Attract
Focus Punch
0.040244
Electabuzz 1
Relaxed
Cheri Berry
Thunderbolt
Thunder Wave
Brick Break
Light Screen
0.039211
Electabuzz 3
Quirky
Lum Berry
Fire Punch
Ice Punch
Thunderbolt
Cross Chop
0.022311
Electabuzz 3
Quirky
Lum Berry
Fire Punch
Ice Punch
Thunderbolt
Cross Chop
0.06412
Electabuzz 2
Quirky
Leftovers
Thunder
Rain Dance
Attract
Focus Punch
0.03974
Ampharos 2
Hardy
BrightPowder
ThunderPunch
Fire Punch
Focus Punch
Thunder Wave
0.07701
Ampharos 3
Hardy
Focus Band
Thunderbolt
Mega Kick
Iron Tail
Brick Break
0.07306
Swampert 2
Docile
Quick Claw
Surf
Earthquake
Counter
Mirror Coat
0.1159
Swampert 3
Brave
Shell Bell
Surf
Earthquake
Ice Beam
Counter
0.09637
Feraligatr 2
Sassy
Quick Claw
Surf
Dragon Claw
Brick Break
Scary Face
0.1157
Machamp 3
Hardy
Quick Claw
Cross Chop
Fire Blast
ThunderPunch
Ice Punch
Gah focus punch is so brutal calm mind blissey can just out bulk the brick break pokemon and you can swap stall the cross chop but focus punch is so strong and has so much pp that when you use calm mind you will lose. Intimidate goes great with a bulky special wall for most of these. Not all mixed attackers are listed. I find ampharos with fire/thunder/focus punch breaks most of my favorite teams because it has a super effective move against blissey, umbreon, suicune, shedinja, skarmory
Latios
Latios doesn’t appear in the lower rounds :)
I would actually list perish song mean look as a minor threat but it is so rare they pull it off with random palace moves that any small %gains vs it are less significant than other threats.
My lessons:
So I did a lot of testing, palace maven spenser just concedes when he sees me now, and I learned a lot. In the lower palace without as wide a variety of threats and legendaries you don’t need to be quite as aggressive in battling threats. The variety of threats in the later rounds is actually oppressive/soul crushing for palace players. For anyone who wants to understand the true beauty of the palace I recommend a challenge where you try to beat palace gold 5 times without losing. There are a lot of cool teams left to make and taking the lower palace seriously is so much less soul crushing than how unsolvable the higher palace is.
What I learned:
Because status moves are forced to be used by nature even when an attack would be better, substitute blocking status moves is great in the palace. It’s easy to have an advantage over a single opposing pokemon but after you beat them the best way to carry that advantage forward is with a substitute. Substitutes are the best defensive move when facing swords dance and OHKO because even if you use sub on a turn they don’t attack you get to stay safe unlike protect. Substitutes may not be as good in the higher palace as opponents hit harder and are more likely to get you low, I’m not sure I haven’t tried it there yet.
Calm nature has quickly become my go to nature because of how useful it is to only spam non-support moves. Every nature in the palace has a sizeable attack percent at full health so you just kind of have to accept that you’re attacking. (well gentle, naughty, and lonely are 18-20% but they all switch to 80% attack below half health and it’s very hard to control this in a useful way).
Calm works of course by healing/being defensive long enough to get a few hits in and wear down your opponent. And while you can get more fully set up if your attack isn’t strong, it’s better have an effective move to not give your opponent for ever to set up their own boosts so you can cover those sets as well.
My favorite sets are rest+sub+defense boosting move and 1 attacking move. This is because you work against the biggest weakness of rest which is healing to early and being asleep by having something else to do. Then often you will have a sub before you rest giving you a safe turn while you try to wake up. The AI is very smart about using substitute and rest when it has a third option for defense.
If people are looking for a good nature for palace gold, I’m definitely recommending calm. Modest works very similarly if you need the special attack, or maybe want to sneak toxic into a slot on a pokemon with recover instead of rest. But Calm has slightly better odds.
It’s always been clear that Blissey would be good in the battle palace, I don’t know why it took me so long to take testing it seriously. This thing has crazy stats and freaking Natural Cure. You just go in a sit in front of calm minders with almost no fear. Okay so against calm minders it helps that your stats and recovery are way better and you do need to be attacking them or you will get crit.
In the low palace I tried a leftovers sub calm mind tbolt flamethrower blissey and it pretty much worked because eventually your spdef was so high you would gain more health back with leftovers than you would take.
I think blissey definitely has play in the higher palace but it may need specific ev’s to help with the calm mind matchup.
Wish is really fun but the users just don’t have the base stats where I want them and waiting a turn to heal can sometimes be too long.
My favorite way to use wish is between two pokemon who are defensive on the same side. I like healing sassy choice banders up when possible and if you can be physically defensive and get an intimidate off it’s great.
Salamence (M) @ Choice Band
EVs: 112 HP / 252 Def / 144 Spe
Ability: Intimidate
Level: 50
Sassy Nature
- Aerial Ace
- Earthquake
- Flamethrower
- Rock Slide
Vaporeon (M) @ Lum Berry
EVs: 4 HP / 252 Def / 252 SpA
Ability: Water Absorb
Level: 50
Calm Nature
- Surf
- Acid Armor
- Substitute
- Wish
So with modest vaporeon only needs 108 SpA ev’s to one shot armaldo. But at level 52 vaporeon learns hydro pump which needs no SpA investment. The salamence set is great because it attacks realiably and can switch in easily. Attack ev’s change almost nothing when it comes to choiceband mence in the low palace so this is my favorite use.
So maybe this was a case of trying too many fancy things at once but I made a decent umbreon team using wish and shedinja because of their synergy and the common pokemon shedinja has the highest winrate in the palace against. In the end focus punch ampharos was too much of a threat to ignore. There is probably a decent wish umbreon team out there somewhere.
Suicune @ Chesto Berry
EVs: 252 HP / 252 Def / 4 Spe
Ability: Pressure
Level: 50
Calm Nature
- Surf
- Ice Beam
- Reflect
- Rest
Umbreon (M) @ Lum Berry
EVs: 252 HP / 4 Def / 252 SpD
Ability: Synchronize
Level: 50
Bold Nature
- Toxic
- Charm
- Rest
- Wish
Shedinja @ Persim Berry
EVs: 252 Atk / 252 Spe
Ability: Wonder Guard
Level: 50
Hasty Nature
- Aerial Ace
- Shadow Ball
- Swords Dance
- Confuse Ray
One great feature of wish is that you can pp stall an opponent with any pokemon, bring in your wish user then heal any of your other pokemon on a struggle.
another great feature of wish is that you can switch in a full health pokemon expecting them to take a hit but that wish will heal them back up
My team suggestion for the low palace:
I had an awesome Suicune-skarmory-blissey team I wanted to share because it had insanely high win percentages in all matchups because of sturdy. My favorite part was that with sturdy you could have your ohko defense as not the lead pokemon without decreasing your chance in the matchup. Except then mixed pokemon like focus punch ampharos came along and wrecked it. A team that actually solves the lower palace is tantalizingly close maybe a different sturdy pokemon like donphan could actually beat ampharos. Or maybe a calm raikou set is like a blissey that isn't weak to fighting(edit decided to test this, it is strong but rest is more likely to be awkward if you sleep against a calm mind slowbro for instance). Or maybe suicune lead can be replaced with frenzy plant/ hydro cannon or a hydropump ludicolo.
Suicune @ Chesto Berry
EVs: 252 HP / 252 Def / 4 Spe
Ability: Pressure
Level: 50
Calm Nature
- Surf
- Reflect
- Rest
- Substitute
Blissey (F) @ Leftovers
EVs: 252 HP / 252 Def / 4 SpD
Ability: Natural Cure
Level: 50
Calm Nature
- Substitute
- Calm Mind
- Soft-Boiled
- Thunderbolt
Salamence (M) @ Lum Berry
EVs: 48 HP / 252 Atk / 140 Def / 68 Spe
Ability: Intimidate
Level: 50
Hasty Nature
- Aerial Ace
- Earthquake
- Flamethrower
- Substitute
An important part of this team is that suicune is the lead to help with the swords dance matchup. Although if you play at level 71 or above I highly recommend switching to hydro pump and modest with 48 SpA ev’s you can turn the surf 2HKO’s into one shots which has a higher chance of winning. This is just a good suicune I will probably use this one in the open level. It’s great against clear body psychup users because it boosts with reflect instead of lowering or raising stats. The Ai is in fact more likely to use brick break if you have reflect up so it’s great bait to switch into salamence. I do wonder about using this fact with like a lightscreen latias vs some of the mixed attackers but I think the type resistance gets factored in as well. I tried running less hp for stronger surfs but it didn’t feel like it was working.
Salamence here is just fast enough to outspeed arcanine/houndoom but more importantly electabuzz/tentacruel. The HP is for substitutes so it triggers half health after just two subs. And the def ev’s are so it can switch in to intimidate physical attacks. Not having recovery makes salamence a liability, only use it when it’s needed as without it there are things you can’t beat. Often for double teamers you pp stall them first then bring out salamence to aerial ace (there probably is a correct number of intimidates for each separate struggling double team opponent). Salamence’s job requires both aerial ace and earthquake meaning the calm sub rest defense curl variant is not an option. If salamence had bulkup it would be the best thing in the palace. Dragon dance just wasn’t good enough in my opinion it just left you vulnerable on ddance turns. Though it is clear without choice band mence lacks power against some threats like nidoking. I haven’t tried Naughty/adamant yet but those natures are actually strong contenders though adamant comes with much higher odds to not move at all (15% vs 3%). Though even +atk doesn’t guarantee OHKO’s on nidoking (makes it about 50% chance). Flamethrower is there for the important threat of SD scizor but actually is the highest damage move against several opponents like donphan and steelix.
Blissey tends to handle feralgtr and blastoise with intimidate support while suicune takes swampert and whiscash. Blissey has so much hp that mirror coats are rarely dangerous (still have to pay attention to the situation)
A 4 hp 252+spdef blissey is only a 1/16 chance to get crit from +6 espeon-2 (15 iv’s) from full health. Which shifts to a 10/16 chance at 252hp 4+ spdef. So knowing how much hp you really need for the mixed attack matchups could be important.
The debate between thunderbolt and shock wave is interesting, shock wave obviously saves time against double teamers and might even improve your odds in some grass double team matchups if you don’t carefully preserve salamence. Thunderbolt though definitely saves time in several slow matchups as not KO’ing can result in many extra turns and probably increases your win percentage in calm mind match ups as it is better to kill faster than risk crits. Flamethrower while resisted by the water types like spenser’s suicune that blissey is so important for can give burn that will finish the job, in testing I think it was too slow. But it would definitely be nice not to worry about the ground immunity. I think the biggest reason to use tbolt is that it's the move with the best win percentage against spenser's suicune.
On facing fisherman: don’t switch directly into blissey if the opponent has an ohko move. Suicune has high enough odds of substitute stalling the ohko pp that you should stay in (and suicune is not so important for these trainers).
There is an attract curse ancient power quagsire that can be quite the pain for this team. However only 1 in 4 are both able to attract salamence and have water absorb. In that case though you kind of need to stall out the ancient power then intimidate swap as low as you can before staying in with salamence.
EDIT: the curse quagsire is a menace and with boosted defense it manage to crit mence twice before mence could crit back. Even with reflect to buy more time. Of course I beat the non-water absorb versions but you run into it quite often. Also facing a lot of DT snorlax. I'm considering toxic milotic, but easier to slot in is going back to dragon dance salamence.
The question might be why not use this in the higher palace (arguably the best gold symbol team to date) and essentially you can with the only difference being salamence needs the power of choice band which will play very differently and a lot of matchups get way worse. Only having 1 attack type on blissey and suicune will cause very unfortunate circumstances when you are more likely to go down a team member.
My next task is to find something to use for battles 43-77ish that will be faster than struggle snorlax. I will probably test out blissey in a serious capacity but I may go back to my original record team style and try to improve the snorlax set somehow. Especially since I know this suicune is better than the set I was using. Maybe a lightscreen sub rest meteormash/shadowball metagross for calm mind users hahaha
I attached some zip files for local copies of the damage calc for round 5 and for round 6 with their specific set dexes already in place, that should be easier to use, just double click on one of the html documents to launch them.
So, I am a very new to this forum and was wondering if this is the place to post this.
I wanted some help / advice in forming a team for the battle frontier, built around Breloom? Why you ask. Well I've recently got the gold symbols for the battle tower and battle dome, both of which I managed on my first attempt using a team of Latios (Serious nature, average IVs), Metagross (Adamant, also average IVs) and Milotic (Bold, actually breed to have very decent but not perfect IVs). I will attempt the other facilities in due course but I wanted to try and get a streak in the battle tower using my favourite Pokemon of all time, Breloom.
I'm therefore looking for any suggestions on which two 'mons would go well with my Breloom. I have currently breed a Jolly 31 IV in attack and Speed Breloom (which I intend to keep that way). So far I've trained it to have 96/156/6/0/0/252 EVs, giving it stats at level 60 of: 160/203/116/84/92/159 (The HP IV is shocking I know, I had a better Breloom but lost it in a trade glitch trading to LG, and didn't want to spend another 10 hours finding a better Breloom).
I'm open to any changes in 'mons, besides Breloom, and any moves changes. Anyway my current plan is to have something like this:
I never breed specifically breed to have HP types, I don't have that much time to put in. This was pure luck that this Breloom's Hidden power is a 57 power HP ghost. I don't know if that is strong enough to viably use however? PS the HP investments is to make Breloom HP 160 at level 60, being a good leftovers number, this EV spread can be changed however as my Breloom is still only level 54.
Houndoom @ Lum berry / other
Timid
252 SpAtk, 252 Spd, 4 SpD
Crunch
Flamethrower
Sunny Day / Dream Eater
Solar Beam / Will-o-Wisp
I was thinking maybe Dream eater could help against Poison walls like Weezing, I could spore them with Breloom then switch. I'm a bit clueless with the last two moves tbh. I want Houndoom because he nicely covers a lot of things Focus Punch can't hit with his two STABs.
Swampert @ Leftovers / Chesto Berry
Relaxed
252 HP, Some Def and Sp Def split
Earthquake
Surf / Rock Slide
Ice Beam
Rest / Counter / Mirror Coat
This last spot I was thinking I just need some kind of wall, with good resistances who can also hit back. Rock Slide I was mainly thinking for the like of Gyarados.
Anyway, any help would be appreciated. I've searched and I can't find many examples of people building teams around a SubPunch Breloom. Any suggestions would be appreciated, thanks!
I'm not sure what's the kind of streak that you're going to attempt to obtain but it won't be a very big one. Gold should 100% be possible but anything beyond that would be a stretch. If you're going to keep Breloom on the team, keep in mind that due to its common weaknesses to Psychic, Fire, Ice and Flying it is hard to balance on a team where you can only take 3 members with you.
Not sure what is Sunny Day or Dream Eater function in there. Houndoom is too frail to find opportunities to set up Sunny Day and it also ruins your own Water type moves. Dream Eater is basically relying on Breloom putting something slower to sleep and it takes a turn to switch. One-turn sleeps happen and it's extremely gimmicky. Taunt is a better move to use in here. It will prevent bulky Pokemon like Umbreon from using Double Team or one of their status moves. While it only last a turn, it's good enough to check potential Double Team users or bulky walls that rely on status. I think you can keep Will-o-Wisp as the last move over Solarbeam. At least it will be able to cripple physical attackers and does something. Might be worthwhile to breed a Hidden Power like Grass unless you have the time for it.
You got no Flying type switch-ins and while Swampert is bulky, it won't take critical hits too well. Aerodactyl 2 who runs Choice Band has 170 HP EVs which means that it will have enough bulk to tank a Surf and hit Swampert twice. If one of those hits is a crit, it will heavily cripple it for the rest of the match. You're also going to struggle with Starmie which your team lacks an appropriate response. Only thing you can achieve to do is Mirror Coating it, but that's an extremely reactive approach. Surf destroys Houndoom and Psychic destroys Breloom. All it takes for Starmie to get through your team is a critical hit on Swampert.
For this reason, I suggest replacing Swampert with Lanturn:
This is a Level 50 set, so you'll have to adapt it to Open Level if you plan to use it. With your HP IV on Breloom being so low, maybe you should let Lanturn use the Leftovers instead. It's bulky enough to take some hits and with this investment, assuming that you are able to RNG for good IVs, it will survive Salamence 4's Earthquake from full health. You definitely want to use a Modest nature with max SpA EVs because Lanturn offensive stats are really weak and it needs all the power it can use to deal damage. It's very bulky thanks to that high HP stat and you barely need to invest on it. 12 SpD guarantees that Alakazam will only ever achieve a 3HKO with a +252 Psychic. This also comes really useful against Starmie as Lanturn can easily tank its Psychic and KO it back with its STAB Thunderbolt. It's also good enough to deal with Aerodactly 2 if it's locked into Aerial Ace. The Speed EVs allows it to outspeed Feraligatr and Blastoise, two common Thunderbolt targets that can carry Earthquake. This means that Lanturn can smack them first before they Earthquake it.
Surf is for Ground and Rock types. Ice Beam kills dragons. Thunderbolt is Electric STAB. The fourth move depends on you: Protect let's you stall and regain a bit of health. Rest let's you recover your lost HP with a Chesto Berry. Make sure you get Volt Absorb as it grants you an immunity against Electric type attacks.
So, I am a very new to this forum and was wondering if this is the place to post this.
I wanted some help / advice in forming a team for the battle frontier, built around Breloom? Why you ask. Well I've recently got the gold symbols for the battle tower and battle dome, both of which I managed on my first attempt using a team of Latios (Serious nature, average IVs), Metagross (Adamant, also average IVs) and Milotic (Bold, actually breed to have very decent but not perfect IVs). I will attempt the other facilities in due course but I wanted to try and get a streak in the battle tower using my favourite Pokemon of all time, Breloom.
I'm therefore looking for any suggestions on which two 'mons would go well with my Breloom. I have currently breed a Jolly 31 IV in attack and Speed Breloom (which I intend to keep that way). So far I've trained it to have 96/156/6/0/0/252 EVs, giving it stats at level 60 of: 160/203/116/84/92/159 (The HP IV is shocking I know, I had a better Breloom but lost it in a trade glitch trading to LG, and didn't want to spend another 10 hours finding a better Breloom).
I'm open to any changes in 'mons, besides Breloom, and any moves changes. Anyway my current plan is to have something like this:
I never breed specifically breed to have HP types, I don't have that much time to put in. This was pure luck that this Breloom's Hidden power is a 57 power HP ghost. I don't know if that is strong enough to viably use however? PS the HP investments is to make Breloom HP 160 at level 60, being a good leftovers number, this EV spread can be changed however as my Breloom is still only level 54.
Houndoom @ Lum berry / other
Timid
252 SpAtk, 252 Spd, 4 SpD
Crunch
Flamethrower
Sunny Day / Dream Eater
Solar Beam / Will-o-Wisp
I was thinking maybe Dream eater could help against Poison walls like Weezing, I could spore them with Breloom then switch. I'm a bit clueless with the last two moves tbh. I want Houndoom because he nicely covers a lot of things Focus Punch can't hit with his two STABs.
Swampert @ Leftovers / Chesto Berry
Relaxed
252 HP, Some Def and Sp Def split
Earthquake
Surf / Rock Slide
Ice Beam
Rest / Counter / Mirror Coat
This last spot I was thinking I just need some kind of wall, with good resistances who can also hit back. Rock Slide I was mainly thinking for the like of Gyarados.
Anyway, any help would be appreciated. I've searched and I can't find many examples of people building teams around a SubPunch Breloom. Any suggestions would be appreciated, thanks!
Your current team setup looks like a "classic goodstuff" approach that relies on offensive/defensive synergy between its team members and Kommo-o already gave you some pretty solid advice on improving it, so maybe what I'm about to suggest isn't your cup of tea at all in terms of strategy.
If you're up for some more gimmicky ideas, if you can manage to boost Breloom's speed somehow, a Spore, Leech Seed, Sub, Focus Punch/other attacking move set becomes nearly unstoppable. The easiest team setups that come to my mind right now to achieve that are Crippler + BP Ninjask, Crippler + Agility BP Zapdos, or Macho Brace Trick Grumpig + Spore Dragon Dance BP Smeargle (all of those get even better if you can manage to get some Evasion or Attack boosts in somewhere as well). I think Actaeon had an idea of knocking Breloom into Salac range with Double-Edge recoil that might be worth considering as well.
From my own experience with both Focus Punch Breloom and a fast Spore Persian on my Assist team, it probably won't be enough for very long (200+) streaks in the tower, but it should be possible to build this in a sufficiently stable way to reach Gold consistently and only lose to pretty bad hax.
Keep in mind that all of this is just theorymonning, it's entirely possible that there's some serious flaw that makes this idea not work at all in practice that I just can't think of right now.
I'm not sure what's the kind of streak that you're going to attempt to obtain but it won't be a very big one. Gold should 100% be possible but anything beyond that would be a stretch. If you're going to keep Breloom on the team, keep in mind that due to its common weaknesses to Psychic, Fire, Ice and Flying it is hard to balance on a team where you can only take 3 members with you.
Not sure what is Sunny Day or Dream Eater function in there. Houndoom is too frail to find opportunities to set up Sunny Day and it also ruins your own Water type moves. Dream Eater is basically relying on Breloom putting something slower to sleep and it takes a turn to switch. One-turn sleeps happen and it's extremely gimmicky. Taunt is a better move to use in here. It will prevent bulky Pokemon like Umbreon from using Double Team or one of their status moves. While it only last a turn, it's good enough to check potential Double Team users or bulky walls that rely on status. I think you can keep Will-o-Wisp as the last move over Solarbeam. At least it will be able to cripple physical attackers and does something. Might be worthwhile to breed a Hidden Power like Grass unless you have the time for it.
You got no Flying type switch-ins and while Swampert is bulky, it won't take critical hits too well. Aerodactyl 2 who runs Choice Band has 170 HP EVs which means that it will have enough bulk to tank a Surf and hit Swampert twice. If one of those hits is a crit, it will heavily cripple it for the rest of the match. You're also going to struggle with Starmie which your team lacks an appropriate response. Only thing you can achieve to do is Mirror Coating it, but that's an extremely reactive approach. Surf destroys Houndoom and Psychic destroys Breloom. All it takes for Starmie to get through your team is a critical hit on Swampert.
For this reason, I suggest replacing Swampert with Lanturn:
This is a Level 50 set, so you'll have to adapt it to Open Level if you plan to use it. With your HP IV on Breloom being so low, maybe you should let Lanturn use the Leftovers instead. It's bulky enough to take some hits and with this investment, assuming that you are able to RNG for good IVs, it will survive Salamence 4's Earthquake from full health. You definitely want to use a Modest nature with max SpA EVs because Lanturn offensive stats are really weak and it needs all the power it can use to deal damage. It's very bulky thanks to that high HP stat and you barely need to invest on it. 12 SpD guarantees that Alakazam will only ever achieve a 3HKO with a +252 Psychic. This also comes really useful against Starmie as Lanturn can easily tank its Psychic and KO it back with its STAB Thunderbolt. It's also good enough to deal with Aerodactly 2 if it's locked into Aerial Ace. The Speed EVs allows it to outspeed Feraligatr and Blastoise, two common Thunderbolt targets that can carry Earthquake. This means that Lanturn can smack them first before they Earthquake it.
Surf is for Ground and Rock types. Ice Beam kills dragons. Thunderbolt is Electric STAB. The fourth move depends on you: Protect let's you stall and regain a bit of health. Rest let's you recover your lost HP with a Chesto Berry. Make sure you get Volt Absorb as it grants you an immunity against Electric type attacks.
I should have specified, I don't want to go on a massive streak, but was thinking a goal of 100 / 105 wins with my Breloom would be nice, nothing crazy. I think I agree with you on the Sunny Day / Solar Beam and Dream Eater front, I thought perhaps Breloom could put something like a bulky Weezing to sleep and Houndoom could hit it for SE damage, but having just tried to see if I could Solo the Elite Four with my lvl 54 Breloom, I realise that turn 1 sleep happens very frequently. But you're right, I think I'll give it Taunt and Will-o-wisp to help it out. The only other possible moves I could think of using is Pursuit, Thief, or possibly even Snatch? I don't have a lot of experience in the Battle Tower, pretty much played through it a couple of times. Does the AI switch much at all, or would this be worthless? I feel like I could definitely get some value from thief. And I wouldn't know specifically when snatch might work, I guess in those scenarios against bulky 'mons who like to set up. It could be very useful taking someones Double Team maybe?
In terms of my Breloom and it's 4th move. What do you think is best?: Leech Seed, a 57 Power HP Ghost, or maybe Mach Punch? I'm thinking Leech Seed because it might help me stall out certain mon's better.
Ok I like the sound of using Lantern, I will definitely look into that, thank you :)
Your current team setup looks like a "classic goodstuff" approach that relies on offensive/defensive synergy between its team members and Kommo-o already gave you some pretty solid advice on improving it, so maybe what I'm about to suggest isn't your cup of tea at all in terms of strategy.
If you're up for some more gimmicky ideas, if you can manage to boost Breloom's speed somehow, a Spore, Leech Seed, Sub, Focus Punch/other attacking move set becomes nearly unstoppable. The easiest team setups that come to my mind right now to achieve that are Crippler + BP Ninjask, Crippler + Agility BP Zapdos, or Macho Brace Trick Grumpig + Spore Dragon Dance BP Smeargle (all of those get even better if you can manage to get some Evasion or Attack boosts in somewhere as well). I think Actaeon had an idea of knocking Breloom into Salac range with Double-Edge recoil that might be worth considering as well.
From my own experience with both Focus Punch Breloom and a fast Spore Persian on my Assist team, it probably won't be enough for very long (200+) streaks in the tower, but it should be possible to build this in a sufficiently stable way to reach Gold consistently and only lose to pretty bad hax.
Keep in mind that all of this is just theorymonning, it's entirely possible that there's some serious flaw that makes this idea not work at all in practice that I just can't think of right now.
I have definitely thought about doing something like this yes. In fact I did see your Persian Breloom Gengar team when I was trying to look for others using Brelooms and I liked the idea of that. The problem is that I'm not used at all to using gimicky stuff at all, but I'm sure I could learn.
I don't think I have access to a Salac Berry unfortunately, can you even get one on FRLG or Emerald/Saphire? Those are the only games I have access to.
I'm in the process of breeding an Agility/Swords Dance/Baton Pass/Silver Wind Scizor. That would help with all of Breloom's weakness's bar fire so perhaps that's something I could try. Unfortunately I don't have XD so I can't get a Zapdos with Baton Pass ): Definitely something I will look into however.
I should have specified, I don't want to go on a massive streak, but was thinking a goal of 100 / 105 wins with my Breloom would be nice, nothing crazy. I think I agree with you on the Sunny Day / Solar Beam and Dream Eater front, I thought perhaps Breloom could put something like a bulky Weezing to sleep and Houndoom could hit it for SE damage, but having just tried to see if I could Solo the Elite Four with my lvl 54 Breloom, I realise that turn 1 sleep happens very frequently. But you're right, I think I'll give it Taunt and Will-o-wisp to help it out. The only other possible moves I could think of using is Pursuit, Thief, or possibly even Snatch? I don't have a lot of experience in the Battle Tower, pretty much played through it a couple of times. Does the AI switch much at all, or would this be worthless? I feel like I could definitely get some value from thief. And I wouldn't know specifically when snatch might work, I guess in those scenarios against bulky 'mons who like to set up. It could be very useful taking someones Double Team maybe?
In terms of my Breloom and it's 4th move. What do you think is best?: Leech Seed, a 57 Power HP Ghost, or maybe Mach Punch? I'm thinking Leech Seed because it might help me stall out certain mon's better.
Ok I like the sound of using Lantern, I will definitely look into that, thank you :)
Pursuit has no use on Frontier. Opponents barely switch-out and it's a deadweight move. Snatch could be interesting but you would need good prediction to make even decent use out of it. With Houndoom being so frail, most opponents will rather attack it directly rather than set-up on it. Thief is good but only if you're not carrying an item. If you really want a 4th attack, you can just stick to Faint Attack if you can't afford the time to breed for a Hidden Power.
A Hidden Power Ghost with 57 base power is barely usable. If it would've been a slightly stronger base power like 60 or maybe even 65, it would've been good. Just stick to Leech Seed, it lets you recover even more health and also helps Lanturn in getting some extra HP if you need to switch.
Ok fair enough, I think I'll go with Will-o-wisp then either Taunt, Faint attack or Snatch. I can probably test each one out and see how it feels. Thank you for your help Kommo-o, appreciated. I was also thinking that with Leech Seed, especially if I go protect and leftovers on Lantern, it could help out a lot with extra recovery. I look forward to trying this team.
It's been a while since I attempted the Battle Tower again but I wanted to introduce everyone a new team that I have been playing recently on the Discord that I really felt in love with. I'm happy with how this team worked and the innovations I made in order to grind on wins. The results so far are not living up to its potential but I genuinely believe this team can hit 1000 wins with some small luck on its favor. Before you dig into this post, I wanted to let you know that Quick Claw Regirock is the main sweeper of this team. How is it working? Start scrolling down and find out!
The original idea was to use Registeel for obvious reasons. Not only it provided perfect synergy with Zapdos and Grumpig, but it also resisted each other's weaknesses and it could even allow PP stalling. However, as someone who has extensively knew how to use Registeel, I knew this was not going to work in practice for various reasons: Registeel's weak base Attack doesn't allows it to sweep as the single sweeper on this team and when you consider I had to pair it with Gyarados on DDW, that pretty much shows why. Registeel can't beat Pressure users that resist its main STAB like Raikou and Entei who often use Rest or have a way to boost their stats (Calm Mind + Double Team). It also struggles against Water types who resist its STAB and have ways to recover the lost health (Ludicolo).
The next idea was Snorlax but this was short-lived for various reasons. Normal STAB sucks and depending on the coverage move you choose, you will inevitably get walled by something which completely beats the purpose of using a mono-sweeper on a Trick team.
At first, I didn't really consider Regirock as a serious option but when I started to look into the list of Curse users, I felt that Regirock was worth a try. STAB Rock is really potent, it has no immunities and Regirock learns Earthquake which means that it gets the only coverage move it will ever need. Regirock also resists Normal which shouldn't make an issue setting up against Choice Banded Normal types like Granbull or Usaring if needed.
This is pretty much Actaeon's Grumpig set. I haven't experimented a lot with Alakazam and Linoone, but hands down, this is the best Trick user in G3 and if you think otherwise, then your opinion is invalid. While Grumpig doesn't has Alakazam's or Linoone's speed, it makes it up with bulk and a pseudo-resistance to Ice, thanks to Thick Fat, which is really amazing. Trick is pretty much standard stuff. You lock the opponent into a single move and then you focus on having your next Pokemon set up as much as you can until it eventually struggles and pretty much set up the win. Torment exists mostly for special attackers preventing the AI from using the same move twice in a row. It also makes set-up easier for Zapdos as you can Protect while they use their attack and set up Double Team on the turns the opponent has to Struggle. Reflect is my biggest innovation on Actaeon's set. Unlike submenceisop and Actaeon I wasn't running Skill Swap and my team lacked an Intimidate user or Mud Slap which would've forced me to run this move. Since Zapdos raises its own evasion and I am not using de-buffing moves, I felt that Reflect suits the bill in here. With Reflect up, Zapdos takes a pittance from Metagross' Shadow Ball or Meteor Mash which allows it to comfortably set up on it. It also allows Grumpig to survive Explosion from the likes of Golem or Steelix if they decide to explode on turn 1 which allows Grumpig to survive and set up for later. Reflect also has the advantage of weakening Struggles from strong physical attackers like Ursaring or Snorlax. The benefits the team gains from Reflect has convinced me that if you're not running Skill Swap, this is the best move you can get as filler. The last move is Icy Wind and with Grumpig's speed investment, it allows Grumpig to outspeed neutral 252 Spe Jolteon and Crobat after a speed drop.
The EVs are pretty simple and I didn't make changes from what Actaeon typically runs: 92 Speed EVs with a Timid nature outspeeds all Metagross sets and Salamence 4 as well. The 214HP EVs and 204 Def EVs allows Grumpig to survive Rhydon's Megahorn and Banded Metagross' Shadow Ball, meaning that Grumpig can pretty much set a Reflect or Torment depending on the situation.
This is submenceisop's Zapdos and as a Baton Passer you won't be able to find a better candidate than Zapdos. It's good defensive typing, excellent stats and speed allows it to perform this role extremely well. Normally, once Grumpig Tricks an opponent and cripples it with Torment, Zapdos switches in to start the set-up that will inevitably allow Regirock to boost its stats and sweep. Protect and Substitute are bread and butter as Zapdos can protect on the attacks that would normally break its Substitute while it sets up Double Team on Struggle. Thanks to Pressure, this becomes a deadly combination that allows Zapdos to stall the opponent's PPs until it burns it out. It also allows Zapdos to stall out from moves that would otherwise put him in danger until the opponent. Double Team is an important move as it allows Zapdos to increase its evasion and pass them down to Regirock with Baton Pass. On most cases, once you get into +6 evasion and under a Substitute, Regirock becomes the recipient which allows it to continue the set-up and prepare it for the sweep.
Just like Grumpig, I didn't deviate from submenceisop's Zapdos set either: 228 Speed EVs allows Zapdos to outspeed Espeon by one point meaning that it can set up on it before it breaks its Substitute. 220 HP and 60 Defense are placed for bulk. With Reflect up, Metagross Choice Banded Shadow Ball / Meteor Mash fails to break its Substitute.
CHOCODISCO (Regirock) @ Quick Claw IVs: 30-31-30-19-30-30 EVs: 242 HP / 252 Atk / 16 SpD Ability: Clear Body Level: 50 Adamant Nature
- Curse
- Substitute
- Earthquake
- Hidden Power [Rock]
The main star of this team and the main sweeper. Once Zapdos is fully set-up, most of the time, the opponent will have its PP dried up and with the Choice Band locked, it will only be able to use Struggle. With evasion and a sub, Regirock now has all the turns it needs to set up Curse to bolster its Attack and Defense all the way to +6 in order to start a sweep. Hidden Power Rock was chosen as the main STAB due to Rock Slide's shaky accuracy. While that extra 5 base power allows Regirock to OHKO Flygon at +6, it does not compensates the 90% accuracy which can result in inconvenient misses. Earthquake allows Regirock to crush Steelix, Metagross and Rhydon into smithereens while hitting anything that resist its Rock STAB. While Flygon and Breloom are the only two Pokemon that resist both HP Rock and Earthquake, once Regirock is fully set-up, these two can't do anything to stop its sweep due to Regirock's defense boosts tanking their super-effective STABs while being unable to break its Sub at +6 if it didn't took lots of damage before. I had a lot to think when it came to the last move and while it would've been weird to use Substitute without recovery, this allows Regirock to set up again. With Substitute, Regirock protects itself from status moves that could cripple it, OHKO moves that ignore the evasion boosts it built up and attacks that could OHKO it. I wish I could fit Rest somewhere since I've been on situations where Regirock could've really used the HP recovery, but Regirock really needs both of its attacks and without Sub, Regirock would be relying completely on just the Substitute Zapdos passes on, which can be easily broken if the opponent's Struggle is powerful enough. What really makes me feel proud about this Regirock set is how effective Quick Claw has been as the item of choice: It seems like a meme choice, but it does so extremely well. With Substitute, Lum Berry is extremely situational and while Hard Rock is tempting, once I tested Quick Claw, I haven't looked back. With Quick Claw, Regirock can occasionally outspeed the opponent and KO the opponent which pretty much allows it to keep its Sub intact against a faster opponent while continuing its sweep. Sometimes, getting a priority Curse is also nice when setting up since it reduces the opponent's damage.
Regirock needed max Attack in order to achieve OHKOs on Skarmory at +6, so I had to RNG one through Method 4 on Pokemon Box. Anyways, 242 HP with the IV combination allows Regirock to hit 185 HP and create an extra sub thanks to the uneven numbers. The rest is dumped into Special Defense to bump its defenses a little bit. With Regirock's Defense already being immense, I didn't found any notable calculations that would benefit from having extra Def EVs.
Quick Claw users can be dangerous, but the worse ones are the users who run Explosion. While Grumpig might be able to Trick them, if they go down with Grumpig, the team loses its main way to set up. I normally use Reflect against them just to survive the T1 Explosion shenanigan.
If it gets locked into Curse, it becomes annoying because a +6 Struggle with a Choice Band hits very hard. You want to Torment in here so that Zapdos can freely set up the evasion boosts while Protecting on Struggle.
Psych Up is pretty annoying and it normally forces the team to set up all over again because it makes me obligated to not build up on the evasion boosts. Fortunately, most Psych Up users are easily stalled up by Zapdos and once it burns their PP, it can set up again. It's a very long process though.
Normal types with strong attacks are dangerous as it pretty much means Grumpig won't have a 2nd turn to live. Reflect is necessary but it usually means Zapdos will only have a few turns to build up on evasion boosts. Mega Kick Granbull / Ursaring are easily stalled out but Double Edge Ursaring is scary...
While not as dangerous as Claydol or Steelix, Shiftry can still mess up the team. However, once Grumpig sets up Reflect, Zapdos bosses this motherfucker even if it decides to Explode.
Sticky Hold prevents Trick, which means that Grumpig cannot lock it into a move. Add Sludge Bomb's 30% chance of poisoning and having access to QC and Explosion, makes Muk the biggest threat to this team. I have no choice but to take him 1-v-1 with Regirock and Earthquake it.
Avoid tricking against these Pokemon and simply set up against them
Pretty sure they are out there more threats but will update this section as I find them
Unfortunately, due to time constraints, I haven't been able to record a video of how this team works and so far I have only limited myself on streaming it through the Discord. Special thanks to Actaeon and submenceisop for creating the Grumpig and Zapdos sets. Thanks to both of you, Regirock has finally claimed a place on Gen 3 Frontier!
Unfortunately, I have decided to end my pursuit of a streak with this team. My streak ended at 350 wins officially. I had been attempting to reach the 500 win mark before, but with work getting a bit more chaotic, it had been impossible for me to break through so I'm ending up chasing any further record with this team.
Loss came against a Thriathlete with Flygon 2 and Tentacruel 2. I stayed with Grumpig using Icy Wind because from previous experiences, it's never worth to set up on Flygon. But I was unfortunate that within all sets to wait, it was Tentacruel 2 who poisoned my Zapdos switch-in with Toxic. I misplayed in here because the best I could've done was to stay in and then let Grumpig take the Toxic instead and swap into Zapdos, then go into Grumpig and lock it into Trick. With Zapdos poisoned, I was unable to BP enough boosts to Regirock and couldn't even stall out its Surf. It was pretty over when the last mon, Slowking, finished it off. I didn't presented a streak because my previous loss attempts always crashed at 300s. But I guess it is not meant to be. Either way, I got no complains. The team is solid enough and I guess I can chase something else on my free time.
For the low palace I note that suicune which learns hydropump (at 40) (break point at level 71) becomes definitively better than surf because only having to hit once is so much better than hitting twice and with modest and a small amount of evs it can ohko armaldo. Which inspired us to look at a team specifically for the high open level palace as tyranitar’s sandstream changes things.
Salamence is ev’d to grab the easy KO on horndrill nidoking, brick break doesn’t even OHKO tyranitar so maybe another move is better.
Registeel is immune to sandstream notably. It has other features over struggle snorlax in that it is genderless for attract and resists psychic for better setup against calm mind. The base stat difference is noticeable as it takes more struggles to finish pokemon off giving them about twice the opportunity to land a crit or OHKO, and reduced hp advantage for recoil/counter.
Milotic is supposed to help vs tyranitar. Hydropump/toxic should help shorten the clock and sub/recover should keep you awake for more turns than sub/rest when taking constant damage in sand. Milotic’s high special attack is great here allowing it to still use hydropump even at the bulky level 97. Modest is pulling double duty adding special attack and increasing the toxic rate. Toxic has utility against shear cold users as it gives them a clock they have to land a hit in and not sleeping helps keep sub up more often.
A useful Hitmontop set
One more notable set that actually functions in the palace that I found was calm bulk up sub rest hitmontop. It suffers from it’s lack of hp. Fighting type is funnily enough super effective against some of the biggest threats in the water-ice ohko users, tyranitars, Regis, and snorlax.
Hitmontop (M) @ Lum Berry
EVs: 252 HP / 180 Def / 76 SpD
Ability: Intimidate
Level: 97
Calm Nature
- Bulk Up
- Brick Break
- Rest
- Substitute
I don’t know what it’s best use actually is (we substituted it for milotic/suicune as a second intimidate pokemon) but I think this is a very workable set and a great intimidate pokemon for the palace so it would be interesting to see what kind of team can be built around it.
Another way to use Calm/Modest?
So I’ve hyped up sub-softboiled-calm mind blissey which is basically unbreakable between the base stats and moves and can run just leftovers due to natural cure. But one of the problems when facing shear cold users is that blissey might spam calm mind over it’s other defense attribute moves and not substitute often enough. One way to fix this is to run light screen instead of calm mind. Because now on the turns where the move is chosen the ai will smartly see that light screen is up and focus on soft-boiled/substitute instead of spamming calm mind because it assumes no crits/ohko moves. The ai is actually pretty good with these types of decisions.
Blissey (F) @ Leftovers
EVs: 252 HP / 252 Def / 4 SpD
Ability: Natural Cure
Level: 50
Modest Nature
- Toxic
- Substitute
- Light Screen
- Soft-Boiled
The idea is that this blissey is almost as good as calm mind vs calm mind users and it can pass a light screen to help out while perhaps even being better against ohko. Although that isn’t so clear as with a few calm minds you can dish out so damage fast with blissey and you actually get to set up and carry that forward.
Fixing my aggressive record team
The big thing that was looming on my mind was adding more recovery to Hardy snorlax you were often tanking hits while setting up curses and attacking meaning snorlax had a very limited number of turns before it went down (leftovers could only do so much).
Of course there is only rest. So it sounds pretty simple add rest to snorlax and give it chesto. But any nature that will use rest often enough will use rest too often (like when you only took a little damage) and you will be asleep when you should be attacking. The other mental hang-up I had was putting a defensive move on Hardy even though it only has a 7% chance to be used.
Realizing that I might only want rest to be used 7% of the time anyways felt genius. There are all these situations where your opponent is some slow set up double team pokemon chipping away at snorlax despite it’s increasing defense and you have say 5-7 turns to heal, in those cases you have a decent chance to just rest and sweep the rest of the game from high health and curse boosts. It also gives you a chance against burn (and toxic if you don’t run immunity)
And I gotta say adding rest to the Hardy set did pretty much exactly what I hoped for. Obviously it is still risky compared to the consistency of say blissey but you get way more sweeps now with curse over just trading damage most games.
From there you need to decide which two moves to use and how much to split between physical and special defense. And from testing you can be successful whatever your defensive split or moves. Personally I see snorlax’s role on the team as handling latios and hypno ect, so going a little extra on the special defense and using shadow ball works best towards that goal. It also has the advantage of good neutral coverage against most pokemon besides dodrio.
I was excited to take what I learned about substitute and calm and apply it. I just really thought reflect would be the way to go. The calm mind spamming that I feared is a bit of a pain but the boost to the offenses does save time and sub/rest fire off just often enough.
The improved matchup vs spensers suicune is important here.
Not running icebeam is more work, but having a substitute user is way better for the team over all and helps enough that you don’t lose all of you chances vs things you would want icebeam or toxic for. You also have more reason to be careful around trainers with water absorb if you're lucky they just have the other ability though.
Then I just used banded salamence. You have to accept the attack or die risk of sassy in exchange for the offensive pressure of the band. https://pokepast.es/97723891fb45a671
Overall it’s very hard to judge whether this team is better than the struggle team. Struggle team has some advantages such as once fully set up it has high odds of sweeping even dangerous pokemon. This team gets to use the tag tam strategy to finish pokemon off more often. This team definitely has the time advantage though. Neither team has a true solution for ohko, the idea is mostly to just attack, maybe get lucky with suicune subs. For both you want to get" setup" up first if possible as even one turn of damage from struggle lax can help you beat an ohko user, then for the bulky aggro team suicune is the preffered pokemon to be "setup" with agaisnt possible ohko users since it has substitute. For struggle I actually prefer to take out the first pokemon then setup struggle when possible, because losing the struggle user to the seccond pokemon is one of the most dangerous situations (if they are third you will likely at least get 1 struggle off and be able to clean up) and they are more likely to bring out the counter or cross chop user as a second pokemon if you have snorlax/registeel on the field because it's super effective.
I haven't posted for a while but I wanted to report a completed Battle Tower Doubles streak using a very peculiar team that one of my best friends: ReptoAbysmal came up with, all the way back in 2005.
To give a little bit of context and explain how this team was born, you should know that I'm one of the regulars on the Battle Tower Discord and I've always enjoyed having my casual talks with friends over there. It happened that while we were discussing some obscure Gen 3 mechanics, the good ol' Repto told us that he actually used to write guides for Gamefaqs back in the day. When I found out that he even made an old XD/Orre Guide for Pokemon XD, I was astonished. The Pokemon Gamecube games are one of my favorite titles of all time. Even though ReptoAbysmal hates Colosseum with the fiery passion of 600 suns burning, I still think these are one of the best games ever made and it struck the inner child inside me. Honestly, I can't believe I never bothered on reading his guide back in the day. The fact that good ol' man ReptoAbysmal was talking about IVs, EVs and Hidden Powers in 2005 shows that he was way ahead of us.
He has an innate ability on writing entertaining guides with his wit and beating the shit out of everything even if it were for a good laugh. Seriously. This is golden stuff that should be preserved. I enjoyed his old guide so much that it inspired me to make this team and this is how the Reptomons were born. So I made a team based on what he used to clear the Orre Colosseum on XD but adapted it to Frontier and see how good the team is to grind out wins.
In order to maintain ReptoAbysmal's honor, I limited myself to only using the Pokemon that he used back in 2005 to clear the Pokemon Colosseum/XD post-game. Of course, any Pokemon that I used would have to be adapted to Frontier since the opponents I was going to face were completely different to what he did on XD/Colo. His main team consisted of Latios / Hariyama / Milotic / Sceptile / Rhydon / Gyarados with Slaking / Heracross / Alakazam coming up as the main backups and the rest were niche backups for specific bosses on the game.
The initial draft started with Rhydon on the team and I felt these were the four best Pokemon to use. Using Snorlax with Self-destruct was tempting but since it would force to run Protect on everything and didn't wanted to lose Calm Mind on Latios, I decided to leave it behind. Rhydon was ok on the first rounds, although due to its low Speed and x4 weakness to Water & Grass, I felt that it would inevitable hold back the team. At this moment, it was when I decided to swap Rhydon out for Marowak when things changed. Marowak didn't had the x4 weakneeses and while it was still weak to Grass, Water and Ice, Marowak could still survive some attacks which allowed it to retaliate with powerful Earthquakes in return. Ever since I moved into Marowak, I haven't looked back and while Snorlax could've been used on Hariyama's spot, I had a soft spot for Fake Out + Helping Hand which has massively helped the team.
This is my bread and butter Latios that has accompanied me since I ever started on Gen 3. Everyone knows how powerful Latios is and how easily it can shred teams with just a single Calm Mind. What really makes this set so effective in Doubles as well is how crazy good it is with just having Fake Out and Helping Hand support. With Hariyama supporting it on the field, it can easily pull chances where it can set up a Calm Mind but what makes it so good is Helping Hand. At +1 HH boosted attacks are insanely strong and Latios will hardly need to boost ever again. Even with no Calm Minds on its belt, HH already does a lot guaranteeing OHKOs on Pokemon like Venusaur 2, Muk and Nidoqueen while pushing its damage output to insane levels. As if they weren't amazing in most battles, the Lati duo reigns supreme, and they still remain as the best Pokemon in Gen 3. For Doubles, Ice Beam is a better move as it allows Latios to destroy Salamence until kingdom comes and ravage Grass types. The rest of the moves are self-explanatory: Thunderbolt for Water types and Psychic as your main STAB.
28 HP and 12 Def guarantees that +252 Silver Win from Scizor never OHKOs from full health. 220 Speed is for that sweet 173 benchmark in Frontier allowing it to outspeed Sceptile/Dugtrio and the rest in Special Attack for power. 4 SpD just to avoid wasting an EV increase.
Chouji (Hariyama) (M) @ Focus Band
IVs: 30 Def / 19 SpA / 30 SpD
EVs: 30 HP / 188 Atk / 240 SpD / 52 Spe
Ability: Thick Fat
Level: 50
Shiny: Yes
Adamant Nature
- Detect
- Fake Out
- Brick Break
- Helping Hand
------------------------------------------------------------------------------------------------------------------------------------------------------------ I happen to love Hariyama for this. He may not be all that awesome as a standalone Fighting type, but he can learn Fake Out, be bred both Detect and Helping Hand, has tankish HP, and Thick Fat to assist him further. Slap Brick Break on him, and he makes a damn good assistor to my team.
------------------------------------------------------------------------------------------------------------------------------------------------------------
These were Repto's words back in 2005 and I honestly can't imagine myself using a different Pokemon for Doubles ever again because that's how good Hariyama is for this generation. Fake Out not only guarantees that Latios gets a CM boost under its belt but also allows it to 2-v-1 on QC abusers like Rhydon and get them quickly out of my screen. Helping Hand though, is what really makes this Hariyama the MVP of the team. Not only it powers up Latios to insane levels but pretty much does the same for Gyarados and friends. As a supporter Pokemon, Hariyama is excellent. If there is one thing I've learned from Eisenherz's ZapFini team in G7 is that Fake Out is not always the most wise move to start with depending on what the opponent leads. Sometimes you will find yourself on situations where you can gain more from just straight attacking with a Brick Break or boosting Latios for the OHKO on stuff like Starmie or Aerodactyl. You should only click Fake Out only if there's a QC user or the 2nd partner Pokemon is not a threat for Latios to set up a Calm Mind with. Detect protects Hariyama from damage and since Hariyama is usually the mon that gets most of the punishment in Doubles, it's a nice move to spam against opposing Earthquake spammers and stall for some turns while Latios delivers the pain on the field. Detect also helps "lure" the AI and redirect if it's at low HP or activated its Focus Band to stall for valuable turns.
Initially, I RNG abused this Hariyama on my cartridge and planned to use HP Ghost, but after testing and realizing that HP Ghost was only good for the occasional hit on Misdreavus or on a Fighting resist, I decided to go full Repto on the Hariyama and run Detect which has not disappointed at all. 30 HP and 240 SpD EVs guarantees that Hariyama will always survive a +252 Psychic from Alakazam. The strongest Psychic STAB in Frontier and Hariyama doesn't needs its Focus Band to be activated for this shit. 52 Spe EVs allows it to outspeed Walrein and the rest goes into Attack to power up its STAB Brick Break as much as possible and guarantee the 2HKOs on bulky stuff like Snorlax and Umbreon. Thick Fat was chosen because not only it complements Latios very well but the added Ice and Fire resists can come in handy if Hariyama was forced to switch into these attacks. While Repto had Lax Incense in here, I decided to go for Focus Band instead due to Hariyama's vulnerability to Aerial Ace which makes the move never miss. This is pretty much a Gen 3 moment where due to item clause, you can't give Hariyama a Leftovers or anything else more useful.
Dead Mom (Marowak) (F) @ Thick Club
IVs: 30 HP / 30 Def / 15 SpA / 30 SpD / 30 Spe
EVs: 80 HP / 252 Atk / 10 SpD / 168 Spe
Ability: Lightning Rod
Level: 50
Adamant Nature
- Protect
- Earthquake
- Perish Song
- Hidden Power [Rock]
------------------------------------------------------------------------------------------------------------------------------------------------------------ A force to be reckoned with. With a Thick Club, this fella is just lethal. It doesn't even need attack EVs to deliver some really painful Earthquakes. That said, you can prolong this guy's lifespan considerably with plenty of EVs in defense, special defense and HP. For a beneficial nature, go attack (without EVs) or special defense. Moveset depends a little on trait, in that Double-Edge is nice to have so long as you're Rock Head. With Lightning Rod, just stick with your purification moves and perhaps consider Return, once it becomes available.
------------------------------------------------------------------------------------------------------------------------------------------------------------
Marowak is the absolute powerhouse on this team. Thanks to Thick Club and Gen 3 not nerfing spread moves that damages your partner, Marowak was blessed with a full powered STAB on Doubles that makes opponents fall like flies thanks to Thick Club. Armed with Lightning Rod, Marowak can come in on predicted Electric attacks aimed at Gyarados when it's on the field and protects the rest of my team from a Thunder Wave that could pretty much stop any Latios/Gyarados sweep. The best part is that Gen 3 mechanics does not redirects your own Thunderbolt which means that Latios can freely use the move even when Marowak is on the field. Earthquake is basically the move you will click 95% of the time because of how ridiculously strong it is. Thanks to Gen 3 switching mechanics, it's not really surprising for Marowak to grab 2 or 3 KOs on a single turn. Protect avoids powerful attacks like Hydro Pumps or Ice Beams that can easily take Marowak down. Initially, I ran Icy Wind and Rock Slide as after-thoughts because 90% of the time, Marowak's only function was to click Earthquake and grab KOs. However, after the first run with the team, I felt that I could do better with different moves. Actaeon experiments with Doubles have heavily inspired me to use unorthodox moves on some teams and this is how I came up with Perish Song. Mind you, I don't think Icy Wind was a super bad move, but when you consider that Gyarados can boost Speed and Latios is already fast enough, there was hardly any need for Speed control. Perish Song allows Marowak to check Double Team abusers and Curse users. Thanks to this move, I can easily save my team's ass without just relying on Gyarados substituting. Hidden Power Rock was chosen as the coverage move because it is single target, accurate and hits whatever is immune to Marowak's Earthquake. This is probably the least used move on Marowak but it isn't as bad as Rock Slide is, so I will take that.
In order to successfully adapt Repto's Marowak for Frontier purposes, we need to bump a lot of Speed because no team can be successful if you can't be faster than Walrein/Lapras. The rest goes into Attack as the good ol' man ReptoAbysmal recommends while the rest goes into HP for some small extra bulk.
Last but not least, Gyarados has plenty of things that Salamence wishes it could do, most notably, its ability to set up on Water types and not being weak to Ice. Gyarados slotted nicely into this team thanks to its resistance to Fight and Bug which means that Gyarados pretty much laughes on Reversal sweepers like Heracross and Medicham. Thanks to Marowak's Lightning Rod, Gyarados laughs miserably at Electric types attempting to attack him while it gains boosts by itself. Intimidate is a broken ability in Doubles as it completely nerfs physical attackers making its spread moves deal pathetic damage. Because Rock Slide gets nerfed in Doubles, it actually allows Gyarados to beat non-STAB Rock Slide users like Flygon. Substitute is mandatory as it makes Gyarados "haxproof" and allows it to set up on Double Team spammers like Ludicolo, Umbreon or Shuckle who can't break its Sub but become extremely annoying if they gain too many boosts.
The spread is pretty much the same one from my DDW team although this could fairly be much better optimized for Doubles. I guess that if Actaeon has some suggestion for the EV spread, I'm open for it. The Speed EVs allows Gyarados to outspeed neutral 252 Spe Crobat/Jolteon after a +1 while 180 HP EVs gives a perfect Leftovers number. Rest goes into Attack for power. This Gyarados is bulky enough to take Ice Beams from the likes of Vaporeon and Milotic, so don't be afraid of setting up against them if you have the opportunity.
---------------------------------------------------------------------------------------------------------------------------------------------------------------
This is a very fun team to play with specially considering that as submenceisop mentioned while I was streaming it on the Discord, that it felt like two different teams. Marowak and Gyarados are extremely synergetic with each other thanks to Marowak's Lightning Rod protecting it from fatal Electric attacks. On the other hand, Latios and Hariyama get along thanks to Fake Out while Hariyama deals with the Steel and Dark types that Latios can struggle against. Latios is Latios and it will clean entire teams once it grabs a boost. A Pokemon that has really impressed has been Marowak though. Thick Club boosted Earthquakes are no joke and it's common to see Marowak killing switch-ins due to how insanely powerful it is. The best part is that all other members are either immune (Gyarados & Latios) or can avoid damage against it (Hariyama: Detect). Even though it feels like two separate teams, I like how well the combine with each other. ---------------------------------------------------------------------------------------------------------------------------------------------------------------
This is what pretty much threatens the team mostly on top of my head:
Dusclops: Hariyama can't touch it and switching into Gyarados can be too risky as there's always the risk of getting burned. Best way to deal with it is to get the Intimidate as otherwise you can buy turns for Latios to chip it down with HH or CM boosted Psychics. Worth mentioning that if Gyara gets to switch-in clean, it can't break the Sub nor burn/poison you.
Rhydon: Goes without saying. Quick Claw hax and OHKO moves are bad news for this team. Fortunately, Fake Out + Ice Beam is good enough to take him down.
Snorlax: This is a Pokemon I hate to see on the lead because it pretty much forces a Gyarados switch-in to weaken it with Intimidate and Hariyama to Brick Break it. It's a big issue though depending on the partner because if Latios has to stay to KO it, then it will most likely target it or Curse. Best way of dealing with it is to Brick Break immediately as it can become too dangerous with multiple Curse boosts.
Regirock: Due to the lack of special Water or Grass STABs, Regirock can become really annoying for the team since it is only hit by super-effectively by Marowak which targets the higher of its defenses. Intimidate cannot nerf its Explosion either.
Explosion users: Explosion is a bad matchup for this team, specially if I lose a team member because it can easily take down half of the team down. Watch out for Hex Maniacs who can easily pair Muk with a Ghost type like Gengar/Dusclops and trigger Explosion. Forretress is the less dangerous one, but I've seen it use Explosion sometimes if the partner is a resist like a Steel type or Rock type. Exeggutor is more of a random afterthought but it can also Explode, so always make sure you plan accordingly.
Strong Psychic types: Due to the lack of Psychic resists outside Latios, having strong Psychic types as leads makes it obligatory to Fake Out and set up a CM to deal with them. Alakazam is a threat though due to Inner Focus. Marowak is usually bulky enough to tank an Ice Punch and if you bring Gyarados out, it's easy to lure it for the Thunder Punch.
The Lati twins: They are the worse Pokemon to face for the team. Set 1 and Set 2 usually carry moves to hit the whole team super-effectively but they can't touch Gyarados if they are lured enough to Thunderbolt it while Marowak can easily stall for turns with Protect allowing Gyarados set up. Best strategy usually is to Fake them out and then set up a CM. Latios OHKOs any opposing Lati@s set with +1 HH Ice Beam.
Will be posting a new playlist soon about this team.
Loss:
Battle #175 vs Swimmer Joyce:
Joyce's lead combination was dangerous due to Whiscash 4 and Tauros 4 being there. Initially I faked out the Tauros while Latios attacked Whiscash with Psychic. Whiscash gets to Ice Beam Latios to 50% of its health. The next turn, I decided to went for Whiscash's head but it costed me to lose Latios as Tauros Double Edged it to death while Hariyama only managed to bring it down to the red since it survived thanks to Intimidate. Gyarados comes next and I can only blame myself for choking this game and not switching Marowak out. Got overconfident and didn't swapped into Marowak on the moment that the Tauros targeted Gyarados with Thunderbolt. I was too scared of losing Marowak very early but sacking it just to avoid the Thunderbolt would've been enough to avoid the damage and the paralysis eventually. But I didn't. Tauros' Thunderbolt doesn't kills but it brings Gyarados to 40% HP while the only thing that Hariyama manages is to do chip damage to the upcoming Feraligatr. The worst part came that the Thunderbolt did managed to paralyze Gyarados which pretty much ended up costing me the match. The next turns, Gyarados was unable to move and Marowak only achieved to finish off a weakened Tauros only to be brought down by Glalie and Feraligatr. After Gyarados died to Ice Beam after two turns of parahax, Hariyama was brought down to its knees by Feraligatr's Hydro Pump and then Aerial Ace.
Got parahaxxed to death.
Special Thanks & Credits:
Obviously ReptoAbysmal for being the main inspiration for this team! If you guys ever wanted to check out some of his stuff, you can read his old XD/Orre guide on this link and have some fun with it!
I have managed to reach 84 wins in Battle Palace Singles LvL50 with my team. This is a team I have suggested to dgice some time ago but only now I have managed to assemble it and put it into use. I would like to thank him because he provided some solid info for it as well as for Battle Palace in a whole!
First things first I want to address that I am playing in cartridge only and thus when I was theory crafting a team I had set my mind that I wouldn't use sets like Struggle Snorlax or Struggle Registeel since each and every battle would drag for so long.
Hasty Salamence is the Pokemon I chose to make the team around since it has a great offensive-defensive profile. It has great speed and coverage while packing Intimidate and a great typing! Initially I planned to use Dragon Dance but after reading dgice's post I changed my mind and went for Sub which honestly is the best move in Palace!
Milotic was up next because it synergies with Salamence so we'll. She was a safe switch throught my runs able to stall dangerous threats that Salamence was to afraid to 1vs1. Bold is a very convenient Nature and most of the time when Milotic was below 50% she would use Recover.
With two Pokemon decided I was looking for a third one to fill in the holes and Magneton was surprisingly good at this! It has perfect type synergy with Sala/Milotic resisting Dragon/Ice/Rock and Electric/Grass it has Sturdy that makes it HAX proof and he is immune to Toxic that could be a problem with Milotic. Magneton had a very specific role to check dangerous 1HKO users that can spell doom to any team and that was the main reason it was chosen. Sure Pokemon like Walrein-4 pack EQ but some clever (and probably lucky) switching around him and Sala can nail you the win! He also proved to be a great partner to Milotic since he can check annoying Rest Pokemon like Vaporeon/Kingdra and Suicune. I would force this threats to rest and then switch to Magneton.
One thing I have to comment is it's nature. In short Modest is BAD. All to often I had a clean KO on the opponent's weakened Pokemon only to have Magneton using Sub over and over and sometimes even lost to this! I tend to believe that Quiet is probably the best set for what I want Magneton to do, offering good odds to attack and having respectable odds to use defensive moves. This is the set I would probably try to get at some point and run Palace again.
Hidden Power Grass 70 is important to have clean KO's on Whiscash-1 as well as better odds for Whiscash-3. 44 speed outspeds Walrein-3/ Walrein-2 as well as most dangerous Pokemon that pack 1Hit-KO moves. The rest is dumped into HP and Sp.Atk for obvious reasons!
The opponent Lead with Suicune. I switched to Milotic and tried to Toxic it. It was a Rest/CM/Surf/DD set. I tried to come on the turns that it was sleeping with Salamence and try bring it down but it kept waking up at 2-3 turns and I had to go back to Milotic. Once it was +6 it was hard even for Milotic to tank. Tried to go for a sneaky play and Metal Sound it to death but didn't worked out and eventually lost the struggle war after seeing his second Pokemon a Regice with Thunder.
I am pretty satisfied with the team and the streak I managed! None of my tries ended before 42 rooms so I would definitely suggest the team to anyone trying to get Gold Palace symbol. I think with the Quiet Magneton and some.luck on my side I can reach 100 rooms! So I will be looking at this!!
That's all for now!
I haven't posted for a while but I wanted to report a completed Battle Tower Doubles streak using a very peculiar team that one of my best friends: ReptoAbysmal came up with, all the way back in 2005.
To give a little bit of context and explain how this team was born, you should know that I'm one of the regulars on the Battle Tower Discord and I've always enjoyed having my casual talks with friends over there. It happened that while we were discussing some obscure Gen 3 mechanics, the good ol' Repto told us that he actually used to write guides for Gamefaqs back in the day. When I found out that he even made an old XD/Orre Guide for Pokemon XD, I was astonished. The Pokemon Gamecube games are one of my favorite titles of all time. Even though ReptoAbysmal hates Colosseum with the fiery passion of 600 suns burning, I still think these are one of the best games ever made and it struck the inner child inside me. Honestly, I can't believe I never bothered on reading his guide back in the day. The fact that good ol' man ReptoAbysmal was talking about IVs, EVs and Hidden Powers in 2005 shows that he was way ahead of us.
He has an innate ability on writing entertaining guides with his wit and beating the shit out of everything even if it were for a good laugh. Seriously. This is golden stuff that should be preserved. I enjoyed his old guide so much that it inspired me to make this team and this is how the Reptomons were born. So I made a team based on what he used to clear the Orre Colosseum on XD but adapted it to Frontier and see how good the team is to grind out wins.
In order to maintain ReptoAbysmal's honor, I limited myself to only using the Pokemon that he used back in 2005 to clear the Pokemon Colosseum/XD post-game. Of course, any Pokemon that I used would have to be adapted to Frontier since the opponents I was going to face were completely different to what he did on XD/Colo. His main team consisted of Latios / Hariyama / Milotic / Sceptile / Rhydon / Gyarados with Slaking / Heracross / Alakazam coming up as the main backups and the rest were niche backups for specific bosses on the game.
The initial draft started with Rhydon on the team and I felt these were the four best Pokemon to use. Using Snorlax with Self-destruct was tempting but since it would force to run Protect on everything and didn't wanted to lose Calm Mind on Latios, I decided to leave it behind. Rhydon was ok on the first rounds, although due to its low Speed and x4 weakness to Water & Grass, I felt that it would inevitable hold back the team. At this moment, it was when I decided to swap Rhydon out for Marowak when things changed. Marowak didn't had the x4 weakneeses and while it was still weak to Grass, Water and Ice, Marowak could still survive some attacks which allowed it to retaliate with powerful Earthquakes in return. Ever since I moved into Marowak, I haven't looked back and while Snorlax could've been used on Hariyama's spot, I had a soft spot for Fake Out + Helping Hand which has massively helped the team.
This is my bread and butter Latios that has accompanied me since I ever started on Gen 3. Everyone knows how powerful Latios is and how easily it can shred teams with just a single Calm Mind. What really makes this set so effective in Doubles as well is how crazy good it is with just having Fake Out and Helping Hand support. With Hariyama supporting it on the field, it can easily pull chances where it can set up a Calm Mind but what makes it so good is Helping Hand. At +1 HH boosted attacks are insanely strong and Latios will hardly need to boost ever again. Even with no Calm Minds on its belt, HH already does a lot guaranteeing OHKOs on Pokemon like Venusaur 2, Muk and Nidoqueen while pushing its damage output to insane levels. As if they weren't amazing in most battles, the Lati duo reigns supreme, and they still remain as the best Pokemon in Gen 3. For Doubles, Ice Beam is a better move as it allows Latios to destroy Salamence until kingdom comes and ravage Grass types. The rest of the moves are self-explanatory: Thunderbolt for Water types and Psychic as your main STAB.
28 HP and 12 Def guarantees that +252 Silver Win from Scizor never OHKOs from full health. 220 Speed is for that sweet 173 benchmark in Frontier allowing it to outspeed Sceptile/Dugtrio and the rest in Special Attack for power. 4 SpD just to avoid wasting an EV increase.
Chouji (Hariyama) (M) @ Focus Band
IVs: 30 Def / 19 SpA / 30 SpD
EVs: 30 HP / 188 Atk / 240 SpD / 52 Spe
Ability: Thick Fat
Level: 50
Shiny: Yes
Adamant Nature
- Detect
- Fake Out
- Brick Break
- Helping Hand
------------------------------------------------------------------------------------------------------------------------------------------------------------ I happen to love Hariyama for this. He may not be all that awesome as a standalone Fighting type, but he can learn Fake Out, be bred both Detect and Helping Hand, has tankish HP, and Thick Fat to assist him further. Slap Brick Break on him, and he makes a damn good assistor to my team.
------------------------------------------------------------------------------------------------------------------------------------------------------------
These were Repto's words back in 2005 and I honestly can't imagine myself using a different Pokemon for Doubles ever again because that's how good Hariyama is for this generation. Fake Out not only guarantees that Latios gets a CM boost under its belt but also allows it to 2-v-1 on QC abusers like Rhydon and get them quickly out of my screen. Helping Hand though, is what really makes this Hariyama the MVP of the team. Not only it powers up Latios to insane levels but pretty much does the same for Gyarados and friends. As a supporter Pokemon, Hariyama is excellent. If there is one thing I've learned from Eisenherz's ZapFini team in G7 is that Fake Out is not always the most wise move to start with depending on what the opponent leads. Sometimes you will find yourself on situations where you can gain more from just straight attacking with a Brick Break or boosting Latios for the OHKO on stuff like Starmie or Aerodactyl. You should only click Fake Out only if there's a QC user or the 2nd partner Pokemon is not a threat for Latios to set up a Calm Mind with. Detect protects Hariyama from damage and since Hariyama is usually the mon that gets most of the punishment in Doubles, it's a nice move to spam against opposing Earthquake spammers and stall for some turns while Latios delivers the pain on the field.
Initially, I RNG abused this Hariyama on my cartridge and planned to use HP Ghost, but after testing and realizing that HP Ghost was only good for the occasional hit on Misdreavus or on a Fighting resist, I decided to go full Repto on the Hariyama and run Detect which has not disappointed at all. 30 HP and 240 SpD EVs guarantees that Hariyama will always survive a +252 Psychic from Alakazam. The strongest Psychic STAB in Frontier and Hariyama doesn't needs its Focus Band to be activated for this shit. 52 Spe EVs allows it to outspeed Walrein and the rest goes into Attack to power up its STAB Brick Break as much as possible and guarantee the 2HKOs on bulky stuff like Snorlax and Umbreon. Thick Fat was chosen because not only it complements Latios very well but the added Ice and Fire resists can come in handy if Hariyama was forced to switch into these attacks. While Repto had Lax Incense in here, I decided to go for Focus Band instead due to Hariyama's vulnerability to Aerial Ace which makes the move never miss. This is pretty much a Gen 3 moment where due to item clause, you can't give Hariyama a Leftovers or anything else more useful.
Marowak (F) @ Thick Club
IVs: 22 SpA
EVs: 94 HP / 252 Atk / 164 Spe
Ability: Lightning Rod
Level: 50
Shiny: Yes
Adamant Nature
- Protect
- Icy Wind
- Rock Slide
- Earthquake
------------------------------------------------------------------------------------------------------------------------------------------------------------ A force to be reckoned with. With a Thick Club, this fella is just lethal. It doesn't even need attack EVs to deliver some really painful Earthquakes. That said, you can prolong this guy's lifespan considerably with plenty of EVs in defense, special defense and HP. For a beneficial nature, go attack (without EVs) or special defense. Moveset depends a little on trait, in that Double-Edge is nice to have so long as you're Rock Head. With Lightning Rod, just stick with your purification moves and perhaps consider Return, once it becomes available.
------------------------------------------------------------------------------------------------------------------------------------------------------------
Marowak is the absolute powerhouse on this team. Thanks to Thick Club and Gen 3 not nerfing spread moves, if it damages your partner, Marowak was blessed with a full powered STAB on Doubles that makes opponents fall like flies thanks to Thick Club. Thanks to Lightning Rod, Marowak can come in on predicted Electric attacks aimed at Gyarados when it's on the field. Lightning Rod also protects the rest of my team from a Thunder Wave that could pretty much stop any Latios/Gyarados sweep. The best part is that Gen 3 mechanics does not redirects your own Thunderbolt which means that Latios can freely use the move even when Marowak is on the field. Earthquake is basically the move you will click 95% of the time because of how ridiculously strong it is. Thanks to Gen 3 switching mechanics, it's not really surprising for Marowak to grab 2 or 3 KOs on a single turn. Protect avoids powerful attacks like Hydro Pumps or Ice Beams that can easily take Marowak down. The other two moves were more of an after-thought but they were the best I could come up with at the time. Icy Wind justified its niche since it gives the team a bit of Speed control which has come in handy. Rock Slide is probably the less used move on the set. It's just there to hit Shedinja I guess, lol and I dislike the move a lot in Doubles since it had to do with me losing one of my Pike streaks. I think it could be worth to breed or RNG a different Marowak with HP Rock. It's single target and accurate, so it might be worth upgrading on it.
In order to succesfully adapt Repto's Marowak for Frontier purposes, we need to bump a lot of Speed because no team can be successful if you can't be faster than Walrein/Lapras. The rest goes into Attack as the good ol' man ReptoAbysmal recommends while the rest goes into HP for some extra bulk.
Last but not least, Gyarados has plenty of things that Salamence wishes it could do, most notably, its ability to set up on Water types and not being weak to Ice. Gyarados slotted nicely into this team thanks to its resistance to Fight and Bug which means that Gyarados pretty much laughes on Reversal sweepers like Heracross and Medicham. Thanks to Marowak's Lightning Rod, Gyarados laughs miserably at Electric types attempting to attack him while it gains boosts by itself. Intimidate is a broken ability in Doubles as it completely nerfs physical attackers making its spread moves deal pathetic damage. Because Rock Slide gets nerfed in Doubles, it actually allows Gyarados to beat anything that relies on Rock Slide that isn't backed up by STAB from users like Flygon. Substitute is mandatory as it makes Gyarados "haxproof" and allows it to set up on Double Team spammers like Ludicolo, Umbreon or Shuckle who can't break its Sub but become extremely annoying if they gain too many boosts.
The spread is pretty much the same one from my DDW team although this could fairly be much better optimized for Doubles. I guess that if Actaeon has some suggestion for the EV spread, I'm open for it. The Speed EVs allows Gyarados to outspeed neutral 252 Spe Crobat/Jolteon after a +1 while 180 HP EVs gives a perfect Leftovers number. Rest goes into Attack for power.
---------------------------------------------------------------------------------------------------------------------------------------------------------------
This is a very fun team to play with specially considering that as submenceisop mentioned while I was streaming it on the Discord, that it felt like two different teams. Marowak and Gyarados are extremely synergetic with each other thanks to Marowak's Lightning Rod protecting it from fatal Electric attacks. On the other hand, Latios and Hariyama get along thanks to Fake Out while Hariyama deals with the Steel and Dark types that Latios can struggle against. Latios is Latios and it will clean entire teams once it grabs a boost. A Pokemon that has really impressed has been Marowak though. Thick Club boosted Earthquakes are no joke and it's common to see Marowak killing switch-ins due to how insanely powerful it is. The best part is that all other members are either immune (Gyarados & Latios) or can avoid damage against it (Hariyama: Detect). Even though it feels like two separate teams, I like how well the combine with each other. ---------------------------------------------------------------------------------------------------------------------------------------------------------------
This is what pretty much threatens the team mostly on top of my head:
Dusclops: Hariyama can't touch it and switching into Gyarados can be too risky as there's always the risk of getting burned. Best way to deal with it is to get the Intimidate as otherwise you can buy turns for Latios to chip it down with HH or CM boosted Psychics. Worth mentioning that if Gyara gets to switch-in clean, it can't break the Sub nor burn/poison you.
Rhydon: Goes without saying. Quick Claw hax and OHKO moves are bad news for this team. Fortunately, Fake Out + Ice Beam is good enough to take him down.
Regirock: Due to the lack of special Water or Grass STABs, Regirock can become really annoying for the team since it is only hit by super-effectively by Marowak which targets the higher of its defenses. Intimidate cannot nerf its Explosion either.
Muk and Forretress: Explosion is a bad matchup for this team, specially if I lose a team member because it can easily take down half of the team down. Watch out for Hex Maniacs who can easily pair Muk with a Ghost type like Gengar/Dusclops and trigger Explosion. Forretress is the less dangerous one, but I've seen it use Explosion sometimes if the partner is a resist like a Steel type or Rock type.
Strong Psychic types: Due to the lack of Psychic resists outside Latios, having strong Psychic types as leads makes it obligatory to Fake Out and set up a CM to deal with them. Alakazam is a threat though due to Inner Focus. Marowak is usually bulky enough to tank an Ice Punch and if you bring Gyarados out, it's easy to lure it for the Thunder Punch.
The Lati twins: They are the worse Pokemon to face for the team. Set 1 and Set 2 usually carry moves to hit the whole team super-effectively but they can't touch Gyarados if they are lured enough to Thunderbolt it while Marowak can easily stall for turns with Protect allowing Gyarados set up. Best strategy usually is to Fake them out and then set up a CM. Latios OHKOs any opposing Lati@s set with +1 HH Ice Beam.
Will be posting a new playlist soon about this team.
Loss:
Battle #175 vs Swimmer Joyce:
Joyce's lead combination was dangerous due to Whiscash 4 and Tauros 4 being there. Initially I faked out the Tauros while Latios attacked Whiscash with Psychic. Whiscash gets to Ice Beam Latios to 50% of its health. The next turn, I decided to went for Whiscash's head but it costed me to lose Latios as Tauros Double Edged it to death while Hariyama only managed to bring it down to the red since it survived thanks to Intimidate. Gyarados comes next and I can only blame myself for choking this game and not switching Marowak out. Got overconfident and didn't swapped into Marowak on the moment that the Tauros targeted Gyarados with Thunderbolt. I was too scared of losing Marowak very early but sacking it just to avoid the Thunderbolt would've been enough to avoid the damage and the paralysis eventually. But I didn't. Tauros' Thunderbolt doesn't kills but it brings Gyarados to 40% HP while the only thing that Hariyama manages is to do chip damage to the upcoming Feraligatr. The worst part came that the Thunderbolt did managed to paralyze Gyarados which pretty much ended up costing me the match. The next turns, Gyarados was unable to move and Marowak only achieved to finish off a weakened Tauros only to be brought down by Glalie and Feraligatr. After Gyarados died to Ice Beam after two turns of parahax, Hariyama was brought down to its knees by Feraligatr's Hydro Pump and then Aerial Ace.
Got parahaxxed to death.
Special Thanks & Credits:
Obviously ReptoAbysmal for being the main inspiration for this team! If you guys ever wanted to check out some of his stuff, you can read his old XD/Orre guide on this link and have some fun with it!
So I made a few changes on the team and after some testing with submenceisop on the Discord, I was able to upgrade on the Marowak set.
Dead Mom (Marowak) (F) @ Thick Club
IVs: 30 HP / 30 Def / 15 SpA / 30 SpD / 30 Spe
EVs: 80 HP / 252 Atk / 10 SpD / 168 Spe
Ability: Lightning Rod
Level: 50
Adamant Nature
- Protect
- Earthquake
- Perish Song
- Hidden Power [Rock]
As you can see, Marowak is now running Perish Song which is a move that has been heavily inspired by Actaeon and Hidden Power Rock. The reason why is because I felt that the team did not gained a lot from Icy Wind and Speed control was hardly needed with Latios being so fast as it is and Gyarados being able to boost its own Speed. Perish Song has come quite in handy with the team not only because it adds an additional anti-hax check for the team but it also forces out Curse users like Snorlax before they get out of control. Hidden Power Rock is simply a more accurate and better move than Rock Slide. Seriously guys, how do you even consider this move to be good? It sucks in both Singles and Doubles and it is arguably worse than AERO ASS. Due to Gen 3 mechanics, spread damage that doesn't hits your ally is nerfed at 50% and when you consider that Rock Slide only has 75 base power... well that's pretty bad.
I am also posting the updated exportable on this post. Hope you guys enjoy it!


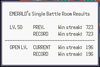


 Quick Claw users can be dangerous, but the worse ones are the users who run Explosion. While Grumpig might be able to Trick them, if they go down with Grumpig, the team loses its main way to set up. I normally use Reflect against them just to survive the T1 Explosion shenanigan.

 Psych Up is pretty annoying and it normally forces the team to set up all over again because it makes me obligated to not build up on the evasion boosts. Fortunately, most Psych Up users are easily stalled up by Zapdos and once it burns their PP, it can set up again. It's a very long process though.
 Normal types with strong attacks are dangerous as it pretty much means Grumpig won't have a 2nd turn to live. Reflect is necessary but it usually means Zapdos will only have a few turns to build up on evasion boosts. Mega Kick Granbull / Ursaring are easily stalled out but Double Edge Ursaring is scary...
 While not as dangerous as Claydol or Steelix, Shiftry can still mess up the team. However, once Grumpig sets up Reflect, Zapdos bosses this motherfucker even if it decides to Explode.
 Sticky Hold prevents Trick, which means that Grumpig cannot lock it into a move. Add Sludge Bomb's 30% chance of poisoning and having access to QC and Explosion, makes Muk the biggest threat to this team. I have no choice but to take him 1-v-1 with Regirock and Earthquake it.
 Avoid tricking against these Pokemon and simply set up against them


 Strong Psychic types: Due to the lack of Psychic resists outside Latios, having strong Psychic types as leads makes it obligatory to Fake Out and set up a CM to deal with them. Alakazam is a threat though due to Inner Focus. Marowak is usually bulky enough to tank an Ice Punch and if you bring Gyarados out, it's easy to lure it for the Thunder Punch.