Gen III Battle Frontier Discussion and Records

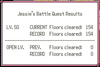
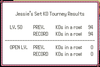
I'm pretty happy to share that I've hit a 154 streak in the Battle Pyramid (lvl 50 on emulator). The streak is ongoing and my team/items are in fine shape - my mind just needs a break for a while. The whole thing was done with the same team. Apart from some miserable rounds with steel types and exploders I never felt a need to bring in new Pokémon.

The listed items are the ones I intended to give them as soon as possible. Got very lucky and was able to get the choice band before fighting Brendan Gold.

:rs/Slaking:
Slaking @ Choice Band (Adamant)
Double-Edge / Shadow Ball / Earthquake / Hyper Beam
EVs: 4 HP/ 252 Atk / 252 Spe [152 Speed]
IVs: Perfect apart from 22 Def

:rs/Latios:
Latios @ Lum Berry (Modest)
Psychic / Ice Beam / Thunderbolt / Calm Mind
EVs: 28 HP / 252 SpA / 228 Spe [158 Speed]
IVs: {29, 21, 15, 31, 23, 29}

:rs/Blissey:
Blissey @ Leftovers (Bold)
Seismic Toss / Toxic / Soft-boiled / Aromatherapy
EVs: 172 HP / 252 Def / 84 Spe [86 Speed]
IVs: 0 Atk, perfect otherwise
Credits: BIG thanks to the Bank of Hoenn for providing this Blissey, and to @Runeblade14's Pike Blissey for the EVs.

The team isn't exactly breaking new ground but I'm ok with that.

The Pyramid might as well have been built from the ground up to make Slaking shine. The vast majority of your battles are 1v1s with Pokémon well within Slaking's OHKO range. Return is reliable, powerful, and has 32 PP. Once you obtain a choice band you only really have to worry about double battles, hax, and mental fatigue.

Latios is my special sweeper. Admittedly he died more than anyone else and Blissey probably got more KOs overall but he counters some of Slaking's worst match-ups (Gyarados, Salamence, Skarmory, bulky waters). Calm mind got no use at all and I'll probably replace it with dragon claw or recover.

I thought I'd use Blissey's aromatherapy more but Lum berries become plentiful early on. Soft-boiled is amazing for dividing a hyper potions 200 healing into smaller chunks. Toxic and seismic toss let her stall out wins in a way that tends to bring my attention back if my mind was wandering.

Overall the team works well together. If I could cram one more team member it'd probably be a Gengar with elec/fire/ice coverage. Immunity to poison and explosions would be incredibly convenient.

I found the best way to traverse each floor was to find long stretches where I could walk in a straight line. When I hit a wall I'd try to turn 90 degrees and keep going. This lets you get a look at new tiles with very few wasted steps, at least at first. After you find a few trainers and items you kind of have to just meander until you find the exit.

The trainer distribution information I dug up isn't as helpful as I thought it'd be but it can still make your life easier. If you spawn in a cage of double battles then once you escape there should be no other trainers. If you see trainers set up for double battles then you're probably near the exit.

The 10 items I kept on hand were: Choice band, lum berry, leftovers, hyper potion, ether, revive, max elixir, max revive, full restore, and sacred ash. I never used the max elixir or sacred ash and only used one full restore. Maybe the fluffy tail would give more utility overall? I'd just rather trudge through wild battles than lose a streak to a doomsday scenario I could have come back from.

A 154 streak would put me 2nd highest on the level 50 record board. I'm happy to give further proof if its requested but honestly I think any of the streaks I've passed could easily surpass me. The Pyramid's just way more likely to bore you into retirement than hax your streak to death.

PS - I want to give a huge shout-out to the Weezing that survived four consecutive hits with Focus Sash rolls and almost forced me to use a sacred ash. It was genuinely the scariest moment of my entire streak and only happened because I'd mentally checked out.
 

Attachments

Hello everyone, as some of you might have noticed, they were a few visual upgrades on the forum and most importantly a very big change I wanted to introduced and explained to you as to why I made this decision.

I decided to separate Level 50 records from Open Level records on all the leaderboards, which means that entries will also be separated by the level you chose to compete. The main reason why I made this change is not only to organize the records much better but will also reflect the differences between Level 50 and Open Level.

For those who are not aware, on Generation 3, your Pokemon's levels are not changed when you enter any facility. Once you pick a format to compete with (Singles, Doubles or Multi if available) you'll have to pick on whether you want to play in Level 50 mode or in Open Level mode. At Level 50, Pokemon like Dragonite and Tyranitar are not allowed to compete and they are not used by any of the AI Trainers. As a matter of fact, you'll only encounter these Pokemon in Open Level. Why this happens? Legally, Dragonite and Tyranitar are only obtainable on Level 55 upon evolving. Because Emerald does not allows any Pokemon above Level 50 to participate on this mode it's impossible, under normal means, to use both of these Pokemon on Level 50.

Because of this, players who play on Open Level have to take into account these two threats which completely changes how you're going to build your team if you want to take them into account. Additionally, when you're playing at Open Level, it opens additional moves to a Pokemon through their level up moveset which otherwise, they would be unavailable to use at Lv.50. There are examples like Articuno's Sheer Cold (learned at Lv.85), Metagross' Agility (learned at Lv. 66) or Raikou's Crunch (learned at Lv.61).

Because both of the trainer movepools change between both modes and they have a massive influence on teambuilding, it would be fair to say that Open Level is a slightly different metagame from Level 50 and therefore, I felt that it was necessary to make the distinction. With the format change on the leaderboards, I feel that they will now reflect much more accurately the quality and teambuilding process that was taken into account on the teams that competed in Open Level and the differences between those that were played at Level 50.

With the new changes implemented, the leaderboards look very different now but I feel they are much more well organized and new players will be able to immediately recognize what mode was chosen to compete on each facility, mostly paying attention to the differences between both modes. Mind you, my intention was not to increase or lower someone else's standing on the leaderboard but I felt that for the sake of organizing all of these records on a much better way, this change was needed. With this distinction, there are more #1 spots to take over from, so I hope it also works as motivation for someone who possibly wants to use their Lv.100 Pokemons they bred since they were 10 years old, or attempt to take over more records if you felt that the previous ladder was too far away.

In case that during the transition, I might have accidentally removed one of your records or they are in the wrong section, please let me know here and send me a link so I can correct it. Wishing everyone the best of luck in your streaks and please let me know if you have more questions! :)
 
Last edited:
The trainer distribution information I dug up isn't as helpful as I thought it'd be but it can still make your life easier. If you spawn in a cage of double battles then once you escape there should be no other trainers. If you see trainers set up for double battles then you're probably near the exit.

The 10 items I kept on hand were: Choice band, lum berry, leftovers, hyper potion, ether, revive, max elixir, max revive, full restore, and sacred ash. I never used the max elixir or sacred ash and only used one full restore. Maybe the fluffy tail would give more utility overall? I'd just rather trudge through wild battles than lose a streak to a doomsday scenario I could have come back from.
Thanks for providing the info on the Pyramid running mechanic and trainer distribution. It's something I've wondered for a long time. I think the worst floor you can spawn in is where there are unavoidable double battles near the entrance/exit.
Fluffy Tails might be a bit better than Max Elixirs to escape from annoying stuff like Forretress/Armaldo since Max Elixirs are very rare and you get enough Ethers for the occasional rounds that you actually need PP restoration.

I decided to separate Level 50 records from Open Level records on all the leaderboards, which means that entries will also be separated by the level you chose to compete. The main reason why I made this change is not only to organize the records much better but will also reflect the differences between Level 50 and Open Level.
My Arena runs were done in Open Level (Level 100). Also, #3 (chickenofdoom) on the Pyramid Open Level list was under my old username so that can be removed/combined.
 

QuentinQuonce

formerly green_typhlosion
Hello everyone, as some of you might have noticed, they were a few visual upgrades on the forum and most importantly a very big change I wanted to introduced and explained to you as to why I made this decision.

I decided to separate Level 50 records from Open Level records on all the leaderboards, which means that entries will also be separated by the level you chose to compete. The main reason why I made this change is not only to organize the records much better but will also reflect the differences between Level 50 and Open Level.

For those who are not aware, on Generation 3, your Pokemon's levels are not changed when you enter any facility. Once you pick a format to compete with (Singles, Doubles or Multi if available) you'll have to pick on whether you want to play in Level 50 mode or in Open Level mode. At Level 50, Pokemon like Dragonite and Tyranitar are not allowed to compete and they are not used by any of the AI Trainers. As a matter of fact, you'll only encounter these Pokemon in Open Level. Why this happens? Legally, Dragonite and Tyranitar are only obtainable on Level 55 upon evolving. Because Emerald does not allows any Pokemon above Level 50 to participate on this mode it's impossible, under normal means, to use both of these Pokemon on Level 50.

Because of this, players who play on Open Level have to take into account these two threats which completely changes how you're going to build your team if you want to take them into account. Additionally, when you're playing at Open Level, it opens additional moves to a Pokemon through their level up moveset which otherwise, they would be unavailable to use at Lv.50. There are examples like Articuno's Sheer Cold (learned at Lv.85), Metagross' Agility (learned at Lv. 66) or Raikou's Crunch (learned at Lv.61).

Because both of the trainer movepools change between both modes and they have a massive influence on teambuilding, it would be fair to say that Open Level is a slightly different metagame from Level 50 and therefore, I felt that it was necessary to make the distinction. With the format change on the leaderboards, I feel that they will now reflect much more accurately the quality and teambuilding process that was taken into account on the teams that competed in Open Level and the differences between those that were played at Level 50.

With the new changes implemented, the leaderboards look very different now but I feel they are much more well organized and new players will be able to immediately recognize what mode was chosen to compete on each facility, mostly paying attention to the differences between both modes. Mind you, my intention was not to increase or lower someone else's standing on the leaderboard but I felt that for the sake of organizing all of these records on a much better way, this change was needed. With this distinction, there are more #1 spots to take over from, so I hope it also works as motivation for someone who possibly wants to use their Lv.100 Pokemons they bred since they were 10 years old, or attempt to take over more records if you felt that the previous ladder was too far away.

In case that during the transition, I might have accidentally removed one of your records, please let me know here and send me a link so I can put it up again. Wishing everyone the best of luck in your streaks and please let me know if you have more questions! :)
Thanks for doing this, good QoL change which will hopefully spur lots of new attempts. I historically only played Open Level as I feel it has more prestige but I'm getting more curious about level 50 so will probably take some runs at that in the future. Looks like I might have to fill that space on Battle Tower Multi level 50... also most pleased to see myself becoming the lead in Pike Open Level!

Just one clarification: my Tower Doubles streak (Dodrio, Marowak, Manectric, Gyarados) was done on Open Level, not level 50.
 
Thanks for providing the info on the Pyramid running mechanic and trainer distribution. It's something I've wondered for a long time. I think the worst floor you can spawn in is where there are unavoidable double battles near the entrance/exit.
Fluffy Tails might be a bit better than Max Elixirs to escape from annoying stuff like Forretress/Armaldo since Max Elixirs are very rare and you get enough Ethers for the occasional rounds that you actually need PP restoration.
Since I have played a lot of Pyramid I can confidently say that it's indeed not worth collecting Max Elixirs since they are pretty rare and you should be fine with Ethers/Leppa Berries. You can also play around your leading Pokemon provided that you have good coverage and reduce the need for PP restoring items even more. For instance in the ghost room first floor spawn Duskull and Haunter which can really be KOed pretty fast with anything and then around the last levels swap to your Ghost counter Pokemon.

I am still not sure how I feel about Fluffy tail though. When I started the run I felt that they would be really helpful so I did collect them wherever I found them. So far I have used maybe 1-2 times and those where mainly because I was too lazy to fight a wild encounter one tile away from the exit! They are also pretty rare I have 5-6 when I have reached 99 Lum Berries and around so in Hyper Potions. The team has pretty good coverage and you can always KO the wild Pokemon, I mean it's a 3vs1 with level advantage most of the time and Revives if something goes wrong. And the fact that I prefer to KO the wild Pokemon to increase the visibility (and potentially save time) makes the whole idea of using an item to just flee counter intuitive.

The idea of a Pyramid Bag Strategy Guide is something that I have in mind and will be doing some time in the future when I feel that I would have enough data from runs!
 

QuentinQuonce

formerly green_typhlosion

Pokemon Adventures: Emerald - GBA

View attachment 323769


Day 1
Battle Factory

View attachment 323768


Time to start my Battle Frontier Challenge! And we're starting with one of the most difficult challenges of all. Having gatecrashed the Frontier's opening ceremony and announced to the world his intention to beat all seven facilities, the Frontier Brains have no option but to allow Emerald to participate. Enraged by Emerald's flippant attitude and perceived lack of knowledge, Factory Head Noland demands that Emerald take on the Battle Factory first.

Analysis
Starting with the Factory is both a blessing and a curse. While I'm duty-bound to pick certain species if they appear, I'm largely free to play as I like. But either way, the Factory is one of the hardest facilities to get the Gold symbol in, and I'm feeling some trepidation. I started early because I knew it would take multiple tries.

To my surprise, it only took 4 attempts to make it to the end. The first attempt got me to 15, the second to 20 (I lost to Noland, who wrecked me with a Scyther), the third to 33, and the fourth successfully to 42.

I opted to swap as much as possible where I could to improve the opening draft faster, though it's impossible to max out your swaps before the second Noland round. I expected the mandatory picks to make this significantly harder (I'm mandated to swap for certain species if they show up). However, because most of the species used are lower-tier mons such as Togetic and Illumise, this became less relevant in the later rounds, and did not impact things materially in earlier rounds since I only ran into a couple of them. Luckily, once I've swapped for them, I'm not obligated to keep them for the entire round and can trade them away after if they're a hindrance.

Writeups of all six rounds are as follows.

I start with an opening draft of Ponyta1, Combusken1, Spoink, Sealeo1, Flaaffy, and Loudred. None of those are species I'm required to take, so I'm free to choose as I like. I go for Combuske, Sealeo, and Spoink and work my way through. This round is pretty easy - the randomised AI neuters threatening foes - so I pretty quickly make it through. Swaps are as follows:

-Spoink for Kadabra
-Sealeo for Omanyte
-The next opponent has Rhyhorn, which is a mandatory swap, so I exchange it for Omanyte
-Kadabra for Elekid
-Rhyhorn for Kabuto
-The final trainer specialises in Water types, so I swap Combusken for Lickitung

The opening draft is Scyther1, Torkoal1, Machoke1, Sealeo1, Banette1, Swellow1. I take Swellow, Banette, and Torkoal.

-Torkoal for Combusken
-As the next opponent specialises in Psychic types, I trade Combusken for Solrock
-Solrock for Metang
-Illumise shows up, which is a mandatory swap, so I trade away Metang
-Illumise for Ninjask
-Banette for Kingler

Round Three
Silver Symbol time. I'm presented with an opening draft of Sandslash2, Ivysaur2, Mightyena2, Graveler2, Weepinbell2, and Magneton2. I'm obligated to take Ivysaur, so I opt for Mightyena first, Ivysaur second, and Graveler third. Surprisingly, it turns out to be one of the most reliable Pokemon I've ever used in the Factory, winning several matches almost single-handledly. I fully intended to keep it for Noland... and then the guide tells me the next opponent is skilled in the Fire type, so I reluctantly swap it. In hindsight I very much wish I'd kept it, but I coped nonetheless.

Swaps:
-Graveler for Gligar
-Gligar for Pidgeot
-Pidgeot for Sandslash
-Sandslash for Arbok
-due to the next opponent specialising in Fire types, I swap Ivysaur for Poliwrath
-Mightyena for Grumpig

This meant that my team for Noland was Grumpig2, Arbok2, and Poliwrath2.


View attachment 323833
Noland (Silver)
I swapped for Grumpig2 just before fighting Noland assuming that its elemental punches would make for a quick and easy match. No such luck... his first Pokemon was Wobbuffet, which Grumpig cannot hope to beat. I opted for Ice Punch desperately hoping for a freeze; while I was able to get three hits in as it Countered on the first turn, it promptly wised up and 2HKO'd with Mirror Coat.

Luckily, Poliwrath was able to patch things up, first Belly Drumming and then Resting back up to full health. And here is where I majorly misplayed. I should have Hypnotised it, but I stupidly assumed why bother - at half health +6 Brick Break should do just enough to KO. It didn't. Wobbuffet survived with a shred of health and Countered. 100% my fault for getting sloppy.

My hopes of surviving this fight are low. I send out Arbok and finish Wobbuffet off. Wigglytuff comes out next. Miraculously, it misses with Sing, allowing me to 2HKO with Sludge Bomb. And then his final Pokemon is Seviper, which dies to Earthquake.

And breathe. I did not remotely deserve that win, but you bet I was glad to get it.

Onto the next half of the challenge...

And we're onto having fully-evolved Pokemon. I'm presented with Vaporeon1, Snorlax1, Muk1, Aggron1, Lanturn1, Exploud1. None of these are much good, but my hopes weren't high. I opt to take Vaporeon, Muk, and Aggron and rapidly start swapping, exchanging Muk for Cradily after the first match.

Then Sceptile shows up. This is one of the mandatory species I have to swap for, but I have no problem with this; it proves to be an excellent lead, until I'm forced to abandon it. Rhydon shows up early and I was hoping to hang onto it, since it's one of those hateful Quick Claw sets I'm always paranoid about facing, but I end up having to ditch that soon after, too.

Swaps:

-Muk for Cradily
-Vaporeon for Sceptile
-Aggron for Rhydon
-Skarmory shows up (another mandatory species) so I swap Rhydon for it
-Due to the next opponent specialising in Flying types, I swap Sceptile for Kingdra
-Skarmory for Salamence

This was the hardest round by far; I never really found a rhythm in this round roster-wise. Sceptile would have been a great lead for the whole round if not for the Flying team - ironically, the hardest foe on that team was Miltank, which I had to stall out of PP with Cradily until it couldn't heal with Milk Drink any more.

The opening draft in this round was a somewhat more promising Kingdra2, Glalie3, Typhlosion2, Umbreon2, Jynx3, and Lapras2. I took Typhlosion, Glalie, and Lapras - not a great combination, in hindsight. The lack of defensive synergy immediately proved to be a problem when the first opponent brought out a fearsome Choice Band Aerodactyl. Lapras only narrowly survived and KO'd in turn with Surf. However, things turned around a few battles in...

Swaps:
-after narrowly surviving Aerodactyl's rampage, Glalie was swapped for Aerodactyl
-Typhlosion for Blaziken
-for the first time in the challenge, no swap; none of the opponent's picks justified it
-no swap again
-no swap again: the upcoming trainer was skilled with normal types. Blaziken smashed through the opposing Porygon2 and Blissey
-no swap again
-the upcoming trainer was skilled with Ground types; swapped Blaziken for Kingdra

Proper test of willpower, that. Blaziken/Aerodactyl/Lapras isn't, on the face of it, the best team, but they worked together well enough to get things done for long enough that it didn't feel right to switch it up. I worried that I'd hobbled myself for the Gold round, but there was nothing to be done.

Round Six
Here we go... the final challenge. Opening draft was Magmar3, Muk4, Blissey4, Golem3, Glalie3, and Lapras3.

A truly terrible opening selection, but somehow I made it through. I go with Glalie, Muk, and Blissey, rapidly swapping Glalie for Kingdra and Muk for Victreebel. Kingdra did the job well enough, but Victreebel3 does not remotely pull its weight so I swap for Cradily3, which is equally terrible.

However, it all turns around when the fourth opponent has the fabled Starmie3 - a SPIT Starmie with max Speed and Special Attack. It even turns out to have Natural Cure! Naturally, I swap Kingdra for it and it proves to be a wonderful lead. I quickly dump Cradily for Ampharos3, thinking that Starmie/Ampharos/Blissey is a pretty decent roster for Noland. However, the penultimate opponent has Blaziken3, so I exchange Ampharos.

FINALLY feeling like I had a good strong team, I prepare to fight for my first Gold symbol.

View attachment 323833
Noland (Gold)

He opens with Miltank and I pause for a second and try to guess if it's 3 or 4. Neither is particularly good news, but even if Blaziken can't KO it can bring it down to KO range for Starmie. Blaziken eats a Shadow Ball and then Endures as Miltank uses Earthquake, smashing it with a full-powered Reversal on the next turn.

Out comes Donphan. Nothing Blaziken can do can KO, so I use Reversal for about ~40%. As it's Donphan3, I worry about the likelihood of a Quick Claw Fissure, but mercifully Starmie gets in first and drops it with Surf. His final Pokemon is Cradily.

Praise be. If it's the abysmal third set, I've won. Cradily eats an Ice Beam, then prepares to use Solarbeam. Oh, thank god. It is! Starmie Ice Beams again, bringing it to ~5%, and dies to Solarbeam. Blissey comes out and finishes the job with an Ice Beam of her own.

________________________________________________​

And that's day 1 done! One down, six to go. Tomorrow, it's onto the next facility, and it couldn't be more different - we're headed to the Battle Pike...

View attachment 323857

____________________________________________​

Pokemon Adventures: Emerald - GBA


1616066980772.png


Day 2
Battle Pike

1616068132616.png


Day two of the Battle Frontier Challenge. Today we come to perhaps the strangest and most beguiling of all seven facilities... the Battle Pike. After his shock win at the Factory Emerald is accosted by an angry Tucker and Brandon, who chase him to the open mouth of a giant Seviper-shaped building. Lucy appears and reveals that Emerald has arrived at her facility, the Battle Pike, and challenges him to enter. Emerald agrees and contacts the person who sent him to the Frontier to request a team designed to take on the challenge...

Analysis
Back to the Battle Pike so soon. Due to the somewhat overpowered team Emerald chooses for himself, I had a feeling this would be the easiest facility, and I was right - it only took one attempt to complete. As it happens, I got far too lucky (rounds 4, 5, 7, and 8 all passed without a single trainer battle, and round 6 with only one) which then evened out in the later rounds...

...which led to me going up against Lucy with a team of frozen Pokemon.

1616074588984.png


The Team

1616068487115.png

Starmie @ Lum Berry (Natural Cure)
Surf
Ice Beam
Thunderbolt
Psychic
252 Sp.Atk/Speed, 6 HP (Modest)

Not even Emerald could resist the allure of a SPIT Starmie. It's so standard it hardly merits a description - quick, strong, heals itself with ease.

1616068590545.png

Rapidash @ White Herb (Run Away)
Overheat
Hidden Power (Grass)
Double Kick
Charm
252 Speed, 140 Att, 118 Sp.Atk (Hasty)

An incredibly unconventional pick. What's the polite way of saying it's garbage? OHKOs nothing, dies to a stiff breeze. Even HP Grass barely 3HKOs most opposing Waters. Charm was included to let Blissey sponge attacks from things like Machamp, but as I only used it once throughout the whole challenge it was mostly a novelty. Mostly served as a meatshield, and it did that job very well.

(Sorry, Rapidash. You've still got one of the best shinies of all time.)

1616068437258.png

Blissey @ Leftovers (Natural Cure)
Softboiled
Aromatherapy
Toxic
Seismic Toss
252 Def/Sp.Def, 6 HP (Bold)

Another top-level pick for the Pike, and weirdly rarely seen in the manga. I never usually run Aromatherapy on Blissey so this was fun.


1616070926728.png

Lucy (Gold)

1616070798384.png

The Gold battle against Lucy began with my entire team frozen. Switched Starmie out for Blissey, and then Blissey for Rapidash. Rapidash promptly died to Sludge Bomb, but not before unfreezing itself with Overheat and doing ~50% to Seviper. Starmie comes back out and finishes Seviper.

Lucy sends out Steelix, which survives Surf and strikes back with Earthquake, bringing Starmie to around ~30%. Steelix's Brightpowder always seems to activate at the worst time, so I was a little worried - but the second Surf hit and sealed the deal.

Then comes Gyarados, which due to being bulked out can survive a Thunderbolt. But even though Starmie was well within KO range from Return, the AI prioritises getting the Speed advantage if it can - even though Gyarados' lack of Speed EVs means it takes two uses of Dragon Dance to get it. Which gives Starmie ample time to 2HKO with Thunderbolt.

1616072885564.png


_________________________________________________________________________​

I'm a little disappointed at how easy this part of the challenge was, to the point where I actually considered shutting my game off at 139 rooms and starting again. But it is what it is. Tomorrow's challenge promises to be far more of a challenge... we're off to the Pyramid.

1616072544677.png
 
Last edited:
Thanks for providing the info on the Pyramid running mechanic and trainer distribution. It's something I've wondered for a long time. I think the worst floor you can spawn in is where there are unavoidable double battles near the entrance/exit.
Fluffy Tails might be a bit better than Max Elixirs to escape from annoying stuff like Forretress/Armaldo since Max Elixirs are very rare and you get enough Ethers for the occasional rounds that you actually need PP restoration.
Good point on the max elixirs, especially since my Slaking's shadow ball and return cover most wild Pokémon.

For the running mechanic I left out the bonus you get for a failed flee attempt, which is 30*(number failed attempts)/256. I kind of had tunnel vision for trying to figure out if 100% chance turn-one flees were possible. The full equation looks like this:

Flee chance = (A/B) * (P/256) + (30*F /256)
A = Your unmodified speed
B = Enemy's unmodified speed
F = Number of failed flee attempts
P {80, 88, 96, 104, 112, 120, 128} depending on your floor's scenario.

You can factor out the 1/256 but writing it like this helps show that the most important factor is the ratio of your speed to your opponents.

I had moderate success having Slaking attack on turn one and attempt to flee on truant turns.

Here's a chart of the actual variables in the source code. Could be useful if you wanted to make use of the trainer hints about remaining trainers/items.
# Items# TrainersTrainer Distribution
38Uniform
37Uniform
36Uniform
35Uniform
45Uniform
44Uniform
24Uniform
73Uniform
63Uniform
53Uniform
23Uniform
36Exit Scatter (?)
35Exit Cluster
45Exit Cluster
24Entrance Cluster
44Entrance Cluster

It also turns out that one of the exit cluster scenarios is probably a sort of exit scatter? The clusters set up double battles but there's a different variable name for the scatter and experience tells me that you'll sometimes get a maze of single battles leading to the exit.
 
Thanks for doing this, good QoL change which will hopefully spur lots of new attempts. I historically only played Open Level as I feel it has more prestige but I'm getting more curious about level 50 so will probably take some runs at that in the future. Looks like I might have to fill that space on Battle Tower Multi level 50... also most pleased to see myself becoming the lead in Pike Open Level!

Just one clarification: my Tower Doubles streak (Dodrio, Marowak, Manectric, Gyarados) was done on Open Level, not level 50.
Updated your streak and hope to see you fill in that Multi Lv.50 spot!
 
Hello everyone, as some of you might have noticed, they were a few visual upgrades on the forum and most importantly a very big change I wanted to introduced and explained to you as to why I made this decision.

I decided to separate Level 50 records from Open Level records on all the leaderboards, which means that entries will also be separated by the level you chose to compete. The main reason why I made this change is not only to organize the records much better but will also reflect the differences between Level 50 and Open Level.

For those who are not aware, on Generation 3, your Pokemon's levels are not changed when you enter any facility. Once you pick a format to compete with (Singles, Doubles or Multi if available) you'll have to pick on whether you want to play in Level 50 mode or in Open Level mode. At Level 50, Pokemon like Dragonite and Tyranitar are not allowed to compete and they are not used by any of the AI Trainers. As a matter of fact, you'll only encounter these Pokemon in Open Level. Why this happens? Legally, Dragonite and Tyranitar are only obtainable on Level 55 upon evolving. Because Emerald does not allows any Pokemon above Level 50 to participate on this mode it's impossible, under normal means, to use both of these Pokemon on Level 50.

Because of this, players who play on Open Level have to take into account these two threats which completely changes how you're going to build your team if you want to take them into account. Additionally, when you're playing at Open Level, it opens additional moves to a Pokemon through their level up moveset which otherwise, they would be unavailable to use at Lv.50. There are examples like Articuno's Sheer Cold (learned at Lv.85), Metagross' Agility (learned at Lv. 66) or Raikou's Crunch (learned at Lv.61).

Because both of the trainer movepools change between both modes and they have a massive influence on teambuilding, it would be fair to say that Open Level is a slightly different metagame from Level 50 and therefore, I felt that it was necessary to make the distinction. With the format change on the leaderboards, I feel that they will now reflect much more accurately the quality and teambuilding process that was taken into account on the teams that competed in Open Level and the differences between those that were played at Level 50.

With the new changes implemented, the leaderboards look very different now but I feel they are much more well organized and new players will be able to immediately recognize what mode was chosen to compete on each facility, mostly paying attention to the differences between both modes. Mind you, my intention was not to increase or lower someone else's standing on the leaderboard but I felt that for the sake of organizing all of these records on a much better way, this change was needed. With this distinction, there are more #1 spots to take over from, so I hope it also works as motivation for someone who possibly wants to use their Lv.100 Pokemons they bred since they were 10 years old, or attempt to take over more records if you felt that the previous ladder was too far away.

In case that during the transition, I might have accidentally removed one of your records or they are in the wrong section, please let me know here and send me a link so I can correct it. Wishing everyone the best of luck in your streaks and please let me know if you have more questions! :)
Charm Fissure Dugtrio feels a little overlooked in the examples :)
 
For all the players who would like to attempt another streak at the Battle Palace, I'd like to share a team that dgice and I improved, utilizing the infamous DIESAL Struggling Snorlax. Here it is!

CIGARETTE (Salamence) (M) @ Choice Band
Ability: Intimidate
EVs: 20 HP / 252 Atk / 236 Spe
Sassy Nature (+SpD, -Spe)
- Aerial Ace
- Earthquake
- Rock Slide
- Flamethrower

DIESAL (Snorlax) (F) @ Leftovers
Ability: Immunity
EVs: 164 HP / 92 Def / 252 SpD
Bashful Nature (neutral)
- Curse
- Amnesia
- Double Team
- Rest

RESERVOIR (Suicune) @ Chesto Berry
Ability: Pressure
EVs: 252 HP / 252 Def / 4 Spe
Calm Nature (+SpD, -Atk)
- Protect
- Substitute
- Dive
- Rest

The idea is to Intimidate right from the start, increasing both Snorlax and Suicune's physical bulk instantly. Snorlax sets up on special attackers, but against the really strong ones such as Espeon and Latios, Salamence sacks itself in order to bring in Snorlax without damage (or straight out beats them).

Suicune performs multiple roles: it can stall physical attackers, beat Rock-types, and swallows a ton of PP against anything in general. It either beats or stalls Metagross to the point where the rest of the team easily wins. Including the OHKO-spammers this team is otherwise weak against. It can also hold its own against a variety of Pokemon if something goes wrong with Snorlax.

But usually, you only have to play the first 5 to 10 turns of this team seriously, and after that you can sit back and win while autofiring the A button and rolling a cigarette, hence the Salamence nickname. Note that Sassy nature makes it survive weak Ice Beams and only get 2HKOed by some decently powerful Psychics. Also, Flametrower OHKOs most Scizor and Forretress and Rock Slide has over 50% chance to OHKO Zapdos if necessary.

Oh yeah, Spenser is free after beating Arcanine with Suicune and stalling Slaking out of Hyper Beam PP before setting up Snorlax. Setting up against Arcanine is also possible (although it takes long to outstall Roar), but then you'll be vulnerable to a crit Hyper Beam, which has almost 2% chance of happening through Double Team and +6 Defense. Slaking gets two shots at doing this, however.

Have fun with this, I personally got over 100 pretty easily but off the record, and lost when the autofire button prevented me from switching into Double-Edge Entei to Intimidate it: entirely my own mistake.
 
Last edited:

QuentinQuonce

formerly green_typhlosion
So I had a quick go at getting a Multi level 50 streak - since I'd done so well with AI partners before I figured it'd be interesting to do it the other way and team up with another real-life player (myself, in this instance).

In sum: it's a total non-starter. Much like a link battle, the whole thing proceeds at a snail's pace; animations are forcibly turned on, making the process even slower. Perhaps it'd go marginally faster if I wasn't operating both games myself but it's still incredibly tedious compared to the pace of other modes.

The most difficult thing of all, and what killed my run, is that it's incredibly hard to keep the connection going for long periods of time. As good as the wireless devices for the GBA are, they're not designed for sustained usage. I play on two old GBAs and it's incredibly easy to knock one of the wireless devices slightly loose if they're not on a flat surface. Even when they are on a flat surface, you still risk the connection being interrupted since it's not that powerful and is most optimal when the two devices are facing one another with nothing in the way. This is precisely what happened to me just before my 21st battle, and I gave up in frustration. Since the game considers that to be exiting without saving the streak was disqualified.

I'm willing to give it another shot but I think this will probably be more easily achieved by someone using an emulator. The most optimal way on the GBA seems to be little and often - doing a few battles at a time

One curiosity I had was about whether this mode could be manipulated at all. Since I have more than five cartridge copies of Emerald (really don't ask why I have so many), I tried swapping partners to see if this had any effect on which opponents you face. Since your streak is counted no matter who you're partnered with, it's possible to have one player with a streak of 49 partner another player with a streak of 0. I wondered if having a "newbie" player join in would affect the opponent rosters - for instance, I wondered if at later streaks you might even see one stronger opponent and one weaker.

In my case, I used my game with the longest Frontier streaks (IGN Joziah) as the "primary" partner, swapping the second player after two rounds. There was no observable difference in the third round (all the enemy rosters in that round were the ones I expected to see) although it's worth pointing out I didn't get far enough to properly test this. My intuition is that the game counts the longer streak for both players - so if player 1 has a streak of 7 and player 2 has a streak of 35, player 2's streak will take precedence. Otherwise you could repeatedly swap partners in order to only face weak opponents and cheese a long streak artificially.

I'll update if/when I manage to get a better run but I'm not expecting any world records.
 
I'd like to post yet another Mono Poison team attempt, since I'm definitely not satisfied with the current Mono Poison (see page 11, 12 and 26). The team is a joke of course, and I don't think it's more dependable than than the Gengar/Weezing/Muk stalling setup. It's way more flexible, that's for sure!

BATTLE TOWER: TEAM "FRAGILE"
The main idea is to Grudge away the most threatening moves to Gengar by using its two pre-evolutions, who share exactly the same typing, and then setup the meanest Gengar set I could think of that doesn't make use of Curse, since I already tried that but it heals too inefficiently even with +6 Evasion.

1616144534375.png

FAIRYFLOSS (Gastly) @ Salac Berry
Ability: Levitate
EVs: 255 Speed
Naive Nature (+Spe, -SpD)
IVs: 0 HP / 0 Def / 0 SpD
- Substitute / Perish Song
- Endure
- Grudge

- Destiny Bond

Gastly leads by scouting against slower, no Quick Claw-holding Pokemon using Substitute, although Perish Song helps against Ninjask for example. For that, use more bulk to survive unboosted Shadow Ball. Against faster opponents that do not have 4 attacks that can hurt my team, it uses Grudge. The four-attack 'mons capable of destroying my team despite two Grudge and a Torment, like Starmie, Gardevoir and Mr. Mime for example, get Destiny Bonded. Endure to outspeed everything after Salac Berry.

Note that Gastly's minimized Defense and Special Defense greatly increases the chance of my opponent not using setup moves. Some funny calcs:

255+ Atk Scizor Steel Wing vs. 0 HP / 0 Def Gastly: 226-267 (251.1 - 296.6%) -- guaranteed OHKO
255+ SpA Espeon Psychic vs. 0 HP / 0- SpD Gastly: 566-666 (628.8 - 740%) -- guaranteed OHKO
255+ Atk Poison Barb Muk Sludge Bomb vs. 0 HP / 0 Def Gastly: 68-80 (75.5 - 88.8%) -- guaranteed 2HKO


1616145989024.png

DANDELION (Haunter) (M) @ [No Item] / Sitrus Berry
Ability: Levitate
EVs: 252 HP / 4 SpD / 252 Spe
Timid Nature (+Spe, -Atk)
- Torment
- Grudge
- Curse

- Thief / Protect

Haunter actually uses its abysmal bulk; it survives a non-boosted Espeon Bite (whose Psychic got Grudged by Gastly) and some weaker attacks so it can Torment + Grudge in relative safety, ensuring Gengar's setup against most Pokemon. If possible, Haunter is kept alive so it can Curse against restlooping (Pressure) opponents later, who otherwise might steal too much of Gengar's PP. Thief is a filler move mainly for Quick Claw opponents, but it can also be put to use for breaking a Substitute, for example, so Curse works after that. On the other hand, Protect can be useful to make sure you Grudge away the right move against stuff like special Ursaring (can't believe that's a threatening Pokemon for once).


1616146258588.png

TRUST (Gengar) (F) @ Leftovers
Ability: Levitate
EVs: 76 HP / 12 Atk / 196 Def / 4 SpD / 220 Spe
Jolly Nature (+Spe, -SpA)
- Substitute
- Double Team
- Will-O-Wisp

- Sludge Bomb

This Gengar sets up like a breeze against most opponents that just lost their two most effective moves, possibly after a Torment. When fully setup, there's no Pokemon in the entire Frontier that can holds his own against this very long without having to replenish HP. Gengar beats one Recover/Rest user with plenty of PP to hurt the next Pokemon as well, but if there are two of them, or if they have Pressure, Haunter might need to help with Curse on free turns.

Will-O-Wisp hits everything but Fire-types, who don't have the bulk to survive repeated Sludge Bombs despite Gengar having really low Attack. Moreover, burned Aerial Aces don't break Gengar's Substitute (the strongest one, Salamence's, has 68.8% chance to break and extra Defense doesn't help; hence the filler Attack EVs). Gengar having lots of Defense also helps against Burned Struggle should I have to setup on that). This set is so much fun to play! Very often, Gengar has to 'spill PP' against opponents. In that case, make sure to deplete WoW and Double Team about equally so you always have enough WoW PP left for the next. Be careful against Synchronize Pokemon: use Sludge Bomb instead of WoW! Also use Sludge Bomb as a finish move instead of allowing a Pokemon to (maybe) break the Sub before they faint to Poison or Burn damage.


Thanks for reading ;)

Edit: the team has reached 35 after a few tries. It has lots of problems, including even Faint Attack Flygon lol. Nevertheless, it's a blast to play. Another good Gengar set might be Substitute / Protect / Curse / Double Team.

 
Last edited:
Well after many years lurking decided to make an account and post.
These are the teams I used to get gold symbols in open level on retail. Most of them are considered "standard" for many facilities, also big thanks to Adedede for his Dans Macabre team.
Teams are in their right order, so what comes first it's what's in the lead. Explanations are rather short or non-existent, but I think most teams are self-explanatory. Can't really dig much into it because did this like months ago and I do not remember much about the whole setup.
To achieve this I used up to 9* mons, that are listed by number of appearances.

3 - Metagross, Salamence, Slaking
2 - Blissey, Starmie, Milotic, Gengar
1 - Wobbuffet, Alakazam

As a retail player I decided to use them as many times as possible, so I kept using the same mons with the same natures and EVs in every facility. Gengar is an exception with 2 EV spreads. Some mons might have some moves changed, so I would just clone them to avoid losing moves learnt by tutoring/breeding too.
The main selling point is that I didn't use legendaries, there is no need for a perfect IV Lati@s or Suicune whatsoever. Sadly Blissey and Gengar are quite mandatory, so access to FRLG is needed. If someone does not want to restart a game or spend quite some time rnging (even tho is recommended) I hope this might be useful.

Pretty standard team, modest starmie probably does it better, but timid was enough. Explosion metagross might seem weird in this facility, but surely will save many runs vs trainers that get you healed after.

Starmie @ Mystic Water
EVs: 4 HP / 252 SpA / 252 Spe
Ability: Natural Cure
Timid Nature
- Psychic
- Surf
- Ice Beam
- Thunderbolt

Metagross @ Choice Band
EVs: 164 HP / 252 Atk / 92 Spe
Ability: Clear Body
Adamant Nature
- Meteor Mash
- Earthquake
- Shadow Ball
- Explosion

Blissey (F) @ Leftovers
EVs: 172 HP / 252 Def / 84 Spe
Ability: Natural Cure
Bold Nature
- Aromatherapy
- Soft-Boiled
- Toxic
- Seismic Toss
Rounds 1-7 this very same order. Round 8 flip it, so DD Salamence is in the lead and use slash items and attacks.
Overall decent team, took me a few attempts because electric types mess up with this team a lot, jolteon and electrode particularly.

Starmie @ Lum Berry/Twisted Spoon
EVs: 6 HP / 252 SpA / 252 Spe
Ability: Natural Cure
Timid Nature
- Psychic
- Surf
- Ice Beam
- Thunderbolt

Metagross @ Leftovers/Persim Berry
EVs: 164 HP / 252 Atk / 92 Spe
Ability: Clear Body
Adamant Nature
- Meteor Mash
- Earthquake
- Shadow Ball
- Explosion

Salamence (M) @ Choice Band/Lum Berry
EVs: 4 HP / 252 Atk / 252 Spe
Ability: Intimidate
Adamant Nature
- Aerial Ace
- Earthquake
- Rock Slide
- Brick Break/Dragon Dance
Again Salamence + Metagross is a decent core. Salamence will more often than expected DD and sweep, at the end of the day it's just luck, but Milotic can potentially outstall and win by it's own. If you want to use Metagross in other facilities start with this one because otherwise you want it to learn Explosion and here that move is a big no-no.

Salamence (M) @ Lum Berry
EVs: 4 HP / 252 Atk / 252 Spe
Ability: Intimidate
Adamant Nature
- Aerial Ace
- Earthquake
- Rock Slide
- Dragon Dance

Metagross @ Leftovers
EVs: 164 HP / 252 Atk / 92 Spe
Ability: Clear Body
Adamant Nature
- Meteor Mash
- Earthquake
- Shadow Ball
- Protect

Milotic (M) @ Pecha Berry
EVs: 252 HP / 252 Def / 4 SpA
Ability: Marvel Scale
Bold Nature
- Surf
- Ice Beam
- Toxic
- Recover
All rounds used Alakazam/Slaking/Blissey team but rounds 6 and 9 dropped Alakazam and went Salamence to avoid Wobbuffet mostly. Otherwise just spam teleport, it's broken.

Alakazam (M)
EVs: 4 HP / 40 Def / 252 SpA / 4 SpD / 208 Spe
Ability: Synchronize
Timid Nature
- Psychic
- Thunder Punch
- Fire Punch
- Teleport

Slaking (F)
EVs: 4 HP / 252 Atk / 252 Spe
Ability: Truant
Adamant Nature
- Return
- Shadow Ball
- Earthquake
- Aerial Ace

Blissey (F)
EVs: 172 HP / 252 Def / 84 Spe
Ability: Natural Cure
Bold Nature
- Aromatherapy
- Soft-Boiled
- Toxic
- Seismic Toss

Salamence (M)
EVs: 4 HP / 252 Atk / 252 Spe
Ability: Intimidate
Adamant Nature
- Aerial Ace
- Earthquake
- Rock Slide
- Dragon Dance
Not much to say. If gengar can kill the lead you just Destiny Bond the second and gg. Otherwise Slaking + Milotic deal with everything.

Gengar (M) @ Lum Berry
EVs: 40 HP / 252 SpA / 216 Spe
Ability: Levitate
Timid Nature
- Thunderbolt
- Ice Punch
- Fire Punch
- Destiny Bond

Slaking (F) @ Choice Band
EVs: 4 HP / 252 Atk / 252 Spe
Ability: Truant
Adamant Nature
- Double-Edge
- Shadow Ball
- Earthquake
- Aerial Ace

Milotic (M) @ Leftovers
EVs: 252 HP / 252 Def / 4 SpA
Ability: Marvel Scale
Bold Nature
- Surf
- Ice Beam
- Toxic
- Recover
Back in the day got this one in a past save with the Dome team. The idea was simple, kill the first with gengar, DB the second and let the third face Slaking/Milotic combo. Took me several attempts because as many teams, it was really weak to fast electric types and evasion spam and what not. Adedede 's Dans Macabre team is just better, and more consistent. Also it does not involve trick/boosting strats that other long streaks teams rely on that would take hours on retail. It's slower than the average team, but pays out.

Slaking (F) @ Choice Band
EVs: 4 HP / 252 Atk / 252 Spe
Ability: Truant
Adamant Nature
- Double-Edge
- Shadow Ball
- Earthquake
- Hyper Beam

Gengar (F) @ Lum Berry
EVs: 252 HP / 40 Def / 216 Spe
Ability: Levitate
Timid Nature
- Mean Look
- Perish Song
- Protect
- Destiny Bond

Wobbuffet (M) @ Leftovers
EVs: 252 HP / 136 Def / 120 SpD
Ability: Shadow Tag
Bold Nature
- Encore
- Counter
- Mirror Coat
- Destiny Bond

* You can dump Alakazam, it makes pyramid faster, but it is by no means necessary.
 

Attachments

QuentinQuonce

formerly green_typhlosion
Pokemon Adventures: Emerald - GBA


View attachment 323976

Day 2
Battle Pike

View attachment 323977


Day two of the Battle Frontier Challenge. Today we come to perhaps the strangest and most beguiling of all seven facilities... the Battle Pike. After his shock win at the Factory Emerald is accosted by an angry Tucker and Brandon, who chase him to the open mouth of a giant Seviper-shaped building. Lucy appears and reveals that Emerald has arrived at her facility, the Battle Pike, and challenges him to enter. Emerald agrees and contacts the person who sent him to the Frontier to request a team designed to take on the challenge...

Analysis
Back to the Battle Pike so soon. Due to the somewhat overpowered team Emerald chooses for himself, I had a feeling this would be the easiest facility, and I was right - it only took one attempt to complete. As it happens, I got far too lucky (rounds 4, 5, 7, and 8 all passed without a single trainer battle, and round 6 with only one) which then evened out in the later rounds...

...which led to me going up against Lucy with a team of frozen Pokemon.


The Team

View attachment 323979
Starmie @ Lum Berry (Natural Cure)
Surf
Ice Beam
Thunderbolt
Psychic
252 Sp.Atk/Speed, 6 HP (Modest)

Not even Emerald could resist the allure of a SPIT Starmie. It's so standard it hardly merits a description - quick, strong, heals itself with ease.

View attachment 323980
Rapidash @ White Herb (Run Away)
Overheat
Hidden Power (Grass)
Double Kick
Charm
252 Speed, 140 Att, 118 Sp.Atk (Hasty)

An incredibly unconventional pick. What's the polite way of saying it's garbage? OHKOs nothing, dies to a stiff breeze. Even HP Grass barely 3HKOs most opposing Waters. Charm was included to let Blissey sponge attacks from things like Machamp, but as I only used it once throughout the whole challenge it was mostly a novelty. Mostly served as a meatshield, and it did that job very well.

(Sorry, Rapidash. You've still got one of the best shinies of all time.)

View attachment 323978
Blissey @ Leftovers (Natural Cure)
Softboiled
Aromatherapy
Toxic
Seismic Toss
252 Def/Sp.Def, 6 HP (Bold)

Another top-level pick for the Pike, and weirdly rarely seen in the manga. I never usually run Aromatherapy on Blissey so this was fun.


The Gold battle against Lucy began with my entire team frozen. Switched Starmie out for Blissey, and then Blissey for Rapidash. Rapidash promptly died to Sludge Bomb, but not before unfreezing itself with Overheat and doing ~50% to Seviper. Starmie comes back out and finishes Seviper.

Lucy sends out Steelix, which survives Surf and strikes back with Earthquake, bringing Starmie to around ~30%. Steelix's Brightpowder always seems to activate at the worst time, so I was a little worried - but the second Surf hit and sealed the deal.

Then comes Gyarados, which due to being bulked out can survive a Thunderbolt. But even though Starmie was well within KO range from Return, the AI prioritises getting the Speed advantage if it can - even though Gyarados' lack of Speed EVs means it takes two uses of Dragon Dance to get it. Which gives Starmie ample time to 2HKO with Thunderbolt.

View attachment 323997

_________________________________________________________________________​

I'm a little disappointed at how easy this part of the challenge was, to the point where I actually considered shutting my game off at 139 rooms and starting again. But it is what it is. Tomorrow's challenge promises to be far more of a challenge... we're off to the Pyramid.


Pokemon Adventures: Emerald - GBA


1616193371050.png


Day 3
Battle Pyramid


1616193458616.png


Day three of my Frontier challenge. Today, it's the Pyramid. Having only just finished his Pike challenge, Emerald is challenged by Brandon to start his Pyramid challenge immediately. Emerald swiftly chooses a team suited to take on this mysterious new facility, but Brandon reveals the ultimate challenge: his team of legendary titans...

Well, it's 00.38am GMT and I've only just finished my writeup from yesterday. This one took its time - I started at 8am GMT and only finished at 23.10pm. It's lucky I specifically set today aside for this because I knew it wouldn't be a quick job. Five attempts in total: the first two ending before 21 floors, the third at 41, and the fourth at 37. In the manga Brandon suggests to Emerald that he start the day before, since it will take him so long to complete the challenge that he'll need a head start. I sorely wish I'd taken his advice and done the same.

Analysis
This was, to put it mildly, bloody difficult. It's curious that this was chosen as the third facility in the manga because it's generally agreed by fans that the Pyramid is harder by far than the Palace or the Dome.

Unlike in the Pike, none of the picks Emerald makes here are quality mons in-game. And I struggled to get the best out of them. None of my first four runs were ended by misplays: I just simply did not have the resources to support my team. Alakazam can't sweep everything itself. Shedinja is a god against something that can't touch it, but useless against anything that can. So you need items - and lots of them - to give yourself that safety net. This is what differentiated my final run from the others. The key to a successful run was, bluntly, grinding: grinding for the maximal amount of items possible. And while I didn't obtain the 99 Revives Emerald does, I did pretty darn well. I managed to collect four (4!) Sacred Ashes on my winning run.

Credit where it's due: I would not have made it through without the host of resources available, not least Smogon's listing of wild Pyramid encounters, and Golden Blissey's useful post about floor layouts as well as Huff_J7's recent comments.

I'll detail my team, then briefly write up my winning run including my faceoffs against Brandon.


The Team

1616193680088.png

Alakazam
Teleport
Ice Punch
Fire Punch
Psychic
252 Sp.Atk, 180 Speed, 78 HP (Modest)

My lead 99% of the time. Teleport looks so gimmicky but is the crucial move without which the run could not have succeeded. As Huff_J7 detailed a few posts back, having high speed in the Pyramid isn’t a guarantee of escape. There are too many wild Pokemon Alakazam cannot reliably beat so escaping is the way to go. Even for some, it's just not worth fighting and getting worn down. For instance, Xatu in round 9 can be 2HKO'd with Ice Punch, but you run the risk of taking a Shadow Ball or a Confuse Ray in the process; better just to flee. It’s annoying to not be able to run all three punches but Ice/Fire/Psychic gives the best overall coverage.

Shedinja
Silver Wind
Shadow Ball
Aerial Ace
Swords Dance
252 Att/Speed (Adamant)

The ultimate high risk, high return mon. Part of me was dreading using this. But it's more usable than it looks on paper; so much of the game cannot touch it (including more than half of the wild encounters), particularly in the early rounds, that it's an auto-win if you know which enemy set you're facing. It’s beneficial to get it paralysed, since it prevents errant poison/burn from killing it off, and if the opponent can’t hurt it it doesn’t matter how many full paralysis turns it takes to bring it down.

Phanpy
Earthquake
Ancientpower
Secret Power
Hidden Power (Flying)
252 HP/Atk, 6 SpDef (Adamant)

On paper the weakest member of the squad but in practice often a crucial pivot. Max HP means most attacks fail to one-shot which can open up all sorts of possibilities. I’ve brought Phanpy for early rounds in past runs and it does genuinely pull its weight, especially in the paralysis round where none of the wild Electric types can touch it. All of its moves were specifically chosen because they do not make contact in order to avoid triggering abilities like Static and Effect Spore.

This roster was used during rounds 1-2 and 4-9. For the rounds where Brandon was encountered, I had another lineup, detailed below.

Brandon Team

1616198897590.png

Sceptile
Leaf Blade
Substitute
Leech Seed
Detect
252 HP/Def/ 6 Speed (Hasty)

A wickedly good SubSeeder. Stalls out everything with ease.

1616198863279.png

Hitmonchan
Sky Uppercut
Earthquake
Detect
Mach Punch
28 HP, 252 Att, 4 Def/SpD, 220 Speed (Adamant)

I've always thought of Hitmonchan as being completely inferior to his two more offensive cousins. Turns out I was completely wrong; it definitely pulled its weight and then some.

1616198851269.png

Cubone
Earthquake
Double-edge
Protect
Swords Dance
186 HP, 252 Att, 72 Speed (Lonely)

The cutest and most underused member of the squad by far. It's EV'd to be faster than Brandon's Regis, but this ended up being totally redundant since Hitmonchan proved more than capable of taking all three down. In both round 3 and 10, I barely used this in the Pyramid proper; Hitmonchan and Sceptile did the job too capably for it to be needed.

The paralysis round. I decided to stay on the first floor for a while, and swapped Phanpy into the lead position once I had ensured all the trainers were dealt with. Of note is that on the first floor, you will only encounter the first four Pokemon in the pool of wild encounters (refer to the linked list for full details). Plusle cannot touch Phanpy at all, while Minun, Pikachu, and Electabuzz can only deal chip damage. This I exploited to its fullest extent, checking my team after every battle to see if Phanpy had collected an item.

I subsequently rushed as quickly as possible through the other floors until I found the exit on the seventh floor. However, again I opted to stick around. Why, you ask? Well, all of the wild Pokemon in the first round have one thing in common: they cannot damage Shedinja*. Thus, I saved it for the final floor, running back and forth around the exit tile and grinding encounters to abuse Phanpy's Pickup as capably as I could. By the time all my squad's PP was exhausted and I was ready to leave, I had more than 12 Hyper Potions as well as 2 Sacred Ashes.

*since Breloom is capable of poisoning Shedinja via Effect Spore, I made sure to get it paralysed early on.

The poison round. Alakazam can deal with all the wild encounters here barring Ludicolo, which I always fled from with Teleport. I repeated my Pickup abuse strategy on the seventh floor until it was out of PP. Picked up two Choice Bands - thanks, game, but I really only need one.

The burn round. Used my Brandon team for this round (even though, having beaten his Silver team earlier, I didn't face him at the end. Hitmonchan destroys most of the wild Fire-types with Earthquake - the only problematic encounter is Weezing, which I managed to flee from without too much collateral damage. Picked up three Max Revives. Feeling confident!

The PP-draining round. I've always disliked this one. Alakazam can only reliably beat Banette, Shedinja, and Gengar, so copious usage of Teleport ensued. Since the opponent rosters start to become much stronger around here, I took more care to avoid NPCs from here on out.

The Levitate round. Wild spawns are a total mixed bag - Alakazam can deal with Flygon and Gengar with ease, but Chimecho is too tricky to handle. The run almost ended when I blundered into a double battle against Ninetales and Flareon. Had Shedinja not already been fainted from an earlier battle, I would have certainly lost - Flareon took Alakazam down with a Quick Claw'd Shadow Ball, but Ninetales' Flamethrower fell short of a KO on Phanpy, who wiped them both out with Earthquake.

The trapping round. Finally an easy one in terms of wild encounters - Alakazam can beat Trapinch, Diglett, and Dugtrio with ease, and Wynaut (generally a 2HKO) rarely uses Mirror Coat thanks to the garbage AI. Teleport not allowing escape from Shadow Tag is a crock of shit, though. I'd accrued a few Fluffy Tails earlier and deliberately kept them for Wobbuffet. On the first few floors I found the most optimal strategy to be to grind a handful of wild encounters with Shedinja to open up a larger visible area which I could then use to avoid the trainers.

Found another Choice Band. Really not needed, but whatever.

The Ice round. Probably the easiest overall, since all but two of the wild encounters cannot do anything to Shedinja. This allowed me to open up a wide field of visibility very quickly. I only fought three trainers this round - the last had an Ursaring, which was initially concerning, but it was the third set. Crunch barely 3HKOs Alakazam.

The Explosion round. It's so goddamn satisfying to see wild Pokemon explode on Shedinja. Came so close to ending my streak on the seventh floor, though - mere inches away from the exit tile, was ambushed by a Hex Maniac with the wicked Houndoom4. With Overheat an easy KO on Phanpy, I couldn't switch it in. All I could do was heal while it KO'd all my team members over and over, finally weakening itself with Overheat a second time so that Phanpy could KO. Luckily, my item stores were healthy enough to weather the hit - though it still pains me to use up 5 Revives in one battle.

The Psychic round. The wild spawns are very much a mixed bag. I lost the Shell Bell I'd picked up earlier to a Trick Alakazam, but picked up a Brightpowder not long afterwards to give those Pokemon that don't want to wear a Choice Band another option. An unlucky double battle against Fearow and Shiftry seems like it might spell the end of the run, but luckily Alakazam saw off Fearow with a critical Ice Punch while Shiftry stupidly elected to use Solarbeam, giving me an extra turn to finish it off.

The Rock round. And the final challenge. Luckily, Hitmonchan equipped with a Choice Band is enough to destroy every single wild Rock-type I meet. Determined to make it, I grind wild encounters at the start of each floor to avoid trainers, and I only get sighted by one - a Triathlete with a Jynx which mercifully turns out to have no offensive moves. And we make it to Brandon with a rather impressive haul, including another sodding Choice Band:

1616198682103.png
1616198587342.png
1616198654459.png

1616199402497.png

Brandon (Silver)

Because I got past 21 floors and then broke my streak, I didn't fight Brandon on my winning run, but I'm including the warstory anyway. In the run where I fought Brandon, I didn't manage to obtain a Choice Band. Sceptile stalled out Regirock with alternating Detects and Substitutes while it exhausted all its Ancientpower PP, then began using Superpower. Eventually it got a Quick Claw Superpower, leaving me too weak to make a Substitute. It blew up on the next turn as I used Detect.

Regice came out and predictably Ice Beamed as I managed to get off a Leech Seed. I sent out Hitmonchan. I'd picked up three X Attacks earlier on so promptly got one off and cheesed through both his remaining team members. Shame not to use Cubone, but that's that.

1616199413827.png

Brandon (Gold)

I healed my team to the max and went in.

Sceptile led off against his Articuno. I open with Detect then throw up a Substitute while its Blizzard misses, giving me an opening to use Leech Seed. I proceed to stall out Articuno until it drops. Oddly, once it runs out of Blizzard PP, it elects to use Water Pulse and Reflect rather than Aerial Ace. Still, wouldn't have made a difference anyway.

I Leech Seed Zapdos who Drill Pecks my Substitute away, before whittling it down in a similar fashion. It breaks my Sub on its last turn before fainting. This leaves me naked against Moltres, but not to worry. This is part of the plan, and I can sacrifice Sceptile with impunity. I Leech Seed and it uses Aerial Ace, finishing Sceptile off.

Luckily, Brandon invests no EVs into his bird trio’s offenses (all three are Mild with maxed Defence and Speed with the remainder in HP) so neither Zapdos’ Drill Peck or Moltres’ Aerial Ace or Hyper Beam come close to OHKO’ing Cubone. The only issue is that Fire Blast has a chance to OHKO on a high damage roll. Liberal Protect usage is the only way to proceed here, but I also gave Cubone the Brightpowder to hold before the battle, and as I'd hoped, the un-Protected Fire Blasts both miss. Once Fire Blast’s PP is extinguished, Cubone is free to Double-Edge the fiery bird into oblivion as it pitifully uses Safeguard in an attempt to stave off its doom.

And I've won!

1616200305152.png


________________________________


While I'm hoping the next challenge will be easier, tomorrow will be the Arena - a facility I've always found very tough indeed. Let's hope for good results!

1616200601091.png
 
Last edited:
Happy to report an ongoing streak of 273 wins in the Emerald Battle Tower - Open Level with the same team I had for my previous streak of 174. I had time in the previous couple weeks to get my streak going again and have extended it by nearly 100.

The full team can be seen here: Latias, Suicune, Steelix. I've made one change since my last post that has resulted in WAY less close calls and tense battles. I opted to replace Mud-Slap on Latias for Rain Dance to counter lead Tyranitar that was giving me trouble, and I'll never look back. After a Rain Dance turn 1, I can set up on every Tyranitar with ease, and the loss of Mud-Slap hasn't led to any close calls yet so far, though it has resulted in having to use quite a few more turns to get Suicune at +6 SpA/SpD at full health behind a Sub prior to sweeping.

Really love Kommo's idea to split up the level 50 and Open Level leaderboards, as the addition of Tyranitar and Dragonite truly makes for a unique metagame.

Hopefully my next post will see me having broached the 300-win mark with my squad! I'm currently preparing and raising a team utilizing Shedinja for the Battle Palace, since I think that format really lends to Shedinja's strengths - it draws switches from things that can't hit it, which allows me to use up a moveslot somewhere else on the team that would have been for phazing.
 

QuentinQuonce

formerly green_typhlosion
Pokemon Adventures: Emerald - GBA


View attachment 324361

Day 3
Battle Pyramid


View attachment 324362

Day three of my Frontier challenge. Today, it's the Pyramid. Having only just finished his Pike challenge, Emerald is challenged by Brandon to start his Pyramid challenge immediately. Emerald swiftly chooses a team suited to take on this mysterious new facility, but Brandon reveals the ultimate challenge: his team of legendary titans...

Well, it's 00.38am GMT and I've only just finished my writeup from yesterday. This one took its time - I started at 8am GMT and only finished at 23.10pm. It's lucky I specifically set today aside for this because I knew it wouldn't be a quick job. Five attempts in total: the first two ending before 21 floors, the third at 41, and the fourth at 37. In the manga Brandon suggests to Emerald that he start the day before, since it will take him so long to complete the challenge that he'll need a head start. I sorely wish I'd taken his advice and done the same.

Analysis
This was, to put it mildly, bloody difficult. It's curious that this was chosen as the third facility in the manga because it's generally agreed by fans that the Pyramid is harder by far than the Palace or the Dome.

Unlike in the Pike, none of the picks Emerald makes here are quality mons in-game. And I struggled to get the best out of them. None of my first four runs were ended by misplays: I just simply did not have the resources to support my team. Alakazam can't sweep everything itself. Shedinja is a god against something that can't touch it, but useless against anything that can. So you need items - and lots of them - to give yourself that safety net. This is what differentiated my final run from the others. The key to a successful run was, bluntly, grinding: grinding for the maximal amount of items possible. And while I didn't obtain the 99 Revives Emerald does, I did pretty darn well. I managed to collect four (4!) Sacred Ashes on my winning run.

Credit where it's due: I would not have made it through without the host of resources available, not least Smogon's listing of wild Pyramid encounters, and Golden Blissey's useful post about floor layouts as well as Huff_J7's recent comments.

I'll detail my team, then briefly write up my winning run including my faceoffs against Brandon.


The Team


Alakazam
Teleport
Ice Punch
Fire Punch
Psychic
252 Sp.Atk, 180 Speed, 78 HP (Modest)

My lead 99% of the time. Teleport looks so gimmicky but is the crucial move without which the run could not have succeeded. As Huff_J7 detailed a few posts back, having high speed in the Pyramid isn’t a guarantee of escape. There are too many wild Pokemon Alakazam cannot reliably beat so escaping is the way to go. Even for some, it's just not worth fighting and getting worn down. For instance, Xatu in round 9 can be 2HKO'd with Ice Punch, but you run the risk of taking a Shadow Ball or a Confuse Ray in the process; better just to flee. It’s annoying to not be able to run all three punches but Ice/Fire/Psychic gives the best overall coverage.

Shedinja
Silver Wind
Shadow Ball
Aerial Ace
Swords Dance
252 Att/Speed (Adamant)

The ultimate high risk, high return mon. Part of me was dreading using this. But it's more usable than it looks on paper; so much of the game cannot touch it (including more than half of the wild encounters), particularly in the early rounds, that it's an auto-win if you know which enemy set you're facing. It’s beneficial to get it paralysed, since it prevents errant poison/burn from killing it off, and if the opponent can’t hurt it it doesn’t matter how many full paralysis turns it takes to bring it down.

Phanpy
Earthquake
Ancientpower
Secret Power
Hidden Power (Flying)
252 HP/Atk, 6 SpDef (Adamant)

On paper the weakest member of the squad but in practice often a crucial pivot. Max HP means most attacks fail to one-shot which can open up all sorts of possibilities. I’ve brought Phanpy for early rounds in past runs and it does genuinely pull its weight, especially in the paralysis round where none of the wild Electric types can touch it. All of its moves were specifically chosen because they do not make contact in order to avoid triggering abilities like Static and Effect Spore.

This roster was used during rounds 1-2 and 4-9. For the rounds where Brandon was encountered, I had another lineup, detailed below.

Brandon Team

View attachment 324385
Sceptile
Leaf Blade
Substitute
Leech Seed
Detect
252 HP/Def/ 6 Speed (Hasty)

A wickedly good SubSeeder. Stalls out everything with ease.

View attachment 324384
Hitmonchan
Sky Uppercut
Earthquake
Detect
Mach Punch
28 HP, 252 Att, 4 Def/SpD, 220 Speed (Adamant)

I've always thought of Hitmonchan as being completely inferior to his two more offensive cousins. Turns out I was completely wrong; it definitely pulled its weight and then some.

View attachment 324383
Cubone
Earthquake
Double-edge
Protect
Swords Dance
186 HP, 252 Att, 72 Speed (Lonely)

The cutest and most underused member of the squad by far. It's EV'd to be faster than Brandon's Regis, but this ended up being totally redundant since Hitmonchan proved more than capable of taking all three down. In both round 3 and 10, I barely used this in the Pyramid proper; Hitmonchan and Sceptile did the job too capably for it to be needed.

The paralysis round. I decided to stay on the first floor for a while, and swapped Phanpy into the lead position once I had ensured all the trainers were dealt with. Of note is that on the first floor, you will only encounter the first four Pokemon in the pool of wild encounters (refer to the linked list for full details). Plusle cannot touch Phanpy at all, while Minun, Pikachu, and Electabuzz can only deal chip damage. This I exploited to its fullest extent, checking my team after every battle to see if Phanpy had collected an item.

I subsequently rushed as quickly as possible through the other floors until I found the exit on the seventh floor. However, again I opted to stick around. Why, you ask? Well, all of the wild Pokemon in the first round have one thing in common: they cannot damage Shedinja*. Thus, I saved it for the final floor, running back and forth around the exit tile and grinding encounters to abuse Phanpy's Pickup as capably as I could. By the time all my squad's PP was exhausted and I was ready to leave, I had more than 12 Hyper Potions as well as 2 Sacred Ashes.

*since Breloom is capable of poisoning Shedinja via Effect Spore, I made sure to get it paralysed early on.

The poison round. Alakazam can deal with all the wild encounters here barring Ludicolo, which I always fled from with Teleport. I repeated my Pickup abuse strategy on the seventh floor until it was out of PP. Picked up two Choice Bands - thanks, game, but I really only need one.

The burn round. Used my Brandon team for this round (even though, having beaten his Silver team earlier, I didn't face him at the end. Hitmonchan destroys most of the wild Fire-types with Earthquake - the only problematic encounter is Weezing, which I managed to flee from without too much collateral damage. Picked up three Max Revives. Feeling confident!

The PP-draining round. I've always disliked this one. Alakazam can only reliably beat Banette, Shedinja, and Gengar, so copious usage of Teleport ensued. Since the opponent rosters start to become much stronger around here, I took more care to avoid NPCs from here on out.

The Levitate round. Wild spawns are a total mixed bag - Alakazam can deal with Flygon and Gengar with ease, but Chimecho is too tricky to handle. The run almost ended when I blundered into a double battle against Ninetales and Flareon. Had Shedinja not already been fainted from an earlier battle, I would have certainly lost - Flareon took Alakazam down with a Quick Claw'd Shadow Ball, but Ninetales' Flamethrower fell short of a KO on Phanpy, who wiped them both out with Earthquake.

The trapping round. Finally an easy one in terms of wild encounters - Alakazam can beat Trapinch, Diglett, and Dugtrio with ease, and Wynaut (generally a 2HKO) rarely uses Mirror Coat thanks to the garbage AI. Teleport not allowing escape from Shadow Tag is a crock of shit, though. I'd accrued a few Fluffy Tails earlier and deliberately kept them for Wobbuffet. On the first few floors I found the most optimal strategy to be to grind a handful of wild encounters with Shedinja to open up a larger visible area which I could then use to avoid the trainers.

Found another Choice Band. Really not needed, but whatever.

The Ice round. Probably the easiest overall, since all but two of the wild encounters cannot do anything to Shedinja. This allowed me to open up a wide field of visibility very quickly. I only fought three trainers this round - the last had an Ursaring, which was initially concerning, but it was the third set. Crunch barely 3HKOs Alakazam.

The Explosion round. It's so goddamn satisfying to see wild Pokemon explode on Shedinja. Came so close to ending my streak on the seventh floor, though - mere inches away from the exit tile, was ambushed by a Hex Maniac with the wicked Houndoom4. With Overheat an easy KO on Phanpy, I couldn't switch it in. All I could do was heal while it KO'd all my team members over and over, finally weakening itself with Overheat a second time so that Phanpy could KO. Luckily, my item stores were healthy enough to weather the hit - though it still pains me to use up 5 Revives in one battle.

The Psychic round. The wild spawns are very much a mixed bag. I lost the Shell Bell I'd picked up earlier to a Trick Alakazam, but picked up a Brightpowder not long afterwards to give those Pokemon that don't want to wear a Choice Band another option. An unlucky double battle against Fearow and Shiftry seems like it might spell the end of the run, but luckily Alakazam saw off Fearow with a critical Ice Punch while Shiftry stupidly elected to use Solarbeam, giving me an extra turn to finish it off.

The Rock round. And the final challenge. Luckily, Hitmonchan equipped with a Choice Band is enough to destroy every single wild Rock-type I meet. Determined to make it, I grind wild encounters at the start of each floor to avoid trainers, and I only get sighted by one - a Triathlete with a Jynx which mercifully turns out to have no offensive moves. And we make it to Brandon with a rather impressive haul, including another sodding Choice Band:

View attachment 324382View attachment 324380View attachment 324381

View attachment 324386
Brandon (Silver)

Because I got past 21 floors and then broke my streak, I didn't fight Brandon on my winning run, but I'm including the warstory anyway. In the run where I fought Brandon, I didn't manage to obtain a Choice Band. Sceptile stalled out Regirock with alternating Detects and Substitutes while it exhausted all its Ancientpower PP, then began using Superpower. Eventually it got a Quick Claw Superpower, leaving me too weak to make a Substitute. It blew up on the next turn as I used Detect.

Regice came out and predictably Ice Beamed as I managed to get off a Leech Seed. I sent out Hitmonchan. I'd picked up three X Attacks earlier on so promptly got one off and cheesed through both his remaining team members. Shame not to use Cubone, but that's that.

View attachment 324387
Brandon (Gold)

I healed my team to the max and went in.

Sceptile led off against his Articuno. I open with Detect then throw up a Substitute while its Blizzard misses, giving me an opening to use Leech Seed. I proceed to stall out Articuno until it drops. Oddly, once it runs out of Blizzard PP, it elects to use Water Pulse and Reflect rather than Aerial Ace. Still, wouldn't have made a difference anyway.

I Leech Seed Zapdos who Drill Pecks my Substitute away, before whittling it down in a similar fashion. It breaks my Sub on its last turn before fainting. This leaves me naked against Moltres, but not to worry. This is part of the plan, and I can sacrifice Sceptile with impunity. I Leech Seed and it uses Aerial Ace, finishing Sceptile off.

Luckily, Brandon invests no EVs into his bird trio’s offenses (all three are Mild with maxed Defence and Speed with the remainder in HP) so neither Zapdos’ Drill Peck or Moltres’ Aerial Ace or Hyper Beam come close to OHKO’ing Cubone. The only issue is that Fire Blast has a chance to OHKO on a high damage roll. Liberal Protect usage is the only way to proceed here, but I also gave Cubone the Brightpowder to hold before the battle, and as I'd hoped, the un-Protected Fire Blasts both miss. Once Fire Blast’s PP is extinguished, Cubone is free to Double-Edge the fiery bird into oblivion as it pitifully uses Safeguard in an attempt to stave off its doom.

And I've won!

View attachment 324388


________________________________


While I'm hoping the next challenge will be easier, tomorrow will be the Arena - a facility I've always found very tough indeed. Let's hope for good results!


Pokemon Adventures: Emerald - GBA


1616274937467.png


Day 4
Battle Arena

1616275067820.png

Day four and it's time for the brawniest, the roughest, the scrappiest, the most pugilistic of all seven facilities - the Battle Arena. After venturing into the Artisan Cave beneath the Frontier and encountering the mysterious man known only as Guile Hideout, Emerald and his newly-assembled team enter their next facility to compete for the Tactics symbol...

Analysis
This was all going so well, too...

Well, this stings. It's always hard to admit defeat, but it looks like I'll have to be doing that today. The Factory took four attempts, the Pyramid five, and this... took uncountable attempts and I still haven't managed to make it to the gold.

I did get the silver symbol, though, and that's something. But even that took numerous passes to reach. I'd estimate that reaching 28 wins for the first time took seven attempts - frankly, I lost count - after which I made two further tries to get to 56. The furthest I managed was 34 which frankly felt like a massive achievement.

Adding insult to injury is that in the manga, Greta is the first Frontier Brain to allow Emerald to challenge her directly without passing through the gauntlet of rookie trainers. Ha bloody ha. I should be so lucky.

Have I mentioned how much I dislike the Arena lately?


The Team
1616275406409.png

Sceptile @ Scope Lens
Leaf Blade
Thunderpunch
Crunch
Hidden Power Ice
252 Sp.Atk/Speed, 6 HP (Hasty)

It's a decent lead, especially in the early rounds, though most of its coverage is pitifully weak and a better boosting item would be a godsend. But it loses to too much to be reliable. I started to think about running Dig over Thunderpunch in later rounds to exploit the judging system, but ultimately I ran out of time to test it.

For the Greta round, I ran a different variant:

Sceptile @ Sharp Beak
Leaf Blade
Thunderpunch
Hidden Power Flying
Quick Attack
144 Att, 252 Sp.Atk, 100 Speed, 14 HP (Hasty)

The given EVs guarantee an OHKO on Greta's Heracross with a full-powered Hidden Power Flying. Quick Attack was included as insurance in case it used Endure, but went unused.

Sudowoodo @ Lum Berry
Earthquake
Rock Slide
Brick Break
Hidden Power Flying
78 HP, 252 Att, 180 Sp.Def (Quirky)

It's pretty bulky with these EVs and can usually take a hit, even living through un-STABed super-effective hits like Masquerain's Hydro Pump. Trouble is, can it KO anything back? Not usually, no. This is why I initially ran a Choice Band; it gave it the power it needed to edge those 2HKOs up to OHKOs. The problem with that, though, is that the inability to switch can and will punish you severely. It's not fast enough for a Salac Berry to be viable so Lum Berry was the go-to replacement.

Dusclops @ Leftovers
Pain Split
Ice Beam
Psychic
Shadow Ball
252 HP, 60 Def, 204 Sp.Def, 4 Sp.Atk/Speed (Rash)

It looks so good on paper, but somehow it never quite lives up to its potential. This squad doesn't have the best defensive synergy, but I was immensely underwhelmed by Dusclops' capability as a backup wall. The Rash nature it's forced to run didn't help matters, but fundamentally I felt like I didn't play it as well as I could have done. A Curse/Rest set might have accomplished more, but I doubt it.


1616279540749.png

Greta (Silver)

Exhausted and resentful, I finally made it to Greta a couple of hours ago. Sceptile cleanly OHKO'd Heracross with HP Flying, ironically getting a critical hit and thus rendering my careful EV spread completely pointless. Umbreon came out; I used Leaf Blade while it used Psychic, and then again getting a critical hit while it paralysed me with Body Slam. Leaf Blade hit for a final time while it struck back with Faint Attack, so it went to the judges.

We scored equal on both mind and skill, but I won on body even though our totals looked more or less the same. Shedinja comes out and finishes me with Shadow Ball - I sent out Sudowoodo and it bafflingly used Return before Hidden Power Flying took it down.

So that's the silver symbol taken care of. Not the colour I wanted, but better than nothing I guess!

1616280160710.png


_________________________________​

It's a shame not to have done better, but I'm happy that it took until the fourth facility to have serious trouble. I wasn't expecting to get the gold symbol on the Pyramid yesterday so I won't let this bug me too much. Might try again on the seventh day if I have time but probably not.

Tomorrow, it's the Dome!

1616280763711.png
 
I had some unexpected success in the Battle Arena and got all the way to a 94-streak (lvl 50, on emulator). I was able to record battles 84-94, including the battle that ended the streak.

Before this I'd gotten the silver symbol but cobbled together existing Pokémon to do it. My first attempt at an actual gold symbol team was a copy of wtset's Regice / Gyarados / Latios team. The Regice was rng'd in Emerald on frame 1,418,304 with a modest nature, IVs of {21, 11, 30, 30, 23, 30}, and Hidden Power fire at 69 base power. It worked fantastically - I got all the way to Greta gold before getting swept by her Umbreon.

After that I had troubles getting to a high streak again so I decided to try out new team members. None of the Pokémon I had on hand seemed sufficient so I finally got around to breeding a perfect Metagross with max power Hidden Power Steel. And WOW that ended up being a good choice.

I really like using Metagross as a lead. Clear body negates so many of the things physical leads have to worry about but special leads don't care about at all (intimidate and charm come to mind). Using Regice made me realize that a clear body + lum berry lead could shrug off a lot of different moves. Invalidating an enemy move essentially gives you a free turn - either 3 turns vs their 2 or a max of 9 turns for your team vs their max of 8. That's huge and is what led me to my final team composition.
:rs/Metagross:
Metagross @ Lum Berry (Adamant)
Hidden Power (Steel) / Shadow Ball / Earthquake / Explosion
EVs: 4 HP / 252Atk / 252Spe [122 Speed]
IVs: 30 SpD

Metagross functions amazingly well as a lead. Max speed investment lets them out speed a few of their biggest threats including several sets for Entei, Salamence, Magmar, Moltres, Blaziken, and Marowak that would otherwise 1HKO Metagross. Lum berry lets them eat a status move to gain a free turn over the enemy. Clear body keeps their attack stat safe from intimidate. All that adds together to make a lead with bulk, power, and just enough speed to excel. Basic plan is to attack until you either die or until Explosion becomes your best option. Then you explode.

:rs/Gyarados:
Gyarados @ Sharp Beak (Adamant)
Hidden Power Flying / Earthquake / Dragon Dance / Taunt
EVs: 252Atk / 4SpD / 252Spe [132 Speed]
IVs: 30 SpA / 30 SpD / 30 Spe
Credits: I'm enormously thankful for the folks at the Bank of Hoenn that provided this (shiny) Gyarados.

Gyarados goes into the second slot for the same reasons as in wtset's team. The Pokémon that give Metagross the most trouble tend to be easy prey for Gyarados.

:rs/Latios:
Latios @ Bright Powder (Modest)
Psychic / Ice Beam / Thunderbolt / Calm Mind
EVs: 28 HP / 252 SpA / 228 Spe [158 Speed]
IVs: {29, 21, 15, 31, 23, 29}

Latios is frail but very powerful and decently fast. He does a great job of getting revenge KO's and clinched a few matches. But whenever he's out I get very anxious. I think I'll replace Calm Mind with Dragon Claw going forward since I never had time to use it. I might also just switch Latios out for Latias for her better defenses.

Here's the video of the last 10 battles of my streak. This recording doesn't capture the time I spent staring at my screen after Latios clinched a win at 2 HP. That was beyond lucky, and my luck ended up running out in the next set. They lead with Breloom and get a crit that cuts Metagross's turns short. Gyarados goes for the kill (likely could have set up a dragon dance here) and is met with Steelix. I make the streak-ending mistake of going for a Dragon Dance on a Pokémon capable of 2HKO'ing me. Then before Latios is able to get a revenge kill I'm taken out by a quick claw explosion.

I didn't play perfectly and my team needs adjustments. Not sure if this was a fluke or not but I'm excited to keep trying.
 

Attachments

QuentinQuonce

formerly green_typhlosion
Pokemon Adventures: Emerald - GBA


View attachment 324531

Day 4
Battle Arena

View attachment 324532
Day four and it's time for the brawniest, the roughest, the scrappiest, the most pugilistic of all seven facilities - the Battle Arena. After venturing into the Artisan Cave beneath the Frontier and encountering the mysterious man known only as Guile Hideout, Emerald and his newly-assembled team enter their next facility to compete for the Tactics symbol...

Analysis
This was all going so well, too...

Well, this stings. It's always hard to admit defeat, but it looks like I'll have to be doing that today. The Factory took four attempts, the Pyramid five, and this... took uncountable attempts and I still haven't managed to make it to the gold.

I did get the silver symbol, though, and that's something. But even that took numerous passes to reach. I'd estimate that reaching 28 wins for the first time took seven attempts - frankly, I lost count - after which I made two further tries to get to 56. The furthest I managed was 34 which frankly felt like a massive achievement.

Adding insult to injury is that in the manga, Greta is the first Frontier Brain to allow Emerald to challenge her directly without passing through the gauntlet of rookie trainers. Ha bloody ha. I should be so lucky.

Have I mentioned how much I dislike the Arena lately?


The Team

Sceptile @ Scope Lens
Leaf Blade
Thunderpunch
Crunch
Hidden Power Ice
252 Sp.Atk/Speed, 6 HP (Hasty)

It's a decent lead, especially in the early rounds, though most of its coverage is pitifully weak and a better boosting item would be a godsend. But it loses to too much to be reliable. I started to think about running Dig over Thunderpunch in later rounds to exploit the judging system, but ultimately I ran out of time to test it.

For the Greta round, I ran a different variant:

Sceptile @ Sharp Beak
Leaf Blade
Thunderpunch
Hidden Power Flying
Quick Attack
144 Att, 252 Sp.Atk, 100 Speed, 14 HP (Hasty)

The given EVs guarantee an OHKO on Greta's Heracross with a full-powered Hidden Power Flying. Quick Attack was included as insurance in case it used Endure, but went unused.

Sudowoodo @ Lum Berry
Earthquake
Rock Slide
Brick Break
Hidden Power Flying
78 HP, 252 Att, 180 Sp.Def (Quirky)

It's pretty bulky with these EVs and can usually take a hit, even living through un-STABed super-effective hits like Masquerain's Hydro Pump. Trouble is, can it KO anything back? Not usually, no. This is why I initially ran a Choice Band; it gave it the power it needed to edge those 2HKOs up to OHKOs. The problem with that, though, is that the inability to switch can and will punish you severely. It's not fast enough for a Salac Berry to be viable so Lum Berry was the go-to replacement.

Dusclops @ Leftovers
Pain Split
Ice Beam
Psychic
Shadow Ball
252 HP, 60 Def, 204 Sp.Def, 4 Sp.Atk/Speed (Rash)

It looks so good on paper, but somehow it never quite lives up to its potential. This squad doesn't have the best defensive synergy, but I was immensely underwhelmed by Dusclops' capability as a backup wall. The Rash nature it's forced to run didn't help matters, but fundamentally I felt like I didn't play it as well as I could have done. A Curse/Rest set might have accomplished more, but I doubt it.


View attachment 324567
Greta (Silver)

Exhausted and resentful, I finally made it to Greta a couple of hours ago. Sceptile cleanly OHKO'd Heracross with HP Flying, ironically getting a critical hit and thus rendering my careful EV spread completely pointless. Umbreon came out; I used Leaf Blade while it used Psychic, and then again getting a critical hit while it paralysed me with Body Slam. Leaf Blade hit for a final time while it struck back with Faint Attack, so it went to the judges.

We scored equal on both mind and skill, but I won on body even though our totals looked more or less the same. Shedinja comes out and finishes me with Shadow Ball - I sent out Sudowoodo and it bafflingly used Return before Hidden Power Flying took it down.

So that's the silver symbol taken care of. Not the colour I wanted, but better than nothing I guess!

View attachment 324572

_________________________________​

It's a shame not to have done better, but I'm happy that it took until the fourth facility to have serious trouble. I wasn't expecting to get the gold symbol on the Pyramid yesterday so I won't let this bug me too much. Might try again on the seventh day if I have time but probably not.

Tomorrow, it's the Dome!

Pokemon Adventures: Emerald - GBA

1616335882213.png


Day 5
Battle Dome


1616335505422.png

Day five and we turn to the most crowd-pleasing of all seven facilities: the prestigious Battle Dome. With visitors from all over the Pokemon world flocking to Hoenn's Battle Frontier, Emerald competes for his next symbol in front of a vast audience - alongside the two other Pokedex holders of the Hoenn region, Ruby and Sapphire. Who will emerge victorious from the tournament?

Analysis
Sunday, Sunday, Sunday. A breather day. I was expecting this challenge to be one of the easier ones, and I was right. While Emerald's picks in the manga don't manage to win him the Tactics symbol, they worked just fine for me, and it only took two attempts for me to make it to 10 consecutive wins.

Like a lot of people, I've always quite liked the Dome so this was probably the funnest part of the challenge so far. A nice change of pace after the nightmare that was the Arena yesterday.

The Team
1616336541418.png

Alakazam @ Lum Berry
Psychic
Thunderpunch
Ice Punch
Fire Punch
36 HP, 116 Def, 252 Sp.Atk, 4 Sp.Def, 100 Speed (Modest)

The given EVs guarantee it can survive anything Tucker throws at it while being able to 2HKO in turn. This is crucial given that Swampert and Charizard both annihilate Alakazam while it can only ever 2HKO them. Unfortunately Metagross still deals over 100% with Meteor Mash unless I max both HP and Defence. Tricky, but hopefully I can play around that.


1616336749175.png

Metagross @ Choice Band
Hidden Power (Steel)
Earthquake
Sludge Bomb
Explosion
252 Att/Speed, 6 Sp.Def (Adamant)

I figured it was best not to rely on Meteor Mash's imperfect accuracy. The EVs are simple, making it as fast as possible while also hitting as hard as possible. Explosion was rarely used but included for the sake of Umbreon, Walrein and similar annoyances.

Since these two are the only ones Emerald is seen to useI decided that the only fair way to do this would be to only use Alakazam and Metagross for every battle. That way, the level of challenge felt maintained, while having a rule to keep in mind made me play more cautiously.

The possible Pokemon I could have brought as a third are: Starmie, Rapidash, Blissey, Shedinja, Phanpy, Hitmonchan, and Cubone. Shedinja was too easy (Tucker's Gold team can't touch it) so I decided that was out. I decided to go with Hitmonchan since, as a Fighting type, it might dissuade opponents from bringing their Darks and Steels. Probably overthinking things, but ah well.

My first attempt failed at the seventh tournament against Swimmer Joyce. Alakazam dispatched her Gyarados but died to Tauros; I sent out Metagross and got lazy, deciding to use Explosion instead of another move. Double knockout, but Joyce then won the referee's decision. (Can someone clue me in as to why? I thought the player was supposed to always win that against regular NPCs.)

1616336442611.png

Tucker (Silver)
He lead off with Swampert while I go with Alakazam. Not ideal. I don't want Charizard coming out second and roasting Metagross.

Alakazam fires off a Psychic while Swampert strikes back with Earthquake, bringing us both to half health. Next turn Psychic KOs. I await his second mon feeling a little concerned. If Charizard comes out, it wins against Metagross hands down. Even if I survive and use Explosion, Tucker will win the referee's decision.

But apparently I needn't have worried. He brings out Salamence and I get an easy KO with Ice Punch.


1616336444252.png

Tucker (Gold)

Once again, we both lead with Alakazam and Swampert respectively. The fight is a total replay of our Silver bout: Psychic, Earthquake, Psychic.

Metagross comes out next on his side. Correctly anticipating a Protect, I switch to my own Metagross. Even if it had used Earthquake, I would have comfortably survived and almost KO'd with Earthquake myself, leaving it open for Alakazam to Fire Punch. But as it happens, I 2HKO with Earthquake.

Latias, where art thou? Thou art more cooler than an overgrown mudfish.

1616338627559.png


________________________________________________________________________________

In the manga, once Emerald loses at the Dome, he challenges the Palace the same day. That's not going to happen here, however. We'll wait for tomorrow to head to the Battle Palace!

1616339852477.png
 
Firstly, I'm in love with these posts and I think they strongly deserves a specific thread.

(Can someone clue me in as to why? I thought the player was supposed to always win that against regular NPCs.)
Basically in Dome the ties are won by the player who is ranked "higher".
This is influenced by a lot of factors (BST, IVs, Lv. ...), but at the end of the day it's enough to see your team description in the Tournament chart: if you are in the top left corner with a "winning" team description, you'll lose ties just vs. Tucker.
You probably should have brought Blissey as the 3rd to get this kind of rank!
 

QuentinQuonce

formerly green_typhlosion
Firstly, I'm in love with these posts and I think they strongly deserves a specific thread.
Thank you! I did consider it but in the end figured why abandon this one. I'm considering doing an equivalent Platinum run though so will do a dedicated thread for that if I do.

Basically in Dome the ties are won by the player who is ranked "higher".
This is influenced by a lot of factors (BST, IVs, Lv. ...), but at the end of the day it's enough to see your team description in the Tournament chart: if you are in the top left corner with a "winning" team description, you'll lose ties just vs. Tucker.
You probably should have brought Blissey as the 3rd to get this kind of rank!
Ah yeah I figured that probably had something to do with it. Not 100% clued up on the Dome's internal workings. I was on the right side of the tourney tree iirc.
 
Last edited:
Quick update on my Battle Pike streak: I managed to reach 350 rooms cleared with my Latios/Metagross/Blissey team. Will update regularly for my progress.

Also may I ask to have the Actaeon mono-type teams and all the different strategies he has used so far to be posted somewhere? As I manage to reach some personal records might as well try new stuff and his teams are a nice source for improvising!

IMG_20210321_215535.jpg
 
Quick update on my Battle Pike streak: I managed to reach 350 rooms cleared with my Latios/Metagross/Blissey team. Will update regularly for my progress.

Also may I ask to have the Actaeon mono-type teams and all the different strategies he has used so far to be posted somewhere? As I manage to reach some personal records might as well try new stuff and his teams are a nice source for improvising!

I'm still updating this post from time to time when I think I can improve something; it's trying to evolve into the most optimal setup for the whole challenge. This post lacks in-depth EV/strategy descriptions and problem-handling discussion and some teams are much harder to play than others (e.g. Mono Ghost). Some of the thought processes on older versions of the teams are scattered around page 11, 12 and 13 of this thread. If you have any specific questions, let me know!
 

QuentinQuonce

formerly green_typhlosion
Pokemon Adventures: Emerald - GBA

View attachment 324728


Day 5
Battle Dome


View attachment 324726

Day five and we turn to the most crowd-pleasing of all seven facilities: the prestigious Battle Dome. With visitors from all over the Pokemon world flocking to Hoenn's Battle Frontier, Emerald competes for his next symbol in front of a vast audience - alongside the two other Pokedex holders of the Hoenn region, Ruby and Sapphire. Who will emerge victorious from the tournament?

Analysis
Sunday, Sunday, Sunday. A breather day. I was expecting this challenge to be one of the easier ones, and I was right. While Emerald's picks in the manga don't manage to win him the Tactics symbol, they worked just fine for me, and it only took two attempts for me to make it to 10 consecutive wins.

Like a lot of people, I've always quite liked the Dome so this was probably the funnest part of the challenge so far. A nice change of pace after the nightmare that was the Arena yesterday.

The Team
View attachment 324733
Alakazam @ Lum Berry
Psychic
Thunderpunch
Ice Punch
Fire Punch
36 HP, 116 Def, 252 Sp.Atk, 4 Sp.Def, 100 Speed (Modest)

The given EVs guarantee it can survive anything Tucker throws at it while being able to 2HKO in turn. This is crucial given that Swampert and Charizard both annihilate Alakazam while it can only ever 2HKO them. Unfortunately Metagross still deals over 100% with Meteor Mash unless I max both HP and Defence. Tricky, but hopefully I can play around that.


View attachment 324734
Metagross @ Choice Band
Hidden Power (Steel)
Earthquake
Sludge Bomb
Explosion
252 Att/Speed, 6 Sp.Def (Adamant)

I figured it was best not to rely on Meteor Mash's imperfect accuracy. The EVs are simple, making it as fast as possible while also hitting as hard as possible. Explosion was rarely used but included for the sake of Umbreon, Walrein and similar annoyances.

Since these two are the only ones Emerald is seen to useI decided that the only fair way to do this would be to only use Alakazam and Metagross for every battle. That way, the level of challenge felt maintained, while having a rule to keep in mind made me play more cautiously.

The possible Pokemon I could have brought as a third are: Starmie, Rapidash, Blissey, Shedinja, Phanpy, Hitmonchan, and Cubone. Shedinja was too easy (Tucker's Gold team can't touch it) so I decided that was out. I decided to go with Hitmonchan since, as a Fighting type, it might dissuade opponents from bringing their Darks and Steels. Probably overthinking things, but ah well.

My first attempt failed at the seventh tournament against Swimmer Joyce. Alakazam dispatched her Gyarados but died to Tauros; I sent out Metagross and got lazy, deciding to use Explosion instead of another move. Double knockout, but Joyce then won the referee's decision. (Can someone clue me in as to why? I thought the player was supposed to always win that against regular NPCs.)

View attachment 324731
Tucker (Silver)
He lead off with Swampert while I go with Alakazam. Not ideal. I don't want Charizard coming out second and roasting Metagross.

Alakazam fires off a Psychic while Swampert strikes back with Earthquake, bringing us both to half health. Next turn Psychic KOs. I await his second mon feeling a little concerned. If Charizard comes out, it wins against Metagross hands down. Even if I survive and use Explosion, Tucker will win the referee's decision.

But apparently I needn't have worried. He brings out Salamence and I get an easy KO with Ice Punch.


View attachment 324732
Tucker (Gold)

Once again, we both lead with Alakazam and Swampert respectively. The fight is a total replay of our Silver bout: Psychic, Earthquake, Psychic.

Metagross comes out next on his side. Correctly anticipating a Protect, I switch to my own Metagross. Even if it had used Earthquake, I would have comfortably survived and almost KO'd with Earthquake myself, leaving it open for Alakazam to Fire Punch. But as it happens, I 2HKO with Earthquake.

Latias, where art thou? Thou art more cooler than an overgrown mudfish.

View attachment 324748

________________________________________________________________________________

In the manga, once Emerald loses at the Dome, he challenges the Palace the same day. That's not going to happen here, however. We'll wait for tomorrow to head to the Battle Palace!
Pokemon Adventures: Emerald - GBA

1616438245671.png


Day 6
Battle Palace

1616421536842.png

Day six and we arrive at the Battle Palace. Having suffered a bruising loss at the Dome, Emerald arrives at the Battle Palace demanding a match with Spenser in order to maintain his target of defeating all seven facilities within the span of a week. Unexpectedly, Spenser agrees to his request, stating that a battle out of view of the press suits him better anyway...

Analysis
Definitely underestimated how difficult this one would be. Because the Palace has one of the lowest thresholds for the gold, I figured it wouldn't take me too long. But it ended up taking me six tries - one ending at 28 wins, the next at 39, the next at 30, the next at 37, and the one after that at 35. I've warmed to the Palace slightly, though. Very slightly.

Incidentally, I'd be greatly interested if someone with knowledge of the game's internal workings could clue me into the cleverness of the AI. My Pokemon generally used an effective move if it could (only on a couple of occasions did Sceptile use Earthquake against a Flying foe, for instance) but it also played in other intelligent ways as well, such as avoiding using Leaf Blade or Thunderpunch against Sharpedo so as to bypass Rough Skin, or always using Leaf Blade once its HP was low enough for Overgrow to activate. Curiously, the enemy AI seemed much stupider, resulting in all sorts of glorious instances like a Forretress using Explosion while Dusclops was out.

The Team

1616441240980.png
Sceptile @ Lum Berry
Leaf Blade
Crunch
Earthquake
Thunderpunch
120 Att, 252 Sp.Atk, 138 Speed (Hasty)

These three again. Sceptile is my lead, naturally. Suffers rather from 4-moveslot syndrome but Earthquake generally works out as a better choice than HP Ice. Fortunately, Hasty is a beneficial nature in the Palace and means it attacks nearly all of the time, especially when under half health. But if it ever doesn't, Lum Berry can give it a second chance to strike.

Sudowoodo @ Choice Band (Rock Head)
Earthquake
Rock Slide
Double-Edge
Brick Break
6 HP, 252 Att/Sp.Def (Quirky)

Amazing if it can get the right move off, dead weight if not. Quirky isn't the best nature in the Palace, but it's just good enough to attack most of the time (56%, to be exact). I used Sudowoodo in my last Ultra Moon playthrough and am rather fond of it, but I wish I'd been able to use it in a facility where I could really get the best out of it. It's an interesting Pokemon to EV, though. Max Sp.Def gives it an unexpected amount of staying power.

Dusclops @ Leftovers
Pain Split
Will-o-Wisp
Confuse Ray
Night Shade
48 HP, 210 Def, 252 Sp.Def (Rash)

Honestly really, really starting to dislike this thing. Nearly all of my losses were due to ending up with Dusclops as my final team member and it not being able to outlast anything. I initially ran Curse as a quick way to whittle down enemies, but of course it kept using it at totally inappropriate moments and dying to the opponent's next move.

Unfortunately Rest is classed as a Defence move rather than a Support one, meaning that with a Rash nature it is very unlikely to be chosen. This leaves Pain Split as a decidedly inferior healing option. I really wish this had been given a better nature, Rash is so awful for it and forces me to waste EVs patching up its bulk. Seemed to attack directly far more than its Nature would suggest - Night Shade seemed a more reliable choice than Shadow Ball.


1616439768230.png

Spenser (Silver)

Expected this to be a much longer fight than it turned out to be. Crobat came out first against Sceptile: Crobat used Toxic while Sceptile used Leaf Blade. I considered a switch but thought better of it. Since Crobat's only attacking move is Fly, I can switch to Sudowoodo if it uses it, but I don't want either of the other two poisoned. Sceptile subsequently uses Crunch while Crobat Double Teams. It finally correctly uses Thunderpunch on the third turn, taking it down.

Lapras comes out. This was the one I was most concerned about facing. Since Sudowoodo doesn't have Sturdy, Horn Drill is quite capable of cleaving through my team. Nothing to be done, though. I Leaf Blade as it uses Horn Drill and mercifully misses. It Protects twice but the second one fails, and my second Leaf Blade takes it down.

Slaking last of all. It gets off a Shadow Ball as Sceptile uses Earthquake for chip damage, bringing Sceptile down to the range where it's more likely to attack, and it goes for a Leaf Blade next turn, taking Slaking to around 20%. Unfortunately Slaking Swaggers and Sceptile hits itself next turn, but this brings it down to around 10%, enough to take advantage of Overgrow. So I switch to Sudowoodo. Slaking gets a critical Shadow Ball, bringing the rocky tree down to 30%, and then gets smashed by Rock Slide the next turn.

1616439772419.png

Spenser (Gold)

It's Sceptile v Arcanine. I switch to Sudowoodo to soak up the inevitable Overheat. With the given EV spread and the fact that Spenser's Arcanine has a neutral nature and no Sp.Atk investment, Overheat isn't even a 4HKO when you factor in the Sp.Atk drop. Unfortunately Sudowoodo idles for the next two turns as Arcanine first tries Extremespeed and then Protect. I finally get off a Rock Slide which leaves it on ~5%, and it Roars Dusclops in. I switch back and promptly finish the job.

Slaking comes out next. I switch in Dusclops hoping to burn it. No joy, but Pain Split reduces its HP beautifully after it gets off a Shadow Ball. It takes two uses of Will-o-Wisp to burn it. Wanting to save Dusclops for Suicune, I switch back into Sudowoodo as it Hyper Beams for pitiful damage.

Suicune comes out and, rather than do the sensible thing and drown Sudowoodo with Surf, uses Calm Mind twice, allowing me to get in two hits with Double-Edge. And then on the third turn... it idles, and I finally get the KO. Yes, I just beat a Suicune with a Sudowoodo.

1616442047596.png

I'm amused too, Spenser.


1616442090879.png


_____________________________________________________________________

We're almost done, but not quite yet. Tomorrow, it's time for the greatest challenge of all - the Tower!

1616442261710.png
 
Woah, green typhlosion, this challenge is awesome. The Emerald chapter is an (overall) pretty faithful rendition of the Battle Frontier experience, with Rald using some really good strategies, unlike the anime where they retooled the brains to glorified Gym leaders. Still a good season imo, but its nowhere similar to the challenge in the games. And you are even bringing the 1-week limit, good luck!

Does that mean we're going to fight a souped up Dynamax Kyogre at the end? :psynervous:
 

Users Who Are Viewing This Thread (Users: 2, Guests: 5)

Top