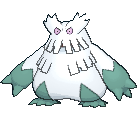
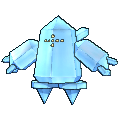
Posting a completed streak of 624 wins in Ultra Moon Super Doubles.

Part I: How the Mighty Have Fallen
This run was born from a slump following my previous 1845 streak. I had initially been very eager to jump back into randoms, as it had been months since I'd used the format. Dusting off the ol' RNG website, conveniently still maintaining my preset customs, I'd dived in headfirst. I'd even brought a handful of new alternate flunkies and even the intent to use a number of faster mega evolutions, if I'd rolled them. And briefly, I did taste a bit of success with some of the sweeter fruit to come of the generator. While they weren't a part of something grand, I must give credit where credit is due!


That Snorlax right there is neither my Pulverizing Pancake variant, nor my suicidal variant; it's my previously unused Belly Drum set. Eisen demonstrated exactly what this behemoth is capable of... while our spreads are not wholly identical, it didn't matter, as it was no less tenacious and ferocious. Instead of Psych Up Dusknoir, I had the opportunity to pair it with Oranguru for Instruct abuse. You know how that turned out. Mega Blastoise and Togekiss were left with scraps, but the floor was spic n' span with them around.


It is here that I realise the AI is onto something with its Steelix4. Utilized properly, with frequent helpings of hands and some Gravity shenanigans, Steelix was demolishing everything in sight. If setting sand for itself wasn't feasible, Primarina usually took the helm. I'm given my first taste of Liquid Voice, and it's palatable. Buzzwole had already teamed up with Steelix during my last streak and I liked the way they played together.


Uxie is like a lighter Cress, but that had little sway over me. For the purposes of tree climbing, their differences weren't too staggering and, besides, I didn't even roll Cress. Emboar did almost all of the heavy lifting here, somewhat surprisingly, leading to many bacon-related puns in the discord. Uxie made ample use of Foul Play, one of the only tools unavailable to its superior sister setter. It's not bad when Helping Hand or Ally Switch have little use. For an amusing little side anecdote, I distinctly remember asking Smuckem to quickly run a damage calc for Wishiwashi but can't remember the target (I was playing at work, where the Showdown calc is slow and obnoxious to use on a phone... I use it myself when needed, but in an active discord, I felt both lazy and reckless.) I know I was choosing between Ice Beam and U-turn.
And that's where my enjoyment came to a screeching halt. Twice in a row, actually, because I felt my fourth team failed so rudely and abruptly that I wanted to let those three highly satisfying teams have another go. My mistake was rerunning the same team as the original failed attempt, which included a Mega Metagross (not blamed for either loss, actually, but I didn't think it coincidental, either.) They were first murdered by Sylvia and her makeshift sun team, thanks to a Kantonian Ninetales2 and its liberal Dark Pulse flinching and Drought-boosted Fire Blast crits. I disliked the manner in which a NINETALES steamrolled me (only Alolan Ninetales-1 is supposed to be a cancerous bastard! Come on!!) and so back into the fray. Teams 1-3 did their jobs as expected, and then Team #4 met Benji, the sand specialist who just HAD to lead his oddball Rotom-Mow4. If you don't immediately recall the moveset off the top of your head, it's the Thunder Wave user, and that's the only info you really need. This loss was probably more aggravating than the last, because paralysis has a way of being less abrupt than weather and crits.
But, no! Repto had not hit rock bottom! Two losses in a brief period isn't even enough to warrant more than a disappointed emoji or two from your discord chums.

Enter Vaporeon.Apparently my fucking 3DS contracted something from my friendly neighborhood policeman Benji because Ahem. Specifically, this Vaporeon: 339 Vaporeon-1 Quiet Quick Claw Wish Surf Helping Hand Shadow Ball Def/SpA
Coasting all the way to Battle #4, Vaporeon lead alongside Drizzletoed-1, and while TR was activated uninhibited, it didn't matter one bit. Vappy activated its Quick Claw four consecutive times and pelted me relentlessly with rain-boosted Surfs, critting at least one that I remember, quickly putting me in a hopeless situation. My Sylveon, the only teammate besides my setter who could stand up to the abuse, was soon hit with Confuse Ray by a Milotic and smacked itself on the turn it would have fainted the Vaporeon. There was no mindless HH usage by the AI- just priority damage and tons of it. I was still active in the discord while this was going on, and some of you fellas might remember I had a bit of a meltdown; lots of obscenities and maybe a bit of self loathing. Losing the fourth battle was a personal record, not that I saved any digital memory of it- I can assure you, I was so angry that I shut the 3DS off before my defeat was even finalized, and had the pleasure of being scolded by the uptight Tree Girl. You can keep your Moomoo Milk! For all I know, you just get 'em from that Hex Maniac, and you know she's on some freaky growth hormones!
I know the way Spidey & Friends rolls by heart; they had coasted easily to 50 during the initial 17x run which indicated I was onto something. If I hadn't already been planning to default to these four, henceforth, it was encouraged by turskain to perhaps mitigate some of the bullshit. If nothing else, they were more synergetic and had dealt with plenty of paralysis. And two of my pokes cared little for Vappy1!
While I quickly lost two more times in the 50s and 60s, using Mega Metagross in yet another team which all but condemned it to the Bank for eternity, it had the effect of being much, much less discouraging than losing before 50. I enjoyed using my OG flunkies, and could reach and shove Blue off his high horse in my spare time at work. And being soundly destroyed by damage instead of slowly eaten in an incapacitated state was more of an energizer than another puncture wound. Because of this, little time elapsed between my trouncings. While I may have lost interest in running 110-speed pokes in TR, I sure as hell was not above running everything else.
Araquanid had murdered her third consecutive rhino, winning a five-minute shopping spree in the process. While she indulged herself, I was left to my own devices. My hands were filthy, there was insanity in my eyes, and maybe a bit of blood. To some, I looked like shit. In reality, I was looking at shit, entire boxes of it. And by golly, I was gonna use it, embrace it, become one with it. And maybe if I could retain a smidge of common sense, conquer the tree with it.
Part II: So Much For Common Sense
Battles 51-60:


Battles 61-70:


Battles 71-80:


Battles 81-90:


Battles 91-100:


While no battle in particular left any unsavory taste in my mouth, by battle 100 I was already ready to move away from the RNG. I had a number of vague ideas bouncing around, and the long-existing intent to rerun a few short-lived teams. Long term success had stopped being a goal at this point, since I was having so much fun by quickly jumping between teams. But which idea to try first? Paper was rocking his Assault Vest Primarina, Fougeta was getting ready to rock his own TR/Tailwind hybrid, involving what I believe was an initial Specs Primarina, and I had my own sorely underutilized Liquid Voice Primarina. I also had a devious little nugget, a weapon created in the grimy, underground labs of one Extendedfreezer and myself. This seemed like a good time to open the containment unit.
Part III: Fiendish Creations New & Old
It didn’t take long to come up with an ideal setter for a lead LV Primarina, as well as a fourth poke to make good use of Ferrothorn. I didn’t have a set milestone in mind, though I did have enough faith in the squad to handle much more than the ten battles I’d normally allot to the randoms mooks. Speaking of random mooks, I noticed that Musharna gets a pretty disproportionate amount of screen time compared to the other setters. Determined to change that, I contemplated not using Musharna for the remainder of the streak. That seemed too unrealistic, so I resolved instead to not use Musharna for at least the next 100 battles.
Battles 101-200:



Musharna @ Lum Berry, Telepathy
Relaxed (236 HP, 252 Def, 20 SpD)
-Trick Room
-Psychic
-After You
-Helping Hand
You will find my willpower is nonexistent. More people are warming up to the prospect of Gravity, especially my fellow TR afficionados. However, After You still raises a few eyebrows. Its function on this team is solely to allow Primarina to break dangerous speed ties (first and foremost Alolan Exeggutor2 at 58) as well as thwart some much slower things that weasel their way onto wider rosters. Musharna still outspeeds the Curse users after one or two drops, so it was handy for that as well. Otherwise, against certain safer Scientist/Breeder lead pairs and especially Hikers, Mush would forego the TR entirely and assist Primarina in killing. Oh, did this team love the Hikers.
I have impressed upon others the fortitude of Musharna's physical bulk, and I shall do so once more:
252 Atk Sniper Drapion Night Slash vs. 236 HP / 252+ Def Musharna on a critical hit: 174-207 (78.7 - 93.6%) -- guaranteed 2HKO
252+ Atk Choice Band Tyrantrum Head Smash vs. 236 HP / 252+ Def Musharna: 160-190 (72.3 - 85.9%) -- guaranteed 2HKO
252+ Atk Choice Band Armaldo X-Scissor vs. 236 HP / 252+ Def Musharna: 176-210 (79.6 - 95%) -- guaranteed 2HKO
252+ Atk Iron Ball Conkeldurr Fling (130 BP) vs. 236 HP / 252+ Def Musharna: 138-164 (62.4 - 74.2%) -- guaranteed 2HKO
The significantly rarer Tyranitar1's Fling caps at 81%.

Primarina @ Life Orb, Liquid Voice
Quiet (252 HP, 252 SpA, 4 SpD)
-Moonblast
-Energy Ball
-Hyper Voice
-Protect
It’s weird to look at my Primarina with Protect instead of a fourth attack. I also have nagging feelings about the spread, but all Def EVs were removed and put back into HP, with the last four going into SpD. Unfortunately, four Defense EVs are all it takes to break a tie between Def/SpD for my two leads, which triggers unwanted Download boosts to SpA. I learned from randoms that Porygon-Z3 inflicts a frightening amount of damage with just Analytic and an Expert Belt; Download provides an even stronger kick and allows it to put Musharna in the red. If both enemies go for Mush or use a spread move, I’m up a creek. I don’t need P2’s Shadow Ball or Z-Tri Attack being powered up, either. Between Colress, Ezra, Tamah, and the Aethers, the ducks are fairly common enemies. Mush needs all the physical bulk it can get, so Prima had to miss out a little bit.
It mattered when facing strong and bulky Steels, and the exploders. You should have immediately thought of Metagross34, and those two were absolutely at the top of my list. If I ran Hydro Pump for anything (thereby mostly ruining the whole point of these leads,) it would have been for Metagross. Magnezone was also a concern but, as I’m getting ahead of myself, I’ll come back to these threats.
Liquid Voice leaves something to be desired but, thankfully, water weaknesses are everywhere, often with poor SpD. The Life Orb compensated nicely for the spread penalty and easily landed OHKOs on most of these. Primarina enjoyed multiple forms of support in Helping Hand and Acid Spray. Moonblast was used just as frequently as Hyper Voice, since one OHKO was almost always going to be preferable to critically injuring both opponents. Energy Ball on a bulky water will probably never be redundant.
While Primarina doesn’t make the best bait, it was at least much thinner than Musharna and drew its share of attacks. Playing without TR due to blitzing was extremely rare, the way it should be.

Ferrothorn @ Iron Ball, Iron Barbs
Brave (252 HP, 252 Atk, 4 SpD)
-Gravity
-Gyro Ball
-Power Whip
-Acid Spray
There are some things that, once unleashed, can never be put back. This joint project between Freezer and myself is probably the most unorthodox yet successful thing I have ever helped produce, arguably even more than my namesake. In fact, since Freezer was the first person to actually use it, my own Ferro was raised from one of his eggs.
Functionally, it was an extremely simple but strongly adhesive glue for the rest of the team. Slower than every enemy, with a guaranteed -2 SpD at itsfingertips prongs; Acid Spray was so effective that it was used nearly every battle. Gravity was not used for Power Whip so much as Focus Blast, as well as cancelling the benefits of Double Team for a number of users. OHKOing Cresselia2 at -6 with Thunderbolt has a way of putting a smile on my face. While Steels and their immunity created some issues, I could reliably outmuscle them. Even Musharna benefitted nicely from Acid Spray, delivering OHKOs to some bulkier Poison and Fighting types. Whereas Mawile and Araquanid gambled around their decent odds of debuffs to Stockpile spammers, Ferrothorn’s opponents accepted their fates the moment it appeared.
Iron Ball increases the damage output of Gyro Ball considerably, even reaching 100 against enemies as slow as Shiinotic (HH still required to OHKO Set3.) The item choice is less unorthodox when you consider that offensive Ferrothorns don’t have much variation in their item selection to begin with, but most still wouldn’t gravitate toward it. I’m happy to have such a solid weapon at my disposal when it isn’t running support.

Ampharos @ Ampharosite, Static
Quiet (244 HP, 12 Def, 252 SpA)
-Power Gem
-Thunderbolt
-Dragon Pulse
-Focus Blast
Amphy provides a good dose of specially-based muscle with different coverage, and a means of hitting Metagross and Magnezone a lot harder with or without Helping Hand. Being backline with Ferrothorn made it the more common beneficiary of Acid Spray. That being said, Primarina typically ripped the opponents apart enough that Ampharos usually claimed only one head for itself, if it were even needed. Still, there were no mega evolutions I'd have rather used with this squad.
Battles 201-250:


Battles 251-300:


Battles 301-380:


Battles 381-500:


With boredom for Feardemaru setting in heavily, it was time to try something else. I didn't really have any original ideas, old teams I could feasibly rehash (triples would be a different story) or any gimmicks I wanted to borrow from a fellow Smogonite. The only idea that had firmly rooted in my mind was that it'd be worthwhile to begin notarizing the enemies I'd fought, as Coeur had been doing this for some time and it looked interesting to read through. I just needed a team to use. Without any vivid recollection of the thought processes that brought me to this conclusion, I would ultimately settle on running non-randomized, monotype teams.

Part I: How the Mighty Have Fallen
This run was born from a slump following my previous 1845 streak. I had initially been very eager to jump back into randoms, as it had been months since I'd used the format. Dusting off the ol' RNG website, conveniently still maintaining my preset customs, I'd dived in headfirst. I'd even brought a handful of new alternate flunkies and even the intent to use a number of faster mega evolutions, if I'd rolled them. And briefly, I did taste a bit of success with some of the sweeter fruit to come of the generator. While they weren't a part of something grand, I must give credit where credit is due!
That Snorlax right there is neither my Pulverizing Pancake variant, nor my suicidal variant; it's my previously unused Belly Drum set. Eisen demonstrated exactly what this behemoth is capable of... while our spreads are not wholly identical, it didn't matter, as it was no less tenacious and ferocious. Instead of Psych Up Dusknoir, I had the opportunity to pair it with Oranguru for Instruct abuse. You know how that turned out. Mega Blastoise and Togekiss were left with scraps, but the floor was spic n' span with them around.
It is here that I realise the AI is onto something with its Steelix4. Utilized properly, with frequent helpings of hands and some Gravity shenanigans, Steelix was demolishing everything in sight. If setting sand for itself wasn't feasible, Primarina usually took the helm. I'm given my first taste of Liquid Voice, and it's palatable. Buzzwole had already teamed up with Steelix during my last streak and I liked the way they played together.
Uxie is like a lighter Cress, but that had little sway over me. For the purposes of tree climbing, their differences weren't too staggering and, besides, I didn't even roll Cress. Emboar did almost all of the heavy lifting here, somewhat surprisingly, leading to many bacon-related puns in the discord. Uxie made ample use of Foul Play, one of the only tools unavailable to its superior sister setter. It's not bad when Helping Hand or Ally Switch have little use. For an amusing little side anecdote, I distinctly remember asking Smuckem to quickly run a damage calc for Wishiwashi but can't remember the target (I was playing at work, where the Showdown calc is slow and obnoxious to use on a phone... I use it myself when needed, but in an active discord, I felt both lazy and reckless.) I know I was choosing between Ice Beam and U-turn.
And that's where my enjoyment came to a screeching halt. Twice in a row, actually, because I felt my fourth team failed so rudely and abruptly that I wanted to let those three highly satisfying teams have another go. My mistake was rerunning the same team as the original failed attempt, which included a Mega Metagross (not blamed for either loss, actually, but I didn't think it coincidental, either.) They were first murdered by Sylvia and her makeshift sun team, thanks to a Kantonian Ninetales2 and its liberal Dark Pulse flinching and Drought-boosted Fire Blast crits. I disliked the manner in which a NINETALES steamrolled me (only Alolan Ninetales-1 is supposed to be a cancerous bastard! Come on!!) and so back into the fray. Teams 1-3 did their jobs as expected, and then Team #4 met Benji, the sand specialist who just HAD to lead his oddball Rotom-Mow4. If you don't immediately recall the moveset off the top of your head, it's the Thunder Wave user, and that's the only info you really need. This loss was probably more aggravating than the last, because paralysis has a way of being less abrupt than weather and crits.
But, no! Repto had not hit rock bottom! Two losses in a brief period isn't even enough to warrant more than a disappointed emoji or two from your discord chums.

Enter Vaporeon.
Coasting all the way to Battle #4, Vaporeon lead alongside Drizzletoed-1, and while TR was activated uninhibited, it didn't matter one bit. Vappy activated its Quick Claw four consecutive times and pelted me relentlessly with rain-boosted Surfs, critting at least one that I remember, quickly putting me in a hopeless situation. My Sylveon, the only teammate besides my setter who could stand up to the abuse, was soon hit with Confuse Ray by a Milotic and smacked itself on the turn it would have fainted the Vaporeon. There was no mindless HH usage by the AI- just priority damage and tons of it. I was still active in the discord while this was going on, and some of you fellas might remember I had a bit of a meltdown; lots of obscenities and maybe a bit of self loathing. Losing the fourth battle was a personal record, not that I saved any digital memory of it- I can assure you, I was so angry that I shut the 3DS off before my defeat was even finalized, and had the pleasure of being scolded by the uptight Tree Girl. You can keep your Moomoo Milk! For all I know, you just get 'em from that Hex Maniac, and you know she's on some freaky growth hormones!
I know the way Spidey & Friends rolls by heart; they had coasted easily to 50 during the initial 17x run which indicated I was onto something. If I hadn't already been planning to default to these four, henceforth, it was encouraged by turskain to perhaps mitigate some of the bullshit. If nothing else, they were more synergetic and had dealt with plenty of paralysis. And two of my pokes cared little for Vappy1!
While I quickly lost two more times in the 50s and 60s, using Mega Metagross in yet another team which all but condemned it to the Bank for eternity, it had the effect of being much, much less discouraging than losing before 50. I enjoyed using my OG flunkies, and could reach and shove Blue off his high horse in my spare time at work. And being soundly destroyed by damage instead of slowly eaten in an incapacitated state was more of an energizer than another puncture wound. Because of this, little time elapsed between my trouncings. While I may have lost interest in running 110-speed pokes in TR, I sure as hell was not above running everything else.
Araquanid had murdered her third consecutive rhino, winning a five-minute shopping spree in the process. While she indulged herself, I was left to my own devices. My hands were filthy, there was insanity in my eyes, and maybe a bit of blood. To some, I looked like shit. In reality, I was looking at shit, entire boxes of it. And by golly, I was gonna use it, embrace it, become one with it. And maybe if I could retain a smidge of common sense, conquer the tree with it.
Part II: So Much For Common Sense
Battles 51-60:
Talk about your triple dog dares. Had these been among the flunkies rolled for 151, 101, or even 71, a milestone I had not seen in a while, I likely would have opted to build a much safer-looking squad. On the other hand, I had been meaning to try Aurora Veil Glaceon, and here I had rolled my only supplier of Hail. Paperquagsire loves this move, and the AI uses it every chance it gets.
And the fuss is spot on. I quickly ran into Ezra with this squad and, while Heatran was nowhere to be seen, I did meet P-Z, Espeon, Latios and her own Glaceon, resulting in a violent pissing contest with Jellicent quickly destroyed. Glaceon saved the day, setting AV the following turn; it debuffed their onslaught just enough that a SpD drop from P-Z’s Psychic wasn’t enough to allow Latios2 to score a KO with both of them down.
To my dismay, Wally would lead Cloud Nine Altaria. To my delight, it would mega-evolve and dump its nuisance of an ability and grant me free reign to steamroll his team save for Magnezone, conveniently lacking an Assault Vest.
Jellicent doesn’t look like an S- or A-Class setter, but can be EV’d to survive Tyrantrum4 Head Smash, a baseline for respectable physical bulk. Cursed Body, Scald and Night Shade keep it from being too passive, since it doesn’t have access to my other favorite tools in HH, Gravity or Ally Switch. For randoms, you can do a lot worse than Jellicent.
I don’t remember who Ferrothorn was competing with. It would be helpful to log the entire contents of those rolls for reminiscing much later on.
Battles 61-70:
Fake Out, Low Kick, Flare Blitz, and Darkest Lariat with an Assault Vest. No U-turn, because I’m still not sold on the concept of a moveslot spent on the possibility of refreshing its perks.
The most memorable anecdote for this team involved the first encounter with Stein (Drampa3, Rhyperior4, Carbink3, Araquanid4) since my huge loss to his cretins. The battle was fittingly one-sided, but his Unholy Quadrumvirate did not serve as my opponents, making the revenge a little less sweet. For that matter, with two fire types, it wasn’t even served cold. I considered this another loss and swore that next time would be different.
The most memorable anecdote for this team involved the first encounter with Stein (Drampa3, Rhyperior4, Carbink3, Araquanid4) since my huge loss to his cretins. The battle was fittingly one-sided, but his Unholy Quadrumvirate did not serve as my opponents, making the revenge a little less sweet. For that matter, with two fire types, it wasn’t even served cold. I considered this another loss and swore that next time would be different.
Battles 71-80:
Don’t assume that just because I ran Cofagrigus/Regirock leads that I defaulted to the boring and frequently safe tactic of setting off Weakness Policy on a hulk with more bulk than it knows what to do with, with an exploitable typing, only to commit suicide with relative impunity or, if need be, spamming Ally Switch while the backline is hastily exposed. I actually ran Nasty Plot with two attacks, and Curse/ElemPunch Reggie, okay? I like to exper yeah fuck that noise lol
They did forego the kamikaze tactic in one interesting battle of note. Mimikyu4/Snorlax4 leads put Cofagrigus to bed early, by way of doubling into it and with an untimely crit. Refusing to use Fissure, for some reason, Snorlax opted to set off the WP with an univested Earthquake and was repaid with a Hammer Arm OHKO. It also wrecked Mimi's disguise, who was subsequently placed near death by Sludge Bomb. Another round of survival sees Gengar3 fall, but my abusers are left with 7 and 8 HP, respectively. Now would be a good time for something slower than both of them, wouldn't you say? Wouldn't you know it, Carbink3 joins the party and eats a nice Sludge Bomb before putting Dragalge down (Reggie felled by Shadow Sneak.) Mimikyu didn't have to throw the game from this point, but this is the AI we're talking about. It used Destiny Bond while Golisopod dispatched Carbink, and attempted Destiny Bond again for an automatic failure, leaving Golisopod to win easily and, were it not for that Rocky Helmet, virtually unscathed.
They did forego the kamikaze tactic in one interesting battle of note. Mimikyu4/Snorlax4 leads put Cofagrigus to bed early, by way of doubling into it and with an untimely crit. Refusing to use Fissure, for some reason, Snorlax opted to set off the WP with an univested Earthquake and was repaid with a Hammer Arm OHKO. It also wrecked Mimi's disguise, who was subsequently placed near death by Sludge Bomb. Another round of survival sees Gengar3 fall, but my abusers are left with 7 and 8 HP, respectively. Now would be a good time for something slower than both of them, wouldn't you say? Wouldn't you know it, Carbink3 joins the party and eats a nice Sludge Bomb before putting Dragalge down (Reggie felled by Shadow Sneak.) Mimikyu didn't have to throw the game from this point, but this is the AI we're talking about. It used Destiny Bond while Golisopod dispatched Carbink, and attempted Destiny Bond again for an automatic failure, leaving Golisopod to win easily and, were it not for that Rocky Helmet, virtually unscathed.
Battles 81-90:
There is no depth I won’t sink to! Violating all laws of decency imparted by the Alola Convention, I’ve finally resorted to unleashing Togedemaru. Perfect timing, as the PN still has its hands full with Eppie’s genocide. Ten battles would squeak right on by!
Lv1 Togedemaru, with the required ability and egg moves, had been a recent addition to the Alternate Flunkies crew; upon rolling it, I was eager to give it a shot. Aside from maybe Aromatisse, the others were probably not something I'd immediately gravitate toward when assembling a serious Feardemaru squad, but out of the entire roll of mooks they looked to be more helpful than the others. Palossand could delete some poison types and under some circumstances could deal with ghosts. Drampa was still a fantastic endgame nuke. I amused myself with the prospect of hitting it with Endeavor just to trigger Berserk, but the only scenario where this could even be entertained as rational would also force Togedemaru to be taunted. Being amusing doesn't also have to sabotage my progress, so it would never see the light.
However, in all seriousness, Feardemaru enlightened me to some disturbing trends in the AI, changes in their behavior from my Aron days. Namely, they’re much more unpredictable, and don’t necessarily gun for Toge with a vengeance. They frequently used weak priority attacks on the partner, doubled into the partner, protected liberally.. all of these even with a 1HP target available. Moltres2 was my wildcard last gen, but this time I couldn’t often take anyone for granted. Toge outlived all four opponents in a number of battles. In one particular replay, Mismagius3 not only wasted Never-Ending Nightmare on Aromatisse; partner Alolan Ninetales chose to Ice Shard it as well, passing two easy opportunities to remove it.
Helping Hand would not be most players’ first choice as a situational fourth move for Togedemaru, but it was both excellent and useful. Between delivering OHKOs to bulky Ghost weaknesses, or bulky anything with Devastating Drake, or cleaning up a frail backline with Hyper Voice, the move had some good mileage.
Battles 91-100:
That’s right, it’s an all-legend team, just like the veterans use! Guzzlord doesn’t look at all out of place, and neither does that Lando-T! Cresselia might as well be Cress4. Using the AI sets against them feels great, just like Smucks on occasion.
Ranking high up as one of the happiest moments of this streak, Guzzlord found itself frozen with yellow HP and giving several cold stares to lastmon Skarmory4. As most of you will know, Skarm cannot do anything of value against a frozen poke by itself, except spend its own PP. There were scant few awake in the discord during this early morning battle, but we mused over the length the RNG would torment me, while simultaneously spiting Skarm. I spent over a dozen turns without thawing, not that I minded that much.
These fellows complemented each other surprisingly well, not caring a whole lot about that shared ice weakness. Though, Bewear can be a real asshole. Helping Hand and Ally Switch suit these 580 mooks just as well as they do the 450s.
While no battle in particular left any unsavory taste in my mouth, by battle 100 I was already ready to move away from the RNG. I had a number of vague ideas bouncing around, and the long-existing intent to rerun a few short-lived teams. Long term success had stopped being a goal at this point, since I was having so much fun by quickly jumping between teams. But which idea to try first? Paper was rocking his Assault Vest Primarina, Fougeta was getting ready to rock his own TR/Tailwind hybrid, involving what I believe was an initial Specs Primarina, and I had my own sorely underutilized Liquid Voice Primarina. I also had a devious little nugget, a weapon created in the grimy, underground labs of one Extendedfreezer and myself. This seemed like a good time to open the containment unit.
Part III: Fiendish Creations New & Old
It didn’t take long to come up with an ideal setter for a lead LV Primarina, as well as a fourth poke to make good use of Ferrothorn. I didn’t have a set milestone in mind, though I did have enough faith in the squad to handle much more than the ten battles I’d normally allot to the randoms mooks. Speaking of random mooks, I noticed that Musharna gets a pretty disproportionate amount of screen time compared to the other setters. Determined to change that, I contemplated not using Musharna for the remainder of the streak. That seemed too unrealistic, so I resolved instead to not use Musharna for at least the next 100 battles.
Battles 101-200:

Musharna @ Lum Berry, Telepathy
Relaxed (236 HP, 252 Def, 20 SpD)
-Trick Room
-Psychic
-After You
-Helping Hand
You will find my willpower is nonexistent. More people are warming up to the prospect of Gravity, especially my fellow TR afficionados. However, After You still raises a few eyebrows. Its function on this team is solely to allow Primarina to break dangerous speed ties (first and foremost Alolan Exeggutor2 at 58) as well as thwart some much slower things that weasel their way onto wider rosters. Musharna still outspeeds the Curse users after one or two drops, so it was handy for that as well. Otherwise, against certain safer Scientist/Breeder lead pairs and especially Hikers, Mush would forego the TR entirely and assist Primarina in killing. Oh, did this team love the Hikers.
I have impressed upon others the fortitude of Musharna's physical bulk, and I shall do so once more:
252 Atk Sniper Drapion Night Slash vs. 236 HP / 252+ Def Musharna on a critical hit: 174-207 (78.7 - 93.6%) -- guaranteed 2HKO
252+ Atk Choice Band Tyrantrum Head Smash vs. 236 HP / 252+ Def Musharna: 160-190 (72.3 - 85.9%) -- guaranteed 2HKO
252+ Atk Choice Band Armaldo X-Scissor vs. 236 HP / 252+ Def Musharna: 176-210 (79.6 - 95%) -- guaranteed 2HKO
252+ Atk Iron Ball Conkeldurr Fling (130 BP) vs. 236 HP / 252+ Def Musharna: 138-164 (62.4 - 74.2%) -- guaranteed 2HKO
The significantly rarer Tyranitar1's Fling caps at 81%.

Primarina @ Life Orb, Liquid Voice
Quiet (252 HP, 252 SpA, 4 SpD)
-Moonblast
-Energy Ball
-Hyper Voice
-Protect
It’s weird to look at my Primarina with Protect instead of a fourth attack. I also have nagging feelings about the spread, but all Def EVs were removed and put back into HP, with the last four going into SpD. Unfortunately, four Defense EVs are all it takes to break a tie between Def/SpD for my two leads, which triggers unwanted Download boosts to SpA. I learned from randoms that Porygon-Z3 inflicts a frightening amount of damage with just Analytic and an Expert Belt; Download provides an even stronger kick and allows it to put Musharna in the red. If both enemies go for Mush or use a spread move, I’m up a creek. I don’t need P2’s Shadow Ball or Z-Tri Attack being powered up, either. Between Colress, Ezra, Tamah, and the Aethers, the ducks are fairly common enemies. Mush needs all the physical bulk it can get, so Prima had to miss out a little bit.
It mattered when facing strong and bulky Steels, and the exploders. You should have immediately thought of Metagross34, and those two were absolutely at the top of my list. If I ran Hydro Pump for anything (thereby mostly ruining the whole point of these leads,) it would have been for Metagross. Magnezone was also a concern but, as I’m getting ahead of myself, I’ll come back to these threats.
Liquid Voice leaves something to be desired but, thankfully, water weaknesses are everywhere, often with poor SpD. The Life Orb compensated nicely for the spread penalty and easily landed OHKOs on most of these. Primarina enjoyed multiple forms of support in Helping Hand and Acid Spray. Moonblast was used just as frequently as Hyper Voice, since one OHKO was almost always going to be preferable to critically injuring both opponents. Energy Ball on a bulky water will probably never be redundant.
While Primarina doesn’t make the best bait, it was at least much thinner than Musharna and drew its share of attacks. Playing without TR due to blitzing was extremely rare, the way it should be.

Ferrothorn @ Iron Ball, Iron Barbs
Brave (252 HP, 252 Atk, 4 SpD)
-Gravity
-Gyro Ball
-Power Whip
-Acid Spray
There are some things that, once unleashed, can never be put back. This joint project between Freezer and myself is probably the most unorthodox yet successful thing I have ever helped produce, arguably even more than my namesake. In fact, since Freezer was the first person to actually use it, my own Ferro was raised from one of his eggs.
Functionally, it was an extremely simple but strongly adhesive glue for the rest of the team. Slower than every enemy, with a guaranteed -2 SpD at its
Iron Ball increases the damage output of Gyro Ball considerably, even reaching 100 against enemies as slow as Shiinotic (HH still required to OHKO Set3.) The item choice is less unorthodox when you consider that offensive Ferrothorns don’t have much variation in their item selection to begin with, but most still wouldn’t gravitate toward it. I’m happy to have such a solid weapon at my disposal when it isn’t running support.

Ampharos @ Ampharosite, Static
Quiet (244 HP, 12 Def, 252 SpA)
-Power Gem
-Thunderbolt
-Dragon Pulse
-Focus Blast
Amphy provides a good dose of specially-based muscle with different coverage, and a means of hitting Metagross and Magnezone a lot harder with or without Helping Hand. Being backline with Ferrothorn made it the more common beneficiary of Acid Spray. That being said, Primarina typically ripped the opponents apart enough that Ampharos usually claimed only one head for itself, if it were even needed. Still, there were no mega evolutions I'd have rather used with this squad.
Surprise Threat:

Lickilicky was a notable pain in the ass for this team. Too much bulk to be slaughtered by Primarina, and because Prima had forsaken all Def investment, even Set3's Body Slam was enough for an easy 2HKO, made all the more likely with Quick Claw procs. If Set4 lead, there was really nothing I could do to prevent it from exploding its first or second turn. Snorlax was dangerous on a similar level, but lack of a QC and the weak offense of Set4 without Fissure spam (no nightmare anecdotes there) made it seem easier to deal with. I even had the pleasure of nailing Snorlax4 with a single-target Hyper Voice, in rain provided by Politoed, after taking an Acid Spray. It almost looked like Snorlax didn't carry an Assault Vest!
But I digress. Starter teams like Reina's also had potential to be hairy, requiring little more than a specific pairing that would threaten one while giving no safe switch to the other. Several of the starters have a relatively one-sided matchup with someone else on my team. Infernape leads with Fake Out also didn't help one bit.
Battles 201-250:
There's a chance someone remembers this motley crew from the original SM, and its surprise in lasting until Battle 131 before meeting its timely demise. This motley crew was formerly rounded out by Guzzlord and not the drastically less shitty Mega Camerupt. Well, coming fresh out of a streak during which you mowed down a large number of Breeders and their camels will do that. My two muscleheads Volt and Crab do not like encounters with enemy Camerupts, especially in the backline where it's far too late to decline setting TR. When planning to re-run this team, the only thing I could think about was how desperately they wanted to avoid encounters with Camerupt. I refused to change Vikavolt or Crabominable, and so Guzzlord unfortunately had to take a snack break. Of course, having my own Megarupt didn't give me a sure checkmate to my enemies', since it still required other things to go my way, but it was a massive improvement. And sure enough, I did in fact have to destroy a number of them, extremely fortunately under mostly optimal conditions; namely, being able to use my own camel immediately. Cooks provided two, while Iniko and Danby provided the others. If Guzzlord had a better stat spread and could OHKO one with Devastating Drake, I wouldn't have changed the team.

Oranguru @ Lum Berry, Inner Focus
Relaxed (212 HP, 164 Def, 132 SpD)
-Trick Room
-Instruct
-Psychic
-Protect
Still enjoys the benefits of a lead partner weak to Rock Slide! Still has to decide if it's better to Instruct a non-guaranteed OHKO, or throw in an attack of its own!
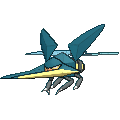
Vikavolt @ Life Orb, Levitate
Quiet (212 HP, 252 SpA, 44 SpD)
-Thunderbolt
-Bug Buzz
-Energy Ball
-Protect
A different kind of nuke compared to my favorite spider, but still hits incredibly hard. All the more impressive is that this thing evolves from an early route insect which, some generations ago, would have been surely condemned to unusable garbage. I still find myself unfairly grouping it with shitmons for that reason, but I love using it regardless.
Unfortunately, being a lead compels it to run Protect, as there are often situations where Flash Cannon would have allowed for more clean OHKOs (particularly Black Belts Iniko and Arnold with their Ice fetishes.) The moveset as is still left little to be desired, with few enemies being able to simply wall it outright. While a number of fire types are nasty, Incineroar4 ranks among the highest for that blasted Quick Claw and a mere 75% cap on LO Thunderbolt, requiring Instruct. Zard X and Camerupt create more hopeless scenarios, having the slimmest of odds for 2HKOs, but don't have as much capacity for bullshit.
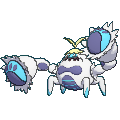
Crabominable @ Wide Lens, Iron Fist
Brave (188 HP, 252 Atk, 68 SpD)
-Ice Hammer
-Earthquake
-Stone Edge
-Close Combat
I like this thing more and more as I continue to use it, and even fight against it. I've even ceased my complaining that it wasn't given Knock Off via move tutor, as I still get lots of mileage out of EdgeQuake (no immediate decision as to which one would be dumped for the move.) While being Ice type was its final nail to half its detractors, it's what makes Ice Hammer such a spammable and deadly move. The other half sneer at its lack of priority, but there's no incentive to use such weak moves on a TR-capable powerhouse that wields two 180 BP STABs. Wide Lens even mitigates Ice Hammer's drawback pretty nicely, and made me less wary of using Stone Edge without Gravity (still sparingly, of course.) That said, its frailty isn't really mitigated by EVs into bulk. Allowing its teammates to expose the backline, ensuring it had a clean path to sweep, was imperative to its success. Unlike Vikavolt, I can still lovably call my Crabby a true shitmon.
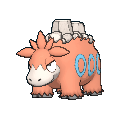
Camerupt @ Cameruptite, Solid Rock
Quiet (244 HP, 12 Def, 252 SpA)
-Ancientpower
-Earth Power
-Flash Cannon
-Heat Wave
Now we have the opposite of my earlier Primarina; it was very odd to me to be running a Camerupt without Protect, let alone in the backline, but I was glad I did! Flash Cannon was as useful to Camerupt as it would have been to Vikavolt, perhaps even moreso. Foregoing Protect on my backline pokes under most circumstances is the gamble I often take, with the payout being more momentum in having increased coverage. For some pokes the payout isn't quite as high, and Camerupt could be considered among them. Because of the success I had, I'm probably more apt to try it again, but that requires me to use another team without leading it, and the camel usually makes far too good a lead to pass up. As the Magnemite family learned Explosion well into its lifespan, perhaps someday Camerupt can use Energy Ball without needing Nature Power and terrain.
Anyway, being able to pick up Vikavolt's slack made it the perfect pinch hitter. Be it Magnezone or a handful of dangerous fire types, Camerupt easily cleaned up after it. As I mentioned earlier, it was tasked with destroying a handful of opposing Camerupts; it was able to do so by entering battle before they showed their heads, with TR safely activated. While the speed order being determined after evolving did strip it of a handful of choice preemptive OHKOs, they required it to lead, making it a moot point. Having a constant 22 speed and getting the jump on the likes of Trevenant4 and the Escavaliers is still a giant boon.

Oranguru @ Lum Berry, Inner Focus
Relaxed (212 HP, 164 Def, 132 SpD)
-Trick Room
-Instruct
-Psychic
-Protect
Still enjoys the benefits of a lead partner weak to Rock Slide! Still has to decide if it's better to Instruct a non-guaranteed OHKO, or throw in an attack of its own!

Vikavolt @ Life Orb, Levitate
Quiet (212 HP, 252 SpA, 44 SpD)
-Thunderbolt
-Bug Buzz
-Energy Ball
-Protect
A different kind of nuke compared to my favorite spider, but still hits incredibly hard. All the more impressive is that this thing evolves from an early route insect which, some generations ago, would have been surely condemned to unusable garbage. I still find myself unfairly grouping it with shitmons for that reason, but I love using it regardless.
Unfortunately, being a lead compels it to run Protect, as there are often situations where Flash Cannon would have allowed for more clean OHKOs (particularly Black Belts Iniko and Arnold with their Ice fetishes.) The moveset as is still left little to be desired, with few enemies being able to simply wall it outright. While a number of fire types are nasty, Incineroar4 ranks among the highest for that blasted Quick Claw and a mere 75% cap on LO Thunderbolt, requiring Instruct. Zard X and Camerupt create more hopeless scenarios, having the slimmest of odds for 2HKOs, but don't have as much capacity for bullshit.

Crabominable @ Wide Lens, Iron Fist
Brave (188 HP, 252 Atk, 68 SpD)
-Ice Hammer
-Earthquake
-Stone Edge
-Close Combat
I like this thing more and more as I continue to use it, and even fight against it. I've even ceased my complaining that it wasn't given Knock Off via move tutor, as I still get lots of mileage out of EdgeQuake (no immediate decision as to which one would be dumped for the move.) While being Ice type was its final nail to half its detractors, it's what makes Ice Hammer such a spammable and deadly move. The other half sneer at its lack of priority, but there's no incentive to use such weak moves on a TR-capable powerhouse that wields two 180 BP STABs. Wide Lens even mitigates Ice Hammer's drawback pretty nicely, and made me less wary of using Stone Edge without Gravity (still sparingly, of course.) That said, its frailty isn't really mitigated by EVs into bulk. Allowing its teammates to expose the backline, ensuring it had a clean path to sweep, was imperative to its success. Unlike Vikavolt, I can still lovably call my Crabby a true shitmon.

Camerupt @ Cameruptite, Solid Rock
Quiet (244 HP, 12 Def, 252 SpA)
-Ancientpower
-Earth Power
-Flash Cannon
-Heat Wave
Now we have the opposite of my earlier Primarina; it was very odd to me to be running a Camerupt without Protect, let alone in the backline, but I was glad I did! Flash Cannon was as useful to Camerupt as it would have been to Vikavolt, perhaps even moreso. Foregoing Protect on my backline pokes under most circumstances is the gamble I often take, with the payout being more momentum in having increased coverage. For some pokes the payout isn't quite as high, and Camerupt could be considered among them. Because of the success I had, I'm probably more apt to try it again, but that requires me to use another team without leading it, and the camel usually makes far too good a lead to pass up. As the Magnemite family learned Explosion well into its lifespan, perhaps someday Camerupt can use Energy Ball without needing Nature Power and terrain.
Anyway, being able to pick up Vikavolt's slack made it the perfect pinch hitter. Be it Magnezone or a handful of dangerous fire types, Camerupt easily cleaned up after it. As I mentioned earlier, it was tasked with destroying a handful of opposing Camerupts; it was able to do so by entering battle before they showed their heads, with TR safely activated. While the speed order being determined after evolving did strip it of a handful of choice preemptive OHKOs, they required it to lead, making it a moot point. Having a constant 22 speed and getting the jump on the likes of Trevenant4 and the Escavaliers is still a giant boon.
Surprise Threat:

Punk Guy Dustin obliged me with my first TR-Free Diet Pill in quite a while by leading Staraptor3, who was more than happy to OHKO Oranguru with Giga Impact. At least when Incineroar lead, it needed to crit with Crunch, or at least double into it while simultaneously resisting the urge to Flare Blitz my insect. But between a recharge turn and support from Tauros3, Manectric3 and Gyarados3, the battle was not quite disastrous. Being paired with a Flying type compelled Tauros to use Earthquake a second time and not Giga Impact, inflicting unimpressive damage and ensuring it fell without inflicting another casualty. While Gyarados being Set 3 ensured that Manectric was going to evolve regardless, Manectric was in the #1 slot and would have out-prioritized it, enabling me to use Thunderbolt with no risk of Lightning Rod. Because Overheat is a guaranteed OHKO on Vikavolt, there remained a chance it would target it first; nevertheless, Irisked correctly predicted it would go for -1 Crabominable and swapped in Camerupt to eat the hit. No Waterfall from Gyarados, but a harmless DD; with it down and Manectric now at -2, I had Dustin by the balls.
Close, but no Cigar:


Nice try, Stein! I know a Slowking when I see one, and that ain't no Slowking. Your Jellicent isn't even the right gender! This attempt to satisfy my relentless vendetta was as much a failure as the last. Our feud is far from over.
Punk Guy Dustin obliged me with my first TR-Free Diet Pill in quite a while by leading Staraptor3, who was more than happy to OHKO Oranguru with Giga Impact. At least when Incineroar lead, it needed to crit with Crunch, or at least double into it while simultaneously resisting the urge to Flare Blitz my insect. But between a recharge turn and support from Tauros3, Manectric3 and Gyarados3, the battle was not quite disastrous. Being paired with a Flying type compelled Tauros to use Earthquake a second time and not Giga Impact, inflicting unimpressive damage and ensuring it fell without inflicting another casualty. While Gyarados being Set 3 ensured that Manectric was going to evolve regardless, Manectric was in the #1 slot and would have out-prioritized it, enabling me to use Thunderbolt with no risk of Lightning Rod. Because Overheat is a guaranteed OHKO on Vikavolt, there remained a chance it would target it first; nevertheless, I
Close, but no Cigar:
Nice try, Stein! I know a Slowking when I see one, and that ain't no Slowking. Your Jellicent isn't even the right gender! This attempt to satisfy my relentless vendetta was as much a failure as the last. Our feud is far from over.
Battles 251-300:
Functionally, the leads were very similar to the 101-200 Primarina team, albeit with more concentrated brute force. Being much faster than a good number of threats to TR would allow Heracross to get the jump on them, and After You would intervene where speed then became a liability. The lack of a spread move was to be compensated by having a wider list of guaranteed OHKOs and, hopefully, the ability to open enough holes for Stakataka to easily clean up. This team underwent a couple significant changes from its conception at the start of UM, not the least of which the replacement of Oranguru as a setter. Oranguru outspeeds Heracross in TR, but is not a good user of After You. Instruct is devastating with Stakataka (as Josh has amply demonstrated) but Helping Hand serves a purpose nonetheless. The fact is, the types of enemies Heracross and Exeggutor destroy so easily are also highly dangerous with a speed advantage (or tie, as is more common with Exeggutor.) To get the most mileage out of Megacross, I'd have to forego the Instruct. The second not-so-massive-yet-not-insignificant change was the removal of Stakataka's Wide Lens. More on that later.

Musharna @ Lum Berry, Telepathy
Relaxed (236 HP, 252 Def, 20 SpD)
-Trick Room
-Psychic
-After You
-Helping Hand
Since this set has not changed, rather than sing another song about Helping Hand, I'd like to point out that this team had the unfortunate coincidence of playing without TR more than any other team involved in the streak. On the other hand, this team also suffered far less, perhaps not coincidentally. Three battles out of fifty may not seem like a lot, but Musharna is noticeably more difficult to kill than a number of setters I use, which makes such instances stand out. ...well, that and, by virtue of cutting many teams off early, most of them didn't even know what this was like.
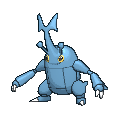
Heracross @ Heracronite, Moxie
Brave (236 HP, 252 Atk, 20 SpD)
-Protect
-Pin Missile
-Rock Blast
-Close Combat
I can't immediately recall taking advantage of a reliable OHKO for a quick T1 Moxie boost, and I have no replay of it, which is the strongest indicator that it never occurred. I also really would have liked to somehow fit Bullet Seed onto this set. There are many pokes that are easily slain by this move, relevant threats, not the least of which bulky waters like Wishiwashi and Primarina. But, they still weren't as threatening as a number of fliers, Togekiss and Charizard among them, so Rock Blast was here to stay. Losing Protect was also out of the question. HH Skill Linked Rock Blasts or Pin Missile compensated pretty nicely (especially for defensively poor Fairy types) but it also meant forgoing After You. I was actually more impressed by Megacross' handling of Scientists, Breeders and Hikers than Primarina, probably because the ideal scenarios typically meant Primarina slaughtered both targets. Megacross was able to show off its great bulk as well as its ability to just shred almost anything on neutral hits. Now imagine if evolving took a much larger speed cut, similar to Abomasnow's, and the leftover points were used to fluff its defenses even further. Oh, what could have been!
Even during my 1845 streak, I'd contemplated running Heracross in the back, utilizing Bullet Seed but also allowing Stakataka to be used as bait. Going through many mock battles of existing replays (my standard for trying new ideas without ruining streaks) made me strongly reconsider, both for Heracross' better ability to offensively protect Musharna, as well as Stakataka making poorer bait than anticipated. It also lost some useful coverage by running Protect and couldn't snowball as well without Instruct, which was necessary for it to lead. I wasn't going to go back to using Oranguru as a setter, either.
252+ Atk Heracross-Mega Helping Hand Close Combat vs. 252 HP / 0 Def Escavalier: 211-249 (119.2 - 140.6%) -- guaranteed OHKO
This dish is savory, to say the least, my friend.
252+ Atk Heracross-Mega Helping Hand Pin Missile (5 hits) vs. 252 HP / 252+ Def Shiinotic: 195-230 (116.7 - 137.7%) -- guaranteed OHKO after Leftovers recovery
Oh, you brought dessert! You spoil me!
252+ Atk Heracross-Mega Helping Hand Rock Blast (5 hits) vs. 252 HP / 0 Def Primarina: 195-235 (104.2 - 125.6%) -- guaranteed OHKO
252+ Atk Heracross-Mega Helping Hand Rock Blast (4 hits) vs. 0 HP / 0 Def Mimikyu: 148-176 (113.8 - 135.3%) -- guaranteed OHKO
(moaning, unintelligible gibberish)
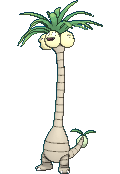
Alolan Exeggutor @ Grassium Z, Frisk
Quiet (236 HP, 20 Def, 252 SpA)
-Flamethrower
-Sludge Bomb
-Dragon Pulse
-Leaf Storm
With Instruct, this fellow (fellows?) would make fine use of an Expert Belt. Without any such abuse, I opted for a nuke so it could better carry its own weight. Bloom Doom made a HUGE difference in the battles gone to shit, as it made for a reliable OHKO while its partner made a strategic switch or even a controlled death for the team. Frisk was more useful than I'd anticipated, despite being backline. It saw a lot more action than it did on the Oranguru team, as it was almost always more preferable to Stakataka versus a number of bulkier targets. I'll complain about this more with Marowak, but 45 is such a lousy minimum speed to hit. It ties with too much (AY failing because the game decided you were going to win the tie regardless is also annoying.) I also don't believe it's worth running a single point in speed to beat them outside of TR; it forces a loss with the room flipped, and After You is more of a special case than an option I'd want at my fingertips as often as possible.
Sludge Bomb has enough useful OHKOs against problematic pokes (hell, bopping Shiinotic34 alone is a reason to run it) that I wouldn't bother dropping it for something else, Energy Ball or otherwise.
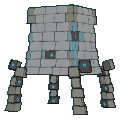
Stakataka @ Assault Vest, Beast Boost
Lonely (252 HP, 252 Atk, 4 SpD)
-Rock Slide
-Earthquake
-Gyro Ball
-Superpower
The loss of accuracy in Wide Lens was made up for by the nice spike in SpD, which not only allowed it to stand on its four legs a bit better, but allowed it to switch into things for both Musharna (immediate anecdote, Thundurus2 Dark Pulse) and Heracross. It made an incredible difference in the few battles played without TR. Speaking of accuracy, Rock Slide had the sweet coincidence of never failing me when I needed it most, so I'm thankful.
No Wide Guard for fairly similar reasons to Araquanid, with even less incentive as a backline, who should be worrying more about ending the battle quickly. Instead of gambling between Rock Slide and Stone Edge, Stakataka was concerned with the many Earthquake users opting to use their Fighting-typed attack, instead. Superpower has a number of select uses, but the biggest one is Snorlax. Normally would run Stomping Tantrum over Earthquake, since the move becomes more than strong enough after some boosts; the special effect is also amusingly easy to trigger with Instruct, as killing both targets with the initial Rock Slide would force a failure and power it up for any remaining opponent. But I digress. Telepathy and Helping Hand make for useful quake applications.
With enough damage inflicted by Heracross, Stakataka had a pretty easy job. Helping Hand mitigated Instruct somewhat, and compensated for the lack of accumulated boosts. I love this thing and look forward to Triples perhaps giving it a better medium for attempting to shine in a setter or mixed role.

Musharna @ Lum Berry, Telepathy
Relaxed (236 HP, 252 Def, 20 SpD)
-Trick Room
-Psychic
-After You
-Helping Hand
Since this set has not changed, rather than sing another song about Helping Hand, I'd like to point out that this team had the unfortunate coincidence of playing without TR more than any other team involved in the streak. On the other hand, this team also suffered far less, perhaps not coincidentally. Three battles out of fifty may not seem like a lot, but Musharna is noticeably more difficult to kill than a number of setters I use, which makes such instances stand out. ...well, that and, by virtue of cutting many teams off early, most of them didn't even know what this was like.

Heracross @ Heracronite, Moxie
Brave (236 HP, 252 Atk, 20 SpD)
-Protect
-Pin Missile
-Rock Blast
-Close Combat
I can't immediately recall taking advantage of a reliable OHKO for a quick T1 Moxie boost, and I have no replay of it, which is the strongest indicator that it never occurred. I also really would have liked to somehow fit Bullet Seed onto this set. There are many pokes that are easily slain by this move, relevant threats, not the least of which bulky waters like Wishiwashi and Primarina. But, they still weren't as threatening as a number of fliers, Togekiss and Charizard among them, so Rock Blast was here to stay. Losing Protect was also out of the question. HH Skill Linked Rock Blasts or Pin Missile compensated pretty nicely (especially for defensively poor Fairy types) but it also meant forgoing After You. I was actually more impressed by Megacross' handling of Scientists, Breeders and Hikers than Primarina, probably because the ideal scenarios typically meant Primarina slaughtered both targets. Megacross was able to show off its great bulk as well as its ability to just shred almost anything on neutral hits. Now imagine if evolving took a much larger speed cut, similar to Abomasnow's, and the leftover points were used to fluff its defenses even further. Oh, what could have been!
Even during my 1845 streak, I'd contemplated running Heracross in the back, utilizing Bullet Seed but also allowing Stakataka to be used as bait. Going through many mock battles of existing replays (my standard for trying new ideas without ruining streaks) made me strongly reconsider, both for Heracross' better ability to offensively protect Musharna, as well as Stakataka making poorer bait than anticipated. It also lost some useful coverage by running Protect and couldn't snowball as well without Instruct, which was necessary for it to lead. I wasn't going to go back to using Oranguru as a setter, either.
252+ Atk Heracross-Mega Helping Hand Close Combat vs. 252 HP / 0 Def Escavalier: 211-249 (119.2 - 140.6%) -- guaranteed OHKO
This dish is savory, to say the least, my friend.
252+ Atk Heracross-Mega Helping Hand Pin Missile (5 hits) vs. 252 HP / 252+ Def Shiinotic: 195-230 (116.7 - 137.7%) -- guaranteed OHKO after Leftovers recovery
Oh, you brought dessert! You spoil me!
252+ Atk Heracross-Mega Helping Hand Rock Blast (5 hits) vs. 252 HP / 0 Def Primarina: 195-235 (104.2 - 125.6%) -- guaranteed OHKO
252+ Atk Heracross-Mega Helping Hand Rock Blast (4 hits) vs. 0 HP / 0 Def Mimikyu: 148-176 (113.8 - 135.3%) -- guaranteed OHKO
(moaning, unintelligible gibberish)

Alolan Exeggutor @ Grassium Z, Frisk
Quiet (236 HP, 20 Def, 252 SpA)
-Flamethrower
-Sludge Bomb
-Dragon Pulse
-Leaf Storm
With Instruct, this fellow (fellows?) would make fine use of an Expert Belt. Without any such abuse, I opted for a nuke so it could better carry its own weight. Bloom Doom made a HUGE difference in the battles gone to shit, as it made for a reliable OHKO while its partner made a strategic switch or even a controlled death for the team. Frisk was more useful than I'd anticipated, despite being backline. It saw a lot more action than it did on the Oranguru team, as it was almost always more preferable to Stakataka versus a number of bulkier targets. I'll complain about this more with Marowak, but 45 is such a lousy minimum speed to hit. It ties with too much (AY failing because the game decided you were going to win the tie regardless is also annoying.) I also don't believe it's worth running a single point in speed to beat them outside of TR; it forces a loss with the room flipped, and After You is more of a special case than an option I'd want at my fingertips as often as possible.
Sludge Bomb has enough useful OHKOs against problematic pokes (hell, bopping Shiinotic34 alone is a reason to run it) that I wouldn't bother dropping it for something else, Energy Ball or otherwise.

Stakataka @ Assault Vest, Beast Boost
Lonely (252 HP, 252 Atk, 4 SpD)
-Rock Slide
-Earthquake
-Gyro Ball
-Superpower
The loss of accuracy in Wide Lens was made up for by the nice spike in SpD, which not only allowed it to stand on its four legs a bit better, but allowed it to switch into things for both Musharna (immediate anecdote, Thundurus2 Dark Pulse) and Heracross. It made an incredible difference in the few battles played without TR. Speaking of accuracy, Rock Slide had the sweet coincidence of never failing me when I needed it most, so I'm thankful.
No Wide Guard for fairly similar reasons to Araquanid, with even less incentive as a backline, who should be worrying more about ending the battle quickly. Instead of gambling between Rock Slide and Stone Edge, Stakataka was concerned with the many Earthquake users opting to use their Fighting-typed attack, instead. Superpower has a number of select uses, but the biggest one is Snorlax. Normally would run Stomping Tantrum over Earthquake, since the move becomes more than strong enough after some boosts; the special effect is also amusingly easy to trigger with Instruct, as killing both targets with the initial Rock Slide would force a failure and power it up for any remaining opponent. But I digress. Telepathy and Helping Hand make for useful quake applications.
With enough damage inflicted by Heracross, Stakataka had a pretty easy job. Helping Hand mitigated Instruct somewhat, and compensated for the lack of accumulated boosts. I love this thing and look forward to Triples perhaps giving it a better medium for attempting to shine in a setter or mixed role.
Unsurprising Threat:


Kukui ended this original team many moons ago, Oranguru and all, at 130. While the pokes named are only ingredients in the overal poison cocktail that is his roster, they pose the most immediate threats and don't care who they're paired with to carry out their deadly mission. Incineroar4 is the absolute worst on the list, and paired with Primarina3 is the worst possible lead pairing for this team. Thankfully, they never appeared in that formation. Heracross can tank a number of supereffective hits; while STAB Moonblast is among them, Flare Blitz is not, and it was just begging for a Quick Claw activation. On battle 300, the final intended use of this team, that very scenario played out. Two procs twice in a row; fortunately, Incineroar was paired with the crummy Midnight Lycanroc and Fire Fang failed to burn Stakataka on the switch (wanted to get it in ASAP to rack boosts and otherwise assist Heracross with a difficult trainer.) HH EQ destroyed both his leads, and HH RS the following turn cleaned up Primarina and Braviary. That could have gone much worse! Many of Kukui's possible pairings would have forced me to take undesireable trades.
The battles without TR involved Moltres2 Sky Attack crit and flinch, a SpD drop from Raikou's Shadow Ball followed by Greninja4 Dark Pulse (likely would have killed regardless of drop, but lower rolls could have prevented that) and a Fake Out from Kantonian Raichu paired with Mega Glalie, whom I didn't allow to detonate into Musharna (which it would have survived anyway.) The battles were fun and interesting in their own right, on top of giving my three abusers the chance to synergize without it.
Battles 301-380:
Yes, that is who you think it is. The triumphant return of my unorthodox ballbuster and namesake, Iron Ball Gardevoir. That said, like her debut, she is not the star of the show but a critically important offensive support unit in that show. And that show is all about taking the AI's Explosion feitsh and showing them what it's capable of when properly and sinisterly used. While on its head, the team may look built around Golem and, to an extent, that's true; however, the remaining two abusers brought very important utilities and coverage and, owing to suicide being a one-way ticket, had to do just as much fighting themselves. The tagline for this team comes from one of my favorite things to say when people remarked on IBG and if I'd recommend it to other players.

Musharna @ Lum Berry, Telepathy
Relaxed (236 HP, 252 Def, 20 SpD)
-Trick Room
-Gravity
-Psychic
-Helping Hand
Back by popular demand You again! Now with added Gravity Flavor! While giving Stone Edge and Focus Blast accuracy are among its standard perks, rendering most Rotom formes extremely vulnerable to Earthquake is one of the best uses for the move. Nullifying Hi Jump Kick is another, but it was just as helpful to block one, then switch to Marowak and allow the user to kill themselves. In one instance, Medicham was paired with Bisharp4, who would not lay off the Taunt and forced me to resort to this tactic regardless.
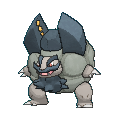
Alolan Golem @ Expert Belt, Galvanize
Brave (188 HP, 252 Atk, 68 SpD)
-Protect
-Earthquake
-Stone Edge
-Explosion
For the record, I generally prefer Heavy Slam + Double Edge Golem and lacking Protect/Explosion entirely. But, like Primarina's moveset issues, the team wasn't going to function any other way and necessitated this approach. This also gave it its biggest weakness.
Unsurprisingly, Golem attracts Earthquake like shit attracts flies. It has the bulk to survive most STABless quakes with the spread penalty, but lacks any and all methods to feasibly damage bulky ground types in return. Neither Gardevoir or Marowak have safe switches into these, which meant some sackin' was in order. Luckily, the teams where this was most likely (Hikers and Breeders) had poor matchups against my backline; if Golem could at least cripple or destroy one enemy, the trade was much easier to stomach. There was some respite in users like enemy Alolawaks, who would use Stomping Tantrum into Protect and then be free to eat a Stone Edge the following turn, passing any attempt to Detect. Others like Mega Sceptile were not as safe, failing to OHKO but requiring HH for Stone Edge to deliver one itself. Mega Garchomp and Palossand not only provided no respite at all, but sacking Golem to send in backup wasn't even guaranteed to take me out of hot water.
Barring that highly common and lethal attack, Electric-typed Explosions are... well, pretty dumb. STAB plus HH plus the nice little kick from Galvanize meant that if the targets weren't immune, there were going to be pieces of them everywhere. Some bulky grass types could barely avoid becoming McNuggets, but the damage was still far too severe to come back from. There's a certain, very real satisfaction in offing targets that ordinarily had no business whatsoever being attacked with such a move, among them Heatran and pretty much all Steel and Ghost types. Golem was often able to take something down without blowing up, and then bring the battle to a swift 3v1 the followng turn. Just as often, Golem didn't even bother with that noise and detonated right away. Like Exeggutor, Golem dislikes its 45 speed but, coincidentally, losing speed ties (with bad results) happened extremely rarely for this team.
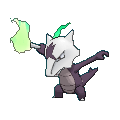
Alolan Marowak @ Thick Club, Lightning Rod
Brave (252 HP, 252 Atk, 4 Def)
-Low Kick
-Flare Blitz
-Earthquake
-Shadow Bone
Immune to all Explosions except those of Glalie; though, a bigger perk than being able to safely battle alongside Golem is killing Thunder Wave and Charge Beams from the likes of Zapdos, as well as most useful moves by Magnezone. Marowak isn't built for longevity, making the protection from Lightning Rod somewhat more helpful than Rock Head (at least until Instruct is involved.) Turskain will agree that four-attacks Marowak utilizing Low Kick is more helpful than Protect, as it now has a great damage option for Snorlax as well as Tyranitar or Mamoswine, without having to gamble around abilities (sub-50% kill rate for 252 Thick Fat Mamoswine4, in case you mistakenly thought Marowak had enough raw power to plow through that) or use Helping Hand as assurance.
Marowak loves being able to use Earthquake instead of the single target and missable Bonemerang. This thing eats the Rotoms for breakfast, and uses their bodies to store bones. Shadow Bone is also an excellent and much-needed signature move, though is juuuuust soft enough to miss some important targets, with or without HH. Still, I can't complain.

Gardevoir @ Iron Ball, Telepathy
Quiet (252 HP, 252 SpA, 4 SpD)
-Moonblast
-Energy Ball
-Psychic
-Focus Blast
Not to be underestimated in the least! Falling below 40 speed, she has no fear of tying with negative-natured base 30s, and 125 SpA still has a long way to go before it's as weak as 100 is in modern times. In other words, IBG did plenty of effortless killing, with and without Helping Hand. Given the cleanup she was tasked with, I believe Energy Ball and Focus Blast were statistically used more than anything else. She also took the fewest number of Explosions for the team, though that's to say nothing of the amount of Earthquakes. The original IBG began with Helping Hand before I came to my senses, and the move was not even considered here. Her four attacking slots were too important. Needless to say, I was thrilled with her effectiveness, though constantly wary of the four main users of Bullet Punch making an appearance (which includes both Scizor sets.)

Musharna @ Lum Berry, Telepathy
Relaxed (236 HP, 252 Def, 20 SpD)
-Trick Room
-Gravity
-Psychic
-Helping Hand

Alolan Golem @ Expert Belt, Galvanize
Brave (188 HP, 252 Atk, 68 SpD)
-Protect
-Earthquake
-Stone Edge
-Explosion
For the record, I generally prefer Heavy Slam + Double Edge Golem and lacking Protect/Explosion entirely. But, like Primarina's moveset issues, the team wasn't going to function any other way and necessitated this approach. This also gave it its biggest weakness.
Unsurprisingly, Golem attracts Earthquake like shit attracts flies. It has the bulk to survive most STABless quakes with the spread penalty, but lacks any and all methods to feasibly damage bulky ground types in return. Neither Gardevoir or Marowak have safe switches into these, which meant some sackin' was in order. Luckily, the teams where this was most likely (Hikers and Breeders) had poor matchups against my backline; if Golem could at least cripple or destroy one enemy, the trade was much easier to stomach. There was some respite in users like enemy Alolawaks, who would use Stomping Tantrum into Protect and then be free to eat a Stone Edge the following turn, passing any attempt to Detect. Others like Mega Sceptile were not as safe, failing to OHKO but requiring HH for Stone Edge to deliver one itself. Mega Garchomp and Palossand not only provided no respite at all, but sacking Golem to send in backup wasn't even guaranteed to take me out of hot water.
Barring that highly common and lethal attack, Electric-typed Explosions are... well, pretty dumb. STAB plus HH plus the nice little kick from Galvanize meant that if the targets weren't immune, there were going to be pieces of them everywhere. Some bulky grass types could barely avoid becoming McNuggets, but the damage was still far too severe to come back from. There's a certain, very real satisfaction in offing targets that ordinarily had no business whatsoever being attacked with such a move, among them Heatran and pretty much all Steel and Ghost types. Golem was often able to take something down without blowing up, and then bring the battle to a swift 3v1 the followng turn. Just as often, Golem didn't even bother with that noise and detonated right away. Like Exeggutor, Golem dislikes its 45 speed but, coincidentally, losing speed ties (with bad results) happened extremely rarely for this team.

Alolan Marowak @ Thick Club, Lightning Rod
Brave (252 HP, 252 Atk, 4 Def)
-Low Kick
-Flare Blitz
-Earthquake
-Shadow Bone
Immune to all Explosions except those of Glalie; though, a bigger perk than being able to safely battle alongside Golem is killing Thunder Wave and Charge Beams from the likes of Zapdos, as well as most useful moves by Magnezone. Marowak isn't built for longevity, making the protection from Lightning Rod somewhat more helpful than Rock Head (at least until Instruct is involved.) Turskain will agree that four-attacks Marowak utilizing Low Kick is more helpful than Protect, as it now has a great damage option for Snorlax as well as Tyranitar or Mamoswine, without having to gamble around abilities (sub-50% kill rate for 252 Thick Fat Mamoswine4, in case you mistakenly thought Marowak had enough raw power to plow through that) or use Helping Hand as assurance.
Marowak loves being able to use Earthquake instead of the single target and missable Bonemerang. This thing eats the Rotoms for breakfast, and uses their bodies to store bones. Shadow Bone is also an excellent and much-needed signature move, though is juuuuust soft enough to miss some important targets, with or without HH. Still, I can't complain.

Gardevoir @ Iron Ball, Telepathy
Quiet (252 HP, 252 SpA, 4 SpD)
-Moonblast
-Energy Ball
-Psychic
-Focus Blast
Not to be underestimated in the least! Falling below 40 speed, she has no fear of tying with negative-natured base 30s, and 125 SpA still has a long way to go before it's as weak as 100 is in modern times. In other words, IBG did plenty of effortless killing, with and without Helping Hand. Given the cleanup she was tasked with, I believe Energy Ball and Focus Blast were statistically used more than anything else. She also took the fewest number of Explosions for the team, though that's to say nothing of the amount of Earthquakes. The original IBG began with Helping Hand before I came to my senses, and the move was not even considered here. Her four attacking slots were too important. Needless to say, I was thrilled with her effectiveness, though constantly wary of the four main users of Bullet Punch making an appearance (which includes both Scizor sets.)
Surprise Threat:

Oh my god. Of all minute details to forget. Of all stupid details to forget until it's too fucking late to prevent your cold, hard rude awakening across the face. I'm talking, of course, about Damp. More importantly, that a handful of things have Damp as their HA. Now, had you asked me to name some things with Damp, I would have told you Swampert, probably Quagsire, maybe even Jellicent. But I wouldn't have thought of Kingdra. Hell, all the times Politoed entered battle without Drizzle, many, many dozens of times during the 1845, I would have assumed it had Water Absorb.
In this particular replay, it gets even better! Golisopod/Kingdra leads, and for reasons that escape me I decided to switch Marowak into the expected First Impression, and detonate Golem immediately to OHKO both leads. Even though Set3's Hydro Pump was a guaranteed OHKO on Golem. Golisopod was in fact Set 3, meaning First Impression was quite a bit weaker and probably worth risking TR, without knowing what Kingdra would do. So, Marowak replaces Mush, takes laughable damage from FI with no LO recoil, and Kingdra Surfs without KOing either target. Everything is going smoothly... ...and my smile is immediately turned upside down as I see that god-awful ability trigger on my screen. I decide to sack both pokes instead of Protect stalling with Golem, which would probably not have accomplished anything. It's now a 2v4, with only negligible damage dealt to Golisopod via resisted Surfs.
Fortunately, sailing was smooth on account of AI stupidity, and plain 'ol bulk. Mush sets TR, tanking two hits, while Gardevoir offs Kingdra and then Golisopod the following turn. Kingdra was replaced by Carbink4, who spent its first turn not exploding, but... ...using Psychic on Gardevoir. Okay. Volcarona3 then replaces Golisopod, and Protect blocks HH + Psychic while Carbink does what it wanted to do originally- detonate. Gardevoir and Musharna are now weak enough to be slain by anything Volcarona can do, regardless of any debuffs it takes from Overheat. And yet, TR is active, prompting Volcarona to Quiver Dance; the following turn, it chose something besides Protect, thereby ensuring that my two Psychics would seal my victory. Only one other battle of this streak was anywhere near as terrible.
Unsurprising Threat:


Closest battle I have had in this entire streak, and so foul tasting that I immediately boxed the team. It began with a misplay and immediately spun out of control.
For whatever reason, instead of sacking Golem and bringing Gardevoir in safely to deal with Garchomp, I switch it in outright. Chomp evolves and Earthquakes, bringing Gardevoir to 37 HP; Milotic Ice Beams, bringing Garde to 5 HP... ...and frozen. That was already a stupid decision on my part, but the trolling from Milotic adds insult to injury, moreso because I've had that exact sort of shit happen repeatedly with Cynthia's Milotic. Without those side effects, it brings so little to her team; so, naturally, it needs to stay relevant in any way it can. Garchomp sets sand instead of killing Gardevoir outright, Musharna uses Psychic for what appears to be little more than 25% (low roll) and Milotic makes a switch to Togekiss. Sand finishes Gardevoir.
Helping Hand Shadow Bone fails to KO Garchomp, which calcs confirm as both attacks rolling extremely low. Garchomp obliges me with another swift death, while Togekiss wastes Musharna's Lum Berry with Thunder Wave. Were it Set 4, Mush would have been easily destroyed here, along with any hope of winning.
Psychic finishes Garchomp, and Golem has no choice but to gamble on connecting Stone Edge. It pays off, and Togekiss is also down. Weakened Milotic and Lucario enter. Luke is going to off Musharna with priority no matter the set, so I use HH to at least do something useful. It Bullet Punches, confirming Set 3, and Earthquake easily delivers a OHKO while critically injuring Milotic. With only two pokes on the field, Surf hits at full power, though weakened somewhat by the small SpD boost from sand. And with TR now deactivated, Golem will have to eat another one.
...and it did, with a single fucking digit of HP remaining. Deserved or not, upon reflection of these 80 battles, I was put into many difficult spots due to Ground types and a moveset that was quite worthless against them. Palossand was every bit as dangerous and Garchomp, with supereffective hits against my entire team. They were much more easily destroyed than Mega Garchomp, but still required sacking and were all too common between Policemen and Breeders. And I was pretty tired of tensing up every time I faced leads like that. The team was an absolute blast at times, but I had seriously had enough of this shit.
Evil Doctor No.1845:


This is unacceptable.
Oh my god. Of all minute details to forget. Of all stupid details to forget until it's too fucking late to prevent your cold, hard rude awakening across the face. I'm talking, of course, about Damp. More importantly, that a handful of things have Damp as their HA. Now, had you asked me to name some things with Damp, I would have told you Swampert, probably Quagsire, maybe even Jellicent. But I wouldn't have thought of Kingdra. Hell, all the times Politoed entered battle without Drizzle, many, many dozens of times during the 1845, I would have assumed it had Water Absorb.
In this particular replay, it gets even better! Golisopod/Kingdra leads, and for reasons that escape me I decided to switch Marowak into the expected First Impression, and detonate Golem immediately to OHKO both leads. Even though Set3's Hydro Pump was a guaranteed OHKO on Golem. Golisopod was in fact Set 3, meaning First Impression was quite a bit weaker and probably worth risking TR, without knowing what Kingdra would do. So, Marowak replaces Mush, takes laughable damage from FI with no LO recoil, and Kingdra Surfs without KOing either target. Everything is going smoothly... ...and my smile is immediately turned upside down as I see that god-awful ability trigger on my screen. I decide to sack both pokes instead of Protect stalling with Golem, which would probably not have accomplished anything. It's now a 2v4, with only negligible damage dealt to Golisopod via resisted Surfs.
Fortunately, sailing was smooth on account of AI stupidity, and plain 'ol bulk. Mush sets TR, tanking two hits, while Gardevoir offs Kingdra and then Golisopod the following turn. Kingdra was replaced by Carbink4, who spent its first turn not exploding, but... ...using Psychic on Gardevoir. Okay. Volcarona3 then replaces Golisopod, and Protect blocks HH + Psychic while Carbink does what it wanted to do originally- detonate. Gardevoir and Musharna are now weak enough to be slain by anything Volcarona can do, regardless of any debuffs it takes from Overheat. And yet, TR is active, prompting Volcarona to Quiver Dance; the following turn, it chose something besides Protect, thereby ensuring that my two Psychics would seal my victory. Only one other battle of this streak was anywhere near as terrible.
Unsurprising Threat:
Closest battle I have had in this entire streak, and so foul tasting that I immediately boxed the team. It began with a misplay and immediately spun out of control.
For whatever reason, instead of sacking Golem and bringing Gardevoir in safely to deal with Garchomp, I switch it in outright. Chomp evolves and Earthquakes, bringing Gardevoir to 37 HP; Milotic Ice Beams, bringing Garde to 5 HP... ...and frozen. That was already a stupid decision on my part, but the trolling from Milotic adds insult to injury, moreso because I've had that exact sort of shit happen repeatedly with Cynthia's Milotic. Without those side effects, it brings so little to her team; so, naturally, it needs to stay relevant in any way it can. Garchomp sets sand instead of killing Gardevoir outright, Musharna uses Psychic for what appears to be little more than 25% (low roll) and Milotic makes a switch to Togekiss. Sand finishes Gardevoir.
Helping Hand Shadow Bone fails to KO Garchomp, which calcs confirm as both attacks rolling extremely low. Garchomp obliges me with another swift death, while Togekiss wastes Musharna's Lum Berry with Thunder Wave. Were it Set 4, Mush would have been easily destroyed here, along with any hope of winning.
Psychic finishes Garchomp, and Golem has no choice but to gamble on connecting Stone Edge. It pays off, and Togekiss is also down. Weakened Milotic and Lucario enter. Luke is going to off Musharna with priority no matter the set, so I use HH to at least do something useful. It Bullet Punches, confirming Set 3, and Earthquake easily delivers a OHKO while critically injuring Milotic. With only two pokes on the field, Surf hits at full power, though weakened somewhat by the small SpD boost from sand. And with TR now deactivated, Golem will have to eat another one.
...and it did, with a single fucking digit of HP remaining. Deserved or not, upon reflection of these 80 battles, I was put into many difficult spots due to Ground types and a moveset that was quite worthless against them. Palossand was every bit as dangerous and Garchomp, with supereffective hits against my entire team. They were much more easily destroyed than Mega Garchomp, but still required sacking and were all too common between Policemen and Breeders. And I was pretty tired of tensing up every time I faced leads like that. The team was an absolute blast at times, but I had seriously had enough of this shit.
Evil Doctor No.1845:
This is unacceptable.
Battles 381-500:
These guys had such a smooth sailing during their ten battles that I wanted to use them again, sooner than later. I didn't waste time by replacing Palossand or Drampa, deciding that reworking the squad to be "more reliable" would only strip it of the quirks that made it stand out all the more. I also didn't want it to resemble Eppie's team in any way.
The problematic trends of the AI semmed to get more and more perverse as I gained more and more experience with the team. Leaving Togedemaru alone, especially with moves the AI otherwise seemed most likely to use on it, was a blessing at times and a vile curse at others. I really valued my predictability. Though, there's something hilarious about Raikou setting Reflect instead of attacking- and finding that the change actually benefitted it. Fake Out, the only physical attack on the team, could no longer reach its cap of 2 damage. Now that's controlling your fate.

Aromatisse @ Lum Berry, Aroma Veil
Sassy (252 HP, 180 Def, 76 SpD)
-Trick Room
-Moonblast
-Thunderbolt
-Odor Sleuth
I miss last gen where megas weren't in the tree, and Relaxed 252/252/4 was quite enough for Aromatisse. Because your Drapions, Kantonian Muks and Metagross are going to be hit with Fake Out regardless, some protection against Mega Gengar's Sludge Bomb seemed the way to go. Heal Pulse was on the original unchanged Aromatisse but didn't serve the kinds of purposes I'd hoped it would, while Thunderbolt actually saw a fair bit of use; Helping Hand was similarly unused, moreso considering Aromatisse frequently fell before Toge or not at all. During the randoms portion, Aromatisse didn't have Odor Sleuth, but relearning it seemed like a no-brainer. It still was not used much at all, but had more purpose than the other two options. I probably would have used Disable if I could have done so without rebreeding. Unfortunately, both my Aromatisse were bred last gen without any egg moves.

Togedemaru @ Berry Juice, Sturdy
Brave (No EVs)
-Helping Hand
-Fake Out
-Spiky Shield
-Endeavor
Togedemaru looks so adorable during its idle animation, where it squeezes its eyes shut, bristles its spines, then opens them and peeks left and right. Maybe that's why the AI often declined to hit it with priority attacks. "Do the thing again! Do the spiky peeking thing again! Awwwwwwwwwwww..!!"

Drampa @ Dragonium Z, Berserk
Quiet (192 HP, 60 Def, 252 SpA)
-Flamethrower
-Energy Ball
-Hyper Voice
-Draco Meteor
While Drampa could have played around with some different coverage moves, particularly Shadow Ball, the set is no less useful as is. Plus, all of these attacks have max PP and because it's a permanent member of Spidey & Friends, I'd rather not change anything between any given point and the next time S&F gets serious.
Palossand @ Expert Belt, Water Compaction
Quiet (244 HP, 12 Def, 252 SpA)
-Shadow Ball
-Energy Ball
-Earth Power
-Destiny Bond
I don't recall using Destiny Bond even once. While I wish Palossand were much stronger, it has the benefit of many of its preferred targets having poor SpD or completely uninvested bulk, like Megagross, which at least allows it to kill things.
The problematic trends of the AI semmed to get more and more perverse as I gained more and more experience with the team. Leaving Togedemaru alone, especially with moves the AI otherwise seemed most likely to use on it, was a blessing at times and a vile curse at others. I really valued my predictability. Though, there's something hilarious about Raikou setting Reflect instead of attacking- and finding that the change actually benefitted it. Fake Out, the only physical attack on the team, could no longer reach its cap of 2 damage. Now that's controlling your fate.

Aromatisse @ Lum Berry, Aroma Veil
Sassy (252 HP, 180 Def, 76 SpD)
-Trick Room
-Moonblast
-Thunderbolt
-Odor Sleuth
I miss last gen where megas weren't in the tree, and Relaxed 252/252/4 was quite enough for Aromatisse. Because your Drapions, Kantonian Muks and Metagross are going to be hit with Fake Out regardless, some protection against Mega Gengar's Sludge Bomb seemed the way to go. Heal Pulse was on the original unchanged Aromatisse but didn't serve the kinds of purposes I'd hoped it would, while Thunderbolt actually saw a fair bit of use; Helping Hand was similarly unused, moreso considering Aromatisse frequently fell before Toge or not at all. During the randoms portion, Aromatisse didn't have Odor Sleuth, but relearning it seemed like a no-brainer. It still was not used much at all, but had more purpose than the other two options. I probably would have used Disable if I could have done so without rebreeding. Unfortunately, both my Aromatisse were bred last gen without any egg moves.

Togedemaru @ Berry Juice, Sturdy
Brave (No EVs)
-Helping Hand
-Fake Out
-Spiky Shield
-Endeavor
Togedemaru looks so adorable during its idle animation, where it squeezes its eyes shut, bristles its spines, then opens them and peeks left and right. Maybe that's why the AI often declined to hit it with priority attacks. "Do the thing again! Do the spiky peeking thing again! Awwwwwwwwwwww..!!"

Drampa @ Dragonium Z, Berserk
Quiet (192 HP, 60 Def, 252 SpA)
-Flamethrower
-Energy Ball
-Hyper Voice
-Draco Meteor
While Drampa could have played around with some different coverage moves, particularly Shadow Ball, the set is no less useful as is. Plus, all of these attacks have max PP and because it's a permanent member of Spidey & Friends, I'd rather not change anything between any given point and the next time S&F gets serious.

Palossand @ Expert Belt, Water Compaction
Quiet (244 HP, 12 Def, 252 SpA)
-Shadow Ball
-Energy Ball
-Earth Power
-Destiny Bond
I don't recall using Destiny Bond even once. While I wish Palossand were much stronger, it has the benefit of many of its preferred targets having poor SpD or completely uninvested bulk, like Megagross, which at least allows it to kill things.
Unsurprising Threat:


The one cursed weather Toge couldn't get around, on top of the threat of Ice Shard from a number of these. The scariest battle that went immediately downhill because of a Snow Warning lead involved Vanilluxe. Making matters slightly more challenging, this Vanilluxe would reveal itself as Set 3, much more dangerous to the entire team than 4. Goodra4 was its partner, so in sacrificing Toge to remove Vanilluxe I was likely going to be forced to spend Devastating Drake just to remove Goodra. Thankfully, Dancer Jo's backline was Magnezone and Wishiwashi, which were not too much for Palossand and Drampa to handle (especially with hail damage breaking Zone's possible Sturdy.) Wishiwashi would reveal Set 4, but Palossand had successfully beaten Magnezone and could take one for the team.
Golisopod4 was a frequent enemy for this team and one of the only priority users to happily oblige Toge in its attempts to bait. It even had the gall to open with Rock Slide during battle 400, rapidly setting a 2v4 in motion. It was only due to Golisopod's cooperation that the battle quickly returned to a highly winnable state. Togedemaru even got to inflict a literal KO! I was so proud.
With boredom for Feardemaru setting in heavily, it was time to try something else. I didn't really have any original ideas, old teams I could feasibly rehash (triples would be a different story) or any gimmicks I wanted to borrow from a fellow Smogonite. The only idea that had firmly rooted in my mind was that it'd be worthwhile to begin notarizing the enemies I'd fought, as Coeur had been doing this for some time and it looked interesting to read through. I just needed a team to use. Without any vivid recollection of the thought processes that brought me to this conclusion, I would ultimately settle on running non-randomized, monotype teams.
Last edited:

