Battle Tree Discussion and Records

Thanks!^

Ok here goes nothing...I got 67 on the Multi Battles with AI partner Wally. Originally I had copied Pav a Nice Day's double team that got him over 350 wins, but I lost on battle 88 twice in a row....sadly both times were easily preventable. If anyone's interested, I can post my experience, but his write up is much better. Only difference is my Kommo-O had flash cannon (generally not too useful because it couldn't take out most fairies).

Anyway - onto the Super Multi's write up.

Kangaskhan@Kangaskhanite
Ability: Scrappy
Nature: Timid
EVs: 4 HP, 252 Atk, 252 Spd
Fake Out
Return
Sucker Punch
Low Kick

Tapu Lele@Choice Scarf
Ability: Psychic Surge
Nature: Timid
EVs: 4 HP, 252 SpA, 252 Spd
Psyshock
Shadow Ball
Moonblast
Psychic

Teammate:
Wally

Gallade@Galladite
Ability: Steadfast/Inner Focus
Close Combat
Psycho Cut
Destiny Bond
Rock Slide

Magnezone@Assault Vest
Ability: Sturdy
Thunderbolt
Volt Switch
Flash Cannon
Tri Attack


Pretty straight forward here. you have to predict who Mega Gallade will attack and then Fake-Out the other opponent with Kangaskhan. If you're lucky, the fake out victim is flinched and the Gallade's target is already down. Sometimes I find it necessary to fake-out who gallade was going to target anyway in case it was something that was faster and could take him out in one shot. But by the time the first round is done, the team already has pretty good momentum. Tapu Lele is good to switch into if there are too many dangerous fighters out there and the usual strategy described above wouldn't take anyone out. And Gallade's frailness is offset by Magnezone's general bulk and Sturdy, allowing him to get at least one good attack most of the time. In general, I hardly used Tapu Lele (I don't even think i used Psyshock at all), but he/she/it was a pretty solid revenge killer when the situation came up. There were generally some hiccups, like Gallade using a move that wasn't optimal for the situation, but the team was robust enough to work around those situations.

On the 50th battle, 5YFG - WWWW - WWWJ - 4AUG, Wally did some some things I would not have expected, but ultimately the strategy still worked well.


Here's the losing battle:

EU4W - WWWW - WWWJ - 4ATR

It was basically just a few things that went wrong (Kangaskhan getting burned from Flame Body and me thinking Gallade would outspeed tornadus (or he missed an attack, I wasn't really watching). That's fine and all, but the problem was that I picked the wrong move once Lele came out...it should've been Moonblast to take out that Mega Latios, not Psychic >_> 50/50 shot and it was the wrong choice.

Other threats? Mainly Ghost types, especially ones like Spiritomb whose only attack is pain split, which doesn't trigger sucker punch working. Gallade is strong enough to do some damage, but I had to be pretty lucky getting Sucker Punch eligible attacks with Kanga. To make matters worse, I can't just switch into Tapu Lele because it is weak to Ghost (but then again, who's attacking Kangaskhan with a Shadow Ball anyway?)

Trick Room users are also problematic. I kind of know who most of them are and prioritize in getting rid of them first, but if I don't pay attention and it happens, then I put myself in a precarious positio.


Closing comments - I probably won't do this mode again in this game as I'm happy I broke 50, but I believe this team could've easily gone longer if I paid more attention. I don't think a partner like Wally is even necessary - you just need something fast that can hit hard, but luckily Wally's roster was pretty compatible with my team.

Hopefully I helped - the strategy is pretty straightforward and shows how great Kangaskhan still is after getting nerfed this generation.

IMG_0866.JPG
 
My streak ended at 79 thanks to turn 1 Tri Attack freeze from Colress’s Porygon-Z. Download from Porygon2 boosting its special attack didn’t help either as Lopunny couldn’t tank a Psychic and went down without really doing anything. I may have won if I’d attacked Muk over P2 but whether or not Koko could tank a hit from +1 P2 I have no idea.

Well, back to the start for me.
 

NoCheese

"Jack, you have debauched my sloth!"
is a Site Content Manager Alumnusis a Forum Moderator Alumnusis a Contributor Alumnus
Minor idea: since Sun/US and Moon/UM have different special trainers as opposition - Kiawe, Plumeria, Sina exclusive to Sun, and Dexio, Guzma, Mallow exclusive to Moon, would it be useful to track the game version used on the leaderboards as well? It's a small difference, but possibly more relevant than the difference in opposing trainers/sets between vanilla SM and USUM, and on Discord I heard some players owning both games choosing which game to play on depending on their respective special trainer match-ups.
Going forward, this would be easy to add. I'm not sure if having an extra mark for this on the leaderboard will be super useful, though. I'm also not eager to scan through all the previous teams to add this info. But what certainly is true is that this is a good reason to be very clear about which precise version of the game you are using when you post a streak.
 
Well for the frequent people it's also quite easy (for me, my runs are on Moon and UltraSun specifically).

Also fuck Sina btw.
 

Eisenherz

επέκεινα της ουσίας
is a Forum Moderatoris a Community Contributoris a Tiering Contributoris a Top Social Media Contributor Alumnus
Moderator
Submitting a streak of 279 in Ultra Sun Super Doubles.

The losing battle: BCFG-WWWW-WWWJ-5LM2 vs. Sina. Looking back at it, this was very winnable. I had been playing pretty recklessly for quite some time and rarely looked up the sets since by now, I know a lot of them already. I'm pretty sure this was the first time I ever saw Sandslash go for an Aurora Veil (I must have KOed them before in my previous encounters with that set), and that put me in a very bad spot... but the biggest problem is that I completely forgot about Ice Shard on M-Abomasnow; I thought I was about to win until the last turn! I should simply have double-Flamethrowered Abomasnow in case the 1st didn't KO (I was pretty confident it would KO with the Clanging Scales chip damage, but I was obviously wrong). Oh well! I do have more fun overall when I don't research everything to play optimally, so I'm ok with this streak ending earlier than it could have, there's many other teams I want to test!

The team started as a different one where I had a Mega Gyarados and Togedemaru lead with Comfey in the back to provide Gyarados with healing after setting up. But I quickly realized that most of the time Comfey was on the field, it was the star of the show, being way more useful than just another support Pokémon with priority healing. So I decided to build a team around Comfey; it was put together pretty quickly from what I had in my boxes. A few changes were made to the sets here and there as I progressed, but I discovered the team had a lot more synergy than I originally thought. Let's get into it with more detail!

The team:

@ Pixie Plate

Modest | Triage
IVs: 31/0/31/30/30/31 [HP Ground] (Hyper trained to 31/0/31/31/31/31)
EVs: 116 HP / 252 SpAtk / 140 Spe
Calm Mind / Draining Kiss / Hidden Power Ground / Floral Healing

The star of the show! Which is pretty difficult to believe given how tiny Comfey is on the screen compared to most Pokémon, especially the other members of the team (the sprite here and on Showdown really don't do it justice, it's much smaller in game!). I was very surprised by how well this Pokémon - and set - did in the Tree. I'm sure most people are familiar with what it does at this point, since it's Comfey's niche in about every tier it's in, but for anyone who doesn't know, thanks to Triage, Comfey gets +3 (!) priority on Draining Kiss. As weak as the attack is, it heals Comfey by 75% of the damage dealt; pair this with Comfey's low base 51 HP, and you're certain to heal by a good amount, making Comfey very hard to take out if it's not through a Z-move or a really powerful hit that OHKOs.

Originally, I was especially appealed by the priority Floral Healing since it's a great pairing with bulky set-up Pokémon. This was the idea behind every teammate I gave Comfey: Mega Salamence's power and bulk needs no introduction anymore, but it gets worn down quickly when using Double-Edge for its insane damage output; Floral Healing can entirely mitigate the recoil. Aegislash's bulk is also famous, in shield forme at least, so I figured having recovery would be beneficial, not to mention Aegislash's legendary synergy with M-Salamence. I added Kommo-o to that core since I wanted something that could set up, and Kommo-o becomes so bulky from using its Z-move, it loves getting healed at the start of a turn too.

However, after running the team for a while, I realized Flower Healing was barely an option that came in handy every once in a while: Comfey's true greatness comes from the Calm Mind-Draining Kiss combo. I usually set up a Calm Mind turn 1, since Comfey can usually tank a couple of hits, and protect Salamence if it's threatened by anything. This usually resulted in Comfey being reasonably low in HP at the start of turn 2, in which I Draining Kissed back to 75%+ HP and finished off one of the targets with M-Salamence. In some occasions, for example against Trick Room or some bulky Special threats, I went full greed and boosted Comfey to +6, using Draining Kiss a couple of times in between to heal back. But generally, the chip damage from a +1 Draining Kiss at the start of every turn is just what the rest of the team needs to score KOs. It's worth noting that unless you need chip damage right away against a big threat, it's important to use Calm Mind as soon as possible, since it can't contribute as much without it.

The last slot of the moveset is really open for debate. I originally had HP Ground on the set, so I just left it there to see if it would come in handy. Tailwind and Leech Seed were appealing options, I also considered Giga Drain for a priority Grass move, and Protect as well. In the end, HP Ground ended up being a lot more useful than I thought it would, I actually used it a lot. Comfey's speed EVs ensure it outspeeds Toxicroak and Nidoking, so it's safe to HP Ground into them if need be, but it's against Magnezone, Togedemaru and Mawile that it came in the most handy. M-Mawile is one of the biggest threats to the team, but a turn 1 Flamethrower + HP Ground has a really high chance to KO instantly. So ultimately, I left HP Ground and was very satisfied with it, but I can't compare to how the other options would fare since I didn't test any of them. The best choice would probably depend on Comfey's partners.

The item was the other piece of the puzzle I was hesitant on. I originally had Leftovers (I left them on until battle 50, which is when I started to be a bit more serious about the team), thinking that an extra bit of healing at the end of each turn would stack well with Draining Kiss recovery and make Comfey really hard to take out. But in practice, the Leftovers were practically useless, that chip recovery barely ever made any difference, and the battles didn't go on long enough to justify them. I considered a 50% berry, which I still think would have been a good choice, and a Life Orb, which's reasoning is basically the opposite of Leftovers (since Draining Kiss heals so much every turn, the chip damage from LO isn't as bad, especially since it helps heal more HP in the first place). But then I realized Pixie Plate was the perfect compromise: added damage to the one move I spam all the time = extra recovery every time as well, without the inconvenience of the Life Orb (HP Ground isn't used enough to be worth boosting anyway). To be honest, I don't think this Comfey set even needs an item at all to function well, but the extra Pixie Plate damage helps with a lot of 2HKOs at +1, so I think it's the optimal choice.

All in all, to my surprise, the set performed really well in the Tree and I believe it could be paired with a wide array of partners and do well, since it basically does its own thing on the side and assists whatever's there. It works really well in Trick Room too because of the +3 priority, which was very handy since my team was pretty Trick Room-weak.

@ Salamencite

Hasty | Intimidate -> Aerilate
IVs: 31/31/31/31/31/31
EVs: 124 Atk / 132 SpAtk / 252 Spe
Hyper Voice / Double-Edge / Flamethrower / Protect

This Pokémon really doesn't need an introduction anymore, everyone here knows what it does and how good it is at it. I simply grabbed the VGC M-Salamence I had in my boxes and rolled with it, I figured it was generally a good moveset and EV spread anyway, and I wasn't disappointed, though I'm sure it could be optimized better for the Tree.

Hyper Voice is wonderfully spammable, while Double-Edge is so powerful, I kept expecting to see the critical hit message after it hit. Flamethrower was originally Tailwind (I changed it after battle 50); the team really doesn't need Tailwind support (it's actually hindering for Aegislash, if anything). I went for Flamethrower since 1. Ice-types scare Salamence and 2. Steel-types scare Comfey = very handy coverage for my lead overall. I ended up using it a lot, so I believe that was the right choice (over a Dragon move, for example).

The synergy with both Aegislash and Kommo-o was really good (I didn't think double Dragon could have such good synergy, but Flying and Fighting really compliment each other well as secondary types), granting a switch-in to any of Salamence's weaknesses.

@ Ghostium Z

Modest | Stance Change
IVs: 31/0/30/31/31/31 [HP Ice] (Hyper trained to 31/0/31/31/31/31)
EVs: 188 HP / 236 SpAtk / 68 SpDef / 12 Spe
Shadow Ball / Flash Cannon / Wide Guard / King's Shield

I tried using Aegislash on so many Tree teams, but I always ended up switching it for something else, so I'm glad I finally found a team where it worked well with all 3 partners. Like Salamence, the moveset is really standard and taken straight from my VGC boxes in game, so there really isn't a lot to explain.

Funnily enough, it seemed so natural to run Ghostium Z that I originally didn't realize I had two Z-moves on my team. I tried to think of item replacements; Leftovers surely would have made a lot of sense, but at the same time, the Ghostium Z saved me a few times, and the more I advanced, the less I was willing to change it. I almost always used Clangorous Soulblaze as my Z-move, but every time I saw Cresselia or Uxie, I just went for a Never-Ending Nightmare into them to OHKO, and that was really satisfying. I also tried to keep it as a winning condition against Pokémon that boosted their evasion so I could pull the trigger when they're just in range. Aegislash really is another of these Pokémon that don't *need* an item, so I was fine with not making use of the item most of the time if it meant it coming in clutch every once in a while.

One of the reasons I really wanted Aegislash on the team to begin with was Wide Guard; after my previous streak featuring Celesteela, I was sold on how amazing Wide Guard is and I try to include it on every team I can have it on. I found Aegislash to be a more awkward Wide Guard user than Celesteela because of Stance Change (there's been plenty of moments where I wanted to Wide Guard but was in Blade Forme, and didn't want to risk getting KOed), but it still was incredibly useful. Double STAB is pretty self-explanatory; Flash Cannon can sometimes be dropped for coverage, but with my team being weak to Fairy and Ice, Flash Cannon was very much needed here.

@ Kommonium Z

Modest | Soundproof
IVs: 31/31/31/31/31/31
EVs: 180 HP / 4 Def / 92 SpAtk / 4 SpDef / 228 Spe
Clanging Scales / Close Combat / Flamethrower / Protect

Kommo-o was originally placed on the team as an afterthought, just an outsider to the core of the team, but it ended up having much better synergy than I anticipated. Having double Dragons, especially with one 4x weak to Fairy, really scared me. But the resistance to Rock and the fact it can tank neutral hits very well made Kommo-o a valuable member when it came to finding switch-ins.

Most of the time, however, the way Kommo-o was used was this: Comfey sets up a Calm Mind turn 1 while Salamence protects (or Hyper Voices if it's not threatened at all). On turn 2, I Draining Kiss + Hyper Voice and pick up a KO, but a crit, Z-move, or just a strong unexpected attack takes one of my lead Pokémon out. Kommo-o comes in, and I either Hyper Voice + Clangorous Soulblaze or Draining Kiss + Clangorous Soulblaze; in both cases, it was almost always possible to score a double-KO with Kommo-o in this situation all the while getting fully boosted. Afterwards, facing down the opponent's remaining Pokémon with a boosted Kommo-o and either Comfey or Salamence made for an easy KO. I believe this way of using Kommo-o (cleaning up the field with the Z-move rather than trying to boost on Pokémon at full HP) is the best way to get the most out of it.

Some might question the Modest nature with Close Combat. For those unfamiliar, this is the most standard way of running Kommo-o in VGC - the sheer base power of Close Combat paired with Kommo-o being at +1 usually makes up for the -Atk nature, since the move is not meant to be spammed but only used when super-effective (it OHKOs M-Kangkashan, Heatran or any Tyranitar for example). Focus Blast is a terrible alternative because of its accuracy, and Kommo-o's bulk being one of its selling points, I prefer not lowering it with the nature.

Once again, the EV spread is taken straight from my VGC boxes and isn't tailored for the Tree, but I really liked its bulk and speed tier and found no reason to change it during the battles.


There may be more threats than what I list here since the team was created without much research and I'll only be listing what actually gave me trouble during the streak. A longer streak would have allowed for a more exhaustive list, but the basics should be there!

  • Not a common encounter, but with its coverage, it can take on the entire team. Nidoqueen-3 is way more threatening than Nidoqueen-4, but not knowing which one you're against makes it hard to play around. Having Protect on Comfey would help scout and play around it, but without that, if you ever choose to attack it with a Pokémon, you're basically sacrificing a team member for that damage. Depending on what it's paired with, finding switch-ins can be very difficult. Ideally, if you can Double-Edge + HP Ground it right away for the KO, do it.

  • Like Nidoqueen, Mega Mawile can just KO the entire team. My last few encounters with it went pretty well since I went for Flamethrower + HP Ground into it immediately for the KO; there's a very slight chance it survives, but if that happens, it can only pick up 1 KO and is in range of any of your attacks next turn. It's especially threatening on all-Fairy teams, because the partners will be putting pressure on half of your team at the same time.

  • Magnezone-4, in particular, is the big threat here. With the Assault Vest, it tanks Flamethrower and HP Ground really well, and you can't just ignore it because it does such big damage to the entire team. With no way of KOing it in a single turn even by doubling into it (with the lead, at least), and with no Protect on Comfey, it's really difficult to play around, and I usually had to accept to trade something for it.

  • Not a very common occurrence, though having Kukui among the boss battles gives it more showtime. Its Fairy STAB destroys half of the team, and the other half is severely damaged by its Water moves (the biggest threat being Hydro Vortex since it OHKOs Comfey without a Calm Mind and deals a good 75% to Aegislash). Add Blizzard to the mix, and it's guaranteed to be a nightmare to deal with. Thankfully, Double-Edge does a ton (a near OHKO), so as long as you're in a position to use it it's not as bad.
  • Paralysis: A large amount of the games where I got close to losing were due to getting para-haxed. There's plenty of Pokémon that love just spamming Thunder Wave, and the team has no immunity to it, and 2 Pokémon that can't even protect at all in front of it, so para-hax is bound to happen at some point. I really thought this would be what I would end up losing to. I wish I could use Tapu Fini on every single team ever!
  • Evasion: This is the first "long" (100+) streak where I found myself struggling against the evasion-boosters of the Tree. My rain team had so many tools for them that I didn't give it much thought when putting this together. I believe I've had 3 close finishes, vs Cresselia, Zapdos and Bastiodon. Thankfully, Aegislash's Z-move usually handles Cresselia without a problem, but the other 2 could be really bad, especially Zapdos.


  • Battle #75 vs. Veteran Xio: GCHG-WWWW-WWWJ-8CDD. Very close battle, where I really thought I would lose. Mono-Fairy teams are the most threatening, and I still can't believe these damage rolls at the end (really wasn't expecting that much damage!).
  • Battle #106 vs. Sightseer Ezra: 7NGW-WWWW-WWWJ-8EQT. This battle is a pretty good reflection of the average battle.
  • Battle #124 vs. Worker Omar: SEMG-WWWW-WWWJ-89VD. This is where I learned how much of a threat Nidoqueen is to the team. The worst part, however, is Togedemaru, which's Red Card I didn't see coming, and activated at the very worst moment. On that day, lessons were learnt the hard way!
  • Battle #136 vs. Scientist Robyn: M5BG-WWWW-WWWJ-8EZC. Trick Room + Rotom-Frost is a scary matchup in itself, but this battle highlights how the team generally handled Trick Room (and shows how good Comfey is at dealing with it!).
  • Battle #147 vs. Golfer Patrick: KPZG-WWWW-WWWJ-8FXP. UGH. This Zapdos... we all know it, we all hate it. When I saw the direction the battle was going to take after the first Double Team, I decided my plan would be to go full greed with Comfey, +6 +6, heal off Zapdos' partners (funnily enough, a Charizard that I walled with Wide Guard) and then bank on connecting a Draining Kiss at some point. Thankfully, enough of my attacks connected in time for things to work out, though I was keeping the Z-move in bank to be safe.
  • Battle #167 vs. Office Worker Harding: HR8W-WWWW-WWWJ-8EKT. The Kommo-o showcase...! What I liked most about this team is how every member seemed to equally pull its weight. They all at some point carried the rest of the team.
  • Battle #235 vs. Veteran Candy: 52DW-WWWW-WWWJ-5N64. Wow, what a crazy game. That one gave me my portion of hax for the week. I was absolutely certain I had lost at the end, but banked on my only winning condition: having 2 Thunders miss. What do you know... they did! Which is even funnier considering the hax that happened beforehand... that Raikou should have been LONG gone...!
  • Battle #280 vs. Sina: BCFG-WWWW-WWWJ-5LM2. The losing battle; I discuss it at the beginning of this post!

This was a fun streak, and I'm a little sad I got too impatient to play the team as optimally as I could have. Though I really believe this team could have gone much further, I also think its lack of answer for paralysis would hold it back at one point or the other. There's a lot of different things I want to try at the moment (currently working on an Eevee revival!), but I'm hoping to give Comfey another try at some point on a more carefully crafted team, because if anything, this streak convinced me it has high potential in the Tree!

Thank you for reading! :heart:
 
Last edited:
Any chance I could get some advice on a potential Battle Maison team I'm working on? I know this is the thread for the Battle Tree, but I was directed here to ask for some help. My team can be found in the "Hide" tab.


RMT Carry my Beloved Espeon to 2 More Ribbons From the Battle Maison

I have built this team in order to carry my Espeon to a 50 win streak to get those last two ribbons in this generation. I have every other obtainable ribbon, but am lacking a sufficient team to get me through the Battle Maison. I have selected five competent teammates for Espeon that will hopefully be enough to get me that 50 win streak. I chose Triples because it's easiest to carry a pokemon with 5 others than any other amount.


Ares (Dragonite) (M) @ Lum Berry
Ability: Multiscale
EVs: 140 HP / 172 Atk / 16 Def / 60 SpD / 116 Spe
Quirky Nature
IVs: 0 Def
- Dragon Claw
- Substitute
- Dragon Dance
- Thunder Punch
Currently, I am working on if I should have Kangaskhan or Dragonite in the first three, but I settled on Dragonite due to its Marvel Scale ability. Dragonite (or Kangaskhan) will be the main sweeper of the team, with support from Talonflame and Greninja.


Poseidon (Greninja) (M) @ Focus Sash
Ability: Protean
EVs: 252 SpA / 4 SpD / 252 Spe
Timid Nature
IVs: 0 Atk
- Mat Block
- Grass Knot
- Dark Pulse
- Ice Beam
Greninja's role in the first few turns of battle is to allow the rest of the team to get set up. On the first turn, Greninja uses Mat Block to protect its teammates while Dragonite either uses substitute or Dragon Dance. Talonflame will use tailwind to boost the team. Once the first turn has finished, Greninja will become a sweeper along with Dragonite.


Hermes (Talonflame) @ Sharp Beak
Ability: Gale Wings
EVs: 4 HP / 252 Atk / 252 Spe
Adamant Nature
IVs: 0 SpD
- Tailwind
- Brave Bird
- Flare Blitz
- Steel Wing
Talonflame's purpose is to be the speed demon for the team. On the first turn, it will use Tailwind, which, along with Gale Wings, will allow is to move first nearly every turn. Once Tailwind has been used, it becomes a sweeper with Dragonite and Greninja.


Artemis (Togekiss) (F) @ Leftovers
Ability: Super Luck
EVs: 252 HP / 252 SpA / 4 SpD
Modest Nature
IVs: 0 Atk
- Aura Sphere
- Air Slash
- Hyper Voice
- Dazzling Gleam
Togekiss is here to cover the deficiencies that are present in the above three, while also being a bulkier pokemon who can take a few more hits.


Hera (Kangaskhan) (F) @ Kangaskhanite
Ability: Scrappy
EVs: 244 HP / 252 Atk / 12 SpD
Adamant Nature
- Return
- Power-Up Punch
- Sucker Punch
- Substitute
Kangaskhan is my other choice for the main sweeper but I can also use it to rotate in on the scenario.


Apollo (Espeon) (M) @ Expert Belt
Ability: Synchronize
EVs: 252 SpA / 4 SpD / 252 Spe
Timid Nature
IVs: 0 Atk
- Calm Mind
- Psychic
- Shadow Ball
- Dazzling Gleam
Espeon is here really only to get the two ribbons. It can do some damage, but It's not equipped like it should be.

Conclusion

Like I have said, this team is built so that Espeon can get the last 2 ribbons in GEN 6. The style that I am going for is to out-speed my opponent and clean up from there.

Ares (Dragonite) (M) @ Lum Berry
Ability: Multiscale
Level: 50
EVs: 140 HP / 172 Atk / 16 Def / 60 SpD / 116 Spe
Quirky Nature
IVs: 0 Def
- Dragon Claw
- Substitute
- Dragon Dance
- Thunder Punch

Poseidon (Greninja) (M) @ Focus Sash
Ability: Protean
Level: 50
EVs: 252 SpA / 4 SpD / 252 Spe
Timid Nature
IVs: 0 Atk
- Mat Block
- Grass Knot
- Dark Pulse
- Ice Beam

Hermes (Talonflame) @ Sharp Beak
Ability: Gale Wings
Level: 50
EVs: 4 HP / 252 Atk / 252 Spe
Adamant Nature
IVs: 0 SpD
- Tailwind
- Brave Bird
- Flare Blitz
- Steel Wing

Artemis (Togekiss) (F) @ Leftovers
Ability: Super Luck
Level: 50
EVs: 252 HP / 252 SpA / 4 SpD
Modest Nature
IVs: 0 Atk
- Aura Sphere
- Air Slash
- Hyper Voice
- Dazzling Gleam

Hera (Kangaskhan) (F) @ Kangaskhanite
Ability: Scrappy
Level: 50
EVs: 244 HP / 252 Atk / 12 SpD
Adamant Nature
- Return
- Power-Up Punch
- Sucker Punch
- Substitute

Apollo (Espeon) (M) @ Expert Belt
Ability: Synchronize
Level: 50
EVs: 252 SpA / 4 SpD / 252 Spe
Timid Nature
IVs: 0 Atk
- Calm Mind
- Psychic
- Shadow Ball
- Dazzling Gleam
 
Last edited:
Cool to see some Comfey-action!
Since NZtechfreak wrote about a similar Comfey some time ago i really got stuck with the idea. Conincidentally 2 days ago i thought some minutes about a team consisting of Mega-Gyarados + Raichu, Comfey and Aegislash, which seems to resemble your first idea with Gyara and Togedemaru, assuming you chose this because of Lightningrod+Fake Out support for Gyara.
Anyways, cool that a Comfey gets its place on the leaderboard! For sure it would be interesting to see on which different ways its special niche could be exploited beyond
 

Smuckem

Resident Facility Bot Wannabe
is a Community Contributor Alumnus
Any chance I could get some advice on a potential Battle Maison team I'm working on? I know this is the thread for the Battle Tree, but I was directed here to ask for some help. My team can be found in the "Hide" tab.


RMT Carry my Beloved Espeon to 2 More Ribbons From the Battle Maison

I have built this team in order to carry my Espeon to a 50 win streak to get those last two ribbons in this generation. I have every other obtainable ribbon, but am lacking a sufficient team to get me through the Battle Maison. I have selected five competent teammates for Espeon that will hopefully be enough to get me that 50 win streak. I chose Triples because it's easiest to carry a pokemon with 5 others than any other amount.


Ares (Dragonite) (M) @ Lum Berry
Ability: Multiscale
EVs: 140 HP / 172 Atk / 16 Def / 60 SpD / 116 Spe
Quirky Nature
IVs: 0 Def
- Dragon Claw
- Substitute
- Dragon Dance
- Thunder Punch
Currently, I am working on if I should have Kangaskhan or Dragonite in the first three, but I settled on Dragonite due to its Marvel Scale ability. Dragonite (or Kangaskhan) will be the main sweeper of the team, with support from Talonflame and Greninja.


Poseidon (Greninja) (M) @ Focus Sash
Ability: Protean
EVs: 252 SpA / 4 SpD / 252 Spe
Timid Nature
IVs: 0 Atk
- Mat Block
- Grass Knot
- Dark Pulse
- Ice Beam
Greninja's role in the first few turns of battle is to allow the rest of the team to get set up. On the first turn, Greninja uses Mat Block to protect its teammates while Dragonite either uses substitute or Dragon Dance. Talonflame will use tailwind to boost the team. Once the first turn has finished, Greninja will become a sweeper along with Dragonite.


Hermes (Talonflame) @ Sharp Beak
Ability: Gale Wings
EVs: 4 HP / 252 Atk / 252 Spe
Adamant Nature
IVs: 0 SpD
- Tailwind
- Brave Bird
- Flare Blitz
- Steel Wing
Talonflame's purpose is to be the speed demon for the team. On the first turn, it will use Tailwind, which, along with Gale Wings, will allow is to move first nearly every turn. Once Tailwind has been used, it becomes a sweeper with Dragonite and Greninja.


Artemis (Togekiss) (F) @ Leftovers
Ability: Super Luck
EVs: 252 HP / 252 SpA / 4 SpD
Modest Nature
IVs: 0 Atk
- Aura Sphere
- Air Slash
- Hyper Voice
- Dazzling Gleam
Togekiss is here to cover the deficiencies that are present in the above three, while also being a bulkier pokemon who can take a few more hits.


Hera (Kangaskhan) (F) @ Kangaskhanite
Ability: Scrappy
EVs: 244 HP / 252 Atk / 12 SpD
Adamant Nature
- Return
- Power-Up Punch
- Sucker Punch
- Substitute
Kangaskhan is my other choice for the main sweeper but I can also use it to rotate in on the scenario.


Apollo (Espeon) (M) @ Expert Belt
Ability: Synchronize
EVs: 252 SpA / 4 SpD / 252 Spe
Timid Nature
IVs: 0 Atk
- Calm Mind
- Psychic
- Shadow Ball
- Dazzling Gleam
Espeon is here really only to get the two ribbons. It can do some damage, but It's not equipped like it should be.

Conclusion

Like I have said, this team is built so that Espeon can get the last 2 ribbons in GEN 6. The style that I am going for is to out-speed my opponent and clean up from there.
- While bringing a neutral-Natured Pokemon into any battle facility is never good, I would be inclined to let that slide for Dragonite if it wasn't a lead, since in Triples you have more opportunities to throw a unoptimized backup after creating some breathing room for it to support or setup. But, since you are leading with it, you pretty much have to get yourself an Adamant Dragonite to fully exploit the power Dragon Dance affords it. Besides, you never know when you'll find yourself in situations where simply attacking straightaway to score a 2HKO on something can be the best play. That extra power that the +Atk Nature brings will be needed then
- Along those lines, in formats other than Singles & Rotations, you will find it difficult to fit setup 'mons on the team; the risk of opponents doubling or tripling up on you before you get the chance are high. It's more forgivable in Triples since, again, your teammates can go and set the table for it. Problem is, having more than one setup 'mon on the team is taking away offensive pressure you could be putting on the opponent, as fast-paced as Triples is. For that reason, I would say that Espeon can ditch Calm Mind and go for some more offense. It's an Expert Belt set, so you should be giving it another attack to maximize Belt usage. Signal Beam and Psyshock are options, Protect is there if you're stumped for ideas (because it's Triples and having Protect almost never hurts). Check which Hidden Power it has too, that might come in handy every once in a while
- You will be disappointed by the lack of damage output on Steel Wing, consider changing that to Protect (in case of Fake Out shenanigans) or U-turn. Also, because the majority of what Talonflame does is Gale Wings-boosted, and because it''s plenty fast even without Speed investment, consider diverting at least some EVs over to HP, lets you absorb more recoil from its STABs. If you check out the Maison thread, you'll notice several Talonflame Trainers went 252 HP /252 Atk for their spreads
- While Togekiss serves you fine in its present role, it's missing out on providing valuable support to its teammates by keeping non-STAB, spread, non-boosted Hyper Voice. Explore backup Tailwind, Heal Bell, Morning Sun for additional bulk, Follow Me, Thunder Wave, ,Yawn, etc.
- MegaKhan can buy itself or teammates an extra turn to do something or just survive with Fake Out, with half a team of Flyers Earthquake can be used farily freely and be devastating after a boost or two, even spread and not enjoying the Parental Bond boost. Try using one of those over Substitute. Also, any particular reason for that EV spread?
- Having so many Electric- and Rock-weak members means that some Ground support would be welcomed, if you decide to change any team members up. While everyone and their mom uses Garchomp for this purpose, if Tailwind is a part of the team's equation, there are several Ground-types one can throw in there to suit the role (I'll let others recommend those).

I'm sure there's more I could think of, I just need to, well, not be at work to think of it...
 
Last edited:
- While bringing a neutral-Natured Pokemon into any battle facility is never good, I would be inclined to let that slide for Dragonite if it wasn't a lead, since in Triples you have more opportunities to throw a unoptimized backup after creating some breathing room for it to support or setup. But, since you are leading with it, you pretty much have to get yourself an Adamant Dragonite to fully exploit the power Dragon Dance affords it. Besides, you never know when you'll find yourself in situations where simply attacking straightaway to score a 2HKO on something can be the best play. That extra power that the +Atk Nature brings will be needed then
- Along those lines, in formats other than Singles & Rotations, you will find it difficult to fit setup 'mons on the team; the risk of opponents doubling or tripling up on you before you get the chance are high. It's more forgivable in Triples since, again, your teammates can go and set the table for it. Problem is, having more than one setup 'mon on the team is taking away offensive pressure you could be putting on the opponent, as fast-paced as Triples is. For that reason, I would say that Espeon can ditch Calm Mind and go for some more offense. It's an Expert Belt set, so you should be giving it another attack to maximize Belt usage. Signal Beam and Psyshock are options, Protect is there if you're stumped for ideas (because it's Triples and having Protect almost never hurts). Check which Hidden Power it has too, that might come in handy every once in a while
- You will be disappointed by the lack of damage output on Steel Wing, consider changing that to Protect (in case of Fake Out shenanigans) or U-turn. Also, because the majority of what Talonflame does is Gale Wings-boosted, and because it''s plenty fast even without Speed investment, consider diverting at least some EVs over to HP, lets you absorb more recoil from its STABs. If you check out the Maison thread, you'll notice several Talonflame Trainers went 252 HP /252 Atk for their spreads
- While Togekiss serves you fine in its present role, it's missing out on providing valuable support to its teammates by keeping non-STAB, spread, non-boosted Hyper Voice. Explore backup Tailwind, Heal Bell, Morning Sun for additional bulk, Follow Me, Thunder Wave, ,Yawn, etc.
- MegaKhan can buy itself or teammates an extra turn to do something or just survive with Fake Out, with half a team of Flyers Earthquake can be used farily freely and be devastating after a boost or two, even spread and not enjoying the Parental Bond boost. Try using one of those over Substitute. Also, any particular reason for that EV spread?
- Having so many Electric- and Rock-weak members means that some Ground support would be welcomed, if you decide to change any team members up. While everyone and their mom uses Garchomp for this purpose, if Tailwind is a part of the team's equation, there are several Ground-types one can throw in there to suit the role (I'll let others recommend those).

I'm sure there's more I could think of, I just need to, well, not be at work to think of it...

Thank you for the advice, I will certainly take it all into consideration. Four questions for you:

1. Which 'mon would you recommend trading out a Ground-type for?

2. Would Dragonite or MegaKang be more beneficial to start in the center spot?

3. Is it beneficial enough to settle for 4 IVs instead of 5 or 6?

4. What Ground-types would you recommend(besides Garchomp)?
 

Smuckem

Resident Facility Bot Wannabe
is a Community Contributor Alumnus
1.) Actually, I would give the current team a whirl, just with the movesets changed as recommended. Since you're just going for the ribbon and not some high number streak, the team may be solid enough to get you by with a little RNG help (i.e., you don't run into Black Belts, Scientists, or Battle Girls much from that Battle 31-49 stretch). If you fall a few times with it, then we start toying around with replacements.
2.) Depends on whether you place Fake Out on MegaKang or not: if you do, she leads; otherwise, Dragonite does (admittedly, I'm curious to see how often you're "allowed" to get that first DD boost off). Those who have used MegaKang with success in Triples tend to use it as a backup, as a general offensive presence, but I can't definitively speak on it, since I've only use it in short spurts
3.) No need to settle for 4 IVs when you're surrounded by people who can breed 5IV or 6IV hatchlings for you here. Gen VI games aren't played as much these days, sure, but plenty still do. Whatever you might need, just ask! (If not here, then on the Wi-Fi subforum.) Better safe than sorry, or however that saying goes...
4.) See Note 1
 
Last edited:

Eisenherz

επέκεινα της ουσίας
is a Forum Moderatoris a Community Contributoris a Tiering Contributoris a Top Social Media Contributor Alumnus
Moderator
Cool to see some Comfey-action!
Since NZtechfreak wrote about a similar Comfey some time ago i really got stuck with the idea. Conincidentally 2 days ago i thought some minutes about a team consisting of Mega-Gyarados + Raichu, Comfey and Aegislash, which seems to resemble your first idea with Gyara and Togedemaru, assuming you chose this because of Lightningrod+Fake Out support for Gyara.
Anyways, cool that a Comfey gets its place on the leaderboard! For sure it would be interesting to see on which different ways its special niche could be exploited beyond
Haha, that's quite the coincidence! Yeah, it's basically the same idea, Togedemaru was there for Fake Out + Lightning Rod support. The combo is nice and might be even better with Raichu due to its higher speed, I had just thrown that together very quickly...! In a proper build I'm sure this could work out for a decent streak; I lost to a mono-Fairy matchup, but my 4th wasn't Aegislash, it would have helped a lot (also, I had Zing Zap over Iron Head on Togedemaru, the latter would have helped more for that matchup).

But in any case, your post reminded me that before the streak I posted about, I actually tried the strategy you mentioned several pages ago! I bred a new Raichu for it, but used my HP Fire Koko and Careful Celesteela. Unfortunately, I lost at Battle 20 vs. Kiawe. I'm sure the team could've climbed higher, but it's kind of funny I lost to that matchup in particular so quickly, since it's probably the only one we knew in advance would be a real problem to deal with, and the particular Pokémon were the very worst case scenario: he led A-Marowak-2 and Salazzle-3 (which could've been 4 too).
After taking a little time to review my options, I decided to gamble on Marowak potentially not having Lightning Rod and tried Discharging as I normally would. I knew Salazzle would probably Fake Out, but I couldn't Protect anything, and couldn't predict what attack Marowak would target at which Pokémon, everything seemed just as likely, and I really had no switch-in to any of them (especially a Flare Blitz). Salazzle Faked Out Raichu (so even if I attempted to Fake Out I would have failed, and my sash was getting broken regardless), Koko brought Salazzle down to sash, and sure enough, Marowak did have Lightning Rod and didn't take a bit of damage, other than Flare Blitz recoil from OHKOing Koko... so I sent in Landorus, to Earth Power the Marowak and hopefully finish off Salazzle with Raichu, but Marowak Detected and Salazzle Fire Blasted Landorus, bringing it pretty low, after which I KOed with Discharge. Guess what he sends in? M-Kangaskhan, and its wonderful Fake Out pressure. I couldn't really guess where Fake Out would go, but figured if he Faked Out Landorus and I didn't Protect it, he could also Flare Blitz into it as well and then I lost Landorus which is my only way of getting rid of Marowak, so I protected, and I Discharged with Raichu hoping for a paralysis on Kangkashan. But Kangaskhan Faked Out Raichu and Marowak Flare Blitzed it, so I got nothing out of the turn (Discharge didn't paralyze), and was down to Landorus + Celesteela. I went for Earth Power into Marowak and Leech Seed into Kangaskhan, but Marowak Detected again, and Kangaskhan Double-Edged Landorus for the KO. I tried to think of all the other plays I could have made there, like protecting Celesteela and targetting Kangaskhan with Earth Power instead, but I don't see any way I don't lose Landorus to Double-Edge or Flare Blitz on that turn anyway. Marowak asserted dominance and picked up the last KO on Celesteela.

So I think no game could better prove your point of Marowak-A being the biggest threat to the team as that one, it's pretty funny it happened so early on...! At first, I figured that having HP Water/Ground Koko was indeed a necessity for this team, but looking back at it, I'm not sure that would have been enough. Salazzle Faked Out Raichu, but could very well have gone into Koko; if I Helping Hand + HP Water turn 1, Salazzle can Fake Out Koko and Marowak just KOs it. I think it's awkward to have a lead that cannot Protect at all, because it makes any Fake Out pressure that much bigger, especially if there are no good switch-ins (neither Lando or Celesteela can switch into a potential Flare Blitz). Considering Marowak's potential to Detect whenever I target it and how threatening Kiawe's other Pokémon are to the team, I think this may actually be a matchup where the team could come up short no matter how it's played, even with HP Water on Koko.

Kiawe aside, the other 19 battles were really fun, and the lead combo does get very powerful, very quickly. However, one thing that I found to be really awkward was that after a couple of Lightning Rod boosts, Raichu's Discharge does a ton to Koko, so I can't just spam Discharge with both of them; I need to either switch to Landorus, which is often scary (Raichu's Discharge alone needs to be powered up 2+ times to hope for OHKOs at neutral) given the attacks that may be going into that slot, or I just let Koko go down to my own Raichu in exchange for a KO on 2 of their Pokémon, which is usually the option I went for. It still worked out in these battles obviously, but I'm pretty sure in the higher battles against very bulky teams, like most Trick Room ones, this would have been a real problem. It doesn't help that Celesteela isn't an option to switch in next to either Koko locked into Discharge, or next to Raichu if HP Ice is not going to be helpful. Relying on Landorus so much doesn't feel safe since it's pretty frail. All in all, it was very fun to play since it's very aggro and offensive, but I'm not convinced of the viability of Double-Discharge for a long streak, at least without both partners immune to it and at least one carrying Protect.

I might give the team another whirl and pray for no Lightning Rod A-Marowak, we'll see, thanks for sharing! :)

For anyone curious, this is the team I've been referring to: https://www.smogon.com/forums/threads/battle-tree-discussion-and-records.3587215/post-7678290
 
Sad to hear that it came to such a quick end, but thank you for trying it and i'm glad you had some fun with it! I thought the downfall would be some misplay or bad matchup against a Ground type or EQ user, but spotted the second big weakness definitely as Fire types and especially these both ones you encountered (near Scarf Darmanitan, Camerupt-M and Rotom-H, but Salazzle probably still is the worst).
If you somehow managed to get some SE Hidden Power off on Marowak, he only can kill one Pokemon before he dies to the recoil. But of course we saw how 'smart' he used Detect so yeah.. Or maybe directly sacrifice Celesteela when facing Kiawe since it does nothing against Fires anyways, and then hope to get some situation of healthy Koko and Landorus on the field. If Salazzles Fake Out is gone, perhaps they could make it alone against Kiawe.
Yes, as you said the huge reliance on Lando probably is a big weakness, especially against these Fires and in such situations i guess it's hard to preserve it to pick up crucial KOs. Your notes in the end also show that no matter how much one theorizes, the only thing that finally counts is what happens at playing. Seems to be unconvenient to switch at times, because you want the back at full health, but often one has to since the offensive and defensive coverage of Koko and Raichu are not that manifold. So in hindsight there seem to be many dilemmas to come, such as in your losing battle.
But again, cool that you tried it, and perhaps you find some usage for this Raichu in the Comfey team, so your effort on breeding may still be payed out!
 
WHOA. NEW SINGLES TEAM.
AND THIS ONE IS UNIQUE.
Well, actually not really. The team I use is another Dragon/Fairy/Steel core, but it's a damn good one, bringing me up to a high streak of 138.
View attachment 105652

Bill (Dragonite) @ Lum Berry
Ability: Multiscale
Level: 50
EVs: 252 Atk / 4 SpD / 252 Spe
Adamant Nature
- Outrage
- Dragon Dance
- Roost
- Earthquake / Fire Punch (?)

Oh, Bill. How I missed you. Dragonite is super bulky with its Multiscale ability, being able to eat up even an Outrage or Dragon Claw from Garchomp or its Mega counterpart. It also had a nice typing in Dragon and Flying, being able to avoid Earthquake or Earth Power from different Pokemon and checking them effectively, like Nidoking and Heatran.

SET DETAILS: An Adamant Nature and 252 Attack EVs are given to Dragonite to allow it to do huge amounts of damage to its foes, while 252 Speed EVs allow it to be super quick after just one Dragon Dance. A Lum Berry is given to Dragonite to allow it to avoid status for one turn, as it can usually sweep with Outrage anyways.

MOVES: Outrage is the main STAB move to focus on, as it can effectively dent anything that isn't a Fairy, like Florges. Outrage, being boosted by a Dragon Dance is even more threatening to face and I'm guessing it's not the same as Swords Dance from Garchomp, as Garchomp does not get to boost its Speed in anyway, or at least I think. Roost is there to give Dragonite some longevity, allowing it to stall out if necessary. Earthquake is a good option, because one, it's Earthquake, two, it can check some Pokemon that would usually be able to counter Dragonite, like Alolan Golem or Terrakion. And although, I haven't used it, I was also considering Fire Punch as another good option for Dragonite, because it can be better suited to deal with Ice-types a lot better, like Alolan Sandslash or Articuno but considering you would not want to stay in on an Ice-type anyway, I didn't really consider it. And even if I did, it would leave Dragonite walled against Rock-types. So, that's the reason why I chose Earthquake over Fire Punch.

COUNTERS:
Ice-types: Speaking of Ice-types, some Ice-types cause trouble against Dragonite, like Regice if locked into an unboosted Outrage, Mamoswine because of priority Ice Shard or Articuno because it is also somewhat bulky, allowing them to KO Dragonite easily.

Ice-type coverage: Suicune is probably the biggest offender here. Of course they had to give Suicune massive bulk, Ice-type moves like Ice Beam and Blizzard, and give it a ChestoRest set to heal it back up. I'm just glad that CrocCune does not exist. And at least no Pokemon here use Hidden Power Ice. cough cough Raikou, Zapdos cough cough

Dragon-types: Before Dragonite sets up is when it is at its weakest, with Mega Salamence being able to KO with Dragon Rush if it does not miss and if Dragonite is not at full HP. However, Mega Salamence, would not want to take an Outrage in return, bar Intimidated but even so, it would still take high damage back from it. Mega Altaria is another good counter to Dragonite as it removes one of Dragonite's options in Outrage, forcing Dragonite to go for the less powerful Earthquake.

Stealth Rocks and Rock-types: Though uncommon, Stealth Rocks do make appearances in the Tree. And even if they don't, Pokemon like Terrakion and Tyrantrum can hit Dragonite with super effective Rock-type moves like Stone Edge, Rock Slide or the very dangerous Head Smash.

Fairy-types: Funny enough, Fairies don't actually end Dragonite's life here. But if Dragonite is the only one left, then go for Earthquake. Florges can't really take an Earthquake and Sylveon can take loads of damage from Earthquake as well. But their Fairy-type moves hurt.

Togekiss: Leave it to Togekiss to be one of the most annoying Pokemon to face in the Battle Tree. And it even brought its ParaFlinch set along with it. Dragonite cannot do anything against Togekiss, so just wait there or switch.

View attachment 105653
Life Orb Special Attacking Lead (Tapu Koko) @ Life Orb
Ability: Electric Surge
Level: 50
EVs: 252 SpA / 4 SpD / 252 Spe
Timid Nature
- Dazzling Gleam
- Grass Knot
- Volt Switch
- Thunderbolt

Tapu Koko is one of the coolest Pokemon to come out of the seventh generation and it is a darn good one too. Its typing allows it to deal with a myriad of Flying-types and Water-types as well as those pesky Dragons and Fighting-types as well. Electric Surge only boosts those Electric-type moves as well, and prevents the opponent from Resting or Tapu Koko and its teammates fall asleep.

SET DETAILS: 252 Special Attack EVs and 252 Speed EVs along with being a Timid Nature, allow Tapu Koko to be as speedy as a good threat has to be. A Life Orb is given to Tapu Koko as it is very nice to not be Choice-locked into something that you have a bad match up against, as well as giving Tapu Koko a bit of extra power.

MOVES: Dazzling Gleam is taken for STAB damage and is used to deal with Salamence and other Dragons but mainly Salamence and its Mega. Along with maybe Garchomp but ok. Grass Knot is used to deal with the heavy Ground-types that exist like Mudsdale, Hippowdon, and Rhyperior, although, it is very risky using Grass Knot as if Tapu Koko does not KO with Grass Knot, it might just get hit by an Earthquake. Thunderbolt is used for primary STAB damage, being boosted by Electric Terrain, defeating the many Flying-types that exist in the Tree, namely Sheer Cold Articuno, Moltres, Tornadus, Thundurus, Staraptor, and Togekiss as well as many of the Water-types like Politoed, Suicune, Jellicent, Pelipper, Mega Gyarados, and Greninja. Volt Switch, while not as powerful as Thunderbolt, still really FREAKING HURTS.

COUNTERS:
Mega Tyranitar: Tapu Koko cannot even 2HKO Mega Tyranitar with any of its moves, with Dazzling Gleam (its best move in this case), doing a maximum damage output of 47.8%. Mostly thanks to the Special Defense that Mega Tyranitar receives not just from Mega Evolving but also from the sandstorm as well.

Heatran: Tapu Koko only has the option to Volt Switch out on Heatran as it cannot be hit by an Earth Power from Heatran mostly because of its frail Special Defense stat.

Ground-types: Ground-types in general like Nidoking and Nidoqueen are good counters to Tapu Koko because they can hit back with an Earthquake or Earth Power.


View attachment 105655
Scizor-Mega @ Scizorite
Ability: Technician (Pre-Mega Ability: Light Metal)
Level: 50
EVs: 248 HP / 252 Atk / 8 SpD
Adamant Nature
- Bullet Punch
- Roost
- Bug Bite / Superpower (?)
- Swords Dance

Here is my Mega! Mega Scizor, being a good sweeper in Wifi is also not that bad of a choice here either. Sure, its Fire-type weakness might make you look down on it for a bit but otherwise, it's got an amazing defensive typing. Technician alongside Bullet Punch is amazing, because of the fact that it is STAB and gets boosts from Swords Dance. Mega Scizor is also great at shutting down users of setting up Trick Room.

SET DETAILS: 248 HP EVs make Mega Scizor very bulky in HP, while 252 Attack EVs allow Mega Scizor to hit very hard. A Scizorite is given to Scizor to Mega Evolve. Before Mega Evolving, Scizor's ability is Light Metal, allowing it to take less damage from attacks that are based on weight like Low Kick. Once Mega Evolving, Technician will be gained, allowing Mega Scizor to do its job.

MOVES: Bullet Punch was pretty obvious on this set, as Scizor would never have been able to take advantage of using it without Technician. Bullet Punch can, well, "punch" through the Fairies and Icicles that would otherwise hurt Tapu Koko and Dragonite, like for instance, Mamoswine, Mega Gardevoir, and Articuno. Roost allows Mega Scizor, your only Mega, to get some longevity. Swords Dance can be used to boost Bullet Punch to high levels. Bug Bite is used to handle Psychic-types, namely those that can set up Trick Room, like Cresselia, Oranguru, and Slowking. I was also debating Superpower over Bug Bite because if so, then Mega Scizor can deal with Magnezone and other Steel-types but then that leaves me with no super-effective option against Psychic-types so.. yeah Bug Bite. Also, stealing and eating a berry is pretty noice.

COUNTERS:
Fire-types: Well, of course it is. It's Mega Scizor's only weakness. Pokemon like Alolan Marowak that does not use Special Attacks, Magmortar, and Salazzle can easily OHKO Mega Scizor with their Fire-type move options.

Intimidate and Burns: Although Intimidate is a lot easier to handle, it still hinders Mega Scizor a tiny bit. On the other hand, burning Mega Scizor is the equivalent of having bitter medicine go down your throat. Basically, you can't really recover from burns.

Steel-types: Skarmory can easily wall Mega Scizor to no end, while Magnezone can easily eliminate Mega Scizor even without Hidden Power Fire.

Electric-types: Thundurus and Mega Manectric can beat Mega Scizor one on one because of how overwhelmingly powerful they are against Mega Scizor. Mega Menectric, being able to Overheat itself is not easy to handle.

Zapdos: Zapdos gets a special mention as it can resist all of Mega Scizor's options (unless you want to run Hidden Power Ice Mega Scizor, be my guest), and hit back with a Heat Wave.

Bulky Water-types: Jellicent can prove to be problematic for Mega Scizor as it has an amazingly good typing, being able to resist all of Mega Scizor's moves, and attempt to burn Mega Scizor with Scald or Will-O-Wisp. Toxapex having the same problems as well.

WHEW! That was a long one.
But hey, there's that.
And here are some replays that I have kept to myself.

LOSS VIDEO:
Battle No. 139: SD3W-WWWW-WWWJ-B6HW

SOME REALLY SCARY SITUATIONS I WAS IN:
Battle No. 123: Q6FG-WWWW-WWWJ-B6HK
Battle No. 47: HA4W-WWWW-WWWJ-B6YV

Ok. That's it. I'm really tired now, so I'm going to go to sleep now.
I found your post interesting because I just ran a very similar team. It was identical except for Tapu Koko- I had the very bulky Suicune instead. I also had Dragonite in the lead.

I’ll give more details on my team (just lost after 147 wins) later.
I looked at your battle videos. I’m guessing you wish you could go back and bullet punch mamoswine with scizor before it fissure’d you. That was a killer.

Some additional points-

None of the Zapdos’s in the tree carry heat wave. They’re still a pain for scizor, given the typing, but they can’t Ohko you most likely.

On mega manectric, I agree with you. That thing was even more threatening for my team because of suicune. Luckily I only ran into it once.
Have you considered extremespeed for Dragonite? It comes in really handy in a pinch. You wouldnt have room for roost though, so i guess it depends on your play style. You’re also not leading with Dragonite, so its role is different.

And yeah, earthquake on Dragonite is a must. Don’t give that up, unless you feel like being walled by empoleons or Heatran. You’ll miss out on Skarmory and levitate bronzong, but your teammates take care of them well anyway.
 

Smuckem

Resident Facility Bot Wannabe
is a Community Contributor Alumnus
I saved a battle video with Wally leading Garchomp4-Mega (slot 1) and Gallade4-Mega, and did 10-20 mock battles. Garchomp Mega Evolved every single time.
I finally can add to this--I'm currently running one of the many configurations of The Room, in this case Oranguru/Hariyama/Shiinotic/Guzzlord, and in Battle 10 of this streak ran into Wally, leading with Altaria3 (slot 1) and Garchomp4. I ran twenty Mock Battles and got Altaria Mega Evolving every time. Just a little more evidence to add to the pile...
 
At this point I think we'd make better use of our time studying dual Z-move leads, as turskain posted a heap of intriguing info on the subject. Not that it's particularly easy to come by such a pair, either. I do have one saved, though, and presumably turskain still has his to learn from.
 

turskain

activated its Quick Claw!
is a Community Contributor Alumnus
The aforementioned testing involved Rotom-Frost3/Audino4 on Turn 2 of a battle, after Audino was Faked Out on Turn 1 while First Impression KO'd its allied Oranguru34. I did 22 mock battles on this battle video making the same moves on Turn 1, and then doing nothing on Turn 2 to see what the AI would do in this situation, and if it would ever use Inferno Overdrive on Audino3 while it had the Gigavolt Havoc / Z-T-Wave option from Rotom-Frost3 in slot1. Here are the notes from this:

My Pokémon: Golisopod @ Assault Vest in Slot 1, Togedemaru (Lightning Rod) @ Focus Sash in Slot 2
The AI's side: Rotom-Frost3, Audino4 (Faked Out on previous turn, which is why some of the results involve Bronzong switching in)

mock battle 1: gigavolt havoc + fire blast
mock battle 2: gigavolt havoc + yawn
mock battle 3: dark pulse pod + yawn - next turn z-twave + yawn
mock battle 4: gigavolt havoc + yawn
mock battle 5: gigavolt havoc + fire blast
mock battle 6: rotom t-bolt + yawn
mock battle 7: switch audino to zong + gigavolt havoc
mock battle 8: blizzard + yawn
mock battle 9: gigavolt + yawn
mock battle 10: gigavolt + fire blast
mock battle 11: z-twave + fire blast
mock battle 12: gigavolt + fire blast
mock battle 13: gigavolt + yawn
mock battle 14: z-twave + fire blast
mock battle 15: audino switched for zong + z-twave
mock battle 16: rotom t-bolt + fire blast - next turn blizzard + inferno overdrive
mock battle 17: audino switched to zong + gigavolt
mock battle 18: audino switches to zong + gigavolt
mock battle 19: z-twave + fire blast
mock battle 20: z-twave + hyper voice
mock battle 21: z-twave + fire blast
mock battle 22: audino switching to zong + t-bolt

Note that I have Lightning Rod on my side, so the AI stops using electric moves after observing the ability. This testing was inconclusive, but notably Inferno Overdrive only got used once in all these battles - and this was after Rotom-Frost had used a regular Electric-type move to activate Lightning Rod, possibly a factor in disabling its Z-moves.

In the actual battle, Rotom-Frost used Blizzard twice in a row before using its Z-move while Audino4 flinched so I did not get to see its moves, which is what prompted me into mock battling to see if there was any explanation for this - my hypothesis was that the flinched Audino might've been using Inferno Overdrive, thus "locking out" Rotom-Frost from using its Gigavolt Havoc. I didn't learn much about the specific Blizzard uses, aside from them being rather uncommon and concluded that the moves in the actual battle were a very unusual series of events, and that Audino probably wasn't using Inferno Overdrive on that flinch turn.

(I kinda forgot about this entirely and had it in the backlog to post Soon™ along with other battle videos, so thanks for the reminder!)
 
Last edited:
The aforementioned testing involved Rotom-Frost3/Audino4 on Turn 2 of a battle, after Audino was Faked Out on Turn 1 while First Impression KO'd its allied Oranguru34. I did 22 mock battles on this battle video making the same moves on Turn 1, and then doing nothing on Turn 2 to see what the AI would do in this situation, and if it would ever use Inferno Overdrive on Audino3 while it had the Gigavolt Havoc / Z-T-Wave option from Rotom-Frost3 in slot1. Here are the notes from this:

My Pokémon: Golisopod @ Assault Vest in Slot 1, Togedemaru (Lightning Rod) @ Focus Sash in Slot 2
The AI's side: Rotom-Frost3, Audino4 (Faked Out on previous turn, which is why some of the results involve Bronzong switching in)

mock battle 1: gigavolt havoc + fire blast
mock battle 2: gigavolt havoc + yawn
mock battle 3: dark pulse pod + yawn - next turn z-twave + yawn
mock battle 4: gigavolt havoc + yawn
mock battle 5: gigavolt havoc + fire blast
mock battle 6: rotom t-bolt + yawn
mock battle 7: switch audino to zong + gigavolt havoc
mock battle 8: blizzard + yawn
mock battle 9: gigavolt + yawn
mock battle 10: gigavolt + fire blast
mock battle 11: z-twave + fire blast
mock battle 12: gigavolt + fire blast
mock battle 13: gigavolt + yawn
mock battle 14: z-twave + fire blast
mock battle 15: audino switched for zong + z-twave
mock battle 16: rotom t-bolt + fire blast - next turn blizzard + inferno overdrive
mock battle 17: audino switched to zong + gigavolt
mock battle 18: audino switches to zong + gigavolt
mock battle 19: z-twave + fire blast
mock battle 20: z-twave + hyper voice
mock battle 21: z-twave + fire blast
mock battle 22: audino switching to zong + t-bolt

Note that I have Lightning Rod on my side, so the AI stops using electric moves after observing the ability. This testing was inconclusive, but notably Inferno Overdrive only got used once in all these battles - and this was after Rotom-Frost had used a regular Electric-type move to activate Lightning Rod, possibly a factor in disabling its Z-moves.

In the actual battle, Rotom-Frost used Blizzard twice in a row before using its Z-move while Audino4 flinched so I did not get to see its moves, which is what prompted me into mock battling to see if there was any explanation for this - my hypothesis was that the flinched Audino might've been using Inferno Overdrive, thus "locking out" Rotom-Frost from using its Gigavolt Havoc. I didn't learn much about the specific Blizzard uses, aside from them being rather uncommon and concluded that the moves in the actual battle were a very unusual series of events, and that Audino probably wasn't using Inferno Overdrive on that flinch turn.

(I kinda forgot about this entirely and had it in the backlog to post Soon™ along with other battle videos, so thanks for the reminder!)
All right, the details of being the second turn do change the circumstances considerably, but it’s still quite useful.

In my case, both users lead (Grimsley Scrafty3 slot 1, Honchkrow3 slot 2) and in the actual battle, Scrafty used All Out Pummeling on its second turn. I played around BHE because it was the far more dangerous move, but I’ll try to get Honchkrow to use it without killing or disabling Scrafty first to prevent the AI being “forced” to take the option.
 
Ok, I will talk about my team now, as promised. I reached a streak of 147 in Super Singles, using Dragonite, Suicune, and MegaScizor.
This was the exact same team I had moderately good success with in the Maison last gen. I reached a streak of 342 with it back then, but then again, I didn't get it that high on the first try, and more importantly, the Maison is a far easier facility than the Tree.
It was so much harder, in fact, that I wondered if I could even crack 100 with the trio. Fortunately I managed, although I will say it took so much more dedication and knowledge of the game this time around. The Tree is that much more serious and challenging, which is great.
Ok, now for the raw data.

250px-149Dragonite.png
Dragonite (the lead) No nickname. Just boring old "Dragonite".
Adamant nature
Ability- Multiscale
Held Item - Lum berry
Ev's- attack and speed maxed, remainder in hp
IV's- all hyper trained and perfect except for speed, which is close
Moves:
Outrage- standard
Dragon Dance- standard
Earthquake- i feel this is mandatory, a super effective earthquake is stronger than a neutral outrage (unlike fire punch)
Extremespeed- Honestly, I hardly used this. In future runs I may replace it, though I do like its "emergency" factor

This guy was my bread and butter. I honestly never wanted to lose him, as I lived in mortal fear (haha) of him going down only to run into the rare pokemon which could dismantle my backups, Suicune and M-Scizor. I will discuss these dangerous mons' more in the threats section, but mainly they were Sunnybeamer Moltres and Charizard Y. Magnezone was also very threatening since I didn't run superpower on Scizor, and he hits too hard for Suicune to stall him out, unlike Rotom heat who Suicune could probably handle.

Suicune.png
Suicune- nicknamed "Wildebeast"
Bold Nature
Ability- Pressure
Held Item- Chesto Berry
Ev's - Hp and defense mainly with a bit put in speed. I need to change the spread as it's a relic of a former era, but I will take the few in speed and put them back in defenses.
IV's- Everything hyper trained except for sp att. Sadly i got around to maxing that one only when my run ended. It turns out I needed the extra firepower in the last battle, too. Oh well.
Moves:
Scald - standard
calm mind - standard
icy wind- I debated between this and substitute for protection from ohko spammers. Ultimately, I settled on icy wind. Its utility is incredibly useful - many times I need to slow down the opponent so Dragonite can finish it off without risking a flinch, for example. I did run into Walrein 4 once, and luckily he missed sheer cold and I 2khoed him with Dragonite. You can bet my palms were sweaty with that one. Still, I couldn't deny icy wind's utility, as outside of slowing opponents down, it was my only way of hitting those very annoying water absorb pokemon. I actually lost a run once to perish song lapras, back in gen 6, because I couldn't hit the darn thing and Suicune was my last pokemon. Ugh.
Rest- Sometimes I could afford to rest even after my berry was used up when I knew the opponent couldn't harm me, like if his best move's pp was drained. I had to be careful with this, though, so as not to entice the ai to switch out the "lame duck" pokemon for something more threatening.

Dragonite may have been my bread and butter, but Suicune was the defensive glue that held the team together. I consider her better than Tapu fini, honestly. I'm biased, but I feel like Suicune makes up for her lack of misty terrain with sheer defenses and her ability to burn grounded opponents with scald. She can't do everything she could do last generation, though. She can't wall mega metagross, especially when he gets an attack boost from meteor mash on the switch in. Still, she can wall an amazing assortment of opponents. The trick is to set up on the ones she can wall while keeping in minds threats she cannot, like M-metagross or M-mawile. Hardly anything forces out after being at plus 6, too. Maybe physical grass types, like leafeon. But almost nothing else.

scizor-mega.jpg
Szicor (mega)- nicknamed "Clawface"
Adamant Nature
Ability- Technician
Held Item- Scizorite
Ev's- Not ideal. Max attack and the rest dumped mainly in hp, with a little in speed. I plan on fixing this soon. I prefer max attack on scizor, as it allows him to ohko several fast but frail fire types when fully set up at +6. I think he needs more defensive investment though, so I will take out the small bit in speed in order to do that. This guy's ev's were essentially unchanged from last gen.
Iv's- Everything is maxed except for sp att and speed. I've been reluctant to fix his dreadful speed iv because I like using him on my battlespot trick room team sometimes. Lame, I know, but I'm too lazy to breed a brave-natured one.
Moves:
Bullet Punch - standard and reason why speed investment usually isn't neccesary
Bug Bite- I debated changing this to brutal swing as someone did in a previous writeup (I believe it was Josh C. ? not sure) I can see why they did that, as bug coverage is simply terrible. I decided to stick with bug bite though, partly because I wanted to see how far I could take this team while being completely identical to my old maison team. Also, bug bite is very effective at eliminating bulky grass types that Dragonite is sometimes bothered by when not running fire punch (e.g. Tangrowth).
Roost- I knew i was going to run roost, as Scizor would have to take the brunt of many hits while switching in
Swords Dance- This leaves no room for superpower, but I wanted a setup wincon. Notice how all three of my team members can set up.

Mega Scizor is amazing. It's that simple. Unfortunately my loss resulted partially because of his complete inability to hit fire types, but what can ya do. There was some quick claw hax too - I'll get to it.
Ok, I decided to put down the threats for this team as well as general guidance for people who may want to play this in the future.
Anyway, threats-

Charizard Y-
charizard-mega-y.gif
Wooh, was this guy scary as a lead. If he gets the air slash flinch on Dragonite, it might be over. I shouldn't have to explain too much- he threatens my backups tremendously. I guess I could try switch stalling fire blast and solarbeam between scizor and suicune, true. Fortunately I never had to attempt this. But yeah, this guy is why I wanted to keep Dragonite alive as much as I could help it.

Moltres3-
Spr_6x_146.png

The sunnybeamer Moltres set. It's very threatening, and ended my run a previous time. Same reason as charizard y. It also can have the obnoxious ability Flame Body, which wastes Dragonite's lum berry at the very least.

Incineroar4-
Spr_7s_727.png
Say hello to my new nemesis. This guy ended my run for the final time, and couldn't have done so in a more insulting manner. With constant defense drops from crunch, Suicune couldn't tank him, and a last second quick claw activation that also happened to be a crit (!) on Dragonite spelled my doom. Suicune couldn't even 2hko him unboosted, probably because I was lazy and didn't hyper train her sp attk. But yeah, that thing is bulky. Just watch the vid.

Notice how these are all fire types so far? Yeah, there's a theme here. Only 2/3's of my team can hit them for meaningful damage.

Another threat - 0.jpg

Yeah, Metagross4. As I mentioned earlier, Suicune can't tank him, especially after a meteor mash attack boost. When this led, I simply dragon danced and earthquake. It survives a +1 EQ, unfortunately. After it knocks out dragonite, I better hope moltres3 doesn't come out next.

manectric-mega.jpg
Mega Manectric- Very threatening to my team for obvious reasons, as it packs electric stab and fire coverage. Also annoying is intimidate, similar to Incineroar4. This allows him to survive fully setup mega scizor's bullet punch, as at +5 it's not always strong enough to ohko it. (+5 252+ Atk Technician Scizor-Mega Bullet Punch vs. 0 HP / 0 Def Manectric-Mega: 131-155 (90.3 - 106.8%) -- 43.8% chance to OHKO)


Half the battle with this team was knowing who to setup with. If some of these threats came out after a complete setup, they were likely dead.
I'm only going to upload 2 videos since I feel like hardly anyone watches these videos anyway.

Ok, the loss- EKAW-WWWW-WWWJ-Y425
Misplay and hax but mostly hax. Simply put, I couldn't handle Incineroar4 and his darn quick claw activations (that also happen to result in crits).

Ok, this one involved more misplay, though I won-
H6RG-WWWW-WWWJ-Y48N
 
Scythes - Must've been someone else - I haven't used Scizor at all for Singles in the Tree (or Maison). In saying that, I'm currently using a Mega variant for a Multis team!
 
I think the only reason I thought Zapdos had Heat Wave, in which it does, is because I have used Zapdos with Garchomp in Doubles before and that one had Heat Wave. Something tells me that I got those confused.
Some Zapdos sets had Heat Wave in ORAS. With SM they removed all tutored moves from tree mon and in the case of Zapdos2 replaced it with ancientpower.
 
Posting an ongoing streak of 1000 wins in Ultra Moon.


This run is especially significant to me because, not only is it the farthest I've ever gotten with a doubles team in any facility, the first 250 battles were done entirely in my trademark "TR randoms" format. My methods have changed drastically since using this format in triple battles last gen; since there's also a large group of newcomers to our community that haven't really been exposed to it, I might as well detail those changes.

This website http://www.randomnumbergenerator.com has a really useful, customizable table which I use to determine my team. Every number corresponds to a specific poke in a specific box. Previously, I rolled only six numbers and, barring an unresolvable item conflict, what I rolled was what I battled with; because the tree has changed so much from the Maison, I didn't want to limit myself to a strict four entries, which had the potential to create crippling disadvantages. That still occurs, but by giving myself far more leeway in choosing, I can at least attempt to make things easier. It also lets me discard repeats more easily. Many pokes have multiple movesets, and I gave myself the option of using an alternate moveset even if it didn't correspond to the specific number.

My pool of available pokemon is as follows:
  • TR Setters: 14 (roll 2)
  • Mega Evolutions: 12 (roll 1)*
  • TR Abusers: 60 (roll 6)
  • Secondary TR Abusers: 45 (roll 2)**
* Some of these megas are highly experimental, like Kangaskhan, Blastoise and Metagross. During this streak, they were automatically ignored if selected. We can't all be monsters like Eppie.

** These are split fairly evenly between two boxes and the rolls were treated as the same number for both, if there was an available slot, instead of rolling numbers between 1 and 45. For example, rolling a 10 would select Braviary (first) and Rotom-Wash (second.) Rolling a 24 would select Celesteela from the first box and nothing from the second. Essentially I could roll up to four of these.

Unlike my triples runs, I used the megas comparatively rarely. I also made very small moveset changes depending on the rest of the team, primarily via TMs, though often this boiled down to teaching Protect to something leading. Some pokemon like Donphan received significant changes. My nervousness began to skyrocket past the 200 mark, even when I had pretty high confidence in the team, and I spent so long deciding who to use for the 240-250 run that I decided enough was enough, and I'd use my serious team for the remainder of the streak.

For all the talk about the "necessity" of Fake Out for these TR teams, I was very pleasantly surprised by the ease at which I'd managed without it. Not only that, for all its offensive prowess I believe my original frontrunner Hariyama was holding the team back. Strong as hell, but limited coverage, prone to provoking disastrous turn-wasting switches to things that resisted the Fake Out which previously hit them, and hard countered by a number of much slower pokemon he couldn't hope to outspeed, survive or KO under TR, especially with one or more stat drops under his belt. His fighting typing also encouraged the AI to direct many powerful attacks toward Oranguru, which never helped.

Araquanid, on the other hand, made an incredible lead. While impressively bulky on the special side, it still drew most attacks from the opposition, especially the nasty rock and electric attacks that could and would be used against Oranguru. With a Life Orb, Araquanid had a very long list of useful and guaranteed OHKOs, and its speed allowed it to undercut the pokes that posed serious threats to Harry. The frequent Scientist and Breeder teams were no longer a coin flip, but generally easily beaten by my leads. By surviving far longer, Araquanid was usually able to ensure that Mawile or Drampa could finish battles safe from their biggest threats, if they were even required. Initially seeming like an unconventional choice of lead, chosen more because I saw potential for Mawile's Intimidate to hurt as much as it helped, I'm happy to have learned I'd made the right choice.

Before diving deeper into my serious portion of the streak, I have a lot to say about the randoms. They made up 75 out of my total replays, be it a fun or difficult battle, so if you happen to be intrigued by one of the teams and want to see them in action, let me know. Some of these teams were incredibly wacky!

Battles 1-10:


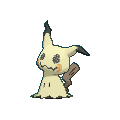
First and last time I would use Mimikyu as a setter. While getting TR up was not much of a problem, misses and status aside, it was virtually deadweight outside of it, in stark contrast to all of my other setters. Lack of power was another factor, as its favorite pastime was failing to KO targets if it could even hit them. Fortunately the remaining three pokes were able to do the work themselves. I haven't permanently banished Mimikyu to the Bank, and have not yet fully settled on a new job for it, but setting TR and supporting its teammates is the wrong choice.

Battles 11-20:


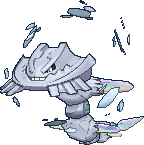
Worldie may be interested to know this Stacky was not used as a setter, but some offensive support; Rockium Z with Gravity, Wide Guard, Stone Edge and Gyro Ball. It did its job particularly well, easily scoring KOs here and there and being fairly difficult to KO. Lack of enemy EQ usage made it all the easier to set Gravity. The boon from the 20 points added to Beartic's base attack cannot be understated; this MASSIVE spike opened up so many KO opportunities and put this big boy on par with his buddy Mamoswine. I was really happy with it, having previously kicked it out of the pool last gen (to some mild disappointment from Smuckem.) VS Grimsley is the only battle Stakataka did little, but Torterra stepped up to the plate in its stead. While I like to use vanilla Slowbro as a setter (standard M-Slowbro set doesn't use TR) the crit immunity and added offense did help.

Battles 21-30:


As I would come to find out, highly amusingly, Healer cures Ursaring's poisoning before the Toxic Orb immediately refreshes it, preventing poison damage but maintaining the Guts boost. Escavalier is one of the only pokes M-Audino dislikes facing, and this team fought two of them; the latter, Escavalier3, was the cause of a generally close battle which was won because of the AI stupidity in selecting a target for KO; Palossand has no way to badly damage Toucannon and, with TR off, I was required to Destiny Bond it as it chose to Beak Blast twice. All Toucannon needed to do was attack my weakened Azumarill, and I'd have lost. Palossand used an Expert Belt which normally would have gone to Azumarill, so Azumarill tried the Protective Pads instead. Because it relies on contact moves and Flame Body is a significant threat, I figured it was a sound choice (Healer is great, but shouldn't be depended on.)

Battles 31-40:


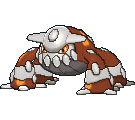
This team originally rolled Stakataka as its second setter, and I was initially stoked to try it, but two battles in I strongly reconsidered and switched it out for the second setter rolled, Bronzong. While I haven't lumped Stakataka in with Mimikyu yet, that being "DO NOT USE" for TR, triples might be the better avenue for it, or at least someplace Ally Switch can be constantly at the ready. Holding an Air Balloon compensated for its ground weakness but did nothing for special fire attacks, and the team as it was had a significant risk when facing those types. Not only that, in contrast to Rockium Z Stone Edge, Rock Slide made for pretty poor offensive support, and its speed meant it would be going first and typically failing to KO anything. Reuniclus was vital in destroying any fire types that might have appeared, and while Heatran was rolled, I opted not to use it because I'd just be replacing one common weakness for another.

While I didn't give Stakataka its fair chance, I DID save a replay of it passing Beast Boost onto Vileplume, who steamrolled the enemy because of it.

Battles 41-50:


I had the opportunity to run Sand Stream AV Gigalith and Mega Steelix for this portion, but chickened out because they wouldn't have played well with the rest of the team. Pulverizing Pancake is the sort of nuke that works in doubles because of the limited number of opponents; while Snorlax has fallen a long way, it was still good at punching the sorts of holes my backline could capitalize upon. Crabominable was the true MVP, winning a number of the battles that went to shit, though the enemies being severely weak to its STABs was the main culprit. This was the first round of battles I got a taste of just how dangerous Thunder Wave can be, though I wasn't finding myself in severe crisis until the Team Araquanid portion.

Battles 51-60:


An alternate Gigalith's moveset changed drastically for this streak, particularly in gaining Throat Chop. Ally Switch was pivotal in allowing Gigalith to do as much damage as possible before exploding; even without Helping Hand, the results were devastating. Cofagrigus was running a Mental Herb, but one battle saw such an inconvenience from paralysis that I wished I'd gone with a Lum Berry. I wouldn't make that mistake twice.

Battles 61-70:


Holy shit! If there were ever an example of how badly Ally Switch fucks with the AI, THIS IS IT. Originally very concerned for the RNG results, absolutely stacked with rock types, I began to look at it from a different angle and decided that perhaps I could use it to my advantage. And that's exactly what happened. Triples Aurorus used Dark Pulse for cross-field filler, but used Protect this time around for that crucial first turn. After that, it was an icy rampage. Hyper Voice, Earth Power and Freeze-Dry were all it needed to destroy most teams by itself. The AI happily supplied me with lots of fighting type leads to be duped (this portion of the streak is not a good demonstration rebutting idiots who claim the faclities counter team.)

Battles 71-80:


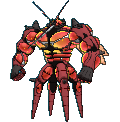
While I'm a big fan of memey Hone Claws sets on M-Aggron, there was none of that here; I used an extremely bulky Curse set, which worked well. Gravity also put in a lot of work, but unfortunately -1 Aggron undercuts Bronzong, so there was still potential for a miss. Dhelmise is not popular, nor would its moveset be seen as viable by the lot of you, but it hit incredibly hard and performed admirably well.

Battles 81-90:


I hate what has become of Sucker Punch but Honchkrow is still a solid user of it. Power Herb Sky Attack as a means of getting Moxie rolling ASAP even versus bulky enemies has been completely outclassed by Z-Brave Bird, and doesn't leave a moveslot devoted to deadweight afterward. Honchkrow doesn't make anyone's lists when discussing viable TR abusers but I've always liked it for its power and the sorts of holes it can patch (or create) in using it. It was my savior in a bad battle versus a Breeder, in which Audino was repeatedly flinched with Rock Slide; outspeeding all of the Breeders' available pokes, Honchkrow had a significant advantage without TR and would deliver a decisive OHKO to M-Camerupt that would have wrecked me otherwise. This streak featured a Moltres2 setting off my Flash Fire when any other move would have been preferable. While not likely intentional (for the AI) Gastrodon redirected and absorbed a Hydro Vortex, which felt freaking great.

Battles 91-100:


An unusual roll in that none of my possible TR abusers were from the first box, making them all from Gen V and higher. Also unusual was Wally's team, which included no megas. This Musharna used After You instead of Gravity, because it allowed Tyrantrum to keep its standard Choice Band instead of using an Iron Ball. Tyrantrum would also replace Superpower with Earthquake, but use the move only once. This streak contains a very one-sided Aegislash sweep completely devoid of AI hax, though they certainly tried. I ran Wide Guard but never found myself using it, and decided that in the future I'd try Sacred Sword (offensively, its only moves were Shadow Ball and Flash Cannon.)

Battles 101-110:


Togekiss remained completely unused until Wally because Abomasnow was being a cheap piece of shit and freezing everything that threatened to KO it or require some backup. Among those game-changing freezes were Armaldo, Primarina and Scrafty. The battle with Primarina involved a very surprising choice on behalf of the AI, neglecting to detonate Lickilicky next to its frozen ally; while it would have forced the AI into a loss, that's never stopped them before (at least not last gen; I can't immediately recall it happening in the tree.) Gravity was used on Musharna this time. I'm glad I opted for Bisharp instead of Lurantis, because it made a very effective LO attacker and was used to slaughter some things that Abomasnow wouldn't have beaten without its haxxy BS. WOULD it have inflicted freezes on them, also? Perhaps. But I'd have felt terrible about it. I despise Glaceon so much that the more my pokes behave like it, the harder it gets to look myself in the mirror.

Battles 111-120:


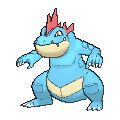
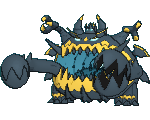
Feraligatr was used in only three battles because the free switches into Escavalier were too good to pass. I fought Xenophon and Xio twice apiece, and most other battles had lead pairs which were very friendly to it. There was also a battle that got off to a terrible start with Walrein4, but Guzzlord (special set) would save the day. When it actually did battle, Feraligatr easily swept with Swords Dance and an abusable Sheer Force moveset. While generally unacceptably weak right off the bat, I was glad I gave Guzzlord a chance (initially as switches for my primary muscle, plus Instruct abuse) because it turned out to be pretty useful.

Battles 121-130:


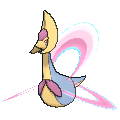
Unbelievably satisfying OHKOs to Slaking, Regigigas, Regirock, and especially Suicune. How's that Bold 252/252 working for you now, jerk? Helping Hand was of great value to both Bulu and Golurk, who now has High Horsepower to mitigate the effects of Grassy Terrain. Clawitzer is just as good a cleaner as ever. Previously, Cresselia used Lunar Dance in Triples, albeit so rarely it was time to try something else. Ally Switch was, whaddya know, an excellent replacement. Rather than run dual grass coverage for some healing, Bulu ran Protect because it led, as well as Wood Hammer, Stone Edge and Fling. I consider No Guard to be heavily overrated on Golurk when it gets far more damage out of Iron Fist and an Expert Belt.

Battles 131-140:


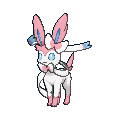
M-Steelix struggled a bit due to the influx of heavies and bulky waters, but Sylveon gave a lot of support by simply having a rarely resisted, unusually strong spread move, and especially Buzzwole, by being so bulky it could switch into Earthquakes for pitiful damage and provide great additional damage. Still, this was not an easy team to use. Amusingly Gothitelle reached +6 SpA twice, because of a weak Musharna4 that gave two SpD drops from Shadow Ball, and again from a Punk Guy with his Intimidate team. The former made for a very satisfying KO lategame; the latter unfortunately did not give her any really good targets (the final +2 was given by Scrafty of all things.)

Battles 141-150:


While I think very highly of Hydreigon as a cleaner in TR, especially in Triples where its STABs can hit from anywhere, this team still depended heavily on Marowak doing most of the work, which it beautifully did. Komala is not a good fit for TR due to its frailty even when running the bulkier spreads which TR teams allow. Having said that, it does hit quite hard. Helping Hand secured a number of OHKOs against rather bulky enemies. I wouldn't recommend anyone trying Komala, but outside of Smuckem I don't think that's going to be a thing, ever :P

Battles 151-160:


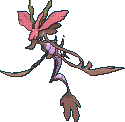
I passed on trying Stakataka as a setter again; I just don't see myself being comfortable with it without Ally Switch. Otherwise this team was very braindead and strong, though I wasn't getting as many Fiery Dance boosts as I would have liked. It wasn't needing them to secure KOs, but it would have been a lot more fun to steamroll because of them. Alolan Golem is extremely nasty even without Explosion.

Battles 161-170:


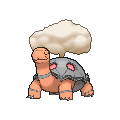
Mudsdale is overwhelmingly bulky when attacked weakly by fast opponents, and was not often KOd. Fake Out? Yes, please. Nightshade has been a really good move for securing KOs and helping to topple walls. Fixed 50 damage tends to be a lot in this format, when your other pokes easily hit enemies to within that kill range. Both standard Alolan Egg and Empoleon use an Expert Belt, but with such a common hold item amongst my roster, they have easy alternatives.

Battles 171-180:


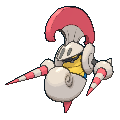
I was highly fortunate in that the only fire type encountered during this run was a lead M-Camerupt who was carefully disposed of without setting TR. There were also a lack of lead fighting types that might require Intimidate support. We've briefly discussed Druddigon in the discord, and it did what it does best here, which is deliver really strong hits. I consider it to be a lot more useful than most other physical dragons as far as TR is concerned.

Battles 181-190:


Rotom-Wash was originally born as an Ally Switch user, the idea being it could easily tank Hydro Pumps and Ice Beams and what have you. When it rolled alongside Camerupt, I thought this would be the perfect time to see it put into practice. ...and the move never ended up being used, even once, in no small part due to Regirock severely plowing through most teams by itself. When there was a time and place for Rotom to come in, I was left with what was regrettably a weakened version of what it could have been, because this washing machine was EV'd entirely for bulk. Since I wasn't depending on it, I didn't rebreed for Quiet until afterward, and it is now a bulky and slightly potent attacker.

Battles 191-200:


Four attacks Lonely Stakataka here in all its devastating brick-hurling notoriety, and Torrent Primarina, as the HAs hadn't been released yet. Not that it mattered, as LO Hydro Pump is still very strong. Ally Switch continued to be broken with or without Stakataka in play. Lurantis made a respectable lead, with fewer chances of needing to run and hide compared to Stacky. ..or so I thought; unfortunately, it would still need to switch fairly often. Delivered a OHKO to Wishiwashi without a crit, which I was not expecting. Also got so doped up on steroids Superpower boosts that it made short work of Cresselia4, which felt great. Lickilicky notably does not like to detonate around Dusclops, as it'll just spam Brutal Swing for laughable damage. It's not the first time I've seen this behavior.

Also, FUCK SWAGGER. Guzma gave me my closest battle yet of this whole randoms streak, or at least the most anxious that I can recall. However, the aforementioned Swagger remark was more because of an Umbreon on an Eevee team, which caused a lot of disruption.

Battles 201-210:


Wouldn't you know it, not a Metagross in sight, the biggest roadblock to Carbink safely setting TR (Magnezone is also nasty, but not as much.) Carbink is not strong, but strong enough to help, considering its STABs cover a lot of useful weaknesses. Golisopod is a monster in spite of its terrible ability and, so I've come to find, so is LO Reckless Bouffalant. Originally, I rocked Scope Lens + Focus Energy in triples, for that 100% crit rate. Not leading with it meant there was even less incentive to try that shit here, so I went with a more direct approach. Like Snorlax, Bouffalant appears much weaker than the prominent physical threats nowadays but is deceptively powerful.

Battles 211-220:


I've said it a few times in the discord, but Lickilicky has some eye-opening muscle for such an unimpressive 85 attack. It compensates with a generally high-BP moveset able to 2HKO things weak to them (without Helping Hand) and both Z-Explosion and Explosion itself are obscenely strong, the former able to OHKO most things with average bulk and the latter easily OHKOing anything without a resist, with HH used beforehand. It's surprising more because the things that were detonating up to this point were sitting on Weakness Policy boosts on top of Helping Hand, with over a third of the raw attack power compared to Lickilicky. Yet the results were the same for both: total annihilation. There was not a lot of work for Vikavolt or Rhyperior, but they cleaned up very reliably.

Battles 221-230:


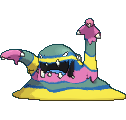
While Muk wasn't using Explosion for room clearing, Acid Downpour came in clutch many times. There was also a battle where it was getting constant Rock Slide flinches, which ultimately saved me. Donphan also had a lot of respectable power, using Knock Off and Seed Bomb in place of Ice Shard and Head Smash. While Sturdy allows it to use Weakness Policy, because it wasn't a lead, I opted to use an Expert Belt instead. After You came in extremely handy, as the same runts like Aromatisse and Shiinotic which easily outsped and slaughtered it, could now be safely slain in TR by acting first. In fact, there was a battle in which both of them appeared and fell just like that.

Donphan had to beat Cynthia almost entirely by itself due to some severe trolling (not that it was alone; Musharna had no offensive presence but was buffing it.) I complained about Hariyama triggering costly switches with its Fake Out targets, but this run involved a flinched Gigalith switching into Tyranitar... with a Close Combat targeting that slot. Top Ten Greatest-caliber play right there, everybody!

Battles 231-240:


The speed tie between Oranguru and Bewear proved to be annoying without Hammer Arm being used first. Cynthia was extremely annoying again, because of Spiritomb's Swagger. Florges is another eyebrow raiser, but it not only made a fantastic support with Helping Hand, it actually nearly solo'd an early team in the run, not to mention through Light Screen, at that. Having said that, the Veteran Electric-themed team was chock full of shitty SpD like Raichu, as well as Mega Ampharos who walls Moonblast about as well as it walls Earthquake. This Florges had Grassy Terrain, and originally I envisioned it pumping up Torkoal's Z-Solarbeam if it came to that, which it didn't. But it's the thought that counts. Only Oranguru had any real chance of losing its hold item, but Iron Ball Symbiosis was a possibility which never triggered.

Battles 241-250:


The finale. I spent so long deciding who to use because my desire to keep things fresh and avoid familiar faces was conflicted with my struggling to build the rest of the team around Iron Ball Tapu Lele, relatively new to my roster, and Ferrothorn; they were competing with the pokes I ultimately used and I decided I'd rather be boring than creative and throw away what had become a really lengthy randoms streak (nowhere near my personal best, but we'll see about triples.)

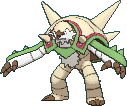
That said, I had an easier time than anticipated. Wide Lens was crucial on Chesnaught without Gravity, and he was in charge of killing first and foremost anything that could threaten the backline, even at its own expense. Jellicent3 is a pest on Scientist teams, even if you're immediately able to deal with it, but my fully defensive Jellicent was even worse. Cursed Body kicked in all the time, which was great.

Spidey & Friends!

Oranguru @ Lum Berry, Inner Focus
Relaxed (212 HP, 164 Def, 132 SpD)
-Trick Room
-Instruct
-Psychic
-Protect

Credit to Josh C. for the spread, which came with a bunch of notable survivals. Even then, I did not hesitate to send in Mawile for an Intimidate if I believed the enemies might double up on it. Just about everyone that's used a TR team this gen has used Oranguru, and there's not an awful lot I have to add to it, except that I was very surprised by the number of times the AI left it sitting at low single or double digit HP and declined to KO once TR deactivated, and allowed it to just set it right back up. Suicune was notorious for this.


Araquanid @ Life Orb, Water Bubble
Brave (252 HP, 252 Atk, 4 SpD)
-Protect
-Liquidation
-Leech Life
-Ice Beam

I'll get to the Ice Beam in a moment, but first I want to discuss why I didn't use Wide Guard, the standard for a very good reason.. ..in theory. In practice, it's terrible. If I ran Wide Guard and used it when I anticipated Rock Slide or Explosion, I'd block it, and then promptly be murdered by Stone Edge or take needless damage from something else. Part of what made Araquanid so successful was keeping its HP as high as possible, taking damage only when I considered it acceptable, be it my LO recoil or leaving something benign/less serious than the target I KO'd. I specifically mentioned Stone Edge because that would have been the main culprit. Facing many, many, many Hikers/Workers/Policemen with their Rock/Ground themed teams, often running set34 in cases, or all four in the case of Hikers and their Terrakions/Tyranitars, it is nigh impossible to tell which is which until they move. So not only would I scout with Protect, there was usually virtually no chance that it would immediately become safe to just use Wide Guard from then on. Versus anticipated Explosions, it was always better to just Protect both my leads and then go from there, switching in Mawile if the remaining ally would likely continue to go after Araquanid. Yes, there were times where it would have been helpful to use Wide Guard late in the battle, to block an incoming Blizzard that might have hit Drampa, but those instances were practically nonexistent, unlike the instances I would prefer to have Ice Beam:

Punks with their Intimidate spam, and Mega Mence in general, were usually the main source of grief for Araquanid. While Arcanine is still guaranteed to fall to -2 Liquidation, that can't be said for anyone else. In some cases, it was usually better to just send in Mawile were it safe, and go from there; often, however, the best results could be achieved if Araquanid could somehow stay in and remove Salamence by itself. Two Ice Beams, or an Ice Beam + Psychic (not totally guaranteed) served that purpose well. Mega Mence was a fairly common enemy throughout these battles.

Chesnaught was another big one, particularly Chesnaught4, who takes unimpressive damage from its physical STABs but is guaranteed to die to Ice Beam + Psychic. Starter teams are generally nonthreatening to Araquanid in most cases, so it was very helpful to be able to do this. Whimsicott3 likes to use Cotton Guard, and with or without Prankster, it was easier to use Ice Beams to break its subs without fail and give Oranguru or Mawile the opportunity to do more damage. There were other instances, but the main two were Salamence and Chesnaught, with Whimsicott3 being frequent enough that I appreciated the option.

I didn't begin using Ice Beam until I was at least past the 500 mark, but until then I had Mirror Coat, which was also used practically never. I did win a disastrous battle with it, in which Mawile was frozen by a Rotom-Frost and couldn't do anything; Araquanid tanked a Thunder, delivered the OHKO with Mirror Coat, then died to LO recoil. I was given the win even though neither side had any surviving pokemon. Because I was put in that situation because of hax, I didn't see much to be gained from keeping Mirror Coat, especially since that instance came about with Araquanid at nearly full HP, and the conditions wouldn't be the same "next time."

The standard seemed to be Waterium Z on Araquanid, and it's easy to understand why; Water Bubble powers Hydro Vortex up to absolutely retarded levels. But apart from that one turn, you're left with a vanilla Liquidation that's capable of so much more:

252+ Atk Life Orb Water Bubble Araquanid Liquidation vs. 0 HP / 0 Def Lucario-Mega: 156-187 (107.5 - 128.9%) -- guaranteed OHKO

252+ Atk Life Orb Water Bubble Araquanid Liquidation vs. 252 HP / 0 Def Gardevoir-Mega: 198-234 (113.1 - 133.7%) -- guaranteed OHKO

252+ Atk Life Orb Water Bubble Araquanid Liquidation vs. 252 HP / 0 Def Tornadus: 187-221 (100.5 - 118.8%) -- guaranteed OHKO

-1 252+ Atk Life Orb Water Bubble Araquanid Liquidation vs. 252 HP / 0 Def Mawile-Mega: 78-94 (49.6 - 59.8%) -- 96.5% chance to 2HKO

252+ Atk Life Orb Water Bubble Araquanid Liquidation vs. 252 HP / 0 Def Garchomp-Mega: 127-151 (59 - 70.2%) -- guaranteed 2HKO
Relevant because this is one of the few naughty puppies that survives Hydro Vortex. It also guns for Araquanid with a vengeance.

252+ Atk Life Orb Water Bubble Araquanid Liquidation vs. 252 HP / 0 Def Registeel: 101-120 (54 - 64.1%) -- guaranteed 2HKO
If Registeel enters and TR is already up, KILL THIS FUCKING THING CLEANLY WHILE YOU HAVE THE CHANCE.

252+ Atk Life Orb Water Bubble Araquanid Liquidation vs. 252 HP / 0 Def Hippowdon: 250-296 (116.2 - 137.6%) -- guaranteed OHKO
Anyone used to playing with TR has learned to kind of hate these guys. They're no longer a problem!

252+ Atk Life Orb Water Bubble Araquanid Liquidation vs. 0 HP / 0 Def Charizard-Mega-Y in Sun: 172-203 (112.4 - 132.6%) -- guaranteed OHKO
Most fire types share a similar fate, as well as sunless Passho Ninetales, but it's great to have that sort of insurance.

252+ Atk Life Orb Water Bubble Araquanid Liquidation vs. 252 HP / 0 Def Primarina: 88-107 (47 - 57.2%) -- 87.9% chance to 2HKO
Not guaranteed, but worth the risk. I haven't yet failed to 2HKO, and they're relatively common enemies between rain, Xio, Kukui, etc.

252+ Atk Life Orb Araquanid Leech Life vs. 0 HP / 0 Def Politoed: 83-99 (50.3 - 60%) -- guaranteed 2HKO
There are a number of water absorbers, but this is one of the more common ones. This is helpful when they don't supply rain for your massacre.

252+ Atk Life Orb Araquanid Leech Life vs. 0 HP / 0 Def Latios: 159-190 (102.5 - 122.5%) -- guaranteed OHKO
Leech Life is a guaranteed OHKO on most psychics and grasses with builds similar to Latios, but Latios is among the more necessary ones.

If the enemy is so stupid to supply rain, Araquanid is unstoppable, even 2HKOing Suicune and Rotom-Wash, OHKOing Mega Swampert, and so on. The AI will occasionally try to burn Araquanid with Will-O-Wisp, with or without Protect, but the immunity from Flame Body is a godsend. Against teams which can carry Heatran, I'm always on the lookout so they can be eliminated before needing to send in a replacement. Because Heatran2 carries Protect, I'm also constantly aware of that (as well as any other users that like to use it out of nowhere.)

Araquanid's 4 SpD bulk is not to be underestimated. It's very difficult to KO on the special side, easily replenishes its HP against most of those foes, if it isn't able to KO them outright. This allows me to save most bulky waters not called Rotom-Wash for last, because Araquanid badly walls them and heals much more than they're able to do with their water/ice coverage. Their STABless Shadow Balls also inflict very little damage. Having said that, because Suicune builds can carry Calm Mind or some form of healing, I do like to batter them with Liquidation if the opportunity arises, because the good odds of defense drops makes them much easier to take down, especially once Mawile is able to join.

Being weak to Rock Slide was an excellent boon, because the AI loved being given a reason to spam it and it would do mostly negligible damage to Oranguru.


Drampa @ Dragonium Z, Berserk
Quiet (196 HP, 60 Def, 252 SpA)
-Flamethrower
-Energy Ball
-Hyper Voice
-Draco Meteor

Paw Paw dragon served an even more important role on this team than it did with Hariyama. Lead Gastrodons are extremely dangerous on Rock/Ground teams for their ability to completely shut down Araquanid's main offense, so it was totally worth losing Protect for this extra attack. Drampa was my go-to for delivering OHKOs to Mega Slowbro, Cofagrigus, and a number of other walls that I didn't want my other sweepers tackling head-on. I could breathe with relief when facing the more notorious Brightpower/Lax Incense holders, also, because Devastating Drake made an excellent response to them as well.

Drampa has a lot of similarities to Porygon-Z in both bulk and offense, and while I'd love for it to be much tankier, it did allow Berserk to trigger more often. I tried to be especially careful when sending Drampa in because it's the spongiest unit on the team; without DD or Berserk, it doesn't have quite the wallbreaking power of the other two, either, so I had to be sure that when it entered, the enemies would leave (in a body bag.)


Mawile @ Mawilite, Intimidate
Brave (252 HP, 252 Atk, 4 SpD)
-Crunch
-Iron Head
-Play Rough
-Rock Slide

No Sucker Punch. Sucker Punch BAD. Without Crunch, Cresselias and Bronzongs without Araquanid would be a nightmare, as well as any number of things weak to Dark that probably won't use most of their turns to attack. The scenarios where Mawile needs priority to finish something outside TR are virtually nonexistent, because in most cases it'd be better off using Iron Head. Rock Slide was also a valuable move in destroying some fire types when Araquanid couldn't be around or safely brought in. Play Rough rarely missed when I needed to use it, but Rock Slide did pose a couple of dire consequences from missing. I'm still glad I had the move instead of Protect.

Mawile was vital in neutering lead Scizor3s with their LO Uturns, as well as some Z-moves that I didn't want hitting Oranguru at full force, like Bewear4's Z-Giga Impact. Mawile was also frequently sent in after scouting lead Dragonites, as well as potential exploders. Sadly, vanilla Mawile's defense leaves a lot to be desired, but it usually didn't result in me losing it before it could deliver some necessary KOs. Huge Power is such a significant boost that a single enemy Intimidate or even a burn was usually not enough to stop it from inflicting serious damage.

Nuisances & Threats:
  • Empoleon: Takes more damage from resisted Liquidation than any of Drampa's moves (except DD which I would not normally waste on it) and while it isn't much of a threat offensively, I never felt comfortable letting it sit there for very long.
  • Gigalith: Namely, Set3. If it's Sturdy, it means Araquanid has to die for Liquidating it, or I can bring in Mawile and just watch it explode. They make very dangerous leads because of the restrictions they put on me.
  • Gastrodon: While they don't draw blood like Gigalith, Storm Drain is still very bad for me regardless, and these are fairly common enemies on themed teams.
  • Dragonite: Oranguru survives Set3's Outrage, but barely. Mandatory double Protect, and switching to Mawile regardless, because if not Outrage it's definitely going to Stone Edge. Fortunately, Multiscale only gives it a 50% chance to survive Play Rough. Be it 3 or 4, Araquanid doesn't have very good options against it, as Ice Beam isn't a guaranteed 2HKO if Multiscale, and will only activate Snowball, pissing it off more.
  • Golisopod: Mostly because Set3 not only has a Quick Claw, it's also unpredictable, and won't First Impression on sight. I typically didn't encounter these outside of Guzma.
  • Drampa: Set3 is not a guaranteed 2HKO for Liquidation unless the first one cut its defense. It also outspeeds Oranguru, which means that if I didn't KO, it's going to attack. It easily secures OHKOs on my own Drampa and Mawile, so it's very bad news. That said, the teammate it's with determines a lot of that, as I usually won the gamble with its Quick Claw, and tried not to even let it come to that. However, just using Liquidation willy-nilly is very dangerous as it will eventually try to Roost, which allows Berserk to trigger more than once. Arguably the most dangerous enemy to this team even without hax.
  • Registeel: If it's Set2, I'm golden, as it's weak and can't boost its defense. Any other set, I'm in for some struggling if it decides to begin boosting its defense. Liquidation is a solid 2HKO ONLY if its stats have not been jacked up. Curse is preferable to the Amnesia/Iron Defense set, because at least Drampa can attack it at full power. Fortunately, while I fought many of these in their least ideal scenarios (as leads) the Curse sets usually didn't try to rest until TR was shut off and I had the speed advantage, and could hit them twice for ~25% HP.
  • Honchkrow, Drapion, Sharpedo, Hydreigon, etc: Honchkrow is the big one, because Set3 easily OHKOs with Black Hole Eclipse and Set4 easily OHKOs with Drill Peck. Requires scouting and switching accordingly, which isn't always the safest, especially if it's Set3 and hasn't used BHE. As for the others, and most powerful Dark types, they present significant danger if they double team Oranguru, as Intimidate or protecting while trying to KO one of them is not necessarily foolproof. There have been battles where things play way out of my favor, but have been salvaged nicely. Outside of Grimsley, Punk Girls can often create this type of scenario.
  • Aggron: Honorable mention because when Oranguru did find itself taunted, it was usually from this thing. It's very unsafe to just attack them outright with Araquanid, because I usually encountered this thing on Scientist teams, who also carry Mega Aggron, easily surviving two Liquidations without defense drops and threatening to KO with Stone Edge. These fuckers also spam Thunder Wave, the bane of my existence (you're still my #1 nemesis, Glaceon. I'm not over you.)
  • Thunder Wave: Primarily from Latias4, Uxie1, Mesprit2, and various Rotoms. It eventually reached the point where I would rather Instruct-KO known T-Wavers and let Araquanid die in the process, because wasting TR turns from full paralysis was almost always worse than having free turns to attack, albeit minus a unit. Most of my rage-inducing battles were because of this move. I also learned not to Instruct Liquidation against Zapdos without Pressure, because it presented two opportunities for Static to trigger. Even Zapdos2, the bulky one, takes so much damage from one that a Psychic would KO if it connected.
  • Amoonguss & Shiinotic: Not overly nasty on breeder teams, especially when they're in the back, because the AI liked to save them for last. It's when they lead, or when they appear alongside much nastier things (like Glaceon4 in hail with Aurora Veil up) that their bulkiness and access to Spore becomes extremely dangerous. But the breeders made them much easier to deal with, given Oranguru's speed advantage; Psychic takes a fat chunk out of Amoonguss, gets to wake up from the first Spore right away, and a Liquidation will usually ensure that anything else will KO. Instruct going first outside of TR also allows for some carefully targeted executions. Liquidation is a guaranteed 2HKO on Shiinotic4 and while Set3 is the "bad" one, in a worst case scenario I don't mind holding out until Mawile can come in safely and just murder it with Iron Head. These two were pretty common enemies with mostly similar means of handling.
  • Baby Doll-Eyes: Primarina3, Sylveon4, and Vaporeon4 be damned. It's not so much the attack drop but the priority, and occasionally they even used it on something other than Oranguru or Drampa. This move is so annoying that I've been thinking of potential uses for it, myself.
  • Stockpile: Hahahahahaha! As if! The most prominent Stockpile users were easy pickings for Mawile and Araquanid, who could simply seed them for defense drops from Crunch and Liquidation, respectively, which quickly destroyed them. Versus Lanturn, Araquanid is able to heal more with Leech Life than it can damage (also compensating for LO recoil) and Toxapex's Baneful Bunker does nothing to Mawile.

Replays:
HK6G-WWWW-WWWJ-NXXR
Battle 999, VS Sightseer Christian, Glaceon4/Drampa3/Volcarona/Heatran3

Easily the most difficult battle I've ever had with this team that didn't involve Oranguru being slain before TR could go up. Drampa3 needed to be taken down, but I had no safe switches, and no immediately viable options; if Mawile comes in, I gamble with the QC and also must land Play Rough; Drampa comes in, gambles with QC, OHKOs the opposing Drampa and immediately falls to Blizzard. Araquanid can survive a few Hyper Voices with a Blizzard thrown in, but Liquidation will 3HKO without defense drops and it'll just be Roosting in the meantime. This one also had Berserk.

What I did was opt to keep Araquanid in play and focus on taking down its partners, which worked- somewhat. I took down Glaceon and Volcarona (REALLY would have preferred she send in Heatran) and Mawile replaced it once it fell to LO recoil, hitting Drampa on the way out. I was really hoping her last poke would be Latios or Alakazam, and my heart sank to find out it was Heatran. Dual Rock Slides, neither missed, and Drampa flinched, so no Fire Blast KO before the Instruct; Heatran destroys Mawile, but the two Rock Slides left it with ~30%, which Devastating Drake removed.

I've replayed this battle many times, trying different things from turn one, and only one of my other attempts was successful. My first replay involved bringing in Mawile immediately, and Drampa triggered the Quick Claw immediately. This seriously had every reason to be the end of my streak. Damn. I invite anybody else to either mock battle it with me, or consider any possibility of what I could have done differently *WITHOUT knowing she was packing Heatran as her final unit and planning specifically for that eventuality.*

LCPW-WWWW-WWWJ-NXGB Batle 1000, VS Wally, Magnezone3/Garchomp4/Altaria/Gallade

Much easier than the previous battle, but they made pretty dangerous leads. Sacking Araquanid to attempt to take down Magnezone was the correct play, as Mawile and Drampa have a number of options for dealing with any combination of his remaining three, minimizing the danger to themselves. Araquanid never missed, so I was able to send in Mawile and take relatively safe gambles with instructed Play Roughs.
 
Last edited:

Users Who Are Viewing This Thread (Users: 1, Guests: 6)

Top