Welcome to Smogon! Take a moment to read the Introduction to Smogon for a run-down on everything Smogon, and make sure you take some time to read the global rules.
Since Oricorio can use Protect (and should always have received at least one boost of its own before any partners are sent out) it's not such a priority to provide it with Tailwind support. I mean, Ribombee, Garchomp, and Silvally are already pretty fast, and 99 times out of 100 Oricori is guaranteed a boost at the start of battle: at +1, she outruns almost everything. It's also just an issue of 4-moveslot syndrome, as well: Ribombee could use it, but both she and Ori are far better off with QD.
I'm coming around to the idea of Kommo-o, though. I initially thought about Dragon Dance but Soulblaze really does outclass it. I've got a 5IV Adamant Hakamo-o I might use; I could breed another but I don't see the use of going with a nature that lowers its defences - even with Adamant I think Soulblaze remains a decent option. Something like:
Kommo-O @ Kommonium Z
Clanging Scales
Close Combat
Earthquake
Poison Jab
6 HP, 252 Att, 4 Def, 248 Speed (Adamant)
Only needs 248 Speed at level 50 to outrun Electrode and other base 150s at +1 if my calculations are correct, so I've moved the spare 4 EVs to Defence. I'm not sure how much better this will do than Garchomp, but it'll be interesting to find out...
I've played around with Parting Shot Silvally in singles and I think it worked much better there. If I was allowed five moves I'd probably run it, but I think offense is more productive when it usually comes out towards the end of a fight. Same goes for Tailwind. I'm thinking potentially Double-Edge/Crunch/Iron Head/Protect (holding either a Normal Gem or a Life Orb) might work better. (Or possibly even drop Protect and stick with Thunder Fang, who knows.) I never get to use Explosion anyway (and since it usually comes out third or last I rarely want to) and obviously Protect means its partner can Earthquake with impunity. Agh, too many options!
I think Couer was saying that your team should have Tailwind or some type of speed control of you included Kommo-o on the team, since it can sometimes struggle to get into a position where it can Soulblaze safely.
I am kinda interested in seeing how a more physically based Soulblaze Kommo-o would work out, but I'm concerned about Soulblaze itself lacking some power. You're effectively weakening your strongest attack with an Adamant nature, and with the way I see it, Soulblaze should get you a double KO each time you use it, to ensure its safety. But, either way you go, I highly suggest that you have Protect on your moveset. It helps you get into position to Soulblaze safely and bait some attacks, especially Fairy type moves with that nasty 4x weakness. Not having Protect against an all Fairy team like what Xio could have basically means you start off a game basically in a 3v4. At least with Protect, you can make things somewhat safer for your partner for a turn. In my mind, I would replace Earthquake with Protect, as I feel that Close Combat has very similar coverage to it, but with more power being STAB and a higher base power without the spread damage penalty. Also, you're wasting 4 EVs in Speed on that Kommo-o spread, and 244 EVs should get you the same benchmark you want, so those extra 4 EVs could go into Special Defense, just to not waste them.
Adamant isn't ideal but Kommo-o's got such good bulk I didn't want to compromise either one of them. The only other option is to go Brave or Quiet which is even less ideal. Can't see myself scoring a lot of double KOs with Soulblaze. I see your point about Protect, I was just taken with the idea of using Earthquake alongside Ori. Again, it's a four-moveslot problem. But yeah, CC is probably generally a better option.
Posting a Super Doubles streak of 2074 wins with Kommo-o / Talonflame / Togedemaru / Mega Kangaskhan, and a streak of 792 wins with Togedemaru / Golisopod / Kommo-o / Mega Kangaskhan. Both on Ultra Moon.
Starting with the summary and set details of the various teams used throughout playing and tweaking the teams. Before USUM's release I doubted Kommo-o's viability even with its new Z-move due to its lacking coverage and many weaknesses - suffice to say I was wrong. I initially set out to try it with the following line-up:
The plan was to use Fake Out support, Nuzzle speed control, and Lightning Rod to avoid Kommo-o's low base Speed becoming a problem. This one fell in the 400s to Mega Alakazam - and I reworked the line-up to try and resolve this problem and others.
Initially with the same Golisopod set as on Team Brexit, but later with Icy Wind replacing Sucker Punch. I played this team for a long time and while playing it, worked on the trainer cheatsheet specifically to help identify and learn how to approach specific threat trainers to this team. It was at this time I started thinking of threats and dangerous battles as "specific problem Trainers" rather than problem species first and foremost, which helped a lot in preparing for various circumstances. This team made it to the 700s twice, with the best attempt finish at 792 wins.
I also tried a rearrangement of the previous team with Golisopod/Kommo-o leads and Togedemaru back-ups. I felt this one had promise and solved some of the problems, but eventually I gave up on this team and made one more change, keeping lead Kommo-o but ditching Golisopod in favor of an option I neglected all along.
The 2074-win lineup. Talonflame had been nerfed, but fulfilled similar roles to Golisopod with strong priority against many Kommo-o bad match-ups, and speed control with Tailwind. It also had excellent synergy with Togedemaru and Kangaskhan, and settled the speed problems for good. STAB Flare Blitz with Life Orb was also a crucial attack, enabling Mega Mawile to be removed, or put in KO range for anything in case it had Intimidate. Togedemaru's set was adjusted, replacing Nuzzle with Zing Zap to try and compensate for Talonflame being weak to Waters, unlike Golisopod and the need for Nuzzle being lessened with Tailwind support - this worked as intended, increasing Togedemaru's offensive presence. There were a couple of early losses before the succesful attempt with this team, but less battles total than I played with Pod/Maru variants.
Now for a few more stray thoughts. Since these teams share a lot of Pokémon and I used different sets on some of them, I'll start with set summaries of all the 6 Pokémon.
Mahler (Togedemaru) @ Focus Sash
Ability: Lightning Rod
EVs: 4 HP / 252 Atk / 252 Spe
Level: 50
Jolly Nature
- Iron Head
- Zing Zap
- Fake Out
- Spiky Shield
Lead, Fairy removal tool, Bait Steel-type for Toxic immunity
Speed control, Lightning Rod supporter, Fake out control
On Zing Zap sets, does not OHKO bulky Waters but provides the necessary denting to put them in range for allies
Not a suicide lead by default - often best switched out while still in good health or after Sash is broken
Initially, I thought of it as a Sashed Fake Out lead, but later found it performed best as a Sash-holding back-up, counterintuitively
Jolly Nature for Speed. I did not try out any other natures.
I initially had 4/4/4 defenses for efficiency, but 244 Atk had a 1/16 chance to miss the OHKO on Florges, so I changed to a 252/252 spread.
Spiky Shield - an essential move for baiting attacks, which it does a lot with Steel/Electric typing, and spending turns under TR, and in other conditions - can't go wrong with an upgraded Protect
Lightning Rod support - T-Wave for Kommo-o was the original idea, but it also helps Golisopod when leading. With Talonflame, the benefits of Lightning Rod only became bigger.
Focus Sash with Steel-typing - not broken by Sand, but threatened by Hail, burn damage, and other residual damage - between Lightning Rod and Steel-typing, Togedemaru can counter Zapdos2, Cresselia2, Blissey4 in combination with switch stalling if played correctly, and it has sufficient HP to survive possible Struggles
STAB Iron Head - from USUM tutors, this move was essential for hitting Fairies, I never tried anything else as primary STAB
Speed control with Nuzzle - it can make foes slower so Soulblaze moves first, or eliminate Mimikyu with a Nuzzle + Iron Head combination to first slow it down and break Disguise, then snag the KO. With Talonflame, I ditched this move as Tailwind already filled the need for speed control.
Fake Out support - for any of the three teammates. Especially notable is Fake Out + Lightning Rod to allow Talonflame to use non-priority Tailwind after Gale Wings has been broken, if the situation allows for it.
PRESERVATION LEVEL: High when against trainers who have Mimikyu, Togekiss, or multiple Fairy-types on their roster - High against Zapdos2, Cresselia2 as a reliable check if it is at high health. Against Trainers without Fairies, or specific threats that Togedemaru checks (Zapdos2, Cresselia2) on the roster, LOW - the distinction is very important, Togedemaru can range from least priority/sac to being the most important team member to keep in good health, and the trainer you're up against determines its role.
Zing Zap - on Talonflame ver, replaces Nuzzle for a more offensive option, to compensate for Talonflame matching up poorly against Waters compared to Golisopod, and with Speed control necessity from Togedemaru being lessened.
The first constant on all the teams, Togedemaru was the starting point I had for supporting Kommo-o and it always stayed on. Its effectiveness, and higher utility compared to Raichu, or other Lightning Rod users can't be overstated - even with base 96 Speed and a physical set that does not benefit from Special Attack boosts, this Pokémon delivers with its Steel/Electric typing and valuable STAB coverage for Kommo-o pairings. This Pikaclone is simply a tremendous upgrade over its brethren, very reliable and versatile, and exceptional support whether it's in the lead or in the rear.
Nuzzle provides 100% accurate paralysis and breaks Sash and Disguise - an excellent move to use on Mimikyu, one of Kommo-o's counters. With Togedemaru/Golisopod leads, there is an inherent passivity and slowness, which screams a vulnerability to Volcarona, Gyarados, Haxorus, and other Speed-boosting foes - with Speed halved from paralysis, these can be slowed down a lot, but care must be taken since it only halves their speed. At +2, Gyarados34 outspeed pre-Soulblaze Kommo-o when paralyzed, and Volcarona does so at +3. When moved to the rear with Talonflame in front, I ditched Nuzzle in favor of Zing Zap, but I would still recommend Nuzzle for the Pod/Maru incarnation of the team.
Togedemaru's relatively low base 96 Speed does become an issue for using Nuzzle to control speed. If it is facing two faster foes, being KO'd before moving isn't great, and can make Nuzzle unusable - speed Trainers are especially guilty of this. In cases like this, Spiky Shield + Icy Wind, or Fake Out + Icy Wind, or switching around may be an alternative. With Talonflame leading, Tailwind is a considerable boon to Togedemaru while active, and it provides good coverage and decent enough damage to work well offensively with the other team members.
After losing Focus Sash, Togedemaru becomes vulnerable to a wide array of faster foes. Unlike Sucker Punch users, Togedemaru lacks the tools to keep on going, and is left with the option to Spiky Shield, get sacced, or switch out if it encounters a bad 3rd or 4th Pokémon coming in with its Sash broken. Having Mega Kangaskhan on the team makes the sac option of these more viable, with a second Fake Out user after Togedemaru has dropped capitalizing on the space created by Togedemaru being KO'd.
- Kommo-o2. It holds Cheri Berry - why this and not Lum Berry? Whatever the reason, Nuzzle does not hit this thing and the possibility of Soundproof makes things worse.
- Garchomp3. Why are Ground-types immune to Nuzzle? If Pikachu can KO Onix, Nuzzle should damn well be able to paralyze Grounds, but I digress.
- Traced Lightning Rod - Porygons, Alakazam, Gardevoir, etc
- Lum Berry - no users as memorable as Cheri Berry Kommo-o2 come to mind right now
- Lack of priority - against Speed Trainers, two foes faster than Togedemaru are not uncommon and being outsped to disable Nuzzle feels bad. Using both Icy Wind and Nuzzle with the logic that if one fails, the other still works is an option but Icy Wind accuracy and miscallenous hax can quickly make this backfire.
- I liked Nuzzle Mimikyu on Pod/Maru and would not use Zing Zap on that team, but Gale Wings Tailwind is clearly a superior, and much more reliable form of Speed control and was a huge improvement over relying on this move.
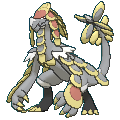
Zymbals (Kommo-o) @ Kommonium Z
Ability: Bulletproof
EVs: 4 HP / 4 Def / 244 SpA / 4 SpD / 252 Spe
Level: 50
Modest Nature
- Clanging Scales
- Close Combat
- Flamethrower
- Protect
Cleaner, Z-move user, set up sweeper - works in the rear or in the lead
Depends on one or more of Tailwind, Nuzzle, Icy Wind and Fake Out supporting it, and Protect to bring in or utilize said support
When in the rear, ideally comes in from Emergency Exit, a switch, or one of the leads being KO'd to safely use Soulblaze for 1-2 KOs and securing a good sweeping position
On rare occasions, switched in on Turn 1 while Togedemaru is using Fake Out or Spiky Shield - usually comes in later, but proactive deployment is not to be neglected when possible
PodMaru's team idea is to set up Soulblaze reliably using the leads to pivot and cripple first - if the leads are such that Kommo-o can Soulblaze on them without speed control assistance, capitalize on the opportunity and avoid unnecessary damage or sacs on the leads
Later leads Kommo-o/Golisopod and Kommo-o/Talonflame instead put Kommo-o back in the front, instead paired with Speed control to be used while Kommo-o protects - a change motivated by various factors but most notably Garchomp3, Salamence, Charizard34, and other opposing Dragon-type issues.
Nature: I tried several natures over the course of the team: Hasty, Mild, Modest, and Timid. I settled for Modest in the end - the power boost on Soulblaze, Scales, and Flamethrower having a more favorable calc on Mawile felt most important, and Timid would be a possible second choice for slow teams - notably, Timid can hit 150 Speed, outspeeding Mimikyu4 at 148.
EV spread: Max speed for 137 - Whimsicott34 sits at 136 - the rest into a simple 244/4/4/4 for efficiency. I tried out some bulk investment in exchange for special attack, but found it not that useful, and Kommo-o drops its own defenses which decreases the applicability of defensive calcs depending on situation.
Clanging Scales - turns into Soulblaze, deals damage - I tried various nature for Kommo-o, and eventually settled on Modest for the Soulblaze/Scales damage, and Flamethrower having more favorable calcs on Mega Mawile
Close Combat - secondary STAB that deals enough damage even with a Modest nature (thanks to people on the Tree Discord for bringing up Modest)
Flamethrower - more than anything else essential for hitting Mega Mawile, a decent coverage move otherwise
Protect - absolutely mandatory, it allows a variety of plays for supporting Kommo-o such as - Protect + Sac, Protect + Switch, Protect + Emergency Exit, Protect + Nuzzle, Protect + Icy Wind
Bulletproof - blocks Beak Blast, Focus Blast, Dark Pulse, Shadow Ball in order of importance - Toucannon devastates attackers that make contact, ie the entire rest of the team, and would hit Kommo-o supereffectively were it not for this abilty
The other half of the team. Kommo-o's good qualities can be summed up in one move: Clangorous Soulblaze, the new Z-Move that boosts all of its stats and hits both foes. When using this move, and after using it, Kommo-o is a great Pokémon - the question becomes if it can effectively use the move, and get to stay on the field after using it. On all iterations of the team, I brought two Fake Out users, Togedemaru and Kangaskhan, to help it out, but this alone was never enough - Inner Focus, ghosts, multiple faster foes, you name it. Speed control was necessary to cover a greater number of situations, which I tried Nuzzle and Icy Wind for, but eventually realized that Tailwind was the best move for making Kommo-o go first when required.
It should be noted that Clangorous Soulblaze is still not a win condition by itself if succesful. There are many foes that completely counter Kommo-o even when omniboosted - many of the tree's Fairies, Garchomp3, opposing Kommo-o, freezes, crits - there's no shortage of not-so-rare incidents that can halt Kommo-o in its tracks. In these cases, having two Fake Out-using allies provides a lot of potential for cleaning up hopefully weakened foes and coming back from a deficit. Fake Out also helps prevent many of Kommo-o's counters from stopping a sweep, if brought in with Protect + a switch or sac or otherwise. Fake Out is not just for using Clangorous Soulblaze - it retains high utility for extending the effectiveness of a Kommo-o sweep after.
Wide Guard users in the Tree are the same ones as in the Maison - Bastiodon4 the common user, Regigigas4 as another, and Mienshao4. Clangorous Soulblaze has its damage quartered by the move, but the omniboost is still gotten so it's not a bad thing usually. Clanging Scales is fully blocked, so Close Combat and Flamethrower should be preferred if these foes are a possibility after using Soulblaze.
Aggron34. Metal Burst is bad news - Aggron3 wants to be hit with +1 Flamethrower at some point in the battle, ideally Aggron's set is scouted before using Soulblaze but it might be necessary to risk it.
Cobalion2. I once crit this thing through Maranga Berry, and it survived then OHKO'd Kommo-o back with Metal Burst. This one shouldn't be a problem unless Soulblaze crits so I would still use Soulblaze on it - as a possible precaution, damaging Cobalion2 so it's in guaranteed KO range for CH Soulblaze is an option but getting a crit then Metal Burst isn't the most common thing to run into.
Toxapex34. Toxa3 carries Red Card, and can use Baneful Bunker randomly at any time - attacking it with an ally is not reliable, because the allied attack gets blocked by Baneful Bunker, and then Soulblaze pierces it to activate Red Card and instantly phaze Kommo-o. In a vacuum, the preferred solution is to target the Toxapex slot on two consecutive turns with allies before Kommo-o moves, so that even if it Bunkers on Turn1, an ally hits it first and triggers the Red Card - but if Tox's ally needs to be hit with Soulblaze, taking the hit may be necessary. Getting Ice Beamed by this Toxapex is also bad news, so it punishes both attacking it with Red Card phazing, and leaving it alone with freeze risk.
Electrode34. Mirror Coat on Set3 if it isn't Soundproof, and it can be Soundproof.
Exploud34. Soundproof.
Bouffalant34. Soundproof.
Kommo-o1234. Soundproof. Often, using Scales or Soulblaze is still something that is preferred for getting the boosts, or hitting its ally and having a 2/3 chance of hitting Kommo-o, but consider using +1 Close Combat without scouting its ability in cases where other foes are a lesser concern and opposing Kommo-o could be a huge issue if Soundproof. The Speed-boosting sets, Kommo-o2 (Dragon Dance) and Kommo-o3 (Autotomize) are the main concern, as they outspeed the whole team including +1 Kommo-o after a boost.
Abomasnow3. Soundproof in case it does not have Snow Warning, and is Sashed to survive an allied attack - stay vigilant especially if you're playing on Sun where Sina carries this set. Set4 Mega Evolves if it is able and gains Snow Warning.
Togedemaru3. Red Card - same as Toxapex, except less common, and less threatening overall since it is walled by Togedemaru. Still obnoxious.
Rhyperior3. Metal Burst OHKOs Kommo-o back - not great, but sometimes the risk may be worth it. I misplayed into this thing quite a few times. Set4 having Protect, and Continental Crush to OHKO Talonflame through Protect adds extra complications to the match-up.- Bisharp4. Metal Burst - unlike other Metal Burst users, this one's got Taunt and uses it a lot, but it can still be an unpleasant surprise.
Sableye4. Metal Burst - super rare set, think I got hit by this thing once.
Mirror Coat users with Ice move: particular Suicune, Tentacruel, Milotic sets - I've seen Mirror Coat but these also pose the threat of Freeze, so there are a variety of possible issues - honorable mention especially to Tentacruel34, with Set4 spamming protect to absorb hits while Set3 threatens Blizzard/Mirror Coat while holding Sash and wants to be double targeted.
Vanilluxe4. Mirror Coat - as an Ice-type it mostly gets Flare Blitzed and is best never left alive anyway.
Not Liepard3 - this set has Red Card, but it is OHKO'd by Soulblaze. It may survive +1 Clanging Scales and remove boosts, but by that point it's probably too late for the AI.
Minior3. Red Card. I forgot this set existed before looking it up for this write-up, and it is rare - only included on Janitor rosters.
As a weak point, it is difficult to switch in directly from the rear - the other back-up is generally first to be sent out, with Kangaskhan entering the field last
Nature: Adamant is my preferred nature for Tree Kangaskhan, maximum power for Fake Out and Sucker Punch, maximum recovery on Drain Punch - this team has heavy speed control, as well as Fake Out support, so the extra Speed from Jolly is optional, though even on teams without speed control I would use Adamant as first choice.
Double-Edge - high damage output, in the Maison I found Return a fine option as well but with Parental Bond's nerf, Double-Edge with an Adamant nature feels necessary for adequate damage
Drain Punch - coverage, recovery, and importantly a move that does not inflict recoil even when Double-Edge would be more damaging than it
Sucker Punch - the nerfs to this move and Parental Bond hurt a lot, but it's still an essential move for hitting Mega Alakazam and other targets weak to it, having another non-recoil move, and the now less common neutral priority hits when desired
Fake Out - essential control to support the team and good chip damage
Scrappy - hits Ghosts prior to Mega Evolution, essential against Mimikyu, Jellicent, useful on some other things
The third constant. Mega Kangaskhan is still good after the nerfs, and Fake Out never stops being useful. It's also one of the best Fairy checks - it matches up poorly against Mawile, Mimikyu and Carbink, but the rest of the Tree's Fairy roster with generally low Defense is ripe for picking. A natural choice for Kommo-o teams, it also checks Alakazam, Starmie, Azelf (depending), and a garden variety of other Psychic-types. You can't go wrong with Kangaskhan. It also works well with Golisopod, as seen on Team Brexit, and Talonflame, one of its classic Maison partners. Sharing a Fighting-weakness with Togedemaru is a drawback, but Togedemaru holding Sash helps with this. Having two Fake Out users on the team works great, providing ample control to get Kommo-o and Talonflame online against unpreferable foes. I've kinda neglected back-up Fake Out in the past, but the move is high-value whether in the lead or in the back - priority is fantastic for cleaning up weakened foes and finishing battles, and Fake Out's flinching property for extra control makes it the best priority move. If we're counting Maison, back-up Khan with Fake Out was something I found very effective in Super Rotations - and it's right at home in Doubles, too. Togedemaru/Golisopod/Kangaskhan, and Talonflame/Togedemaru/Kangaskhan are both cores of three priority users augmenting the speed-disadvantaged Kommo-o, and with priority the more the merrier, to stack up multiple priority attacks for ignoring foe Speed.
There are counters to priority - Queenly Majesty from Tsareena, and Dazzling from Bruxish block all priority moves, and care must be taken to not forget about these and try to use Tailwind if possible to avoid having to use priority on them. The sole Quick Guard user past Battle 40 is Cobalion4 - I rate it a lesser concern than the priority-blocking Abilities, and it feels like it uses the move relatively rarely. But it is something to watch out for.
Mimikyu needs another mention - it counters Kommo-o, and Set4's Rocky Helmet severely damages Kangaskhan, which can only damage it with Sucker Punch after Mega Evolving. Against foes that have Mimikyu4 on their roster, consider delaying Kangaskhan's Mega Evolution to retain Scrappy for the purpose of hitting a possible back-up Mimikyu. The other fairy that can give Kangaskhan gray hairs is Mega Mawile, crippling it with Intimidate and resisting the Normal STAB - Flamethrower and Flare Blitz with Fake Out support are essential for disposing of it.
Brexit ([Golisopod) @ Assault Vest
Level: 50
Ability: Emergency Exit
EVs: 252 HP / 20 Def / 220 Atk / 12 SpD / 4 Spe
Adamant Nature
- First Impression
- Aqua Jet
- Icy Wind
- Leech Life
Lead & Trick Room check
Alakazam counter
Bulky water check
Speed control support, absorbs hits to create space
Pivoting with Emergency Exit
Excellent defensive synergy with Togedemaru's Steel/Electric
Reliable priority chip
EVs: 4 Spe for 61 to outspeed base 40s, and opposing Golisopod, a slight Attack cut to put more into Defense for Garchomp3 Outrage calc (49% max so it does not activate Emergency Exit, outside CH) and minor bulk increase, possibly unimportant
Nature: Adamant - a possible option is Brave with a low Speed IV, for the purpose of making Trick Room users not set the field condition due to Golisopod underspeeding them. I did not think of this while playing the team - a Speed stat of 41 or 42 with a Brave Nature would make most TR setters attack or use status moves other than TR, per research done by Smuckem. This would help with some things and hurt with others, and make Icy Wind a little less effective for helping Golisopod against slow foes it would otherwise outspeed after an Icy Wind or two. Trick Room is an issue, so this change sounds good.
First Impression - a move that counters Alakazam34 (Mega Alakazam may trace Lightning Rod), and has reliable damage output against many others
Aqua Jet - Golisopod is slow, I experimented with Liquidation but found the priority of Aqua Jet indispensable for coverage and reliability
Icy Wind - speed control, with Golisopod's bulk it can use the move in many situations to make opposition slower than any of the three teammates - essential against Salamence34 and opposing Kommo-o1234, which otherwise wall Golisopod and threaten the whole team
Leech Life - sustain, and a high-BP STAB move that can be used after First Impression is expended - essential for wearing down and trading with bulky Waters such as Suicune, Slowbro - valuable under Trick Room to stall out its duration assisted by recovery
Emergency Exit support & momentum preservation - an incredibly versatile ability with "late U-turn" utility - after a foe has hit Golisopod, bringing in Kommo-o safely with that foe's turn spent, to set up Soulblaze for the following turn - resets First Impression - synergizes with Assault Vest and Leech Life to decrease the amount of undesired activations - Golisopod's natural bulk and Assault Vest means it is very rarely OHKO'd, and in most battles this ability will activate, to at least passable effect
Sucker Punch - part of the set at first, before I tried Icy Wind as a replacement - not a high-value move, especially since Kangaskhan already has a stronger Sucker Punch
The first idea I had for a Mega Alakazam check that would work on a Kommo-o team. First Impression OHKOs any Alakazam and Emergency Exit could theoretically allow pivoting to avoid other bad match-ups for Kommo-o. With a weakness to Electric, it appreciates Lightning Rod. Ice/Water resists and Leech Life allow it to take on most opposing Waters with confidence, including Slowbro/Slowking and most TR setters as long as it's not burnt.
Now that I'm trying to write about Golisopod I'm not coming up with much - Golisopod with Assault Vest is very bulky, uses Icy Wind or priority moves or Leech Life, and performs relatively consistently. Icy Wind accuracy, low Speed, and suspectibility to Emergency Exit activation, flinches, and confusion before it moves if using Icy Wind or Leech Life are its weaknesses, and can stack up to make it deadweight if things aren't going right. Honorable mention to Rock Slide, Outrage random targeting, Dragon Rush flinches, Stone Edge crits, and Mega Mawile (Set4 Stone Edge has a high chance to OHKO).
U-Ship (Talonflame) @ Life Orb
Ability: Gale Wings
Level: 50
Adamant Nature
EVs: 204 HP / 252 Atk / 4 Def / 28 SpD / 20 Spe
- Brave Bird
- Flare Blitz
- Tailwind
- Protect
Lead
Tailwind setter
Priority attacker - LO Brave Bird OHKOs Alakazam, Greninja, others
Fake Out & Lightning Rod beneficiary - slow after losing Gale Wings, but support allows it to function and often set Tailwind anyway
Mawile check - OHKO without Intimidate, 95% max at -1
Requires babysitting - keeping Gale Wings, when needed, makes all the difference
EV spread: 20 Speed EVs hits 149 Speed to outspeed Mimikyu4 (148 Speed), max Attack, the rest in bulk - HP/4/4 would result in a HP stat of 182, so I moved 3 points from HP to Special Defense to reduce HP to 179 for minimizing Life Orb recoil. I experimented with different Talonflame spreads using more Speed EVs, but found that a spread similar to what I liked best in the Maison was still preferable even with Gale Wings being nerfed, with the adjustment of slight Speed investment for specifically outspeeding Mimikyu, one of Kommo-o's counters.
The moves need no introduction - for a Talonflame in battle facilities that can choose moves, the usual four have been the go-to aside from a niche Taunt or Quick Guard in the lead position. For the hold item, Life Orb is the best remaining option after the Z-crystal is taken up by Kommo-o. Since Brave Bird inflicts recoil damage anyway, for Gale Wings purposes it's the strongest non-Choice/non-Z boosting item available, and boosting Flare Blitz is great.
Leading next to Kommo-o, Gale Wings remains Talonflame's selling point. It can set the field condition while Kommo-o protects, or attacks - but crucially, also provides immediate offense with LO Brave Bird when against slower foes, or to snipe Alakazam or other problem foes. Togedemaru provides switch options into Electric, and if willing to break Sash, Rock and neutral moves. After Tailwind is set, the Speed increase benefits Talonflame if it's still alive, with Gale Wings broken.
The nerf to Gale Wings is a pretty massive blow to Talonflame's utility, make no mistake - Fake Out support or Lightning Rod maneuvers, or both felt essential for helping it get off the ground. It took me a long time to realize Talonflame was the right choice for this team, and I thought it was shit when I tried it with Tapu Bulu before.
Hammerhead (Landorus) @ Life Orb
Ability: Sheer Force
EVs: 4 HP / 4 Def / 244 SpA / 4 SpD / 252 Spe
Level: 50
Timid Nature
- Earth Power
- Psychic
- Hidden Power Ice
- Protect
Cleaner
Electric immunity
Check to random things
Immune to ground, complements Mega Kangaskhan well
In retrospect, not the choice the team needed
The original 4th Pokémon. It wasn't a very good choice, though it did serve adequately. A write-up was intended to be here, but since this Pokémon was swiftly scrapped, there's nothing to be found.
Then a similar series of stray thoughts on each lineup and the development process.
Mahler's Zymbals
The first iteration. I had various mistaken impressions about Kommo-o prior to USUM's release, such as that its Fairy weakness would be too difficult to cover. Anyway, when I looked at this Pokémon its low Speed stat, and suspectibility to all sorts of status, faster foes, and especially Fairies stood out - leading to the Kommo-o/Togedemaru core that has been the team's center since. Togedemaru got Iron Head from USUM tutors, solidifying it as a check to opposing fairies, on top of Lightning Rod and Fake Out with a very solid Steel/Electric-typing. For the Electric-move, I opted for Nuzzle - I did not think Kommo-o would be succesful with only Fake Out to support it, and Nuzzle adds an additional method to control opponents and solve the speed issues.
The back-line was a toss-in of Mega Kangaskhan and Landorus, without particularly much theorymon employed - of note at this point is that though Togedemaru has Lightning Rod, only two of the team members are suspectible to Electric-type moves, and one of them resists the type... let's just say it was a work in progress. With this team, I played a couple hundred battles, and eventually lost to a Mega Alakazam lead that I was ill-equipped to do anything about - it could trace Lightning Rod to block Nuzzle, and if it were Alakazam4, it could also have Inner Focus to prevent Fake Out. Things were looking bleak and I concluded this team had simply no way of including reliable answers to Alakazam - Kangaskhan Sucker Punch alone could not handle it, when paired with other moderate or high threats.
I was impressed by the Toge/Kommo-o/Khan core, and the dual utility of both Fake Out as well as Nuzzle speed control provided by Togedemaru. Double Fake Out seemed quite good for supporting Kommo-o.
Landorus did something, but not a lot and shared weaknesses and also wasn't that fast.
After the loss I was racking my brain thinking of how a Kommo-o/Togedemaru core would possibly address the Alakazam problem. The answer I came up with was a Pokémon I had used before.
Mahler's Exit
Rather than leading Kommo-o, which made several match-ups impossible when paired with Togedemaru, Golisopod took the lead position running the old Team Brexit set with Assault Vest.
Golisopod checked several boxes: firstly, it was a hard counter to Alakazam, and some others as extra. The priority allowed it to function reliably in most battles - something Kommo-o was not very good at doing. Assault Vest bulks it up, and in combination with Leech Life allows it to take on bulky waters and trade blows under Trick Room.
Kangaskhan worked well on the first iteration of the team, and it remained on the line-up unchanged.
Kommo-o was moved into the rear - the concept of Golisopod was to use it as a pivot, like Volt Switch using its ability Emergency Exit, while also having a hard counter to many of Kommo-o's worst match-ups in the lead.
Togedemaru stayed the same, with Nuzzle, Iron Head, Fake Out, and Spiky Shield - Nuzzle's permanent crippling effect tied into the Emergency Exit idea, with foes being slowed down forever, while Golisopod could wait however long it takes for Emergency Exit to activate and pivot in Kommo-o safely.
This lead line-up led to some absurd battles, and was by far the slowest, and most passive Doubles team I've played. It also put me firmly out of my comfort zone, with a total departure from my usual approach of lead control combined with instant high-damaging offense that doesn't require set-up turns to claim a lead.
Eventually I lost decisively to a Kommo-o2/Salamence34 lead combination. Kommo-o2 holds Cheri Berry which make Nuzzle ineffective against it, so I could not stop it from going fast with Dragon Dance, and Golisopod could basically do nothing to most Dragons. Not good...
The solution I came up with it after this loss was a move I had neglected - Icy Wind, Golisopod's new toy from USUM tutors. This move would allow Golisopod to effectively serve a speed control role, and enable it to set up wins against Dragons, Flying-types and various speed boosters that otherwise walled or didn't care about it.
With Icy Wind, the line-up finally came together and after numerous losses while I was still trying to wrap my brain about how to play a very bizarre strategy (for battle facility doubles standards) I reached 700 wins and lost shortly after.
I kept trying, convinced this team had potential for a streak of 1000 or more - I reached 700 wins again, but proceeded to lose again - note that there were other earlier losses in between these two attempts, all of which are included in the battle video compilation.
While playing this team, I started making the trainer cheatsheet (link) since I found that it was very sensitive to trainer match-ups, and that my knowledge of enemy rosters was seriously lacking. Using the cheatsheet increased my success rate by a lot, and I would consider frequently consulting the trainer list absolutely essential for playing this team and its variants, especially for trainers that can run Mawile, Mimikyu, Primarina, or other fairies - even Comfey, Carbink and Ribombee can be very threatening depending on circumstance.
This is the variant of the team I played the most battles on, eclipsing the version I eventually settled on. It was fun to play and a big learning experience in how to plan long-term win conditions around unknown foe lastmons, using the whole team by default and not primarily the leads to set such a situation up.
Mahler's Exit (rearranged)
Rather than having Kommo-o as a cleaner - a task I found it had failed in after quite a few losses to Mimikyu, Comfey, even Ribombee - I put it back in the lead position where I started, convinced that it should instead be used as an early-midgame sweeper to punch holes into the enemy team for the back-ups to clean up. I kept the 4 species the same while so doing, as I was convinced by their synergy and power. This change made the team signfiicantly easier to play - but I still lost and went back to the drawing board after a couple of attempts.
Kommo-o lead position was the right choice by now in my mind - it was Golisopod's Icy Wind, as well as Nuzzle that were letting me down. Icy Wind was inaccurate, and crucially only dropped Speed by one stage - meaning it could not address Garchomp3, a major problem for leading Kommo-o. There was already a Pokémon that could fill Golisopod's role as co-lead better...
Mahler's Flight
Talonflame, a Pokémon I had already used possessed similar traits to Golisopod, and others the team would benefit greatly from:
Checking Alakazam with Gale Wings BB
Speed control to support Kommo-o, with Gale Wings Tailwind - Icy Wind, except reliable, and provides more speed to allow outspeeding Mega Charizard, Garchomp3, and basically everything necessary, without accuracy issues or possibilities for hax or premature EE activation
Checking Fairies - especially Mega Mawile would be OHKO'd by LO Flare Bitz without Intimidate, and put into KO range if it had Intimidate - as well as Mimikyu, these two Fairies were the bane of Golisopod's, and Kommo-o's existence before.
More offense in the lead position - coming full circle now, from the ultra-passive Togedemaru/Golisopod leads into LO Brave Bird + Clangorous Soulblaze as a Turn 1 option against TR setters and slower foes in general.
With Talonflame added, it seemed Nuzzle would be unnecessary, and extra damage against Water-types that Golisopod used to check with Zing Zap valuable, and adjusted Togedemaru's set accordingly. I made no changes to the team after this, aside from experimenting with different EV spreads for Talonflame, and consider it finished.
The leads. Options to start with include:
Protect + Tailwind
Protect + Brave Bird
Soulblaze + Protect
Soulblaze + Brave Bird
Soulblaze + Tailwind
Switching out either lead + Tailwind/Soulblaze
Consider if Tailwind is necessary or beneficial - against some Trainers, notably Scientists and Breeders, the whole roster is slower, but other Trainers depending situation may also not particularly benefit from the Tailwind advantage. With Lighting Rod, any expected Electric attack or T-Wave is a good opportunity for switching it into either slot to absorb these hits and their status risks.
Note that Kommo-o can first switch out, and return to the field later in the match to use Soulblaze on the last turn of Tailwind, and/or with Fake Out support - it mainly appreciates the Tailwind boost before being omniboosted, and is fine without Tailwind once it has received the boosts* (exceptions apply). Making extended maneuvers or sacs to get Kommo-o into a position to sweep with a Speed advantage is a central point of both Flight and Exit, though with Talonflame a lot of the time a simple Protect+Tailwind will suffice - but depending on the situation, switching around and using Fake Out or removing threats first can be preferable.
Since Gale Wings is gone after Talonflame either takes recoil from an attack, or damage from any source, it may only be able to use one "reliable priority move" - a downside of the nerf to Gale Wings. Bad decisions that end up not utilizing Gale Wings effectively may make Talonflame deadweight. Lightning Rod, and Fake Out go a long way to let Talonflame function after losing Gale Wings, if the circumstances allow for it.
Commonly deployed with a Turn1 switch while Protecting, Tailwinding, or Attacking, while being threatened by Electric-type moves, T-Wave, or intending to sac Talonflame for a Fake Out + Soulblaze turn 2 with Kommo-o coming in to revenge.
Great synergy defensively and offensively, and the best support Talonflame can ask for, eclipsing even the old Gastrodon. Fake Out can enable Tailwind use after losing Gale Wings.
It is generally preferred that Tailwind is set if deploying this combination and the Trainer has foes faster than Kommo-o that threaten it in the rear - so that Kommo-o can be reasonably assured to outspeed with Soulblaze, after either or both of these Pokémon drops to bring it in.
Togedemaru resists Fairy and Flying, Kommo-o's two defining weaknesses - switching into strong Moonblasts or Play Rough is possible but the risks must be considered, Mega Mawile is to be treated with extreme caution as its Sucker Punch can snag both Togedemaru and Talonflame after only slight prior damage. I got Talonflame sniped by Sucker Punch trying to Flare Blitz Mawile at least once and losing the check to Mawile is very bad - Fake Out should be used to avoid this risk if Talonflame is in KO range, if possiblef.
Deployed with a Protect and switch, or Protect + Tailwind/Attack into sac most commonly.
Lightning Rod protects Kommo-o from T-Wave, allowing it to avoid crippling speed drops and FP stopping its sweep cold.
Fake Out support is invaluable, and STAB Iron Head + Zing Zap hits all fairies not named Mega Mawile for good damage, with all of the Tree Fairy roster save for Mawile being more suspectible to physical attacks.
Lightning Rod finds Togedemaru many switch opportunities - the Rock resist is less valuable, as Stone Edge, Continental Crush, still hurt quite a lot and will often 2HKO Togedemaru.
One of Togedemaru's weaknesses is its neutrality to Water moves. Hydro Pump or another Water move on the switch may be preferable to sac Talonflame on instead, rather than losing Togedemaru's Sash early and possibly giving it one or more less Zing Zaps down the line, but the case is not clear cut and should be considered depending on the trainer match-up.
Togedemaru is not immune to Freeze - it should as a generalization only be switched into possible Ice attacks when "absolutely necessary", and saccing Talonflame preferred to deploy it if Ice moves are being used, rather than risking a switch.
With Kangaskhan in the rear, using Protect on Kommo-o while Togedemaru uses Nuzzle/Zing Zap and is sacced can bring in additional Fake Out support if Togedemaru is not positioned to provide. Another possibility is to Protect on Kommo-o while switching in Kangaskhan into an attack that may KO it - for the purpose of bouncing Togedemaru back in for Fake Out, or vice versa.
Kangaskhan only rarely switches in directly. In most circumstances, the 3rd Pokémon to send out after a team member is KO'd is Togedemaru - its Fake Out, and Spiky Shield with Focus Sash provides the greatest flexibility as 3rd for most purposes, but in some cases - especially with Tailwind active and depending on what is on the foe's side - it is an option to send out Kangaskhan third, but this is riskier than Togedemaru on average, and I recommend it primarily when Tailwind is active, to make Kangaskhan's Double-Edge and Fake Out move faster than opposing Fake Out and faster foes.
Notable exception: with two Fake Out users, it is possible to make a sacrifical switch when having one out at current time and one in the rear - protect Kommo-o, or more rarely Talonflame, while switching in the rear Fake Out user - if the switch-in survives, it can use Fake Out, and if it is KO'd the Fake Out user that was switched out can then use Fake Out, for a high cost guaranteed Fake Out setup - this is a heavy investment, but can allow using Soulblaze or Tailwind in otherwise risky situations to set up and sweep with higher odds against an unknown last Pokémon that will by default be slower if Tailwind is active, or Kommo-o is omniboosted.
The rarest field state to end up in, as often Talonflame is KO'd or has been switched out by the time Kangaskhan enters the field, and Togedemaru forms a stronger field when paired with Talonflame.
Talonflame/Kangaskhan synergy with Brave Bird for Fighting-types is good, but Terrakion, Cobalion, Mega Lucario, etc are not covered by Talonflame, especially due to the Gale Wings nerf making it move after these fast Fighting-types - ideally Tailwind would be up, or possible to set up to prepare for this possibility.
Almost all of them. As mentioned, I worked on the trainer cheatsheet specifically for use with this team, and referred to it when playing frequently. For some time I put a post-it note on my 3DS next to the screen, listing the trainers that run Mimikyu, who are:
Mimikyu4 Only
Police Officer Rendor
Black Belt Chucky
Dancer Carrie
Mimikyu34 Both
Office Worker Darrel
Office Worker Jana
Veteran Xio
Janitor Sika
Janitor Paulo
Also of importance are the Trainers capable of running Mega Mawile - the biggest offenders are Veteran Xio, and the Punk Guys specializing in Intimidate. Against these three trainers, I play with the assumption that the 3rd or 4th Pokémon is going to be Intimidate Mawile, and preserve either Kommo-o or Talonflame to check it.
Veteran Xio, the Fairy specialist, deserves special mention. She runs all the threatening Fairies, so against her it should be assumed that the back-ups will be the worst two out of Mimikyu, Mawile and Primarina, if they're not among the leads. Pokémon Center Lady Perri has Set234s and some Fairies, and is impossible to miss.
Against Veterans who run Zapdos2 or Cresselia2, it is crucial to preserve Togedemaru at high HP to maintain the ability to stall these out of PP. It is possible to reliably beat Cresselia2 without a Toxic immunity on your team by utilizing a switch stalling tactic where you switch a healthy (not poisoned) Pokémon into a slot, then Protect or switch it out into an already Poisoned Pokémon, and repeat this process while constantly switching out to reset the Toxic counter. If you have four Pokémon alive and one of them is not poisoned, and the others are sufficiently healthy, this allows you to stall out Toxic PP, after which the healthy Pokémon can win the PP war. It should also be doable with three Pokémon, but I prefer to stay safe and keep Togedemaru alive and healthy as a guaranteed check.
For the Zapdos2 case, once its Ancient Power has been spent Togedemaru walls it with Lightning Rod. Care must be taken to not allow Togedemaru to be hit with Ancient Power; and to use Protect on Talonflame to tank Ancient Power whenever possible, to minimize the chances of AncientPower boosts. A boosted Zapdos can very easily KO Togedemaru with Struggle in the worst case, if it comes down to a 1v1 - ideally you'll have two or more Pokémon, and plenty of HP to tank Struggle with when relying on Togedemaru's Lightning Rod to stall out Zapdos2. There are battle videos of this being done in the playlists.
If you've been following the Battle Tree Discord, you'll know that I've been slacking off on various write-ups for over a year now. Frankly I don't feel very motivated to work on write-ups and streak posting - while I enjoy playing Tree, I get very lazy when it comes to posting and write-ups start feeling like work very quick and I postpone the task indefinitely. I've also not been satisfied with most of my results, contributing to my silence in the thread.
I'm not too happy with my old write-ups either - beauty in the eye of the beholder and all that, but reading my own works feels like I didn't communicate my point properly, and did a lot of filler/forced writing and ended up with an unsatisfactory explanation. I've wanted to improve this for a while, but motivation continues to be quite lacking - I tried to do something better with this one, but ran out of fuel halfway through. There were more things I wanted to put into this, but I find article/documentation writing quite difficult. I usually started by writing in Notepad before, but used Google Sheets to draft the write-up this time and then copied, pasted and edited various thoughts to compile the write-up, which may be to blame for some of the disjointedness of this post - check out the source material used for this post if you are interested: https://docs.google.com/spreadsheets/d/1VkKMG5YjflR2c43CxBhFBTT85P93m-4y60T1sr5YxU8/edit?usp=sharing
Regardless, though this write-up is not satisfactory, I think I managed to make it a little better than before, and most importantly get it written in the first place - something that continues to be a struggle.
That's it for the slightly incomplete team description. I wanted to get 4 digits, and reached this goal with Mahler's Flight. After hitting 1000 I wanted to surpass my Maison Doubles streak numbers, which I did - in retrospect there were a lot of issues with my play in the Maison, some of which I've been able to improve on and getting bigger numbers in Tree felt like a meaningful milestone to pass. Getting 2000 was nice but I would've wanted more, at least 2500 and preferably 3000 if possible - but mistakes were made in the loss, which is regrettable. Bringing back Talonflame and getting good mileage out of it even after nerfs feels good, but I would've liked more.
I have some new and old teams to play next, hopefully to bring back more than just Talonflame. Don't get your hopes up for it any time soon, especially not for a write-up!
Updated through here! turskain, I know the feeling about writeups quickly feeling like work, but yours, both old and newer, are a treat, so know at least that they are very much appreciated!
On my own front, I ended up having to replace my 3ds, but that's been done, and I've resumed climbing (slowly, but successfully) with Gliscor / Chansey / Mega Slowbro. I had another "should probably have lost" close call, so while the team is strong it definitely has exploitable vulnerabilities, but it may just be just solid enough to get to 1000. We shall see! I've tried to take good notes, so hopefully, when it is writeup time, the report will be helpful.
Mat Block is a unique move that blocks all damage from moves that come after it. Off of a great speed stat of 122, this means that Greninja can let Kommo-o set up safely on turn 1 against the likes of Salamence, Latios, Metagross, Azelf, Glaceon, and more. This move is the backbone of the team, and the sheer usefulness of it cannot be stressed enough. Mat Block + Clangorous Soulblaze is what I click in the majority of battles, and if the combo is successful then the battle is likely won. Holding a Focus Sash is a crucial part of the set, as it allows Greninja to use Mat Block even if one enemy is faster. After use of Mat Block, Greninja is a fighting type, and will often be targeted by attacks that Kommo-o loves to not be hit by, such as Brave Bird or Psychic. While this can be helpful, it isn't consistent enough to rely on except in a few cases. For example, Mega Blaziken always goes for Brave Bird into Kommo-o turn one, and then Brave Bird into Greninja turn two.
The coverage moves on Greninja need little explaining. Ice Beam is one of the best attacking moves to have, and it helps to deal with problems such as Shiinotic and Tsareena. Grass Knot helps my matchup versus most bulky water types, and also helps to trivialize sand teams. Dark Pulse hits opposing Psychics such as the lake spirits, and can help stop squishier TR setters such as Mega Slowbro and Cofagrigus. While the Protean-Boosted coverage Greninja provides is appreciated, it rarely gets OHKOs unless it's x4 effective, and it's best used for finishing off a pokemon weakened by Kommo-o. Also, while Ice/Grass/Dark is great coverage, it doesn't hit fairies well at all which makes fairy-heavy trainers tough to deal with with my frontline.
Clangorous Soulblaze + boosted Clanging Scales is a KO for most pokemon and often sweeps entire teams, with only Steels, Fairies, and specially defensive demons such as Snorlax4 and Blissey standing up to it. +1 Close Combat can deal with the Steels and bulky Normals (watch out for Chople Berry on Blissey4 though), and Flamethrower helps with some key threats such as Whimsicott, Shiinotic, and Mawile. Protect is a staple move, and is most often used after Mat Block + Soulblaze turn one with a fairy type lead as Scizor swaps in for Greninja.
A Rash nature does impair the special bulk of Kommo-o, and Modest is certainly better in most situations. I thought about breeding for the new nature, but with Modest I would have a roll to OHKO Electrode34 with +1 CC whereas Rash always kills, so I decided to keep using it. I'm aware that my EV spread isn't great, it doesn't maximize my stat gain, and some EVs are fairly useless, but it gets the job done. 228 EVs in speed hits the speed tier of 134 unboosted, and 201 at +1 which outspeeds base 130 pokemon such as Crobat and Jolteon. I have no clue why I have 20 EVs in HP, I have no clue what calc it lets me live. 4 EVs in Attack and both Defenses are probably the failed result of my terrible attempt to make a more balanced stat spread. 244 SpA allows me to KO any Rotom form with Dark Pulse + Soulblaze, which is amazingly convenient. I'll try to make a better EV spread if I ever try this team again. Some people say Overcoat as an ability is inferior to Bulletproof on Kommo-o. They're probably right, but I think Overcoat is still viable. Because Spore bypasses Mat Block, Amoonguss can ruin a Soulblaze sweep for this team, however, this is completely prevented by Overcoat, as it makes Kommo-o immune. Overcoat has also come in clutch against sand teams a few times when Kommo-o takes a hit that brings it to red HP, only to ignore the sand damage and sweep.
A Steel type is essentially a requirement on a Kommo-o team. Fairies are everywhere, and they stop my frontline cold. Scizor's role on this team is OHKOing or heavily damaging the vast majority of them with Bullet Punch. Many times I've shuddered at the sight of Veteran Xio and her mono-fairy roster, only for Scizor to solo the entire battle. Bug Bite is fairly strong and helps deal with Electric types that resist Bullet Punch (it even OHKOs Jolteon!), as well as KOing many of the Grass types that Primarina fears, and it's also good against Uxie, Cresselia, and other bulky psychics.. Superpower is rarely used, but I'm always glad I have it when Porygon2, Bastiodon, Magnezone, Rotom-Frost, and other such threats show up. Protect is great for baiting fire moves and letting the other team members clear out the danger.
Scizor has a hard time swapping into attacks since it needs to mega evolve to have good bulk. Fortunately, my leads discourage fire type attacks so Scizor is rarely sniped by one on the switch, but if swapped into a double target, there's a good chance that Scizor goes to red HP or is flat out KOed. It's important to keep this in mind against trainers Scizor is important for, such as Tamah, Xio, and Aino. The EV spread is the same one Turskain used for his 958 win streak; 92 speed EVs outspeeds the Rotoms, bar Fan4. Max Attack hits as hard as possible, the rest goes into bulk.
Hyper Voice is a very spammable move, as most spread moves are. It's good for chip damage, murdering Fire, Rock, and Ground types, and when used next to +1 Clanging Scales, not much can survive the ensuing chorus. Moonblast is more powerful than Hyper Voice and is selected whenever I want more damage on a single target, and it's a great tool for the dragons Kommo-o can't handle. Energy Ball allows Primarina to 2HKO the likes of Suicune, Primarina, Rotom-Wash, and most other bulky Water types, which is what elevates it above other pokemon that could fill this spot. Nearly nothing else has the bulk, utility, and coverage that Primarina does, and with emergency rations in the form of an Aguav Berry, it forms a perfect bulky glue for the team.
Unfortunately, Primarina leaves a bit to be desired on the physical side of bulk, although the berry mitigates this somewhat. It makes up for it by tanking super effective special hits such as Jolteon3 Thunder, Salazzle3 Sludge Bomb, Lilligant4 Solar Beam, and tons of weaker Charge Beams, Venoshocks, and Giga Drains. Primarina is fairly slow, but 44 speed EVs gets the jump on Glaceon and Walrein. 220 HP EVs prevent Primarina3 from 2HKOing with 2 max roll Moonblasts, and the remaining 244 go into special attack.
An early version of this team used Clefable in the Primarina slot with the hope of redirecting attacks and boosting Clanging Scales with Follow Me and Helping Hand. That version was murdered ruthlessly by Primarina4 three times in a row since I lacked a way to damage it well enough, Grass Knot and Bullet Punch were very unlikely rolls to 2HKO, Kommo-o couldn't hit it for shit, and Scizor got OHKOed by Hydro Vortex; Whenever I encountered Primarina4, my fate was sealed. It was around this time that the HA Alolan Starters were released, and as it turns out, Primarina is a pretty good Primarina check. It takes next to nothing from Primarina3 and 4, and it can 2HKO them back with Energy Ball. I wanted to maximize my special bulk, so I used an Assault Vest set at first, with Hydro Cannon over Protect for a last ditch effort nuke. It was able to shrug off nukes such as Mega Ampharos' Thunder, Lilligant4 Bloom Doom, +6 Special Attack Volcarona4 Hurricane, Serperior4 Leaf Storm, and pretty much every other special attack out there.
After a nasty loss against a speed trainer where Greninja and Weavile steadily chipped away at Primarina's HP until it died, I started looking into replacement items. Thanks to Eisenherz endlessly shilling 50% berries, I decided to give the team one last try, replacing the beloved Assault Vest with an Aguav Berry, and Hydro Cannon (which I used about twice throughout all the battles, it was a terrible move) with Protect. As much as I love Assault Vest, the 50% berry is undeniably better and has saved my ass countless times over the course of the streak.
The Biggest Threats:
This pokemon was such a big threat before that I had to get my own simply to not automatically lose to it. I need to be careful to get Primarina in safely and to preserve it against any enemy that might have this since it's my only reliable answer. Primarina often comes paired with more big threats such as Magnezone or Braviary on Kukui's roster, or Mawile on Xio's roster.
Outspeeds Greninja and OHKOs Kommo-o, hits monstrously hard, especially if it traces Protean. Scizor is the best answer to it, 2HKOing with Bullet Punch and OHKOing with Bug Bite. Unfortunately, there will be cases where you have to let Alakazam trace Protean, and if it does so then it will do a fuckload to Scizor with Focus Blast, and will also resist Bug Bite if it uses that move.
Can TWave through Mat Block, dodge Close Combat with Bright Powder or survive the hit with Sturdy, kills Primarina with Thunder and does a lot to Scizor with it, also potentially limiting your switching ability. A Magnezone + Alakazam lead pair would be an absolute nightmare.
Big Threats:
Talonflame4, Crobat3, Braviary3, and Tsareena4 more specifically. They all outspeed Greninja and OHKO Kommo-o, which makes the first turn quite hectic. My team has no flying resist, so swapping into any of the three birds above is challenging to do without taking heavy damage. Ice Beam + recoil from Flare Blitz/Brave Bird + another Ice Beam KOs Talonflame, Ice Beam is a 15/16 roll to OHKO Crobat, and Braviary is an 11/16 roll. Tsareena will sometimes HJK into Greninja so it's harder to neutralize without taking much damage. It also blocks Bullet Punch for the field, which can let fairy type partners tear through my team.
These are all grouped together since they're immune to Soulblaze and have some special tool to fuck up my team.
Togekiss: TWave is unpredictable and devastating, not OHKOed by Ice Beam or Bullet Punch.
Whimsicott: Tailwind, can damage through Protect with Twinkle Tackle, set 4 survives Ice Beam and +1 Flamethrower from full HP, both sets survive Bullet Punch.
Mawile: OHKOs every member of the team. Kommo-o is the best answer to it, so keep it alive and healthy on trainers that carry this menace.
Mimikyu: Annoying to kill thanks to Disguise and Rocky Helm, but with a decent damage output you can't ignore it.
Aromatisse: Sets TR. Not OHKOed by Bullet Punch, Aromatic Mist can turn Primarina34 even deadlier by making them not 2HKOed by Energy Ball, Heal Pulse is never fun either.
Shiinotic: Effect Spore punishes Scizor, not OHKOed by anything, although a few attacks are rolls. Spore is also a humongous pain in the ass to play around.
Smaller Threats:
Garchomp3 is neatly handled by Ice Beam + Protect in most cases, but it still deserves a place on the threatlist for how it restricts what you can do.
(Possibly) Immune to Soulblaze, can set Light Screen, can possibly stop Mat Block with Taunt or a Thunder(bolt) paralyze. Never attacks Kommo-o though so that's nice. OHKOed by +1 Close Combat, but be wary of Static.
Can stop Mat Block with Thunder(bolt) paralyzing, can also flinch with King's Rock. OHKOed by Bug Bite.
TWave, Bulky as hell, can trace Protean, hits fairly hard, and generally just a pain.
The three most notable TR setters. Audino gains a fairy type upon mega evolution which complicates things as it doesn't always mega. It also has a fire move for Scizor. Carbink can't touch my backline but can hurt the front quite a bit. Slowking hits fairly hard and is generally bulky and annoying.
Scarf Guillotine goes before Mat Block and OHKOs, however, this usually goes for X-Scissor.
Zapdos2 is incredibly hard to stop once it gets going since the best wall for it also has very little PP.
QC is never fun, this is no exception. Can also pack Thunder Wave or Memento for crippling.
No easy way around the Red Card since if it uses Baneful Bunker it still gets chipped by Soulblaze and swaps Kommo-o out. I also can't hit Water/Poison types very well.
Crit Sludge Bomb kills Kommo-o, however it almost always goes for Thunderbolt into Greninja. I generally use Mat Block to prevent a possible Dazzling Gleam from set 3
While every Rotom form is KOed by Dark Pulse + Soulblaze, Rotom-fan has an unpredictable scarf set that can Thunder and Air Slash it's way through the team.
These are the scariest Fake Out users, the others don't have the offensive presence to really be scary. Fake Out either stops Mat Block or Soulblaze, and there's no way to know who it'll target as it seems like an even split between Kommo-o and Greninja. I can't really offer advice on how to get around it as the scenario changes greatly depending on the other lead pokemon.
Hypnosis bypasses Mat Block, Fire Blast roasts Scizor, and Greninja can't do much to it. On the bright side, Energy Ball doesn't do shit to Primarina.
While it is Scizor food, Ninetales1 can set up Veil and Hypnosis my team.
Like Toxapex3, these have Red Card. However, they're rare and more forgettable so it's more likely that they erase your boosts by surprise
The main reason for Overcoat on Kommo-o. Spore from this guy can ruin the game, and beyond that it can use Rage Powder, Clear Smog, and more to ruin your day. On the bright side it can't touch Scizor, and using Grass Knot with Greninja on it's partner makes Spore and Rage Powder useless.
Tamah: Lots of fairies, lots of bulky normals that Kommo-o can't deal with because of the fairies, Rotom-fan, some scary ground types such as Garchomp3.
Xio: Fairies everywhere. If Scizor goes down to Primarina4 or Mawile4 then you'll have a bad time, so don't let that happen.
Perri: Another fairy spammer. Also has some TR setters such as the slowthings. She has unique threats in the form of some set 2 pokemon no one else carries.
Raz/Granville: Speed trainers are the natural enemies of Mat Block, as it's extremely hard to get a turn one Soulblaze off. Alakazam + Birdspam is a deadly combo that happens quite a lot with these guys.
Kukui: Primarina and Magnezone form a fearsome roster, and being the sole trainer to have Braviary3 (I played on Ultra Sun) makes him even scarier to face since it outspeeds Greninja.
Savir: Lots of TWave users, Alakazam, Magnezone, Mawile, Porygon2, and Druddigon3 with a Quick Claw to top it all off.
Ezra: A threat to any team, this one is no exception. While Mat Block does make her easier to beat than usual, she still has 2 of the biggest threats to the team in Alakazam and Magnezone, with lots of situational threats littered throughout her roster.
The Loss:
KUNG-WWWW-WWWU-V7NQ
Battle 878 vs Ace Trainer Tamah (Porygon24/Togekiss4/Mamoswine4/Primarina4)
Turn One: Tamah leads Porygon2 and Togekiss, a very Kommo-o unfriendly combo. I wanted to get rid of Togekiss because it's more of a threat, so I went for Ice Beam and swapped Kommo-o for Scizor. My thought process was that I could either Bullet Punch or Ice Beam Togekiss on the next turn for the KO, depending on who got paralyzed. I clicked the wrong goddamn pokemon though and was greeted with absolutely no damage.
252 SpA Protean Greninja Ice Beam vs. 252 HP / 0 SpD Eviolite Porygon2: 46-55 (23.9 - 28.6%)
Meanwhile, Togekiss reveals itself as set 4 with Dazzling Gleam, dealing about 50% to Greninja. Scizor was TWaved by Porygon2, who also revealed itself as set 4.
Turn Two: I tried to salvage my mistake by KOing Togekiss with Bullet Punch + Ice Beam. Luck wasn't on my side though, and Scizor got fully paralyzed. Ice Beam did around 75% to Togekiss, who retaliated with an Aura Sphere KO on Greninja. Porygon2 went for TWave into Greninja, which redirected to Scizor, doing nothing.
Turn Three: Togekiss was still on the field, and there was no guarantee I would break through paralysis to KO it, so I was forced to send in Primarina. I went for Hyper Voice + Bullet Punch, and in retrospect Hyper Voice + Superpower would have been better, but Scizor was fully paralyzed again so it didn't matter. Togekiss got off another DGleam before dropping to Hyper Voice, and Porygon2 TWaved Primarina.
Turn Four: Mamoswine enters the field. I Bullet Punch + Hyper Voice since it lives either of them separately, it uses Earthquake, damaging the field and putting Primarina in berry range, Porygon2 uses Tri-Attack putting Primarina in red HP. Hyper Voice double KOs. Primarina comes in.
Turn Five: Scizor is fully paralyzed and fails to use Bullet Punch. Primarina (CPU) outspeeds Primarina (Mine) because of paralysis and KOs both Scizor and Primarina with Dazzling Gleam. I send in Kommo-o.
Turn Six: I used Protect, not like I could have won.
Turn Seven: Close Combat doesn't kill, what a shock. Dazzling Gleam OHKOs 3 times over
252+ SpA Primarina Dazzling Gleam vs. -1 20 HP / 4- SpD Kommo-o: 472-556 (308.4 - 363.3%)
"A Trainer who can't win is worthless! Leave the ring...immediately!" -Ace Trainer Tamah
no need to rub it in...
There was lots of bad luck, mostly in the form of paralysis and which pokemon Tamah had. However, I'm not blaming that for my loss, as I could have played better. I could have clicked the right pokemon and gotten rid of Togekiss. I also could have switched Primarina for Kommo-o on turn four. This would have preserved Primarina for the last pokemon and I could have Soulblazed on the weakened Porygon2 and Mamoswine.
Looking at all my old battles hurts, all my plays are so terrible.
8J7W-WWWW-WWWV-3Y8D
313 vs Weavile/Greninja/Aerodactyl/Crobat (Loss, Final battle with Assvest Prima)
If I hadn't lost here, I might have never swapped to 50% berry Primarina. Just bad plays all around, and a lot of bad matchups.
4XPG-WWWW-WWWV-3Y8K
280 vs Talonflame/Salazzle/Arcanine/Kangaskhan (Loss)
If I had swapped Kommo-o for Scizor at any point in this battle and baited fire moves with protect this would have been a lot better. I didn't though.
5ZBG-WWWW-WWWV-3Y9X
304 vs Florges/Shiinotic/Mimikyu/Primarina (Loss)
Turns out sacrificing Scizor against a trainer that only has fairy types doesn't pay off. Wack.
2XQG-WWWW-WWWZ-RNLV
192 vs Togedemaru/Audino/Florges/Slowbro (Loss, humiliation)
I almost lost faith in the team after this battle where it got beaten by Florges2, arguably the worst set in the tree.
672W-WWWW-WWWV-3YBZ
203 vs Gengar/Magnezone/Chandelure/Latios
Turn one Thunder Wave + Full Para into Greninja, I struggle to get off a Soulblaze all game and only win because the last pokemon was Latios.
PDKW-WWWW-WWWV-3Y8F
280 vs Sandslash-A/Abomasnow/Drampa/Glaceon
I needlessly sacrifice two pokemon to Drampa3 instead of just sending in Primarina, and then struggle to get the battle back under control.
LHQG-WWWW-WWWT-HKJK
482 vs Druddigon/Rotom-mow/Eelektross/Manectric
A surprise turn one Earthquake makes the battle a bit hard to manage, and Scizor/Primarina don't appreciate a dual electric backline at all.
9EHG-WWWW-WWWV-3Y89
689 vs Musharna/Slowking/Medicham/Gardevoir
Medicham and Mega-Gardevoir nearly sweep me in Trick Room.
RS9W-WWWW-WWWV-HKFP
561 vs Delphox/Moltres/Whimsicott/Charizard
Idiotic misplays lead to a 1v1 between 129 HP Primarina and Charizard-Y.
Solar Beam: (140, 142, 144, 146, 146, 148, 150, 152, 154, 156, 156, 158, 160, 162, 164, 166)
So yeah I was screwed. I had given up, but for some reason Charizard used Heat Wave, allowing me to KO with Hyper Voice. I have no clue why this happened, and I couldn't get it to use Heat Wave again in any mock battles.
When I first tried this team, I just wanted to beat my old best of 392. Even though I barely broke 300 with the assault vest version of the team over all 4 of it's attempts, I still felt that the team could go far. All of the losses were my fault, none of them were to hax, and it honestly stung a bit that the problem was with my skill, not the team. When I broke 392, I felt that I had finally gotten better. My plays were far less risky, and I knew the team like the back of my hand. I knew which scenarios were Soulblaze-safe and which weren't, I knew what to target and KO as soon as possible and how to mitigate the damage from top tier threats. Breaking 500 I was just happy that the team was getting the success it deserved after so many months of failed attempts. Going into the 800s I started thinking that this team could really break 1000, and that just made the loss that much more devastating. I still do think that it could get 1000 wins, but I'm sure as hell not gonna try for it anytime soon. Maybe next gen. In the meantime, I have tons of shitty gimmick teams to try out.
Hello all, reporting a completed streak of 271 in Super Doubles
After taking a break from all things Tree related for several months, I thought I'd dive right back in. My team features the very underrated lead combo of Weavile and Tapu Koko. And since it seems like it's the highest streak involving Weavile yet, I'll go ahead and claim naming rights for the combo "Woko". Woko is actually a really good combo because you get the bolt beam combination in your leads, which is excellent coverage. And with Weavile having the fastest Fake out in the tree outside of Mega Lopunny, Weavile can flinch one foe while Koko nukes the other.
Anyways, the team-
Moveset-
Fake out
Knock off
Ice punch
Protect
Weavile is simply amazing bait, especially with the sash and protect. He's also the fastest fake out user other than mega lopuny, meaning i can fake out fake out leads like salazzle before they use it on me. About the ability, I've been meaning to change it to inner focus. [Edit: Just realized Weavile doesn’t even get inner focus. Scratch that then.]
Ev's- standard, attack and speed
Nature-Jolly
Item- Focus Sash
Ability- Pressure
Moveset-
Thunderbolt
Dazzling Gleam
Grass Knot
Volt Switch
Standard Koko specs set. It works brilliantly when combined with fast fake out support.
Ev's- special attack and speed
Nature- Timid
Item- Choice Specs
Moveset-
First Impression
Leech Life
Liquidation
Aqua Jet
Ok, this is where the team gets a little weird and suboptimal, admittedly. Don't get me wrong, I love Golisopod, it has amazing priority and did its job as a solid trick room check. However, the bug is weak to electric, and the terrain makes that worse. Sticking an assault vest on him helped with that a little bit, but there's no question he was the weak link in my team and that I only used because I didn't have anything better. The good thing is, he resists fighting and ground. With the latter resistance especially I liked switching out Koko when he was facing an Earthquake user (like Scarf Garchomp).
Ev's- Attack and HP
Nature- Adamant
Item- Assault Vest
Moveset-
Fake out
Return
Drain Punch
Sucker Punch
Ev's- Attack and Speed
Nature- Adamant
Item- Kangaskhanite
Pre-mega ability: Scrappy
Ah, good old Mega Kang. I felt he was the best mega available to me, especially for the nice fake out support. Drain punch is used over low kick as i want consistent damage regardless of weight, and more importantly I love the recovery. Why return over double edge? Simple, when I bred him I didn't do my homework and check his egg moves, didn't find out DE is an egg move until it was too late. After I lost I bred a new one with it though, so it's cool.
Sorry I didn't use pictures, I'm feeling lazy today. In other news, I redid the team, keeping three of them but replacing Golisopod with Life Orb Landorus Incarnate. The electric immunity is amazing and he resists fighting too, which is nice. He also hits a lot harder than Golisopod. Checking Trick Room might be harder though. Another change is that I bred a new Kang, this time with double-edge. Definitely an upgrade.
I'm at exactly 100 wins with the new team right now. Hoping to far outpace the above team with it- wish me luck.
Mega Steelix for sure. Powerful electrics. Oh, and evasion spammers.
Ah, almost forgot-
ok here are some vids-
PB2G-WWWW-WWWV-94DP
An annoyingly close battle thanks to the evasive zapdos2.
EMYW-WWWW-WWWV-94ED
Similar story except this time with Dugtrio2. Oh and my bad custap berry explosion prediction skills didn't help.
VC6G-WWWW-WWWV-94FU
The loss. For those who don't feel like watching, I'll summarize. I had again a bad encounter with a custap berry user, escavalier. Oh, and Druddigon3 reared his ugly head, his quick claw activating 4 out of 7 turns. That's 57% of the time for an 18% (I think?)proc. Despite all this, I could've won if not for a terrible misplay against brightpowder magnezone. I forgot to aqua jet it with golisopod, magnezone went first and ohko's him. Oops.
I decided to throw in a fun clip of the sun team I've been trying. Not too viable I'm afraid but it was a lot of fun.
4AWW-WWWW-WWWV-94MF
And another one, a tough fight-
CHEW-WWWW-WWWV-94NV
11/6 Edit- Unfortunately the new team lost, but it was a fluke and i'll redo it. I'm uploading the vid, which I recommend seeing just for the entertainment aspect (don't get me wrong, I misplayed, but it's still pretty flukish and comical)
PPNG-WWWW-WWWV-DYFP
I'm starting to feel like I'm burning out on Tree-climbing and will probably have to step away for a bit, recharge for a while, and play, you know, other games. But, I wanted to leave myself in a situation beforehand where I would have options for when I come back, and see what strikes my fancy then. So, I went and carried out an assault on various facilities, trying to get back to 50 wins on all of them and with a different archetype in each case. I think I've managed to do that (all of these are ongoing):
Castle Doubles: 56 wins (DisQuake with Zapdos/Scarf Flygon) Subway Doubles: 56 wins (TerraCott) Maison Triples: 51 wins (Roslindale Condores/Quetzales, Bench composed of an Imperfect platoon of Articuno1/Crobat3/Donphan4/Muk4 (or what is Muk2 today)/Lapras3/Nidoqueen3/Subway Tauros1/Subway Gengar3/Whimsicott3/USUM Rhyperior2) Agency: Grade 50 (current rental is Sheer Force Landorus2, supported by Grade 50 Suicune1 & Terrakion2) Sun Doubles: 50 wins (Dancer) Ultra Moon Doubles: 60 wins (VGC ZapFini, not using Tapu Fini/Tyranitar)
I won't be disappearing from these forums or this thread while on hiatus--I encourage everyone to keep up the good fight, at least until SSBU comes out and everyone is sucked into that vortex. Happy climbing everyone!
Sadly not, though, almost none of those pokemon combination is unique to a specific trainer that is not a Special Trainer, so you don't need to run in the specific trainers shown in the leaderboard to get the same AI partner.
There hasn't been much in this thread since Mahler's Flight dropped, so I finally mustered up the willpower and spare time to record and upload a selection of 16 battle videos from my ongoing streak, as seen here:
Additionally, I took the time to detail my train of thought and battle plan during these videos, if you feel like turning on the subtitles.
This video was originally supposed to be for my 1500 post, but I reached 1500 months ago and... completely forgot to record the videos. Oops!
There hasn't been much in this thread since Mahler's Flight dropped, so I finally mustered up the willpower and spare time to record and upload a selection of 16 battle videos from my ongoing streak, as seen here:
[video snipped]
Additionally, I took the time to detail my train of thought and battle plan during these videos, if you feel like turning on the subtitles.
This video was originally supposed to be for my 1500 post, but I reached 1500 months ago and... completely forgot to record the videos. Oops!
Congrats on the continuing streak. Very good show!! I'm assuming you're past 1500 but not yet at 2000? While there hasn't been a ton of action of late, something cool did happen today:
725G-WWWW-WWWV-Q6XU
Gliscor / Chansey / Mega Slowbro got to four digits!! I'll get myself on the leaderboard once I put together a suitable writeup, but I'm quite pleased with how things have played out.
Yeah, I hit 1500 in late July and I'm well past that. Not going to post any definitive numbers until I either reach 2000 or lose, since I feel like my team has well overstayed its welcome in the Tree (i.e. that i should have faced a matchup/hax combination that caused me to lose). No point in posting an update at a non-milestone to lose only 3 battles later.
Speaking of, I had a near-loss during today's session, caused by a combination of lazy play and bad memory. Only won because the backups were very favorable.
We made it a long way, but Cynthia ended my Super Single run on the 410th battle... I had some poor luck in this match and I didn't play my best, especially at the end not directly knocking out Garchomp with Gyro Ball. You can view the replay of my final battle with this code: B96G-WWWW-WWWV-SN2E. For those interested, I will share the team that has brought me all this way with you. I'm so proud of them for making it this far <3
I'm a big fan of Generation 3, so at first I battled with Metagross over Ferrothorn. In order to test out a Ferrothorn I'd recently bred, I swapped him in and since then I just kept on winning. Honestly, I've never used any kind of resources like the ones listed in the original post and just created this team based on my previous experiences at the Battle Tree. I really like these Pokémon and I think they work very well together as team. I noticed that any combination of two members of this team would almost always be able to attain victory if the opponent also had one of their Pokémon knocked out. This is important because Blaziken and Latios's explosives powers can knock out or severely damage at least one Pokémon before fainting themselves. In doing so, the outcome of the match could already be decided. However, Dragon-type Pokémon can be troublesome and would often require the use of all three Pokémon together in order to bring them down.
A great and powerful Pokémon. Mega Blaziken can blow his foes away with his strong STAB attacks. I don't use Thunder Punch very often, though it can sometimes help against certain Water or Flying-type Pokémon. With his Speed Boost Ability he can turn around a lot of battles against Pokémon that would usually be faster and quickly steamroll through the opponent's team. His typing also works well with the other two members of this team. When facing Water-type Pokémon like Slowbro and Vaporeon, Latios and Ferrothorn can easily be switched in to take their hits. Earthquake users that can withstand a OHKO such as Rhyperior can be lured into going for the super effective hit when I switch to Latios and negate all damage with his Levitate Ability. Blaziken unfortunately has problems with Dragon-type Pokémon, like Salamence and Dragonite, who are also the among the biggest threats to this team.
As I mentioned before, Latos is strong against many Pokémon Blaziken is usually weak to with its defensive types and Ability. His most important attack is the devestating Devestating Drake, which alone is enough to knock out even defensive Pokémon in one hit. It is also useful to avoid the drop in Special Attack that goes along with the use of Draco Meteor, making Latios a strong attacker even after getting off his Z-Move. Psychic is not as strong, but since Blaziken can often deal with Dark and Steel-type Pokémon, it can be used very reliably. Surf deals with Ground and Rock-type Pokémon that trouble Blaziken. Other than that, Recover rounds out its moveset. I never really used it to much, but it came in handy a few times to stall out the PP of Sucker Punch against Bisharp and Honchcrow. With his Speed he can knock out most weakened Pokémon without taking damage.
~
Ferrothorn (M) @ Leftovers
Ability: Iron Barbs
Level: 50
EVs: 252 HP / 124 Atk / 36 Def / 92 SpD
Brave Nature
IVs: 0 Spe
- Protect
- Power Whip
- Gyro Ball
- Leech Seed
Ferrothorn serves this team as a defensive tank that can soak up the remaining weaknesses Blaziken and Latios share. Of course, his Speed is extremely low and this can be a good or a bad thing. On one hand, he can turn the tables against Trick Room users like Bronzong and Slowking, on the other hand, his is very prone to suffer from secondary effects. There were many battles in which Ferrothorn was rendered unable to move because of status effects or flinching moves, as can be seen in my losing battle as well. In addition, his important Grass-type moves are inaccurate and this has caused me a lot of trouble before. Despite all this, his Leech Seed can slowly take down a great variety of Pokémon that aren't Fire-types and with his strong Power Whip he can knock out the problematic Water-type Pokémon Milotic and Gastrodon in one hit. Overall, he is a vital member of the team.
How did you deal with Salamence4-Mega (Dragon Rush, Double-Edge, two other moves)? As well as Charizard-4 (X)'s outspeeding and OHKOing the whole team after a Dragon Dance. I see you mentioned dragons being a problem, what happened in battles with two or more threatening dragons as foes such as these? Devastating Drake could check slower Dragons, but after using it Latios is very vulnerable to a large amount of Pokémon that could come in, such as Volcarona4. Did this become an issue at any point?
How did you deal with Salamence4-Mega (Dragon Rush, Double-Edge, two other moves)? As well as Charizard-4 (X)'s outspeeding and OHKOing the whole team after a Dragon Dance. I see you mentioned dragons being a problem, what happened in battles with two or more threatening dragons as foes such as these? Devastating Drake could check slower Dragons, but after using it Latios is very vulnerable to a large amount of Pokémon that could come in, such as Volcarona4. Did this become an issue at any point?
I don't know whate those numbers added to the Pokémon's names mean, but I assume it has something to do with their moves right? It was indeed difficult to deal with Mega Salamence... I had to rely on racking up recoil damage and hurting it with Iron Barbs from Ferrothorn so Blaziken would be able to deal the final blow.
Mega Charizard X was never really a problem for me, to be honest. When it would be sent out, I would usually be able to comfortably knock it out with Blaziken or Latios. Otherwise I could switch back and forth between Ferrothorn and Latios to damage it with recoil and Iron Barbs, until it would knock itself out. In this way I dealt with Dragon-type Pokémon that know Fire-type moves such as Fire Blast or Fire Fang, letting them knock themselves out or wasting all their PP. Since Ferrothorn has Protect, so that makes it easier as well.
As for Volcorona, it too was never really an issue. Blaziken can resist its most powerful attacks and is still faster after a boost in speed, even if Volcorona had used Quiver Dance, and can knock Volcorona out in one hit with Flare Blitz. Volcorona would always attack Latios with Bug Buzz, so I could easily switch Blaziken in and knock it out with Flare Blitz, it's the same situation with Ferrothorn, only then would Volcorona use a Fire-type move.
Its their set number. Tree pokemon have 4 sets they pick at random, though most trainers pick either the first two or the last two sets depending on whether you've passed 40 battles. For instance, Salamence4 is the mega while set3 is a special set with yache berry, while Charizard 3 is Zard Y. Set1 and 2 of these pokemon are gimmicks, and hardly any set12 holds a mega stone.
I don't know whate those numbers added to the Pokémon's names mean, but I assume it has something to do with their moves right? It was indeed difficult to deal with Mega Salamence... I had to rely on racking up recoil damage and hurting it with Iron Barbs from Ferrothorn so Blaziken would be able to deal the final blow.
Mega Charizard X was never really a problem for me, to be honest. When it would be sent out, I would usually be able to comfortably knock it out with Blaziken or Latios. Otherwise I could switch back and forth between Ferrothorn and Latios to damage it with recoil and Iron Barbs, until it would knock itself out. In this way I dealt with Dragon-type Pokémon that know Fire-type moves such as Fire Blast or Fire Fang, letting them knock themselves out or wasting all their PP. Since Ferrothorn has Protect, so that makes it easier as well.
As for Volcorona, it too was never really an issue. Blaziken can resist its most powerful attacks and is still faster after a boost in speed, even if Volcorona had used Quiver Dance, and can knock Volcorona out in one hit with Flare Blitz. Volcorona would always attack Latios with Bug Buzz, so I could easily switch Blaziken in and knock it out with Flare Blitz, it's the same situation with Ferrothorn, only then would Volcorona use a Fire-type move.
Thanks for sharing your team and congrats on the streak! I had been thinking of trying it but it seems that it could have issues with Azumarill 3 and 4. Azumarill 3 runs Z-Belly Drum which can easily activate since Blaziken doesn't OHKOs with Thunderpunch (252+ Atk Blaziken-Mega Thunder Punch vs. 252 HP / 0 Def Azumarill: 132-156 (63.7 - 75.3%) -- guaranteed 2HKO) and it proceeds to destroy the rest of your team at +6 with Aqua Jet / Play Rough / Superpower while getting its HP back. Azumarill 4 also runs a Choice Band and it proceeds to hit anything on your team quite hard.
Also there is veteran Xio who runs all Fairy types on her team. In addition to Primarina and Azumarill, two troublesome pokemon on her rooster for your lead, she can also carry Slurpuff 4 which commonly runs Flamethrower to OHKO Ferrothorn and Dazzling Gleam to deal with Latios (In addition to Unburden which makes it faster than Latios and +1 Blaziken). Since your lead Blaziken can often get weakened with any damage potentially sustained in addition to the Flare Blitz recoil, how do you deal with Slurpuff if Blaziken is gone? I'll appreciate any advice and thanks!
Thanks for being so interested! I'd love to answer your questions in detail, but I can't really remember how I dealt with Azumarill and Slurpuff or if I've even encountered them at all. Hypothetically, it might be possible to make run Azumarill run out of PP for Superpower by switching between Latios and Ferrothorn, while making it take damage from Ferrothorn Iron Barbs at the same time. Superpower only has 5 PP and Azumarill would also be reducing its attack every time. In Slurpuff's case, I suppose keeping Blaziken on the field when the opponent sends in the next Pokémon would be your best bet.
In my time battling with this team, Blaziken always almost always gets knocked out in one hit or with recoil damage. I would advice to use Superpower conservatively and rely as much on Flare Blitz as possible. It is dangerous to lower Blaziken's Attack and then not being able to knock out the following Pokémon. Because Blaziken already weakens himself with Flare Blitz, he doesn't have the stamina to withstand many attacks. If you're relying on Blaziken to take direct hits from super effective or neutral attacks, you likely won't have much success. That's why it's important to keep Blaziken around as much as possible, no matter how much HP he has left. His attacks are so strong and with Speed Boost, he can still muster up the strengh for a powerful hit even when driven in a corner. I would advice to not mind Blaziken's remaining HP too much and instead prioritize keeping it able to battle.
Switching between the different Pokémon in general is a useful strategy, especially in seemingly hopeless situations. One time I faced a Cresselia that used Double Team six times... By switching my team members, I was able to make it use Struggle and eventually win. This kind of strategy works especially well if Ferrothorn has used Leech Seed on his foe. You can slowly drain the foe's health without attacking. When playing many games, always keep the option of switching in mind, even if it seems tempting to use a strong attack and let one the team members faint. Since Blaziken, Latios and Ferrothorn can cover each other weak points, it is important to thoroughly consider this option in most situations.
One more general tip I can give you is to not be afraid to use Latios' Z-Move. As I said before, it is not only super strong, but keeps Latios' Special Attack at the same level as well. When you're facing two remaining Pokémon and have the chance to certainly knock out one of them, go for it! This is only in case Psychic won't do the job or if you're not completely sure it will. I've never used Draco Meteor before using Devestating Drake. Draco Meteor can miss and that's a little scary to me... In a few battles, I got myself into a sticky situation because I was too hesitant to use Latios' Z-Move in order to conserve its use, so please learn from my mistakes.
I hope you'll find these tips useful if you decide to use this team. I'd say battle with it a few times and see if it fits your style :D
So that streak looks fishy to me, for a couple of reasons.
-No status protection
I'm not necessarily talking about just t wave, wisp, and toxic, but also 10% or 30% effects from attacks, such as thunderbolt, ice beam, and flamethrower. In particular, Latios and Ferro will be taking a bunch of Thunderbolts, and sooner or later one of them is going to get paralyzed and that's not fun to deal with.
-No setup moves
So you got a favorable matchup against the foe's lead. Great, now you have to get favorable matchups against their backups as well. Running setup moves means that if you get a good matchup against their lead, it doesn't matter if they have quick claw incineroar or moody glalie in the back - you can just mow through their team knowing you'll outspeed and ohko pretty much everything at +6. Your team doesn't even get put into an advantageous state if their lead is harmless. While setup isn't mandatory for a decently large streak, it heavily evens the odds.
-Heavy reliance on inaccurate and/or unreliable moves
No, I'm not talking about regular draco meteor here. I mean Ferrothorn's Power Whip and Leech Seed. Your Ferro set is so reliant on these moves hitting that it doesn't seem to be a good fit for your team at all.
-Unfamiliarity with tree sets
You don't use a set lookup or trainer cheat sheet of any kind, which is already a red flag, seeing as a lot of the tree's sets are horrendous for unprepared teams to face. Also legendaries are capable of being all four of their sets post-40, and some have sets straight out of left field like Zapdos3 (mixed rain dance + light screen).
You mention about how volcarona "isn't a big deal" for your team to face, but if you'd ever faced one you'd have realized that:
a) both post-40 sets run HP/Defense Bold and thus easily survive a flare blitz (252+ Atk Blaziken-Mega Flare Blitz vs. 252 HP / 252+ Def Volcarona: 124-147 (64.5 - 76.5%) -- guaranteed 2HKO after Leftovers recovery)
b) Neither post-40 set OHKOes Latios at +0 with bug buzz and obviously is outsped by Latios, so they're much more likely to go for a Quiver Dance if they come out against lati. 0 SpA Volcarona Bug Buzz vs. 0 HP / 0 SpD Latios: 122-146 (78.7 - 94.1%) -- guaranteed 2HKO
c) one of the volcarona sets runs hurricane, which can ohko non-mega blaze and thus it is likely to go for that against a blaze that either hasn't mega'd or has taken some chip damage (say, from flare blitz recoil) 0 SpA Volcarona Hurricane vs. 0 SpA Volcarona Hurricane vs. 0 HP / 4 SpD Blaziken: 142-168 (91.6 - 108.3%) -- 50% chance to OHKO
-No backup plan
Alright, what happens when Salamence4 crits ferrothorn with double edge? What about when Walrein4 dodges Superpower with lax incense? Or when Double Team Tornadus gets a free substitute? Or when Noivern4 confuses Latios with Hurricane on the switch and you self-hit?
Your team doesn't need that much hax to lose, and is especially vulnerable to double threats. Picture this: You get a grass-type lead, say Venusaur. Blaziken OHKOes with flare blitz. Volcarona comes next. Either you sac Latios to it (which, by the way, risks confusion) or you sac Blaziken. Now, you're screwed if the last mon is something like Chandelure, which has a clean OHKO on Latios and Ferrothorn and takes nothing from Blaziken (who is already weakened). You need a contingency plan to deal with stuff in case your team is already weakened. You don't appear to have one aside from PP stalling, and your team can't even PP stall effectively.
All of these points make me believe that you backed up your save file at the start of every session you played, so that you could reload it if you lost, and only chose to keep the loss once you got to 400.
Thank you for pointing out my team's weak points, but I wish you wouldn't accuse me of cheating out of nowhere. I already explained how I used this team in detail. Of course it's not perfect and there are hypothetical situations in which it is vulnerable to a specific team or bad luck, otherwise I would never have had any chance of losing. If you don't want to believe me, that is your choice. I know that I played fair and square, and I only came here to share my final streak and my team I'm proud of. It's disappointing to me that you would react like this...