• Check out the relaunch of our general collection, with classic designs and new ones by our very own Pissog!

Battle Tree Discussion and Records

After a seeming eternity of searching, I FINALLY have my double Z-Stone lead sample battle!!!! I will be performing some experiments with this sample, see what Z-move usage results from throwing various lead pairs at it. This post should be updated regularly with the team used, the replay video to share with those interested, and the outcomes of the various tests. I also will be leaving space for suggestions for other 'mons to try and elicit potential behaviors from these leads.

Battle #81, vs. Demiathena (Zapdos4/Raikou3/Uxie3/Azelf4) -- JUMG-WWWW-WWXX-WEB4
Although this opponent isn't MonoElectric, it packs plenty of Electric coverage, not to mention the pulverizing Supersonic Skystrike from an unusual source..and the star of this particular team just neuters it horribly. With that said, Uxie3 was still Uxie3 here...

This sample was obtained using...whatever the hell this thing is: Torkoal Sun Room

The testing will be performed with:

KIT KAT JAM (LILYWHITE SESSIONS VERSION):

356.gif

UnEspanto (Dusclops) (Lvl.53) (F) @ Eviolite
Ability: Pressure
EVs: 252 HP / 80 Def / 176 SpD
IVs: 31/31/31/0/31/0
Relaxed Nature (+Def, -Spe)
- Trick Room
- Brick Break
- Night Shade
- Foresight

tauros.gif

"White Stag" (Tauros) (Lvl.100) (M) @ Life Orb
Ability: Sheer Force
EVs: 6 HP / 252 Atk / 252 Spe
IVs: HT/HT/HT/xx/HT/HT
Adamant Nature (+Atk, -SAtk)
- Zen Headbutt
- Rock Tomb
- Iron Head
- Rock Climb

exeggutor-alola.gif

"Gogoat Ride" (Alolan-Exeggutor) (Lvl.100) (F) @ Assault Vest
Ability: Frisk
EVs: 252 HP / 252 Atk / 6 Def
IVs: 31/31/31/xx/31/0
Brave Nature (+Atk, -Spe)
- Brick Break
- Earthquake
- Wood Hammer
- Dragon Hammer

swellow.gif

Factory God (Swellow) (Lvl.50) (M) @ Toxic Orb
Ability: Guts
EVs: 252 Atk / 252 Spe
IVs: 31/31/30/31/31/31
Adamant Nature (+Atk, -SAtk)
- Growl
- Facade
- Aerial Ace
- U-turn

rhydon.gif

"Bozo's Horn" (Rhydon) (Lvl.100) (F) @ Quick Claw
Ability: Lightning Rod
EVs: 252 HP / 252 Atk
IVs: HT/HT/HT/31/HT/HT
Adamant Nature (+Atk, -SAtk)
- Megahorn
- Stone Edge
- Earthquake
- Horn Drill

passimian.gif

KitKatJam (Passimian) (Lvl.50) (F) @ Choice Scarf
Ability: Receiver
EVs: 252 Atk / 6 SDef / 252 Spe
IVs: 31/31/31/30/31/31
Adamant Nature (+Atk, -SAtk)
- U-turn
- Earthquake
- Rock Slide
- Close Combat
 
Last edited:
Happy New Year's Eve.
IMG_0382_1.jpg
Updating my ongoing streak to 2018 wins in Ultra Moon with Team Stalwart. It has not changed since the last time I used it.
373.png
245.png
472.png

Salamence (F) @ Salamencite
Ability: Intimidate
Level: 50
EVs: 4 HP / 252 Atk / 4 Def / 12 SpD / 236 Spe
Jolly Nature
- Return
- Substitute
- Roost
- Dragon Dance

Regardless of what EV spread you run on Salamence, it will always be able to set up on most of the Tree. However, the way you want to handle the sets that Salamence cannot set up on determines what is the best EV spread. If you want to run some sort of bulky set, make sure that Mence's teammates are capable of switching in on and safely winning against all of the following: Latios2/3/4, Salazzle3, Tyranitar2/3, Azelf3, Raichu3-Alola, Haxorus4, Liepard4, Charizard4-MegaX, Mimikyu3, Terrakion3. Of these, Salamence cannot afford to lose even a single point of speed against Tyranitar2/3, Salazzle3, Haxorus4, and, to a lesser extent, Latios4. Going the other way, speed tying Alakazam4, Salamence4 and Sceptile3 is not very useful, so the other "fast" Salamence spread would be 4 HP / 252 Atk / 4 SpD / 244 Spe. This spread wastes 4 EVs so as to keep an odd HP number for Substitute and give Porygons an attack boost from download. All this spread does is avoid the speed tie with Hydreigon3/4 non-mega, which may be useful if you want to stay in without being forced to go mega. However, this use-case is marginal, so it is a matter of opinion whether you want to go 236 speed or 244.


Suicune @ Leftovers
Ability: Pressure
Level: 50
EVs: 196 HP / 252 Def / 60 Spe
Bold Nature
IVs: 1 Atk / 13 SpA (Hyper Trained)
- Icy Wind
- Calm Mind
- Scald
- Rest

Icy wind is the unconventional choice here, as opposed to Substitute. I will say that Substitute would make certain sets easier to deal with (especially glalie3), but that comes of the cost of less utility for the rest of the team. Icy Wind is incredibly useful for slowing down the likes of Crobat4, Salamence4, Kingdra34, and Weavile4. Also helps chipping certain stuff without activating Mirror Coat.

95% accuracy means that this move can miss at the worst of times, and I've come to view it as a luxury. However, being able to bring Taunters down to a speed where Suicune can set up on them is something that no other move does, and I'll stick to my guns on this one.

Gliscor (F) @ Toxic Orb
Ability: Poison Heal
Level: 50
EVs: 236 HP / 4 Atk / 4 Def / 252 SpD / 12 Spe
Careful Nature
IVs: 15 SpA
- Earthquake
- Substitute
- Protect
- Toxic

When discussing SubToxic Gliscor spreads for tree, the debate is always bulk vs speed. (note that I did not specifically mention either defense here, since I believe that physdef Gliscor is better than spdef on certain teams, my team already has 2 physical walls) Indeed, having more speed helps Gliscor get up a sub against a different range of foes. However, there is a big flaw with running full speed EVs on Gliscor: it gives Gliscor a strictly worse matchup against every special attacker outside of the 117-160 speed range. That doesn't even mention the sets within that range that the extra speed doesn't help against. The only *important* matchup that I can think of where the extra speed would help a lot is against Glalie3, and that set is thankfully so rare that it is extremely unlikely to appear in a position where it threatens my team.

On the other hand, look at the important matchups noticeably worsened by running max speed: Alakazam4 (appears fairly often on speed trainers, and has a decent chance of KOing salamence on turn 1), Sylveon3, Jolteon4, Chandelure4 (especially if infiltrator), Porygon-Z4 (especially if adaptability), Kommo-o3, and Gliscor's sweeping capability is hurt by running less bulk, which matters in case Suicune goes down due to repeated crits and Mence is unable to set up.

Also Dexio would be absolutely garbage to fight with max speed Gliscor, since he runs special attackers almost exclusively and occasionally I have to pull off a Gliscor sweep against him.

The strategy for this team revolves around getting something fully set up against their lead, be that a Suicune at +6, Gliscor with a substitute, or Salamence with both. Of these, Salamence with +6 behind a sub is most preferable, followed by Salamence at +2 or higher with sub, then subbed Gliscor, Mence with any number of dances but without sub, and lastly a +6 Suicune. However, getting a setup Mence is rarely straightforward, and sometimes made difficult or impossible by the opposing lead. The below guide tells you how to make the most of problem leads. More dangerous leads are bolded.
Accelgor34: It won't use Final Gambit, but you need to be wary of Unburden. Attack it with non-mega Return first, then roost and set up your sub and DDs. Be wary of set 4's Encore, which is why you need to get rid of Unburden. If you get encored into Roost, go to Gliscor, then back to Mence to both reset Encore and activate Toxic Orb.

Aerodactyl34: Harmless if set 3 (just make sure not to switch Mence into a Thunder Fang paralysis), but if set 4, you must rest on turn 2. Guaranteed KO on Suicune if its first two Stone Edges are both crits, but then Gliscor gets a free Substitute.

Aggron34: Demands Substitute on turn 1, as Salamence has no way to safely get back in to enjoy the free setup set 3 gives. Set 4 is prone to Taunting, and the most likely setup you'll get is Gliscor with a Substitute. Make absolutely sure that Gliscor is NOT taunted on the turn it KOes Aggron, and be wary of switches to Levitators.

Alakazam34: Demands immediate Dragon Dance, but if set 4 you have a 5/16 chance to lose Salamence. If Mence dies to set 4, go to Gliscor and PP stall Gleam, then set up subs. Gliscor can usually sweep speed trainers on its own.

Articuno12, or Articuno1234: NEVER EVER EVER switch Suicune in until you've confirmed beyond a shadow of a doubt it's not set 2. If it leads, sub with Mence. If it did not use Ice Beam or Ice Shard, then you have the OK to switch Suicune in. If there is ANY possibility of it being set 2, LEAVE MENCE IN TO DIE TO IT. Then go to Gliscor and PP stall all its Sheer Colds (it usually uses Ice Beams first though), and set Suicune up to +6.

Aurorus24: If it reveals set 2, just click Return and hope it doesn't grab an AncientPower boost off of Mence. Then go to Gliscor and EQ whenever it gives you a free turn.

Azelf34: Click Mega Return (OHKOes set 4 and prevents set 3 from doing damage to your team). If sets 1 or 2 are possible, click mega Sub instead, to hopefully grab a setup opportunity off of set 2 (it's worth it to be down 25% health against set 3)

Banette4: Set 3 doesn't appear post-40, so respect its prankster Wisp and set up Suicune on this thing instead.

Barbaracle34: If it uses a set 3 move, don't switch Mence back in recklessly if it's Tough Claws (damage calculators are your friend here)

Bastiodon: Set 4 is actually capable of stopping a fully set up Mence in its tracks, so be wary.

Bewear34: Set 3 has Quick Claw and Swords Dance. Suicune can actually beat it in a slugfest with Scald, just be wary if it uses Swords Dance.

Braviary34: If no defiant, set up a sub immediately to act as a buffer. If defiant, turn 1 dance and pray.

Breloom34: If it hasn't revealed Poison Heal, don't tempt fate by Returning it. Instead, if set 4, let it die to its own Toxic Orb. If set 3, go to Gliscor and Toxic it, so that you can set up on it if it has Poison Heal.

Chandelure4: Do NOT switch Gliscor in unless Suicune is already statused. Do NOT set up a substitute on it. Do NOT leave Mence in on it. Do NOT try to set up against it. Spam Scald until it burns Suicune, then switch out to Gliscor. Do not treat that previous sentence as immutable, the strategy for this thing changes drastically depending on what exactly it does. Damage calcs are your best friend here.

Charizard34: Set up a Dragon Dance immediately. Don't get cute and try and set up a Sub or Roost some health back, just go for a +1 OHKO and hope it doesn't crit Mence with Dragon Rush.

Cobalion12 or Cobalion1234: Cobalion1 is one of those mons where you have to keep in mind when the AI will pick Rest (it's generally at 60% health or lower). When setting up, try and hit this thing down to Rest range while it's already asleep to get extra turns of setup.

Cresselia12 or 1234: Same thing as Cobalion1, really.

Crobat34: Set 3 has Razor Claw, and set 4 has Taunt. Don't mix up the strategies for dealing with each set here. Icy Wind set 4 twice so that Suicune can set up on it. Calm Mind on set 3, and don't attack it.

Dragonite34: Set 3 has a weird tendency to lock into Stone Edge against Mence. I mean, I'll gladly take it. Switch to Gliscor and hope it doesn't crit an Outrage.

Drampa34: Immediate switch to Suicune, it's up to you to judge how many Calm Minds you need to safely deal with set 3. Dangerous because it can actually KO Suicune if it gets lucky with Quick Claw and/or crits.

Electivire34: If set 3, PP stall Ice Punch then go to Salamence from Suicune (needs a max roll crit to OHKO mence) and set up Dances on it. If set 4, it's ohko'd by Gliscor after 2 rounds of LO recoil, but you can get a Sub by PP stalling Ice Punch.

Electrode4: If this taunts Gliscor, IMMEDIATELY go back to Mence. It'll either switch out, thus resetting the board, or set up Light Screen/rain dance and give you another shot to give Gliscor a sub.

Espeon34: It's not worth trying to set up against this, just straight up OHKO it.

Exeggutor3: Go to Gliscor to bait Leaf Storms until it's out, then set Mence up.

Exeggutor4-Alola: Cycle between Salamence and Suicune to rack up Intimidates until it's at -5, at which point Salamence's sub can survive a Dragon Hammer (necessary to avoid crits while setting up).

Ferrothorn34: Go to Gliscor to get up a sub before a potential boom, but if it turns out to be set 4 instead, cycle Intimidates until it's down to -2 (it will stop Cursing once it's at -6 speed) and set Mence up. Be very wary of it Seed Bombing when Mence switches out.

Froslass34: Be extremely wary of this thing's Cursed Body and Destiny Bond.

Garchomp34: Go to Gliscor here, don't leave Mence in to get Outraged. Also Gliscor sets up a sub on set 4, which is nice.

Gardevoir34: Be wary if this traces Intimidate. Salamence does live set 3's Dazzling Gleam, but you'll have to Sub against the possibility of set 4. If it's set 3 and Traces, go to Suicune, then back to Mence to reset drops and OHKO.

ALL Gigalith: Just go to Gliscor immediately, and, if set 4, Toxic it. If set 4, be very aggressive and EQ it with Subs up, it will often Curse.

Glalie34: Where do I even start with this thing. I guess you should Sub against it turn 1 because a) it likes to Protect turn 1 regardless of its set and b) Mence actually does pretty well against set 4 in a 1v1. If it's set 3 without moody, keep spamming Sub because there's no penalty for taking too long against it. If it's set 3 WITH moody, on the other hand, say your prayers. Note that I've never faced a moody Glalie3 AS a lead, but I did experience one battle where the lead Rotom-C volt switched into it on turn 1, and won because of accuracy drops. I guess if it's moody set3, click Return to try do do as much damage to it before it gets too many boosts to deal with (and kills mence i guess). Pay ESPECIALLY close attention to its Special Attack boosts, as it may decline to use Frost Breath on Gliscor if it's at +0 or lower. Dealing with Glalie4 in particular will be discussed below.

Glalie4: Sub turn 1. Actually just sub until it either protects or booms, or you get to too low health to sub again. At that point click Return.

Goodra34: Both sets have Thunder, so go to Suicune only as a pivot to ensure Gliscor gets in safely.

Gothitelle34: Substitute is your friend here, especially if it's Shadow Tag. Note that it is possible to determine its ability WITHOUT switching out to test for shadow tag, as either Frisk or Competitive will broadcast itself on turn 1.

Greninja34: Gliscor is EV'd to outspeed a -1 Greninja4 if things get hairy.

Gyarados34: Just dance - +1 OHKOes set 3 and +2 OHKOes set 4. +2 Mence also outspeeds +3 Gyarados, so keep that in mind if you're going for a Substitute. You may have to improvise here though.

Haxorus34: Mence outspeeds this non-mega. Substitute here, lets you absorb set 3's Z-move or scout set 4's Dragon Dance.

ALL Hippowdon: Remember the curse trick here (AI will not curse once they're at -6 speed). You may need to improvise against set 1 (Whirlwind).

Hydreigon34: Salamence speed ties this non-mega, so be sure to Mega Evolve if you want to stay in to absorb set 3's Z-move.

Incineroar34: Don't leave Mence in. It's far more preferable to get Suicune in to set up on set 4, even risking Crunch drops. Set 3, of course, is free +6 Mence.

Kangaskhan34: Run a lot of calcs here. I didn't record many of my fights against this thing, and I don't remember much about it either (most of my encounters with Kangaskhan were from Kiawe, who isn't available on (ultra) moon, and thus i haven't seen him in over a year). Just be very wary of crits, and I think I may have ended up taking it to -2 attack in the past.

Kingdra34: Sub to soak a potential Z move, then Icy Wind to slow it down and check for potential Sniper.

Klinklang34: Set 3 will rarely Gear Grind into you, so don't worry too hard about it.

Latias134: If it turns out to be set 4, then don't think about getting dances off on it. Just try to kill it without Mence getting paralyzed or KO'd in return.

Latios1: Go for a return 2HKO without Subbing. Yes, it has a 10% chance to win the 1v1 against mence, by either two minimum rolls or by dodging one of the Returns.

Latios134: If set 4, has a tendency to DD to +6, at which point a +5 Mence outspeeds it.

Liepard34: Go for non-mega return. Mence escapes paralysis if it's not Prankster set3, and you've set yourself up to 2HKO it while avoiding Unburden if it's set 4.

Magnezone34: Go to Gliscor, and if it uses a set 4 move, EQ immediately. If it uses a set3 move, then sub immediately and PP stall Flash Cannon, while keeping in mind to keep Gliscor alive against backups.

Mandibuzz34: Be wary of Weak Armor set 3.

Mawile34: There are two ways you can treat this lead: you can play it safely (by saccing mence to give Gliscor free entry) or risky (by switching Gliscor in turn 1 and hoping it doesn't get crit). If it's Hyper Cutter, play it safe regardless of what you'd normally do. Either way, once Gliscor's in, PP stall play rough, and, if set 3, EQ it while you're behind a sub (either from sucker punching or swords dancing). If set 4, PP stall stone edge, and then set up either mence or suicune to +6. I have not yet gotten Gliscor crit by this thing, so I don't know what I would do if it happened. Probably i'd try to scald it with Suicune, hoping to beat it in a slugfest.

Metagross34: Cycle switches between Salamence and Suicune until it's at -2 Attack (you will have to sac mence to this if the first meteor mash gets a boost), and then spam Rest while praying Suicune doesn't get haxxed out. Once Zen Headbutt is depleted, Suicune can then set up safely to +6. If it's set 3, press scald immediately in hopes of neutering its explosion.

Milotic34: If set 3, switch Mence back in after Blizzard PP is depleted, to set up Mence on Mirror Coats.

Mimikyu34: Click Return immediately. Set 3 cannot OHKO Salamence even with a Z-move, and is thus prone to Swords Dancing. This is a much bigger threat if it appears in back.

Musharna34: Substitute. If set 3 breaks sub, keep subbing until you're in Psychic range, then Roost. Repeat until it's out of Psychic.

Ninetales4-Alola: Return. If it used Ice Shard, Return again. If it used Freeze-Dry but Mence survived the turn, switch to Suicune and Scald it.

Noivern34: Mega Dragon Dance. Don't get fancy here, Salamence survives a non-crit Dragon Pulse.

Raichu3-Alola: Return 2HKO. It's too unsafe to do anything else.

Regirock2: This gets a special mention for being able to stop a +6 Salamence sweep thanks to its bulk + Custap berry. Thankfully, +5 Return does not put it in Custap range, so if the opponent is capable of using this (check their roster), go to only +5 instead.

Ribombee34: Don't fool around with this thing, just OHKO it immediately.

Rotom-Cut3: Sub turn 1. It has a 50-50 chance to either Volt Switch or Wisp, and you really don't want Gliscor getting wisped.

Rotom-Frost34: Go to Suicune, and make completely sure Suicune is statused before going out to Gliscor to stall Blizzards so Mence can set up.

Rotom-Heat34: Set 4 also has both Wisp and Volt Switch, but set 3 incentivizes Subbing with free setup.

Rotom-Spin34: Don't go to Gliscor, instead just sub with Mence. You may take a Thunder paralysis, but it's a better option than getting tricked a Scarf.

Rotom-Wash34: Sub turn 1, since Mence can set up on both of them.

Salamence34: Go to Suicune immediately, and Icy Wind to slow set 4 down. Then go to Mence on a Double-Edge and finish it with non-mega Return. If set 3, just stall out its Meteors, then switch in Mence to set up on it.

Salazzle34: You should be 2HKOing Sash Nasty Plotters.

Sceptile4: This favors Rock Slide against Salamence, since the AI doesn't understand the multi-hitting property of multi hit moves. Get it to -2, its Rock Slides won't break a sub there.

Shiinotic34: After PP stalling Moonblast with Gliscor, you will want to PP stall its Grass move with Salamence while setting up, and do not touch it at all. Wait for it to switch out and go ham on its backups.

Slowbro34: Set 3 is free setup for Mence after Psychics are gone. However, set 4 poses a threat if it gets crits on Suicune. IIRC you want to get to +2 (+1 if the blizzard freezes Suicune on the switch) and then start Resting.

Snorlax34: Don't switch Mence out. Set 4's Body Slams fail to break sub anyway, while set 3 is prone to Protecting, giving you a free sub.

Spiritomb34: If it's Pressure, great. If Infiltrator, set up Suicune on it instead.

Staraptor34: Keep track of the order of Intimidates so you can check its set. Against Reckless, sub. If it used Z-Feather Dance, use DD from behind sub, while if it brave birded your sub, Mence has a guaranteed KO. If intimidate, you can safely get set 4 to -2 attack while being alerted of set 3 before turn 1.

Starmie34: Go to Suicune. If set 3, great! If set 4, switch stall Ice Beam, and then go to Salamence from Gliscor where you can either try for a 75% OHKO or risk a Dragon Dance if mence got Surfed on the switch.

Sylveon34/134/234: Remember that set 3 has Razor Claw and will crit Suicune at the worst times. I have seen Sylveon3 go on critical hit rampages, and it is not fun to be on the receiving end of one.

Tentacruel34: Salamence's subs can withstand set 4's Venoshocks. If set 3, go to Suicune and aim to deplete its Sludge Bombs and Blizzards. Salamence can then set up as it spams Mirror Coat helplessly.

Terrakion34 or Terrakion1234: Sub, sub, sub. You do not want to be on the wrong end of a boosted Terrakion3, so the strategy around this involves making sure that you can safely kill it if it does decide to boost. However, a Terrakion2 crit Stone Edge will KO mence outright, go to Gliscor and PP stall then toxic on the switch turn if this happens. Anyway, what you want to do if it could be set 3 is to sub until you're in Rock Slide low roll range, then Roost up. After you've either depleted its Rock Slides or it Swords Dances, then you can set up. +1 Mence will OHKO Terrakion3, which is your best recourse if it boosts then destroys the sub while you counter-boost. Note that I prefer a +1 subbed mence to a +2 unsubbed mence, so just straight up attack it if it boosts twice.

Thundurus34 or Thundurus1234: Don't waste Taunt turns by EQing set 4. It will backfire when the AI switches in a Latios against Gliscor. Go to Suicune or Salamence on focus blasts instead.

Togekiss34: Go to Suicune immediately, if it's set 4 remove its Dazzling Gleams with Gliscor then set mence up on it. If set 3, make sure Suicune is statused on the turn you switch back to Mence, then set up on it.

Tornadus34 or Tornadus1234: If it Prankster Taunts mence on turn 1 (you should be subbing against this), go for a Return OHKO.

Turtonator34: Sub immediately. If it used Shell Smash, use Dragon Dance and then OHKO at +1. If it hit a head smash, go to Gliscor and stall until it booms.

Tyranitar34 or Tyranitar1234: Requires different strategies for all 4 sets, but you must start with Mega Sub unless it's being used by an Aether (set4 only)
If set 1: Free setup for mence.
If set 2 or 3 (indistinguishable until set 2 uses Ice Beam): Dragon Dance to +2, then 2HKO with Return. Note that set 2 is liable to attack Mence with Ice Beam for some reason, but can be 2HKOed at +1. Don't chance a freeze here.
If set 4: Go to Suicune and improvise.
Do not take this lightly. The Mega sub on turn 1 is crucial, and against sets 2 or 3, there is no room to deviate from the plan, or else you will lose mence at best.

Tyrantrum34: If set 4, spam Sub until either it misses a Head Smash or Salamence dies. If the former, Roost up and set up, if the latter, have Gliscor immediately sub.

Umbreon34: Use either the same Curse trick from Ferrothorn or Hippowdon or the Rest trick from Cobalion/Cresselia.

Uxie: Set 3 will prefer Psyshock to Thunder against Mence, which is thankful as it not only hits for less damage but lacks the risk of Paralysis.

Vanilluxe34: Don't switch to Suicune until you've determined its set. Don't attack it either, as Weak Armor may trigger.

Vikavolt34: Do NOT switch to Gliscor turn 1. Sub once instead, and only then go to Gliscor.

Volcarona4: It's up to you to judge whether going for +2 or +3 is better here, but don't go any farther.

Weavile34: If this taunts Suicune, Icy Wind it to -2 so you can set up on it anyway.

Whimsicott34: Spam return until it's dead. Actually you're not OHKOing prankster set 3 if it uses Cotton Guard, so set Suicune up on that instead. Set 4 is horrible for being able to potentially set Tailwind for its backups (potentially deadly if Dexio) while having Infiltrator to prevent setup, and also it can OHKO Salamence with Z-Moonblast.

I really did not expect my team to get this far, and it's great that I'll be able to enjoy the (temp) number one spot on leaderboard with this cheeky update. I really wanna know how far GG Unit is at the moment, so that I'll know exactly how little hope I have of passing him permanently. Cheers.
 
Last edited:
Reporting a streak of 1,000 wins in Ultra Moon Doubles.

The team remains the same, and has acquired the nickname "4K". Click here for the QR rental team

Kartana @ Focus Sash
4 HP / 252 Atk / 252 Spe
Jolly
Beast Boost
- Leaf Blade
- Sacred Sword
- Tailwind
- Protect

Kapu-Riki (Tapu Koko) @ Choice Specs
44 HP / 244 SpA / 220 Spe
Timid
Electric Surge
- Volt Switch
- Thunderbolt
- Dazzling Gleam
- Electroweb

Kangaskhan @ Kangaskhanite
100 HP / 252 Atk / 156 Spe
Adamant
Scrappy
- Fake Out
- Double-Edge
- Drain Punch
- Sucker Punch

Kommo-o @ Kommonium Z
4 HP / 252 SpA / 252 Spe
Modest
Bulletproof
- Clanging Scales
- Close Combat
- Clamthrower
- Protect

The EVs for Kang don't quite match the reality of the run, where I managed to botch the spread and waste a few stat points, again. Koko also ran a worse spread, 36 / 252 / 220, but you should use this one to cover for both Aerodactyl4 and Heatran4 (cutting Speed further would run into Weavile problems; cutting SAtk is nebulous, as the chip damage from Koko is a keystone of this team, but it could be correct). That I managed to play 1,000 battles without noticing / caring for this is entirely within character. (NB. the QR team currently has the bad EVs in place; I'll fix that at some point, possibly, maybe.)

-----------

I'll abbreviate the team description this time, but there'll be more advice on specific (isolated) foes.

Basic strategy: Use Koko to obtain Tailwind (rarely Electroweb) and whatever other advantage is safe to shoot for; use Kartana to absorb enemy attacks; use Kangaskhan to support Kommo-o with Fake Out (delay its entry for as long as possible, but don't hesitate to bring it when necessary, either). Koko then comes back in the endgame, where it wins alongside Kommo-o. All four team members can output generic high damage favoured by the type chart to inflict neutral damage on a wide range of targets (Grass is an exception, but Grass/Fighting complements Normal and Electric well).

Set comments: Kangaskhan isn't leading (which was the original idea with Incineroar/Kartana leads on the previous team) because I found this setup to be less vulnerable to opposing Fake Out, Intimidate, and general concerns of outspeeding (since there is no redirection on the team), and invests some bulk here as Kommo-o rarely wants to switch in directly, whereas Kang's speed is usually not decisive -- if I have speed control, 140 is fast enough already, and if not, Kang is probably trying to re-establish control with its priority moves anyway. Acting before Kommo-o helps by occasionally redirecting Soulblaze to single-target via KOing the other foe first, though, and has a few other perks, such as Drain Punching when Soulblaze would double KO regardless; therefore, I would not drop Kang below 138 Speed (it's nice to outspeed that crew anyway), but if you don't care about Absol3 (Focus Sash, Play Rough), you can drop it to just that. -- Likewise, with Kang being the main damage sponge (before Kommo-o has Soulblazed, at least) and two other high-powered Fighting moves on the team, I opted for Drain Punch over Low Kick. E-Web Koko is "my" baby. "The rest is standard", with the novelty lying mainly in the combination of a Koko team with a Kommo-o team.

The value of the team members depends on the enemy trainer (this applies to Koko more than anything else). Sand trainers, for instance, commonly demand T1 Gleam -- injuring Kangaskhan or Kommo-o needlessly by switching into Earthquake isn't a good trade for an alive Koko that still loses the endgame. Wally leading Garchomp3 leads to similar considerations -- EQ is most likely a KO, but who cares, since it means Tailwind as long as nothing else can interfere (though you need to mind Fire Fang, so T1 TW might also be a bad choice depending on Garchomp's ally -- it's the play vs. Altaria, dubious vs. Gallade, and not recommended vs. Magnezone).

Speed trainers (all three classes) almost automatically lose once you've set Tailwind (the remaining obstacles being e.g. backline Weavile or Talonflame4), but they will make that more difficult than any other trainer -- be careful against them and preserve speed control over dishing out (costly) KOs, which will just bring the next outspeeding threat, unless you need to remove something like Crobat. Some examples of trainers against whom Tailwind should (usually) be foregone: Xio, Xenophon, (obviously) Breeders/Scientists/Hikers, Colress if he has already lost Mega Metagross, Samantha if Raikou/Latios are both impossible or not a concern, sometimes Tamah if backline Garchomp3 doesn't matter as much as the thread at hand (or she leads Chomp) -- on that note, thanks to paperquagsire for pointing out how comically badly Tamah loses to Kartana with almost her entire roster; I had not noticed myself...


-------------

The Gallery of Rogues

Despite the looks of it, I'm not listing everything. Anything with Fake Out is a threat T1 generically, for instance, but often handled just as generically by Protect + Volt Switch. Anything with Soundproof is Soundproof, but Abomasnow, Bouffalant or Exploud don't warrant much of a mention otherwise, etc. -- Specific lead pairs will not be mentioned for the most part, since I have to keep some secrets I'm too lazy for that.

The worst of them are highlighted in bold print.


Aerodactyl: Koko is EVd to survive Aerodactyl4 non-critical spread Earthquake; if the partner permits, you might want to click Volt Switch and have Kangaskhan on the field unharmed by Turn 2 either way. Aerodactyl3 usually does not get a turn, and would be much worse if it invested Speed; as it stands, you only have to respect Sky Drop if you click anything but Tailwind or Protect with Kartana first, which should be rare.

Alakazam: Can always be Sucker Punched for the OHKO, but critical or Specs Psychic OHKOs Koko (don't switch Kommo-o into this slot). The other T1 move is Focus Blast into Kartana, which commonly forces T1 Protect + Volt Switch. Zam3 survives all Kommo-o moves, which can make it dangerous in the midgame as well (worse if it Traces Parental Bond). Careful. Incidentally, don't ever run Soundproof Kommo-o.

Alolan Exeggutor: Notable as a Dragon that barely survives Soulblaze and threatens Dragon Hammer back. Doesn't do much otherwise, though.

Alolan Marowak: The set is lol (until it paralyzes something or Rain Dance makes you miss the +1 Flamethrower KO), but Lightning Rod is not, and I'm quite sure this bears the distinction of the pokémon that takes the least damage from anything the leads could do. If Tailwind gets set, it gets KOd "en passant" by DE, Sucker Punch or Soulblaze, though.

Alolan Ninetales: Can often only be set2, whose most dangerous action is winning the speed tie and freezing Kartana with Freeze-Dry; Snow Warning usually sets Z-Aurora Veil T1 (somewhat of a problem; you may want to gamble on the double-target and speed tie), but it could also Z-Freeze Dry Kartana, or even use Dazzling Gleam, which occurs more commonly than its feeble damage would suggest.

Alolan Raichu: Sashed, has a personal perma-Tailwind courtesy of Tapu Koko, and threatens Kommo-o before Soulblaze with a potential +2 Psyshock; rather dangerous. Sucker Punch OHKOs safely as long as it doesn't choose Nasty Plot.

Altaria: Set4 is mostly neutered thanks to Electric Terrain (although it survives +1 Scales); set3 is dangerous once it starts outspeeding and nearly always picks DD T1; the indicated play is always Tailwind and usually Dazzling Gleam. If Wally leads Altaria/Garchomp, assume set3 for both and play exactly this; base Altaria's typing will cause Garchomp to prefer locking into Earthquake. If all else fails, shove Kommo-o in its way to induce Giga Impact and exploit the recharge turn.

Ambipom: Dangerous ambiguity of Fake Out vs. Taunt/King's Rock Fling on different sets; usually demands Protect + Volt Switch.

Archeops: Earthquake / Protect ambiguity is concerning whenever the ally also outspeeds and redlines Kartana, but Kommo-o comes in relatively safely.

Aromatisse: Set4 must be addressed with T1 Volt Switch / Thunderbolt + Leaf Blade, or sets Trick Room.

Articuno: Potentially dangerous (T1 Sheer Cold or Blizzard); forces Thunderbolt. Set2 alone survives Thunderbolt on connection, but set4 can Protect and has Tailwind / Blizzard for counterplay, and set3 Reflects T1.

Audino: Demands double-targeting to prevent Audino4's Trick Room (use Leaf Blade for better damage to Audino3). If you see double setters, this commonly attacks Kartana with Z-Fire Blast or Flamethrower (in fact, Audino4 sometimes chooses this over Trick Room even if not adjacent to another setter). If it does set TR, Audino4 pretty much does nothing and should be kept on the field for as long as possible. Audino3 has to be removed with some urgency.

Avalugg: Sturdy Blizzard from set3 is the worst action here. Not a pressing concern, but beneficial to target with Thunderbolt (avoid VS and particularly a switch to Kommo-o).

Bastiodon: Be careful about set4 Wide Guard. Soundproof itself is less important, since that means no Sturdy and it doesn't punish (set3 nominally carries Fissure, but is distracted by its setup moves); mind that Kangaskhan will miss the OHKO with Drain Punch and might harvest a Metal Burst afterwards.

Beedrill: Demands a manual switch from Koko to avoid Poison Jab OHKO, but set4 tends to Protect. Mind that both carry Brick Break, but base Beedrill is scrawny, wherefore the computer doesn't seem to value targeting Kartana with it.

Bewear: Make note of Unnerve because of Quick Claw Ice Punch; usually distracted by Hammer Arm, though. Set4 might well KO the Koko slot T1 (don't Volt Switch), but cannot stop Tailwind or the subsequent Soulblaze if chipped; use Dazzling Gleam if the enemy has a T1 KO on Kartana.

Bisharp: Kangaskhan OHKOs both sets with Drain Punch. Doesn't do much unless attacked (respect set4 Sash Metal Burst).

Blastoise: Fake Out vs. Blizzard/Hypump set ambiguity on T1, but rather toothless afterwards. Protect Kartana and judge whether the partner is any more threatening than a Blizzard; otherwise, good to Volt Switch.

Blaziken: Demands either Tailwind or Thunderbolt T1, but also gets safely OHKOd by the latter (Flare Blitz recoil finishes set4).

Braviary: Demands Protect + Thunderbolt, as otherwise set3 interferes with Kartana (198 speed) and set4 sets Tailwind (VS is not enough thanks to Wacan Berry).

Bronzong: Demands Thunderbolt + Sacred Sword (VS is not enough) to prevent Trick Room. If you see double setters including this, Bronzong is the only setter species where Stein/Cadel carry both sets. Quick Claw Rock Slide is not much of a threat. If TR does get set, Bronzong is 2HKOd by Sucker Punch, but will usually Safeguard before attacking. Kommo-o walls both sets in isolation, and induces set3 to explode.

Camerupt: Forks the frontline, but only appears on trainers where Tailwind is not in demand, so Kartana is free to attack T1 for decisive chip damage (and Sheer Force means no burn procs).

Carbink: Must respect Sturdy; the minimal force required to stop Trick Room is Leaf Blade + Dazzling Gleam. Has the distinction of what I think is the only STAB Dazzling Gleam in the Tree that can miss the KO on +0 Kommo-o.

Carracosta: Must respect Sturdy Weakness Policy Earthquake, but rather benign otherwise.

Chandelure: Kommo-o has a favourable matchup outside of getting burnt (Kommo-o burns only matter vs. Ezra if she could still send Heatran, though; you also lose the +1 CC OHKO on Porygon-Z, but it takes good damage from +1 Scales; similarly, you'll hardly need CC vs. Sun trainers) and can be switched to safely, which is nice because Heat Wave deals meaningful damage to both leads.

Charizard: Demands Tailwind + Volt Switch (into it).

Cobalion: Somewhat dangerous. Set2 survives +1 CC and OHKOs back with Metal Burst. Set3 has Swagger and Psych Up while holding Lax Incense. Does nothing much otherwise; just remember that Set4 runs Quick Guard.

Cofagrigus: Demands Leaf Blade + Volt Switch/Thunderbolt to prevent Trick Room, and you'll lose Beast Boost in the process. Threatens a burn or Destiny Bond on Kommo-o, but its Shadow Ball is blocked by Bulletproof which can buy you 1-2 turns.

Comfey: Set3 is nothing except that it sets Grassy Terrain. Set4 Triage Draining Kiss is dangerous to Kommo-o even after Soulblaze.

Cresselia: Always demands Leaf Blade + Thunderbolt to prevent Trick Room if set4 is possible, and even then, it can survive a double low roll. The problem is that double-targeting Cresselia123 is a huge tempo sink -- not entirely worthless, but hardly advancing the Tailwind plan.

Crobat: Almost every Tapu Koko lead hates Crobat (lol Mienshao Ally Switch). Set3 threatens Cross Poison or Brave Bird to chip Kartana, whereas set4 threatens Taunt (or Cross Poison at much lower risk of a critical OHKO); I usually aim to Volt Switch into Crobat + Tailwind T1, giving me either TW and an opportunity to bring Kang/Kommo, or removing the bat with Koko alive -- usually, it even gives me both. If Weavile or Jolteon lead alongside, though, you have to double switch immediately (and pray Weavile doesn't Ice Punch Kartana), then FO the non-Bat + Soulblaze.

Darmanitan: Set4 outspeeds both leads and may target Tapu Koko; be careful. Consider a T1 switch to Kommo-o if the ally cannot interfere with Tailwind setting.

Dragonite: Break Multiscale first. The CB set locks into Earthquake; set4 goes Fire Punch Kartana -> Extreme Speed, inviting a Kommo-o switch.

Drampa: Set3 has this hateful Quick Claw Dragon Pulse; Soulblaze is only safe if Kangaskhan FOs it on the same turn. Might be worthwhile to damage it with the leads, as this induces set3 to Roost. Don't get Kartana Glared before it sets Tailwind, for that matter, or Kommo-o Z-Meteored through Protect. Sacred Sword barely misses the OHKO; if you can afford Gleam + Sword, do just that, but it's not the norm. Prominent backline threat when facing Ezra.

Dugtrio: I hate this pokémon, but it gets 2HKOd by Dazzling Gleam if it doesn't dodge. You have to respect T1 Fissure (which outspeeds Kartana), but there are still worse pokémon that speed trainers can lead with.

Dusknoir: Demands Leaf Blade + Thunderbolt, but set4 is nearly harmless otherwise. If this comes in third or fourth, consider double-targeting its ally instead.

Electivire: Survives Soulblaze at 68% min; chip beforehand or suffer Ice Punch. Must respect set4 Feint, and is powered up by E-Terrain but that rarely matters, since it gets super-effective hits on every team member. Somewhat dangerous, but low speed makes it manageable.

Electrode: Set4 would be especially hateful if it used Taunt or Thunder on Kartana T1, but rarely ever deviates from the Light Screen -> Rain Dance -> Taunt sequence against the leads, especially the Screen. Nonetheless, respect Taunt if its ally could cascade you into catastrophic failure. Note that this identifies itself T0 by the presence or absence of Air Balloon. Set3 almost always Protects. Hateful set of abilities, too (Soundproof/Static with Aftermath a lesser concern), and has an insulting roll to survive Kartana Leaf Blade.

Entei: Set3 is still not good to see since critical Eruption OHKOs Koko on the spread. If it signals Pressure or it threatens the double-target KO to Kartana, the best plan is usually Protect + Volt Switch to Kangaskhan, but note that Kommo-o takes a pittance from Eruption (28% max) and might be the better switch (whether Koko dies or not). All other Entei are pretty much irrelevant.

Escavalier: Mind the Custap Berry; avoid Thunderbolt.

Exeggutor: Mind (Z-)Leaf Storm to Koko slot (Kommo-o would get OHKOd by Psychic, which I'm not sure can be chosen but I haven't dared to make this switch yet) and that it usually dodges the KO from +1 Flamethrower (only a ~30% roll). May well go for Z-Grassy instead, which does nothing. Fortunately, Exeggutor is slow even if drawing Chlorophyll in harsh sunlight (150).

Rotom-Fan: Scarf Air Slash is a threat to Kartana, but this is the one Rotom set that Tapu Koko can outright OHKO with Thunderbolt. Choose that and Protect Kartana; set3 will whiff Thunder Wave into Kartana instead.

Ferrothorn: Bulletproof Kommo-o has the best possible matchup against set4. Set3's only threat is Explosion. Save this for last.

Flareon: Yeah. Both sets survive Thunderbolt and carry Inferno Overdrive, which OHKOs Koko and brings Kartana to 1 HP whether it Protects or not; the silver lining is that Kommo-o matches up well against Flareon, Tailwind or not (although Giga Impact from set4 still deals 62% max before Soulblaze). Focus on eliminating any threats next to it (Jolteon/Espeon/Glaceon vs. Eevee trainers; Charizard/Blaziken/etc. vs. Sun).

Florges: Dies to Leaf Blade + chip, sometimes even without the chip, and Xio does not demand Tailwind. Rather benign, but Kommo-o loses to it.

Froslass: Technically 2HKOd by Dazzling Gleam or Electroweb, but Kartana must Protect the T1 Blizzard and neither backliner wants to switch into that. Worse yet, this loves to proc Cursed Body on Specs Koko; I tend to Volt Switch + Protect for that reason. Be thankful it's not a common foe.

Gallade: Must respect that Mega Gallade CCs Kartana before it acts; the backline has a very bad matchup if this isn't slowed down or injured (Gleam puts this into range for Fake Out), but it will not come to that unless Koko somehow dies before acting. Wally can only achieve that with Garchomp3 locking Earthquake, but in that case, allied Gallade4 would be fucked on T2 anyway.

Garchomp: Set4 is pretty benign since it's naturally slower than Kommo-o and always dies to Soulblaze (if Mega Evolved, it can survive +1 Scales). Set3 is the danger. Koko will usually not survive Earthquake; Kartana shrugs it off, but gets chipped from its Sash -- and adding to the trouble, Garchomp3 could instead lock Fire Fang, threatening to flinch it (although a Fang-locked Chomp3 will never threaten Kommo-o until it switches out). Dangerous, too, if it appears third or fourth and could lock Outrage against your active Kommo-o without Tailwind.

Gardevoir: Dangerous to the Koko slot; there's no switch into Hyper Beam and neither lead can KO set4 immediately. Double-Edge always OHKOs, though. Kommo-o obviously always loses the 1-1.

Gengar: Set4 is a combination threat whenever you need Koko to deal with the other ally, and might just as well Shadow Ball Kartana, but at least it cannot harm Kommo-o much at all, outside of Thunderbolt paralysis or Destiny Bond nonsense (perhaps avoid revealing Bulletproof on the switch). Set3 has Dazzling Gleam (37.5% to OHKO +0 Kommo-o on a spread). Keep in mind that Sucker Punch will not always OHKO Mega Evolved set4.

Glaceon: When Hell freezes over, that was probably Glaceon's doing. There's no subtlety here -- it's a threat because it has Blizzard (powerful enough to inflict 100% min to +0 Kommo-o on a spread) and comes with either Bright Powder or Focus Sash. Chip this before the Soulblaze, and avoid switching in the backline.

Goodra: Survives Soulblaze, but is OHKOd by Double-Edge. Nothing much more to say.

Greninja: Demands Volt Switch into it, or Kartana probably gets flinched by set3. Denying set4 Blizzard is important as well.

Gyarados: Demands Volt Switch into it (always OHKOs), or Tailwind T1; will grow dangerous if left alone. DD T1 is almost assured, no matter which set.

Heatran: Commonly set1234. The only set that's strictly dangerous rather than a moderate threat is Heatran4, which has a 12.5% chance to outspeed and OHKO Koko with Earth Power, though this also means it's not attacking Kartana, which it prefers to do. Set123 are notorious for Flame Body and requiring a 2HKO from every Fighting move on the team, but if you can risk the burn with Kangaskhan, they also make for great Drain Punch sinks and nothing immediately dies to them, either. The best line of play against lead Heatran is usually decided by its ally; that said, Heatran/Porygon-Z or Heatran/Latios are high-danger lead pairs courtesy of Ezra; the former can easily go 2-4 for Tailwind + Thunderbolt Heatran on the first turn, and the second is very difficult to manage, but since Protecting against Latios4 is very dangerous, I'd risk the Latios3/Heatran4 combination and input Tailwind + Volt Switch Latios (Kangaskhan) (VS into Heatran risks DD Latios4 / Protect Heatran2); if Kang dies on the switch, you will have Tailwind and can bring Kommo-o to Soulblaze while Koko or Kartana finishes Heatran, and hopefully the backline isn't Drampa3 / Zone3 having the luckiest days of their lives. Otherwise, FO whatever you need to (usually Latios) and Soulblaze if Kartana is dead, KO Heatran and use Kang to KO Latios next turn if not. Bottom line, Heatran usually won't break your neck by itself, but be careful as it tends to enable a multitude of threats, the Scarfer is never benign, and Flame Body can be hateful.

Hippowdon: Survives Leaf Blade. I don't think this shows up anywhere outside of sand teams, against which Koko should usually Gleam anyway, which pushes all Hippowdon into Blade range.

Incineroar: Set4 with QC Flare Blitz is bad, but it needs further assistance from its ally to threaten Kartana and its Kommo-o matchup is disastrous. Must also respect that set3 breaks through Kartana's Protect. Not benign, but no worse to face than Darmanitan.

Infernape: One of the more dangerous users of Fake Out, not least because set4 is Sashed (but at least cannot outspeed and Encore Kartana after a Protect) and Koko doesn't enjoy LO Overheat. Concerning if it appears third, too, since it's usually on Sun teams, where Kommo-o is the only pokémon with an excellent matchup.

Jellicent: Always Volt Switch (Cursed Body) for a guaranteed OHKO on set3 (TR).

Jolteon: You'll face it in Electric Terrain, no less. For one, Fake Out + Sucker Punch OHKOs, but Jolteon is most notable for commonly using Thunder into Kartana T1, which might well screw you over (6.25%) if you suffer full paralysis, and it's immune to Electroweb 2/3 of the time. Hyper Beam into Koko is another possible choice. Like Heatran, most dangerous if its ally is, and given that Jolteon is everywhere (and particularly on speed trainers), you will usually want to Protect Kartana T1 and try to set Tailwind with Kangaskhan's FO supporting it. Kommo-o might get the opportunity to Soulblaze against Jolteon, but the most dangerous partners for Jolteon (Weavile, Crobat) happen to threaten Kommo-o as well, though Crobat4 less so.

Kommo-o: Yeah, opposing Kommo-o is one of the most serious threats to this team -- because it can be Soundproof. Dazzling Gleam OHKOs (the Sash set survives, but that one is terrible anyway), but when that resource has been spent one way or another, Kommo-o34 can survive Double-Edge + Sacred Sword (~92% min from the combination), and Dragon/Fighting coverage is obviously bad news in return. Preserve Koko whenever the enemy trainer can use Kommo-o, or you're setting yourself up for a hard time.

Landorus: Set134 can be managed, but set2 (Scarf) could Focus Blast Kartana or Earth Power Koko, both for lethal (save Sash) and with no way to call it safely. The upside is that Focus Blast means nothing to Kommo-o, so you probably still have a chance to Soulblaze, but again, this enables adjacent threats even worse than Heatran or Aerodactyl.

Lanturn

Latias: Survives Soulblaze if set4; set3 will paralyze Kartana with Thunder Wave (but is in fact slower, thankfully -- which I just re-discovered while looking at my videos!); set2 threatens outspeeding Draco Meteor into Kartana. Can be a good choice to Electroweb if set34, but less so if set12 (probably better to Gleam).

Latios: Protecting against Latios4 (nearly always DDs T1, not EQs) is a good way to set yourself up for a loss (although FO + Sucker Punch deals 99.6% min, so there is a recourse in isolation). The same can be said for not Protecting against Latios23, which outspeed Kartana and threaten Psychic into the Koko slot simultaneously; the Specs set3 will deal brutal damage here (either Draco Meteor or crit Psychic OHKOs non-Mega Kang on the switch). Latios1 can survive +1 Scales (or dodge it) -- Don't Sleep.

Lickilicky: Don't sleep on the threats of (Z-)Explosion or QC Body Slam; can survive any Fighting move on the team (~95% min from +1 CC); uses Dragon Tail on your setup Kommo-o if ignored. Not a main threat, but you could wish for better.

Liepard: Must acknowledge (hardly respect, what a hateful move) Prankster Thunder Wave, but fortunately it seems reluctant to use that move on Kartana, possibly due to Foul Play -- I don't think I've seen it on this run.

Lopunny: Not nice to see, Sweet Kiss is dangerous. Fortunately, neither can hit Koko with much else (lacking Normal STAB outside of Fake Out) and they enjoy HJKing into Kartana Protect, but this is another situational threat enabler and worse to see than Mega Kangaskhan.

Magnezone: As ever. Set3 can OHKO Koko with Analytic E-Terrain Thunder (!), but prefers to Thunder or T-Wave Kartana (don't discount the possibility, though, it will happen on occasion); Kommo-o matches up well (outside of T-Wave paralysis), OHKOing both with +1 CC (save for Sturdy/BP) and you have a few chances to deliver the winning Fighting move after a chip (can VS into this, too, to identify by damage -- Kommo-o can switch into set4, ally permitting, since that won't T-Bolt Koko). Kartana can check for Magnet Pull to assess the threat level, too.

Mandibuzz: Counter-Tailwind could be dangerous to face; see Whimsicott. Volt Switch does not OHKO that set, but Bolt will.

Manectric: Can have Lightning Rod (note that the Intimidate-themed Punk Guys only run set3) and outspeeds Kartana no matter the set, with Electroweb (possibly) not an option. Both sets seem to use Overheat and nothing else (except QA if in range).

Mawile: You know the drill. This OHKOs Koko T1 if it wants to (and threatens slow Fire Fang to Kartana), but the main danger lies in the obstacle to Soulblaze/Scales it poses combined with the chance to survive +1 Flamethrower. Thunderbolt is a 56.3% roll.

Medicham: Dangerous for similar reasons as Lopunny, and gets Psycho Cut to threaten Kommo-o with if your speed control fails. Neither set survives Gleam, but T1 Fake Out could go anywhere.

Meganium: Yeah, it warrants mention. Meganium does nothing on its own, but set3 is the only pokémon aside from Aurora Veil setters (of which only Ninetales-A2 can bring hail itself) that can set dual screens; your enemy is effectively down a pokémon. EQ T1 isn't completely negligible.

Mesprit: Deserves bold face because of set4 Wide Lens Blizzard while taking two hits to dislodge but running Protect at the same time; add an uncanny ability to show up next to Uxie3. Set2 has Thunder Wave.

Metagross: Thankfully set4 lacks Earthquake or Explosion, but don't switch in Kommo-o; Sucker Punch is a 2HKO, or 98% min combined with Volt Switch damage, on Mega Evolved set4 and Koko survives Meta3 non-crit spread Explosion. The main issue is usually set4 Brick Break, since it outspeeds Kartana, but Metagross also has a midgame field presence that needs to be addressed, allowing it to enable adjacent threats.

Mienshao: Yeah. This pokémon runs either Focus Sash or Fightinium Z, and set4 is seemingly designed to screw this team over: Wide Guard, Feint, AOP, Fake Out, and an incredibly strong Reckless HJK. Thankfully, it's also slow and safely dies to Thunderbolt (not VS!), and neither outspeeds Kartana after T1, but it will always pose the T1 ambiguity of FO / AOP.

Mimikyu: Takes two hits (which is above average), has Rocky Helmet which can trip up Kartana or evolved Kang (which obviously has issues hitting Ghosts in general), and Kommo-o loses to it; be careful and don't trade down recklessly to the backlines if this could appear.

Minior: Red Card / Shell Smash Explosion set ambiguity. Pretty much ineffective as a lead, but possibly the most disgraceful Soulblaze stopper.

Moltres: OHKOd by Volt Switch, but set4 can Protect it midgame -- I've never seen that against the leads, though; Kartana is too alluring. All sets pose a danger to Kommo-o outside of Tailwind.

Rotom: All non-Fan Rotoms are pretty much the same deal, but for ceremony, Wash gets hit hard by Koko; Frost threatens Blizzard when next to a TR setter, but loses to +1 S-Sword; Heat is the most consistently dangerous (Inferno Overdrive, and nothing hits it for x2); and finally, Mow sucks even worse against Kommo-o than any other form. They try to inflict slow status on Kartana and take two hits to defeat, but all of them are slow and usually perish in a Soulblaze no matter what else happens.

Muk: Must respect set2 QC Gunk Shot.

Oranguru: Demands Leaf Blade + Volt Switch to deny set3 Trick Room.

Palossand: Survives Leaf Blade (chip with Gleam).

Passimian: Must respect 198 speed CC into Kartana; sometimes demanding Protect.

Porygon-Z: Set3 survives Thunderbolt, but can still be worthwhile to use it to chip for Soulblaze and avoid the set4 Breakneck Blitz, which is very bad news for the Koko slot no matter which ability was drawn.

Porygon2: Takes too many hits to defeat and fires +1 Psychic / Ice Beam / E-Terrain Thunderbolt into the appropriate sap. Not a Tailwind or Soulblaze stopper, but you'll want to be careful around it.

Primarina: Despite that every pokémon on the team save for Kommo-o can OHKO Primarina (Kang DE is only 92.5% min), it beats Kommo-o worse than any other Fairy (at +1, you will still die to spread Dazzling Gleam while CC is a 3HKO) and thus deserves bold print; it forces your hand by appearing at the worst possible time.

Raichu: Fake Out + Lightning Rod + E-Terrain Light Screen + outspeeds Kartana by one point. This would be terrible if it didn't get 2HKOd by Dazzling Gleam (unless it uses Light Screen, but that also gives you the necessary reprieve); as it stands, it's "merely" a threat enabler, but certainly one of the worst; be thankful it's quite rare.

Raikou: This, however, isn't rare at all. Watch for the Pressure announcement; if there is none, Inner Focus Raikou123 is one of the main reasons why Tapu Koko runs Electroweb (particularly set2 which can T-Wave Kartana at leisure), but Raikou3 could well Protect it, thus you sometimes need to press Tailwind on Kartana as well -- all will be worth it for a Soulblaze. Note that Raikou4 signals itself (Air Balloon, thus also avoiding E-Terrain until you hit it) and picks Reflect T1 with such regularity that I consider paralysis a lesser risk from it, and commonly use Tailwind T1 unless the ally could contribute to a failure cascade. In a pinch, Kommo-o can bait Extrasensory from sets14.

Rampardos: Effectively cannot be distinguished from Archeops.

Regice: Dread dispenser of status effects that takes too many hits to KO (pretty much the same as Mesprit in practice, but with more dangerous sets on the whole, compensated for by the weakness to Fighting moves), but thankfully not at the speed of Froslass. Sets14 can often be distracted into using Focus Blast (or set4 Thunder Wave) with Kartana/Kangaskhan at least, although there's no guarantee that it won't just use Blizzard/IB again.

Regigigas: You know what this does. In addition to the usual fare, set4 can block Kommo-o with Wide Guard. Usually not top priority to remove, but you want it done by the time you get to the sweeping phase, or there'll be trouble.

Rhyperior: Lightning Rod, Sash Metal Burst, Horn Drill, Earthquake, Protect -- this can be a threat enabler for sure, but fortunately neither Rhyperior set tends to act wisely (spamming Payback or needless Protects). Usually appears on TR trainers or male Sightseers; high priority to KO in the former case. Usually you want to lock Gleam, as Kommo-o should not switch into potential Horn Drill, nor Kang into Continental Crush.

Ribombee: This runs away if you let it, but Double-Edge (OHKO) or Thunderbolt (nearly always an OHKO at +0) plus Tailwind means that this needs multiple turns to become dangerous. I enjoy seeing Ribombee as a lead on Granville/Raz, because nearly everything else they could use tends to be worse (maybe not Noivern and Greninja). It would "bee" a different story if they invested Speed.

Salamence: Set4 outspeeds Kartana and set3 Protects, but not all that notable. Electroweb might be a good idea, but Thunderbolt has a ~50% roll to OHKO set4 as well (better yet on set3), while Gleam is a safe ~78% min if the Protect from set3 is a threat in the given situation.

Salazzle: Unpredictable; could use FO, Sludge Bomb or (Z-)fire move. VS is often a good bet despite the FO threat, and a T1 switch to Kommo-o on the Kart slot (an unusual action) might be indicated (Inferno Overdrive is 42% max, and you will bait Dragon Pulse next turn).

Sceptile: Set4 EQ won't ever OHKO Koko by itself, but it can enable threats either with this or generic Lightning Rod interference, ignores Electroweb (though the ally won't -- another reason why Web is on Koko), and Leaf Storm from set3 isn't all that benign either (though set3 loses to Kommo-o by itself, so Kang can salvage the Soulblaze against most enemy pairs).

Serperior: Sometimes you'll have to Electroweb while this is also on the field; don't let its presence dissuade you -- +1 Speed changes rather little since all team members still outspeed it in Tailwind and the backliners don't outspeed +0 Serperior4, either. Nonetheless, nothing here likes taking +2 Specs Leaf Storm (not even Kartana) to say nothing of more nightmarish scenarios. Strive to remove this.

Sharpedo: Demands Tailwind + Volt Switch into it or Gleam; must not be allowed to outspeed Kommo-o in Tailwind (+2 or higher).

Shiinotic: With Electric Terrain denying Spore, this is rather neutered despite that it can still threaten Kommo-o and the leads have trouble hitting it at all, but save it for Kang (or +1 Flamethrower after chipping).

Slaking: The Koko slot dies to Giga Impact (don't switch), but nothing happens from it on T2 and that's when you can execute FO + Tailwind / FO + Soulblaze as feasible (you probably don't want a second Impact to happen, so the latter will often be preferable even if you didn't achieve T1 TW; Kartana/Kommo-o can also double Protect to exploit its presence).

Slowbro/king: Differ in that one safely dies to Leaf Blade and the other to Volt Switch. I won't spoil which is which. (Slowking4 also takes 101% min from Thunderbolt, though.)

Snorlax: The usual. Try to injure it with S-Sword, as Soulblaze deals amazingly poor damage to set4 (in the ballpark of 20%, which isn't even enough to safely KO after the Sword).

Starmie: Fast and mean, with Sash and Gleam; don't address this with just Soulblaze midgame. Set4 can outspeed and IB Kartana T1.

Swampert: Usually RDs T1 (instead of EQ).

Talonflame: Set3 is a blank, but set4 OHKOs Kommo-o at +0 or with a crit priority Brave Bird, and Kang gets punished with Flame Body. Both sets will probably aim at Kartana T1 and break its own Gale Wings (good because you don't want set3 to use 110 BP Acrobatics, and there are often more pressing concerns); as a third or fourth mon, where Kartana is probably not available, this is a threat you should keep in mind.

Terrakion: Must acknowledge set2 locking EQ in combination with something that threatens Kartana, but I don't remember that this became an issue in practice even once on the entire run, as it can just as well lock Edge or CC, and non-crit EQ doesn't OHKO Koko. The other Ground-attacking scarfers (Lando, Heatran) are much more notable. All Terrakion lose to Leaf Blade, and there is even a 50% roll from T-Bolt, but I doubt there's a situation where you'd want that. Kartana sitting just above the Swords of Justice in speed is truly a blessing, as they all love targeting it and none of them accomplish anything by that.

Thundurus: Nominally has Prankster Taunt. I never saw that move, probably because the same set runs Focus Blast, and the computer simply loves using that on Kartana. Set1 is the only one that doesn't get OHKOd by Thunderbolt, and also the only one that can't potentially interfere with Kartana setting Tailwind.

Togedemaru: Very similar to Raichu. Red Card / Sturdy is a concern; chip it.

Togekiss: Volt Switch gets rid of it, and Double-Edge inflicts ~90% min. This is good because the other two team members generally stand no chance against it (except they will win 2-1); bolded for the same reasons as Primarina, with Thunder Wave added. Tends to appear on more dangerous teams to begin with, and is one of the few Kartana-stoppers that Tamah runs.

Tornadus: Nearly interchangeable with Thundurus, except they all die to Bolt (or VS).

Torterra: Torterra4 is a more dangerous endgame foe than you might expect, and it will be there for the endgame, but Kommo-o matches up well and Sacred Sword is a fantastic contribution.

Toucannon: Must be addressed due to Tailwind, but you can imagine how.

Toxapex: Must be addressed due to Red Card, but you can imagine how; avoid attacking when it's eligible for Baneful Bunker, though (both sets run it).

Toxicroak: The generic plan is to VS into this and go to Kommo-o if it survives to catch a potential Sludge Bomb with Bulletproof, Kangaskhan if not. Modify the plan as its ally demands.

Trevenant: Yeah, Trevenant. This is possibly the most dangerous single enemy to face with the team outside of Soundproof Kommo-o1234 with Koko out of order; you cannot prevent set4 from setting Trick Room, nor set3 from dealing far too much damage with Choice Band Earthquake (Koko will drop, unlike with Aerodactyl4). On the upside, Trevenant4 also cannot touch Bulletproof Kommo-o at all (one of those curiosities; Ferrothorn3 is another, Chesnaught3 comes very close), and dangling it around will often be key to waste its turns or make its moves predictable.

Tsareena: Disables Fake Out / Sucker Punch field-wide, can OHKO 3 out of 4 team members (but either locks its move or doesn't have speed, which is the saving grace that prevents this from happening), cannot be adequately addressed with the leads, and shows up on teams where they tend to struggle to begin with. A fresh Tsareena joining a Mega Camerupt I could suddenly not Fake Out as planned nearly caused a loss on the previous run with the team, not that anybody cared.

Typhlosion: See Entei, except it draws the Eruption set more often.

Tyranitar: Tailwind T1

Tyrantrum: Switching Kommo-o into CB Head Smash is possible, but an emergency measure.

Uxie: QC Psyshock crit deals 88-104% to Kommo-o. None of the other Uxie sets are that much better to see; take your pick between the Thunder Wave spammer, the Reflect setter that will Memento out unpredictably and dangerously, and the second-weakest Dazzling Gleam in the Tree (citation needed), which still deals unpleasant damage, and all of them once again take too many hits.

Venusaur: Kommo-o dominates Venusaur like little else in the Tree.

Volcarona: Not as much of a problem as it could be "on paper"; Protect on T1 isn't common due to the presence of Kartana. Make sure to hit this with Koko T1, though -- Hurricane threatens Kommo-o.

Weavile: The reason why Koko runs 195 Speed and not less. Fake Out, Ice Punch, Taunt, Protect, Sash is a bad combination to play around, but at least it takes 2HKO damage from pretty much anything, and is OHKOd by Drain Punch later. Demands T1 Protect, which is dangerous when paired with pokémon that demand T1 Tailwind such as Crobat, or some other action from Koko that you can't count on now. Worse yet, both slots are definitely in danger of Ice Punch, although it's not as commonly chosen as FO. Bringing Kang safely tends to be crucial against it. Dangerous in the midgame as well.

Whimsicott: Prankster Tailwind usually demands T1 Tailwind (which Xio usually doesn't). Z-Moonblast is particularly dangerous to Kommo-o and throws a wrench into baiting tactics. Swagger (Prankster or otherwise) needs no explanation. +1 Flamethrower needs prior damage from VS / Bolt to OHKO. When playing against it, you can safely assume that Tailwind always comes before Swagger -- make sure you use that turn well.

Wishiwashi: I'm convinced that this uniquely generates its set at the time of targeting it and it's always the one with the more obtrusive berry. More seriously, it's often better to VS this for chip and ignore it otherwise.

Zapdos: Not too dangerous, but it will often set Light Screen because its ally requires more attention on T1. Don't leave Kommo-o in the path of Z-Drill Peck.

---------------

The Loss and the Future

The losing event happened during what I thought was battle #1003 but was, in fact, #1002. It's not important. A Speed trainer (Buddy iirc) leads Noivern/Crobat, and after critical Cross Poison to Koko, I try to send out a pokémon, and Crobat used the illegal move Dream Eater on the interturn. Translation: the game freezes for just long enough to ensure I notice, then crashes to the message "An error has occurred [...]" on a black screen. That same error had haunted a previous (non-reported) similar team that included Togekiss in September, killing it twice before I ran the "repair tool" (which actually just redownloads the game, lol) and never saw it again afterwards -- well, until now. After restarting the 2DS, it failed to read from the SD card at first; now that I've redownloaded UM, the issue seems to have subsided again.

Despite that this was less than satisfying, I got what I wished for, almost exactly to the letter: 1K with 4K, and almost exactly two years after getting back into Pokémon with Battle Tree teams involving Fire Blast Salazzle, dreaming of "the big 100" -- all I can comment is "take notes, and you'll improve".

Thrill of the chase, would've been nice, etc.; but despite that I say something like this every time, I think it's time to shift gear again. From stints with the Q.R.T.O.O. on the original S/M, I fondly remembered both a wonderfully janky TR sand team (Bronzong / Escavalier / Nidoqueen / Tyranitar) and a Lusamine-themed Gravity team (Clefairy / Milotic / Lilligant / Bewear) and scoured the PGL for US/UM teams in the same vein. There was a single Lusamine team, obviously made for PvP Singles, which included Iron Tail Lopunny (something independently pointed out by everyone who asked me what I was doing) and Binding Band Milotic -- and despite a valiant performance from Mismagius (Ghostium Z, Shadow Ball / Icy Wind / Mystical Fire / Thunder Wave) and Minimize Clefable, I could not get this team far at all, dying twice at ~30. Fortunately, I was not alone...

Eisenherz suggested that I try his Tree-attuned Gladion cosplay QR team (you're viewing the final version, for the most part devised by him, whereas the turtle, Normal Gem Tailwind Silvally, Weavile's Protect and Lucario's Flash Cannon were gradual suggestions by yours truly, developed as I kept losing anyway to Toxicroak4, a.k.a. NEVERMISS KOFROG). I still didn't manage to get far past the stamp -- in particular, Ghost-type Trick Room setters (in this case, Mallow's Trevenant4) threatened the line-up I chose, which was Lucario/Silvally/Blastoise/Weavile. The most impressive lesson I learnt here was the surprising strength of Scarf Final Gambit, a reliable precision strike to nearly any target that, unlike Fake Out, immediately brings the Tailwind beneficiary (and on a safe switch!) -- if only Silvally had Scrappy. If anyone else wants to try the team, I'd consequently recommend leading Weavile and additionally replacing Parting Shot with Crunch; I chose to change costumes instead, though, and we'll see what happens.

If you happen to have a QR team that you'd like someone else to try first, feel free to ping me here or on Discord -- if I like it, I'll give it a shot.


The VR Room

tl;dr everything is an overload because I want to promote my jargon. Foes throw and nothing too bad happens, then the game crashes (not pictured).

#256 vs Dooley, Latios / Raikou / Entei / Mawile
Bottom line: I don't have time to Protect, so I press *both* forms of speed control hoping that one goes through, which will be enough for Kommo-o to come back. Then he sends Mawile on a resist switch from the most disappointing Leaf Blade in the world, but I happen to have a Tapu Koko ready (though Mawile inconsequentially fails to roll low anyway), and Entei doesn't draw the Scarfer (which would also have had to lock Extrasensory and draw Inner Focus to have any chance). U2DG-WWWW-WWXX-H4XL

#445 vs Y. Athl. (f), Salazzle / Sceptile / Ambipom / Serperior
First turn goes badly, with Salazzle unfortunately not getting distracted and choosing the best possible action (calling Scep not using EQ here was obvious) in FO to Koko, but could hardly have switched Kangaskhan into possible T1 Overdrive, as the L-Rod threat (which did materialize) means that Koko will not be able to revenge (the go-to play vs. Lazzle is Volt Switch). What follows is "the best double switch of the streak" that gives me the chance to win; after this, I overload Ambipom as FO on either target will subsequently pit Serperior34 (Contrary or not) alone against a decisive lead, whether it Leaf Storms Koko or not. 3C7G-WWWW-WWXX-H3F5

#573 vs Gentleman, Regice / Raikou / Suicune / Cobalion
Set4 is most prominent, but don't sleep on Amnesia Regice (set3), either. This could have ended in a loss if Regice had rolled that IB freeze (Cobalion4 still dies to Thunderbolt if Kartana doesn't get the Sword, but it did make it easier to Soulblaze), and I'm not quite sure where I went wrong here, although Drain Punching Regice like that when I knew LO CC could be in the cards is certainly a candidate; that said, I'm not sure I would have had time to address Regice later, either. DADG-WWWW-WWXX-H48S

#617 vs Madame, Uxie / Moltres / Mesprit / Latios
This one's worth a laugh maybe, because the computer decides to participate in the Puzzle Hunt and engineers the only way that two foes can use Memento in the same battle. Then I make a needless example of Latios; the Kommo-o switch into what turned out to be Psychic was deliberate: a KO to Kommo-o immediately gives me Kang/Koko with the latter now able to lock Gleam (which wins), a KO to Kangaskhan gives me Gleam / Soulblaze as an overload, and a KO to neither (such as Latios4 Dragon Dance -- "oi, Fake Out + Sucker Punch is only 99.6% min, I've a right to be scared") gives me Fake Out / Soulblaze instead. Rather academic here, but when do I get to show off? 2VFW-WWWW-WWXX-HXZ7

#679 vs Madame, Heatran / Cresselia / Moltres / Azelf
Mixed luck -- Cress isn't TR and gets KOd by allied Lava Plume, but then again, said Plume not only double-burns with Koko on the verge of death (thank those HP EVs) and no speed control in sight, but also brings a much more dangerous foe, Flame Body Moltres, where sets234 all threaten Kommo-o's setup with Air Slash or Power Herb Sky Attack respectively, and while a T-Bolt lock largely prevents this, set4 carries Protect, which it will actually use with Kartana not on the field. Thankfully, Protect also means that my Soulblaze will go through, so I have to overload again; this means that Kangaskhan can FO Moltres without Mega Evolving to push it into +1 Scales range with a reduced burn risk, and while lastmon Azelf tries its best to throw me for a loop (Z-Thunder Wave?!), it's not enough. NKCG-WWWW-WWXX-HXYZ

#827 vs Omar, Nidoking / Rampardos / Alolan Sandslash / Manectric
Not as notable for the line-up as the sheer absurdity of the opening sequence, which went T1 Protect/Protect, T2 Protect/Savage Spin-Out into Koko slot (???) despite the presence of the very clear OHKO Poison Jab on that Nidoking set (not picking EQ while next to Rampardos is more understandable, since the T2 Protect carried a risk of failure, which the computer might have been "aware" of). 2A7G-WWWW-WWXX-HX9F

#956 vs Samantha, Cresselia / Latios / Thundurus / Regigigas
Pick your poison; this reminded me of last streak's Raikou / Cress lead encounter. I end up with Trick Room, but a manageable sort; not addressing the "reverse pair" Latios4 / Cresselia3 would have been a far worse outcome, and Samantha's non-Latios backliners are rather passive with the exception of Raikou, where I'd have a turn of Trick Room against it. I like how Koko keeps just pressing Gleam in this battle, and why not -- Gigas confirms set3 anyway. SVUG-WWWW-WWXX-HWL3

#1000 vs Colress, Porygon-Z / Klinklang / Magnezone / Alolan Muk
In the amusing grand tradition of #1000 "milestone" videos, all of the featured pokémon seem to go out of their way to draw their most harmless possible sets and show up at the most convenient time. Frankly, this one's not worth watching for the battle itself, but, you know. CSZG-WWWW-WWXX-HWKK


Thank you for reading. :reina:

I can pretty safely vouch for the verified viciousness of this team, as thanks to its QR, I was finally able to crack 200 wins for the first time in Ultra Moon!

200 Wins Ultra Moon 01-01-19.jpg
200 Wins Ultra Moon 01-01-19 #2.jpg


Thankfully, I find the team straightforward enough to use that I can normally boil most situations down to "if it has something super-effective against Kommo-O, don't bother bringing it in in unless said opponent also has something that can target and one-shot Karatana. Outside of these considerations, Volt Switch and light the Soulblaze when ready". Tree is never that simple of course, but it's simple enough that you can reach marks with it...even when you're functioning on a few hours of sleep. This current run also has given me a newfound hatred of Grass/Fairies, as it's typically difficult to bring Kommo in at all with these monsters on the field (since the rest of the team needs to generally peck away at them, due to how bulky the most commonly encountered offenders are). Good way to start the new year, I imagine, and I can only hope it is a sign that leads to more success...not for me, but for the rest of the crew.
 
Last edited:
Where can I find the needed requierments to report a battle tree record?
I would like to report one
You're free to report any streak you have had, as long as it's from unhacked pokes.

To be leaderboard eligible, you simply have to score higher than 90 wins in a row, and provide credible data :)
 
Hello everyone! I want to build a team, and I want to choose 1 core to start:
Core 1: Finigross
Metagross-Mega @ Metagrossite
Ability: Clear Body
EVs: 252 HP / 252 Atk / 4 SpD
Adamant Nature
- Iron Head
- Zen Headbutt
- Protect
- Brick Break

Tapu Fini @ Choice Specs
Ability: Misty Surge
EVs: 252 HP / 4 SpD / 252 Spe
Modest Nature
IVs: 0 Atk
- Dazzling Gleam
- Scald
- Grass Knot
- Ice Beam

Core 2: Garheat
Garchomp (M) @ Groundium Z
Ability: Rough Skin
EVs: 252 Atk / 4 SpD / 252 Spe
Jolly Nature
- Poison Jab
- Earthquake
- Dragon Claw
- Protect

Rotom-Heat @ White Herb
Ability: Levitate
EVs: 92 HP / 228 SpA / 188 Spe
Modest Nature
IVs: 0 Atk
- Thunderbolt
- Hidden Power [Ice]
- Overheat
- Protect
Both core's idea is having a pkmn that hits hard (Metagross and Garchomp) with another one that can destroy the first one weaknesses. I want to know experienced players which could be better (cause the only thing i got alone is a 53 singles streak). Thanks a lot!
 
Here it is, the team report for Murkrow and friends, making it to 282 wins in super doubles.


After having some annoying failures with a trick room team I was working on, I decided to switch to tailwind for speed control. From previous experience, I knew that having 3 turns to utilize tailwind was a huge hindrance to its effectiveness. Thus, I decided to go the hyper offense route and mostly ignore defensive strategies or tactics, but a few of these were integrated into the final version of the team. A good way to destroy opposing pokemon quickly is to hit them both at once. With this though in mind, I already knew that Kommo-o is perfect for this, but I didn’t want it be a lead, since it works great as a cleaner and getting soulblaze off in tailwind is easy. Other great Spread moves include Diamond storm, Origin Pulse, Thousand waves...oh wait, all of these are illegal in the tree! How unfortunate. Looking at legal options, earthquake and blizzard are obvious choices but blizzard requires too much support and earthquake hits your pokemon as well. After tossing around my options for a few days, I decided to take inspiration from Eisenherz’s rain teams, and utilize the synergy between pelipper and swampert, to fire off powerful earthquakes while having my speed boosted and not hitting my partner pokemon, which is now free to attack, instead of using protect and eating precious turns contributing nothing after setting tailwind. Eventually I settled on Murkrow since it is the only priority using tailwind setter not on the leaderboard as far as I know, except volbeat/illumise, which wouldn’t work with this strategy anyway. It also seemed like something interesting to try. Since the line up of murkrow and Kommo-o was extremely vulnerable to blizzard, I added Mamoswine and charizard-Y to the line up, completing the initial version of the team. Leading with Mamoswine and Murkrow, the team did alright, making it to 123 wins, before falling to… scientist robyn. I decided that Water types were a problem, and charizard couldn’t do very much against dangerous fairy types that counter kommo-o. I decided to swap it out for HP ice Rotom-W without Hydro pump, also mitigating the electric weakness somewhat. I also found Mamoswine to be lackluster despite it resisting ice, and swapped it for Landorus-I. This was a nice excuse to put my adamant lando which had been sitting in a box since early ORAS days to good use. This version of the team made it 195 before losing, and the team was still having problems with fairies. I also felt that the team was just one rock slide miss away from losing to Articuno or glaceon4 much too often, so I wanted some insurance. Also realizing that the team was extremely vulnerable to grass types, speed trainers, and Mallow in particular, I made the final changes to the team.

I bred a new Kommo-o going from rash to modest, and added Celesteela as the final pokemon. Wide Guard and Heavy Slam worked as intended, and Celesteela perfectly rounds out the team (well, mostly), destroying fairy types and sceptile, and providing blizzard insurance, a switch into fairy moves, and lots of power, especially after a beast boost. Its flying type also lets Lando spam earthquake much more freely, a near requirement for a team based on hyper offense in the battle tree.

The final version of the team is still highly vulnerable to electric, ice, and fairy moves, and I occasionally had to sack both leads for a safe setup opportunity against blizzard, but this team was never meant to be well balanced, only to take absolute advantage of tailwind. Still, there were a not insignificant number of games where murkrow survived long enough to set it twice.


Final Team EV spreads and explanations. The beginning of the notes are a bit bad as far as elegant writing goes. I copy pasted it from my phones notepad, and I don't bother writing well for my own notes, here.


Murkrow:
Dream ball
Nickname: Tulukaruq
The Yup’ik (an Alaska native indigenous culture) name for raven
Nature: Adamant
12 HP / 252 Atk / 60 Def / 60 Sdef / 124 Spe
Item: Evilolite
Ability: Prankster

Moves:
Brave bird
Taunt
Tailwind
Protect


OHKOs Megagross with BB + earthquake. Highest chance to KO Milotic4 with EQ, since this is an annoying threat. Outspeeds scarfchomp in tailwind. Comfey4's draining kiss is always a 2HKO, barring crits. This spread could probably be improved, but you can’t survive crit brave bird from talonflame4 without significantly nerfing your offensive potential. Investing more into special defense would likely be a waste, as the common and strong electric, fairy, and ice attacks dished out by the tree do over 120% to this spread in most cases. I decided to go with max attack to help differentiate it just a bit from talonflame, and the damage is quite good for what can be expected.

Murkrow does offer a few advantages over competitors like Tornadus or whimsicott, With its dark type making it immune to prankster taunt from the genies and the ability to kill yourself with recoil, to get your backline out faster. In practice, this last part was more of a mixed bag than I had hoped. Occasionally Landorus would be forced to take an unnecessary attack, but this was still pretty rare overall. I chose to go with eviolite over other items, since some trainers carry bulky, weakish pokemon that can’t KO you with the item. Against some teams, this was helpful to dish out more damage in games where Murkrow wasn’t annihilated turn one. Golispod first impression crits, Talonflame4 brave bird crits, some electric Z moves, Rhyperior4 Techtonic rage crit through protect, and a combination comfey draining kiss and brave bird can stop you from setting tailwind, depending on your choice of action.

I initially considered using modest with dark pulse, but decided on brave bird instead. Having 50% more power, or equal after intimidate, really helped plow through teams and use the precious tailwind turns effectively. It also helps that flying and ground makes an effective attacking combination, destroying grass and rock types that can be difficult to KO for the other. With taunt, the better matchup against trick room setters was not as needed.


Landorus:
Ultra ball (this animation matched so much better in gen 6…)
Nickname: Terra Preta
After the soil type.
Nature: Adamant
116 HP / 236 Atk / 4 Def / 4 spD / 148 Spe
Item: Life orb
Ability: Intimidate

Moves:
Earthquake
Knock Off
Rock Slide
Protect

This Lando outspeeds everything in TW except Aerodactyl1 (lol), and hits a life orb number with 179HP. Reduced attack does not change its damage against garchomp, Metagross, Milotic, Mawile, and some others. Healthy meta genie strikes again. Once again its almost perfect for its role here. The strongest earthquake available for a tailwind team in the tree, after the life orb. Knock off is essential for the many levitating psychics and ghost types. I was reluctant to use rock slide with its shaky accuracy, but it worked out fine in the end. Hitting both targets 81% of the time, and only one 18% of the time, was good enough apparently. Having a rock move helped a lot against the Kanto birds and fliers in general. I wouldn’t change anything about this spread if I tried the team again.

Your chance to OHKO base gallade with EQ goes down by 6%, I believe, compared with 252 Atk.


Kommo-o:
Level ball
Nickname: ‘auana-a
A corruption of the native Hawaiian dances’ traditional name.
Nature: Modest
20 Atk / 4 Def / 252 spA / 4 spD / 228 Spe
Item: Kommonium Z
Ability: Overcoat

Moves:
Clanging scales (clangorous soulblaze)
Close Combat
Flamethrower
Protect

OHKOs electrode with CC. Out speeds base 130s with a boost outside of tailwind. Under tailwind without the boost, Kommo-o outspeeds Latios with a dragon dance up by one point. Survives MegaZam psychic at +1 barring a crit. Investing the leftover 8 points into defense is much more efficient since with a boost, you don't have a decimal place being left over in the calculation. 150 HP also minimizes residual damage from all sources. Cobalion 3 has a 13% chance to survive boosted CC from full. Aside from this, everyone should know what this thing does by now. In practice, the attack investment wasn't very useful. A dangerous situation with air balloon soundproof electrode never occurred. The 12% higher chance to OHKO blissey3 is nice though.

Although some might question attack investment on modest (just use rash), and Kommo-o has less stat points overall with this spread, but the points are distributed in a way where they can contribute more.


Celesteela:
Beast ball
No nickname
Nature: Adamant
20 HP / 228 Atk / 4 Def / 12 spD / 244 Spe
Item: none
Ability: Beast Boost

Moves:
Heavy Slam
Acrobatics
Wide guard
Protect


Attack EVs hit a jump point. Out speeds base 150s in tailwind. OHKOs Togekiss with heavy slam. Survives thundurus2's thunderbolt once specs is knocked off. HP minimizes residual damage. The massive speed investment did pay off, as I would have likely lost to Mega aerodactyl without it, although I didn’t record the battle… at 112 speed, Celesteela ties with Incineroar3 and Garchomp4, and I considered investing the last attack point into speed to avoid this, but I wanted the extra attack. I honestly don't know if it made any difference in this streak, but perhaps something to consider in the future. As for the item, the moon rocket pokemon doesn’t do enough damage with non stab moves, owing to its low base 101 attack. I decided that the full power acrobatics was the best approach, and its damage output is effectively exactly equal to that of Murkrow’s brave bird. I don’t really think of it as not having an item, rather its item doubles the power of one of its stab moves consistently. This gives celesteela enough power to contribute, with 120 and 110 base power moves. Just don't use heavy slam on metagross.

With this being the last pokemon added to the team, it shows, now that I am finding a flaw in its spread, namely the Thundurus calc. One of the things you can learn even after finishing a team, is possible flaws. It really does take hundreds of battles, and a lot of practice, to get a good feel on how something plays and can be improved. A good lesson for anything in life.


QR team
https://3ds.pokemon-gl.com/rentalteam/usum/BT-5A3D-4F8E


...and the uploaded image file is too large. Whatever, maybe tomorrow.......... EDIT: finally. Thanks to First letter of the alphabet for helping.
Murkrow and friends.jpg


Dangerous opponents:
Speed trainers
Punks with mawile
Wally
Cynthia
Mallo
Lea

Mawile trainers: Kikujiro, punks, Grimsley, Office worker Savir (not a complete list)
Speed trainers can carry Sceptile, which has unburden leaf storm, or mega, which outspeeds Kommo-o without tailwind even after a boost.

Ace trainer Lea can carry Whimsicott with tailwind, alongside darmanitan4 and infernape3/4. She also carries incineroar4.

Mallow is probably the single most dangerous trainer to face. Murkrow can't take draining kiss + BB, or crit BB by itself. Sceptile can threaten with unburden leaf storm or rock slide flinches. Celesteela doesn't like flare blitz either. Her toucannon can also set tailwind. The version of the team with Mamoswine and Rotom was even more vulnerable, obviously.

Fairy trainers like Perri should be easy bait, but Audino can carry fire moves on two different sets, so destroying it first is ideal, if possible.

236+ Atk Life Orb Landorus-Therian Earthquake vs. 252 HP / 0 Def Slowking: 118-140 (58.4 - 69.3%) -- guaranteed 2HKO
252+ Atk Murkrow Brave Bird vs. 252 HP / 0 Def Slowking: 102-121 (50.4 - 59.9%) -- guaranteed 2HKO

236+ Atk Life Orb Landorus-Therian Knock Off (97.5 BP) vs. 0 HP / 252 Def Trevenant: 161-190 (100.6 - 118.7%) -- guaranteed OHKO

0 SpA Comfey Draining Kiss vs. 12 HP / 60 SpD Eviolite Murkrow: 56-68 (40.8 - 49.6%) -- guaranteed 3HKO

252+ Atk Murkrow Brave Bird vs. 252 HP / 252+ Def Lilligant: 146-174 (82.4 - 98.3%) -- guaranteed 2HKO after Leftovers recovery

252+ Atk Murkrow Brave Bird vs. 252 HP / 0 Def Aromatisse: 111-132 (53.3 - 63.4%) -- guaranteed 2HKO after Leftovers recovery
236+ Atk Life Orb Landorus-Therian Earthquake vs. 0 HP / 0 Def Aromatisse: 129-152 (73.2 - 86.3%) -- guaranteed 2HKO

236+ Atk Life Orb Landorus-Therian Knock Off (97.5 BP) vs. 252 HP / 0 Def Cofagrigus: 125-148 (75.7 - 89.6%) -- guaranteed 2HKO

236+ Atk Life Orb Landorus-Therian Earthquake vs. 0 HP / 252 Def Glaceon: 74-87 (52.8 - 62.1%) -- guaranteed 2HKO

236+ Atk Life Orb Landorus-Therian Earthquake vs. 252 HP / 0+ Def Regice: 90-107 (48.1 - 57.2%) -- 89.5% chance to 2HKO
252+ Atk Murkrow Brave Bird vs. 252 HP / 0+ Def Regice: 78-93 (41.7 - 49.7%) -- guaranteed 3HKO


Until next time, have fun.
 
Last edited:
Reporting a streak of 521 wins in Ultra Sun Doubles.

If this goes up on the leaderboard, please don’t credit me. Just put it under the name:

Dual Core Processing

Named so because the team happens to feature overlapping fire-water-grass and dragon-fairy-steel cores, this team is comprised of familiar faces, playing mostly familiar roles.

salamence-mega.gif

Megabuster (Salamence-Mega) @ Salamencite
Ability: Intimidate
Level: 50
EVs: 4 HP / 252 SpA / 252 Spe
Timid Nature
- Hyper Voice
- Dragon Pulse
- Double-Edge
- Tailwind

incineroar.gif

Litterboxer (Incineroar) @ Assault Vest
Ability: Intimidate
Level: 50
EVs: 252 HP / 12 Atk / 4 Def / 12 SpD / 228 Spe
Adamant Nature
- Fake Out
- Flare Blitz
- Knock Off
- Earthquake

tapu_fini.gif

Clam Jam (Tapu Fini) @ Leftovers
Ability: Misty Surge
Level: 50
EVs: 252 HP / 84 Def / 4 SpA / 12 SpD / 156 Spe
Bold Nature
- Calm Mind
- Scald
- Moonblast
- Protect

ferrothorn.gif

Plantinum (Ferrothorn) @ Zoom Lens
Ability: Iron Barbs
Level: 50
EVs: 252 HP / 4 Def / 252 SpD
Sassy Nature
IVs: 0 Spe
- Leech Seed
- Protect
- Power Whip
- Toxic

Overview
The team aims to leverage its tight defensive synergy to create as many strong match-ups as possible, and the opportunities to switch into them. Offense is viewed first and foremost as threat removal, for the purpose of seeking a stable game state in which to generate an advantage.

Incineroar and special Mega Salamence form the defensive yet proactive frontline. Calm Mind Fini and max bulk Ferrothorn sit and wait on the backline, until the time is right for them to come out and sit and wait on the battlefield. These 'mons have the sheer stat totals and brute force to wreck some dudes just by pressing buttons, but when combined, I believe they can become an air-tight machine. I believe that in the right hands, DCP has what it takes to go on indefinitely.

If you like defensive play and generating incremental value, then this strategy might be for you. If you want to train yourself into the habit of looking up rosters, sets, and calculations, this team requires doing so. If you want to try out a facility doubles team with a hint of facility singles flavor, this team could be that change of pace you're looking for. If you just want to see for yourself how a team with no clear path to victory, founded around the premise of getting hit a lot can function so decently, I can advise taking it, or something like it, for a spin.

In many games, I tend to gravitate towards defensive play patterns, especially ones that involve high amounts of decision-making, low to no payoff, and some sort of unusual jank. This team follows that trend to a degree - but over time, the harsh environment of the battle tree weeds out the useless and the weak.

I’d been aimlessly messing with random tree setups, and became addicted to tapu fini. No matter what team I build around her, my megamence seemed to always end up claiming a slot. I started messing with incineroar in doubles, and instantly fell in love.

One day, I came across Eisenherz's ZapFini team. I didn’t understand its nuances at the time, but I sensed in his team everything I’d ever wanted my ideas to be, and was inspired to give tree a serious shot. At this point, I began identifying the identity of my dream team.

-Defensively oriented strategy, with offense viewed as a threat removal tool
-Centered around tapu fini and its misty terrain
-As much switch-in potential and pair flexibility as possible

My concept of a dream team differed from ZapFini in a few ways:

-access to spread moves
-fini in the back, both for safekeeping, and to fully abuse her switch-in potential
-aversion to pinch berries (most naive in conception, but perhaps one of the most impactful differences)

And so I got to work.

That work being, putting fini mence, ince, and some rando in my party and flailing around for a while.

The wonderful people in this community provided me with the resources and the means to learn about team building, the tree, and the AI. Without access to their knowledge, advice, and expertise, I would either have long since given up, or would still be flailing around to this day.

Special vs Physical: I’d been running the classic physical mega salamence in tree since SM, and was captivated by its awesome power. However, over the years, I’d had a few minor recurring qualms about him in doubles. Special megamence circumvents a good number of physical megamence’s little demons, and is able to spread his aerialate love.

Timid Hyper Voice is often slightly too weak to secure a 1HKO in doubles. When fake out can’t spot the difference, usually that means it’s time for a Tailwind if they’re faster than ince. In maybe half the cases, even a Timid Double-Edge does the job. In the other half of cases, it usually calls for some switching. Additionally, soundproof mons throw a wrench into your flow, especially in the cases of abomasnow and kommo-o, who should normally be mence food, and air balloon electrode that mence otherwise wouldn’t need to waste his entire turn on. A neutral-hitting HV is often slightly too weak to get a guaranteed 2HKO on innumerable random mons, but a fake out will usually push them past the red zone.

Dragon Pulse might seem like a parallel to the oft-maligned Dragon Claw on physical mence. It also might look a little comical on a team built around misty terrain. It is both, but I’ve found pulse to be indispensable. Pulse allows mence to halve many worrisome rock and electric threats. It also oneshots a small handful of worrisome dragon-type threats. And here’s the kicker - most of these threats happen to float anyway.

-atk Double-Edge still hits pretty hard. Not hard enough to oneshot everything weak to it, which does cause problems sometimes. For the most part, though, it's here to allow this mence to pull his weight against specially bulky walls, or simply to have a slightly harder-hitting move against anything that just extremely needs to be dead right now.

Tailwind: For about 100 battles, I had Roost in this slot. Across those battles, I think I used it once, and it was probably incorrect to do so. After a hair-raising near loss vs a sun team, I scrutinized my team, and made the swap to Tailwind. That swap singlehandedly turned this team legit. Just like how I can't imagine life without misty terrain, I now can't imagine life without a lead Tailwind user. Absolutely essential.
Not much needs to be said about his set, this guy’s kind of a legend.

Earthquake as the fourth move is a welcome spread move that cleans up stragglers, and notably hits fire and electric threats to the backline just hard enough to get a 2HKO, often sped along with mence's help. It doesn't hit your partners very hard, and if it does, they can protect it - which works out, because the those aforementioned threats will usually target the protector so you can get their first half free.

Stat Investment: HP investment helps this team sleep at night. Assault Vest as its item frees up a ton of special defense points, which I dumped wholeheartedly into speed. I had been running into some major roadblocks with 0 speed incineroar, and holy crap is fast cat night and day for this entire team. This investment most notably takes him above the rotoms that plague fini and any one random other team member. I pushed a little further to 109 to outspeed Excadrill, which I was incredibly thankful for on a regular basis. It also incidentally surpasses marowaks, magmortars, vanilluxe, most heatrans, nidos, and the list goes on and on.
Calm Mind Fini is my idea of stability. She easily switches in, nullifies status hax, and serves as a win condition. Her moveset is relatively set in stone. I find more comfort in the predictability of Leftovers over a berry, but maybe that's just limiting her potential.

Her speed investment pushes her over Tyranitar to make him dance, zapdos, enteis, volcaronas, tentacruels, electivires, uxies, and a host of others along the way, most notably the bulk of the rotoms.
When I said Fini is my idea of stability, fuck that. This guy IS stability. I arrived at ferrothorn after tireless teambuilding efforts and scrutiny, but he also stood out to me as criminally underrepresented in the leaderboards. In any case, I can't say most would have predicted his build would look like this.

Zoom Lens turns Leech Seed and Toxic into the reliable moves I always imagined they were. In absence of a recovery item, turning leech seed reliable is of the utmost importance - the problem seems to create and resolve itself. However, zoom lens carries another important function - enabling Power Whip.

Power Whip as its only attacking move might not seem intuitive. It wasn't to me, either - I started with Gyro Ball and Seed Bomb - but once I started looking into accuracy items, I made the swap to whip instead. Over time, I realized that the threats that Ferro needed to hit were slow and bulky, or electric or water-type. After a day of calculations, it turned out Iron Head was almost universally straight up better than gyro ball for ferro's role on this team, and after coming to grips with that wild fact, phasing out the steel move for the grass one was natural. It didn't feel natural at first, but after 50 battles, I couldn't imagine it being any other way.

Leech Seed and Toxic seem redundant and slow for doubles. That's mostly correct, but the recovery of seed is too good, and the inevitability of toxic is a treasured surgical tool against some of the most notorious tree sets. Non-combat damage allows for dodging destiny bonds, retaliation moves, and making contact; in addition, a hands-off death allows you to swap in Incineroar for a fresh Fake Out against the wildcard replacement, or to protect against a faster mon who's about to die to leech seed for safety and value.

Battle 522 vs Veteran Candy
Raikou-4, Azelf-4, Cobalion-4, Terrakion-4

Negligence. Playing while staring into space and listening to a stream gets me what I deserve, and this team what it doesn’t.

Opening raikou and azelf. Raikou reveals non-inner focus, prime fake out target. Tailwind to bring ince up to speed, mence takes a psychic to yellow health. Standard opening, looking great.

I predict that raikou is likely to set up reflect, but begin acting carelessly. Ince should have been able to solo azelf at that point, why risk mence dying when ferro could take the hit easily? Why was azelf deemed the threat anyway, ferro would take a psychic any day, and raikou threatens fini too much to let live. If I was keeping mence in, why not dragon pulse raikou instead? Something tells me I was banking on an earthquake to finish raik off the next turn for free, but I get more than I bargained for as mence goes down to a thunder.

Somehow, I'm still zoning out after that. Fini comes in, as does cobalion. I remember this turn vividly, though - waffling between flare blitzing cobalion and earthquaking. I lock in EQ, but then run some calcs, and determine flare blitzing and moonblasting cobalion would be safer. I go back, but then fear letting raikou live, and worry about cobalion-4's protect costing me the entire turn and then some. Waffle back and forth again, locking in and canceling ince’s moves back and forth, until I mindlessly lock in fini’s move. The turn begins to play out as I slowly realize what I've done. Cobalion protects, fini’s moonblast is eaten, and I get to find out what move I had chosen for ince. EQ, which I think is not bad, since it didn’t completely waste the turn. Raikou’s thunder finishes fini off, possible only thanks to ince’s help, and I wake up just in time to realize it’s all over.

Ince is pressured into flare blitzing cobalion, and ferro into leech seeding it. Terrakion comes out versus a lone ferrothorn, and I press a couple of buttons. Those buttons should have been Run, then yes, but instead I go with denial. To be fair, I could’ve still won, if the thunders had missed and I crit my power whip. Sacred sword flinches me to remind me where the fuck I was. Or rather, should have been. The end.

I didn't follow a single basic philosophy of the team. I didn’t remove threats. I didn’t seek good matchups. I didn't even switch once. I didn’t think. I didn’t try.

I’m sorry, Dual Core Processing. I failed you.

I'm sorry.

What's with the double Intimidate lead?
It's a lot more sound than you'd think. Sure, there's diminishing returns, but every little bit counts when your team does nothing. Sure, some abilities punish stat drops, but few of them actually turn that into a threat. Braviary and the Quick Claw proccing Lurantis are the only ones I've run into that have seriously threatened this lead strategy.

Don't you just lose if you get crit?
Due to the way this team takes hits, most of them are resisted. However, yes, if an untimely crit eats through intimidate drops or calm mind boosts and takes out a crucial member ahead of schedule, things can get dicey. Because of this, I double-check rosters any time one of my available options entails taking one or more super-effective or strong neutral hits. In the end, rock slide flinches are much more problematic, with status - or rather, status threat induced suboptimal switches, following closely behind. I usually calculate assuming a crit when a crit move or a strong neutral hit is involved, and there's usually one team member who's more than willing to take that risk.

Is there anything you would change?
The way this team is set up, all its parts are tightly fitted around the others. If there's a major problem with these sets, it's because I am overvaluing or undervaluing certain aspects of tree/this game - and unfortunately, I'm not much of an expert on my own misconceptions. As for minor changes, I think stat investment could be more closely tailored around thresholds, especially when it comes to spread move chip damage. A Modest mence might make more 'mons manageable (or perhaps even better, a non-attack-lowering nature). Also, ince might be able to use more speed, and fini less. Ince could make use of more attack to push into many guaranteed 2HKO territories. Hold item distribution also haunts me sometimes - use what you find most comfortable and impactful to work with. However, the possibilities boggle my mind.
Set/roster lookup isn’t your friend. It’s your life.

The same goes for damage calculations, especially when incidental spread move damage is a major aspect of your game plan.

This team has rock and fighting type weakness overlaps. The rock overlap is often a source of anxiety, and the fighting overlap is often a source of grief. This team really feels when its switch-in options are hampered, and when dealing with the high stakes games of focus blast, stone edge, rock slide, superpower, head smash, and close combat, it’s tough to stay in control. Games quickly and often centralize around the holders of these moves. Another incarnation of this team might look to try make the weakness overlaps, if any, be for more manageable types - ice/water, for example, were almost auto-wins for the team thanks to its backline, and it would probably not mind in the slightest if the frontline was deathly weak to both.

One-hit KO moves have never caused me problems, in part because I got lucky, and in part because I played to give myself the best odds against them. Ince handles a good portion of them, and fake out + two double edges handles most of the rest. The game plan upon seeing a potential 1HKO mon is to, if given the opportunity and the means, determine what set it is, and then upon inevitably finding out it’s the 1HKO set, going for an all-out blitz on it. Thankfully, these mons rarely were accompanied by other meaningful threats. However, even if they were, the risk of exposing my backline to them - fini, unable to touch them, or ferro, unable to outspeed them - is typically far greater than any other risk present.

When you can bring out ferro, you usually should. He has many perfect matchups, but also many unwinnable ones - this dictates that you need to get your ferro value while the getting’s good. Ferrothorn's mere presence actually makes the AI too scared to use trick room, and he eats rain teams for breakfast. Even when it's not safe to keep him out, its magnetic attraction to fire type attacks allows you to script the battlefield for multiple turns at a time.

Boosting fini is a risk/reward decision based on the cost of the damage she and her teammate will take doing so, the benefit of the offensive power (and to some degree, the defense) she gains, and the risks of the unknown AI backline. I started out boosting way too much, at the cost of the team’s longevity. By the end, though, I had progressed to boosting way too little, not taking full advantage of favorable situations. At my peak, I factored in the risk of speedy backline physical attackers, how a crit would affect each gameplan, and the health of my entire team, and every boost or foregone boost was done with purpose and conviction.

Leech seed converts a good gamestate into HP recovery to spread around your entire team, and at least one completely free switch. AV Ince healing up often feels like cheating, and a fini with leftovers and double leech seed recovery can boost even in the presence of some beasts.

In the best of times, this team takes enemy Overheat and Draco Meteor to generate setup value. For this reason, ferrothorn is often the unintuitive dragon-type switch in instead of fini. In a similar way, this team often tries to bait out and absorb the fight’s Z-move - but the AI is unfortunately a little unpredictable in its usage.
As this strategy resolves around careful planning to generate small advantages, unpredictability is the ultimate enemy. Set mixups and, in unfortunate situations, targeting mixups will be the primary sources of unnecessarily foregone and lost value.

Anyone that limits this team’s options can, in the in the right place at the right time, rise to the level of a threat. Fast and strong or bulky and powerful pokemon of all colors can threaten unacceptable amounts of health loss without a flawless answer. Taunt, encore, speed control, and flinch control can directly invalidate options.

The way the team is assembled, there are many readily-apparent surgical extreme threats to its individual members. However, there are also a few notable all-around threats.

Crobat
Move over Grimsley, this here is the coin flip master. 50% of shrugging off Fake Out. 50% of being the 50% sleep set. 50% of being the 50% crit chance set. Can target either ince or mence, with either Brave Bird or Cross Poison. Even uses the move choice mixup against fini, just to make even second level switching risky, and even routinely brave birds ferro over cross poisoning fini. I desperately want Tailwind against him, but misty terrain can’t save mence from hypnosis. 50% of the time, crobat is 100% of a menace, which is all it really needs to be to warrant a top place on my shit list. Unpredictable, versatile, and potentially devastating.

Terrakion
This dude hits hard, where this team hurts most. He’s bulky enough to withstand a hit from the members that aren’t immediately threatened by or outspeed him. When he’s double intimidate dropped, he borders on being manageable, but when he comes out from the backline, the atmosphere immediately turns grim. He also tends to be accompanied by surgical threat rosters, and all it really takes is for one of my options to be restricted for a turn against Terrakion to become a choice of who to sacrifice.

Alakazam
This dude is fast, specially bulky, and has Focus Blast. Again, he has a vexing mixup - either he has a shot at Inner Focus alongside an especially beefy focus blast, or he traces Intimidate, dodging the Knock Off 1HKO. I just fake him out and set up Tailwind the vast majority of the time, because swapping around and trying to position around this wrecking ball is just a flat out losing proposition.

Gardevoir
Focus Blast is a recurring problem for this team, and the gardevoirs pack alongside it a bag of tricks for the fighting resists on my team, with the power to back it up. Again, unpredictability - if it’s mega, it will focus blast someone, but if it’s not, it has a fairy move on turn one. I say “someone,” because it sometimes blasts mence, making the ferro switch-in sweat. Fini can’t even take a Hyper Beam quite well enough to set up on her, and seeing that those beams are often aimed at ince, future unclear. Similar to alakazam, except it seems repeated switching is the right option, albeit a risk-filled and anxiety-inducing one.

Tyranitar
The other insidious killer. It’s easy to ignore the tyranitars as dinky spread attackers. All he does is boost for 20 turns anyway, back though the intimidates to a point where he can actually tickle ferro. However, his huge bulk against my non-ferro members, his slight unpredictability, and his sand damage add up to almost always take a disproportionate chunk of value out of my team to the grave with him, whether I notice it or not. In the off chance that he manages to outlive his dancing fever, he starts denting any and all team members.

That Walrein
Oh, how I hate that walrein. The other 1HKOers are more easily killed, and don’t have very threatening set mixups. I’m amazed at how well this team mitigates bullshit, but no matter what you’ve got going for you, there’s always one bastard lingering around to remind you, “Nothing is perfect. Not on my watch.”

Dual Core Processing (and friends) QR:
https://3ds.pokemon-gl.com/rentalteam/usum/BT-4987-90F1

Notable Battles

D7GW-WWWW-WWXX-PDDW
The only time post-Tailwind-addition this team's life flashed before my eyes. Horribly mismanaging megamence's life was the culprit here, but most of my plays afterward were fair.
TT3W-WWWW-WWXX-PDHU A 2v4 situation pivots on one legendary turn, in which I realize the AI has a chance of going for a double Sandstorm, and I all-in bet on it.
MDUW-WWWW-WWXX-PDM2 How this team fared against a +4 milotic - hilariously well.
Q3WG-WWWW-WWXX-PDTF How many turns did this ferrothorn stay in versus a moltres? The answer may surprise you. The importance of experience with AI play patterns.
36PG-WWWW-WWWV-K5TG is hilarious. Rough draft of this team brought to its knees at battle 17. Keep in mind that's zoom lens ferro.

Good Examples of Ordinary Functioning

HNLW-WWWW-WWXX-PEY8
Fairy trainers challenge many teams, this one is no exception.
AC2G-WWWW-WWXX-PEMG Careful maneuvering around set mixups.
YGZW-WWWW-WWXX-PEPK More set mixups, more disciplined risk management.
QXAW-WWWW-WWXX-R2XY Each new threat requires reexamination of your game plan.
J3LW-WWWW-WWXX-R2XN Oftentimes, slow and steady wins the race.

I may have failed this team as its pilot, but I hope that I did it justice in its writeup. I hope that I have accurately and usefully communicated Dual Core Processing's structure, function, and most importantly, its overall philosophy. In the end, I was left with the feeling that this team's potential was limited not by external factors, but by its player. Whether or not that is actually the case, I find the idea beautiful. If I have conveyed to you a fraction of that beauty - thank you.
 
Last edited:
I can pretty safely vouch for the verified viciousness of this team, as thanks to its QR, I was finally able to crack 200 wins for the first time in Ultra Moon!

View attachment 153418View attachment 153419

Thankfully, I find the team straightforward enough to use that I can normally boil most situations down to "if it has something super-effective against Kommo-O, don't bother bringing it in in unless said opponent also has something that can target and one-shot Karatana. Outside of these considerations, Volt Switch and light the Soulblaze when ready". Tree is never that simple of course, but it's simple enough that you can reach marks with it...even when you're functioning on a few hours of sleep. This current run also has given me a newfound hatred of Grass/Fairies, as it's typically difficult to bring Kommo in at all with these monsters on the field (since the rest of the team needs to generally peck away at them, due to how bulky the most commonly encountered offenders are). Good way to start the new year, I imagine, and I can only hope it is a sign that leads to more success...not for me, but for the rest of the crew.

Updating, reporting a completed streak of 473 wins in Ultra Moon Super Doubles. I won't elaborate too much, as Coeur has expounded upon this team a ton, but needless to say, that this squad WORKS.

- vs. Dexio, Starf Battle (Passimian3/Whimsicott3/Slowbro4/Espeon) -- Dexio is always a tricky proposition, due to the Tailwind/Trick Room mixups he can throw to counter my Tailwind, and the Fairies sprinkled in there to dissuade the Soulblaze. This is demonstrated here, as well as one of my very few uses of Electroweb, the added bulk to Koko coming into play, and my commemorative first USUM Starf obtained. CE7W-WWWW-WWX2-478L
- vs. Harvey, Battle 232 (Gengar4/A-Golem2/Lanturn4/Vaporeon4) -- Mildly tough, but more shown as a personal footnote for myself, as this was a decent snapshot of the sort of gimmicky team I would run if I were a facility Trainer: Kantomons, Alolan Formes, Johtomons (mandatory), and Megas strictly from those two regions (as you can tell, I'm quite old compared to some other members of this community). E4KW-WWWW-WWX2-47AA
- vs. Christian, Battle 285 (Porygon-Z4/Chandelure4/Drampa3/Espeon) -- the closest battle of the streak, and not surprisingly it's exactly why I advise against throwing Kommo-O out there if anything on the opposition is capable of one-shotting it before you light the Soulblaze. Two Drampa3 Quick Claw procs didn't help matters either. MegaKhan's bulk became incredibly clutch here and was yet another instance of why, if you're stuck for Mega slots and aren't gonna run a JohtoMega, MegaKhan is your next-best option. M4EG-WWWW-WWX2-47EQ
- vs. Gwenny, Battle 314 (Azelf/Cresselia2/Heatran/Articuno) -- 46 turns long, and you can imagine why. Fortunately, if you keep Kartana alive, this becomes less of a grueling trial and more of a source of great embarrassment for my Nemesis... FGAW-WWWW-WWX2-47GY
- vs. Poppy, Battle 361 (Hydreigon/Honchkrow/Greninja/Zoroark4) -- turskain has previously noted on this thread that some weird shit is occasionally going on with Zoroark and "resist switching" when it has its Illusion active. I saved this partly as an instance of backline Zoroark to see if anyone here can help My Liege out and tease this behavior out of it, and partly to note my first recorded instance of Set 4's Focus Band saving its ass in Tree. 4Z6W-WWWW-WWX2-47Y8
- vs. Perri, Battle 362 (Florges/Lilligant2/Aromatisse/Blissey2) -- my most recent Perri Battle, and while not tough, it was an bizarrely Set 2-loaded instance. The other two were likely Set 2 as well, knowing my luck. F8RW-WWWW-WWX2-47LK
- vs. Xio, Battle 444 (Primarina/Mimikyu3/Sylveon3/Togekiss) -- while Xio is normally a huge cunt due to her ability to entirely block Soulblaze, in this instance, the rest of my team didn't particularly seem to mind...one of Kartana's shining moments in this streak. 4CVG-WWWW-WWX2-47LT
- vs. Larry, Battle 474 (Aromatisse/Rotom-Heat/Amoonguss3/Sharpedo4) -- I was in a tight situation and basically gambled myself into a loss once I had this pared down to a 3v2. Always go for the safe play, children. 4WNW-WWWW-WWX2-47NE

Tree Streak 01-11-19.jpg
Tree Streak 01-11-19 #2.jpg


NoCheese You can remove my 138-win streak from the leaderboard now, boss: I don't want to clutter things up too much on my end now, and this much more impressive run can essentially replace it while leaving the important streak with 'Buncha Faves, Dood' intact.
cayZ5 Scythes ANTS You have helped flesh out the QR-UNO to a good degree and provided me with material to keep shooting forward in the Ultra Tree for a good while to come. I both love you and hate you for that, I'll have you know...thx!
HeadsILoseTailsYouWin And I guess I'll have to give your team a spin sometime; after all, I still have a UM Singles stamp to acquire...


And now, to keep climbing towards my next goal of maxing out my BP for the first time in UM!
 
Last edited:
This streak is in Ultra Sun.
This team has surpassed 464 wins thus far and is really satisfying me in the Battle Tree.
While not a lot of entries, (fourteen as I am writing this post to be exact) Kommo-o is certainly an amazing Pokemon to use in Doubles.
And I finally managed to get Landorus-T (I do not usually like using Landorus-T) a moment in the spotlight as well, though it didn't last long, but I'll get to that later.

OVERVIEW:
Kommo-o is a fantastic Pokemon. It has great power and can also be used as a mixed attacker, which is what I did.
This is also my first time using Kommo-o as well, and using it alongside a Fake Out user is especially great. It has relatively high physical bulk as well, even taking a Dragon Claw from Mega Garchomp at +1 Defense from Clangorous Soul Blaze. However, it also suffers
from a huge weakness from the Fairy-type. So, Mega Gardevoir could easily OHKO it if it wanted to. Psychic-types are a problem for it as well such as Alakazam and Mega Gallade. Nevertheless, Kommo-o is one of the most fun and underused Pokemon in the Battle Tree. (As a comparison, Garchomp has fifty two entries.)

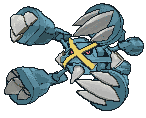
View attachment 156841
Kommo-o
Komota (Kommo-o) @ Kommonium Z
Ability: Bulletproof
Level: 50
EVs: 4 Atk / 252 SpA / 252 Spe
Naive Nature
- Clanging Scales
- Flamethrower
- Close Combat
- Protect

SET DETAILS:
- Kommo-o's main role is to receive an Omniboost from using Clangorous Soulblaze from the Kommonium Z, its item of choice.
Even so, Clangorous Soulblaze is an already powerful move that even almost OHKOes Multiscale Dragonite, and that comes from a
2x super-effective move and gives Kommo-o an Omniboost that it needs to outpace some threats such as Mega Salamence, Latias and Latios, and opposing Kommo-o.
- Clanging Scales also hits Mega Garchomp, Mega Charizard X, and Latios very hard but at the cost of lowering Defense. However, it does have a fantastic trait of hitting through Substitute. (The same goes for Clangorous Soulblaze)
- Flamethrower is used as a great coverage move that it can use to take out troublesome Steel-types such as Ferrothorn, Mega Lucario, and denting Mega Aggron.
- Close Combat is a good STAB move to have to hit Blissey, Heatran, and Porygon2. Taking out Porygon2 is also very handy as once Porygon2 is gone, (notably from Colress) it can prevent Trick Room from being set up. However, that doesnot stop Fairy-type Pokemon such as Aromatisse and Carbink.
- Protect is used because Protect.
- Bulletproof was used to block Shadow Ball, Focus Blast, andother moves. The only downside to this was that this ability was not Soundproof, which can also block other Kommo-o's Clanging Scales. However, considering there is only one set that actually uses Clanging Scales, Bulletproof was alright to use from me. The given EV spread and Naive nature allows Kommo-o even Mega Lopunny at +1.
- A Kommonium Z is used to allow Kommo-o to use Clangorous Soulblaze.

HOW I USED IT:
Kommo-o was used as a lead Pokemon. Its main role is to set up Clangorous Soulblaze immediately. Therefore, my other lead Pokemon, Mega Kangskhan proves to be very useful in that regard. It becomes a truly menacing threat when it comes across other Dragon-types, Steel-types, and dents anything that does not resist its attacks. Kommo-o cannot do anything against Fairy-types, so Celesteela is there to help protect it. In return, Kommo-O can face off against the Electric-types that Celesteela struggles against, as well as absorb a burn from a Will-O-Wisp or a Fire-type move since it's not merely a physical attacker. Mega Kangaskhan appreciates Kommo-O for breaking down the Rock-types and Steel-types that get in its way. Lastly, Landorus-T helps Kommo-o by "boosting" Kommo-o's defensive value thanks to Intimidate and in return, beats down (some) Ice-types.

OTHER OPTIONS:
Kommo-O has a sheer amount of alternative options to choose from, however, most options are not better than the set that it used. (Or at least I think so.)
- Flash Cannon, Iron Head, and Poison Jab are probably the best alternative options to use, as they provide coverage against Fairy-types.
Earthquake, at first glance may seem useful but it hurts your teammate and Close Combat already hits most of the Pokemon that Earthquake also hits.
- Ice Punch and Thunder Punch could potentially be used to hit Flying-types more easily.

COUNTERS:
Ice-types and Ice-type coverage:
Notice the "some" is in parentheses when assisting Landorus-T with Ice-types. Some other Ice-types like Articuno and Mamoswine will not fall to a
+1 Flamethrower. Alolan Ninetales is probably the BEST counter to Kommo-o. However, bar Alolan Ninetales, they also can't take Clangorous Soulblaze all too well. But some Water-type Pokemon, like Suicune and Dragon Dance Feraligatr can hit Kommo-o with their Ice-type coverage.

Fairy-types:
Togekiss, Alolan Ninetales, Gardevoir and Mega Mawile are some of the best counters to Kommo-o, period. They struggle against Celesteela a lot, however, when Celesteela is out of the picture, Fairy-types become way more problematic. Veteran Xio is therefore, Kommo-o's living nightmare.

Psychic-types:
Mega Alakazam, Mega Gallade, and Alolan Raichu can hit Kommo-o with their super-effective Psychic-type attacks, but cannot switch directly into Kommo-o's moves at +1.

Stat Removing Moves:
Clear Smog, Haze and other stat removing moves are annoying to deal with, since they remove Soulblaze's omniboost.

OVERVIEW:
Mega Kangaskhan, easily known as one of the most dominant forces in VGC, period. GAME FREAK had to nerf it so much that it almost became unusable in Ubers. This doesn't stop it from offering fantastic assistance with the dominant move of Fake Out and fantastic coverage of Low Kick and Sucker Punch. However, while the Speed typing is great, it is still outsped by faster Fake Out users of Mega Lopunny and Weavile and falls to outspeed Choice Scarfers like Machamp and Garchomp. It also has a not so great offensive typing and has no access to a form of reliable recovery.
But the pros outweigh the cons, and Mega Kangaskhan is a great consideration for any team that involves Doubles. (unless you use Tapu Lele)
View attachment 156839
Mega Kangaskhan (ignore the immature name)
bend over (Kangaskhan-Mega) @ Kangaskhanite
Ability: Parental Bond (Scrappy)
Level: 50
EVs: 4 HP / 252 Atk / 252 Spe
Jolly Nature
- Fake Out
- Body Slam
- Sucker Punch
- Low Kick

SET DETAILS:
- Kangaskhan's pre-Mega ability is Scrappy, allowing it to hit even Ghost-types with Fake Out. Fake Out is a great move for Mega Kangaskhan to use because of it allowing Kommo-o a much safer chance of setting up and sweeping and even allows Kangaskhan to Mega Evolve safely.
- Body Slam is used as, what was supposed to be a fun gimmick, has proved to be very useful with the double shot of paralysis and is Mega
Kangaskhan's main STAB move of choice.
- Sucker Punch is a necessity, as it is the only move that can hit Ghost-types (aside from Scrappy Fake Out and Body Slam).
- Lastly, Low Kick is used to hit Tyranitar super hard, as well as opposing Mega Kangaskhan.
- A Jolly Nature is used to outspeed Pokemon such as some Landorus, Mega Medicham, and Mega Gardevoir while also hitting them hard as well with the EV spread given. A Kangaskhanite is used to allow Kangaskhan to Mega Evolve.

HOW I USED IT:
Mega Kangaskhan was used as a lead Pokemon alongside Kommo-o. Mega Kangaskhan's utility in Fake Out and paralysis can actually make the difference, as Kommo-o isn't the fastest Pokemon. Also, double Fighting-type coverage means Tyranitar is not safe to come in. It can pick off Ghost-types such as Mega Gengar with Sucker Punch as well. Landorus-T offers Intimidate support which is great for Mega Kangaskhan to soak up more hits notably from some Fighting-type Pokemon such as Mega Gallade and physical Togekiss. (Yes, that is a thing.)

OTHER OPTIONS:
- Using the usual Return or Double-Edge is acceptable, as they both offer much more offensive power than Body Slam.
- Fire Punch can be used to hit troublesome Steel-types such as Ferrothorn and Mega Scizor but does not have the moveslot for it to use it.
- Ice Punch is the same in this regard, hitting Salamence, Garchomp, and Noivern.
- Hammer Arm can be used as a fun gimmick to mess around with the Trick Room teams. But as said, it is usually a gimmick.
- However, Power-Up Punch's +2 Attack boost can really help with Mega Kangaskhan becoming both a utility Pokemon and an offensive powerhouse.
- Lastly, Rock Tomb can be used to assist Kommo-o and Celesteela by lowering the opponent's Speed stat twice.

COUNTERS:
Fighting-types:
Choice Scarf Machamp, Mega Medicham, and Terrakion can hit Mega Kangaskhan with Close Combat or Drain Punch,
even denting it after an Intimidate drop. Mega Lucario can easily threaten an OHKO with Adaptibility boosted Close Combat.

Ghost-types:
Seeing difficulty against some Ghost-types such as Jellicent and Chandelure, they can burn Mega Kangaskhan with Will-O-Wisp and cripple it.
However, they have to be careful of Sucker Punch.

Intimidate or Burn:
Mega Kangaskhan highly relies on its damage to be a menacing threat, so Intimidators like Mega Manectric, Mawile, Gyarados, Salamence, and
Arcanine are not usually Pokemon that Mega Kangaskhan wants to stay in on. Also, burning it halves its Attack, making it less of an offensive threat.

Residual Damage:
Because of no form of reliable recovery, it can be whittled down by Rocky Helmet, Iron Barbs / Rough Skin, burns, toxic poison,
and is also crippled by paralysis.

Mega Gallade:
With Inner Focus, Mega Gallade can avoid flinching and proceed to KO either of Mega Kangaskhan or Kommo-o with Psycho Cut (Crit) or Close Combat.

Faster Fake Out Users:
All cases of this situation are Weavile, Mega Lopunny, Ambipom, Infernape, Liepard, Mienshao, Salazzle, Ludicolo (Drizzle + Swift Swim), and Raichu. Weavile can try to also nab a KO on Kommo-o with Ice Punch as well, while Mega Lopunny can hit Mega Kangaskhan with High Jump Kick or Kommo-o with Ice Punch, and Infernape hits Mega Kangaskhan with Close Combat, to list a few examples.

Abilities such as Rough Skin, Iron Barbs, Flame Body, etc:
Due to Mega Kangaskhan hitting twice, it is more likely for Mega Kangaskhan to gain the effect from the ability. For example, Mega Kangaskhan has a greater chance of being burned by Flame Body.

OVERVIEW:
Celesteela is a fantastic Pokemon to use due to its amazing defensive typing and stupidly bulky stats and has Beast Boost to become even bulkier.
Though Steel-type is not usually seen as an offensive typing, Celesteela's massive weight has made it a tremendous user of Heavy Slam,
especially against Fairy-types. Leech Seed also gives Celesteela a reliable form of recovery and Protect is used alongside it to gain even more
HP. However, Electric-types tend to take out Celesteela very easily and is also somewhat passive if not using Heavy Slam.
View attachment 156840
Celesteela (is this name even allowed?)
USSR (Celesteela) @ Leftovers
Ability: Beast Boost
Level: 50
EVs: 252 HP / 44 Atk / 44 Def / 4 SpA / 164 SpD
Careful Nature
- Heavy Slam
- Leech Seed
- Flamethrower
- Protect

SET DETAILS:
- A Careful nature, 252 HP, 44 Defense and 164 Special Defense EVs mix Celesteela's defensive stats around and allows Celesteela to gain a Special Defense boost from Beast Boost. Even if the investment in Attack is not high, Heavy Slam still deals a truckload of damage. The last few EVs were put into Special Attack to boost Flamethrower an extra tiny bit.
- Heavy Slam is Celesteela's main STAB move of choice to use as it hits ridiculously hard anyway.
- Leech Seed is used as a somewhat reliable form of recovery and whittles down opponents such as Suicune until they are able to be KOed by Heavy Slam.
- Flamethrower picks off other Steel-types that may be able to deal with Celesteela such as Scizor, Mega Metagross, and its rival, Skarmory.
- Protect is used alongside Leech Seed to gain even more HP from Leech Seed recovery as well as Leftovers recovery.

HOW I USED IT:
Celesteela is essentially the shield of Kommo-o, shielding it from Fairy-type attacks and hitting them back with Heavy Slam. Intimidate support from Landorus-T also helps as well and avoids Landorus-T's Earthquake. Fake Out support from Mega Kangaskhan allows Leech Seed to possibly be set up for free. In return, Celesteela beats Ice-, Rock- and Fairy-types, most notably, Gigalith, Alolan Ninetales, and Terrakion.

OTHER OPTIONS:
None whatsoever that are viable.

COUNTERS:
Fire-types:
Incineroar doesn't mind that it is super bulky and can pretty much hit it with Flare Blitz anyways. Also, Mega Charizard X & Y, Heatran, and
Moltres, can hit ridiculously hard with their STAB Fire-type attacks.

Electric-types:
Mega Manectric might just be the number one counter to Celesteela as it resists Heavy Slam, Intimidates Celesteela, and doesn't take much damage from Flamethrower or Heavy Slam. Zapdos, Thundurus, and Raikou also take on Celesteela very comfortably as well. However, none of them like to switch into a Leech Seed, except for Rotom-Mow.

Taunt:
Taunt users like Weavile and Hydreigon can prove to be a massive problem if it is revealed to have Taunt, blocking Leech Seed and Protect attempts.

OVERVIEW:
Ohh, Landorus-T, the number one most used Pokemon in Doubles. It has an amazing ability in Intimidate, a great offensive and possibly defensive typing as well, and has a fantastic movepool as well with great stats. Most people run the Choice Scarf varient, however, I on the other hand, am using an Assault Vest. Landorus-T also has a great skill of taking one hit and then hitting back with an even more powerful one, such as
fishing for Rock Slide flinches, which has saved a few games for me. However, Ice-types are a problem to Landorus-T. Landorus-T also lacks Protect as well in this case. Lastly, for whatever reason, most of my losses with this team was mostly because Landorus-T missed at least one Rock Slide. Landorus-T is cross-eyed, dammit.
View attachment 156842
Landorus-T
LandMaster (Landorus-Therian) @ Assault Vest
Ability: Intimidate
Level: 50
EVs: 252 Atk / 4 SpD / 252 Spe
Jolly Nature
- Earthquake
- Rock Slide
- Superpower
- U-turn

SET DETAILS:
- A Jolly Nature, along with 252 Speed EVs make Landorus-T as fast as possible. 252 Attack EVs also make Landorus-T hit super hard as well.
- Intimidate is a fantastic ability to use as Landorus-T can also be an effective pivot with U-Turn.
- Earthquake is used to hit super hard and cleans up most weakened foes as well. Rock Slide hits Flying-types such as Tornadus and Thundurus (how ironic) and has a decently high chance to flinch the opponent.
- Superpower is used to surprise Bisharp, Tyranitar, and Snorlax to hit them very hard but also lowers Landorus-T's stats. You would usually want to switch if using Superpower.
- An Assault Vest is used to allow Landorus-T to not only take hits from the physical side but also on the special side as well.

HOW I USED IT:
Landorus-T is great with Intimidate support. Having Landorus-T pivot with U-Turn helps Mega Kangaskhan with its physical prowess and helps them stay on the field longer and also beats the Rock- and Steel-types that get in Mega Kangaskhan's way. Also, Celesteela is great in this regard and avoids Landorus-T's Earthquake while Celesteela can defeat Ice-types rather quickly (or slowly). Lastly, Kommo-o can defeat Ice-types as well thanks to its Fighting-type, however, both have to watch out for their weakness to Ice-type moves. Landorus-T also might have the advantage of having a slow U-Turn, bringing a teammate in safely.

OTHER OPTIONS:
- A Life Orb set can be used, boosting Landorus-T's attacks but this makes Landorus-T much more frail, something it never thought it would hear.
- Earth Power can be used, but it has a very noticeable power drop.
- Though not common in Doubles or the Battle Tree at all, Stealth Rock can be used to chip the opponent's HP.
- Explosion can be used as a gimmick surprise and, but this hurts your teammate (especially if Landorus-T is equipping a Choice Band)
- Hidden Power Ice hits Garchomp and other Landorus but is not generally used.
- Knock Off is probably one of the better options that Landorus-T has, but it is very weak otherwise.
- Stone Edge is not recommended, as it has a very high likelihood to miss.
- A mixed attacker set with Sludge Bomb or Sludge Wave can be used, however, I imagine that this is also a gimmick.
- While Choice Scarf might seem good, being locked into resisted or non-effective moves suck, and hitting your teammate with Earthquake is not a fun thing to do. (This actually contributed to one of my losses as well) Therefore, Assault Vest would be better in this case.
- Rock Tomb can be used to slow down opponents such as Choice Scarf Garchomp and Mega Salamence.
- A Z-Move set is not recommended, as it means getting rid of another Z-Crystal user in Kommo-o.

COUNTERS:
Ice-types:
Weavile, Rotom-Frost, and Glaceon can hit Landorus-T on the super-effective side but has to watch out for the super-effective hits that Landorus-T packs as well. Ice-type moves in general can almost always ignore the fact that the Assault Vest in there in the first place.

Water-types:
Rotom-Wash, Vaporeon, and Suicune can easily take Landorus-T's attacks and can hit back with a strong Water-type move or a super-effective Ice-type move.

Intimidate and Burn:
Landorus-T is a physical attacker, so Intimidate from other Pokemon such as Incineroar, Salamence, and Mawile can weaken Landorus-T a little bit. It is much harder to land a burn on Landorus-T but when it does land, Landorus-T is basically crippled for the rest of the game.

These few Battle Videos are somewhat close calls I had:
No. 437 (78WW - WWWW - WWX2 - ECM6)
No. 434 (X7BW - WWWW - WWX2 - ECN3)
No. 355 (TMGW - WWWW - WWX2 - ECNS)
No. 252 (RTAW - WWWW - WWX2 - ECZB)

View attachment 156843
LOSS VIDEO:
RVDG - WWWW - WWX2 - EBMW
"Hahaha! Just as I announced! A perfect victory for me!" - Youth Athlete Buddy
At this point, the Battle Tree is taunting me.

Buddy thought it was fun to toy with my emotions.
Led with Weavile and Noivern. I decided I would switch out Kommo-o into Celesteela.
I attempt to Fake Out Noivern, but Weavile, because of how fast it is, Faked Out first.
Noivern proceeded to use Hurricane but missed Celesteela. But then it used Focus Blast on Mega Kangaskhan and it landed. (how?)
Weavile taunts Mega Kangaskhan, which I'm alright with.
Celesteela Heavy Slams Weavile and lives at 1 HP because of Sash, but also proceeds to Pickpocket Celesteela's Leftovers as well.
Mega Kangaskhan Body Slams Noivern and paralyzes it.
Then Weavile switched out into Jolteon (ugly), somehow predicting I was gonna Sucker Punch?
Anyways, Noivern kills Mega Kanga with Focus Blast and dies to Celesteela's Heavy Slam, with Celesteela getting a Special Defense boost.
Weavile is sent back out and Fakes Out Kommo-o.
Jolteon proceeds to Thunderbolt Celesteela and Celesteela eats it up.
Then Ribombee comes out.
Now remember that Special Defense boost that I got on Celesteela?
It didn't matter because Jolteon hit a Crit Thunderbolt and down goes my Celesteela. Of course.
I would've Heavy Slammed it too had it not been for that ugly Pokemon, Jolteon.
Anyways, Kommo-o and Landorus-T are the only things left on the field now.
The logical decision was made to Protect Kommo-o on this turn.
Jolteon Fake Tears Landorus-T because he knew I was gonna Protect (Sometimes, I hate the AI)
And Kommo-o Flamethrowers Ribombee.
But now, all hell breaks loose.
Ribombee suddenly became a monster after getting one Quiver Dance up.
One Draining Kiss was enough to dent the hell out of Landorus-T, doing over half with Draining Kiss.
So, essentially, the game was over.
It didn't matter if I protected with Kommo-o because Ribombee could've went for either Landorus-T or Kommo-o to Draining Kiss on, KOing both at the range Landorus-T was at, and Kommo-o dies regardless.
Kommo-o faints due to Draining Kiss and Ribombee gains an insane amount of HP back.
Landorus-T lands the Rock Slide, but Ribombee lives at 1 HP. 1. H. P.
And not only that, from the range Ribombee was at, I could've killed.
But NOOOO. Ribombee just HAD to live, because I got just the roll that Ribombee needed to live. (I didn't get a crit either)
So now I have a loss where it wasn't because Landorus-T missed Rock Slide, but Landorus-T missed the KO WITH Rock Slide.
This adds another reason why I do NOT like using Landorus-T in competitive; It's good for other people, but the moment I use it, it sucks.
This reinforces my opinion.
And another thing, this is another loss where a Jolteon contributed to my loss, had it not Fake Tears on Landorus-T, I would've won.
Nothing I could've done to prevent that.

I hate Jolteon with a passion. Easily the WORST Eeveelution.

EDIT: Now, I'm starting to run Adamant Nature Landorus-T over Jolly, since it seems like Landorus-T needs more power to get the KOs rather than its Speed.
good lord would it kill you to use normally sized sprites like everyone else? lol jk (sorta)

I'm curious as to how you obtained that Kangaskhan since it was no secret how obnoxiously difficult a time Eisen had in legitimately obtaining an Adamant one from the Safari. You're usually very animated about things which frustrate you, but you began using this thing out of nowhere. Not to mention when asked by Coeur where you'd gotten it, your response was

"gen 3 tutor I believe"

Come on. SM and I've shared some pretty blatantly illegal memey shit in discord and there's no question where we got them.
 
Ooh! The 4000th post in this thread!

I've updated through here. Lots of great streaks. And Tapu Koko is sure coming on strong. A few notes. First, I was going to include Touko's streak, with enough people playing, someone is bound to get ridiculously lucky on the high-rolls, and this is more believable than certain sketchy 4-digit claims. But the "take my ball and go home" walk-away post means I'm absolutely going with the skeptics on this one.

Second, brandonplaysstuff, as you see, I did not include your 462 win streak, due to the genned Kanaskhan. Still a good streak and interesting team, just not leaderboard eligible. I have included your 276 win Landorus / Tapu Koko / Aegislash / Mega Gyarados team, but the loss video code you gave doesn't work. Did you accidently typo? Please update when you get the chance!

You'll note I still have not included my 1000 wins in super singles. Gotta stay true to the "no write up, no leaderboard principle" as bending the rules in my own favor would be pretty hypocritical. But I'll get it done eventually!

Continued good luck with the streaks, everybody!
 
The term originates from the Gen IV days when "PokeGen" was one of the more widely used programs for generating pokes onto your save file. Regardless of the result being indistinguishable, they were obviously illegally produced.

Nowadays with more elaborate methods like QR injection and whatever else (PKHex is, as far as I know, still the frontrunner for that sort of thing, carrying over from gen VI) "genning" is still used as a blanket term.
 
Sorry, but what does "genned" mean? Is it a sort of illegal thing?

It means that a Pokemon has been hacked (though it may be still within the legal limits of that Pokemon's abilities as far as moves, stats, etc).

I am willing to recognize streaks used with "genned" (hacked) Pokemon, provided that they are "legal" and that the accompanying writeup and any provided videos demonstrate the legitimacy and thoughtfulness this community has grown to appreciate.

On the subject of hacking, we are more concerned with streaks that are themselves hacked, rather than the Pokemon being hacked. Unlike hacked (but "legal") Pokemon, hacked /streaks/ actually do matter, and are comparatively easy to detect. High streaks are rendered extremely suspicious if they are posted with battle videos showing obvious mistakes (especially if the poster doesn't realize or mention the mistakes they've made). Consider that people generally don't post videos of battles in which they've made mistakes, unless they are using the video to show a 'learning experience'. Battle videos are, and will be, examined closely for such mistakes.
 
I am willing to recognize streaks used with "genned" (hacked) Pokemon, provided that they are "legal" and that the accompanying writeup and any provided videos demonstrate the legitimacy and thoughtfulness this community has grown to appreciate.

As an individual, go ahead. And it's absolutely great to discuss otherwise clean runs using "legal" hacks, test team design, and spur further team innovations. But in an excess of caution, I want to reiterate that the official position on this forum remains as stated in the rules in the OP, excepted below. (The "Edit" is part of the rules text, and was not made as part of this post)

  • Don't cheat. Streaks using hacked Pokemon will not be leaderboard eligible. [Edit: In the interest of clarity, note that this includes "legal" hacks. We've been consistent on this in all the battle facility threads for previous generations.] And I shouldn't even have to mention things like using other software to backup savefiles. No no no. I promise you, we have enough experienced players that suspect streaks get identified very quickly, and cheating to put together a streak of dubious validity will not win you respect.

But yes, absolutely, cheating on your streak by hacking save states to redo losses or the like is the ultimate no-no, and is a major black mark against you. Using genned pokemon just keeps you off the leaderboard.
 
Thanks.

(To me the achievement of reaching a certain number of wins is based on creating a team + the ability of playing with that team and I find it strange to not accept streaks done with these genned pokemon. This implies that the achievement of this number of wins also contains getting the pokemon on a legal way, capturing, breeding, RNGing and also exchanging (here: how will a honest player know whether his pokemon is genned or not? How will we know what a honest or dishonest player used?). This further implies to me that QR-teams shouldnt be recognized as well, as here the challenge of legally obtaining the pokemon also is not given and you rely on statements of maybe unknown players that use even more unknown pokemon. To me using genned pokemon or QR-teams is totally eligible. Also there might be people outside that scroll over the leaderboard to look at different succesful teams, getting inspiration or even trying some of them out. Simply removing teams from there because of genned pokemon will kick these teams back into a spot somewhere in the 160 pages of this thread, unnoticed and untraceable from any interested person for ever. Maybe an additional list for these teams (and QR-teams if you insist) may be a solution? Then any viewer can decide for himself how much credit he gives to genned pokemon teams.)
Brackets around this because this question for sure was discussed before, and from my side there is no need to start a deep discussion. Also i like brackets.


I ain't sure if it's a great idea to do that. I like the idea of leaderboards as guide, a random person can view them and pick their favorite and can try it on their cart. I could Rage Glitch a flawless Bold Wish Chaney that gets past Pokebank easily, but if a guy sees a streak with it and realizes that he's going to need to cheat to get one, he'll wonder what the hell he's doing if people are accepting blatant hacks to the leaderboard.

Speaking of Kang, it's actually not that hard to get a legal Jolly Body Slam one... In a Poke Ball. I just trial and error bred in Emerald until I got the desired nature.
 
I ain't sure if it's a great idea to do that. I like the idea of leaderboards as guide, a random person can view them and pick their favorite and can try it on their cart. I could Rage Glitch a flawless Bold Wish Chaney that gets past Pokebank easily, but if a guy sees a streak with it and realizes that he's going to need to cheat to get one, he'll wonder what the hell he's doing if people are accepting blatant hacks to the leaderboard.
I dont know if i understand you correct. Is this Chansey legally obtainable?
 
I dont know if i understand you correct. Is this Chansey legally obtainable?
Yes, from a PCNY event that lasted 2 weeks in 2004. If you got the event, you have a 1 in 6 chance of actually getting the Chansey, and there is exactly one documented legit one I could find, and it isn't Bold. Technically obtainable, but the barrier of entry is so obnoxiously high that the only way to realistically get it now is via cheating. Wish Chansey is the poster boy of "good sets that could technically wreck shop, but are so ridiculous to get that they will never be on the leader boards"
 
Now im curious. Are there other examples that are that extreme?
There's several, basically every Pokemon that's event only, but Wish Chansey is *that* rare.


There's a few starters with weird moves too but those aren't really competitive... as well as transfers from XD or Coliseum which tend to be difficult to obtain legally nowadays. And well, Eruption Heatran or the shiny legendary dogs also do have unique moves.
 
mega_metagross.png

Fantastic LuchaLele art done by nyankin

Ladies and gentlemen, it has finally happened. I am here to present an ongoing streak of 1000 wins in Ultra Moon Super Doubles! The team is very similar to my last team, with a couple of changes. It features Hawlucha, Tapu Lele, Mega Metagross, and Hydreigon. Before I begin, I have to say that I have played battle facilities since way back in gen 2. I never once had the idea I would be getting large streaks such as the ones I have posted here, and now here we are at 1000. It feels pretty great. Also, I noticed I JUST missed the leaderboard update. Oh well, hopefully the next one won't take too long!

Also, I was unsure if I should record battle videos or just upload them and share codes, but I ultimately decided to just upload some codes. I hope that’s okay. Maybe once the streak is over, I’ll record some of the videos I have saved and upload them in a video. Anyway, let’s begin.

hawlucha.gif

Hawlucha @ Psychic Seed
Level: 50
Ability: Unburden
EVs: 252 HP / 252 Atk / 4 SpD
IVs: 31/31/31/xx/31/31
Adamant Nature
- Low Kick
- Acrobatics
- Tailwind
- Protect

First up, Hawlucha. This guy’s remained mostly unchanged, except I switched out Substitute for Protect. Last time, I said I preferred Substitute because of avoiding status, but then I started to rethink that a little bit. With, Protect, I can reliably avoid Fake Out and stall out Trick Room turns if it ever goes up. Substitute had its advantages, but I starting to think that Protect might be better. It has helped me on this streak way more than Substitute ever had. Tailwind is used for speed control, while Low Kick and Acrobatics are STABs.

tapulele.gif

Tapu Lele @ Psychium Z
Level: 50
Ability: Psychic Surge
EVs: 4 HP / 4 Def / 252 SpA / 4 SpD / 244 Spe
IVs: 31/xx/31/HT/31/HT
Modest Nature
- Psychic --> Shattered Psyche
- Moonblast
- Taunt
- Protect

Next up, Tapu Lele. Psychic Terrain is one of the most important parts of this team as it helps Hawlucha activate its Psychic Seed, also activating Unburden in the process. As for the EVs, I decided to make Tapu Lele a little faster, making it hit the speed tier of 146. This speed-ties with Gyarados-3 and 4, but they use Dragon Dance most of the time on turn 1, so it really isn’t much of a big deal. The increase in speed allows me to catch things like Moltres-1 and 2, Togekiss-3, Gardevoir-3, Venusaur-3, etc. Like Hawlucha, Lele’s moveset hasn’t changed much except I switched out Shadow Ball for Taunt. Why? So I can stop some of the pesky Trick Room setters that the leads cannot handle. This mostly just includes Slowbro-4 (mega), Carbink-3, Bronzong-4, and Cresselia-4. Slowking would also be included on this list, but the chance to roll Oblivious makes it too risky. The rest of the set remains unchanged.

metagross.gif
-->
metagross-mega.gif

Mega Metagross @ Metagrossite
Level: 50
Ability: Clear Body --> Tough Claws
EVs: 4 HP / 252 Atk / 252 Spe
IVs: 31/31/31/xx/31/31
Jolly Nature
- Iron Head
- Stomping Tantrum
- Ice Punch
- Protect

Metagross has remained completely unchanged from the last team, so there really isn’t much to say about this guy. It likes to switch in on potential Poison or Steel attacks targeted at Lele, and it also enjoys demolishing nearly everything in his path. I’m very happy I was able to bring Metagross to the big 1k, as it is also one of my favourite Pokemon.

hydreigon.gif

Hydreigon @ Life Orb
Level: 50
Ability: Levitate
EVs: 12 HP / 4 Def / 244 SpA / 4 SpD / 244 Spe
IVs: 31/xx/31/31/31/31
Modest Nature
- Dragon Pulse
- Dark Pulse
- Flamethrower
- Protect

And finally, the new girl. Hydreigon is the final team member of the team, and boy am I satisfied with her. With the Life Orb, Hydreigon dishes out a lot of damage. The Dark typing also allows her to switch in for Psychic attacks targeted at Hawlucha, if needed. Dragon Pulse is a nice STAB that hits Dragons, and anything else the other two attacks can’t hit too well. Dark Pulse is mainly used to wipe out opposing Psychics, and can also fish for flinches if needed. The Dragon and Dark STABs are nice as they hit quite a bit in the Tree, except for Fairy-types. But, that’s why we have Metagross. It also helps deal with opposing Mega Metagross. Flamethrower is the coverage move of choice as it helps deal with things such as Ferrothorn, Escavalier, Steelix. And Mega Aggron (after prior damage). I was also considering Earth Power for a while and to be honest, still considering it, but I still like the current set as is and I’m pretty much satisfied with Hydreigon’s power. The 244 Speed EVs allows Hydeigon to hit 149 Speed, 298 after Tailwind. 244 Special Attack EVs didn’t really make much of a noticeable difference to 252, so I went with that. The rest of the EVs were put into HP, Defence, and Special Defence.
The team’s threats mostly remain the same since the last run, but there’s some new ones that managed to rise up. I’ll still write about most of the threats I found throughout most of the streak.

Cresselia-4 – With the addition of Taunt to Lele’s repertoire, Cresselia-2 and 3 are kind of a joke now. Cress-4, however, can still be a problem. Even if I Taunt it to prevent its Trick Room, it hits pretty damn hard with each of its attacks. Thanks to the Iron Ball, it actually gets a boost from the Psychic Terrain, making its Psychic pretty deadly to Hawlucha (252+ SpA Cresselia Psychic vs. +1 252 HP / 4 SpD Hawlucha in Psychic Terrain: 168-200 (90.8 - 108.1%) -- 50% chance to OHKO). Also its Moonblast can OHKO Hydreigon as well. Treat this thing with caution.
Uxie-1 – Uxie can still be pretty annoying. Its damage isn’t very threatening a lot of the time though. Set 1’s Thunder Wave can cripple the team with paralysis, but like Cresselia, it’s pretty much Taunt bait.
Magnezone-3 – Thunder Wave, Bright Power, and possible Sturdy? What more does this behemoth need? Mag-3 returns as a pretty big threat to the team. In fact, it’s so scary, that unless I manage to hit it with both Low Kick AND Psychic on turn 1, it won’t go down and will proceed to either hit Hawlucha or Lele with a powerful attack (possibly Analytic boosted too!) or use Thunder Wave to cripple something. It’s too risky to Taunt this thing since it can sometimes end up being set 4 with an Assault Vest. Actually, now that I think about it, set 4 is pretty scary too if it leads. You know what? Magnezone is a monster. Get out of my game. Thanks.
Liepard-3 – Liepard once again gets an honourable mention only because of Prankster Thunder Wave. If it leads, and rolls Prankster, it will try to Thunder Wave Hawlucha. And you don’t want that. Fortunately, it faints to one Moonblast anyway, so Protecting Hawlucha is usually the right call.
Mawile-34 & Metagross-4 – Oh boy. You know, when I went back to planning stages with this team, I was wondering if there was a better way of dealing with these two. One thing I did find out, however, is that Mega Mawile will faint to Acrobatics+Shattered Psyche if Hawlucha does not get Intimidated. So there’s one way of dealing with it. Metagross, however, is still too much for this team. Vs Metagross, I still usually just Protect Tapu Lele or switch out to my own Metagross and have Hawlucha use Tailwind.
Contact Abilities – Static, Flame Body, and Effect Spore are still pretty annoying for both Hawlucha and Metagross. All of their moves are contact moves and can cripple the team if they activate. But, at least Tapu Lele and Hydreigon can deal with most of the stuff that can carry these abilities.
Talonflame-4 – Gale Wings can make this set a menace. Using Protect with Hawlucha, and having Lele attack it is usually the best way to go with this. Set 3 likes to use Swords Dance a lot before its Sash is broken, so it’s not really an issue.
Trick Room – Thanks to Taunt, a lot of the Trick Room setters can be delayed a bit and left to rot. Shattered Psyche still OHKOs most of them though. The more threatening ones are Oranguru-3, Slowking-4, Slowbro-4 (if unable to Mega Evolve and rolls Oblvious), and Aromatisse-4. The slowthings should be pretty obvious: bulky Psychics, can roll Oblivious, and both hit the team pretty hard. Aromatisse can be KO’d by Acrobatics+Psychic, but it has like a 2% chance to survive. Oranguru is a similar issue. Low Kick+Moonblast 2HKO, but a low roll on either move, and Trick Room is going up. The other setters are either Taunt-bait or can be OHKO’d or 2HKO’d successfully.
Blissey-4 – The good news: I have encountered this Blissey once during this run. I know, pretty unbelievable. The bad news: it’s still a problem. Thanks to its Chople Berry, it can survive two Low Kicks. Acrobatics and Shattered Psyche can 2HKO, but it’s only a chance – usually a chance I’m not willing to take. On top of Minimize, Toxic, and Soft-Boiled, it also has Mud Bomb! So, I can’t even hit it a bunch of times with Metagross. I always try to take out this thing as fast as I can.
Snorlax-34 – I did not include this dude on the threat list last time, but let me tell you – SNORLAX IS A THREAT. Set 3 hits very, very hard thanks to its Life Orb, and set 4 is so god damn bulky and also carries FISSURE. Low Kick can OHKO both, but the chances are pretty low. Risking a double into it with Low Kick and Psychic can be worthwhile if the partner isn’t too dangerous.
Heatran1234 – Another major problem. Heatran is the main reason why I’ve been considering Earth Power on Hydreigon since both of the attacks that are super effective vs it are contact moves. Heatran has a chance to roll Flame Body, which can cripple both Hawlucha and Metagross. Low Kick+Psychic vs a lead Heatran will 2HKO, but the Scarf set can OHKO Lele before Psychic is even used. Be careful. Heatran-3 is a different kind of beast that has a powerful Sun-boosted Fire Blast, so like the others, has to be dealt with ASAP.
Fake Out – Although not really a huge problem (since Metagross and Lele are both immune thanks to Psychic Terrtain), it can stop Hawlucha and Hydreigon from acting if they’re out vs one of the users. Vs leads, I have Hawlucha use Protect, and have Lele attack the Fake Out user. Pretty simple. Why didn’t I run Protect on Hawlucha again?
Incineroar-34 – This thing is a pain. From possible Intimidate, to Quick Claw Flare Blitz, it is a true menance and should be treated as such. Low Kick and Moonblast usually KO set 3 if it didn’t roll Intimidate, but set 4 is a different kind of beast. Letting something eat a Flare Blitz or hoping for a crit is really the only thing that this team can do to deal with it. Or switching to Hydreigon on a Flare Blitz can also work.
vs Captain Mallow (Tsareena-3 / Talonflame-3 / Trevenant-? / Toucannon-3): PNYW-WWWW-WWX2-H99X

Since I didn’t lose yet, battle #1000 has its own section. To be honest, this battle was pretty ugly and I actually almost lost. Imagine losing at 999 wins... Anyway, let’s begin.

Turn 1 – Mallow ended up leading with Tsareena and Talonflame. Tsareena isn’t much of a problem since Acrobatics OHKOs both sets 3 and 4, but Talonflame can be a huge problem. Set 4’s Brave Bird can OHKO Hawlucha if Gale Wings is rolled, so I ended up using Protect with Hawlucha. Talonflame ended up using Swords Dance instead of a Flying-move, which lead me to believe it was set 3, which has Acrobatics instead of Brave Bird. Fortunately, for Mallow, I misclicked Moonblast instead of Psychic, but at least I broke Gale Wings. Tsareena ended up using Trop Kick into Tapu Lele.
Turn 2 – Hawlucha used Acrobatics to OHKO Tsareena, while Talonflame used its own Acrobatics to finish off Tapu Lele. Uh-oh. Honestly, I think I should have just had Lele use Protect, but I wanted to attack Talonflame because I thought it would go for the Acrobatics (or Brave Bird!) into Hawlucha, but instead, it decided to pick off Lele. Not unexpected, but poor prediction on my part.
Turn 3 – I sent out Metagross, while Mallow sends out Toucannon. Metagross mega evolves, and Toucannon charges up a Beak Blast. I had Hawlucha use Tailwind, since Toucannon-4 tends to set up its own Tailwind vs this team a lot, and I wasn’t about to have a possible Sceptile come out under Tailwind. Talonflame nearly KOs Hawlucha with Acrobatics. Since it still had its Focus Sash, the Acrobatics was still pretty weak, even with the Swords Dance boost, so it failed to OHKO Hawlucha. Then, I had Metagross use Ice Punch the Talonflame. I didn’t want to risk attacking Toucannon because Beak Blast was also possible (which it did use anyway), and I didn’t want Metagross to get burned. Sure, I’m risking a possible Flame Body from attacking Talonflame too, but at least that’s only a chance and not a guaranteed burn from the Beak Blast charge-up. I was starting to think I should have sent out Hydreigon here instead of Metagross. And finally, Toucannon finishes off Hawlucha.
Turn 4 – I send out Hydreigon, my final Pokemon. Toucannon charges up another Beak Blast, and Metagross finishes off Talonflame with an Ice Punch. Hydreigon uses Dark Pulse to fish for a flinch on Toucannon. It eats its Sitrus Berry, revealing set 3, which means no possible Tailwind, at least. Toucannon does not flinch and uses Beak Blast into Hydreigon.
Turn 5 – Mallow sends out her final Pokemon, Trevenant. Toucannon charges up yet another Beak Blast. I had Metagross attack Toucannon with Ice Punch, now taking the burn, since I don’t think it really mattered anymore and Hydreigon was possibly fainting at the end of this turn. I had Hydreigon take out the Trevenant with Dark Pulse, and Toucannon finished off Hydreigon with its Beak Blast.
Turn 6 – Psychic Terrain expires, and Metagross simply finishes the battle with Ice Punch.

Boy, that battle was really bad. Probably mostly because I was tired and nervous and happy that this was battle #1000. I also went into it a little cocky, saying to myself “oh Mallow, free win”. Boy, was I wrong. There was a lot of misplays but at least I was able to pick up the win.
Here, I have selected another seven battles from the streak to showcase. If there is a need for more, I’ll record the rest and upload to YouTube or something.

#989 vs Office Worker Jana (Carbink-4 / Milotic-4 / Mimikyu-4 / Dugtrio-2): GT2W-WWWW-WWX2-H9A6

Turn 1 – Jana leads with Carbink and Milotic. I immediately thought to myself, I should maybe use Taunt into Carbink to prevent its possible Trick Room. So, I started the battle off with an Acrobatics into Milotic, and used Taunt on Carbink. Milotic used Ice Beam onto Hawlucha, freezing it! Oh no. And then Carbink used Explosion. Wow. I was re-thinking this turn over and over after, and then decided I should have just doubled into Milotic with Acrobatics and Shattered Psyche, risking the Trick Room. Getting frozen with Ice Beam was not fun either, and to have Carbink just explode like that, what a waste of a Taunt.
Turn 2 – Jana sends out Mimikyu. Yikes. I had Lele use Protect, and Mimikyu decided to put Hawlucha out of its frozen misery with Shadow Sneak, revealing set 4. Milotic’s Ice Beam went into Lele’s Protect, but that was probably going for Hawlucha anyway. Maybe I should have expected the possible Shadow Sneak and broke Mimikyu’s Disguise? Oh well, the turn happened.
Turn 3 – I send out Metagross. I end up switching out Lele for Hydreigon, and Metagross mega evolves and uses Iron Head into Mimikyu, breaking the Disguise. Mimikyu, thankfully, ended up flinching. Milotic then uses Rest, and heals back its health. Honestly, I thought this out pretty poorly. I was expecting a Shadow Claw, so I had Lele switch out into Hydreigon to potentially take that, but was also risking that Shadow Claw going into Metagross. But at least it flinched, so I was safe this turn. Way too risky, but it paid off.
Turn 4 – Metagross OHKOs Mimikyu with Iron Head, while Hydreigon gets some Dragon Pulse damage on Milotic. Milotic then uses Sleep Talk and gets Ice Beam and targets Hydreigon, but doesn’t do too much. Not much to do on this turn except take out Mimikyu and get some much needed damage back on Milotic.
Turn 5 – Jana sends out her final Pokemon, Kanto Dugtrio. Yikes. Normally with this thing, I tend to use Hawlucha’s Acrobatics to take it out, but I didn’t have that luxury. And I didn’t even have Tailwind, so I had to risk a Fissure coming from it. Forunately, it used Substitute and Metagross takes out that sub with Ice Punch, and Hydreigon finishes it off with a Dragon Pulse. Milotic uses another Sleep Talk and gets Rest this time.
Turn 6 & 7 – Psychic Terrain expires. Metagross and Hydreigon finish off Milotic with Stomping Tantrum and Dragon Pulse respectively.

#983 vs Ace Trainer Levi (Incineroar-4 / Espeon-? / Infernape-4 / Rotom-Wash-4): DL8W-WWWW-WWX2-H9BC

Turn 1 – Levi leads with Incineroar and Espeon. Incineroar ends up rolling Intimidate, and lowers the Attack with Hawlucha and Tapu Lele. I have Lele use Protect, and Hawlucha use Tailwind so I can out-speed the Espeon with the rest of my team. Espeon picks off Hawlucha with Psychic, and Incineroar uses Flare Blitz into the Protecting Lele.
Turn 2 – I send out Metagross and mega evolve. But, before that can happen, Incineroar reveals it has the dreaded Quick Claw! Incineroar uses Flare Blitz into... Lele...? Anyway, Lele survives with 5 HP and Metagross uses Stomping Tantrum onto the Incineroar, while Lele finishes it off with a Moonblast. Espeon then finishes off Lele with a Shadow Ball. I double-targeted Incineroar because of the potential Quick Claw into Flare Blitz into Metagross. But I guess it had a brain-fart and wanted to target Lele instead? I don’t know how to explain this one. But, hey, at least I was able to take it out before it caused more chaos. Originally, I thought Incineroar did that because Espeon was targeting Metagross with the Shadow Ball, but it also decided to target Lele, so it’s just a very strange decision by the AI.
Turn 3 – I send out Hydreigon while Levi sends out Infernape, BUT, it switches out to Rotom-Wash! Probably because of Metagross’ Stomping Tantrum from last turn. Don’t worry, little Rotom, Metagross isn’t planning on hitting you. Instead, I have Metagross use Iron Head to OHKO the Espeon, and I had Hydreigon use Dragon Pulse into the former Infernape slot. Rotom then munches down its Sitrus Berry and heals back some of the damage.
Turn 4 – Levi sends out Infernape again. Infernape didn’t end up using Fake Out and gets brought down to its Sash, and I had Hydreigon use Dragon Pulse into the Rotom, and it faints. Infernape then takes out Metagross with Flare Blitz and faints to recoil.

#854 vs Veterain Aino (Medicham-3 / Slowking-4 / Musharna / Metagross): R9ZG-WWWW-WWX2-H9CB

Turn 1 – Aino leads with Medicham and Slowking. I decided to just risk the potential Fake Out from Medicham-4 and hoped that was Slowking-3 so it can lock into Psychic with its Choice Specs. Alas, nothing ever goes my way. Hawlucha gets some nice damage with Acrobatics on Slowking, and Lele OHKOs Medicham with Moonblast. Slowking then sets up the Trick Room.
Turn 2 – Aino sends out Musharna. By this point, I fully expected Hawlucha wasn’t going to be up much longer. However, I decided to prolong its life by using Protect. Both Slowking and Musharna used Psychic into Hawlucha, and Lele used Moonblast into Slowking, but fails to pick up the KO.
Turn 3 – Hawlucha is switched out for Metagross. I did this mainly to take another two Psychics, but Slowking then decided to use its Hydro Vortex! It targeted Tapu Lele and OHKO’d it with a crit. Musharna then decided to use Shadow Ball, which was probably also meant for Lele. Metagross takes a lot of damage from that Shadow Ball, but hangs on.
Turn 4 – I send out Hawlucha again. I had Metagross use Protect, and sacced Hawlucha to Slowking’s Psychic. Musharna used Shadow Ball into the Protecting Metagross. I thought about this turn a lot and figured I no longer needed Hawlucha. So I just decided to let it go for now so Hydreigon can come in safely.
Turn 5 – I send out Hydreigon. Metagross gets the double Protect! Slowking uses Surf, and crits its partner Musharna, while Hydreigon takes out Musharna with a Dark Pulse. Finally some good luck.
Turn 6 – Trick Room and Psychic Terrain both expire. Aino sends out Metagross. Both Metagross’ end up mega evolving. Hydreigon used Protect, while Metagross finished off Slowking with Stomping Tantrum. Enemy Metagross used Brick Break into... Metagross? I expected that to go into Hydreigon, hence the Protect. Thankfully, my Metagross survived.
Turn 7 – Opposing Metagross uses Bullet Punch to finish off my Metagross and Hydreigon finishes the battle with Dark Pulse. This battle could have potentially been a loss if that Brick Break went into the Protecting Hydreigon. I would have to have risked a speed-tie and a Brick Break crit on the next turn since Stomping Tantrum can’t OHKO opposing Metagross, and Brick Break would have KO’d Hydreigon there.

#779 vs Sightseer Ezra (Magnezone-3 / Heatran-3 / Gengar-4 / Latios-?): 5QVG-WWWW-WWX2-H9D9

Turn 1 – Ezra leads with Magnezone and Heatran. Uh-oh. This does not look good. Potential Scarf Heatran meant I probably wouldn’t be able to knock off Magnezone easily. And even if I did double into Mag, Heatran can still return a potential OHKO into Lele anyway. So, I decided to have Lele use Protect. Hawlucha uses Low Kick into Heatran and gets burned by Flame Body. Magnezone uses Thunder Wave into Hawlucha, but it fails thanks to the burn. Yay? Heatran then uses Sunny Day, revealing set 3.
Turn 2 – With Hawlucha burned, I knew it was only a matter of time before it would go down. Luckily, Ezra switches out Heatran for Gengar. I was going to Low Kick that slot to finish off Heatran, but it didn’t work out thanks to Gengar’s Ghost-type. Lele then uses Taunt into Magnezone, but misses thanks to Bright Powder and Magnezone successfully paralyzes Lele with Thunder Wave. Dammit.
Turn 3 – Gengar mega evolves into Mega Gengar and is ready for blood. But first! Lele tries to use Protect, but gets fully paralyzed. Hawlucha uses Tailwind, and Gengar takes out Lele with Sludge Bomb. Magnezone then uses Thunder into Hawlucha and takes it out.
Turn 4 – I send out Hydreigon and Metagross, Metagross mega evovles, and uses Stomping Tantrum into Gengar and takes it out, while Hydreigon goes for the Sun-boosted Flamethrower to take out Magnezone. Thanks for the Sunny Day, Ezra!
Turn 5 – We’re not out of the woods yet. Hearan makes a return to the field, and Ezra also reveals she has a Latios as well! Metagross finishes off Heatran with a Stomping Tantrum. Heatran tries munching on its Shuca Berry, but of course that isn’t going to work since it’s way too low from the previous Low Kick. Hydreigon then finishes the battle with a Dark Pulse onto Latios.

#760 vs Pokemon Trainer Kukui (Braviary-4 / Primarina-4 / Magnezone-3 / Ninetales-Alola-?): 5YGG-WWW-WWX2-H9EB

Turn 1 – Kukui leads with Braviary and Primarina. Braviary is actually a pretty scary Pokemon here since set 3 can dish out lots of damage with Brave Bird, and set 4 can set up Tailwind. Primarina is also pretty scary with powerful Water and Fairy-type attacks along with potential Baby-Doll Eyes that can lower both Hawlucha and Mega Metagross’ Attack. Anyway, I have Hawlucha use Protect, and Lele uses Psychic into Braviary, but it just barely hangs on and sets Tailwind. Primarina then uses Sparking Aria and takes out its partner Braviary, while also damaging Lele in the process.
Turn 2 – Kukui sends out Magnezone. With opposing Tailwind up, I definitely needed my own. So, I had Lele use Protect while Hawlucha set up the Tailwind. Magnezone uses Flash Cannon into Protecting Lele, and Primarina then uses Dazzling Gleam and does major damage to Hawlucha.
Turn 3 – Hawlucha uses Low Kick into Magnezone, which is revealed to have Sturdy, and I was planning on using Psychic into it as well, but it missed because of the Bright Powder. Ugh. Magnezone then uses a Thunder into Hawlucha to finish it off. Primarina finally uses its Z-move, Hydro Vortex, and destroys Tapu Lele.
Turn 4 – I send out Metagross and Hydreigon. Metagross mega evolves, while Hydreigon uses Protect. Magnezone gets taken out by Stomping Tantrum, and Primarina uses Sparking Aria and does major damage to Metagross. Kukui was actually going to knock off another one of his own Pokemon with Sparkling Aria. That was pretty weird, but I’ve seen the AI do weirder things so I didn’t think much of it.
Turn 5 – Tailwind expires on Kukui’s side. Kukui sends out his final Pokemon, Alolan Ninetales. I have Metagross take it out with Iron Head before it can even make a single move, and Hydreigon does some damage to Primarina with Dark Pulse. Primarina finally uses Dazzling Gleam to take out Hydreigon.
Turn 6 – My Tailwind and Psychic Terrain both expire and I have Metagross use Iron Head into Primarina, hoping for a flinch because a Sparkling Aria can most definitely finish this battle. Thankfully it flinches. Phew.
Turn 7 – Metagross finishes the battle with Iron Head.

#657 vs Veteran Aino (Gardevoir-3 / Slowking-4 / Metagross-4 / Medicham-3): 949G-WWWW-WWX2-H9F3

Turn 1 – Ah yes, another battle with Aino. Anyway, she leads with Gardevoir and Slowking. I have Hawlucha use Acrobatics into the Gardevoir, nearly taking it out. I try using Taunt on Slowking, but it reveals Oblivious. This was one of the earlier battles where I was still trying to use Taunt on opposing Slowkings, risking the Oblivious. Obviously, it didn’t work out in this battle. Gardevoir uses Shadow Ball into Lele, and Slowking sets up the Trick Room.
Turn 2 – Hawlucha is switched out for Metagross and Lele uses Protect. Slowking and Gardevoir both use Psychic into the former Hawlucha slot. I was expecting another Shadow Ball into Lele here, but Aino decided to just double into Hawlucha instead. Fortunately, Metagross takes both those Psychics like a champ.
Turn 3 – Lele switches out for Hawlucha, and Metagross uses Protect. I went for this because usually Slowking goes for Hydro Vortex into the Metagross, but instead it used Psychic into the former Lele slot? Of course, Hawlucha is there now so it obviously faints to that. I honestly couldn’t figure out why it wanted to use Psychic on Lele, so I decided to just leave it be. Gardevoir then uses Shadow Ball into Protecting Metagross.
Turn 4 – Tapu Lele comes back out. Metagross switches out to Hydreigon, and Lele uses Protect. Slowking uses Surf, and KOs its partner Gardevoir. Thanks, I guess.
Turn 5 – Aino sends out Metagross, which then mega evolves. Slowking uses Ice Beam into Hydreigon and thankfully, it does not freeze. Lele uses Moonblast into Slowking, and Hydreigon OHKOs Metagross with a Dark Pulse. Thanks for the Trick Room, Aino.
Turn 6 – Trick Room and Psychic Terrain both expire, and Aino sends out Medicham. Honestly, I completely forgot she still had a fourth Pokemon and I thought I had this in the bag... but I was wrong. Anyway, Medicham ended up being set 3, which doesn’t have Fake Out. Hydreigon takes out Slowking and Lele finishes the battle with a Moonblast to Medicham.

#60 vs Pokemon Trainer Anabel (Raikou-3 / Alakazam-4 / Latios-1 / Lucario-3): RCZG-WWWW-WWX2-H9K4

Turn 1 – And of course, we can’t have a Battle Video showcase without Anabel. I actually had two Anabel encounters on this run but I thought this one was better. And it was the first special trainer after Blue! Anyway, Anabel leads with Raikou and Alakazam. Hawlucha uses Protect and Raikou also uses Protect. Alakazam uses Psychic into the Protecting Hawlucha. Lele then uses Shattered Psyche into... the Protecting Raikou. Shame. I wanted to take out Raikou ASAP because of possible Thunder Wave from set 2, but it ended up being set 3 with the Protect and my Z-move ended up being wasted.
Turn 2 – Lele uses Protect this time, and Hawlucha uses Tailwind. Since Alakazam was the Specs set, I figured I should just set Tailwind and let Hawlucha go down. I know Anabel can have Snorlax and it could have ended the streak right here, but I had a plan for it. Thankfully, she didn’t end up having it anyway. Raikou then uses its Gigavolt Havoc into my Protecting Lele. Ha, take that, Anabel!
Turn 3 – I send out Metagross and mega evolve. Raikou uses Protect again, but I figured it was going to do that. I had Metagross take out Alakazam with Iron Head and Lele’s Psychic went into the Raikou, which didn’t take any damage thanks to Protect.
Turn 4 – Anabel sends out Lucario, which then mega evolves. Metagross uses Stomping Tantrum and finishes off Raikou, while Lele OHKOs Lucario with Psychic.
Turn 5 – Anabel sends out her final Pokemon, Latios. However, Metagross and Lele take it out with Ice Punch and Moonblast. The amount of damage Latios took from the Ice Punch meant it was set 1, so Lax Incense could have caused a miss but it wouldn’t have mattered much anyway.
And there we have it. This was a long one. But, I’m still really proud of this and I can’t wait to continue on with this team. Need to finish Bowser’s Inside Story first... Anyway, until next time. See ya.
 
Last edited:
Back
Top