After over two years of silence, I make my not-at-all anticipated return with this unhelpful post that I am not qualified for, no one asked for and no one wanted.
An Idiot's Guide to Mold Breakers
If you have ever played a single game of ORAS Hackmons, you will know that every team has at least one, and usually two Wonder Guard Pokemon in order to provide a reliable answer to No Guard OHKO move users and hinder Huge Power abusers throwing off powerful STAB moves. Because of this, many teams are forced to either run multiple powerful attackers with a wide variety of coverage such as two Mega Mewtwo Xs, or at least one Mold Breaker 'mon.
There are many Pokemon used to fulfil this role, but what makes some better than others? How do you know which is the best for your team? Well fear not, because in this post I will poorly attempt to answer these questions for no apparent reason.
First of all, I would like to note that Mold Breakers generally run one of two sets: the Shell Smash sweeper and the choiced attacker. The former aims to blast through all of your opponent's Pokemon after its checks have been worn down or trapped and removed, while the ladder simply aims to blast through the opponent's Pokemon with powerful Choice Specs or Choice Band boosted attacks before switching out.
Because I'm lazy, I will only be discussing Shell Smash sweepers in this post. I'll begin with the one, the only, the heavily disputed king of hackmons:

Primal Groudon
Due to its monstrous base 180 ATK stat and near unresisted STAB move in Thousand Arrows, Groudon is an easy pick when it comes to a Pokemon capable of decimating opponents after only one Shell Smash. Groudon likes to run an EV spread of 240 HP, 252 Atk, and 16 Spe with an Adamant nature in order to outspeed base 150 Pokemon such as Deoxys-Attack at +2 while still being able to capitalise on its impressive bulk and even more impressive attack. It can choose to hold a variety of items including a Lum Berry to cure the status from Glares, Spores or Dark Voids once; Leftovers to provide passive recovery for Groudon to keep it healthy and make a revenge kill more difficult; Safety Goggles to completely block Spores from the likes of Prankster Giratina; or a Mental Herb to shake off Encores or Taunts from Pokemon trying to prevent it setting up or attacking. Typical movesets consist of Shell Smash to boost up to +2 ATK and Speed in only one turn, and Thousand Arrows as a near unresisted STAB move due to its ability to hit non-grounded Pokemon, but the last two slots are rather flexible. Some options include Spore or Dark Void to allow free setup turns while the opponent is sleeping; Taunt to heavily annoy a Giratina attempting to mess with Groudon; hazards to wear down Pokemon so they are later guaranteed to fall to Groudon or its teammates; King's Shield to make Groudon very difficult to be revenge killed by Fake-speed Pokemon; Recover to again make KO'ing Groudon harder; V-create as a very powerful STAB boosted move that will obliterate almost any pokemon at +2; or even Sheer Cold to freely throw off against passive stall teams, instantly killing anything it makes contact with.
"What an unnecessarily long explanation when I could easily read the much better written Groudon analysis, but that sounds great, why wouldn't I always just run Groudon then?" you may be thinking. Well, no Pokemon is without flaws. For example, Groudon's crippling 4x weakness to water moves allows Huge Power Mega Gyarados to effortlessly revenge kill Groudon with Water Shuriken, forcing a dangerous 50-50 with Pursuit in the process. Prankster Giratina is also a safe switch in to most Primal Groudon, easily taking Thousand Arrows due to its high bulk, preventing Shell Smash Spam via Encore or Haze, threatening to cripple it with Glare or Spore, and pressuring it with a Ghost-type Curse.
This is where the first of the considerations foe a team's Mold Breaker are derived from: the Mold Breaker's teammates. For example, Shadow Tag Pokemon can trap and remove the most dangerous threat to Groudon, Gyarados, and Gyarados itself is a great teammate for Groudon as it can force dangerous 50-50s vs Giratina lacking Baton Pass via its Huge Power Pursuit and Knock Off.
The next thing to consider when picking a Mold Breaker or building around one is Imposter-proofing. For those unaware, this means that if an opposing Chansey transforms into your powerful sweeper, do you have a counter? This can be done many ways such as utilizing Plates + Judgement to allow yourself or teammates to resist or be immune to all of your moves, or simply having a solid and consistent switch in.
For teams lacking a lot of coverage and only running one Mold Breaker Pokemon, you may also want to consider picking something bulkier or with Wish support so it sticks around and you don't end up getting stuck behind that one Wonder Guard no other 'mons can hit. (Bulkier sweepers also make it harder for Pokemon with priority moves to finish them off).
(Insert smooth transition to talking about pros and cons of the most common Mold Breakers here).

Primal Groudon
Pros:
+ Near unresisted coverage with only Thousand Arrows
+ Bulky, making it harder to revenge kill (especially with King's Shield)
+ Immune to Will-o-Wisp
Cons:
- Weak to Water Shuriken
- Can be hard to Imposter-proof
- Slower than some Choice Scarfers at +2

Mega Gengar
Pros:
+ Self Imposter-Proofs via Spooky Plate + Judgement
+ Absorbs Toxic Spikes
Cons:
- Frail, easy to revenge kill
- Can be pursuit trapped

Mega Diancie
Pros:
+ Easy to Imposter-proof via Pixie/Earth Plate + Judgement
+ Resists Sucker Punch, and Normal and Flying-type Fake-speed, making it harder to revenge kill
Cons:
- Weak to Water Shuriken
- Relatively frail

Mega Latios
Pros:
+ Resists Water Shuriken, making it harder to revenge kill
+ Very high SpA and SpD with Soul Dew
Cons:
- Weak to Sucker Punch, and Fairy and Ice-type Fake-speed
- Cannot hold a Plate, making Imposter-proofing harder

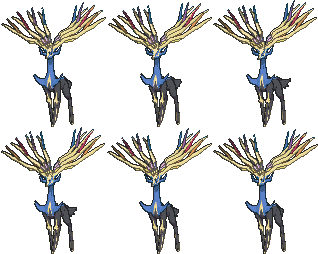
Xerneas
Pros:
+ Bulky, making it harder to revenge kill (especially with King's Shield)
+ Easy to Imposter-proof via Pixie Plate + Judgement
Cons:
- Slower than some Choice Scarfers at +2

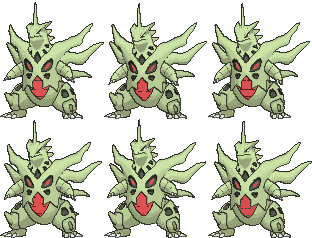
Mega Tyranitar
Pros:
+ Bulky, making it harder to revenge kill (especially with Diamond Storm's defence boost)
+ Resists Sucker Punch, and Normal and Flying-type Fake-speed
Cons:
- Weak to Water Shuriken and Fairy-type Fake-speed
- Slower than some Choice Scarfers at +2
- Can be hard to Imposter-proof

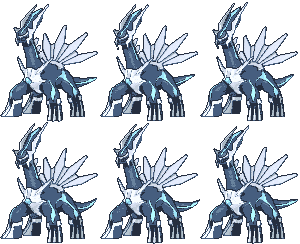
Dialga
Pros:
+ Bulky, making it harder to revenge kill
+ Resists Water Shuriken, and Normal and Flying-type Fake-speed
+ Easy to Imposter-proof/self Imposter-proof using various Plates
+ Immune to Poison
Cons:
- Slower than some Choice Scarfers at +2

Mega Sceptile
Pros:
+ Resists Water Shuriken, making it harder to revenge kill
+ Self Imposter-proofs via Draco Plate + Judgement
+ Immune to Spore
Cons:
- Weak to Fairy and Ice-type Fake-speed
- Relatively frail

Primal Kyogre
Pros:
+ Bulky, making it harder to revenge kill (especially with King's Shield)
+ Resists Water Shuriken and Ice-type Fake-speed
+ Easy to Imposter-proof/self Imposter-proof using various Plates
Well, that's the end of this poorly written and unnecessary post. If you have anything to add, or disagree with me, you're probably right so feel free to yell at me.
An Idiot's Guide to Mold Breakers
If you have ever played a single game of ORAS Hackmons, you will know that every team has at least one, and usually two Wonder Guard Pokemon in order to provide a reliable answer to No Guard OHKO move users and hinder Huge Power abusers throwing off powerful STAB moves. Because of this, many teams are forced to either run multiple powerful attackers with a wide variety of coverage such as two Mega Mewtwo Xs, or at least one Mold Breaker 'mon.
There are many Pokemon used to fulfil this role, but what makes some better than others? How do you know which is the best for your team? Well fear not, because in this post I will poorly attempt to answer these questions for no apparent reason.
First of all, I would like to note that Mold Breakers generally run one of two sets: the Shell Smash sweeper and the choiced attacker. The former aims to blast through all of your opponent's Pokemon after its checks have been worn down or trapped and removed, while the ladder simply aims to blast through the opponent's Pokemon with powerful Choice Specs or Choice Band boosted attacks before switching out.
Because I'm lazy, I will only be discussing Shell Smash sweepers in this post. I'll begin with the one, the only, the heavily disputed king of hackmons:
Primal Groudon
Due to its monstrous base 180 ATK stat and near unresisted STAB move in Thousand Arrows, Groudon is an easy pick when it comes to a Pokemon capable of decimating opponents after only one Shell Smash. Groudon likes to run an EV spread of 240 HP, 252 Atk, and 16 Spe with an Adamant nature in order to outspeed base 150 Pokemon such as Deoxys-Attack at +2 while still being able to capitalise on its impressive bulk and even more impressive attack. It can choose to hold a variety of items including a Lum Berry to cure the status from Glares, Spores or Dark Voids once; Leftovers to provide passive recovery for Groudon to keep it healthy and make a revenge kill more difficult; Safety Goggles to completely block Spores from the likes of Prankster Giratina; or a Mental Herb to shake off Encores or Taunts from Pokemon trying to prevent it setting up or attacking. Typical movesets consist of Shell Smash to boost up to +2 ATK and Speed in only one turn, and Thousand Arrows as a near unresisted STAB move due to its ability to hit non-grounded Pokemon, but the last two slots are rather flexible. Some options include Spore or Dark Void to allow free setup turns while the opponent is sleeping; Taunt to heavily annoy a Giratina attempting to mess with Groudon; hazards to wear down Pokemon so they are later guaranteed to fall to Groudon or its teammates; King's Shield to make Groudon very difficult to be revenge killed by Fake-speed Pokemon; Recover to again make KO'ing Groudon harder; V-create as a very powerful STAB boosted move that will obliterate almost any pokemon at +2; or even Sheer Cold to freely throw off against passive stall teams, instantly killing anything it makes contact with.
"What an unnecessarily long explanation when I could easily read the much better written Groudon analysis, but that sounds great, why wouldn't I always just run Groudon then?" you may be thinking. Well, no Pokemon is without flaws. For example, Groudon's crippling 4x weakness to water moves allows Huge Power Mega Gyarados to effortlessly revenge kill Groudon with Water Shuriken, forcing a dangerous 50-50 with Pursuit in the process. Prankster Giratina is also a safe switch in to most Primal Groudon, easily taking Thousand Arrows due to its high bulk, preventing Shell Smash Spam via Encore or Haze, threatening to cripple it with Glare or Spore, and pressuring it with a Ghost-type Curse.
This is where the first of the considerations foe a team's Mold Breaker are derived from: the Mold Breaker's teammates. For example, Shadow Tag Pokemon can trap and remove the most dangerous threat to Groudon, Gyarados, and Gyarados itself is a great teammate for Groudon as it can force dangerous 50-50s vs Giratina lacking Baton Pass via its Huge Power Pursuit and Knock Off.
The next thing to consider when picking a Mold Breaker or building around one is Imposter-proofing. For those unaware, this means that if an opposing Chansey transforms into your powerful sweeper, do you have a counter? This can be done many ways such as utilizing Plates + Judgement to allow yourself or teammates to resist or be immune to all of your moves, or simply having a solid and consistent switch in.
For teams lacking a lot of coverage and only running one Mold Breaker Pokemon, you may also want to consider picking something bulkier or with Wish support so it sticks around and you don't end up getting stuck behind that one Wonder Guard no other 'mons can hit. (Bulkier sweepers also make it harder for Pokemon with priority moves to finish them off).
(Insert smooth transition to talking about pros and cons of the most common Mold Breakers here).
Primal Groudon
Pros:
+ Near unresisted coverage with only Thousand Arrows
+ Bulky, making it harder to revenge kill (especially with King's Shield)
+ Immune to Will-o-Wisp
Cons:
- Weak to Water Shuriken
- Can be hard to Imposter-proof
- Slower than some Choice Scarfers at +2
Mega Gengar
Pros:
+ Self Imposter-Proofs via Spooky Plate + Judgement
+ Absorbs Toxic Spikes
Cons:
- Frail, easy to revenge kill
- Can be pursuit trapped
Mega Diancie
Pros:
+ Easy to Imposter-proof via Pixie/Earth Plate + Judgement
+ Resists Sucker Punch, and Normal and Flying-type Fake-speed, making it harder to revenge kill
Cons:
- Weak to Water Shuriken
- Relatively frail
Mega Latios
Pros:
+ Resists Water Shuriken, making it harder to revenge kill
+ Very high SpA and SpD with Soul Dew
Cons:
- Weak to Sucker Punch, and Fairy and Ice-type Fake-speed
- Cannot hold a Plate, making Imposter-proofing harder
Xerneas
Pros:
+ Bulky, making it harder to revenge kill (especially with King's Shield)
+ Easy to Imposter-proof via Pixie Plate + Judgement
Cons:
- Slower than some Choice Scarfers at +2
Mega Tyranitar
Pros:
+ Bulky, making it harder to revenge kill (especially with Diamond Storm's defence boost)
+ Resists Sucker Punch, and Normal and Flying-type Fake-speed
Cons:
- Weak to Water Shuriken and Fairy-type Fake-speed
- Slower than some Choice Scarfers at +2
- Can be hard to Imposter-proof
Dialga
Pros:
+ Bulky, making it harder to revenge kill
+ Resists Water Shuriken, and Normal and Flying-type Fake-speed
+ Easy to Imposter-proof/self Imposter-proof using various Plates
+ Immune to Poison
Cons:
- Slower than some Choice Scarfers at +2
Mega Sceptile
Pros:
+ Resists Water Shuriken, making it harder to revenge kill
+ Self Imposter-proofs via Draco Plate + Judgement
+ Immune to Spore
Cons:
- Weak to Fairy and Ice-type Fake-speed
- Relatively frail
Primal Kyogre
Pros:
+ Bulky, making it harder to revenge kill (especially with King's Shield)
+ Resists Water Shuriken and Ice-type Fake-speed
+ Easy to Imposter-proof/self Imposter-proof using various Plates
Well, that's the end of this poorly written and unnecessary post. If you have anything to add, or disagree with me, you're probably right so feel free to yell at me.
Last edited:


